Leaderboard


Popular Content
Showing content with the highest reputation on 04/08/2019 in all areas
-
[attachment file=2 HOBOS.jpg] Got the permanent tags for hull #414 which we will take delivery of on 1 May. This was the very last 2018 Elite II produced. Getting really excited. 2-HOBOS4.pdf
 2 points
 -
What great pics David - just wonderful. I love the Moab area, Arches, the whole area. The MTB riding is insane. A few years back, I did a few miles in the slickrock site, its all rock, about 5 miles in, I thought, if I have "crash" something is gonna break, and its gonna be me. The ride back was somewhat slower and much more "careful". I saw some off-road jeeps and such in places I would NOT dare to drive. Next time we go, I'll have the Ollie, and we will spend much more time exploring. JD: I feel ya. Seems I'm not as good once as I ever was..... some days, some projects - jeesh. RB2 points
-
Some days that's cheap for marital bliss. Bobfirst _ yea I agree, the rack does make the rear access harder - I've begun leaving the sewer pipe connected to the outlet, much easier now. I don't worry about the plate - never had a problem with similar blockage on other vehicles, guess one day it might come up. As far as the difficulty installing/removing the rack - I took a flat file and removed a small amount of material from the "male" side of the R/L assembly. The square tubing corner edges were rounded, and all the flat surfaces filed/planed down until the surfaces were "flat" The tubing is somewhat concave, and as you remove material, it begins to flatten out. I coated them with waterproof grease, and stuck them in the female tubing. I am happy with the results - the rack assembly slides in and out with to much effort. As for the weight rating - its my swag - I'm about 200 - I've bounced up and down on the far rear of the thing - its very rigid - and the trailers suspension takes out some of the physics of the dead load. So that's why I estimated 150lbs. RB2 points
-
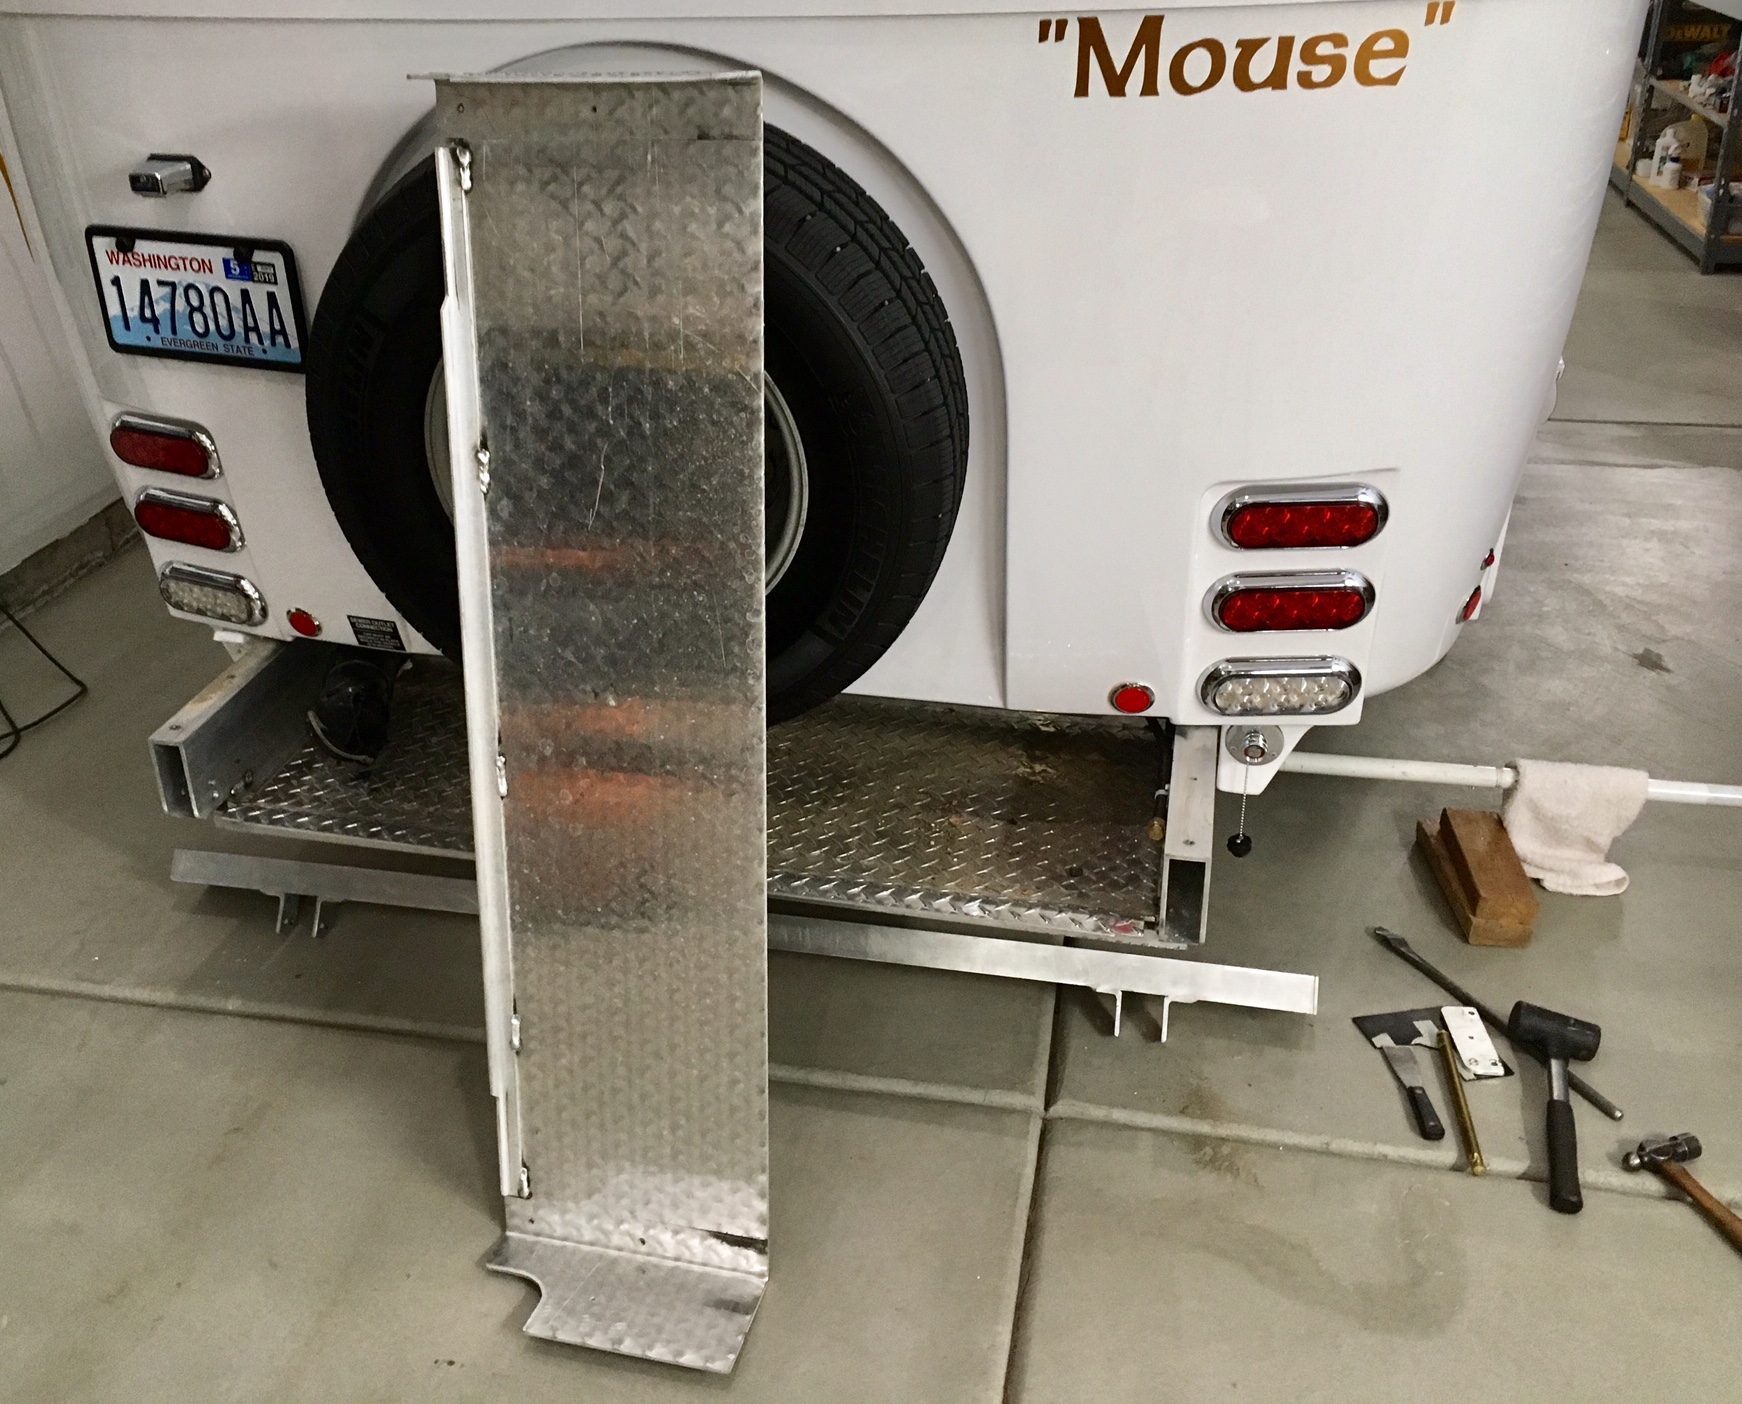
Teaser shots for a future thread. I am working on relocating my tongue cargo tray to the rear on a custom aircraft aluminum rack similar to the factory ones. I removed the top diamond plate cover to work on it, what a horrible job that was. It was pinched between the frame rails and the fiberglass of the body. It took me over three hours to get it off. And yes the spare tire will be able to come off without disturbing the cargo rack, which is good news since it is going to bolted down solidly, no receivers on this one. I got stalled out and need to go get some more materials Monday when the stores open. This stuff takes me so much longer than it used to when I was an active A&P. I have the skills but it seems my brain and fingers are not nearly as nimble. I get there eventually, I just wouldn’t make any money working at this slow rate. John Davies Spokane WA
2 points
-
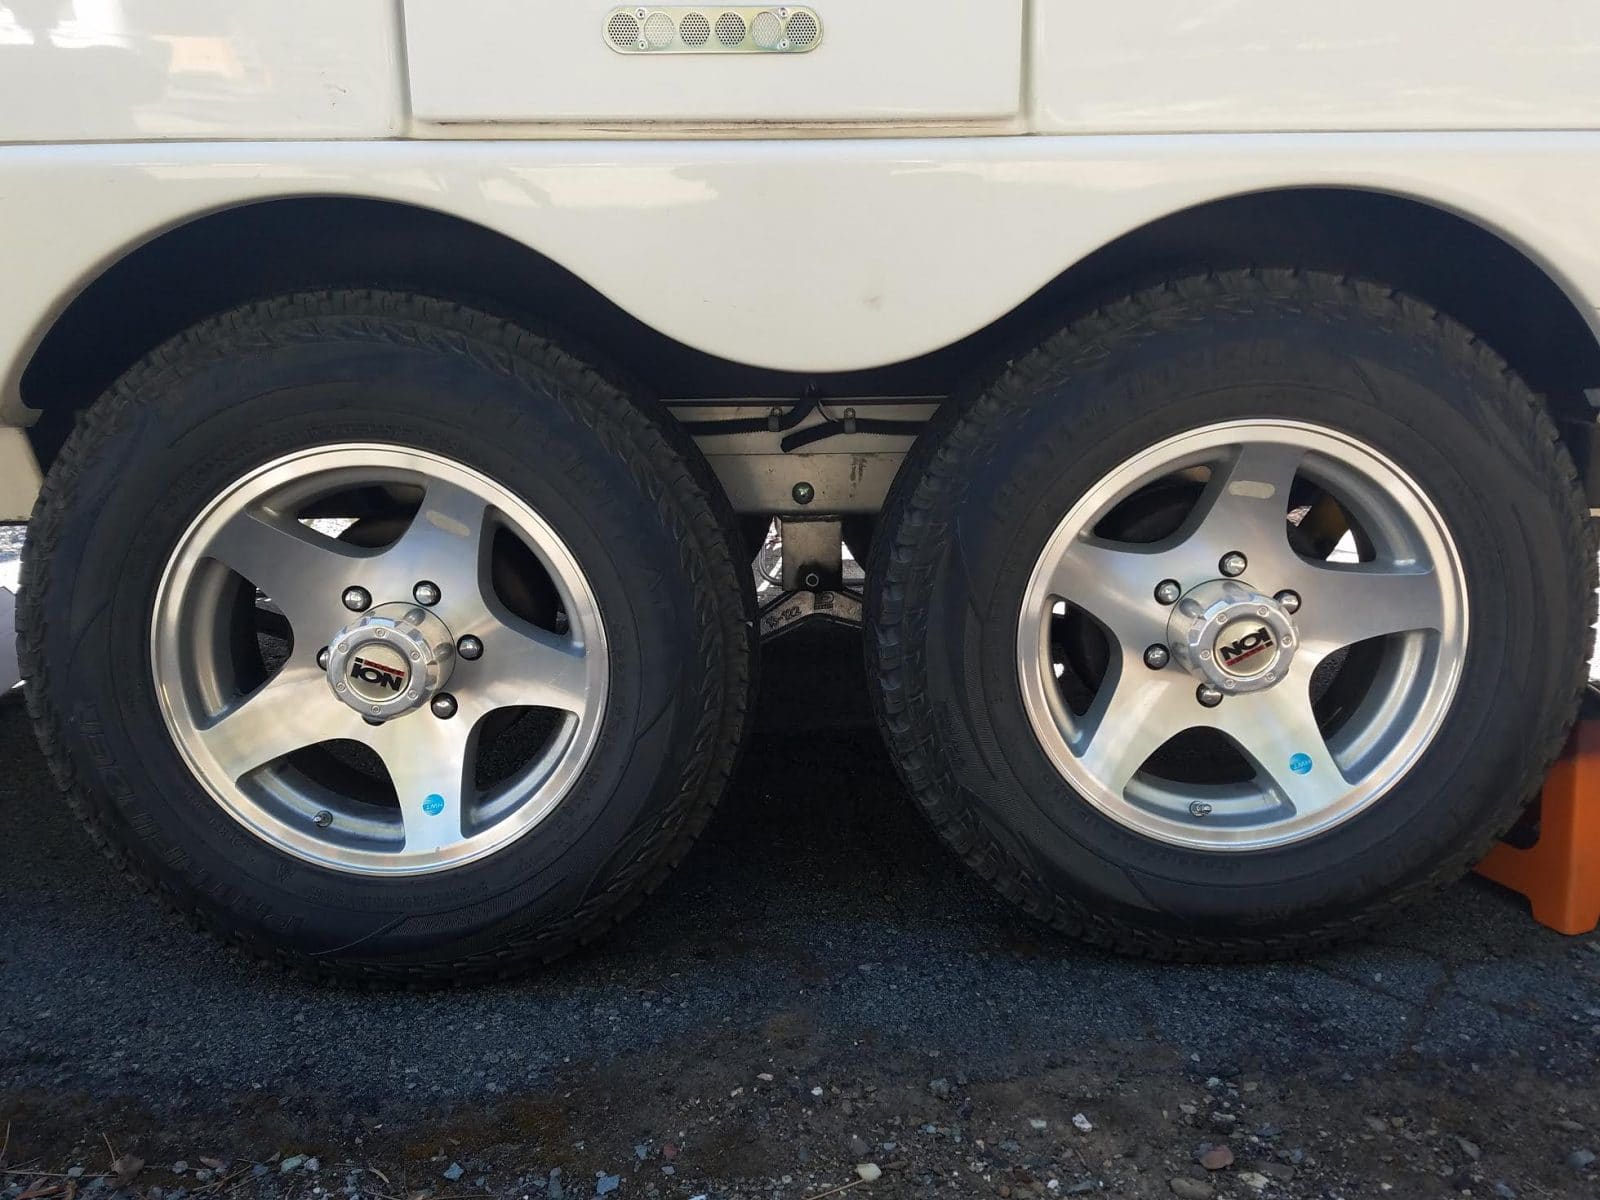
My list of modifications is getting longer and some of these seem pretty important. So I thought I'd start this thread. One of the first ones was the stainless steel countertop with Corian side splash and IKEA faucet: The next is the Heavy Duty suspension kit and 3200 lb Star Wheel upgrade. This was prompted by breaking a wheel and wanting greaseable suspension links. I broke one of the Oliver wheels while it was on another trailer and discovered how thin they are: The next next was the spare tire modification. Mine came with an undersized spare and to fit the full sized tire I had to go to a soft cover:
1 point
-
I talked to tech support at xantrex today. He said GFCI failure as well. He also said it was a time consuming task to try and change the GFCI if the local repair shop would even try it. So, I ordered a new inverter and will have the old one to take a look at internally, carefully of course.1 point
-
You could add a propane conversion kit to either the 2200 or 3000 and have the option to run on gas or propane. Makes for more options and less weight. https://hutchmountain.com/products.html1 point
-
Now that you know about "open" and "close" all you have to remember is to actually "open" and "close" it. Don't ask me how I know this! Bill1 point
-
The frame fits up inside longitudinal channels that are molded into the underside of the body. The only thing between the body and the frame is a layer of 3/16"-1/4" rubber glued to the top of the frame. The body is then bolted solidly to the frame. If the frame moves the body moves with it and vice versa. The movement of the body (and the frame with it) relative to the tires that you see is because of the springs. If you support the frame in four places the perceived movement will be far less.1 point
-
Ours is 23.5 inches. Steve Landrum has a compass on the front of his trailer, the Outlaw Oliver.
1 point
-
John, It is my understanding it should be closed during travel so the contents of the grey tank does not slosh up into the shower pan through the floor drain and open when in use. Andrew1 point
-
Personally, I wouldn't worry about it, but the only places I can think that wouldn't be covered by the bikes would either be on the rack itself or up above the window. A few of us have the license plates mounted to the side, but I think they'd be no more visible there. The 1up rack on my truck completely covers the license plate when it's folded. You can't even tell I have one. But I've only gotten pulled over once, in Hohenwald. I said I was going to Oliver and he said in that case no problem sir nice truck. Not sure how far outside of Hohenwald that trick works.1 point
-
For J.D.1 point
-
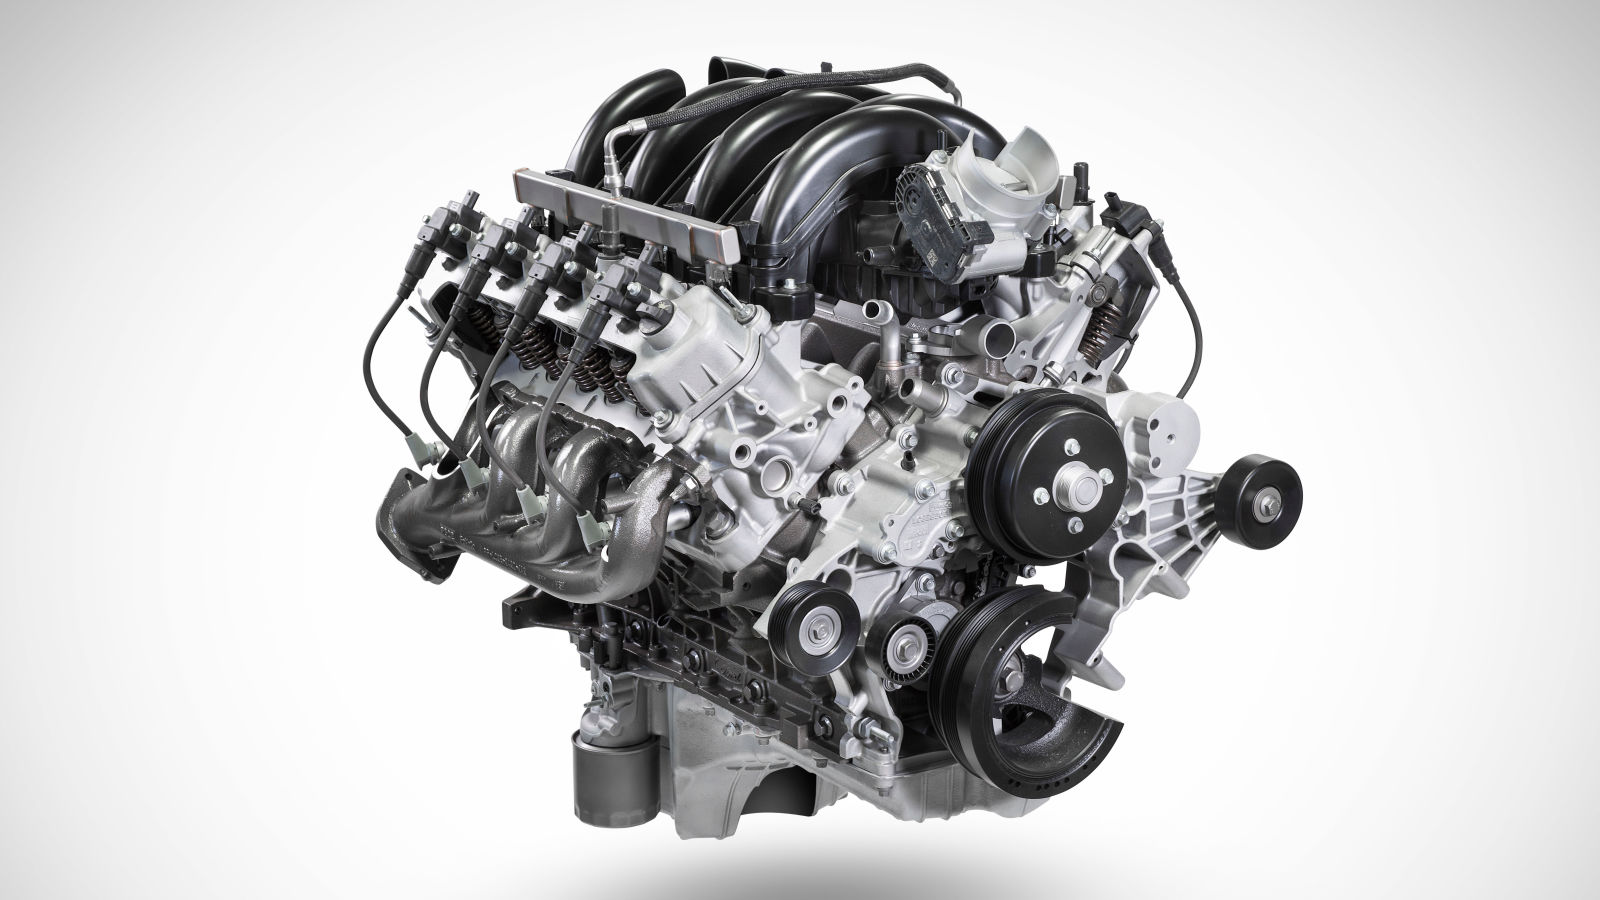
PS, it might be good to wait since the 2020 Power Wagon has some changes coming, a new interior, maybe even an 8 speed. Plus room for even huger tires.... LOL https://www.caranddriver.com/news/a25384478/ram-power-wagon-2020-pickup-spy-shots/ Aaaaaand Ford’s new 7.3 liter gas V8 is tuned for fuel economy and will have beaucoup torque. And the water pump is right on top of the timing case. It appears to be a very simple engine to maintain. It will only be offered in the Super Dutys. Talk about choices..... John Davies Spokane WA
1 point
-
TG, this brought back a wonderful memory. When our youngest son (who had a speech impediment) was in the first grade, he performed "Wockin Wobin" during the school's talent competition. He didn't win. :)1 point
-
We camped in in Goose Island Campground near Moab last week, and it was fabulous. This is a BLM campground, which means no hookups and no water; they provide a firepit, a picnic table, and pit toilets. They are also first come / first served, but we were fortunate to score a beautiful campsite right on the river. One of the nice things about the Goose Island Campground that is right on the paved bike path along the river. I posted about this bike path two years ago, when we camped at another BLM campground seven miles further down the road. This is boondock camping, and I learned more about power management on this trip. Before we bought Ollie, I verified that the batteries would power the 900W microwave and our 900W toaster. These are important to my wife, and therefore important to me. There have been posts on this forum describing the microwave as a battery killer, and I was concerned. We have the Blue Sky Solar system, and on previous trips I monitored battery use via the Battery reading on the See Level Monitor or the BATTERY VOLT/AMP screen on the Blue Sky remote. On this trip I cycled the controller the screens on the Blue Sky remote until I got to the BATTERY CAPACITY screen, and left it there. Now, I touch the button and I can see the battery capacity as percent remaining, i.e. 70% or 100% if full. (It sounds like you can get similar functionality with the Zamp Solar system by installing a Victron battery monitor.) When we used the microwave the battery capacity moved from 98% to 96%, which was okay by me. On future trips I will continue to monitor the batteries when we use the microwave. The sun was out for three of the four days on this trip, so solar charging was good. I did have a generator along as my “magical insurance policy,” but we did not need it on this trip. Here are some picture of Goose Island Campground, as well as Arches and Canyonlands.
1 point
-
Next is the jack stand modification. I started with three jack stands. I threw away the adjustable center pieces and cut off the ratchets. Two of them got modified to flat on the top with a piece of 3" channel. These are the rear jacks . The other one got modified to accept the front jack, with a piece of 2" diameter tube. This works out very well where the ground is nearly level, or they can be set on blocks, if needed, on slopes. They are very strong and stable. Much better than stacking a pile of blocks.[attachment file=73096] [attachment file=73099]1 point
-
The next is the new front logo. These decals are easy to order and very durable. This one is based on a picture of our coyote "Sandy" as she howls. Beautiful.
1 point
-
The next one is the 12 volt ground wire fix. Maverick mentioned that his was not charging from the tow vehicle and I found out mine wasn't either. So, while tracing it out I discovered the umbilical ended under the front dinette seat and only had a two small white wires that went somewhere, but not to anywhere that grounded the system. So, I extended the white wire in the umbilical cable with a #10 to the ground buss under the rear dinette seat and then from the ground buss I ran two #10s to the frame grounding lug that is close to the buss. This fixed the problem and now the tow charges the trailer batteries. It also properly grounds the brakes which seemed to be grounding only through the trailer ball to hitch! This fix may help those with Fords that have been chasing an electrical gremlin related to the brake controller1 point
-
The next is the center TV mount that flips up for travel. Thanks to Windwalker for this idea. I used an aftermarket bracket and added a loop of 1/8" nylon cord to help hold it up during travel:
1 point
-
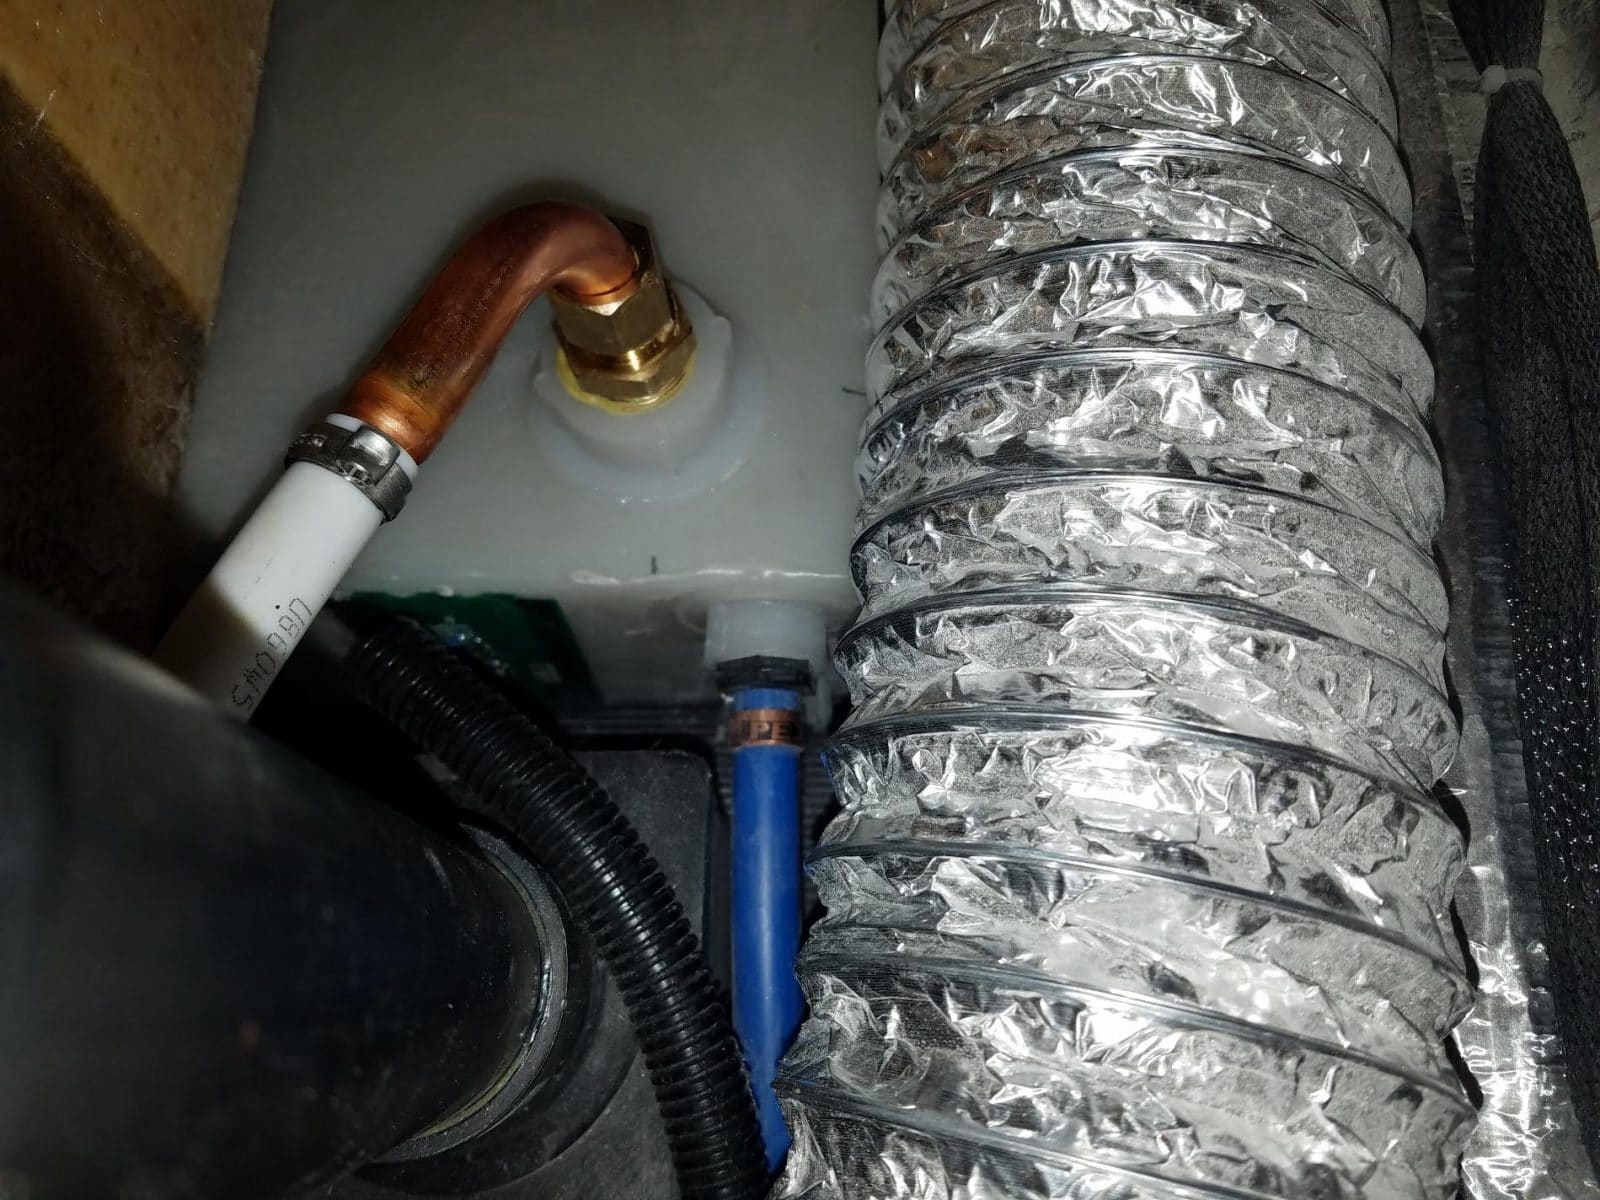
The next is the water tank fix: I designed a dip tube and spin welded a fitting to the top of the tank to install it. This fixes the problem of not being able to access all the water in the tank. It works.
1 point
-
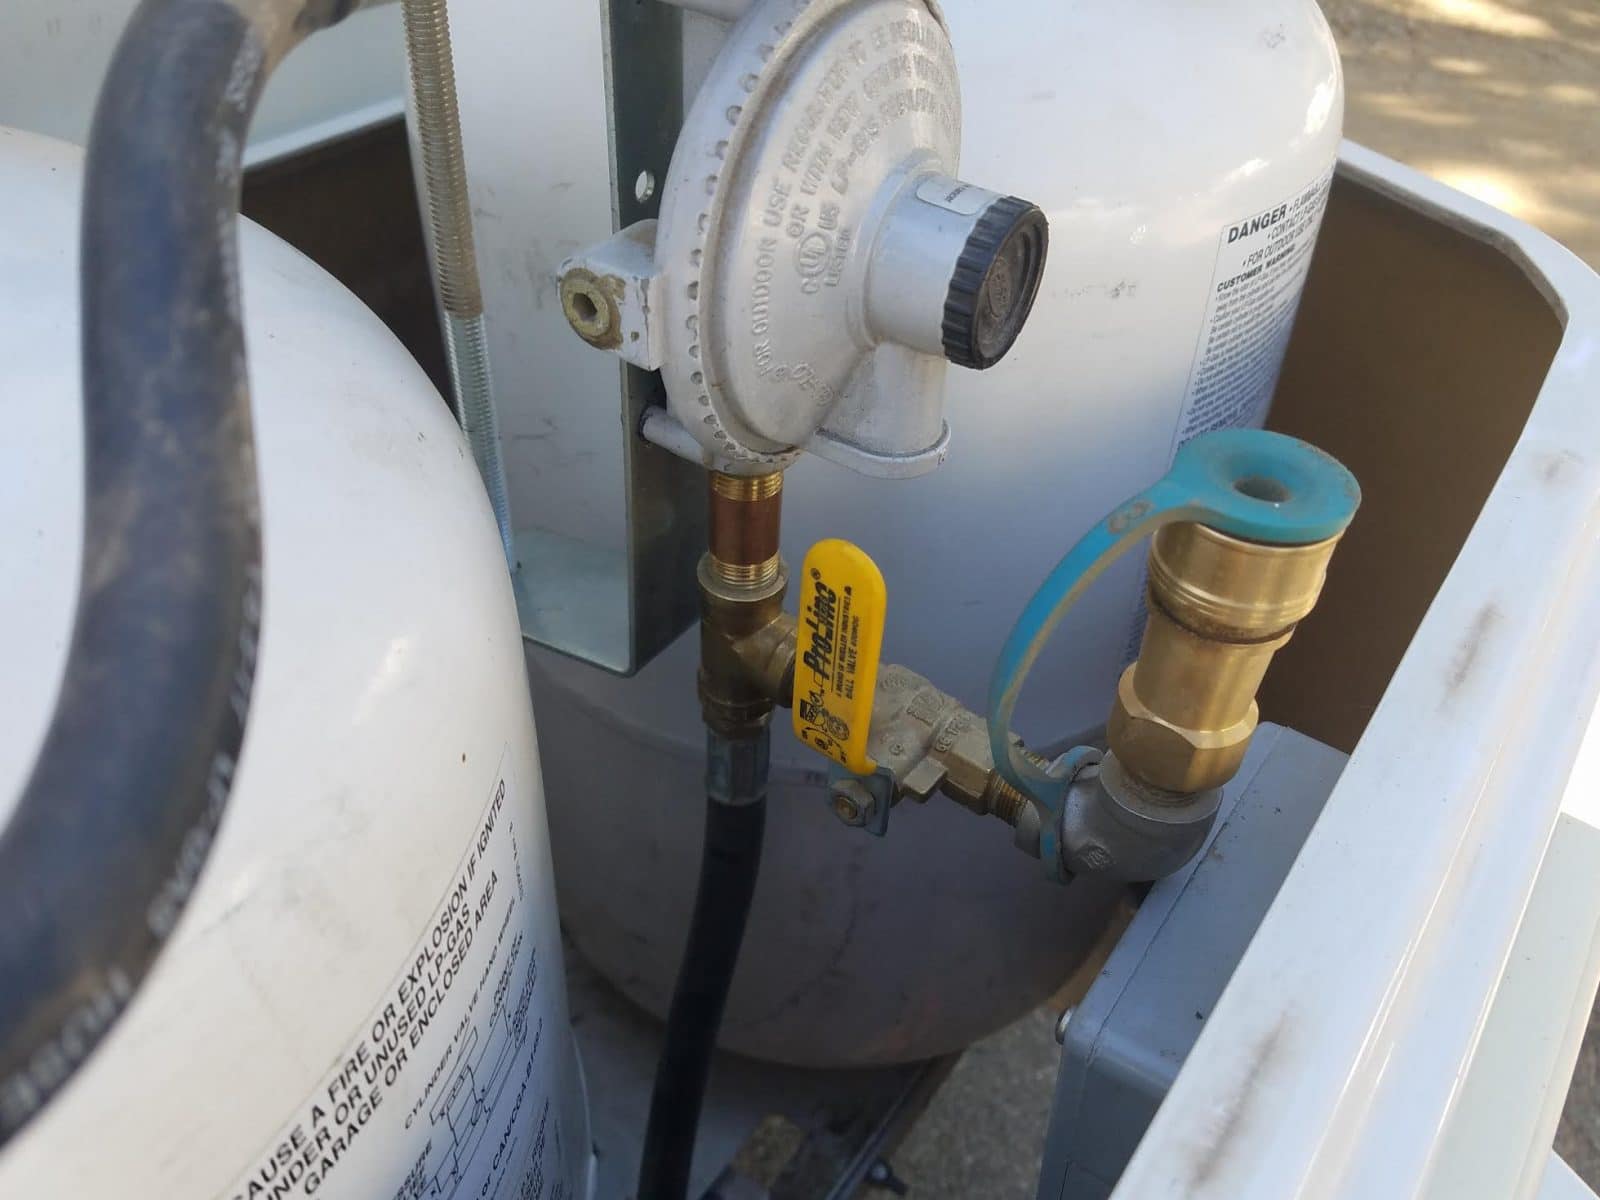
The next is the 30 lb propane upgrade and quick disconnect:
1 point


-
Recent Achievements
-


")


")


")


