Leaderboard


Popular Content
Showing content with the highest reputation on 12/15/2021 in Posts
-
Here's a photo of the finished project
 7 points
 -
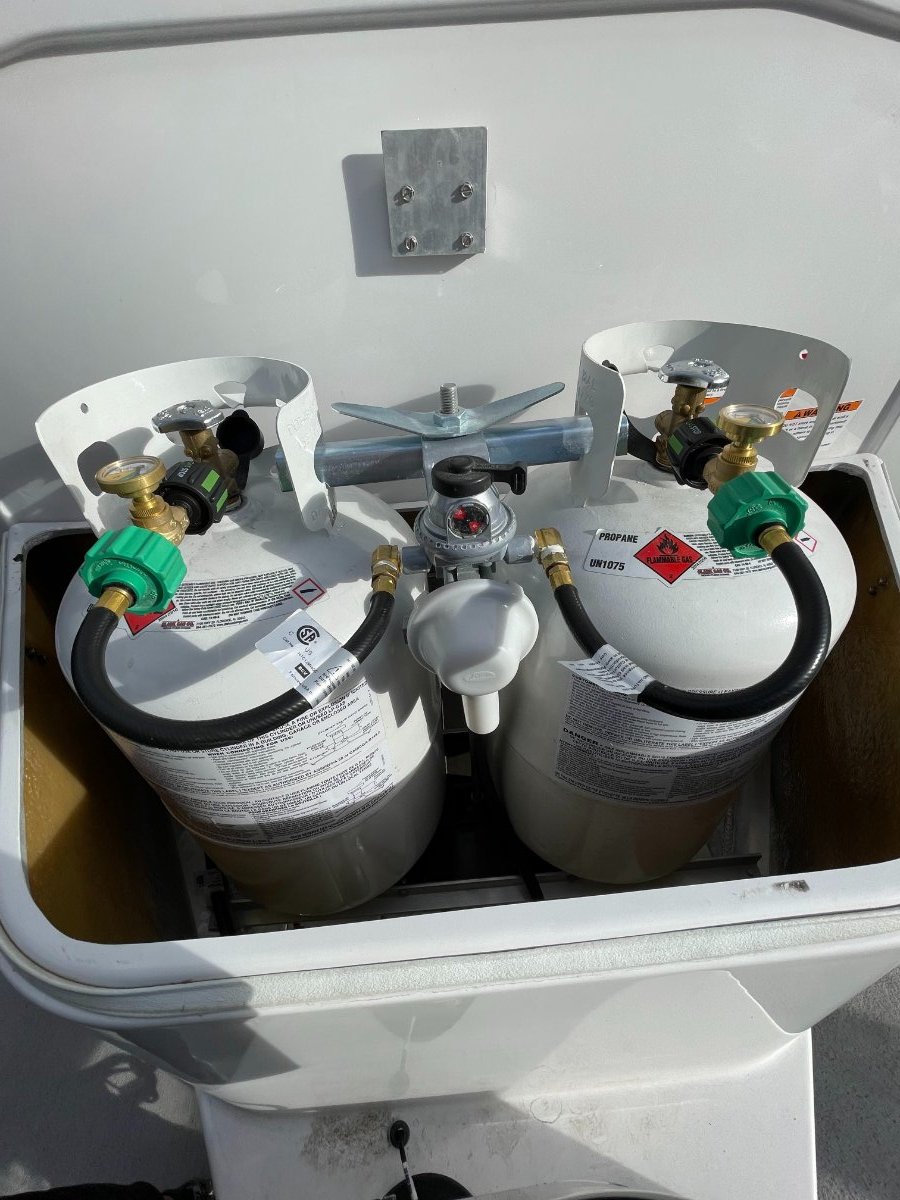
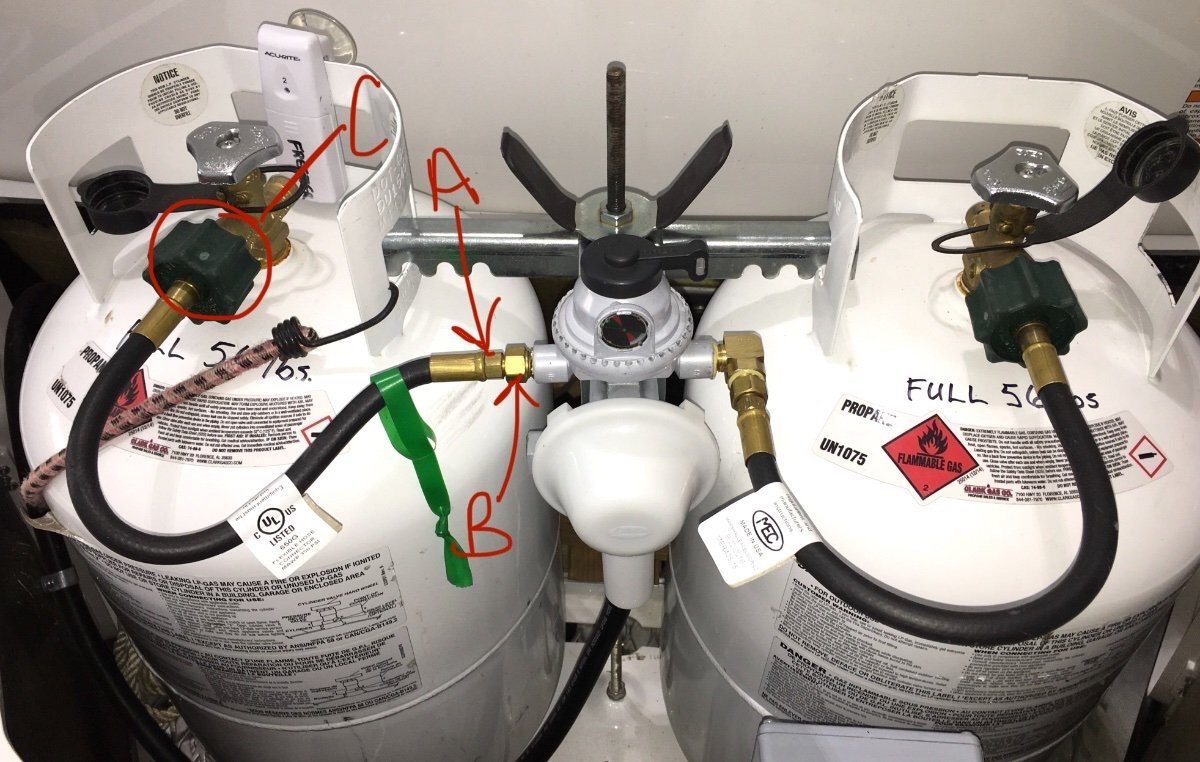
Having read endless discussions here about whether or not people travel with their fridges on propane, @MarkV and I decided to install GasStop Propane Shut-off Valves. Most of the time, we travel with the fridge off, if the trip is short enough, or with dry ice if we have access to some for a longer trip. On our Ollie, we opted for the Lithium Platinum Package, and based on preliminary results, feel relatively confident that we can occasionally travel with the fridge on DC, especially if the sun is shining and we aren’t in transit between two long-term boondocking sites. That said, we took the “better safe than sorry” approach and installed the GasStops just in case we find ourselves in need of traveling with the propane on. It gives us peace of mind. The first thing we noticed when we took the tank covers off is that even on the stock install, the propane hoses between tank and regulator have a pretty severe S curve to them. Noting that these curves aren’t great for hose longevity (another safety concern), we decided to install new street elbow fittings that essentially change the angle of entry of the hose into the regulator by 90degrees, and eliminating one of the bends in the S. We likely would have done this whether or not installing the Gas Stop valves. The install of the street elbow fitting was pretty easy, once @John E Davies cleared up some major confusion on my part. The confusion stemmed from the fact that the current fitting at the regulator has a plastic insert in it. According to John, this is a one-way check valve that allows the automatic propane switchover system to work properly. This straight fitting with the check valve is put in-line with the new elbow fitting so you don’t lose its functionality. Equipment needed: 1) 2 GasStop Propane Shut-off Valves 2) ¼” NPT BRASS Street Elbows (double-check the size of your particular fitting) 3) Pipe Thread Sealant (specifically formulated for gasses) Method Detach propane hose from the ¼” straight NPT fitting at the regulator (A) Remove the straight ¼” fitting at the low pressure regulator (B) Remove the ACME connection at the propane tank (C) Clean as much old pipe thread sealant as you can from both the regulator side and the hose side, being careful not to let any shavings enter the regulator Apply thread sealant to the male end of the new elbow fitting and install it at the low pressure regulator Apply thread sealant to the old fitting’s male end and screw it onto the street elbow. Re-attach Acme fitting to propane tank Let sealant cure for 24 hours Pressurize system and leak test! I’m sure that if I missed a step or got anything wrong, John will chime in. (Thanks, John!) Photo courtesy of John Davies:
4 points
-
Looks nice, and a little extra safety is never a bad thing. Not a huge deal, but something to keep in mind is that the 75k btu limit on the gas stop could be triggered if you’re using a portable firepit (60k btu) and the furnace (20k) at the same time. Also I’m not certain of a generator’s consumption, but a number of people have modified theirs for LP so they’d probably want to check just to make sure they won’t trigger the valve.4 points
-
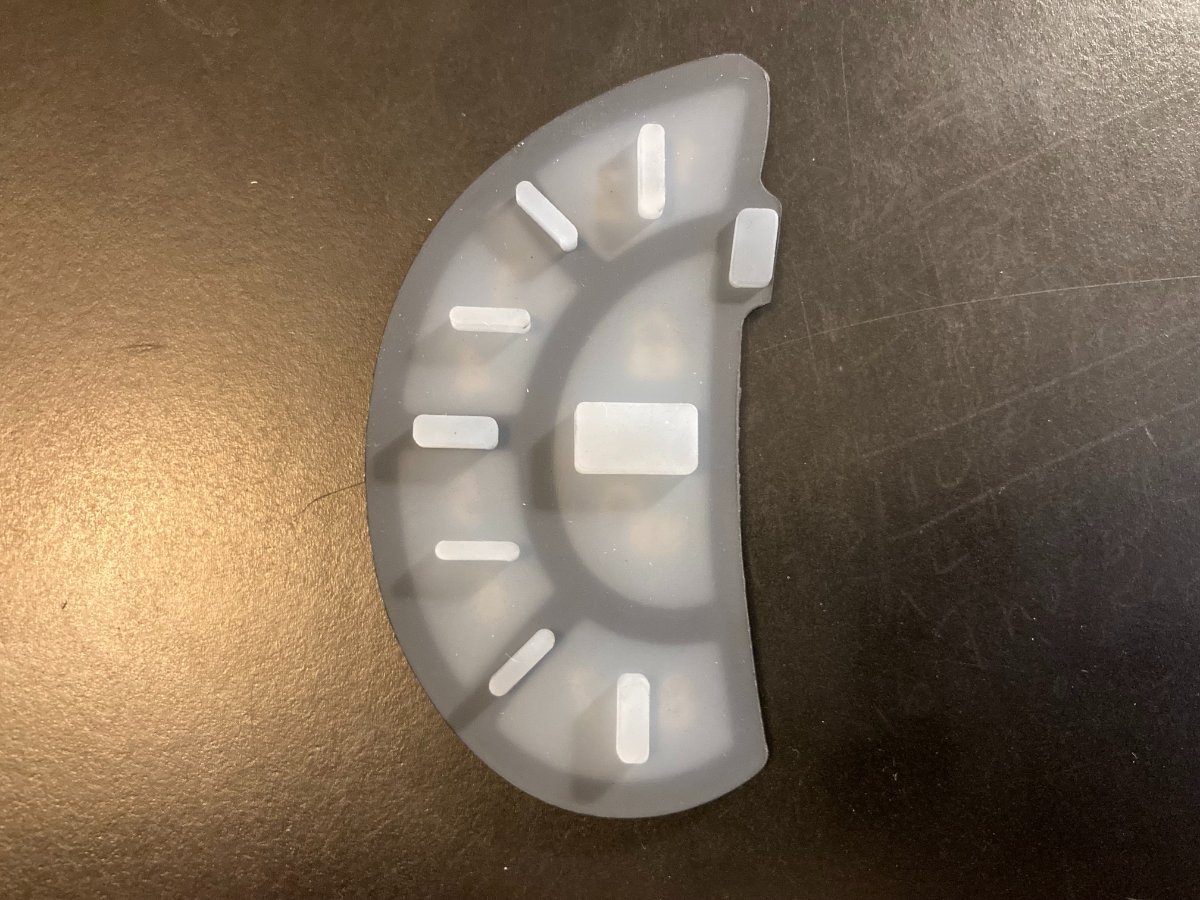
For those who have the RVLock keypad on your door and have been frustrated with the poor-quality keypad sticker, you will be interested in this upgrade. RVLock has come out with an upgraded one-piece silicone keypad membrane with numbers. The silicone membrane replaces the poor-quality keypad sticker and the silicone pad. The upgrade does require removing the lock and unscrewing the internal keypad to install the new membrane. (Instructions pictured) If you are interested, you will have to email or call RV Lock directly as the item is not "available to the public" and not listed on their website. I was given the okay by RVLock to pass the information about the upgrade on to the Oliver Owner's, via the Forum. The "UPGRADED SILICONE RVLock V4 RH Keypad Membrane" was $19.99 + $4.99 shipping. I hope this helps solve a problem. Andrew
3 points
-
Note that if your original propane hoses are showing some age or if you would rather not deal with the elbows there are THESE HOSES available. I installed the 12 inch hoses and they work well. Bill3 points
-
I wouldn't get really excited, like "hold my breath." It's obviously in test mode. Truma would make sense, as a current partner. And reliable German engineering. This unit is not, as far as I've seen, yet readily available. I'm in wait and see mode.3 points
-
I would suggest that you speak with your sales representative. I did, however, forward your thread, and another about the hoses, to Oliver. Personally, I think it's a good idea. I don't see any real downside. If people make the change on their own, I hope they check and use the proper gas sealant or tape on the threads. My previous comment aside, I don't think it's our calling to engineer Oliver trailers. Offer up ideas, ok. Imo, it's still the best trailer in its class out there. If we can help them tweak it, great, with suggestions. Best can always be even better. 🙂2 points
-
A number of Oliver upgrades and improvements have come from owner ideas and upgrades.2 points
-
I’d experiment and see how high you can turn up the firepit with the furnace going before it gets shut down. Or really live on the edge and see if you can shower before the furnace cycles on.2 points
-
Well, IMHO I wouldn't do that routinely, rather be aware that if your pit ever extinguishes itself with a "POP", you should realize that the gas valve was triggered, and from that point you should shut down the furnace when cooking outside. But in reality it may never happen at all. Cross that bridge when you come to it.... John Davies Spokane WA2 points
-
I bought these 12" hoses to use when I installed the new valves, but they were much too long, and I would have had to install the street elbow to use them anyway.2 points
-
Getting older carrying wood among many other things some times isn’t worth it. Some State Parks you travel to allows your own wood, some don’t allow wood brought in from other states. While traveling out west I forgot which state we were in. We came upon an inspection station and there only concern was were we carrying wood? Luckily we had none at the time. With that said the portable fire pit is a good option. It doesn’t replace the wood fire of course. But I’m happy with the portable fire pit I was able to get one from Oliver very nice unit more expensive than online. This fire pit was no cost to me fortunately thanks to the referral program Oliver has. I used some of the credit I had available.2 points
-
Yep, put it in the middle with chairs around and it is quite cozy even in really cold weather!2 points
-
Certainly not a bad idea ! But, if you really don't want to "think outside the box" then as a first step try getting the monitor in a position that is (1) as high in the Ollie as possible and (2) in a position where it is located with only the outside wall of fiberglass between it and the exterior. One of the easiest places to do this is in the attic where the insulation can easily be pulled back and the monitor simply laid between this layer of insulation and the outside hull. Bill2 points
-
Personally, I'd just visit your Ollie more frequently. I hear they can get lonely.2 points
-
My wife made this awesome Christmas card for us! It features us, our many pets, and of course, our Oliver! Feel free to check out more of her work at hannahgumbo.com
1 point
-
Understood. But, before I contact Oliver and suggest they switch to 90-degree LP hoses, I thought it prudent to ask if someone else has already made that specific suggestion. Perhaps Oliver has considered and rejected that proposal, for reasons I have not yet been able to find on this forum. If I get no "takers" after a few days, I will initiate the conversation with Oliver, as the 90-degree LP hoses make sense to me. Who would be the appropriate person to contact at Oliver with such a suggestion?1 point
-
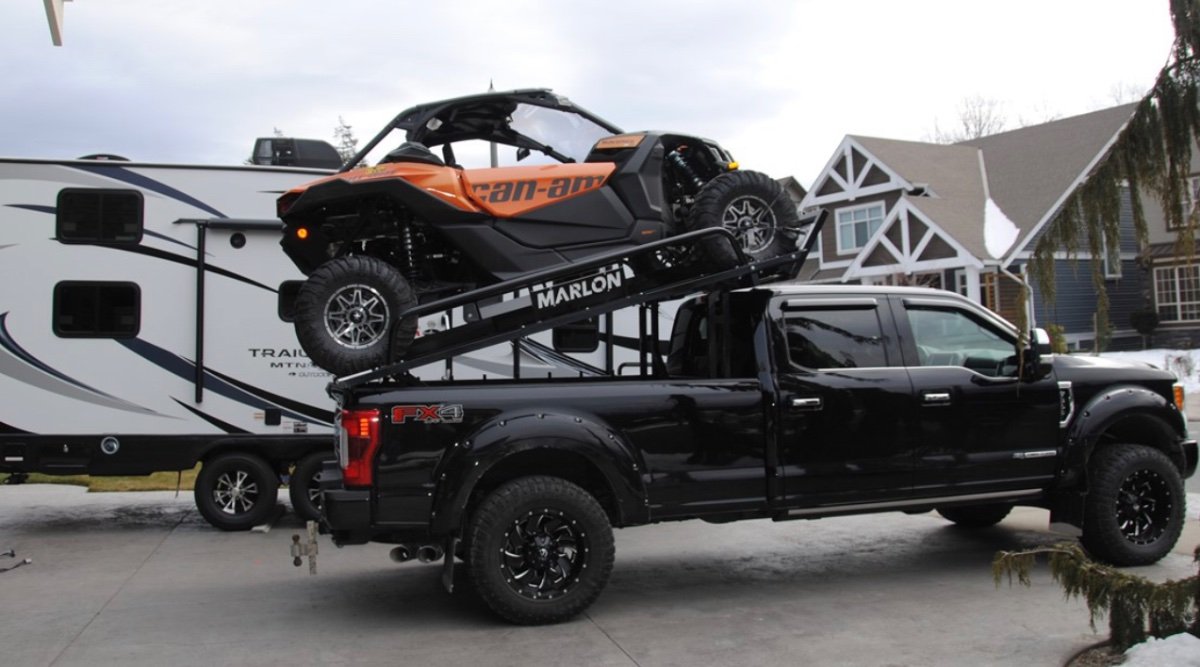
I’ve looked into this a little bit. I’m not sure if some states like Michigan require a 5th wheel behind the truck to pull doubles. The Oliver wouldn’t make a very good trailer for this IMO. Too hard and expensive to make the modifications to support the weight. If you have a heavy duty pickup the Marlon rack might be an option…
1 point
-
Given the necessary 90-degree relationship between the two tank valve outlets and the two regulator inlets, I wonder why Oliver doesn't use 90-degree hoses for factory installations, instead of installing straight hoses with a severe S-bend? The cost differential can't be more than a few $$ per hose, and installation should be easier, saving some labor time. Has anyone suggested this to Oliver?1 point
-
Oh, water heater, too - I just looked up the Truma and it can pull as much as 60k btu. No idea about the standard tank, though I assume it’s a good bit less.1 point
-
I had read that before...thanks for the reminder and I will keep that in mind -- if we're outside with the fire pit, we'll be sure to turn the furnace off!1 point
-
Patriot mentioned this keypad upgrade in THIS THREAD. Bill1 point
-
This may be worth a try: My understanding is that the Bluetooth transmitter is in the monitor housing. This likely is inside your Oliver Trailer. So, you have double hull fiberglass, double foil insulation between them, the distance to the house plus glass windows/walls of the house all reducing the Bluetooth signal. In the absence of a "Bluetooth Extender" your remaining option is to reduce the signal loss include: Moving the house closer to the trailer. (Or the Converse) Modifying the signal barriers (Take your windows out of the house, etc.) Thinking outside the box. Me, I would go for thinking outside of the box.... Literally. Your 712 Smart data cable and power cable often have a lot more wire length than is needed. Try removing the screws that mount the monitor and hang it outside of Ollie. Maybe through the window that is facing the house. May want to put it into a Ziploc Freezer Bag to keep it dry all winter and tape over the window crack to keep critters and weather outside. The end result is that you will have put your Bluetooth transmitter outside of all of the signal reducing barriers of our OTT. Be sure to reinstall in the Spring. Let us know if this works! GJ1 point
-
We also have the Outland fire pit. It keeps our clam toasty warm in cold weather on low. Highly recommend! Mike1 point
-
Busted. Per TCA, the Truma smallest is 13,500 BTU's. Drats............ GJ TCA Now Testing New Truma Aventa Air Conditioner July 17, 2021 Truma North America will soon be supplying the US RV market with premium Truma Aventa rooftop air conditioners. The Truma Aventa will be offered in two models that minimize noise and maximize comfort in a modern, energy-efficient, low-profile design. The Eco model will offer a 13,500 BTU cooling capacity, while the Comfort model offers 15,000 BTUs. As part of this release, Truck Camper Adventure is testing the Aventa Eco model for use in truck campers and vans. Both Aventa models will be offered in black and white. Truma has been selling Aventa air conditioners in Europe and Australia for years, but the North American Aventa was designed specifically for the warmer U.S. marketplace. Numerous partners, including Truck Camper Adventure, are testing the two air conditioner models this summer before the Fall 2021 release. TCA is testing the Eco model using both shore power and off-grid power. The latter system found in the Truck Camper Adventure rig consists of an Expion360 360 amp hour battery, a 500 watt solar power system, and a 3,000 watt inverter. Testing is being conducted across the country, including in the dry heat of Arizona and in high humidity areas in Texas and in the Midwest. Compatible with both ducted and non-ducted systems, the Truma Aventa comes standard with many advanced features, including an automatic cooling mode, a dehumidification mode, a night mode, an air circulation mode, and three manually selectable fan speeds (low, medium, high). Significant noise reduction, which has always been an issue with RV air conditioners, has been achieved in the Truma Aventa by using a thick, noise absorbing EPP foamcore, while the compressor is mounted on shock absorbers to avoid vibration. Based out of Elkhart, Indiana, Truma has a long history of providing high-quality solutions to the recreational vehicle market and is the manufacturer of the excellent Truma Combi water heater-furnace, Truma Varioheat furnace, and Truma AquaGo water heater. This is a developing story. Check back for details as the results of our testing becomes available. Share this:1 point
-
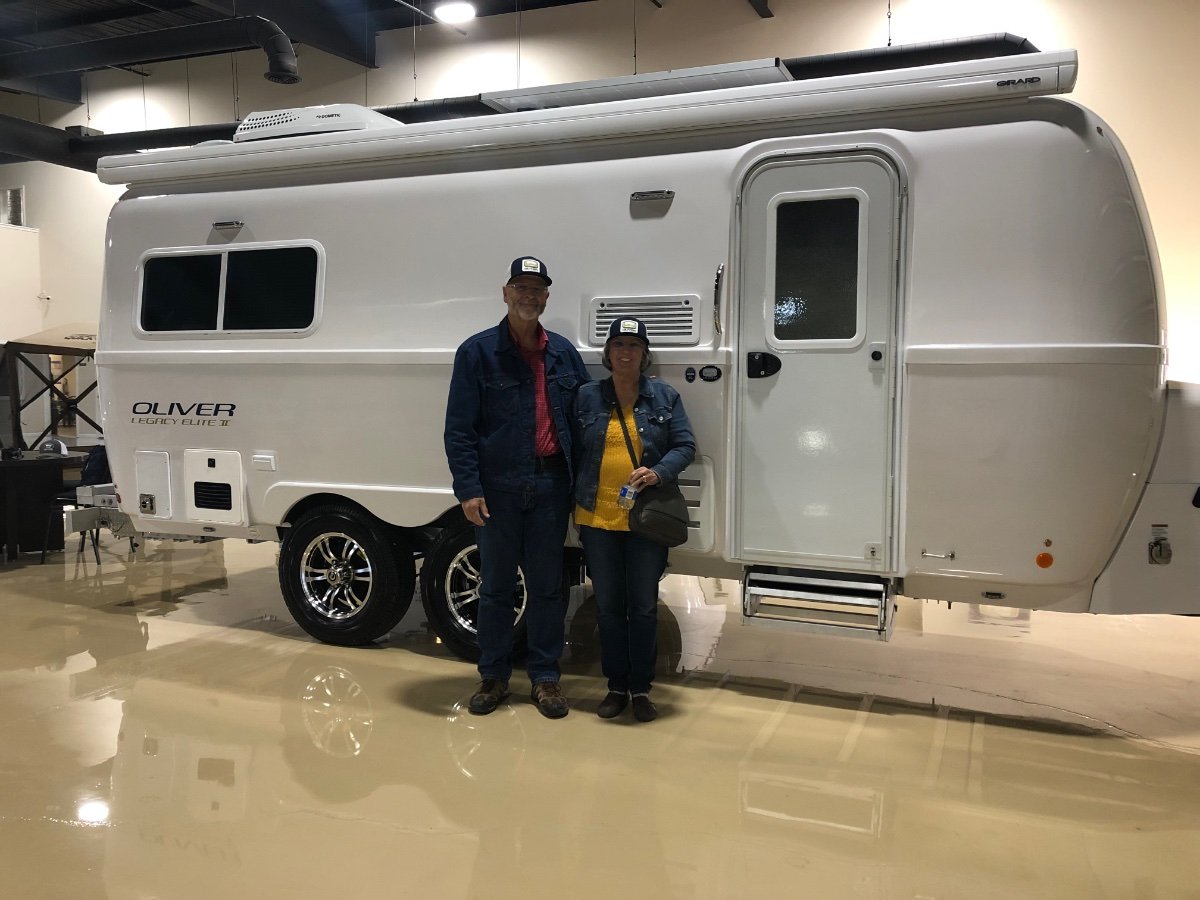
We picked up our LE2 last Wednesday, Dec 8, and took 3 days to return home (near San Antonio, Tx). We had a great trip; weather turned out better than forecast. Really impressed with the camper thus far, and it tows great! Here is a picture an Oliver employee took. I intended to post this on delivery day, but I never could get additional photos to attach right side up (what’s the secret?). Frank
1 point
-
Very nice looking rig. Congratulations and enjoy!1 point
-
Bill, we had site #1, which they gave us, but the young lady did say we were the only ones in the park so we could have had our pick. It was level side to side, but sloped downward front to back. My hitch ball was at 25” unhooked, and I believe the truck squatted at least 1.5” from the LE2’s tongue weight, so it should have been level. However the trailer was nose high on hookup, so I got service to reverse the ball (from .5” lift to 2” drop, so a 2.5” total drop), which appears to have made the trailer almost level (judging from the bubble level on the LE2). There may be a slight nose down attitude. Camping was great—very quiet and convenient. Allowed us to have service over on the hitch adjustment and me to ask a couple other questions. Frank1 point
-
If it was me - 1. Disconnect the water line/hose if connected. (Boondocking -I get it - just want to cover the subject) If you have insulation, tape, HD towels - wrap the hose connections. 2. Insulate as SeaDawg has suggested. If in a pinch - use some thick towels or similar - tucked into the area. A water heater blanket from HD will work - cut to fit. 3. Open up any of the access ports on the inside of the trailer - the aim is to give heated air a path to the areas below and in-between the hull. 4. Make sure you have enough Propane for the timeframe - run the furnace as needed to maintain appropriate temp inside the unit. 5. Optional: If you have a multi sensor temperature station - put one in the rear access hull area - and one in the front - under the front dinette seat area - would be interesting to see what the temps get to in the areas. IE: Amazon.com: Newentor Weather Station Wireless Indoor Outdoor Multiple Sensors, Digital Atomic Clock Weather Thermometer, Temperature Humidity Monitor Forecast Weather Stations with Backlight: Industrial & Scientific and then thumb your nose at mother Nature - not to much though - you don't want to really make her angry.....1 point
-
This is a timely topic and tip for me as I am headed to Big Bend SP on Thursday through Monday. On Sunday and Monday the temperatures are going to be too cold to use the Oliver's water system (or for mountain biking) as they are expected to drop to 12F and stay below freezing for over 24 hours. The trip back from Terlingua to Austin will be chilly one too.1 point
-
I knew the effect of leaving both valves open in summer, but I never considered how that “operator error” could be intentionally used to warm that area during a sudden cold snap, if the hot water system was still active... We really need a central resource or perhaps FAQ threads pinned in place at the top of each section of the forum, with a continually growing list of Ollie-specific tips, tricks and best practices, like this one. I think it is a gem. Thank you! John Davies Spokane WA1 point
-
JD - Yes - you got it. I believed that the intent of the original question was to seek advice as to how to prevent freezing or pipes and things without completing a winterization service. Bill1 point
-
Camping, at 12 at night, 35 day, I'd add a piece of foam to the shower door. Run the furnace. If in storage, I'd do a full winterization .1 point
-
I am not sure what your intent was with that last part...... but leaving both the hot and cold valves turned on, and the shower head valve closed, will cause the hot water circuit to bypass into the cold water one, if the water heater is running. That will make it impossible to get hot water out of any of the other faucets - just tepid warm water - but it will also keep the outside shower parts warm. Was that what you meant? Because it is actually quite ingenious, as long as you don’t want to take a hot shower in the bathroom. But taking off the outside shower extension hose and capping the connection there at the valves would be even better.... Has anybody seen a sturdy cap with rubber seal that matches those hose threads? That way you would have enough extra room inside that little compartment to shove a little zip bag full of insulation. John Davies Spokane WA1 point
-
In addition to what JD just said - I'd try to make sure that the exterior shower is drained as much as you can and even then if it is not winterized I'd leave them either at a slow drip or (if you have a way of being sure they don't "run" open both the hot and cold entirely i.e. leave the lever on the showerhead in the closed position). If you are going to have a problem it will most likely be on the street side of the trailer given that there is much less heat ducting over there. Bill1 point
-
My opinion is that if all the water lines have water in them, something may freeze. If you can get to a Walmart or any RV store ASAP, buy a winterization hand pump and a couple of gallons of RV pink antifreeze. Pump six ounces of antifreeze through each of the FOUR outside ports. That should be enough to get you through a couple of cold nights. Keep the hot water heater going, or you must bypass and drain it completely. If you can’t find the antifreeze and pump locally, and have access to an air compressor and adapter air fitting, you can screw that on and use 60 psi air to blow those lines out. It is not nearly as safe and reliable, but better than leaving them full. Worst case, if you are at a campground, beg a neighbor or the camp host to help you use his pump and antifreeze, and repay him for the AF, and thank him heartily. You need to know how to do this stuff, if you don’t take these minimal steps it may result in broken parts and an expensive repair bill. Especially if you run out of propane or the furnace fails at midnight..... Ideally you should be plugged in and have an electric backup box heater handy, just in case. Boondocking with no shore power is more risky, unless you also have a generator you can fire up to run that heater.... Opening up a few access panels will help with distributing heat underneath them, tho that won’t be needed if the furnace is going. Make sure at least one of your propane tanks is completely full, you will go through a lot more gas than you are used to using. John Davies Spokane WA1 point
-
I have the smaller , older elite, without the ducting. We have camped with nights in the teens, without issue. But, I would definitely use your furnace, so it dissipates some heat into the hull. I just read your other post. Are you already winterized?1 point


-
Recent Achievements
-


")


")


")
