Leaderboard


Popular Content
Showing content with the highest reputation on 04/24/2018 in all areas
-
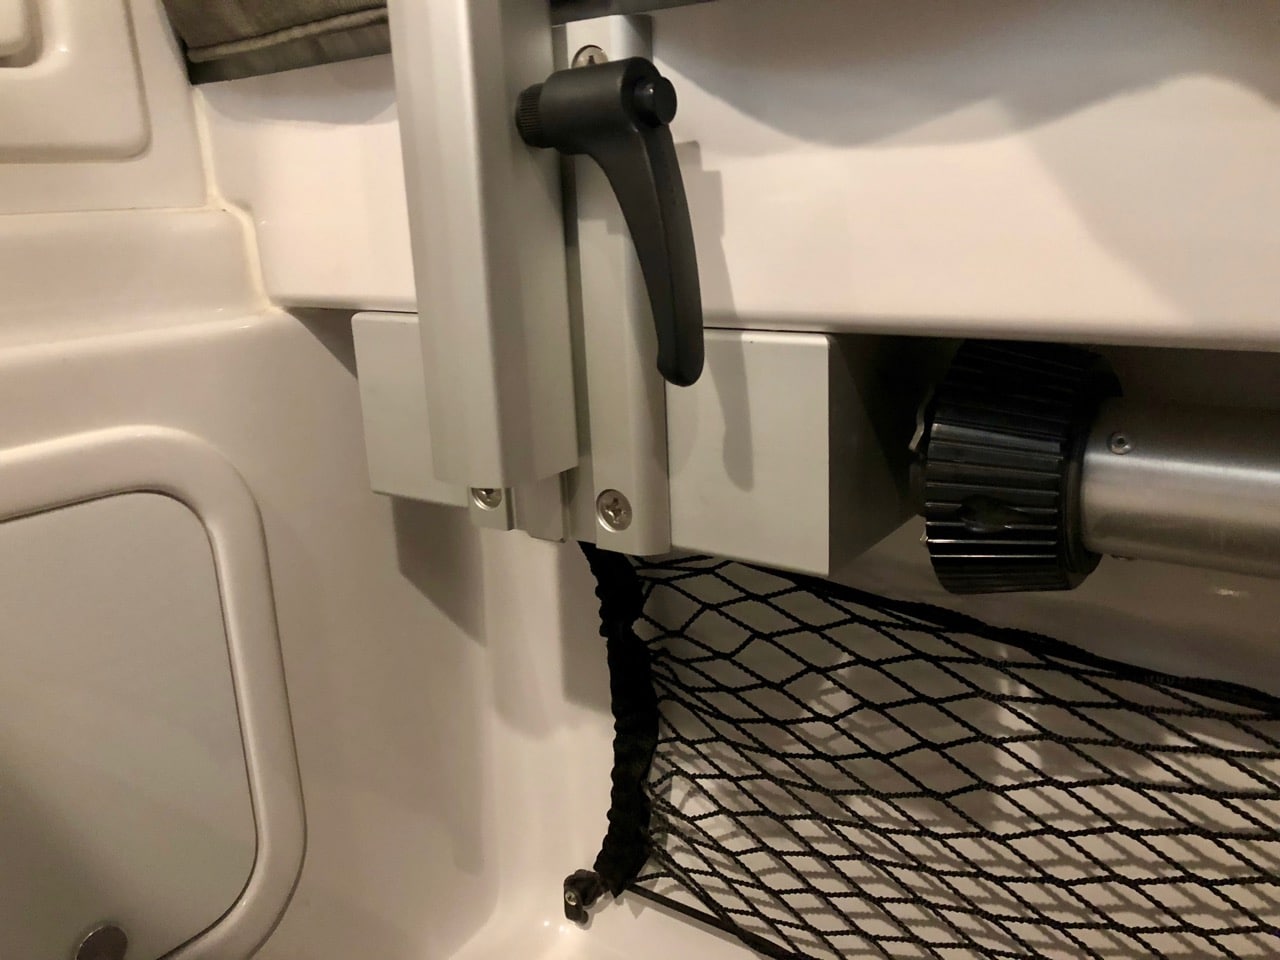
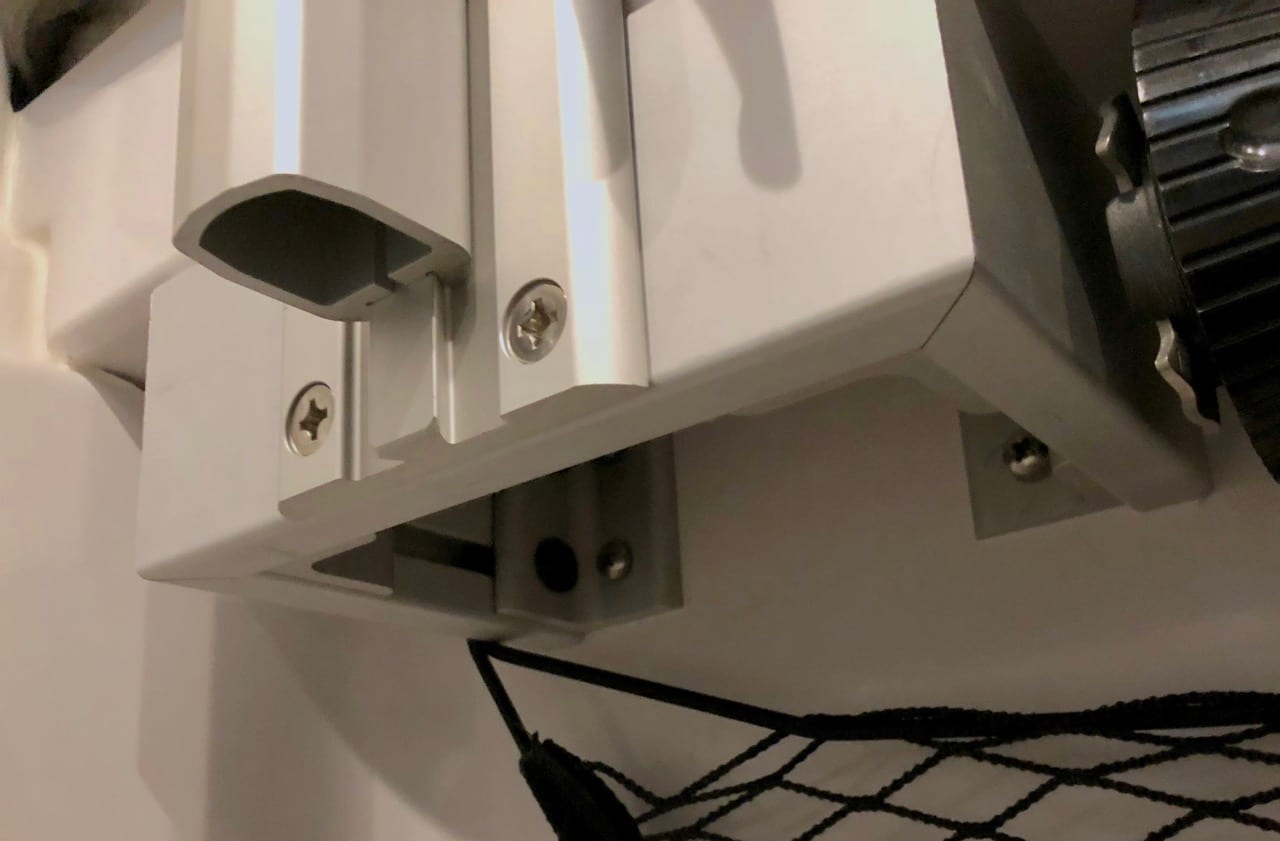
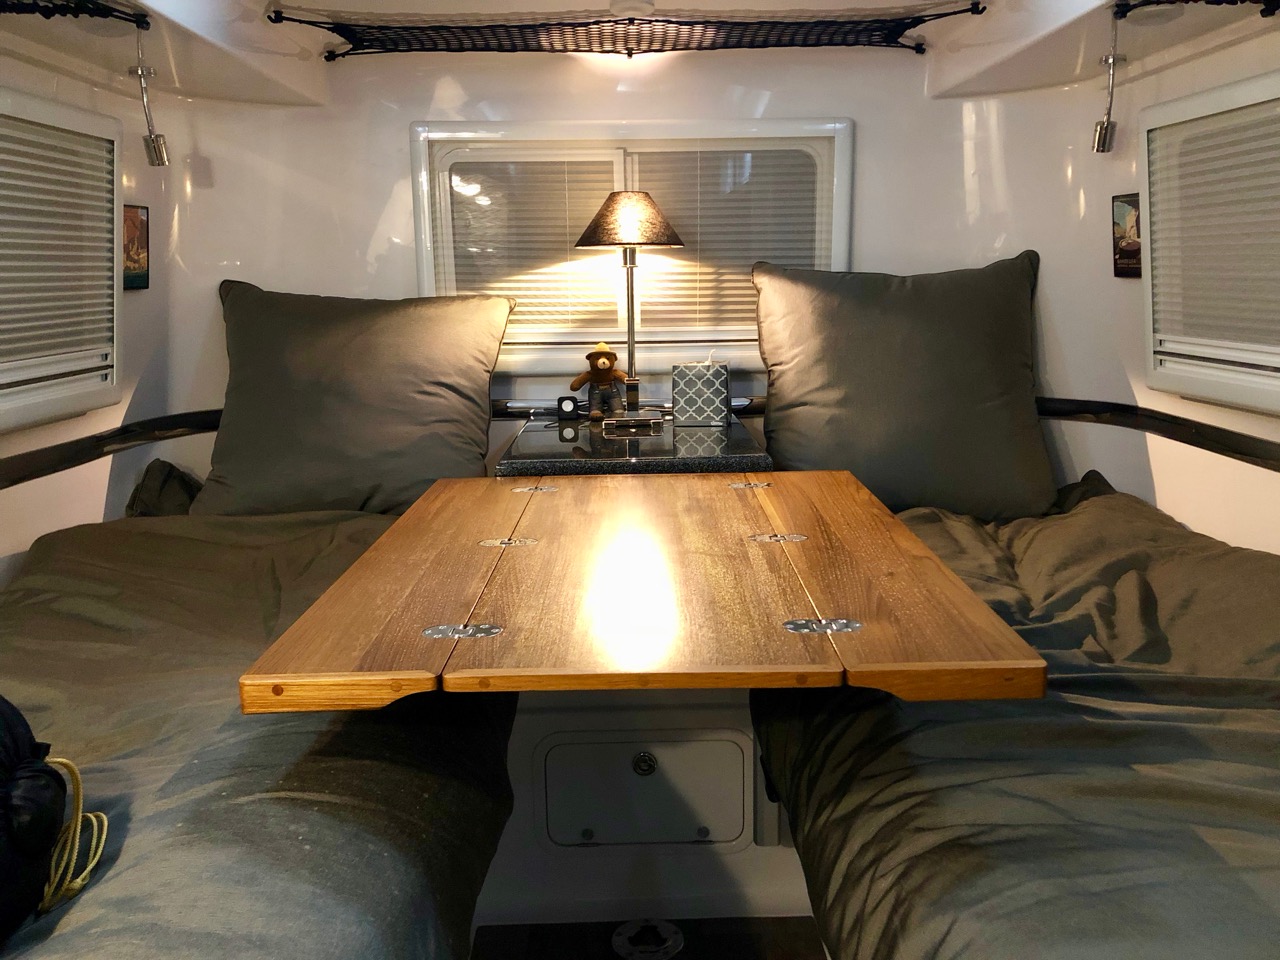
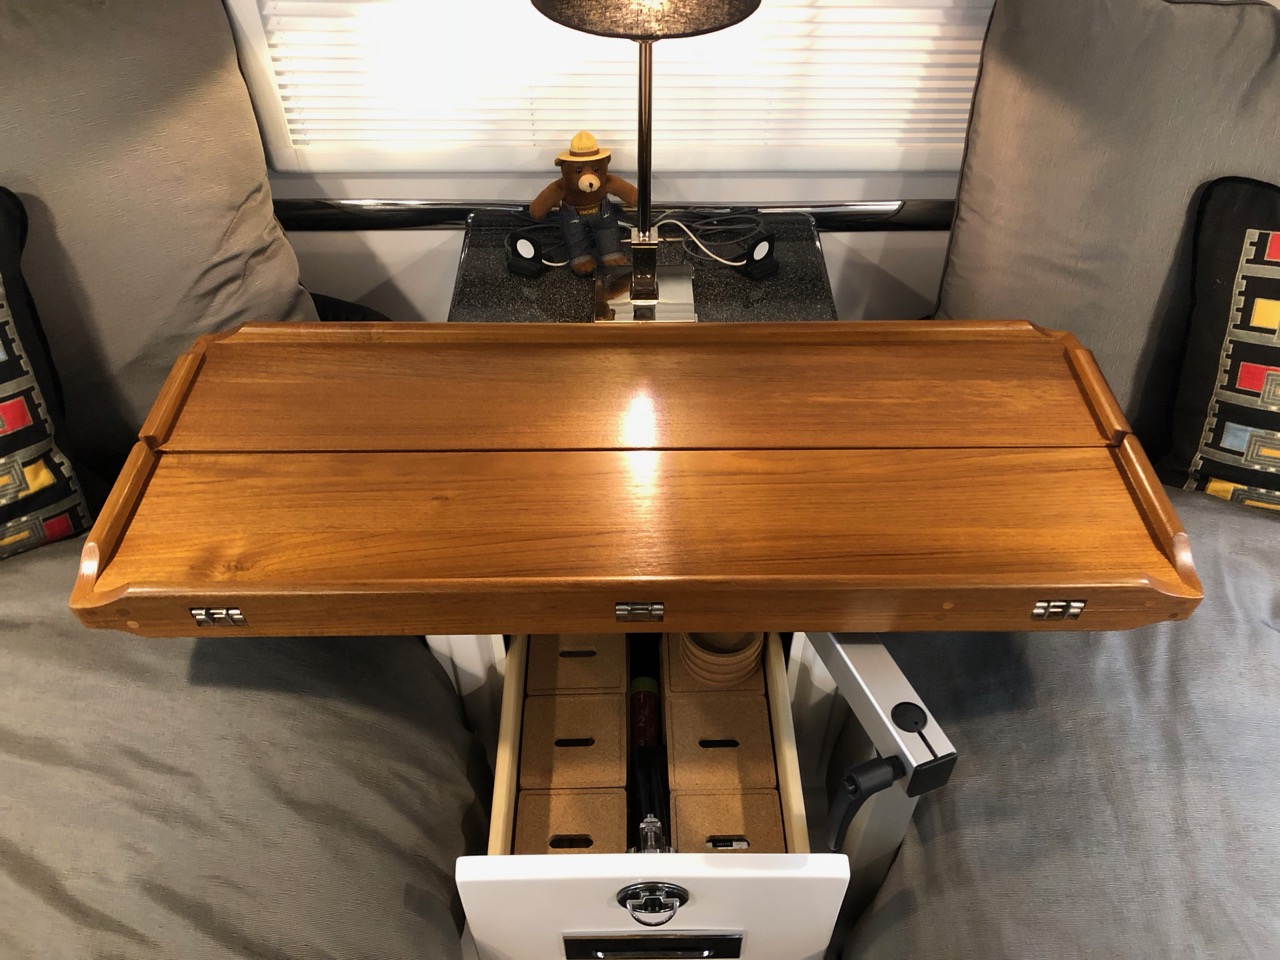
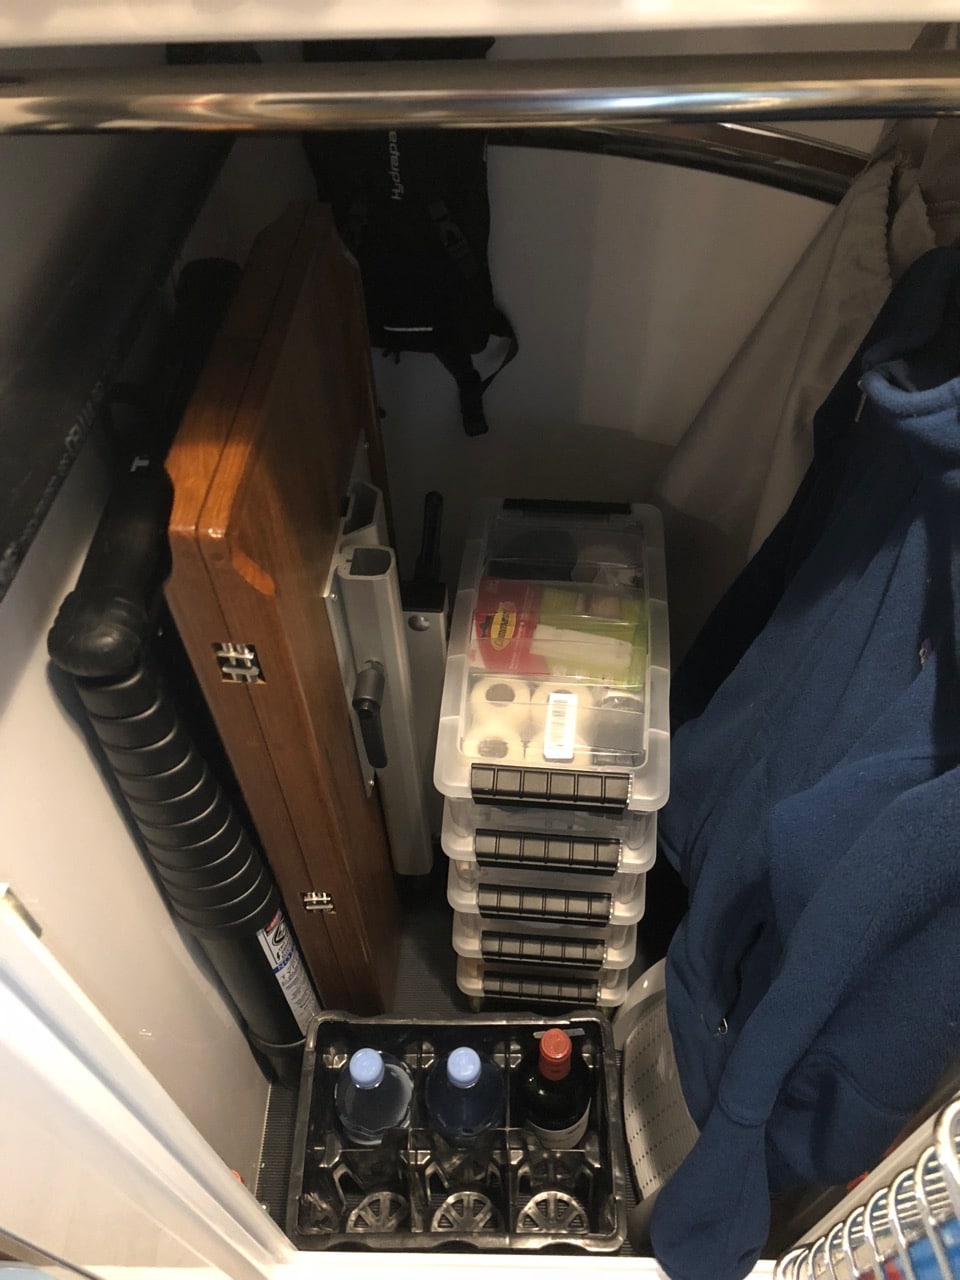
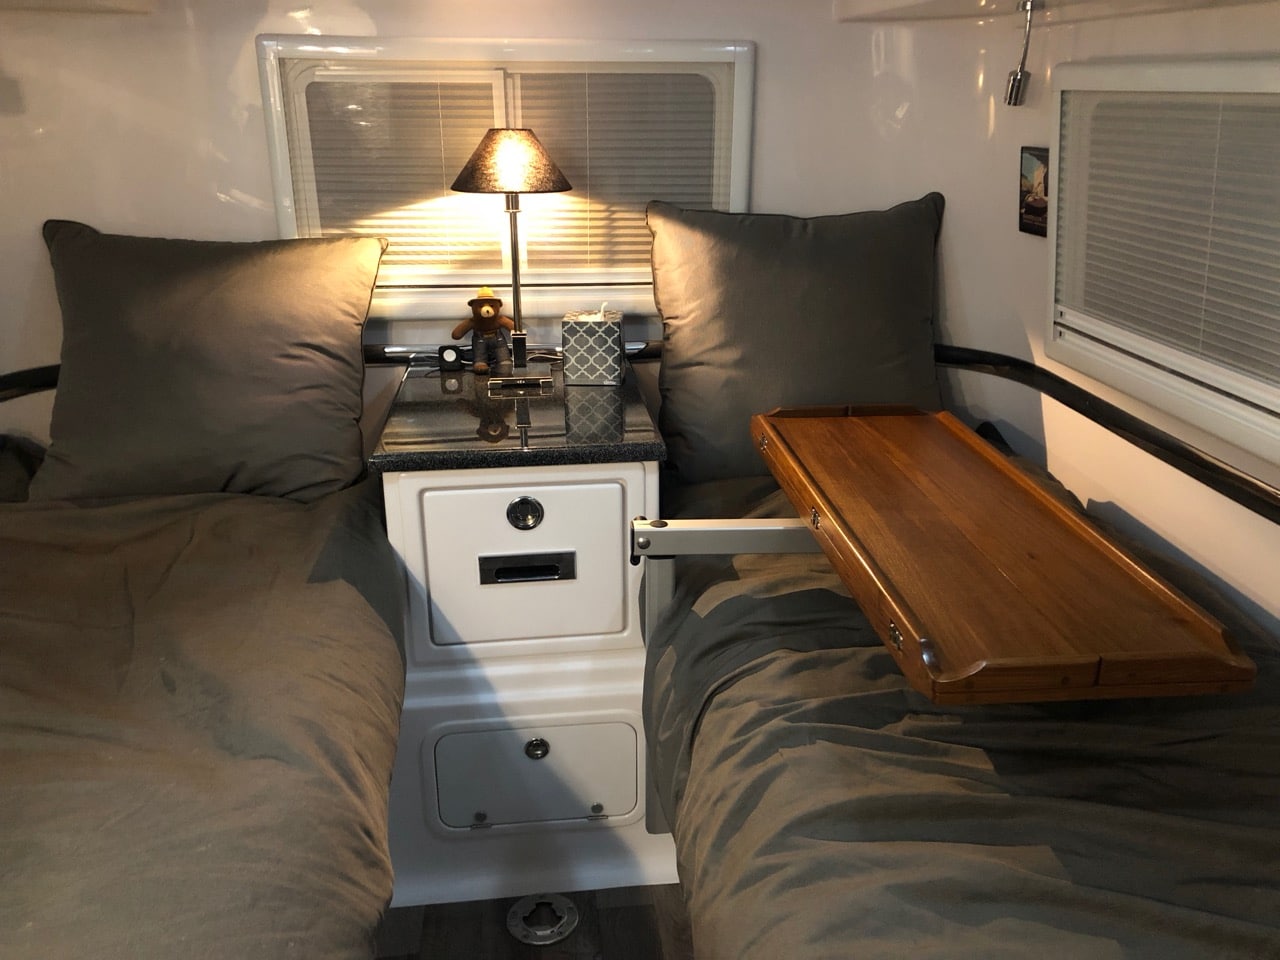
I think like a lot of Elite II buyers, we were torn between the twin beds vs the king. We chose the twin, but not so much for the size or comfort of the beds as it was the utility of nightstand and easy access to the overhead compartments. But we liked the idea of having a table and a large lounging area in the back, and so I set my mind on the idea of trying to have both. At first I designed a custom table for the back that would latch into the nightstand in the back with a pole in front, similar to how the dinette table works. I showed it to Oliver and they thought they'd give it a try, but as time went on and things got delayed or forgotten, I sort of gave up on that idea and asked if they would just sell me the standard table top and legs and I would figure it out. They did, and it was a big mistake since I could never figure it out. The table was just too heavy and bulky to put up and take down, and there was absolutely no place to store it. Plus the height with the standard legs was too short for the mattresses we had (another poor decision on my part). So on our first trip it was labeled the Albatross Table and it was just in the way the whole time. It didn't make another trip, just the two mounts screwed to the floor to remind me that not every problem has a solution. But the solution does exist in the Lagun table. I'd seen them before in the king bed model but I had sort of dismissed them as being too small to be of use. But that was before @rideadeuce started this topic about their upgraded table top. Their top was much larger, foldable, and just generally nicer looking than what I'd seen before; and so it clicked with me that with the Lagun mount, we could have a foldable table that could easily be stored or moved out of the way for access to the upper storage. Also the height could be whatever we wanted and unlike the table we had, could be quickly locked for travel. There were just two problems for us - the mount in it's normal location would block the nightstand drawer; and on top of that, we had opted for an access hatch to the basement right in that same spot where the Lagun is usually bolted to the hull. I needed a way to mount the table to the side somehow. So I made one of these - This contraption is made out of 15 Series extrusion from 80/20. I cut, mitered, and erector setted this little block and associated connectors to go beneath the bed overhang. The Lagun mounting plate (the vertical piece) bolts to the mount and then the whole thing gets bolted to the side wall under the bed in four places and to the bed overhang in four places. It looks complicated but if you have a miter saw and can play with Legos, you can build it. Here are some pics of the block in place so you can see how it mounts. The top two bolts on the Lagun plate bolt into the side of the bed extension, then there are two bolts on the block that secure vertically into the base of the extension, then another four bolts that go into the side wall of the base of the bed, opposite the basement. I marked and drilled for the two vertical holes first, then temporarily bolted it in place to mark all the other holes. You need to do this since not all of the surfaces are perpendicular to the trailer or one another. But the flat bottom of the bed extension runs parallel to the floor so if you use that as your starting point then the table top will end up parallel to the floor as well. The end result is extremely solid - The table top I chose is the 35" Nautic Sail top from Marine Teak. Look around on their site and you'll find a number of styles and sizes, any of which would be a great choice. (This is the same company as this one, btw, but they have more choices in table tops on their UK site.) I debated oiling it, but came to my senses and coated it in a couple layers of low gloss poly. Taking it apart to seal is no problem, but you do have to keep track of a number of shims that go under the hinges to make them flush to the wood. So here's the final result. I really like the versatility of the top. Use it folded, unfolded, bar height, table height, sideways, lengthways, stick it over the bed for travel or to get it out of the way, or...however. With the mounting plate where it is, we can raise the table hight enough to clear the nightstand and lower it enough that it sits on the bed locked in place for travel. As you can see, the drawer clears just fine. The table will work best once we have our cushions made to replace the mattresses, but we just did a quick weekend trip with it and it works well even as it is. And best of all, it fits in the closet -
 5 points
 -
Had another attack this morning. They can register as anyone else can. New users are required to activate their account by clicking a link in their email, which tells me that it most like a human and not a bot doing it. If it continues we will tighten up the spam controls.3 points
-
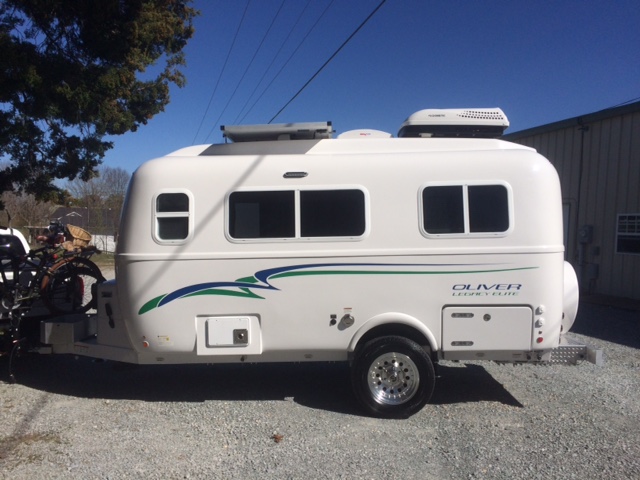
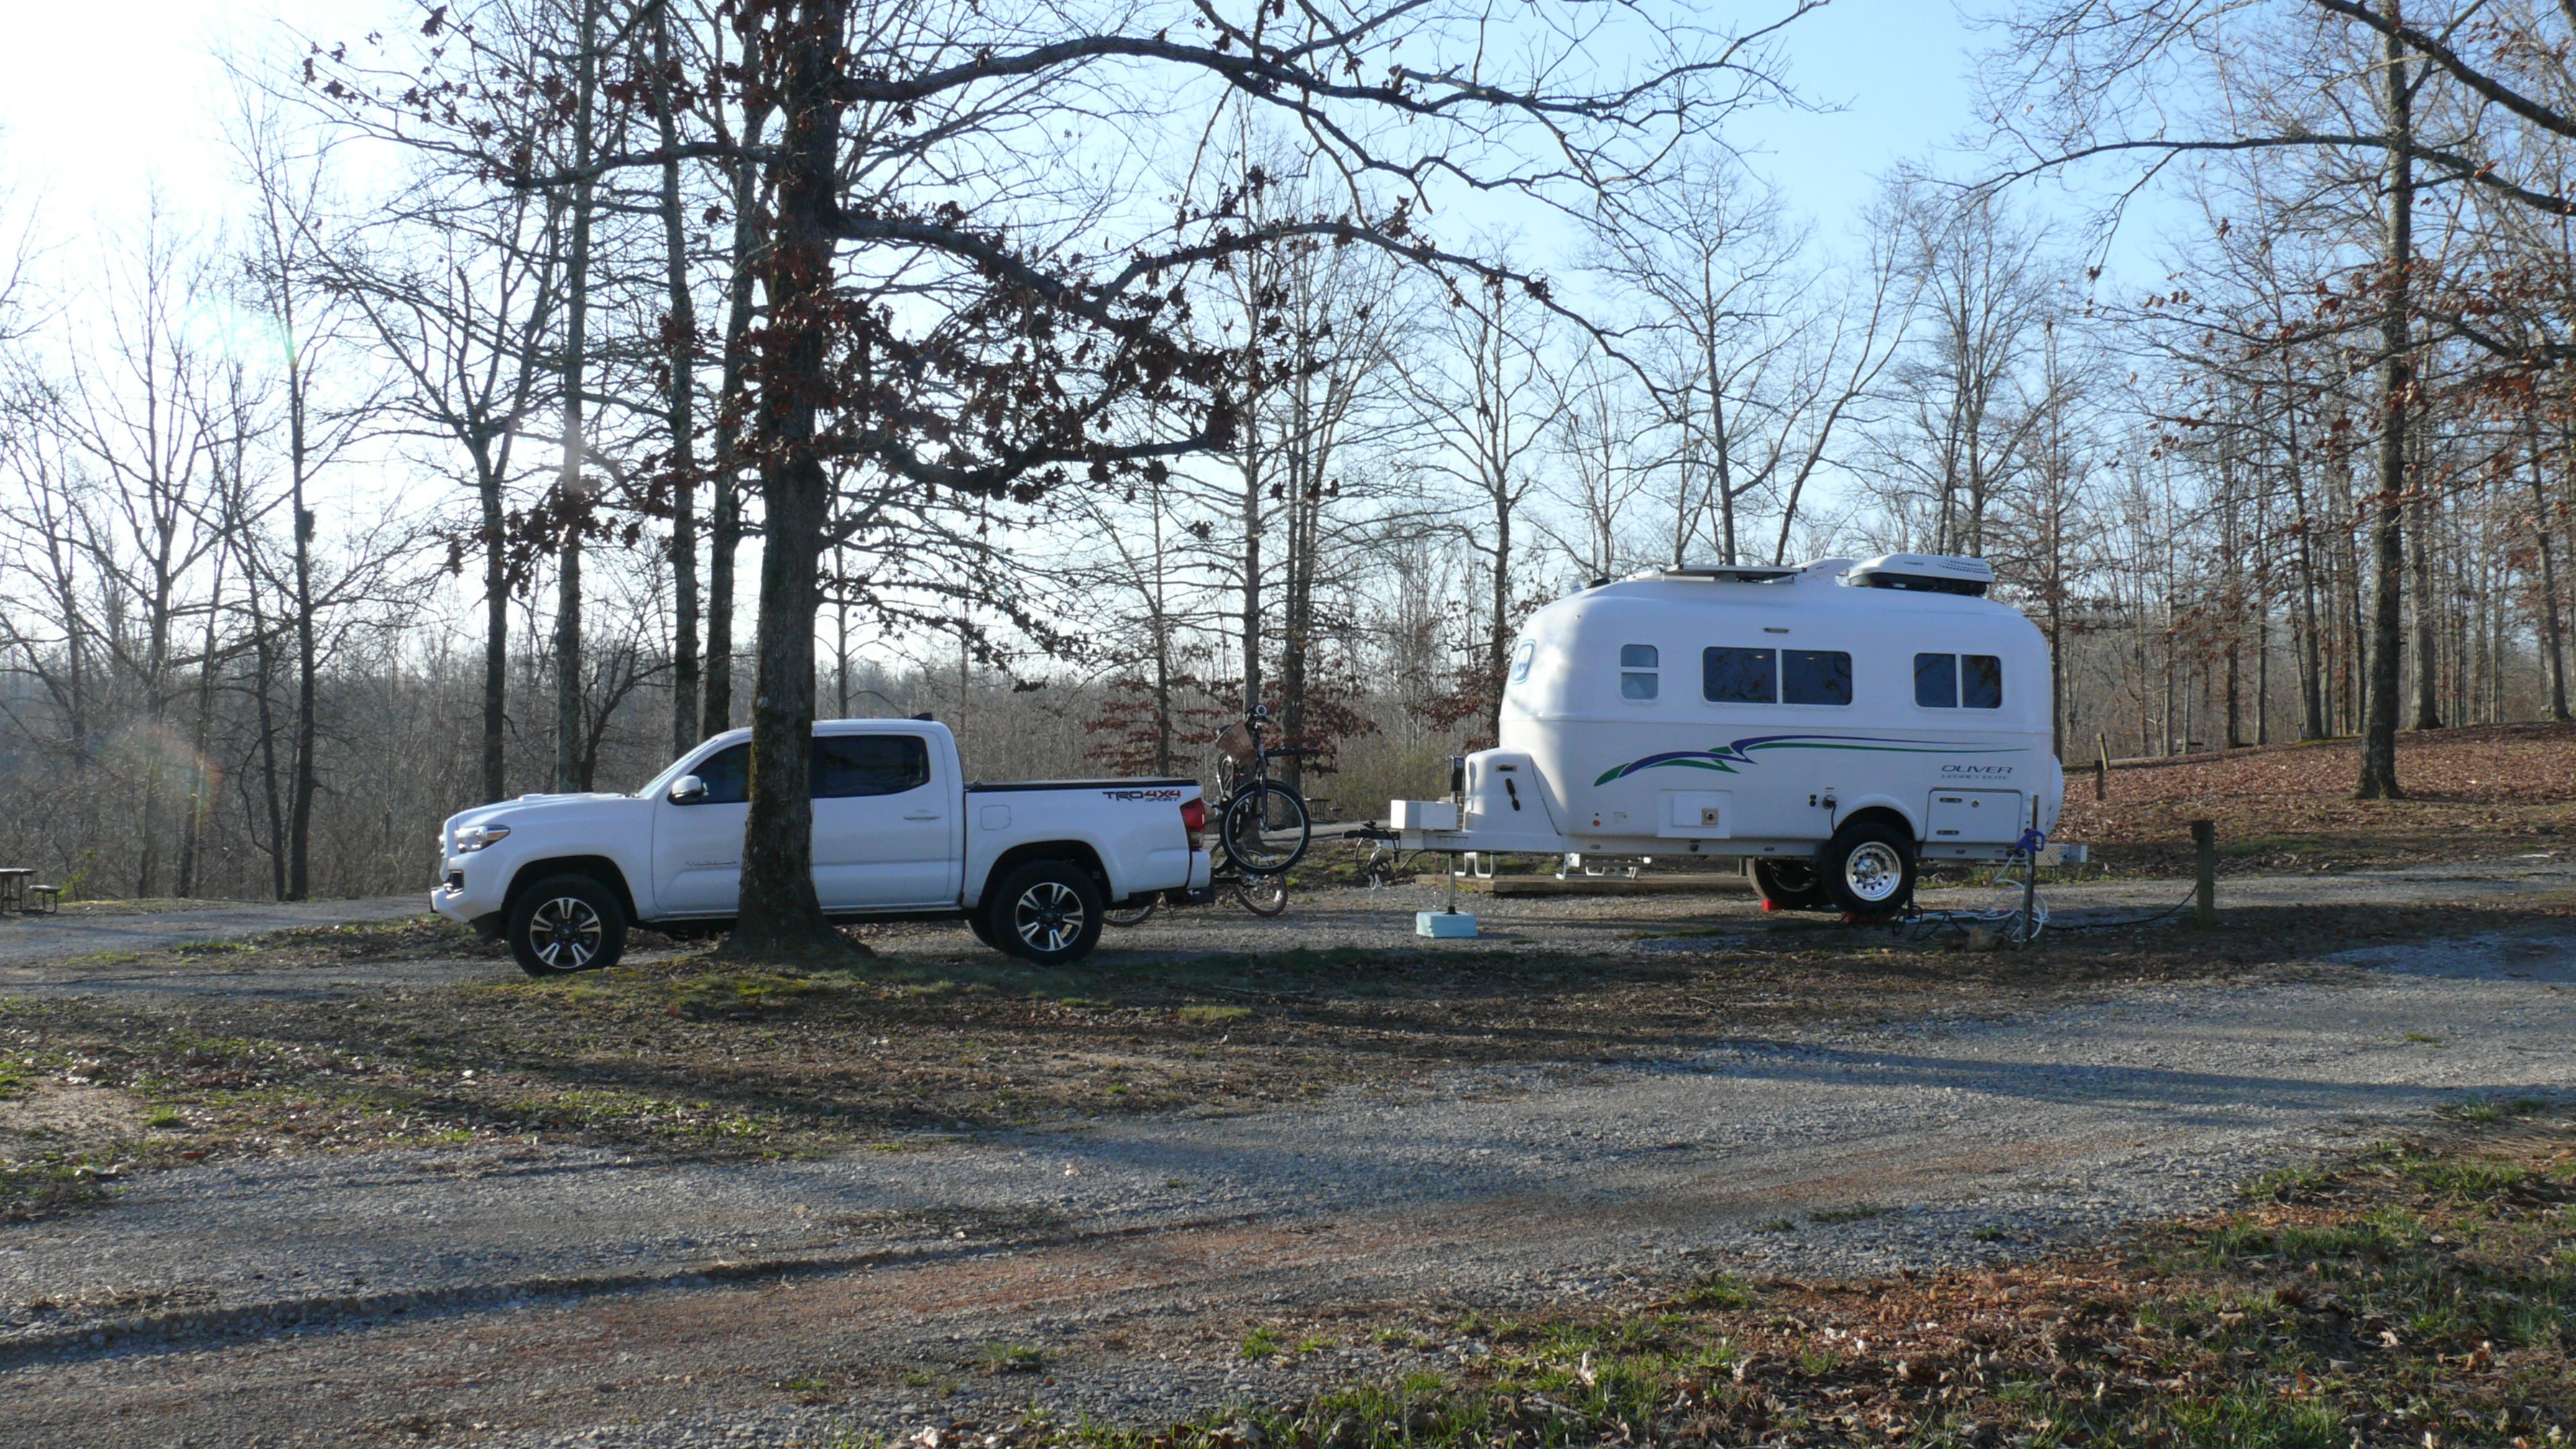
Well we actually got our Ollie stuck in the mud this weekend. Or I guess technically we got the truck stuck trying to pull the Ollie out of the field we'd camped in. We'd picked a nice open field at Land Between the Lakes and we both knew that it was a bit risky since it was predicted to rain on Sunday morning. And per my earlier post, we also knew well that the soil at LBL is like grease when it's saturated. But the spot was at the top of a little rise and I figured that getting out we'd have the weight of the trailer in our favor. But of course to get the trailer turned around Sunday morning, I had to pull it around and off that little hill a bit, and the moment we got off of it we hit softer soil. Four low, diffs locked, all four wheels just spun. Fortunately we had our Maxtrax and a pair of bridging ladders and those worked like a charm. It was slow going, since we had to re-lay the tracks every 10 or 12 feet, but less than 20 minutes later we were back on gravel and washing off the mud. Moral of the story - you might feel like an idiot buying and carrying that stuff around, but when you need it, you need it. I highly recommend at least a set of Maxtrax in the vehicle, even if your only adventure off road is to pull ten feet off into your camping spot. Since we don't have a winch on the truck yet, had we not had the Maxtrax, our day would have involved a long hike in the rain to find a ranger or hunter to help pull us and the trailer out. Innocuous looking little camp site, isn't it? Maybe 60 feet off the gravel? Takes less than that to ruin your day.
2 points
-
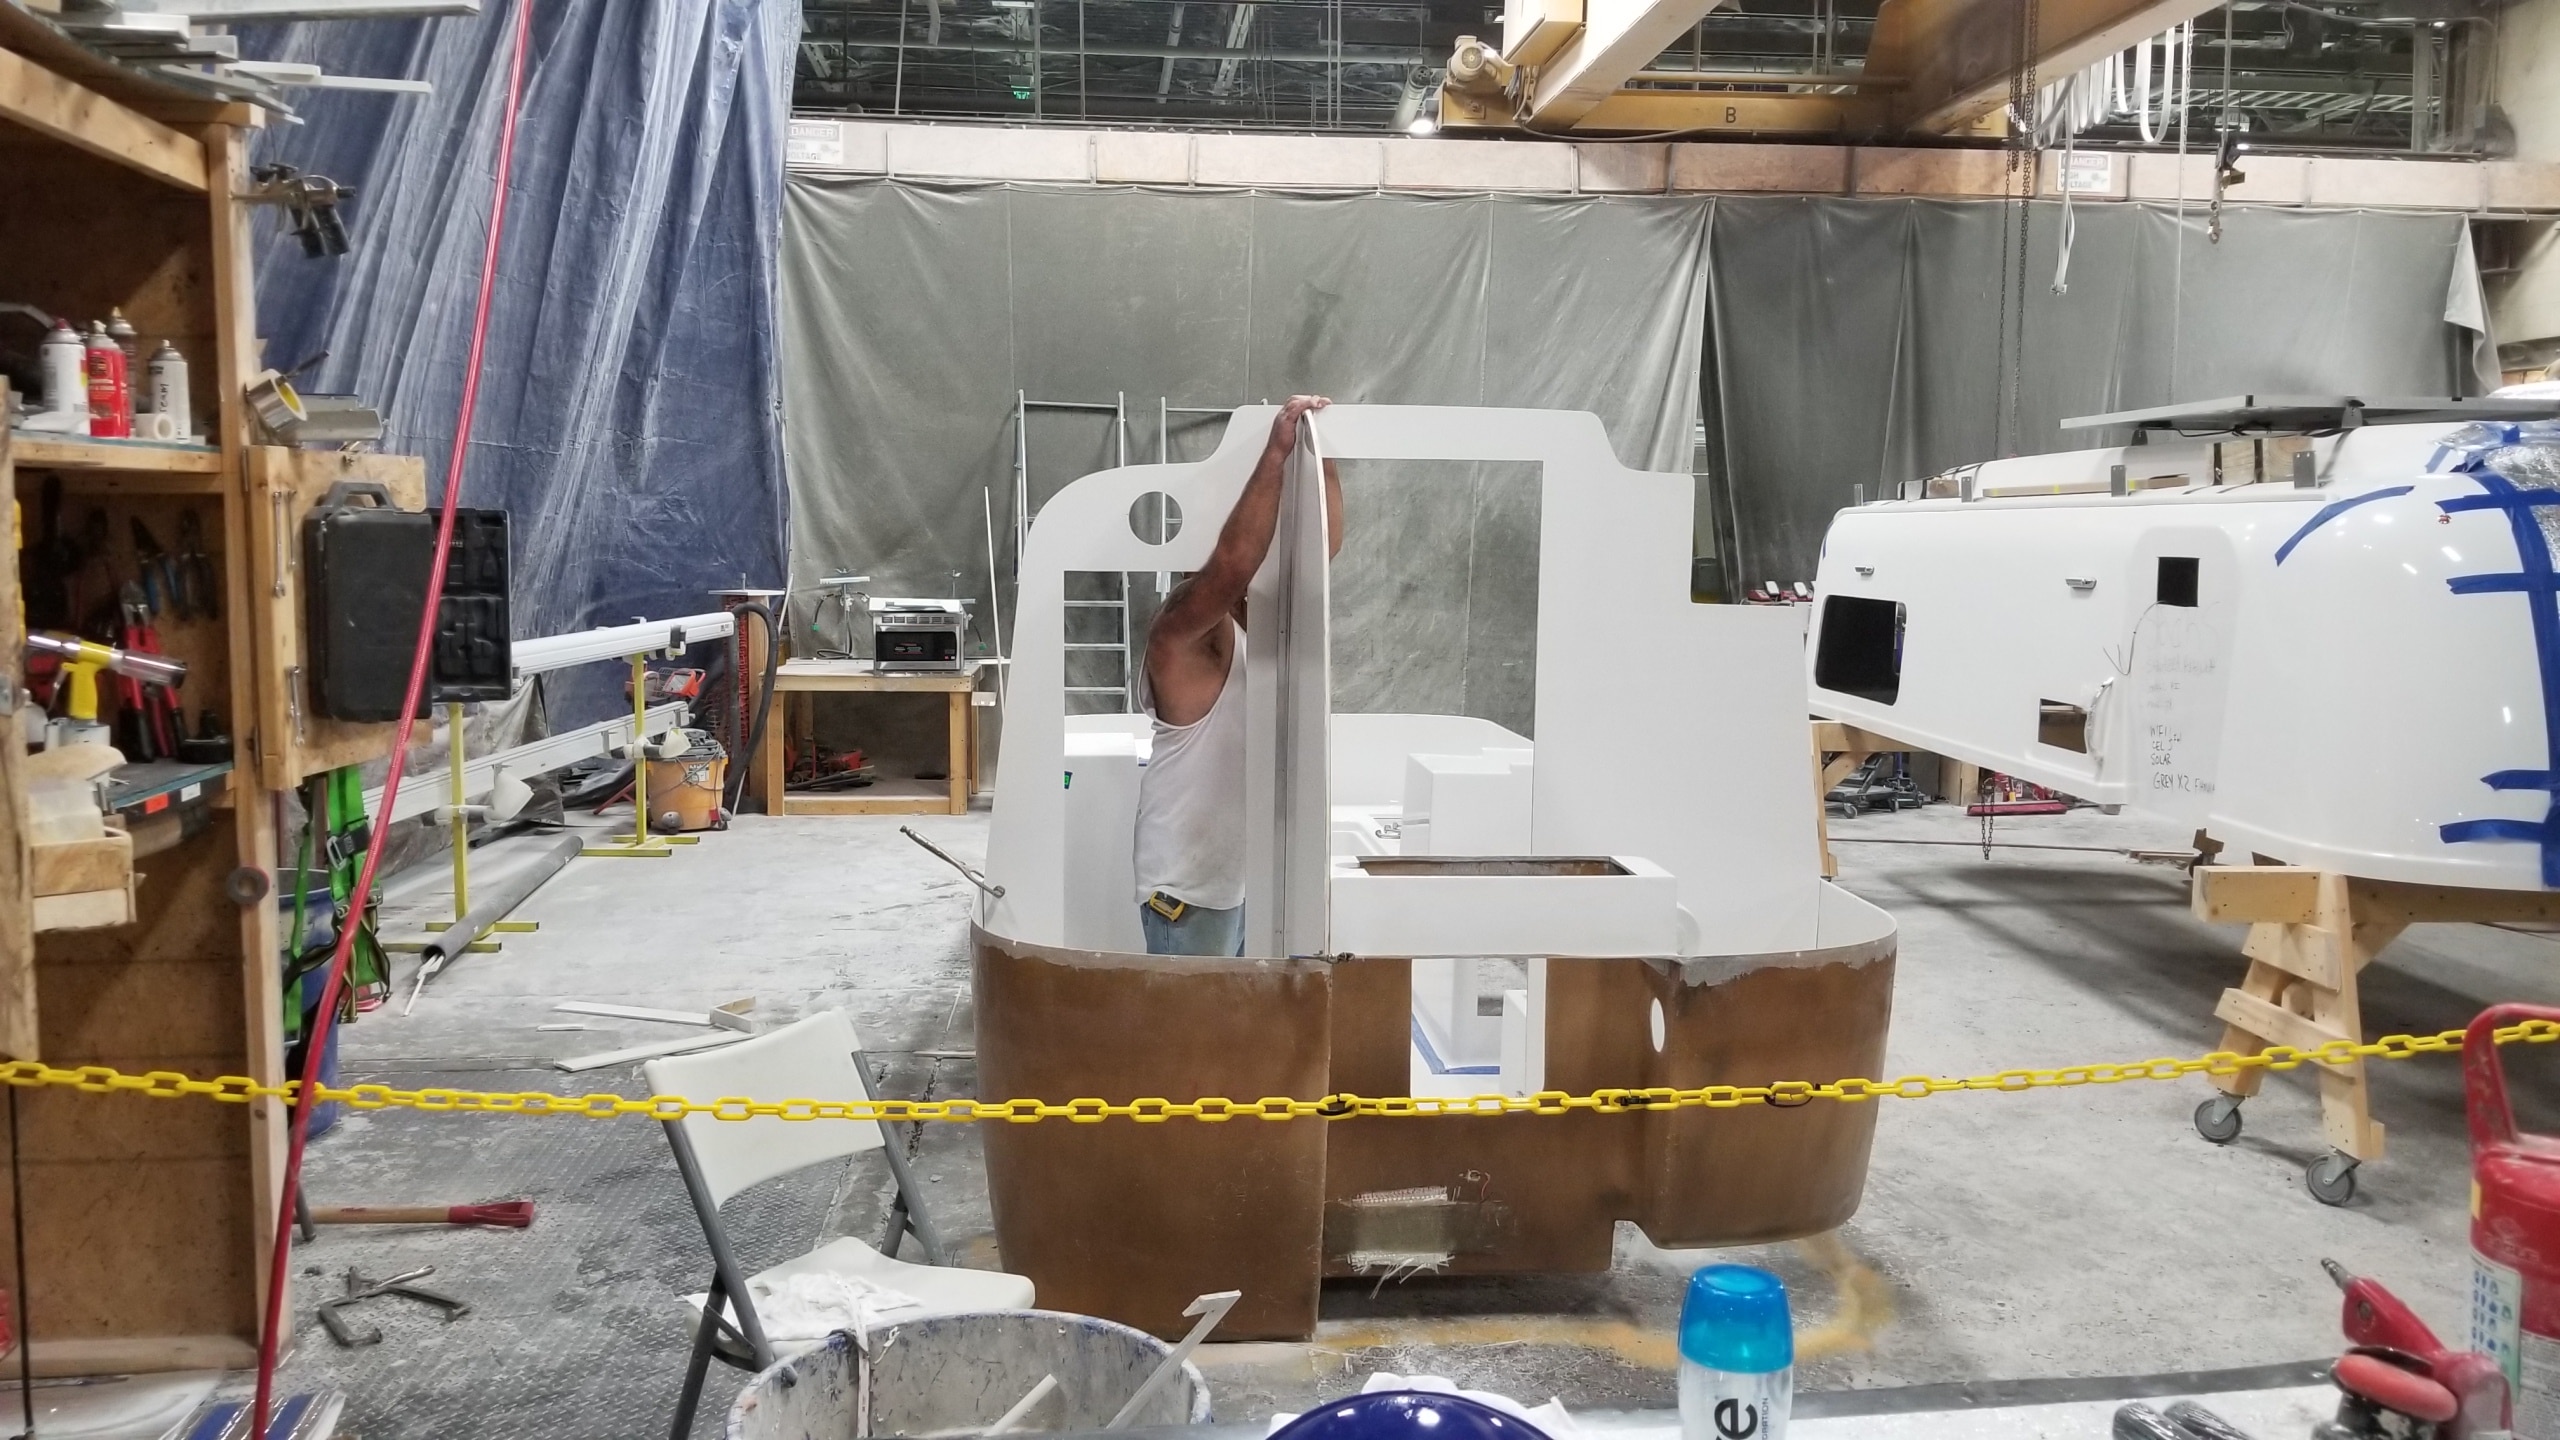
They do use wood on the bath wall and the wall dividing the closet and bath. They showed it to me during our tour and said its the only wood in the camper. They said they do it because people want to be able to hang stuff on that wall. In ours I can see the wood inside the closet looking up at the speaker cutout. Here is a picture of that wall being set in place.
2 points
-
Click HERE for the most recent "unofficial" campsite list -->2018-Oliver-Rally-Camper-List-as-of-04-23-18.pdf <-- Click HERE for the AGENDA --> http://olivertraveltrailers.com/email/2018-Oliver-Rally-Agenda.pdf2 points
-
Kathy - Clair has now "officially" been added to the list and the great news is that this now qualifies ALL of us for a discount on the regular price. I am going to wait until our deadline of Wednesday at high noon to finalize everything with the Park. Just after I call them I will post here exactly what everyone owes and the total details as to where we should meet etc. Thanks for joining the group, Clair! Perhaps we can make Kathy the official photographer? We now have the ten "new" people the Park required plus the two that made reservations previously for a total of 12. If anyone else is interested prior to high noon Wednesday (April 25th) we can have as many as 15 total. Bill2 points
-
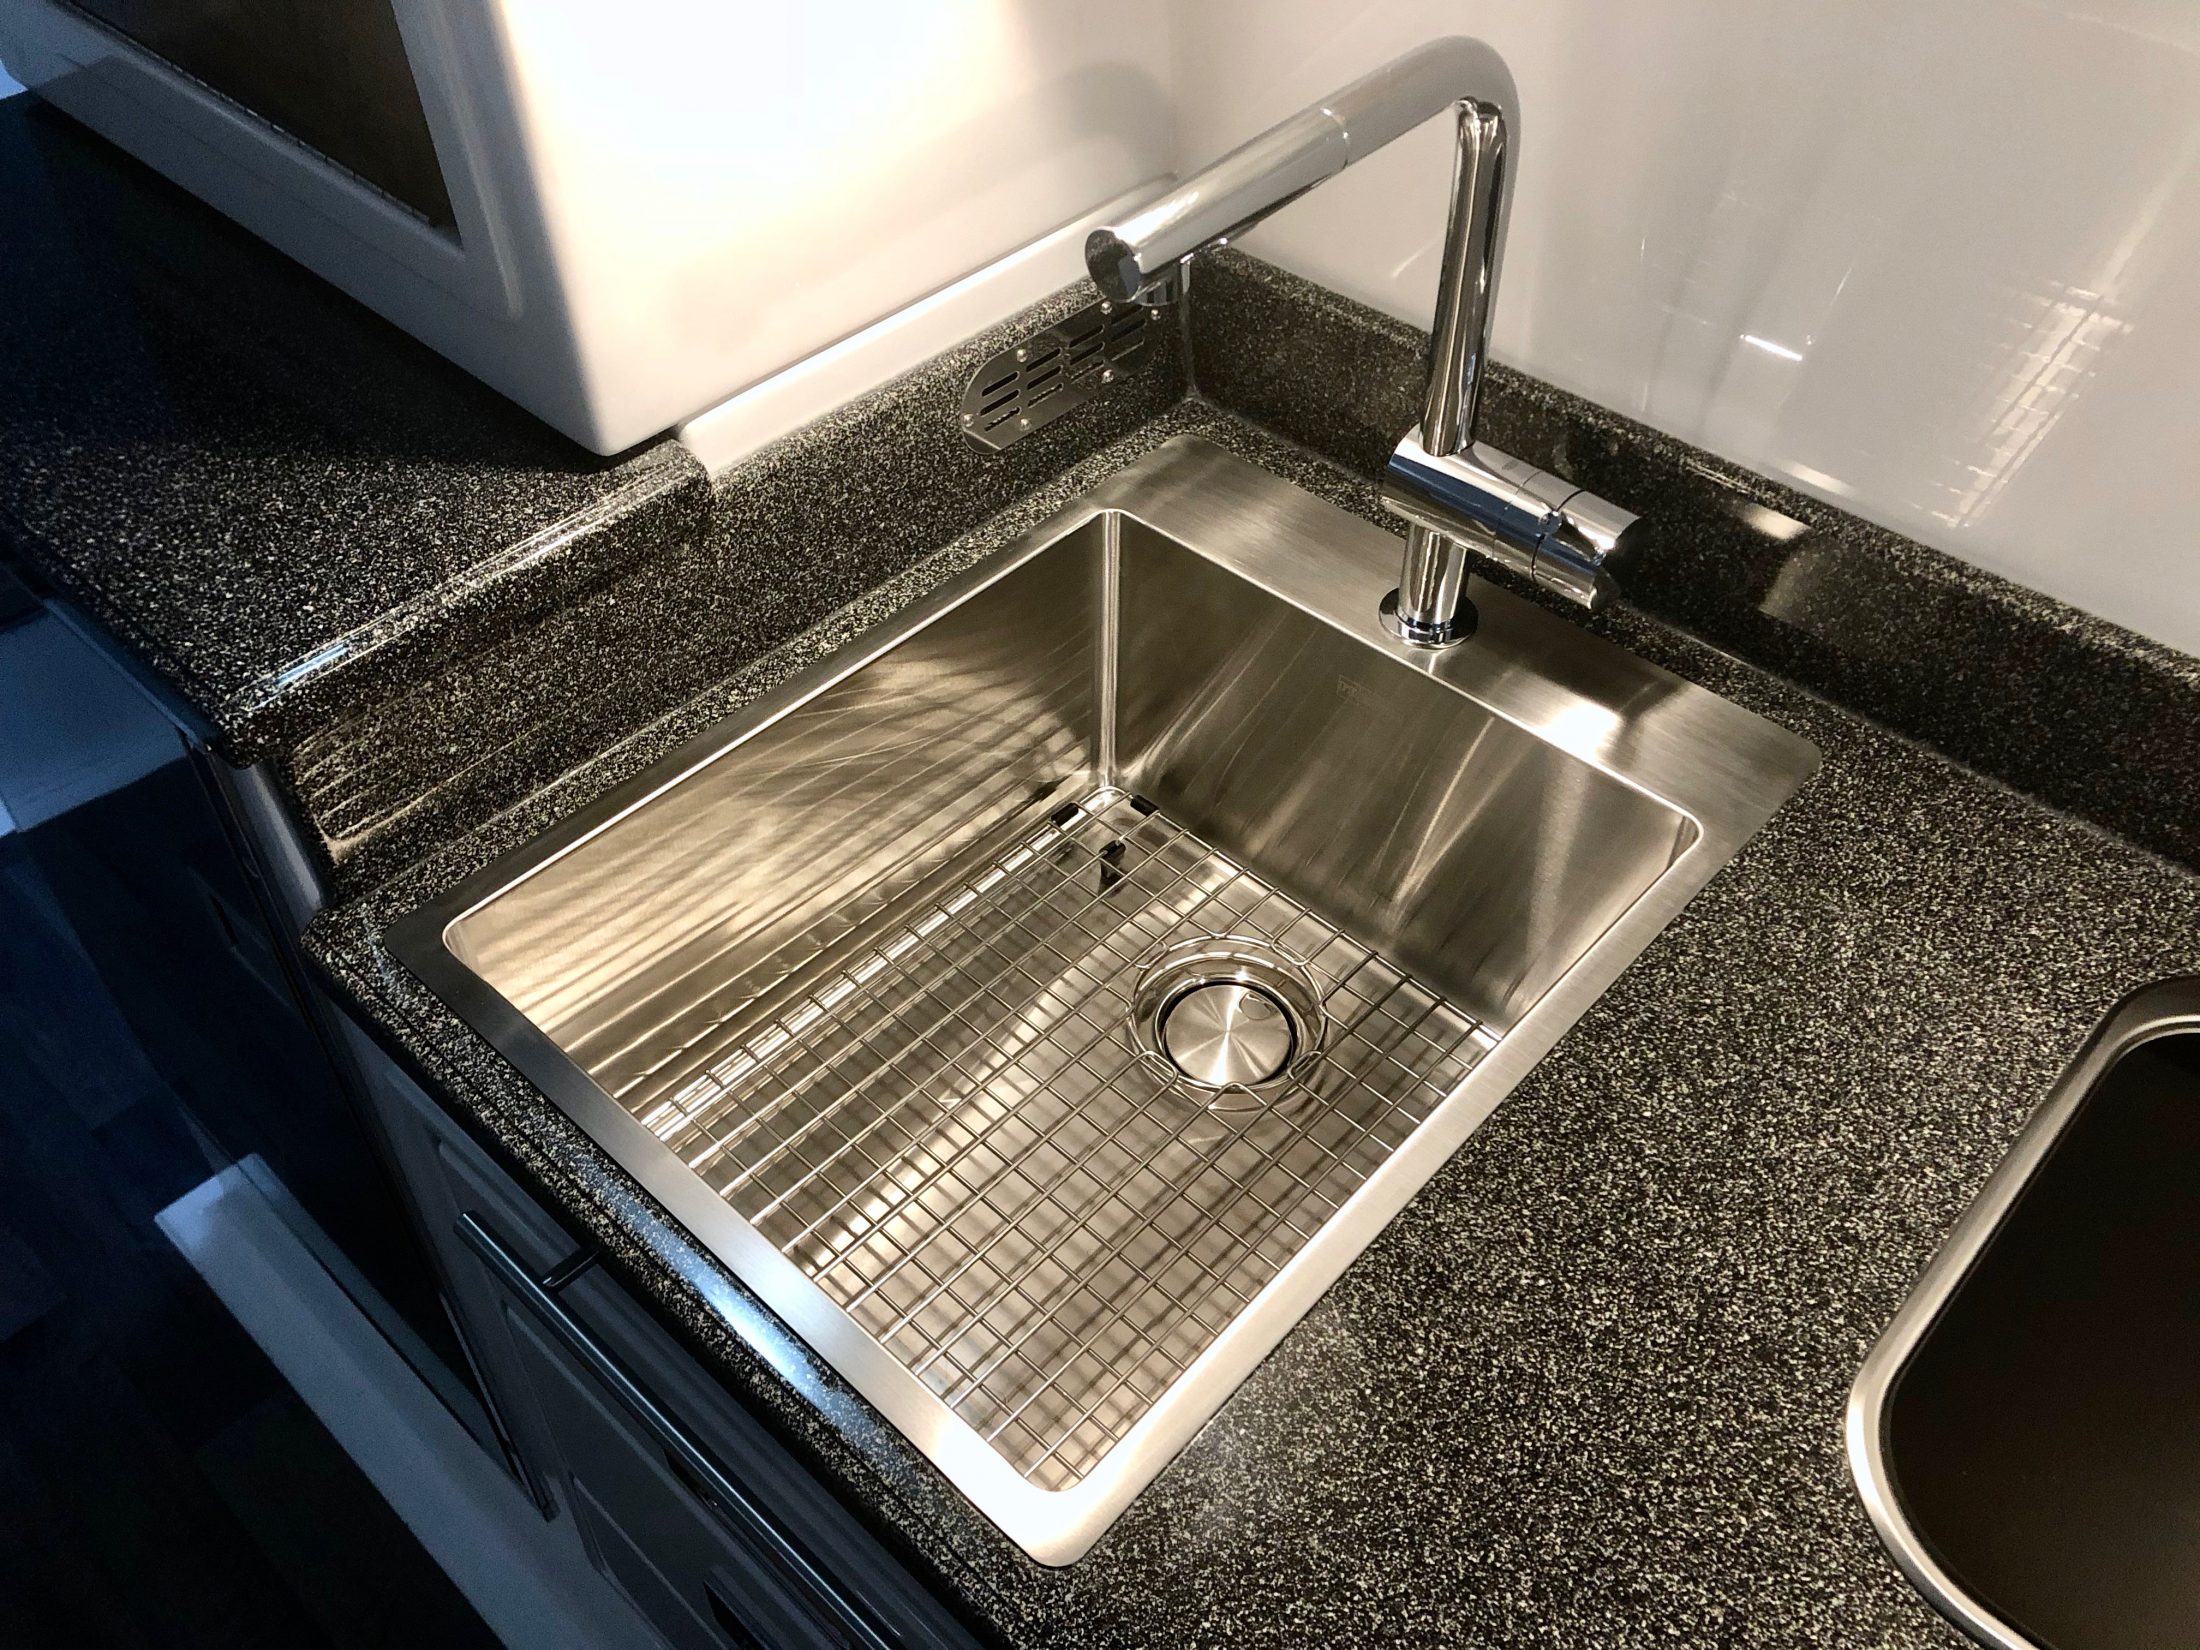
This, I like - I never cared much for Oliver's sink and faucet choices and I'd actually planned to supply them a sink and faucet to get installed on the line. Unfortunately the one I wanted wouldn't work and I was having trouble getting the proper dimensions from Oliver, so I just let it go and figured I'd replace it later. Well, that was a good idea until I realized that the cutout Oliver made for the sink was way too big for any of the bar sized sinks that I could find. And all of the full sized kitchen sinks were too big to fit. But finally I stumbled across this oversized bar sink from Franke. It's the 17" Franke Vector. Overall, it's the same width as the existing sink, but the lip is narrower, so the bowl itself is a bit wider. Mainly the sink is much longer and deeper. In overall volume, it's over twice as large as the original sink, but takes up no more counter space. Can't beat that. And because it's farther forward and 3" deeper, it doesn't splash all over the place like the original. In fact, I can even turn the faucet up all the way without it splashing over the front of the sink, which is novel. I like the Franke sinks in that they have the straight sides and look of a modern zero radius sink, but they do add a slight radius to the corners so that you can actually keep them clean. Installation wasn't too hard. I'd rate it 7/10. The difficulty was that I had to modify the base cabinet for it to fit. There's a wood brace running across the top front that is screwed to the fiberglass beneath the drawer trim, which had to be cut out, and also a portion of the left side of the cabinet. That sounds like a lot of structural support to remove, but the cabinets are mainly tied in at the bottom and I ran it past Jason beforehand to make sure I wasn't looking at it wrong. I have to say that the cabinets are stoutly built, and I'm not at all worried about it. The second problem I ran into was that my countertop wasn't perfectly flat. It bowed down in the middle slightly which wasn't apparent until I installed the sink. But I was able to temporarily shim the counter against the top of the cabinet while the silicone seal dried and then I glued PVC blocks around the perimeter of the sink to both hold it in place and to level the counter. The Franke sinks have an odd installation clip that wasn't designed with hollow core fiberglass in mind, so the blocks were necessary anyway. It's not going anywhere now. Of course I lost use of the flip out drawer but I hated that thing anyway. I glued a few ½" blocks to the front of the sink and then fixed the drawer front to the blocks with heavy duty velcro, just in case I ever need to remove it for some reason. The sink depth worked out perfectly with the existing cutout on the back of the middle drawer to clear the drain. I thought I was going to have to get a Hepvo trap to make it all clear but Oliver actually places the trap behind the cabinet, so no problem. I did have to get the narrowest profile elbow I could find to attach to the drain basket, so I had to go with cheap plastic rather than PVC, but such is life. At the end of the day, however, I decided to use a different drain basket that was a bit deeper, so I had to make the drawer cutout about a half inch deeper after all. The faucet is a Grohe that I found on sale at Home Depot for about half price, so that was a nice find. It has a really nice feel to it and unlike the sink, was a cinch to install. Grohe has a trick installation method that allows you to work from above so that one person can do it without crawling under the counter a hundred times. Oliver's hot and cold lines are convenient to get to and there's an access panel in the back of the cabinet that can be removed if you need more room to work. The only issue I ran into was that the counterweight for the sprayer was getting caught up on everything that's packed in the back of the cabinet. To fix it, I made a tube from some flexible plastic sheeting that I had lying around and just slid that over the sprayer hose. Now the hose slides easily inside the tube and as a benefit, the weight won't bang around inside the cabinet while traveling. So that's about it. I've learned that I don't have the patience or foresight to take progress pictures Like John does, so my description will have to do. But I'm happy to answer any questions.
1 point
-
LOL, I also get fully distracted in Emergency Mode. Fortunately my wife is ussually well away from the action, dirt, and stress, so she has snapped a few great pics in the past. Having a great camera on your phone really helps. Some of the isolated forest, farm and ranch roads around here, especially the unmaintained ones marked “Primitive Road No Warning Signs”, can get grease slick after a sudden rain but fortunately the air is so dry that the ground dries out very fast, within hours usually. I bet that isn’t the case at LBL. I was there a few times camping and dirt biking when I was a youngster, I do remember that there was mud.... John Davies Spokane WA1 point
-
Worth trying. I've had good luck with a sanding disk on a Dremel but I haven't tried using a burr.1 point
-
Yes we will probably implement blocking IP addresses outside US & Canada.. or maybe specific countries. If they are on a proxy server they can hide their actual location and be where ever they want to be. We will get it worked out. Did anyone receive spam emails from the spammers? Probably Microsoft or Norton Security related. If so, please private message me and I'd like to have it forwarded to me. Thanks!1 point
-
Last Call! Tomorrow (Wednesday) at high noon is the cut off for joining the bravest group attending the 2018 Rally. We are doin' level two on Saturday, May 5th at 1pm. Details can be found on the Park's website. After this cut off time it is possible to still join the group but a discount from the usual posted price ($99) will not be possible. If you have interest, either PM me or simply reply to this post. Bill1 point
-
Glad you got Snowball out! With regards to the water pump switch near the outside shower - ScubaRx has done that mod and I've been meaning to do it myself. Perhaps - if you are going to the Rally we can get Steve to give us a little show and tell. Can't be too hard - its just a switch or two. Bill1 point
-
I wish I had some now. Situations like that my brain goes into emergency mode so I don't think to take pics. The only one I've got is of my wife carrying the Maxtrax back afterwards and she'd be mad if I posted it because her hair is frizzy from the rain. We actually didn't get much mud on the trailer, just us from pulling the tracks out of the mud and repositioning them and of course the truck. We had the presence of mind not to spin the wheels trying to get out. I waited until we got home to clean off the tracks and truck, which was a mistake since it rained all the way back and the mud caked on the tracks ended up on everything in the bed of the truck. We used the outside shower to clean off our hands and shoes. Oliver needs to add a water pump switch back there so you don't have to track mud in the trailer to turn the pump on.1 point
-
This is better than the factory solution because you can open the drawer with the table installed. Not to mention also have the basement access door. Color me jealous!1 point
-
That is an excellent execution of a great idea. Thank you for the thorough instructions.1 point
-
That would surprise me, if Oliver used plywood anywhere, especially in a bathroom wall where moisture would be present, I would expect it to be the honeycomb layer they employ in other areas that require extra support, I hope.1 point
-
I believe they’re 1/2in plywood with thin fiberglass sheet laminated to both sides.1 point
-
Beautiful job, overland. Just what the Lagun was designed to do. But, on a land yacht... Congratulations. Sherry1 point
-
Wow, nice work!1 point
-
If anyone wants to make the block I made, here's the list of pieces you'd need to order: #3075 Extrusion, 24" #4303 Bracket, 4 pieces #4302 Bracket, 2 pieces #3320 Bolt Assembly, 14 pieces You'll also need some stainless ¼" or 5/16" bolts to fix the block to the hull. I think most can be 1" or 1.25" long but you'll need two 3" bolts for the two vertical ones that go through the bed extension. I used lock nuts and large fender washers to spread the load against the fiberglass. I also cut off all the bolt ends around the bed side with a dremel and cutoff disk and filed them smooth so not to damage the mattress or cushions.1 point
-
So, we're leaving in a few days for our next Alaska trip. We'll miss the rally (again), and I'm truly sorry.. tomorrow, I am taking all the stuff out of my duffel, and cutting it in half, I hope. I can't lift it with one hand, so it's too much. Pack light, pack layers. My motto. Sherry1 point
-
Delivery Day was cold, but pleasant at the Oliver Sales Office. Jason Essary was our orientation person and he was available by phone all day and night if I needed him. Jason was great! There is so much to learn for a "first-time" trailer person. There is no way Jason or anyone could fully indoctrinate a new owner to every nuance of the Oliver travel trailer. So as we camped, and tried to get comfortable with our new little home, there were situations that came up when I did not have a clue how to proceed. But a quick text or call to Jason and my problem was solved. We spent two nights at the Natchez Trace Campground. The weather was very cold and we used our fresh water tank instead of city hookup due to the threat a freezing. The heat in the trailer was very comfortable. We spent twelve nights in the Ollie as we made our way home to Melbourne. In that process we became not only comfortable, but halfway proficient trailer people. Beverly has learned quickly how to direct me as I back our rig into tight places, and I have learned a few tricks along the way. All my initial worries and concerns have gone by the wayside. We love our Ollie and look forward to hitting the road in mid-April for eight months on the road as full-time nomads.
1 point
-
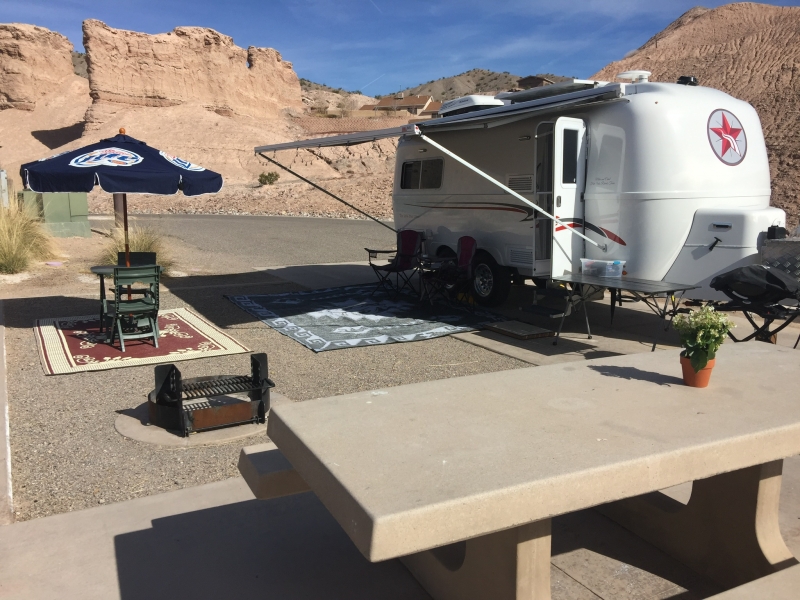
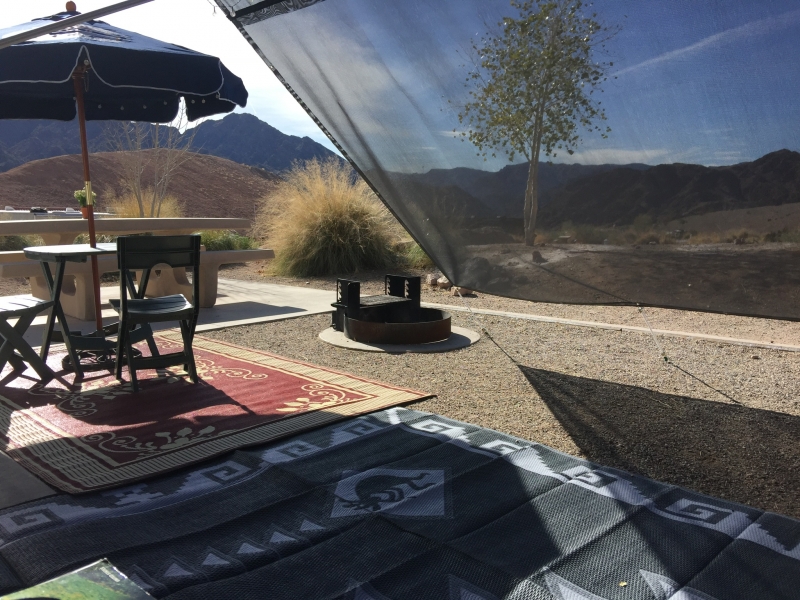
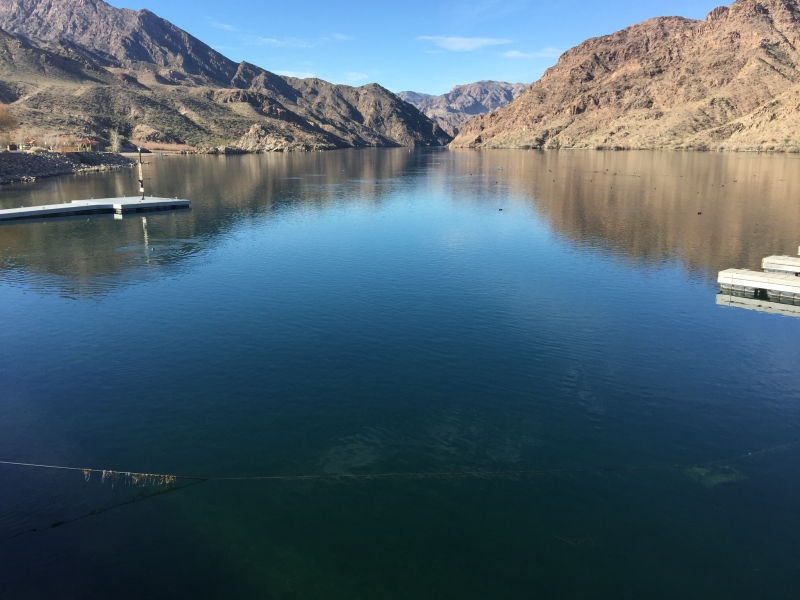
We deviated from our stay in Quartzsite last week to visit some new areas. While on our way to Las Vegas we spent the better part of a week at Willow Beach Marina, part of Lake Mead NRA, about 10 miles from Hoover Dam. The campground is small but well maintained. Very quiet with lots of stars at night. The facilities are top notch. Mike
1 point
-
There are lots of posts here and on Fiberglassrv.com as well, I would read them all. We went in 2012 and last summer 2016 just a couple quick suggestions. go to Glacier and cross over so you can stay in Waterton NP, Banff NP, Jasper NP and the Canadian Ice Fields ( you can stay at the Ice Field Visitor Center for $15 canadian just a parking lot but directly across from the Ice field ) "BEAUTIFUL", just out of Jasper you can go north to the start of the Alcan in Dawson Creek. Make reservation for those like Denali now they will all be full. Do the usual along the way Laird Hot Springs , White Horse, Sign Post City Watson Lake, etc. and if you are willing go north before entering Alaska and head up to Dawson City and Chicken to do the Top of the World Hwy check for the weather if nice go if lots of rain save for the return portion and back track to the Alcan. One thing to remember watching when the Salmon run you want to be there like Homer, Steward, Haines for the salmon which bring all the Grizzly Bears to the salmon runs to feed and like in Valdez you will see the Bears, Seals, Sea Lions and Eagles have a Buffet at the salmon weir across the bay. The salmon start running in July some early some late. Stay at Provincial parks as well busy on holiday and weekends need to be early on the nice ones to get a site, get the Mile Post tells you everything on the road. Then after leaving Alaska return back down the Cassiar Hwy into Washington state doing the 101 coast Hwy to the redwood Nat. Park in Crescent City Calf doing if you can Mt Ranier, Cascades National Park, Olympic Nat Park, Then head NE to do Crater Lake NP moving east ............ On the Cassiar good road go to Hyder in and out of Canada and Alaska........Ok I'm jumping around but a few thinks to look at and see if it fits your style travel slow enjoy and have an extra memory chip for the camera you'll need it......PS I would be out of Alaska by end of August, in 2012 we left Aug 25 and the water lines froze first two nights in Tok and Haines City, gets cold at night by then and most private camp grounds are closing by Sept 1st or the Holiday in Alaska, norther BC and the Yukon Territories. Also clothes for rain, Cold Rain, Hot Summer, and we had snow mid June in the Canadian Ice Fields with ice on the truck in the morning use the layer effect. Ok no more but U will Love it as they say " Just Do It" ....Thanks Gary1 point








-
Recent Achievements
-