Leaderboard


Popular Content
Showing content with the highest reputation on 12/04/2018 in all areas
-
I doubt that's true, but even if it were, the BMV 700 draws 4mA, which is only 35 Ah/year. The 100-hr rate capacity of a Trojan T-105 is 230 Ah, so it would take over 13 years to completely drain your batteries at that rate. Hopefully, you'll recharge at least once in that time frame. If you get the Victron, then I'd definitely get the newer 712 with built in bluetooth. I have the 700 in my trailer and the 712 for the house battery in the truck and when I get a chance, I'm going to swap them. The reason is that if you later go with a Victron solar charge controller, it will want to use the same port that the bluetooth dongle uses, meaning you will no longer have bluetooth. I got mine from Inverter Supply and highly recommend them. That may be who's selling on Amazon since their prices are identical.3 points
-
Another way to kind of do what you want is to do a vinyl wrap. At least one owner has had that done and while I didn't personally care for the theme they picked, the overall result was very nice. And, a wrap could be changed or modified and be easier than a paint job. Bill2 points
-
I saw bee's red trailer, and the black one , back in 2008. Very cool. If you decide to paint yours, post photos. We'd love to see your results... Sherry2 points
-
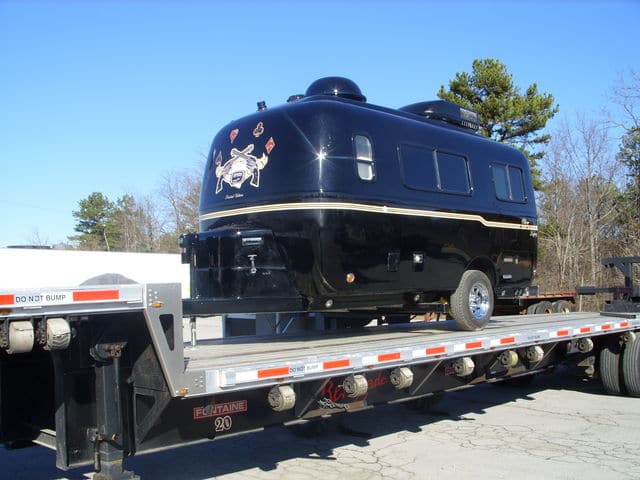
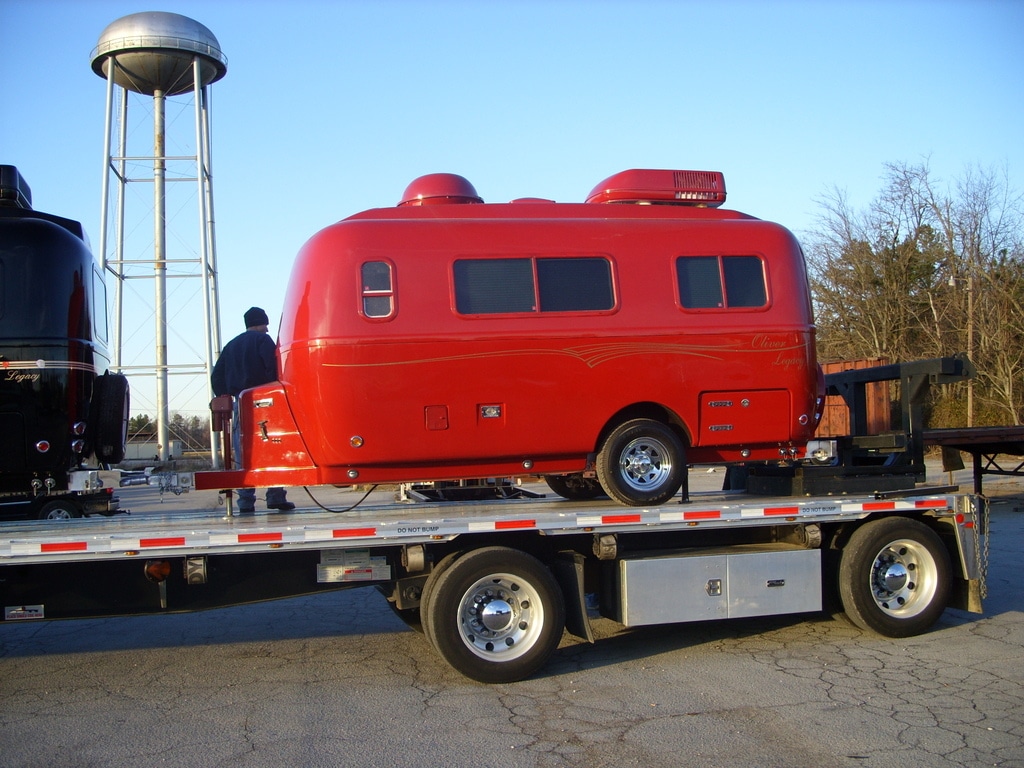
There were two early Oliver trailers that were painted and completed at the factory. Don't bother asking, they state they will NEVER do it again. Not because the trailers didn't look fantastic, but rather the amount of work involved. The ideal way would be to color the gel-coat during hull production. They won't do that either due to the amount of work involved in cleaning the equipment between colors. But...Since this is a fiberglass trailer it can easily be painted (think Corvette.) If you have the equipment and the know-how do it yourself. If not, find yourself a competent body shop and have them do it. I think it is a wonderful idea and, though it might be pricey, easily doable. Let us know if this comes to fruition. [attachment file=Campers Vegas 035.jpg] [attachment file=Campers Vegas 052.jpg]
 2 points
 -
Some time ago, I requested suggestions on "must have" items to have on hand when we take delivery of our Elite II (early spring, 2019). This is our first trailer so seasoned suggestions are great and we got plenty of them via the forum. I am putting together a short list of items to procure starting now and would ask for additional finite details for the items I list as well as suggestions for some absolutely necessary items that I have omitted. I will try to break it down by categories of hardware vs interior items (dishes, towels, sheets, etc.) In all instances, suggestions as to specific brands and places to procure are most welcome. Here is the starting point: <p style="text-align: center;">Hardware: </p> Plug converters: 50 AMP to 30 AMP: 120 volt (house) to 30 AMP (any others??) External Surge Protection: (In addition to the built in one) Yes or No?? If yes, which one? Wheel chock or "X" blocks: Which one? Both? How many of each? Extra 25' potable water hose: (brand?) Extra 25' water hose. Extra 25' 10 gauge extension cord. Jack stand blocks: which ones? External water filters. On this point, is there not one already in-line inside the trailer? In either case, do I need an external filter too and which one? Hitch lock for BullDog 2 5/16" coupler. Which one? Extra grey water discharge hose: Yes/No? What if any accessories for discharge lines? For composting toilet: What kind of toilet paper? What kind of media and how much? Tool Kit: List of tools that are needed or desired. Is there a fairly comprehensive tool kit for RVers that already exists? <p style="text-align: center;">Interior Items (Donna's domain)</p> Cookware: (Pots, Pans,etc. )Suggestions as to "what" and where to purchase RV specific items (also looking for good sources). Utensils: Spatulas, serving pieces,, forks, knives, spoons, etc. (also looking for good sources) (RV specific?) Dishware: plates, bowls, glasses, cups, coffee mugs, serving items, etc. (also looking for good sources) (RV specific?) Napkin and paper towel holder/dispenser. Utensil and plate organizers: Suggestions Dish soap and hand soap (storage). Paper towel dispenser: Type, location, how to attach? Towels (bath and hand) RV unique? Fitted linens sheets for the upgraded single bed mattresses available as an option from Oliver. Inside entrance matt:(brand/size?) Ground matt at exterior entrance to trailer: Extra matt for outside of bath area: (Yes/No?) (We're getting the teak floor covering for bath and sink from Foy) Trash receptacle: (??) Toiletry organization suggestions: Any kind of cabinet or closet organizers that are essential: Toasters: Coffee maker: (We like GOOD coffee and grinder but want to know if there is something smaller for an RV) <p style="text-align: center;">Other stuff that we MUST HAVE at pickup???????</p> We'll worry about food, drink etc. Please feel free to comment add or delete but please keep in mind that we're trying to prepare for essential items needed at time of delivery and time of pickup and don't intend to purchase every nice-to-have item. If we did that, we probably couldn't pay for the trailer. All for now. Thanks1 point
-
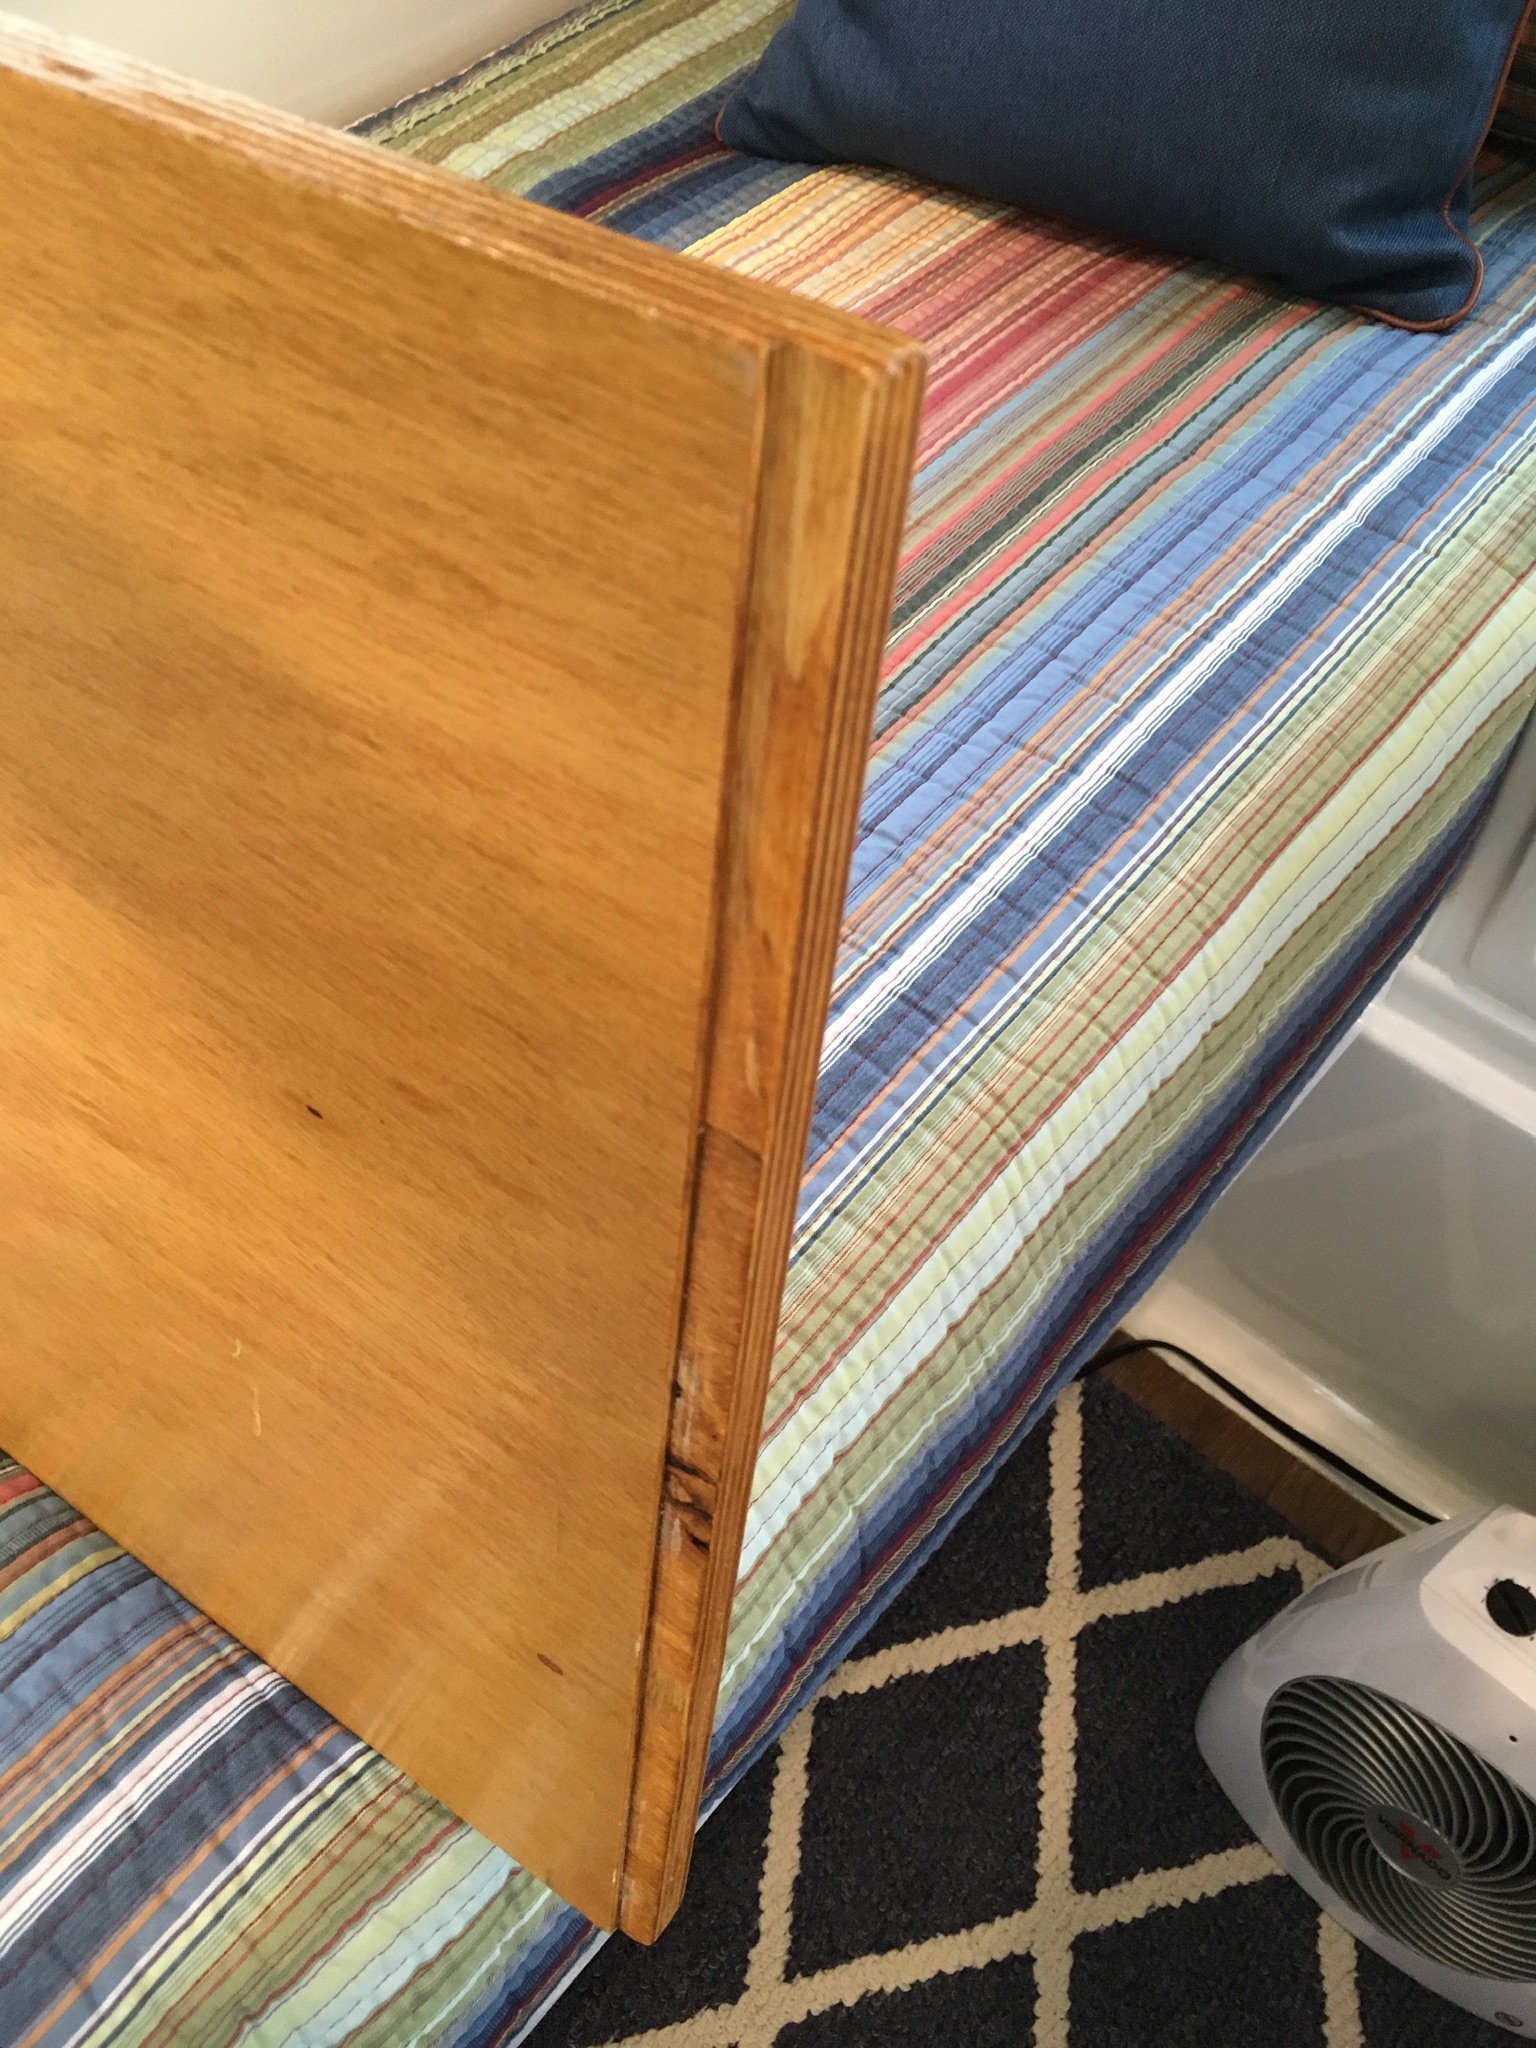
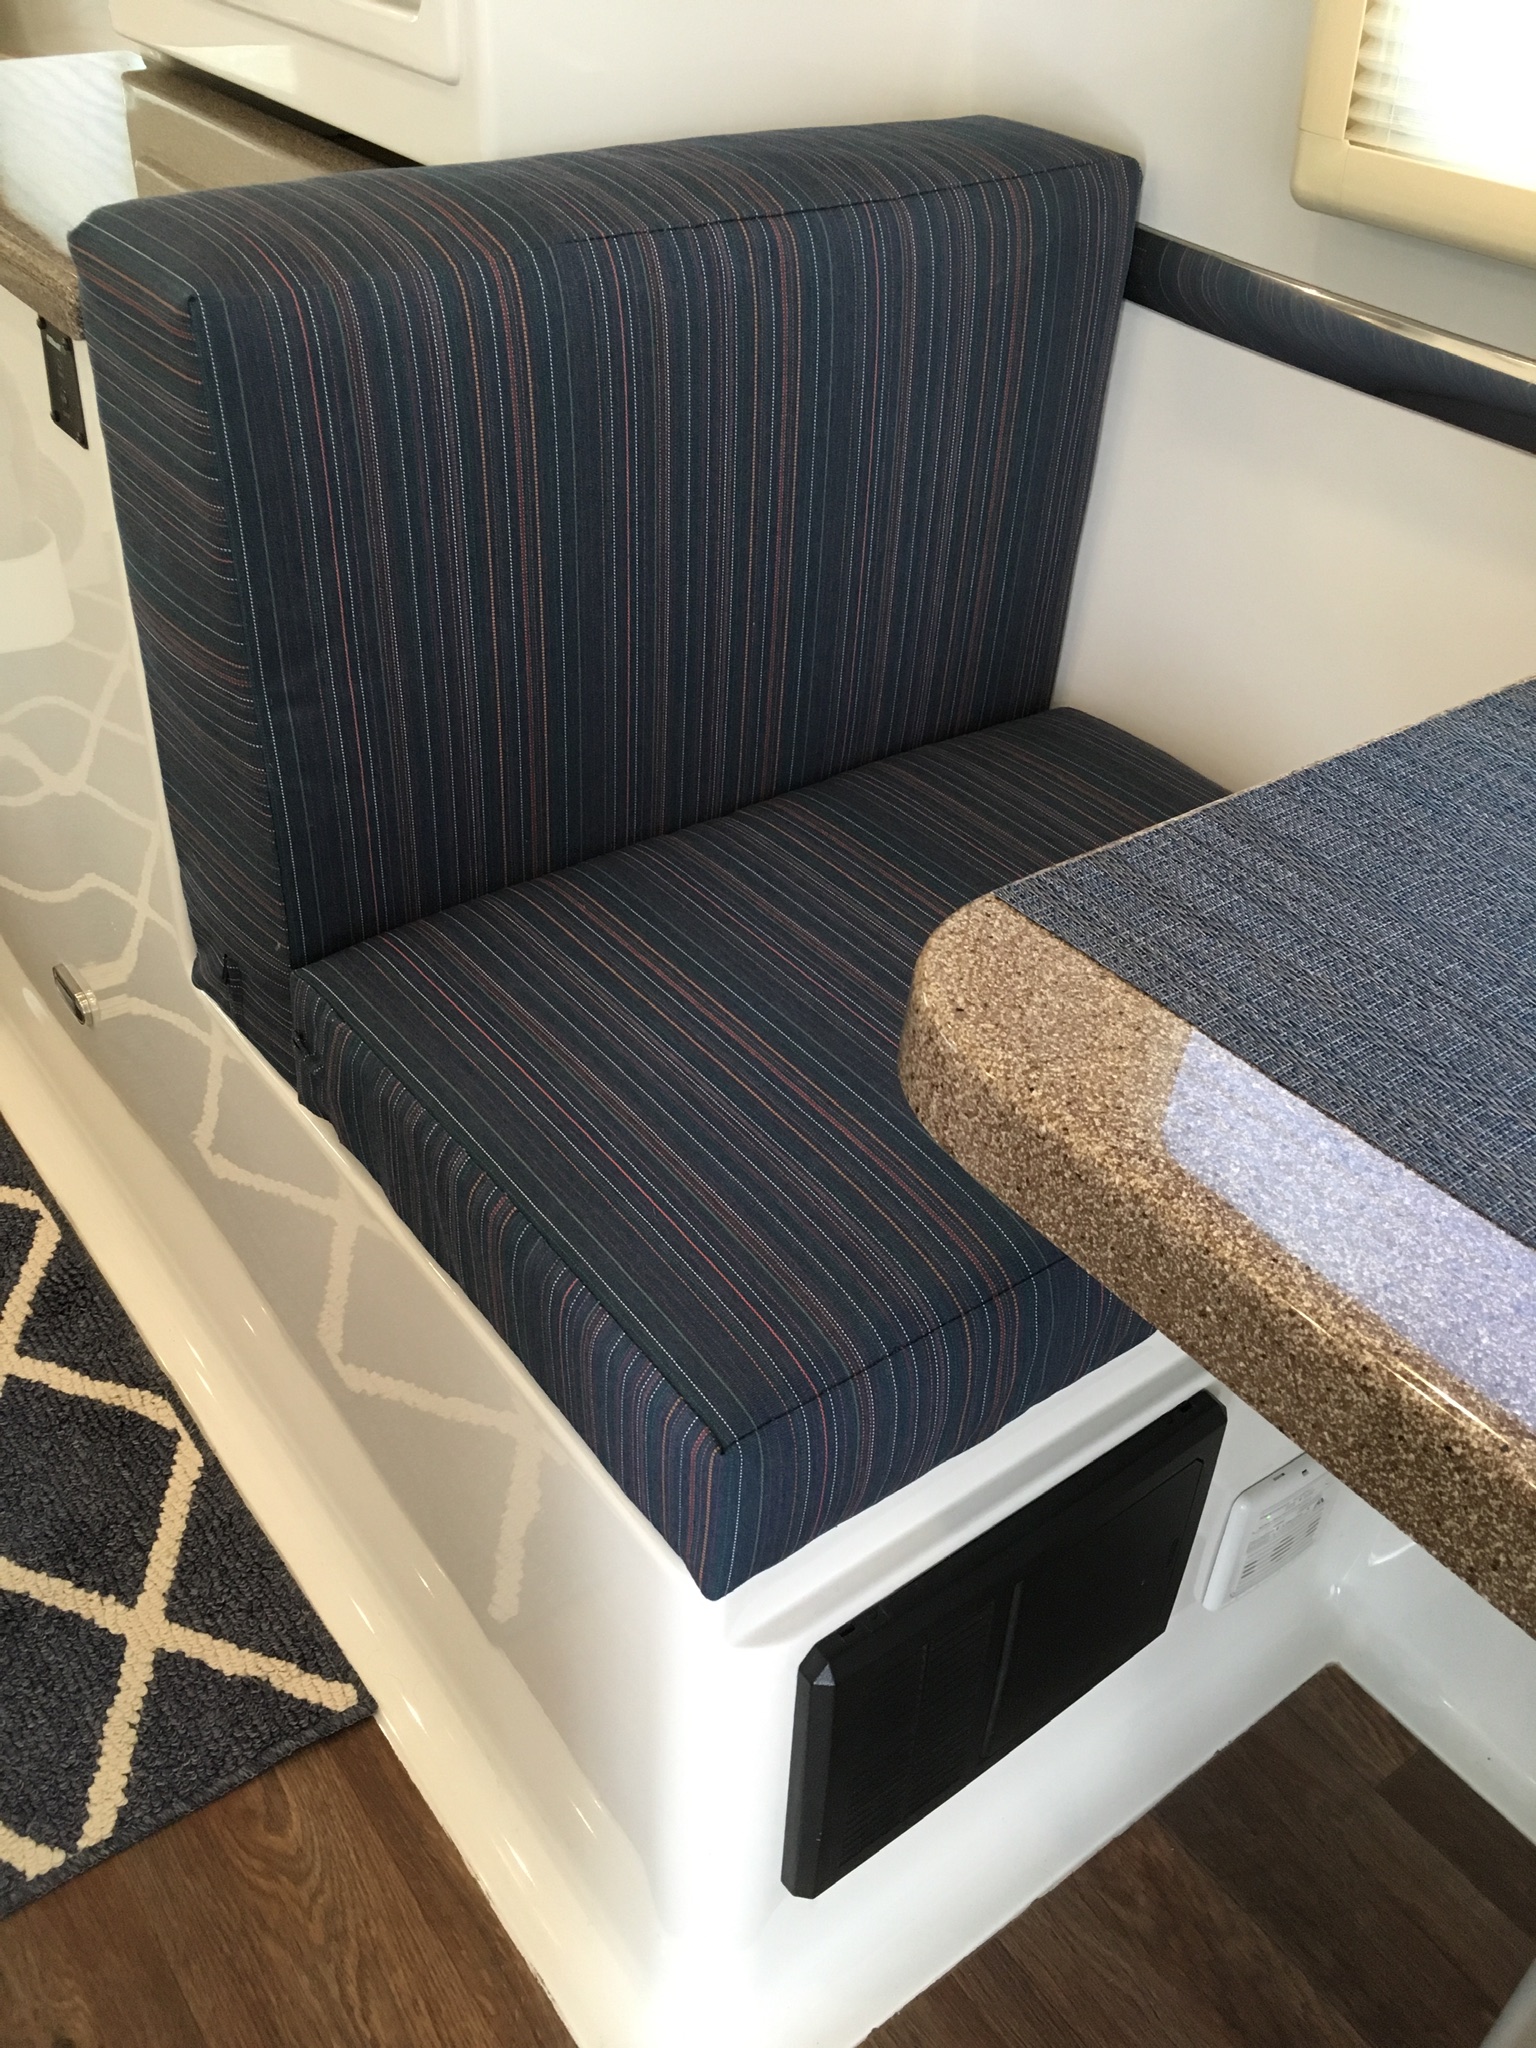
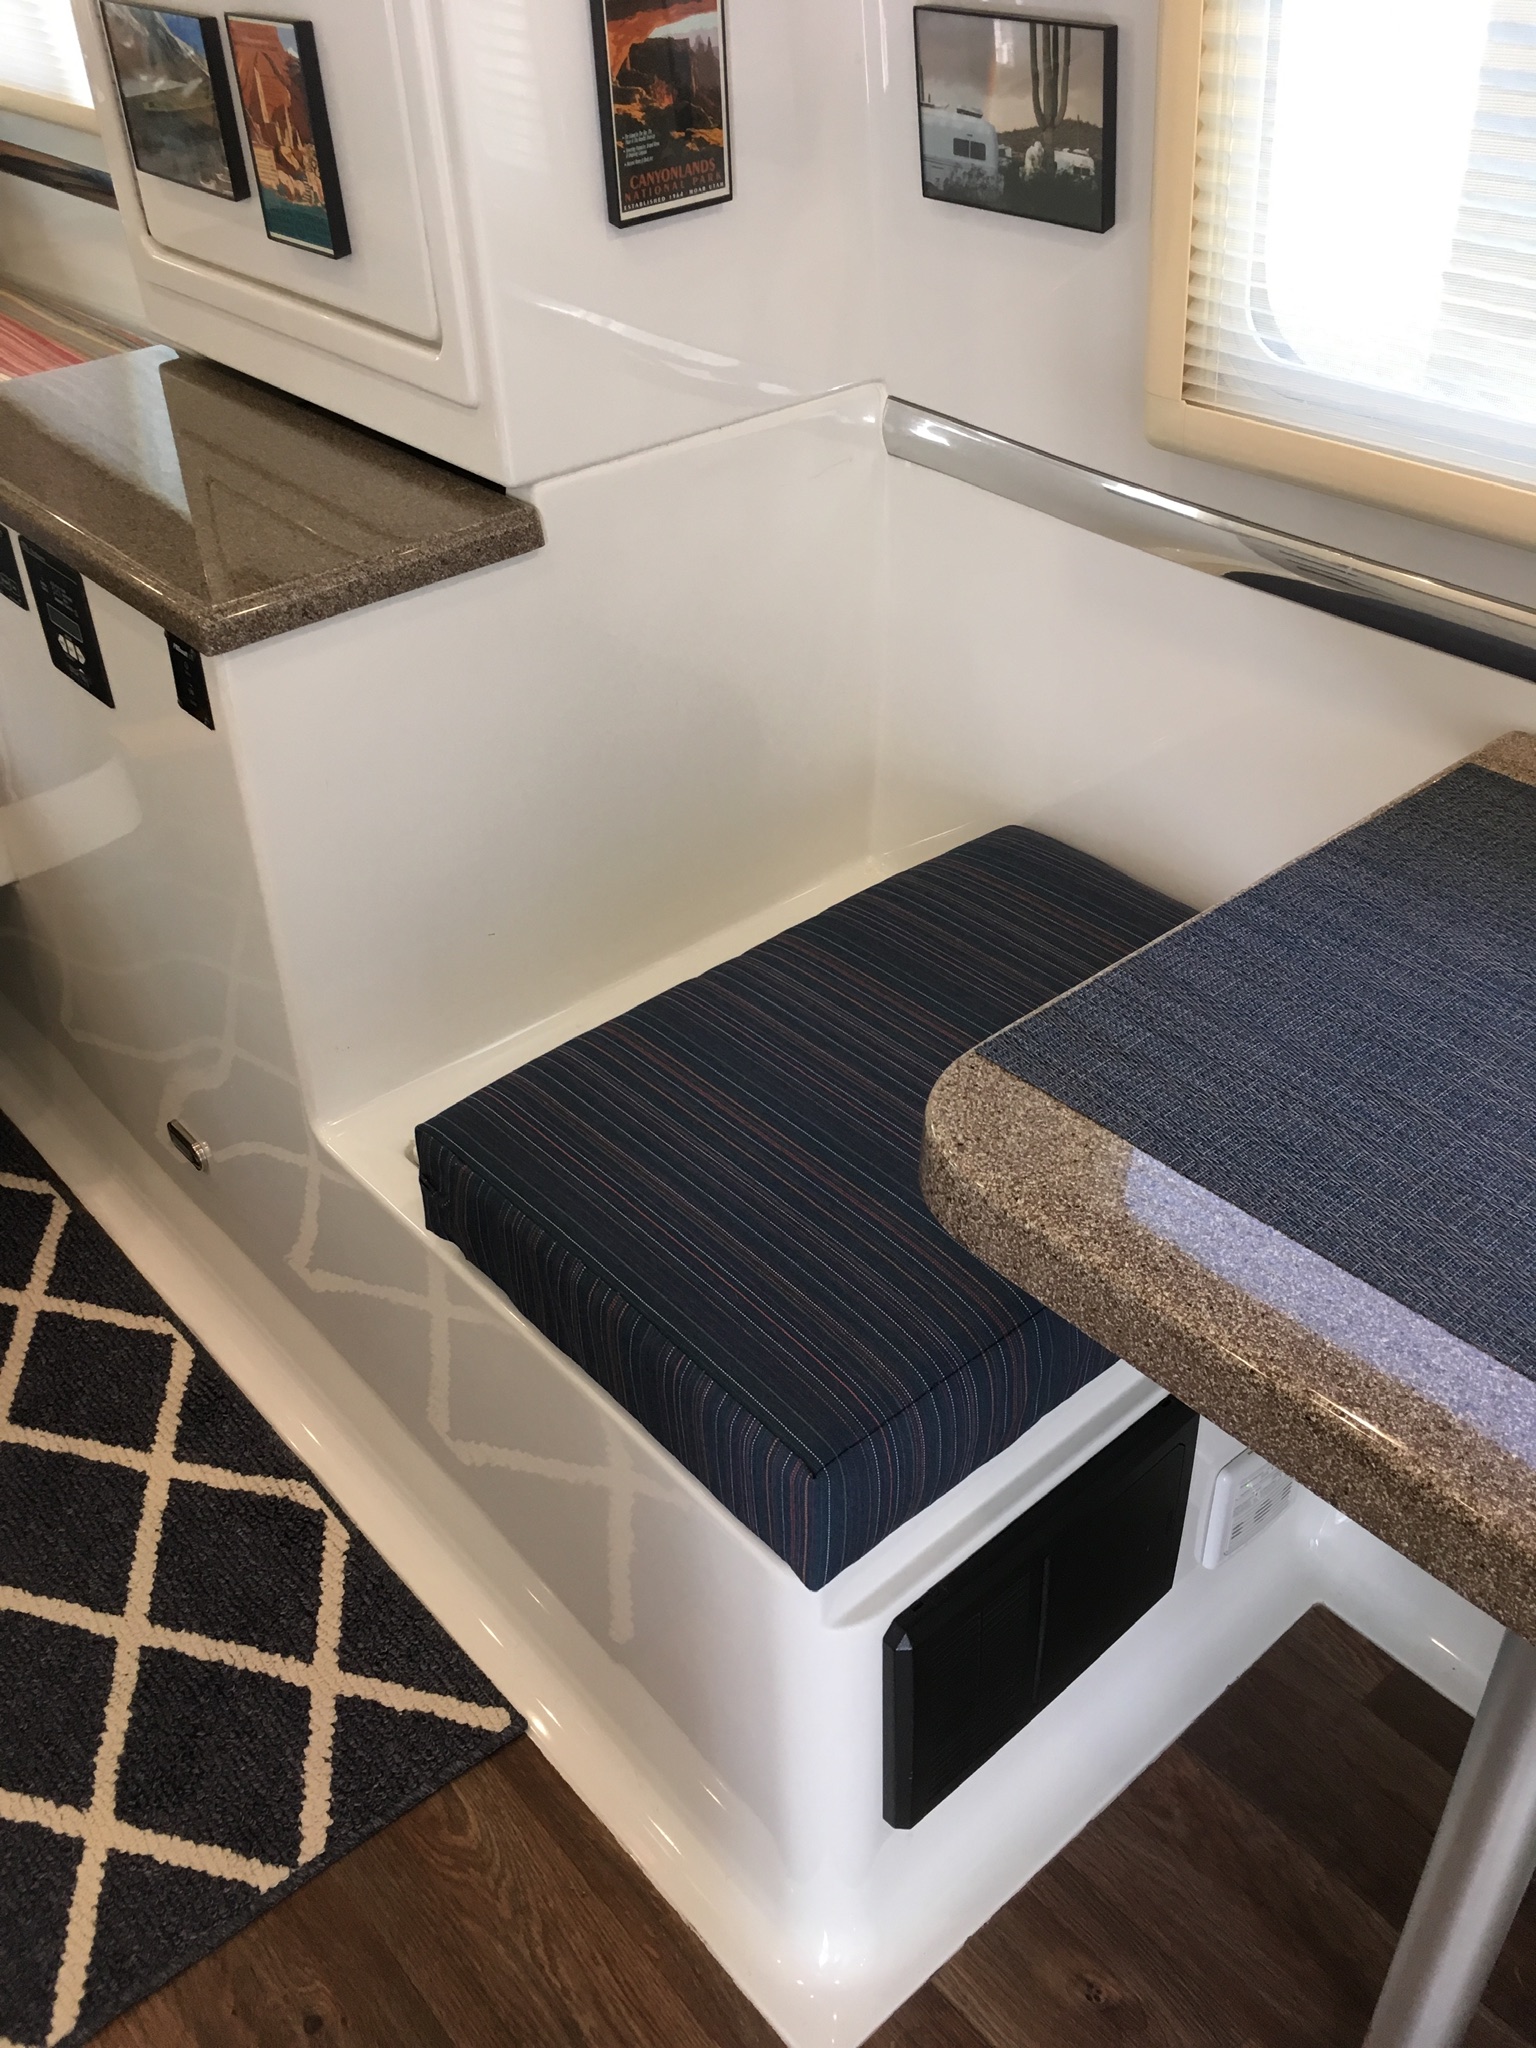
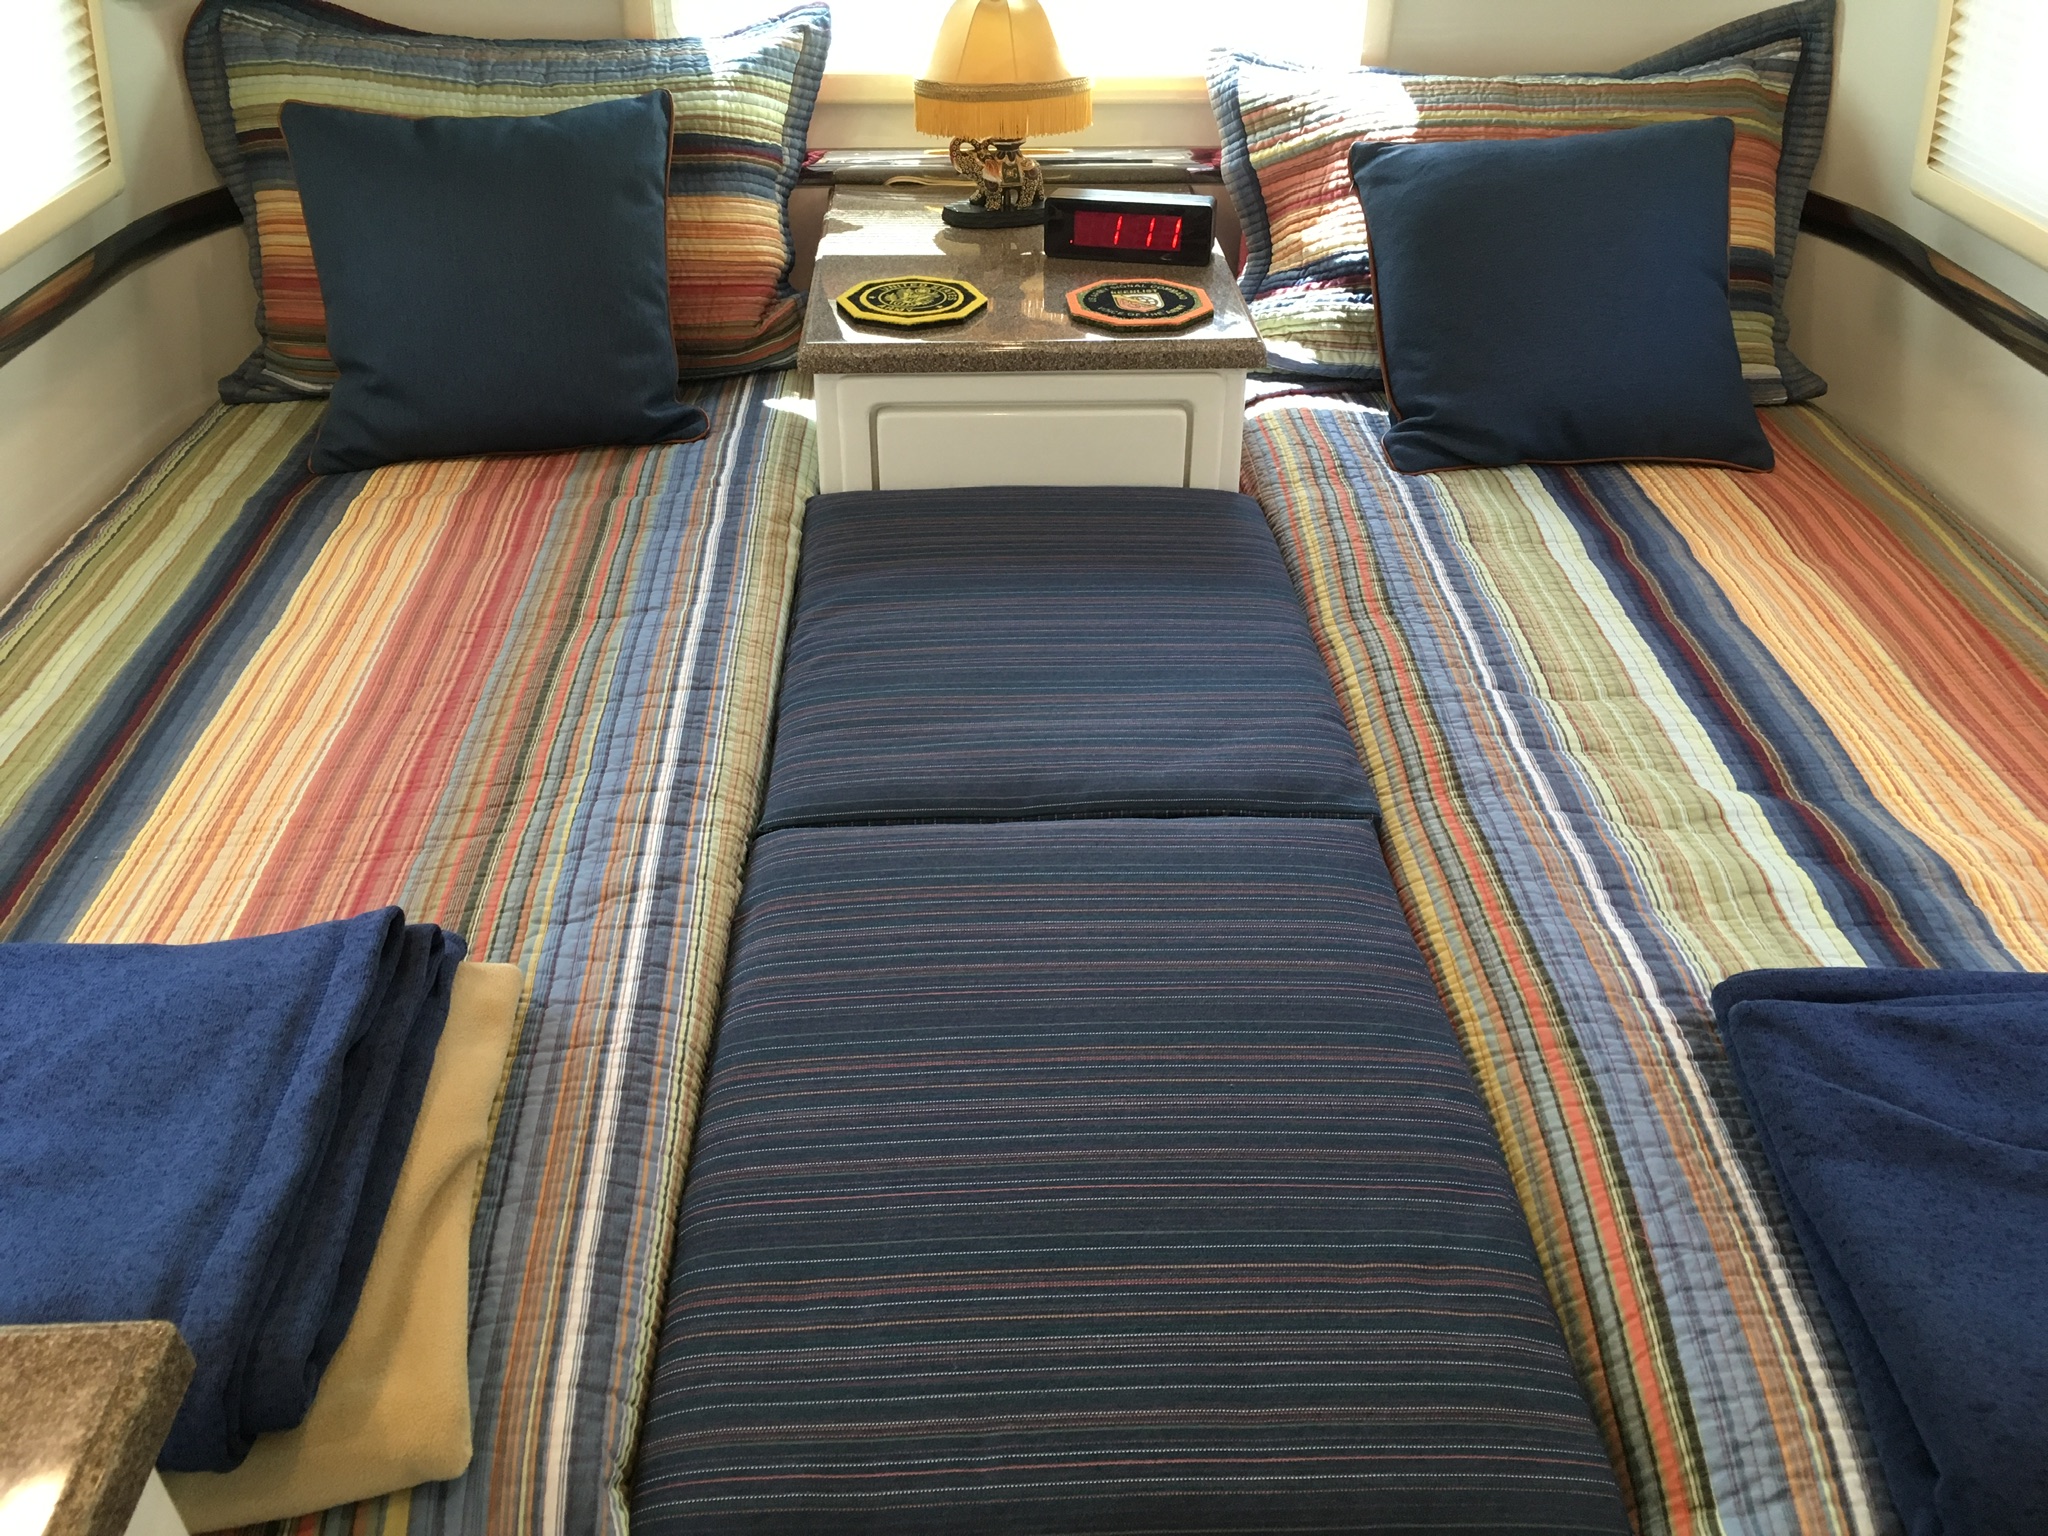
We have the twin bed version of the LEII. After the first year we realized that we were so used to sleeping together that it would be nice to be able to occasionally convert the twin beds to a double bed. I made some plywood pieces to span the gap between the twin beds and we bought some foam to sit on the plywood and create a double bed. We went with this for a year+. The problem was storing the foam when we were in the twin bed mode. So, we measured and discussed and this is what we came up with to eliminate the extra foam. We are leaving tomorrow for a month or so to go up to South Dakota so we’ll see how it works. Here is the gap between the twin beds. It measures 18” X 51”. It’s actually 50” from the nightstand to where the curve starts on the bed frames. Here is the same gap with the plywood. There are three pieces measuring 19” X 17”. It’s 3/4” plywood. The plywood stores easily under the mattresses when not in use. I cut a 1/2” X 1/8” recess on the short side of the plywood so that when placed on the fiberglass mattress frame is locks in place and won’t slide. In order to eliminate the extra foam that required a place to store we reconfigured the dinette cushions. We had new cushions made that included a larger back cushion that measures 25” X 19” and is 6” thick. In the dinette it sits on the fiberglass, not the bottom cushion. The new bottom cushion is smaller, 25” X 17” and butts up against the back cushion. The larger back cushions sit on the plywood when in double bed mode. Here are the new dinette cushions. Notice the back cushion does not sit on the bottom cushion. Here’s a shot with the cushion removed to make the double bed. Here are the cushions on the plywood. We were a little concerned that the dinette seats wouldn’t be as comfortable with the thicker back, but sitting in the driveway the last few days it seems okay. Also, we wondered if the bottom cushion would stay put without the back cushion sitting on top of it. We’ll see how it works out this next month on the road. Mike
1 point
-
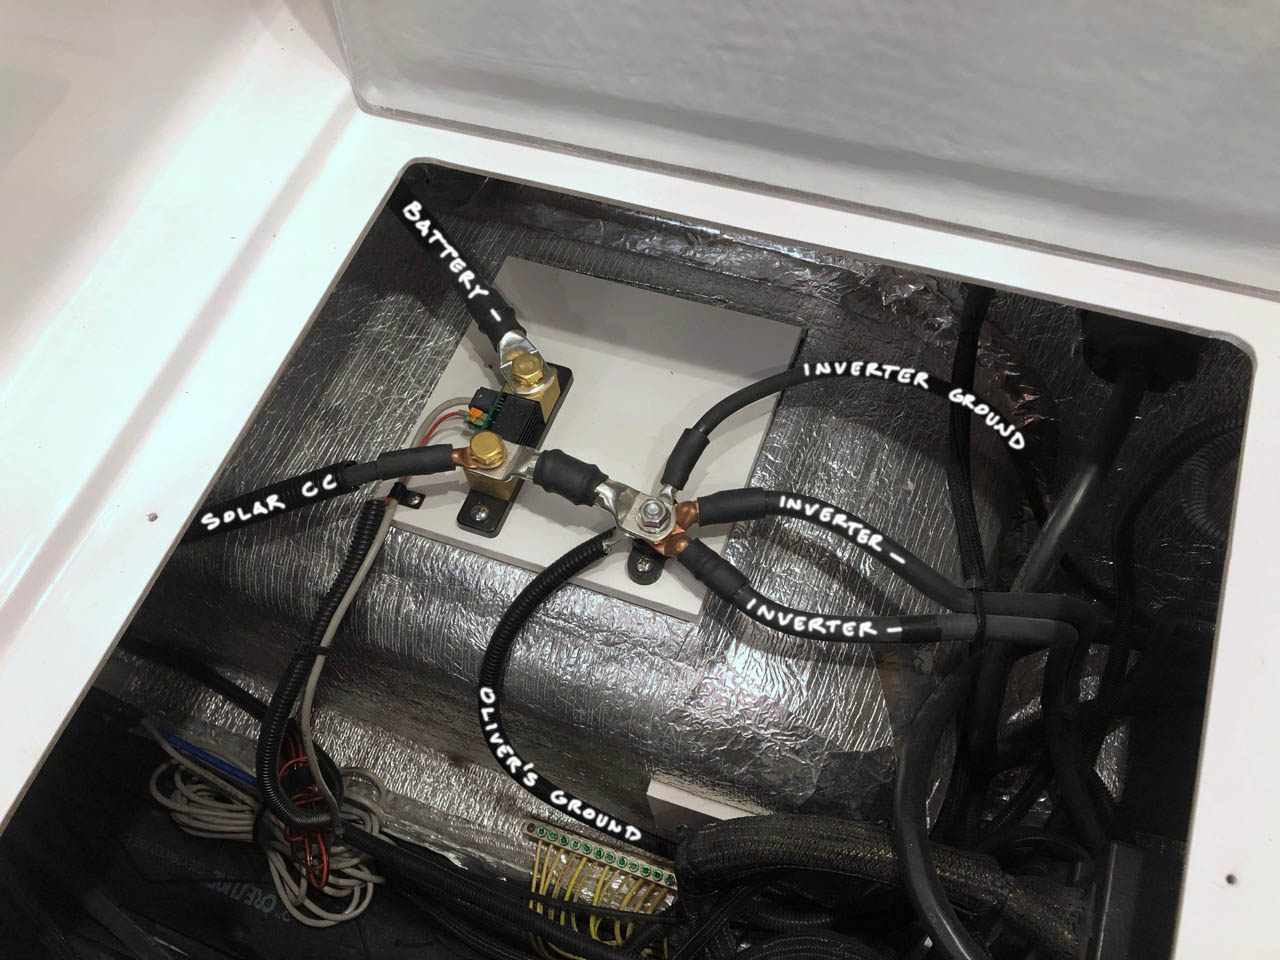
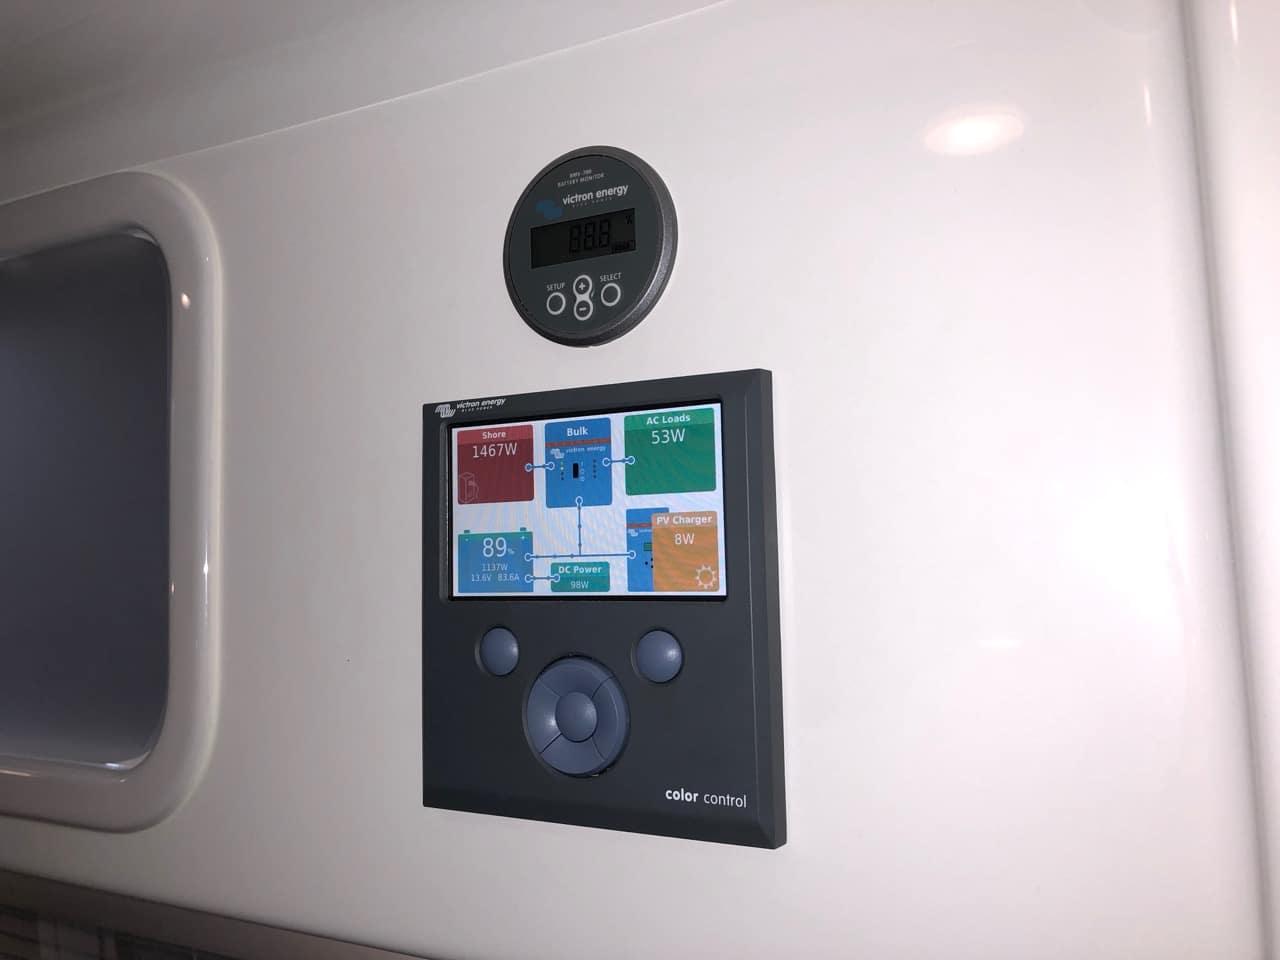
Installation difficulty will depend on where you want to install it. I opted out of the factory stereo, so I had a good spot, though I had too much cabling to try to snake it down between the hulls, so I had to run it through the pantry. Time consuming, but the cables are zip tied in the front corner and are out of sight enough that I forget they're there. If you want to install the monitor like I did, you'll need a hole saw, some care, and a fearless disposition. But it comes with a cover plate if you need to hide a reasonably sized mistake. You might consider installing it somewhere hidden, perhaps right by the shunt or solar charge controller. In hindsight, I should have done that since mine just repeats info that's easier to read on the Color Control. But vs. bluetooth, there's a benefit of just being able to glance at it without having to pull out your phone, so consider your choices. Here's where I installed both the shunt and monitor:
1 point
-
We were all rookies at some time--I was less than two years ago. I was reluctant at first to ask basic questions here but found that folks were patient and willing to offer great advice, which I still ask for . . . As for leveling, we've found that Andersens work the best. (I will, however, never buy from this company again. The owner vandalized a natural arch in Utah and offered, in my opinion, an insincere public-relations apology. There are, it seems, good Andersen-type levelers out there.) Rolling up on these levelers is sure easier than working to build those pyramid-shaped forms with the "lego" pieces, as we did before getting the Andersens. We use the "lego" type blocks under the three jacks. As reported by others above, they reduce how much you need to extend the jacks, keep the ends from sinking into soft ground, and provide peace of mind that you won't be damaging the jacks should you forget to retract them before pulling your trailer. We use Tri-Lynx levelers and caps to build these blocks. After reading Mike's post and viewing his photo, I just put this into my Amazon shopping cart: Camco Yellow RV Wheel Stop-Stabilizes -Large (44622). These, in addition to our Camco Wheel Chocks, will provide extra stability and peace of mind that we won't be rolling off off the Tri-Lynx blocks or Andersens. Note: While I admire those who have built their own blocks to put under the stabilizers, I like that the Tri-Lynx are lighter weight than wood. Like Geronimo John, we store our blocks (Tri-Lynx) in a milk crate along with the chocks. The Andersens are pretty heavy but fit well in the "curve" of the basement compartment. Happy leveling and stabilizing.1 point
-
Great discussion and thank you for posting your results of research. I believe the battery monitor would be a very useful tool for keeping track of the charge state of the batteries. The BMV-712 has a current draw of <1ma vs the BMV-700 & 702 <4ma. They all have pretty small current draw. The risk is that without any charging they will eventually drain a battery... completely. With Li batteries, they can be ruined by doing so. The BMV-712 will take 4 times as long for this to occur vs the BMV-700 & 702. Mike
1 point
-
And at Overland's suggestion I cancelled the order of the BMV-700 and ordered the BMV-712 instead.1 point
-
Hi Jeff, I was putting more trust in the recommendation from Zamp. But for this user's complaint I'd have suggested an inexpensive solar trickle charger to offset the parasitic load (caused by forgetting to shut the unit off? Twice?). We used one on our sailboat and had no issues with phantom/parasitic loads draining the house batteries. For our Airstream (no solar) we added a mechanical shutoff to the negative terminal to eliminate the possibility of unwanted battery drain. In our case today, we have 320 watts of solar panels charging the batteries when the sun shines which is often enough in the CONUS, right? If it is being stored inside I'd be sure to have the batteries on a smart trickle charger. As an aside, who puts a "gas gauge" a starting battery? Cheers, Mark1 point
-
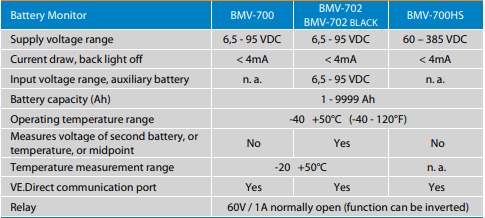
Here’s a pic as we sit out this morning drinking coffee. It looks like it should be the larger one. I just measured the other side and it’s almost 5” between tires as they sit on the ground. This side on legos looks to be about 4.5”.
1 point
-
Good information in this thread. I use the adjustable unit pictured above with the gauge. I would caution you to not leave the regulator in use or stored in freezing weather. Water gets into the spiral pressure tube, also known as a Bourdon tube. Should it freeze, the Bourdon tube is distorted and the needle is no longer accurate. (Trust me on this - experience) The only other item I'll mention is that I always install the regulator at the valve, protecting the hose. I've seen an overpressured hoses that looked like a snake that had eaten a rat. But, truthfully, I rarely used a regulator nor hook up to city water. I fill my water tank using a filter and operate with the pump 99% of the time. Brad1 point
-
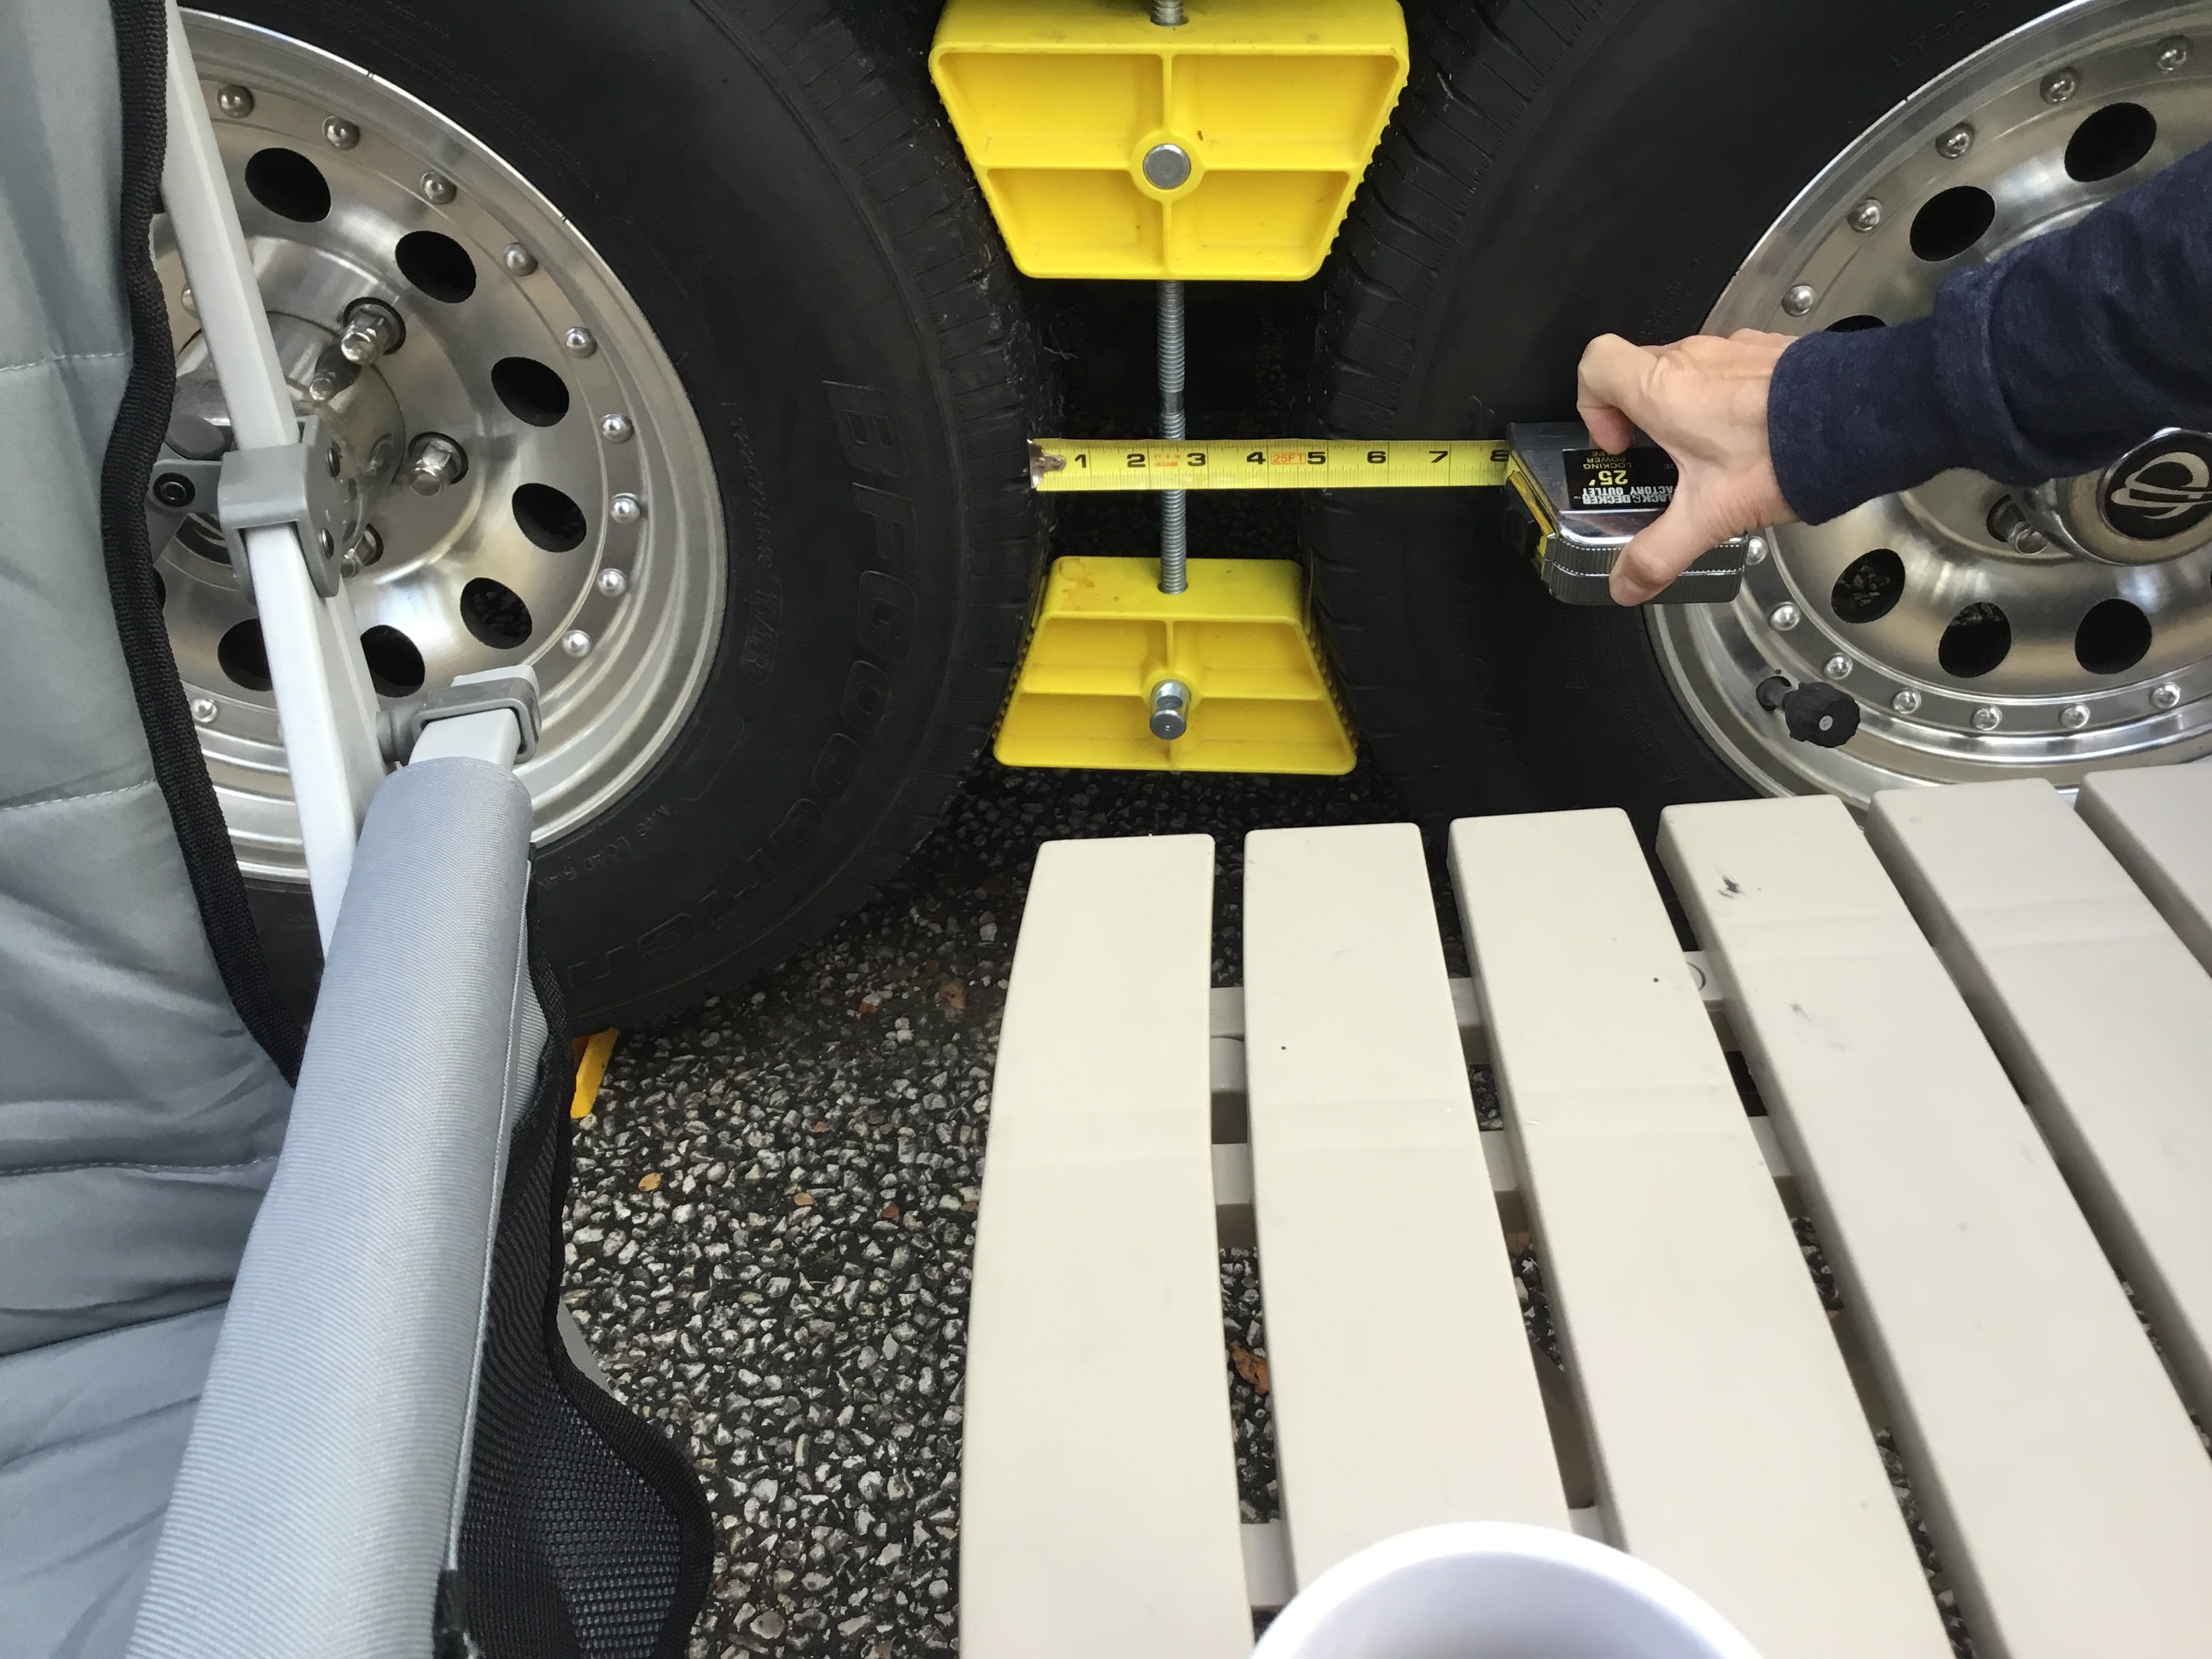
Frank, yes, it’s a Camco. I assume it’s the smaller size if there are two sizes. It fits nicely. It’s the one you see frequently in Walmart. I mounted an aluminum box on the tongue to store my chocks, blocks, leather gloves, flashlight, level and an old towel in. It was about $100 on Amazon and has held up well. Mike
1 point
-
As indicated above, depends on what you set the T-Stat to and the ambient. In general, our fully charged stock batteries will power up the furnace all night on a charge. We camp high and have had several nights with freezing temp's and have not had a problem with the batteries topped off via generator before going to bed. I also support having a supplemental heat source. Even if it is only your Honda and a 1500 watt electric heater. Without kids or pets in the trailer, we like to put the heater in front of the bath room entry facing the emergency escape window. Out of the way and a plug is handy there also. Have fun! Geronimo John1 point
-
That’s correct, though battery monitors and chargers don’t really care how the batteries are connected. Some are more advanced, but in general they just look at the voltage of the system as a whole to determine the state of charge.1 point
-
John, Which furnace are you using? I ask since 7 amps seems high compared to what the Elite 2 manual states. Please note that I have no practical experience yet with the trailer or the furnace. Mike
1 point
-
It's only dumb if you don't ask, well if the sun comes out in the morning you will be able to go as long as the propane holds out. You'll run out of gas before anything else if the sun shines. Just a note if you do cold weather camping always have a back up source, don't ask how I know. I keep a small cube heater should we have electric and when boon docking I keep a small propane buddy heater with several small green propane bottles. Thanks Gary1 point
-
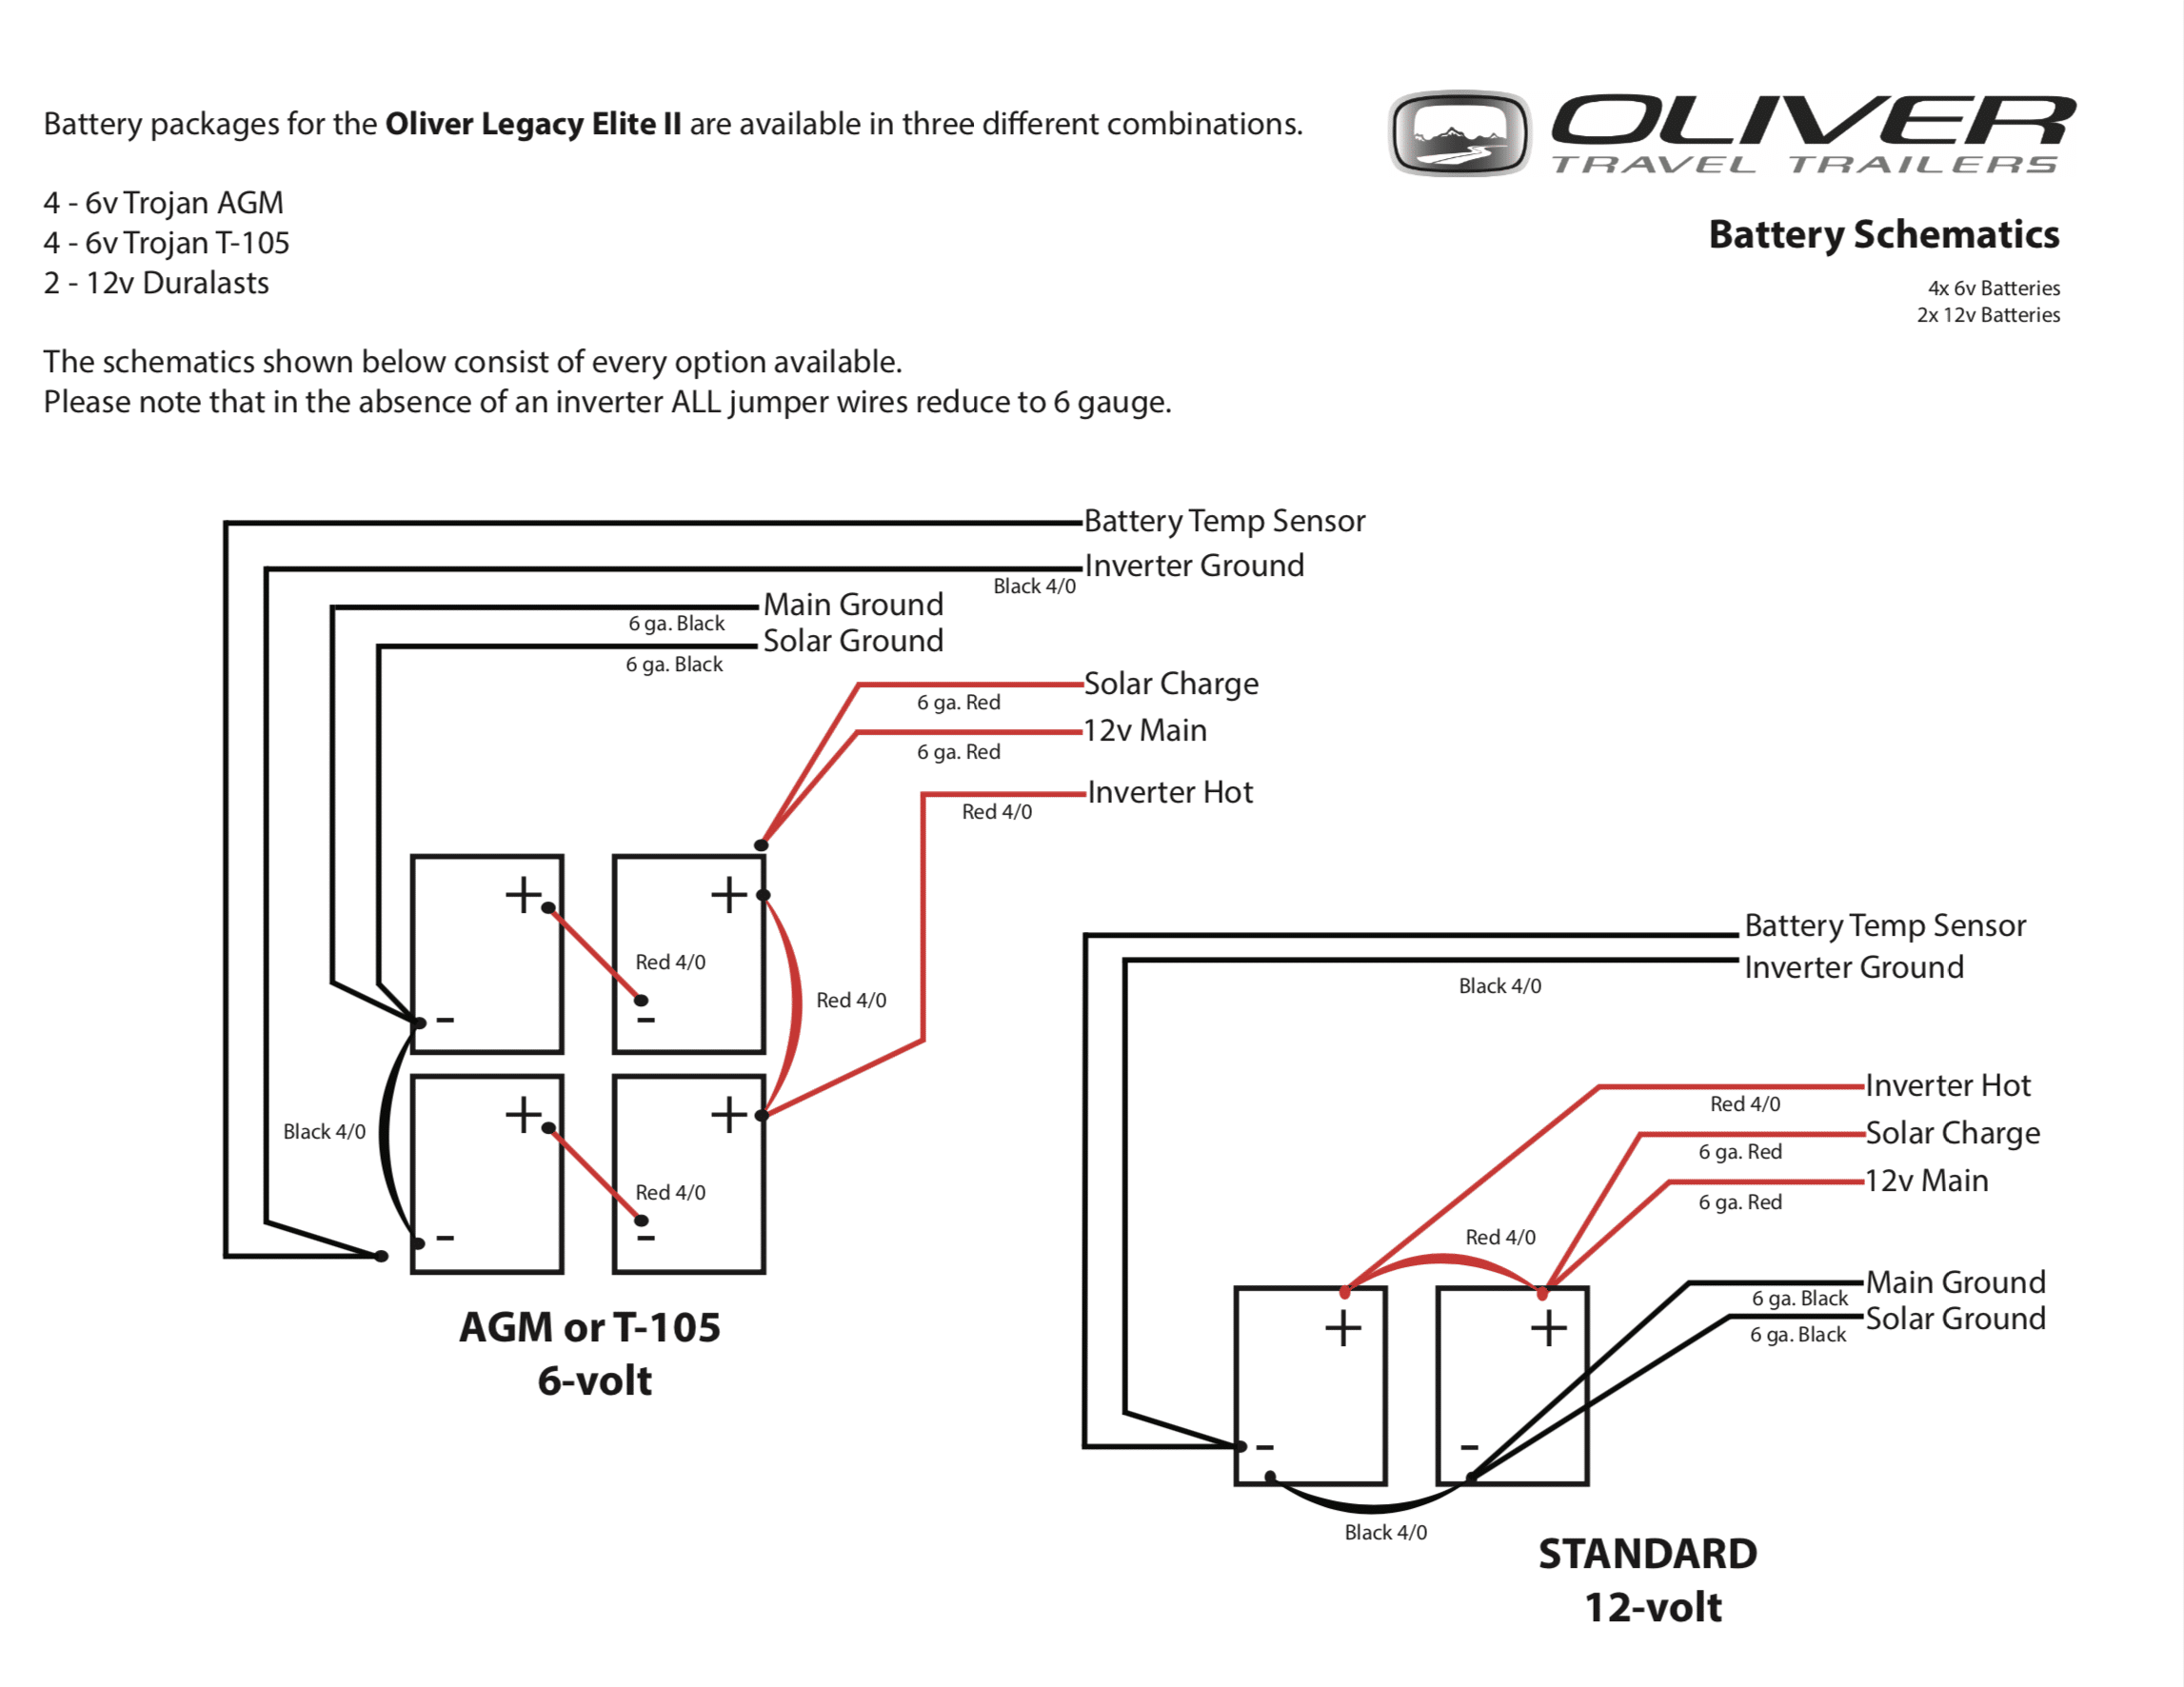
Parallel for 12 volt. But to make sure that it's confusing, if you get the AGMs, then they're 6-volt and will be paired, two each in series then the two sets are paralleled. There's a diagram in the back of the manual that shows exactly how they should be connected. [attachment file=Screen Shot 2018-11-26 at 6.11.38 PM.png]
1 point
-
We’ve had a couple of good trips since this and we’re getting ready to go out again next Thursday. The mod has worked well. It’s important that the density of the middle cushions match the mattresses, otherwise it’s a bit uncomfortable. We found this out on the first iteration just using some high density foam for the middle. The new dinette cushions are a very close match to the mattresses and are much more comfortable. The larger back cushion on the dinette has not been an issue. The new bottom cushion configuration does move more when you get up, but it’s easy to straighten back out. The only thing I would do different is to make two plywood pieces instead of three. I did three because I had some scrap cabinet grade plywood pieces that weren’t big enough. All in all, we’re happy with this modification. Mike1 point
-
Excellent solution and execution. It’s funny because I always thought we would order a standard bed when the time came. I didn’t think my better half would go for the twin bed version. Low and behold, we found a 6 month old 2017 standard bed and used the big bed for 1 trip. We did not like devoting 40% of the space to a bed and did not like converting it to booth table each morning. So we tried different sleeping arrangements and settled on the dinette for Krunch and the back bench for me and the dogs stay on either side bench. And then over Labor Day week the factory converted it to the twin bed configuration. We bought mattresses from Southern Mattress and they shipped then to Hohenwald. Next week is our first trip as a twin bed and I am hoping for the best.1 point


-
Recent Achievements
-
")


")


")

