Leaderboard


Popular Content
Showing content with the highest reputation on 11/18/2023 in all areas
-
After ~5 wonderful years with our Ollie and many adventures around the United States and Canada, we are moving on to a new phase of travel in our lives (overseas, cruises, etc.). So our much loved Hull #461 has been sold to a new owner. This forum has been great for support and sharing among the Oliver owners community, and a thank you to all for the great discussions and information shared over the years. We are definitely going to miss our Ollie, but she is going to a good home with a new owner that is very knowledgeable about trailers in general and also Olivers specifically, and I expect he will be joining this forum (he might already be a guest member). Thanks again to all. I'll still hang around/lurk here on the forums, and safe travels to everyone. Frank6 points
-
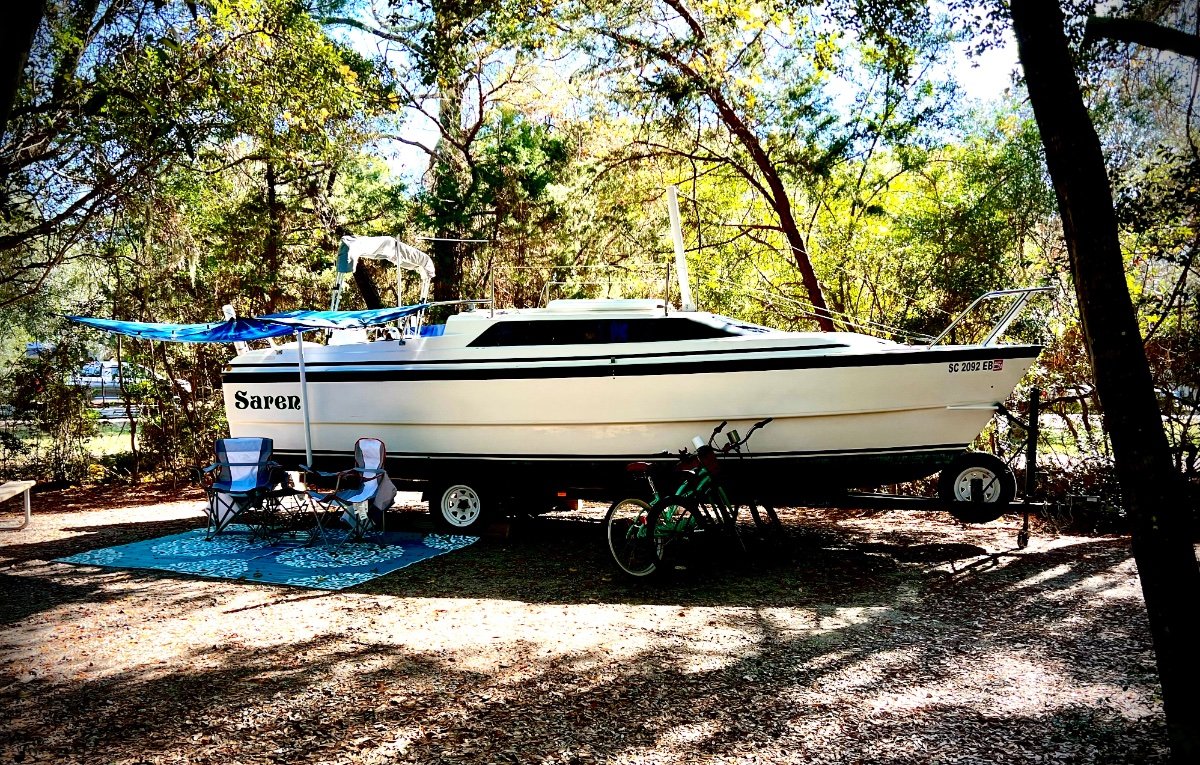
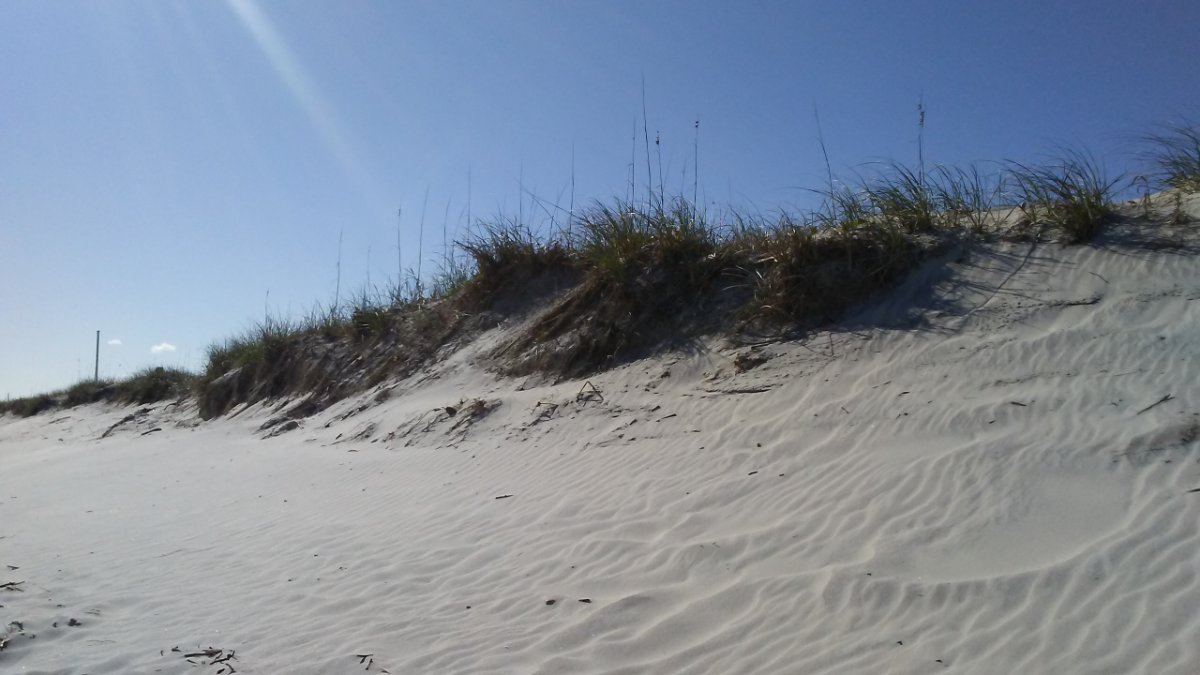
I’m at my home base campground in Huntington Beach State Park, in South Carolina, in hull #997. During my morning stroll I met the owner of this boat, who said it serves them well, both on land and sea. They are based out of Charleston, SC, and travel the east coast thru gulf coast.
 3 points
 -
FDBE92AB-E20B-4E6A-95B9-0EA4E72AEDD9.mov Huntington Beach State Park is our go to favorite CG if we need a coastal camping fix. We take our bicycles as you can ride the bike path all the way to Murrells Inlet. A really beautiful and well run SP for sure. A cup of coffee and an early sunrise brings back memories.2 points
-
We made a 15,000 mile loop from home, through Canada, Alaska and back home in 2019. About 90 days on the road with 95% boondocking. We never had trouble finding a place to stay. In Fairbanks we stopped at a glassblowing shop and they invited us to spend the night in their parking lot! I'm not interested in spending money to park overnight. If we're going to stay a few days in a given spot - maybe, but not if I can find a place to boondock.2 points
-
The EMS in our 2019 EIi is installed under the rear dinette seat on the wall facing the aisle. This pix is looking down under that seat. The readout is mounted in the attic on street side wall.
2 points
-
Welcome to the Oliver family. We just pulled #1290 through Wyoming last week. Boondocked at Evanston in 17° temperature and stayed warm. A little condensation on the windows, but very little. Never on the walls. Ours is stored outside in Oregon, plugged in with tire covers. Ours was the third to last Elite II for 2022. John2 points
-
Been thinking about this for a while, reading posts, and collecting parts. So, this is what I'm thinking (see pic). The OEM water pump is a basic model, at 55 PSI (not bad) and 3 GPM (pretty bad). I had the same model in our sold Bigfoot class-C, which I replaced as well. Now I will have 2 basic back-up water pumps! Those of you with newer models have an accumulator, older hulls did not. When done, we will NEVER lift a mattress to switch a water valve. Some who know me, know that I already have a 35-gallon water tank mounted to my truck. We love our water out here, in the SW, where it is scarce! I will increase the PSI a little to 60 and add volume 5 GPM (huge), also addind dual .75L water accumulators. Some may get worried re manufacturer specs, although design tolerances have considerable room, often up to 50%. I will add 9% more PSI and PEX is rated to 160 PSI (although not all the fittings are). We run our home at 60 PSI water pressure. Take a look! Please let me know what you think. I'm tearing old parts out asap tomorrow! 😋
1 point
-
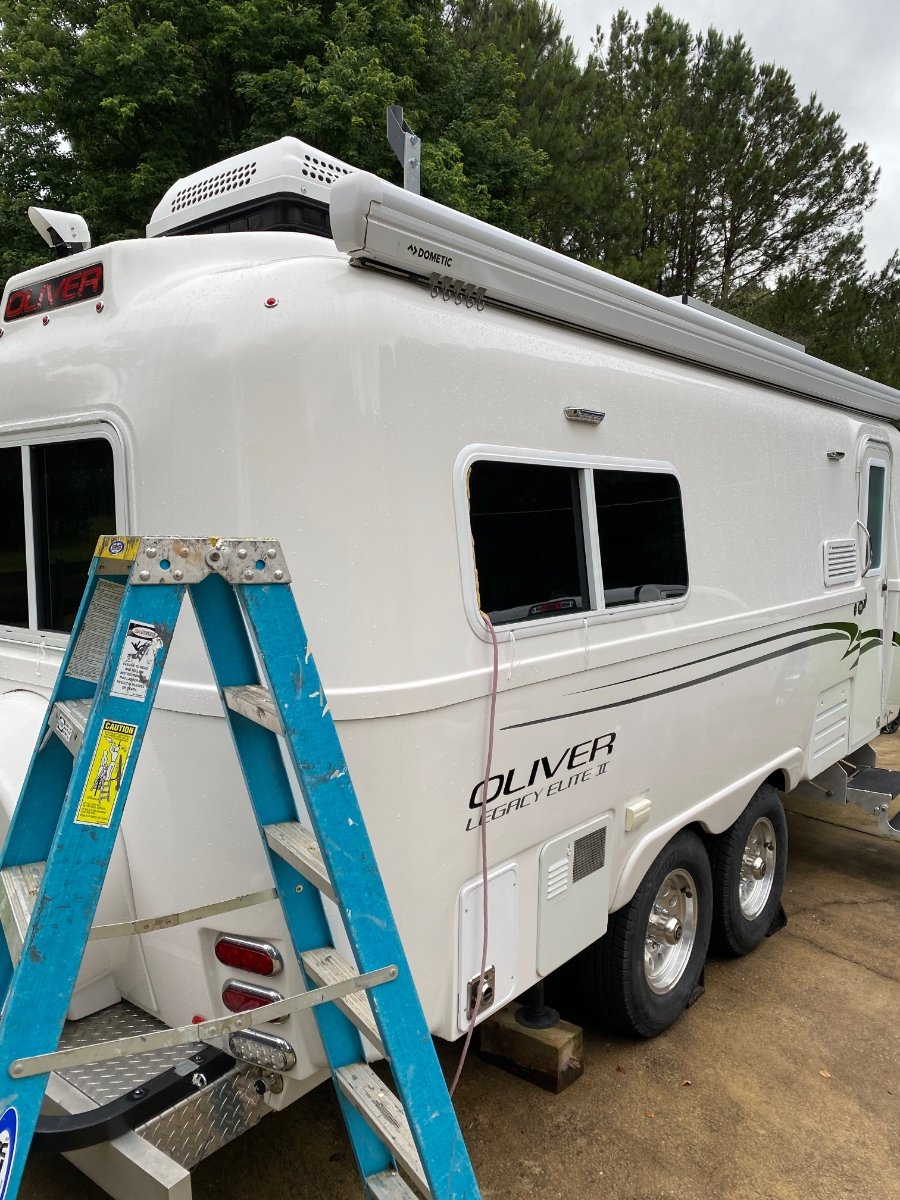
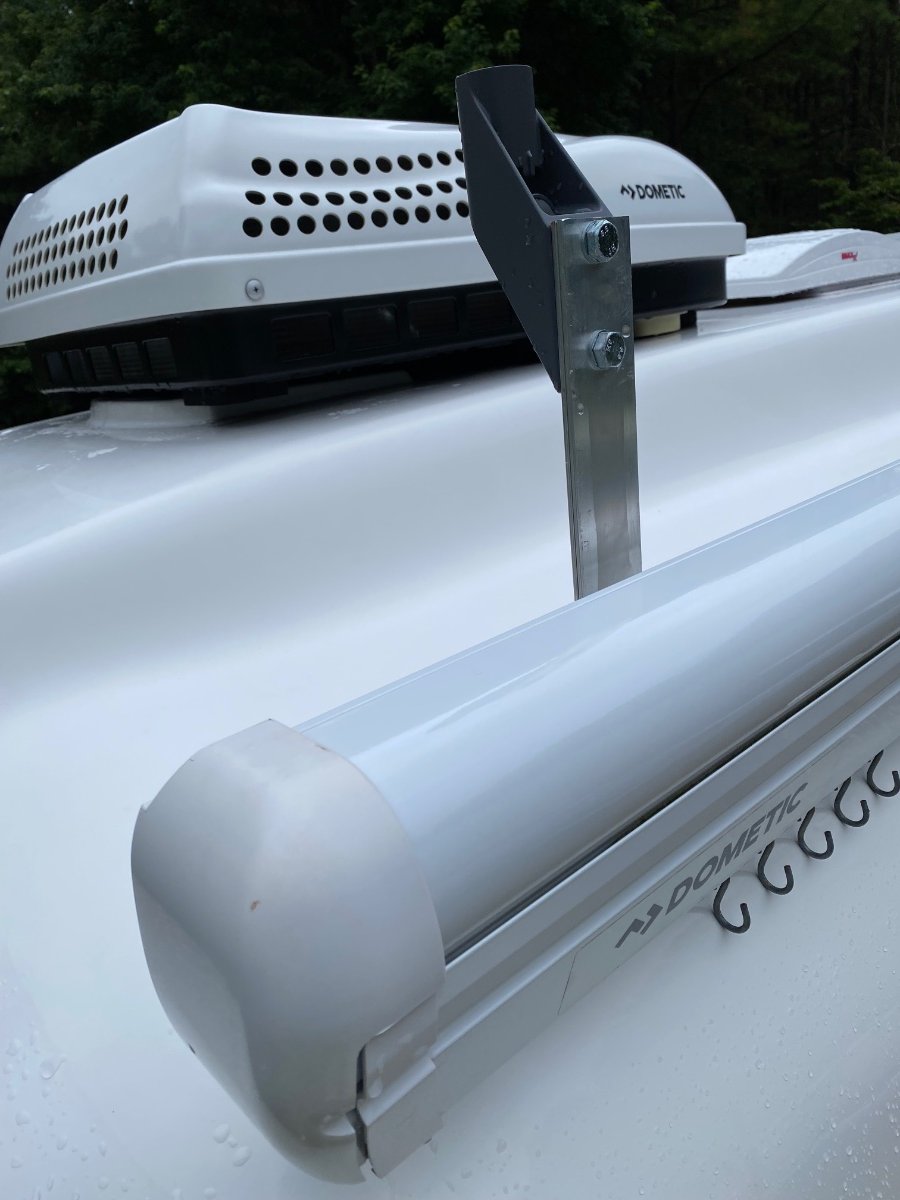
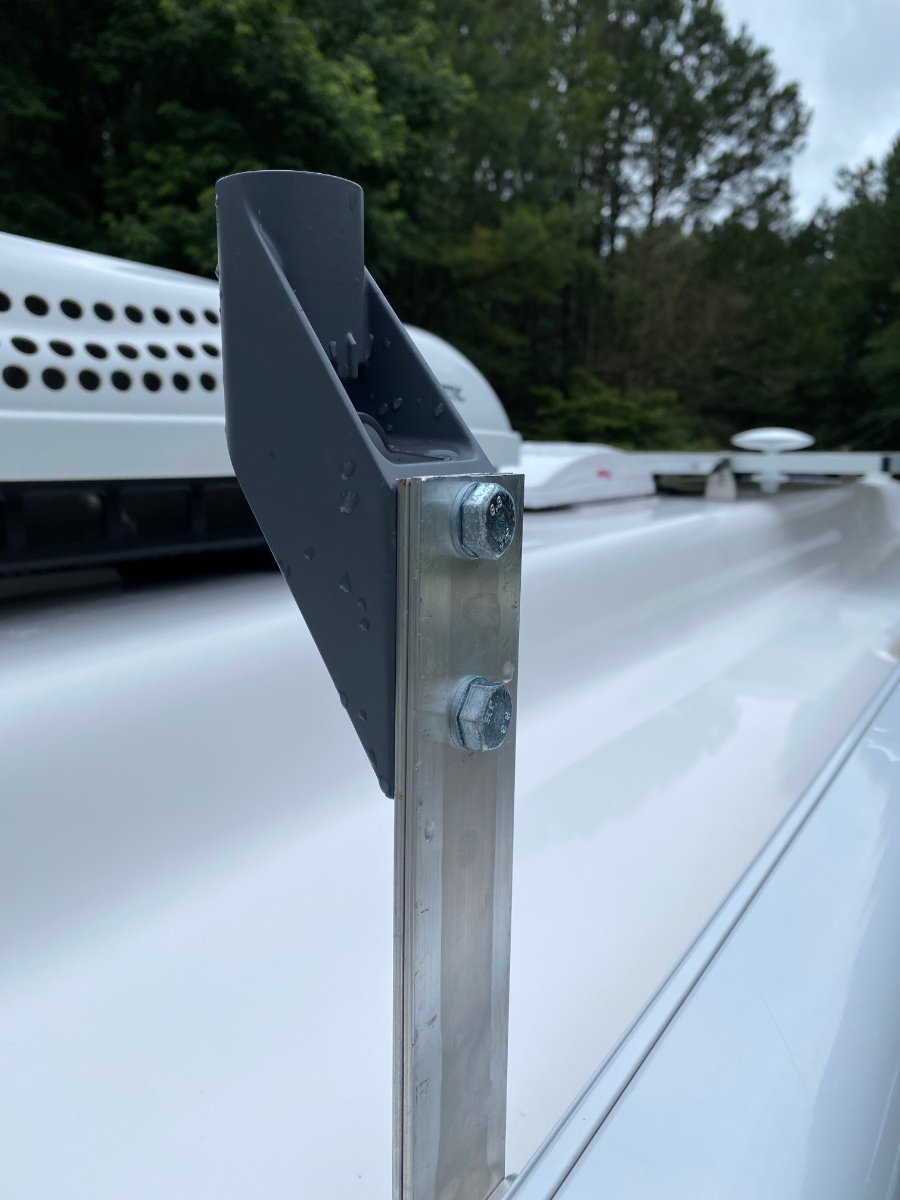
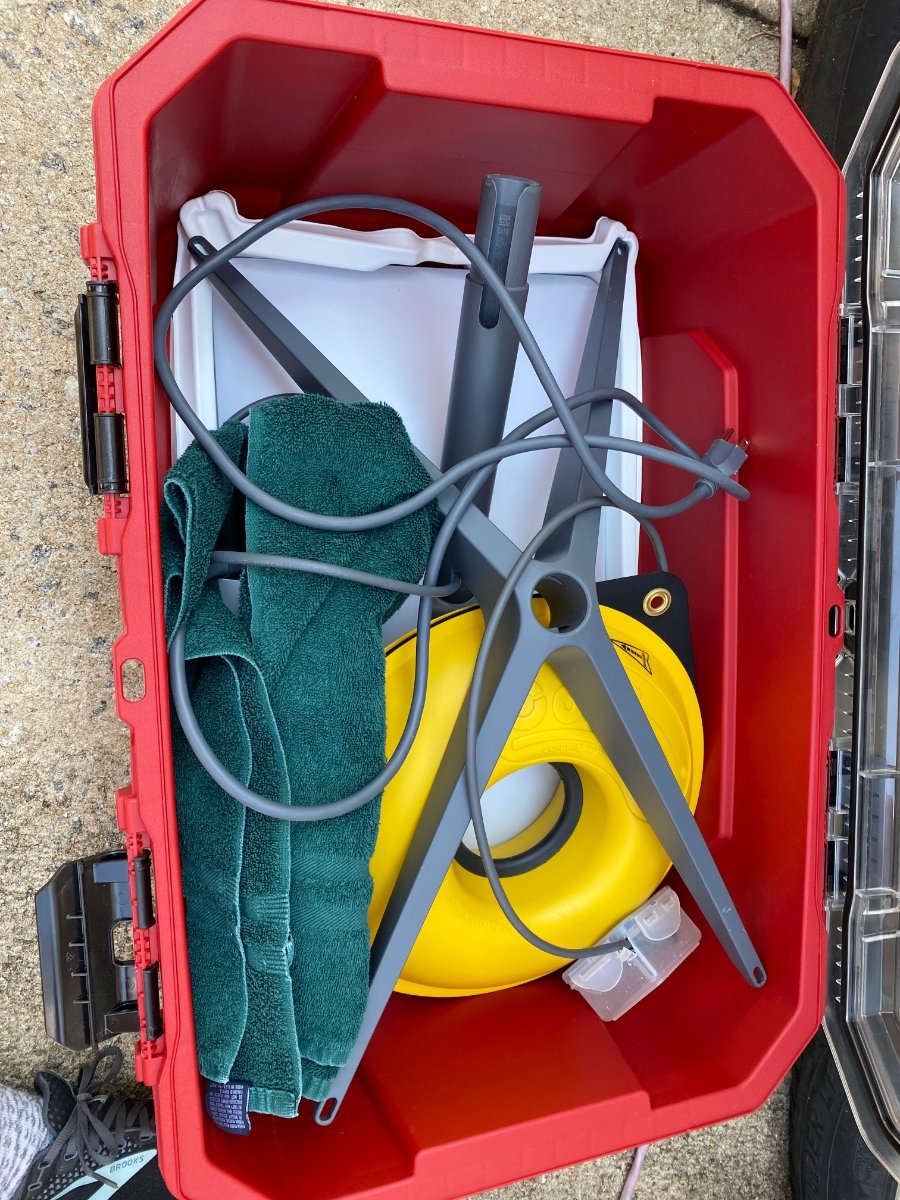
We liked the idea of mounting the Starlink bracket to the roof as we already owned the short mount from when we mounted it to the fascia board of our house. Mounting to the awning where easy and quick access to install the dish at each campground was our priority. But our 2019 Oliver has a Dometic awning whose bolt pattern is diagonal and the Starlink mounts bolt pattern is vertical. Our solution was to select a 2” wide piece of 4’ stock aluminum at Lowe’s, cut 2 pieces for strength, and drill holes on one end to match Starlink mount and the other end to match the Dometic awning. 1. We began by measuring the clearance needed for the dish to clear the awning when the dish is in stow mode, and length for the drilling of holes on both end. For our application, that length was ? We also ensured the trailer was level before starting. 2. Next we used cardboard to make a template to cut and drill the hole patterns. I am sure others may find a better way to do this, but we put dark powder on the bolts and then pressed the cardboard to them using a level on the cardboard to ensure it was straight. (We also visually assessed that it appeared perpendicular to the awning). We then pre drilled the holes in the cardboard and did a test run. NOTE: it took us at least 3 cardboard attempts before we got it right! 3. Now we transferred the template to the metal pieces. We actually drilled the awning pattern on one end of the 4’ aluminum piece before we cut the short lengths. This was in case we messed up, we would only lose a short 2” piece rather than our planned 8” lengths. We mounted the long piece to the awning, but the upper hole was slightly off, so we had to wallow that hole slightly larger, but that did not impact securing it. We cut our length and drilled the Starlink holes. We repeated this process for the second piece. 4. We purchased stainless steel bolts, washers and lock nuts for the Starlink end. So we stacked the 2 aluminum plates and installed. The direction we chose for the Starlink mount was to make it easier to see and plug in the router cable to the dish when we put it up there. NOTE: the awning bolts had been cutoff and threads were damaged so the nuts wouldn’t come off easily on the rear awning bolt set. Thus we had to use the set forward of those. 5. We have traveled at 65mph and it doesn’t seem to move and remains secure. 6. Like others, we bring the 4 legged dish mount/anchor and use it if we are under trees and need to move the dish 50’ away from the camper. We aren’t concerned about theft of the dish as it cannot be used by anyone else. Each dish is specific to the owner’s account. For interest, I am including a picture of our Husky storage box and how we pack it. We use a Cord-Pro to wrangle the 75’ router cord to prevent tangling. I also notched a Tupperware to protect the cord plug end that goes in the dish. It can be delicate and damaged easily. 7. We current put the cord thru the basement door and plug into the router via the trap door at the bottom of the bedside table (we have twins. The basement door has a notch in the rubber seal where the cord fits and allows us to close and lock the door without pinching the cord. Eventually we plan to convert the satellite port. Please ask questions, we would be happy to answer.
1 point
-
Hello, My wife and I are new Oliver Elite II owners. In fact, we put the last 2023 built. We took it back home to Wyoming and I have it winterized, covered and plugged in to shore power. I am feeling pretty good about this coming winter, however, I would feel better with tire covers. What covers have you had good luck with? Thank you for your suggestions.1 point
-
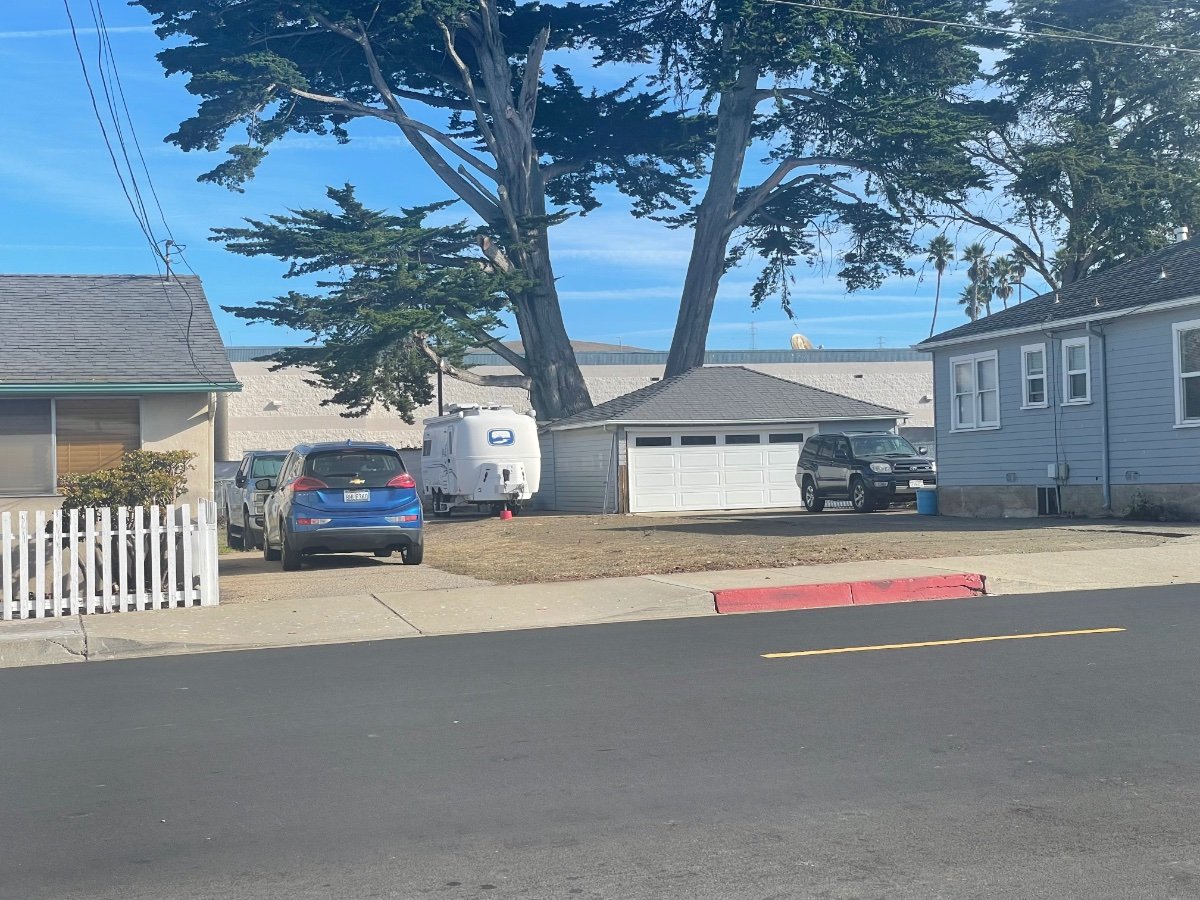
Z My daughter was waiting for a bus near a friend’s home in Morro Bay and saw this Oliie across from the stop. She should now buy a lottery ticket!
1 point
-
My typo. I have edited my quoted post. The main battery cable to Inverter should be 4/0. This will allow for reuse for either 2,000 or 3,000 watt inverters. Also be sure to add a second auto transfer switch dedicated to the A/C. See John Davies post on this topic for info. Doing so allows you full capability of a 3,000 watt converter to power up the A/C and most other loads.1 point
-
A couple of years ago
1 point
-
The gators are certainly here, and at my home as well…I live nearby on the Waccamaw River.1 point
-
Absolutely lovely camp ground. Watch out for those gators on your walks! Bill1 point
-
Sherril you will need to bookmark their web site. https://parks.canada.ca/voyage-travel/reserve Keep checking they will post on that site when the reservation system opens. Good luck and that is beautiful area to camp. Jasper is a little less busy than Banff.1 point
-
Well... last trip out the fan lift mechanism exploded. That gets your attention real quick. Got the part and just re-installed. Wanted to pass along a tip that I did not see here or in the instructions. That spring that attaches to the lifting arm is curiously absent from the instructions that I got with the new part. Ordered it from RV Products directly and they said it would be 3 weeks to arrive but it came in 2 weeks. OK.. here goes. The part of the spring that gets bolted onto the mechanism goes in the hole on top and the same side as the post that turns the bar to raise. That's the hole closest to the hinge when installed. Mine was blown up so I didn't have a reference. Lots of fun... only had to go up on the roof about a dozen times. But no falls and nothing broken. Happy Camping Everyone, Scotty1 point
-
jd1923 - Given the amount of electronic "stuff" in the Oliver, I simply chose to have this system installed at the time of birth. It has worked perfectly over the past years, but, I've never really looked to see exactly how it is installed (with the exception of that remote readout). Unfortunately, Twist is in off-site storage or I'd get some pics for ya. Note that the readout was initially installed under the street side bed. This meant that in order to see what it was trying to tell me, I'd have to lift that bed! Be careful as to where you decide to mount it - the flashing (as it scrolls through its various screens) will make you think that you are trying to sleep in a cheap hotel if you mount it just about anywhere out in the open part of the cabin. However, you will want it in a place where you can see it easily as you plug into shore power. I moved mine from under that bed to inside the pantry - it is high up on the rear wall of the pantry. All I do is open the pantry door and I can see the readout from the entrance door, yet, it is not in the way of storage inside the pantry and, when the door is shut that flashing red display can't be reflecting off the interior of the cabin. Bill1 point
-
Good luck. I assume that you are going to need a new/additional mounting board for the second accumulator. I managed to squeeze my one accumulator onto that same board that Oliver used to mount the water pump but there certainly wasn't enough room for two. Bill1 point
-
Frank - Thanks for being such a supportive and active member of the Forum. Have fun but remember to stay out of trouble. Bill1 point
-
Stick around here there is MORE! 😄1 point
-
Seems like a good plan, really like the power flow control switches. I assume you will be using clamps on the hose barb fittings.1 point
-
Yes, that is the same model PI EMS installed in my OTT.1 point
-
Thank you all so much! Joe1 point
-
Welcome, Joe! Hope the Wyoming winter goes fast so you can hit the road with your new Oliver. Mike1 point
-
While I am on board with the idea, I would have to convince my wife. That might not be too hard to do since I would be the one doing toilet cleaning duties, but it will have to wait. We can add one later if needed.1 point
-
Welcome to the forum Joe C - I have a set of these and they have served me well. https://www.amazon.com/gp/product/B07KYK3WLL/ref=ppx_yo_dt_b_search_asin_title?ie=UTF8&psc=1 Patriot🇺🇸1 point
-
Craig: Absolutely a keeper. Well done! OTT: I highly recommend you subcontract the OTT drawings to Galway Girl! GJ PS: To owners that did not get a full set of drawings with their newer units, you would be doing yourself a huge favor by keeping a copy of this four page file. It GREATLY simplifies one's understanding of our water systems.1 point
-
I totally support MobileJoy's comments. If you boondock where it gets hot or are heavy microwave users (We are guilty of both), then for sure go with the 3000 w inverter. It is not for most of us" For our 2018, OUR Progressive Dynamics Converter (I.E. Battery Charger) had a Lithium switch. Some others do not. Good threads on checking this out on your. Will only take about ten minutes of your time. Also, you will definitely want to install the 712 Smart Shunt with Bluetooth connectivity. As a boondocker, having DC to DC charging capability is also very nice. For the battery to inverter cable run, you need to use 4/0 AWG. For the DC to DC cable runs #4 AWG minimum. Search the forum and you'll find LOTS of info on these topics. Totally can be a DYI effort if you are handy and have some cabling and electrical skills. But it takes a significant amount of time and planning. Cost of materials alone will be in the $2,500+ range if you shop carefully. You can for sure do it at a lot less cost than having OTT do so. Also you'll learn tons in the process. Finally, please update your profile, and your signature block so we know you TV, Hull Number and year. Without this info, more specific info and help is precluded because we would just be guessing. Your 2019 OE2 is very similar to our 2018. (GJ Updated) GJ1 point
-
Keeping to that theme, and being a Star Trek fan for almost a century or two.... I agree and believe that our Clan has a few Klingons and Romulans for sure. Even a Ferengi gestor. A bunch of Vulcan intellectuals (who tend to be detailed, long winded, but highly insightful). And one that I know very well that can claim DNA from all of these races. Luckily, most of the clan is just human enjoying our Space Egg traveling all over our Universe. But there a couple that continue to take their Space Eggs "where no Eggette has gone before". GJ1 point
-
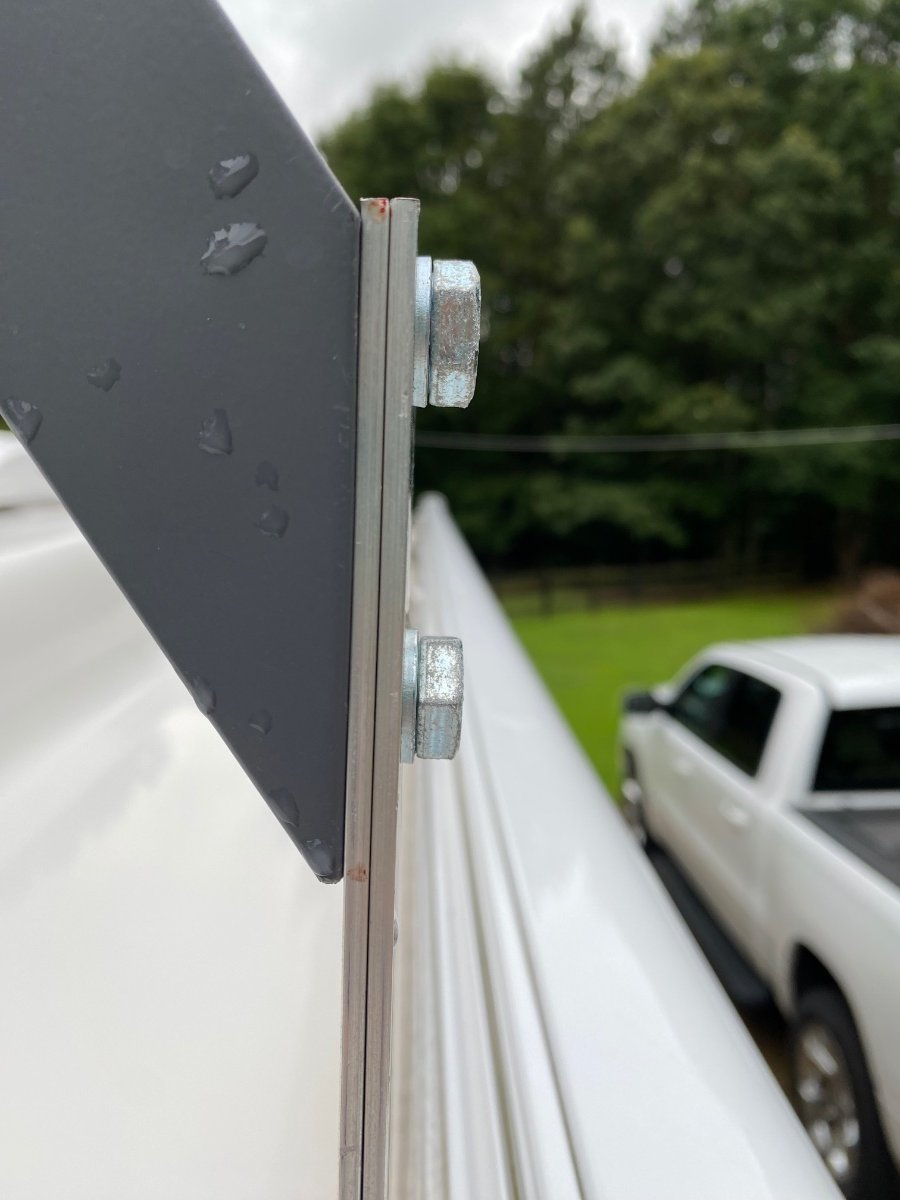
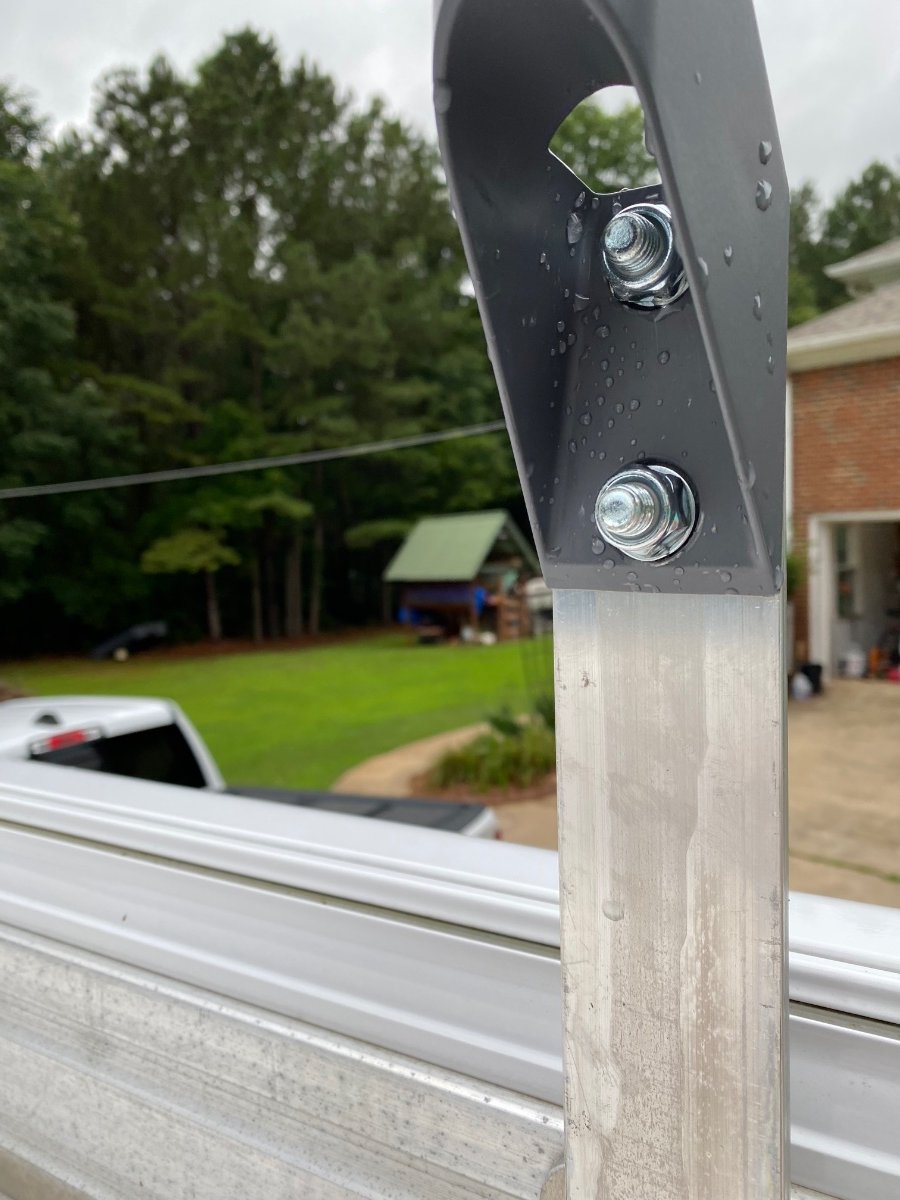
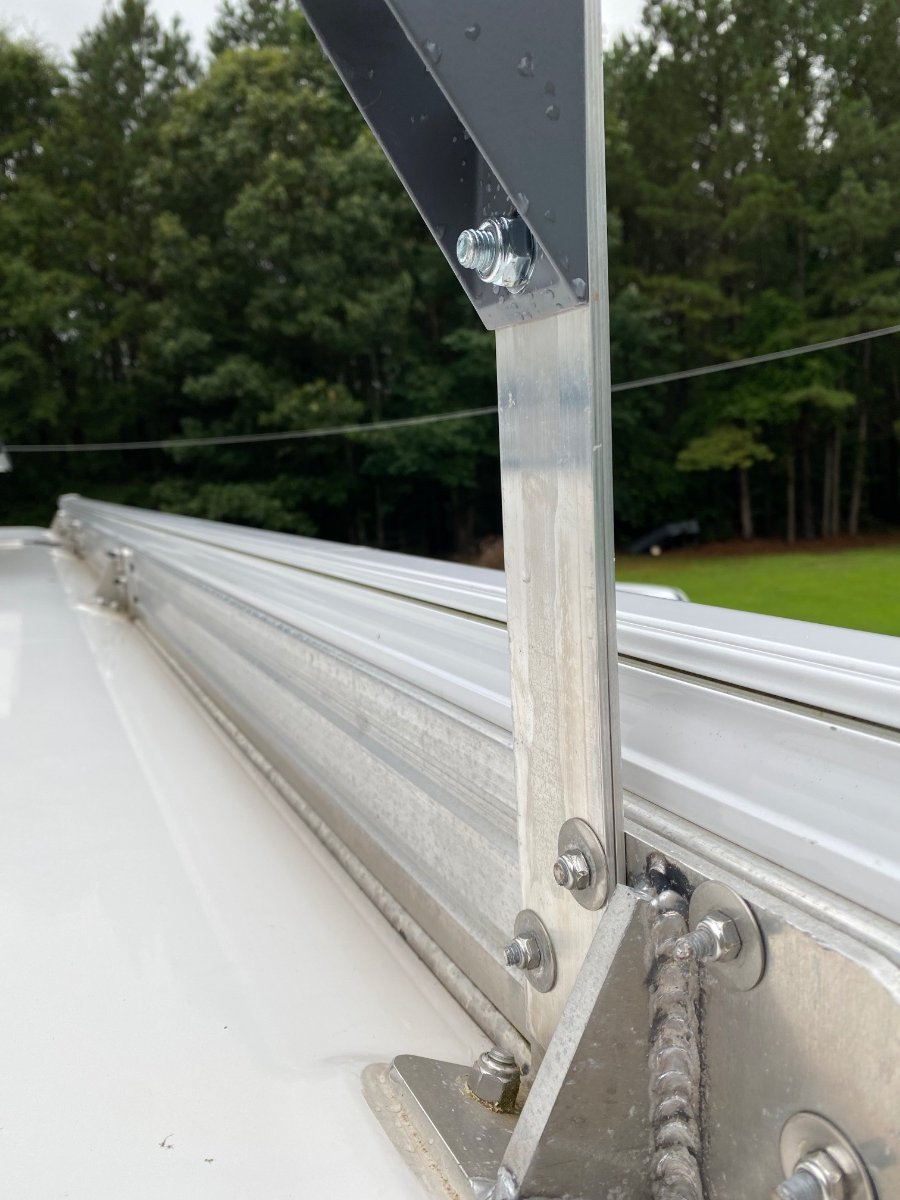
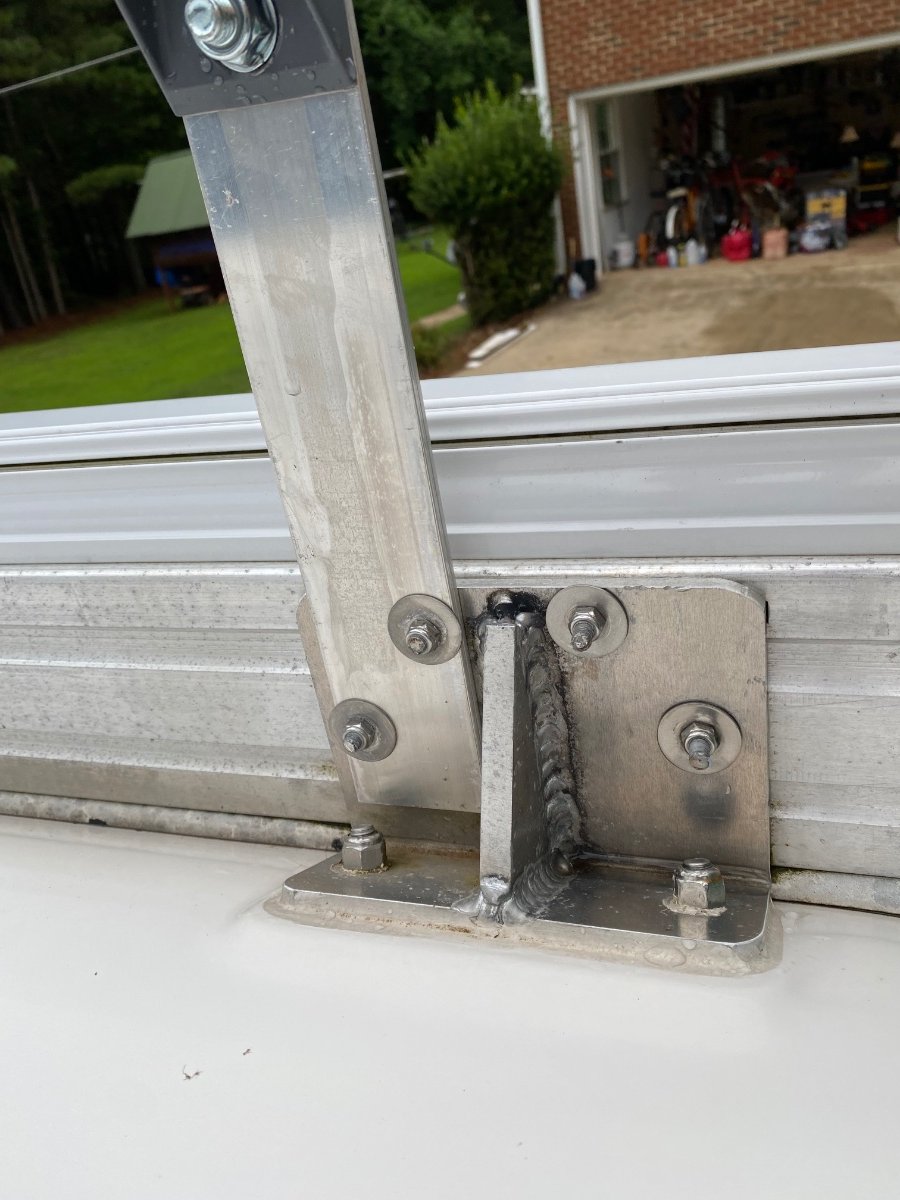
Very creative idea. I also ran into the issue of mounting bolts that were offset. in our Domestic awning rail (below), I drilled and tapped 2 new holes that I installed 2 bolts with thread locker. The front side of the bracket is flush with the aluminum mounting bracket.
1 point


-
Recent Achievements
-


")


")

