Leaderboard
Popular Content
Showing content with the highest reputation on 09/20/2024 in all areas
-
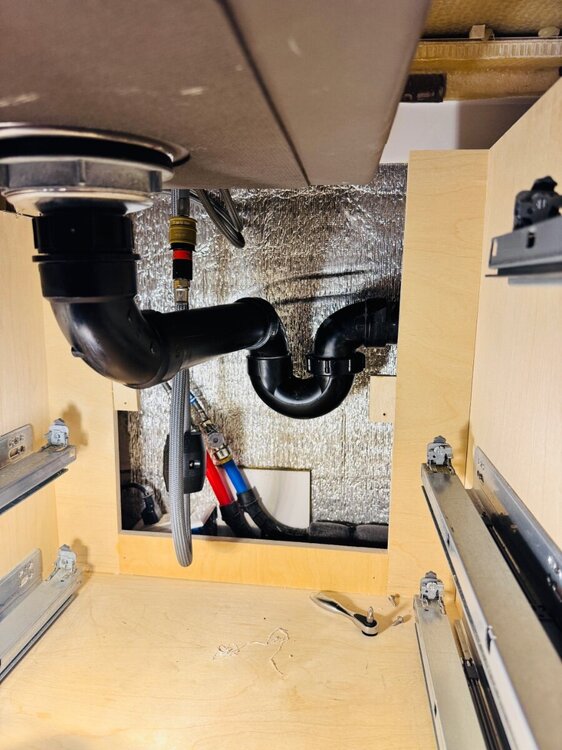
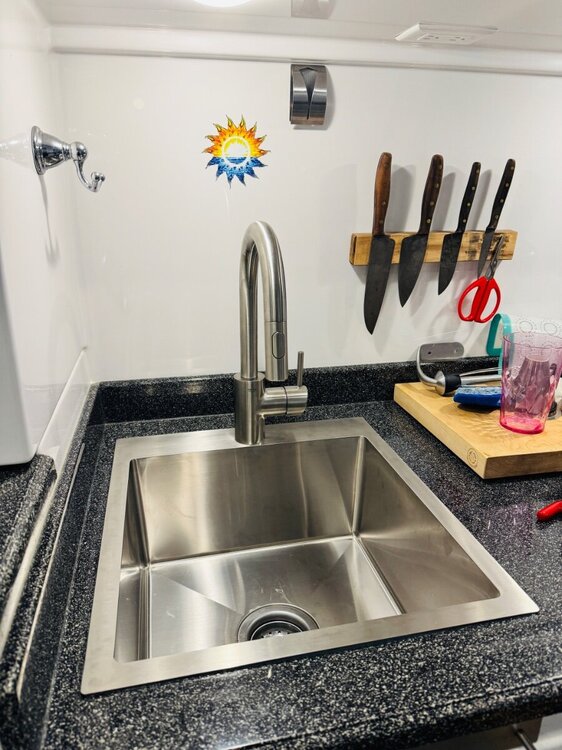
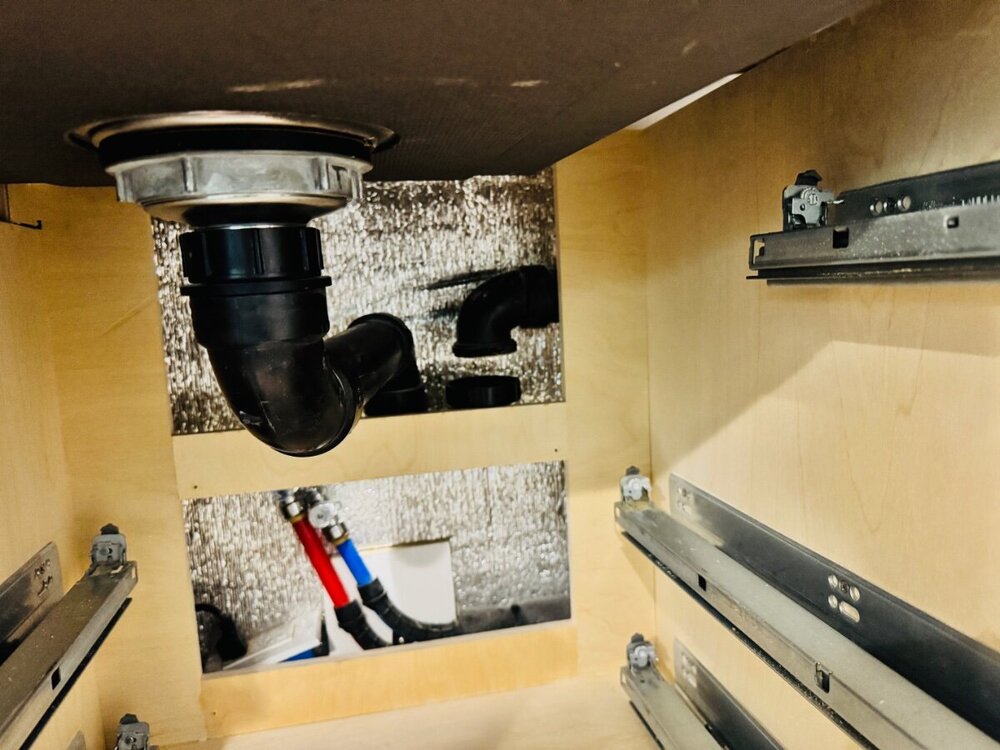
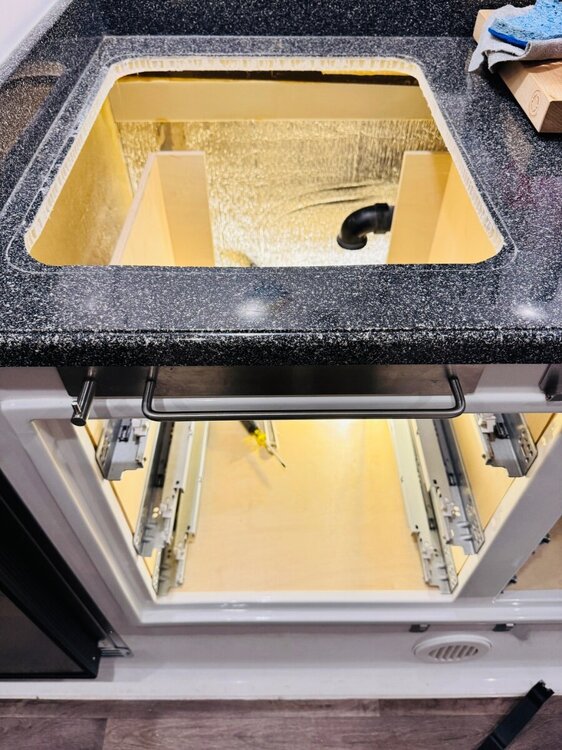
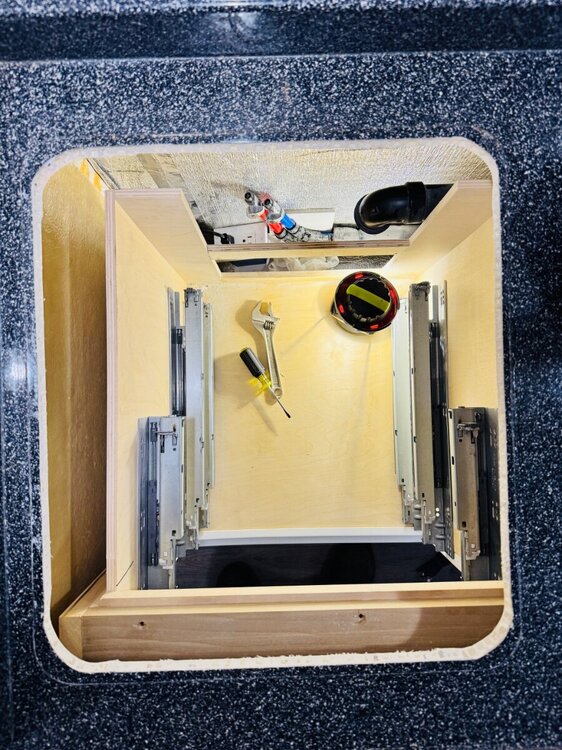
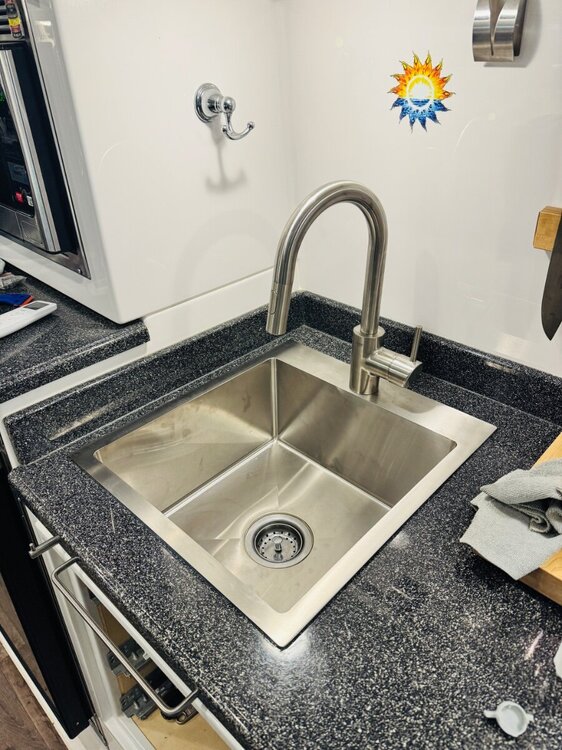
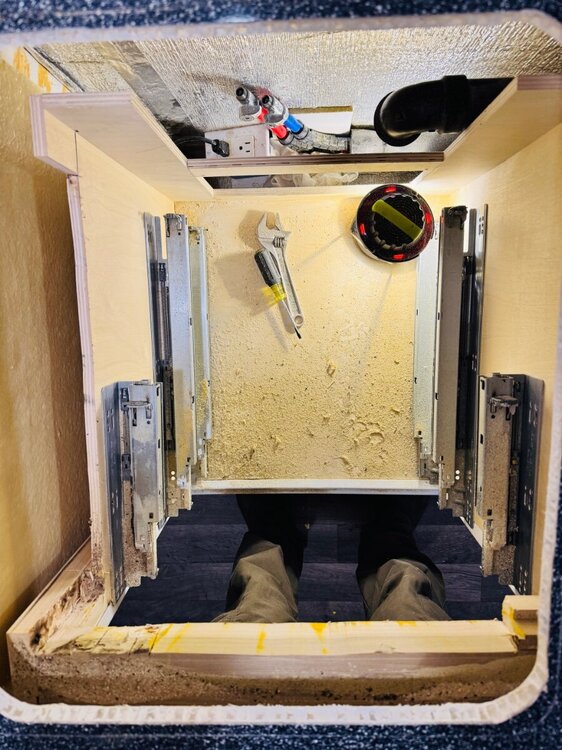
Another copy of @Snowball‘s mod just used different but almost the same components. Took a few pics. I was able to save about 2/3 of the upper front maple crossbar. Real trick since the sink is 2 in deeper was maintaining drainage grade. Had to remove metal tube securement (screwed to the back of the cabinet) and was able to reuse the 1 1/2 in ABS but may end up cutting it under road side bed to shorten a bit to get more of a grade. But seems to be draining ok… we shall see. Love the sink and faucet. SO much more useful. Just have to close up top left drawer with faceboard some how. Oh, I did shim the middle between the middle maple cabinet support and counter, the counter had small bow in it. Easily corrected, then was able to silicone the sink to the counter top. Amazon Links: Brushed SS Sink 17x19x9 18g sink, 11g sink rim https://a.co/d/ I wasn’t able to use the deep drain basket that came with it due to limited space. Grohe Bar faucet https://a.co/d/hK5IcRy Best, Mike2 points
-
Our beloved 686, one of the last 2020's and one of the first with solar+lithium, was involved in an accident 3 weeks ago. It was deemed a total loss. First, we are very thankful that no one was injured. Second, I'm posting this to as a reminder to review your current insurance position! And, so others can learn from our experiences. The needed facts: our Oliver was struck on the curb side then rolled to the street side. The TV was a F250 and suffered a bruised hitch and a hole in the tailgate. Things we learned: Be acutely aware that your lives can change in a matter of seconds. Keep digital copies of insurance info in your phone wallet or shared drive. Go download their app now and make sure you can login! Even at the accident scene, we were naive enough to think "we will just step inside and get it from the cabinet". That's just not going to happen in a roll over. Know and understand your coverage. Go way beyond the declarations and read the policy. We had "Replacement cost" but there were caveats and rules that we did not know! Know if you can use a repair facility of your choice. If you can, are there penalties for going over on parts or labor? Our accident occurred 6 hours from our home. After grabbing a few things, we drove straight home. Then 4 days later, accepting the reality that it might be totaled, we drove the 12 hour round trip to gather and salvage anything we could. None of that trip was covered on our insurance! I had always assumed the things inside were covered; on our policy they were not! Get a dashcam! Understand and know that in today's insurance world, no one is coming to appraise, touch, or review your damage. You are going to use an app and take 9 pictures (one being the odometer. Yep, they will want you to photo your odometer on your trailer). You will probably not have an advocate. We purchased our insurance through Roamly (listed as our agent). They had a message that said "call your insurance company, not us". That being said, OTT was our ONLY advocate. On our return trip to the impoundment lot, we took over 170 detailed, labeled and scaled pictures and shared those with Mike in service. In less than 2 hours we had an estimate of the damage from him ($77,000). Oddly enough, after about 6 days, we got a repair estimate (from the 9 pictures) from the insurance company that was $1000 more. Keep a record of every penny you spend on the Oliver from the original bill of sale down to the rug in front of the door and the command hooks on the wall. With the help of Oliver and our own record keeping, we raised our valuation by $10,000 from the original insurance valuation. Take lots of pictures. First at the accident scene and then of the damage. Get every angle and multiple zoom levels. Again, please set aside some time and review your insurance! Over all, our story ends well - we have ordered a new Oliver!2 points
-
LOL...sorry, have to blame it on siri, or my big sausage fingers!2 points
-
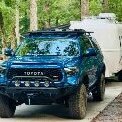
I might have to report you, calling my Toyota Tundra a Nissan is offensive! 🤪2 points
-
Yes - in tact it was. The stairs were broken off but, they took the brunt impact. This pic shows the impact point. The right-front axle was sheared off the frame from the impact and the right-front rim bent. Major structural damage? All 4 pieces of the hull where damaged somewhat so I would say damage was more extensive rather than severe except at the impact point. The interior dividing walls were toast (bathroom and closet). I went around the mid-joint of the exterior hull and found 1 small place where they looked separated. To the naked eye, I could not see any issue to the frame even at the point of impact. But, based on other clues, it wouldn't surprise me. But, everything shifted - the second pic is a fork wedged under the pantry. It was in the top drawer on the other side of the trailer. In one amusing exchange, the sheriff radioed his dispatch for a rollback to haul the Oliver. Dispatch called back saying the towing company was bringing a dump truck and looking for someone with a skid steer. When they finally arrived the tow company apologized for the delay - in their experience, an RV rollover ALWAYS required a skid steer and a dump truck!2 points
-
You bet John. We are well prepared for the cool weather with a little goose down and LP tanks topped off. Ha! We will take the cool temps over heat any day! 😊 Talk Soon!2 points
-
FWIW.. Completed the last recommended torquing of my new Alcan 5 leaf pack 9/16 Ubolts at 596 miles. All 16 nuts were in spec and good to go except on which required a 1/4 turn. I will recheck again whenever we decide to head back home to NC. Off to Yellowstone tomorrow. Happy and Safe Travels!2 points
-
This modification was a break-out from an old and long thread that Mossemi started: “Only one switch to operate streetwise and curbside lights . . .” It concerned a common complaint that the curb side porch lights can’t always be used because the street side lights also come on and they can annoy the neighbors. Mossey posted a new photo of the main switch panel wiring yesterday, and it showed a ground wire labeled “porch light”.” I hadn’t noticed it before, so I tried my circuit signal probe again and finally found where the circuit crosses over to feed the street side porch lights. It was in a sheathed wire bundle behind the attic side board, deep along the right bottom corner. It can’t be reached through the attic without disturbing the insulation, but it can be reached through the right rear speaker hole. The duct tape dust cover will have to cut open then re-taped afterwards. The wire bundle has enough slack to splice it though the speaker hole. I pulled the positive “red” wire out of the “split-sheath” wrap and verified it was the right one with a clamp-on amp meter. It read something like 0.9 amps with the lights on. I cut the wire, capped the end coming from the old switch, and spliced a new blue wire to the lights end. A Wago connector was easier than trying to crimp a butt splice in the tight space. The new wire was sheathed for extra protection and routed to the main switch panel. It was tie-wrapped to an existing wire bundle on the forward edge of the attic ceiling. With the left attic side board also removed (they are held by two small lag bolts), the wire can be passed into the left side upper cabinet. A short stiff wire will help fish it through. The upper cabinets have thin laminate floors fastened with a few Phillips screws. Remove them to expose a channel that the new wire can lay in all the way to the main switch panel. I also removed the microwave outlet for more room to feed the wire into the switch panel area; just snap off the cover plate, loosen the two mounting screws slightly so the wings fold in, and it will come right out. I had a round rocker switch in my stash, and they are also available from Amazon. I installed it in the blanked hole for the “Street Awning” switch, and blacked out the word Awning with a felt marker. The switch just says “Street” now, for the street porch light. Very unprofessional, but I hope someone will had a better solution. If you don’t have a blanked spare switch hole, then a switch can be mounted on the other side of the switch panel, on the inside cabinet wall. The switch was wired with the new blue wire going to the middle terminal, the red hot +12Vdc to the bottom, and the yellow ground to the top (needed for the blue neon indicator.) The other ends of the hot and ground wires went to existing six-port push-in terminals that feed other switches. There were some unused ports. This is easier than it sounds, but it’s good to have a clamp-on amp meter and/or circuit tracer to help find the street porch light wire. I included a photo and list of the tools I used. The inexpensive brands work well enough, and I’d recommend owning them for other electrical projects, troubleshooting and repair work: Digital clamp-on ac/dc amp meter, also a multimeter, can check your shunts and loads too! Circuit tracer for finding wires, shorts, and breaks Metal fish tape, I cut short pieces off the end for these kind of jobs Cable tie gun, you will wonder how you ever got by without one Auto wire stripper, just makes it easier Thomas and Betts crimpers, 50 years old and still my favorite go-to Inspection mirror Fluke multimeter, when accuracy counts Cheers, Geoff1 point
-
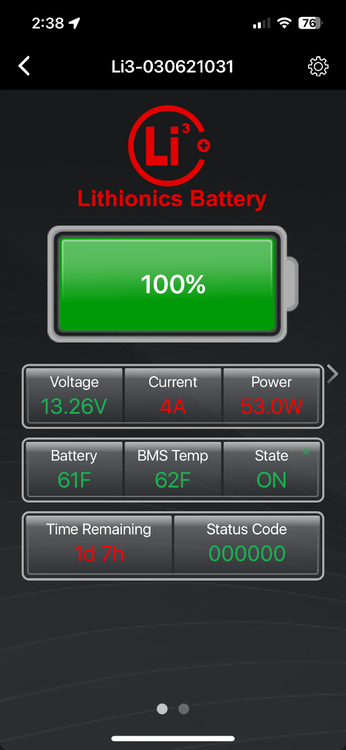
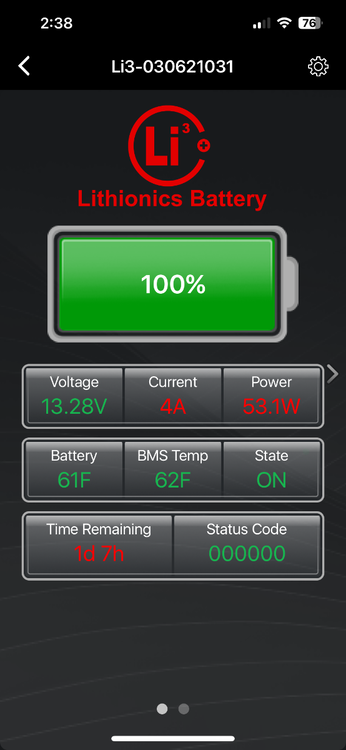
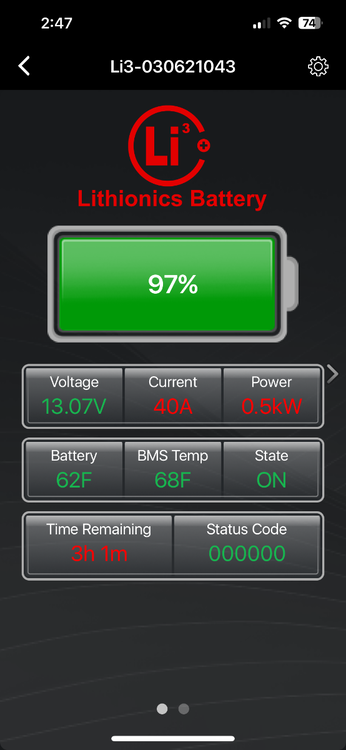
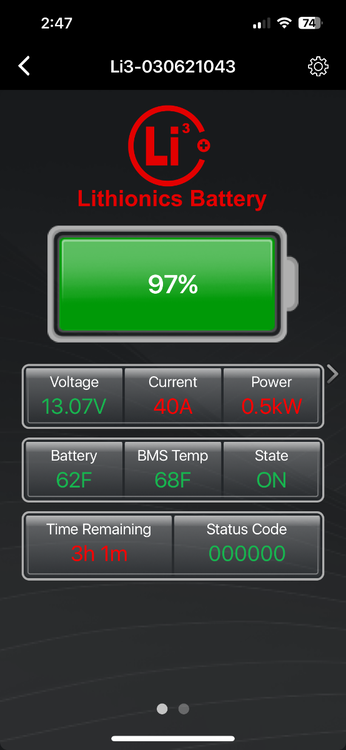
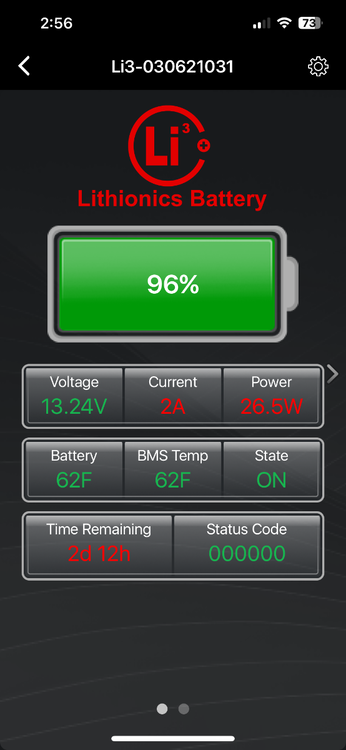
we just had our Dometic ac replaced with the atmos 4.4 unit and we are so happy so much Quieter now I am using the lithium batteries and I will attach a few pics. At least when boondocking we can cool down for a couple hours on a hot afternoon. for us it is a huge improvenent over the Dometic our Olliver Elite came with when th compressor cycles on each battery is showing 37 amp burn After 1 hour battery level down to 96 % IMG_1675.mov1 point
-
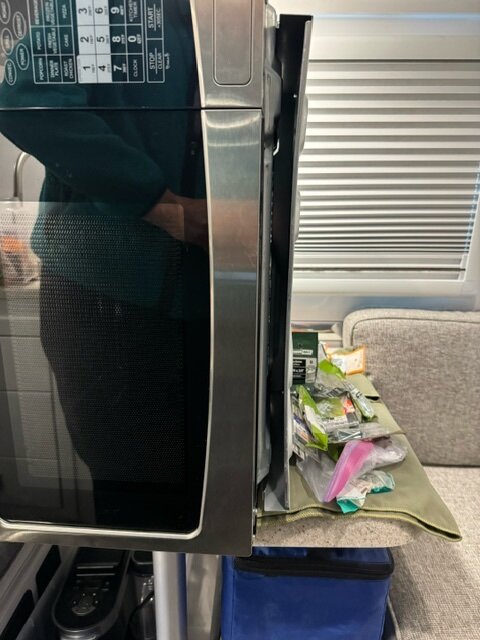
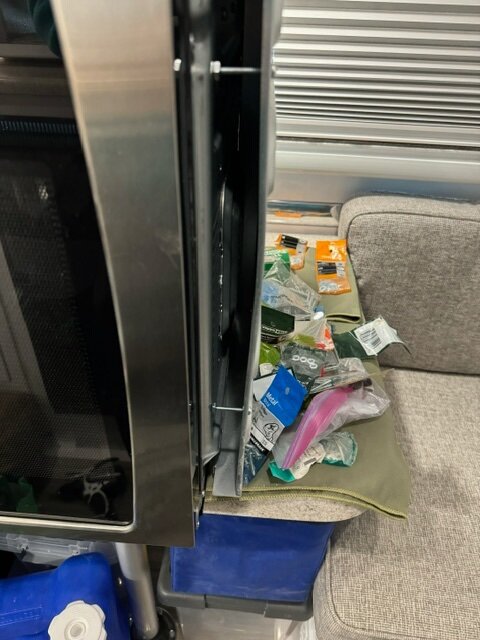
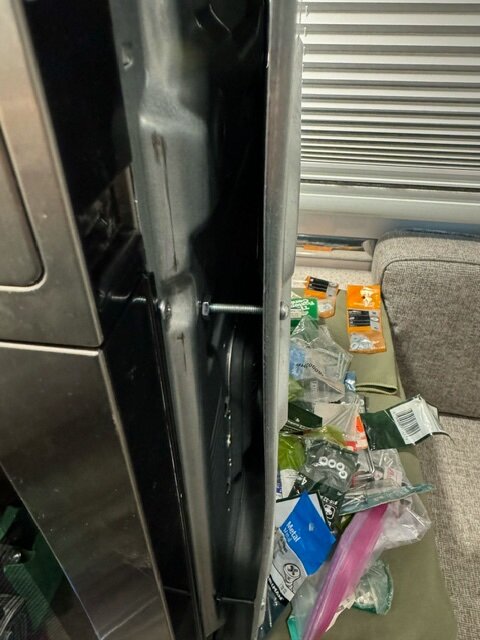
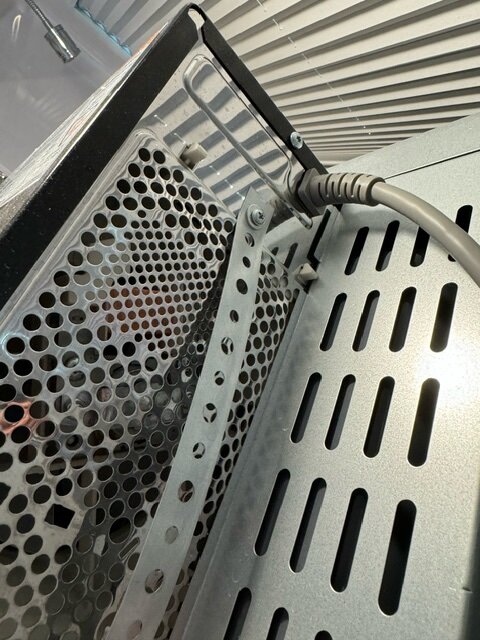
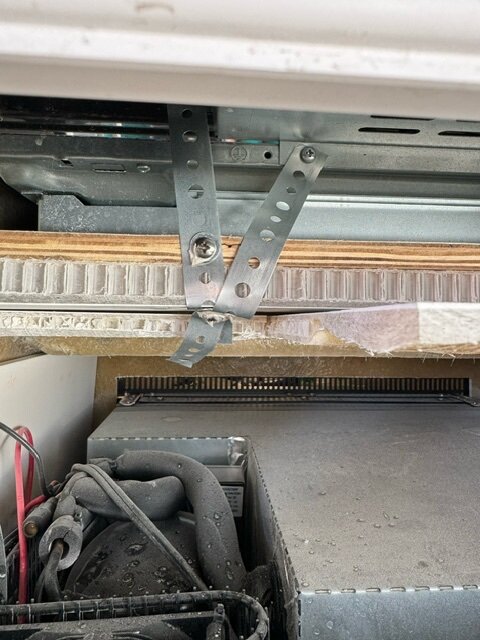
We had a similar but less severe issue. When I look closely at your picture, I notice a small crack in the metal trim around the microwave in the corner. We developed similar cracks in all four corners after a trip to Fruita on I70 from Louisville. We were still under warranty and Oliver sent us a new trim piece along with some metal perforated hanger strap. They recommended that I attach a piece of the strap to a preexisting screw on the back of the microwave and then to the platform the microwave is on. While I was working on the micro/convection oven, I noticed that the center of the metal foot it stands on had partially collapsed in the center. I reinforced this with some screws and lock washers that reinforce this area. We haven’t had an issue since however I did tighten up the hanger tape and and move the lower end of the longest piece to its own attachment site to the left since this picture was taken. The First three images have the microwave on its side. The last two were take through the vent on the outside of the trailer above the fridge and below the microwave/convection oven. One other thought, I was unsure how hot the outside of the oven gets when using convection and therefore tried to steer clear of blocking airflow or putting anything combustible close the oven. Hope this helps.1 point
-
Thanks Bill, I entered a ticket with Oliver, we'll see what they say about it. This is an idea I have had rolling around before the mounting problem. I would really rather have an oven/air fryer over the microwave. The only thing I usually use it for is heating up leftovers and my morning oatmeal. But I could use the air fryer for leftovers and cook my oatmeal on the stove top. What specific model did you replace your microwave with?1 point
-
Rich, you have what I was referring to as a late model HD beast! Not sure of our total payload, but with Chris, Charley and me inside and loaded with all tools and camping equipment, I weigh our TV at under 7400 LBS. Estimating 650 LBS hitch weight (10% of ready Oliver weight), and GWVR at 8800 LBS, it nets 750 LBS available payload. We can hit some flea markets along the way! 🤣 John, I went through the CAT scale in August when we went camping, fully loaded (like when we will go full time end of October) the numbers were: Truck: 8960lbs (gvwr: 10850lbs) Trailer: 6380lbs (gvwr: 7000lbs) Tongue weight: 700lbs WDH is the Anderson. I know I don’t really need it but it was installed for my Touareg before we upgraded to the Chev 2500HD so might as well use it. Interesting numbers with the Anderson and how weight is transferred from the tongue to the trailer and Chevy front axle.1 point
-
Well - yes and no. My hull 117 has a completely different microwave than yours. However, I had much the same with regards to the symptoms you describe. The "problem" with mine was the lack of a bracket that wasn't installed when Twist came down the production line. A simple phone call to Jason Essary cleared up the issue and got me the parts needed to fix the problem. Bill1 point
-
My 2500HD Custom has 3658lbs payload! 😀1 point
-
I have had two of the Anderson levelers break. One after five years and one after two years. They do warranty for life and no issues getting one replaced but you must pay “shipping “ cost of $13.751 point
-
Sure, 2WD is the way to go with a TV, more payload and less climb getting up into the cab. Older 2500 here, not like the HD beasts they market today. User manual states use WDH for hitch weight over 500 LBS. My truck has the Dodge OEM "Helper Springs" too, but they do not engage soon enough on a light trailer. I've tried w/o the Anderson and it rides much better with, less bounce at the hitch, steering feels more grounded. I tried many ways to mount as been suggested. If jack height and being an inch back does not work, I just loosen the chain nuts. Then I drive out of the campsite to straight clean pavement and get down there with a 1/2" drive ratchet and quickly tighten to 5-6 threads showing (I can feel the right torque) before getting on the highway.1 point
-
How sad, seeing your Ollie 'laying down'. It's like a family member being wounded. Glad no human or pet was injured. Thanks for posting this for all to learn from.1 point
-
Glad to hear everyone is okay and thanks for sharing your lessons learned! Mike1 point
-
I'm so sorry that you have had to go through this ordeal but I'm glad to hear that no human was hurt in the accident. Its also nice to hear (but not surprising) that Oliver was a great help to you. I keep telling people that I've never dealt with a finer group of people/company. For me, they are really what makes the Oliver Travel Trailer so special. From your picture above, it appears as though the Oliver basically remained in tact. Were there any cracks in the exterior or other signs or major structural damage - of course I'm assuming that the exterior was roughed up a bit and I noticed the odd angle of that axle. Additional pictures would be of interest if you can share them since there have been relatively few Ollies involved in major accidents. Bill1 point
-
Oh boy! Your’e going to get some different opinions here. But it’s Saul Goodman 😃. I think your’e drawing is right. . . that's if you are going to use a polarized breaker. However, a polarized breaker may not be the best choice between the charger and battery. Here is my logic: The breaker mainly protects the wire in this application, so you want it close to the power source. In your case, you have two power sources, the battery and the charger. The battery has much greater current potential so it should have priority. Additionally, any short circuit condition will trip the charger’s AC input breaker, but the battery will cook the wire if not properly protected. Sometimes this is not intuitive, and charger breakers are installed backwards, or at the wrong end of the circuit. That’s why I’d prefer to use a fuse between the charger and battery, because it protects the wire in both directions and it doesn’t care how far it’s from the power source. In other applications, such as you’re 40 amp + busbar feed, breakers are great. But be mindful of how the solar charger is tapped in, so that the smaller gauge wire is properly protected from the battery too. Consider a fuse or non-polarity breaker if you can find one. I love this forum, some great discussions. I wish you guys were my neighbors.1 point
-
Thanks for the updates :) Enjoy Yellowstone...hope you brought sweaters :) Happy Trails, Us1 point
-
Good plan in general Dave. It's a good simple solution. I always enjoy hand-drawing plans on good old-fashioned graph paper! First, do not mount +positive buses, breakers or other connections to a conductor, e.g. aluminum. Simply dropping a tool could touch a hot connection to the grounding conductor. Use some kind or plastic, PVC, or other non-conductive mounting board. 1/4" HDPE, or thicker if preferred, would work well: Amazon.com: HDPE (High Density Polyethylene) Sheet, Opaque White, Standard Tolerance, 1/4" Thickness, 12" Width, 12" Length by Technology Island (12" X 12") : Industrial & Scientific This may not make sense initially but turn your 50A breaker the other direction. DC breakers are polarized and work on magnetic force and have to be in the direction of current flow. They are marked BAT on one side and AUX (load) on the other side. Normal use is that the battery supplies current through the BAT side of the breaker to the load. In the case of the charger, current is pushed the other direction, from charger to battery, so the directional breaker must be wired in reverse; charger to BAT post and batteries to the AUX side as they are the physical load when charging. The copper bar is a good idea but will not easily fit given one post needs dual connections. You could easily make a short U-shaped jumper cable with either 4 or 6 AWG wire. Lastly, the BAT post of the 40A breaker needs to be connected to the batteries without passing through the 50A breaker as in your drawing. It will still be on the AUX post but after you have switched the direction of the 50A breaker it will be on the right side of the breaker in your drawing so that power to the +tive bus is not going through both breakers. If you like, post a revised version of your drawing and I'll take a look to see if you if you understood my suggestions. Thanks for doing this, because in advising you, I just reviewed the wiring in my recent upgrade and found I had a directional mistake. Easy to change and I will correct ASAP, thanks again.1 point
-
1 point
-
1 point
-
I would love to have a 3/4 ton truck and be done with the hitch but our garage is under the house and there isn't enough headroom. In fact, the Tundra was the only half ton with tow package that wasn't too tall to fit.1 point
-
There are some good comments so far. It was interesting to learn that some solar panels were not meeting their rated capacity, and the sun doesn’t always cooperate either. This is a positive for the DC to DC charger because they have a more reliable output. It was also good to hear that others run their ac off the DC to DC charger, this is a strong selling point IMO. Yes I was disappointed when the 50 amp Victron charger came out after I installed the 30 amp, it’s way improved in efficiency, thus reduced heat. I'm surprised that OTT is not using it. On the bright side, the 30 amp uses smaller gauge wire, but I think a cooling fan is still needed because it starts derating at 104 degrees. This could be less than ambient air temperature when you'd want to run the ac, and you could run down the battery faster if the charger output is not 100%. From what I've seen with the 50 amp specs, this should't be an issue. This raises another important point that trailer folks should be aware of. Most of the DC to DC chargers are used in camper-vans and boats with short wire runs to the alternator, and the multitude of videos and wire specifications reflect that. However, trailer installations have much longer wire runs, typically around 50 feet one way, so they will require larger wire to minimize voltage drop. Even the Victron 50 amp is sized for maximum #4 wire, which would be too small for most trailer applications. Alternator capacity was not something I've given much thought to, because mine was something over 200 amps. It’s good idea to check your'e alternator rating by looking up the alternator code or use an on-line VIN decoder. I believe most newer trucks are at least a 100 amps or more. TV voltage errors should’t be a concern because Victron has safeguards to shut down in low voltage conditions, and they are designed to work with smart alternators that are constantly adjusting output for better fuel economy. Cheers! Geoff1 point
-
Lots of ways to do it out there, but most common recommended is jacking up the front of the trailer (also lifting the truck) to provide slack. I did this for a while, but disliked the extra work the jack needed to do to lift the ass-end of the truck. Instead, I introduce slack by overlapping the hitch and ball. I haven't adjusted the nut since Chris Scarff did at the rally in May 2023. When you are hitching up, back the truck under the ball like normal. Then, back up another inch to inch and a half until the nose of the hitch almost touches the ball mount. Now you can easily slip the whale tail on without making any adjustments. It even works at odd angles (within reason) where other methods require dead straight. Unhooking is the opposite: with the hitch still on the ball, open the bail, raise the tongue until the trailer until the ball falls out, back up an inch or so, and drop off the whale tail. Done! Other than the time I needed to hook up almost 90° to the trailer, this method has worked every time. And no extra strain on the jack! I hope that helps1 point
-
Solved! I did some more extensive probing and found the elusive street side porch wire. This thread was pretty long so I decided to start a new one for how to add a second porch light switch, please see the new post titled “How to add a second switch for the street side porch lights. . . finally” Thanks Mossey for that photo of the porch ground wire. I love the collective wisdom and ideas in this forum, and that picture it’s what started me on the right path! Cheers! Geoff1 point
-
1 point
-
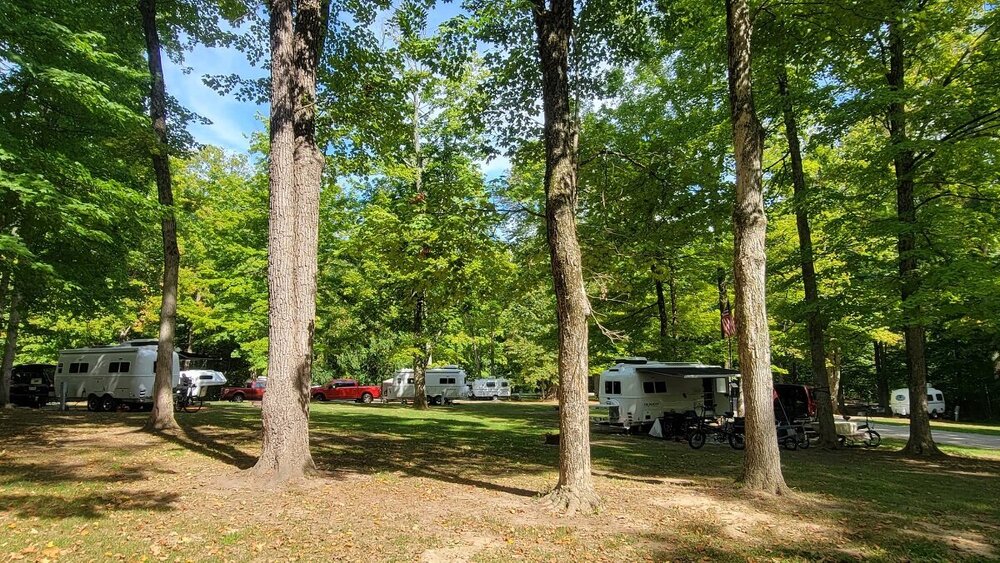
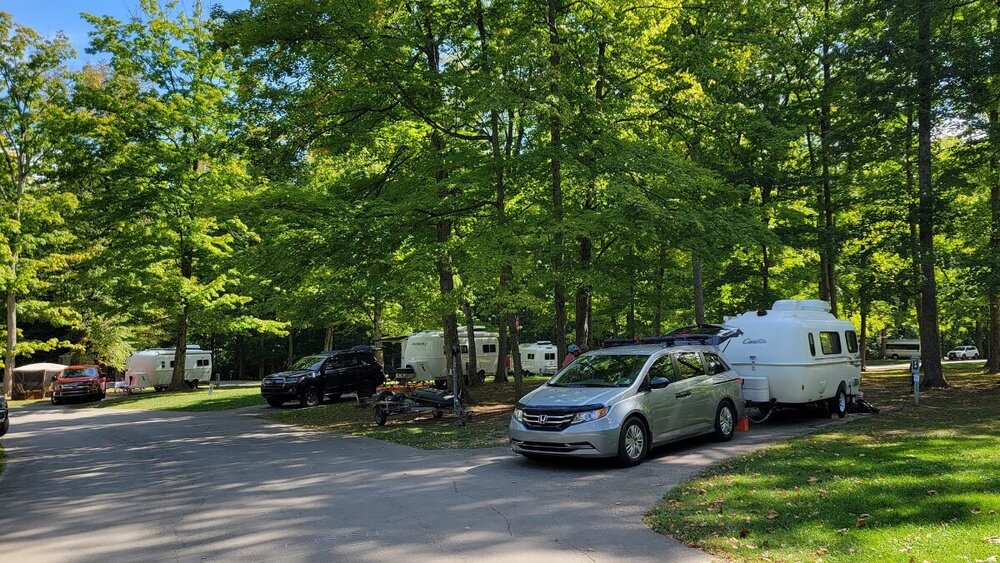
Three of the six Olivers in attendance at the 2024 Ohio Fall Annual Egg Rally, held at Cowan Lake State Park, in southwest Ohio. @Ollie-Haus @csevel Matt & Sue Jones, Deb and me, the folks with the micro-truck at the Oliver Rally, who I've *again* forgotten their name, and an unknown E1 that pulled in but was not found while riding around. Plus a couple who spent about an hour looking at our trailer and talking to Claudia, who have found a 2019 EII and are considering buying it. A fun time, and beautiful weather.1 point
-
The Beech Lane and Anderson brands of levelers look to be the same in appearance and design other than in color, black and red, respectively. Although there is a diverse selection of levelers available, this tear drop ramp-type leveler pairs well with OTTs, especially when used in conjunction with a cell phone app leveling systems as @Patriot and @jd1923 refer. Reason being these systems will indicate if leveling adjustment needs to occur side-to-side, then the leveling ramp(s) can be positioned on the side to be raised and vehicle driven onto them until level according to the app. Set the TV emergency brake, position the wedge(s) of these setups, detach trailer, complete front-to-back leveling per the app utilizing the forward stabilizing jack.1 point
-
sorry to "pop" the bubble, but while many of us indeed DO use our three jacks to level (or even jack up one side to get the tires off the ground), Oliver advises against using them for anything other than stabilizing. Therefore, if you want to level the trailer you can use products like Beech or Andersen levelers (there are several very similar systems on the market, or a product affectionally know as "legos" stacking blocks or even assorted thicknesses of wood that (similar to the "legos") are simply placed under each tire on the side you are trying to raise until you get the trailer level. For the purposes of leveling the trailer (side to side) there is no need to really understand the suspension system. Just make sure that whatever you do to one tire on the side you are trying to level, you do the same to the other tire. Bill p.s. if you travel alone a reasonable amount of the time, levelers like the Andersens or Beech are well worth the price.1 point
-
Yesterday I had the Alcan 5 leaf pack installed at Alcan. This morning I decided to crawl under XPLOR for a closer look and check the torque on my 16 of my 9/16 Ubolts torque setting on the high nuts juuuuust to satisfy my OCD. I found in the short trip back to the our base camp (only 9 miles) from Alcan the Ubolts definitely required retorquing. Each of the (16) high nuts needed at least 1-2 full rotations to bring them into a torque spec per Alcan of 90’lbs. I am glad I checked these high nut fasteners as it is clear that the new Ubolts will stretch in a very short period of travel. This is why Alcan repeatedly recommends you check the torque on the high nuts and wetbolts. I will check again at the required interval of 50//50/500 mile mark. Passing this forward! Happy and Safe Travels All from Grand Junction, CO! You will need a 3/4” deep well socket which can be purchased alacarte at a local HF store.1 point
-
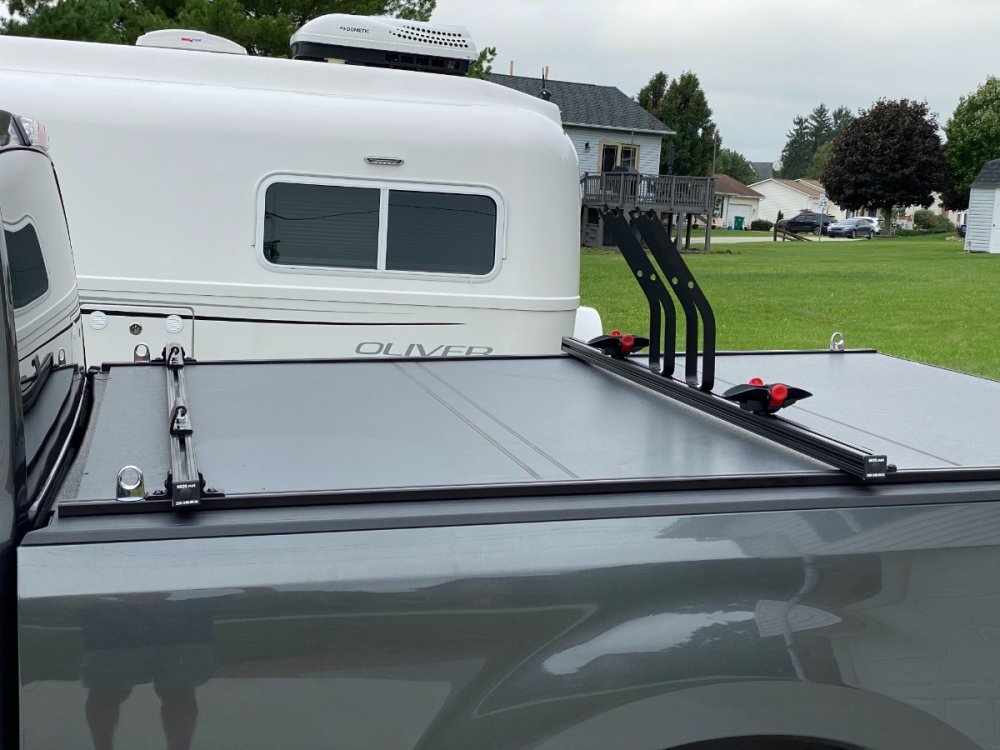
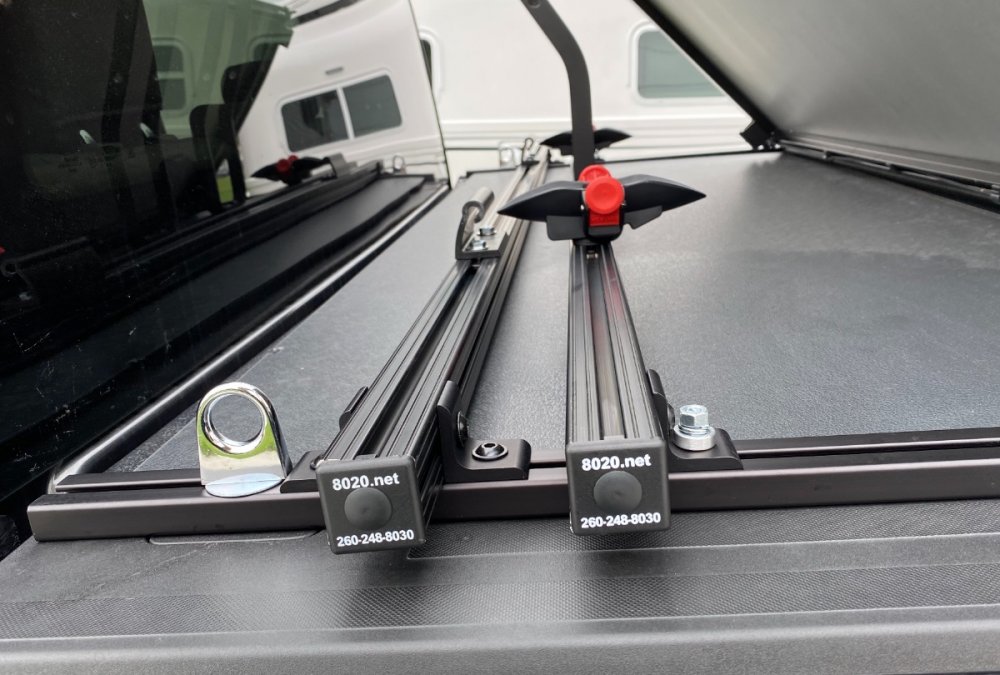
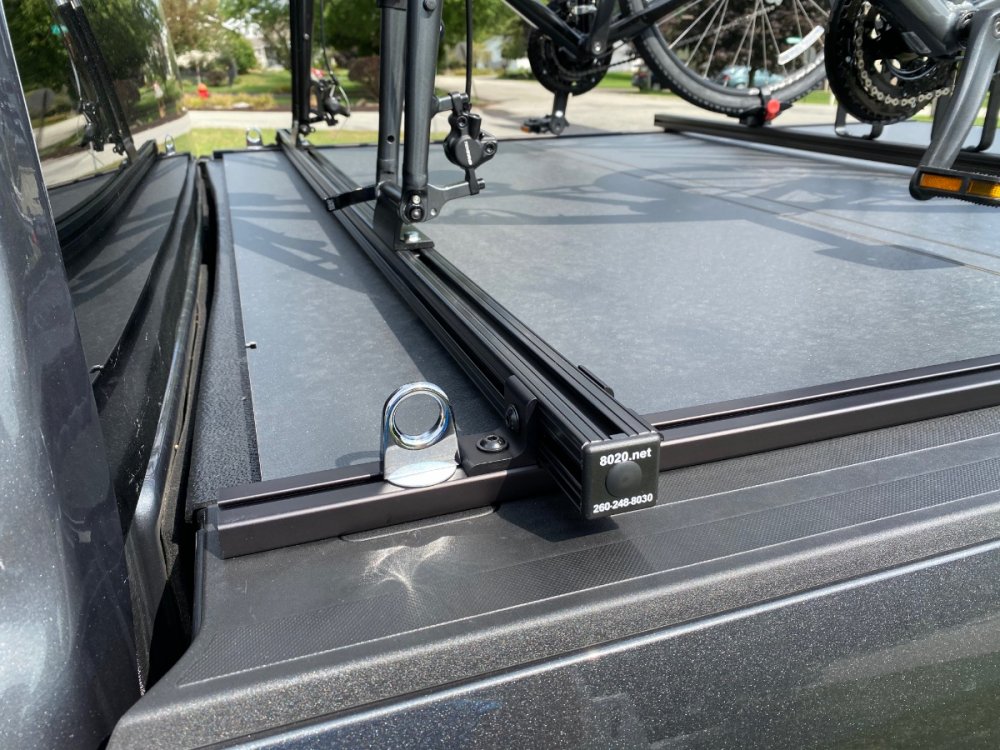
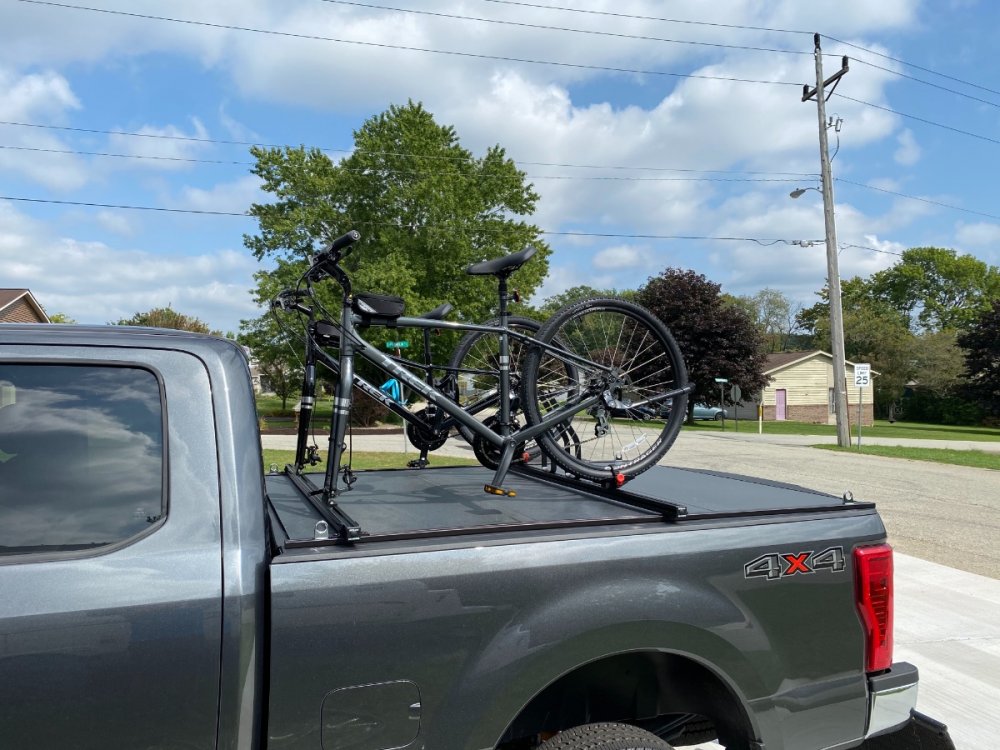
I have a WeatherTech folding hard cover and a home built bike rack mounted over that. Plenty of storage underneath for all the stuff that we carry. And the rear crossbar of the bike rack can be slid forward or removed so I can fold up the bed cover when I need full access to the truck bed. The bike rack framing is T-slot extrusion from McMaster Carr and the fork mounts and rear wheel cradles are from Amazon.1 point
-
Recent Achievements











.thumb.png.fbbde3486e933f990ff511bff8d6bda0.png)

