Leaderboard


Popular Content
Showing content with the highest reputation on 01/03/2026 in all areas
-
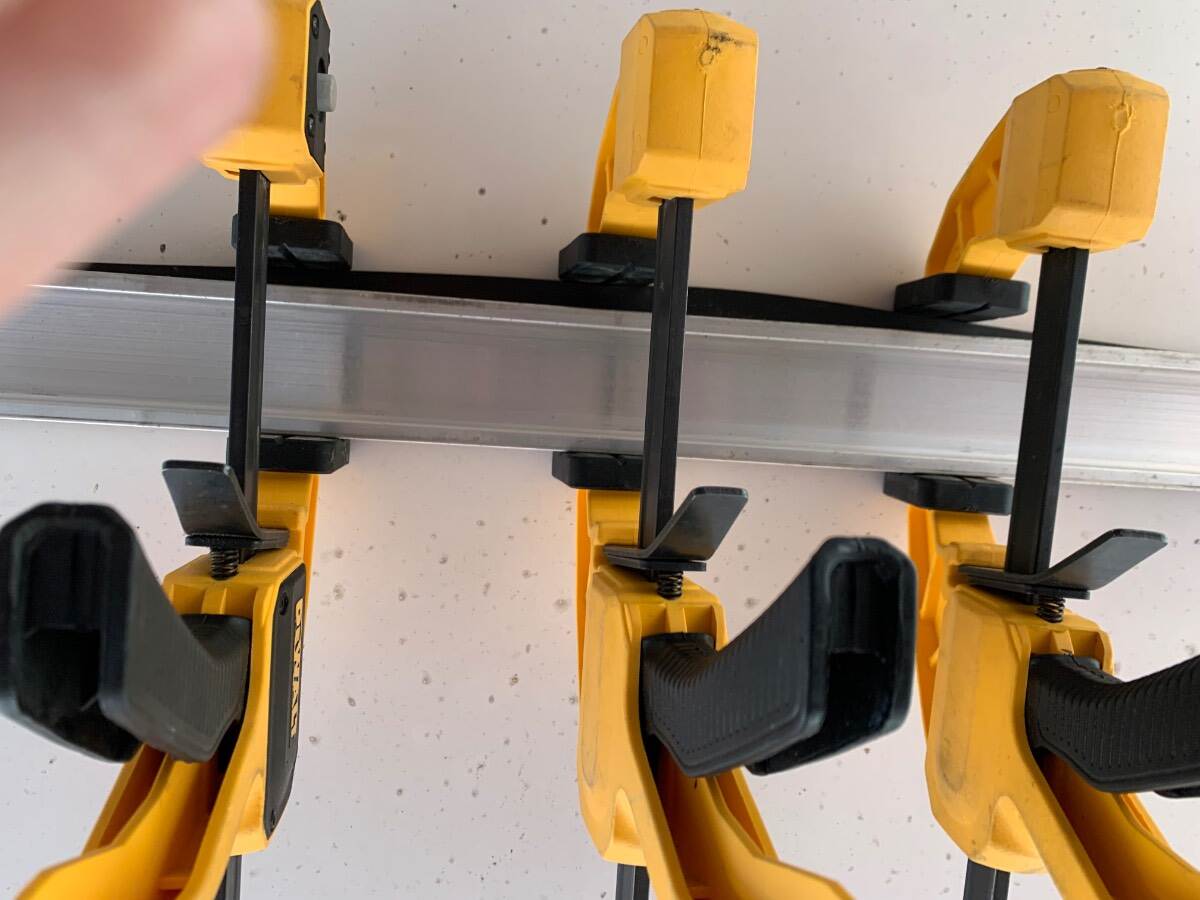
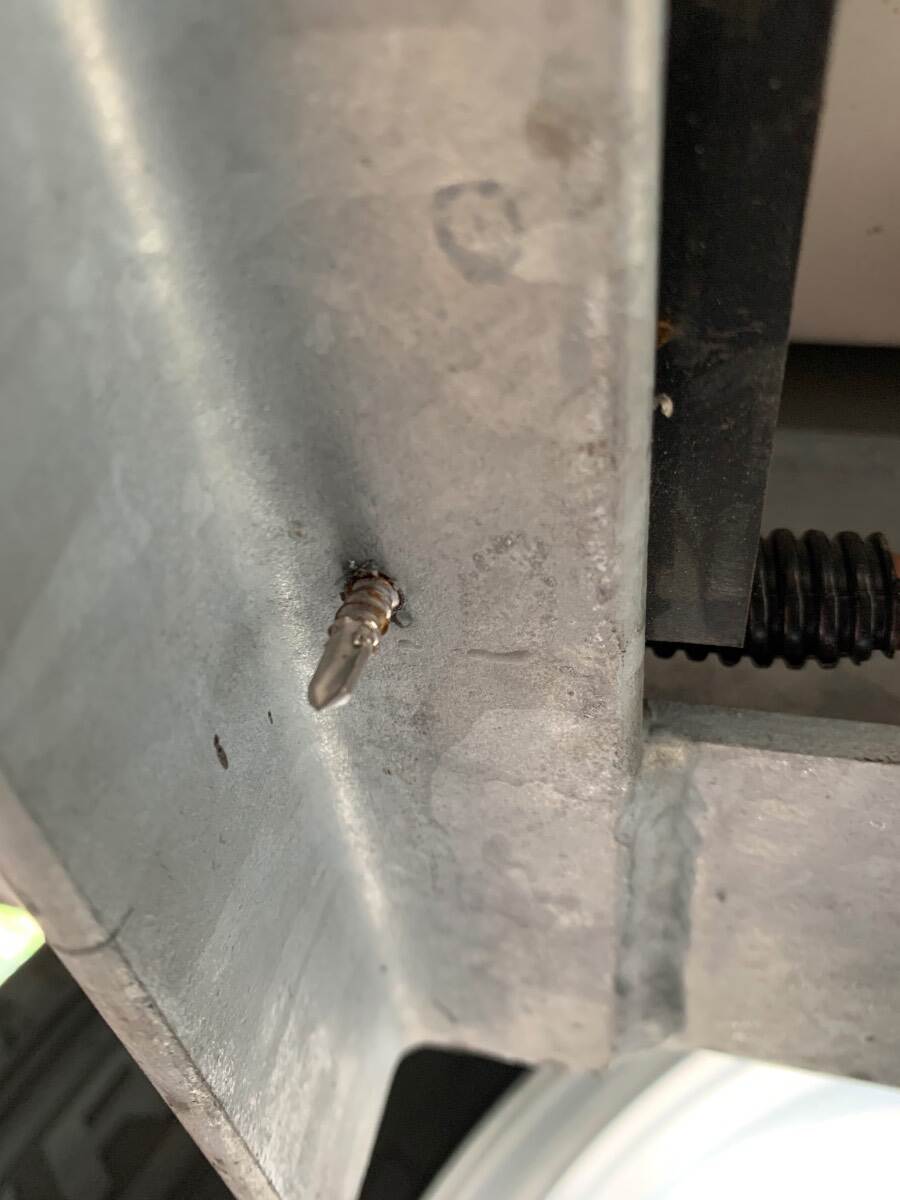
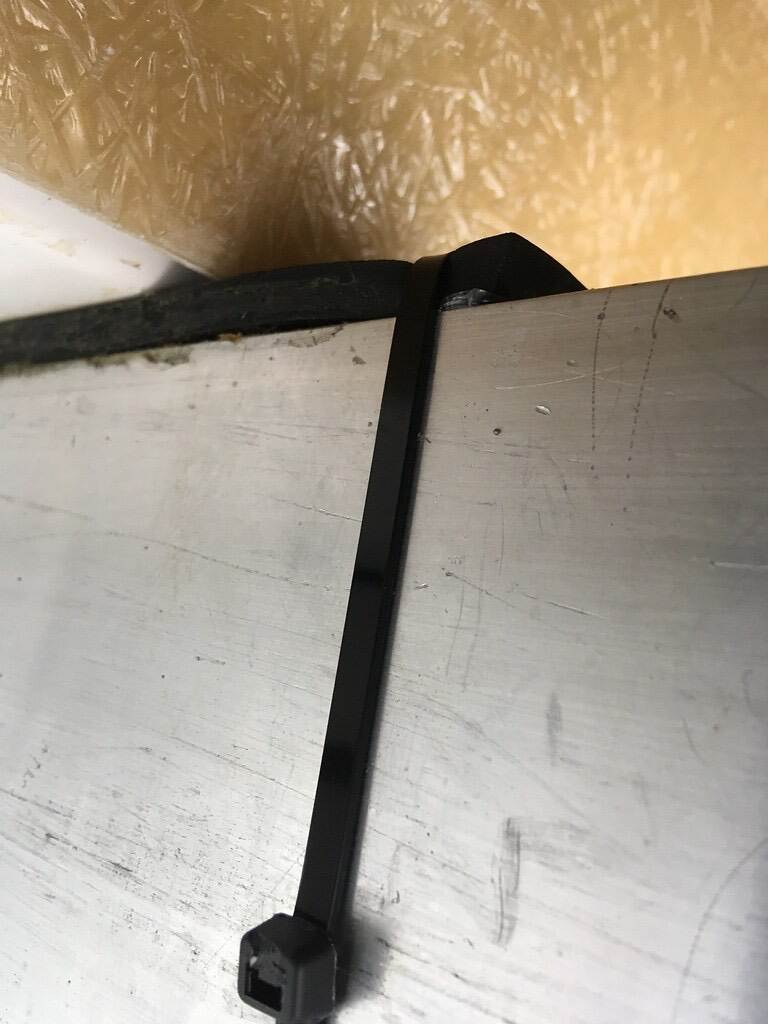
I’ve had rubber migration at the steps, A-frame and undercarriage cross beams; inspection of these areas is part of my routine maintenance. I have used slight pressure on the underbelly to provide necessary clearances by way of a jack and a 2x6 to distribute force on the fiberglass, then clamps used to further restoration. The strips of rubber at the cross beams have a screw at each end and thus, will not fall out completely. I was able to use zip ties at the A-frames where the rubber protrudes beyond the chassis to keep it in place. Unlike the aforementioned cross beam rubber strips, the step strips have no screw securement and can come out. The ones shown in the beginning photos at each side of the steps are the most difficult to reposition and secure.
 4 points
 -
I like JD's idea. Loosen the lug nuts and then turn the steering wheel and gently drive forward at say a 45 degree angle a foot or two. The side thrust should break them free. Or just use some Nevr-Sieze on the rims to avoid the need for the bigger hammer or fouling the lug thread approachs. Maybe a "Better Option". GJ4 points
-
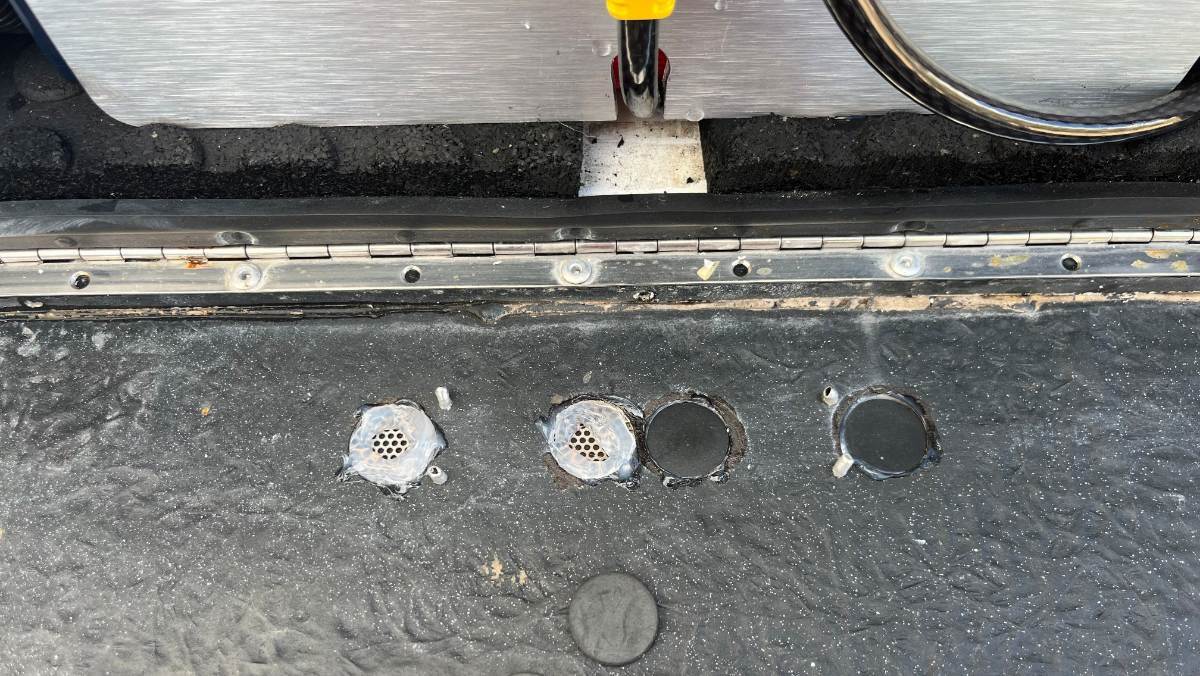
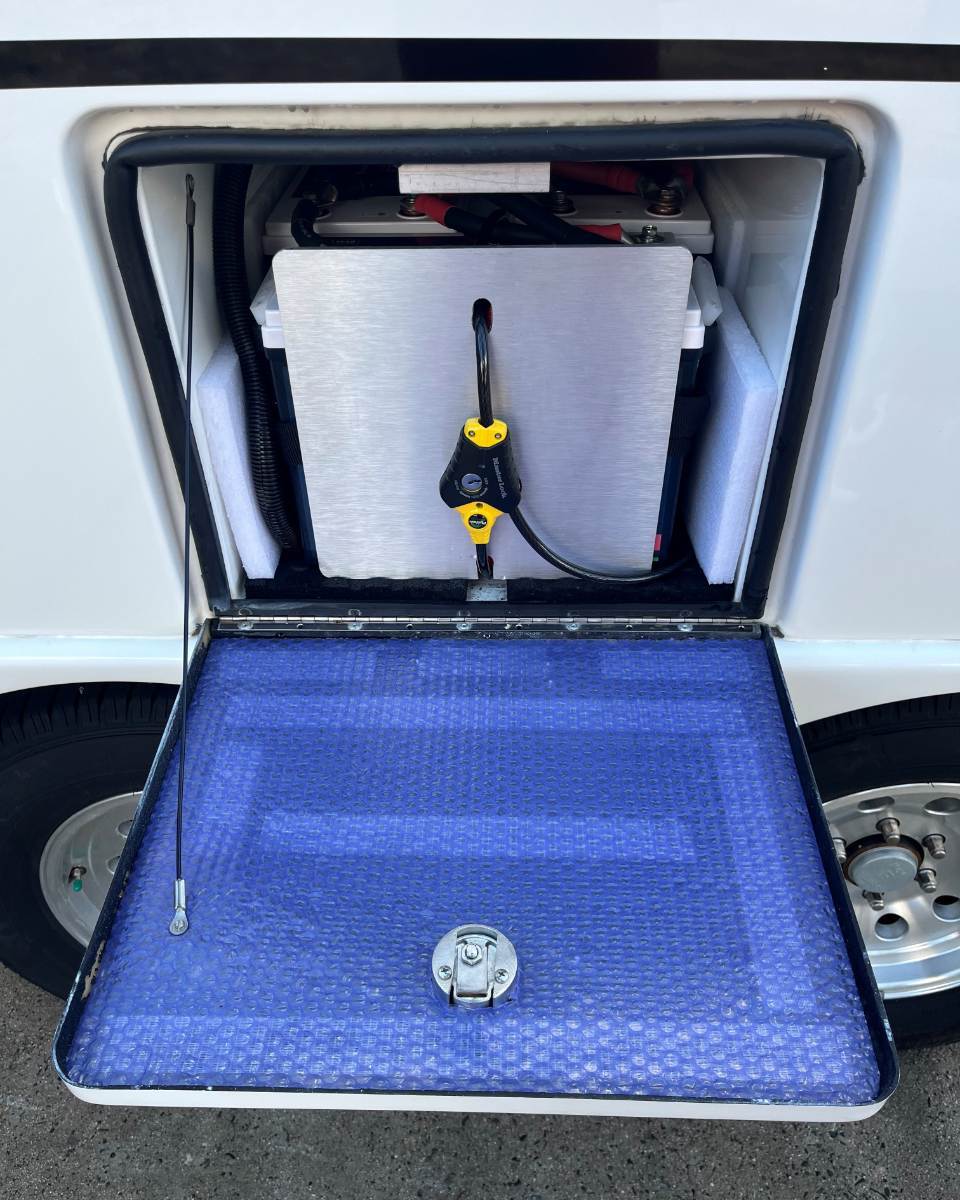
Final touches on the battery door to seal the vent openings and insulate the door... I put a bead of clear silicone around each hole. Then pushed in the 1" rubber disc into place (pic1). The silicone oozed through the perforated openings as I wiped off the excess with many small pieces of paper towels. Final step was to clean the silicone from the outside with paper towels soak in rubbing alcohol. Then I used some bubble insulation that came in a recent shipment. The lines you see are carpet tape to hold it in place (pic2). The insulation is only 1/4" thick and now the door is nicely tight when locked.
4 points
-
As always GJ - thanks for your sage advice. Leaning towards the self-heaters if just because its easier (lol)2 points
-
Big Tex: I'm in your camp. These to me as well are just a temporary fix. At highway speeds, I would not trust them very long. Much rather take a bit more time and String Plug it. This past summer I came across an elderly couple with a flalt tire, no jack and no spare in a borrowed church car. Great. The hole took three strings to get it to a moderate leak. Aired it up three times to get them off the mountain and to a tIre shop. The above screw type plugs would not have worked, but not without an air compressor being handy. GJ2 points
-
I did an overnight in the Ollie last week. Used the Pioneer on Heat. It worked perfectly and the fan cycled on and off with the unit. Great little unit.2 points
-
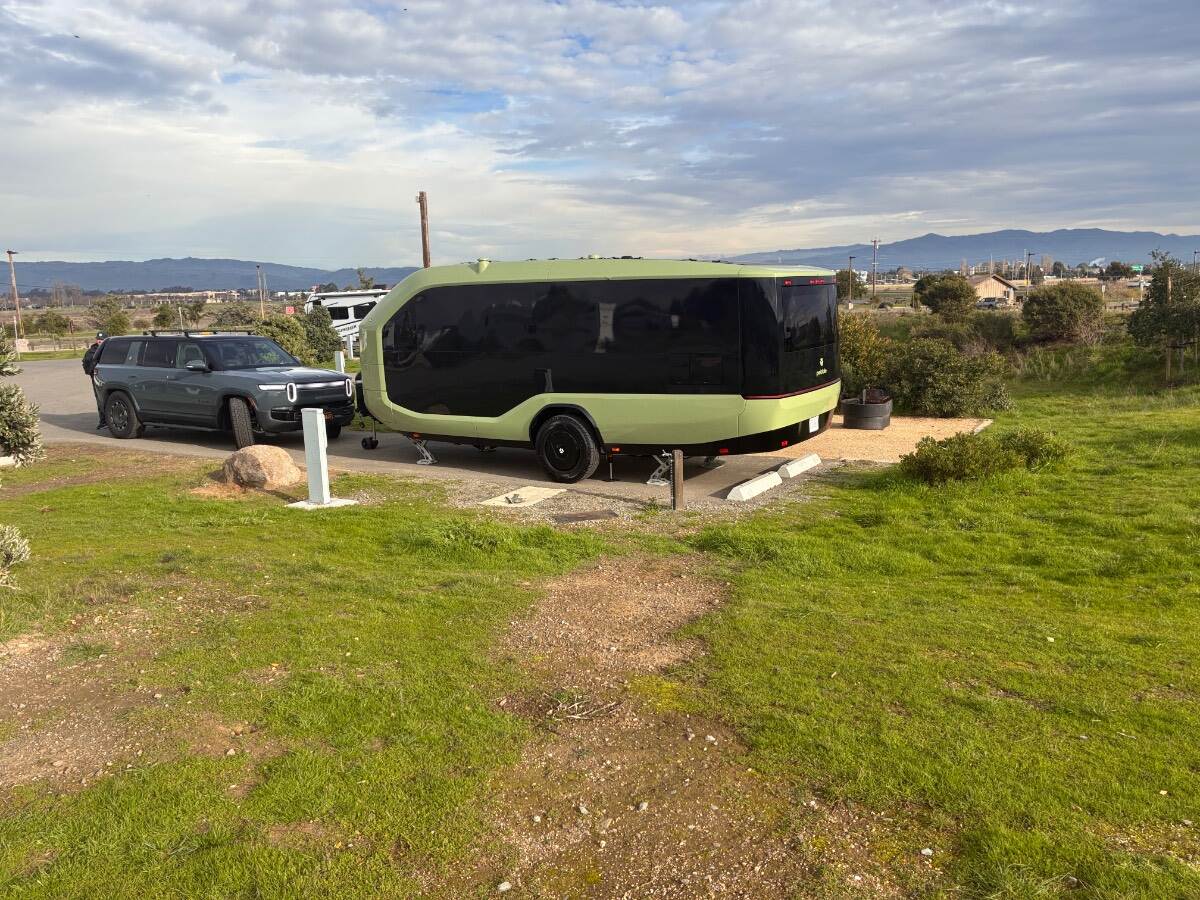
And at what cost. It looks nice, saw some earlier videos of this thing in action. Hardly qualifies as camping IMO. He might get 200 miles up in down the roads in CA but try that east of the Sierra or around the Rocky Mountain Range those towing distances will drop dramatically.2 points
-
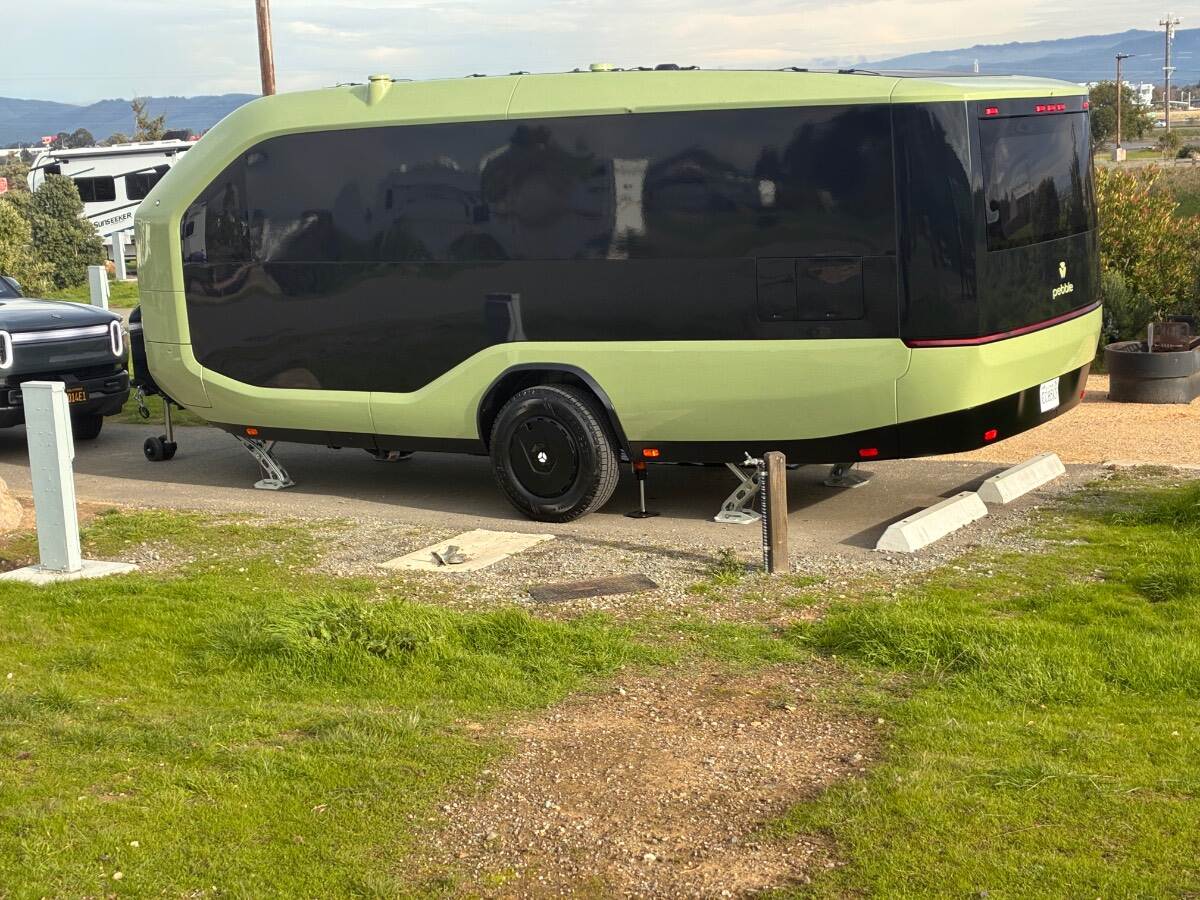
Pulled in to Dumbarton Quarry Campground (great place to stay if needing a place in the east bay / San Francisco). A Rivian pulling a Pebble Trailer pulls in. The driver un-hitches the trailer and uses his I-Pad to back/drive the trailer in place. Next the leveling jacks automaticly lift the trailer off the ground and self-level. I spoke with the owner and this is the first shakedown night from the factory in Fremont, Ca . The owner said he should get a range of 200+/- miles with the Rivian/Pebble combo. The Trailer motors are said to add about 100 miles to the Rivian's range vs pulling a standard trailer. I have to say it's very cool and makes our Oliver / F250 look and sound like a dinosaur. Regardless of how cool, this guy is way braver them me. I like being able to carry a couple of fuel cans for a bit more range (more than double the Riven/Pebble combo). We need early adopters and I'm not that guy. I wish him the best. Yes, the Pebble is very cool.
1 point
-
The key is keeping it clean when camping We us our small vacuum or compressed air. We inspect before closing a window so we don't grind up debris. We call it daily preventative maintenance, and it pays off as our tracks have never had an issue.1 point
-
Thank you Bill, and I'm happy for you! I remember reading re your BB situation, and I'm glad it all worked out for you. 😄 Yep, Epoch batteries and their app are great!1 point
-
Sold our Bigfoot Class-C for an Oliver! Their trailers are very popular, especially in Canada. I was on their forum for 3 years, added inverter/solar and other mods to our BF. The one and ONLY reason to own a Ram is to tow behind a Cummins! Hemi 1500 not. 🙃 Our range is 500+ miles, 400 fully loaded, towing on mountain roads, based on using 30 of a 35 gal tank. Take 50A charge from campsite for free? Not cool. We camp 2 of 3 nights without hookups. Agree with @taylor.coyote re range anxiety. Finally with 900 Ah LiFePO4 house batteries we have no SOC anxiety! Fill up the TV tank, have two 30+ gal water tanks full, waste tanks empty, no worries for 7-10 days in the wild! 😎1 point
-
Really like your installation! We just purchased new Epoch batteries to replace the BB batteries, really like Epoch's App, too!1 point
-
I perceive EV technology to be very cool and loved by several friends. Respectfully, range anxiety is not for me. 225 mile range would be very confining for our off the grid style of travel. I'll let the charging stations become better developed and dependable, EV ranges to increase and the let early adopters scout out this new frontier. I'm old enough and my F250 6.7 is young enough that it may out last my ability to drag a trailer around. Best to you and hope your EV tow vehicle serves you well.1 point
-
Be sure to first soap and water clean the rubber.1 point
-
Wishing Everyone and their Families a "Safe and Happy New Year" Best Regards, Bill and Debbie1 point
-
Happy New Year🎉🎊 from Jolli Olli, Hull #1045.1 point
-
Happy New Year to all -- may 2026 bring joy and adventure!
1 point
-
EV trucks don't go where we camp, 100+ miles from a charging station, and that is one ugly trailer. Keep your diesel truck and Oliver and we'll keep ours too! 😎1 point
-
Happy New Year fellow campers and travelers! Hope 2026 is a good one for everybody. Mike and Carol1 point
-
Nice, though I hope they come in other colors....1 point
-
For sure if your Litho's are going to freeze, then Isolate them! Our Litho's are in a semi-sealed box. That box prevents wind chilling and provides some insulation from the outside situtation. it also gets some heat tranfer from the cabin thru it's inside walls. So when does the battery actually freeze? It would be have to be really cold for a long duration. If I were in your shoes, I would not get the heaters. But I would give myself some "Options". As I have stated many times, "I Like Having Options". Some suggestions for your situtation: Determine the brand/model Extreme Weather info: What is their recommendation for long term storage of the battery in extremely cold conditions with no supervision by the owner. This will give you a worst case process for that battery. For the Battleborns: Charge to 50 - 60% and isolate with master switch until thawed. Then recharge at a reasonable rate to 100% SOC. Remember that is for their battery only. Other MFG's have their process. This would be a consideration in which ones to buy. In your situtation I would consider these (In priority order): Park with the sun on your street side if expecting temps may be an issue. When it warms up, open the battery box door. Close it before it starts cooling down for the afternoon/night. Insulate the door of the battery box. Installed a master cut-off switch if you don't already have one. Just in case your situtation gets really bad. Create cabin air circulation into and out of the battery compartment. A couple of vents (High and Low) and a small 12v fan exhausting the top vent, with a coin style switch to come on when the box is getting near freezing. This would afford significant protection. For less than $200 you could do all four of the above. But, if you really want to go overboard, you could get some bluetooth temperature sensors to monitor the box temperature. Severall greats posts about this topic here in the forum. Hopefully their authors will comment back with their link. Good luck, and enjoy your Ollie! GJ1 point
-
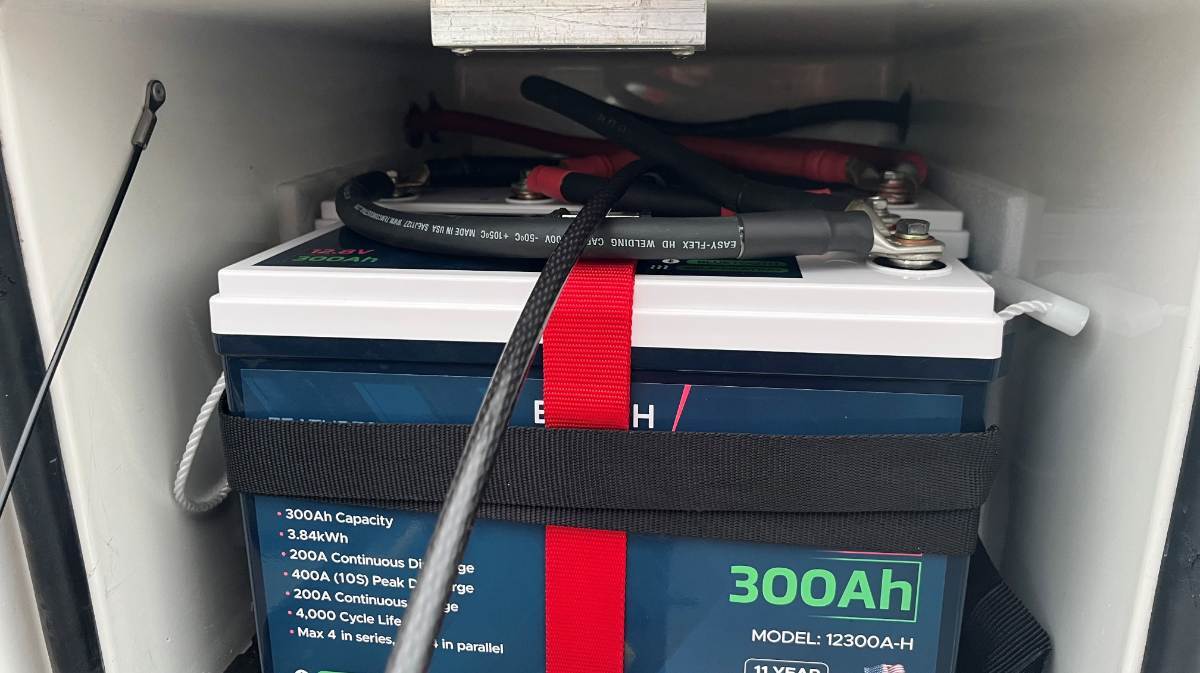
Batteries with internal heaters are a nice option to have. I like options. 😊 This week it’s going to be in the 20’s and 30’s here in beautiful Western NC. XPLORs (2) Epoch 300AH batts will be just fine.1 point
-
I think I would have lowered the jack on the wheel, lugs on just a couple threads. Then place a wheel chock on the inside rim, creating a downhill angle. Gravity/weight of the trailer should do it and lowering carefully it should do less harm than many heavy sledge hammer hits! Given your wheel seized so HARD, I’d bet all 4 wheels are in dire need of bearing and perhaps brake service! For sure this wheel had not been removed in some time.1 point
-
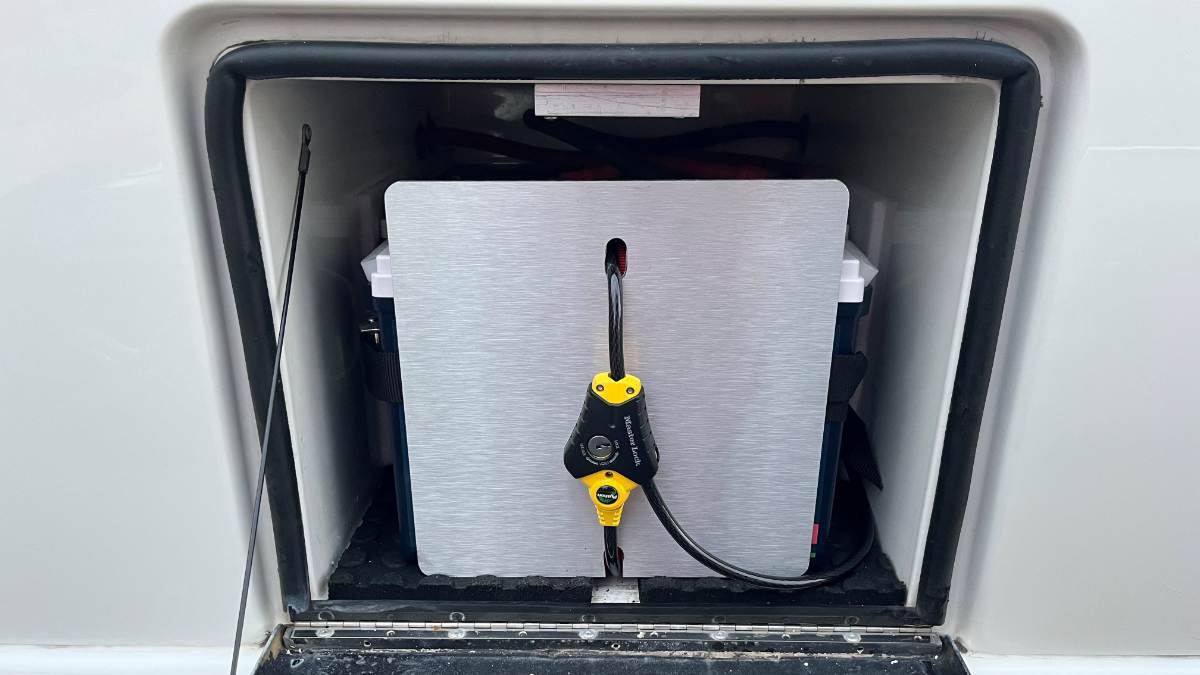
Once I got to this point, I started thinking a thief could possibly undo the battery cables, loosen the straps and even with cable lock in place, slide out the outer battery, then steal them all. Oh No! So, I had a 12x12x1/4" sheet of aluminum left over from another job and it became the perfect solution. Now besides a taking a crowbar to the battery door, a thief would have to cut the 3/8" hardened steel cable. Now these expensive batteries ain't goin' nowhere! I'll cinch down the straps and cable lock again, after putting on some miles... Ya gotta love the new look of our Epoch app! 900 Ah - Priceless! 😎
1 point
-
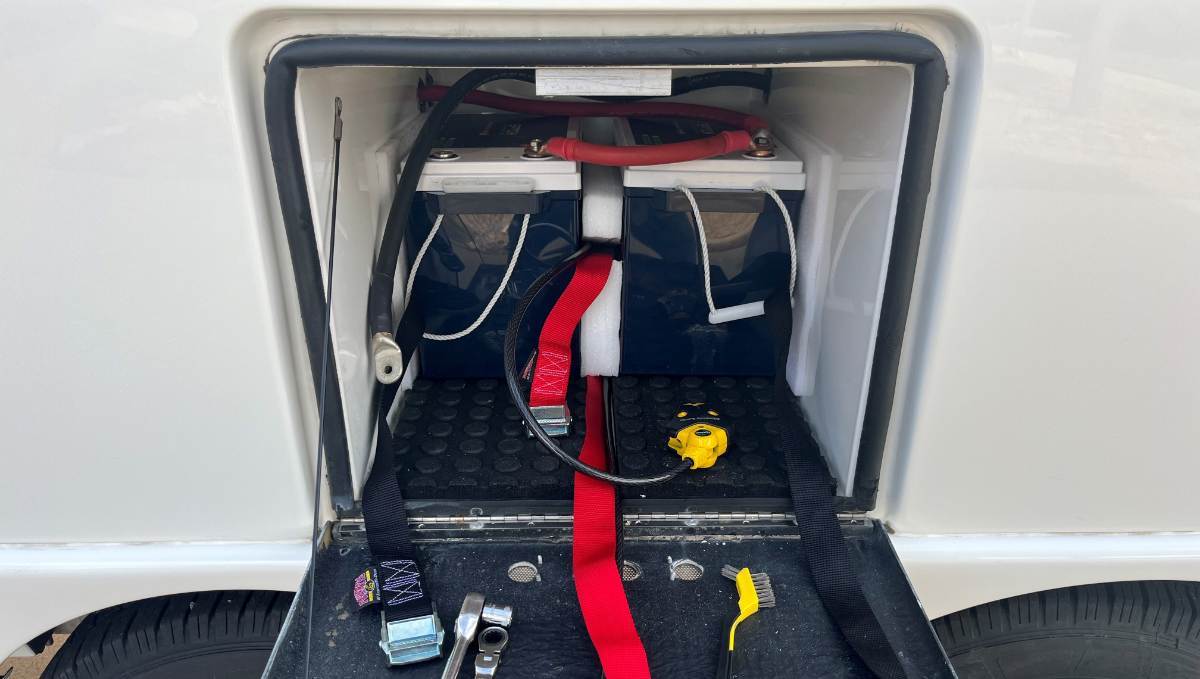
I found this great supplier of Made-in-USA cam-buckle straps and tie-downs: https://www.amazon.com/stores/PowerTyeMFG/page/66AA148A-1600-4E0D-A1AA-AEA3A1050247?lp_asin=B017BYSJ7I/ I purchased this cable lock to secure the batteries: https://www.amazon.com/dp/B00006407M/?th=1 I turned the eyelet bolt on an angle so that the cable lock and strap would fit nicely. I placed foam around and between every side of the batteries. I put 2" of foam between the 2 inside batteries to give the eyelet space, keep it from rubbing. I have an 8-ft cam-buckle strapped tightly around all 3 batteries and these cam-lock straps cinch nicely! A 4-ft strap and the cable lock go through the eyelet to pull the outer battery inwards. I also had to make two more 4/0 battery cables. I planned the layout so the main ground is convenient right-front. And now without the battery tray, I can reach all the way in, over the batteries. I tightened all 6 battery terminal bolts after all 3 batteries were tied down, so these can be easily checked and tightened when needed.
1 point
-
Our much older 2500 series truck was borderline in needing the Andersen WDH. I’ve used it since the manual says to do so over 5K trailer weight and it towed much more smoothly! New Alcans, new 5200 lb axles and we had a few items bounce around. Hanging clothes came off the closet rod, a kitchen drawer opened (never before) and stuff in the attic certainly bounced around! Nothing during a second trip and we only have 1000 miles since. This trip, I went without the Andersen WDH. Descending from Prescott at 5400 ft to The Valley, a 4000+ ft descent, more than most of us do day-to-day, our rig drove like a train on rails! I believe the Oliver suspension is now taking care of itself, very lightly affecting the tow vehicle. Secure the items that bounced around and set correct tire pressure! 55 PSI is only correct if you are carrying about 8,000 LBS GTW! We run at 45 PSI.😎1 point
-
Dexter 5 leaf? Typo? Good that you are planning to change your springs before their roadside failure. The above generic chart provides general industry standard info. The Michelin provided chart for these tires also require at least 35 PSI. If an owner can not find a chart for their manufacturer, use of the above could be pretty good guidline. But with the internet the actual data for your tires is better. Here is the chart for mine OE2 tires: For talking purposes, a typical 6,000 pound OE2 will have a tongue weight of about 580 pounds. That calculates to about 2720 pounds for each axle. From the chart we are off the chart. One could mathamatically postulate that at the example axle weight we should use about 27/28 PSI. Not the case. The pressure shown on the left side is the minimum pressure to be used. But for the purpose of lowering running drag, and to give us more safe warning time when a tire is failing, most of us add some pressure. Likewise, I also run my OE2 with 40 to 45 PSI when on highway. If serious off roading I lower it further to 35 as per the charts. But if conditions dictate, for short duration I would not hesitate to go below the 35 PSI. And have twice with our Ollie. SUGGESTION: I like many other owners, believe that having a 20/18 volt air compressor (And a good plug kit) are musts when traveling far or traveling off road. GJ
1 point
-
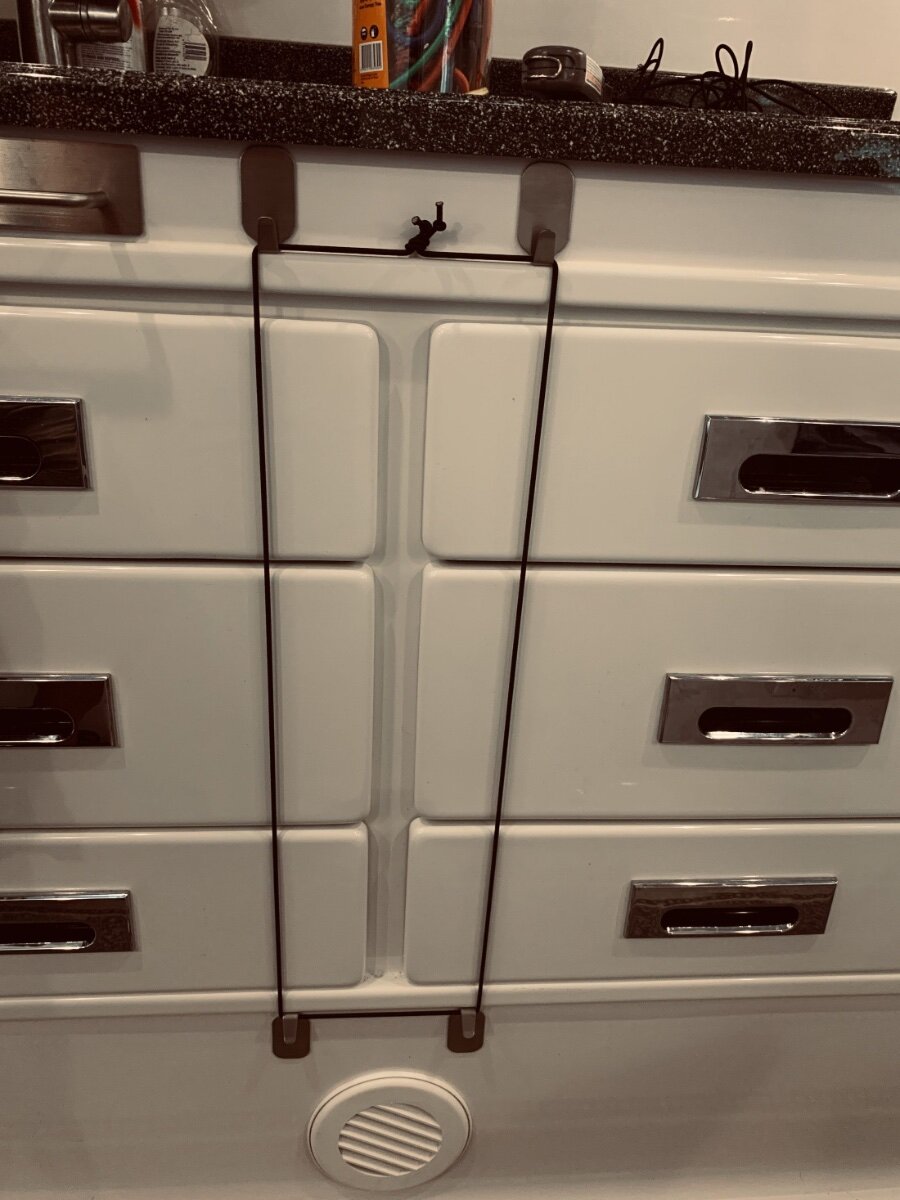
I thought the same thing until I put a camera inside. They pretty much came open every time there was a big jolt. We do have them laden with a lot of stuff though. My only other clue before that was stuff on the floor occasionally after a long drive. I used some hooks on the top and bottom with bungee cords for each set of 3 drawers to use during travels then easily removes and stows. IMO it doesn’t detract from the decor and seems to work well. In all honesty, I should probably just clean out most of the stuff I have in the drawers! But it works, especially off pavement.
1 point


.thumb.jpg.e34bf01ef7f7d5e99ad31856d45afbeb.jpg)


-
Recent Achievements
-


")


")