
Leaderboard



Popular Content
Showing content with the highest reputation on 05/14/2026 in all areas
-
This is my thought as well. I have really liked having a TT that fits exactly where my TV is and does not hangout wider.4 points
-
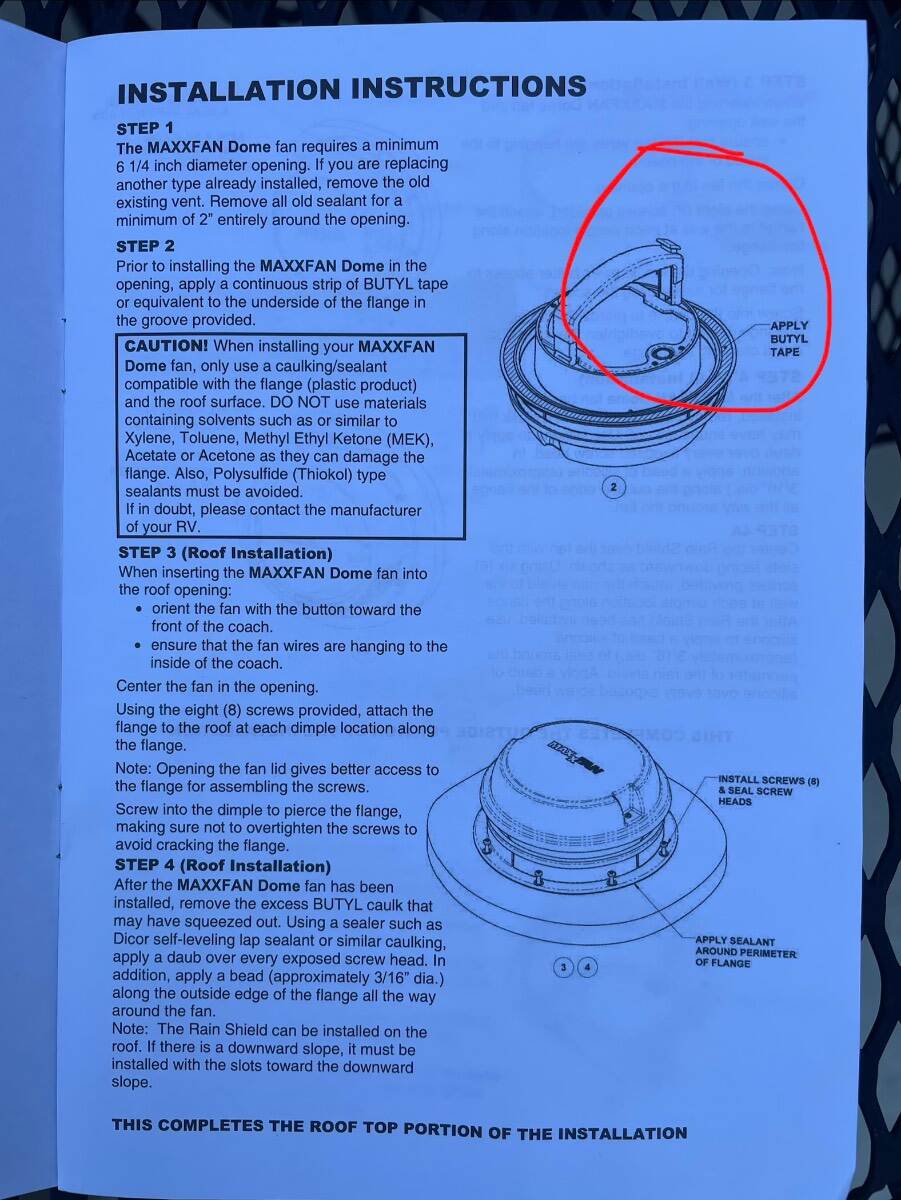
We did just that about 6 years ago. The butyl has held up just fine for us. Still loving that dome, and especially the light ring. Where the fan is located in an original Elite may not be as "curved" as the newer II's. I can't tell you, as I've not bern on the roof of a II. Modern butyl is pretty good stuff.4 points
-
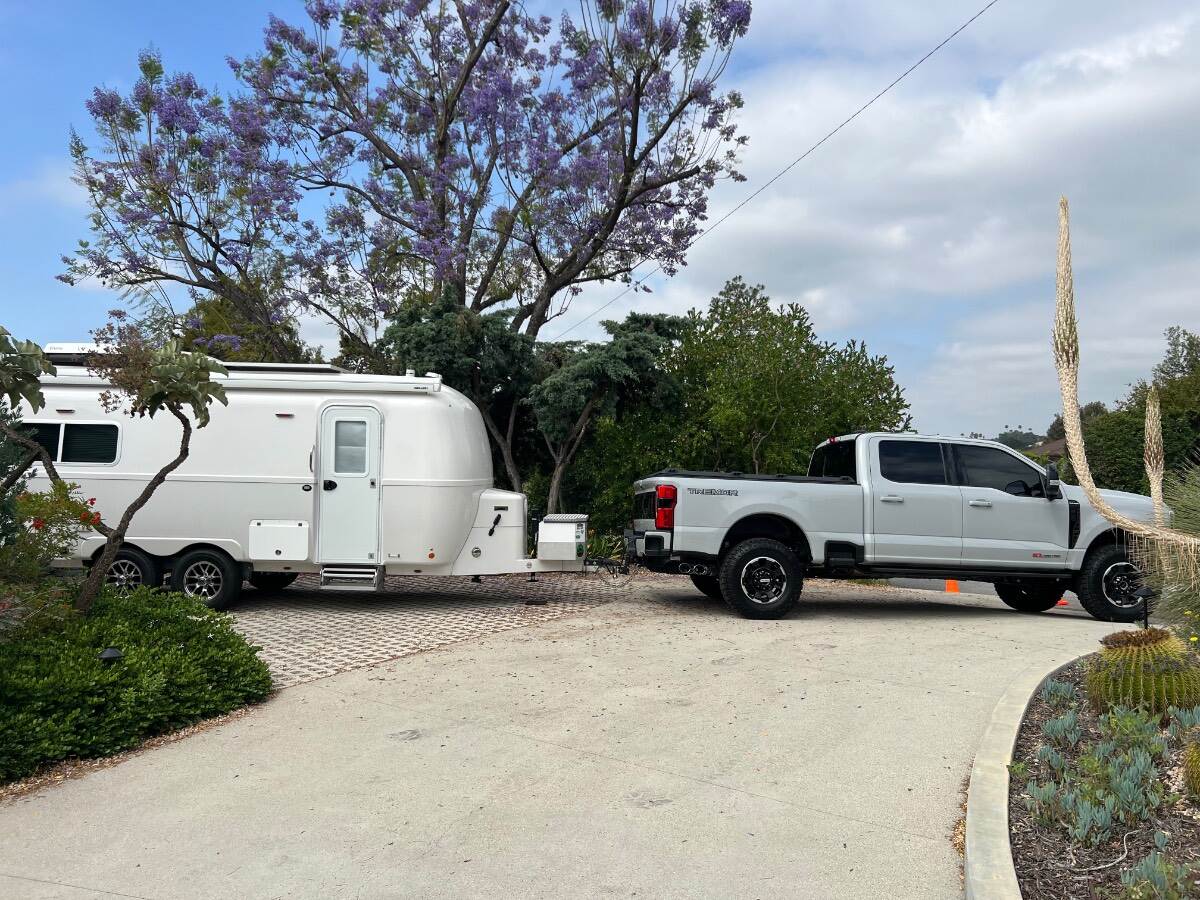
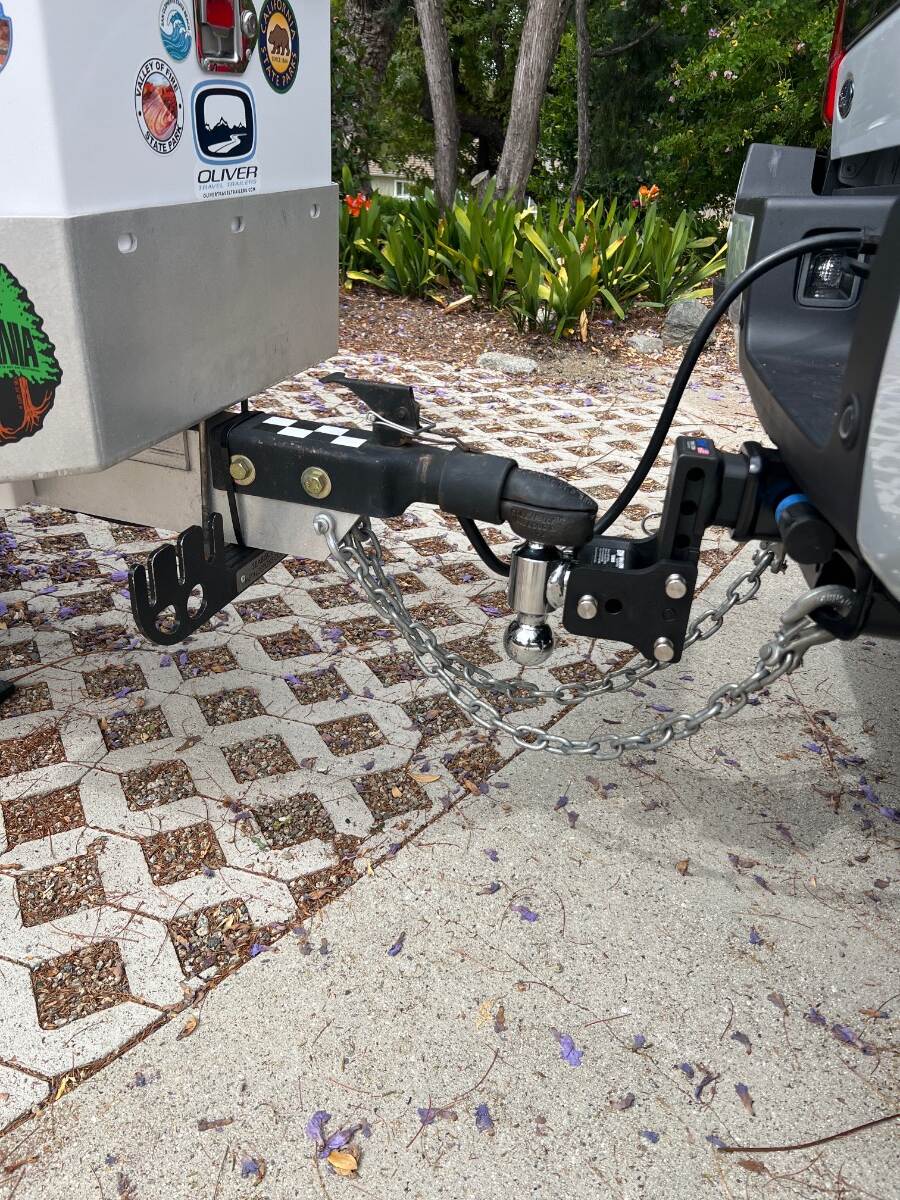
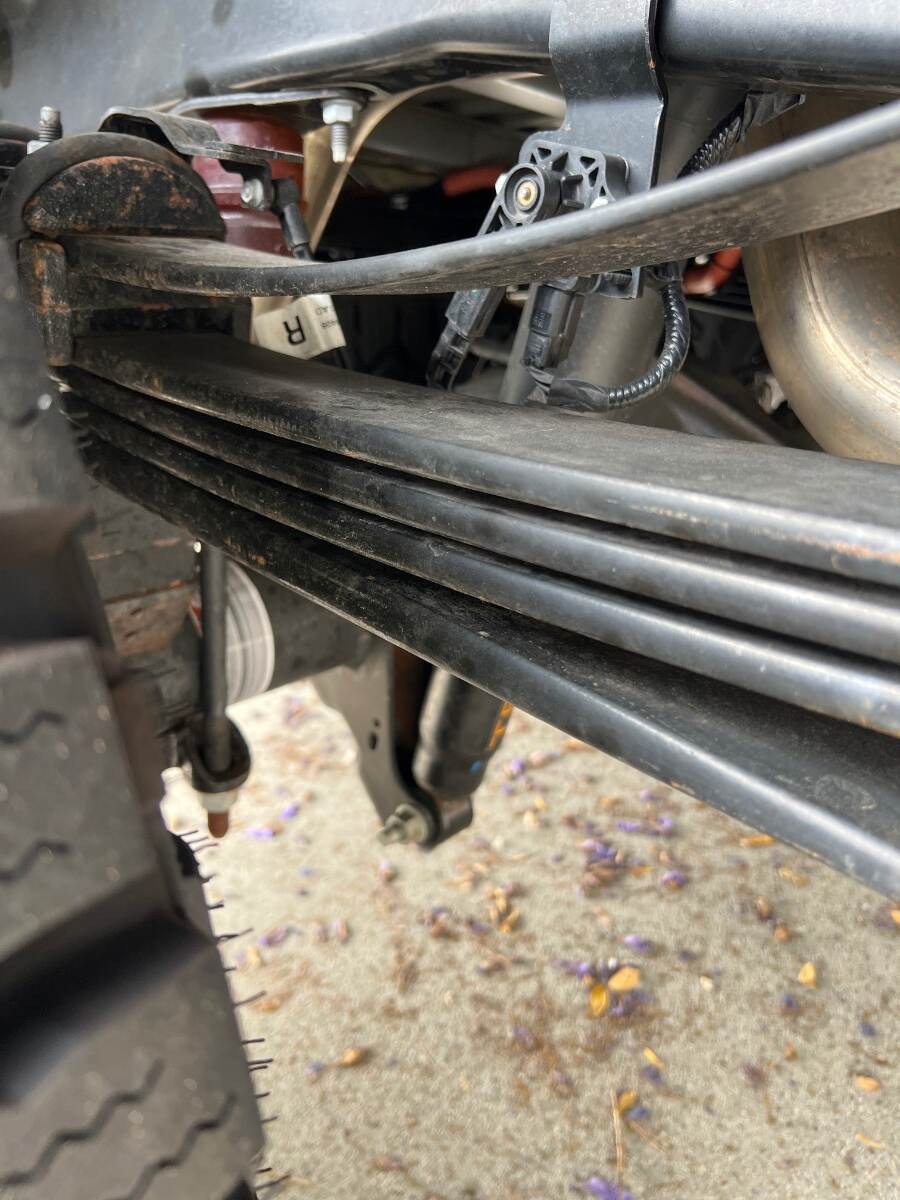
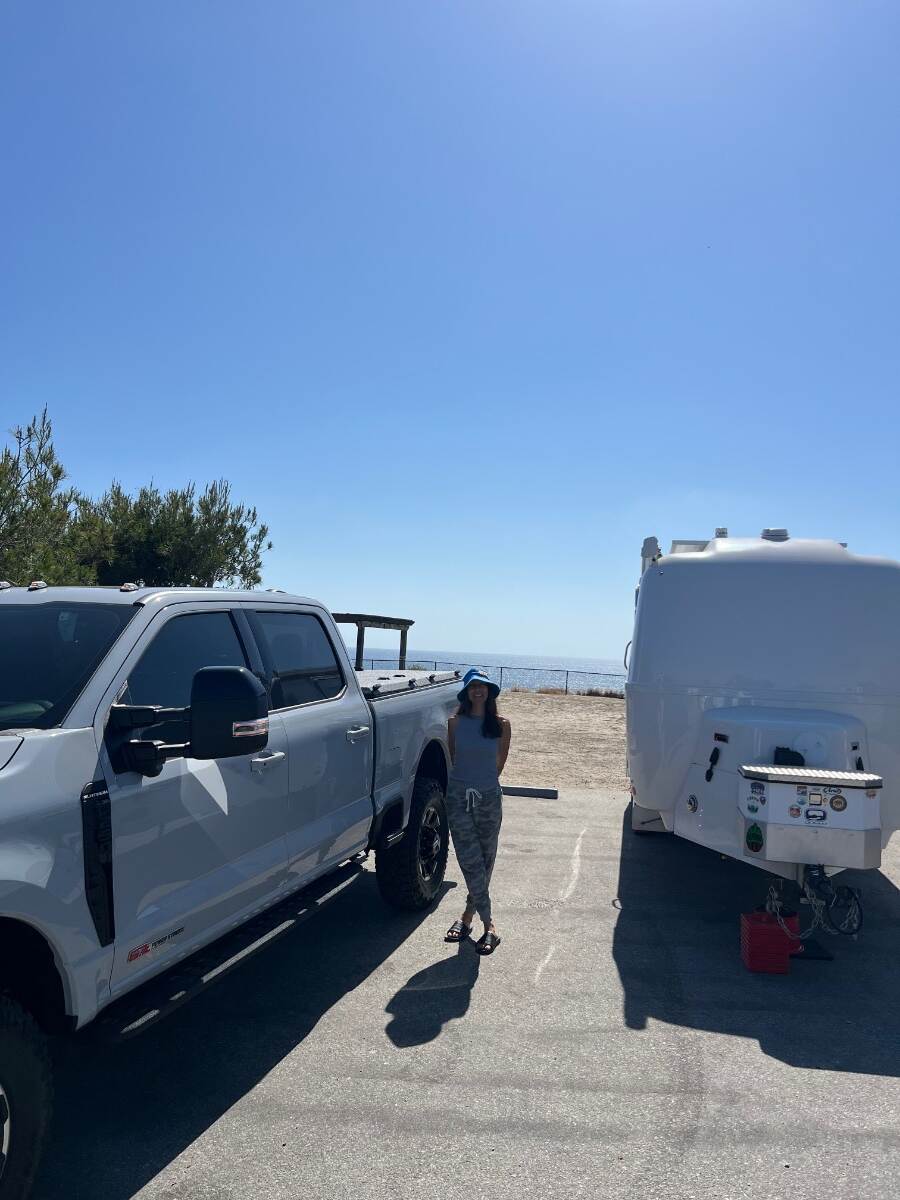
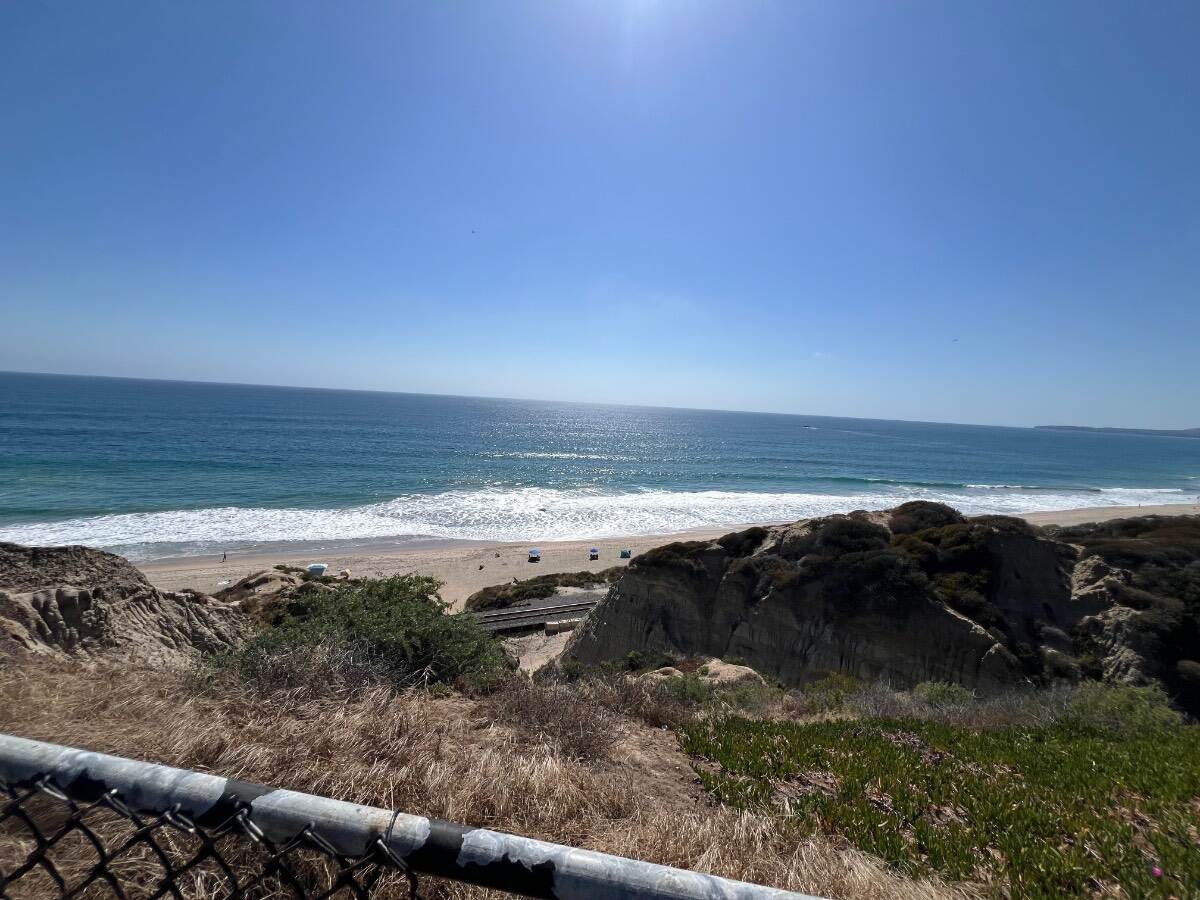
Getting ready to head out to San Clemente state beach. The trailer barely made the truck squat. This truck has some stout leaf springs.I’ll keep you posted about my drive.
 3 points
 -
issue resolved. We bought a Genuine Dometic Water Valve, it is now installed and working as designed.3 points
-
Do not buy a "Lippert" replacement part. Sales ppl will say it is a match, but it is not. Tech will say put in the 2nd screw and it will stop that leak. maybe-maybe not. As the ppl at carnivals (not to disparage any OTT owner who has done that) would tell this 10-year-old who just spent his $5 on basketball, ring toss and water pistols, in the midway, "Close, but no cigar, Son"... The upside, I may have found an authorized Dometic dealer to work on our awning... just not before we head-out. B~Out2 points
-
This was discussed in the Escape forum, someone linked a replacement from Panther RV https://pantherrvproducts.com/3314013-026p/ You should give them a call.2 points
-
Tim - Please make you wish for a non- trailer (i.e. no trailers for sale or wanted) classified section here on the Forum known to Oliver. Might I suggest an email to Jason Essary and/or Scott Oliver. Why did you replace those latches if they were still in good shape? If I had that type of latch, I'd be all over your generous offer. Thanks a bunch for letting everyone know! Bill2 points
-
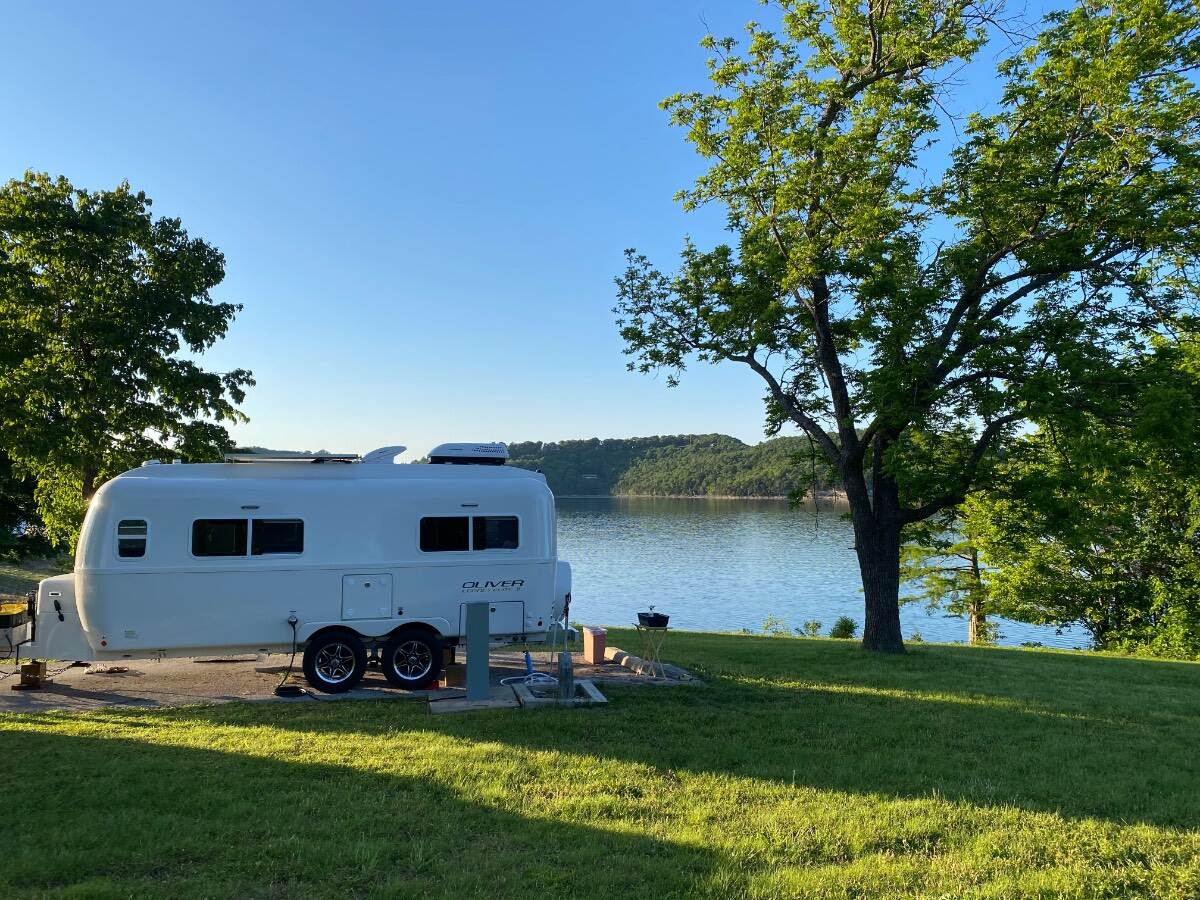
Dam Site Lake COE near Eureka Springs Arkansas on Beaver Lake
2 points
-
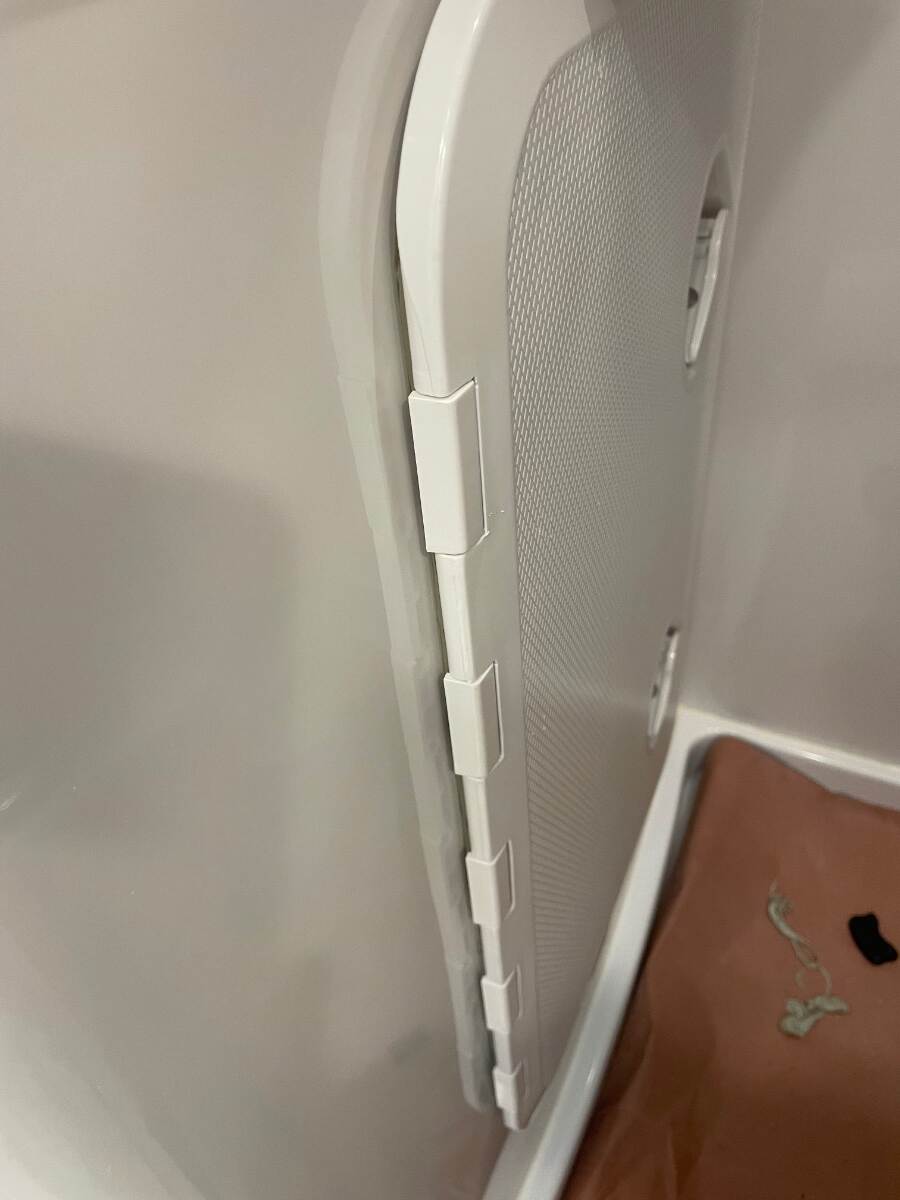
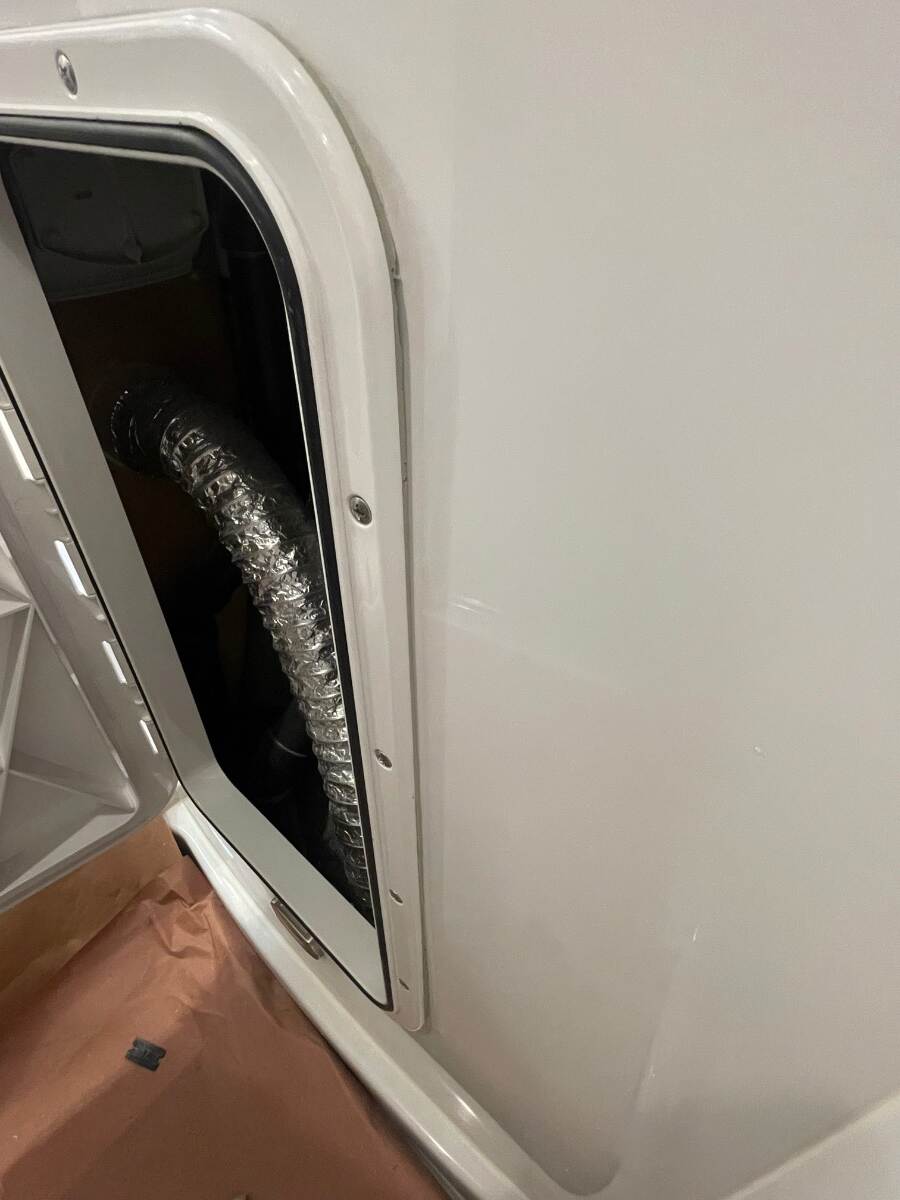
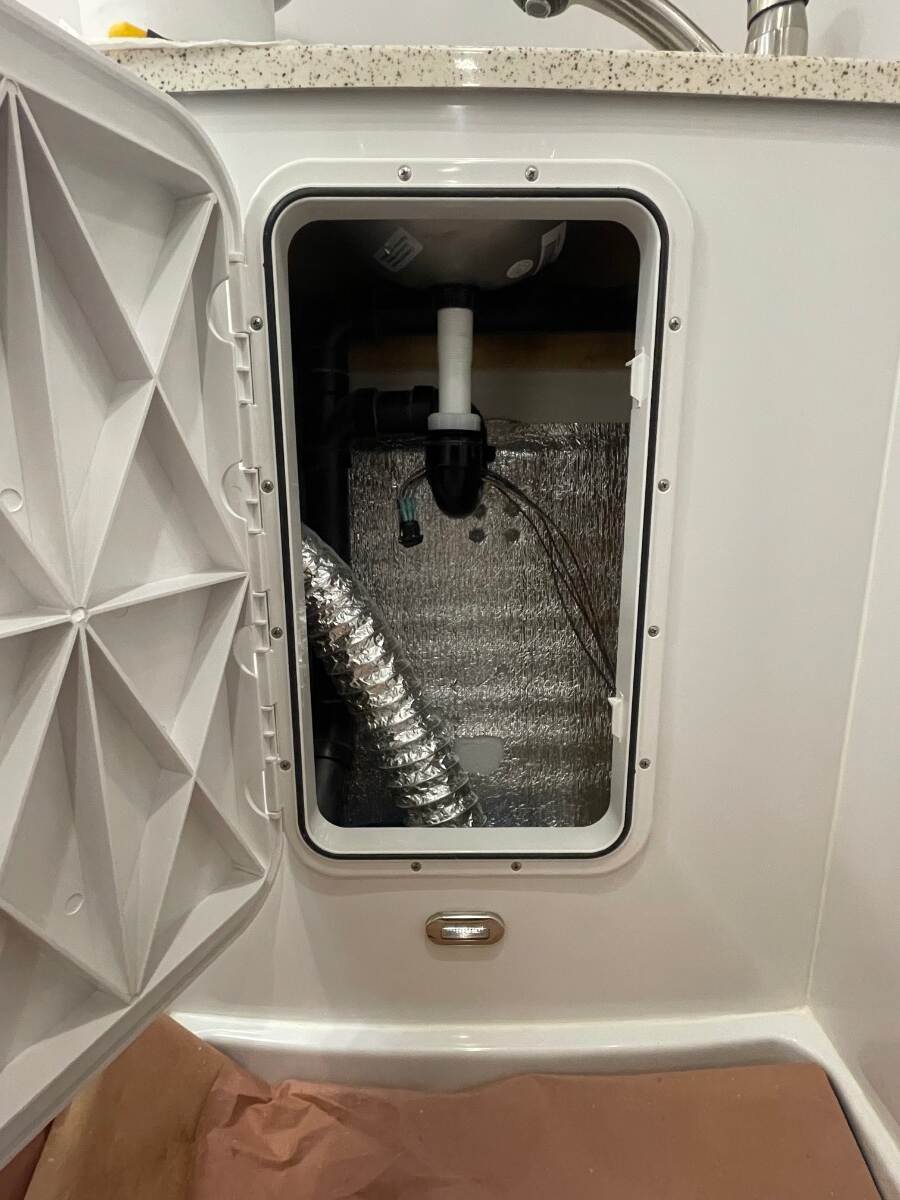
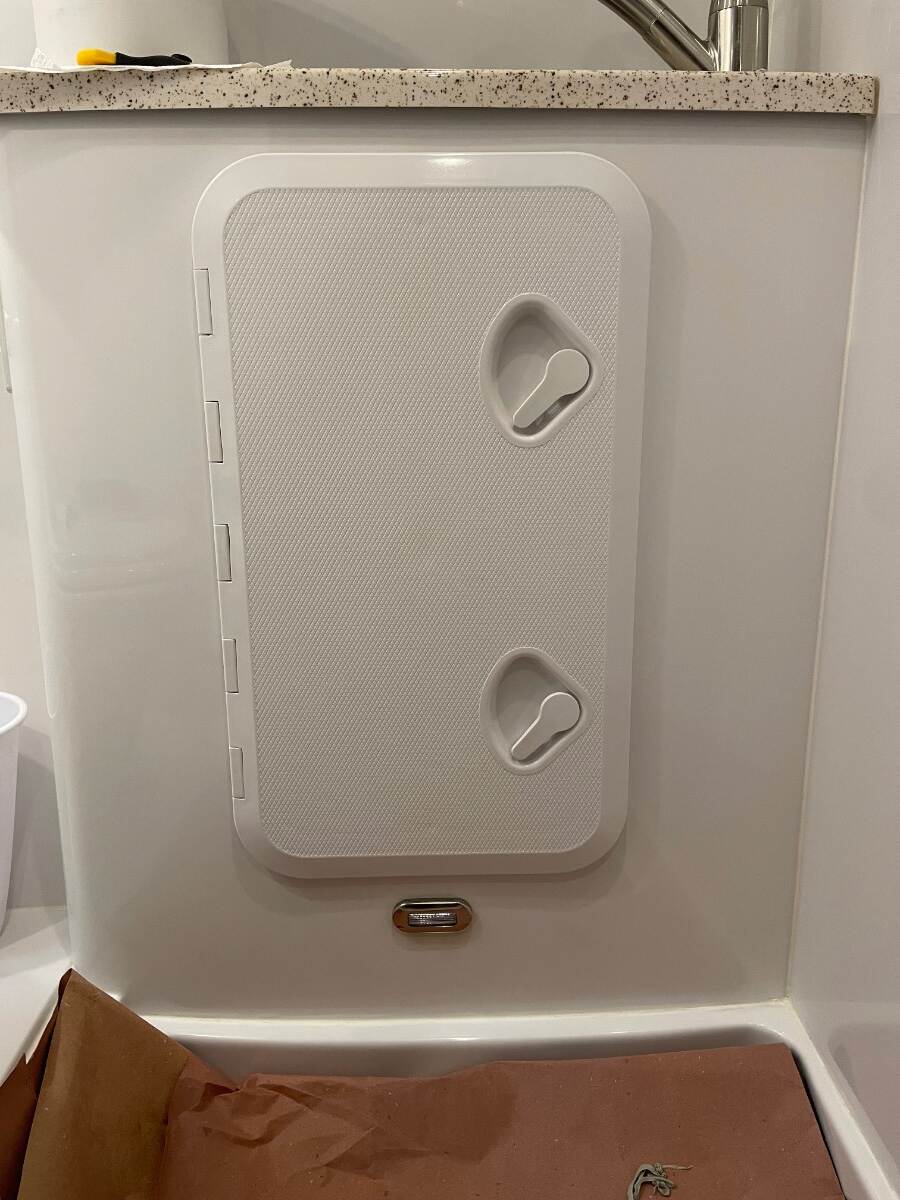
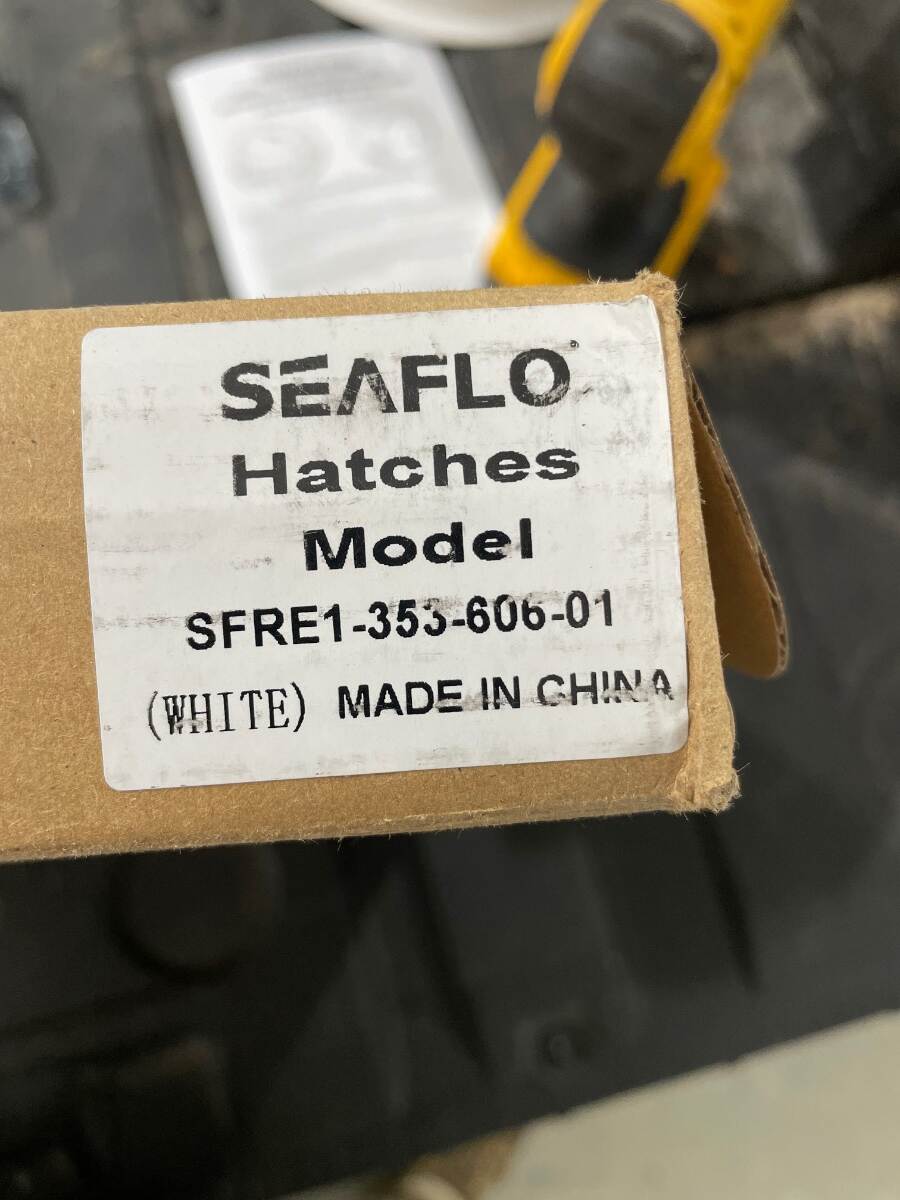
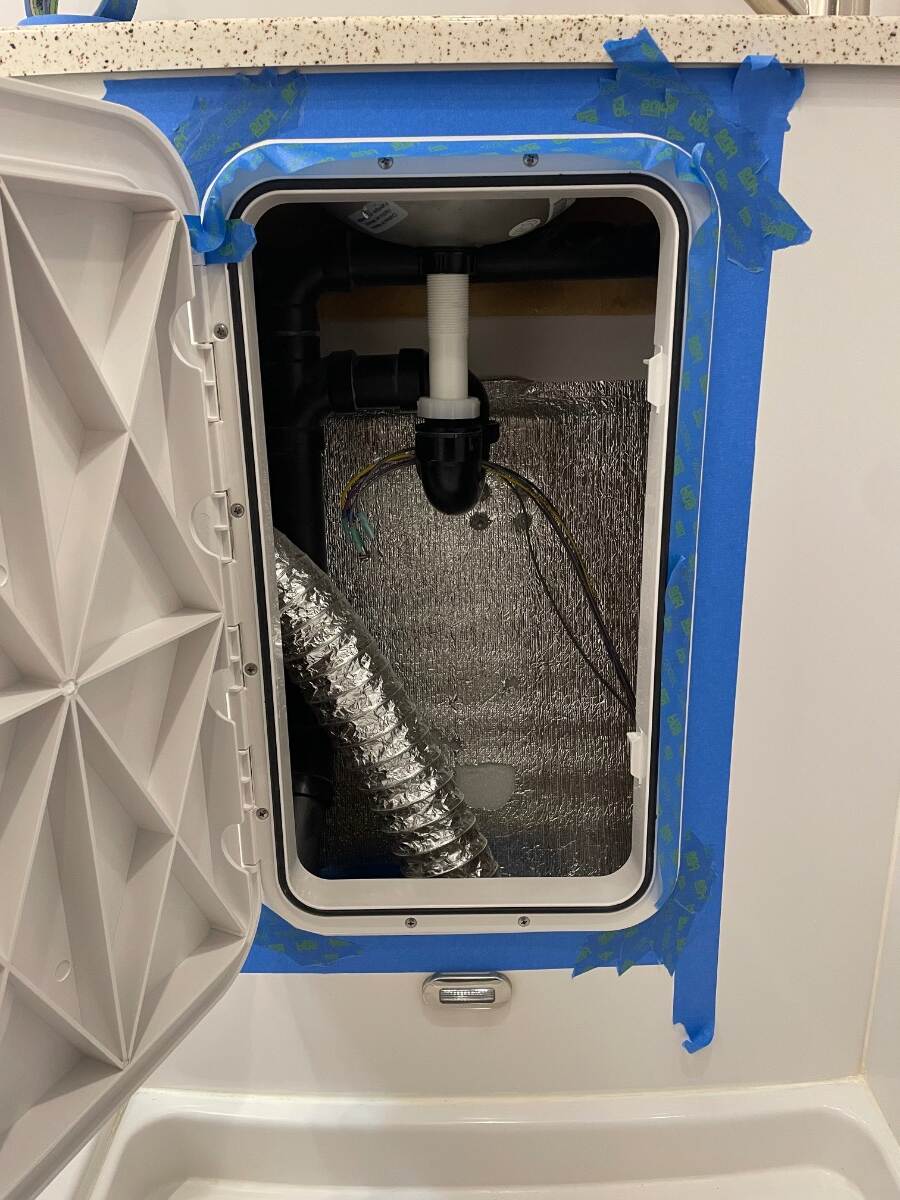
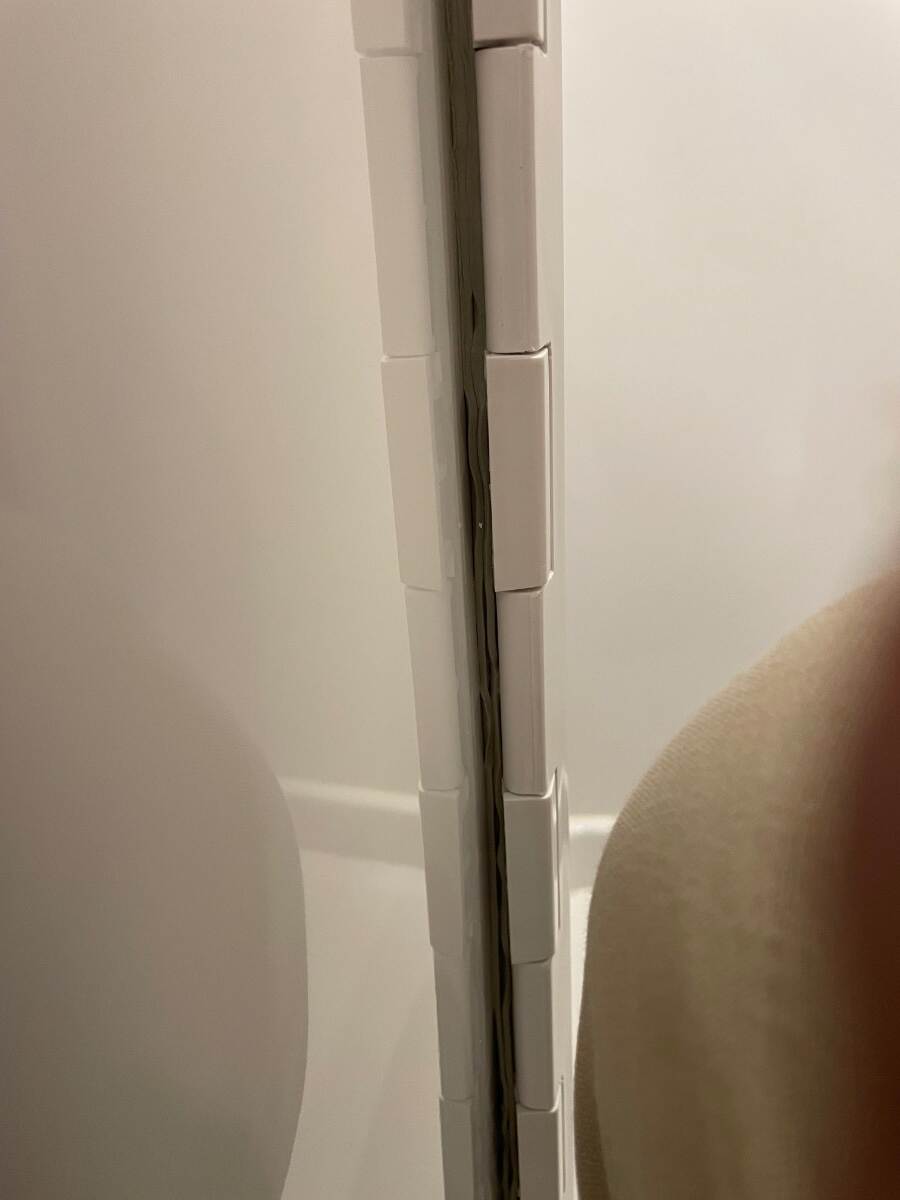
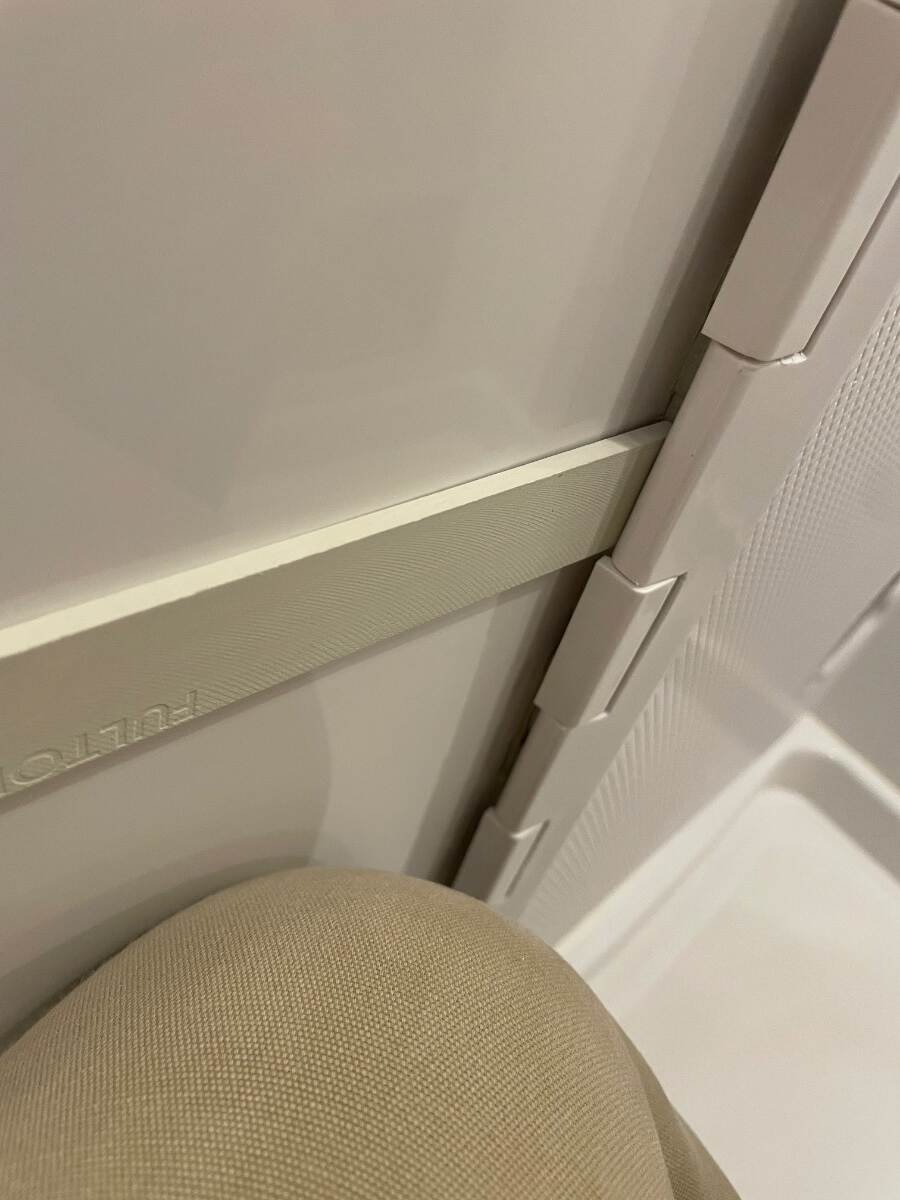
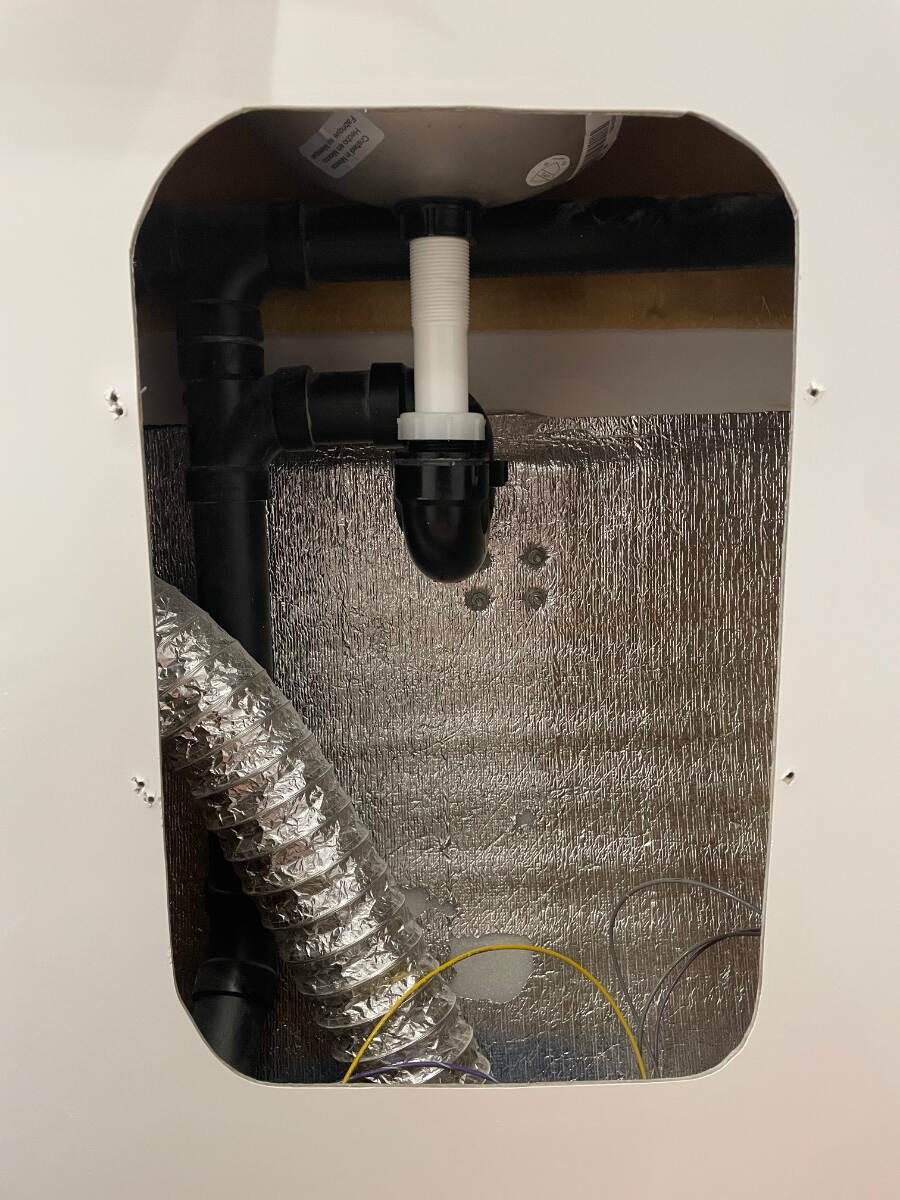
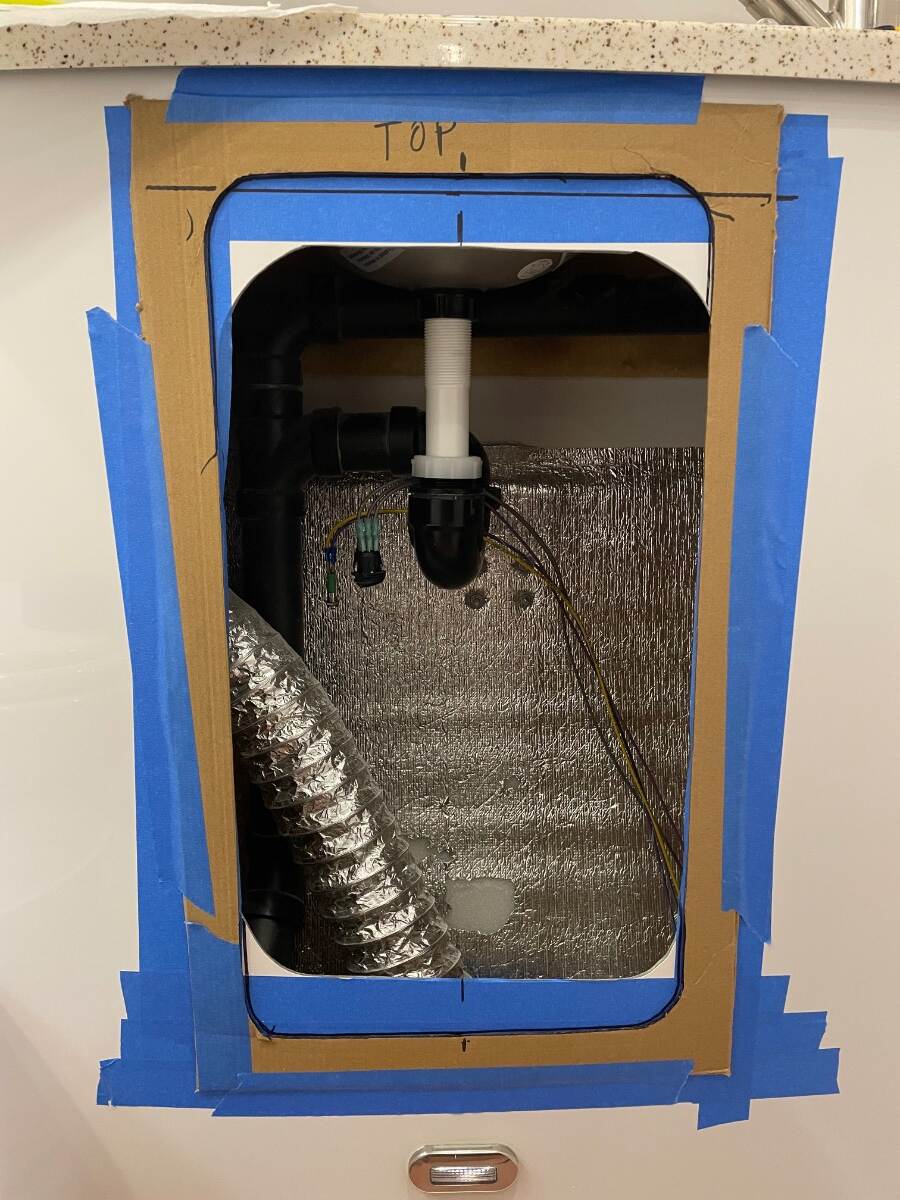
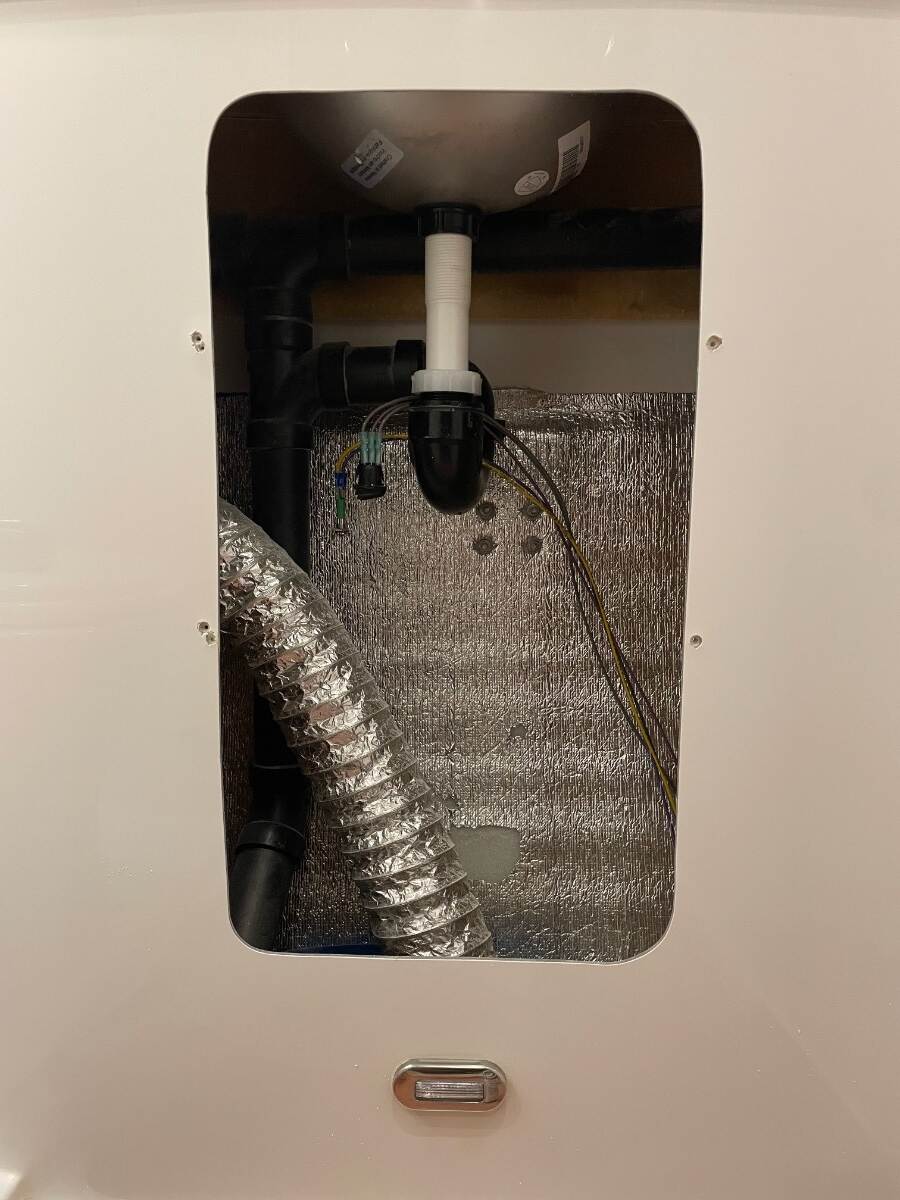
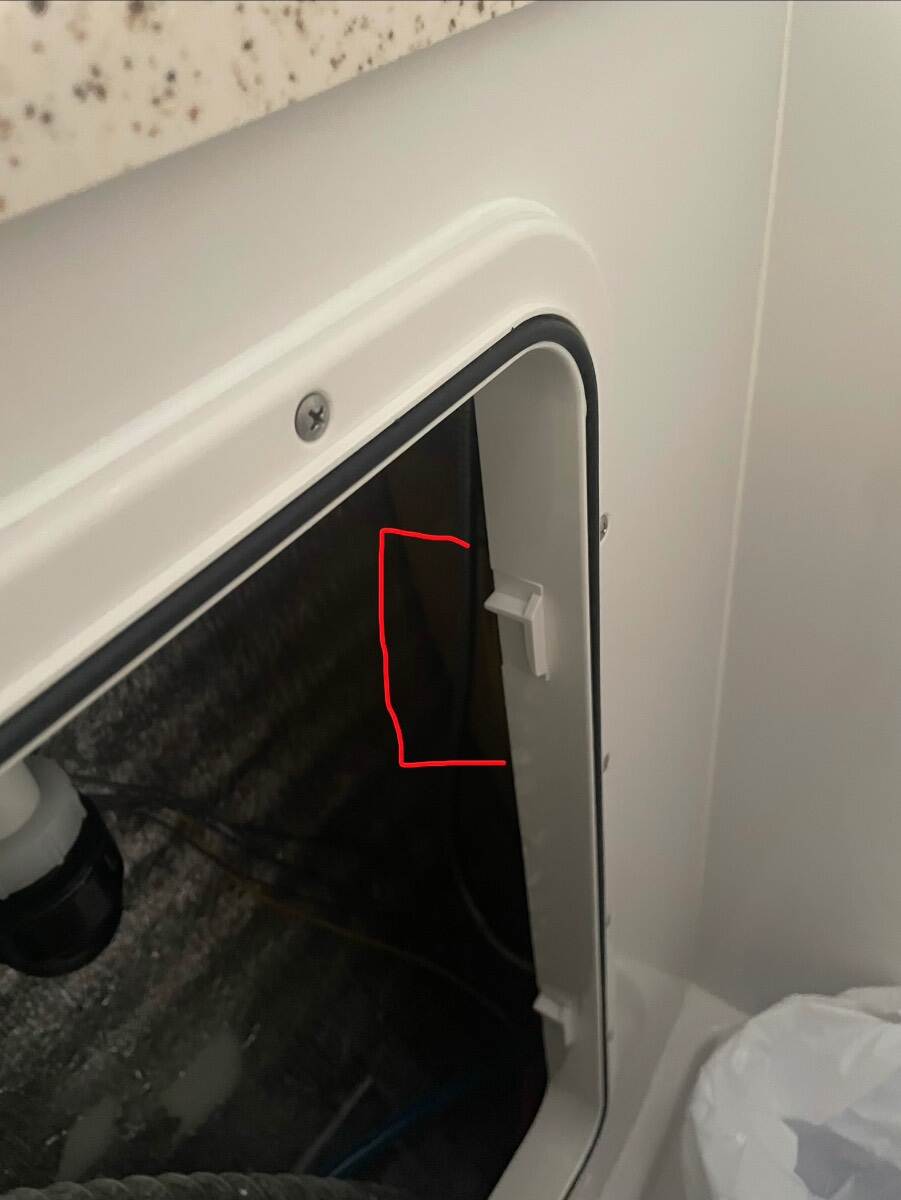
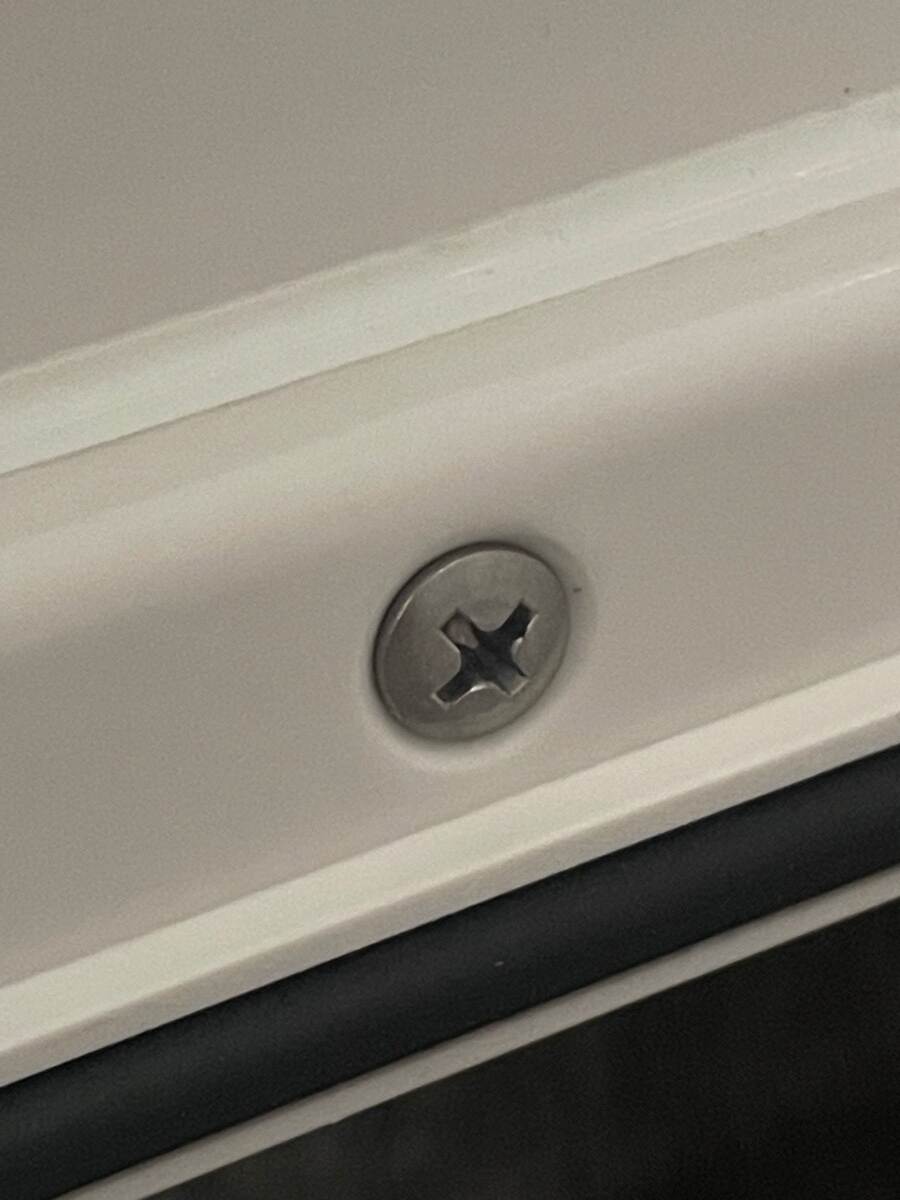
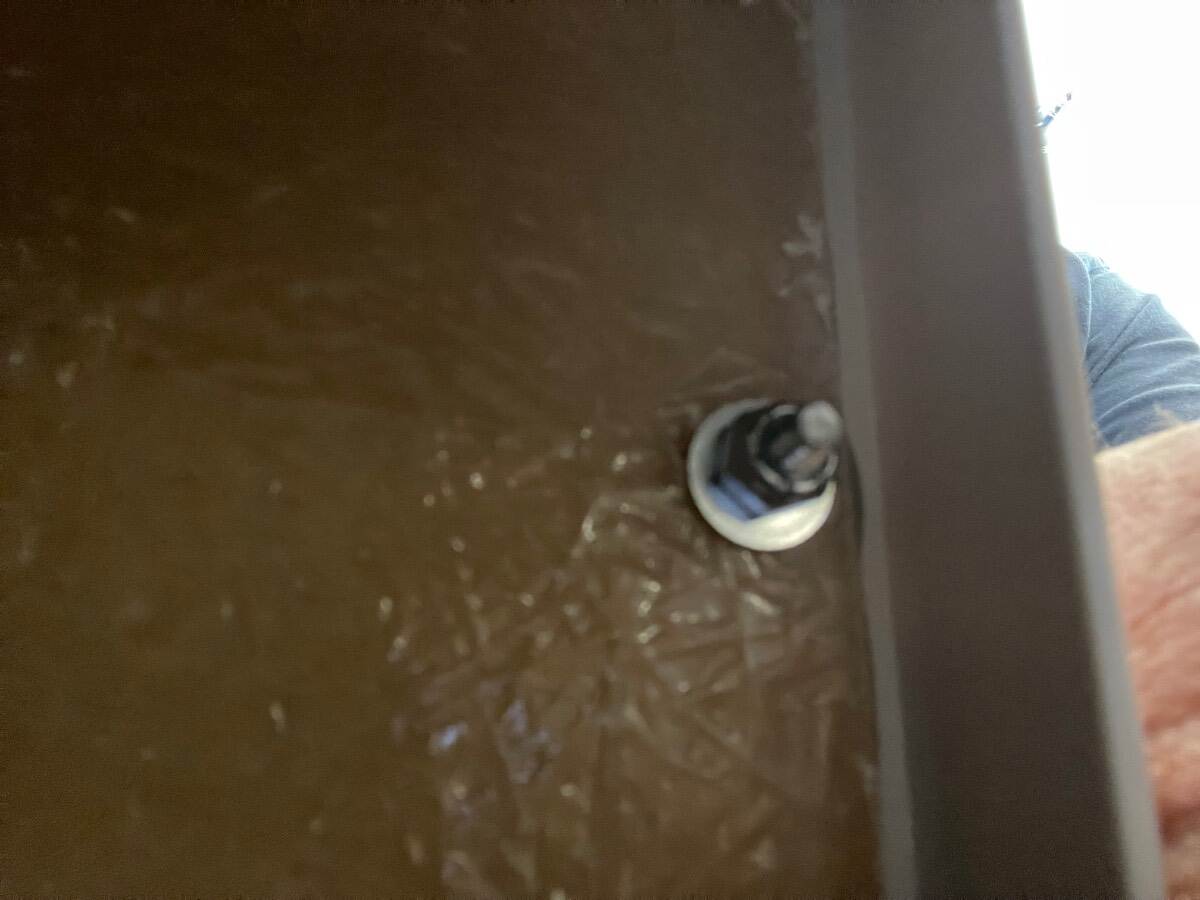
I have been wanting to do this modification for a few years now and actually bought the hatch a few years ago but just got around to installing it before this recent trip. I never have liked the shower caddy/shelf in the bathroom vanity. I’ve had it out at least 2 times to work on the faucet and to replace the sink drainpipe. I needed to tighten the nuts on the bolts that go through the propane enclosure and are accessible only under the sink so I took the opportunity to install the marine hatch. Picture of caddy removed and cleaned up using ASI 0240 adhesive remover and plastic razor blades. I never have cared for the way the factory drills holes in the gelcoat. Every factory screw hole I have seen has cracked gelcoat around it. Vanity front taped up and template taped in place. I actually lowered it after this picture was taken. The door doesn’t detach from the flange, and even if it did you couldn’t reassemble it after the flange was mounted. This and the small space that you are working in makes the hatch and flange difficult to position accurately. It helps to make the opening just large enough for the flange to fit into, then you can modify the hole if needed to square up the hatch. I used a coping saw to cut the fiberglass and a sanding drum in a drill to shape the hole. I cut the opening a little small at first but it was easy to open up a bit using the sanding drum and a sanding block. I marked and drilled pilot holes, then screw-sized holes, then chamfered the screw holes with a 1/2 inch chamfer bit. I also cleaned up the factory holes using my chamfer bit. You’ll want to locate and drill 2 holes, one on each vertical side, then temporarily mount the hatch so that you can better mark the remaining holes. Holes not shown in this picture. I placed one layer of butyl tape all around the flange then an additional layer of butyl along the vertical sides. I did this because the front of the vanity has a slight curve and I didn’t want to pull the vertical sides down to meet the vanity surface. I used 10-24 x 1inch stainless steel oval head machine screws, #12 stainless steel flat washers (because that what I had), and 10-24 Stainless steel Nylock nuts to secure the flange to the vanity. Picture after the butyl is through oozing and trimmed flush with the flange. You can’t trim the butyl behind the hinge so be careful how you apply it to the back of the flange on the hinge side. I suggest keeping it back away from the edge 1/16” and hopefully it will extrude evenly as you tighten the machine screws. I’ll talk more about this area later. Taped off for caulking with ASI 335 sealant You can’t caulk the edge behind the hinge. I wasn’t pleased with the way the butyl looked behind the hinge… …So I used a paint stirring stick that had dried latex paint on it (this sealed the end grain of the stick) to “tool” the butyl behind the hinge. This produced a finish that I was pleased with Picture of open hatch. I have yet to relocate the pump switch and light. I am thinking about putting them in a stainless steel bracket just inside the top right of the opening so that the switch can be accessed while seated. Notice the pump switch and light hanging over the p-trap. I’ve got it cable tied there for this trip. Marine hatch used. I think I ordered it off Amazon. I am very pleased with the way this modification turned out and being able to very easily access the area below the sink. I don’t intend to store anything under the sink, I just like being able to see in as many places as possible. Again, apologies to any of my High School English teachers who may be reading this. Bill
1 point
-
Made it down to the beach. The difference in towing was night and day. Literally no comparison. It’s almost like the Oliver wasn’t behind us. Exceeded my expectations.
1 point
-
Hi Bill (et al) - Thanks for the suggestions, I will open a case. To answer your question, for the same reason Ollie owners replace their trailer's springs when they might otherwise appear to be in good shape 😀 Or maybe I'm just paranoid with too much time on my hands? Anyway, I'd like to keep them out of the trash for the time being, at least. It seems to me like they might make a good 'just in case' spare to have. They are small and don't weigh much. Thanks, best Tim1 point
-
We upgraded from 1/2ton F150 with eco boost 6 for that same reason. The downhill compression breaking in the diesel engine makes a world of difference and no need for an Anderson hitch as the new truck has antiseay brake controls.1 point
-
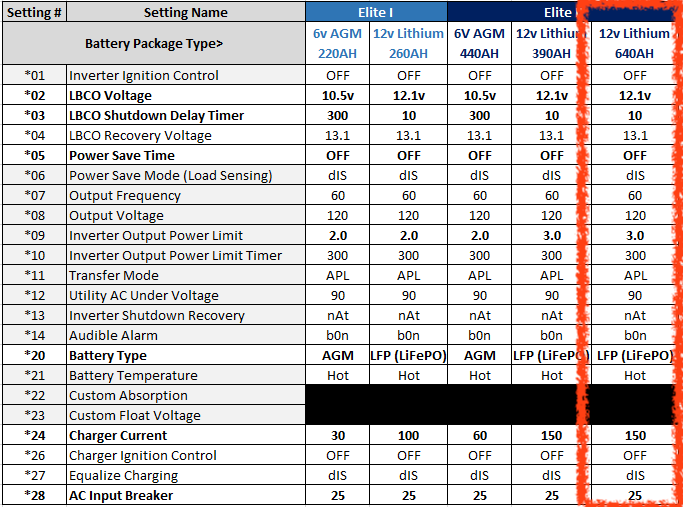
I vaguely remember needing to reset a parameter within the settings of the Xantrex to avoid that problem. The battteries blink When charging so that’s normal. I n our case the LOW Battery Cutoff Voltage setting was not set properly after an update to our system....and it would do the beeping thing. The settings are easily changed in a data table on your xantrex phone app. Your settings would be the column to the left of the red column below: LCBO Voltage can be set from 11.5-12.1 FURTHER INFO: Here's some data from the web: A beeping sound from a Xantrex inverter charger is an audible alarm indicating low battery voltage, an electrical overload, or internal overheating. The system uses the beep to protect the internal components and the connected battery bank from permanent damage. [1, 2, 3] Most Common Causes Low Battery Voltage: The battery bank has dropped below the low-voltage cutoff threshold (typically around 10.5V for 12V systems). This can happen if the batteries are drained, a battery cell is dead, or the charger is disabled. AC Output Overload: The continuous power draw from connected appliances exceeds the total wattage capacity of your Xantrex unit. This triggers a warning beep before the system shuts down to protect its circuits. Overheating (Thermal Shutdown): Poor ventilation, blocked cooling fans, high ambient air temperatures, or heavy prolonged loads can cause internal temperatures to spike. High Battery Voltage: An external charging source like an un-regulated solar controller or high-output vehicle alternator is pushing voltage above the upper safety limit (usually >15.5V). Bad Cable Connections: Loose, corroded, or undersized DC cables cause a sudden voltage drop across the connection terminals under load. The inverter reads this localized drop as a dead battery and triggers an alarm. [1, 2, 3, 4, 5, 6, 7, 8, 9, 10] Troubleshooting Action Steps Check the Digital Display: Look for error codes like E01/E05 (Low Voltage), E03/E06(Overload), or E04/E07 (Over-temperature) to pinpoint the exact failure type. Verify Voltage with a Multimeter: Test direct DC current across the battery terminals. If it reads under 12V, plug into shore power or run a generator to engage the battery charger. Shed Electrical Loads: Unplug high-draw appliances like microwaves, coffee makers, or hair dryers to see if the beeping stops. Inspect Physical Connections: Tighten all cable terminals. Clean off any green or white corrosion crust with a wire brush. Ensure the cooling fan spin freely and the air vents are completely clear. Perform a Hard Reset: Turn off the unit. Completely disconnect all sources of AC shore power and DC battery power for 5 to 10 minutes to reboot the internal microprocessors. [1, 2, 3, 4, 5, 6, 7, 8, 10, 11]
1 point
-
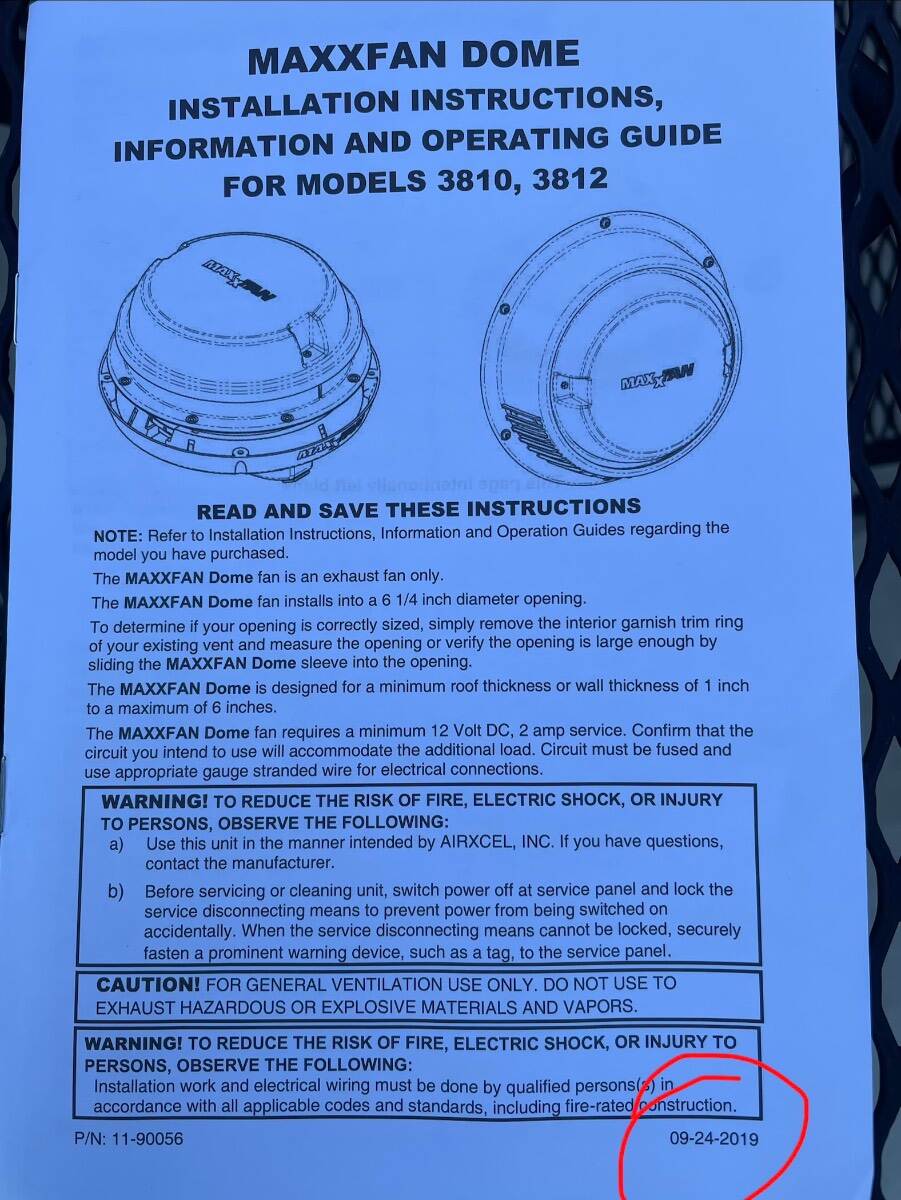
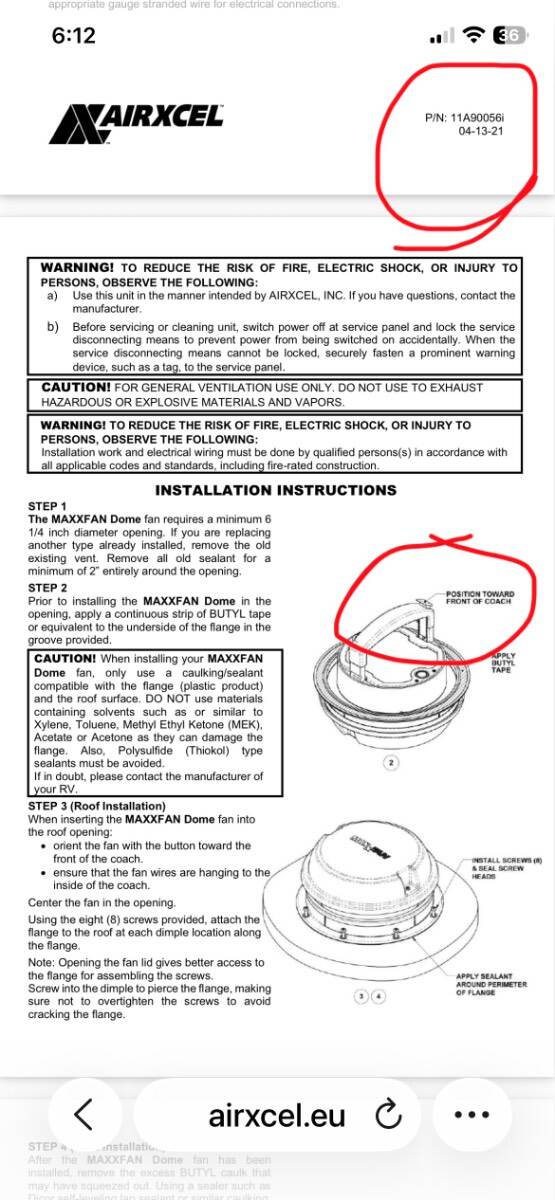
Thanks for your responses. I found a newer version of the installation instructions online. My installation instructions dated 09-24-2019 do not have the note on the drawing that the instructions dated 04-13-2021 have regarding what button to place forward. The old Ventline fan that I removed has a steel base. The butyl tape used to bed it had been built up under the front and rear of the base so as to conform to the roof curvature. Bill
1 point
-
Its the parent company, apparently. Affecting a bunch of good companies they've bought, including Reese and Tekonsha. Major RV Hitch/Towing Company Goes Bankrupt; DOJ Investigating - RV News https://share.google/kvLioMOy73cWpU6Z31 point
-
Yeah, you noticed in my picture that I stacked an 8" Anderson block plus five 1" blocks for 13" total height. You want the height in the blocks so the jack only extends a few inches. These Barker jacks will extend 18" but I only want about half the length showing.1 point
-
By Pony Express do you mean Amazon? Are you sure it is a Dometic brand part. I'm with you in wanting to hear the 'click' like the original part. If not Dometic brand, time for another Amazon return and get the part from eTrailer, Camping World or some legit RV store. https://www.etrailer.com/Accessories-and-Parts/Dometic/DOM93FR.html A lot of hose clamps these days have 7mm screw heads.1 point
-
The stabilizers are one of the best features of the Oliver in my opinion , they make tire changing and general maintenance so much easier and safer. I had a flat while traveling last fall and I got the tire changed very quickly and safely. The stabilizers were invaluable when doing the Alcan spring pack update. Combine the stabilizers with being connected to the tow vehicle and with a backup jack, "belt and suspenders" as @DanielBoondock says, and that makes for a very stable platform.1 point
-
Or if cautious like me use both an external jack and the stabilizers, belt and suspenders1 point
-
I believe that this "OTT & Cooper Tire issue" likely originated from the problems surrounding tires that were shipped to Oliver that had "balancing beads" in them. These balancing beads caused problems with the tire valve due to not allowing the tire stem valves to operate properly. Some additional discussion of this and what Oliver did about it can be found HERE. Note that there were very few Ollies affected by this problem before it was caught. Also note that Oliver supplied new valve stems and a small cash payment to owners that were involved. I'm not aware that there ever was any other tire valve stem "issues" with and/or "recalls" in this regard. Bill1 point
-
Nice insulated windows at delivery - but - being acrylic what are they going to look like later? Interesting hitch - looks strong. IMO the suspension is a no go. Therefore, the ONLY way to go would be to spend the extra for the optional. The window up top is not motorized. Therefore, what happens when it rains? Truma heating (and I assume hot water) - what happens when you need service? propone storage is OK to nice with the fold out cover but less aero. big sink, interior height, large fridge, ducted a/c, lower storage, 500 lb receiver hitch, 3,000 watt inverter, rear camera located below the rear marker lights - are all good. what's the frame material? What are the tires? Shocks? How are the hull built - how thick, what is the core material(s), what is the insulation (is there any?)? What is the size of the bunks? What's the warranty? What's the price? Bottom line - nice to have what appears to be a reasonable competitor, but, at this point I still very much like my Oliver and the company that built it. Bill1 point
-
Great pics! That’s one of our favorite areas. My grandparents lived in Branson when I was growing up, it was a little different in those days. Mike1 point
-
So's your Ollie - nice pic! Bill1 point
-
Yes, you could. I just wanted the security of the larger ball. The referenced model is the direct replacement! It’s critical to line up/drill the bolt holes accurately, but that’s it. Chapter 11 surprising, but they did put 7K labels on one or more 5K couplers. One failed on an Oliver. Maybe the lawyers got them, too bad.1 point
-
Oliver mounted ours wrong, 90 degrees off, and it pops open on the highway. Follow the instructions.0 points
-
The Dometic "Flush Valve Kit" arrived by pony express (3 days) and I installed it late last night. It is the proper part for our model of toilet. However, during re-assembly when I inserted it into the back of the toilet, it did not “Click” as mentioned in the Video or Forum comments. I pressed it in the best I could, but no “CLICK”, removed it and re-inserted the old one and “Click”… re-inserted new one, no "CLICK". I did however add the “second screw as was suppled”, so now I have (2) screws holding the “Flush Valve” in place. And what is with the worm gear clamps (existing & supplied), the heads are not 1/4 or 5/16's, sheeez but I did snug them up tight. This morning I will look for any subtle differences between the old and new Flush Valve. And I still have a very slight drip coming out of the back of the toilet where the “Flush Valve” inserts… I believe I have a work-around, in that I found out where I will re-locate Willis’s water dish. Maggie was not impressed. B~Out0 points











-
Recent Achievements
-
















