Leaderboard


Popular Content
Showing content with the highest reputation on 06/16/2026 in all areas
-
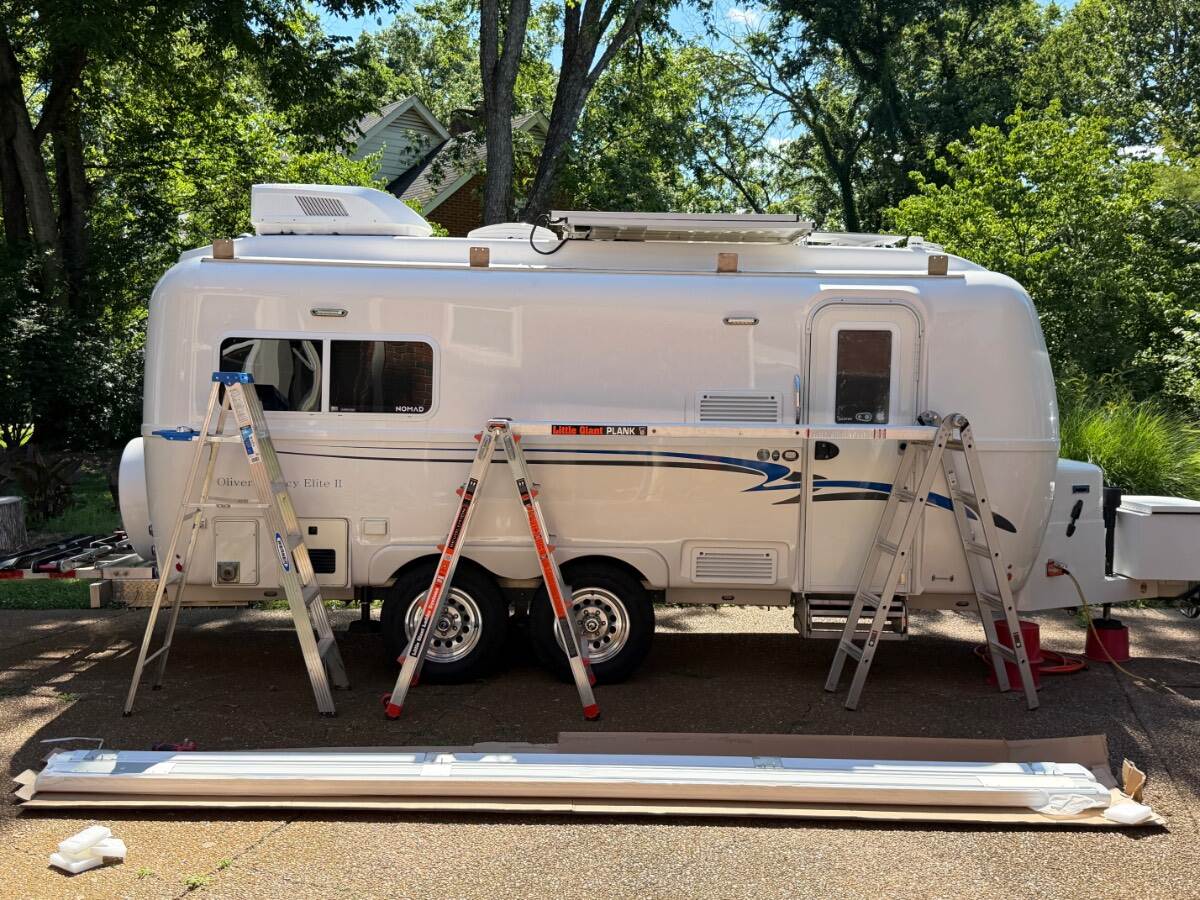
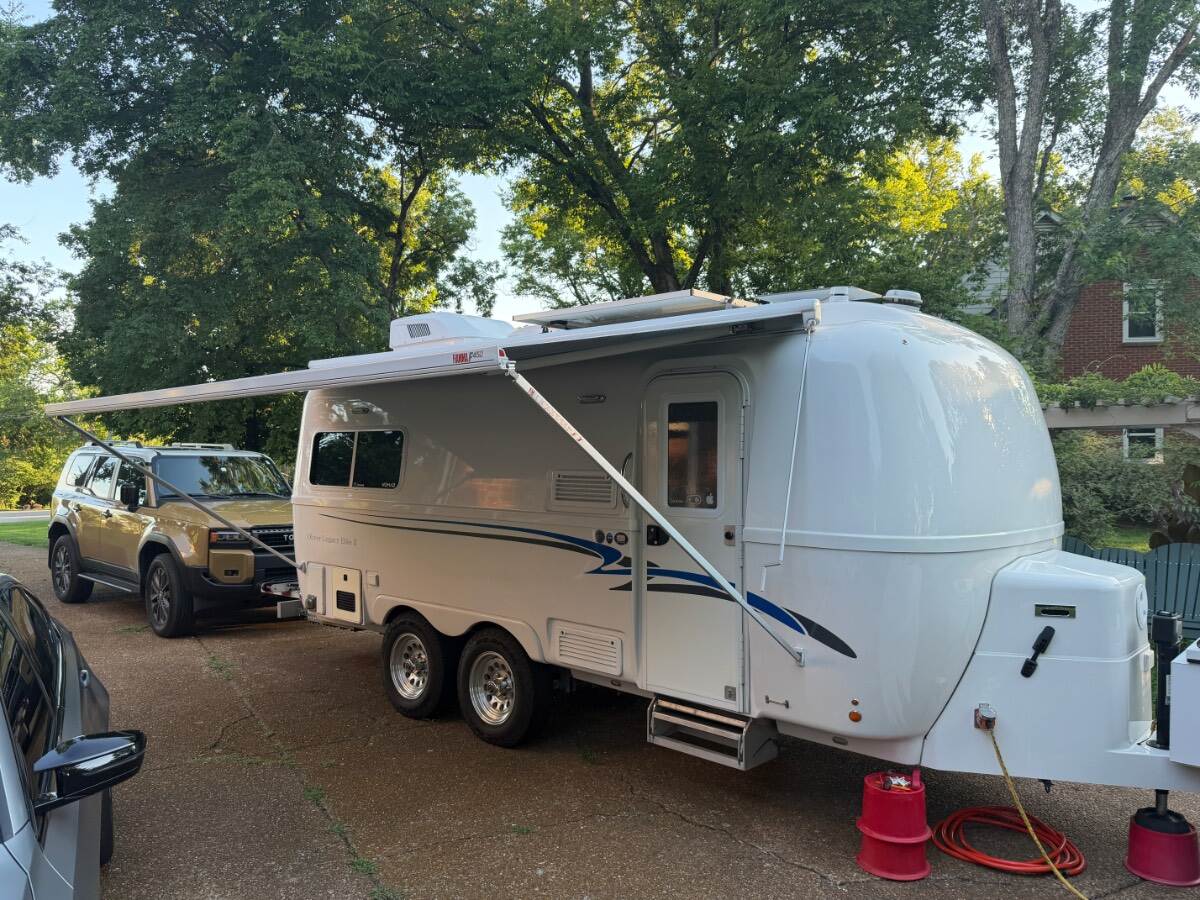
After 8 years of the Carefree awning, I decided to go with what I a wanted originally. A Fiamma 45s 450 (14 ft 8 in.). The Carefree was well made and incredibly durable but had some shortcomings. Mostly regarding closing completely. The Fiamma has a much lighter weight aluminum pole for extending and retracting. Also, like the pole connector on the right side close to the door. I ended up using the old brackets (used a square to mark with both awnings on the ground lined up) just to make the install simpler. The awning extension pole bracket holes on the camper weren’t the same so you have to drill another hole, not big deal. Love the new blue awning and seeing it when closed shut perfectly on both ends of case!
 6 points
 -
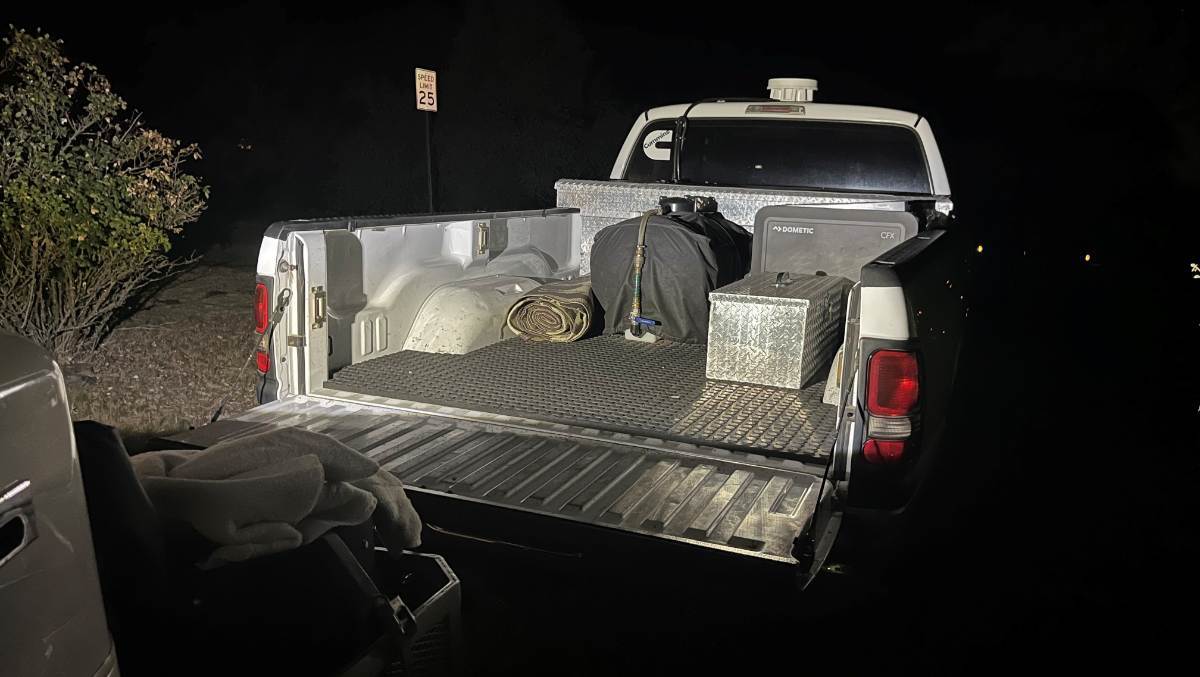
Let me first revise this statement a bit. Love the Rear Porch Light installation, which copies the design and same product used for the Entry and Side Porch Lights! 😎 Not as much love for my new front light, but it's finished and it's not bad. I made a new mounting bracket for the front light from a simple flat bracket. I chose this part since 6" is a good total length and it's 2mm thick. Many SS brackets are thicker which would make it more difficult to form into a U-shaped bracket. Amazon.com: 4 Pieces Stainless Steel Straight Brace (6.1 x 0.7 inch,156 x 18 mm) Flat Straight Braces, Straight Brackets, 24 Pieces Screws Included : Industrial & Scientific Not easy working stainless steel which is a hard steel. I measured the required 2 3/4" width at center. After applying rings of black tape to keep the SS from being marred, I clamped the bracket tightly into a vise at the marked point. I used a jigsaw to cut the groove, running the moving blade right against the vise to keep it in place. I'm not a metal fab guy, so this is the best I could do. I used a "heavy metal" blade, but it wore out after one cut, needing a second blade for the other side. The grooves I cut positioned the correct location and space for the bend. I also believe the heat from sawing helped in hammering a clean angle. Then the bracket was too wide, so I used a bench grinder to cut down the width in the upper portion where it connects to the light. Filed the edges and used steel wool to shine up all sides of the bracket. Sounds like a lot of work but was done in about 30 minutes, (after days of thinking it over)! 🤣 It looks much better now. It's shorter than my previous install and I moved it forward a little. It's visually more pleasing since it doesn't conflict with the lines of the belly bar. It lights up the truck bed fully without shadow. You can see shadow only on the tailgate, but when it's closed the light reflects down to see the trailer hitch and cables if needed. We're good now! But these LED lights are BRIGHT! Maybe later a mini hood attached to the light, so it doesn't hit your eyes when standing to the side. There's always something in the minds of engineers! 😎
2 points
-
Well…. My Oliver and TV played well together for 3 1/2 years before this issue started. But I will keep this in mind. Thanks @ScottyGS for the additional input.1 point
-
Yes! I have a tiny pocket IR thermometer I got at Harbor Freight. Not super accurate, but you're only really interested in the relative temperatures between wheels - looking for one running significantly/unusually hotter than the others (every trailer we've had had one wheel that consistently ran slightly hotter than the others for some reason). HF doesn't sell it anymore, but they have similar pocket IR thermometers on Amazon. I prefer the pocket size to the gun because I can grab it at a rest stop, check my wheels, then drop it in my pocket while I head to the rest room. (You look kinda funny carrying a IR gun into a restroom...)1 point
-
It's possible that one brake "overadjusts." One of ours does. There's no adjustment for this on the "Never Adjust" brakes. You can back it off with the star wheel, but it'll just go back to where it was the next time it adjusts itself. If that's the case, it might make noise for a while after each self-adjustment, then stop after some wear from driving. If that's the case, it's probably not a big deal, especially since you only hear it in reverse.1 point
-
Thanks Scotty, this is very helpful and adds a new twist! The Oliver has LED lights for brake, reverse and taillights. The low amp draw of LEDs may not register with the factory brake controllers, cause for the error codes. @Boudicca908's truck is GM vs. Ford but could still be the same issue. This is worth a try! If true in this case, there could be nothing wrong with the factory brake controller, nothing wrong with Oliver trailer wiring, just the factory controller not playing well with LED trailer lighting, wow! Learning this, the U-Haul trailer test I suggested would not be conclusive! If U-Haul trailers have standard automotive incandescent lights the factory controller would not show error with the U-Haul but only trailers like the Oliver with LED lighting. Yesterday U-Haul failed to rent a trailer with brakes and 7-blade connection. I would try this $30 device asap and scratch the U-Haul idea for now. At some point, if you're able to tow a second Oliver and the error messages go away, that would be a viable test showing issues with your Oliver trailer wiring.1 point
-
Talking to JD1923 now and I was telling him about a "trailer disconnect" problem I had years back with my Ford F150. What solved it was the "Tow Ready 20142". https://www.reeseprod.com/product/20142_trailer-connector-adapter-7-to-7-way It "fools" the truck that there is enough electrical feedback to keep that message from happening. It's not that expensive, less than $30. You might try it. It solved a very vexxing problem for me. Good Luck, Scotty1 point
-
Or move the one out of my flattop cooking box to the truck cab 🙂. However, Rebecca would say I never met a tool that I didn't want two of, so.....(follows link). Agree on the Klein tools, can't count how many of their electrician screwdrivers I have. My electrical bag is pretty much all their stuff. Best recent thing, a USB meter when I was trying to figure out why the new charging port I put in the back was not working on my iPad. https://a.co/d/0i4XkaJ9 <- Shortened Amazon Link Love those - I have been considering taking off the plastic caps as I have lost two of the Oliver inserts and $50+ to put the company logo back on seems like money flowing the wrong way. Doesn't Oliver know I'm an influencer and they should give them to me for free? 🤣 🤣 🤣 Going to do one more day of spin test, give the lug nuts a torque, and happy Oliver camper our way back into Colorado today. Hopefully, all stays good till we get home, and there is nothing exciting to report tonight. Have an undercarriage day on my calendar before our next trip and will follow your video just to make sure everything is buttoned up before we head out for our next journey. Thanks for all the help!!1 point
-
I ordered 25 ft from Rec Pro which is more than needed for the windows but wanted extra in case I goofed up a length or two and thought I might be adding some to other areas which I have not done yet. I cut each length to 56 inches which provides just enough overhang past the window frame. Hopefully adding caulk both above and below the gutter and especially at the ends might help the product to last longer too. On a recent rainy night I noticed water spots on the underside of the gutter indicating the benefit of caulking below as well as above. The real test will come this winter though with the extreme temperature variations we receive here in SW Montana. This method of slightly bending the gutter away from the windows seems to be working very well from my observations so far. Should be receiving new glazing beads from Steele Rubber today and will report back on those once installed. Good luck with your re-install.1 point
-
@routlaw I may have missed it, but which weather stripping (gutter) material did you get and where did you order it from? My old gutters from 2021 gave out recently (no more sticky) and I need more. How much length did you order for the way you installed it? I like your installation versus the way I did it years ago. Thanks,1 point
-
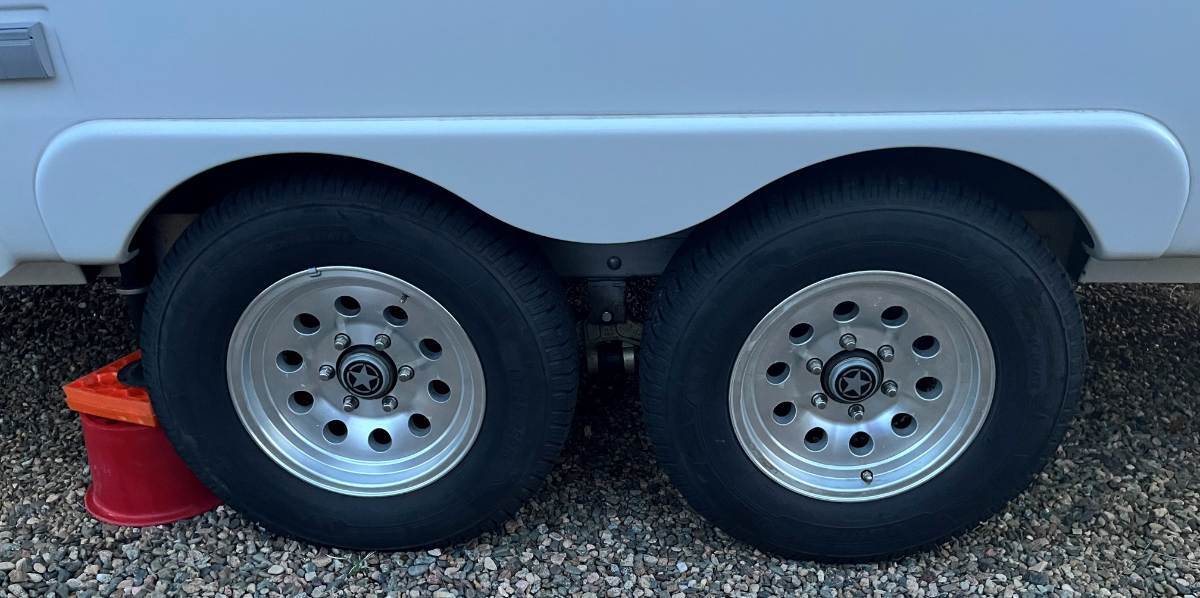
Hmmm! Squeaking one day backing up. RR wheel squeaking another day with the spin test. Spin test today all is quiet after 180 highway miles. Starting to sound more like brakes. They should self-adjust, so yeah issue "diffuses" as you wrote. In automotive issues it's always sound reasoning to think, "what did we work on last that might have caused this?" In your case it was Alcan Springs installation. They could have banged the wheel or dropped the axle on that side. Easy enough to do working on leaf spring replacement. Or maybe they noticed your brakes needed adjusting and tightened the self-adjusters which do not always adjust as they should. You changed your gain from 7 to 5 noting they were grabbing better. A lot of maybes... Try the spin test again on all 4 or... Forget about it until you hear something again when driving or backing slowly, like you did the first time. Enjoy your trip, maybe this was nothing. Two suggestions:1) If you do not have one... Get an Infrared thermometer digital laser gun. When you take a break after a bit of highway towing, asap measure hub and drum temps. Temps on all fours should be close to equal. One hub measures higher than the others, could mean a bearing issue. Higher temp on one drum (or lower meaning shoes not engaging) points to brake issues. You must remove your center caps to measure hub temps. Many of us have. You should like the Texas Star emblems stuck on my Nev-R Lube dust caps in lieu of those standard (big ugly) center caps designed to fit over the old-school bearings. I like Klien tools and purchased this model. It has saved me when my brakes faded coming down a steep range as my brake controller was acting up. I read temps on my truck front rotors up to 400F and waited roadside until they cooled to under 200F. Yeah, when you stop take temps on ALL 8 wheels! Amazon.com: Klein Tools IR1 Infrared Thermometer, Digital Laser Gun is Non-Contact Thermometer with a Temperature Range -4 to 752-Degree Fahrenheit : Industrial & Scientific 2) When you get home follow my how-to on axle maintenance:
1 point
-
The plot thickens - or diffuses - I’m not sure which. @jd1923 I did the requested test this morning. Got no squeak on reverse spin. Could the trip from Dutch John UT to Rawlins WY gotten the brakes back in adjustment? I will test again when we leave the Cabela’s RV Park. I did visually inspect all four tires and did not observe any bald spots or scuffs. Just a higher than normal number of rocks in the treads from two nights on gravel. Possibly a self healing problem? I’m still planning to do a full undercarriage inspection up on jacks with wheels removed when we get home. Will update after tomorrows lift and spin check.1 point
-
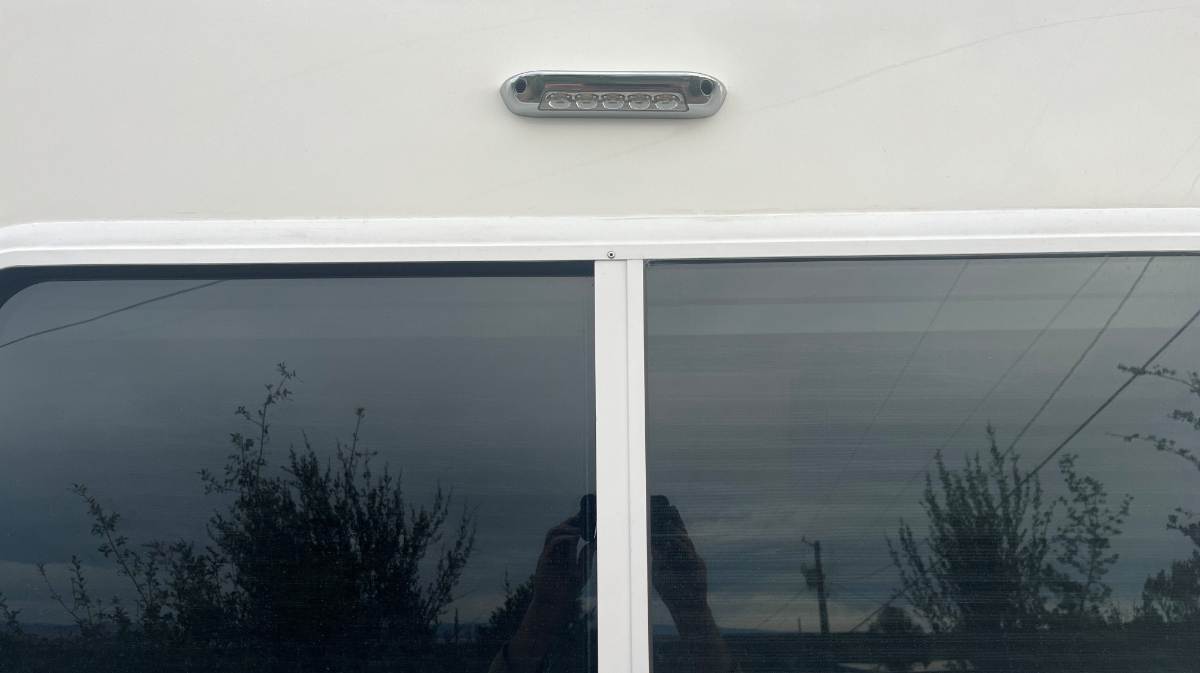
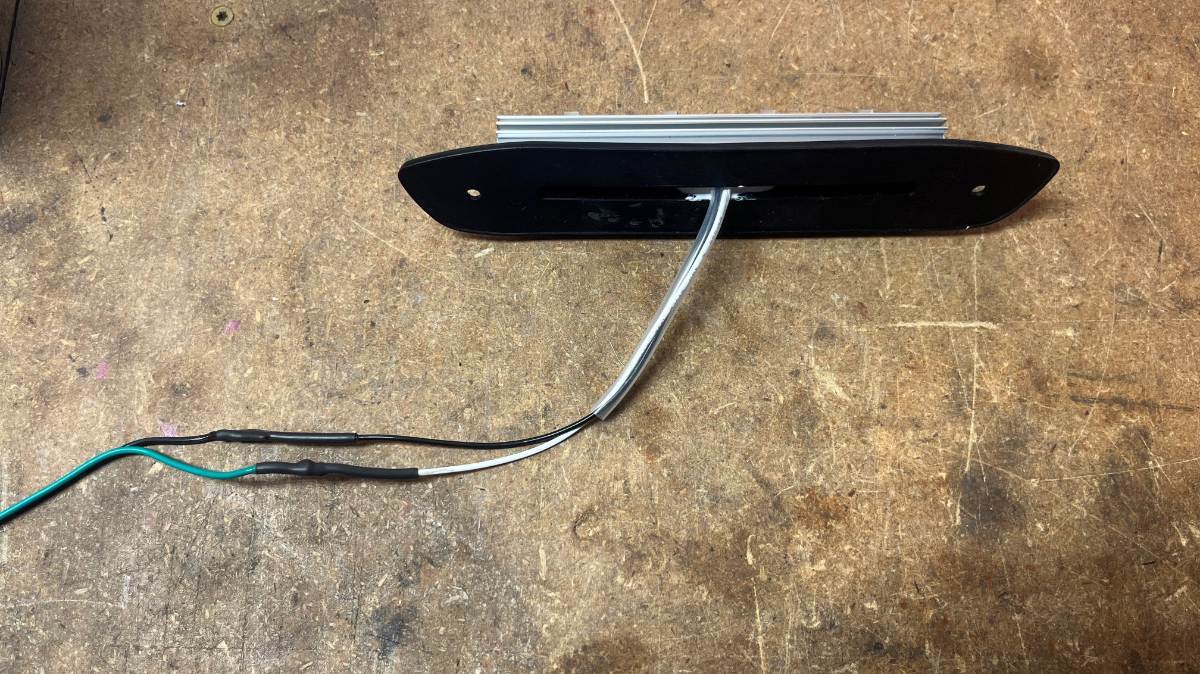
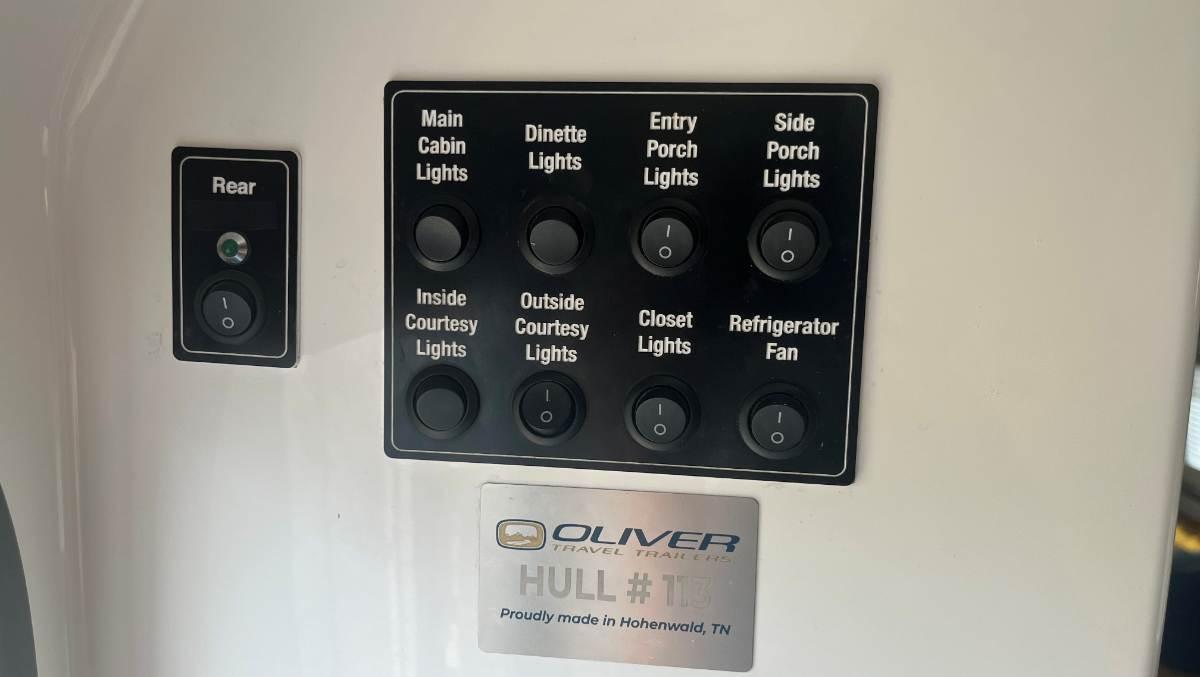
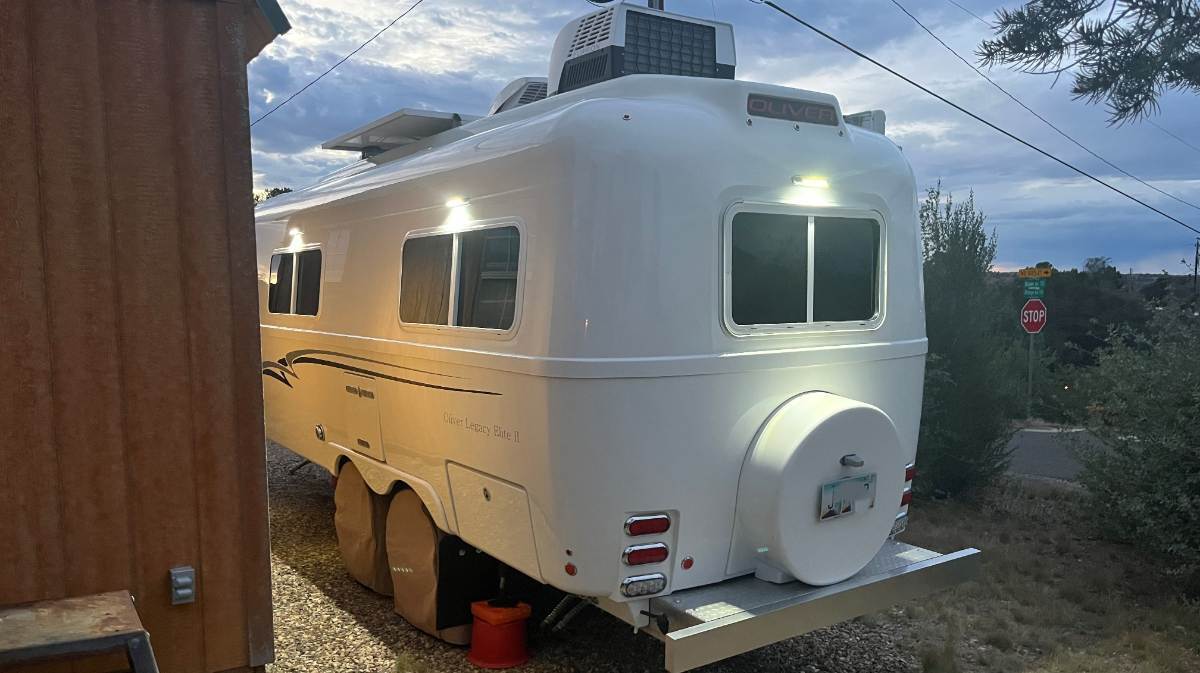
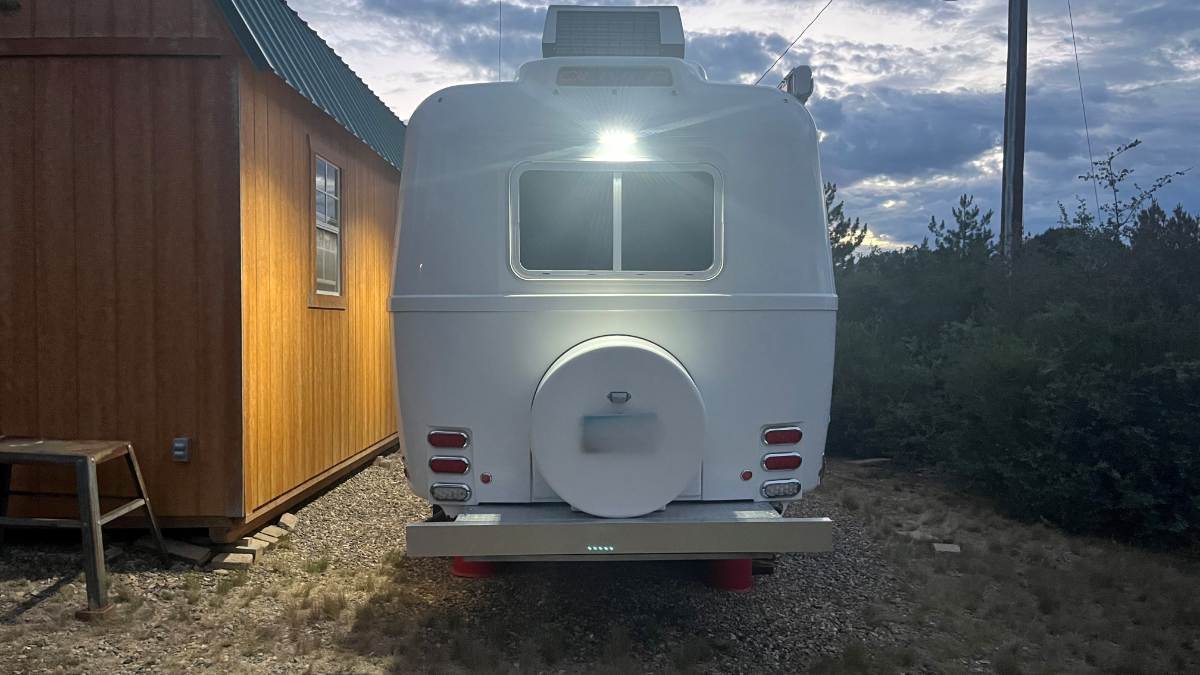
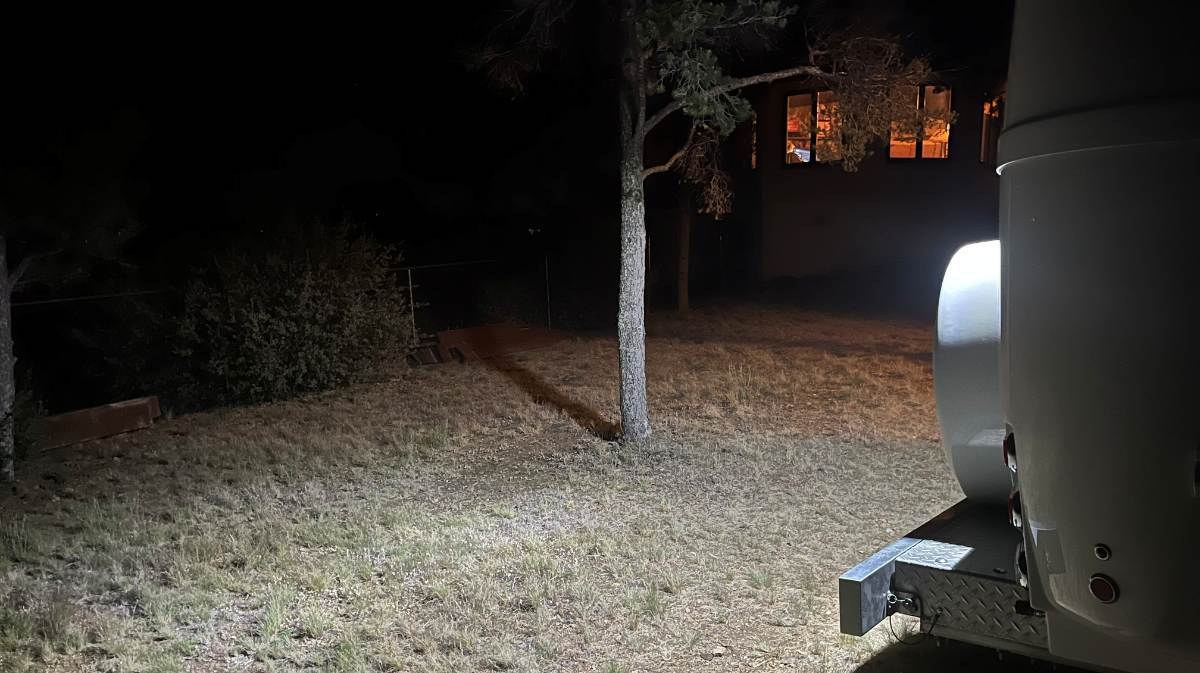
The Oliver Porch Lights are bright for a dark campsite, so we rarely use them. But if you need to light up the area they work great. I've often wondered, why isn't there lighting on the front and rear of the Oliver? I asked a year ago about replacement lights for our OEM Porch Lights and just purchased some recently. OTT should install these lights in all four directions. I would have done one up front too, but running wire would be difficult. I got something else for up front, more on that later. https://itcshopnow.com/products/assurance-exterior-flood-light?variant=50392962007319 I carefully measured the four Porch Lights OTT installed, as the distance from hull belly line, which btw holds a tape measure nicely, up to centerline of the Porch Light at the mounting screws. Turns out they were all installed at different heights +/- 3/4". As a special bonus, this light is 1/4" off from front to the rear mounting screws. My new Rear Porch Light, I promise is the straightest of the bunch! 🤣 It's not easy to choose the best spot to drill into the exterior of your hull, this one especially. I cut away some of the white insulation in the back of the attic. I used a 2-ft piece of metal fish-tape with the ends curled back, running it down the inside of the back exterior hull. Repeatedly, it measured 12" form the bottom of the OLIVER taillight to where the fish-tape hit the top of the rear window frame. It measured 12" so I figured I should go 10" max. Looking from the outside, there is a flat fiberglass frame around the rear window. Above that, the top rear is convex. I had to find the best spot so that the approx. 8" x 1 1/2" light would sit flat in both directions. If not water would get behind it. I drilled a 1/4" hole centered to the window, so the light is just above the flat frame area of the rear window. I soldered and heat shrink extra length of wire to the light. If they only attached 18" of wire! Offset the splices so that they would fit nicely into the drilled hole. It wasn't an easy pull but a few ins and outs and the light pulled flush (would be easier with 2 people, one in one out). I eyeballed the light level to the window frame. I wanted to VHB the light housing vs. drilling two mounting holes but the design of the light would not allow for it. They do not include hardware. Found the stoutest 1" course thread screws that would fit the openings and I drilled 6/94" holes after marking the centers. Wiring? I wanted to add the new rear light to the Side Porch Lights (streetside). However, I could not find the switch leg in the back corner of the attic and I did not want to remove all the stuff out of the kitchen cabinets. But that would be the right way to do it. Cabinets empty, you can easily run wiring up to the main switch panel. Our hull had a rear camera and a separate switch to power it. I removed the camera a year ago, so I'm using this separate switch with existing wiring. I copied something Geoff did, where he used a Sharpie to black out the word "Awning." Mine has a thin cut piece of black tape over the word "Camera" so it just reads "Rear" now! 🤣 I had to wait patiently for dusk and dark tonight! The hull looks great with the new Rear Porch Light to compliment the side lights. And finally, it alone lights up the yard! 😎
1 point
-
Thanks Rich, his frank language is funny too! 🤣1 point
-
My friend Ron, of course you know! Our son Adam played a USTA Tennis Tournament in the very nice Houston suburb of Clear Lake 15 years ago. I remember sitting outdoors, large-brimmed hat on for the sun, I was drippin' wet just watching! 😎 The 16-year-old boys had drenched shirts before the first set was won. Traveling the west vs. the gulf states is night and day. Wish we had a forum member in the east with a Chill Cube for comparison. The Chill Cube condenser fan wets the condenser by design. To my knowledge, no other A/C unit has this feature (perhaps Furrion has a patent). The water-cooled condenser increases the overall cooling efficiency. In very dry climates (the spring is our windy dry season), the little bit of condensate it pulls out of the dry air quickly returns to the air (evaporates). I have yet to see any condensate drip on our hull. When greater cooling is needed and it's humid, the fan should create a visible mist blowing from the condenser coils. More mist means less drip. But when the volume of condensate gets large it would overflow the condensate trough and run down the hull.1 point
-
Especially this geek! If you haven’t checked out Louis Rossmann’s channel, you should. He’s now siding with Will Prowse, and I think BB is toast! Here’s another good video from him to watch.1 point
-
No, I’m agreeing it is likely correct because all the right wire colors are there for a trailer wiring harness. Blue wire is power to brakes.1 point
-
Would be pure speculation. When we sold our previous LE I, the new owner got spreadsheets and the handwritten logbook that's like an airplane's log. We didn't receive anything like that, just some vague contradictory statements about how little the trailer had traveled and the distant places that they had visited. Based on several other items (shocks, refrigerator, plumbing) I have my opinions and speculations. I have tried to go through (with the help of the smart people on this forum) each system and bring it up to better than specs. Bulldog shocks, new refregerator, etc. I also try to give back with designs for installing the GasStop units on an LE I and will eventually get around to posting my refrigerator fan design that has a temp sensor to run the exhaust fans when needed. The reason we purchased an Oliver is the community, the bunch of experienced travelers and engineers that will see a panic message on a Saturday afternoon and start throwing out helpful and thougtful troubleshooting tips. Besides the incredible engineering and reliability of our trailers, it's the community that sets our Oliver apart from the Grand Design sitting across from us and the Apex next door. Wow - this response got off topic. Road brain, or possibly the wide open spaces of Wyoming out the window.1 point
-
Our Oliver turned 10 last month. We will celebrate our 50th wedding anniversary this coming Friday. Time flies. Mike1 point
-
Since you had the latch pinned, I would assume that the issue was caused by the wire part that connected from the latch to the collar. I don't see how that collar can slide back allowing the coupler to open without some type of deformation to, or disconnection of, that wire. Let us know what Bulldog tells you.
1 point
-
It's a lesson to all of us to always have a spare set of shorts handy for occasions like this. 😜1 point
-
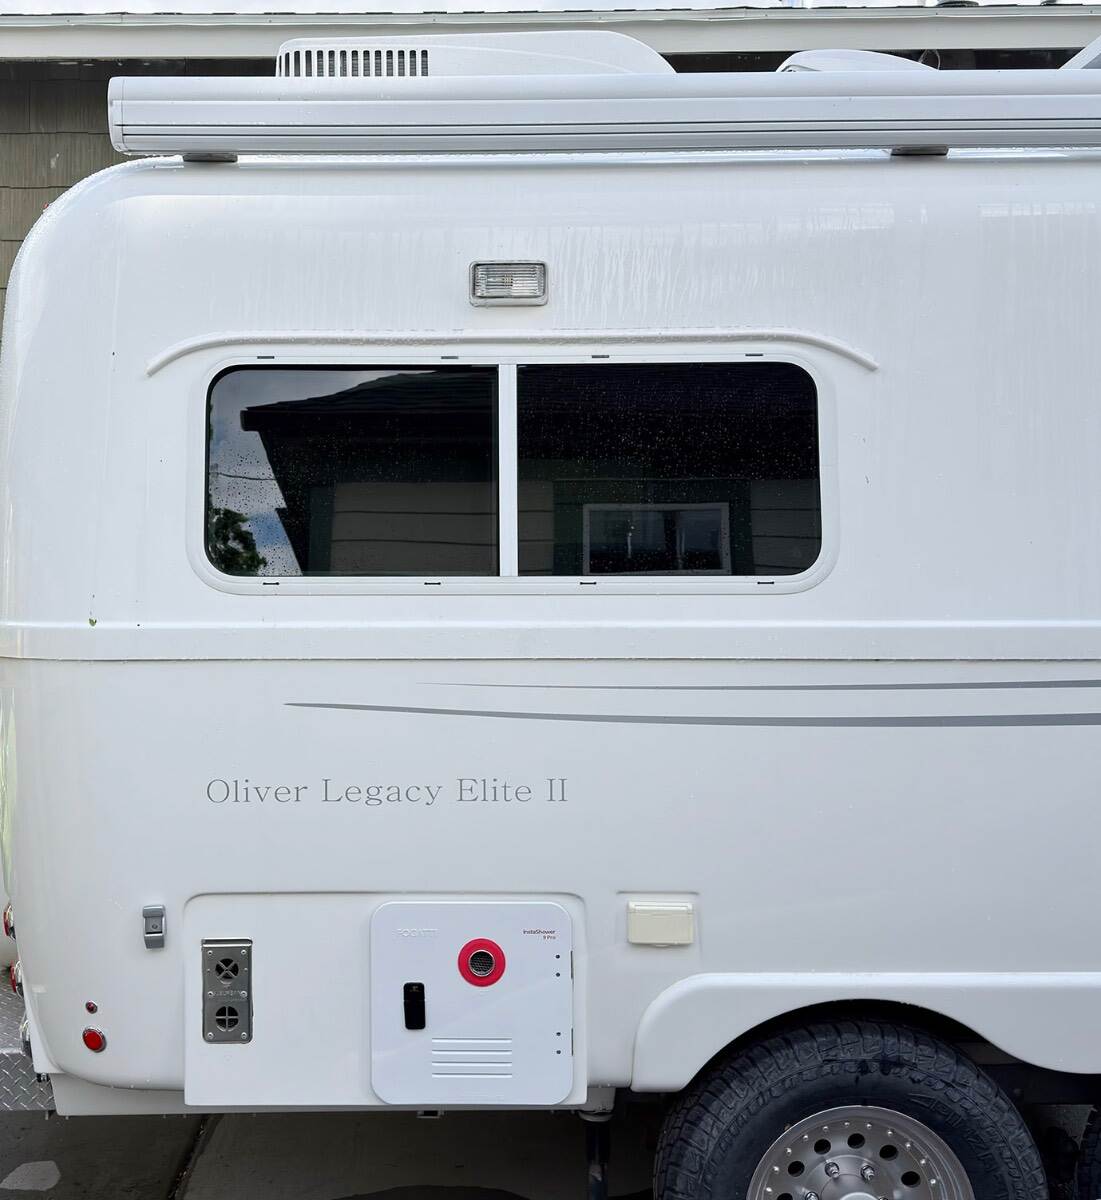
Perhaps I am beating a dead horse on this subject and thread but wanted to add a few things that might be of interest to those with Lippert 8800 series of windows. This past week I ordered 3 sample packs from Steele Rubber in NC which includes many if not all of their rubber weather stripping and glass sliding seals they manufacture. They arrived today. The samples seem to be well made, albeit very expensive for what they are. On my unit the outer most rubber w/s does not nor has it ever touched the sliding glass window and in fact misses the glass by a full 1/8th of an inch. Needless to say our windows were more like a sieve than a sealed window. Weeps holes do little to nothing to mitigate the incoming water during heavy rains. For those of you who need to replace their exterior rubber w/s for what ever reason the part # I have ordered is 70-4500-257 and this sample does indeed provide a relatively tight seal against the sliding window. This part also has a tighter fit in the channel, a good thing. No doubt the wrong w/s was installed on our windows given its rather loose fitting in addition to it not being wide enough to seal against the sliding window. Effectively the original does nothing at all to seal water. Steele Rubber company has a huge amount and variety of gaskets and seals making it nearly impossible to determine the correct fit without the sample packs. They also produce a much different type of glider seal/track that appears to be better and less likely to allow further leakage into the window channels. The ones that came with these windows do nothing to prevent water from entering into the channels and dripping into the cabin. The part # for that item has conflicting information between the website and the sample pack ID's they sent. It is either 70-3577-58 or 70-3577-256 come in 8ft lengths and priced at nearly $49 for each length. The exterior w/s piece is sold by the foot at $7 per foot. In addition to the effort of sealing the windows I have also finally added gutters over the windows. I put this off for a long time mainly because I didn't have faith in these small channels being effective during a downpour. I also installed them a bit different than most by gently curving the ends diagonally away from the window. The sharp bend pointing toward the ground never made sense to me and also caulked above and under the J channel to provide a longer lasting seal, hopefully. Thanks, hope this helps some others
1 point


.thumb.jpg.e34bf01ef7f7d5e99ad31856d45afbeb.jpg)
.png.3686f202d3933fbd87bdd949b010d7e1.png)

-
Recent Achievements
-


")


")


