Leaderboard


Popular Content
Showing content with the highest reputation since 02/23/2026 in Posts
-
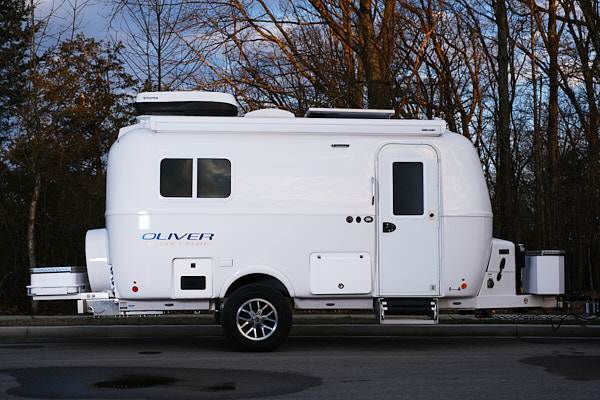
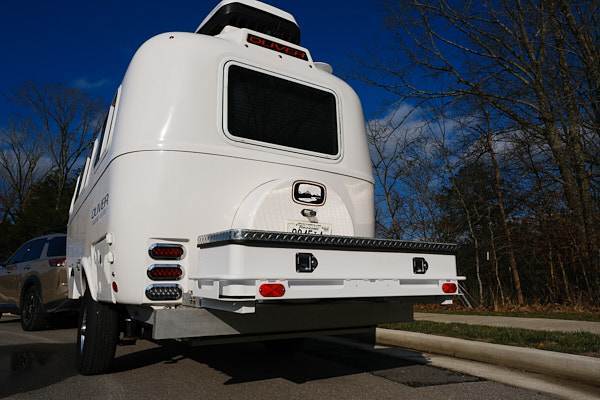
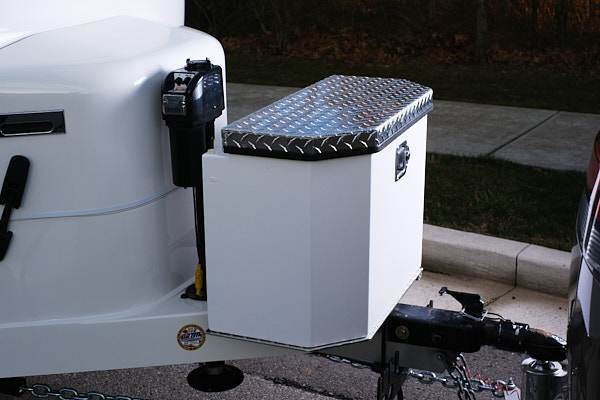
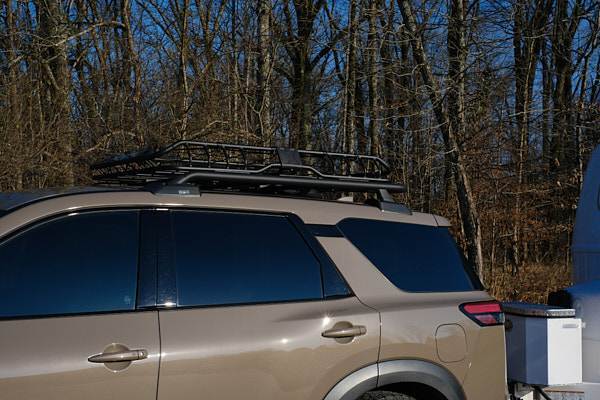
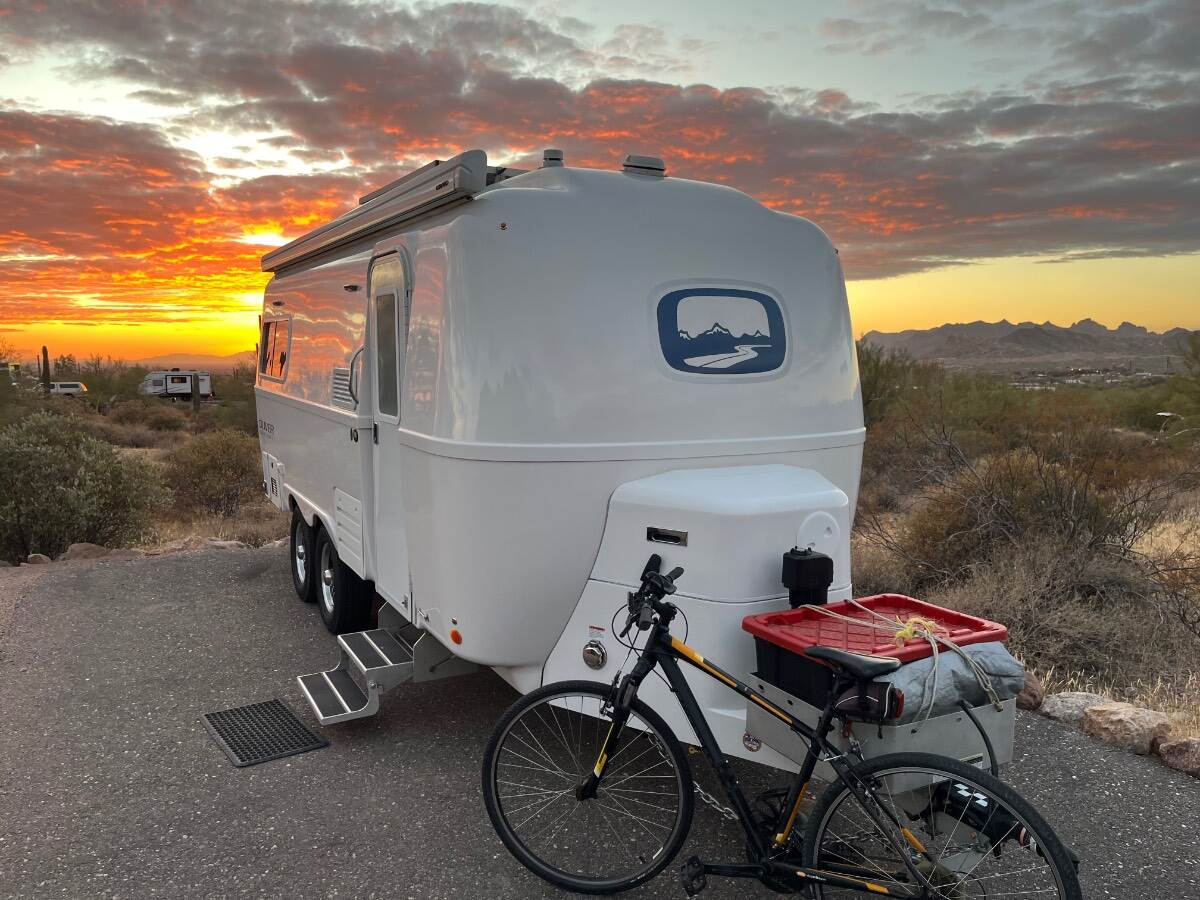
Barb and I have had our LE I for about 18 months now. We fancy ourselves minimalists, but truth be told, we viewed the LE I as a bit of an experiment knowing that it would be a challenge getting all of our gear in the trailer and the Pathfinder. What helps is that we are both perpetual organizers and efficiency nuts so we welcomed the challenge. The game changer for us has been connecting with the folks at Sea Biscuit. Knowing we needed a little more storage one of the first accessories we added was the rear basket from Sea Biscuit. We weren't quite sure what types of containers we could put in the basket, but we knew it gave us lots of options for adding storage. After looking at the myriad options of storage containers, boxes, etc. that could go in that rear basket, we settled on the rear storage box from Sea Biscuit. The locking rear box is home for our hookups, a large tool bag, our outdoor carpet for under the awning, and several other items that immediately come out when we land at a destination. Our sewer hose for draining the gray tank (we have a composting toilet, so no black tank hose) is still in the bumper and it is surprisingly easy to store and deploy when needed even with the box over top. The expanded storage we gained from the rear basket and box combo was our first game changing moment. It allowed us to move several items out of the Pathfinder permanently. Shortly thereafter we noticed the front box that many of the LE II owners had added. To our disappointment, the box was not compatible with the LE I, but we started a conversation with Dave and Kristine at Sea Biscuit about our options. Fast forward several more months and we are one of the first to acquire a front box unit designed specifically for the LE I. The front box is deeper than the rear box and fits neatly between the front jack post and the bull dog coupler. It sits on a steel platform making it super stable, and when opened leaves plenty of clearance for the jack post. The front box now holds our DC to DC charging cables, wheel chocks, and several other necessities that also formerly rode in the back of the Pathfinder. This was game changing moment number 2. One of the final accessories we added to compliment our storage accessories from Sea Biscuit was the rooftop basket from Rhino Rack. The rack holds our chairs and camp table that were also - yes, you guessed it - in the back of the Pathfinder. (Low and behold, I can now see out of the back window.) Barb and I are huge fans of the little Ollie having put over 15,000 miles on it, visiting 21 states in 2025. Our travel style is such that we rarely spend more than a couple of days in one spot so the flexibility of the smaller LE I, and smaller tow vehicle (17 mpg with the Pathfinder) is the perfect combination for us. For anyone who is considering an LE I, or who has an LE I and is looking for quality accessories to expand your storage, we cannot recommend the folks at Sea Biscuit highly enough. The products are top notch and the Hess's are awesome folks. See you on the road!
 13 points
 -
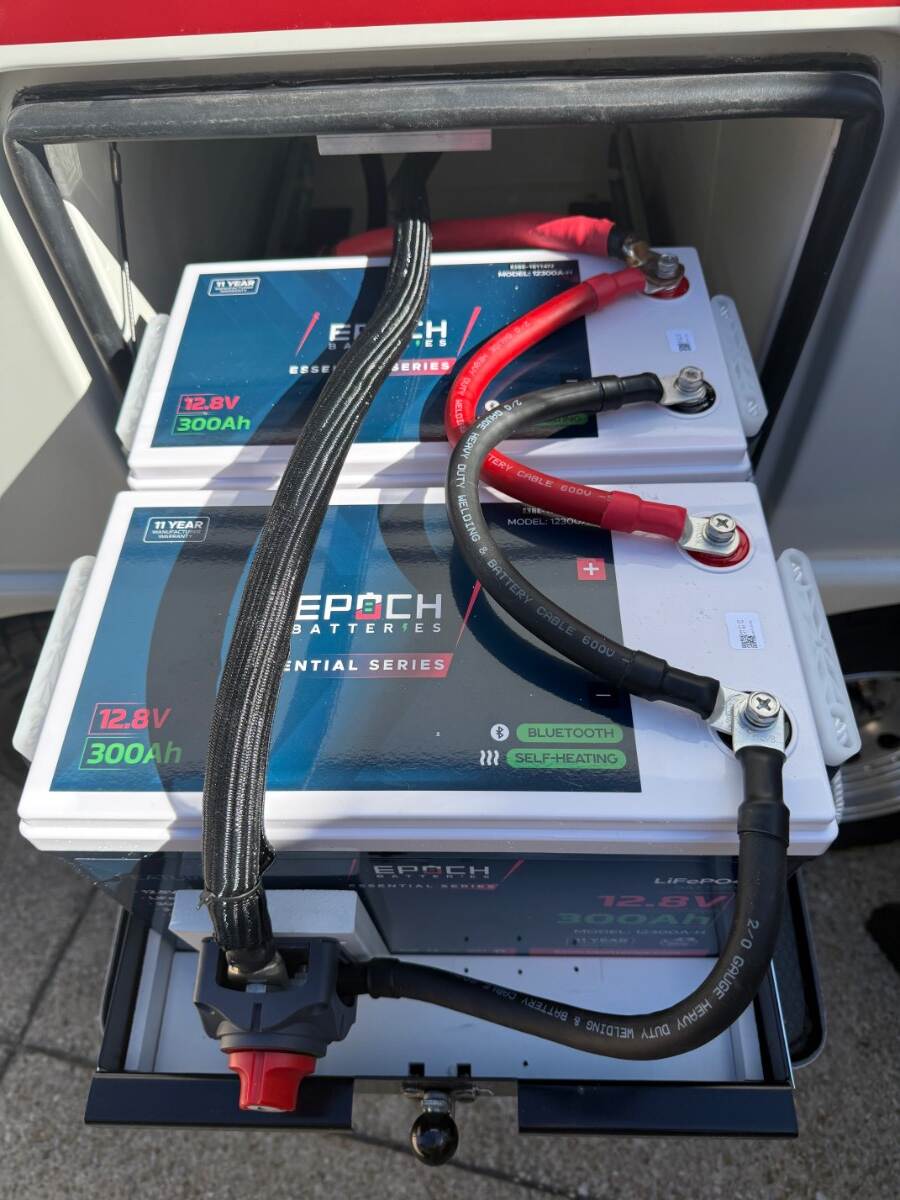
After I had heard about the issues that Battle Born was having, I initially tested my three batteries. I installed my batteries about six years ago and at least initially didn’t have any issues with them. We were in the midst of a two month trip so my testing was very rudimentary. I just ran a 1500 watt electric heater on my inverter for about a half hour. That loaded the batteries to 122 amps which only put about 41 amps on each battery. With this test I was only checking for hot positive terminals. No issues there. After we got back home I decided to replace all of the Battle Born batteries with two Epoch 300 ah batteries at the wise counsel of another Oliver owner. Anyway, I decided to perform a more detailed test on the three old batteries. I had an old 400 watt inverter that I connected with a 100 watt incandescent light bulb (remember those) and connected the input to each battery one at a time. This would put approximately 8 amps load on the battery. I first charged each battery to make sure they were fully charged. I finished my initial battery test today. First and third batteries lasted about 12 hours each. The inverter will turn itself off at 10 volts which is the voltage that a lithium battery is considered dead. The 12 hour time frame seems about right, 100 amp/hr (battery) divided by 8 amps (load) is about 12.5 hours so I think my actual test is fairly accurate. The second battery only lasted a few hours and died to the point that the charger would not recognize any voltage so wouldn’t start charging. I had to jumper a good battery in parallel with the dead one so that the charger would start then after just a couple of minutes I removed the good battery and charging continued. Anyway, I’m going to re test the bad one tomorrow. My original 300 ah had turned into 200 ah! Over the past couple of years I had noticed that the battery pack seemed to draw down quicker than before and that I had to recharge them more frequently. We do all sorts of camping typically, a mixture of boondocking and various stages of campgrounds. We typically camp not just a few days boondocking which is easy for any trailer but we’ll boondock for maybe two weeks at a time. This past year we were in our camper for a total of six months. Four months in the west and two months in the south east. During that time we spent a week here and there boondocking and sometimes in campgrounds with no hook ups. Anyway, it had become more difficult to boondock in the last couple of years. We have a compressor fridge that of course runs 24/7 and then other typical loads. I didn’t know it but we had one third of our battery capacity gone! I’m glad I changed these out for the Epoch batteries! My takeaway and suggestion for others (not just Battle Born owners) is to periodically fully test your lithium batteries. There are load testers sold on Amazon specifically designed to test them and they are a little more elegant than the inverter/light bulb arrangement that I used. The Epoch Essentials 300ah batteries have Bluetooth and can be electronically controlled. The output or charge input can be turned off and on through the app so in a multi battery setup each battery can be isolated. I have not experimented with this feature yet but could potentially make it easier to test one battery at a time in place without having to remove them. Anyway, fellow Battle Born owners test your batteries!8 points
-
If anyone needs new chocks for the upcoming season, Harbor Freight has them on sale with the coupon below: Bill7 points
-
We’ve never used a booster for our TST. Works fine.6 points
-
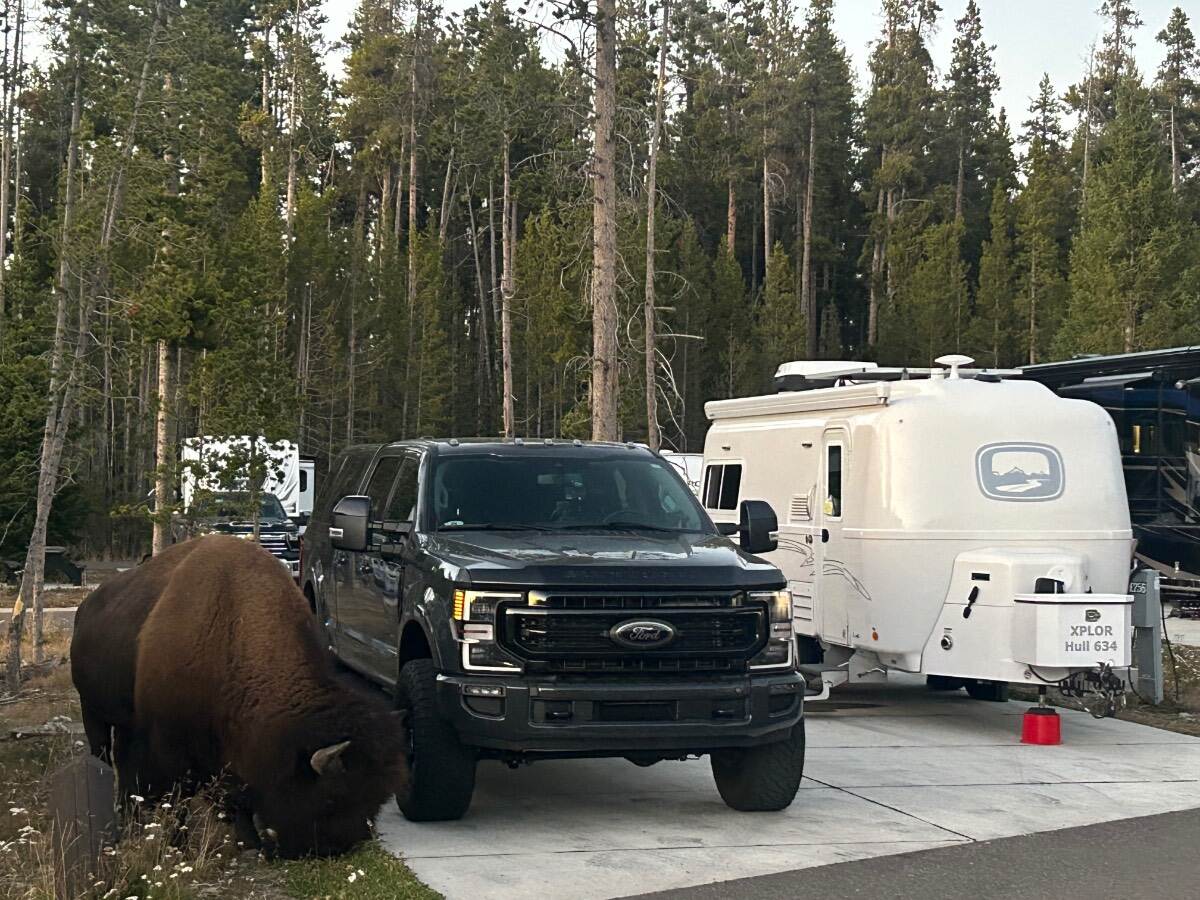
@Olive2Roam Great post and photos! We are big fans of our friends David and Kristine Hess owners of Sea Biscuit. You won’t meet a finer couple who fully support the RV industry with their products. My wife and I have been to their factory where they craft their products. Our front cargo box is has been one of our top mods. We store our chocks, blocks, 30amp cord and all other “possibles” for a quick set up and take down of our campsite. I installed a sheet of XPEL PPF (paint protection film) to the front of the cargo box of XPLOR to keep it protected from the blast zone and road missiles when in tow behind our TV. Your LE1 looks amazing, congrats on your mods! Beauty and the Beast - camped inside Yellowstone NP 🇺🇸
6 points
-
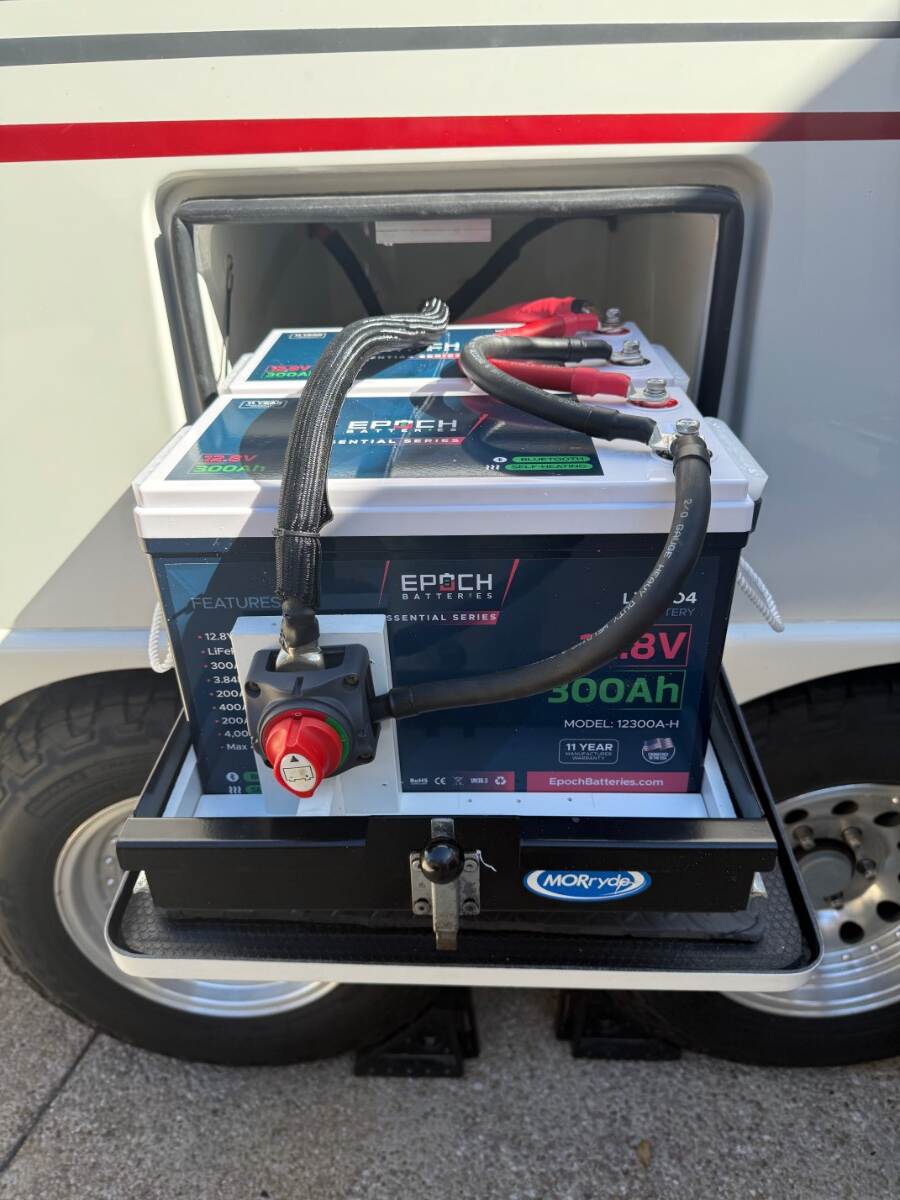
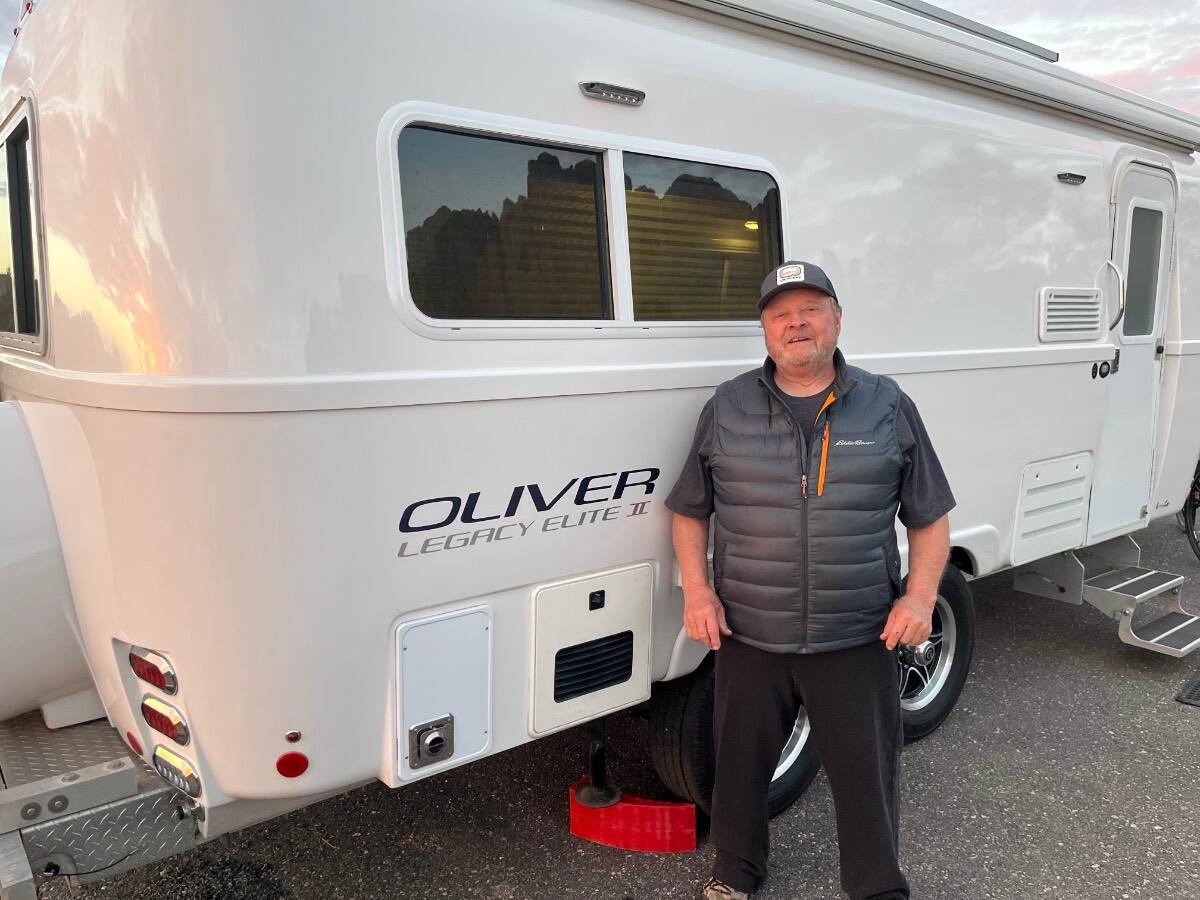
Battle Borns gone. Epoch’s installed. Hold down straps aren’t on yet.
5 points
-
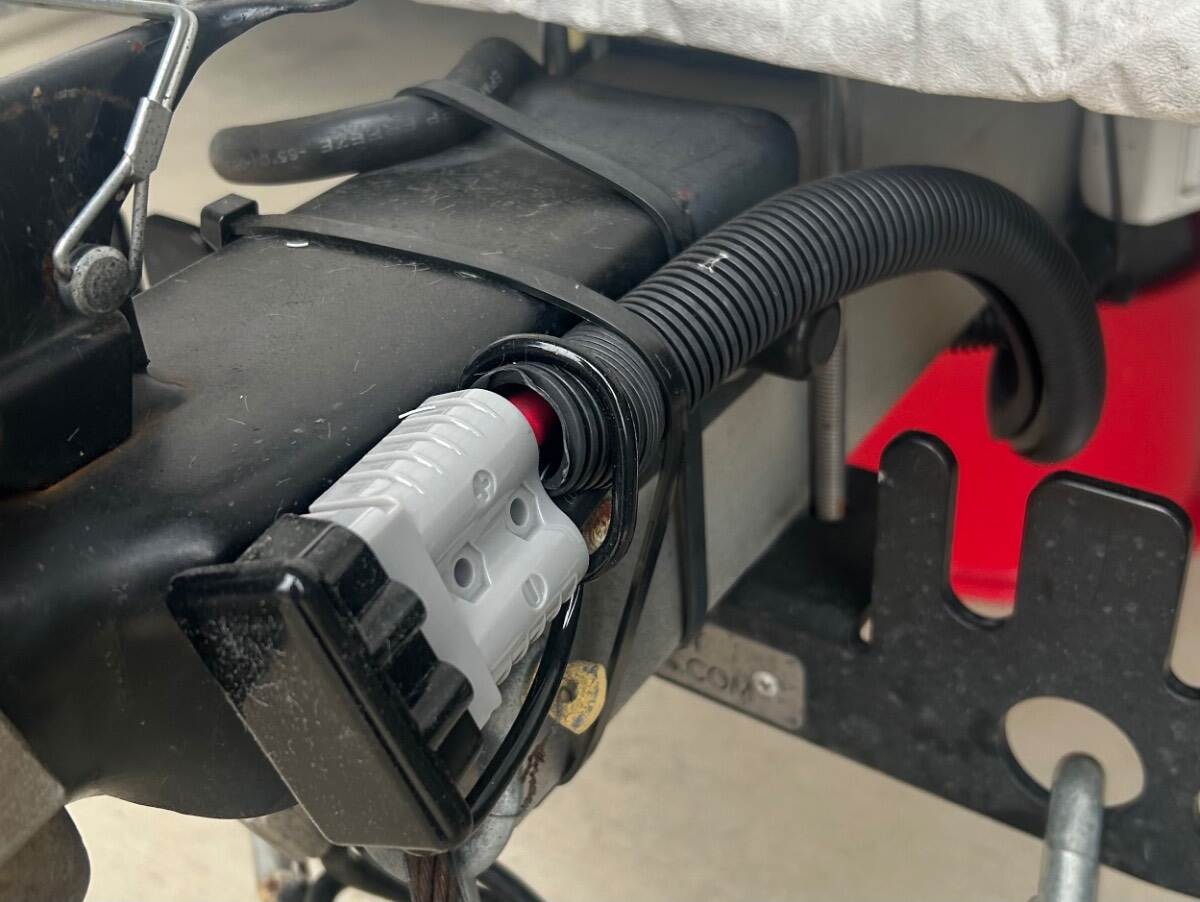
Hey John. Our DC to DC charging system is the detachable cable. There is a receptacle under the bumper at the back of the Pathfinder and there is a receptacle under the cargo box at the front of the trailer. We don’t leave that connected all the time so we made it detachable at both ends. Hope that makes sense.5 points
-
Here's additional photos of the spare tire removed on our LE2:5 points
-
My first thought is thanks for sharing! Even though we have ample carrying capacity, it's still of interest as what you have done here is truly excellent work! I've also heard very good reports re Sea Biscuit. Your white boxes, especially the rear box with the white railing surround, even white supports, look to be a perfect match like it was done at the factory, just gorgeous! 😂 18 months now? We remember meeting a friendly couple with a brand new E1 at the fall 2024 Texas Rally! Would that be you? Please, keep having fun in your cute little Oliver!5 points
-
@HDRider Jeff: I do not think the bumper needs to be removed. On my OTT, Elite II, the trailer hitch receiver needs to be removed.5 points
-
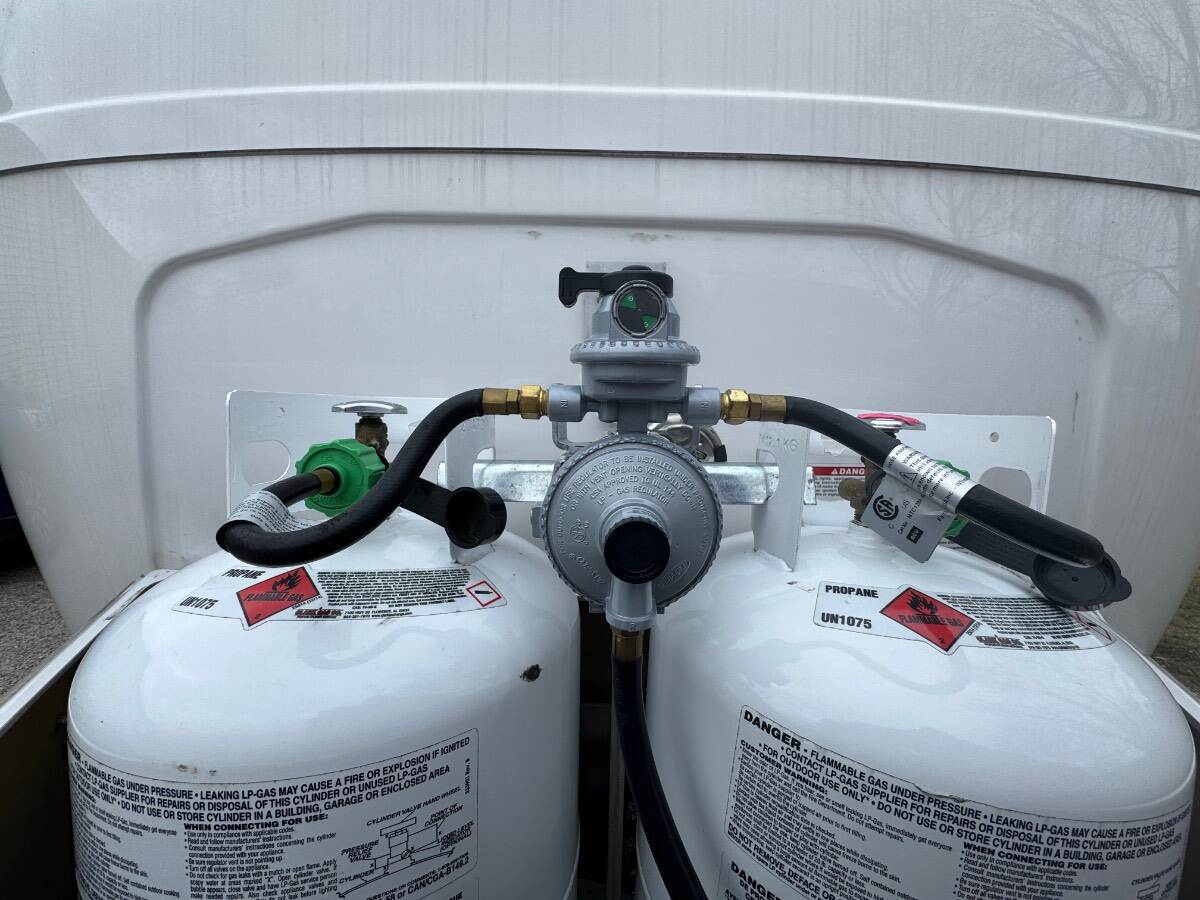
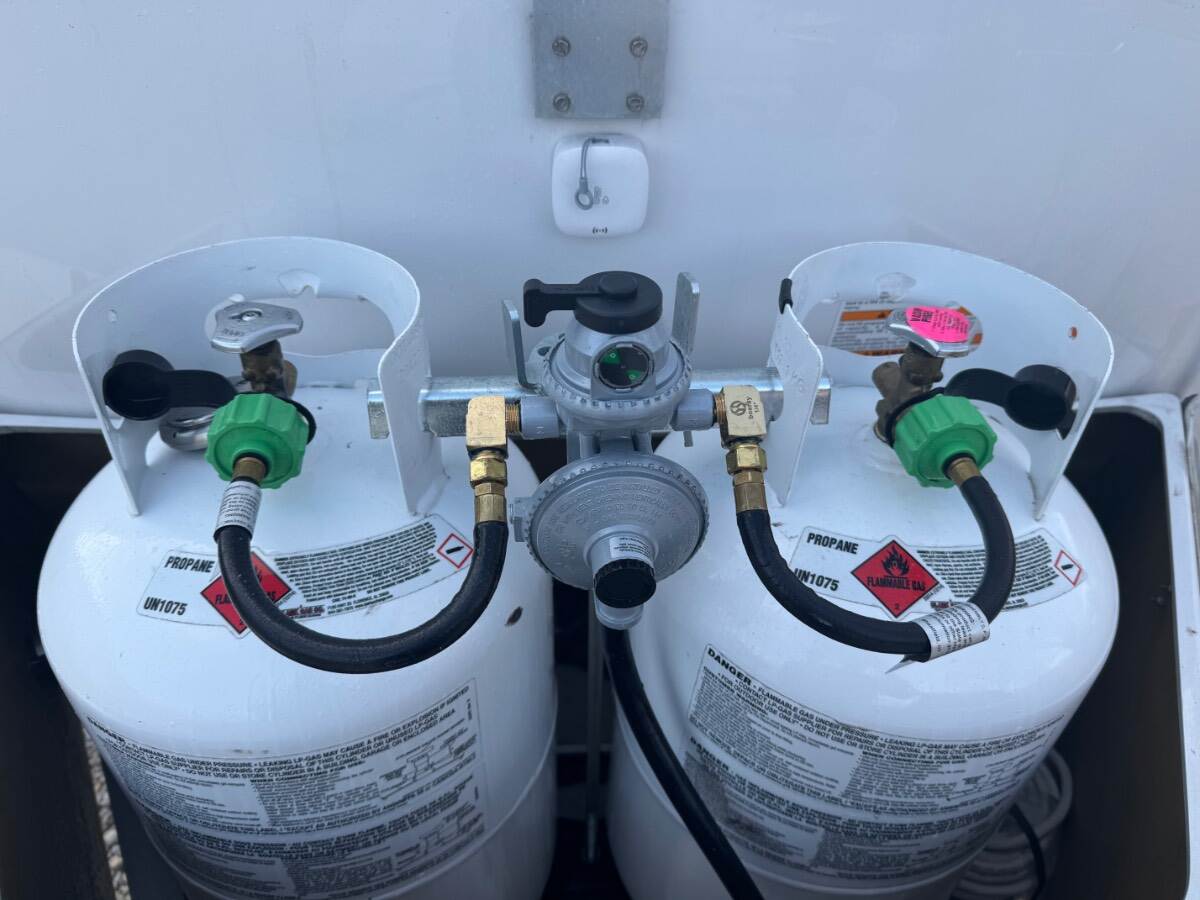
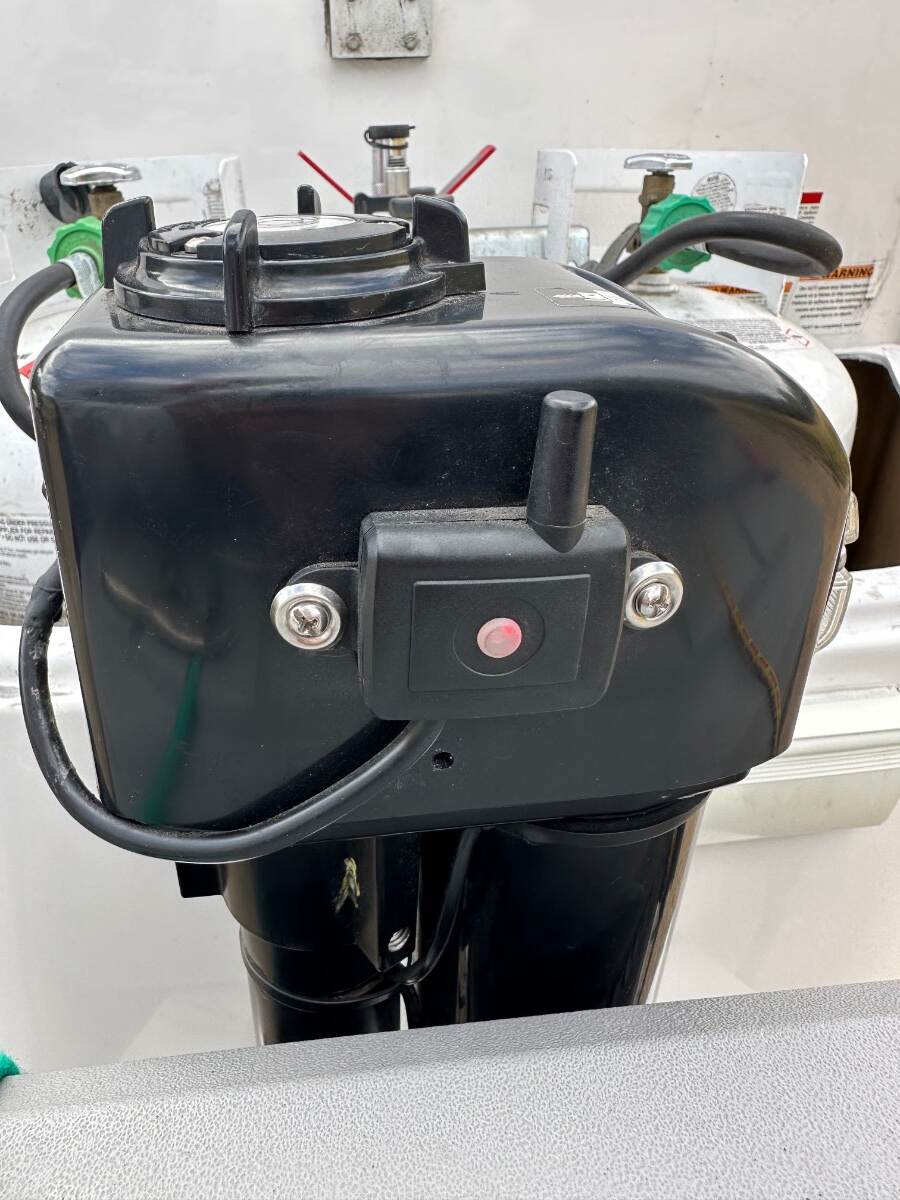
Well we had a “warm” day today so I decided to do one final upgrade that several others have previously done to their propane systems. I got the right angle fittings for the regulator connections a few weeks ago and finally decided to install them. It only takes a few minutes to do in place. The adapter fittings that come on the regulator have check valves built in, so I purchased standard 1/4” street elbows and reused the original adapters to make the connection. One little trick to make the installation easier, with the cold temps, the hose is stiff and feels like it will split if you try to reshape it into the new configuration. If you take the hoses into the kitchen and immerse the rubber part in a pan of boiling water for a minute, the hose will naturally straighten out, and while warm can easily be installed on the tanks and regulators with little tension in the process. There’s a much gentler bend in the hose when completed that should make the hoses last much longer. Before: After: Thanks to everyone who previously made this upgrade and for sharing on the forum.
5 points
-
“Curiosity” is currently parked next to “Dickens” at CGI Detailing’s shop in Murfreesboro, Tennessee. Getting the shine even shinier!5 points
-
To make changes in your signature: Click on your name in the upper right corner of the page. It will pop open this window: Look under SETTINGS and click on account settings. In the settings tab that opens up...near bottom you'll see signature with the pencil icon. Click on that signature line and it will pop open...you can add what you want including maps of your travels, hull # etc. Craig That brass port is the anti-siphon air gap from your black tank flush. The inlet to your external black flush hose bib on the side of the trailer (down low just below the dinette window) runs up to that antiphon then back down to the side of your black tank which is where it connects to the wash head. Once done flushing, that air breaker enables water to drain back out of the inlet port line out the street connection to your flush port. The air gap is an anti suction device that keeps black tank water from coming back out the exterior flush lines. It also makes that line self draining to prevent freeze ups in the flush line. (After you take your hose off after flushing...you'll see about a quart of water drain back out the connection.) Hope that helps.
5 points
-
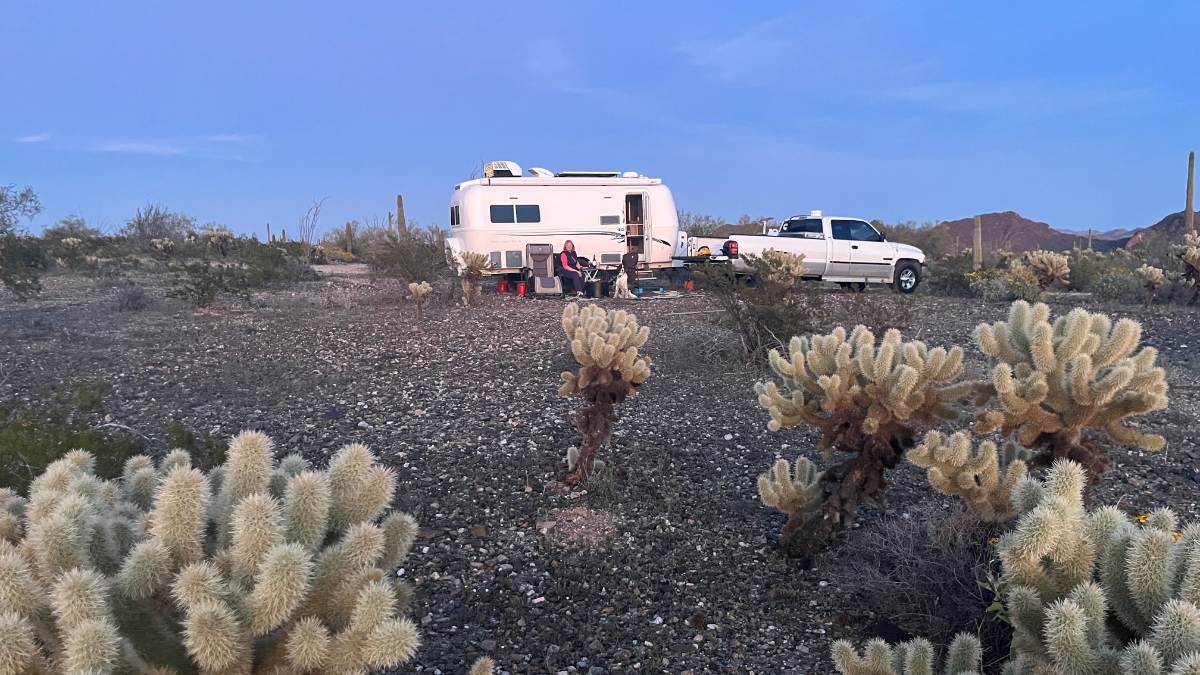
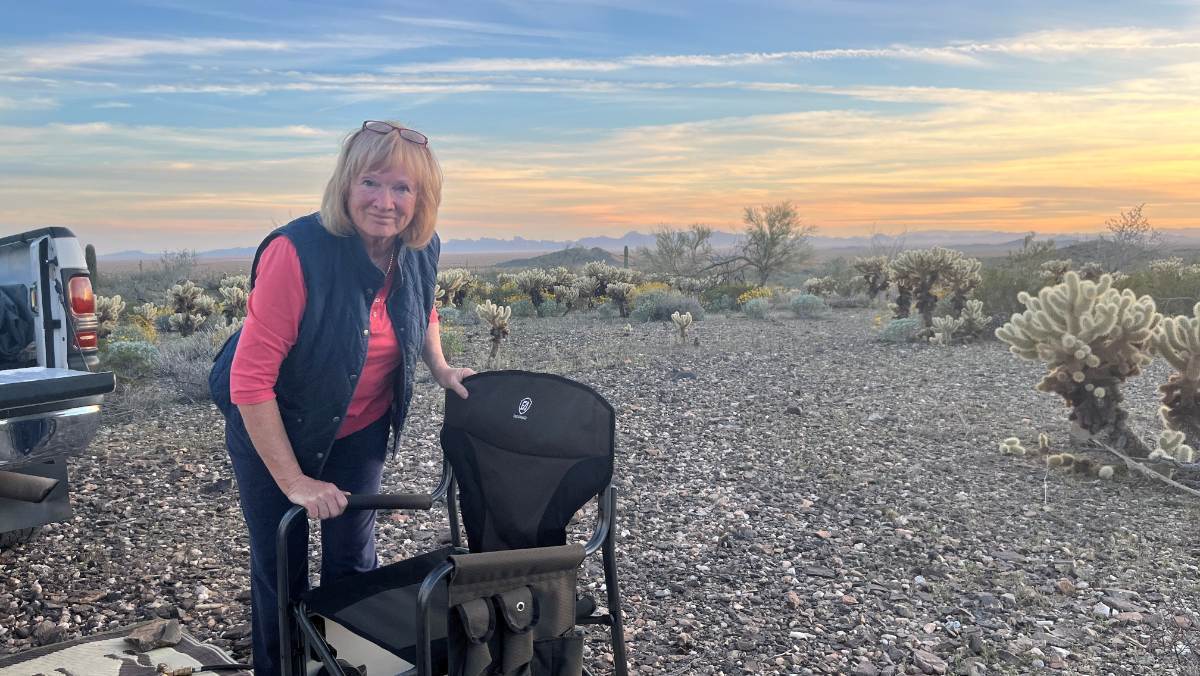
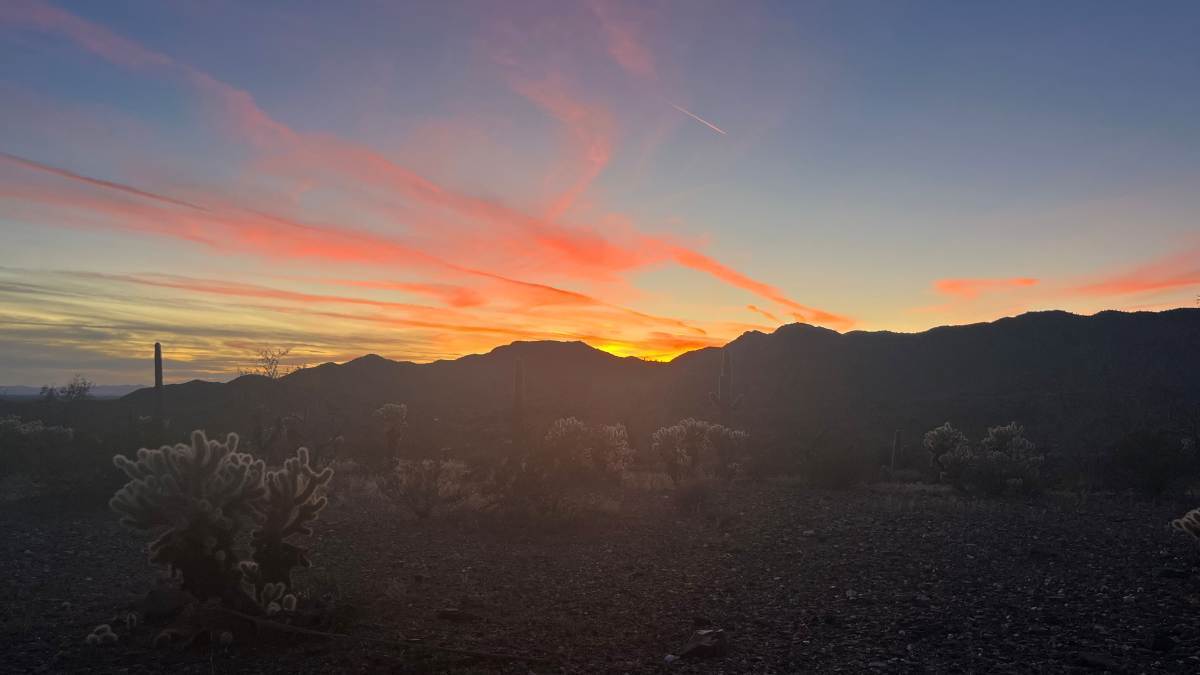
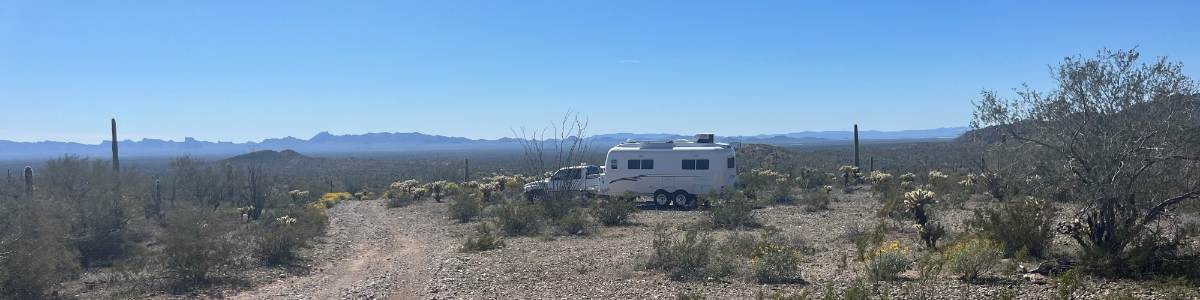
We'll have 4 peaceful overnights in this beautiful and mostly quiet BLM lands. Quiet except for occasional UTVs passing by to run the shelf road to the top of Harquahala Mountain! (3 groups so far on this Sunday.) We got 100 yards off the main road and all I hear are the insects of the Sonoran Desert (perhaps too dry here for many birds). Not one sound overnight! Up close and personal with the Cholla and Saguaro cactus! 75F this afternoon and should reach 85 in a couple days! Drinking coffee this morning, in shorts, shirt off, basking in the Arizona sun. From I-10, halfway between Phoenix and Quartzsite, take Salome Rd to Eagle Eye Rd north. Or take Eagle Eye Rd south off US Hwy 60 at Aguila AZ. The roads are all paved until you get to the staging area and the road to the top is of course dirt, where decades ago there was a Smithsonian observatory. Our tow vehicle is only 2WD and I'm not much for hairy shelf roads anyway! I'd like to drive up close enough to hike the rest of the climb. We'll check it out soon! We each have a good book to read and getting some sun and warmth (got cold and snowing in Prescott) and much needed rest, is all we need to finish up this trip! 😎
5 points
-
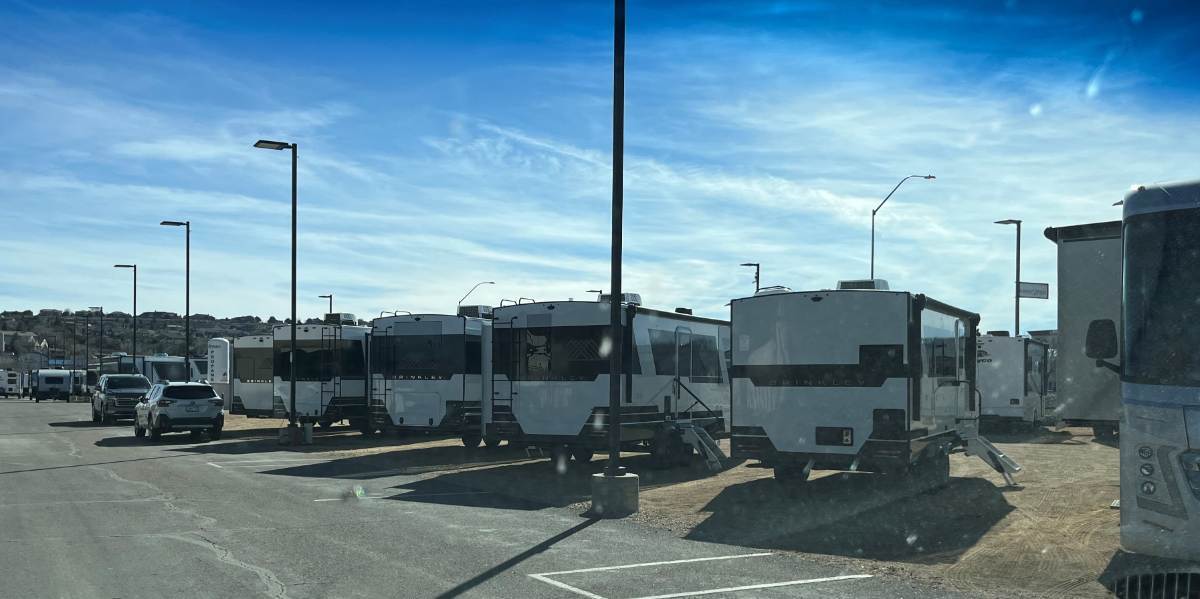
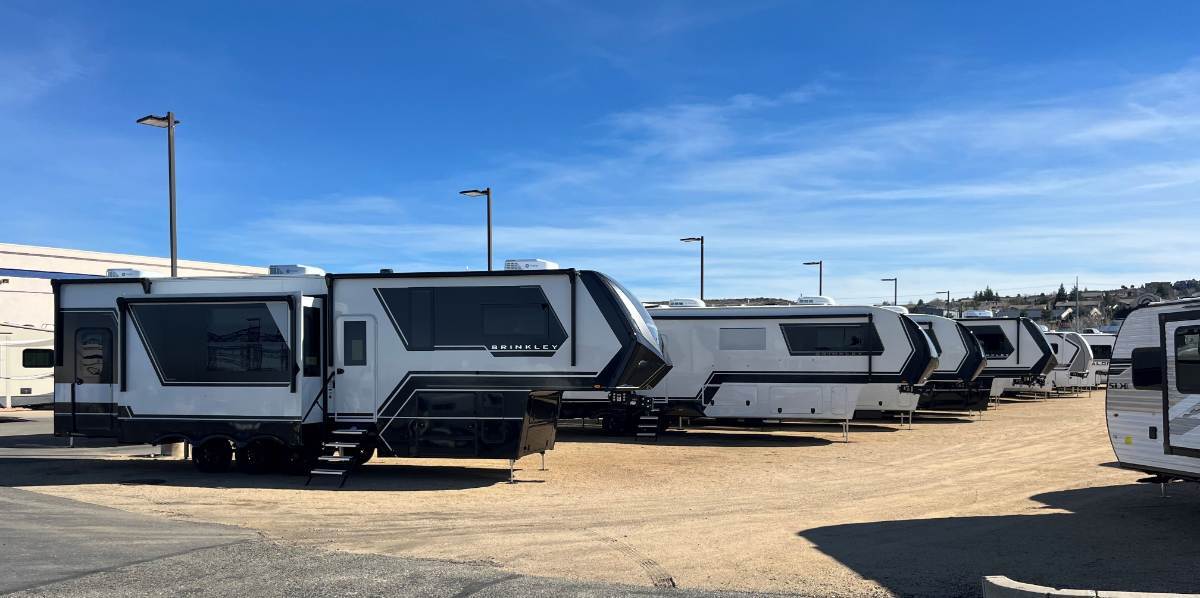
First we lost our friend Rich @rich.dev to how he wrote it in an email to me, "to the Dark Side." He purchased an Brinkley I235 travel trailer for more room. Rich still misses us and he's online here every so often. Later Rich and Thea traded in their I235 for a 5th wheel version, for even MORE room. We should see them in Quartzsite next year! Then our friend Art @MAX Burner moved to the Dark Side, also with an I235. I spent an evening with Art at Quartzsite, having a drink, sitting in one of his theatre recliners half-watching the big-screen projection TV, talking the night away! It was very nice and quite comfortable, but you know wallpaper on fiberboard panels is not the same as double-hull fiberglass! We don't hear much from Art here anymore, but he was in the middle of all our Olivers at Q. When we came back from Q, Blue Compass who took over 3 RV sales locations in our area, had 4 Brinkley TTs in inventory. We use their free dump station, and when returning on another trip 10 days later, one was sold. We were just there last week and Oh My! They now have 5 TTs and four 5th wheels, and you can tell by how they are parked with an empty space, they must have sold one 5th wheel as soon as they got them in! This new hot RV inventory is selling! They must be good trailers in how popular they have become quickly! But we have waaaaay too much into our Oliver, to ever visit the Dark Side! 😎
4 points
-
Brinkley makes excellent trailers and fifth wheels, probably the best conventional RVs on the market today. The company was started by two guys who left management at Grand Design, which was the top dog prior. Here's what usually happens: someone starts a new RV company with better quality than the rest and they build up a reputation. A bigger RV conglomerate comes along and buys them out, then guts the quality to maximize profits. Then the original guys (or girls) start a new company - now the new best-quality king - and the cycle repeats. If we were in the market for another fifth wheel today, it would be a Brinkley.4 points
-
Good call on those plug covers @Patriot. I just ordered them. 👍4 points
-
Wow, what a bummer, but lucky landing. I'd much rather spend on replacing the fan, a simple installation, than have any fiberglass/body damage! It seems weather in the east has been on-n-off bad ever since hurricane Helene! Prayers and best wishes for an early spring and better weather going forward!4 points
-
I went the same way you did. I put Andersen connectors under the reat bumper and under the front of the Oli. I use it when we travel day after day boondocking. If I stayed somewhere with power, or will be staying the next night with power I probably won't use it. We have a trip coming up to Yosemite, Arches, Dinosaur National Parks, and using harvest hosts whenever possible; We will depend on the DC-DC charger much more. Have an August trip, and it should be around 100 degrees everyday, We will be on shore power most of the time and will probably not use the DC-DC charger much if at all. Maybe when we go to Lithium we might use it more often. We are pretty conservative with power on the AGMs. If we boon dock for several days in one spot we use Generator at dinner time to top off the batteries. Except In Wisconsin State parks generators are not allowed so we supplement with the DC-DC charger and the Ford Diesel when staying multiple days. I am going to install an Andersen Cable on the front of the truck this spring. So I can attach from either end of the truck. I am planning on making a Jumper cable with an Andersen connector on one end. so I can jump start or get jump started from either end of the truck.4 points
-
We re all here to help Jeff, no worries! 👍🏻4 points
-
Now, the original question makes more sense! Bill4 points
-
I believe that it was Patriot who first brought Sea Biscuit to the attention of the Forum. They certainly do have quality products and both you and Patriot speak very highly of the owners. Also, glad to hear that the Elite I is working out well for you - your 15,000 miles in the first period of ownership is a bunch. Bill4 points
-
You gotta love this forum! Frankly it was a primary reason we bought our LE2.4 points
-
Saw this post from another user...quite detailed. I mounted the sending unit for our system (not Tire Minder brand) on the outside of our front jack power head. You can easily pull 12V from the inside of the power head and decide if you want/need an on/off switch for the circuit. * I just leave mine on all the time...as the draw is minimal.*
4 points
-
Over the years I have found that more amp/hrs would be of benefit. I initially felt that the 300 amp/hrs of the BB batteries were enough but with the compressor fridge on 24/7 during winter traveling and a few cloudy days here and there, my batteries would draw down to less than I am comfortable with. Anyway, two of the 300 amp/hr batteries seem to be the wave of the future. Having two still gives me the redundancy that I like. As built, Oliver used 4/0 welding cable for the main battery connections to the inverter. These are large enough for the 2,000 watt inverter and are protected by a 250 amp fuse. The wire used for all other dc circuits is #6 welding cable and is adequate for the existing dc circuits in the trailer. I did not install a larger Progressive Dynamics charger or a larger inverter so I didn’t feel it necessary to upsize any wiring. I do have the air conditioner wired so that I can run it through the inverter but it only draws about 90 dc amps. The microwave by comparison draws about 120-130 dc amps. Really the only thing I did when I initially installed the lithium batteries six years ago was to clean up some of the wiring by moving all of the #6 wiring out of the battery box and I added a circuit breaker. Not too involved.4 points
-
Yes, I saw all of the glowing reviews six years ago when I did my upgrade to lithium batteries. Back then Oliver had just introduced their lithium trailer and there weren’t many choices for lithium batteries. Battle Born was the gold standard then. This goes to show that lab testing has little resemblance to real world life testing day in and day out over the years. Even now and with most things we buy, we do our homework and research the best we can and select the best option. I’m not too upset with the way this has turned out. These batteries have traveled many miles in six years and have been well used all without any maintenance. We on average spend four months out of the year in our trailer every year, in 2025 it was six months. We are ready for the next chapter!4 points
-
I had 3 BB 100’s in use for 5 years, worked great, no problems. I was getting increasingly paranoid about my family safety, so I sold them on Facebook Marketplace for $150 each. I tested each one and made sure the buyer was fully informed of the issues. He was aware, but was looking for a bargain and willing to take his chances. I could perhaps have gotten a higher price, but my conscience kept me from being greedy. The way I figure it, I had $2450 total invested, so the cost of 300AH of trouble-free use cost me $400/year. I saved way more than that by boondocking. There are several dozens of them for sale on FB Marketplace in my local rural area, so my guess is many others feel the same way. It might interest some that @Overland had 2 out of 4 go bad in 2021. This was before the present design problems were known, apparently BB told him the BMS went bad. I recall he did a lot of off-road, so maybe his terminals shook loose internally and got hot. @Overland was able to get BB to pay for shipping and replace. https://olivertraveltrailers.com/forums/topic/4956-lithium-battery-upgrade/page/2/ Those were the days when BB was widely regarded as the #1 brand, and there were no reliable Chinese competitors. See Will Prowse glowing endorsement on YouTube from 2020 if interested. Yep, same guy that blew this up on the web, may have been indirectly responsible for becoming one of BB best salespersons.4 points
-
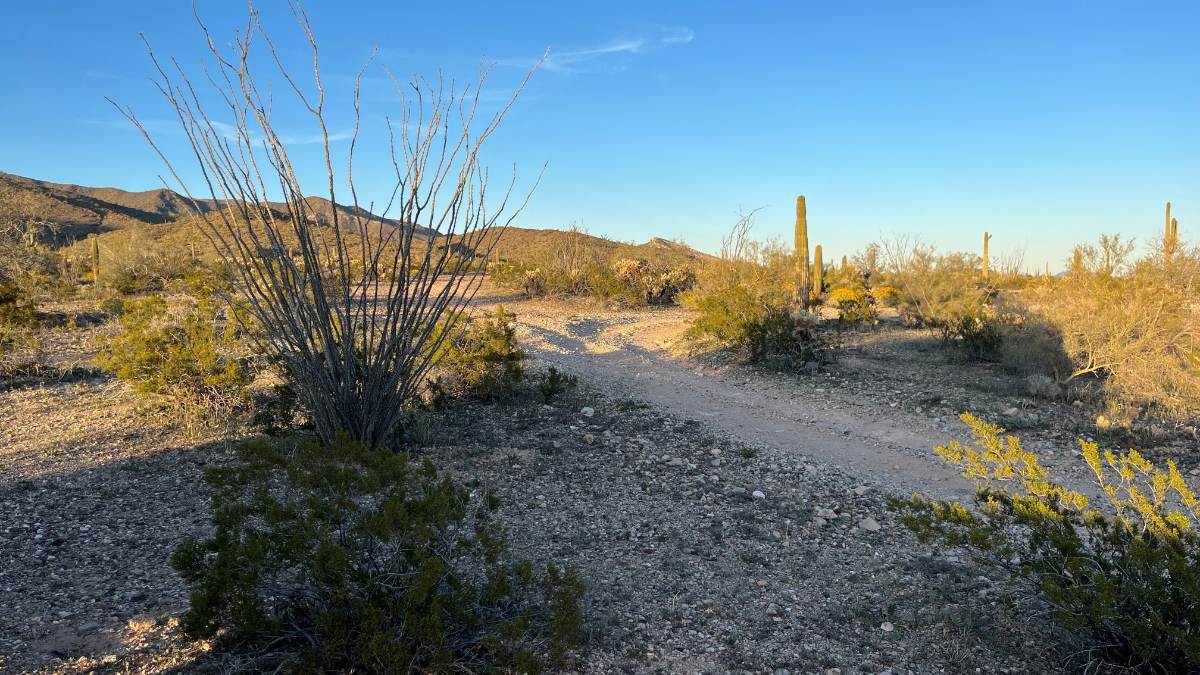
Here's a couple more of the campsite and I have supplied GPS coordinates. We are a couple miles past the staging area. There are campsites at the staging area, one large flat one with picnic table and fire ring. Many RVs were also camping south of the entrance down Eagle Eye Rd. To get here, you'd have to tow down and up 4 narrow washes. Some may not want to pull their Olivers through these washes! I descend slowly, then when my truck is at the bottom I let off the brakes, the weight of the Oliver then pushes the truck through and then quickly hit the pedal to pull up, some were very steep! 😎 There were two other nice campsites on the way to ours and only one past this location. Yesterday we drove up some, to the turn-off to the Monterey Mine. The maps on On-X Offroad are good. With 2WD and not wanting to air down, this was enough. It gets very steep and sketchy the rest of the way to the top. Some of you, airing down with a capable 4x4 would have no problem getting to the top. I understand from the top you can see ALL of SW AZ, from Phoenix, all the way to California, south to Mexico and north to the heights of the Prescott NF! Harquahala Mountain at 5600 FT is the tallest peak in all of SW Arizona. I wish we could travel with the Oliver and somehow bring our 2018 Textron Havoc SxS with us! She would fly to the top with ease!!! 🤣
4 points
-
Chris, I truly commend you for your recent upgrades and attention to detail… Promise me one thing, when you retire, don’t get lazy! 🤣4 points
-
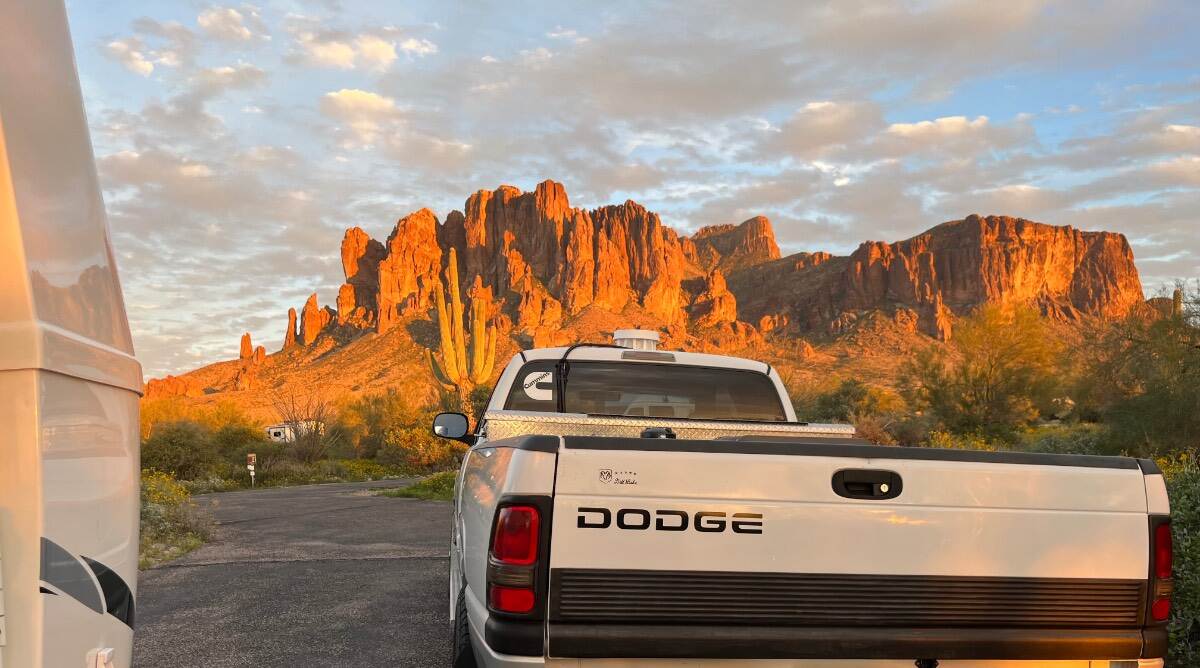
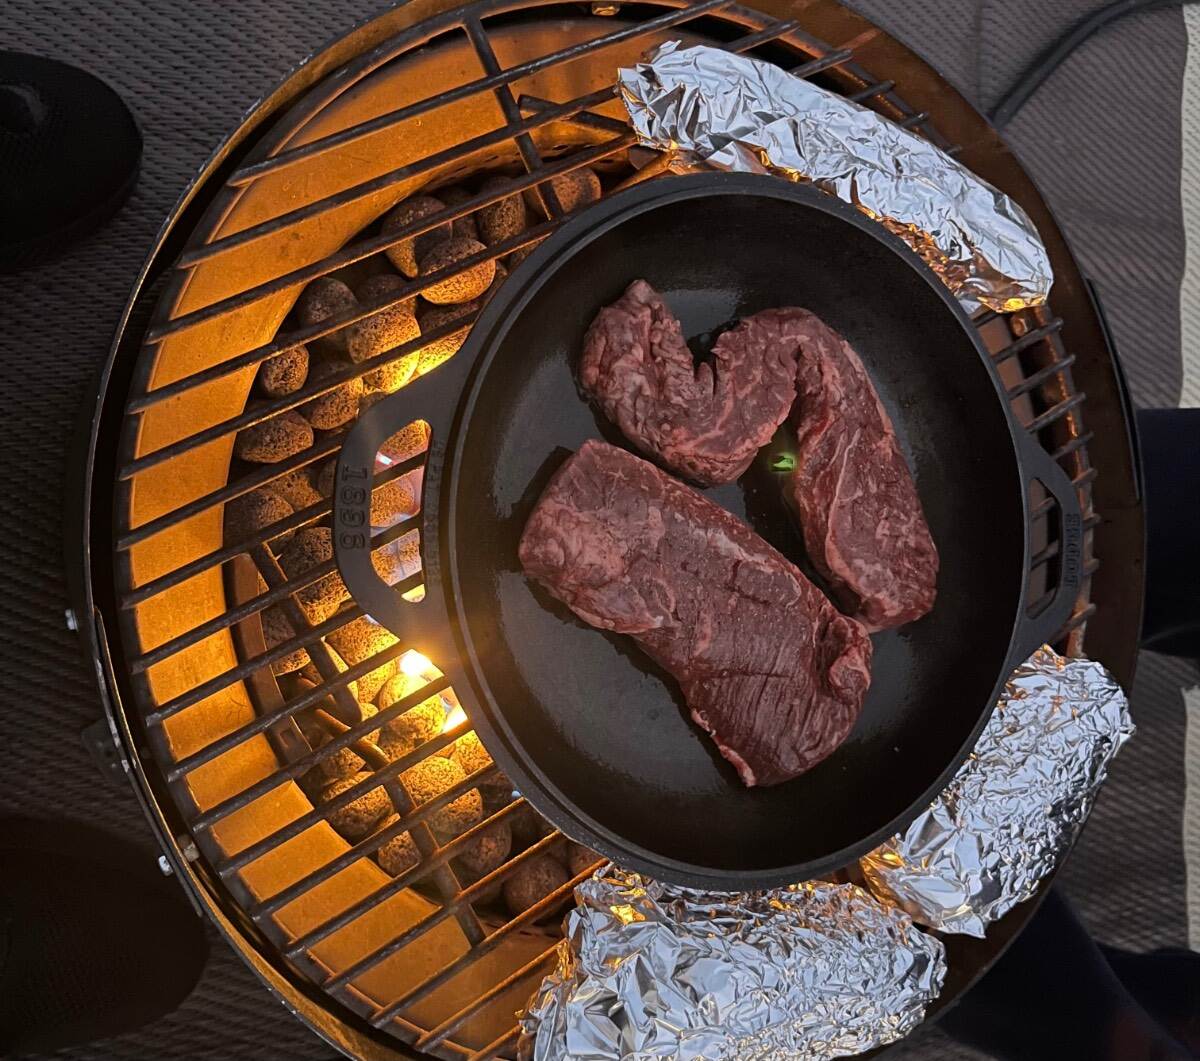
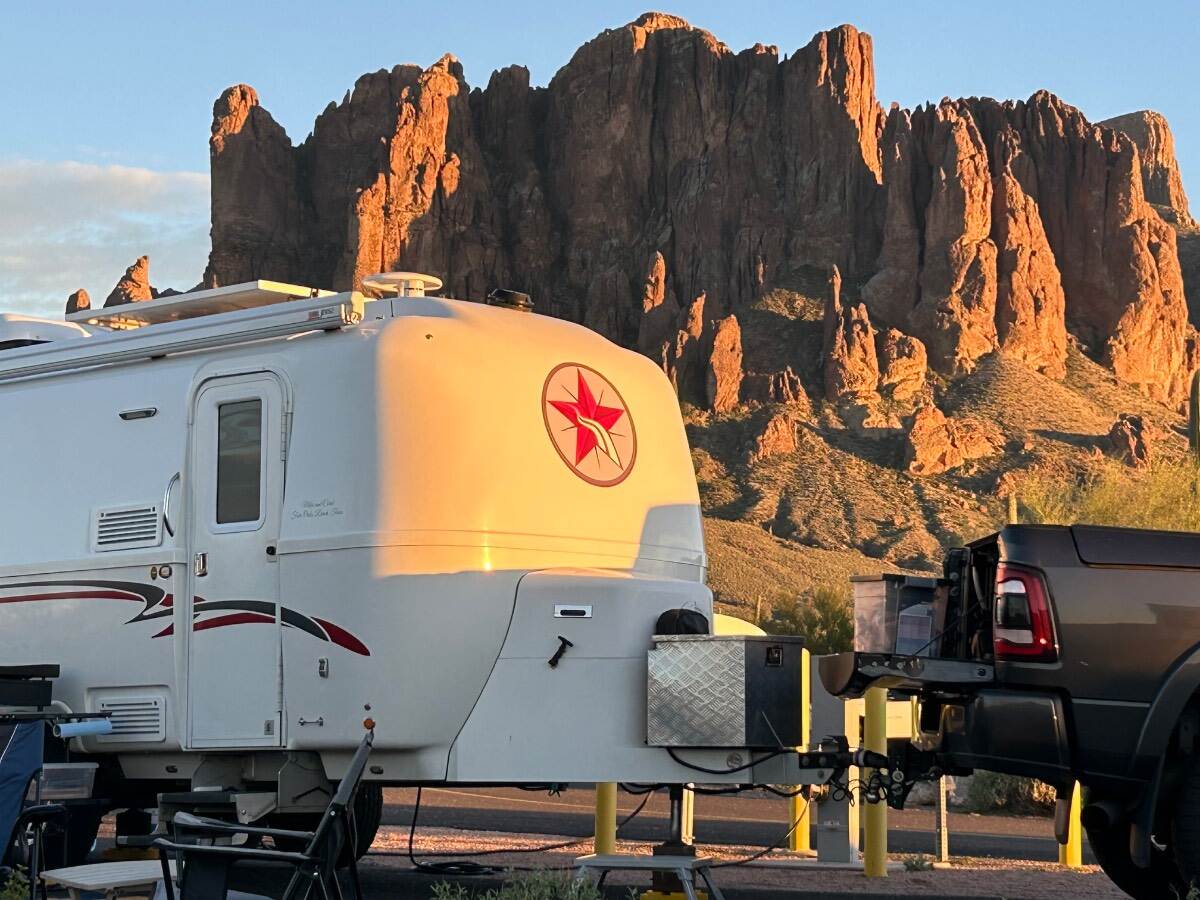
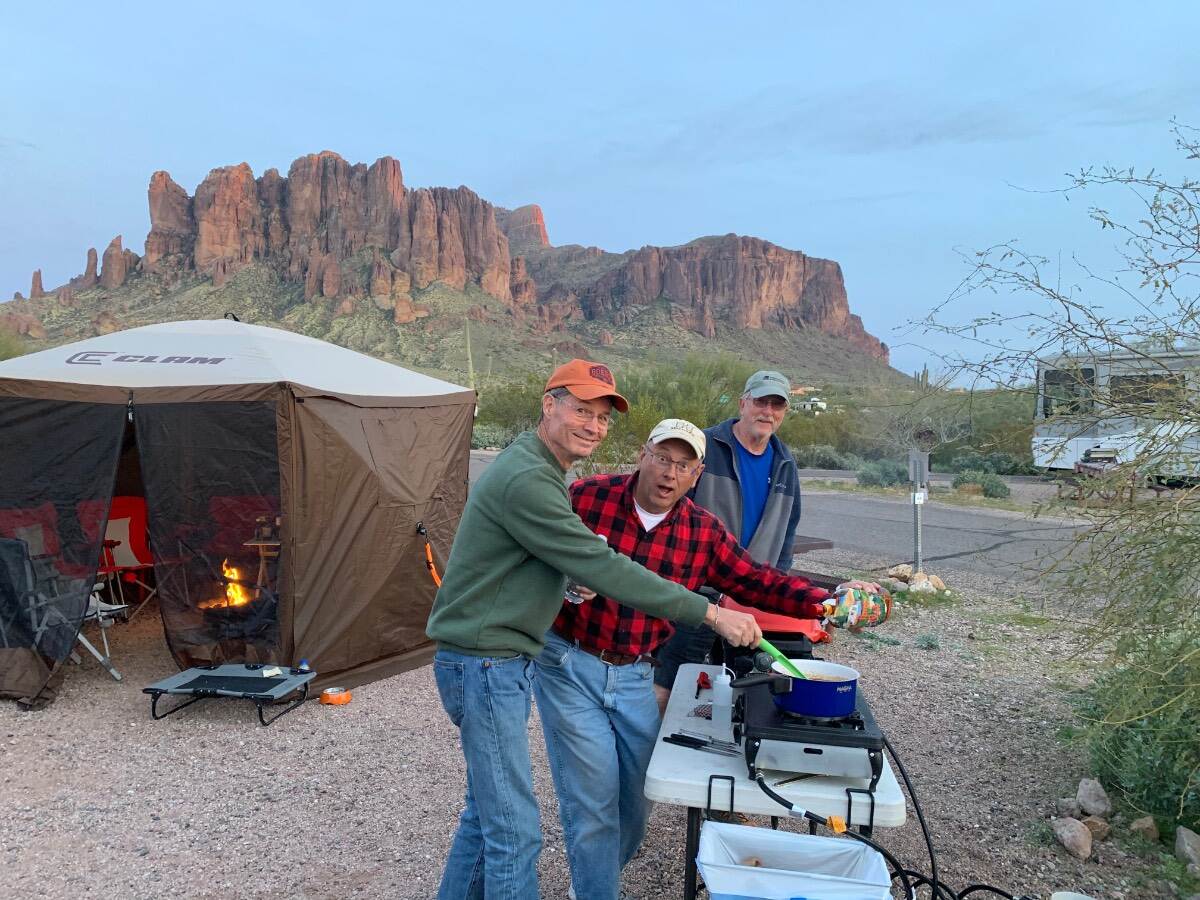
4th visit to Lost Dutchman. I’ll make it up Flat Iron one day (got halfway up last time as it was getting dark)! Came this weekend since the PPA Pickleball pro tournament is in Mesa this week, only a half hour away! What a view! Hangar steaks, baked and sweet potato with asparagus, cooked over the fire ring! 😎
4 points
-
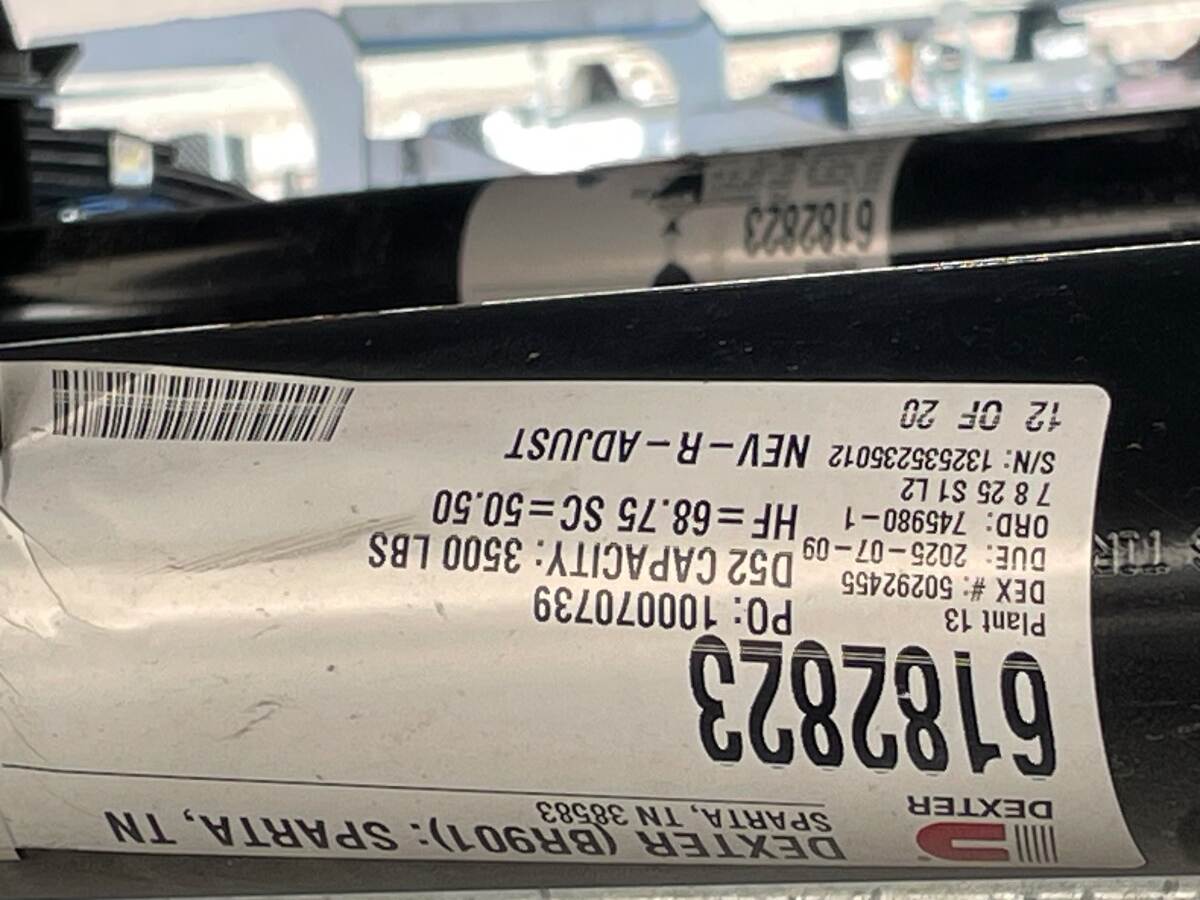
Thanks for all the replies. We are looking at one right now. BTW, it does have the Dexter D52 nevrlube axles.
3 points
-
On Ollie Elite II. D35 bad. D52 good, with Alcan springs even better. 🙂3 points
-
@2008RN Sounds like our travel patterns are very similar. We have lithium and prefer to stay at harvest hosts so I expect this year we will get plenty of use out of the DC - DC charging. Great idea about adding the connector on the front and a pair of jumper cables. I definitely will put those on my list. 👍3 points
-
Very wise install @Olive2Roam and @2008RN. I also had the “pig tail” detachable or “break away” DC-DC 30 amp cable installed. I have silicone weather caps installed on both my Andersen plugs. Inverter Services which is the company that I had do our turn key Lithium conversion on XPLOR highly recommends the break away pig tail for “safety concerns”. 👍🏻😊 Link to the Andersen plug covers if anyone should need a set- https://www.amazon.com/dp/B0DFPXKKLV?
3 points
-
Lot's of good replies here already! Am I correct in thinking new Oliver TTs now come with the Dexter D52 (5200 LB) Nev-R Lube axles? Some of us with older hulls had D35 axles installed and like Mike mentioned, have upgraded. So, you should be good here. Either way, OTT installs Dexter Chinese made leaf springs rated at 1750 LBS each. Although, we've heard rumors OTT is talking with Alcan Springs for USA made springs. Given you're buying new in 2026, you could ask them about this! Search for keyword 'Alcan' for more information. Many of us think 1750 LB springs are under-sprung (200 Oliver owners have installed Alcan Springs rated at 2750 LBS each), and there have been several failures of these springs documented. Our Oliver used to waddle like a duck when crossing bridge seams, gas station entrances, or speed bumps on an angle. Not anymore, and since our Oliver suspension is now handling itself, the truck tows better and I was able to remove the Andersen WDH. The Alcan Spring upgrade is a little over $1K plus labor.3 points
-
The first time I replaced brakes was just a couple of years ago, I’ve got 110Ksih miles on the trailer now. 24K is way too soon for normal braking. I also agree with the comments on bearings, they should not need replacing, just repacking. Mike3 points
-
I'm sure that you will receive a bunch of differing views on this subject and your question. As is covered in the many posts related to this subject, there are those members that believe that the stock suspension is underrated and there are those members that believe that at least some of the issues you might read about are due to things wearing out. There are other opinions that Dexter (the main suspension parts supplier to Oliver) had a run of "bad" or "defective" or "weak" or .... parts from China that caused at least some of the issues. And, of course, there is the manner in which and individual trailer was used - a bunch of rough off-road activity, hitting curbs, etc. Happy reading! Bill3 points
-
I think closer to 6.0 is typical. The shop must think the bearings were subjected to excessive heat and thus, likely damaged as the brakes wore out prematurely.3 points
-
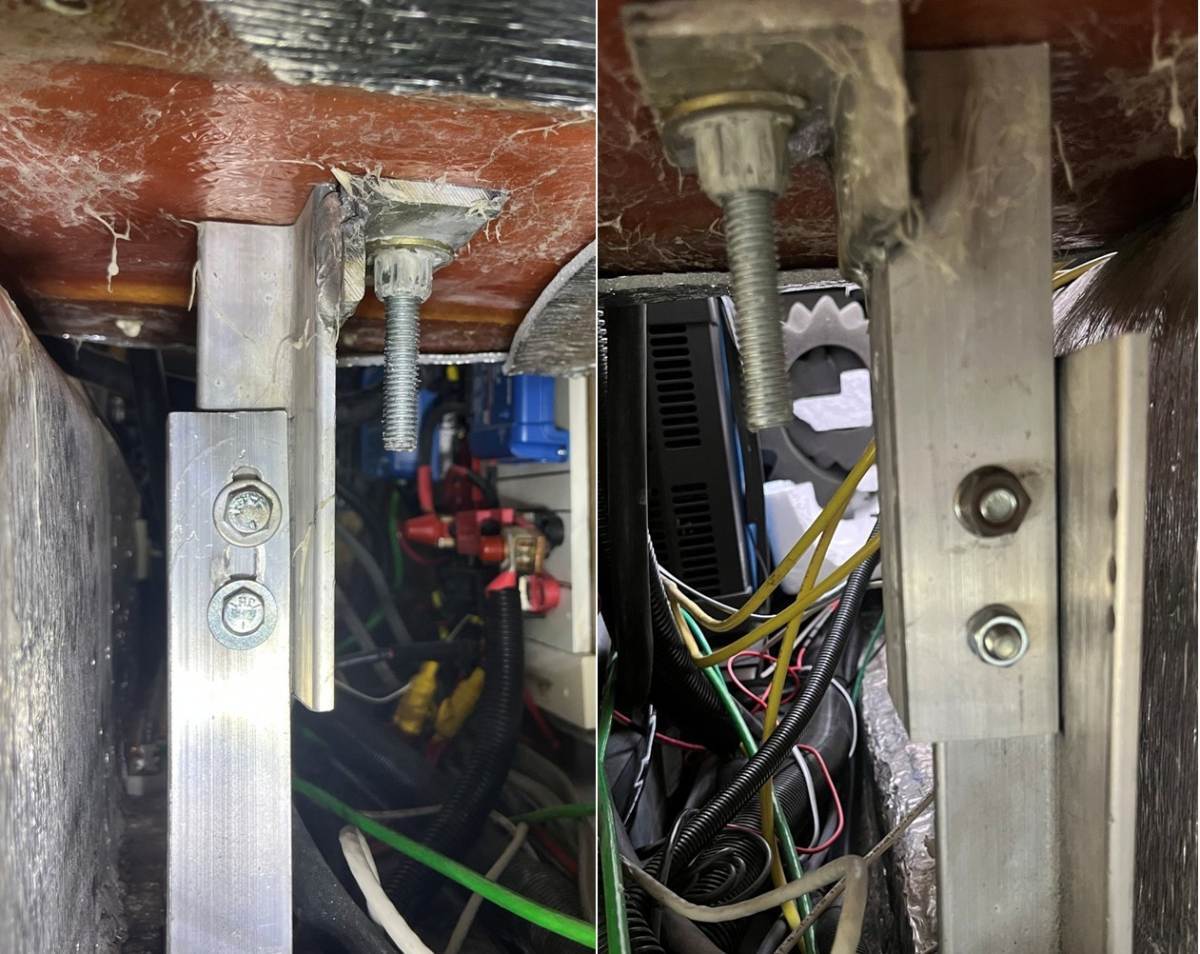
Highs in Prescott are 65F this week. Most of the year I can be outside working. I understand the East has been hammered this year. I hope spring comes early for y'all this year! 😂 Spent the whole day getting everything straight that I noticed during our recent trip, while getting ready for our next trip to St George UT, just 4 weeks away! I corrected the battery support issue and installed our new LP regulator. I did a full inspection of the battery post. The single bolt was in place, the nut was there but loose, with only one thread showing. The two angle-irons seemed to be aligned at a good angle. The base mount has two bolts screwed horizontally and firmly into the frame. The two large upper bolts holding the battery platform were solid. The battery base is square, the door flush, and everything looked good. I decided there was no need to raise the post, since the one bolt at the bottom of the grove was were it was when installed 10 years ago. The original bolt is a 5/16" bolt 1/2" head and since the groove was wider, I added a second 3/8" #5 bolt 9/16" head. I drilled about 3/8" below the top of the groove which would allow for raising the mount if ever needed. Drilling though both angle-irons, with a sharp drill bit, drilling slowly took some patience! Then Chris held a ratchet with a double-long socket extension under the streetside bed opening, as I tightened from the rear dinette opening with my favorite DeWalt 3/8" impact! I first tightened the original bolt, with a short burst of the impact and it now has 5 threads showing. It certainly was loose, still hanging on! Then we tightened the other bolt which has thread sealant and a Nylok nut to boot. This is done now, likely no need for future maintenance! 😎
3 points
-
If you’re referring to the little device that relays the sensor signals I installed mine in the front jack housing, there is power in there and room for the module. I repurposed the switch that controls the jack light so that I can turn the module power on and off.3 points
-
We were in Hohenwald today, and signs of how severe this storm was are everywhere! We came into town from the east on 412, and saw broken trees and power poles by the hundreds. There seemed to be a pile of debris collected along the road every quarter mile or so, some as big as cars. Then we left to the north on Rt 48, and it made the eastern side look like a teaser. Thousands and thousands of downed trees for miles! The worst ice damage I’ve ever seen. Hopefully, no one was injured and folks are somewhat back to normal now.3 points
-
I suggest Nylok nuts and washers, no loctite needed. First do the lift as @David and Gail has showed above. Drill a second hole, top of slot, hand tight both bolts. Also, the angle of your two support beams seems greater than in other pics. The base looks off angle (notice angle of base not square with floor in your first picture). Check below where it should be welded to the frame.3 points
-
Similar outcome shown by the “Grand Adventurer” RV guy, the YouTube video I posted above. You have 1 of 3 bad and he had 2 of 6 bad. Both of you noticed your SOC was not what it used to be! Good test Ken! I still have a drawer full of incandescent GE Reveal bulbs at home, for the health of our eyes and heart!3 points
-
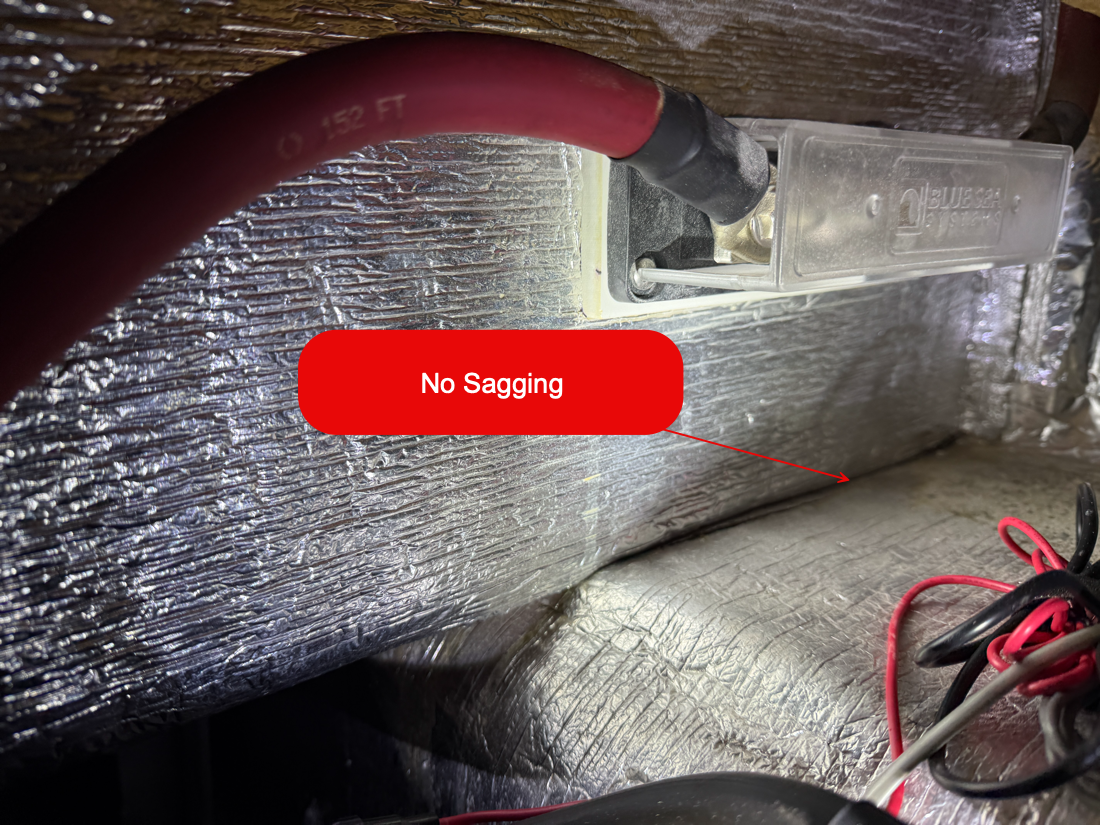
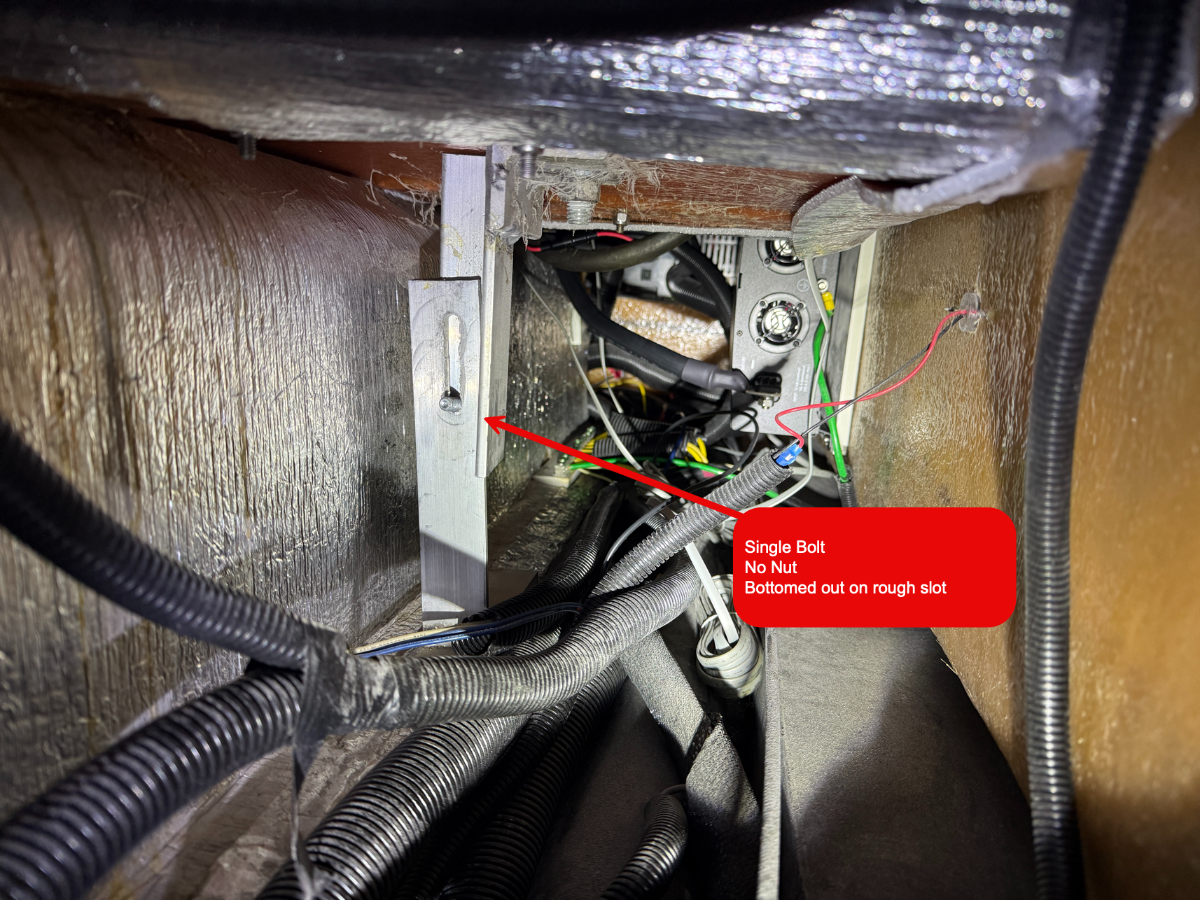
Looks like I have been very lucky with this battery box support issue. One, I only have a single bolt with no nut in sight. No real evidence it ever hat a nut, but I'm sure it did. The bolt has been bottomed out on the hand-cut slock for what appears to be forever. From all appearance, from outside and in, the box is still fairly in the spot it was from day one. I see no signs of separation. That is likely due to the fact that the bolt bottomed out on the slot and really could not come out of the hole. I will put double nuts, with Loctite, on the support beam this weekend. If anyone sees any issues I do not, let me know. I downsized the pics, but should be large enough to zoom in as needed. Also, I'm not sure why my pics have been uploading with such crappy quality. It's not what they look like on my computer. Might try another program to edit. PS. Replacing all pictures. \
3 points
-
The second test of the “bad” battery just finished. That battery started out fully charged this morning and only lasted for 6 1/2 hours. It again shut down with so little voltage that the charger will not recognize a voltage and start charging. The other two batteries took the load for over 12 hours, the inverter shut down at 10 volts as it should. The charger was able to begin charging immediately. This second test confirms that this one battery is defective in some way and can only handle a load for a short period of time. No telling how quickly it discharges under a much heavier load. My Battle Born testing is done! Two good batteries and one bad battery. Now I’ve got to find something to do with these two batteries.3 points
-
Jolli Olli is camped in San Antonio for 4 nights visiting college friends and reliving the early 70's. Highs in the 60's and lows in the high 30's. Thursday headed to 3 stops along the Gulf Coast for 13 days.3 points
-
Well crud... and I got lucky. I just checked my camper for the battery box separation and support issue. The box seems fine, and the single bolt that I do see, upon a quick inspection at night, revealed there is no nut on the bolt. So I will do a detailed inspection in the daytime and find a nut for that bolt. Thanks for posting this information! Great job guys!!!3 points
-
You have 12v only powered items, propane only items, 120v items and some that work on multiple inputs. 12v only: Furnace motor, water pump, lights, front and rear jacks, ceiling fans (Maxxfan and bath fan), TV and Furrion stereo. These items only work off of your batteries. 120v only: AC, microwave. Propane only: cook top Combination: Water heater (heats on propane or 120v or both at the same time), Fridge (on shore power it defaults to 120v, no shore power it goes to propane, if you want to run on 12v you have to select, at least on my 3 way Dometic. It’s most efficient on propane). Your furnace generates heat from propane only but the fan is 12v only, no shore power needed. Also, if you have the 2K watt inverter it works on 12v to generate 120v, if your batteries don’t have sufficient charge your inverter will not function properly. Hope this helps. Mike3 points
-
First time here, we met this guy! 😎
3 points
-
We like Lost Dutchman! Sunset. Anonymous Oliver owners.
3 points


.JPEG.3d21294117f5207ef90908c9f201e878.JPEG)


-
Recent Achievements
-
")


")


")

")


