-
Posts
2,261 -
Joined
-
Last visited
-
Days Won
64
Everything posted by Geronimo John
-
I don't have the courage to do that. It is very delicate and difficult to change if damaged. I do lightly brush it though and rinse well with Dawn/hot water to clean and flush well. Best to relocate the bedding out of harms way, and have a friend inside with towells in case of an overflow. GJ
-
Raise or lower the front end so that the track flows down hill to a weep. 18" Heavy Duty Pipe Cleaners A hose end valve to control water flow to a small fan shaped nozzel to push against the weep to sort of force water into the track and flow water downhill in a controlled manner. Beyond cleaning annually, and checking for junk in the tracks, having window gutters was a HUGE improvement on the older trailers. gj
-

Do I Really Need Self Heating Batteries
Geronimo John replied to Cort's topic in Ollie Modifications
Thanks for the flowers. Self heaters for long term storage are good only if you have plug-in shore power. They are great for boondocking short term in extreme conditions. But are a bit expensive. Enjoy your great trailer and BRAVO for being a four season camper! GJ -

Shock absorbing material on steps bracket coming out
Geronimo John replied to Randy's topic in Mechanical & Technical Tips
Randy: Getting back to your question. Some time along the way, the stairs were severly overloaded and bent the aluminum step angle down. Hence the slippage of the rubber shock absorbing rubber. You could load the stairs to flex the end of the angle down to provide more gap for replacement of the rubber. Then IF you are risk tolerant, you could place a jack under each of the angles and use the trailer weight to bend the angle back to where it was when your Ollie was made. The risk part is that if not done carefully, you could damage the angle's weld at the frame or worse. Or you could live with a bent step frame and discourage high impact loads on the steps.....which is what I would do! GJ. -

Changing tires in the wild - lessons learned
Geronimo John replied to John and Jodi's topic in General Discussion
I like JD's idea. Loosen the lug nuts and then turn the steering wheel and gently drive forward at say a 45 degree angle a foot or two. The side thrust should break them free. Or just use some Nevr-Sieze on the rims to avoid the need for the bigger hammer or fouling the lug thread approachs. Maybe a "Better Option". GJ -

Water pump not working -- problem solved -- FYI
Geronimo John replied to ZLarryb's topic in Mechanical & Technical Tips
For those of who are "Ham Fisted", I have found that my "carefully" crunching is not carefull enough. I suggest unplugging the connection and use a small pair of vice grips. I can crunch it in a much more measured manner. GJ -

Shock absorbing material on steps bracket coming out
Geronimo John replied to Randy's topic in Mechanical & Technical Tips
Be sure to first soap and water clean the rubber. -
Big Tex: I'm in your camp. These to me as well are just a temporary fix. At highway speeds, I would not trust them very long. Much rather take a bit more time and String Plug it. This past summer I came across an elderly couple with a flalt tire, no jack and no spare in a borrowed church car. Great. The hole took three strings to get it to a moderate leak. Aired it up three times to get them off the mountain and to a tIre shop. The above screw type plugs would not have worked, but not without an air compressor being handy. GJ
-
You are on track for sure. However not all mods are not a Priority A. The chain issue is on my list, but it will not rise up to a DIY until the existing curley cables or their hardware wear are near the end of their life. Hence it is on my "Future Project" list, way down near the bottom..... GJ
-
I am thinking that the above statement should be amended to show the reverse. Breaking strength is always way higher than working load approved by the MFG. The breaking strength is the absolute maximum force a piece of equipment can withstand before it fails or breaks. The manufacturer's recommended maximum weight for safe, normal use, is calculated by dividing the Breaking Strength by a Safety Factor. Depending on what is being discussed this can range from 3 to 6 or more.
-
More than a few have stated the same for more than a few of us around these parts. Welcome to the "those that think" club! A few more posts and you too will have risen to the level for consideration in the OTT Rabbit Hole Society. Hope you have a fun New Years Day. GJ
-

Furrion Chill Cube – Product Review and Installation
Geronimo John replied to jd1923's topic in Ollie Modifications
Lots of broken fiberglass light weight fishing poles out there. Cast off small end section is easy to find. Just cut off all but the end "Eye" and go fishing in a different manner. You generally only need 4+feet of it to fish the walls. JD knows how to get from the refergerator to the upper cabinet. This is how I got my Houghton thermistor from the rooftop back into the cabinet over the stove area. If you figure out or know a source for a very white cover to run a 1/4" thermister over the roof let me know! At this point I may just use some of the Gutter materail with the opening facing aft. GJ -
Now that is how to realllllllly stop a trailer! On the perfect adjustment, I came to the same conclusion two summer ago. I was having "fun" weaving the Emergency Break Away through the 7-Pin cable, the DC to DC cable and the "wonderfully easy to use (SIC) safety cables without wondering which one was going to lock up the trailer on a right turn. Came to conclusion that six inches of additional paracord induced slack was the best solution. With my receiver bolt being a double nutted grade 8, the Anderson and it's chaines, and a Bulldog.... I'm not worried about Ollie taking a hike in another direction. Fun discussion. thanks John
-
Ditto! June's 2008 Prius gets 45+ in the hills where we live. My 2012 Prius V, gets 39 MPG. A/C on much of the time. It was 42 until this year. I suspect I need to have the battery equalized. 12 MPG: Either your trip was up hill both ways or the Prius was really ill. GJ
-

Weigh Safe 180 Aluminum hitch with 3” shank, 10” drop
Geronimo John replied to Patriot's topic in Towing an Oliver
Your friend made a mistake. That's not good, but it was a simple mistake. But the jerk that rented him the trailer (or who manufactured it), used connectors that were not appropriate. He/She/They should be held responsible for the damages, not your friend. -
Great pictures for sure. Thank you for posting. GJ
-
Key words for sure. It is obvious that you have a perfectly adjusted chain lenght vs. trailer Emergency Break-Away Cable length setup. I like the results you experienced. Our trailers come with a "slinkie" style brake cable and we have different hitch dimensions based on our TV. As such getting to a perfectly adjusted length when streached out compared to OE2 safety chains length is a challenge. I suspect that not many of us are "perfectly adjusted" ... in several ways. Most likely, like mine, it is too long. For many of us "Without Lucky Charms", our likely senario would play out along these lines: We fail to properly connect our Bulldog/Anderson sytem. On the hightway, our Bulldog decides to take a walk on a different path without us. We hear/feel the slam of the safety chains as the trailer falls back due to aerodynamic drag. Naturally we overact a little and over apply the brakes as we exit the highway. We typically have a 6,000 # TV with 14" ventilated disks and a 6,000 # OE2 with 10" drum brakes. As such, the TV almost always wins the stopping power game. So as happened to you, the trailer tongue slams forward under the bumper, and driver hears/feels the safety chains slam tight and the Bulldog kisses the under carriage or the spare tire. But in our really bad day example, IF the the single point failure of the bolt securing the chains and the Bulldog fails, then it will not be a damage free day. As the driver stays hard on the brakes, the trailer will likely stay under the TV. Hopefully we only will need a new front jack and bumper. But often, for several reasons, it does not stay there. Then the "rip out" race is between the Emergency Break-away Cable and the 7-Pin. Ultimately one of them loses and the trailer brakes lock up and hopefully stops Ollie upright. Or worse. So in my eyes, the last safety device standing is likely either the 7-Pin keeping the trailer brakes in play (in a sort of controlled manner), or the Break-Away Emergency Cable locking them up. Hence my post. So all fun aside, how do you go about adjusting the Break-Away Emergency Cable length to increase the odds of your Lucky Day senario? Thanks, GJ
-
Our's as well, but better with a set of Bullstein 5100's shocks on the pair of Firestone air bags on the rear. Tamed the porporsing and helped the Anderson keep the truck level. Our F-150 on truck scales has almost 50/50% on the axles with 560# tongue weight and a light load in the back. Both were for sure needed for getting thru the Canadan Yukon Territories going to Alaska.
-
I always thought that if the hitch fails, that the chains/cables are the FIRST system to come into play so as to keep the trailer attached to the TV. That means of last resort is the emergency brakeaway cable to stop the trailer. I'm think this as I was told it is OK to extend the emergency trailer brake cable, but never allow it to become tight when turning or driving on rough roads. Your thoughts? Gj
-
Some 100,000 miles or more too. But then a few have experienced sub-frame welds being broken. May or may not be related to full tanks weights. May just be unicorns. Or maybe just a few 10%ers that need 3500 pound rated springs. Regardless, I think 90% or more of us can agree that less weight for MPG and stress on the trailer would be beneficial, not harmful. But carrying some FW is a good idea. GJ
-
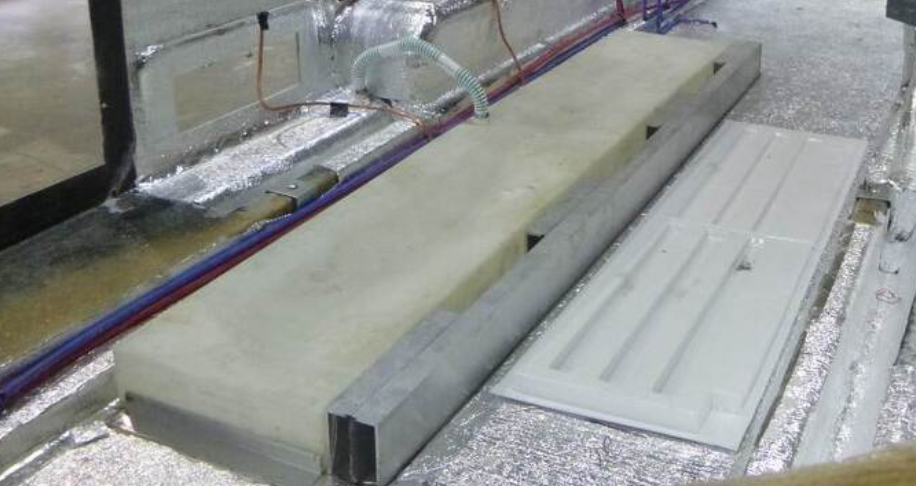
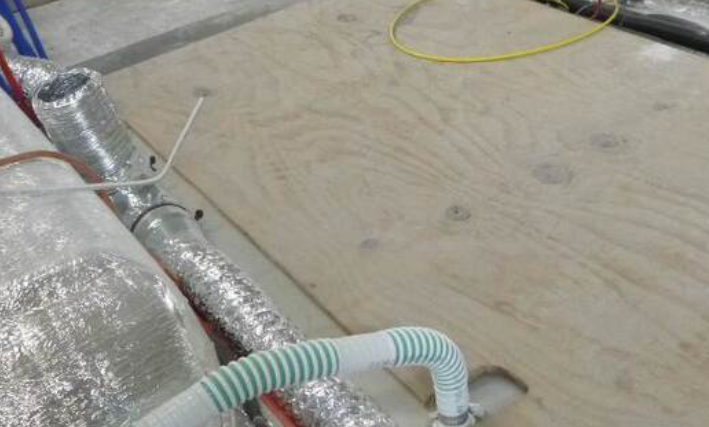
TopGun: Great pictures. Thanks for posting. What is the white plastic "Mat?" to the right of the FWT? Do you have a pic of the Gray and Black tanks as well? Is the plywood only for manufacturing or is it left to support the flooring? thanks, GJ
-
In my experience: YES and NO: Yes if you are traveling on paved roads or do gravel roads or dirt roads at a reasonable speed. No if your are going off road and qualify for membership into the 10% group that NEED 3500 pound springs. Then I suggest draining the black and gray tanks before heading into suspension hell. Also carry full Fresh Water (FW) only needed when boondocking. These thoughts are to reduce tire issue. My thoughts exactly for the black and gray tanks. For the fresh water, I always travel with enough fresh water for a couple of days for my rest stops. This may range from full FWT to half full depending. Like TopGun, it is MPG and convenience related. But also just in case I'm unexpectely stuck somewhere with a problem/weather and no FW source. GJ
-
You raised a good distinction. Our 2019 F-150 Lariat has a stand alone TPMS. It will give me a tire pressure warning light on my dash. The light for sure gets my attention and I can then change the screen to see which tire or tires are being alarmed. For a 2019 Ford F-150 Lariat FX4, the factory recommended cold tire pressure is typically 35 PSI. For this series of Fords the warning is set by the factory at 25% below the Ford recommended tire pressure or 26 PSI. When highway interstate towing Ollie, I run my Nitto Recons at 42 PSI. I had not thought about how far down the curve Ford TPMS alarmng at 26 is vs my 42 psi set point. With 8 seasons on my Ollie TPMS, it is not something I would now invest in. But with your distinction in mind, when I replace the Ollie TPMS I'll for sure go with one that gives me better coverage on my truck monitoring as well. I'll also look into if I can change the alarm 26 psi set point on the truck as well. Thanks GJ
-

Greenland Turbro 13.5k Inverter AC / Heatpump install.
Geronimo John replied to CRM's topic in Ollie Modifications
GJ LOGIC: Time before your trip is precious, and with the mods you have done, and the electrical short wires, and the exploratory work you will be doing to fix the original, and unknown supply chain difficulities, and that you may need reliable Heat Pump, and possibly the A/C even for a winter trip, and there are lots of time stealers in all the "and's" listed above. So goal is to get your A/C Heat Pump on line soonest as time saved to do so before a trip is important. Besides, how long it takes you to fix the old one while it is on your work bench is not a worry. Hence, I would take it down, install the new one, mod it as you have done, and roll on to travel. EARLY ADOPTORS: Your experience reminds me of mine with the Houghton. Early adoptors seem to pay a high price for beng early. But as was my experience with the Houghton Mods, it paid off very nicely. But it also resulted in my caution for other owners not to go down that path unless they were very handy and willing to toss the warranty out the window. I suspect that you'll echo that thought down the road. GI Tongue in Cheek: On the other hand, wif you go the bench route, then have fun with experimenting on it for shop use and noise reduction idea. You could go with agressive ideas that you would not risk on the one in Ollie. That turns the process into FUN in my world. Heck you'll likely end up with a 10 page mod post that makes that unit THE best on the market. So before posting the DIY, blackmail the MFG to pay you $$$ for the solution or you'll not post it and your's will be the last one sold to OTT owners as well as the SOB owners that read our forum. Considering all the time you spent on this upgrade, that really would bring you a smile! LOL GJ Happy wife, happy life. Smart guy.... with a grin!


