Geronimo John
-
Posts
2,302 -
Joined
-
Last visited
-
Days Won
64
Everything posted by Geronimo John
-
 Just keep in mind that Art has exquisite tastes when it comes to beer! GJ
 -
Wow you must be photography buff. You are correct. I try to keep them "simplized" (Yea that is another GJ concocted new word) as: The Keystone effect is when lines converge with distance. Parallax on the other hand is when an object appears differently when viewed from two different points when in motion. The picture of the cabinet door has a bit of the former as you astutely observed. But, if I am inside Ollie, and my wife is driving down the highway, would Parallasium, not to be confused with paralaxium, end up being Keystoning when viewed from an infinite distance? Think on that one for a while. GJ: PS: I can't as it gives me a brain circuit trip.
-
Appears that some folks think that Litho's are maintenance free. They sort of may be, but all the other stuff we put in there are not. In the ole days we would use high mounted light tension springs to encourage the cables to stay out harms way. GJ
-
Our first mod and another warranty issue
Geronimo John replied to Steph and Dud B's topic in Mechanical & Technical Tips
Thank you ALL! With the Houghton up top, it makes the EZ gutter Mod even more relivant. GJ -
Low water pressure in bathroom
Geronimo John replied to Lisa Rae's topic in Mechanical & Technical Tips
I wish I had that problem. Seems the 25 cent flush valve shaft of the Dometic toilet fails frequently enough that I don't need to clean the screen. And they will not support their product wit repair parts. $300+ for a new toilet vs 25 cents. No love for that MFG on this end. I pray OTT votes with our feet...... GJ -
Low water pressure in bathroom
Geronimo John replied to Lisa Rae's topic in Mechanical & Technical Tips
OMG there actually are others of us doing that. YES!!!!!!!!!!!!! Thank you!!!!!!!!!!!!!!!!!!!! GJ -
Spot on. It took me five season to get up to speed with enough confidence to convert a couple of marine lead acid to Litho's. But the time was well spent in learning from many of the same folks here on our forum today. Now there are many proven ways to get there. And as you pointed out, each technology matures and better ones arrive over time. When I purchases our OE2 in 2018, Litho's were relatively new and very expensive. In time their priced dropped and my time came to use the most proven and best reviewed technology. Good new is you have a good system now. Why spend today's dollars to change it if it works for now. Garner all you can from our friends here at the OTT forum and when your system is ripe for upgrade, you will know that is then far better than we did last year. But always be aware that words here, especially from engineers, make a difference. Your reputation is very good and is growing. GJ
-
Art: I think using the pic shown is perfect. Shows the space that we can gain very clearly. I'll be packing the "Hatch Door" with me this summer! GJ
-
Certainly there at least two other brands that have similar safety characteristics as the BB's and can also fit into an OE2 battery tray and provide more than 300 AH. But the brand that MountainOlivers is stating is specifically the Battleborn's. At some point, my experience with them will be out of date. But as of today, I have not yet heard of anybody getting more than 300 AH's from Battleborns in an OE2 battery box. Hence my reaction to the statement of "three or four Battle Born batteries". Have they come out with a new product that will let us get four of their batteries into an OE2 and get more than 300 AH? If so, I'm all ears! GJ

-
I agree with greasing out of service the Anderson sway feature for our F-150. But I don't take apart the Anderson to do so. Just grease the ball with a short burst of spray lithium grease. To keep grease build-up just wipe it off each time you unhitch. I also wipe out the Bulldog as well for the same reason. For the F-150's, I have and recommend air bags and Bilstein 5100's on the rear. Sure fixed the porposing issue and the rear end (with or without Ollie) feels MUCH more planted. GJ
-
Dometic a/c tubing
Geronimo John replied to Alberta and Randy's topic in Mechanical & Technical Tips
Trust me, you don't want to get trapped with us down that rabbit hole. For details you can spend a week reading the 20 mile long posts on this subject. Bottom line is no. GJ Chief Rabbit Hole Inspector -
Our first mod and another warranty issue
Geronimo John replied to Steph and Dud B's topic in Mechanical & Technical Tips
How long did it take you to install the EZ gutters? Nice job! GJ -
Best Bumper Rack for Honda EU generator?
Geronimo John replied to Margaret's topic in Mechanical & Technical Tips
Should you go this direction, you will for sure want to have a very durable and tight fitting cover for the rear bumper mounted Honda. The amount of dust and grime that flies around back there will destroy your generator in no time if you don't protect it. GJ -
Checking Blum Undermount Drawer Slides
Geronimo John replied to Fritz's topic in Mechanical & Technical Tips
What screw length did you purchase? Thinking of pre-purchasing them and adding even if not needed right now. GJ -
I have three and would be hard pressed to figure out how you got four of them in there unless yours are the ones mounted sideways with buss bars utilizing great care and extremely brilliant craftsman skills. For the normal DYI owner, three 100 amp BB's seems the limit. GJ
-
Task completed. Thanks for not hammering me on it. My OOPs was pretty much self inflicted.... as usual. I'll still laughing about it. GJ
-
OMG: Better than mine! I can't read it either. Sort of a big OOPs on my part. TASK List #1: GJ to make signature block bigger! LOL... Nailed me on that one for sure. GJ
-
What AWG is your break point between Wago's and Crimp to posts?
-
Suggest increasing the font of the signature block. Most of our ROF's (Retired Ole Farts) eyes are not good enough to read it. Or, you can keep us in the dark and laugh often about it! LOL But DO take notice of Ole vs. OLD..... For us ROF's, here is your really cool rig: TV: 2008 F-350 Crew Cab, 6.4L diesel, 4WD, custom flatbed with storage boxes, Line-X underbody coating OLLIE: 2022 OE1 Hull 885, Lithium batteries (260AH), 230W solar panels, 2000W Pro inverter, Dometic AC w/Easy Start, Truma Tankless Comfort water heater For sure you'll NOT need to be reviewing the Anderson posts. GJ
-
Awning J Channel or Weather Strip?
Geronimo John replied to csevel's topic in Mechanical & Technical Tips
Ditto! Also to cast some shade on the Refer area when I can't park the curb side to the northish direction. Can both the existing seal and the J "gutter guard" be used at the same time? Belts and suspenders. GJ
-
Wow. Is OTT using Wago's extensively in the new trailers or was this just a one-off use? If yes, this is an important question. I have used WAGO's a bit on some connections that I'll likely be getting into. For example service to the pump and installation of a second load transfer switch to the A/C. But I am hesitant to do so for high vibration applications. Specifically such as the Houghton Relay Mod for their fan. QUESTIONS: For high vibration applications that are a PITA to get to, would you use WAGO or Wire Nuts? (Both of which would need good strain relief of course), What connections are used in aircraft? GJ
-
Draining Freshwater Tank
Geronimo John replied to Ollie Ollie in Free's topic in Mechanical & Technical Tips
OK, I'll fess up.... About half the time I forget to drain over night and end up having Ollie pee on the highway........ -
Over time, the accuracy of the SOC will drift. So, it must be "recalibrated to reality" occasionally. For mine, I do so every two weeks of use when I equalize my litho's. At that time when the voltage hits my target, after resting the litho's, if the SOC is not showing 100% I manually reset it. How you go about doing that is system dependent. Your system documentation should address this procedure. GJ PS: Note the total lack of system specific info in my post. Without your info in the signature block that's all we can do. Kindly look at several examples and add to yours as a courtesy to those of us willing and able to help you. Thank you. GJ
-
Thanks Bill. I really suggest that OTT consider upgrading the bathroom vanity area as MaxBurner documented last year. With a little bit of engineering, the cabinet space could be provided without much cost and with great benefit to future owners! Art: Would be worth sending in your Mod info to OTT in the form of a Service Ticket. That way it for sure will be discussed and consided by their Leadership Team. I'll be packing a door this summer! 🙂 GJ
-
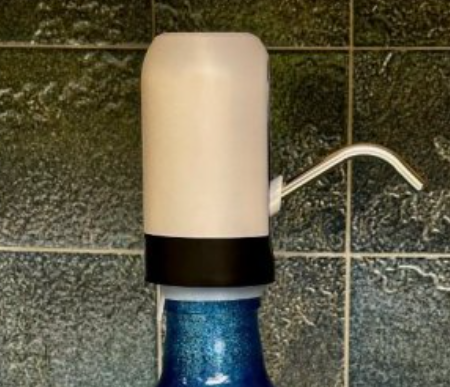
In Feburary I was in Columbia flying paragliders. At our hotel they had one of these setups on the counter for about 20 guests to use. Daily we each used about 1.5 liters. Frankly I could not believe the amount of water it put out every day. This little pump works like a charm. GJ