DavePhelps
-
Posts
394 -
Joined
-
Last visited
-
Days Won
20
Everything posted by DavePhelps
-
This has always been a problem for me. Just how do you get those things out? It would seem you have to lift up and remove the glass but I can't do that either.... John, I also am in Portland and store my Ollie outside uncovered. Wish I had a cover but that's another story. In the winter, I keep the trailer plugged in with one of those oil filled radiators going inside at its lowest setting. I leave the bathroom window open a crack, unless I know a big freeze is coming. And also have my shades closed, though you may want to try leaving them open an inch or two for ventilation. I also always have some short pieces of paracord stuffed in the weep holes of the windows to aid water drainage out of the track. This was talked about a while back and it really helps keep the tracks dry. Those narrow weep holes do not drain water very effectively, but the paracord sucks the water out like a lantern wick. Some folks use pipe cleaners, but I have lots of paracord so use that with great success. Keeping those tracks clean is also important as Topgun2 mentioned. It's one of my least favorite maintenance jobs! Still trying to figure out an effective way to do it. With all of the above procedures employed, I have never had a mold issue. As for getting the mold out, maybe a distilled white vinegar/water solution as an alternative to bleach? Hopefully someone will have a solid idea. Good luck, Dave .picasa.ini

-

What exterior caulk is the factory using now?
DavePhelps replied to Townesw's topic in Mechanical & Technical Tips
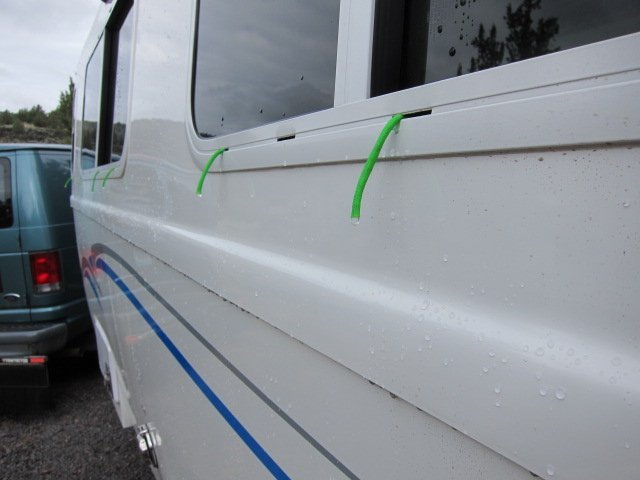
Man I hear you! And that is a pretty gnarly sealant job on your rear window!😖 I pretty much have to tape everything off on each side of the joint (sometimes, just one side is necessary). It takes time, but gives me the best result. I'll wet tool the sealant before removing the tape. Then a final very light tooling (my finger usually) to take the tape/sealant edge off after tape is removed. It's important not to get too much sealant in the joint or you'll have a mess removing the tape and too thick an edge for the final tooling. The thinner tapes leave less of an edge to deal with. I'm still trying different things to get the clean look I want. I bought some silicone finishing tools I want to try next time I get in to it. Dave -
What exterior caulk is the factory using now?
DavePhelps replied to Townesw's topic in Mechanical & Technical Tips
I've been using SIKAFLEX 291 on my Ollie. It has a very good reputation in the marine world. I have experienced no yellowing or mildewing in the years I have used it. The world of sealants is a tough one. There is a lot of chemistry involved that is far beyond my knowledge for sure. Everyone is going to have their favorite based on their use and experience. Not sure why Oliver went to silicone, I'm sure they had their reasons. Although the ASI 335 seems to be a very good product, inevitable future resealing efforts may be compromised unless a very thorough cleaning protocol is adhered to. Not sure what is happening with the yellowing issues some folks are having. It could be quite a few things, part of the mysterious chemical peculiarities of sealants. THIS article may shed some light on that. Since the ASI 335 is neutral cure, it may be susceptible to yellowing from chemical vapor contamination from the butyl tape (or whatever Oliver is using now) around their windows. Don't know how widespread this issue is, or if this is indeed the issue at all. It's just part of the puzzle. The thing about sealants, and all materials really, is that they are part of an ecosystem where everyone has to get along or bad things happen. One needs to consider how multiple materials will interact with each other, both in the short and long term, for good work to be done. Dave -
What exterior caulk is the factory using now?
DavePhelps replied to Townesw's topic in Mechanical & Technical Tips
Scuba Rx, that ASI 0240 sounds pretty good. Especially interesting it can be used as a tooling lubricant. I will try that. What I have been using with great success is Debond, and it is even more expensive! So I think it's going to cost you Geronimo John! Debond The big problem with silicone from a refinishing point of view are the oils it contains. You can clean it off with solvents and plastic razors to where the gelcoat looks pristine, but when you spray the surface with water, it still beads up all over. This is caused by the silicone oils having penetrated the pores of the gelcoat. Not completely removing these oils will interfere with the full bonding of any sealant you want to use, including silicone! You have to break out some 1000 grit automotive sandpaper and wet sand it out with the solvent of your choice (in my case, Debond). When it's all gone, I hit it with some finer grit (1200-1500), then a good polishing cleaner. The gelcoat will then look great, and be ready to be sealed, and most importantly, the sealant will adhere to the gelcoat! All this work is why I never use silicones to begin with, except in some rare instances. Also, if you do any finishing in your shop, be extremely careful to keep any rags, pads, sandpaper, or anything that was used cleaning your silicone problem separate and away from your regular shop supplies. Silicone contamination in your shop can be a total disaster for the finisher. Good luck! Dave- 34 replies
-
- 10
-

-

-

-
Please post any future findings about this break. Has anyone tried bending the hitch back together to see if the break closes cleanly? I am seeing some things in the pics that are a little disturbing. Like in the above pics where there is rust in the center of the fracture and clean bright metal at the top and bottom. Maybe someone else can explain how this can happen. The rust edges also appear to be radiused. I'm no metallurgist so can only comment to what I am seeing. Hopefully, there will be a good explanation in the future on how this happened. Again, very glad you are all safe and back on the road with the new and larger Bulldog. Dave
-
Whoa! I would not try and drive that anywhere. At the least, get a mobile welder to come out to weld it back together so you can safely and carefully get to a shop where a new hitch can be installed. Unless you are able to install the new hitch where you are. It looks like there's rust where the hitch broke apart? Could have been cracked for a while. Never thought this could happen to a Bulldog Hitch. Thank heavens you weren't cruising down the freeway when that happened, that would have been pretty ugly. Glad you are all safe and sound. 🙏 Dave
-
Thought I'd wrap up this discussion with some more test data. It's been around freezing here the past few nights so I wanted to verify past results and include a baseline test with the original OEM setup with just the return by the furnace. Pretty much all original results (OEM return blocked, and two 6" returns added at the rear of trailer) were confirmed, with some minor variances, with curbside rear temps increasing on average 15 degrees, street side rear temps increasing on average 20 degrees, and the under sink area increasing on average 12 degrees. Floor temps at the rear of the trailer increased 14 degrees. These increases were from a cold start in the morning. To start, all under floor areas were about 5-6 degrees warmer than the outside temps, and 11+ degrees colder than the inside temps (I keep a small space heater running in the trailer in the winter). Interestingly, when I put the heating system back in its OEM configuration, and closed off my 6" test returns, this showed only 3 degree temperature increases in the rear curb and street side areas. So not so great there! Under the sink, however, had similar gains (12 degrees). So I think some return air must travel in through the spaces between the cabinet drawers and back to the area under the sink. In my 2015 E1, the cabinet box is open in the back so return air can pass through to that area. All this may not apply to some of the newer trailers, but there are a lot of older ones out there that could benefit from this mod if you travel when it's cold out. Just how cold one can go I can't say yet, but this mod will certainly help a lot and is very simple to implement. The E1 will be different than the E2 as the furnace locations are different among other things. The same principles will apply however, with high pressure (cabin) moving to low pressure (under floor), and the returns will just be located in different areas. Preferably, but not always, as far away from the furnace and supply outlets as is practical (depending what path you want the return air to travel). Thanks. Now I have some big holes to drill out...yikes! 🤯 Dave
-
I will definitely try this! Now if I could just keep the furnace quieter! That would be a big plus for the new Truma heater as our Suburban is like a rocket going off. Keeps the place warm though! I've been absorbing all the good ideas presented. Thanks to all. We are expecting another cold front soon so I will do some more testing. I'll also take floor temperature readings next time, could be interesting. Looks like all you LE2 folks will have to do your own due diligence figuring out return air flow but I see the gears are turning! I think it is a worthwhile endeavor. Cheers. Dave
-
Finally did this and I see on the newer Elite1, it looks like the return air grille was moved to the rear curbside bench seat, so that is much better! Can't tell if a vent was also placed in the bathroom, but that would also be a good idea. E2 still has it's main return right next to the furnace.... Rivernerd also mentioned that Oliver has also added one in the bathroom and that is great. Personally, I would still think about closing the main return vent next to the furnace and add other returns strategically placed (like where Routlaw mentioned earlier) to create better below deck ventilation/heating. Remember to maintain the proper cu.in. return air requirement for your particular furnace if you do this. Finally, and just to be clear, those vents at the top and bottom of the closet door are not return air vents. They probably have good use keeping the closet ventilated and warmer to keep clothes from getting damp or whatever, but they are not part of the return air system and would do nothing to keep the below deck area warmer. If there was, or is a third vent between the closet wall and the bathroom sink vanity, then that would connect the closet to the return air system. Carry on. Dave
-
OK, so one of your return grilles is under the closet door? That would make sense. I was imagining both return grilles inside the closet somehow which wasn't computing. Dave
-
Rivernerd, So is warm cabin air leaking in to the closet from around the door as a result of the reduced closet pressure from the returns in there? Or is one of the vents a supply? Just trying to figure your setup out. Don't see how two returns would warm the space. Glad it's working though! Dave
-
I don't get that either, unless they also added a vent in the door. Glad to hear that they're thinking about the benefits of well placed cold air returns in the newer models though. Dave
-
My interest in this mod is two fold. First, to create more even heat distribution within the cabin area. Second, to keep the basement above freezing as we like to camp in the early Spring and Fall. I think Oliver has overlooked the benefits of proper return air placement and what it can do to increase cabin comfort and durability of the plumbing systems between the hulls. As for between the hulls, yes, there is reflectix insulation on the floor of the outer hull, but it is also mostly an unconditioned dead air space and it gets cold down there! Especially the rear corners where there is a lot of vulnerable plumbing. The beauty of placing the return air ducts far from the furnace is that it turns this under floor space into a giant plenum where conditioned cabin air flows from the return grilles back to the furnace warming the entire area, not to mention more evenly heating the cabin itself. My test showed a dramatic increase in temperature below by moving the vents further away from the furnace. There was definitely more air flow from the vent on the same side as the furnace. But that's not surprising and could be adjusted for if one was so inclined. Just remember that your furnace has a minimum cold air return volume requirement, it's in your owner's manual. I think if you have properly sized return air vents, then outside air being sucked in through the drainage scuppers wouldn't be a issue, but this needs to be tested. This is also a simple passive setup, no fans or other support needed for it to work. I will say that if I was out in extreme cold for long periods, I might need to employ other measures. Time will tell. Now that I have these sensors, I can keep track better of what's going on between the hulls. I'll also probably add a 4" return vent in the bathroom on the side of the vanity under the TP holder. Not a lot of flat wall real estate in the E1 to place a vent but I think I can just fit one in there. More testing to do, but may have to wait until next winter unless some Arctic blast hits us again. Cheers. Dave
-
I finally got around to purchasing some temperature sensors so I could experiment with different cold air return locations. The original 6x10 grille (45 cu. in. free air flow) was installed right next to the furnace in my front dinette seat (Elite 1). I never understood this decision and wonder if anyone knows why Oliver put it there. It is within inches of the furnace and two supply outlets. This is not desirable for even heating and does nothing to create air flow below between the hulls, which would help keep that area warmer in colder temps. My experiment showed much better results than I anticipated. First I sealed off the OEM return with tape. Then I cut two 6" holes in some cardboard and replaced those with the rear curb and street side fiberglass seat panels. I then placed sensors on the floor of the basement down with the plumbing on each side under those holes. I placed the third sensor under the sink. When I turned on the furnace, there was very positive intake through the 6" holes, which by the way, provide a bit more free air flow than the OEM grille (~56sq.in. for 2, 6" round versus 45 sq.in. for 6x10 OEM grille, which actually has 5x9" free air flow). I brought the interior temps up from 58* to 68* in about 10-15 minutes. You can see the temperature difference in the pic below; and this is with the return air holes cut in at seat level, not at floor level and as far to the rear as I would want them! I also noticed a big improvement in heat distribution throughout the trailer, although in our small elite1, heat was never a problem in the cabin. So, before I start cutting holes in my trailer, I ask if there is something I'm missing here, and why didn't Oliver do this to begin with. It seems like a very simple way to markedly improve the performance of an already stellar trailer. Any comments appreciated! Thanks. Dave
-
Thanks everyone for the replies. I have learned a lot about tires and wheels throughout this inquiry! I have given up on getting new 15" wheels (this is a good thing). One consideration with my Oliver are the leveling jack pads. On my trailer, the pads are just 1" away from the tires when retracted. The 16" Ion wheels on my Oliver have a -8mm offset (about 5/16"). This moves the centerline of the tire away from the hub mounting surface (and the leveling pads) by that amount. I would not want the tires to be any closer! All the 15" wheels I could find had 0mm offset. So I'm sticking with my stock 16" wheels with their -8mm backset and 3300lb rating. That will save me a lot of money as well. I didn't know about those LT235/65R16 tires. Cooper makes them, the Discoverer HT3. A little wider (.4"), but 1.3" less diameter. So they should also fit as a spare as it has for other LE1 owners. Lucky for me, I have a friend close by with a LE1 with this tire setup. Tomorrow I'll swing by and get his spare and see how it fits on my trailer. Fingers crossed. Dave
-
Thanks Bill, I wasn't expecting a huge response but thought I would give it a try! I'll try the service ticket route. I tried calling a few days ago and left a message but haven't yet heard back. No doubt things are busy at the factory. If I find out anything I will post it for any future reference needs. Dave
-
Yes, that Oliver sign is a PITA. I would much rather have a surface mounted brake light there, or nothing at all. Sooner or later, it seems many here have had to deal with it. There are some good posts on the forum on how to tackle removing the lense (yep, it has to come off so the area can be properly cleaned for resealing). Don't forget to also check the rear marker lights on each side of the Oliver light. Mine leaked there as well and since the supply wires to those lights had no drip loop, water ran down the wires forward and on to the floor of the upper cabinet where it would eventually leak out of the overhead speakers. Since redoing the marker lights and Oliver sign, there have been no more leaks. Here's a link about the marker lights. Sorry but I can't find the one on the Oliver sign.... https://olivertraveltrailers.com/forums/topic/7018-leaking-marker-lights/#comment-75697 Good luck and hope you are feeling better. Dave
-
Time to replace my tires. I have the original LT225/75R16 that came with our Ollie. I see Oliver has switched to ST225/75R15" tires and new wheels and got to thinking if this new combination would fit under my spare tire cover. The new 15" tire is .4" wider and .4" taller than the smaller 215/70R16 spare that came with our trailer. I always thought it would be nice if all tires were the same for simplicity and rotation purposes. The fit is really close so wondering if anyone has any insight about whether the full sized 15" tire will fit as a spare. Regarding the new wheels, does anyone know the rim width and the offset? Worried about the offset as the tires in my current setup come awfully close to the leveling jack pads (1"). This is why I'm thinking of going to 15" wheels to hopefully get more clearance there. Thanks. Dave
-
I am eventually wanting to do this as well. But I am curious why you wouldn't want to connect your aux panels directly into your existing onboard charge controller. My understanding (uh-oh) is that it is much more efficient for the charge controller to be closer to the batteries than it is for the panels to be close to the controller. Since the aux panels are usually far away from the trailer (typical cable runs are 20' or more), if they have an integrated controller, then there is greater voltage loss along the longer run to the batteries. Aux panels without integrated controllers do not suffer this loss as the current to the onboard controller is not as effected by voltage drop over long runs. It is the voltage drop between the controller and batteries that is the issue. Help me out here. I'm not an electrician but after studying this, it seems like a better option. What am I missing? Thanks. Dave
-
Some time ago, this was discussed in detail but alas, the forum search function is still not all that functional.... The belly band came off in our bathroom a few years back and I reattached it as described below with no further issue. Good prep/cleaning is vital for good adhesion. Depending on what cleaning products have been used by owners on their interior, there may be silicone and/or waxes present on the gelcoat. From the factory, there could be other contaminants. After removing the loose band, I cleaned the area with MEK and a white scotchbrite pad, then gave a final wipe with more MEK and a microfiber towel. There are lots of ways to go about cleaning, but it will require a solvent based cleaner like MEK or the 3M cleaner John Davies showed above, or something similar that leaves no residue, and thoroughly clean off any contaminants. For the tape, I used 3M Super Strength Molding Tape: https://www.amazon.com/Super-Strength-Molding-Tape-03614/dp/B002JOVUO0/ref=sr_1_1?crid=QB28U5VAKS9&keywords=3m+03614&qid=1687388031&sprefix=3m+03614%2Caps%2C165&sr=8-1 I did not remove the old tape, but did "clean" it with a few wipes of MEK. The tape is only .043" thick (1/32+) and I did not notice it made the band stick out or create a space between the hull and the back of the band. IIRC, the band is slightly concave in the back so that helps. The tape is 1/2" wide and I ran a strip along the top and bottom of the band (like it was done from the factory). Before sticking the band to the wall however, there is an important step not to be missed, and that is to first wipe down the contact area of the hull with 3M Adhesion Promoter: https://www.amazon.com/3M-Adhesion-Promoter-Sponge-Applicators/dp/B07MVK1PG6/ref=sr_1_2?crid=HCJKV1Q09VD1&keywords=3m+4298&qid=1687388387&sprefix=3m+4298%2Caps%2C203&sr=8-2 I used small blue tape pieces on the hull for reference marks so I could focus on attaching the band and not worry about it being straight. Try to compress the band a little going around the corners. Peel the backing off the tape as you go. Having a helper makes the process a lot easier. That was my process and it has worked well so far. Good luck! Dave
-
So I've had time to consider this a little more, and make a correction to my earlier post. The Elite 1 has a GVWR of 5000 lbs. The OEM tires it came with are BF Goodrich Commercial LT225/75-16. Please correct me if I'm wrong but tire pressure/load ratings seem to be the same between different manufacturers for the same size and type of tire. So, for the LT225/75-16, its load rating at 70 psi is 2440 lbs. (off the Toyo chart I referenced earlier in this link). This gives a combined load rating of 4880lbs. This is the pressure I have been running these tires with no issue. I misspoke earlier when I said I ran them at 60psi, I do use 70psi, brain fade I guess.... I have not scaled my loaded, ready to travel Oliver, but think that 70psi is a reasonable and safe starting point for highway travel for the Elite 1. I can see why OTT sets them up this way. Once off road, on gravel and traveling at reduced speeds for extended periods, I might lower it down to 60psi. My 2 cents. Dave
-
Yep, I've been setting my air pressure to 60psi in my Elite1 (stock LT tires) for highway driving with no ill effect. After reading all this, I may air down to 50-55psi for wash-boarded gravel roads where my speed is much slower, maybe even lower? I think ultimate tire pressure used is a decision one makes based on vehicle weight, speed, and road conditions. Certainly, all the pressures listed in the charts are for normal highway driving and that is a safe and reasonable starting point. Dave
-
This is off Toyo's website. Scroll down to page 23 to start LT metric tires for pressure/load ratings. https://www.toyotires.com/media/pxcjubjs/application_of_load_inflation_tables_20200723.pdf Dave
-
Towing MPG with GM 3.0 diesel 1500 pickup
DavePhelps replied to tallmandan's topic in Towing an Oliver
Thanks but that link is not working. Just a simple payload number would be great. I'm hoping it's over 1700 lbs. Dave -
Towing MPG with GM 3.0 diesel 1500 pickup
DavePhelps replied to tallmandan's topic in Towing an Oliver
Hey Tallmandan, Would you mind posting a pic of your axle rating/Payload sticker? Or just list them out? It would be appreciated! Thanks Dave