SNY SD UP
-
Posts
352 -
Joined
-
Last visited
-
Days Won
2
Everything posted by SNY SD UP
-
Do not rule out National Parks. We have stayed at some that did not have site water or electric. You can (try to) make site reservations ahead of time, or some 'may' hold some sites for daily 'FCFS' (first come first serve), but with all FCFS, get there early, as they go fast. For example in ND, camping at Theodore Roosevelt National Parks, Juniper (North Unit) CG & Cottonwood (South Unit) CG. Both campgrounds are primitive (no hookups, no showers). However as compensation they do have Bison (i.e. Buffalo) wandering thru the CG. I can only speak for the North Unit (and I believe @Mike and Carol have stayed there). The South Unit has Medora, (a real treat for kids & some adults) and the 'Musical'. Lots of hiking & portions of the Maah Daah Hey Mountain (SERIOUS) Bike Trail. B~Out
-
Yes @Ronbrink has the right idea. You could probably make your own custom fit bungie... 1) some bungie shock cord, 2) some of those under the sheet garters with elastic straps between the metal clamps. Maggie recently bought some sheets (one R. & one L. opening) for our bedding, from, https://www.bunkbedsbunker.com/product/camp-bed-sheets/ The only issue, is the KTT mattress are too thick for them to stay 'snugged in'. We ordered 6" depth, probably should have been 8". they make > 8", but with a $20 up charge. So I will be making our own bungie from some shock cord, and use the sheet garters we already have, and see how that works. B~Out
-

Utah's Mighty 5 next spring (from FL)
SNY SD UP replied to Dennis and Melissa's topic in General Discussion
Art & D would be ..--- ..--- -.... Sorry, But I digress from the original post topic. B~Out -
Utah's Mighty 5 next spring (from FL)
SNY SD UP replied to Dennis and Melissa's topic in General Discussion
Very ingenious 1504 -
I just saw this on a news feed I get. https://products.buybedscrunchie.com/en/pre-1.html?loader=1&Affid=20827&s1=&s2=&s3=&s4=7424&s5=9bf83aa218f7436e97aca7abbd709e52&domain1=www.djpcraze.com&network_id=69 Do not own one, do not know how well they work, probably will not buy one, seeing as though Maggie bought sheets already. If i find out where she bought them, i will post here. maybe you could even make your own... Hope the video comes thru. B~Out
-
2020 Dometic Curbside Awning Issue
SNY SD UP replied to gatorewc's topic in Mechanical & Technical Tips
Where was this Dometic Repair shop located? -
The Saga of corroded brake wires on older trailers
SNY SD UP replied to Wayfinder's topic in Mechanical & Technical Tips
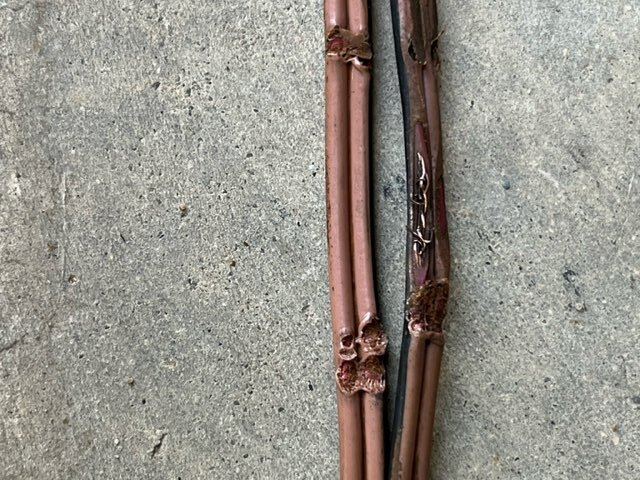
To All, Mine were abraded somewhere within the axle tube in the middle between the hubs. There was about 12' of wire stuffed in the axle between the hubs. Mike T. & I were in discussion, as we both had this issue at overlapping times. I believe I was just further in the process when we discussed. I will include pics (of both dbl. insulated wires) of where abrading exposed to the bare copper within the two insulations. I did not remember to label front & rear. It was explained to me that the during the forming of the axle tubes (and this may vary depending upon manufacturer) the inside of some may get a robotic welding, as well as the outside. the outside of course is smoothed off and painted. The inside, depending on the process may get a smoothing, however most of them are left with weld spatter inside so the axle tube on the inside resembles a concave wood rasp... just what we do NOT want to house our brake wires. Mine actually look like they were somehow pinched, or maybe during the shorting out process heated up enough to melt(?) the insulation near the abrasions. So I went straight to a previously read article by Prof. JED, Emeritus, which dealt with replacing the brake wiring. I ran my newly purchased (NAPA Shielded Brake Cable) wires outside the Axle Tubes, putting them thru a loom at about 9 o'clock (to the rear) to protect from rocks or other strikes. Using butt-splice connectors from the Shielded Brake Cable wires to the leads going into the brakes, then buttered the connectors up with adhesive-sealant to further protect connectors from moisture. I have some ZIP TIES (I've been told, like the ones 'LE' uses on your wrists...) which are 1/2" wide and abt 1/8" thick, and used those secure the loom to the axles. At least that was my approach at the time, as I wanted to get back to camping. The Brakes have worked as they should. B~Out
-
I "burped" my Dometic refrigerator
SNY SD UP replied to dedroll's topic in Mechanical & Technical Tips
Thank Gawd, this procedure was explained. I envisioned struggling holding the fridge on my shoulder, whilst walking up-down the runway, patting it on its back. B~Out -
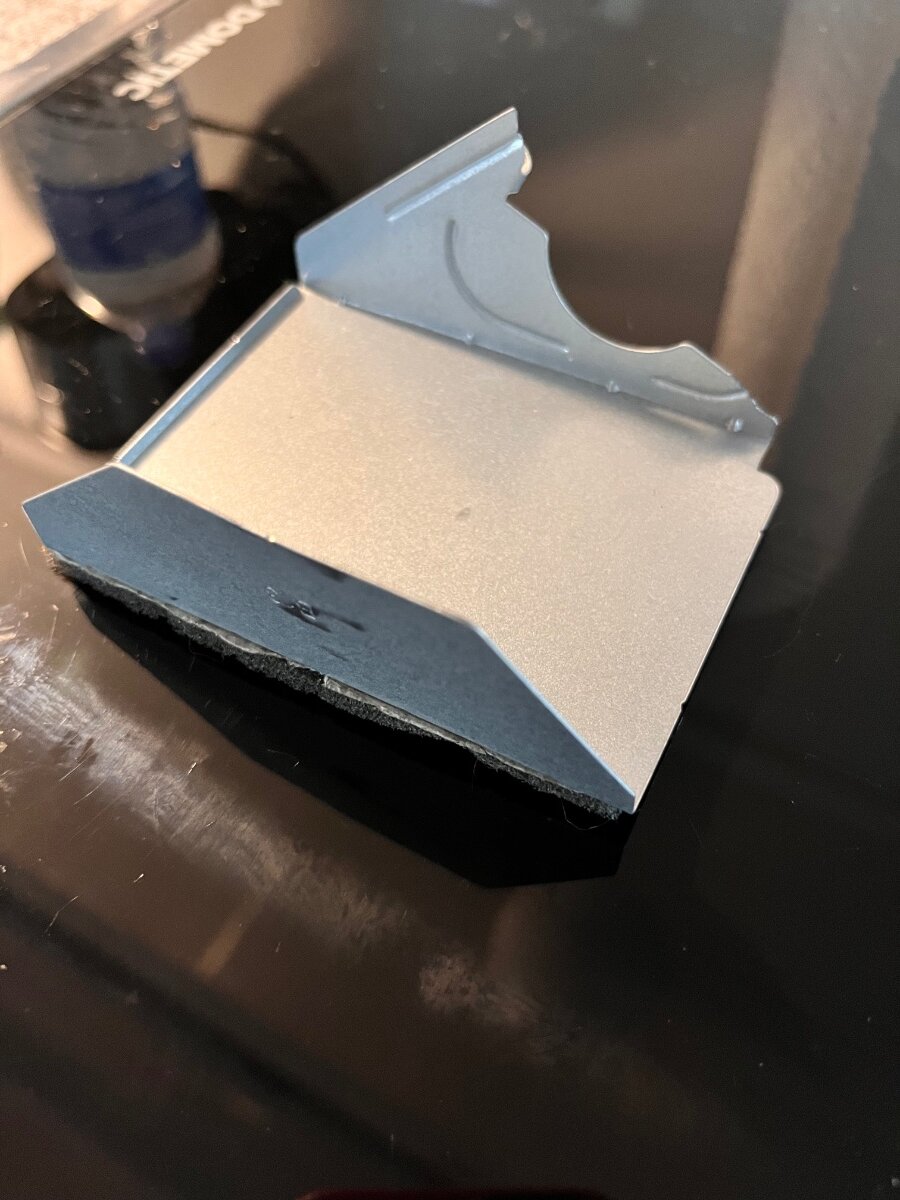
Skipster, One issue I have with the Battery Tray is one side catches easily when pushing it in, the other side does not and i have to make an additional effort for it to latch properly. if you have this issue, could that have sprung your Battery Door at the hinge. Your post makes me want to examine my Batt Door hinge, when the offending side does not catch. And Craig's post makes me want to check my rivets on the door sides and monitor going forward. B~Out
-
Skipster, Please go to your account settings and then click on Signature. Then enter info on your trailer and tow vehicle, as Craig (Galway Girl) has done. This really helps those who read your posts understand a bit more about the Trailer or Tow vehicle, and they can give more direct answer or suggestion. As Craig mentioned, Pictures (see his post) can help people see what you are seeing. I just finished reading Craig's post on his Battery Box issue and thought of your issue i had read earlier. Craig is correct, similar but not the same. Nice fish on your account page, where was that caught? additional comment I am having the same issue with the basement door latch raising, but the door stays closed, while under tow. The door may be a bit sprung, as it is always dropping to the tether when opened. But i am not seeing any issue with the rivets at the bottom. This started on the way to/from ND to AK. However not enough for the door to open, so i just started locking it. i need to figure out what the issue is and repair it before our next outing. Bryan
-
To all, Do we just monitor, and if we see this happening, get ready to (re-)Rivet with stronger stainless rivets? I will look at mine tomorrow, as we have taken some pretty hard jolts since 08/2020 pickup. B~Out
-
Mike, How did you access the nuts, whilst tightening the bolts, as mentioned above, that is a difficult location to get into? Bryan
-
Ty J, It was my Humor, which gets me in trouble every now and then. I really did understand that the Clips, Clamps and Braces, would come off before use. And we will be installing a tether of some sorts on the frame to bath door/latch, as it popped open again while under tow on our last trip, however nothing was damaged this time. B~OUT
-
How do you keep the water inside, with all the Clips, Clamps and Braces on it... Just Kidding, Our latched door evidently tweaked enough to open (under tow) and cracked the mirror or by slamming against the dinette stop... we only have 5 years BAD LUCK remaining. I must admit that the mirror glass only 'spidered', and did not fall from the door. Just applied 'Gorilla Tape" in a nice star pattern, and lived with it the rest of the way home. B~OUT
-
Has anyone done this, if so, what did you do or use to do it? Thanks, B~Out
-
Are we talking about painting the actual pleated shades that go up-down, or the frame around them? It appears as though the link is for the frame not the pleated shades.
-
Correct, Last season, We arrived in Inuvik, NWT where we discovered that one of the rears snapped (same area as most previous pics). We were able to replace it (similar, but not exact) and we continued onto Tuktoyaktuk. On the return to Inuvik and the same mechanics shop, I thanked them for their help, but noticed the other 'rear' had snapped (same area as most previous pics) sometime between Inuvik to Tuk & back to Inuvik. Note: I drove to Inuvik on the way up the Dumpster, and Maggie drove from Inuvik onto Tuk and back to Inuvik. While waiting for the 2nd replacement leaf spring, we found that all four shocks were blown, (this may have been before the trip), we just did not check them before we left for the trip and that probably contributed to LS failure. We had 4 new Monroe 555001 brought in and installed. a couple days later the leaf spring arrived and we were on our way to Whitehorse for 4 new/matching leaf springs. In Whitehorse, they installed 'UNA-212' rated Capacity: 1,830 lbs. each, the 4-leaf measurements were close enough for us... Oliver uses the MPN: UNA-210 rated at 1,750 ea. We made it home no issues, and back up to AK and around this season, no issues. Just not the NWT. So we are running with something a bit different than most of you. We will keep an eye on our shocks. I see some pics of something different than the High Gloss Black 555001 Monroe's on other trailers I am not going to make any changes until I see what OTTO’s comments are after this camping season. B~Out
-
MW issue resolved, well kind of… plugged MW directly into a 12-3 20’ ext cord, then into site power post which had a 110 GFIC receptacle, opened the door and that tripped GFIC breaker at power post. Whew… so glad it was not GFIC @ Inverter. We unplugged MW, “we’re going in”… Opened up case, Found a loose part, Spent considerable time trying to find out where it might be within the case. Could not figure/find where it went, SO Closed up case, Reinstalled MW into cabinet. NO EASY FEAT… MW no longer trips GFIC @ inverter. As soon as we can FIND ONE, we will get to Appliance store and ask about loose part. MW is a High Pointe installed in 2020 in our LEII. Model# EM925AQR BMW
-
Molly - the enabler of new experiences
SNY SD UP replied to Al T from Alberta's topic in Introduce Yourself
AI T, from Alberta, We saw you headed south, as we were headed north a few weeks ago. We did not recognize you as an ‘Ollie’ as you approached because of your wrap. But as we passed we did, and we loved it. Almost did a U-T to chase you down for an introduction & picture… but a saner mind prevailed and we kept heading north. Bryan, Maggie & Willis (aka Kamper Kat) -
Quite honestly I could see this as a venture for someone to spot them out in their range pastures for summer weekend or weekly ‘camping experience’. Kind of like a ‘dude ranch’ experience however I do not see them as viable tow-behinds going down the highway, and then boon-docking. They are just on such a different paradigm than an Oliver. I did some sheep herding many years ago, and was in one of these with 2 Basques and 2 dogs, after 2 nights, I ended up sleeping outside on a cot under a tarp.
-
At 6’6”, now down to 200#, I wondered the same. 1 king or 2 twins. I am a side sleeper, and must have like the fetal position so much in the womb, that I sleep (legs) tucked up a bit. So no brainer for me. 2 twins. Added benefit, if I get a leg cramp, rather than have to jump up in the middle of the night, then try to stand up to stretch out a calf/foot… I just stretch out that leg an press against the wall. Works every time. And Maggie sleeps right thru it. Bathroom shower is difficult for me. So I sit on regular toilet seat and then shower. I am looking for a reinforced lid though… the thought me splitting/cracking the lid and part of me that is sitting down getting pinched does concern me, however, I have not heard of that happening. B~Out
-
Brilliant, I see you included the Wasilla, AK store. We will be passing through there. Maggie will not give me any grief if ‘Another Tool’ helps us resolve this issue. Kind of a toss up though as far as the expense of a MW purchase vs. the effort to replace the GFIC on the inverter. Thanks again
-
CRM, TY FOR THE REPLY We are in Valdez, for a few days. I’ll look into that type of GFIC cord at local hdwe store tomorrow. Otherwise it will be Anchorage. I was thinking the same, but unplugging the MW from trailer receptacle and plugging into a #12 (<20’) ext. cord, then plug that Ext cord into the 110 receptacle w/GFIC at power post, and testing it that way. I know there electrical ‘formulas’ about drawing a current through an ext cord, dealing with the wire size & length of the run. And do not want to skew the test, that you have recommended. Which makes sense to me. BMW
-
This just started happening while on the Road up here in AK. We have been mostly boon-docking thru Canada & Alaska, but will grab a power site if we need a change of pace. This just started happening at our last full service site, after using it. Once the microwave (MW) finished its time, we opened the MW for the next item and it tripped the GFIC. It is now happening EVERY TIME we ‘open the MW door’ it trips the GFIC outlet at the Inverter. 0) we no not use the MW often, even when hooked to 30a shore power. 1) MW plug is secure in it’s receptacle. 2) power at connection post appears to be good. No issues with PMS display codes in attic. 3) we can run (one at a time) coffee maker or toaster from 110 outlets above kitchen area w/o issues. 4) while boon-docking, we did run MW for about 30sec’s, w/o issues. And used it later ON with 30a hookup w/o issue. 5) I have not tried loading it with food, closing door, resetting the receptacle, then seeing if we enter times, if it will run or not. Any ideas short of disassembling MW door, to look for some issue within door latching mechanism. I am not opposed to having to buy a NEW MW on the road, but not in Valdez. We will wait until Anchorage. Then the question is, any particular brand for use in the Oliver? BMW,
-
Thanks to all. This is something i obviously did not think thru. Basically, what is the root cause of my battery failures. We will head out as is, we know there are a lot of 'Canadian Tire' or 'Battery Type' stores as we travel on Canada-1 from Regina to Calgary, before heading north. We will monitor, and sort it out on the way or when we return. I will try a few 'Where's Ollie' entries in our future. No need to make it to Faro, Mayo, Keno City, Minto Bridge, Inuvik, Tuktoyaktuk, been there done that. As Usual, Kind regards to all who asked the right questions (saw the cable issue as a 'Red Herring' even though it was the Black/Neg one...), showed Concern & even offered up 'Reading Material'. B~Out, ...New Moniker to come, BMW (Bryan Maggie & Willis aka Kamper Kat).