
SNY SD UP
-
Posts
352 -
Joined
-
Last visited
-
Days Won
2
Everything posted by SNY SD UP
-
Me again. This may or may not work, but it will probably generate some additional topic traffic. First concern, he is going into a 'wood' door and 'we' are going into plastic. Next concern, would be what do you anchor the lower side of the piston to. Obviously the floor of the cabinet, but how solid is that to hold screws under tension. I can see the top bracket being attached to the same type of round threaded metal disk on the outside of the cabinet that the existing hinges attach to. Finally, would the working location of the piston or other 'spring loaded' scissors hinge' make it difficult to get large items in & out.
-
Steve, And these are the important & pertinent comments by others on this forum that will fill-in for my lack of knowledge. Bryan
-
Peggy, Are you looking at something like a spring loaded scissor piston hinge to lift the door, when unlatched? Bryan
-
Peggy, You are correct, I just visited SNY SD UP, and there is no way to access the inside of the ceiling from the inside of the cabinet. And with the molded ceiling curve to cabinet, that does not allow for any type of a magnet to flush fit to the existing metal latch mechanism. Maybe just change the one you have removed, and work thru how you will create a way to keep it up while accessing the inside of the cabinet. Still ruminating on this.
-
If you had access to the inside of the FG ceiling, you could attach a (STRONG) magnet inside that was aligned to the cabinet latch, and it would hold like magic. (I will now go out and look at 'SNY SD UP' to see if that ceiling area is accessible from the upper inside of the cabinet area) ruminating on this for a while. We did this to hold the bathroom mirror door open against the exterior of the front dinette cabinet. One magnet on the door the other aligned with one magnet on the inside of the access area under front dinette cushion. Bryan Remember with (2) magnets, if you want them to attract, make sure N-S are reversed, if you want them to repel align N-N... Don't ask me how I know. "Hey Bryan, the bathroom door is not holding like it should"...
-
Peggy, Did you use to use razorblades to cut/remove the calking? I have found that these work well and they do not hurt the fiberglass. https://www.amazon.com/dp/B07TVM7W35?ref=ppx_yo2ov_dt_b_product_details&th=1 Have you decided how to hold it up when open? I do not have a lot of experience, but I have a lot of ideas. I am seeing a chrome/stainless steel magnetic disk (aligned with the with front of metal latch) with adhesive on the back that would adhere to the fiberglass ceiling. So when you lift it up, it would catch to the magnet. Like with all magnets it would need to touch most if not all of the metal latch to hold well enough to not come crashing down on your head. I do not believe this would not be too b'ugly. Some of the marine-type (SeaDawg, Are your ears perking?) folks may chime in here with resources/experience. Bryan
-

February 2021 Arctic blast crippled the South
SNY SD UP replied to John E Davies's topic in General Discussion
We can’t seem to come up with a name. How about FROSTY... -
Sherry & Paul, Lots of Campsites are open and more are becoming available each day up here in North Dakota. The only migration is that of the birds heading south. Oh WAIT, our first snow dump of the season, now they are inaccessible until May. B~Out (Shoveling the driveway)
-
Newbies taking the plunge - Are we missing anything
SNY SD UP replied to Dennis and Melissa's topic in General Discussion
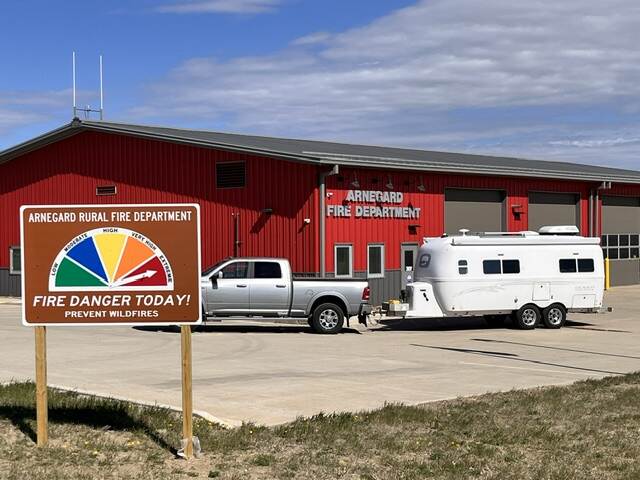
D&M, Oliver is our first TT, as soon as Maggie found it online, and said she wanted it, that was good enough for me. We placed our order in May '20, went to the factory for a tour and to see the various options in person. We would have added the Lithium package if it had been available at the time. We picked up in August, and were on our way. We have had it 3.5 camping seasons with about 40k camping miles, see our map. After we bought a new "TRUXEDO LO PRO TONNEAU COVER" we found out this summer travelling hundreds of Km's on dirt roads up in Canada, we had a lot of dust & some moisture in the bed and settle on the contents. I did have a towel to stop dust from coming up & in from the bottom of the tail gate where it hinges to the bed. We also purchased a rack which "shares" the bedrail along with the Tonneau cover to carry Kayaks, his is 12' hers is 10', not sure how long I will continue to enjoy loading and unloading them. The bed rail rack, may have something to do with Tonneau cover's inability to hold out the dust. My solution was to cover with a tarp & tuck it around the contents before closing the Tonneau. In closing, let me state what others have not... "You will find a way to fill up the bed of your truck"... Regards, Bryan, Maggie & Willis (aka Kamper Kat) -
Ours are 3 yo. My problem is I have accidently stepped on them while dumping. Some slight oval-ing, but no cracks or leaks. I think I will replace before next outing...
-
I have opened a Service Ticket. Awaiting a response.
-
To the Forum, Has anyone removed one from an Oliver? I believe I see how to do this, but looking for some prior experiences here... Before I start the process. Thanks, Bryan
-
Oh, this was a re-active project, not a pro-active one... We have a LE II, I am not familiar with the foot well on an LE I. Would your aux water tank fit in the foot well, and could you then put a bungee around the aux water tank and the post? keeping it near the post and not blocking air returns? B~Out,
-
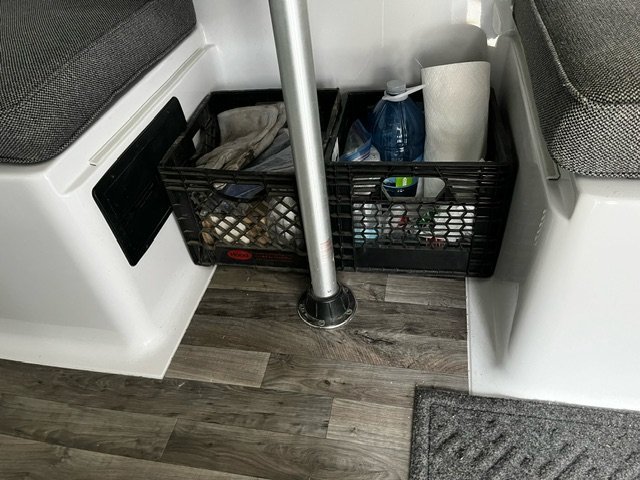
Geoff, et. al., This is something I started doing after loosing a couple of 2 liter bottles of water that dislodged in a bundle of 4 and started to roll around on the floor and slide into the gentle rounded corners on the inside of the trailer (and still rupture and leak...) as we were merrily rolling along through the NWT & YT this last summer. I got a couple of milk crates and put them in the Dinette footwell, behind the table support tube on the street side of the dinette. They insert best by removing the cushions and sliding them in empty from the top. once in, they self adjust so they are both held in the area by the table center pole. We now keep (4) large bottles of water in one, and maybe some other soda/water bottles/cans in the other side. We have not had any issues since I decided to do this. After reading the "LP/CO Detector" section of our manual about placing something in front of the unit that may impede the ability to function as it does, the milk crates should not be a problem. Read the section of the product manual which addresses what liquids that you should not store next to the "LP/CO Detector". B~Out

-
#665 was picked up in Aug 2020. We have an "threaded adjustable" rubber foot (similar to a table foot) at the upper left rear within the microwave enclosure. When you turn the rubber foot clockwise it extends it down until the microwave does not move. You do have to remove the face plate as shown above, to see/adjust that rubber foot. "And/or you have been down some very rough roads." Yes, lots of that. Sorry no pictures. B-Out
-
Bill, I know once water gets into the "inside bottom" it runs out the scupper holes. But where does it drain to get into that 'inside bottom area", just not seeing it. We had water on the floor a few times, but for us it was "ALL TOWELLS ON DECK"... Can water (or maple syrup) get from the floor to the "inside bottom area" from under the refrigerator? Bryan
-
have you tried searching the overall forum on this matter? i searched for insurance roadside assistance and the following popped up look at the "didnt find what you are looking for" and maybe change selection to search to insert AND or OR. there are other member who have had this question, so the answers may be out there.
-
Was the leak from the connection within the trailer or where the flex hoses connect to the rigid pipe that comes out of sewer compartment at the rear, but outside the trailer body?
-
1) OTT - Wondering if the various Nuts & Bolts used on/in the "OTT" are all SAE, or are there some metrics mixed in? 2) Appliances - The Dometic Stove model D21 definitely has Metric Screws threads which come up thru the bottom to hold the heating elements in place, but the screw head can be either Philips or Torx. At this time, I do not have any experience with the WH or AC, but if made in I have heard, if I buy a robust Metric Socket set, those sizes will accommodate most of the SAE sizes. Not sure if that is for true going from SAE to Metric. Do any of you carry both? Have any of you created a mixed hybrid of both where there is not an (SAE-Metric) equivalent. Thanks for the replies, Bryan
-
For what it is worth, I removed my "Hubs", then purchased & replaced them with the following. https://www.amazon.com/gp/product/B00AEBBBGC/ref=ppx_yo_dt_b_asin_title_o07_s00?ie=UTF8&psc=1 They do make it easier to read hub temps with an IR gun and as mentioned above, the removable rubber cap allows access to the axle nut if it needs adjustment. One other tool that I previously had, similar to this makes it easier to remove and re-insert your axel dust caps. https://www.amazon.com/Sturdy-Built-1-98-Trailer-Installation/dp/B0B6QBJRQH B~Out, PS here are some pics, they show what the rubber caps look like. Ours are a bit dusty, from last ND road trip.
-
Nightstand USB Access Question
SNY SD UP replied to Wandering Sagebrush's topic in Mechanical & Technical Tips
Would you please post a picture of the area for the USB ports, Please & Thank You. -
All lights associated with 7pin work as they should. (verified earlier today)
-
Furrion RV power inlet replacement
SNY SD UP replied to WandR's topic in Mechanical & Technical Tips
Sept 2020 I paid $125 + S&H for the Furrion replacement shipped from Oliver. It was the first thing I replaced (having damaged the original) on our trailer. As I remember I did not have much length on the wires coming from inside. At the time, Jason said "We use two different power inlets on the camper depending on what options you get but I am attaching links to both for you." As to what those differences are, I do not know, so I bought the same as that which came on the trailer, although Jason said they had also used the Marinco 303SSEL-B 30A Power Inlet, which if you search, appears to be less expensive, and is also S/S. As others have mentioned, call OTT Service. B~Out -
Ride&Fly - Yes, your post is one of those that I read before diving into this. It appears as though OTT has maybe changed things a bit in that compartment since 2015. However the task remains the same. And I agree about extensions. I do have the nut drivers for the pipe clamps.
-
I went into the bowels of the front dinette seat, to have a look at the Black Blade Valve. Besides being a bit difficult to pull/push from the outside it appears to not seat all the way when pushed in. I have followed other threads which discuss this topic, so I "Know what I have to end up doing". However I cannot seem to get my 2XL hands in there to properly access the bottom nuts/bolts no matter how I try to squeeze in there. Maggie was observing all this as I tried many different angles and she saw my struggles. I told her what I really needed was a ¼” drive socket set so I could get the proper access for inspection and possible replacement done. She suspected I just wanted an excuse to buy more tools for SNYSDUP… I then mentioned to her that her hands were much smaller than mine and could easily fit between the piping. After a very short discussion, I believe I will now be buying a ¼” drive socket set. So my questions are… Before I make that purchase and based upon pictures of others doing this task, is ¼” drive the proper size, given enough sockets???, Am I a bad person… The 2nd picture shows two (red circles) bundle of electrical splice connections that are open. Am I wrong to assume they are for options we did not choose, but were wired-in if we want any of those options added in in the future. The question I have is, Can anyone tell me what the 2 groups of wire connectors would be connected to, so I might label them. Regards, Bryan