Search the Community
Showing results for 'Generator box'.
-
 Other than sitting it on the hitch shelf….. thanks
 -
 We got our LE2 with the bike rack mount and realized we will probably always carry our folding Ebikes in the back of the truck under cover. With that understanding we decided to add a cargo tray and locking box for general items needed for setup, and camp site necessities. Obviously weight is a critical factor so with the tray, box and gear inside we are shooting for less than 200# total. I'm sure we have succeeded after adding up the weigh of all items. The most difficult part is making the extended rails for the tray to mount on. I used the same T6061 aluminum that Oliver uses on their frame members. It's available in small sizes at local metal supply houses such as Metal Supermarket. The aluminum tubing drills and cuts easily with carbide woodworking tools. Use a little lite oil on the blade to keep the aluminum from fowling the blade. You must use good eye protection when cutting. I copied the way the bike rack rails were machined. Here's the results of the project: We have pulled the camper a couple times for local camp outs and the weight of the addition is completely unnoticeable while towing. The box is well made but light weight with locking double latch system. It has a double layer of aluminum in the lid and is foam filled to keep the contents from heating up too much in direct sun. The whole thing is very sturdy and at 220 pounds I can stand on the box lid to see the top of the camper with no effect to the box lid. Good traction and very solid. The softener tank is mounted with a tank wall mount and strap and is set up with quick connects and the standard hoses hook up in just a minute. The softener comes with a regeneration kit and it takes about an hour to perform a regeneration using a box of table salt. It will last up to 2000 gallons of water depending on the mineral content. No need to remove the tank for regeneration, just connect the kit to the external QD fittings and run the process. When done, you are good to go for a few more camping trips. No more hard water scale or rust on pluming fixtures. Remove the tank for winter storage inside the garage. I'm very pleased with the overall project. The box can be removed just as the bike mount is removed for spare tire access. You can actually access the spare without completely removing the tray assembly, Just slide it out about 6-8 inches and the cover and tire are removeable. I bought a self lit license frame and mounted to the back of the tray. I added a plug connection to the license light wire to power the new license plate light. I wanted a removable connection for obvious reasons. The connection is mounted on the lower part of the spare tire cover under the original license bracket. The old license plate bracket is still useable if the tray and box are removed. Tray: https://www.amazon.com/gp/product/B0017H9N4E/ref=ppx_yo_dt_b_asin_title_o02_s00?ie=UTF8&psc=1 Box: https://www.amazon.com/gp/product/B000MK4F68/ref=ppx_yo_dt_b_asin_title_o02_s01?ie=UTF8&psc=1 License Bracket: https://www.amazon.com/Car-License-Plate-Light-Chrome/dp/B00S1Y5TSK?pd_rd_w=jpDah&content-id=amzn1.sym.e8faeee7-63c9-4cb3-96e0-e50a41f3b35b&pf_rd_p=e8faeee7-63c9-4cb3-96e0-e50a41f3b35b&pf_rd_r=018MZ7KVYFFMGM0WSKBV&pd_rd_wg=mdsBW&pd_rd_r=eff79229-c9bb-45a5-8656-400649d9a361&pd_rd_i=B00S1Y5TSK&psc=1&ref_=pd_bap_d_grid_rp_0_1_ec_t Softener: https://www.amazon.com/gp/product/B09Y2KNFFL/ref=ppx_yo_dt_b_asin_title_o06_s00?ie=UTF8&th=1 Tank Bracket: https://www.amazon.com/gp/product/B00208DY76/ref=ppx_yo_dt_b_asin_title_o04_s00?ie=UTF8&psc=1
- 7 replies
-
- 12
-

-
Dave Phelps post got me to thinking. After taking a “Deeper Dive” into this rabbit hole, I have to admit that my salt water/ocean air hypothesis may be all wet. Full disclosure: I am not a metallurgist but with my slide rule, I can still do some structural analysis. But in this case, I think the below interpretation may hold some water. So, this certainly is NOT an official analysis of the cause of the failure. Just the musings of a member of the OTT Rabbit Hole Investigator Team. 😊 As stated in the initial report, the top metal of the Bull Dog (BD) was still somewhat intact after failure. Had this metal also failed, we would be having a discussion about safety chains (Again). But fortunately, that was not the case and there were no injuries. Thank the Lord. Also as reported, and from the below inverted picture, we can see older damaged metal (Rusted), and at time of collapse damaged metal (Shiny white metal). This photo shows us that both sides were well compromised long before the failure event. CURB SIDE OF BD STREET SIDE OF BD But, as evident from the photo from the street side looking at the side of the BD, the street side was predominantly ripped apart during the failure event. Whereas the curb side was damaged long enough in the past to be fully rusted. TV END OF BD OLLIE END OF BD So paraphrasing Dave P's. musing: With or without the horizontal gusset how could this disparity in damage to the side metals happen? But first, let’s “Dig” into what the purpose of "The Gussett" is and likely why BD added it to their 2" couplers. Here is what they look like: The gusset is located near the juncture of the BD round pipe and U-shaped metal attached to Ollie. I believe that the purpose of a horizontal structural member (I.E. Gusset) is to reinforce the round to “U” shaped metals junction from being damaged by side horizontal loads. From the posts, it appears that older BD 2" couplings did not have this reinforcing structural member. I suspect after some lateral failures the design was beefed up to resist lateral loads by adding this gusset. When a box, round or square tube is lateral stressed by an impact load, the impacted side will go into compression and the opposite side will be stressed by tension. So historically for all BD couplers, with or without the gusset, what is the most likely event that would cause side wall cracks with such a disparity as seen above? I think a side impact load. And how would our OE2’s likely incur such an event? By a backing jackknife event where the Oliver aluminum box strikes the bumper thereby bending the BD laterally. So, as a member of the TV dented bumper owners group, I’ll be under my BullDog with a flashlight FOR SURE. For extra points, which bumper would also been damaged? Your thoughts? Geronimo John
-
Our 2021 OEII came with a 2" hitch mount rack receiver but the installation was (in my view and with respect to a lot of other good work done by the prior owner of our trailer) not quite up to 'factory standard'. In fact the U-bolt-based attachment method distorted the receiver shape just enough to make installation, and especially removal, of our 1Up hitch rack next to impossible. So I sought to improve upon it. After some research I settled on a receiver ostensibly designed for use on certain Lexus GX460 models: https://www.amazon.com/dp/B0BRKR1Q4X Drilling and attachment was straightforward given a drill press, a decent 1/2" bit, appropriate measuring tools, and a center punch. The aluminum is relatively soft and drilling oil was not used. I have not been able to get all the chips out of the interior, but did not try too hard to remove an end cap and access the box section beam interior that way. The hardware is 3 1/2" x 1/2" stainless with stainless and yellow zinc washers. We have not tested the setup on the road yet, but static fitment went fine. The receiver and backing plate are fairly heavy; according to the retailer, about 10 pounds. This item is designed for towing, when attached to a GX460; it is likely overkill for this application, but that's OK by me. A side benefit is the receiver has safety chain mounts through which a cable lock could be passed. I discussed this with Jason and he indicated the factory were considering offering a 2" receiver option moving forward. Our bike rack is 2", our cars and TV have 2" receivers, and use of an adapter was not appealing to me. In hindsight I might have painted it white, or silver 😀 Enjoy! Tim
-
Pete - If you are talking about the "open" storage tray sold by Oliver, then a call or email to Oliver Service will get you the answer you seek. However, if you are talking about a "closed" storage box (i.e. something with a lid, then note that Oliver has never (that I know of) sold such a thing. Closed boxes can be found in a number of places and there are many examples here on the Forum. With reference to your "low pressure" issue - there has recently been a fairly involved thread here on the Forum about this very issue. This thread can be found HERE - (simply left click on the word Here and it will take you to that thread). Bill
-
 We've had the Battery Box on our radar screen since we purchased Casablanca back in March from its PO in TX. One of the Hull #226 selling points for us was that the PO had recently replaced the AGMs with 3 Battle Borns and added a Victron Smart Shunt. However, upon learning from the forum, the BB install by the PO was less than optimum - or at least to our understanding at the time. We were surprised that there wasn't a battery master "shut-off" switch. This fact was the main driver for this project - after looking into what we "really" had on our hands, the pervasive project "scope creep" showed its ugly head! Full Disclosure: Although we've had several RVs over the decades, never have we owned Lithiums. Thanks to these forums, learning about the nuances and particulars of LiFePOs, specifically, Battle Borns - and even more specifically, their application with the Oliver, has taken some time to digest. We didn't want to delve into the "fray" of "cleaning up" what was previously installed until our understanding of this particular system was at a high enough level not to screw something up. So, thanks to the forums, many of y'all's posts regarding the subject, and special thanks go out to @Geronimo John for his patience and guidance with what ended up being a fairly large scale re-design of Casablanca's DC distribution system. Initial Configuration and Issues: 1. A key indicator that there was an issue somewhere within the "DC system" was that the charge controller would never reach 14.4 volts; 13.6 was the max ever observed/measured. 2. The BBs were stacked in an unusual configuration on the battery tray. The rear two batts were aligned side-by-side facing left/right and the third "outer" BB was aligned 90 degrees off facing fore/aft. Several cables were too short not allowing full battery tray extension. Clearly not a neat/tidy or logical configuration. 3. The battery bank was not strapped down. 4. Although likely large enough for intended current, the three BB's parallel connections were made with 1/0 cables versus the 4/0 cables distributing the current into the trailer. 5. Several positive and negative connections were made directly to the battery bank without the use of any sort of terminal post or terminal bar even though the Smart Shunt was in place. These connections were bypassing the SS, not good - thus contributing to phantom current within the DC distribution system and not allowing the Victron App to capture all DC power activity. 6. One cable, a yellow 4 AWG, ran from a negative BB terminal to the wrong side of the Victron SS; this cable essentially paralleled the 4/0 cable from the same terminal to the shunt. This made absolutely no sense. 7. As stated above, no battery master switch. We've always had a master switch in previous campers - handy for longer term storage and eliminating phantom current. In case of fire, we wanted a "safety switch" located outside the camper and inside the battery box to quickly secure DC power after quickly exiting the rig. SUMMARY OF WORK PERFORMED: The closer we looked at the DC set-up the more questions and issues surfaced. There were other ancillary DC system "gripes" but the above list really paints the picture of what we were dealing with... After quite a bit of forum research, thought, and informative and lively discussions with Geronimo John; a clearer project plan developed. 1. We made an assumption that the PO didn't upgrade the "lead-acid" charge controller circuit board as part of the BB installation. This rationale would explain why we never observed more than 13.6 volts on shore power with the controller energized. Sure enough, after pulling the board, it was clear that the board was doing exactly what it was intended to do - charge lead-acid batteries; as it didn't have the Lithium micro-switch option. So, we ordered a replacement 45-Amp board from Amazon with the Lithium option - enter "project scope creep." Above pic shows replacing the LA charge controller with a Li-capable board. The lead-acid board is 100% functional and will be posted for sale on the forums. The new Li-board cranked right up and the BBs finally received the charge intended for a Lithium battery bank: 2. Disconnected and removed the 1/0 cables connecting the 3 BBs, labeled and stacked them sequentially from back to front. Sized cables to allow full extension of the battery tray and added nylon tie-down straps from Rangley. Cut, crimped, heat shrunk, and installed new 4/0 color-coded cables in parallel configuration: Made a terminal buss-bar from 3/16" x 1" solid copper for the Blue Sea Systems master switch (Amazon) which will be heat shrinked once it arrives. Contoured a poly board from an old cutting board to mount the switch, like many owners have done. Mounted a positive (+) terminal bar with the master switch to accommodate DC connections. In the new configuration, only 4/0 cables are connected to battery terminals - removed the various "added-on" connections and placed them appropriately between the (+) terminal bar and the Victron SS. Now, all DC (-) connections are made through the shunt so all DC power measurements are captured with the Victron Application. Peace of mind - priceless. While we were at it, we added an SAE solar input port for the 200W Renogy suitcase solar modules - more scope creep... HA! Not being an EE, I'm sure there's something left out, but in the end, we've got a clean set-up in the battery compartment, fully functional Victron SS, and the appropriate charge controller to manage the BBs. Time for a cold one. Cheers! A & D
- 8 replies
-
- 11
-
-

-

Oliver batteries not charging with generator
Chukarhunter replied to chiwald's topic in Mechanical & Technical Tips
I picked up one of these relatively inexpensive generator test kits a while back. It lets you verify both generator voltage and also how many watts and amps the generator is actually generating at site conditions (altitude and temperature) with the clamp meter. This can help you rule out generator issues. It comes with a test pigtail to make measurement easy. (see pictures below). You can find it at Microair .net
-
Are two accumulators better than one?
Ollie-Haus replied to Snackchaser's topic in Ollie Modifications
The supply line is fitted with a "T" fitting and feeds each accumulator equally. The discharge from each accumulator connects to the system with the same "T" configuration. Thus each accumulator is supplying equal amount of pressurized water. You now have twice as much water available under pressure from the two accumulators operating equally at the same rate. This of course is limited to the total flow capacity of the water lines supplying and receiving, and both accumulators must be operating equally. With two accumulators connected in series, the one closest to the demand starts depleting and the second one is only trying to recharge the first one rather than supplying additional water flow to the open tap. It's kind of like several people standing next to each other and trying to pass objects to each other in a chain and filling a box with widgets. If the four people would just individually transfer the items they could from the one container to the other, the rate of transfer would be much faster than if each person has to handle every item being transferred. Edit: One other thing is the space is very limited so configuring the parallel connection would be the biggest challenge. On the other hand, what's wrong with the pump coming on when the faucet is opened? What's the difference between 5 seconds till pump kicks on compared to 10 seconds? You have used no extra water in the process and the electrical usage is negligible. Complicating a system for nearly zero gain is kind of pointless. -
Actually, I tried the Altoid box but it wasn't big enough for my fob to fit in it easily. We used to place our fob's in a ceramic bowl in the breakfast room but stopped that when we first heard about this "new" way of stealing a vehicle. So, we now use a simple metal can in the house versus the bowl. I opted for the hinged lid for inside the truck because it was easier to get the lid on and off versus prying a friction fit lid off a regular can. Also, my issue with the foil was that it would get "wadded up and I'd have to get a new sheet. I did test my metal box and the truck would not open from the outside when I placed the box on or near the handle. But, I did not try to start the truck when the fob is inside the metal box inside the truck - that gives me something to do today! Bill
-

Enclosed Aluminum Box Front Mount
Patriot replied to Tim and Christie's topic in Ollie Modifications
After some thought of how little we used our 3200i generator in the cargo tray on our last 42 day trip out west, we decided to move forward with a custom all aluminum cargo/storage box from Sea Biscuit metal fabrication shop. My wife and I took a 3 hr drive up to Johnson City, Tenn and visited the Sea Biscuit metal fabrication shop. We met David and Kristine Hess the owners. Some of the nicest folks you will ever meet, and they are campers as well. After seeing the high quality of the Oliver storage boxes that David and his team craft we decided to purchase one. The fit and finish is excellent. We like supporting small companies and their products made right here in the USA 🇺🇸. We know we will get a lot more use from our cargo box each time we set up camp. It has lots of room for all things for initial set up. Our gen will be secured in the truck bed. I custom ordered and installed the XPLOR metallic silver graphics from https://lettering.com/ another excellent customer service experience. Had a buddy of mine install XPEL PPF on the front and sides of the box as it sits in the road rash blast zone. For questions on custom boxes and pricing reach out to -https://seabiscuitmetaldesigns.com/product/oliver-box/ a few photos - PPF - I bought and trimmed a fatigue mat to fit from HF to line the shelf and bottom. Added graphics- Moose rack holds our cables off the ground. Plenty of storage for all initial set up gear- XPLOR graphics installed-
-
Good Day All, Just purchased the aforementioned generator (my first) and I’m wondering if it's normal for the unit to vibrate so much in ECO mode. The throttle doesn't surge and it idles very steadily. When ECO mode is off, vibrations go down. Does anyone have experience with this particular model? Thanks in advance for any thoughts.
-
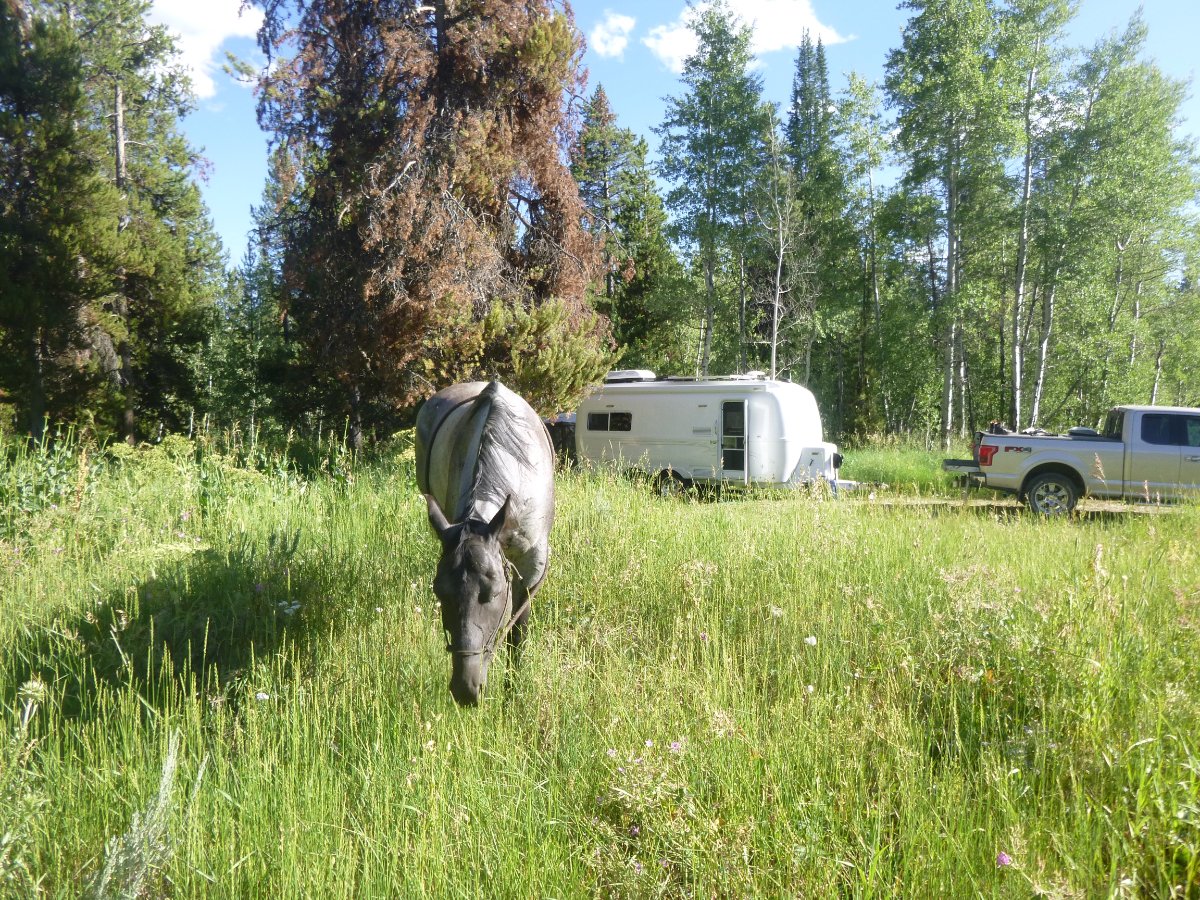
On my recent fly fishing trip to Wyoming I stumbled upon a Forest Service "de-commissioned" campground. My destination was fishing the Buffalo Fork River and I knew that there was a large Forest Service campground (Turpin Meadows) at the end of the paved Buffalo Valley Road. I also knew that there are numerous boondocking sites on this road. However, when I arrived I found the Turpin Meadows campground FULL and even the availability of many of the boondocking sites were hard to come by. So, as I headed west back toward Moran Junction I saw a small sign 9/10th of a mile west of Turpin Meadows for Box Creek Trail Head. The 3/4 mile dirt road ends at the trail head where there are 8 campsites. The Forest Service took away the picnic tables but left the bear boxes. While the pit toilet is not "serviced" by the Forest Service (this means that it is not cleaned nor do they provide TP) the campers using this facility do sweep it out and the result is that it is in better shape than the average. There is water but it is marked that it is not potable, however, both potable water and trash disposal can be done at Turpin Meadows. During the week I camped here it was never full and most nights there were only three of us staying there. It is super quiet but certainly be "bear aware". So, if you are in the Grand Teton area and want to get away from the crowds but still want great hiking and/or good fishing without a long drive on a dirt road, you might want to consider Box Creek. There are stunning views of the Tetons from many of the hiking trails, from the river and from the drive west on Buffalo Valley Road. GPS: N 43 degrees 51minutes 42.5 seconds, W 110 degrees 17 minutes 39.0 seconds Bill
- 14 replies
-
- 16
-
-
-
 Ram 1500 Laramie, 5.7L 8 cyl hemi, 4wd, max tow, air shocks, 6’4” box, crew cab
 -

Generator Inverter Usage
dewdev replied to Wandering Sagebrush's topic in Mechanical & Technical Tips
SeaDawg uses a 1000 watt generator to charge their batteries. a neutral ground plug is REQUIRED. I use a 2000 watt generator (with the neutral ground plug) and I can run my AC. My AC has the reduced voltage starter installed. When using my generator, I need to shut off the circuit breaker to the inverter because it takes to much power when trying to run the AC. My hull # is 10 earlier than your hull #. -
 Certainly there at least two other brands that have similar safety characteristics as the BB's and can also fit into an OE2 battery tray and provide more than 300 AH. But the brand that MountainOlivers is stating is specifically the Battleborn's. At some point, my experience with them will be out of date. But as of today, I have not yet heard of anybody getting more than 300 AH's from Battleborns in an OE2 battery box. Hence my reaction to the statement of "three or four Battle Born batteries". Have they come out with a new product that will let us get four of their batteries into an OE2 and get more than 300 AH? If so, I'm all ears! GJ
-

Made in USA leaf springs
mountainoliver replied to Mountainman198's topic in Mechanical & Technical Tips
A different suspension design would be great going forward but I doubt that it actually could be retrofitted at a reasonable cost. Right now I’d be happy with USA made springs. That small change could make a huge difference. Maybe Oliver could start buying just the axle assemblies from Dexter and springs from a different manufacturer. I know that none of the other mainstream trailer manufacturers would ever do anything so bold or even consider out of the box thinking but Oliver often thinks out of the box, that’s the very reason we have such a great trailer and they’re in such high demand! -

Oliver batteries not charging with generator
Tom and Doreen replied to chiwald's topic in Mechanical & Technical Tips
If you turned the EMS off and you're now charging correctly you may want to investigate why your EMS is preventing your generator from supplying power. Possibly a problem with the EMS itself or there could be truly something wrong with your generator output. By turning your EMS off you will no longer be protected from AC line problems. Is it possible that you could borrow a external power watchdog to test the output of your generator?
-

Oliver batteries not charging with generator
topgun2 replied to chiwald's topic in Mechanical & Technical Tips
OK - good on the grounding plug. Other than turning the inverter off and then on again I don't know of a way to "reset it". However, I don't think that the inverter has much if anything to do with your problem. Basically, the generator produces 110-120 volts of electricity and sends it through the EMS (making sure that the generator electricity doesn't hurt your Ollie) to the transfer switch and then to the charger/converter. The charger converts the 110 volts down to 12 to 14.6 volts and sends that electricity to the batteries. Therefore, the inverter never comes into play. Do you have a multi-meter that you can use to test the voltage coming out of the generator? I really hate to do this to you - but - I have to leave the Forum now. Hopefully someone will pick up the ball (like Steph and Dud B did) to continue to try to help you. Good luck! Bill -
Best Bumper Rack for Honda EU generator?
Geronimo John replied to Margaret's topic in Mechanical & Technical Tips
Should you go this direction, you will for sure want to have a very durable and tight fitting cover for the rear bumper mounted Honda. The amount of dust and grime that flies around back there will destroy your generator in no time if you don't protect it. GJ -

120v wiring failure & good news on fridge outlet
ADKCamper replied to Steph and Dud B's topic in Mechanical & Technical Tips
I am a WAGO connector fan for circuits within their approved rating; properly sized crimp connectors and binding posts for bigger stuff. Clamps or cable ties where possible to limit vibration. I also wrap 2 turns of trimmed-down black tape around the Wago "levers" after making and inspecting the connection to keep those little levers from getting caught on something and opening up when folded back into their junction box. -

Faraday pouches for Tow Vehicle key fobs.
rideandfly replied to Patriot's topic in General Discussion
When I tested the metal box lined with aluminum foil, the lid was also lined with aluminum foil with overlap of foil from the lid and box. A few years ago my testing was with a cell phone's ability to receive calls and messages while in a unlined metal box that failed, but with aluminum foil liner the phone could not receive calls and messages. Not sure if that test is relevant with a FOB, but that was my test a few years ago. One of the things that got me thinking about this again (not Faraday cage related) while on a camping trip last January, I could pick up someone's Victron Bluetooth signal (guessing 50' away) with my Victron Shunt app. Highly recommend using a different PW other than the original multiple 0 PW with the Victron app. -
Well, I'll be .... Sure enough, the metal box continues to NOT allow the door to be opened - there is simply no response from the truck with the doors or lights or automatic deployment of the step - no matter how close or in what position I place the box. However, as with Patriot's safe in the console, the truck started! I placed the metal box inside the console, outside the console, in the back seat, and under the seat - all with the same result. Interesting! Bill
-
Faraday pouches for Tow Vehicle key fobs.
Ollie-Haus replied to Patriot's topic in General Discussion
I think your plan is very sound. On the other hand I tried a similar metal box from some other product and it was only marginally effective. If you got right up against the door handle the touch door locks would still unlock. Also even though the fob was in the box, with the box sitting on the console arm rest the truck still started. On the other hand the pouches I got from Amazon are nearly a year old and the truck still will not respond in any way with the fob in the closed pouch regardless of where you put the pouch in the truck, including placing the pouch with the fob right in the tray of the console near the receiver. The fob rolled up in a few layers of aluminum foil is just as effective. I think every item on Amazon has at least a small percentage of negative reviews, no matter how good the product is. As long as an item rates 4 stars or better I pretty much disregard the negative reviews as spurious, or even the competition planting the negative reviews in hopes of bolstering their competing products. Whichever method works to your satisfaction, I think it's well worth the trouble for the added security and peace of mind considering the cost of vehicles and even the difficulty of replacing one these days. I just edited my previous post and added the Amazon link to the pouches I bought. I'm pleased with the overall performance of this pouch to date. -
 Our 23 foot Airstream had a 50 watt Solar from the Factory. We added a portable 100 watt Panel and connected it to the batteries and had a plug to keep the + and - properly installed, and could plug the Solar Panel into the exterior connection and remove when breaking camp. Our 25 foot Airstream had NO Solar, but the battery box had a connection to wire Solar onto the two AGM Batteries. Had one 100 watt Costco $100 panel and then purchased a second, just in case they quit selling panels. We sold the trailer and gave the new owner the one panel. Our 27 foot Airstream has 200 watts factory installed Solar and we thought we may need a portable, but with the extra 100 watt portable panel in use, we were NOT draining the 200 watt power providing plenty of Solar Charging for our Off the Grid Boondocking minimal power needs. Vent fans, lighting, radio, furnace fan... and this model had Propane, 12 volt Solar and Power hookups for 120volt if needed. Best optimal combination for us. The Oliver has the two Solar Panels on the Roof from the factory and provides plenty of 12 volt power for us. I kept one used Costco 100 watt panel, just in case and purchase another and left it in the carton, unopened. Never know what the future may provide us a need. Cheap insurance. Our 2019 27/28 foot Airstream and 2019 Oliver Elite II have plenty of Solar for Boondockers like us and our three Blue Heelers. The four 6 volt batteries that were in the Oliver provide more than we every could use. The Airstream has the two AGM 12 volt batteries and work just fine with Roof top Solar and have not needed an extra panel for either trailer. When camped at elevation it gets cool to cold at night. We orientate the trailer TO SUNRISE... and the Solar Panel. At elevation the Sun is HOT and the AIR is Cool. I am not a electrician, but the instructions were written so a Neanderthal could understand. Any Human Bean should have no problem. Just know the + and - are... important. I suspect that few Airstream or Oliver owners really care about Boondocking Needs... but we do and if this helps one Oliver owner... it was worth the time to make this up as I type. Now some photographs I found useful for you to understand you can use a small gauge good wiring many feet from the trailer. When the shade and sunlight move... you move the panel. Gives me... goosebumps. Sort of. 🙂
-
I also have been waiting, You think Honda would making a dual fuel generator.