Leaderboard


Popular Content
Showing content with the highest reputation on 02/10/2020 in all areas
-
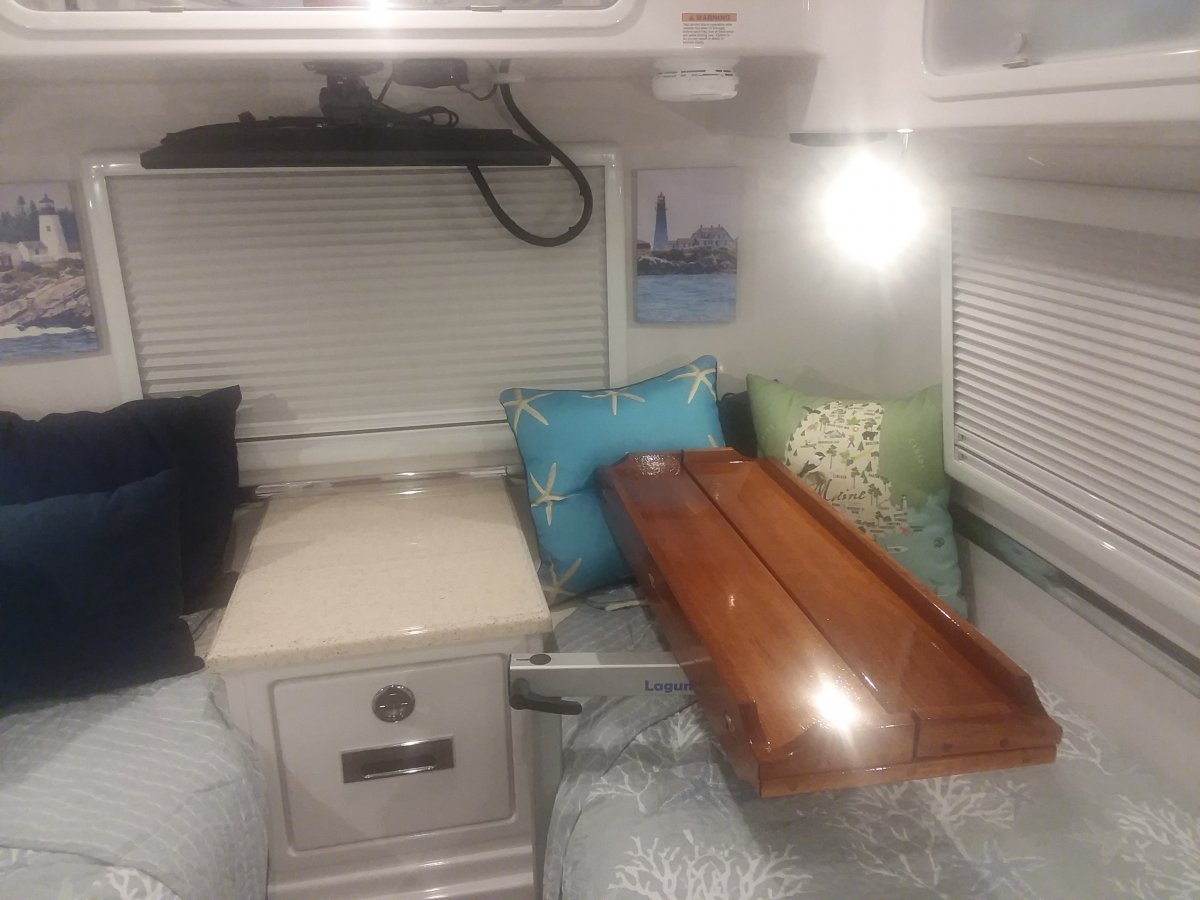
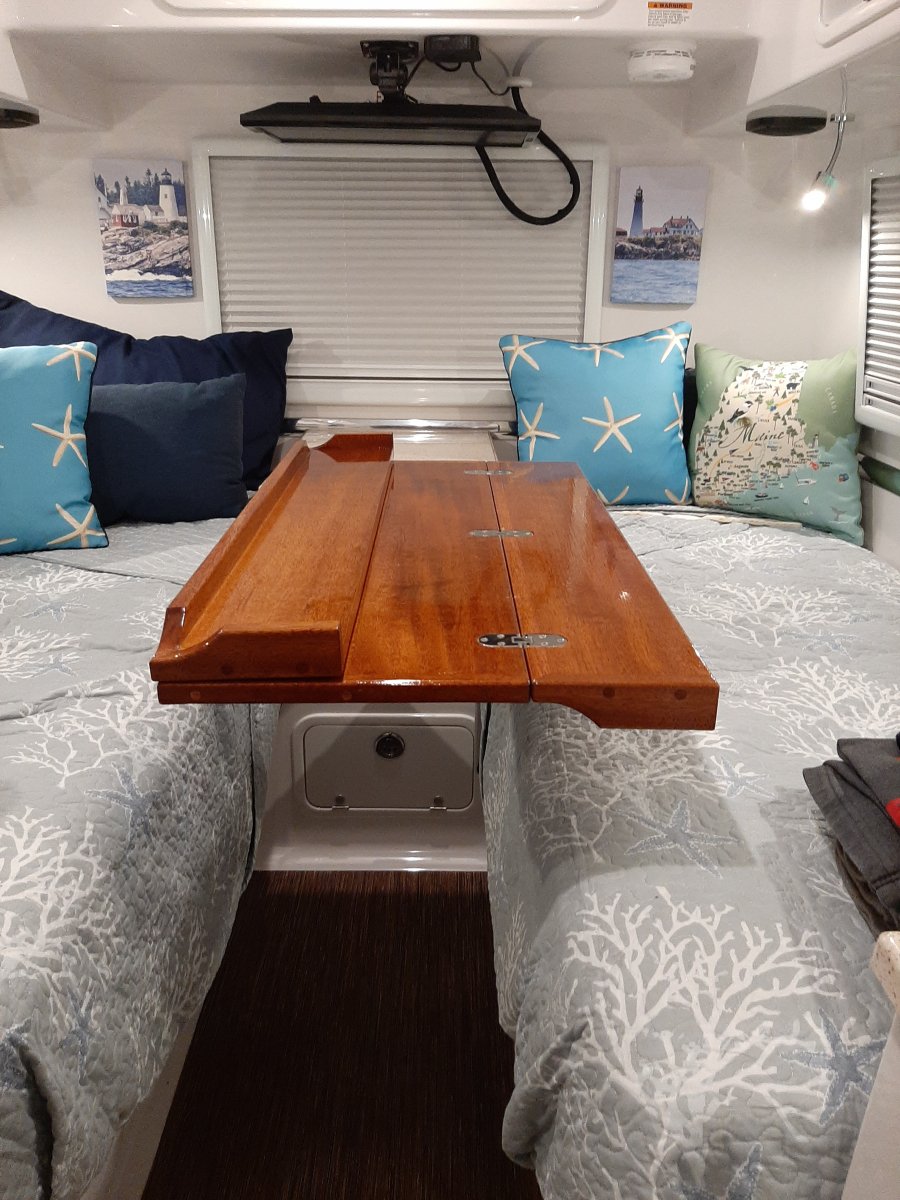
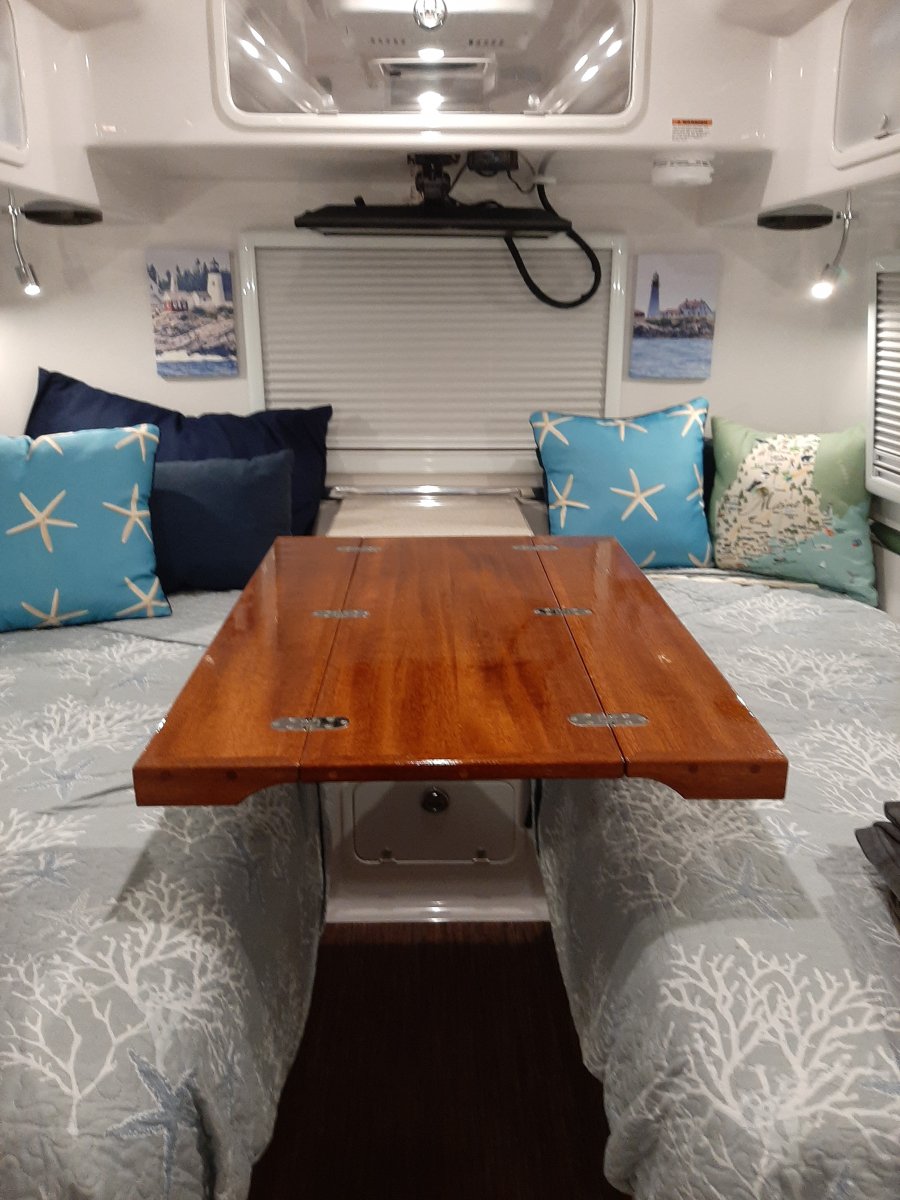
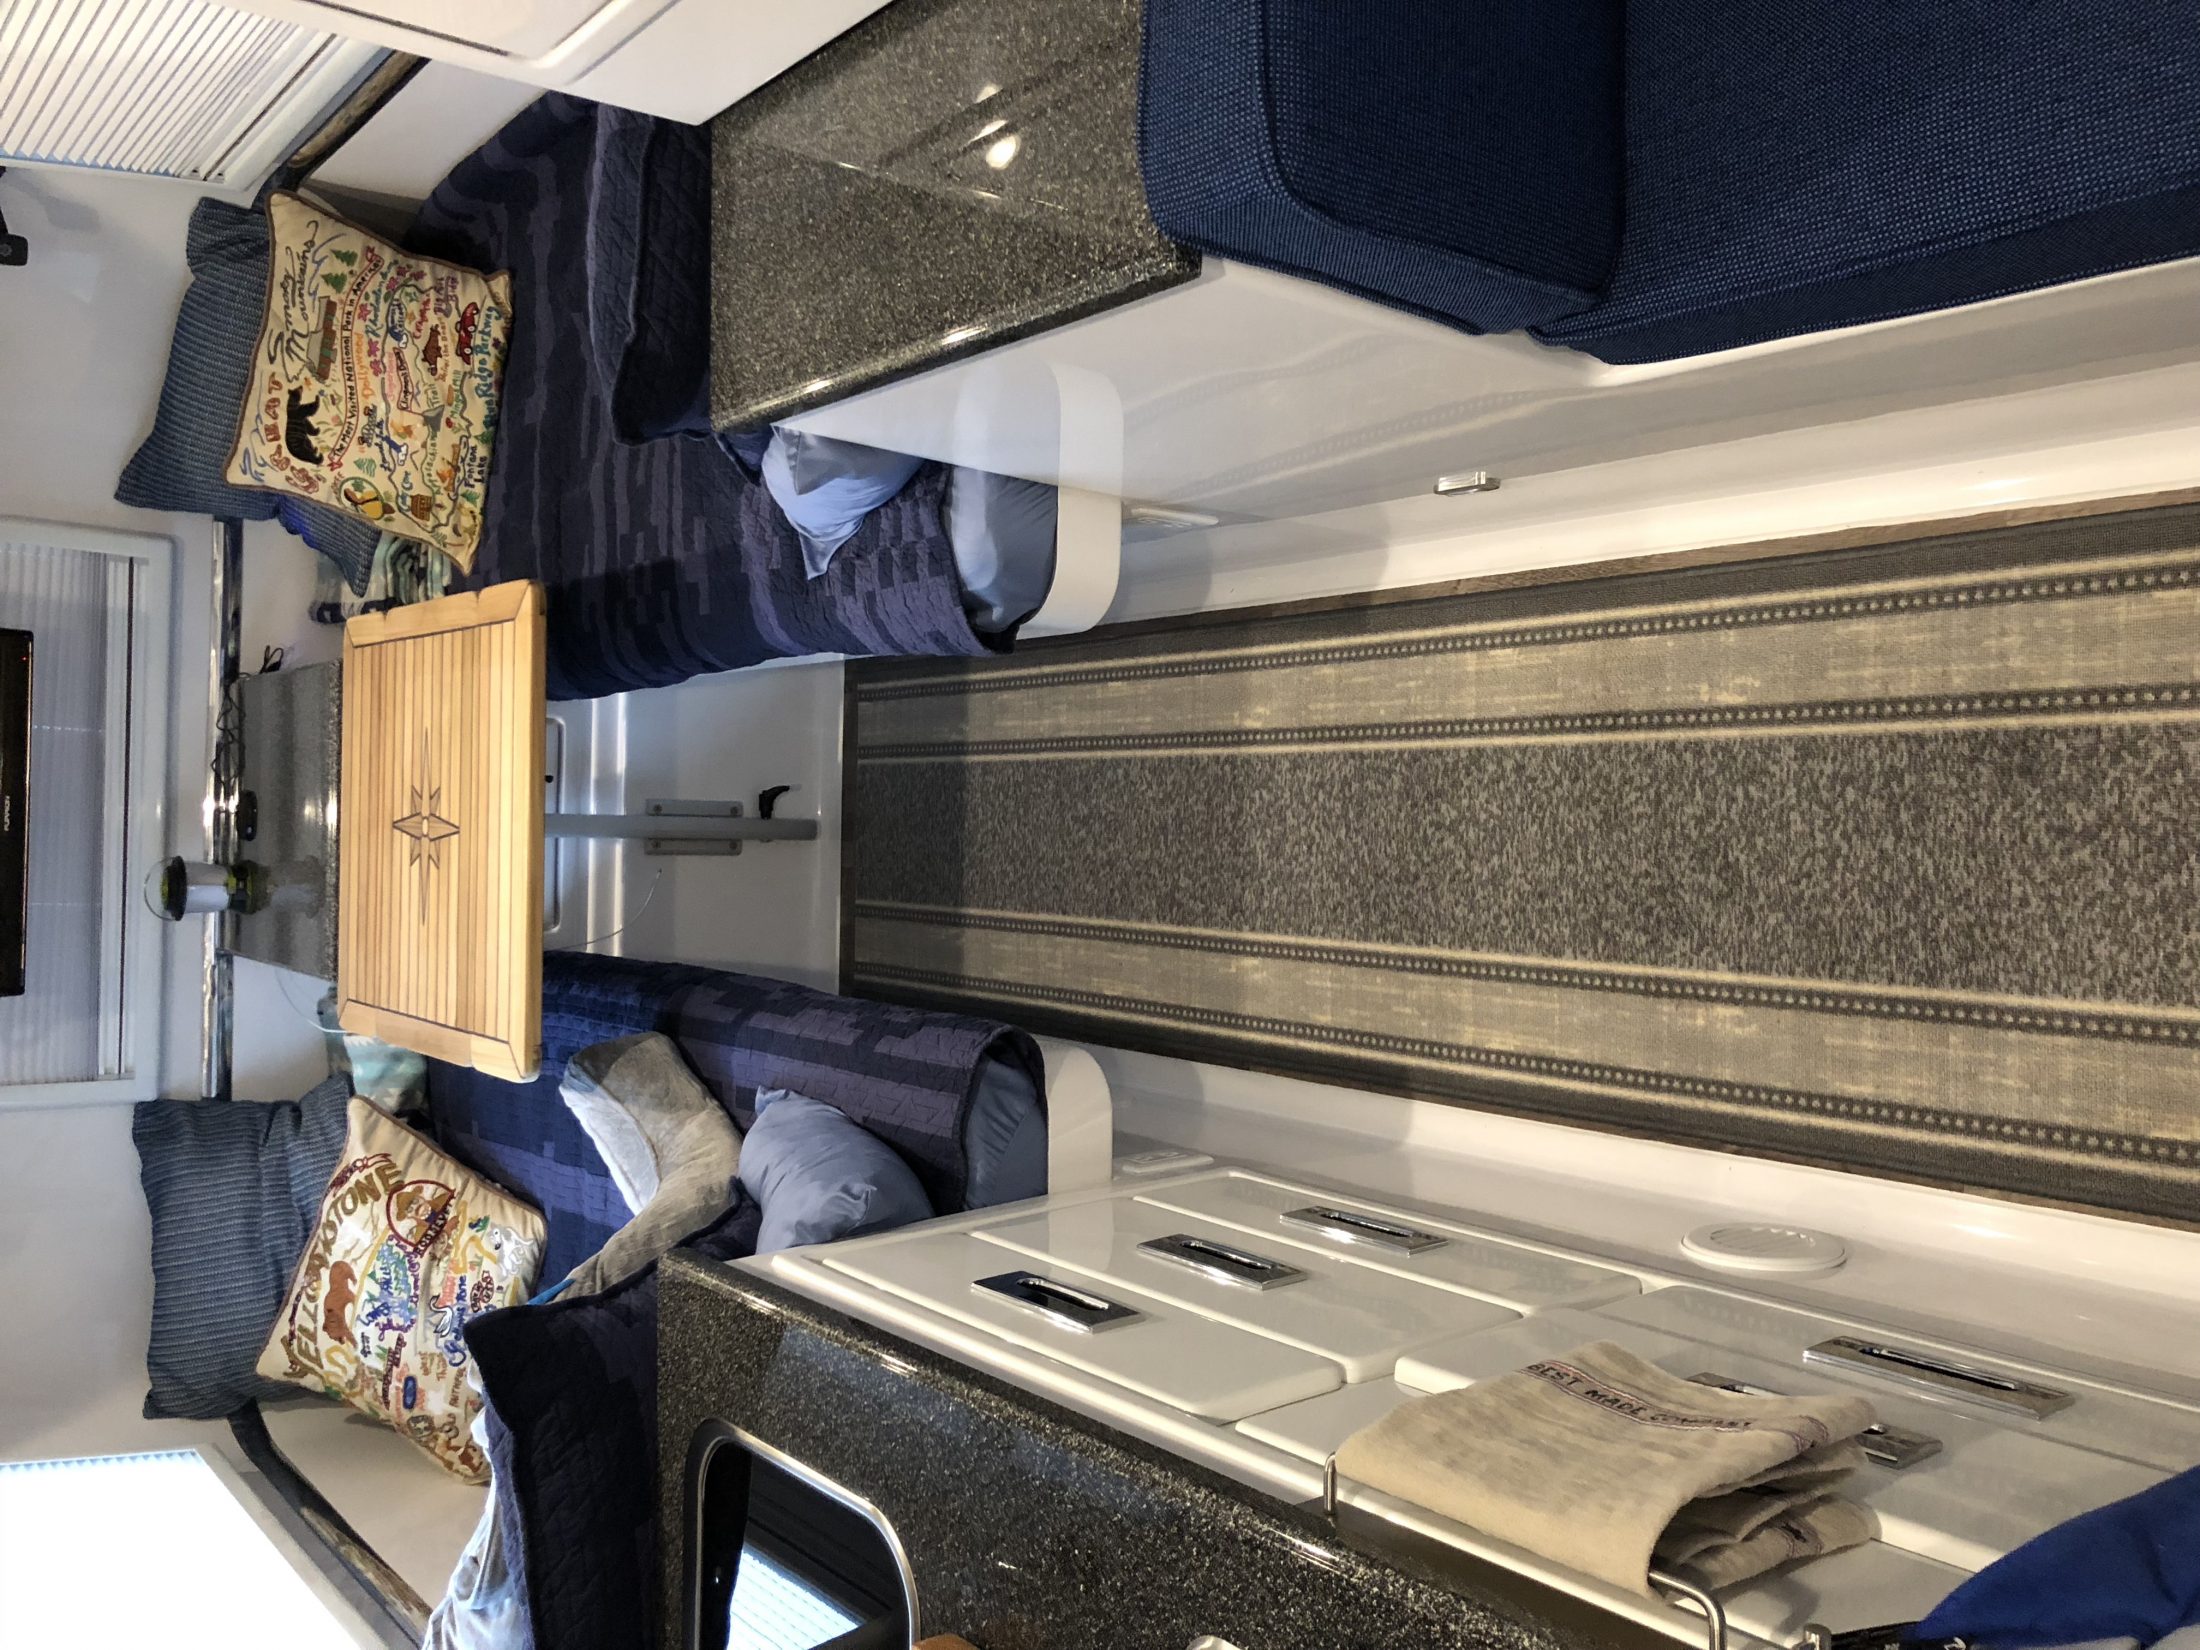
Here are some photos. When we travel we fold up the top and lower it on top of the bed and tighten up the adjustments. I surround the top with bed pillows incase vibration loosens the adjusters. That has not happened. We have the table set up all of the time. Overland did a great job with this. Thanks for sharing. Our custom table is a little bit narrower than Overland's. We mocked up the size we wanted using cardboard.
 4 points
 -
Lol, I wish I had a picture of our dining room while we were waiting for our Ollie. It looked like a camping world annex.3 points
-
So many things I use are online or on my phone/tablet...so I'll break this down into 3 parts: 1) My favorite "online - web based" roadtrip/camping planning tool: RV Trip Wizard is an Online tool I used for planning my trip to/from Hohenwald...it's great. - https://www.rvtripwizard.com/ 2) Apps my Phone/Tablet Tools for Finding and Reserving Campsites: Allstays Camp & RV - also a good lookup tool for campgrounds - https://www.allstays.com/ Campendium - For reviews of campgrounds - https://www.campendium.com/ The Ultimate US Campground App - For locating boondocking sites.= http://www.ultimatecampgrounds.com/ All Trails - for finding localized hiking info - https://www.alltrails.com/ Recreation.Gov - for doing many of the reservations in Nat'l forests, and parks - https://www.recreation.gov/ Harvest Hosts App - for one night stays at wineries, farms, etc. - https://harvesthosts.com/ RV LIfe - All round app I use as a portal into reviews and new campground info. - http://rvlife.com/ 3) Seeing the actual campground sites: I've found so far that I use several apps when planning a long trip. Some are great for finding "camping" others are good for planning the drive. In addition, there are resources we use that help us plan by showing actual campsites as photo's or drive through's including these three sites: Campsite Photo's - https://www.campsitephotos.com/ Campground Views : https://www.campgroundviews.com/ - featuring drive throughs of a campground in 360 deg format so you can look around. The Dyrt - a great site for what's good about a specific campground: https://thedyrt.com/ Hope that helps... Craig & Rose Hull 505 - Galway Girl2 points
-
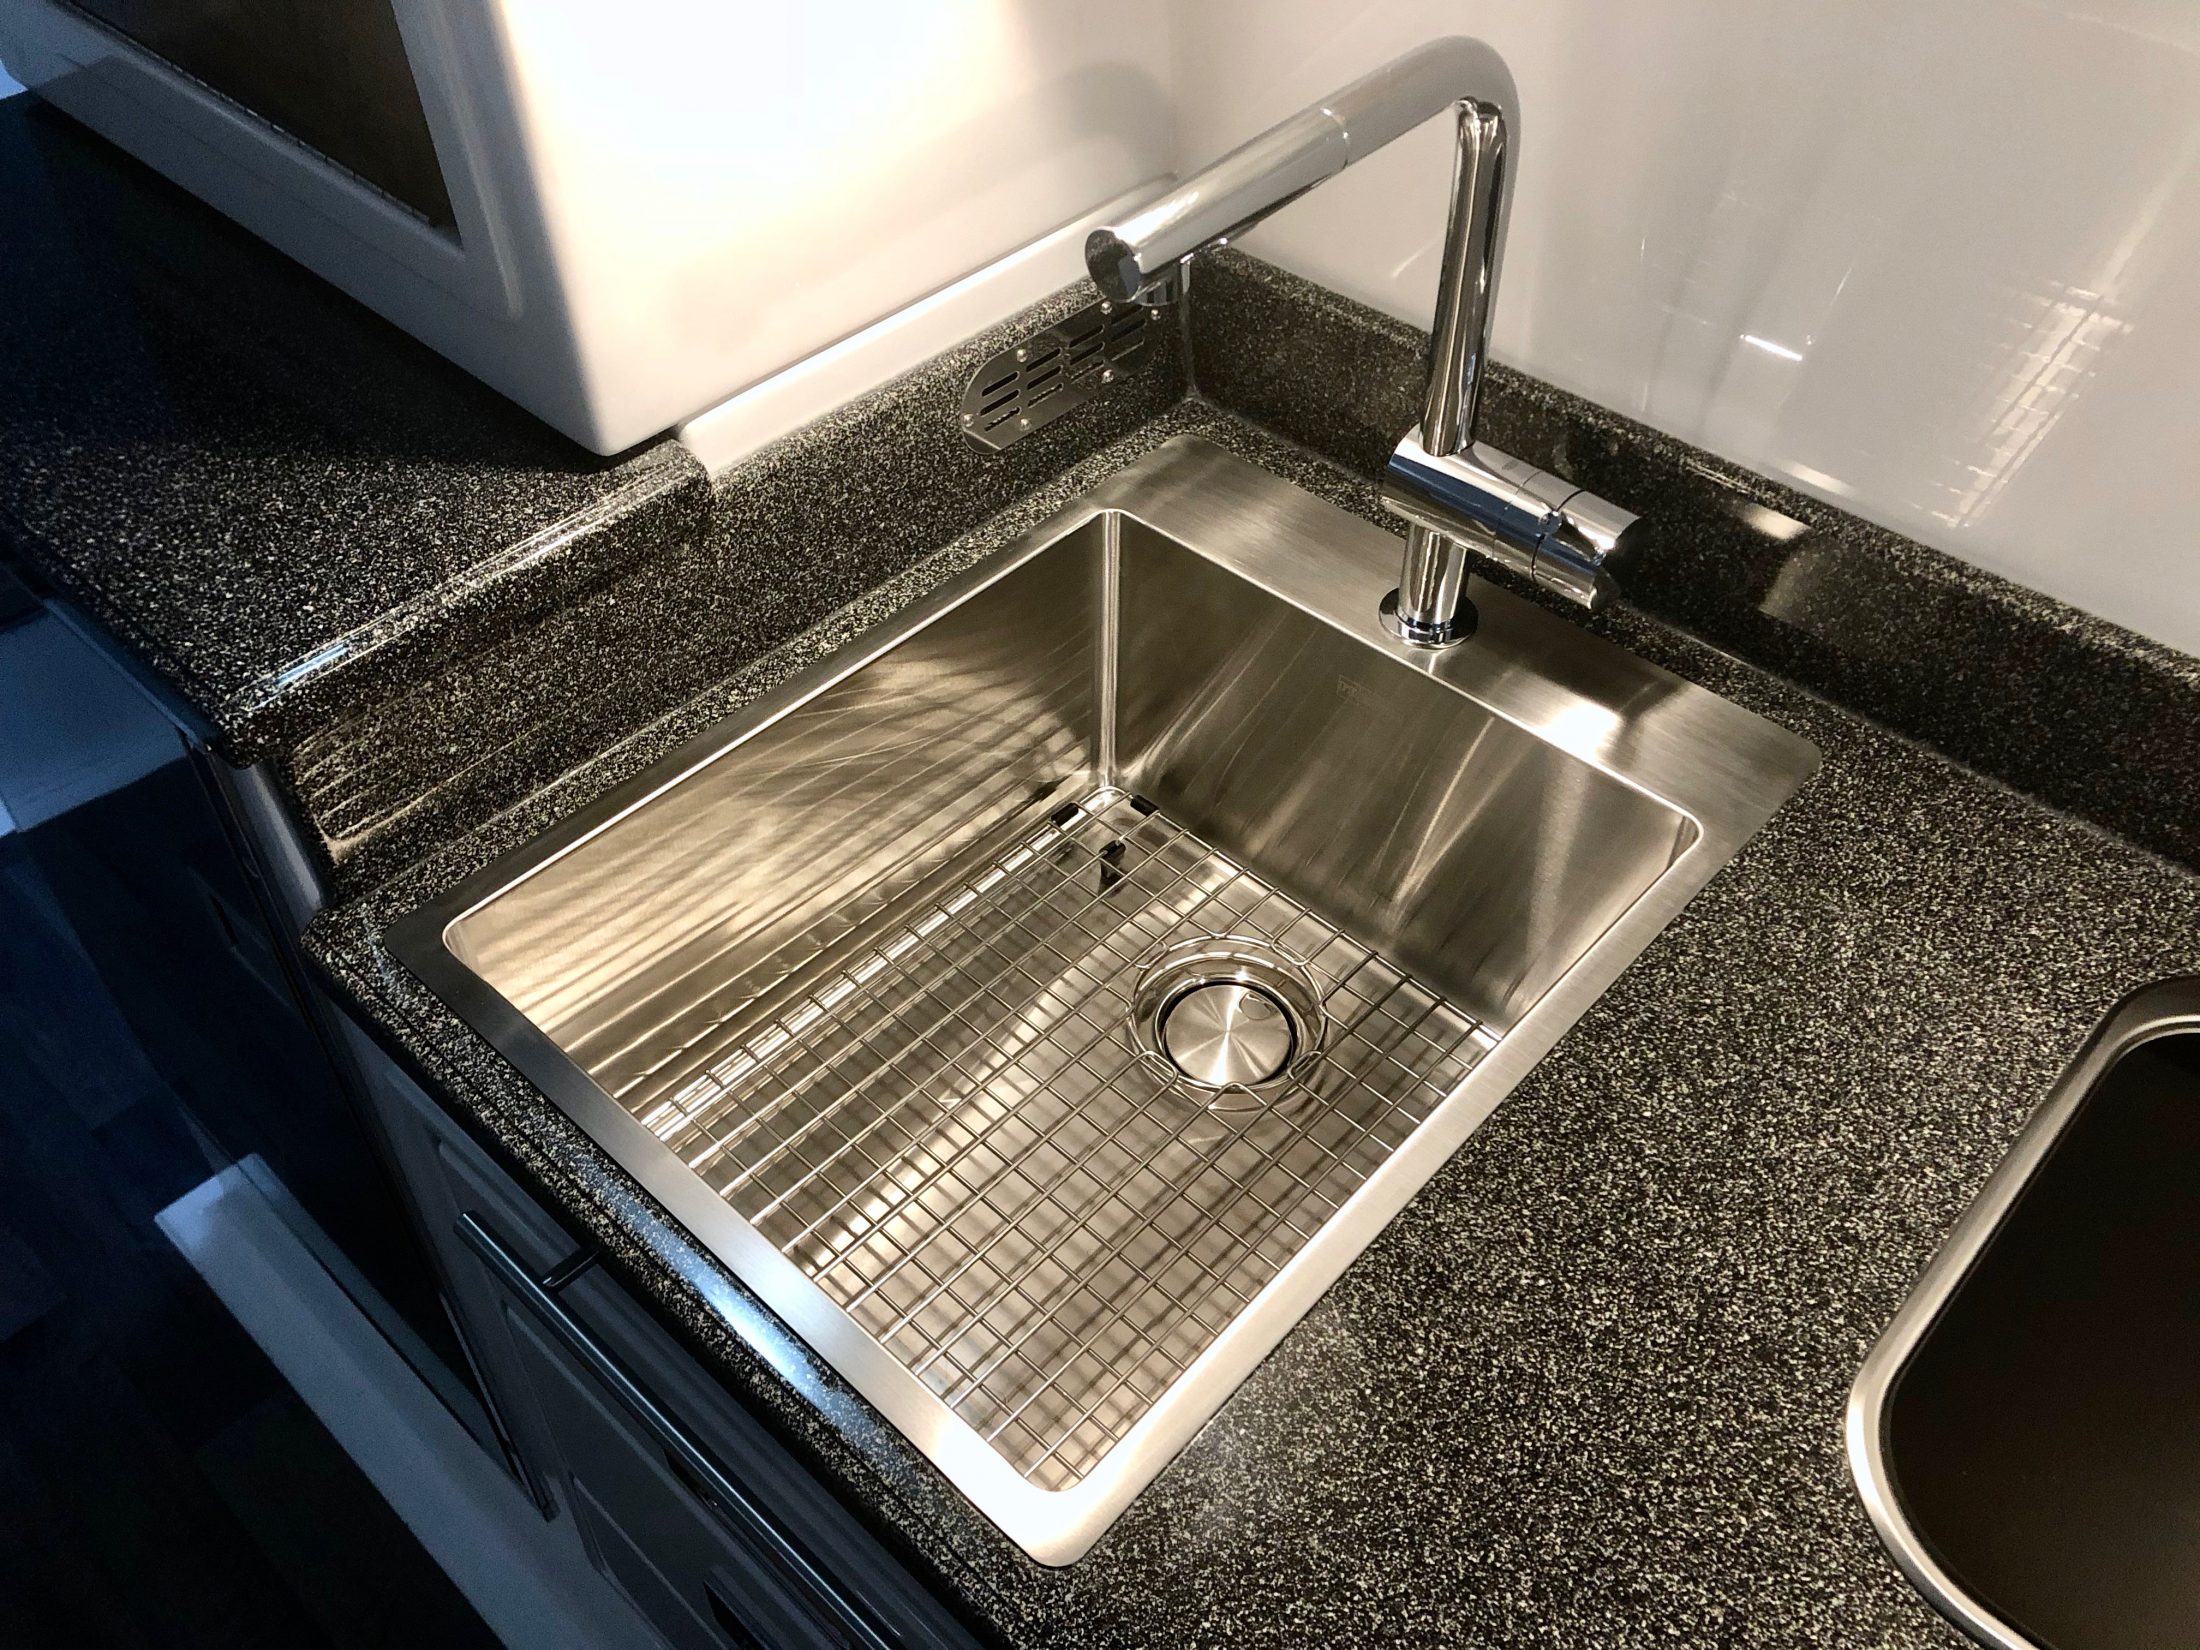
This, I like - I never cared much for Oliver's sink and faucet choices and I'd actually planned to supply them a sink and faucet to get installed on the line. Unfortunately the one I wanted wouldn't work and I was having trouble getting the proper dimensions from Oliver, so I just let it go and figured I'd replace it later. Well, that was a good idea until I realized that the cutout Oliver made for the sink was way too big for any of the bar sized sinks that I could find. And all of the full sized kitchen sinks were too big to fit. But finally I stumbled across this oversized bar sink from Franke. It's the 17" Franke Vector. Overall, it's the same width as the existing sink, but the lip is narrower, so the bowl itself is a bit wider. Mainly the sink is much longer and deeper. In overall volume, it's over twice as large as the original sink, but takes up no more counter space. Can't beat that. And because it's farther forward and 3" deeper, it doesn't splash all over the place like the original. In fact, I can even turn the faucet up all the way without it splashing over the front of the sink, which is novel. I like the Franke sinks in that they have the straight sides and look of a modern zero radius sink, but they do add a slight radius to the corners so that you can actually keep them clean. Installation wasn't too hard. I'd rate it 7/10. The difficulty was that I had to modify the base cabinet for it to fit. There's a wood brace running across the top front that is screwed to the fiberglass beneath the drawer trim, which had to be cut out, and also a portion of the left side of the cabinet. That sounds like a lot of structural support to remove, but the cabinets are mainly tied in at the bottom and I ran it past Jason beforehand to make sure I wasn't looking at it wrong. I have to say that the cabinets are stoutly built, and I'm not at all worried about it. The second problem I ran into was that my countertop wasn't perfectly flat. It bowed down in the middle slightly which wasn't apparent until I installed the sink. But I was able to temporarily shim the counter against the top of the cabinet while the silicone seal dried and then I glued PVC blocks around the perimeter of the sink to both hold it in place and to level the counter. The Franke sinks have an odd installation clip that wasn't designed with hollow core fiberglass in mind, so the blocks were necessary anyway. It's not going anywhere now. Of course I lost use of the flip out drawer but I hated that thing anyway. I glued a few ½" blocks to the front of the sink and then fixed the drawer front to the blocks with heavy duty velcro, just in case I ever need to remove it for some reason. The sink depth worked out perfectly with the existing cutout on the back of the middle drawer to clear the drain. I thought I was going to have to get a Hepvo trap to make it all clear but Oliver actually places the trap behind the cabinet, so no problem. I did have to get the narrowest profile elbow I could find to attach to the drain basket, so I had to go with cheap plastic rather than PVC, but such is life. At the end of the day, however, I decided to use a different drain basket that was a bit deeper, so I had to make the drawer cutout about a half inch deeper after all. The faucet is a Grohe that I found on sale at Home Depot for about half price, so that was a nice find. It has a really nice feel to it and unlike the sink, was a cinch to install. Grohe has a trick installation method that allows you to work from above so that one person can do it without crawling under the counter a hundred times. Oliver's hot and cold lines are convenient to get to and there's an access panel in the back of the cabinet that can be removed if you need more room to work. The only issue I ran into was that the counterweight for the sprayer was getting caught up on everything that's packed in the back of the cabinet. To fix it, I made a tube from some flexible plastic sheeting that I had lying around and just slid that over the sprayer hose. Now the hose slides easily inside the tube and as a benefit, the weight won't bang around inside the cabinet while traveling. So that's about it. I've learned that I don't have the patience or foresight to take progress pictures Like John does, so my description will have to do. But I'm happy to answer any questions.
1 point
-
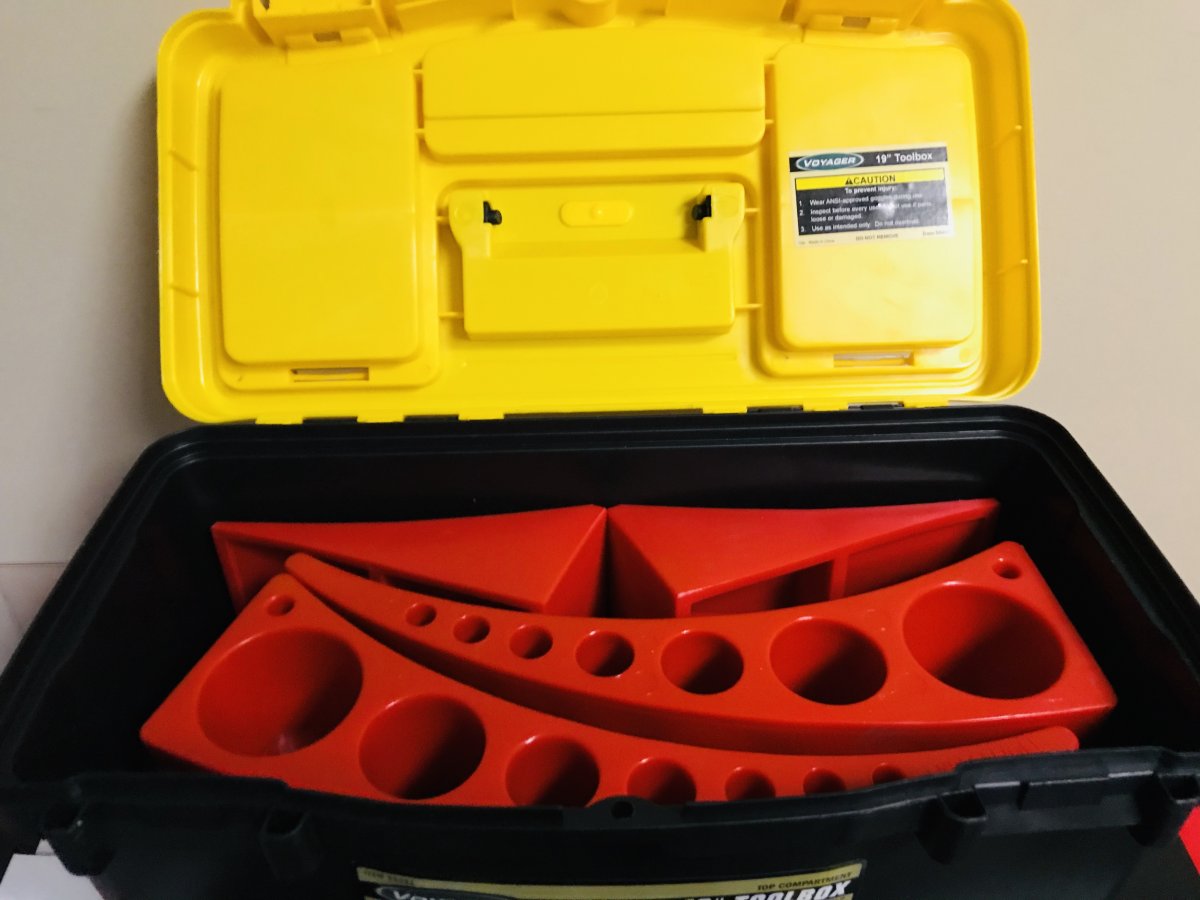
In making good use of our time between now and the time we take delivery of our Ollie in May, I have been ordering a few items that I know we will need and use. Our Andersen levelers arrived today and I spent a whopping $7.68 with a 20% coupon on a plastic tool box from Harbor Freight. I like to keeping all our camp gear organized and so here are a few pics of the tool box. Nothing fancy, but I think it will get the job done. Hope this might help anyone thinking about storing their levelers. Just passing forward an idea. 👍🏻 Happy Camping!
1 point
-
As local hosts who are showing our Oliver 2-3 times a month, I finally built this list of some of the top items people buy for their new Oliver. Maybe this is useful to pending/new owners: Click the link to go to the Amazon list...which includes comments for each item with regards to how it works or fits for Oliver trailers: Oliver Trailer Outfitters list on Amazon Craig & Rose Hull 505 -Galway Girl1 point
-
We are using RVParky alot right now. It has been good for us so far1 point
-
When ordering and gathering stuff, to fill the time waiting for our Oliver, you tend to use a spare room. Don't do it. There is more room in a garage. Sorry.. Actually almost half of the "stuff" we gathered has never been used. Some we take depends on where we are going. But that is half the fun. Search on here and you fill find list of tools and "essentials" to have on board. be sure to flash your light and save when we pass, unless there is a place to stop and chat. Happy Trails...1 point
-
Allstays RV Campgrounds, Ultimate US Public Campground, Allstays RV Dump, Campendium. There are a bunch of Allstays Apps, depends on how you camp.1 point
-
I was trying to research federal and state law about dumping grey water on the ground its all over the board. One interesting thing is kitchen sink water in some cases is considered black waste water. Bottom line that most say use common sense. And don’t tic off the enforcement agent 🤬when they come knocking at your door.1 point
-
They work great! Don't forget a second set of chalks. The Andersen Jack Blocks work great as well and minimize the need to run the jacks up and down so much. Andrew1 point
-
Once we pick up our Oliver, one of the first improvements will be this table mount. Following is a good price for the complete table mounting system, in case someone else is thinking about this mod. Now $138, was $235. https://www.rv-table-mount.com/shop This product excludes the table top. Thanks for the great idea and instructions.1 point
-
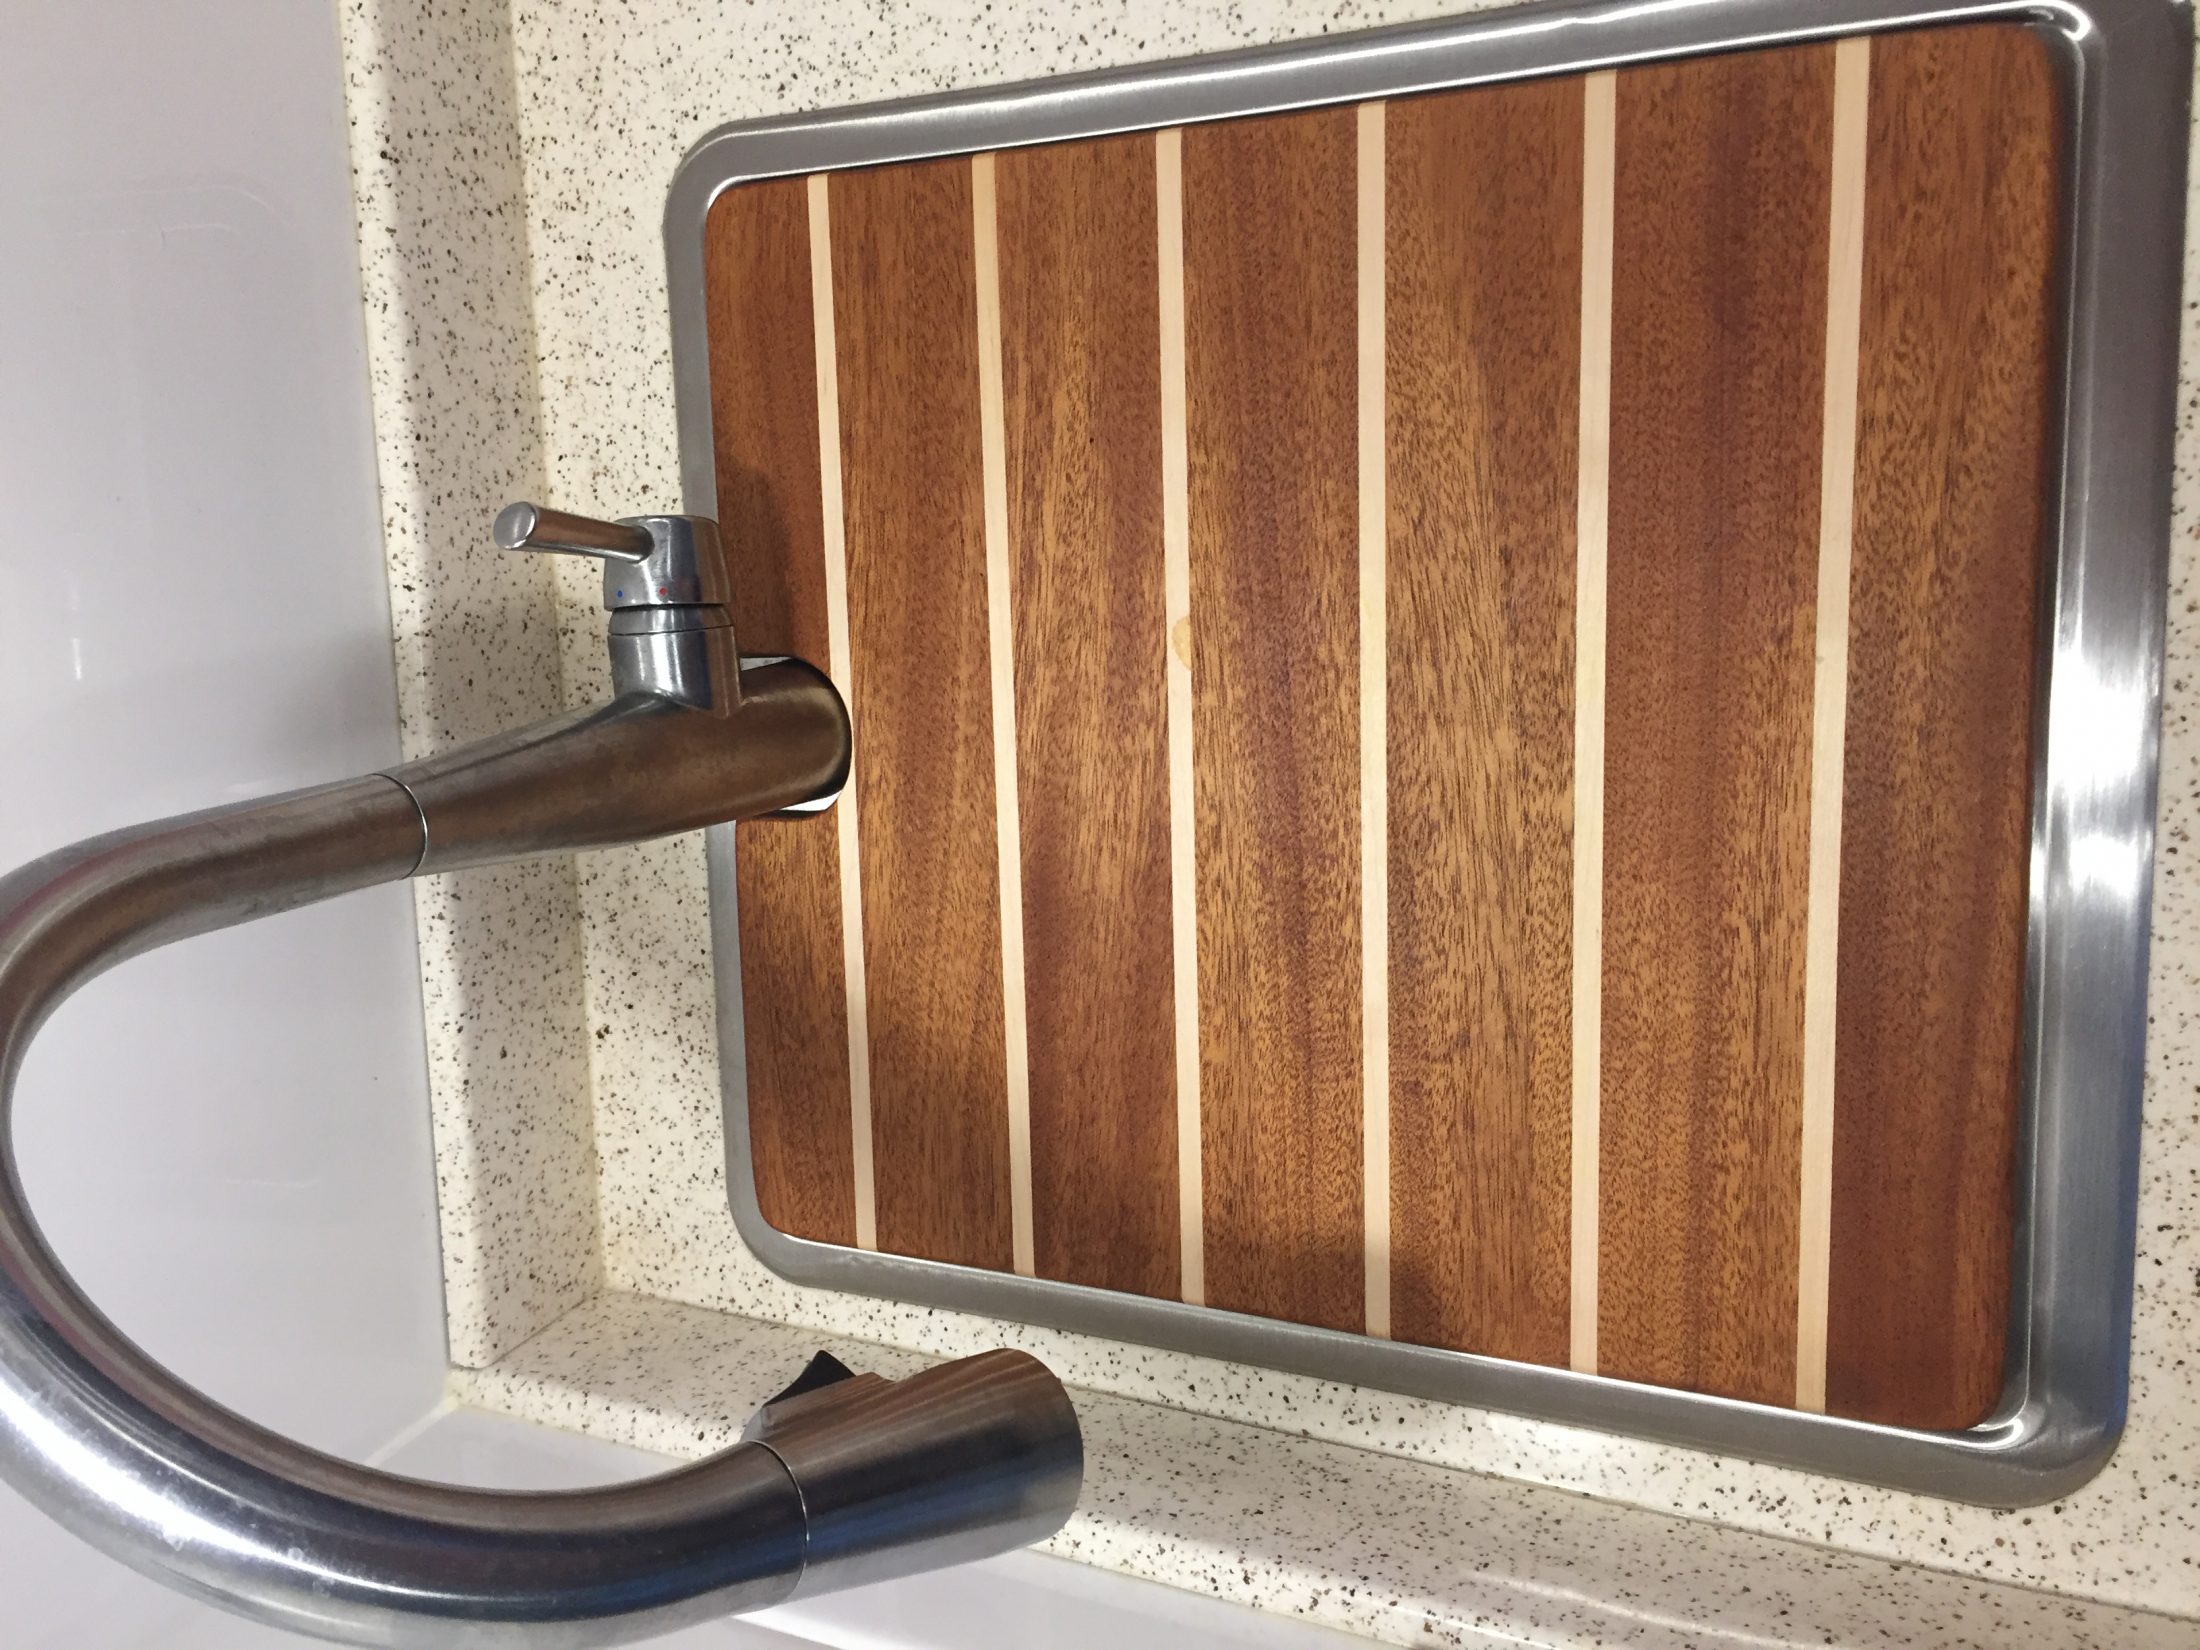
After making my wife the first cutting board and shower mat for our Oliver over 2 years ago, I have made over 90 to date. I never thought so many of you would appreciate my craft and I thank you all. In that time, I have used 2,500 board feet of mahogany and with the need for another shipment of lumber I will be increasing my prices as the price of mahogany lumber has gone up. If you have an order in my queue you price will NOT increase, including those who ordered and are picking up their Olivers in 2020. New price for cutting boards increases from $75 to $85 plus shipping. New price for shower mats increases from $189 to $199 plus shipping. If I can craft a cutting board or shower mat for you, please email me at 48ocean@gmail.com
1 point
-
Neglected to mention that the back cushions from Oliver are joined together via snaps. This helps with both keeping them together while in place and makes it easy to remove/replace them when the bed is used for sleeping or for when one wants to gain access to the compartments underneath. Bill1 point
-
If anyone wants to make the block I made, here's the list of pieces you'd need to order: #3075 Extrusion, 24" #4303 Bracket, 4 pieces #4302 Bracket, 2 pieces #3320 Bolt Assembly, 14 pieces You'll also need some stainless ¼" or 5/16" bolts to fix the block to the hull. I think most can be 1" or 1.25" long but you'll need two 3" bolts for the two vertical ones that go through the bed extension. I used lock nuts and large fender washers to spread the load against the fiberglass. I also cut off all the bolt ends around the bed side with a dremel and cutoff disk and filed them smooth so not to damage the mattress or cushions.1 point
-
Nice to see that someone else zip ties the plumbing lines. I've never had a leak or any lines/connections crack, but I simply didn't like how the lines moved around in the compartment with the water pump. So, I zip tied and used "Gorilla Tape" to secure anything that moved. Many times this was done by simply securing one moving thing to another - now at least these lines all move less than they did before. "An ounce of prevention". While I was doing this, I also covered all water lines that I could reach with foam pipe insulation. Partly this was done because I had some left over from a house project. In addition to keeping some of the hot water a tad warmer than it would be otherwise and keeping the hot away from the cold lines, the main benefit was that the insulation reduced the amount of movement in those lines and/or prevented them from hitting or rattling against other items down in the dungeon. Bill1 point
-
Thanks to previous posts I was able to get perfect runner. Thanks! It is 22"x12' BTW link here: https://www.amazon.com/gp/product/B0796NYT79/ref=oh_aui_detailpage_o05_s00?ie=UTF8&psc=1 Entrance Mat 24 x16 https://www.amazon.com/gp/product/B004AR5WXY/ref=oh_aui_detailpage_o08_s00?ie=UTF8&psc=1
1 point
-
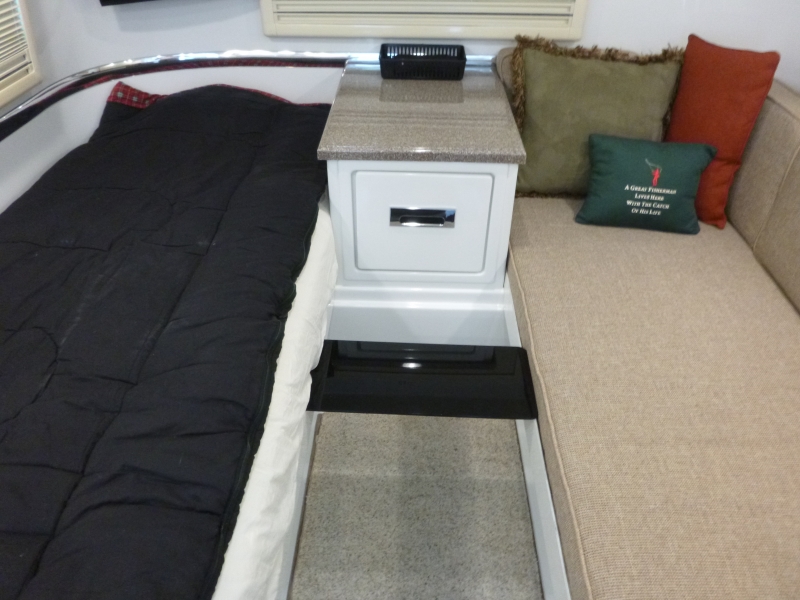
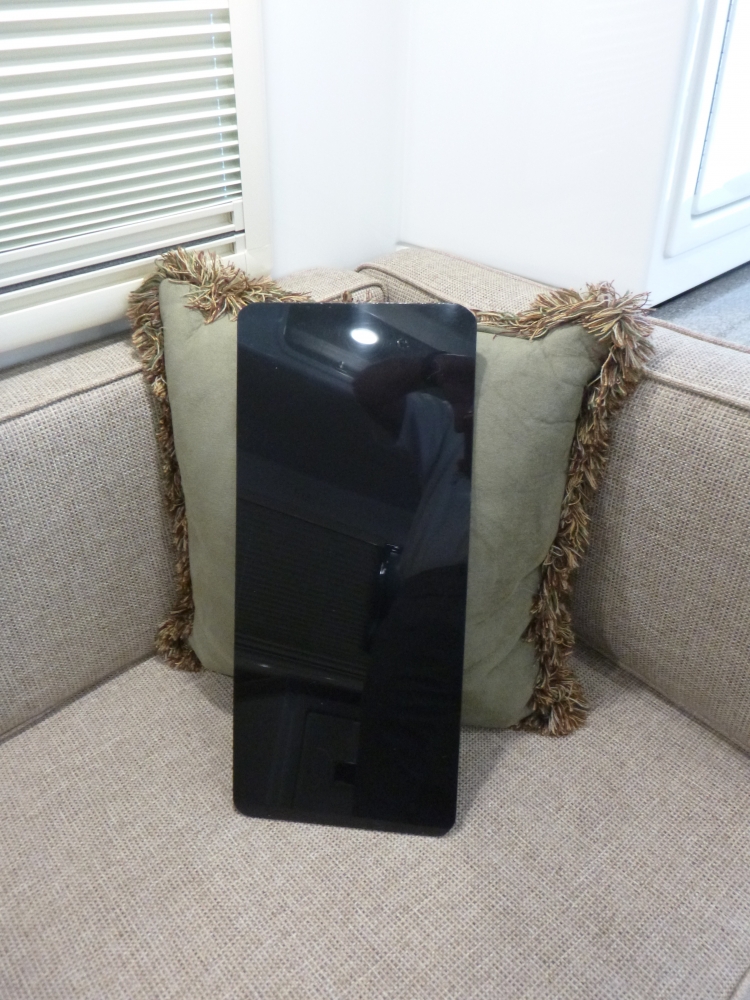
When visiting Trumpetguy's "Setting Sail" I noticed a temporary table that was set between the twin beds. Just the night before I had thought that something like this would be very handy for placing a snack, the tv remote or even a drink. In addition, this table/shelf could be used to hold a CPAP machine or similar item for those that need these things. During the day or for travel, the table/shelf is easily removed and stored under the couch/bed. I believe that Trumpetguy made his out of a piece of wood, but, I had a fairly heavy piece of dark smoke Plexiglas scrap laying around, so, I used that. The rough dimensions are 20 x 10 inches, but, it could be made as necessary. Once the piece is cut , sanded and the edges rounded, it is simply "wedged" between the two mattresses to hold it in place. Bill
1 point


-
Recent Achievements
-


")


")


