Leaderboard


Popular Content
Showing content with the highest reputation on 10/07/2020 in all areas
-
On the former two inch Oliver rear bike rack "platform" - that was basically two 2" receivers with an aluminum 2" square tubing platform attached. I was told why they discontinued it - and previous comments seem to be incorrect. I have one- that I installed, and it is a great piece of equipment - certainly capable of holding a goodly amount of weight. Others have have similar devices fabricated and installed on the Oliver - they have been featured on the forum - a search will get you there. Where I a new purchaser - I would forego the Oliver rack - and have one built (probably do it myself) and installed attached similar to the original Oliver design. Keep it under 200 lbs. and you'll be fine - no that is not an engineering spec - it is from my real world experience. Remember Atlas - and the leverage "thingy" . One can go overboard.... It has not been my experience that Oliver makes decisions on product with purely a cost mindset - balancing utility, cost and experience is a tough process, People can be very unreasonable......
 4 points
 -
I’m not sure if you were asking for information about PDI or not, but the following link will provide some additional information. Their phone support is excellent and a call provided all the information I needed. https://www.progressivedyn.com/support-manuals-troubleshooting-guides/ The previously posted picture for Leisure Time Distributing has a phone number in it and they are very helpful and a great company to deal with. Mossey3 points
-
I agree with Overland on this and I do have the Trojan T-105's (lead acid batteries). During storage I check mine every 6 to 8 weeks. Normally all I do is add water - they don't take much but since I'm at the storage yard I do it anyway. Bill2 points
-
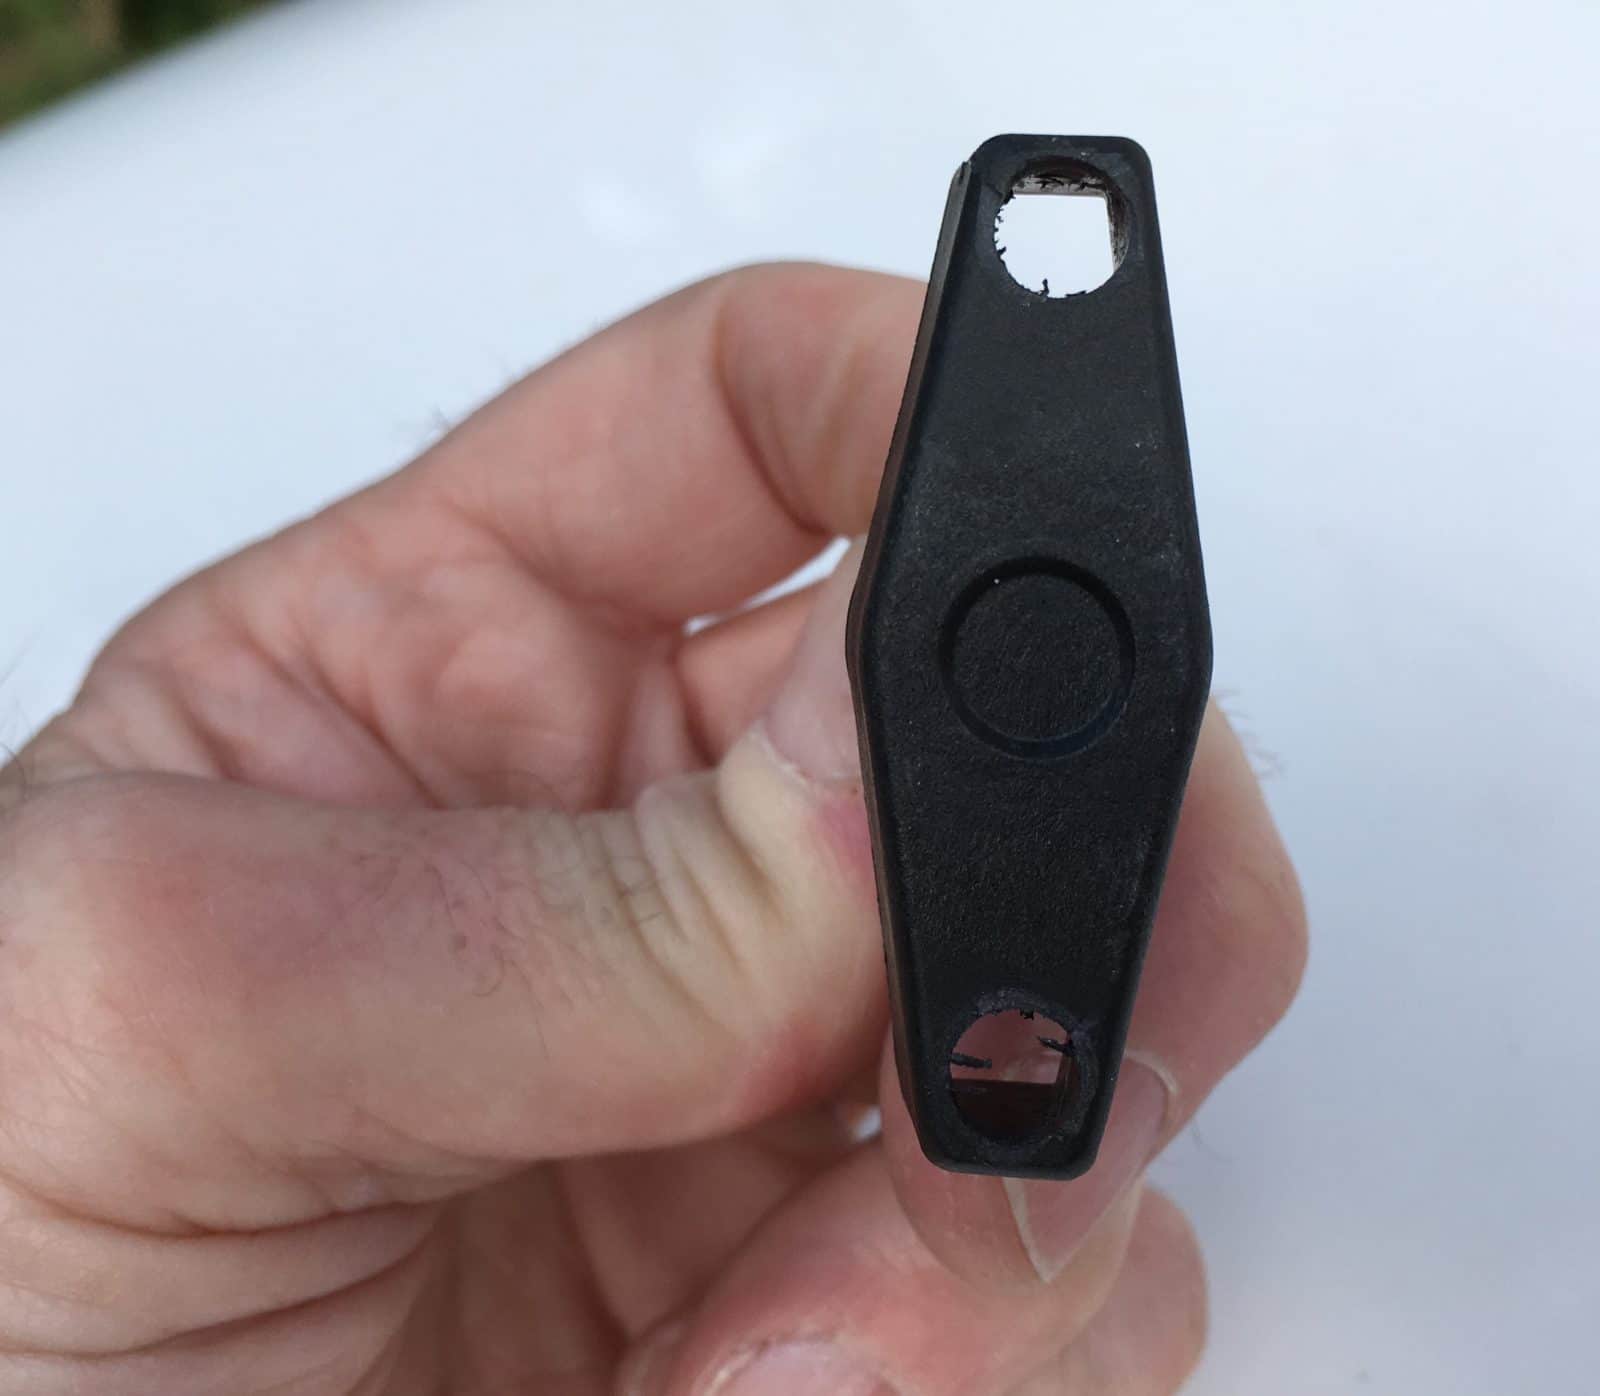
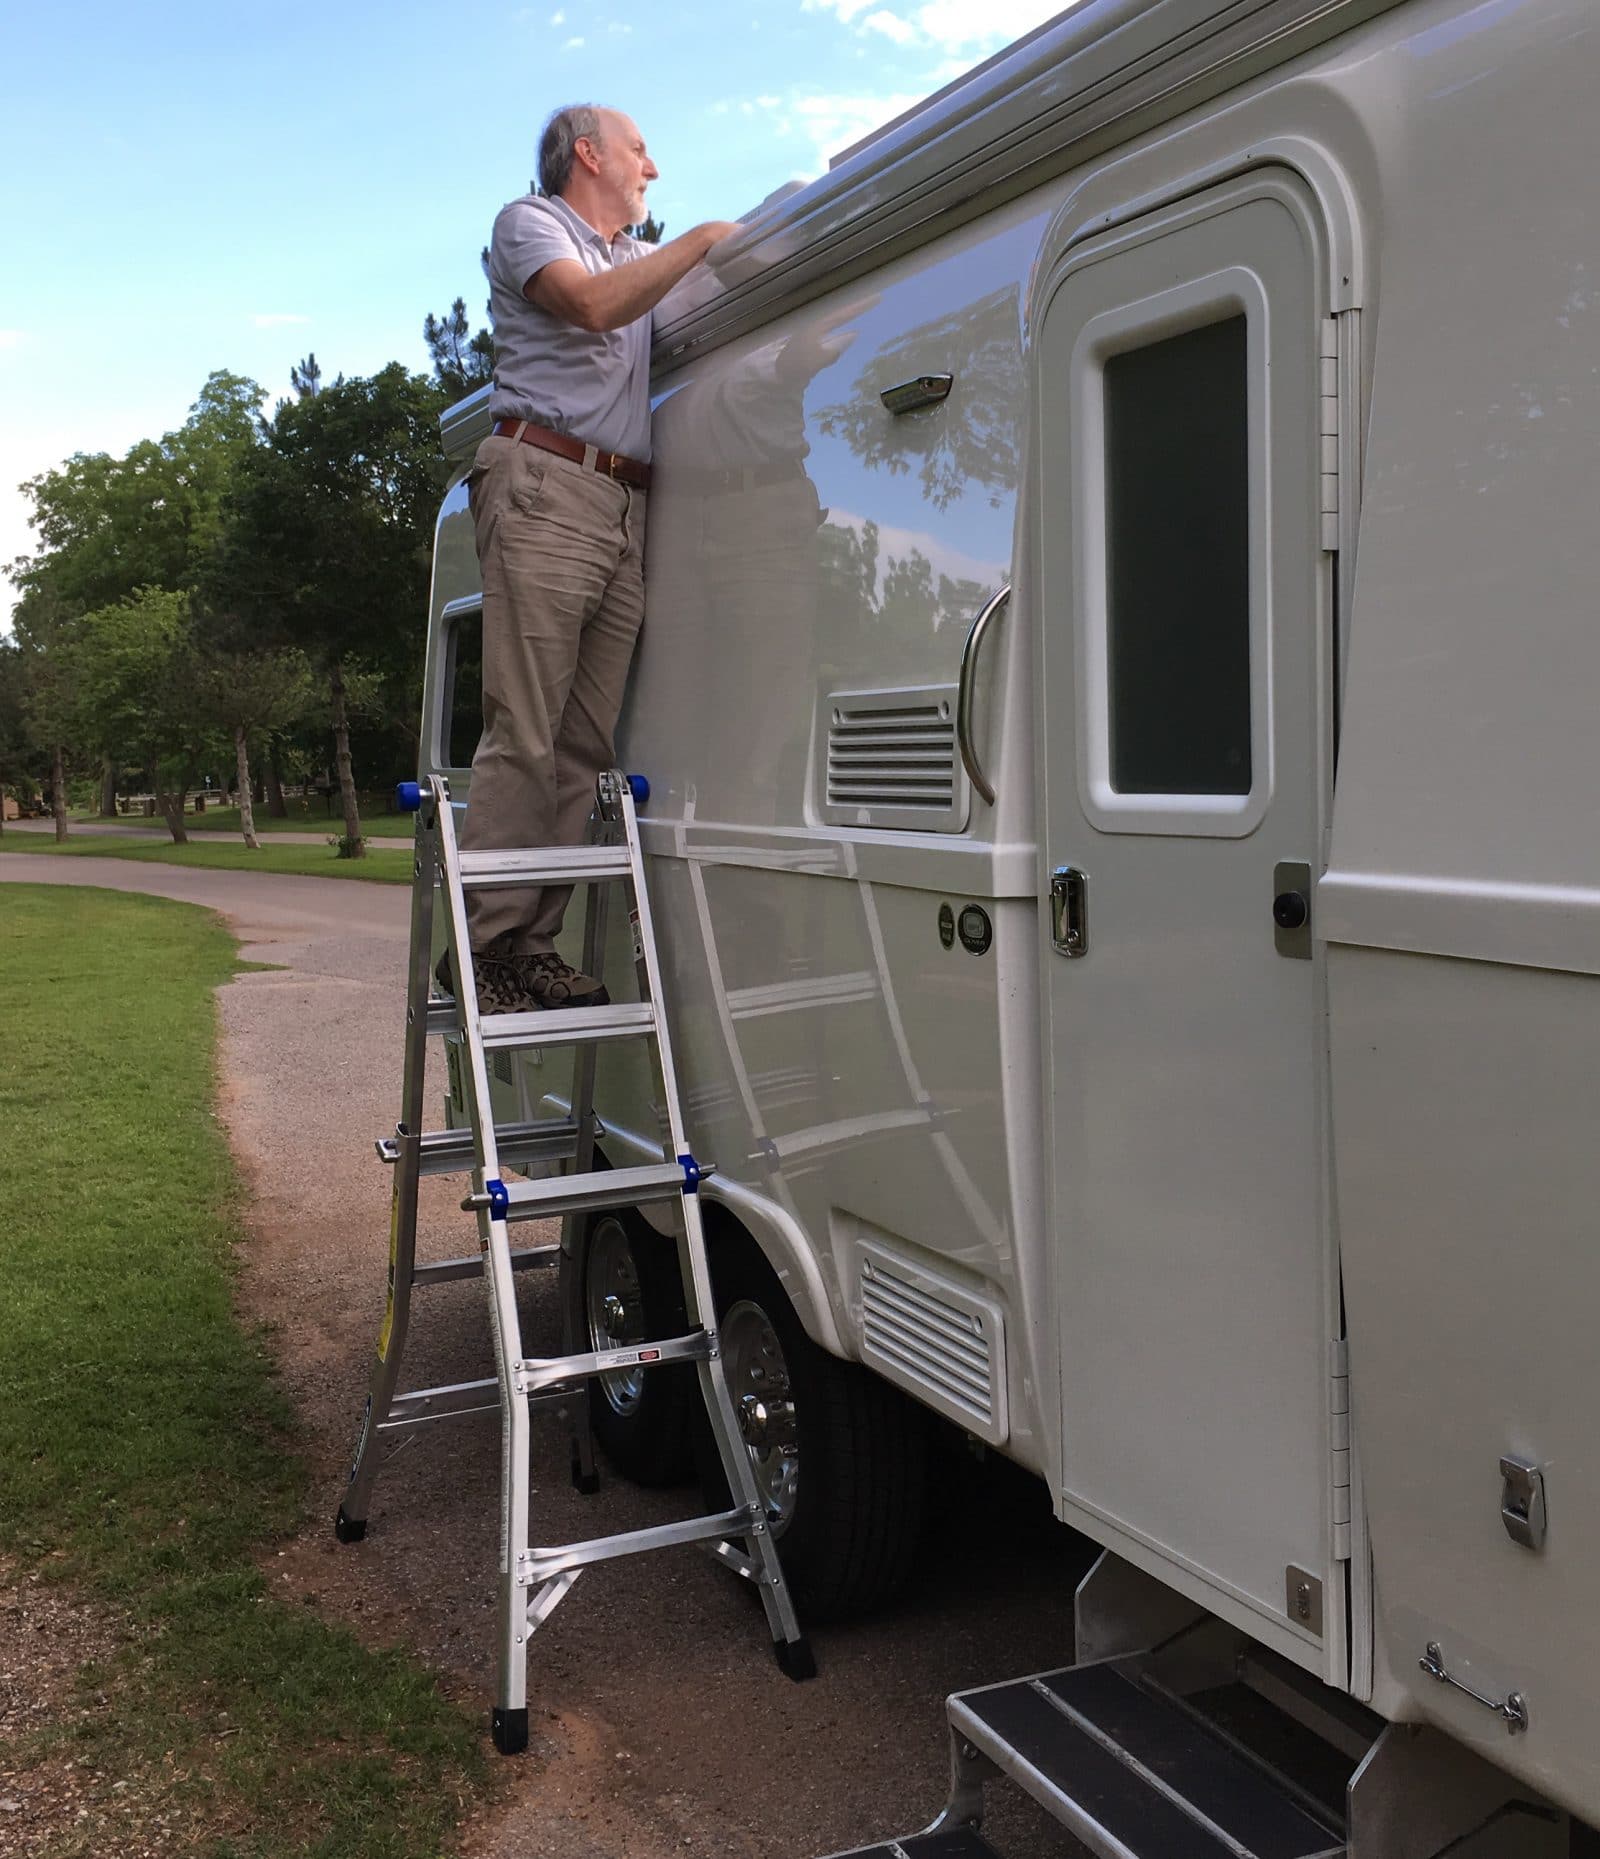
Three days after we took delivery of Mouse, I climbed up my ladder for a check of the roof. Everything looked fine, except for the solar panels. Three knobs were slightly loose, perhaps a 1/16th of a turn. One was a full half turn loose. This is dangerous since a loose or lost knob could wreck the panel and possibly the vent and AC unit behind it, especially if you are towing into a stiff and gusting headwind. I got out my Dewalt driver drill and modified the knobs so that I could secure them tight. I can't recall the hole size, probably 1/4 inch, big enough for a standard sized nylon wire tie. This is just like safety wiring a bolt using steel wire, but the advantage is that the big white ties are highly visible from the ground, so you can include a visual check of all four as you do your final walk around before leaving. You must route the tie so that all the forces are acting to tighten the knob. I think this should be done at the factory, but in the meantime I strongly recommend that everyone with panels on the roof secure the knobs. A better fix would be to drill out the threaded inserts and install through bolts with self locking nuts, but this would make it very hard to reposition the panels for cleaning the roof underneath.... Here is a question: have you ever checked them? If not, then please do so before your next trip. They may be loose.... Be safe. Here is my Werner convertible ladder in action. It is good to have access to your roof, always. John Davies Spokane WA
1 point
-
1. Always turn Propane tank valve on VERY SLOWLY, otherwise the force of rushing gas can cause safety valves on furnace, frig, or hot water heater to shut that appliance down. Only remedy is shot of gas, reset appliance, then turn gas valve VERY SLOWLY. Seemingly faulty appliance has always worked after that. 2. Always lock bathroom door before driving even the shortest distance. Otherwise it will be broken for sure from swinging open. 3. Never camp between other RVs that run generators with exhaust pointed towards your Ollie. The CO detector will go off. NEVER ignore your CO DETECTOR!!! You might die in your sleep. 4. Never run propane appliances while driving. They can cause gas explosions at gas stations. 5. Viair Air Compressor makes winterizing water lines and keeping tires at proper pressure a piece of cake 6. Anderson Leveling wedge is worthless on ice and snow. They need a studded version. 7. Boondocking in Winter requires a decent and quiet generator. Solar power is gone for perhaps weeks. I recommend the Honda 2200i. 8. Protect front lower sections of shell from rock chips with plastic coating. Tow vehicle will spray a ton of gravel into it, especially in Winter. The folks who applied 3m film to my Audi are doing my Ollie. 9. Keep Drain hose attached to outlet in rear bumper and simply cap the end. This is way easier and cleaner than taking it apart each drain cycle. And always drain Black then Gray for odorless hose 10. Dehumidifier is a must when Winter camping. Otherwise condensation runs amuck everywhere. 11. Hoppy Rearview Mirror Level on front of Ollie saves tons of time. And, your head doesn’t get nearly as wet running in and out and in and out etc, etc in the rain and snow to get the darn trailer level. 12. Use other Ollie owners for tips and advice, especially for Set Up and Departure Checklists. They are valuable beyond belief. I’ll add more as they happen. Happy travels1 point
-
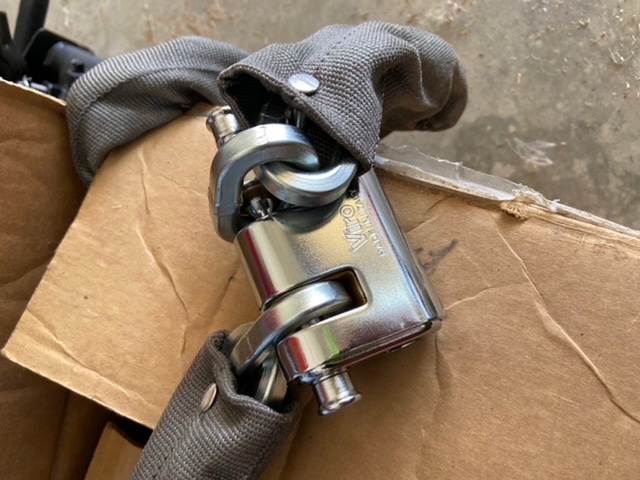
While nothing is entirely theft proof, when camping and especially boondocking in places where expensive gear is exposed, and especially vulnerable while away from the campsite (esp inverter generators), one way to heavily discourage a would-be opportunist, is a bolt-cutter proof lock and chain. Pictured is a 1/2” chain and lock. It would take a cutting wheel to break it. This chain is from Tulsa Chain. The lock is a Viro. We worry a lot less about our gear things are secured with it.
1 point
-
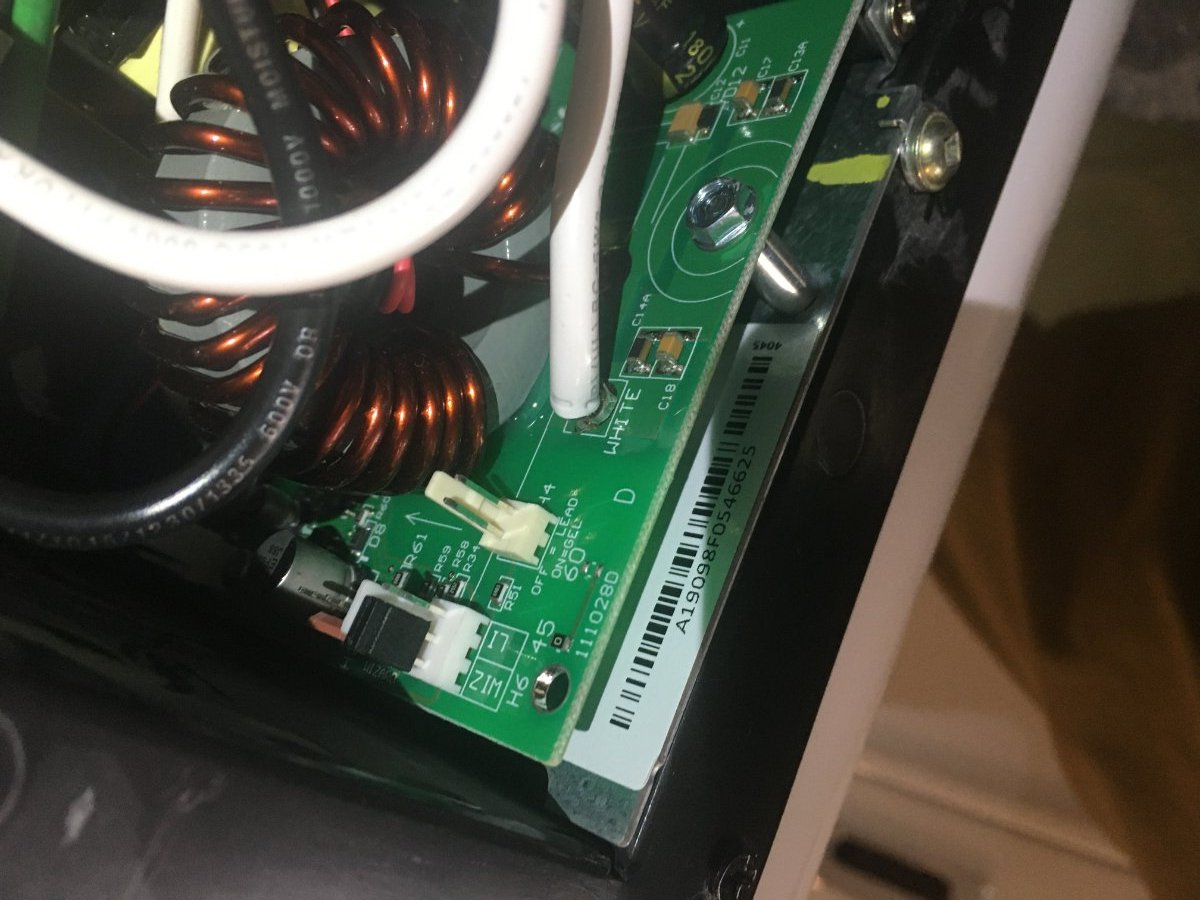
To check which version of board that I was using I had to remove the cover ( 1 square head screw) and then the cover unclips. At the top left corner is where I took the picture previously posted showing the WiZ/Li settings. https://olivertraveltrailers.com/forums/uploads/monthly_2020_10/IMG_3672.JPG.0f08d982adc35e6fe28251580c169ba8.JPG
1 point
-
I installed 2 standard Battle Born batteries, but prepared for a 3rd in the future. One problem I ran into was with the positive battery cable would not lay correctly with a straight lug. I replaced it with a 45° lug which routed the cable toward the cable gland instead of the back wall, which reduced the strain on the battery terminal. Good luck, Mossey
1 point
-
Aluminum is a special skill set as is fiberglass. Airstream has decided they can’t do both. https://www.rvtravel.com/airstream-nest-production-halted/?fbclid=IwAR0R_WkjLfPjUt2SqoKc7GAWps-uMgkpNiMQp7d7oQVnFkbEX0nzFQe2WNY1 point
-
My wife doesn’t do tents. Snakes. 😉 Thanks for your reply. I’m a detail person so I’m only half-kidding.1 point
-
Thank you Overland. I appreciate it.1 point
-
John, If you see my post from 3 hours earlier, there is an image of the PD control module jumper with the pins set to WIZ (lead acid wizard I supposed). I simply moved the jumper to the LI side for lithium as directed by the Progressive Industries support team. It is worth noting that the module from my 2017 LE2 was replaced last year and luckily for me it included the capacity for Lithium battery support.1 point
-
Please explain how the Progressive changes are done.....moving jumper pins? Switching wire terminals? Thanks John Davies Spokane WA1 point
-
John, Thank you for your reply. I have noted that hydraulic crimper. I still need to choose cable, lugs and tie downs. bhcnb posted a link to imperial supplies which has quite a selection. I had my Progressive Dynamics module replaced under warranty last year and the new module is Li compatible according to Progressive support team. Otherwise I would only get small portion of the new Lithium battery filled when attached to shore power. The ZAMP controller will support Lithium as well with a small adjustment to the settings. I will be in Hohenwald next week but unfortunately they will not be able to do a Li retrofit yet (2021). I will ask them to check out the charging system, if that is not part of the annual service.
1 point
-
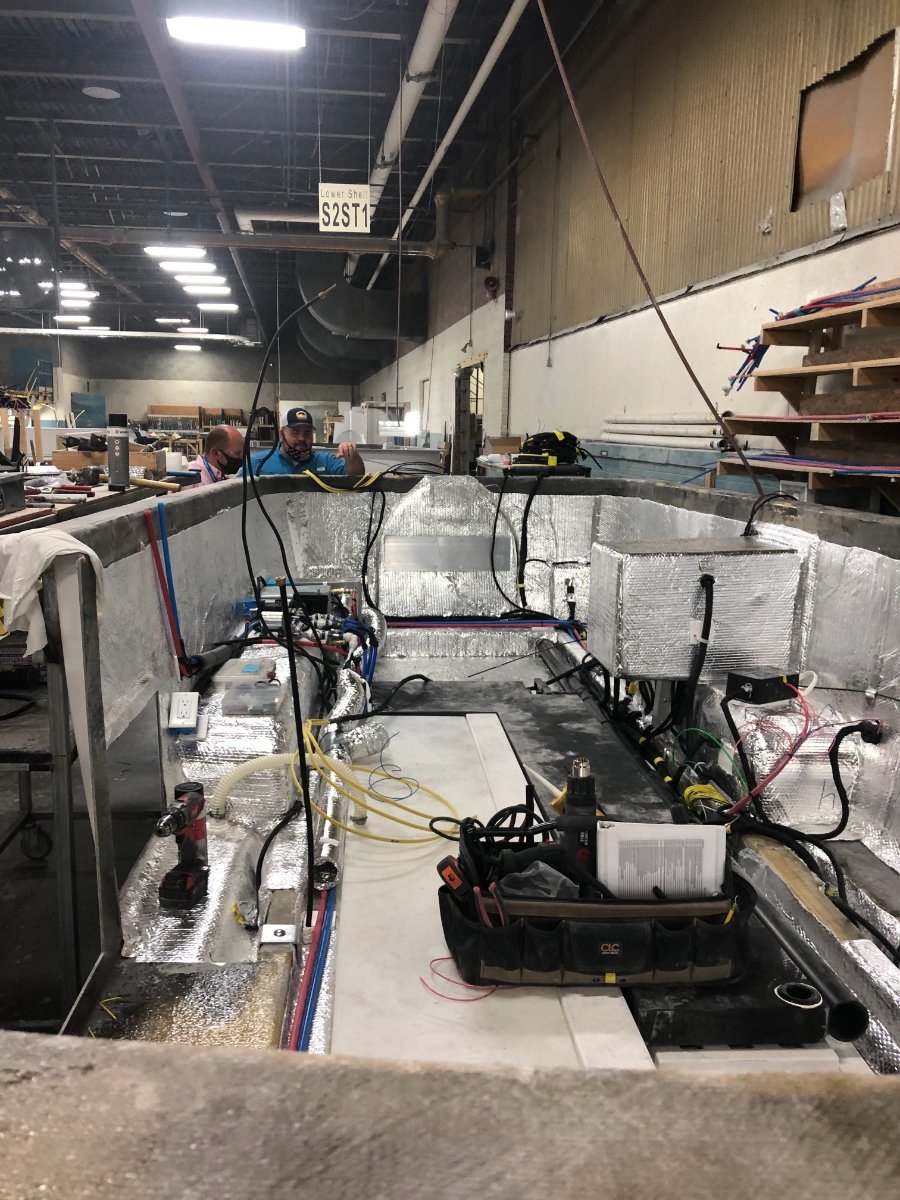
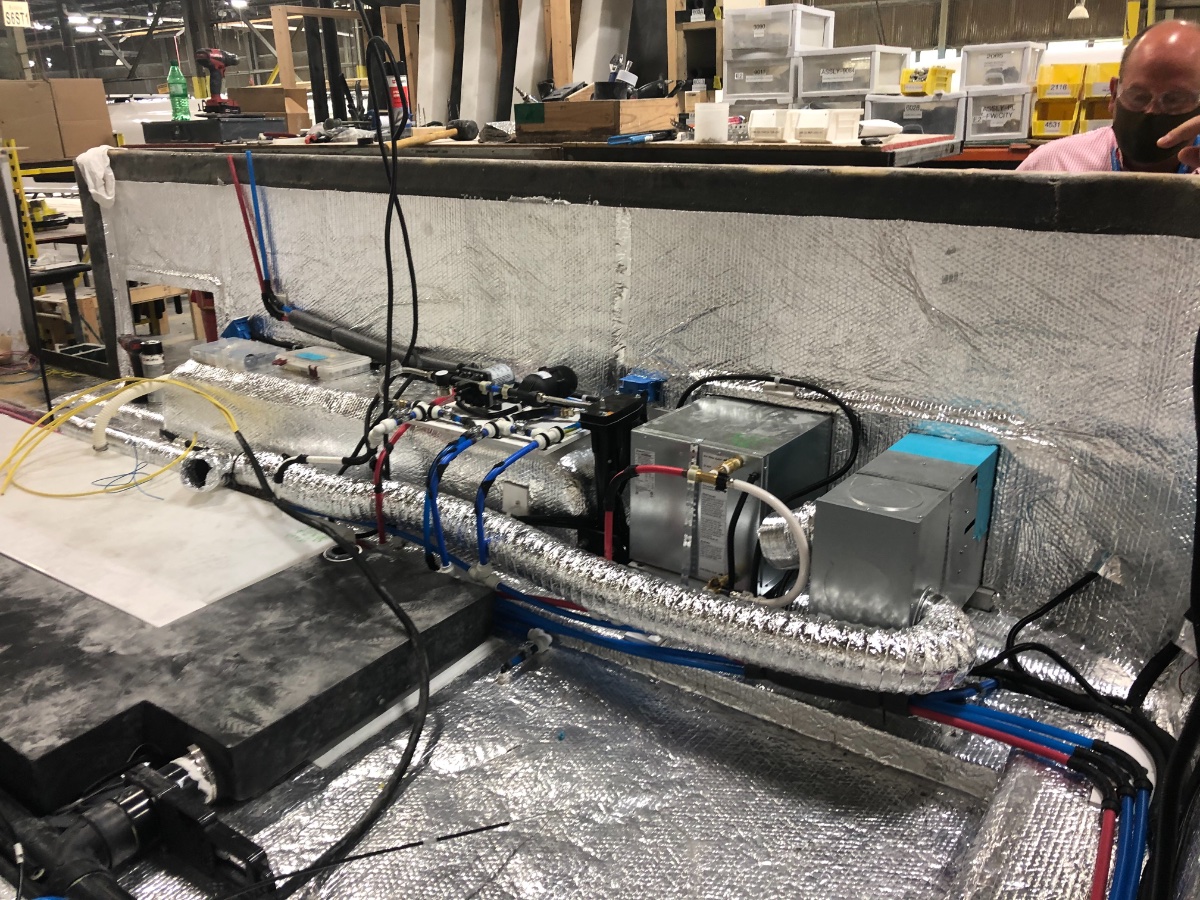
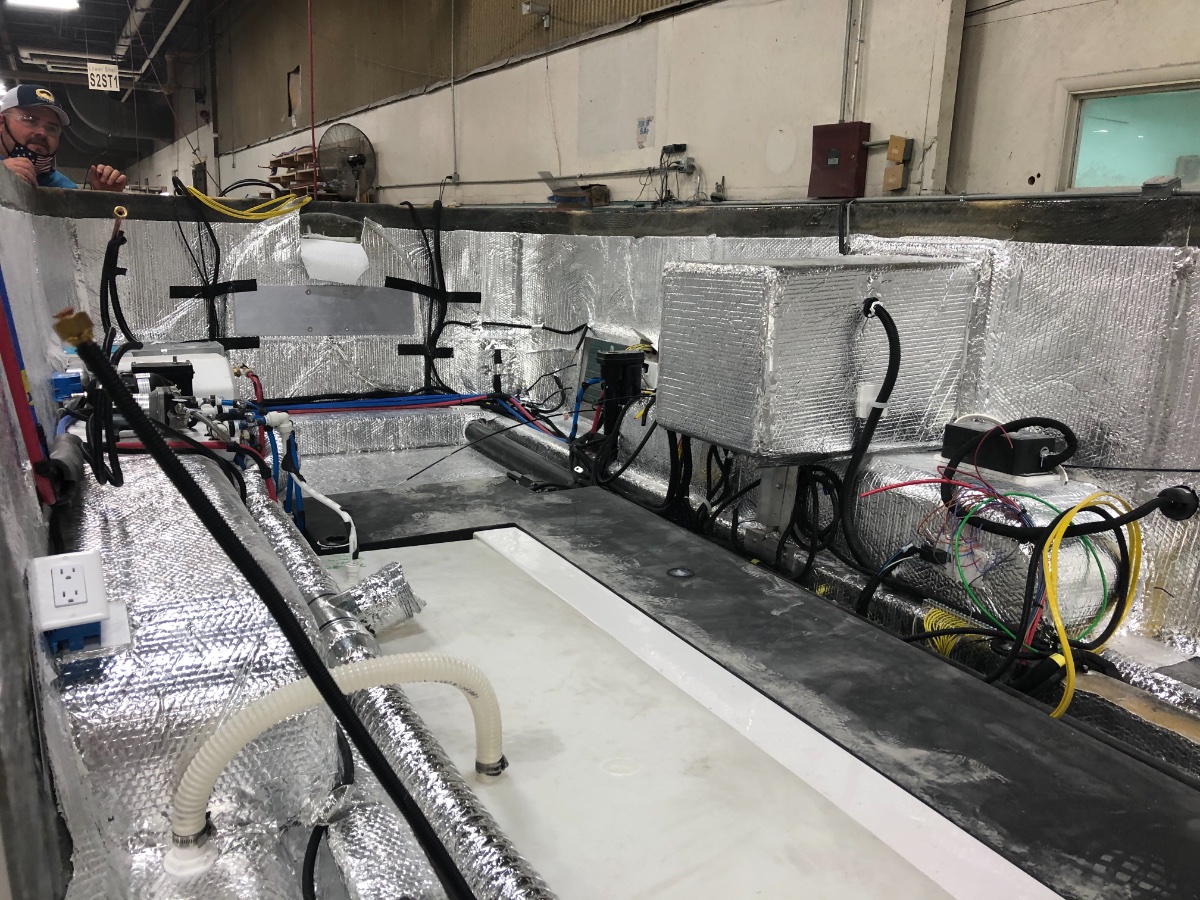
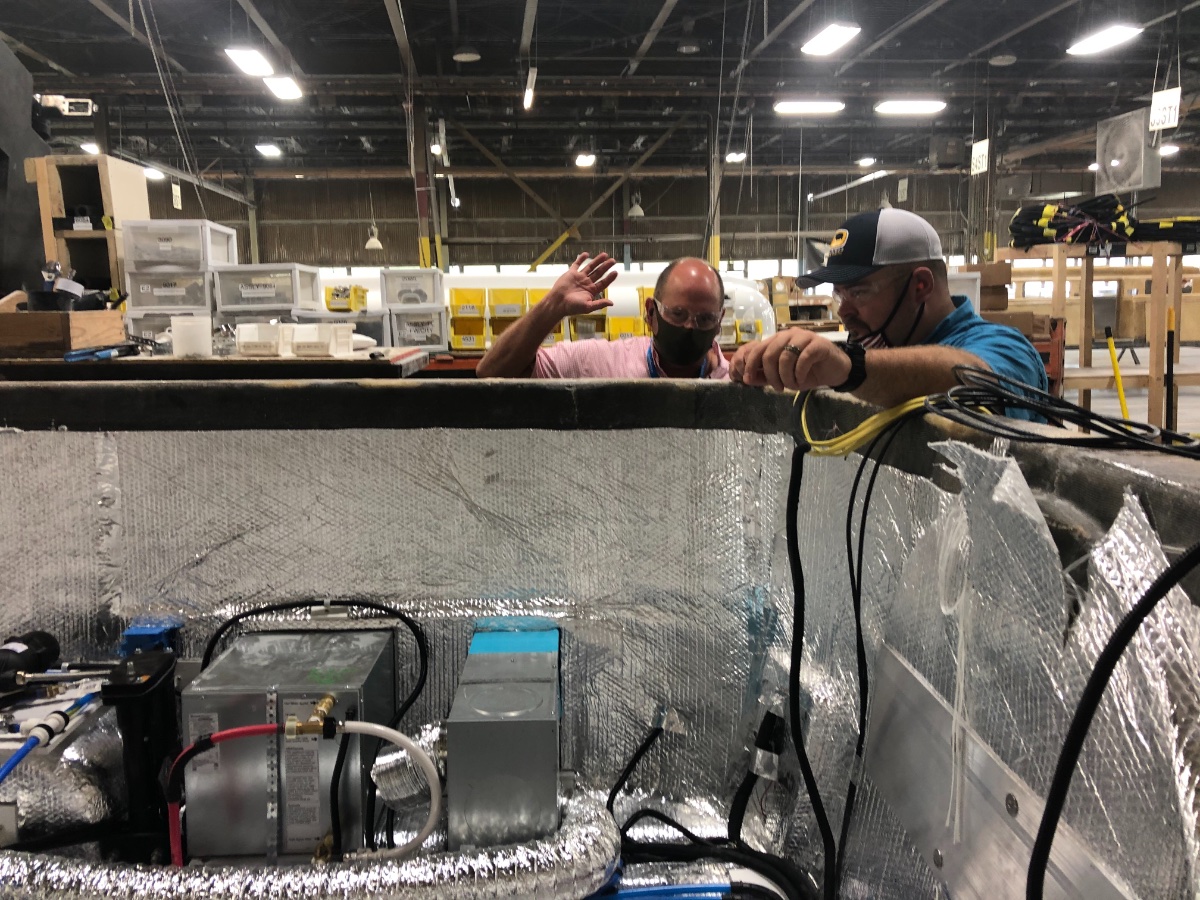
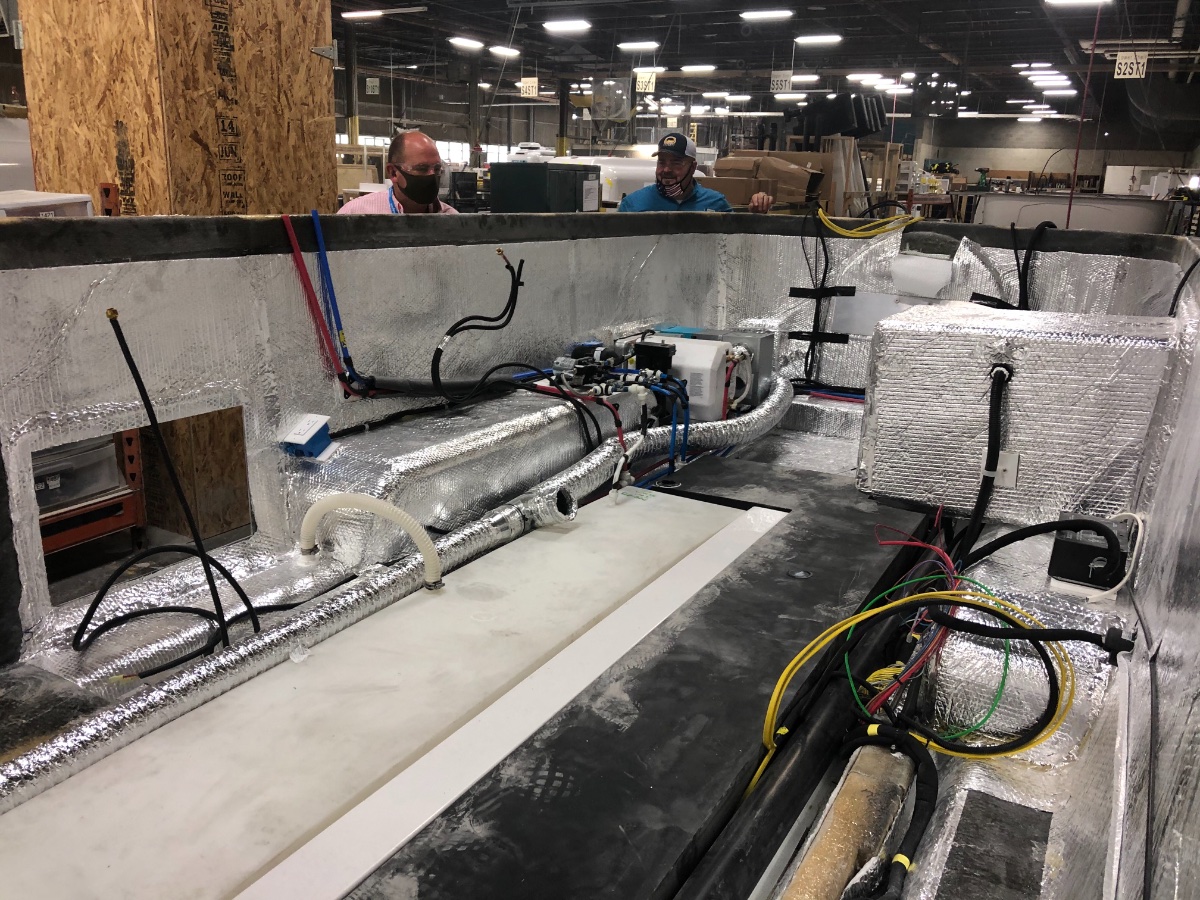
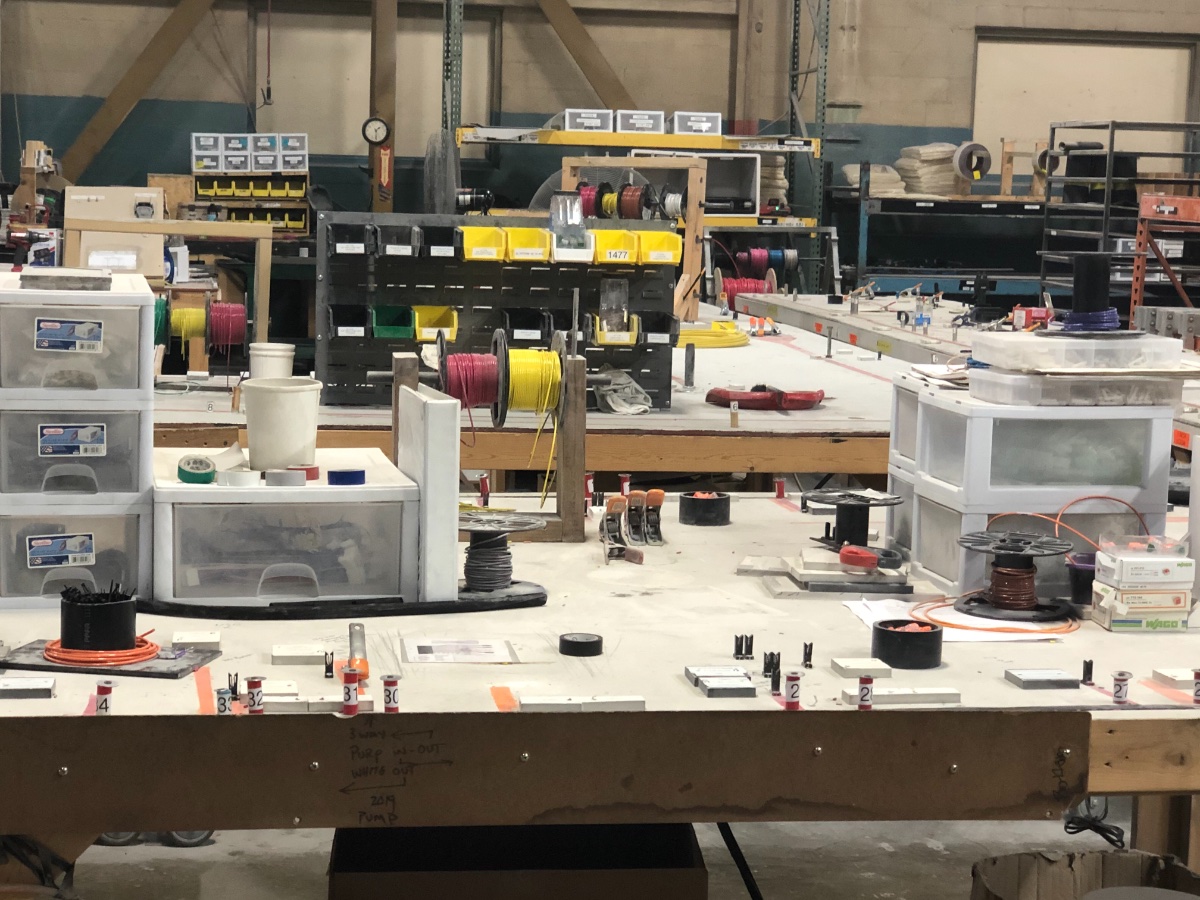
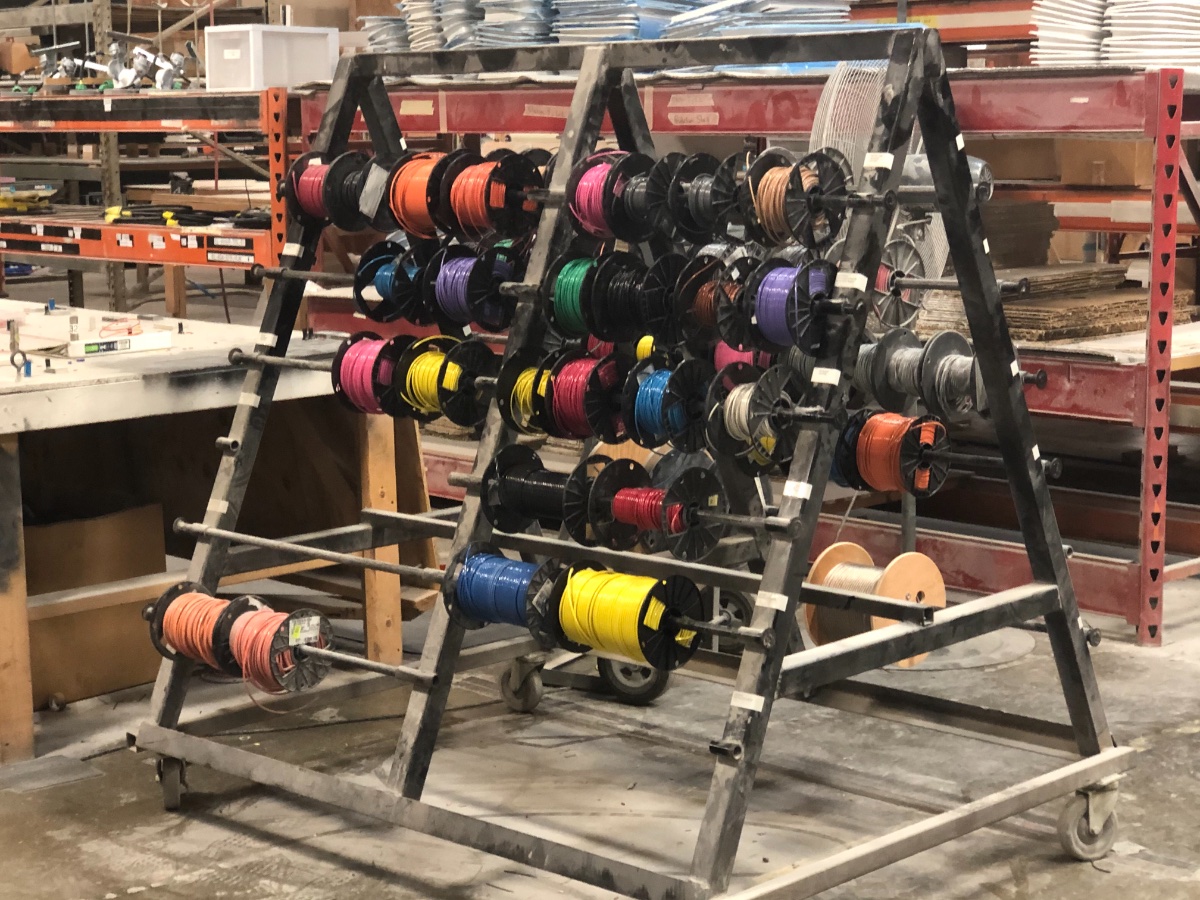
Here are some in-production pictures I took mid August during our tour. It might give you some idea of the hidden wires that are between the inner and outer shells before they are put together. We were very impressed with the quality.
1 point
-
The CG2's are going to be just slightly too wide for the battery tray, which is 14". I would contact Battleborn, however, and ask if the dimensions that they give include the ratchet strap tabs. If it does, then you can easily cut those off and the batteries should fit fine. If not, you might be able to force them in, or perhaps modify the tray to make them work, but I don't know of anyone who's attempted that. You can use four of their their standard batteries, turned on end, and while it will be tight to make the connections, they work fine. That's the setup that I have. The tray that Oliver uses, btw, is the MorRyde SP60-042 Utility Tray, inside dimensions 14" x 21" x 2.75". There's 12.75" clear from the floor of the tray to the bottom of the aluminum catch for the lock.
1 point
-
All we have to do to keep the bathroom warm is leave the door open. No tricks with the vents or fan. If we're taking a shower, we keep it warm in there with a small electric space heater. Just messin' with you about that space heater...1 point
-
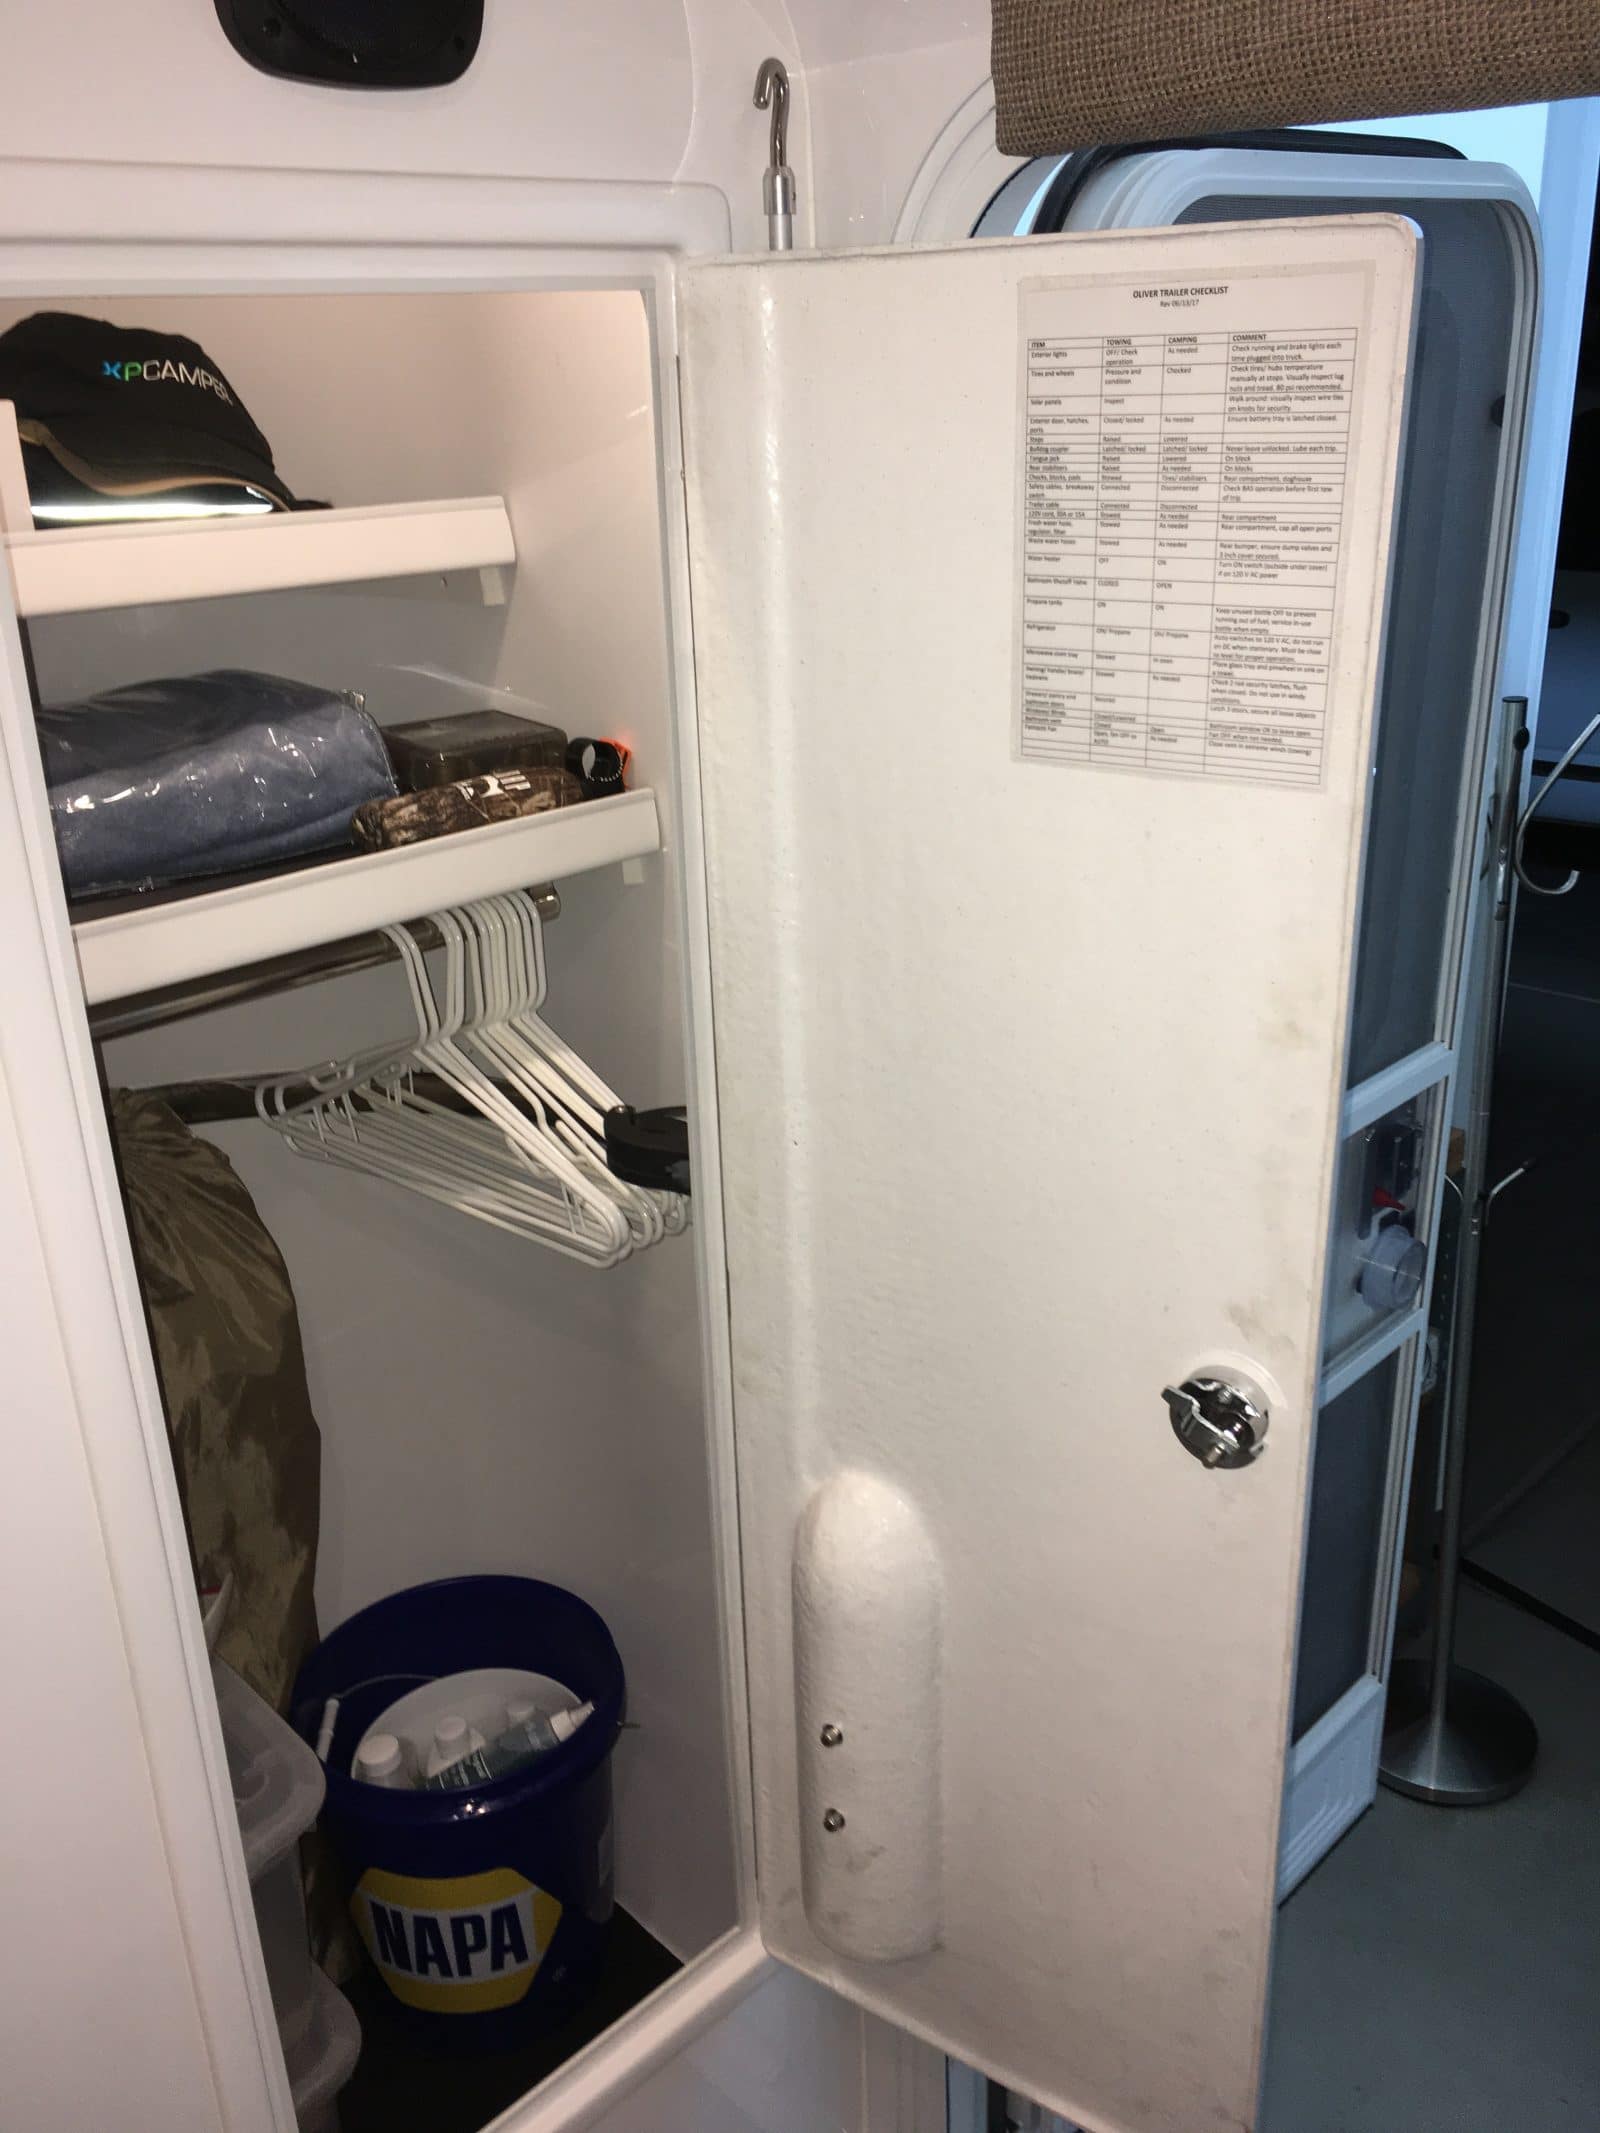
I made this because the Owners Manual towing and camping lists are simply lame. This one is set up like an aircraft preflight checklist. Feel free to edit and change as needed, some items may not apply or you may just want to do it differently. Mine is laminated and posted inside the closet door: Click the attachment at the bottom to download the Word file. John Davies Spokane WA OLIVER-TRAILER-CHECKLIST-–.docx
1 point
-
We are on Day 28 of a shake down inaugural trip in Oliver 412. We love our Eva-Dry dehumidifier and our Honeywell Space Heater. Also, we purchased a Fiksu Pets Elevated Dog bed for our Cairn Terrier. These have all been worthwhile purchases.1 point
-
Thanks for the tips. Which Viair compressor do you recommend? And what leveling system (or systems) do you recommend?1 point
-
I researched both, and decided that I wanted AAA’s Premier RV plan for its 200 mile towing limit. I don’t think Good Sam has a program to match that. I am occasionally in very remote areas, like central WY or southern ID, and it can be a long way to a repair shop. https://wa.aaa.com/membership/plans/premier-rv?zip=99019&stateprov=wa&city=liberty+lake&devicecd=TB I have been happy with AAA forever, the only problem is that the wait time for a truck can be excessive, and if there are a lot of slide-off accidents due to inclement weather, you may never get one. In that case, you get whoever you can to haul you in, pay for it and get reimbursed later. That is painless. I never run out of gas, I carry a lithium jump starter box, my tires rarely explode, so I normally never use their services, but I do feel better having it available in case of collision or sliding into a ditch. The long tow range comforts me when I am in the boonies in my Land Cruiser. If my stuck truck is located on or close to a forest or ranch road that the tow truck can get to, they will come and get me. I may be completely out of cell coverage, in that case I can use my inReach to get my wife or daughter to send a truck to the gps coordinates. OTH I use the AAA 10% discount lots of places, like NAPA and at all motels. Check the various plan discounts to see if there are any you might use often, and buy that plan, all other things being equal.... I think many campgrounds have Good Sam discounts, that may be a factor for you to think about. I rarely stay in a commercial place unless forced to by really bad planning or by worse luck. John Davies Spokane WA1 point
-
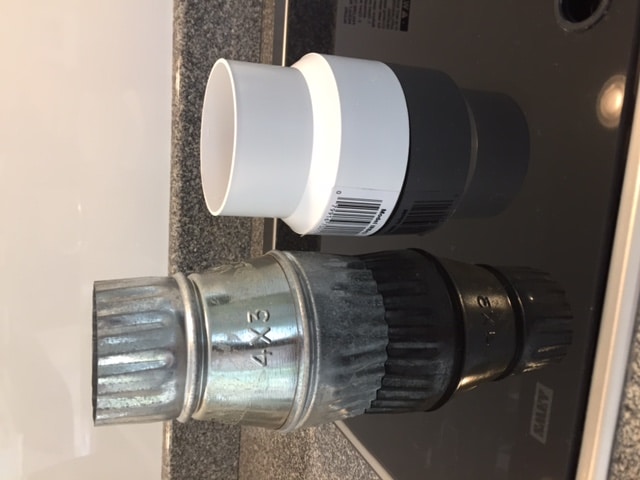
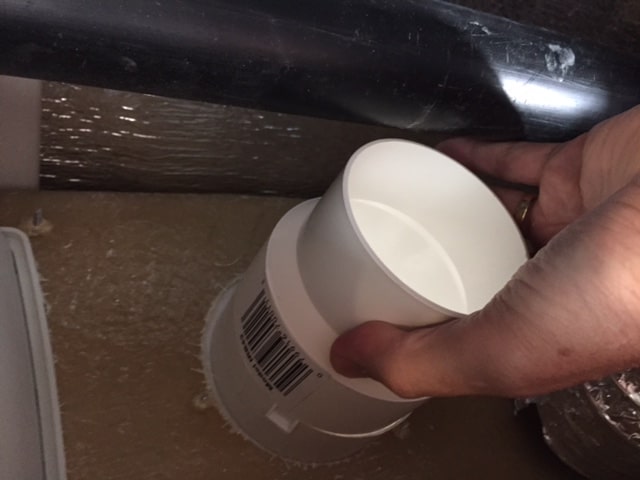
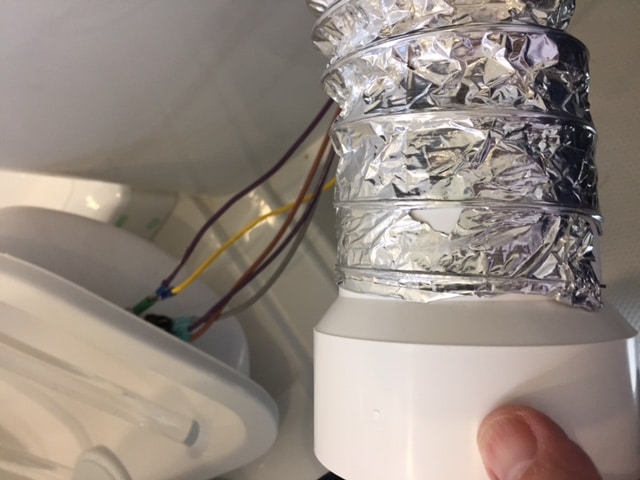
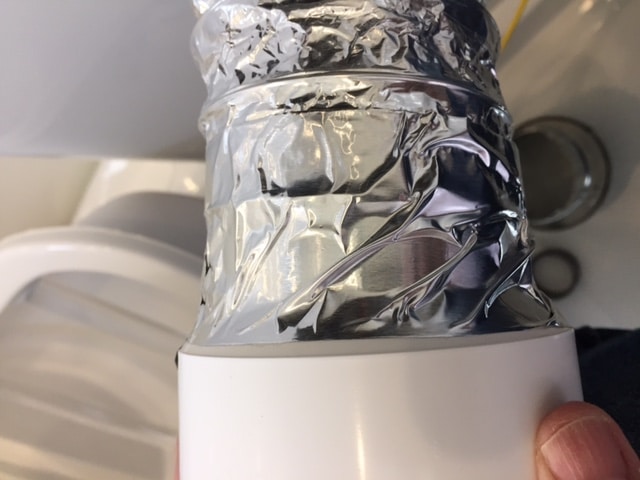
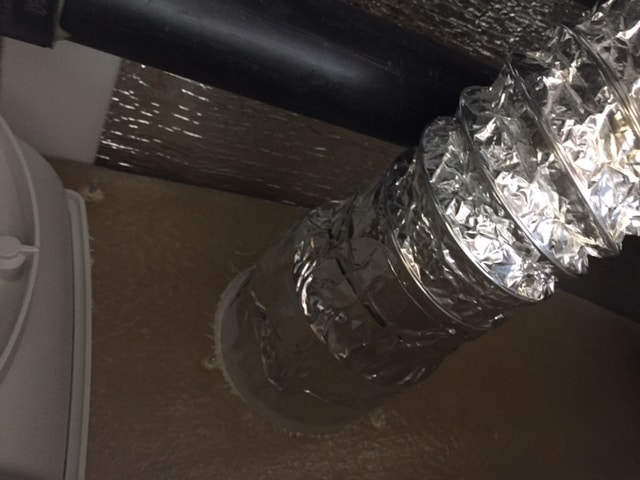
Did some "unscheduled maintenance" today. I discovered a while back that I was not getting any airflow out of the bathroom heat vent.... None. Took a flashlight and looked into the vent, and sure enough, the duct had separated from the vent. When I took the little rack off the front of the vanity, discovered the following: 1. For those who thought that perhaps there was wasted space in there, there really is not. Duct, plumbing, wiring and the recessed wash cloth rack take up almost all of the room. You will be glad to have space to maneuver under there if you ever want to do some mods or repairs. 2. The reducer that attaches the duct to the vent is metal, really heavy for the application, and just barely fits if everything is lined up just right during the build. In my case, the plumbing vent angles out away from the front wall just slightly, and it's just enough to make the reducer not fit. The joint was held together with foil duct tape, and the weight caused it to separate. 3. Found a very light weight plastic reducer on Amazon that fit the situation much better. The joint between the reducer and vent still not a good fit, (meaning it's just a tad too wide to slide into the vent), but with a couple of good wraps with foil tape it's on securely. And feather weight, so no danger that it will come loose.
1 point
.jpg.a9518105ae37f42c3321cd0c9a11494e.jpg)


-
Recent Achievements
-
")


")


")

