Leaderboard


Popular Content
Showing content with the highest reputation on 05/20/2023 in all areas
-
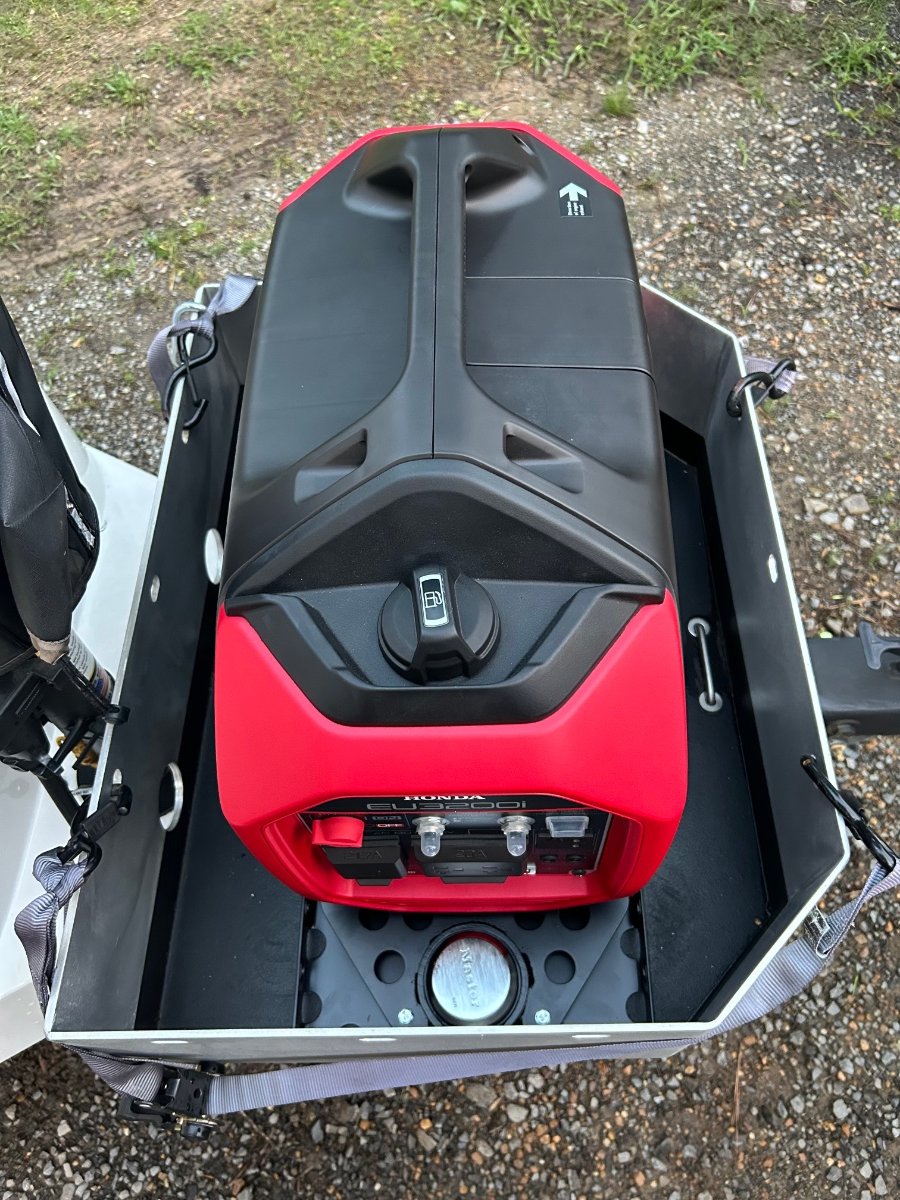
Today I received the first initial production mount of the new Honda eu3200i security mounting system. This came after weeks of collaboration, exchanging measurements and photos, emails and phones calls with fittingdesignsco@gmail.com. Note: You will need to modify your cargo box to use the key to unlock the puck mount. This will require drilling a hole in the side of the cargo box in order for the key to be inserted to unlock the puck mount. The base plate of the mount will also need to be be bolted down in the cargo box. I will add additional photos of mounting this gen security system when we return home from the rally. The unit pricing is $375.00 plus tax shipped to the lower 48. If interested, please contact the company at 530-913-2271 if you have further questions or wish to place an order. Patriot🇺🇸 More install photos to come.
 5 points
 -
Looking good!! Sorry for the installation disruption last night, and thank you for your input on MASA. John3 points
-
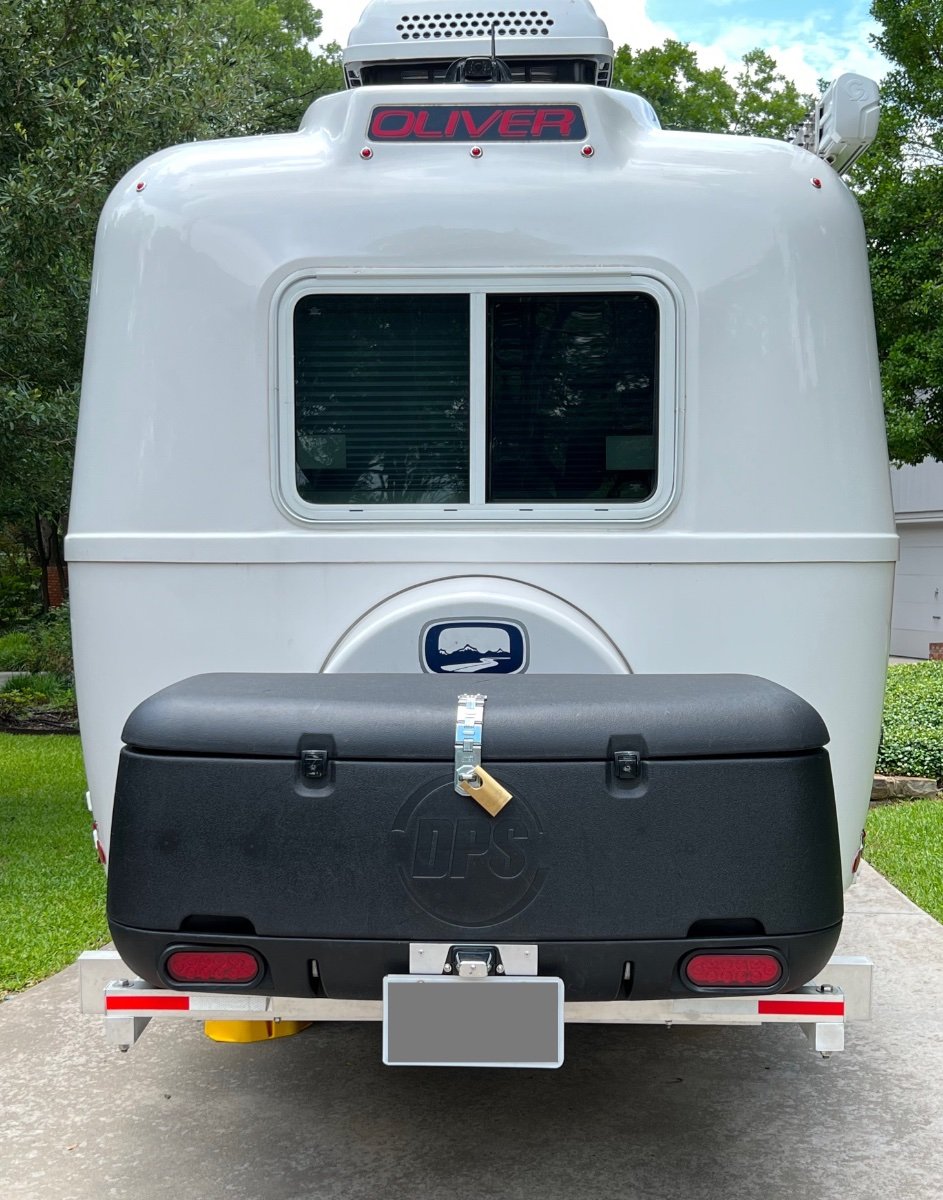
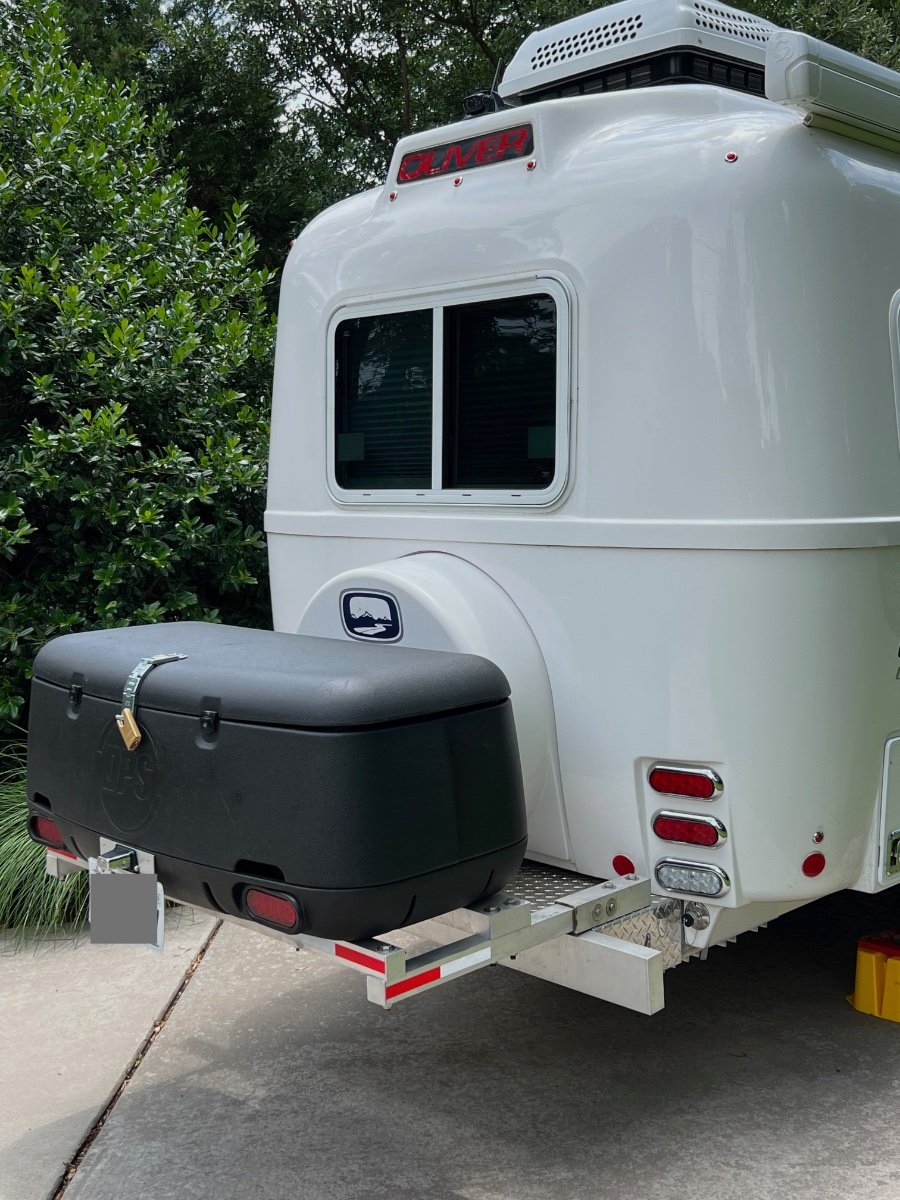
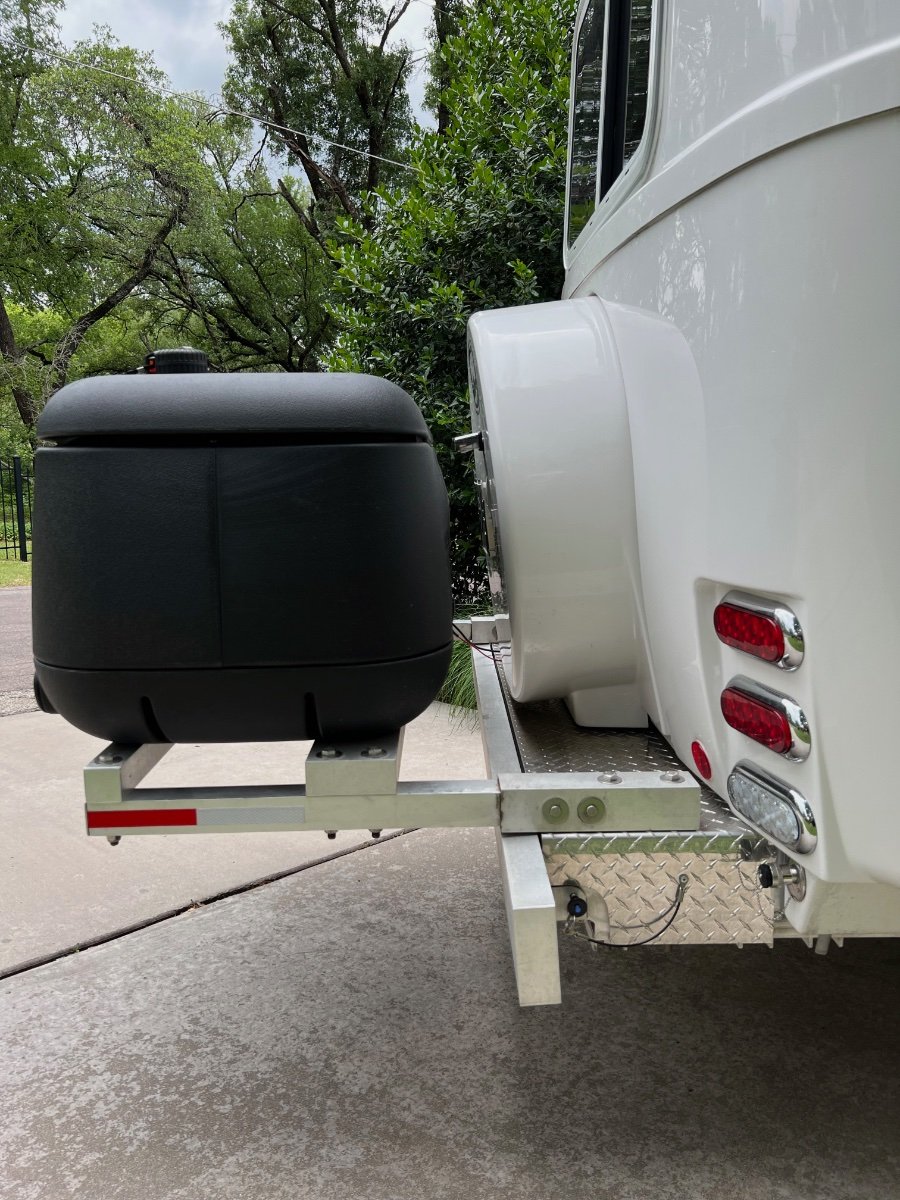
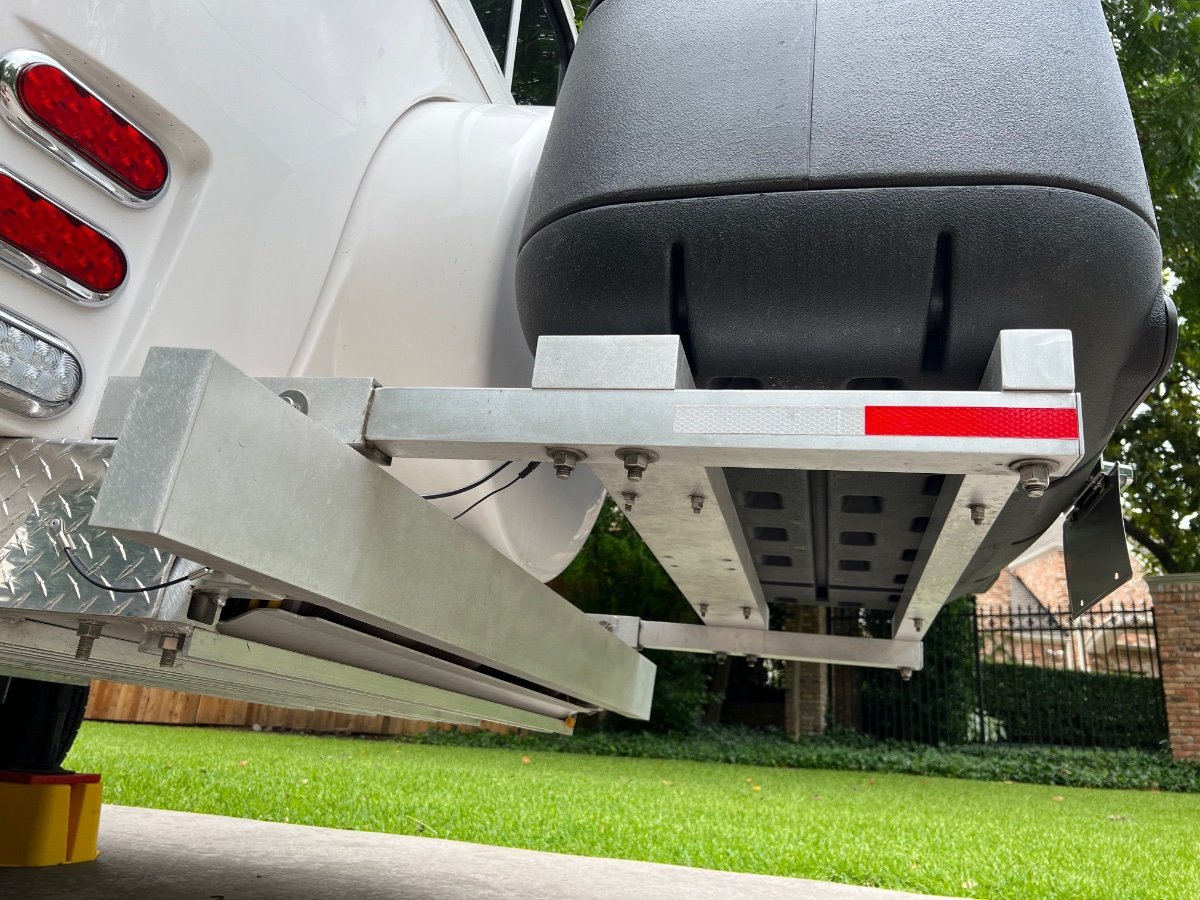
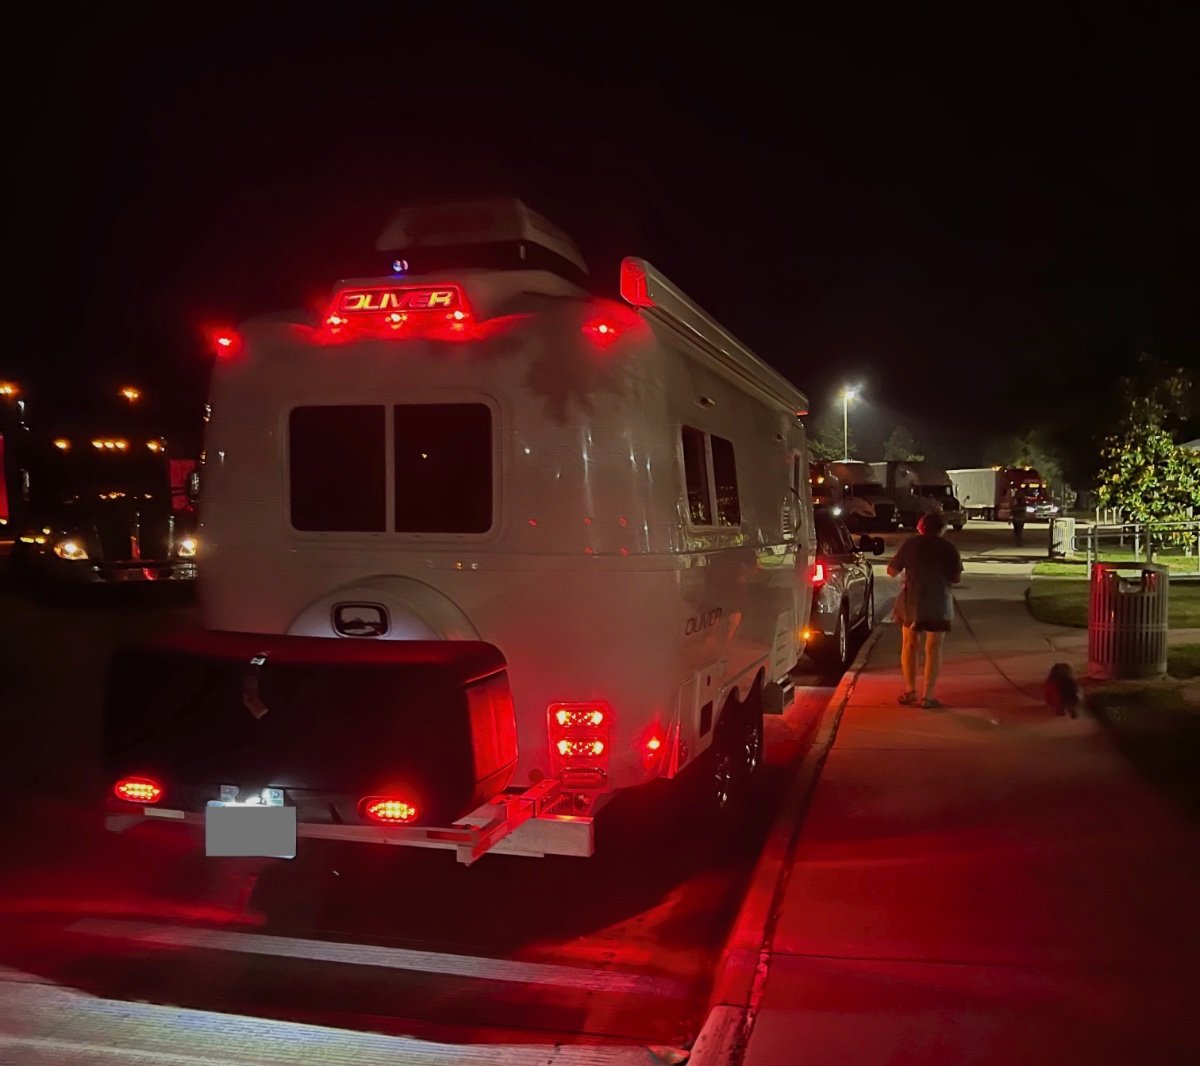
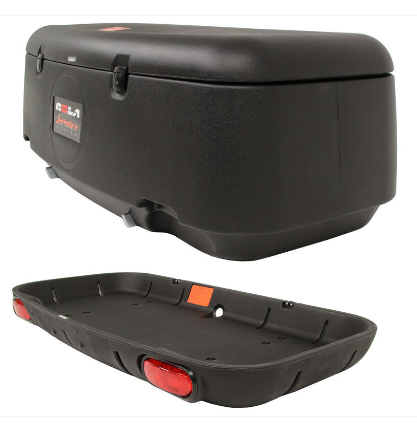
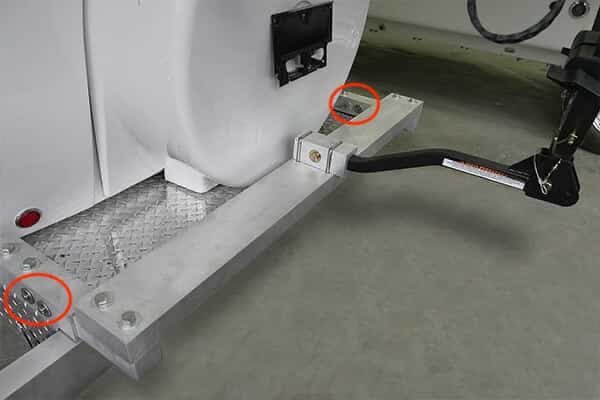
Summary I have installed a rear mounted cargo carrier, with lights, to our 2022 Oliver Legacy Elite II (LEII) travel trailer. We recently completed a two week, ~2000 mile trip, using the cargo carrier, which performed flawlessly. Below are photos of the installed cargo carrier, which are followed by a detailed description of its installation. Storage Constraints Prior to ordering our Oliver Legacy Elite II (LEII) travel trailer I knew we would need additional storage space on the trailer. We are using a 2014 BMW X5 35d (diesel) as our tow vehicle, rather than a pickup truck. Thus, we could not plan to use the pickup bed for supplemental storage. We also needed to stay within the tow vehicle's cargo capacity of 1100 lbs and maximum tongue weight of 600 lbs.. Expecting a tongue weight of approximately 500 lbs. plus two occupants at approximately 300 lbs, we could only accommodate a maximum of 300 lbs. of other cargo. The available payload will be partially used by our camera gear, which must be protected from exposure to moisture. A tongue mounted cargo carrier was not viable, given the tongue weight limit for the tow vehicle. Storage Requirements I anticipated needing additional storage space for the following items: Champion Dual Fuel Generator- 2500 watt (~45 lbs.) (too large for basement storage) Napoleon TravelQ™ 285 Portable Propane Gas Grill and hose (~35 lbs.) (too large for basement storage) Anderson Ultimate Leveling kit (~25 lbs) Harbor Freight rubber chocks (4) (~20 lbs.) Camco Stabilizer Jack Supports (3) (~10 lbs.) Miscellaneous accessories All of these items can tolerate some exposure to moisture, which is likely when stored in any external cargo carrier. A closed and reasonably secure cargo carrier was needed. Searching the owners' forum, I found examples of rear cargo carriers/bike racks and found several examples, including: Oliver's original bike rack design using twin receivers and extending approximately 3 feet beyond the rear bumper; Various rear mounted metal cargo boxes, including custom designs; Rear mounting of an Oliver tongue cargo box by John E. Davies. I also looked extensively at aluminum cargo boxes from various manufacturers, trying to find options which could accommodate the cargo items listed above. I already owned a cargo carrier which we had used on the BMW X5 tow vehicle. This carrier has a heavy steel swing-away frame which mounts to a standard 2" receiver. Mounted on the steel frame are a polypropylene tray and an enclosed container with 13.5 cubic foot capacity. The tray and enclosed container interlock. This cargo carrier also is equipped with fully functional lights (running, brake, turn, flasher). Interlocking pins on the enclosed container mate with the tray. Locking latches secure the container to the tray. Solution Approach I decided to re-use the polypropylene tray and enclosed cargo container, but not the heavy steel frame. Instead, I would use a design similar to the original Oliver bike rack. I ordered the current optional Oliver bike rack when we placed our LEII order, planning to utilize some, but not all, of its components. The current Oliver rear hitch (photo below) utilizes twin receivers that are 11" long, constructed to receive 2" x 2" X 0.25" (wall thickness) T6061 aluminum square tube support arms, which are 17 inches long. The receivers are each mounted to the LEII frame by two long 0.5" diameter stainless steel bolts and nuts. The other components of the rack are a 2" x 5" x 0.25" T6061 aluminum cross-member, 51-1/8" long (with end caps), and a 1-1/4" receiver for connecting a bike rack. I planned to use the twin receivers, and the cross-member, but not the support arms, nor the 1-1/4" receiver. Instead, I would replace the 17" long original support arms with longer equivalents, whose length was to be determined. I would utilize the original 2" x 5" x 0.25" T6061 aluminum cross-member and add another cross member, this one 2" x 2" x 0.25" T6061 aluminum, also 51-1/8" inches long with end caps. The cross members would be bolted to the support arms, in the same manner as on the Oliver rear hitch. The tray and enclosed container from my existing cargo carrier would be mounted to the cross-members. Note the clevis pins circled in the photo below, there are two 0.50" diameter horizontal clevis pins securing the support arms in their receivers. Each clevis pin has a washer on either side of the receiver. Removing the clevis pins permits the support arms to be pulled to the rear, enabling removal of the spare tire cover and spare tire without dismount the support arms. Solution Model A critical dimension to be determined was the length of the 2" x 2" x 0.25" support arms. The new support arms need to be long enough to: Support the polypropylene tray and enclosed cargo box and attach using the molded mounting holes in the tray; Allow the lid of the enclosed cargo box to open without striking the spare tire cover; Permit removal of the spare tire cover and spare tire without removing the cargo carrier and support frame; Permit access to waste water hoses stored behind the bumper; Minimize the additional length of the cargo carrier and support frame to the LEII's length. I fabricated 2" x 2" wooden support arms, approximately 40" long. Using woodworking equipment, I cut slots into one end of each support arm to fit around the bolts holding the twin receivers to the frame. I also drilled horizontal holes for the clevis pins which retain the support arms in the receivers. Positioning the Cargo Carrier on the Cross-members The wooden support arms were inserted into the twin receivers and secured with the clevis pins. Then the 2" x 5" x 51.125" T6061 cross-member was placed across the support arms near the bumper. The additional 2" x 2" x 51.125" wooden cross-member, was also placed across the support arms, but further from the bumper. Clamps were used to hold the cross-members in place on the support arms. The polypropylene tray and enclosed container, latched together, were positioned on the cross-members, centering both to the trailer's width. I opened the lid of the enclosed container and adjusted the spacing (fore and aft) between the lid and the spare tire cover to ensure they did not contact each other. Once I had located the joined tray and enclosed container in what appeared to be a desirable position, I adjusted the positions of the cross-members fore and aft to establish alignment with the mounting holes in the tray. The 2" x 5" cross-member engages two mounting holes on each side of the tray. The 2" x 2" cross- member engages only one mounting hole on each side of the base of the tray. Six 5/16" carriage bolts will fasten the tray to the cross-members. Only four carriage bolts attached the tray to its original steel support frame. I used a mason's string stretched across the width of the tray with weights on either end to aid in aligning the mounting holes in the tray with the positions of the cross-members. I also used carpenter's squares to verify the cross-members were perpendicular to the support arms. Another check of squareness was made by measuring the distance from the trailer bumper to the cross-members. Once I was satisfied with the position of the tray and enclosed container on the support structure, I marked the locations for the holes to be drilled for the six mounting bolts to secure the tray to the cross-members. The tray overhangs the rear cross-member at the rear. With the cargo carrier tray and enclosed container in place on the clamped cross-members, I wanted to determine if the spare tire cover could be removed without removing the entire cargo carrier and support assembly. I found I could remove the clevis pins and pull the support arms aft approximately 7 inches out of the twin receivers and enable removal of the spare tire cover. With the tray and enclosed container positioned on the cross-members, I could now determine the required length of the support arms, which is 33.75 inches. The location of the rear cross-member determines the length of the support arms. After locating the mounting position of the tray and enclosed container I marked all key positions and hole locations on the wooden support arms and wooden rear cross-member. I cut the wooden support arms to the desired final length. Material Sourcing and Machining The required T6061 aluminum components required are: 2" x 2" x 0.25" x 33.75", square tube, quantity 2 (support arms), cost= $110.18 2" x 2" x 0.25" x 51.125", square tube, quantity 1 (cross-member), cost= to $99.08 2" x 12" x 0.125", flat bar, quantity 1 (to be cut into 2" squares for end caps on the support arms and rear cross-member), cost= $6.86 Sales tax= $17.83 No shipping charge. I picked up the materials at the local Metal Supermarkets warehouse Total cost= a $233.95 The above T6061 aluminum components, cut to specified length, were obtained from: Stainless steel bolts and nyloc nuts were obtained from: I was referred by Metal Supermarkets to a local machine shop: When I received the materials I took them and my wooden mockups of the support arms and cross-member to Air & Earth. I also took one of the original support arms. I discussed the machining needed: to cut the slots in one end of the support arms and to drill the needed 0.50 diameter holes for the clevis pins and mounting bolts. I also asked them to cut the 2" x 0.125" flat bar into 2" x 2" squares. I did not ask them to drill the smaller holes for mounting the cargo tray to the cross-members. I was quoted $220 and turnaround of the job within a week. They did an excellent job within the promised timeframe. Finishing and Assembly of the Support Structure After Air & Earth completed the requested machining, I performed the following finishing steps, which included: Rounding the edges of the 2" x 2" square tubing on the slotted end to be inserted into the receivers. I used a 3" wide belt sander with 100 grit sanding belts to round the corners of approximately 12" of the tube which would be inserted into the receivers . The original Oliver support arms also had the corners rounded to more easily slide within the receivers. Several trial fittings were required to verify smooth insertion and removal to/from the receivers. The support arms and the rear cross-member were sanded with an orbital sander using 200 grit disks. This sanding removed markings on the tubes and made the surface textured, similar to the Oliver rear hitch components. The support arms were inserted into their receivers and fastened with the clevis pins. The cross members were aligned with the mounting holes on the support arms and bolted into place. The cargo tray was positioned on the 2" x 5" cross-member at the previously determined mounting position and holes drilled to mount the cargo tray. Holes were then drilled in the 2" x 2" rear cross-member. Carriage bolts, flat washers and double jamb nuts were used to secure the cargo tray to the cross-members. Once all test fittings of the support assembly were completed, lithium grease was applied to the ends of the support arms which are inserted into the receivers. 2" x 2" x 0.125" caps were attached to the open ends of the support arms and the rear cross-member, similar to the end caps used by Oliver. These were attached to the square tubing using JB Weld epoxy. Cargo Carrier Lighting The cargo carrier partially blocks visibility to the taillights of the trailer, which is most noticeable when viewed from close behind the trailer. At a distance the taillights are largely visible. The cargo tray is fitted with two LED light fixtures and a wiring harness with a 4-pin flat connector. A corresponding 4-pin flat connector was installed on the LEII to integrate the lighting on the cargo carrier with the trailer lighting. Details of the installation of the 4-pin connector in the trailer are covered in a separate article. The lights on the cargo carrier ensure the trailer is quite visible from behind. A license plate mount was added to the cargo carrier tray, since the license plate mount on the spare tire cover is blocked by the cargo carrier. Lighting for the license plate mount is provided by adding a Y connector to the license plate light cable under the spare tire cover and adding an extension cable routed to the cargo tray mounted license plate mount. I also added reflective tape to the support frame members. I used the following reflective tape: https://www.amazon.com/gp/your-account/order-history/ref=ppx_yo2ov_dt_b_search?opt=ab&search=reflective Conclusion This addition to our trailer provides significant benefits, with no significant disadvantages. It does add approximately two feet to the length of the trailer. Besides the additional storage space, the cargo carrier and its load slightly reduces the tongue weight. I measured the tongue weight, using a Sherline scale, at 450 lbs., with no water onboard. Tongue weight seems sufficient, as no swaying or other handling issues have been observed. This project had a successful outcome due largely to the information I was able to glean from the Oliver Owners Forum. I hope this information is useful to others on the forum. Comments and suggestions welcome. Regards, Don
2 points
-
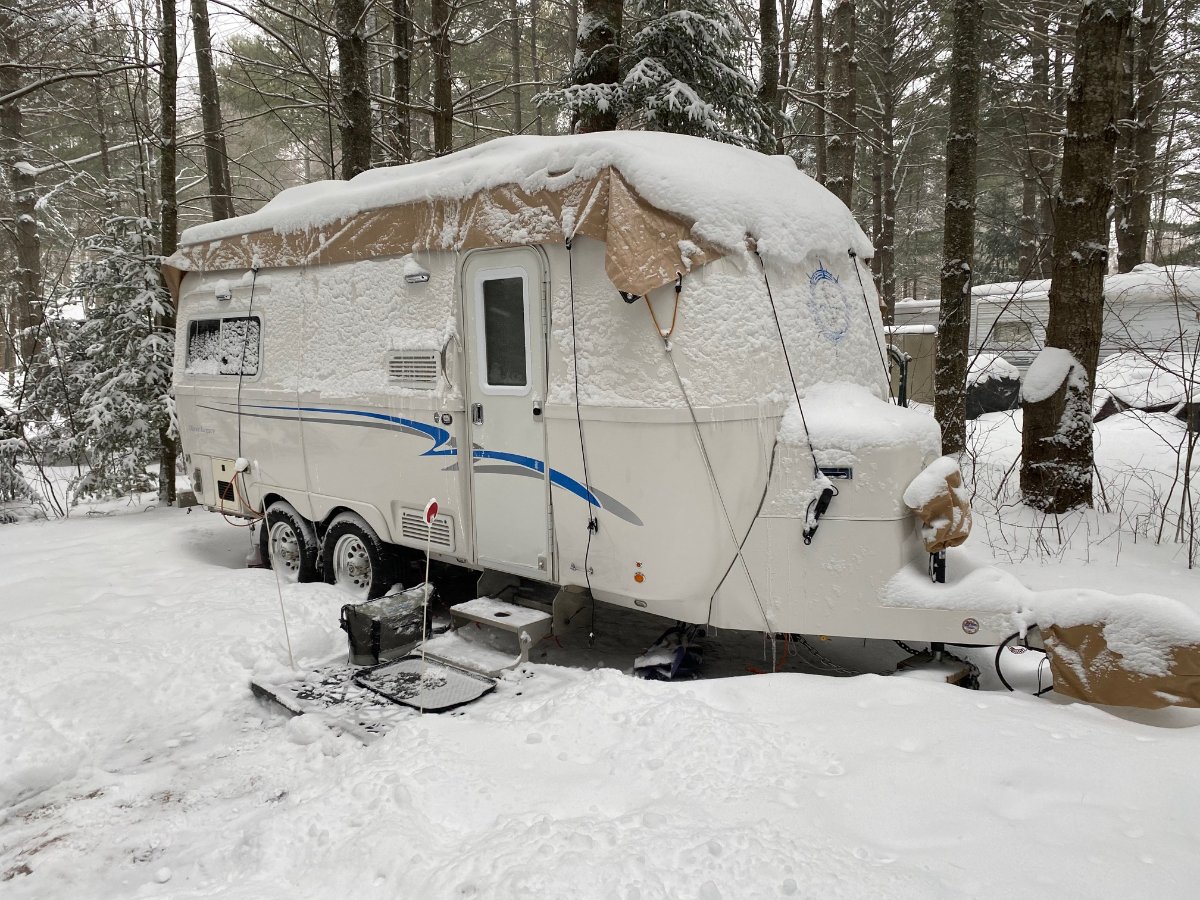
Enjoying winter camping in my Oliver, snowmobiling every weekend.
2 points
-
How cool would it be to have a shot of 4 or 5 Ollies parked along the bulkhead sidewalk at Rocky Point...? La Playa Bonita RV PARK #1.pdf2 points
-
I use to organize group tours in Hawaii and Europe, land and sea. It is a LOT of work. Airstream caravans are organized by people who are familiar with the caravan routes. Of course they have a much larger owners group broken down into regions so there are many people experienced in leading a caravan with knowledge for specific route/destinations. I don’t think there would be enough interest to organize an Oliver caravan to justify the time/work to set one up. It would be fun though!2 points
-
My Ollie (#1019) was coming up on it's 1-year anniversary and I began the annual maintenance routine (diy). I prepared about 3 months for a bearing check and repack, buying parts, tools, watching YouTubes, etc. You see, I ONCE worked on bearings in my high school auto shop...some 45+ years ago! I figured "I got this." The day came (yesterday) and I laid out all my parts and tools and got to work. After the first 6 lug nuts and tire #1 came off, I came across this strange dust cover that said "Nev R Lube". I immediately got on the forum and searched such a thing I'd never heard of or seen. Lo and behold, Ollie apparently went to this system in 2022, the year that gave birth to #1019. In a way I was relieved...I get half a day back (maybe more). But then, I now have a lot of parts and a few tools I won't, or can't use. I'll be selling them soon in our Ollie classifieds. So, like buying all the wrong stuff for a newborn that gendered differently than expected, I'm still happy, yet saddened. I still love Ollie.2 points
-
Not the same thing, but I was going to have some outdoor speaker wires installed in my house that was a spec house we bought new. The guys came out and looked around a bit and asked me what a plate that was hidden behind a downspout was for. I had not noticed it before. Turned out the house was already wired for outdoor speakers. I embarrassingly paid them $50 buck for their time and laughed about it later. 😀2 points
-
Organize one. They’re a lot of work.2 points
-
Thank you John, Always great to see you and Wendy, no interruption we enjoyed meeting you both. We sure hope we get to see you guys again soon! David & Kathy2 points
-
That looks great, and should be a good strong deterrent . Nice little family company. (I looked them up. Thanks for the info.) https://fittingdesignsco.com/products/generator-lock-security-low-profile-mount-honda-generator-mount-predator-generator-mount-camping-travel-mount-truck-mount2 points
-
Sorry, I thought it was included. We have a 2016 Oliver Elite 2 and our tow vehicle is a Porsche Cayenne 2008. I think I fixed that on my profile. Linda1 point
-
The inverter shouldn't have any effect on the 12v outlets. They run directly off the batteries. Sounds like an issue with the outlet itself, or the wiring connection to it. First, look up inside the 12v socket/outlet. There should be metal around the perimeter of the side wall and a separate piece of metal in the center of the bottom of the socket. Those are your 2 connections to the plug (- on the side and + on the bottom). Is all that metal shiny? Not corroded in any way?1 point
-
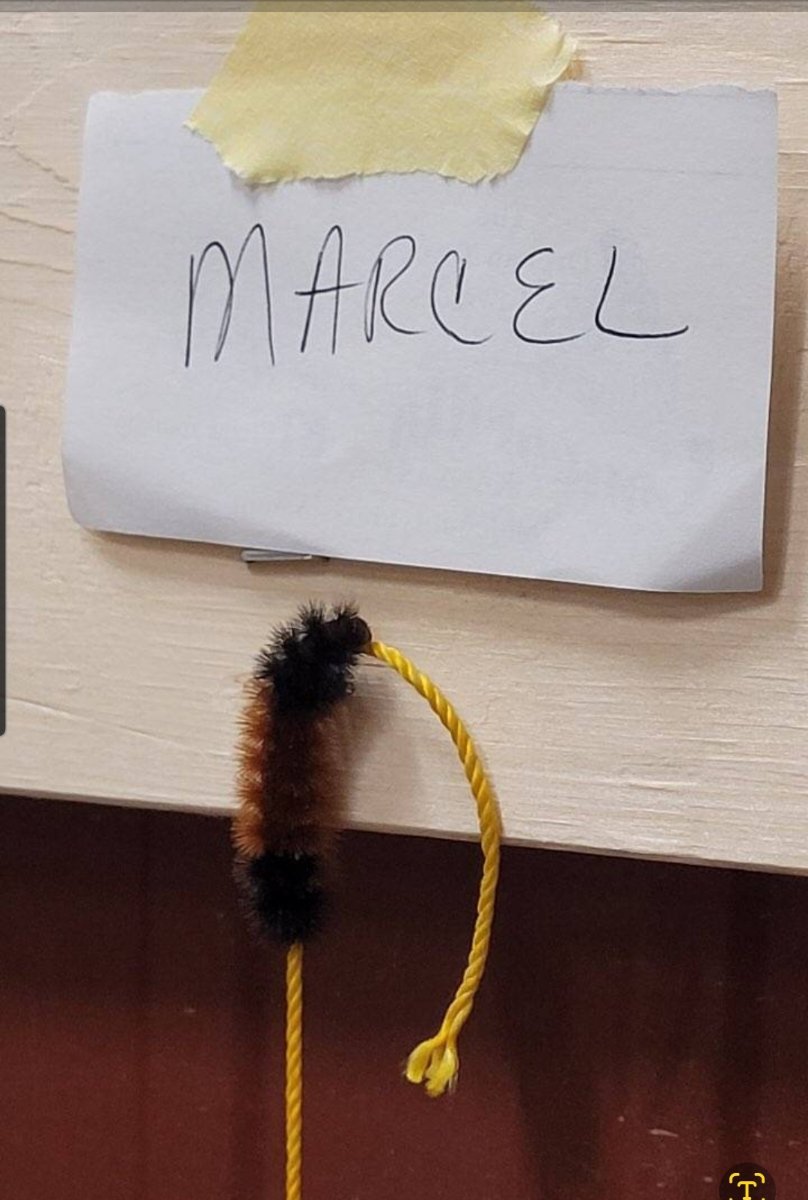
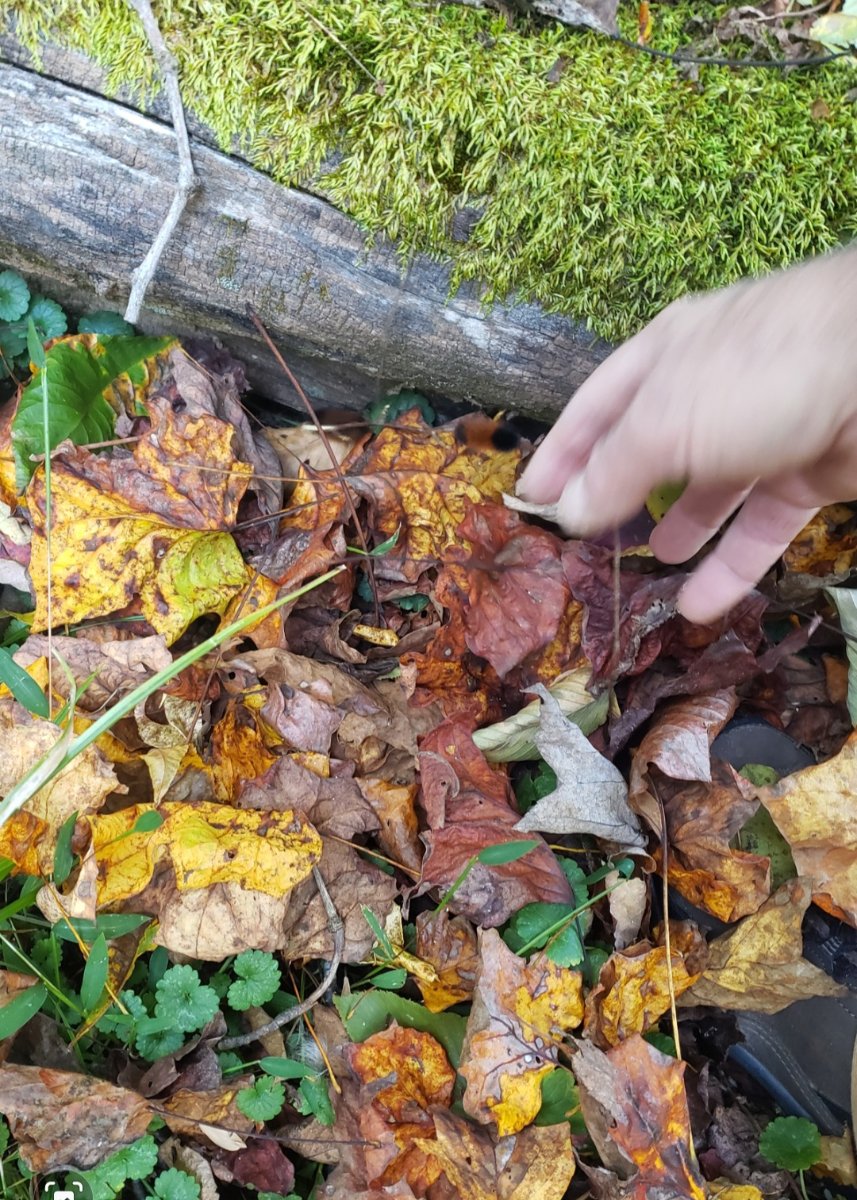
If you (or someone) were to organize even a small caravan, you'd likely have a great time. Back in 2010, a few of us organized a trip we called "the mountain eggroll." We had 5 Olivers, and my friend's Casita. It wasn't a long trip, but it sure was fun. The longest run was from south of Asheville to PlumTree campground, via the Blue Ridge Parkway. (We did turn a lot of heads.) Two weeks, three weekends, bunches of fun visiting small regional festivals and restaurants. Probably doesn't seem like a big number, but the work is much the same. And, at the time, it was over ten per cent of the existing Olivers, so not a bad turnout. 😀 Lots of great memories, and we're all still in touch. A number I count as very close friends. We did a mini reprise two years ago. Only three trailers were able to attend--folks we have camped and sailed with on a regular basis. The weather was pretty bad, so we did our own Wolly Worm races, inside our pole barn, near Asheville, and bailed out of our reservations for a campground near Banner Elk. (Marcel, though a slow starter, won the wolly Worm race.) We've caravanned with just two trailers through eastern Canada, Montana to Alaska, Kansas to Colorado, and a number of other routes with Oliver friends. It's work. And so worth it, small scale. We've made lifelong friends in our small adventures. I personally wouldn't be up for organizing a big caravan or camping event, either. Not at this stage of my life. Maybe some of you younger folks will take the baton? I know I've said it before, but leaving the door open a bit, invites new friends, and adventures, into your life. PS, for any of you wondering, we released the wolly worms humanely back into the wild, after the race.
1 point
-
We've insulated the door on our battery compartment (minnimally with two layers of reflectix) and have run a heat duct to the streetside that snakes under the battery box. Even when temps dropped below 0 Fahrenheit, the digital bluetooth thermometer sitting on top of the batteries showed that temps stayed in the high fifties. The bluetooth feed from batteries themselves as displayed on the LifeBlue App shoed the batteries maintained an internal temp in the 60s. I can't think of an apples to apples test to compare performance to summertime conditions but we've been happy with the performance.1 point
-
It would be so impressive and I’m sure there would be a lot of people saying “What kind of camper are those?”!!!1 point
-
1 point
-
If this is a test scenario, why not just install one cheaper 12 volt sealed lead acid DEEP CYCLE battery from Walmart? You can always sell it later on Craigslist, https://www.walmart.com/ip/Mighty-Max-12V-100AH-Battery-for-Solar-Wind-Deep-Cycle-VRLA-12V-24V-48V/179446910?athbdg=L1600&from=/c/[...seo] T105s are way way more labor intensive to maintain and they vent corrosive and explosive gases. You are taking a huge step backwards going from AGMs. I don’t recommend it. John Davies Spokane WA1 point
-
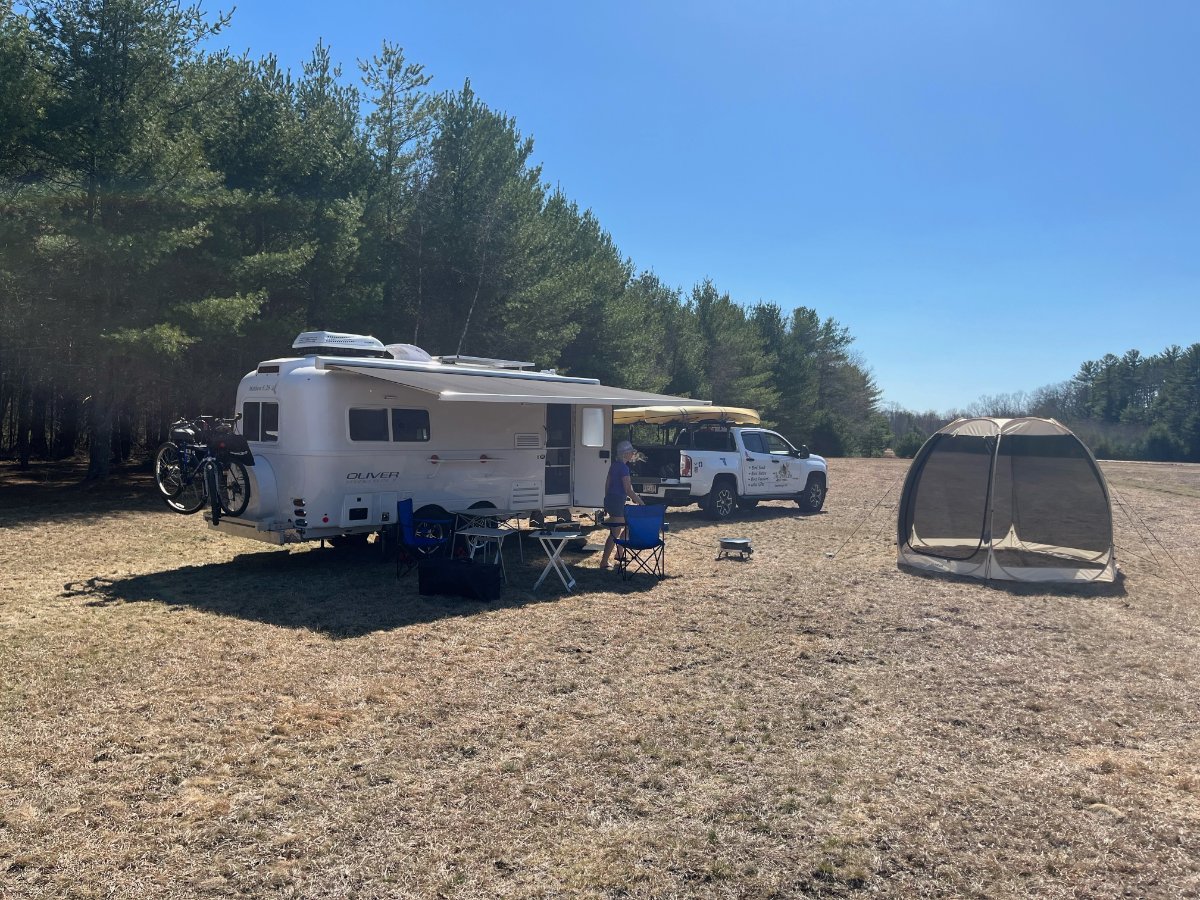
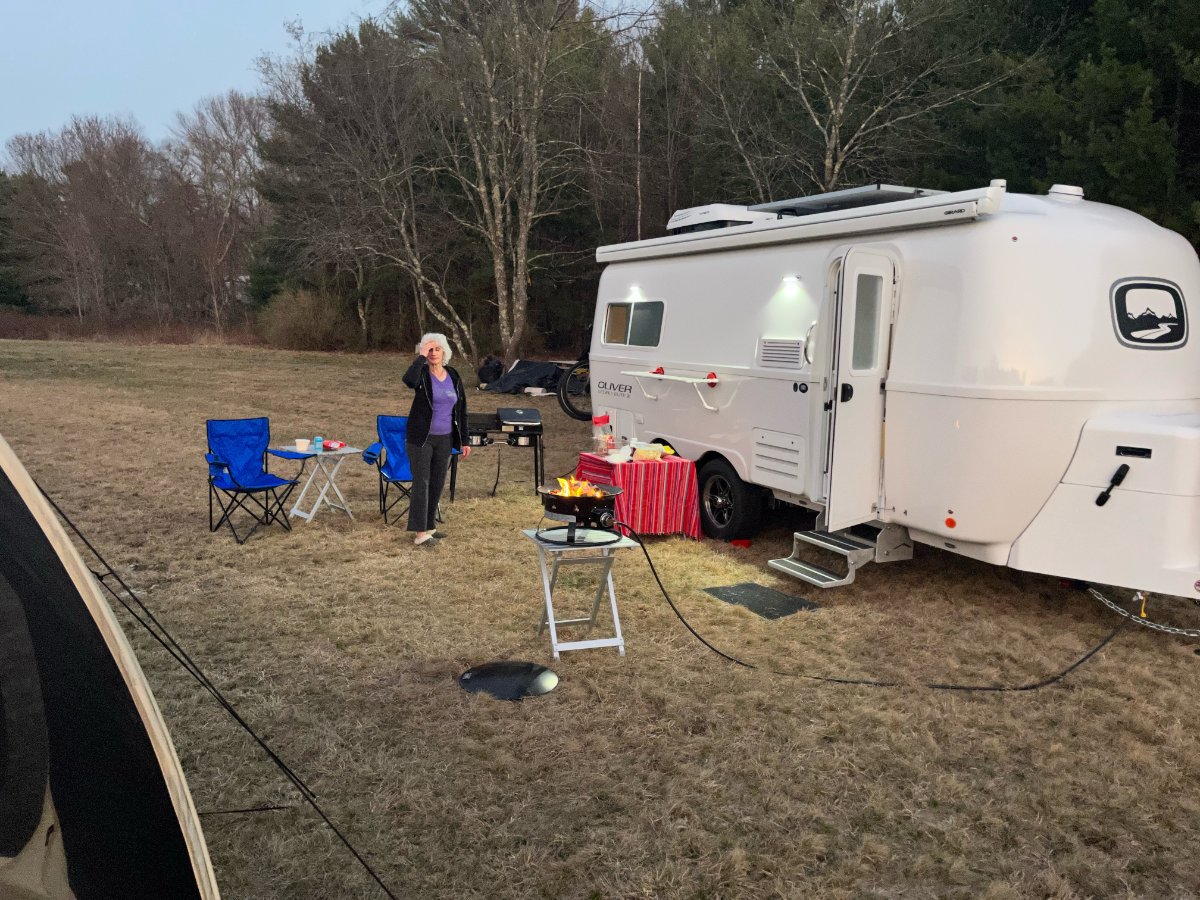
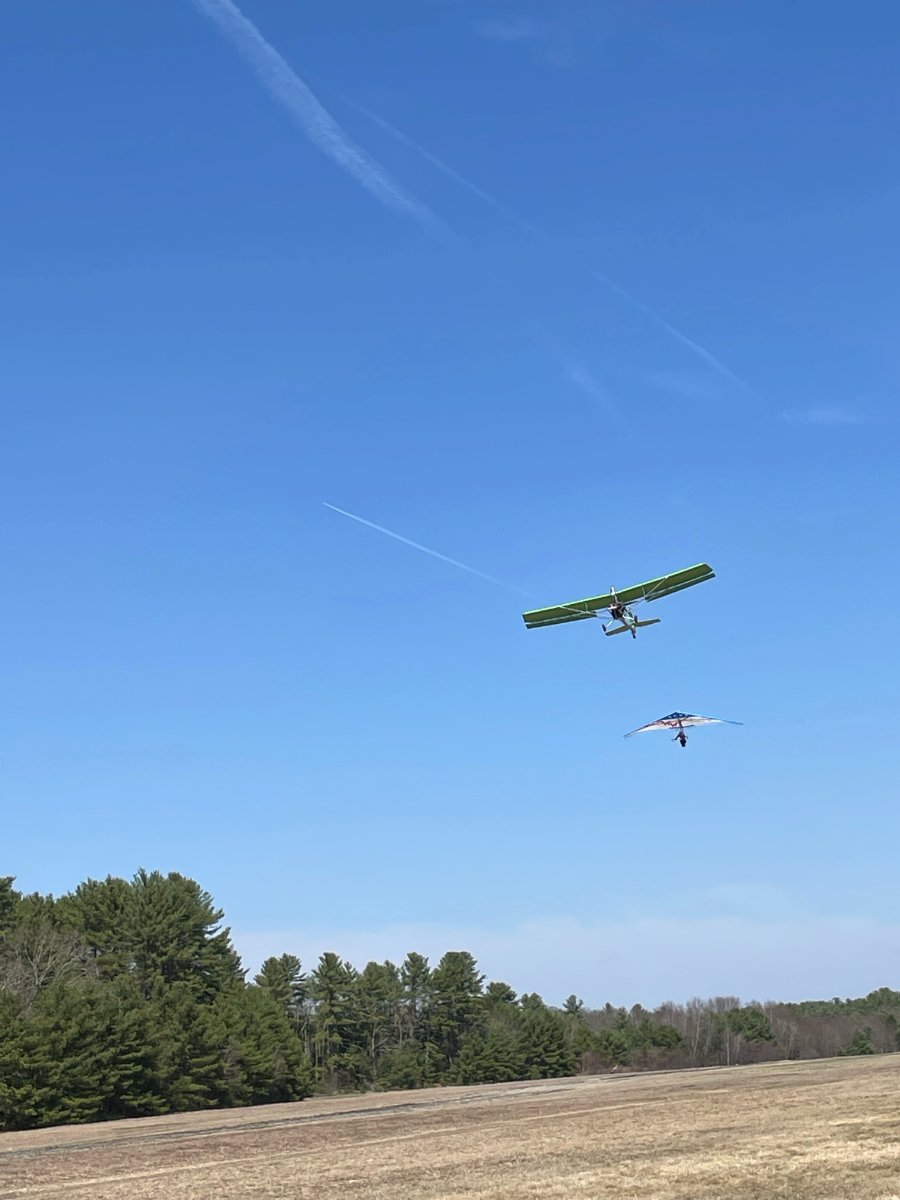
We finally got out for a couple of days and camped at an airport about 30 miles from home. Its free and was fun to get out for the first time this season. Can you believe it his 93 Degrees in MA in April. The trailer hit 96 degrees inside but it cooled down at night and was a good time eating peanuts and looking at the stars.
1 point
-
Thank you Jeff for opening the door on this aspect of our "Clean Energy" asperations. The above comments are interesting and informative. I feel certain that the market will dictate where the Gas/Diesel fuel topic goes. I am more worried about the higher level aspect of where will all our energy to travel comes from. The below are my personal feelings and concerns with our energy infrastructure. Your hope is a good one, and I share it. But sadly I don't think there is any chance of that for many more years. As a country, and a world, we pretty much missed that boat 20 years ago. Why? Coal Power Plants: The EPA emission requirements for coal fired power plants have resulted in significant reduction of these "Cheap" to fuel environmentally dirty power plants. Down the road, it is not likely that they can or will be replaced as the older coal power plants are decommissioned due to age and high cost to meet Clean Air Act requirements. Significant coal investment on a national level died years ago. Nuclear: This for now, and likely 20 or more years, is the only power source that could meet the needs of the zooming EV and other needs. But they take way too long to build, and in some states it will ever happen. Hydro Power Plants: How many new lakes suitable for hydro power production have been built in the last 30 years? Basically none. How has hydro electrical production faired as a result of global weather change? Well down. With the EPA required environmental assessments becoming next to impossible to get approved, I don't anticipate this type of power production to be one to hang our hats on either. Wind/Solar: Yes, we are making huge investments in these technologies. Sadly the vast majority of this equipment is imported. Regardless, for sure in some locations, they will shoulder most of the DAY TIME power needed for the millions of EV's coming towards the market. But Wind/Solar can not be relied upon every day and night without major power storage. To date we just don't have the infrastructure or a technology to do so at a grid level. So back to burning more natural gas to charge all those EV's at night. So basically for the foreseeable future, I believe that Natural Gas will be used to fuel the vast majority of the power for the planned millions of EV's. But again our society has pretty much killed off the initiatives for the energy industry to build the pipelines necessary meet the pending demands of the EV. Worse, the energy industry as a whole does not trust that such billion dollar investments to be profitable to their share holders. Same problem with funding new refineries, pipelines, and drilling new fields as most of our existing fields are beyond their prime. The result is that there is a finite amount of natural gas that can be delivered and used for power production. Existing limitations will cause shortages and you can expect that the cost of power will rise significantly as time passes. Also that weather related problems will result in punishing costs to be incurred as we have not embraced buried utilities as many countries have. I can only hope that reliable battery technologies come on line, and we in the USA get our heads around the need for a comprehensive energy policy that addresses bridge technologies to get us through the next 20 years as we embrace the EV wave heading our direction. In the mean time: The utility companies are closely watching the Hawaii situation where our home and commercial use of solar panels have drastically changed the grid peak times for power production. Peak power production on Oahu used to be afternoons, and is now during late afternoon and evenings after sunset. Now they are moving us to time of NIGHT high power pricing. So if you are needing to replace appliances, recommend you consider ones that you can select when you want it to run. Investigate home solar panels, solar hot water generation, and solar produced power storage investments while there are federal, state and local incentives to do so. Have enough power storage so that you can use your investment when the grids are "temporarily" down. I think that the good news is that the Oil/Gas industry is not going away in our collective life spans. As such, our gas/diesel burning "old school" TV and Ollie will likely love the deserted roads at night when the solar powered EV power stations sit idle with thousands of EV's waiting their turn at the few grid powered Charging Stations. We'll beep beep our horn as they wait for sunup to get some juice into their batteries once again. I keep wondering why we rarely hear anything about addressing the capital costs for the needed electrical production, high voltage power lines and substations needed to feed the 50,000 power stations being built today. GJ1 point
-
We just got back from two week in Quebec. Was -15 one night and lots of overnights around 0. Aside from burning a 30lb LP tank every 3-4 days, was plenty warm. In spite of lots of mods to drive temps in entire garage to mid 50s on those nights, the water system froze up - when it was just above 10 degrees out. Turns out reflectix is decent at minimizing radiational heat loss but really not great at radiational heat loss so even in the warmish areas, where a pex line is up against exterior insulation, it will freeze. Luckily, no damage done. We parked for a few nights by a none-too-fancy, stick built, stock 25' class c RV. Had for-real pink board house insulation and matts of stuff that was similar to our reflectix but was thicker sheet plastic between the foil. They had no problem with their water systems on the -15 night. Had lots of useful take aways from the experience.1 point
-
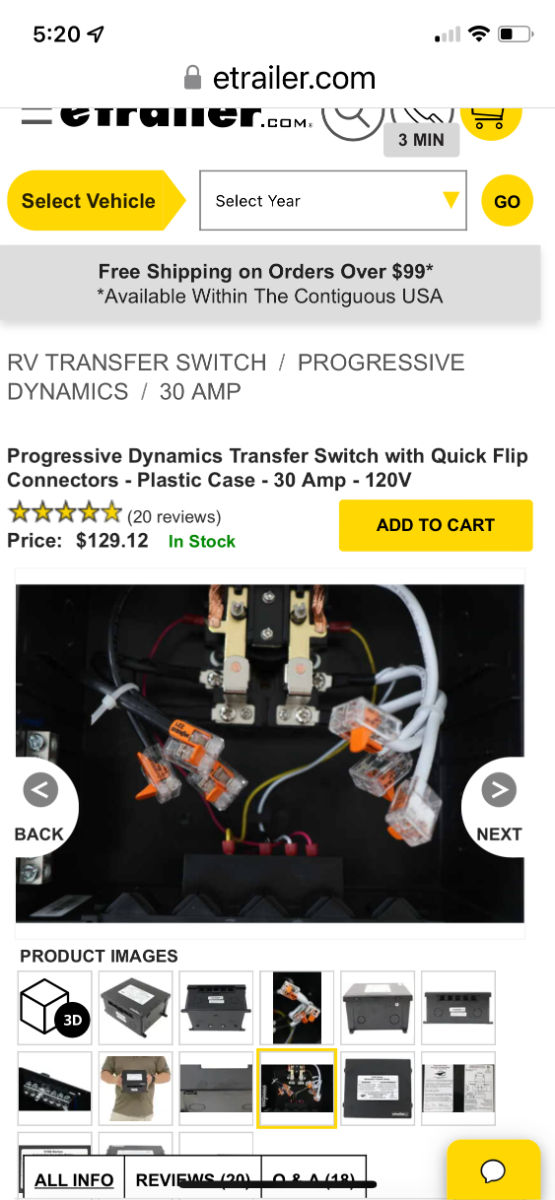
Interesting that the new version of the Progressive Dynamics transfer switch now uses the Wago lever type connectors instead of a terminal block strip.
1 point
-
I would call Progressive Dynamics support and forward your pictures to them. They have improved the way the wires interconnect, ie from using the terminal strip to individual Wago lever connectors. Maybe they’ll give you some satisfaction on a replacement. Also open a service ticket with oliver service. Yours is not the first occurrence of this issue and they need to be kept aware. They may also provide guidance regarding replacement of the switch.1 point
-
Please vote. I will probably stop camping in the near future, since I have respiratory issues with smoke. I use multiple filters inside the Ollie but sometimes I just feel trapped. It is crazy to get August pollution levels in May. I am in NE Oregon, headed for the coast for some fresh sea air, but the darn smoke is following me there. https://olivertraveltrailers.com/forums/topic/3291-honeywell-hpa-compact-air-filters-for-pollen-dust-and-smoke-particles/ https://olivertraveltrailers.com/forums/topic/5790-how-to-window-dust-pollen-smoke-filter/ Thanks for participating. John Davies Spokane WA
0 points


-
Recent Achievements
-


")


")


