Leaderboard


Popular Content
Showing content with the highest reputation on 03/06/2024 in all areas
-
How about an individually adjustable pneumatic airbag type suspension for Ollie? No axles - lighter, smoother ride - less damage to OTT and components, no more broken leaf springs, more ground clearance by adjusting air pressure, enhanced braking, and "drum roll" please.... no more zerks! ...screenshot taken from an earlier thread on "Aussie Quality RVs": ....just say'n
 7 points
 -
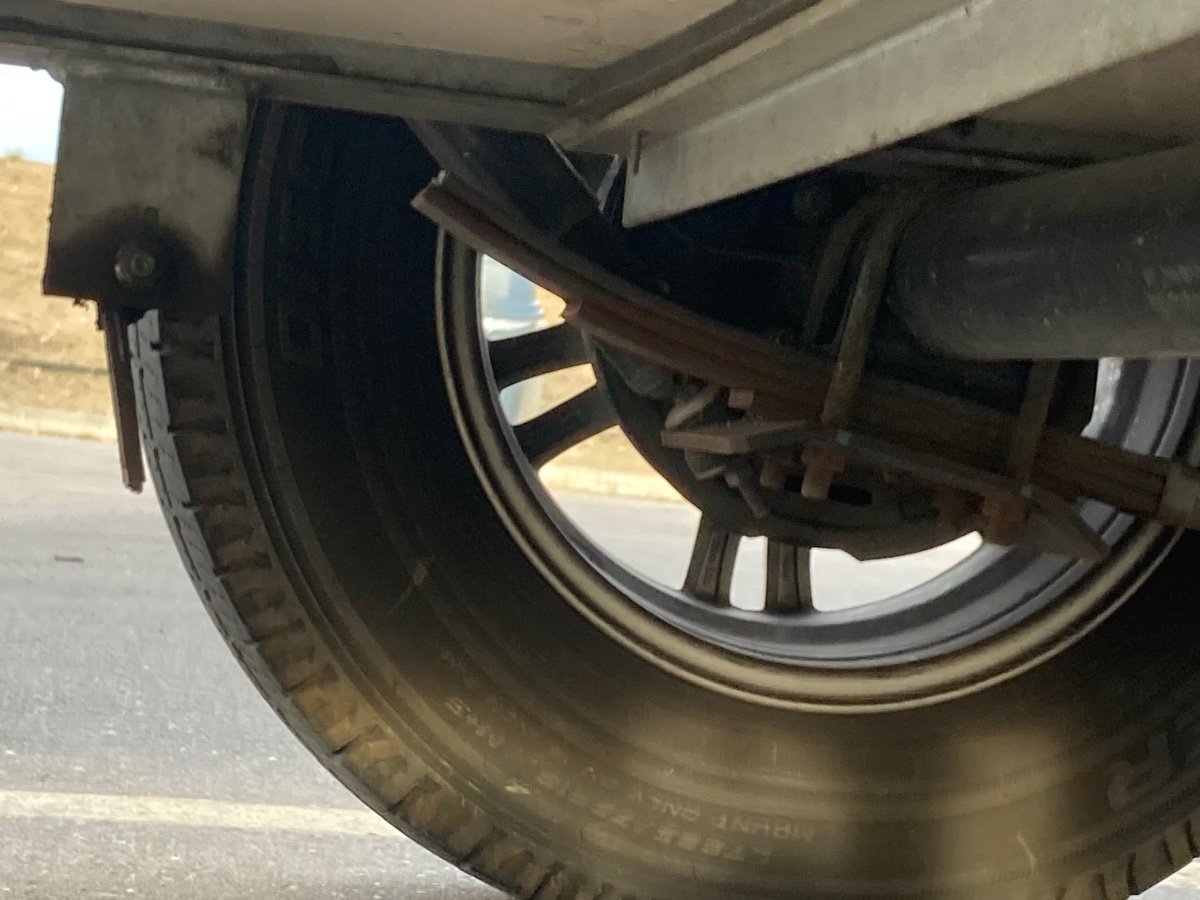
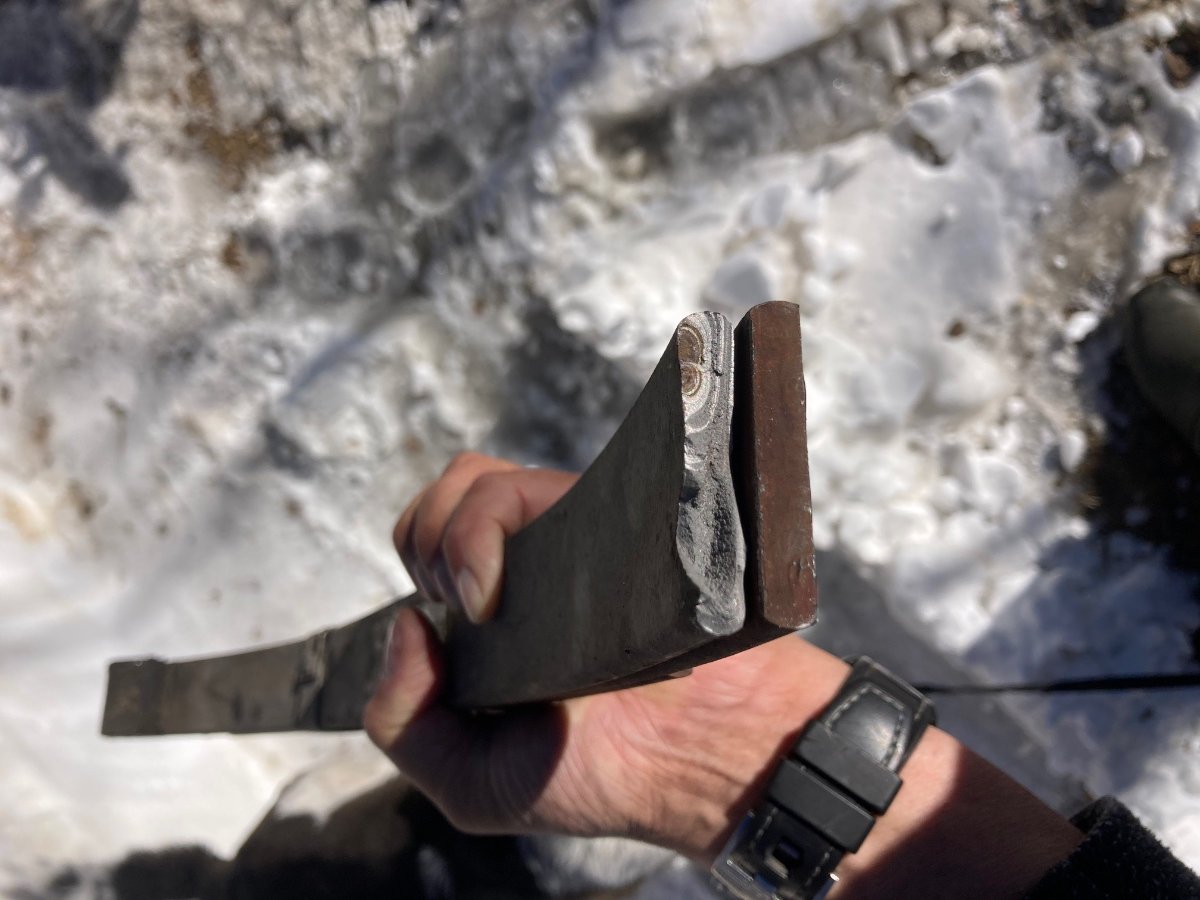
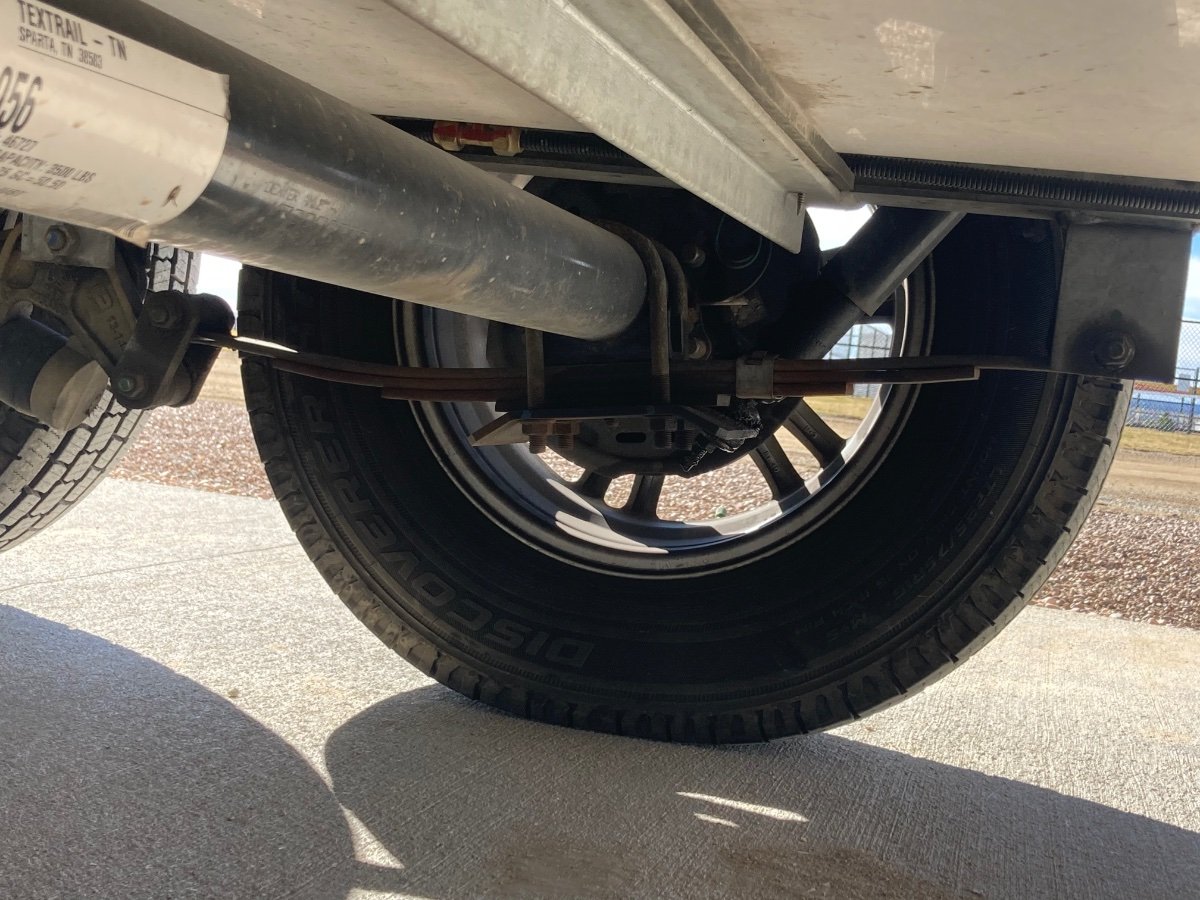
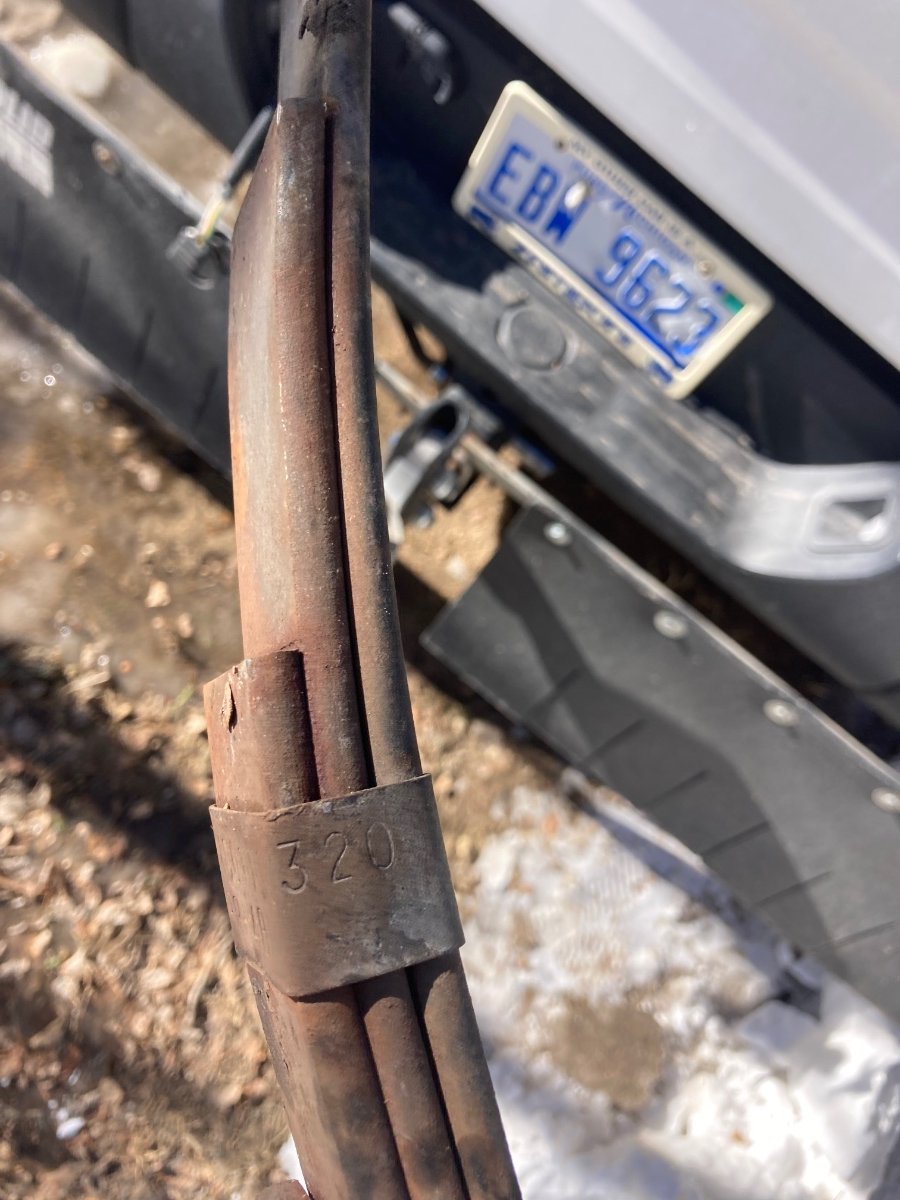
On the way home from the SW this year, I had the pleasure of experiencing a broken LR leaf spring while underway. It broke in the usual place (see pic). Fortunately the broken spring was noticed quickly and I found a safe place to overnight and perform the repair the next day. Unfortunately, I was not carrying a spare spring. After finding a pair of springs locally and installing them I made it home the next day. What I found when inspecting my broken spring was what appeared to be a defect in the steel (see pic). In no way do I blame Oliver for this failure as the trailer spring market is monopolized by Springs made of Chinese steel and Oliver, like all other manufacturers source from the same pool of components. In fact, after opening a service ticket, Mike was extremely helpful in getting me the specs and info I needed. I decided that once I got the trailer home I would replace all four springs with the best springs I could find. Preferably from a US company, made in the US and with US made 5160 spring steel. What I did not appreciate was that there did not appear to be any trailer parts sources which met this criteria. This was not proving to be a simple task. Everything I could find in the RV aftermarket was sourced from China. No exceptions. The only good news I found was that Chinese springs are cheap ($35-55ea). I remembered a Spring Company from my offroading days and gave them a call. They had a set of four springs which fit the measurements provided by Oliver Service and were made in the US with US 5160 spring steel. Cost is $150/ea spring but since I had already spent a fair amount of $ upgrading to stainless lugnuts and US made Timken bearings this did not prevent me from placing the order for a set of four springs and new ubolts. New springs should be here later this week. I will update with pics once I get the springs and also once I install and of course again after towing a few thousand miles.
4 points
-
I most certainly will. Waiting to see and touch them first and confirm the measurements and specs are right (should be no issue). Once I have confirmed this I will share the info and contact details.4 points
-
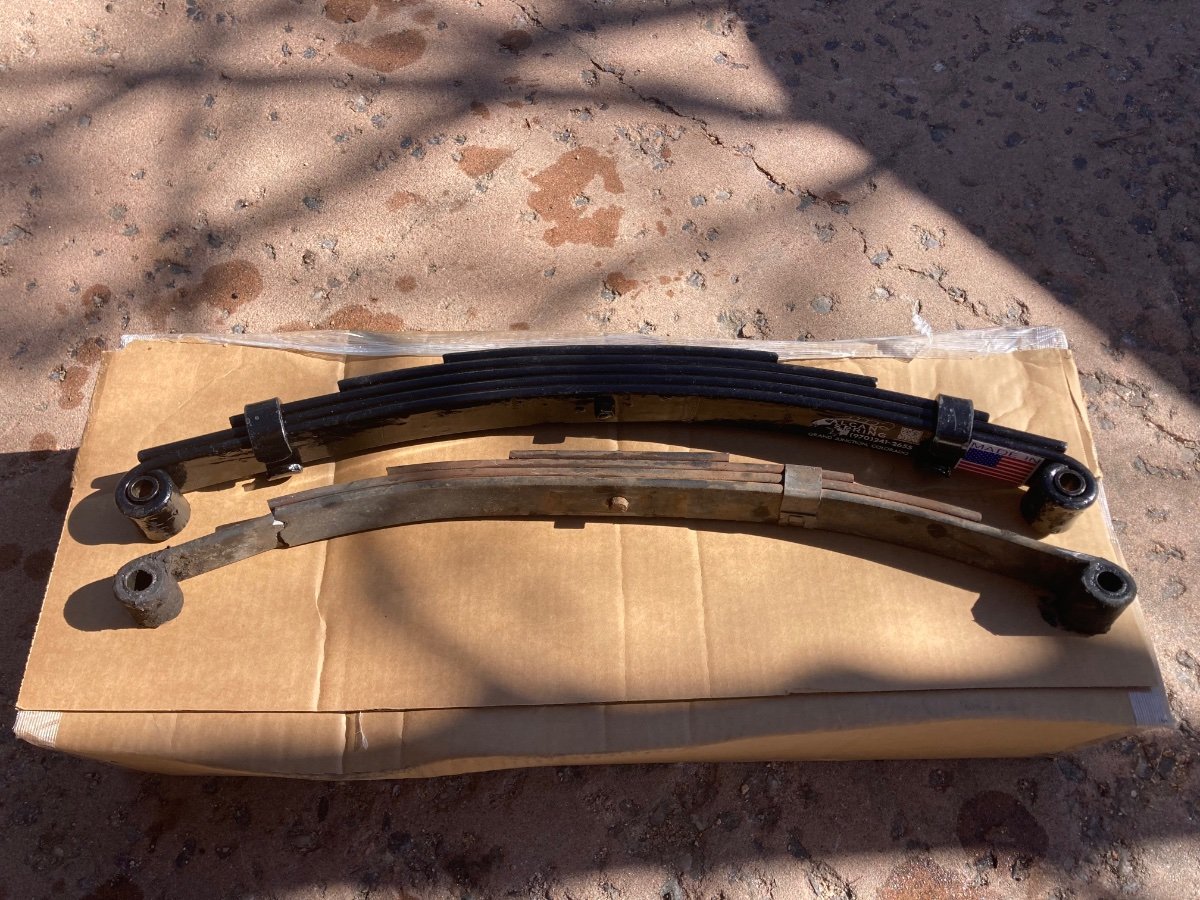
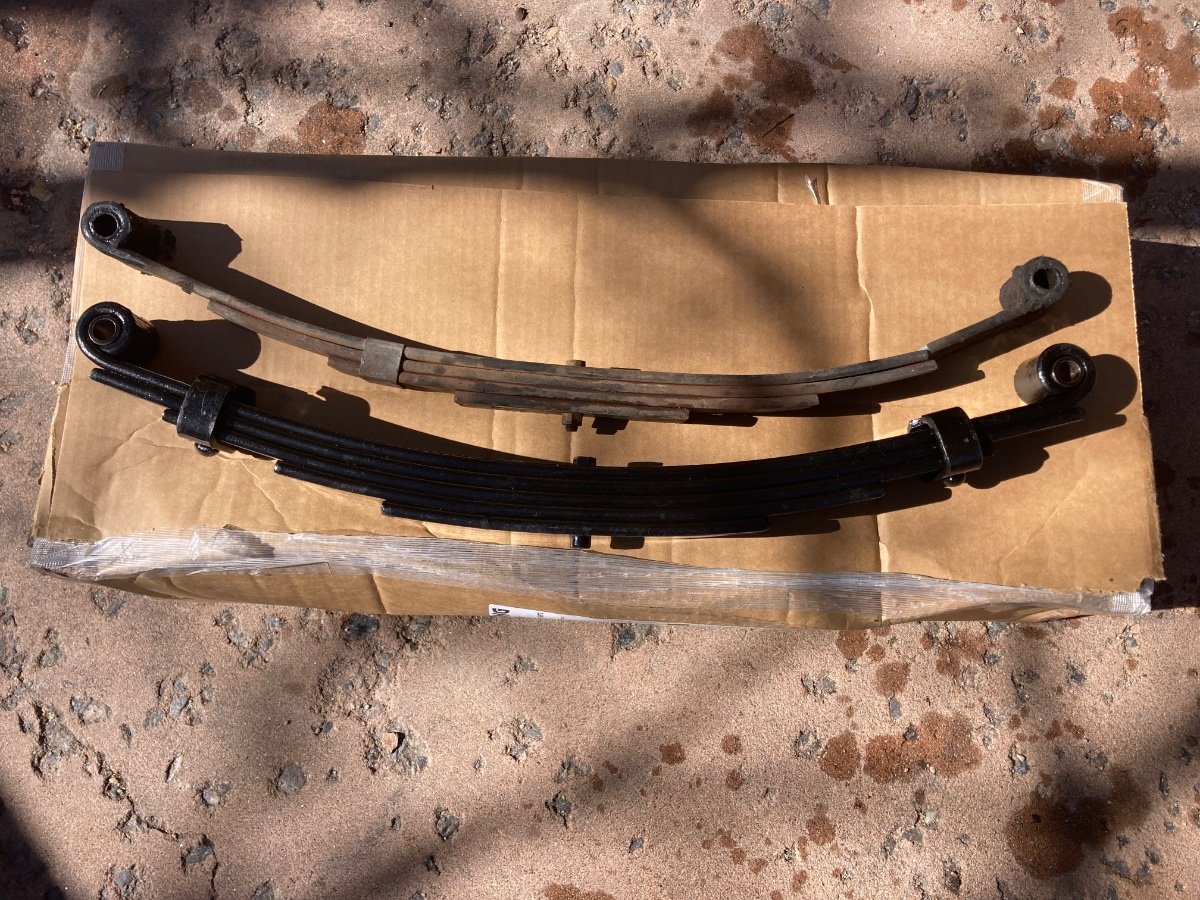
My new springs arrived today. I confirmed measurements are correct and that they are the same size as what my E2 had when it shopped from the factory. Should be a direct bolt-in. Here are the specs on the new springs: -Made in USA with USA sourced 5160 spring steel -Bronze eye bushings vs. plastic -2,750lb rating/ea vs. 1,750 (will not change gvwr as axles/bearings remain determining factor) -5 leaves vs, 4 -second leaf extends underneath eye on each end (protecting common break area) -steel, bolted spring keepers (one each end) vs a single, sheet metal band -width = 1.75" -drop = 3” -length (eye-to-eye) = 25.25” The company I sourced them from is ALCAN. They are known for durable offroading springs and have been building custom springs for rock crawlers and overlanding vehicles for decades. Attached below is their contact info. Ask for Mike and tell him you are interested in the 1.75” wide trailer springs like he sold to Lance from Colorado. I will report back when I have them installed, but that may not be for a couple months until after the snow melts up here in the Rockies
3 points
-
Interesting too that it appears as though the one that broke was on the street side. Certainly it does appear that the steel simply doesn't look right. Bill3 points
-
We were traveling on I-8 in Arizona heading eastbound to Organ Pipe Cactus NM and spotted 2 Oliver’s Westbound and 2 in the campground when we arrived. On road spotted: Westbound, before Yuma, Blue & Grey logo towed by grey F150 Near exit 67 I8 Az , Gold logo pulled by white Mercedes suv Two others in Twin peaks CG , Gary Foy Lin a 2022 pulled by F150 hybrid. tbd other unit. tgats more sittings in one day than the whole time from Sept 2023 to today Craig hull 505 - Galway Girl2 points
-
It would need the hex tightened when leaking upon hookup. Since the City Water is leaking when running the pump from the Fresh Tank, it must be the backflow preventer (check valve). You have no sig, so can't tell hull number, but for ours in 2016 these are in the back of the basement/trunk (see pic).
2 points
-
Yes it might be check valve, but look into the inlet of your fresh and city water connectors, you will see a hex. (I think its 1/2”) fitting like the below piture, tighten that hex. fitting and hopefully that will solve your proble. .2 points
-
Keep in mind that four wheel alignment becomes a periodic maintenance requirement with independent suspension. There's always trade offs so depending on your style of camping. Also there are a lot of other possible fail points with that system. It's a very complex system. I wander what the cost of a conversion would be? Edit: PS - The beauty of the current suspension is you can pick up replacement parts rather cheap, albeit not lifetime quality, at any local farm store and be back on the road in hours. The high end suspension would likely require sourcing parts long distance that would have at least a few days lead time. I think I would be hard pressed to consider this type of upgrade.2 points
-
If you're on shore power and your converter is working correctly (batteries stay charged, etc.) when this happens that lowers the odds it's a voltage problem, but it would still help to get a voltage reading when your furnace kicks in. You could use either a multimeter or a volts readout from a monitor in your cabin (not sure what monitors your year trailer had). Other options would include a bad connection, with the furnace observation being just a coincidence. First thing I would look at would be the switch. The contacts may be worn or oxidized, or you could have dust in there. Do the lights function correctly when switched on/off? No flickering or delay after you flip the switch?2 points
-
2 points
-
If you don’t mind, please share the information on where you purchased your new USA made springs. Last year I purchased two replacement springs from Dexter along with new U bolts and nuts, wrapped the springs and carry them in the truck just in case.2 points
-
Another reason for Oliver to change their suspension system maybe? Just saying.2 points
-
A bolt head of the right size is a suitable substitute for a very large Allen Wrench. GJ1 point
-
You are correct, Generation 3 uses RJ45 connectors and I have confirmed that everything must be shielded. While I am thinking about it, for others ....... I first tried a hole drill on the outside connection but had good success with a router blade for my Dremel, very easy. One other thing for those considering this. I want my Starlink to be powered by 12 V and there is now a relatively inexpensive device that means you don't have to cobble together different devices -- https://www.trioflatmount.com/shop/p/gen3-12vconversion, the company claims it used 4.5 amps. So, all my stuff is due today so I will see if I can get it to work, thanks for answering.1 point
-
I was surfing YouTube last night and came across a video called "Shopping for the best quality travel trailer under 30 feet." The video started with a couple standing in an Airstream on a dealer lot and I thought, "they won't even mention Oliver," but as they were showing the AS interior I could see a couple of Olivers in the distance through the AS window. The plot thickened. They moved on to a couple of stickies, talking about the advantages of having 2 air conditioners and a dry bath (the AS shower was too small for him), before walking toward an Oliver. I thought, "they're going to hate it, because it's so small." However, they redeemed my opinion of YouTubers by immediately commenting on the look and quality of the Oliver. It wasn't for them (he's 6'3"), but they really were impressed with the quality and spoke very well of the Oliver product before they moved on to an InTech, which seemed to be their favorite. I was really impressed by the dealership, which seemed to have a great assortment of RV brands to look over. How often can you find Olivers and Airstreams on the same lot? It was great to see the couple compare Olivers side by side with other brands and come away with a favorable impression. They even said, "if only it was a little bit bigger..." which is the topic of another ongoing thread... 🙂 Here's the video: https://youtu.be/LRFQ8GAqvs4?si=GPqYM6PYyyyLleH01 point
-
This is the direction I would like to see as well. One of the US Spring manufacturers (St. Louis Spring) said they would replicate the springs on my E2 with USA sourced 5160 spring steel if I would send them a new one to copy. Knowing what I know now, I certainly would have paid a premium at time of purchase of my Oliver for USA made springs. I would like to see Oliver investigate this path. Now that they are at dealers, it would certainly further set them apart from the rest sitting on Chinese suspension. I cringe now knowing that my trailer went 25,000 miles supported by a $150 set of springs (again, not Oliver's fault. The entire RV components industry has gone to the cheapest possible cost model without regard to quality or safety).1 point
-
…or this, see around time stamp 15:20. The Aussies know how to make a quality trailer!1 point
-
A different suspension design would be great going forward but I doubt that it actually could be retrofitted at a reasonable cost. Right now I’d be happy with USA made springs. That small change could make a huge difference. Maybe Oliver could start buying just the axle assemblies from Dexter and springs from a different manufacturer. I know that none of the other mainstream trailer manufacturers would ever do anything so bold or even consider out of the box thinking but Oliver often thinks out of the box, that’s the very reason we have such a great trailer and they’re in such high demand!1 point
-
They would make height adjustments to gain more spring travel a lot easier!1 point
-
Suggest starting a list of hull numbers, Month & Year MFG, trailer miles, and predominant use type (RV Parks, Boondocking, Off Road). GJ1 point
-
4x6VDC AGMs, on shore power at the time. Batteries are in good shape.1 point
-
Thank you for the information. You are at least the fourth Oliver owner to have broken springs. Some trailers are newer and some have been older so certain ages of trailers don’t (at least so far) seem to be more or less prone to failure. Also as you stated, this is not an Oliver issue in any way. I believe that all trailers of any make are prone to spring failures.1 point
-
I had one quit working last August at my annual state inspection. Auto parts stores have them. Just in case I ordered some more from Amazon. (PSEQT 3/4 round LED side marker clearance lights, front rear marker indicators tail light waterproof for trailer truck car bus van pickup RV ATV wrangler. 10pcs red & 10pcs amber) These come with the rubber grommets and chrome rings as well for under $20. Be sure to put a little bit of silicone on it before you install it. They just push through a rubber grommet from the outside. Nothing else holds them in place.1 point
-
No. We have the Oliver-installed shower curtain, which keeps the toilet area, including the return air vent location, fairly dry during showers. And, like you, we squeegee the shower walls to speed up drying of the wet bath. Given the amount of air flow whenever the furnace is running, we have experienced no moisture issues in the underbelly. I believe the more abundant source of any moisture in that area comes from condensation when outside ambient temps are low and humidity is high. The flow of return air through the underbelly, which is enabled by the return air vent in the shower, actually helps dry out this condensation.1 point
-
UPDATE: I was indeed the grounding plug! Got a new one and it charges like a champ now!! So glad it was a simple fix!! Thank ya'll again for all your help!1 point
-
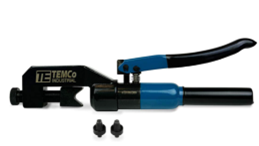
When I needed a short-as-possible 4/0 cable to attach the new shunt, I found the shortest I could buy was 1 foot. Another thing you can do when making your own is to offset the angle of the lug (can't buy these). Notice the pic of the 2 AWG cable above, where one lug is 90 degrees to the other. I built it that way because one side mounts vertically to the battery post and the other side mounts horizontally to the power distribution box. Also check out the pic of my short cable above. I mounted the lugs 180 degrees to each other that gave me a 3/4" lift to mount on the shunt. @topgun2 since Twist and our hull 113 are cousins, send me a PM if you want me to make you a couple custom 4/0 cables, at cost to your specs.1 point
-
I'm presently in need of some new 4/0 cables. But, given that I only need as few as 2 or as many as 4, and have never needed cable crimpers of wire cutters in this size before, it is simply cheaper to purchase the cables ready made. However, THAT doesn't stop me from being VERY jealous. 🤑 Bill1 point
-
Well, "never" is a really long time! And ""out of sight, out of mind" should not be taken literally. As with virtually all things these Andersen Chains should be inspected at least annually. With the woven sleeves mentioned, this is a fairly easy thing to do since they are normally held in place with one or two "zip ties". Each Spring I simply clip the zip ties on each end and push the sleeve back as far as possible looking for damaged places in the chain and hit it with a power washer. After it dries, the sleeves are rolled/pushed back into place and secured once again with a new zip tie. Bill1 point
-
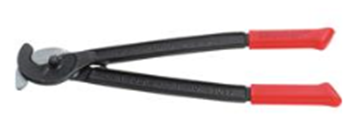
For anyone this is or is anticipating making their own battery cables this is all VERY GOOD advice. Learn from John's previous experiences (I had to learn from my own mistakes thru the years). If you already have a $150 utility cable cutter, you're in good shape. If not, I have successfully used a band saw to make a nice, square cut in 4/0 cables. No band saw either, put on your thinking cap or get out your charge card. Remember, the goal is to get as smooth and square a cut as possible on the end of the cable. I use a small tubing cutter to remove the insulation also, but his method of leaving 1/4' on the cut end is brilliant and I guarantee you'll be hard pressed to come up with a better solution for getting all the strands into the lug prior to crimping. I bought a hydraulic crimper off eBay years ago. I paid about $35 for it. This is a tool I thought I would use a few times and then it would sit on a shelf in the shop for the rest of my life. Not so, I have used it dozens of times for various things. Need to make a pinched locking nut? A 10 ton press will flatten a nut if you're not careful. The fact that I have it makes it useful for many tasks that require a lot of pressure that are difficult to do other wise. I would not be willing to pay over $50. You won't find $150 worth of usage out of it, or will you? If you do, the $50 model will do it just as well. A bench vise is a very useful adjunct to this project. If you don't have one already, you now have an excuse to build a shop...so you'll have a place to mount that new bench vice.1 point
-
There are some learning curves with fabricating your own 4/0 cables. The below is the process that I have used successfully. Specialty Tools Used: If I needed to purchase tools for a 4/0 AWG cable efforts, I would spend the bucks for that Klein Standard Cable Cuter and a Hydraulic Crimper (shown above), or the one like John Davies suggested some time ago Amazon: TEMCO TH1818 Hydraulic Crimper Summit Performance: Klein Tools Standard Cable Cutter 63035 (16.25” long) 4/0 Cable Fabrication Procedure: I have found it very useful NOT to cut the copper bulk cable to length until AFTER you have completed the full lug insulation on one end. Failure to not do so will result in more cable wastage, and utterance of “Bad Words” as JD has mentioned occasionally. That said, one "trick" I stumbled on to help with getting all the copper stranded cable strands into the lugs is related to how I strip, cut and insert the cable to the lug. The amount of insulation to be removed varies by lug size and the length of the hole that your wire is inserted into. But for this description, let's say you want to have 3/4" of bare cable to insert into the copper lug. In this example I would: If the bulk cable does not have a perfect “clean cut”, then carefully cut it square with the cable cutter. Now mark the bulk cable with a paint marker ¼” from the end, and again at ¾” from the end. Use a tubing cutter (or a fancier insulation removing tool) circle cut the cable insulation (only) at the two marks. Only remove the ½” of insulation as you will be leaving that ¼” of insulation intact on the bulk cable. With the ½” section of insulation removed, now you want to loosen the ¼”" band of insulation by twisting the ¼” band of insulation on the bulk cable. Leave it in place to manage the strands of copper. Carefully done and you will have all the copper strands well managed by the ¼” band insulation on the end of the cut to length cable. Use a bench vice to hold your 4/0 lug. Since you have broken the bond of the ¼” band section of insulation, you can more easily insert the cable into the lug by pushing it into the lug as the ¼” of insulation retreats in front of the lug. As the ¼” band approaches the end of travel, remove it and you can finish insertion by twisting the cable into the lug as you push it. Only twist in one direction. Crimp the lug onto the cable. Now cut the cable to length and repeat the process on the other end. NOTE: Always purchase extra cable and lugs. There is a learning curve involved. GJ
1 point
-
I've personally seen 10 trailers with one or more broken.0 points
-
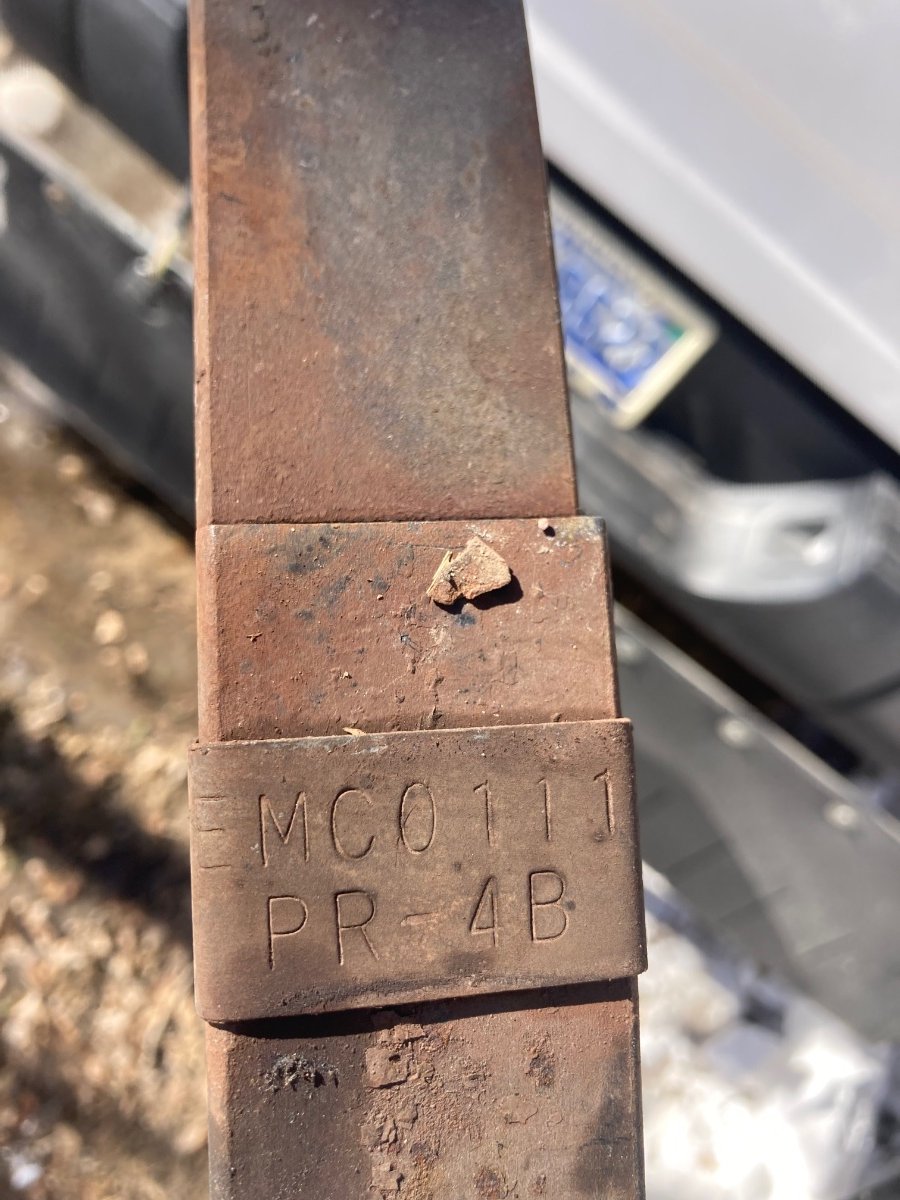
The curb side rear spring was in the process of failing as well. Starting to flatten with the rearward end starting to invert. I have attached the tag from the springs on my trailer. According to Oliver, they are made by Emco
0 points


-
Recent Achievements
-


")


")


