Leaderboard


Popular Content
Showing content with the highest reputation on 06/14/2024 in Posts
-
My goodness, you guys are making me blush... I'm just someone who doesn't mind challenges that involve my interests, whether physical or mental. I research and learn. Doubt for me is always removed by action. btw, my Casita was named OCD for "Obsessive Casita Disorder" ..Ha Thanks again everyone! Regards, Claudia4 points
-
The Truma Soft Start device for the Aventa air conditioner is now available from the factory. I contacted Truma Headquarters and they scheduled their local factory mobile tech to do the install at my home in Scottsdale, AZ. The actual install took about 20 minutes. I ran it through several tests and I'm happy to say it performed perfectly. I'm now able to power my Aventa from a 15 amp outlet, a 20 amp outlet or my Honda eu3200i generator. Nice to have the option for Boondocking or Moochcamping. The generator is now able to run in ECO (auto load demand) mode, which enables it to run at a much lower rpm which reduces fuel consumption and noise level significantly. The unit cost $425 installed + travel time. It comes with a 2 year warranty. I don't think they have mobile technicians available everywhere so check with the factory.3 points
-
@NomadLife, if all the above do not work (the valve under the dinette is definitely open but the tank still doesn't drain) you may have a "black pyramid." This is when solid wastes block the outflow pipe. The solution is usually unpleasant: running a snake up the drain to dislodge the blockage, thus releasing all that black tank goodness back down the pipe at you. 🤮 For reference, to prevent black pyramids always include plenty of water when you flush solids (a full bowl), use RV toilet paper sparingly, no wipes/feminine products in the toilet, only dump when the tank is at least 2/3 full, and never leave the black tank valve open when at a campsite with sewer. You want lots of fluid to move the solids down the pipe. Otherwise, they can accumulate in the tank and solidify.3 points
-
Understatement of the thread. I've seen what Claudia has done on her Oliver, and among other cool ideas, I envy the molded window vents. And I hear she's known in the Casita world for around 100 modifications to her trailer over the ten years she had it. I've got some catching up to do! Will we see you at the fall Casitas of Ohio rally at Cowan Lake State Park, Claudia? Matt and Sue will be attending again, and I'm trying to get two other Olivers to join us. @Golfnut and @Shawna and Scott3 points
-
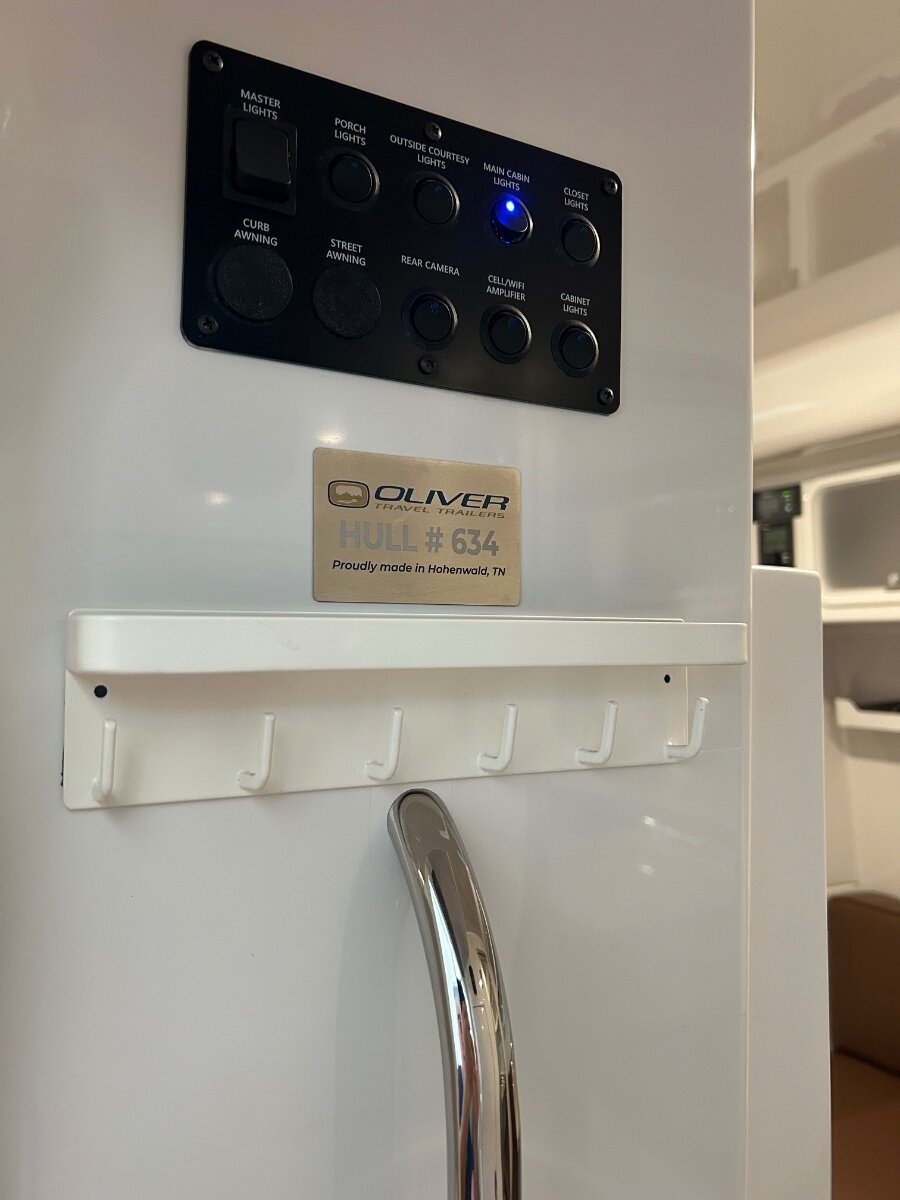
Thanks for the shout out on that key/shelf, but, it was actually Overland that first posted it on the Forum a few years ago. It really is a great shelf. Patriot put me on to applying a sheet of clear film below this shelf/key holder such that the keys do not leave marks. Bill3 points
-
I believe @topgun2 recommended this mod to me early on. Just inside the door has proven to be a super handy place to hang our keys. The shelf on top is where our mini flashlight lives. https://www.amazon.com/dp/B0154HAWHE?ref=ppx_yo2ov_dt_b_product_details&th=1
 3 points
 -
I love my wife Chris, and as each year goes by it becomes ever more so apparent! We purchased our Oliver just days short of a year ago and we love being together in our travels, no matter where we camp for the night, good or bad. I share this thought today with my virtual Oliver family. I do my things and she does hers and the best things are the times we spend together. She often asks, “How’s the blog going?” She’s referring to this forum and she is always interested. I tell her stories regarding y’alls antics, often over a drink or two before dinner. She listens and smiles, what a smile. Today is a very special day for us, as it is our 30th wedding anniversary! I have a difficult job every year from June 1st to June 7th. Her birthday being the latter date. Last year, as you can see, it was easy as can be, as to her surprise I brought home an Oliver! 😊 What in the world can I do this year! Good thing we do not need to top the great times we’ve had and will always have together. I write this for my partner in life. Love you, Chrissy.
2 points
-
Congrats! Your post honors your wife and relationship! Thanks for sharing and it looks like you had a grand time. Our anniversary is next week. We married late in life so we are way behind you at only 12 years but when you have a great wife, who's counting? (Answer - I better be LOL!)2 points
-
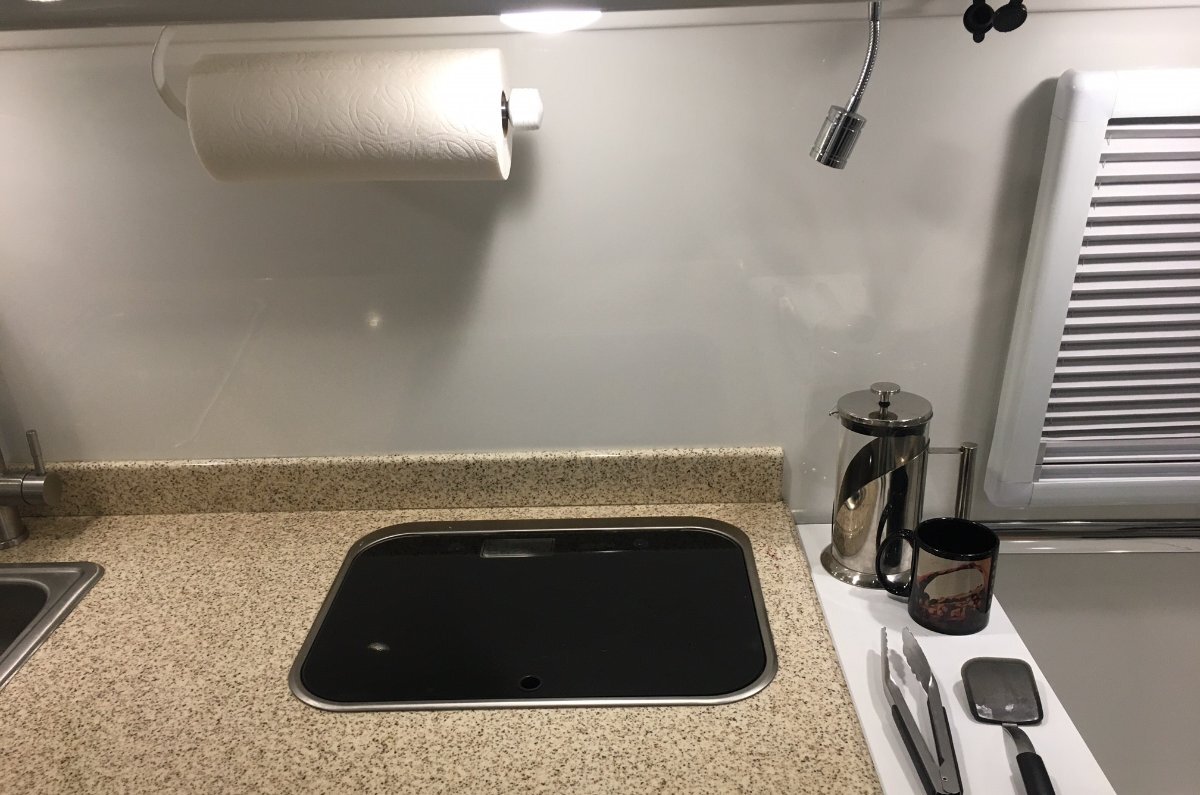
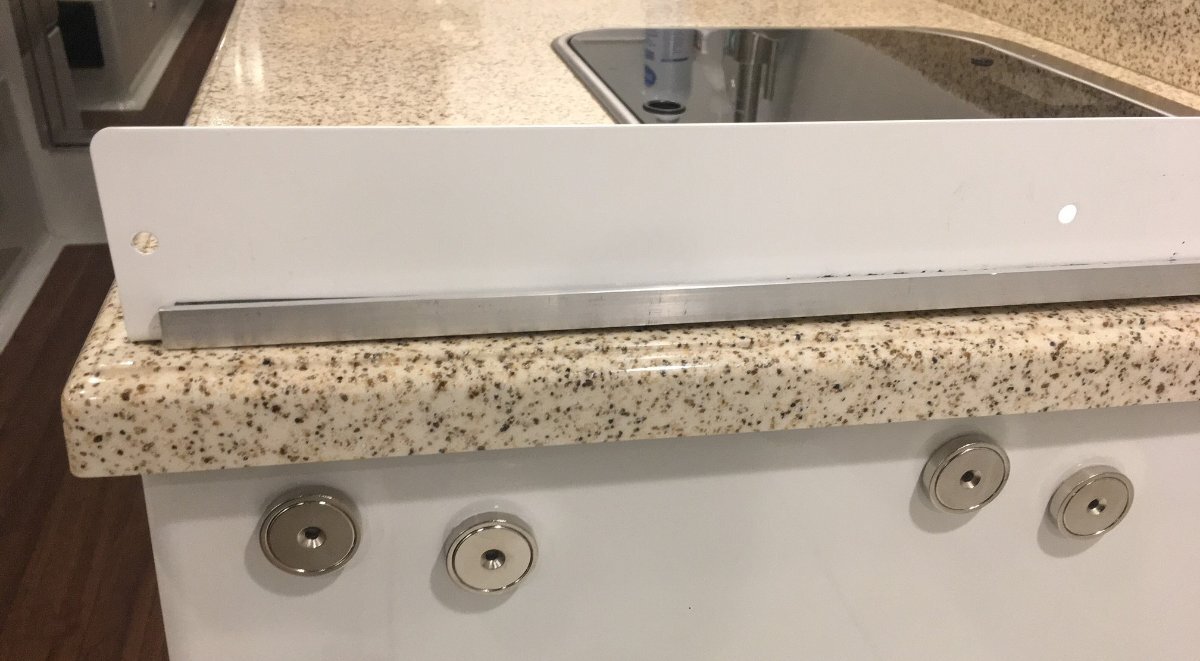
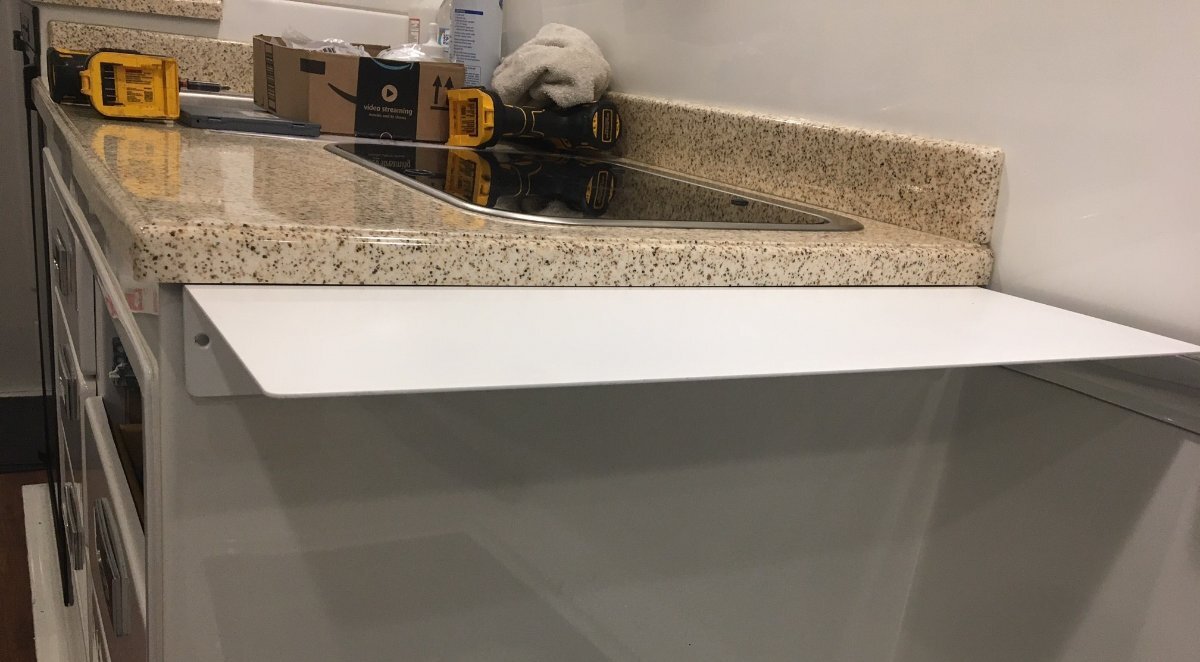
This shelf with magnet set for mounting came to about $95 total. We store it upside down in the attic (fits nicely) when watching TV and sleeping. Towing it can be on or off. Very well-made product, powder coat will not scratch easily. Amazon.com: DIY CARTEL Made in USA Linear Floating Shelf - USA Manufactured Steel - Industrial Heavy Duty Metal Wall Mounted Modern Farmhouse Rustic Designed Shelf (24-in X 8-in Powder Coated White) : Home & Kitchen The 6 magnets mounted with 3M VHB 4950 provide a strong mount. The aluminum bar, also taped in place, keeps the shelf from sliding down the magnets. When locked firmly in place an abrupt snap of the outside edge will dismount the shelf for storage. Chris places a towel just under it to protect the bedding to the right. Could not cook a decent breakfast without it! 😂
2 points
-
One on each side of our twin beds just below the reading lights on the pillow end. Perfect place to store our reading glasses 👓 and I phone.
2 points
-
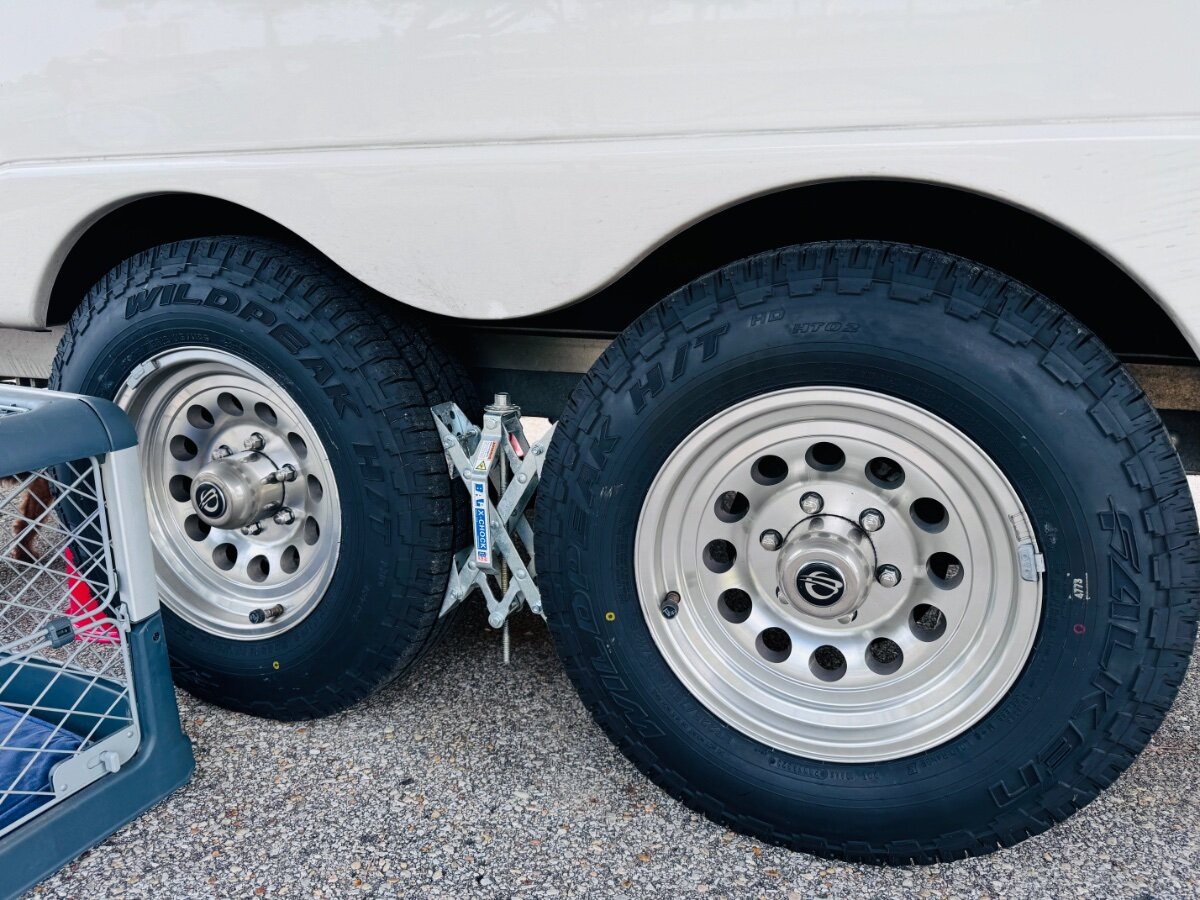
Nothing wrong with Cooper. Many have them here for TV and TT. We have them on our GX, the AT model and they don’t pick up stones. Must say I like the tread on these Wildpeaks, 5 ribs 4 grooves should track nicely. Will give them a good look next time we need tires. Thx2 points
-
This is the jack cover we use and it has served us well. It may or may not fall into the bucket of inexpensive depending on your budget. https://www.amazon.com/gp/product/B07MHYCGJN/ref=ppx_yo_dt_b_search_asin_title?ie=UTF8&th=12 points
-
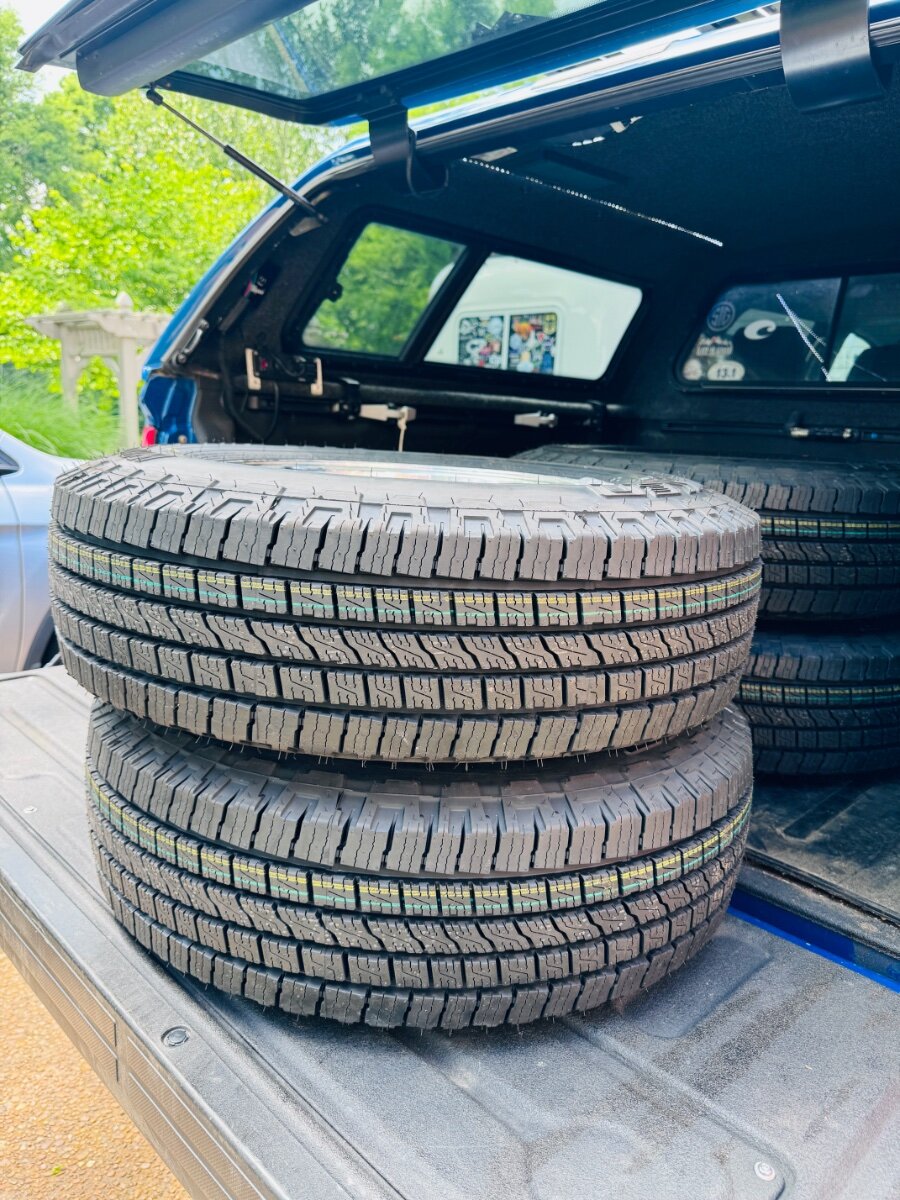
In case anyone was wondering, I went with the Coopers
2 points
-
Our trailer is 8 years old. We had it ceramic coated by the CGI team last year and the fiberglass looks as good as or better than new. Unfortunately, the outlet covers on the 110 outlet and back jack switches had turned yellow. The plastic chrome bezels around the tail lights had lost their shine. So, while this isn’t an easy “mod” it is an easy and inexpensive maintenance project. I ordered new Furrion outlet covers and six new chrome light bezels and had them all replaced in about 15 minutes. All are available on Amazon. Furrion Outlet Cover Light Bezel Old and new. This looks much better than the yellow version. Old and new. New bezel on top, old bezels in the middle and bottom.
2 points
-
Happy Anniversary. We just celebrated #49 a week ago.1 point
-
I assume your water heater bypass valve is set correctly? That is the only thing I can think of at the moment.1 point
-
Johnny, Thanks for the in depth update/report. As an fyi: I spoke to Mike at Oliver Service this past week and they do not have the Aventa soft start available for sale and install yet.1 point
-
We've had no issues with our Cooper tires that came with our trailer. They track great and wear great. It's a shame that Goodyear bought Cooper and stopped production. You made a good choice and were lucky to get some. Enjoy! Before each trip, we go to a CAT scale and check out the TV and trailer weights and tire pressures. We use the attached Excel workbook to help us out Towing Weights.xlsx. We copy a new worksheet for each weighing and use the date to name the worksheet. Our most recent trip we ran with low tongue weight (new ebike and racks on back) but had no issues in high cross winds during trip. Still, we need to correct this.1 point
-
Just as an aside, when using the "convection" oven feature, there is a chance that the oven will "go dark" after the cooking cycle. By going dark, I mean the panel is bank and the interior bulb is not on when the door is opened. This is the overheat thermistor triggering (ours goes off now at after about 30 minutes @ 350F). We open the door, let it cool down (and heat up the cabin 😞). It cools down and resets. I have searched for a schematic for this oven but so far can't find one online. Maybe there is one inside the oven? As @topgun2 mentioned above, this particular problem should be an easy fix but not sure that is what is causing your problem.1 point
-
Most of us know by now, nothing Claudia won't tackle, and certainly not afraid of getting her hands dirty. Great job, @csevel1 point
-
Soo.. I have had great success! Between the vinegar and low pressure air in the line (about 25#) I was able to dislodge whatever was causing my blockage! Just so everyone knows, I'm by no means a first timer with RVs. I've had various trailers over the last 15 years and I'm not new to tools, compressors, trailers and trucks! (owned an excavating company with my ex) I have even done brakes and bearings on the ILOVHER. I don't however know much about electrical and plumbing, but I know enough to come here for expert help whenever something is outside of my field of knowledge! I thank you JD1923 for being up at midnight helping me out. I am very grateful and now have a handy tool for winterization or if this happens again. I don't normally filter water from my house as I know my water source runs through a softener but anywhere else, I use one religiously. I do use a water specific hose that is stored and secured end to end so no real chance of bugs/debris. I'm of the idea that my hot water tank may be backward siphoning or creating a vacuum and dragging junk into the cold line when draining the fresh water tank. I've read this on a few other RV forums so from now on, I'll just bypass before draining since I'm already under the bed moving the valve! I annually change my anode because I know what it looks like when I remove it! To each his own but it is cheap insurance and not hard to do. I usually have some degree of anode degradation and the typical sludge that I flush and brush out. Water quality differs at every campground. I use magnesium over an aluminum HW anode. Again, I'm super thankful to my Ollie fam for supporting me and getting me back into the woods! Thanks again everyone!1 point
-
Sorry JD, but I strongly recommend changing your process. Especially to a first timer using high pressure air! Way too much risk for "water hammer" damage. The reason is that with some air and water already in the lines and up to 80 PSI, the air compressor will blast air and water slugs down the lines at high velocity. When they hit a fitting or a closed valve, the inertial forces of the water slugs can cause significant damage. If using air, start out with 15 psi and flush out all the water. Then move up to 20 PSI repeat working up to 30 PSI MAX. I strongly discourage any air connections beyond 30 PSI. In fact I would never choose to use air pressure at all in my system unless I was blowing out lines that are disconnected at both ends. Just too risky. GJ
1 point
-
Mike...thanks! We just left Steve on Monday from the Maine rally. With Mossemi and Steve next door, and help from Kevin on my Xantrex, I came away with an unbelievable amount of info concerning all things Oliver :) Was the cable difficult to push back through to the valve?1 point
-
John, yes that’s it. I loosen the set screw and then pull the cable all the way out with the handle. I used WD40 to clean it and then added a light coat of grease, don’t remember exactly what grease, probably white lithium that I had on hand. I’ve done this twice since 2016 and it keeps things working smoothly. It’s probably time to do it again before we head to Colorado/Utah next month. The first time I did it Steve Landrum talked me through it after I was complaining that the cable was hard to pull. The gray tank cable is shorter, but the technique is the same! Mike1 point
-
A handy shelf for an iPhone or glasses. We installed two. https://www.amazon.com/dp/B07WQ2PCT7?psc=1&ref=ppx_yo2ov_dt_b_product_details1 point
-
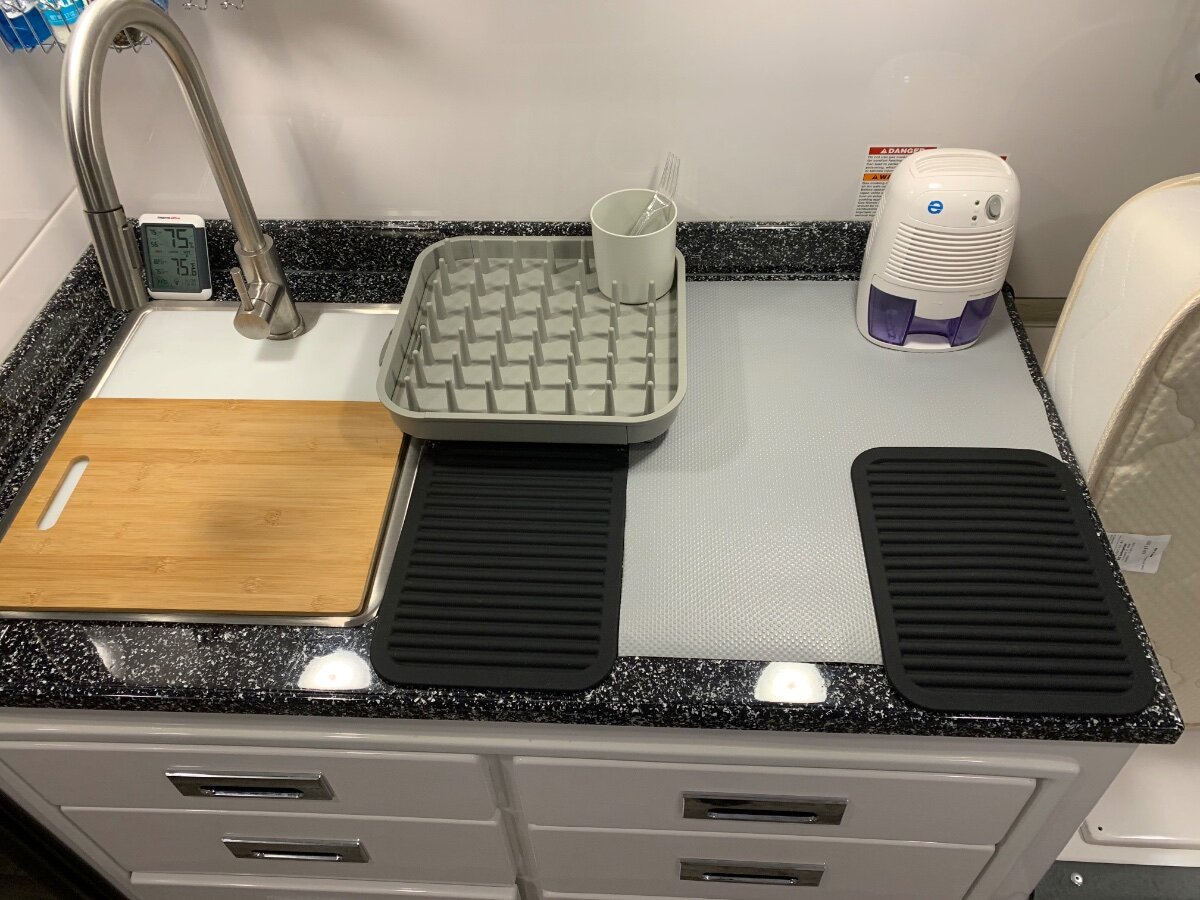
I prefer a fridge thermometer like THIS one. Yes, it is more expensive than the one that Patriot shows but it has an alarm feature. I find that I become accustom to the read out being there and seldom even look at it. That being the case then I will only notice that there is something wrong either when I actually do look at the read out and/or get something out of the fridge that simply isn't as cold as it should be. With the thermometer I use it has an alarm feature that certainly lets me know if the temp in either the fridge or the freezer is above (or below) the limits that I've set. Bill1 point
-
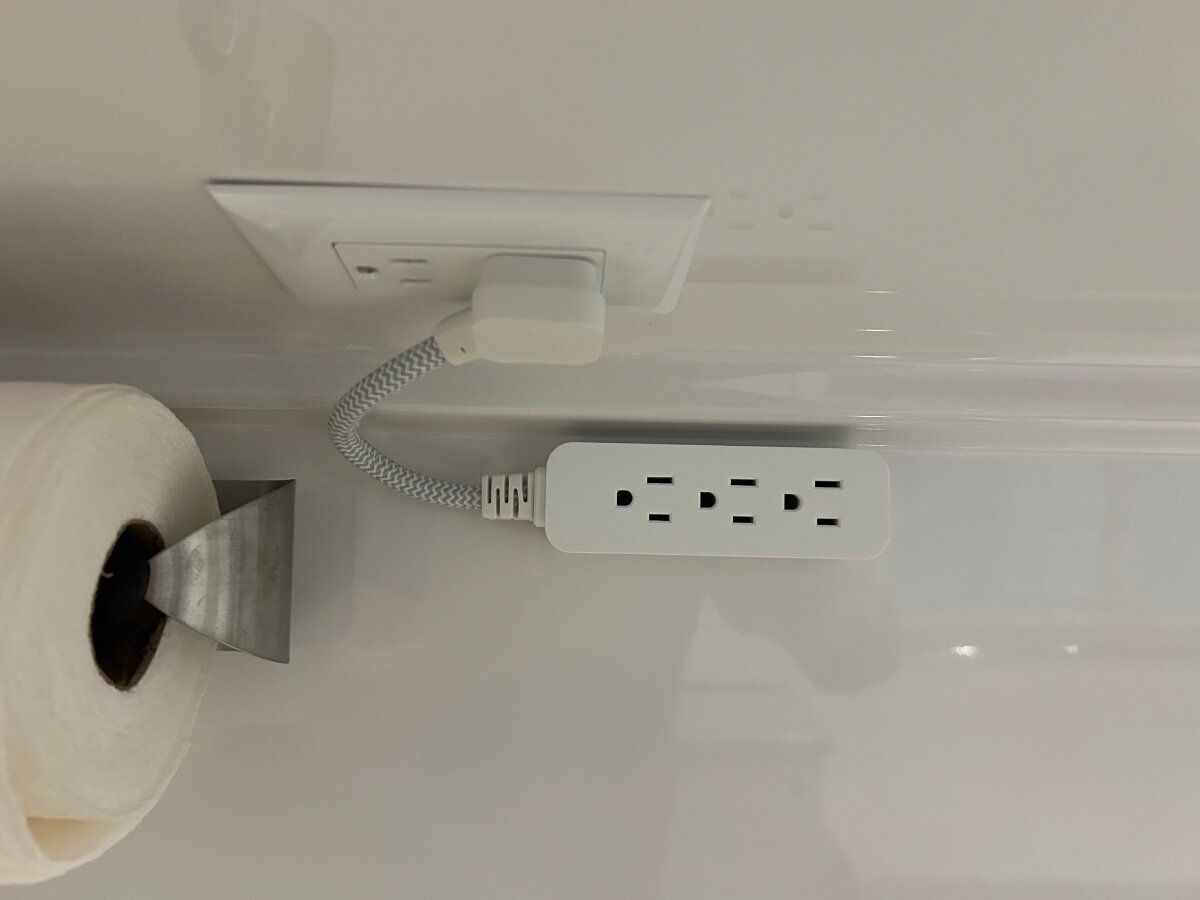
Galley power strip, makes plugging in appliances much easier. https://www.amazon.com/dp/B07P889FHQ?psc=1&ref=ppx_yo2ov_dt_b_product_details
1 point
-
Frig thermometer - there is a gaggle of them out there. This one works for us. https://www.amazon.com/dp/B07RN7Z2RT?psc=1&ref=ppx_yo2ov_dt_b_product_details1 point
-
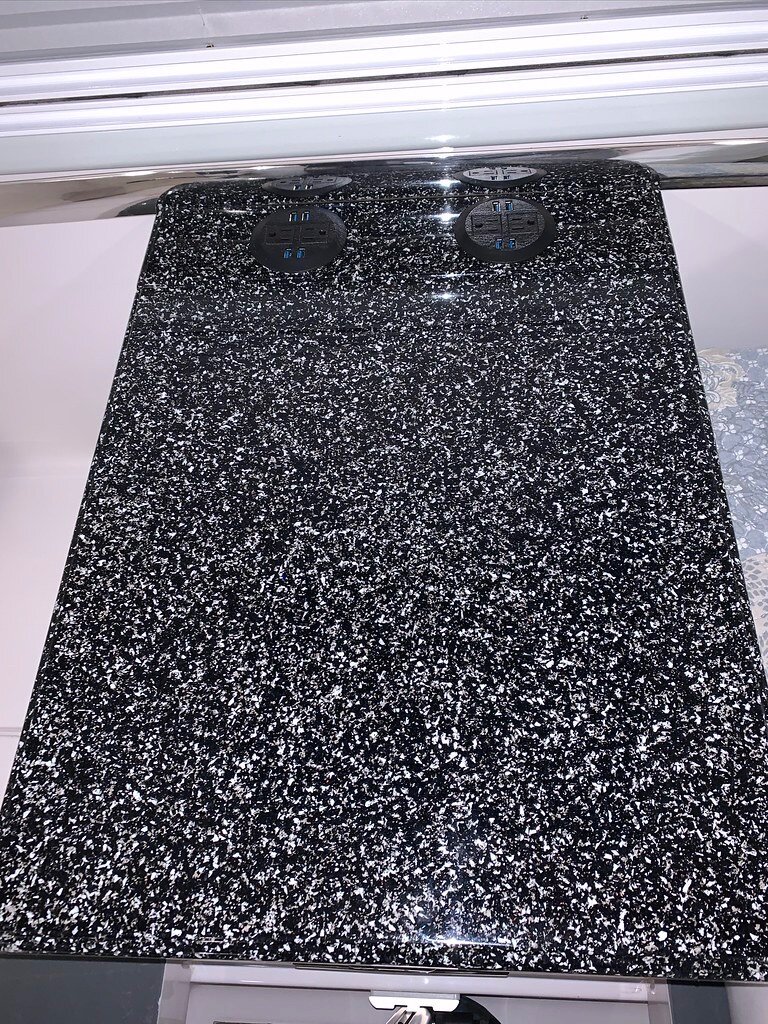
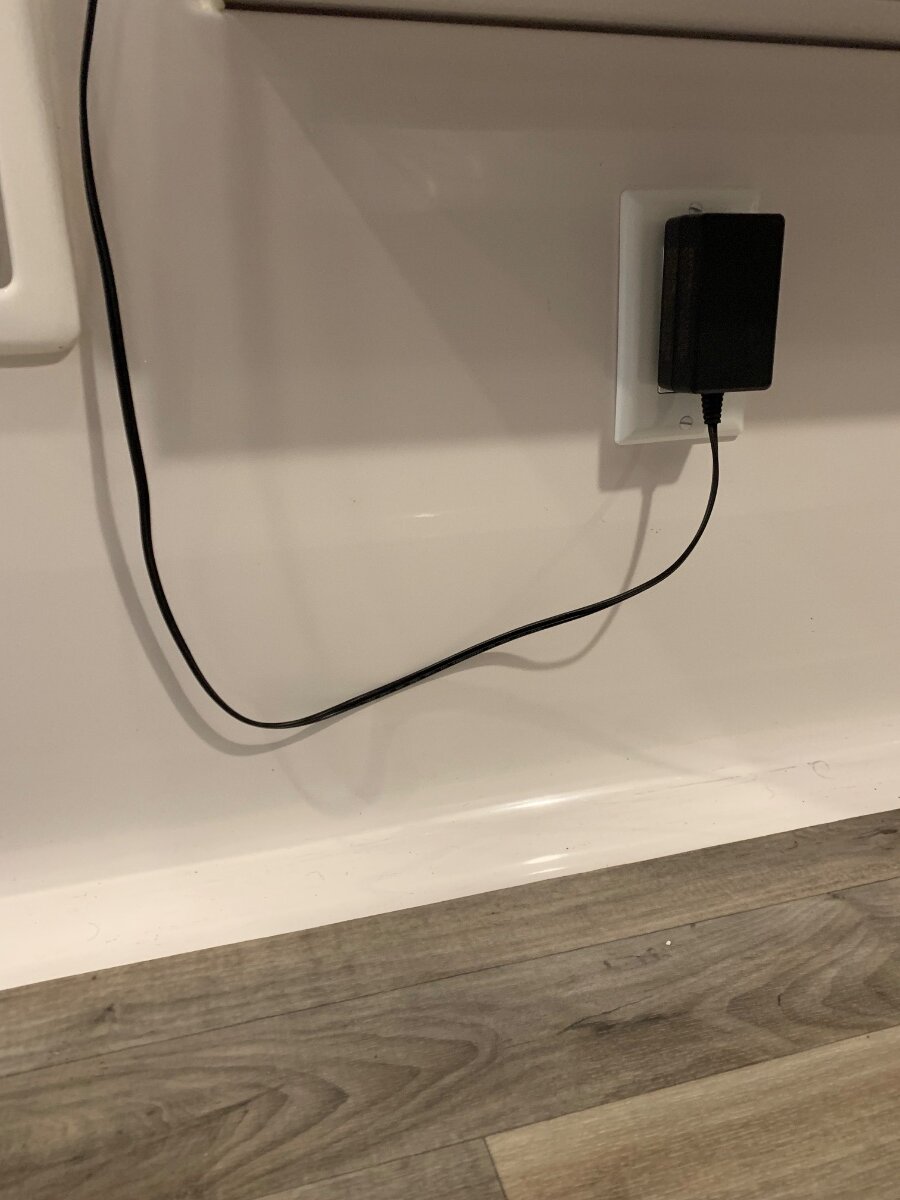
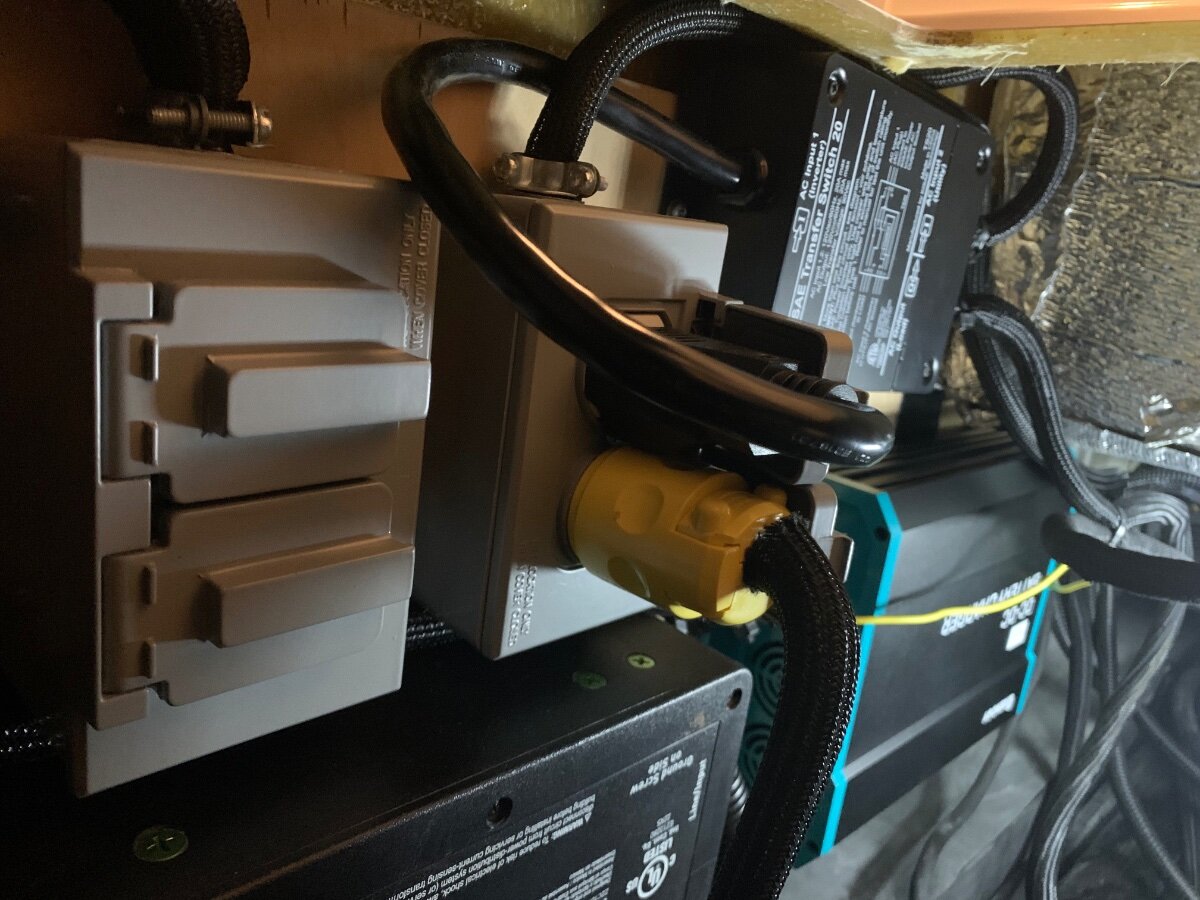
Please be advised, the breaker installed was a 20A not the 30A as mentioned in my reply. At the same time a second 20A breaker was also installed in the panel and wire routed to the nightstand where two desktop receptacles with USB ports were mounted atop that table, then further routed under the curbside bed to the receptacle shown in my January 15 post above, A dozen simple mods!, Additional USB ports. I stage a small dehumidifier in the galley on the stovetop cover and its’ wire can now be run down the wall and along the mattress for power. A third 20A breaker installed provides an auxiliary receptacle inside the rear seat hatch for miscellaneous use; light, fan, etc. Nightstand AC/USB outlets very handy for staging/charging electronics. Dehumidifier cord off counter as opposed to leading upward to the under cabinet outlet; makes for a cleaner look. Dehumidifier cord/plug below curbside twin bed. Miscellaneous duplex outlet inside dinette hatch on left. The receptacle box to the right is an expansion of the Xantrex setup to enable use of the LFPs to power the Dometic a/c.
1 point
-
Thank you, and that’s what makes you a great installer! I worked on 3 mods on our Oliver this week, with what was just “laying around.” Love it! GB 🤣1 point
-
Amazingly there is a high percentage of us that also do so, and drive our spouses nuts in the process! I love watching the craftsmanship that you and the team produce. It is absolutely amazing. GJ1 point
-
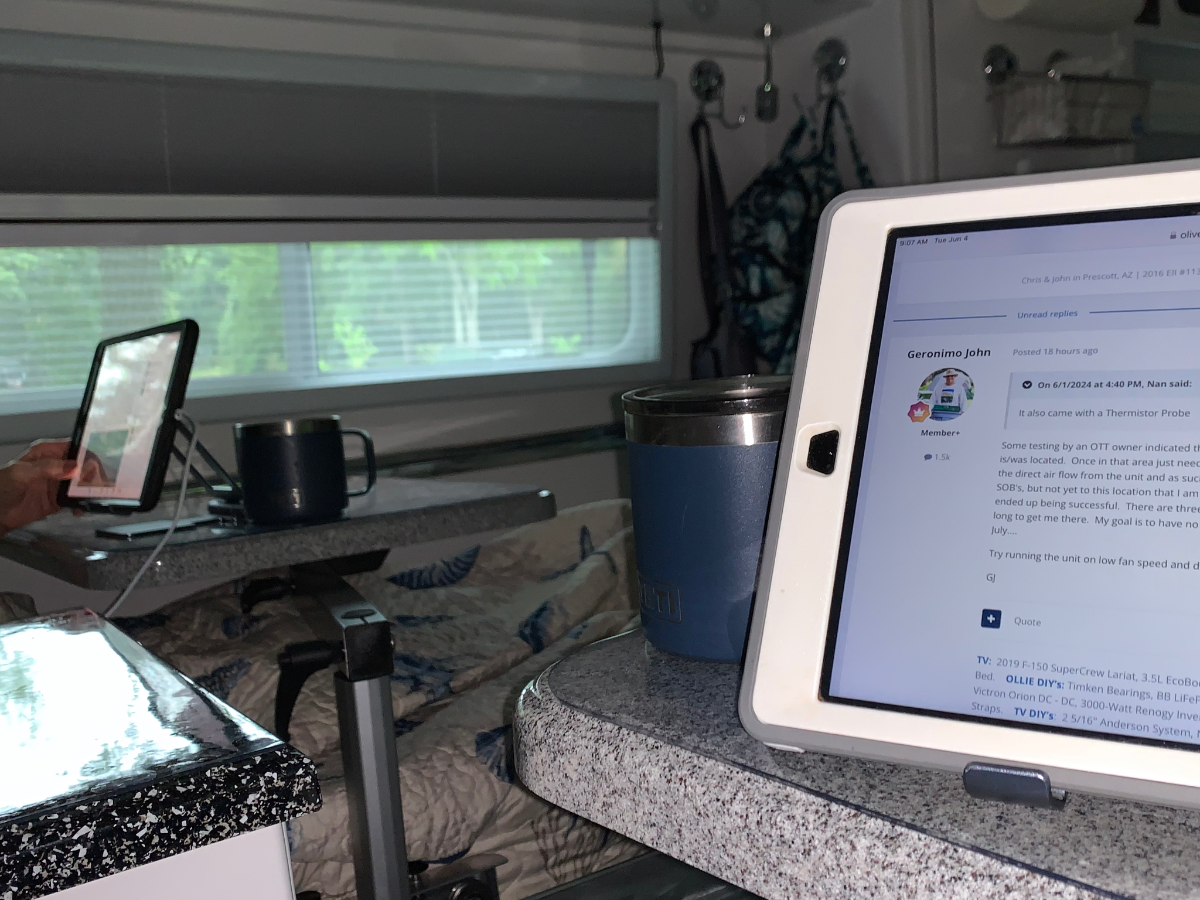
Very pleased with the final outcome and usefulness of our dual Lagun tables; throughly field tested for durability and functionality. My wife adapted well to her own table after a few years of me ‘hogging’ the single original table. The fabricated components of the dynamic system developed remain to be powder coated ‘white’ to better blend in with the Oliver’s interior; perhaps next seasonal camping lull. A cup of Joe and dose of @Geronimo John’s ‘words of wisdom’ to start this day. Life is good!
1 point
-
Been working in the Oliver afternoons, shore power connected with AC on. Loud as a diesel truck and on-n-off it starts singing. Must be fan bearing going. Will replace with any non-Dometic model before travel this fall. It is and sounds like an albatross! I would not spend a penny on it.1 point
-
The Wildpeaks don't just look tough, they are tough. If anyone has the rare opportunity to plug one I want to hear about their wrists and forearms afterwards. No comparison between my old beloved Michelins and the Falkens. I think I have said this before but I thought I was going to have to get the drill out after battling to get the professional sized T-handle reamer through the tire. Finally, after a good bit of sweat with all 200 lbs of me jumping up and down and around the tire I got it through. I could plug a Michelin LTX A/T without taking it off the truck. Just sayin'. I guess I should clarify that was the Falken Wildpeak A/Ts that I was working on, not the H/Ts. But the same HD badging is on both. Although the Wildpeak A/T 35s on the Tundra have the added Duraspec, which is 3-ply sidewall construction. There is a reason they have a huge following in the overland crowd. Next set on the Tundra will be the R/Ts and I will have tried the whole Wildpeak line. I paid $764 for (4) H/Ts shipped off of eBay.
1 point
-
The Falken Wildpeak line is hard to beat for price and durability. https://www.falkentire.com/wildpeak/ht02 The WILDPEAK H/T02 redefines the Highway Terrain tire, delivering industry-leading performance and durability all year long. Featuring rigid tread blocks and a rugged upper sidewall, the H/T02 is built to meet and exceed the demands of today’s pickup truck drivers, from construction site activities to towing and hauling duties. Advanced 4D Nano Design and 3D Canyon Sipe Technology demonstrate Falken’s commitment to excellence, and provide the H/T02 with enhanced all-season drivability. After rigorous tests using the latest ¾-ton diesel pickups, all LT-size offerings of the WILDPEAK H/T02 earned an “HD” badge on the tire’s sidewall, highlighting the Heavy Duty construction with which these tires were built. For those demanding durability and longevity from their truck tires, the H/T02 is in a class of its own.
1 point
-
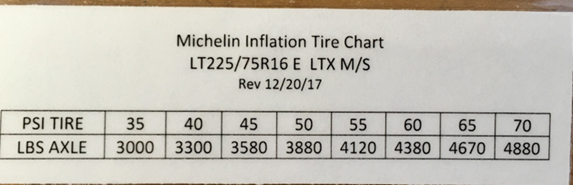
I would consider the MFG recommended pressure chart. For our OE2's at 6,000 pounds less tongue weight divided by 4 OE2 tires the weight is below the chart. That means Michelin is saying use the minimum number listed or 40 PSI. However if you are running TMPS, and you want a bit more warning time and a tad firmer ride, then I would go with 45 PSI as a Max. The same logic line for the Defender tires. Here is the Michelin tire pressure chart for ours: One would deducet using the same logic that 35 psi is their recommended pressure for the Defenders, 40 if you want more TMPS head room. Less off road like going to Tec at Denali AK. GJ
1 point
-
When we purchased our LE2 Ollie used during 2016 the original owner was running 50 PSI, eventually we dropped to 45PSI and right now we're running 40PSI cold. When we tow on the highway we always tow with empty black, grey, and fresh water tanks. The combined LT225/75R/16E dual capacities on the above Michelin chart at 40PSI are well above our actual LE2 ready to camp weight.1 point
-
Look at your table above, at 45 PSI the tire holds 1790 LBS x 4 = 7,160 LBS. Our Oliver ready to camp under 6600 LBS, so we could be at 40 PSI, but since that is the lowest number on the chart, I bump it up to 45 PSI. Ran my tires at 46 last time I checked since they were all just a hair above that number. @John E Davies ran his Mouse at 42 PSI for years which you can see in his posts. If you have upgraded to 5200 LB axles and higher rated leaf springs and carry over 8000 LBS total, then 55 PSI would be the right number. The right pressure for the load should not create excessive heat.1 point
-
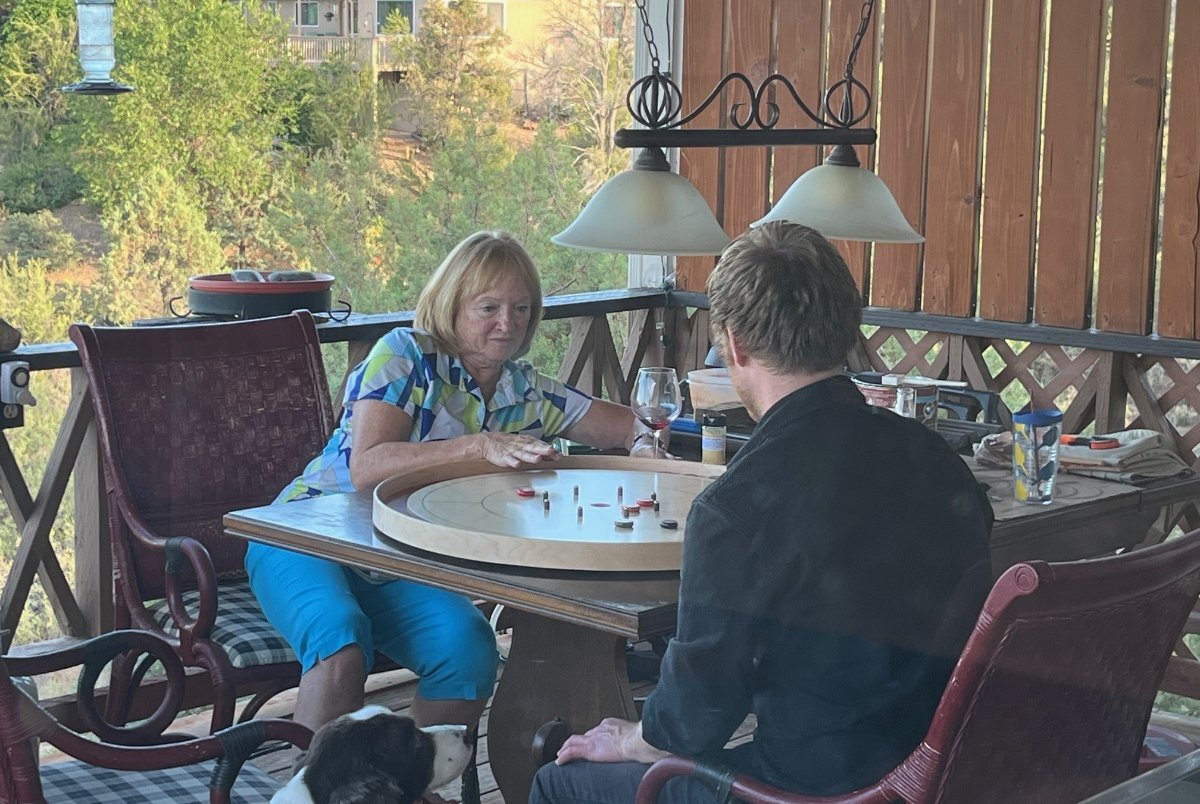
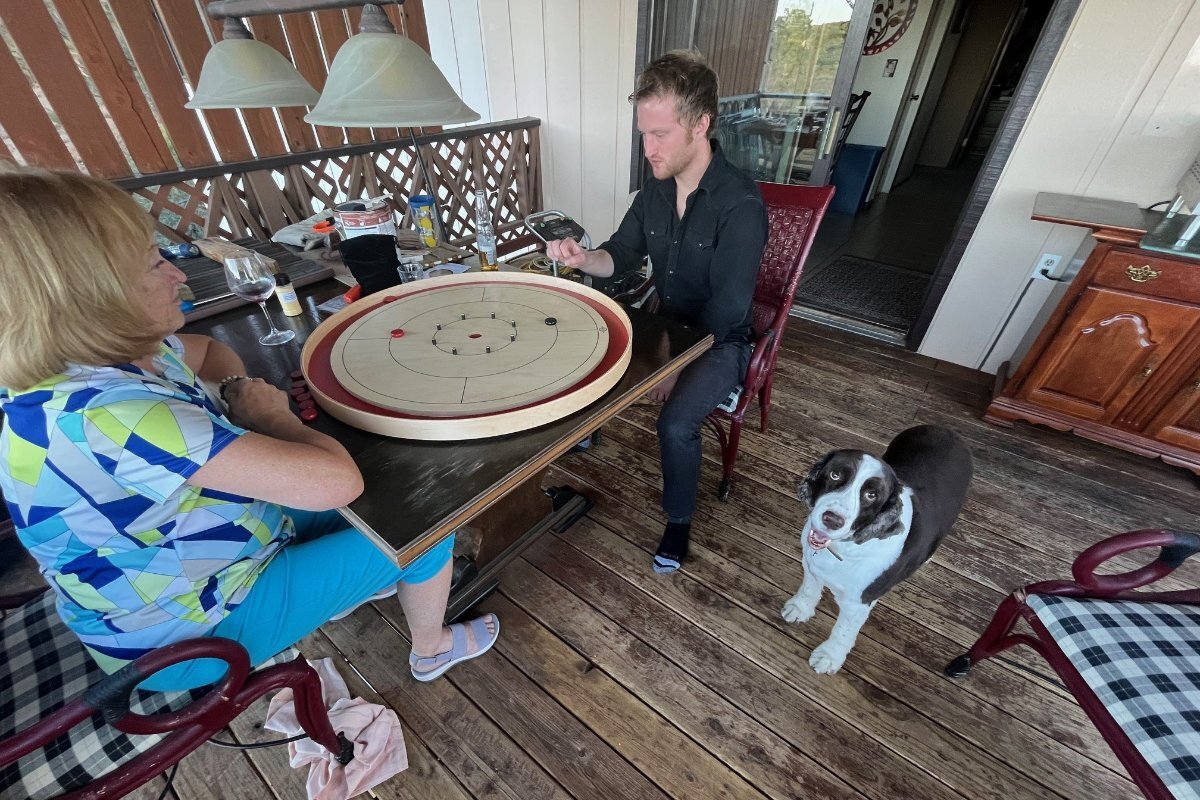
We did an Oliver trip in March to meet up with Chris' sister. They are snowbirds from Minnesota and often stay at a RV Resort in Casa Grande. We played Pickleball one day at the public courts and met a great couple from Ruidoso NM. They introduced us to the Canadian game called "Crokinole!" (BTW, they invited us to camp on their ranch and hope to do so on the way to the Oct. Texas Rally.) Chris bought a cheap Amazon version for my birthday in April. It fell apart quickly so it went back. So now for her birthday, I had to get the original Tracey Board: Crokinole Boards & Crokinole Accessories Canada | Buy Online (traceyboards.com) Not nearly the Oliver I brought home a year ago! Even though, the whole family had a lot of fun playing this weekend (strong competitors)! Where can I find place to stow this for Oliver travel? It's a beast at 30" round and about 20 lbs. It may have to stay home. Any Crokinole players out there! 😂
1 point
-
Our Anniversary night ended well. After a few hours watching a local P-ball tournament, and a little rest at home, we went to Papa's Italian in Prescott. It was a great weekend! Her birthday is still to come this Friday. Certainly cannot afford another Oliver, Lol!
1 point
-
Congrats, John and Chrissy! Enjoy all the Oliver time you can together during this special time of the year! WOW!1 point
-
Happy anniversary to you both! Congratulations, that’s a great milestone! We hit 48 years this month. Doesn’t seem possible…. Mike1 point
-
My wife (Sue) and I only have just short of 20 years on you two. I have some of the same "problem" as you in that our anniversary is on November 30, her birthday is on December 9th and then we celebrate Christmas. Sure does take some "creative" gift thinking. However, I've never even thought about bringing home a "new" Oliver and since there is absolutely nothing wrong with the old Oliver, I'm guessing that it will stay that way. Frankly, as you seem to know, it really isn't the gift as much as it is the thought that is behind the gift. Happy anniversary to you both! Enjoy every minute of it AND the great years to come! Bill1 point
-
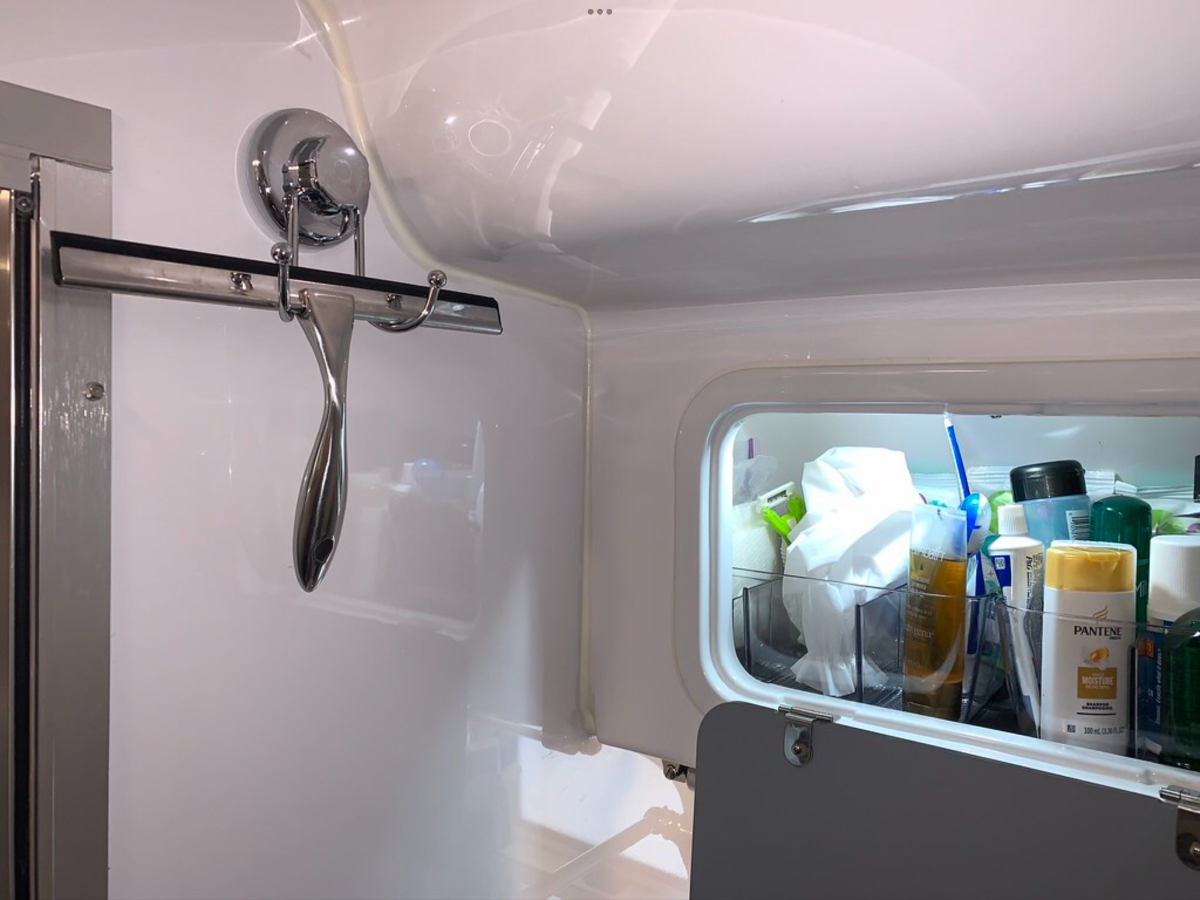
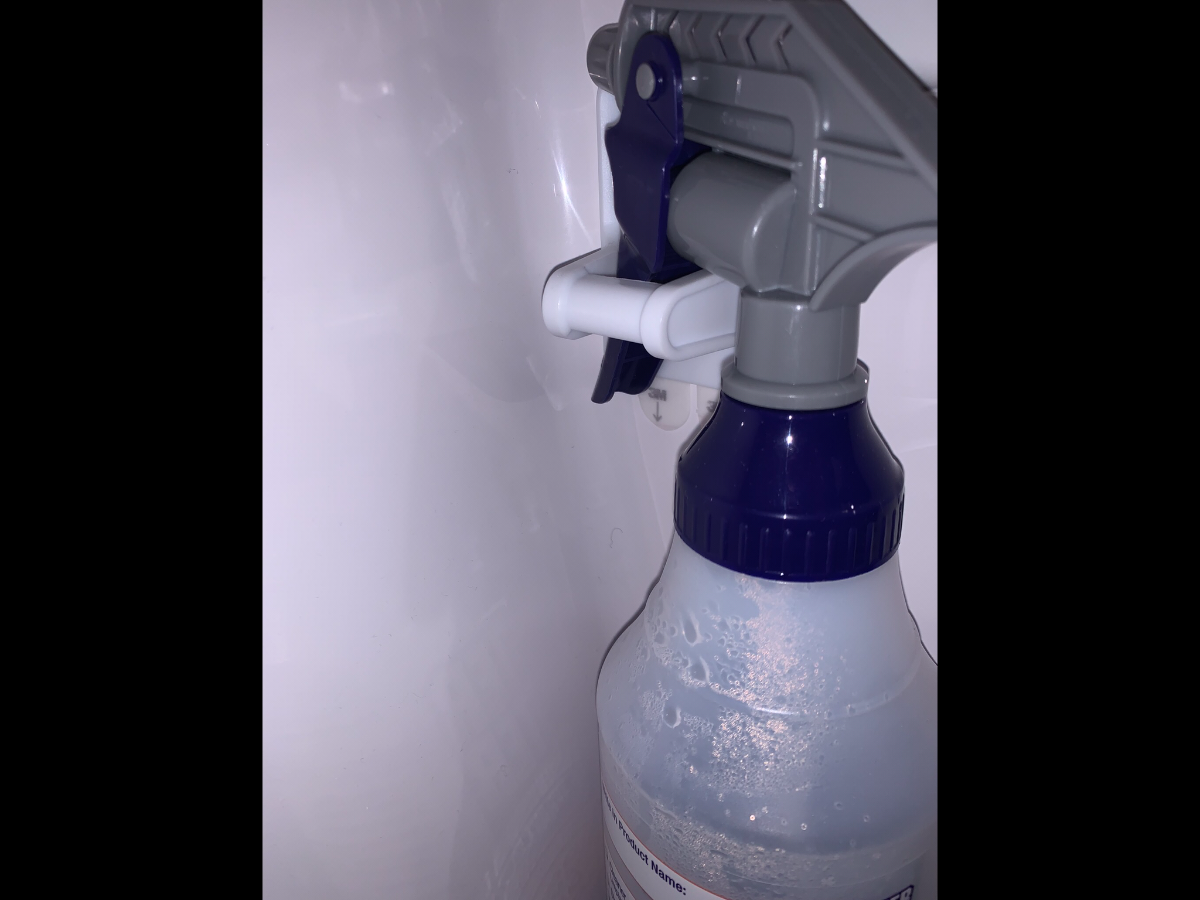
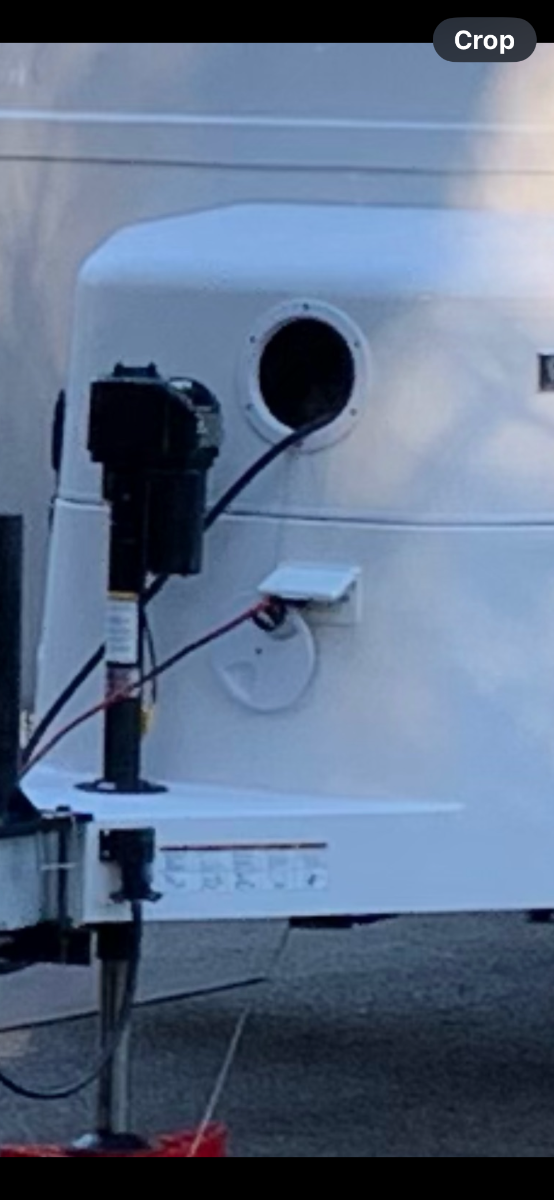
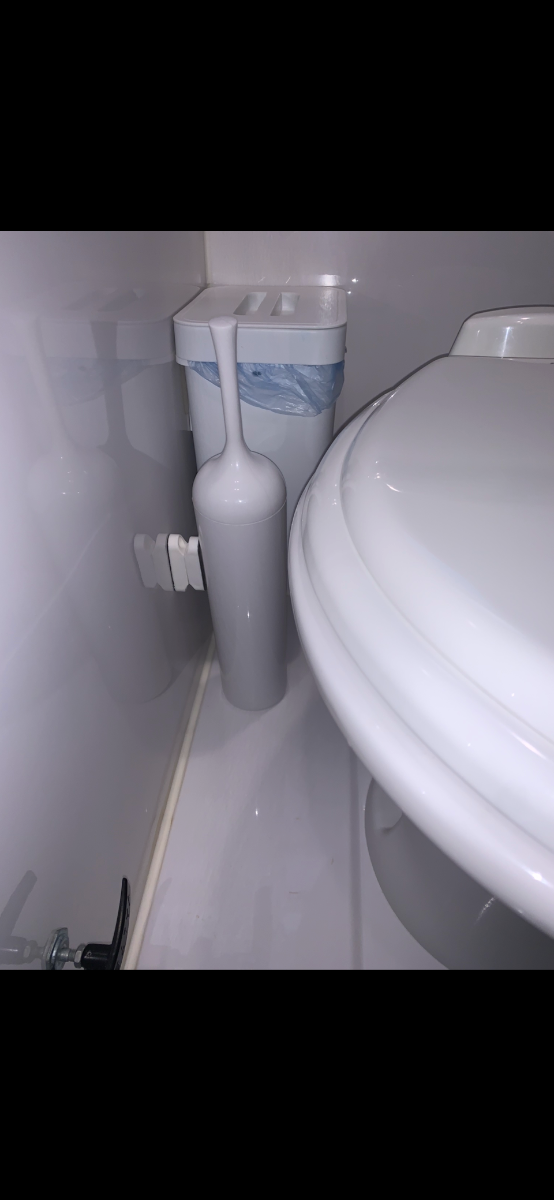
A dozen simple mods! * Denotes pending or completed mods inspired by other owner’s, with full credit and kudos to those individuals. Thanks! *Convenient umbrella holder: Not my idea or pic, but a great one I plan to do. *Collapsable hanger: Added suction cups to a length of pool cleaning pole. Great for drying towels and clothing; SS hooks for shoes, trash bags and such. *Propane tank lock: A couple of holes are drilled in alignment into existing parts to accommodate a long shank padlock; a security cable can be added to further theft deterrence. *Drain holes in awning support brackets: Drilling holes to facilitate proper water drainage on earlier OTT models. Propane auxiliary hose: This is a regulated hose extension that can easily be deployed by removing the round screw cap on the tank cover. It has an inline valve and conveniently stowed coiled atop the tank of proximity. *Tethered screw cap: A wire tether ensures the cap will not be lost if one fails to reinstall upon removal or it vibrates off in transit. And yes, that duplex outlet is another mod, but of the ‘more expensive and difficult to install’ category! Additional USB ports: Easy to achieve by upgrading some of the existing interior duplex outlets with USB capable outlets where needed the most. Handy squeegee for the wet bath: HASKO hook accessary used to hang this tool for convenience of use. I put a clear bumper bead on the wall where the handle end makes contact to protect the fiberglass. Backup plan!: Extra this and that for ……, well you know! Sanitary bags at hand: A convenient roll dispenser for general use, especially if one is in the ‘no paper in the black tank’ camp! Moving on! *Spray bottle: Staged below the TP holder and hung on a Command Brand spray bottle hanger. Great way to not only conserve water, when the toilet needs a little extra attention after use, but also fill space in the black tank. Handy toilet brush: Another use for those magnets widely used to help hold the shower door open when in camp.
1 point
-
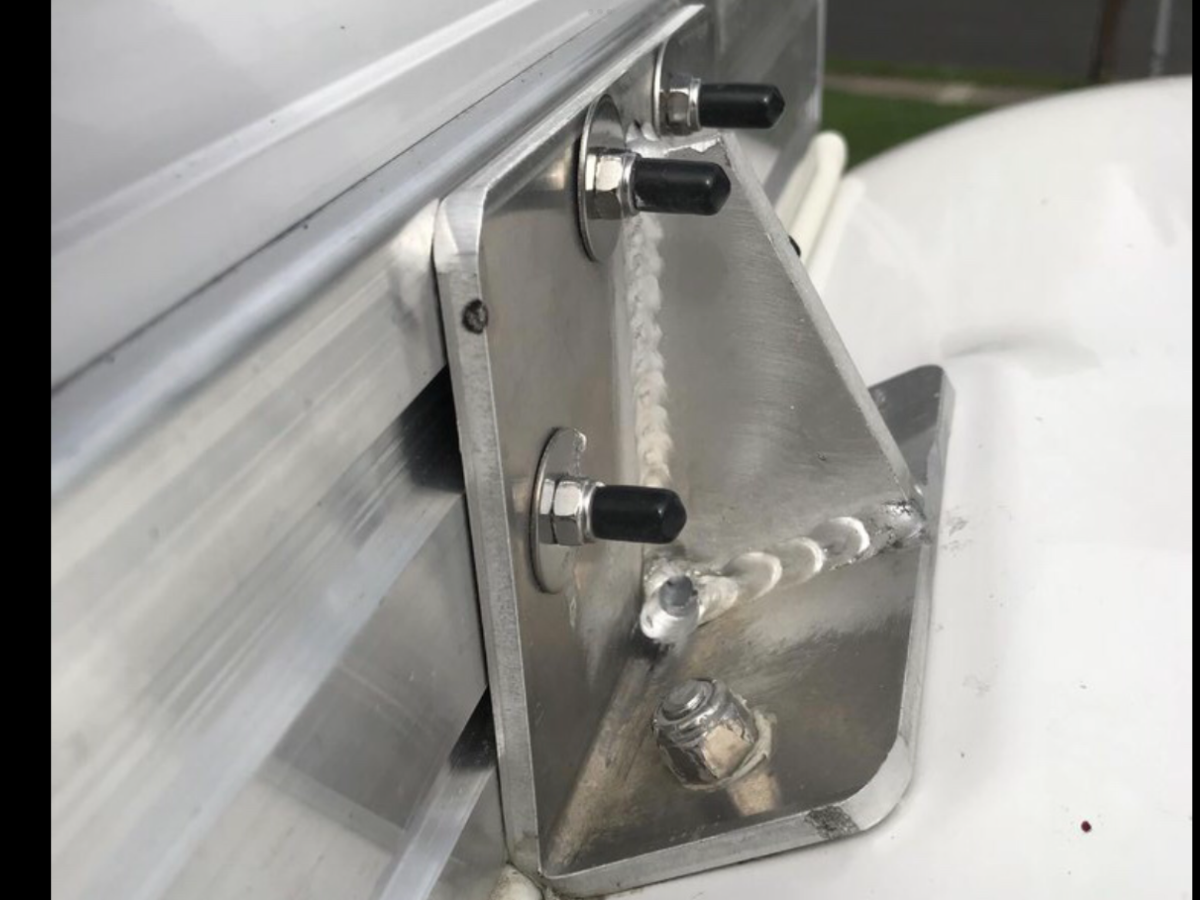
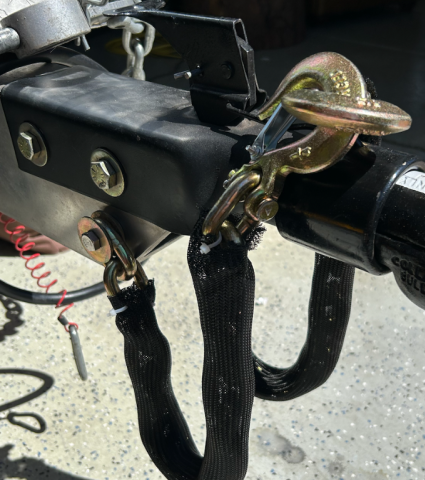
Some time ago we had posts about a F-350 and SOB trailer being hung by their safety chains. That visual and our shared distain for the curly safety wires have put this on to do list for sure. If you have an extra few inches of chain, I would suggest the following considerations: First, the shear strength on a 3/8 grade 8 is between about 5,000 to 7000 pounds. Your chains are rated at 24,000 pounds. Excellent chain choice! Gold Stars. In an emergency situation, likely the trailer chains will not come tight at the same time. As such, one chain will absorb the initial impact loading. If it breaks the bolt, then the other chain will basically follow the path of the first (Stay connected to the TV) as the thru bolt will fall out. Then Ollie will exercise the break away switch. To better utilize the capability of the chains more bolt strength would be warranted. Recommendations in order of how much you believe any of the above follow: A. Replace the 3/8" thru bolt with two shorter bolts. That way if the impact takes out one side, you are still connected. B. If you have an extra 3" of chain, you could anchor the end of the chain to the Bulldog bolt above and then down to your two 3/8" bolts you have installed. Chain hardware would be needed as I doubt that the chain will pass on a 1/2" bolt. C. If you have more length than that you could run the chain to both bulldog bolts. And of curse to the two 3/8" bolts. More chain hardware likely needed. D. Or, if you are a John D., you would machine two spanner bars running from the two bulldog bolts and connect to the spare 3" of spare chain to your two 3/8" bolts. PS: I'm deep enough into the rabbit hole. Personally I'll put on my to do list Option B is smarter chain guy knows of good hardware to connect a chain to the 1/2" bulldog bolts. GJ
1 point
-
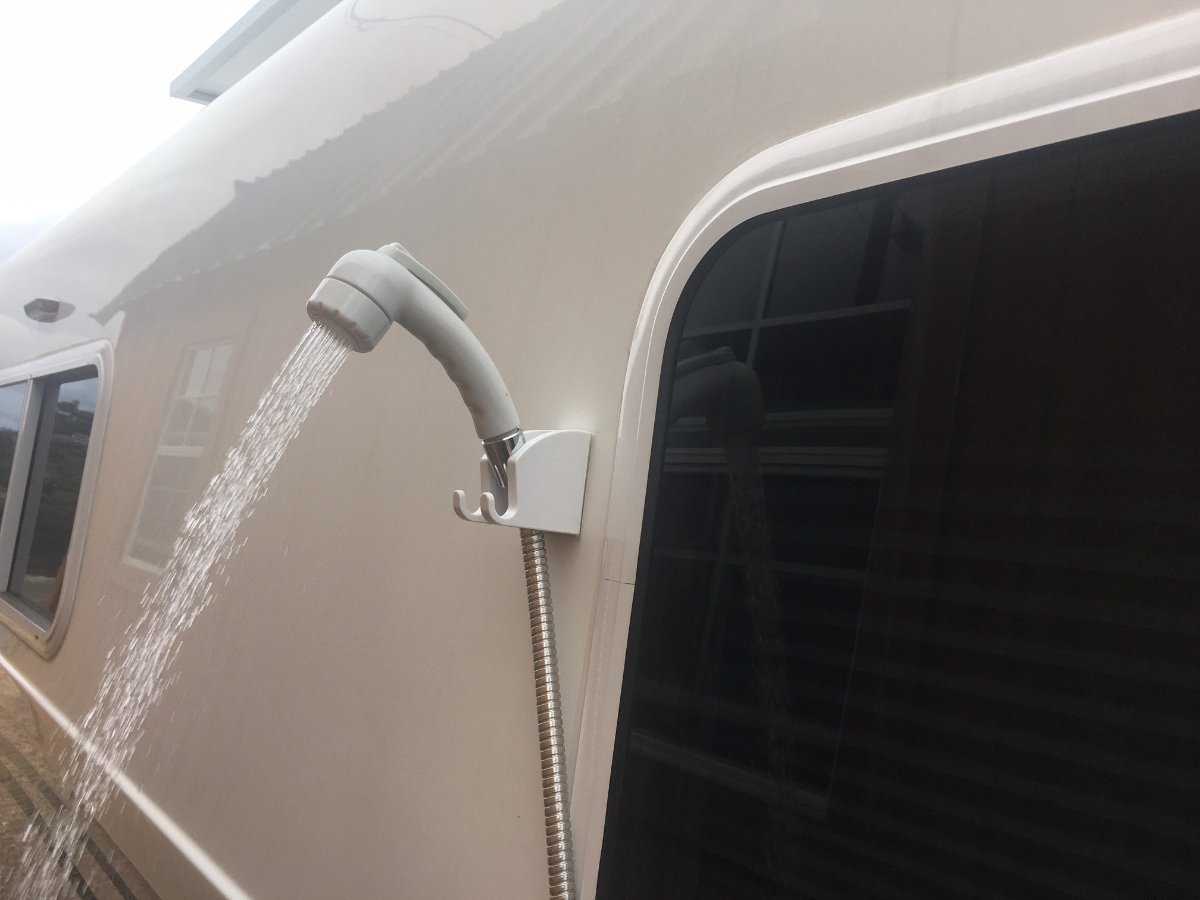
Along the theme of "Inexpensive Helpful Modifications" thank you @Wandering Sagebrush I had shown this in my water pressure upgrade topic, but it certainly belongs here. How about a real outdoor shower? Buy a pair of these (or you can purchase one). Hang one high above head height and hang the second one lower to wash your dog(s). Only the clear plastic mount stays taped to the Oliver and the bracket fits in the shower cabinet! They come in white. Still an inexpensive mod, even though with the crazy inflation seen over the last 3 years, the single now costs what I paid for a 2-pack just 3 months ago! JONKEAN 2 Pack Handheld Shower Head Holder with 2 Hanger Hooks, Strong Adhesive Shower Head Holder, Adjustable Shower Wand Holder Wall Mount, Bathroom Waterproof Shower Handle Holder No Drill Need - Amazon.com
1 point
-
For those that have a bit of time on their hands AND want to save a couple of bucks too: Take those "yellowed" outlet covers off, clean then really well, wipe with alcohol and then given them a couple of coats of Krylon white spray paint. Let dry overnight and put them back on. I did mine this way about two years ago and there have been no signs of the yellow reappearing. Bill1 point
-
@Wandering Sagebrush, so often, the simple path can be the best. Thanks for sharing.1 point
-
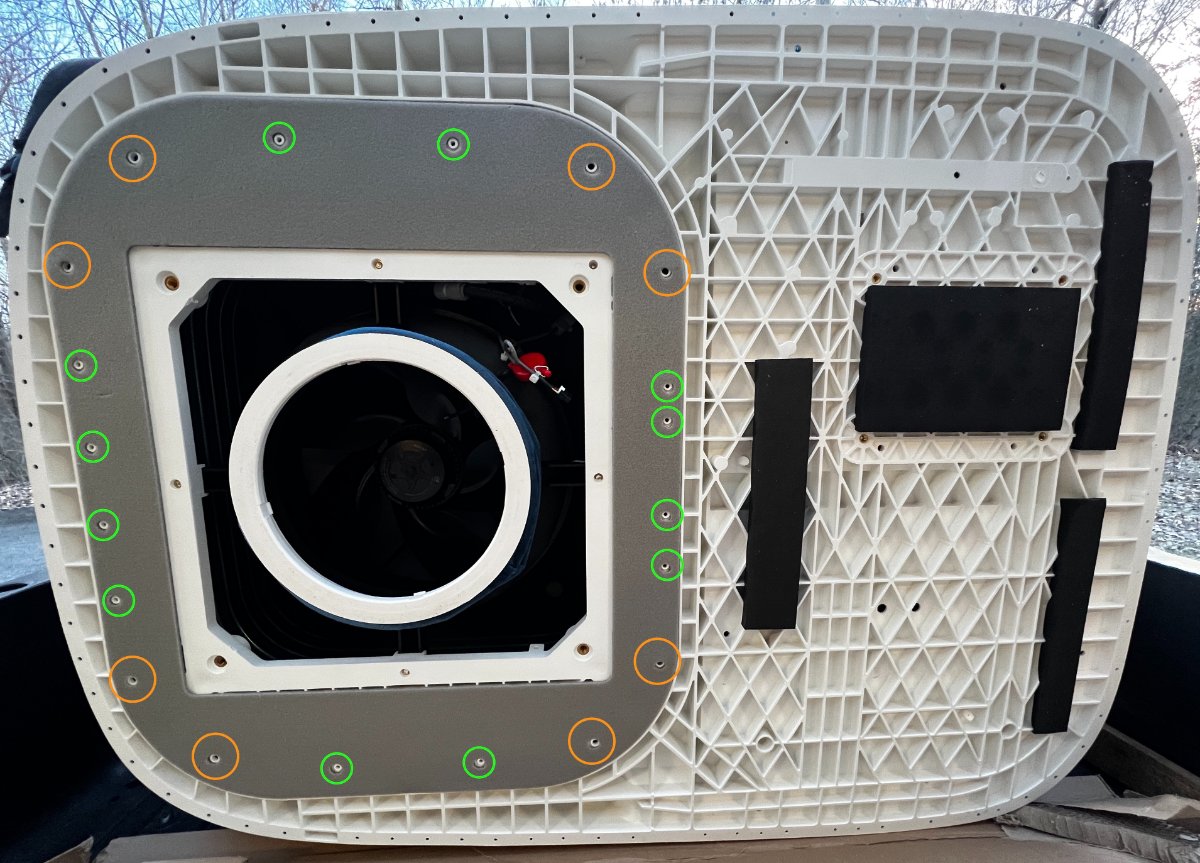
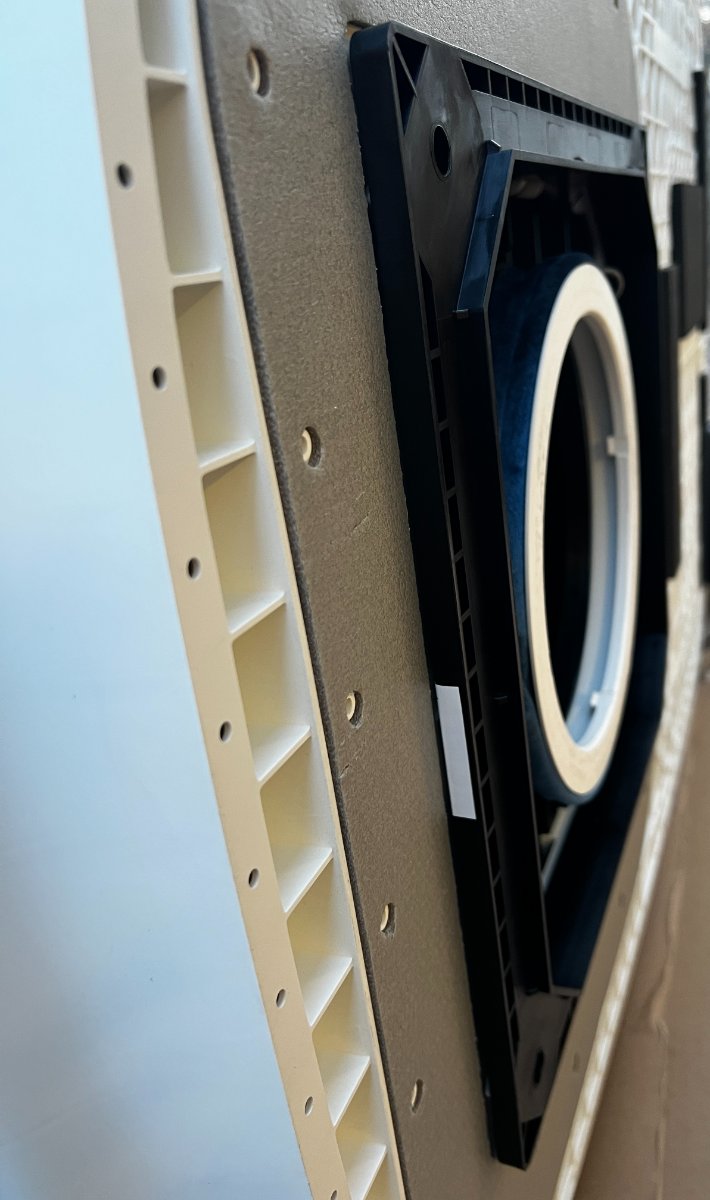
Here are a couple of pictures to help you. I'm afraid it's not going to be as easy as you'd hoped. On the first picture, I've circled all the holes below the evaporator coil. The orange in the corners are maybe 8mm while the green ones are probably 5. As you can see, the entire bottom pan is structurally molded "plastic". Looking at the parts breakdown may also help you. The second picture shows the height of the roof support bracket. At best it's 10 mm so there's not a whole lot of space underneath the unit. The support bracket has an integrated foam perimeter seal, and compression-seals to the bottom pan when it's torqued down. Elevating the unit would be much more involved than just using a "spacer gasket". This particular 3400 is a sacrificial unit I was using, primarily to address your concern. Originally my thinking was to adapt a mini-split condensate pump but the juice didn't seem worth the squeeze. There is a company in OR that fabricates mounting "adapter plates" for these, primarily to accommodate the curvature of Airstream roofs. I thought about contacting them to come up with a design that also incorporated a drain pan system to connected with the Oliver's internal drain tube. My mental design started to get really complex so I haven't pursued this idea any further at this point. I've been using the 3400 on my LEII for about three years and don't find the way this unit drains onto the roof to be a big issue. I do tend to avoid high humidity however.
1 point
-
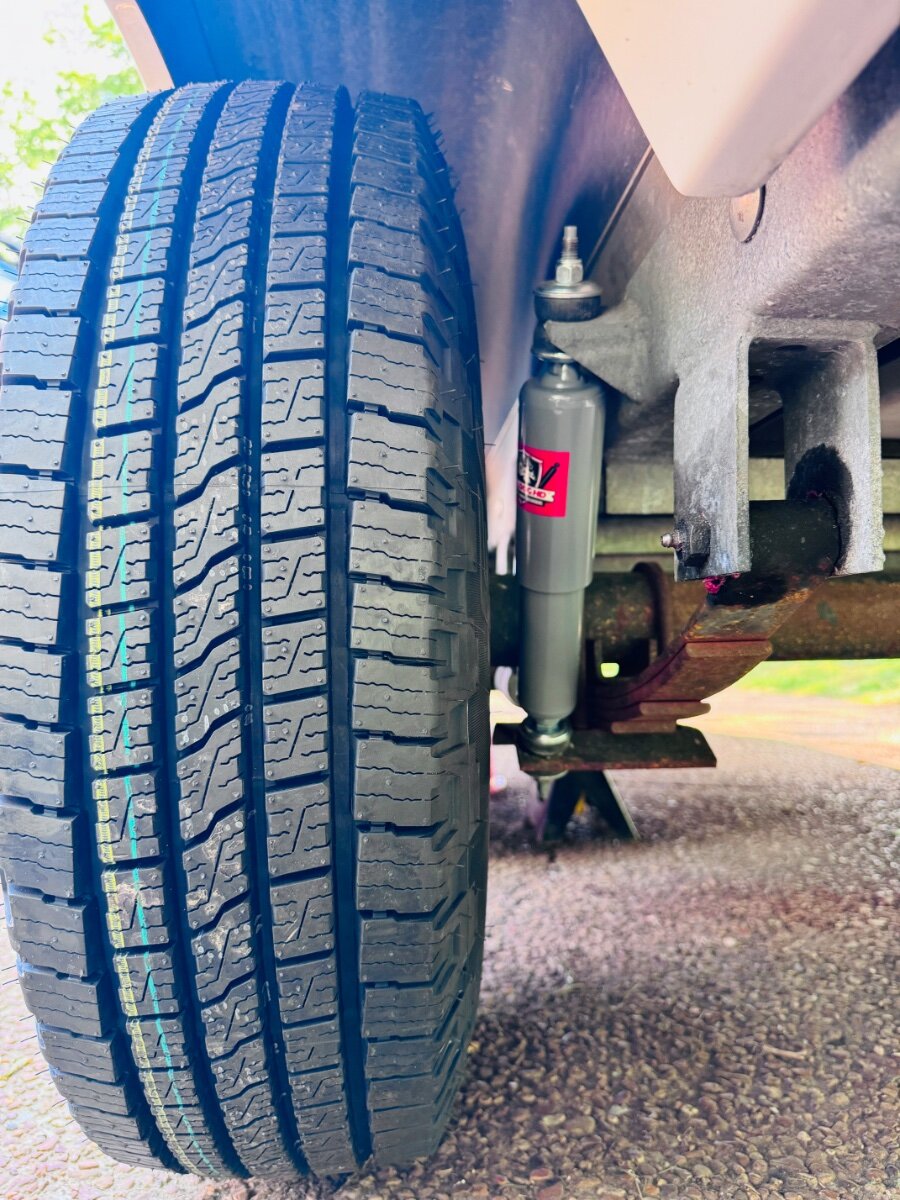
Today was the day I got to do the fun messy job of replacing the China Bomb wheel bearings/seals on the ILOVHER on over to USA made Timkens. This was quite the all day project as we also changed out the shocks and lubed the EZ Flex suspension. We beat the rain by a mere ten minutes! My only experience prior to this, was replacing entire preloaded hubs and manual brakes on my Casita which was easy compared to this. After figuring out the best way to jack the side of the trailer up. (Yes, we used multiple floor jacks, and safety jacks stands, chocks and wood cribbing all while being attached to my truck) All I can say is, Thank God my son was here to teach me and to remove the seals in those hubs! (His father owns an excavating company so he knows a bit about trailers/brakes) There is no way on Gods green earth I would have been able to remove them by myself. We had a puller and they would not budge. I think they were permatex'd in there. He somehow was able to use his strength, ingenuity and multiple tools to get them out without scoring. Here are some observations and or questions we had: 1. My son thinks that the shocks look too large for the application. We used the exact replacement that Oliver uses (Monroe 555025) He says they're nearly all the way compressed with the way the suspension sits and that is why potentially two of them were blown. His opinion is that they'd do more if they were just a bit smaller. I have no idea or opinion but it was the one job I was able to complete by myself so I'm good with it. 2. It was quite the surprise to see that the axle spindle did not have the Dexter EZ lube feature. My understanding is that this was not an option on an LE2 in 2017? I did not know this and bought new grease caps with the rubber insert. As much as I learned today, this was sort of disconcerting. Even my Casita had EZ lube axle and it was a 2007. I greased my bearings every year and it made it easy. All those great suspension features like shocks and a EZ Flex but no way to easily grease bearings?? What gives? I sort of dread doing this again. 3. What's with grease guns? OMG..I wanted to throw and shoot them with a real rifle like skeet. I used two separate guns and they both were being unruly and messy. I could have bought stock today in rubber gloves and shop towels! LOL 4. Bearing grease packer seemed like a great idea. Who knew you'd have to use all 200# of human body weight to press down in order for the thing to squeeze grease into the bearings? 4. I took the advice on the forum and replaced a few zerks with 90s and 45s and used plastic cap covers but OMG.. crawling under the trailer is not for the faint of heart or my elderly bones! I think I want/need a creeper. 5. Thank God for Harbor Freight! I now have all kinds of fun new cheap tools, like impact driver and a torque wrench which I properly learned how to use! I now can afford to go to the Rally. 6. The Nev-r-Adjust Brakes looked good but I think I'm going to go with manual brakes next time. I don't feel confident about what I learned about them today and how they actually DO need adjustment. We greased the important parts with a good brake grease. At least we didn't find any loose parts. springs or worn pads floating about. 7. Found four cracked lug nuts. Son says the sheath on the outside is cracked and I should consider solid replacements. Any recommendations? 8. Beer never tasted so good. Thank you for all of the forum help I've received, without you guys, I'd be dead in the water. See y'all safely at the Rally !
1 point


-
Recent Achievements
-


")


")


")


