Leaderboard


Popular Content
Showing content with the highest reputation on 08/27/2024 in all areas
-
Excellent report, @Ronbrink! Very similar to our experience with the 30A Victron 12/12v charger. Nice work on the install! Makes boondocking from place to place a lot more fun knowing that your Ai-Hr storage will be topped off before arriving at the next location.... Cheers!4 points
-
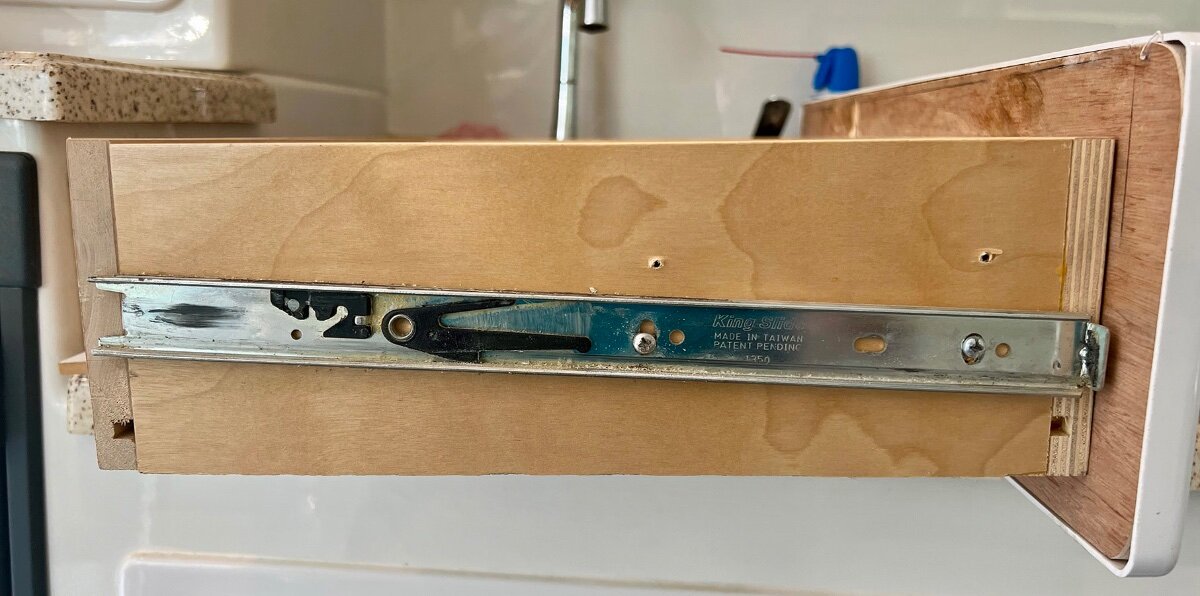
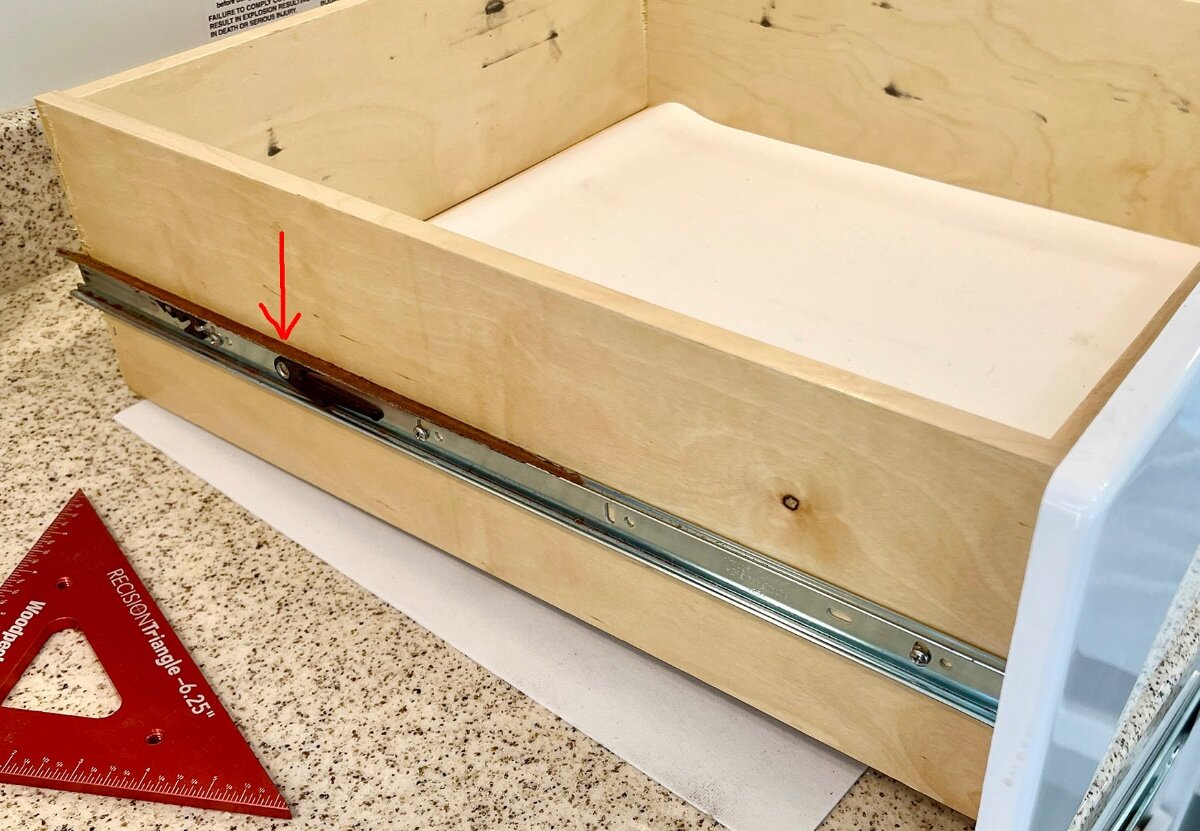
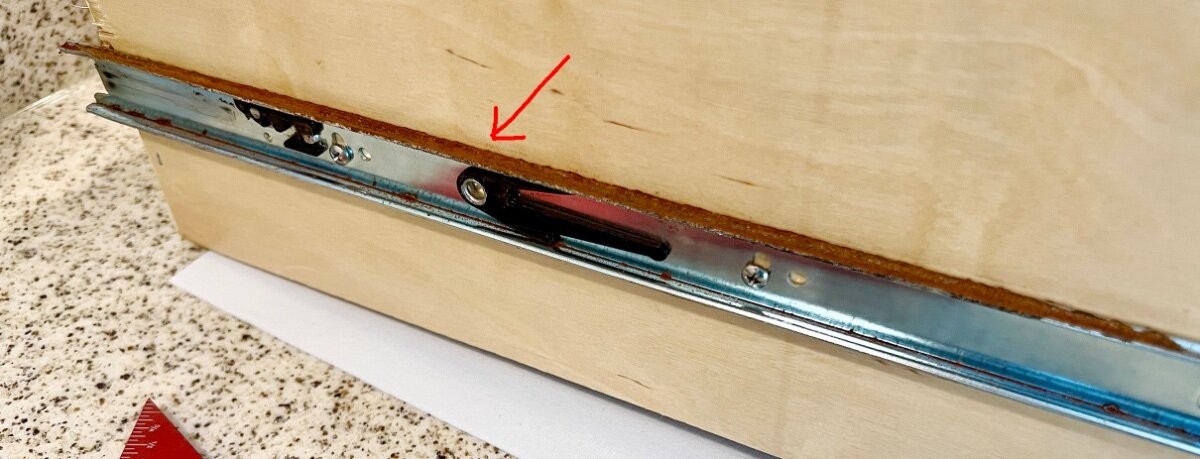
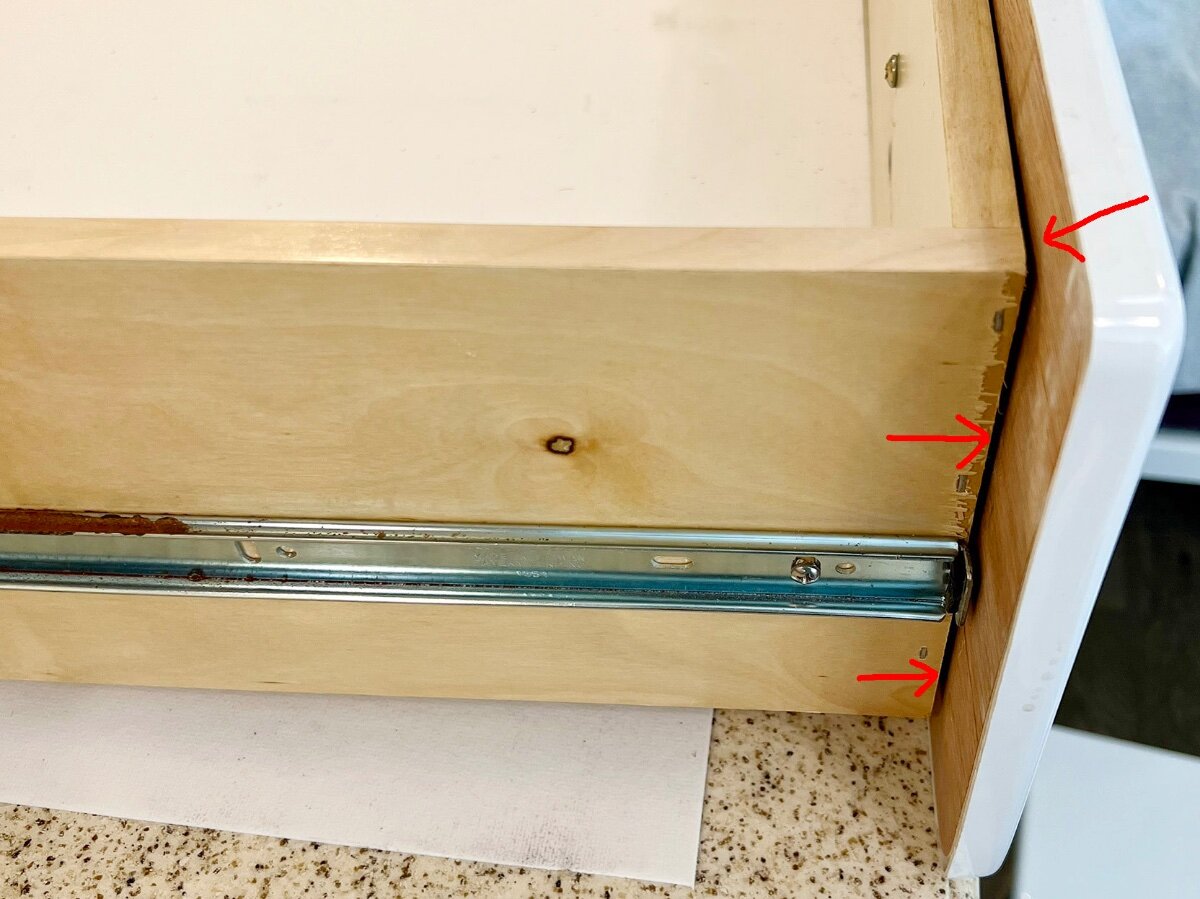
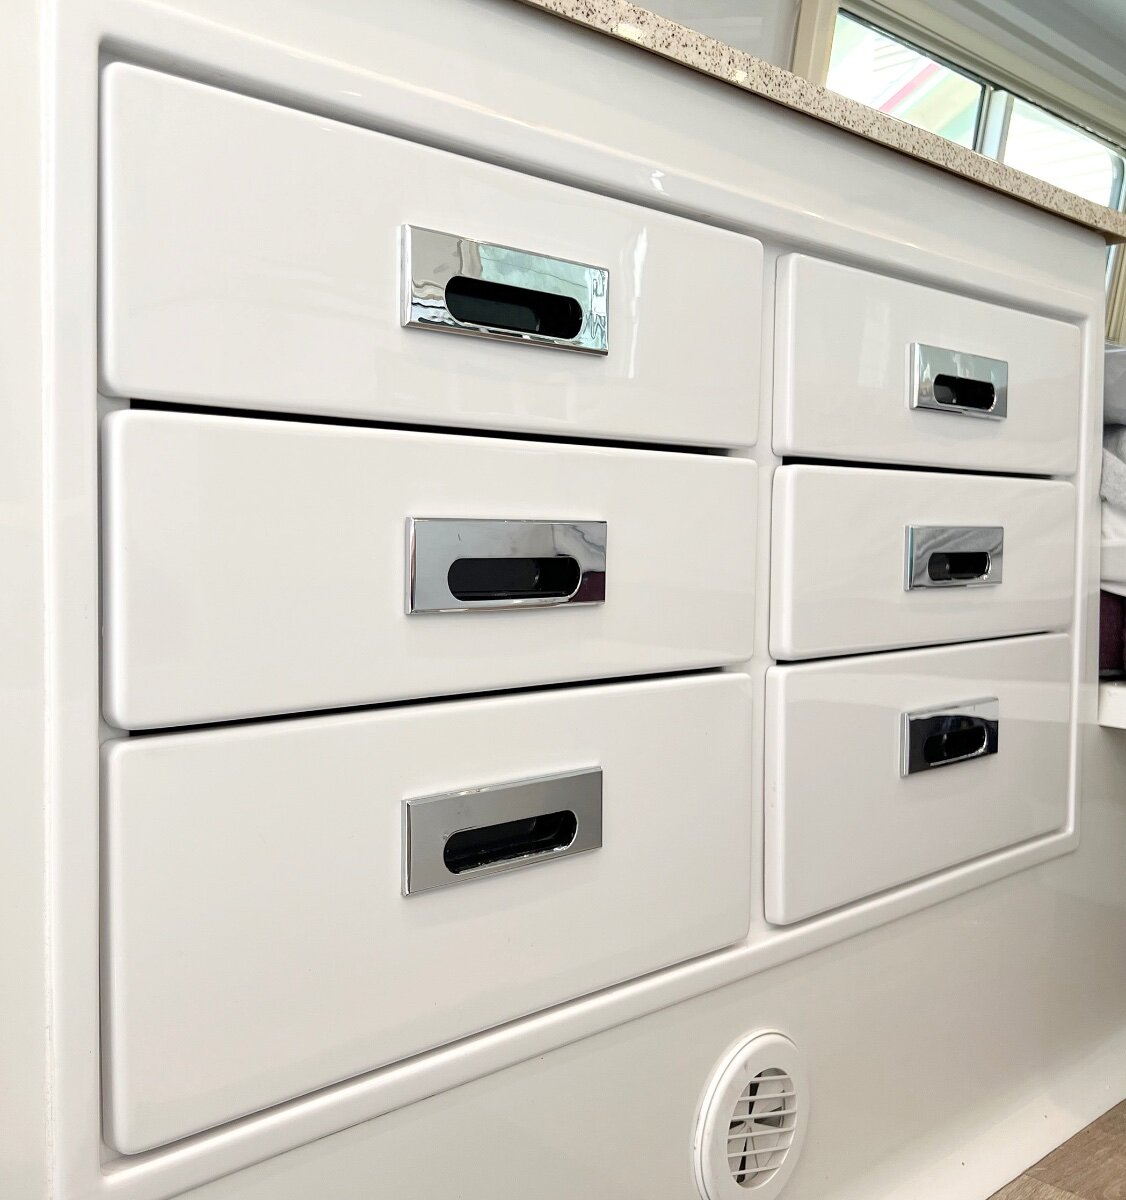
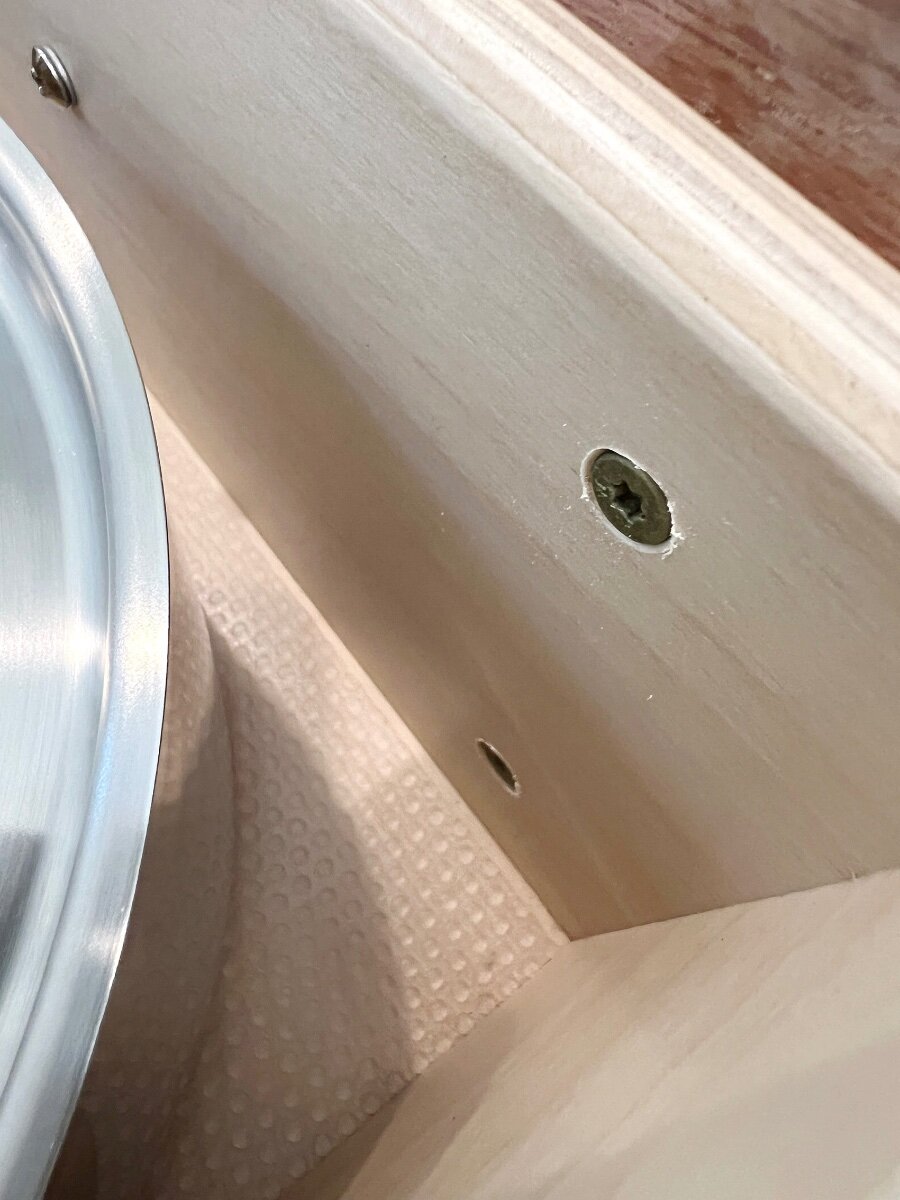
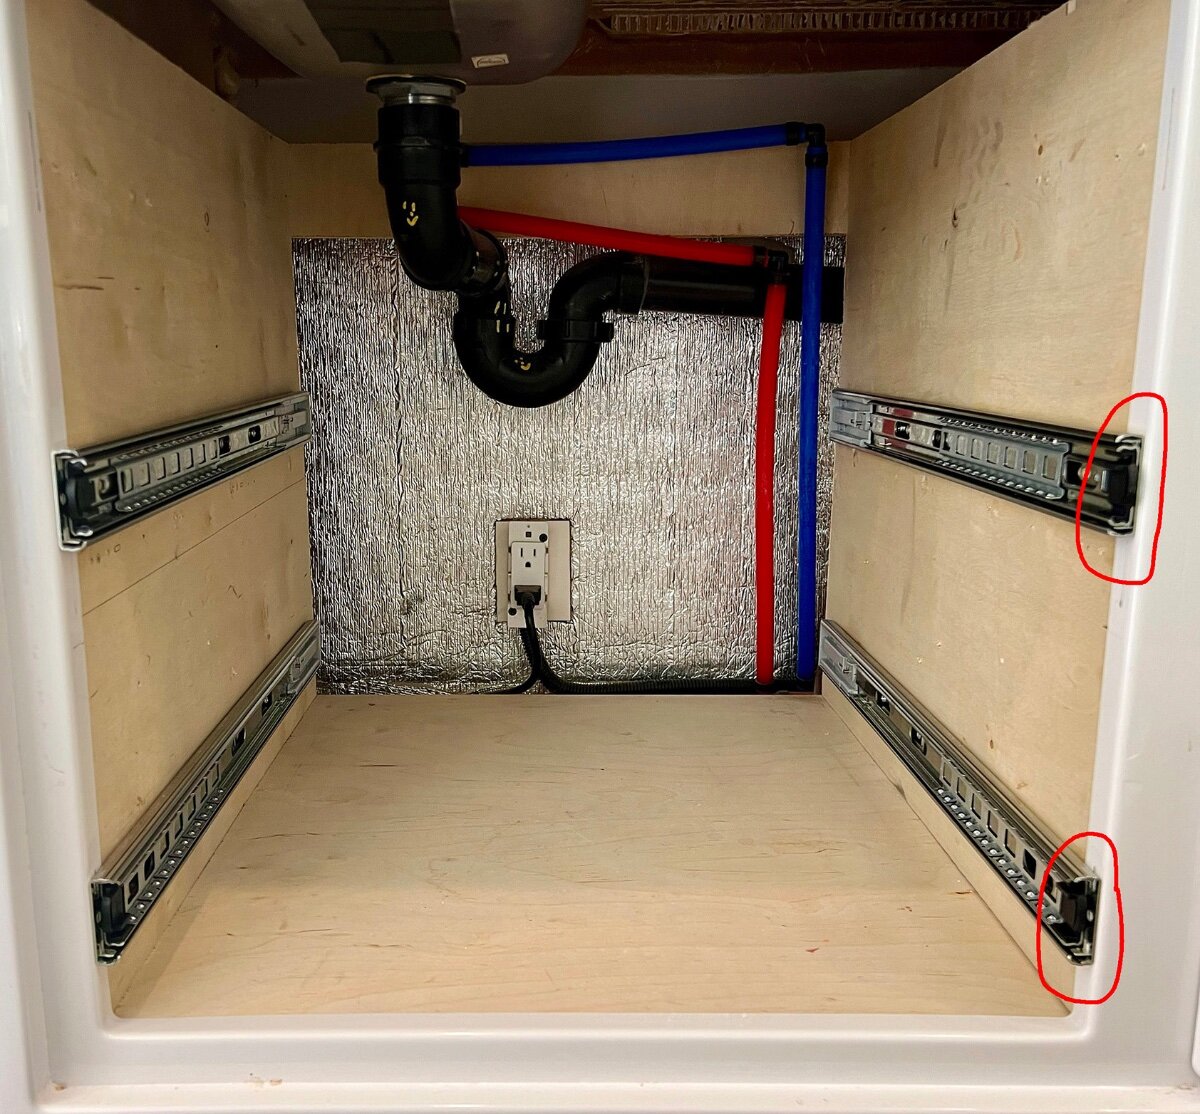
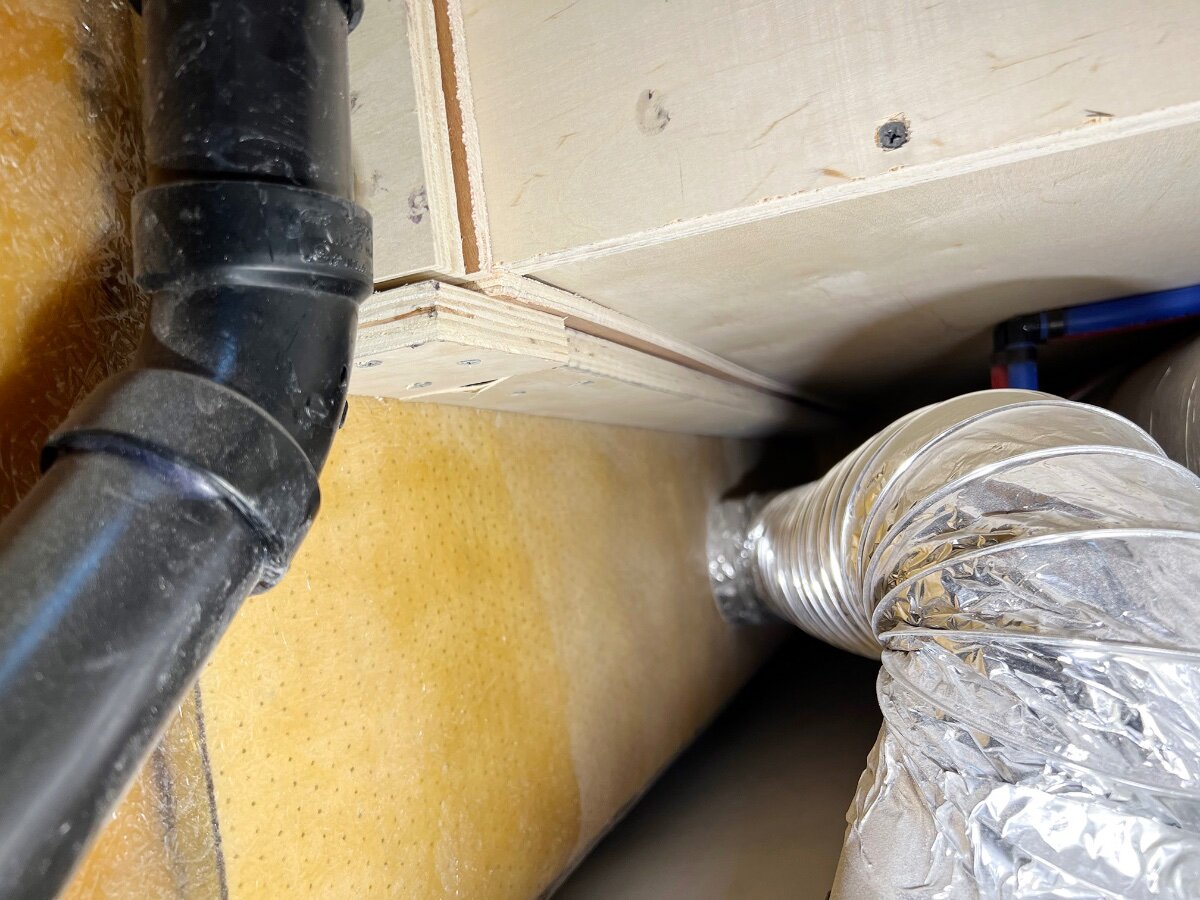
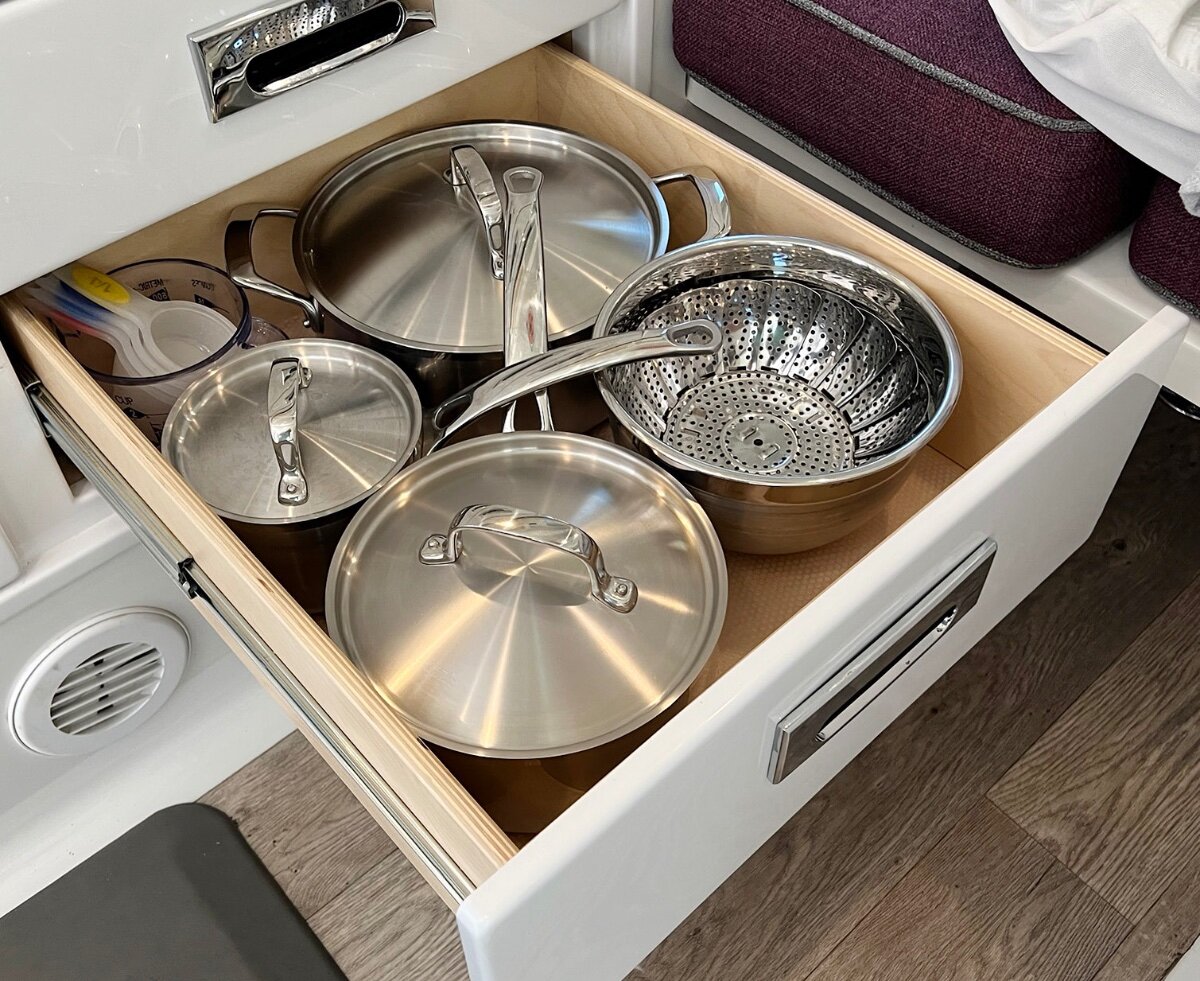
Some of you might have seen my recent post on another thread, Shake Rattle and Roll, regarding items including screws etc coming loose while towing. My situation had become considerably worse as previously stated in regards to the entire set of drawers and associated hardware with the kitchen cabinet drawers. Cutting to the chase I had to replace all of the soft close glides for a litany of reasons which I will detail below then rebuild and redesign the entire drawer setup and arrangement. Some of the glides had corroded severely preventing their ease of use, and in other cases the boxes themselves were made in what can only be described as sloppy construction, inconsistent sizes, and most of them considerably too small for their respective cabinet openings allowing for the glides to come completely out of, or off their rails. If this isn't enough the cabinets themselves were built out of square, out of plumb, and not parallel from front to back or side to side. Hopefully this will provide help to those who might be having some of the same issues. Let me know if you have any questions be glad to help if I can. For starters attached are some photos of the errant issues we were having. Image below illustrates how poorly this set of drawer glides were installed which of course imposed a closed drawer that pointed downward, top portion closed while the bottom tilted outward. The red arrow on this drawer points to the corroded glide rail. This is the worst example in all fairness. closer detail that illustrates the above perhaps better. In the photo below you can see where these drawers were only stapled together and with no glue anywhere. To make matters worse the cheap plywood used for the plastic face frame inserts was never treated for moisture and thus over a period of time would expand contract then warp and pull away from the drawer box itself. The only method for installing these drawer faces was nothing more than caulk, no screws nothing to hold them in place over a period of time in different weather or humidity patterns. Effectively each of the faces had warped convexly as seen in this photo. This is an example of the old drawer boxes once the plastic fronts were removed with scrapers, pry bars and chisels. Note how the 4 inch drawer is 1 inch longer than the 6 inch drawer, and this was consistent throughout for no discernible reason that I could determine. All of my new drawers are a full 20 inches long with the exception of the 12 inch drawer that mounts under the kitchen sink otherwise it would collide with the sink drain, probably not a good idea. Most but not all of these plastic face mounts to the drawers are cracked severely or in some cases mild cracks as illustrated below. Eventually I will replace all of the drawer faces with something else in the future and just be done with the cheap 1/2 inch plywood glued/caulked into these plastic cavities. Now for the rebuild. Below you can see where the drawer positioning is much different. Rather than the 4 inch depth drawer to 6 inch depth drawer, then back to the 4 inch on the bottom row it seemed to make much more sense to do two rows of 4 inch drawers (with 6 inch face fronts) then install the 6 inch drawer with 8 inch front on the bottom row. In addition the upper right drawer as originally installed was only 12 inches deep much like the drawer that mounts underneath the sink. This made no sense to me because there was plenty of room for a full 20 inch drawer to easily slide beneath the cooktop stove. In order to make sure there would not be an overheating issue I ran the both burners for a period of time with my hand touching the bottom of the stove. Never even got warm. It is important to note this stove is built with a second dead air space layer. This allows for much better usage of kitchen tools and storage. Details from the rebuild. Basically I used Kreg Pocket Hole jigs and screws to build the boxes but also used reinforcements below with right angle corner hardware and ran a bead of hot wax glue across all of the underside of the boxes/drawers. Materials were half inch baltic birch plywood, with 1/4 inch birch plywood bottoms dado'ed into the sides and fronts. Closeup detail of hardware and messy hot wax glue. I also used a small painters palette knife to spatula the glue while still hot and pliable further into each joint. It was fairly easy to run the heat gun for 6-8 inches of glue line then press the glue further into position, then start on the next 6-8 inches. Pocket holes can be seen in the photo below. To mount the face fronts back onto each drawer I used 3/4 inch Big Timber screws that are self tapping, however in order make sure they were solid each drawer front was clamped to its respective drawer during installation of screws. As you can see each screw is counter sunk as well allowing for a deeper bite. Note didn't want to glue them on in addition to screws knowing I would eventually replace the fronts with completely new materials. The photo below shows two sets of new drawer glides installed properly that being with front of the glide recessed approximately 1/16th of an inch as illustrated by the red circles, not the full 1 inch as originally installed by Oliver. By installing the glides so far back into the cavity of the cabinet boxes the glides would never fully come to their closed positions. Not sure why the water hoses to the kitchen faucet were installed to the front of the rear cabinet brace at the back as seen in this photo. There was plenty of room to route those blue and red lines between the hull and cabinet which I just might do the future. It is also worth pointing out the opening space on the plastic trim for the cabinets is about 1/4 to 3/8 th's different from right to left side which translates into building each side with different width drawers. The space allowed for this type of drawer glide accommodates 1/2 inch on either side for a total of 1 full inch smaller width drawer compared to the cabinet opening. This is and always has been a tight specification. The original drawers were off by at least 1/4 inch or more. View from the basement. Honestly I have no idea how the entire assembly of the kitchen cabinet drawers even stay in place going down the road. Boxes are screwed together with 3 drywall screws and sort of situated into these pockets made of 2-3 inch depth plywood. I have no idea how those pockets are held in place and it doesn't appear there is any support at the back of the cabinets as they set hovering over the wheel wells by perhaps half an inch. Would love to hear a more informed opinion about this. A few finished results installed. Some of you might see that instead of implementing 4 drawers at 4 inches I ended up building 4 inch on top, 5 inch in the middle, then the standard 6 inch for the bottom drawer. Increasing the middle 4 inch to 5 inch depth provides a bit better depth of space while still allowing plenty of adequate space between each drawer.
 4 points
 -
I did a brief preliminary test while at the Cow Barn yesterday, a 15 minute run at TV idle. No drop in TV battery voltage while running its’ a/c full blast, and the 40A DC-DC charger and DPll (High setting) simultaneously. The run duration was limited due to the fact that the OTT was inside rather than outside the storage shed, whereby exhaust fumes would not have been an issue. The TV’s alternator gauge indicated a steady +14V output throughout the test, a vast improvement over the aging stock alternator. Looking forward to a planned trip next month to see how it performs, but very encouraged by the results of this test. TV at idle DPll current draw offset by DC-DC DPll turned off, DC-DC output (minus misc. OTT draw) DC-DC off, OTT misc. draw
3 points
-
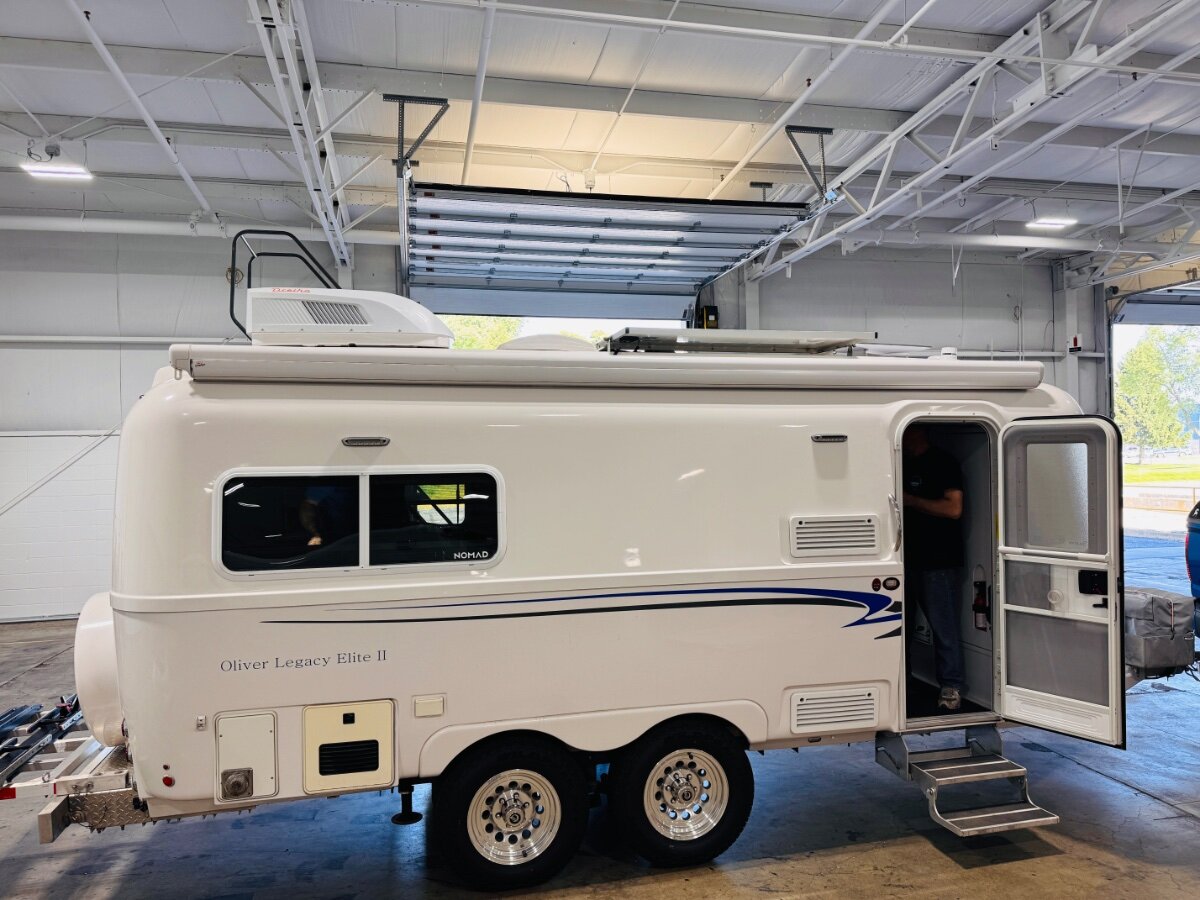
This trailer is Hull #004 and was the second 2008 Elite sold. The trailer went to two partners Andrew and Lisa in Lake Havasu City, AZ where Jim and Evon Oliver have a home. The drawers were not original to the trailer at the time of delivery. Jim had a 2008 trailer built for himself, Hull #030 and had his son Daniel design and build some under belly drawers for extra cargo. It appears that these are copies Oliver built for this trailer. After Jim had Hull # 046 "The Beast" built (originally designated a 22 footer, but now identifies as an Elite II 23-1/2 footer) he had larger under belly drawers added to it. My old records show that this was the only trailer built and labeled as a 2010 model, but I believe I remember @CRM stating his was sold as a 2010 model. All this was happening either during or after Oliver officially stopped trailer production in 2009, so this information was gathered during hectic times and is unclear and subject to error. As far as I know these were the only examples of trailers with the exterior drawers. If anyone knows of others let me know, I'll add this to my master list of Oliver Ephemera.2 points
-
@Ronbrink You are motivating me. I want to see those kind of numbers. Great job!2 points
-
We just finished an amazing four week trip, camping in Tennessee, North Carolina, Virginia, and Pennsylvania. The last week was devoted to family events in NY and CT, followed by a beeline drive home to meet family coming to visit us in Florida. We drove the parts of the Blue Ridge that we hadn't driven before. Although we encountered some hazy and sometimes rainy days, we had a wonderful time. The scenery is incredible... never knowing what amazing vista will open up around the next curve or when you exit the next tunnel. A few shots before the camera tumbled and broke.... We replaced it in Front Royal at the end of Skyline Drive Linville River Bridge View The mountain laurel in bloom Grandview Overlook I only have about two or three hundred more to share.... We loved this trip so much we're thinking about doing it again in the fall to see the leaves change... Maybe starting at the top this time and working our way down. We had hoped to meet up with Tom and Karen (Meanderthal and SheBoss) but timing didn't work out this time... Hopefully, the fall trip will work! Campgrounds on the Blue Ridge are very simple affairs, but quite pretty and inexpensive. No hookups, but each has a dumpstation and water fill station. Bathrooms range from ok to downright basic, but all of them had flush toilets. (One didn't have lights... just a hook to hang your lantern.) No showers. Cold water only in the sinks. All are open seasonally. Check the "Camping on the Blue Ridge" website before you go for more information and postings on which sections of the road are closed. Campgrounds on Skyline are more varied... some almost resort style, some quite primitive. I'll try to post more on them later.2 points
-
Just drove the northern section plus Shenandoah this week on our way north to Nova Scotia. Will plan for the Southern section in the future.
2 points
-
It was such a beautiful drive last October. After spending 6 nights in SMNP we headed up the BRP. We opted for hook-ups, Asheville East KOA, Lineville Falls RV Park, and Boone KOA before breaking off for New River Gorge NP. We drove the North part from Shenandoah NP to Richmond, VA in 2016. We need to connect Boone, NC and Richmond, VA next trip.2 points
-
We hope to camp at Linville Falls and Mt. Pisgah on the BRP in September. We like Doughton Park, but road construction in that area of the BRP. Crabtree Falls is a nice hike from the BRP; Sunset taken from the BRP: Two Ollies at Mt. Pisgah on the BRP one morning: Mt. Pisgah:2 points
-
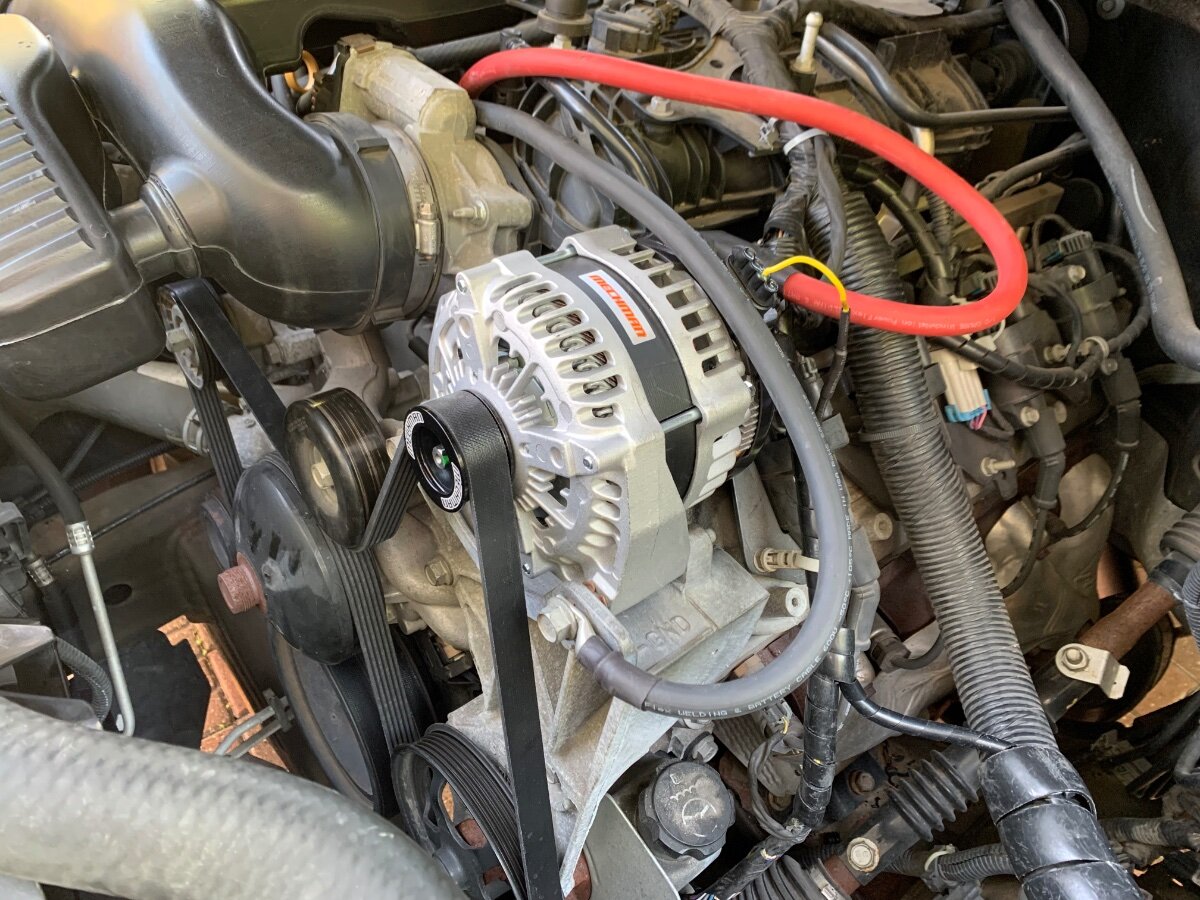
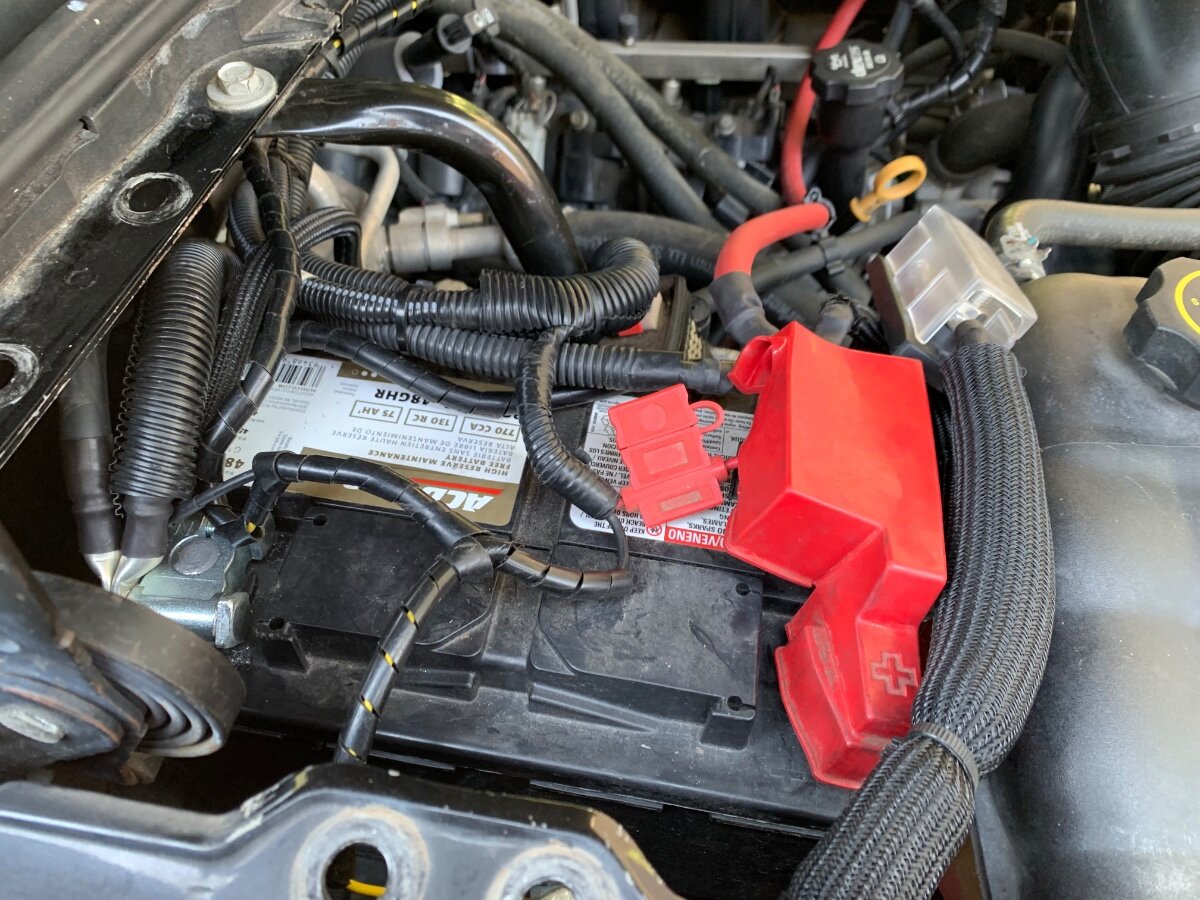
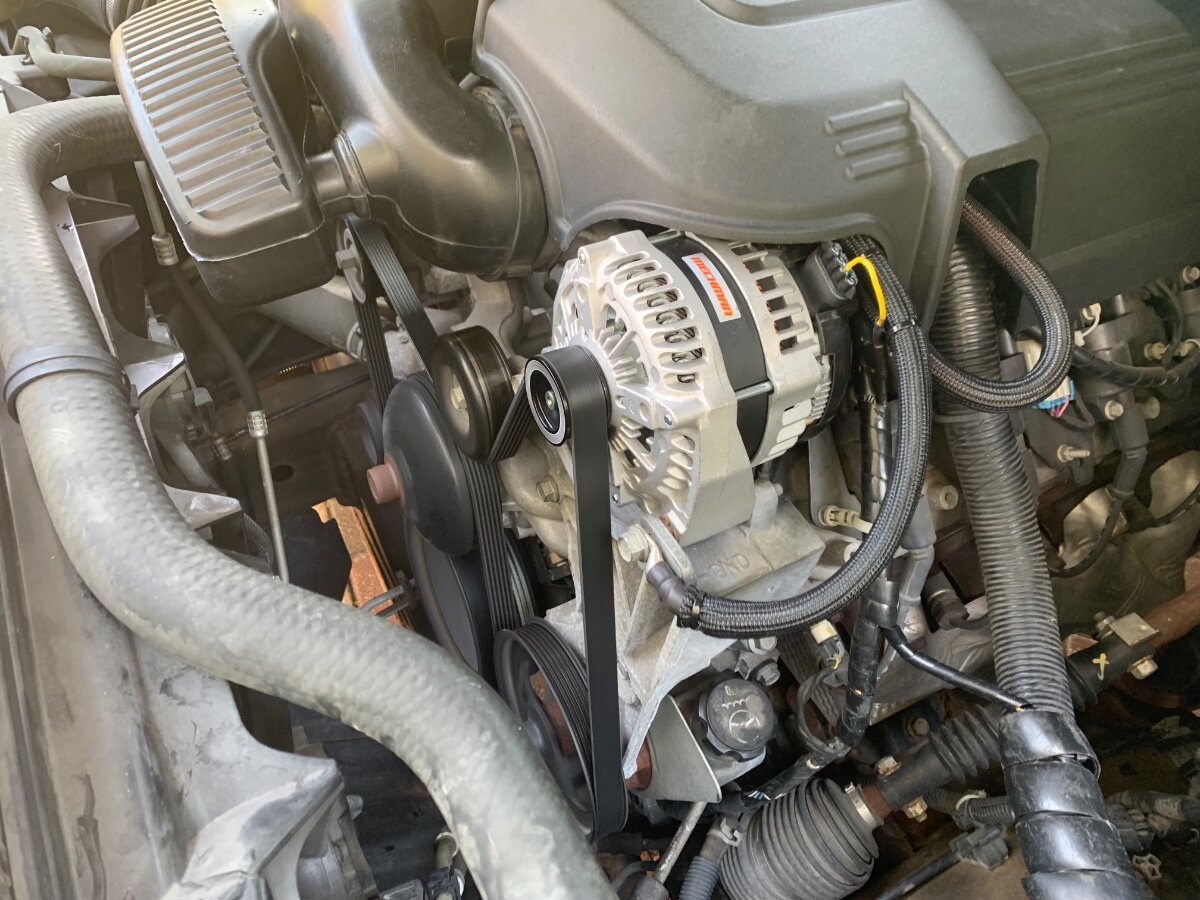
UPDATE1: The installation of the Mechman high output alternator went well, now waiting to field test to confirm any improvement in the DC-DC charger output at idle and general TV battery performance. Perhaps @rideadeuce got his installed and can provide a report on his (hopefully favorable) results. Wire loom to protect the new 1/0 cables remains to be done. Battery chaos! UPDATE2: Wire loom and engine cover installed to complete this alternator upgrade project. As a side note: since my TV has a lower drive belt for the a/c compressor, a new one was first installed before the new shorter one specified for use with the smaller alternator pulley per the manufacturer’s recommendation.
2 points
-
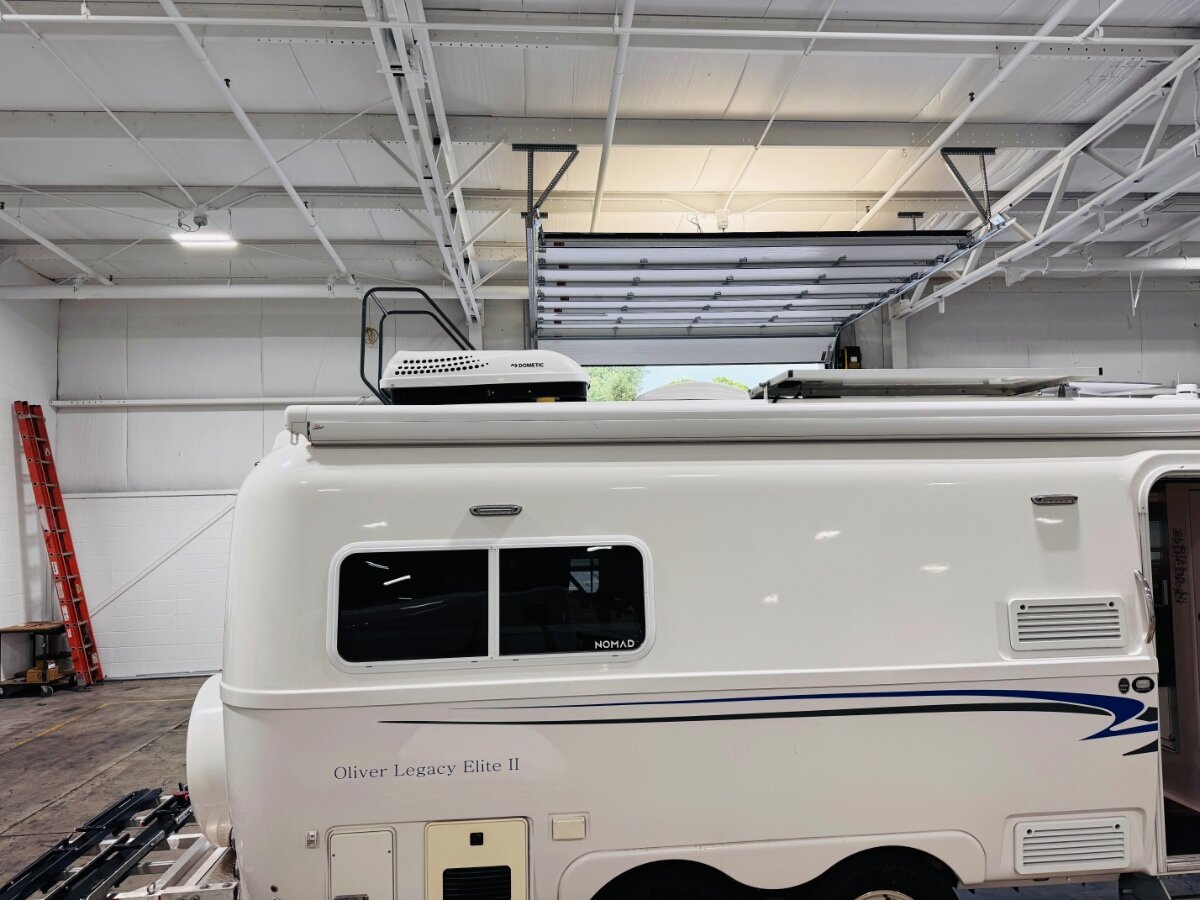
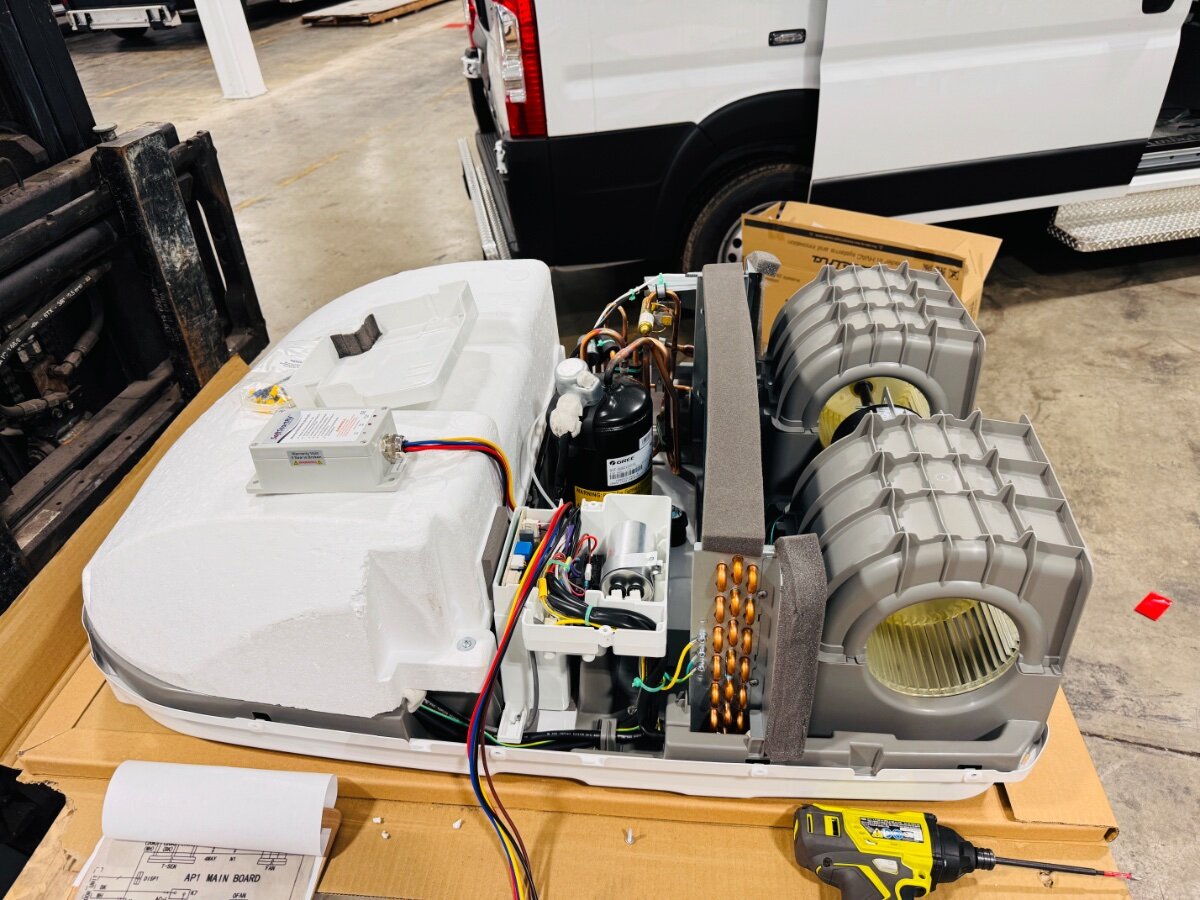
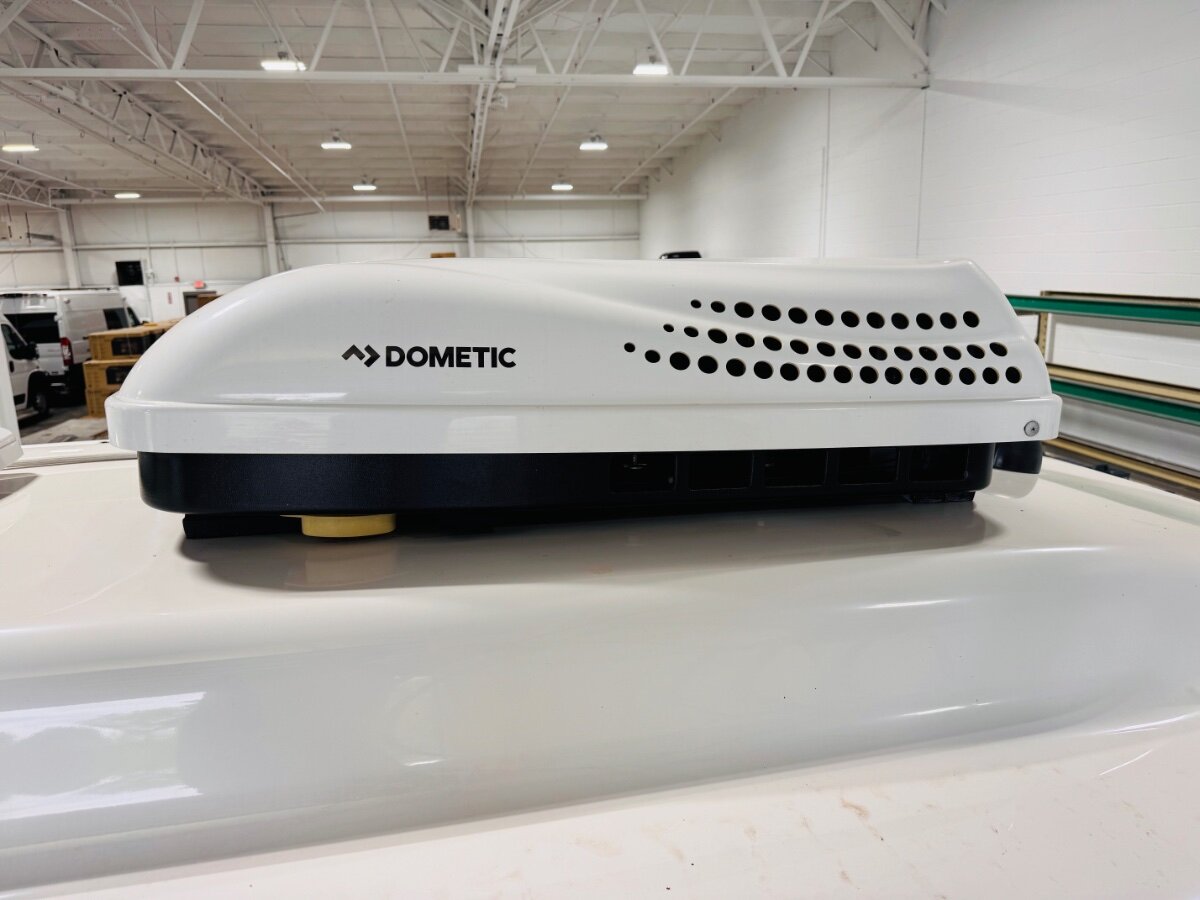
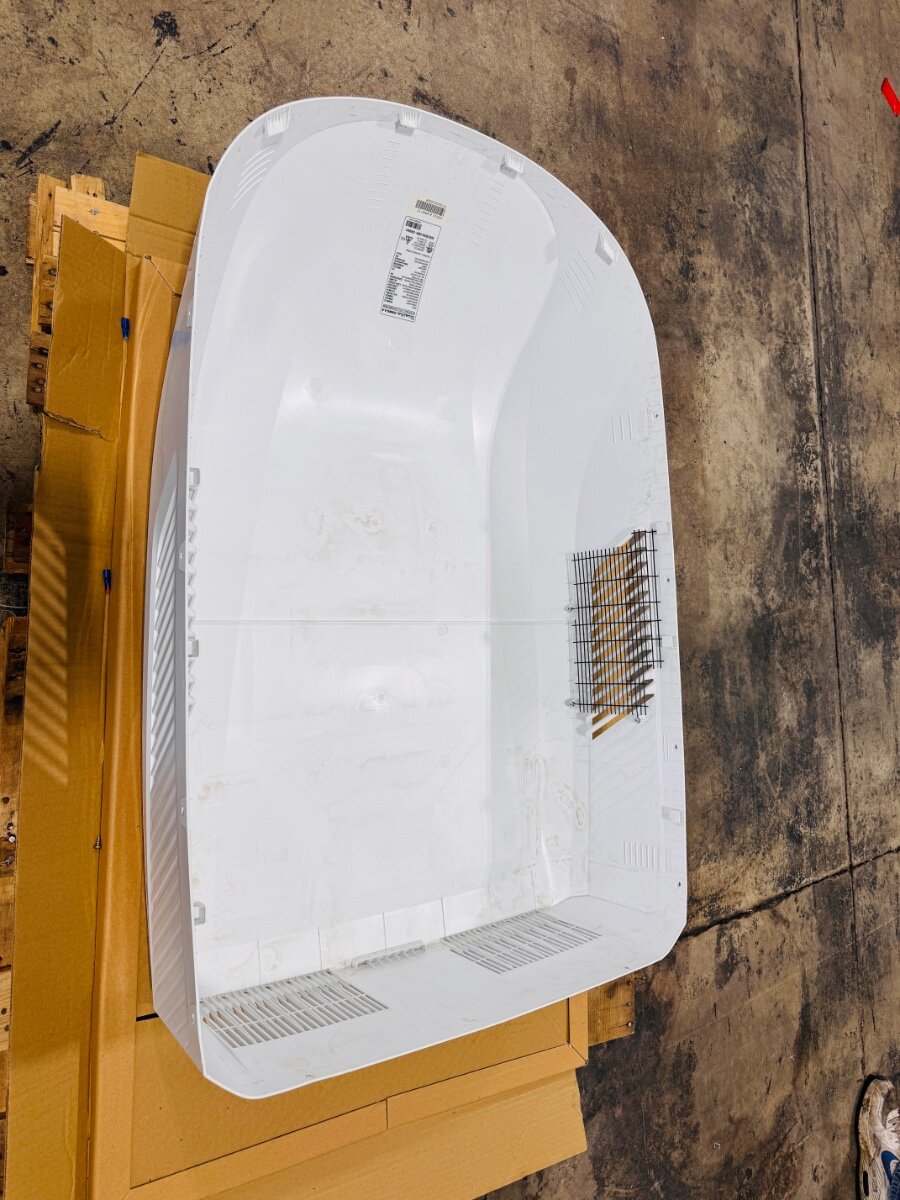
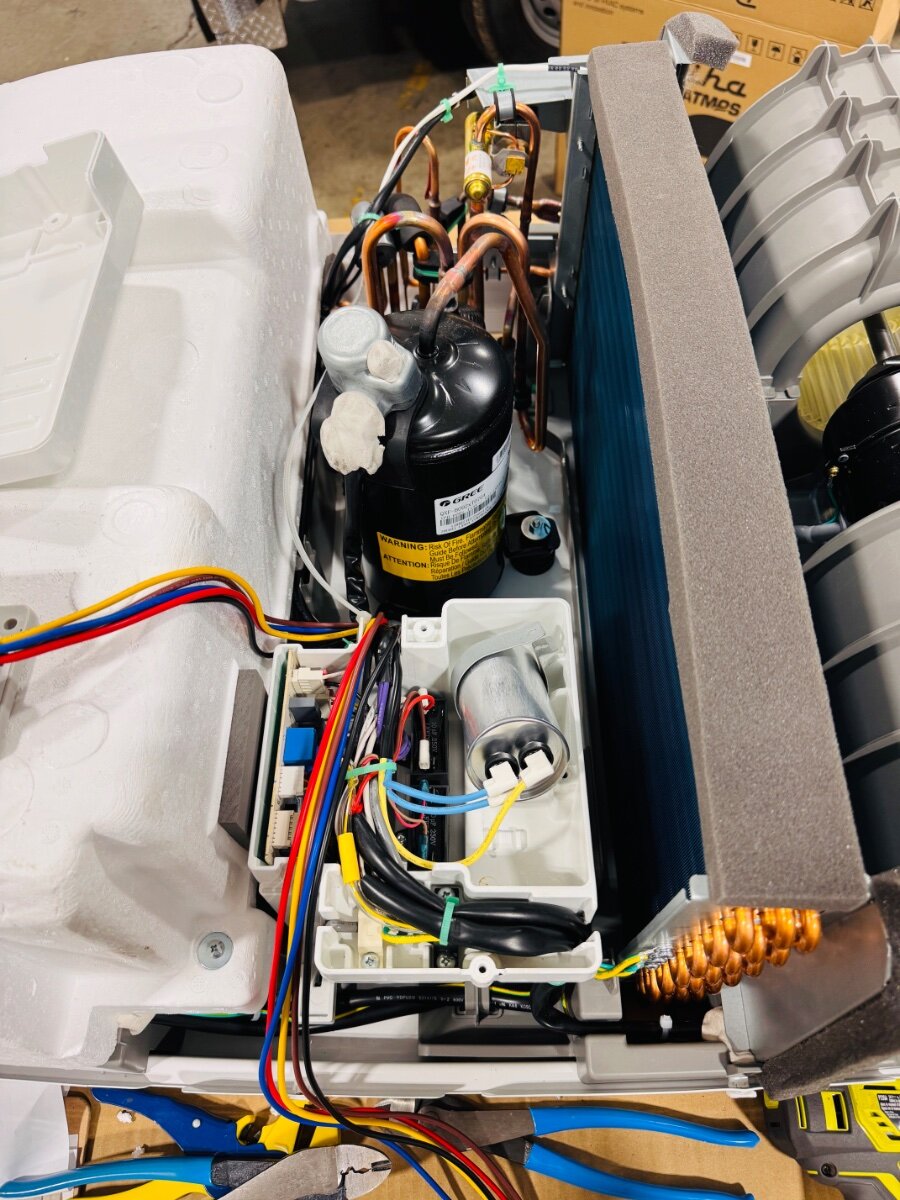
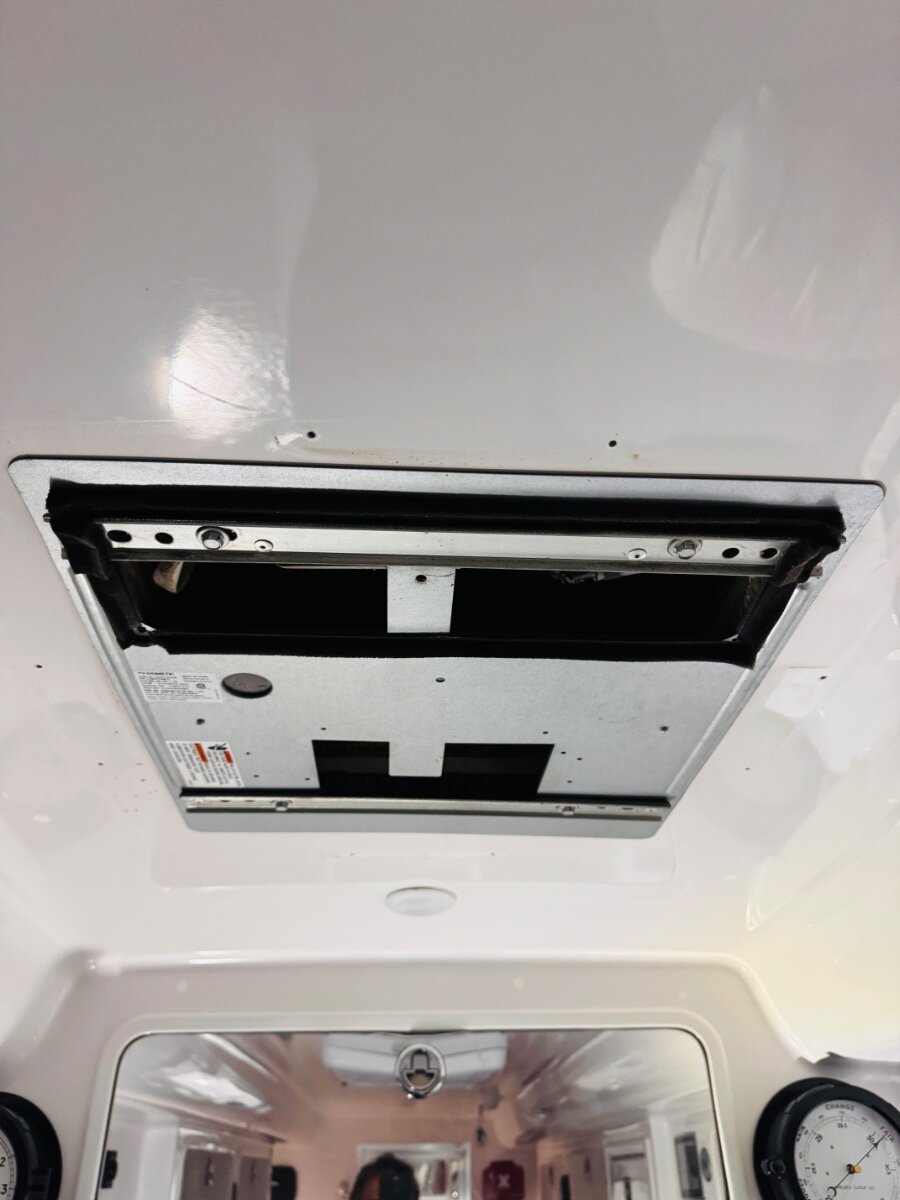
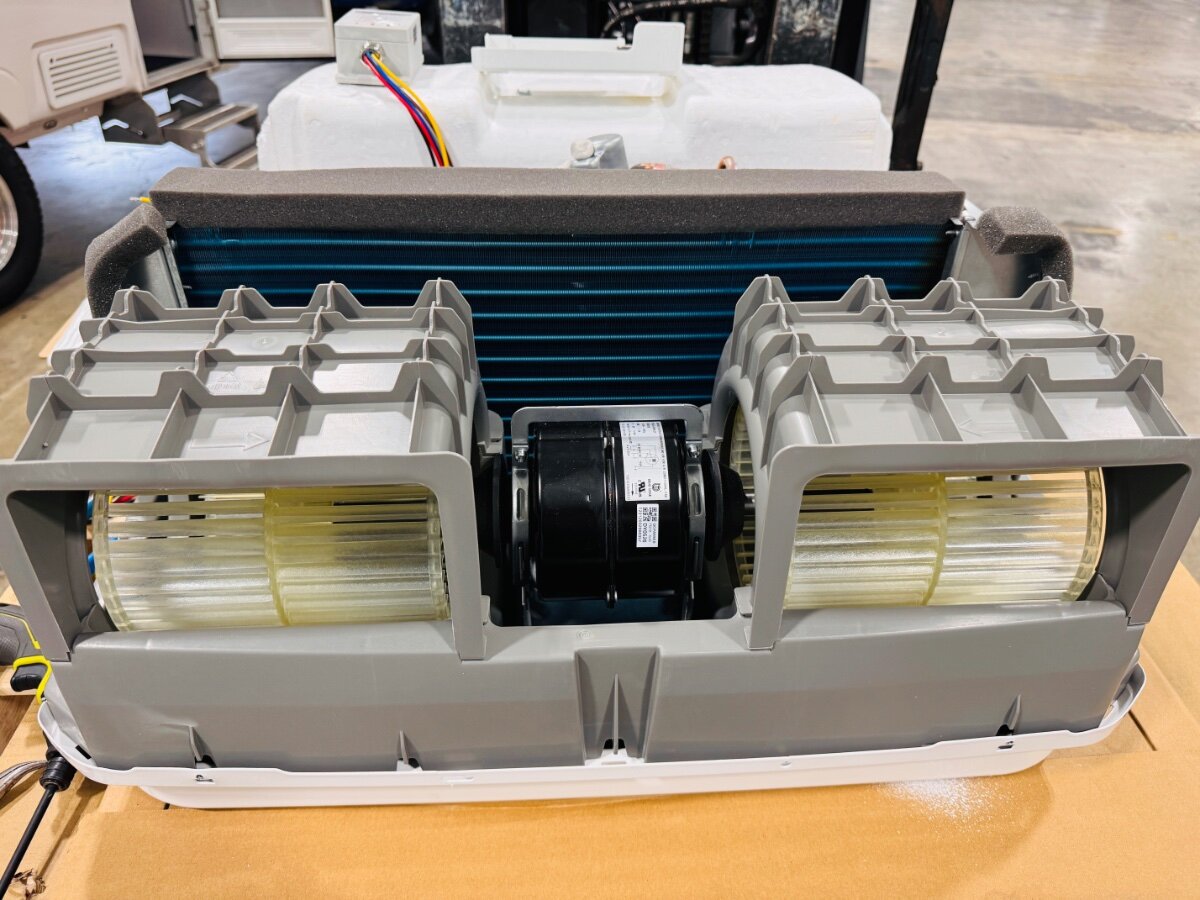
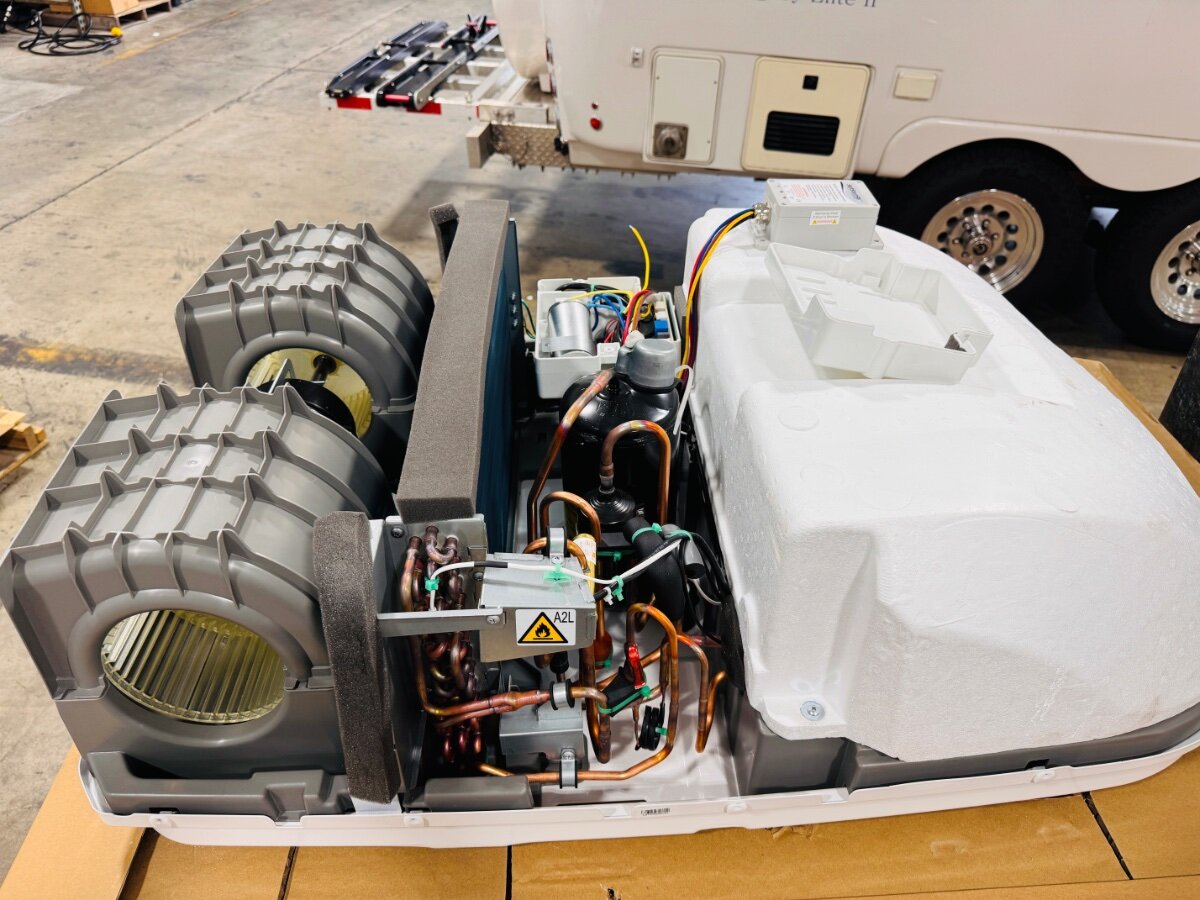
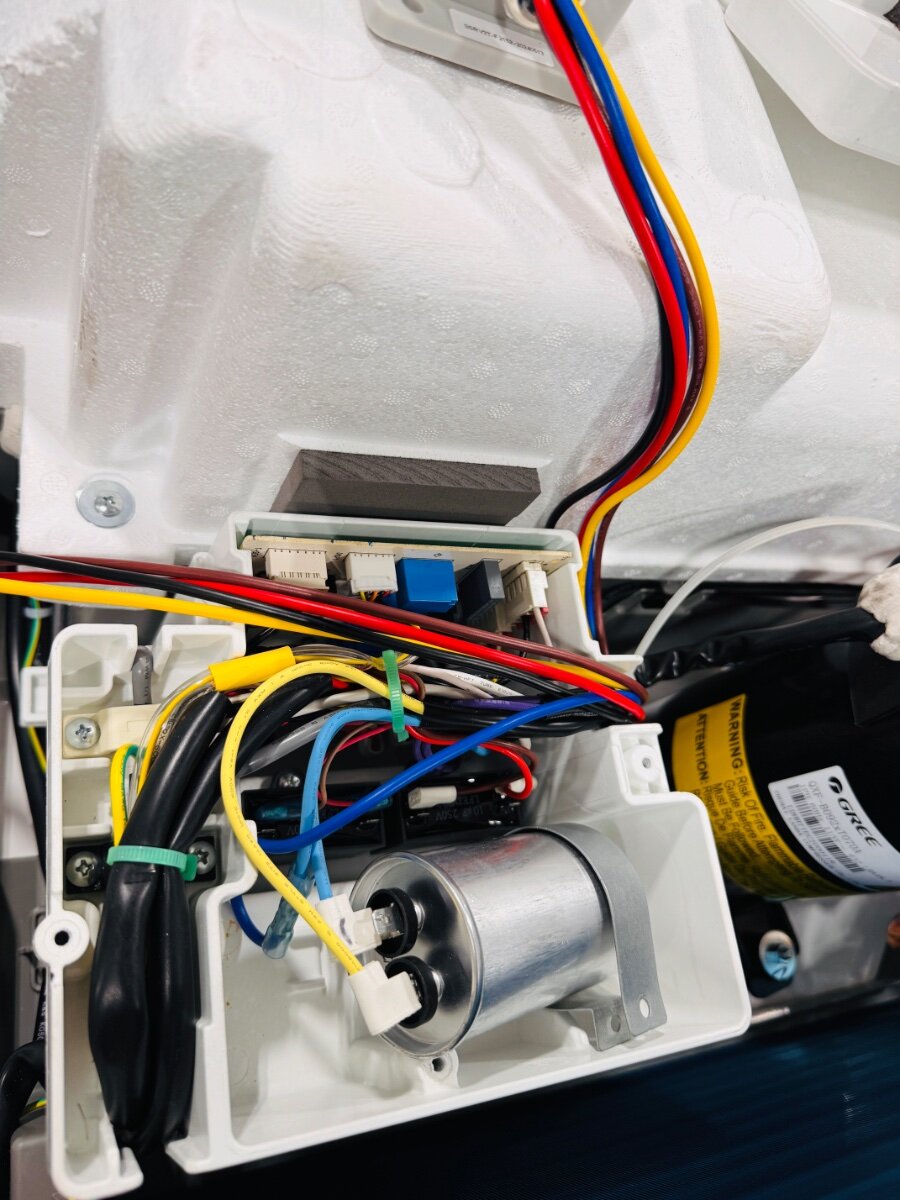
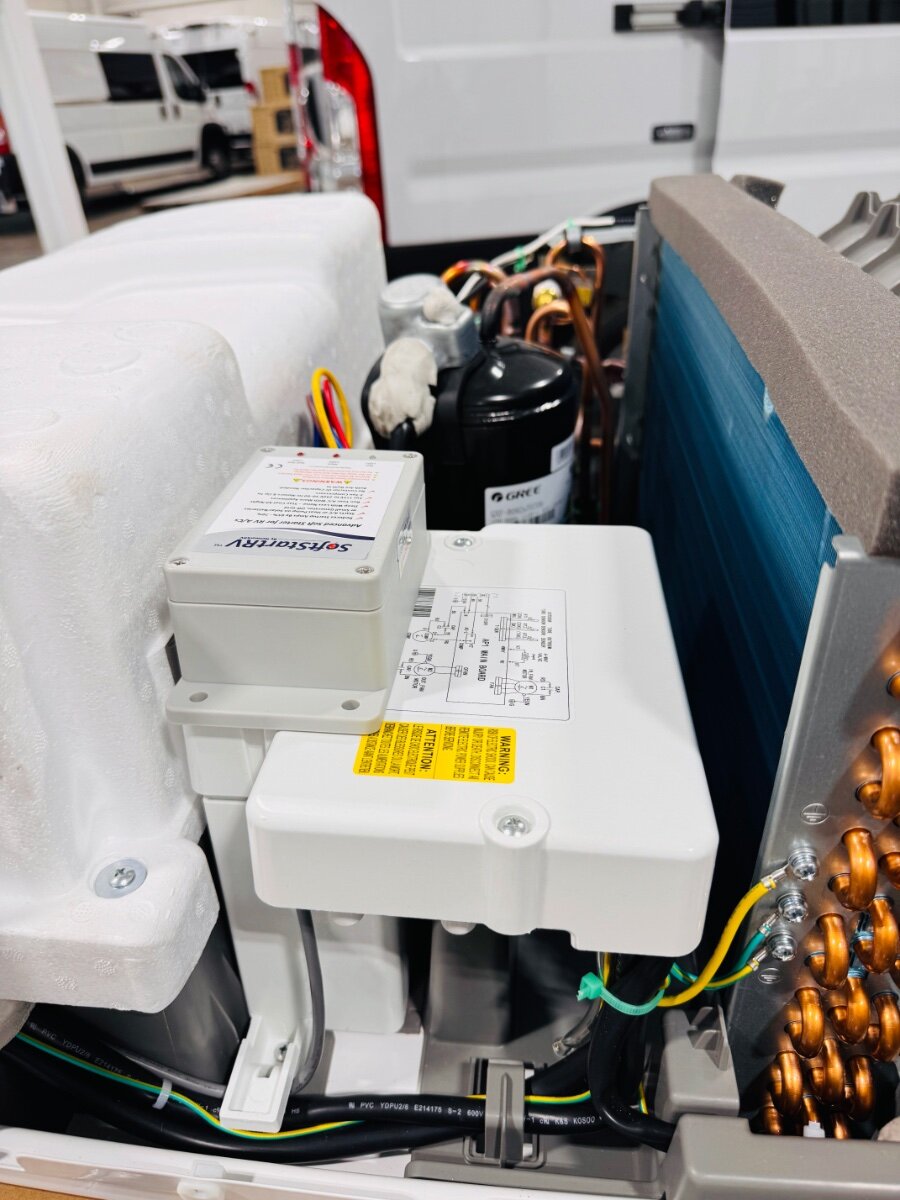
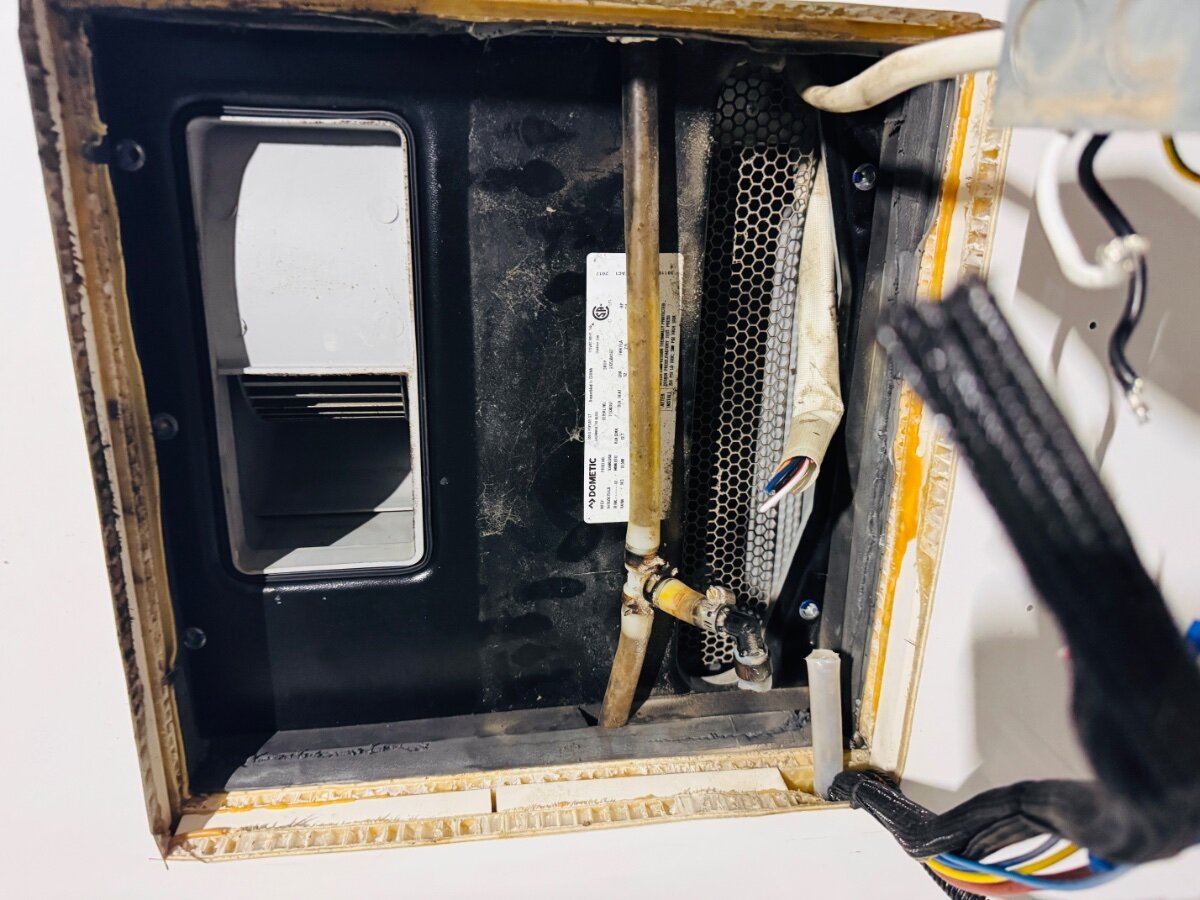
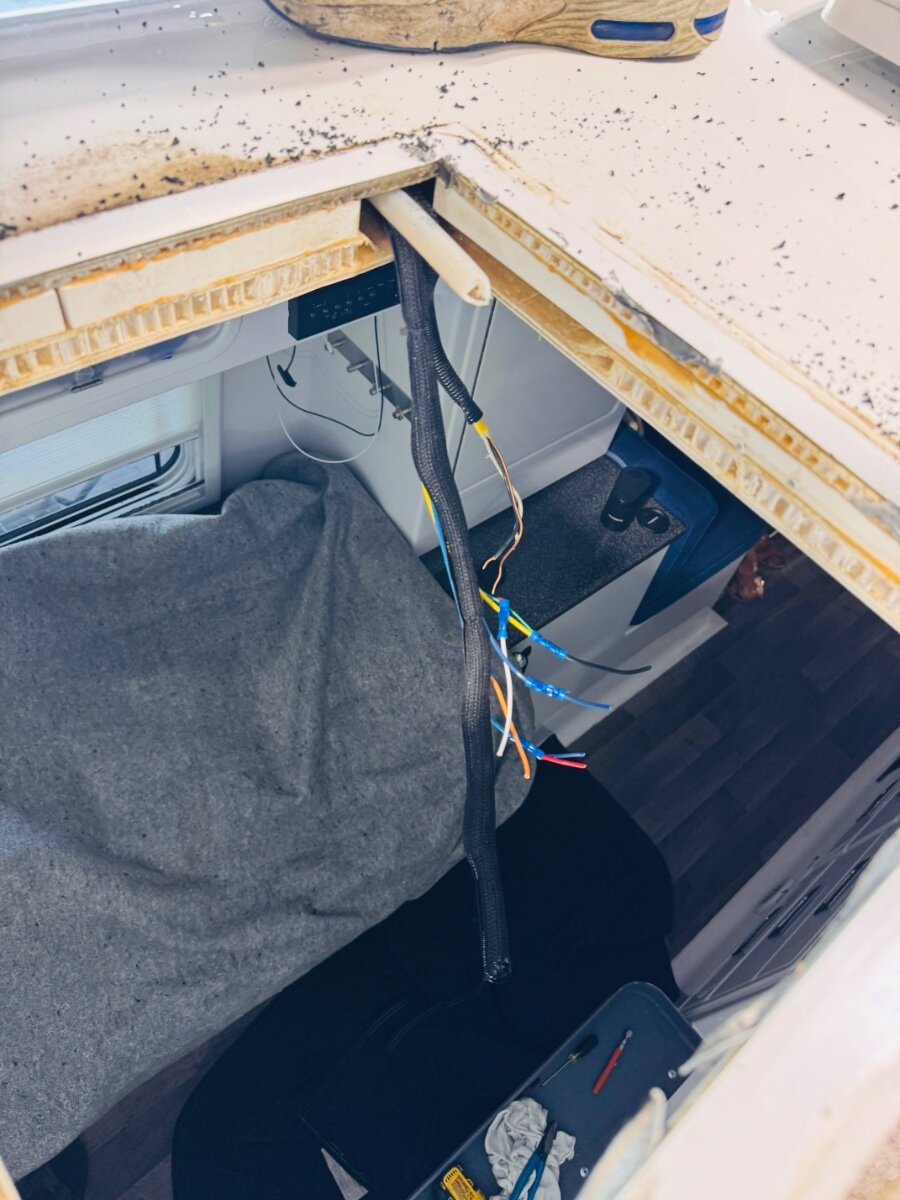
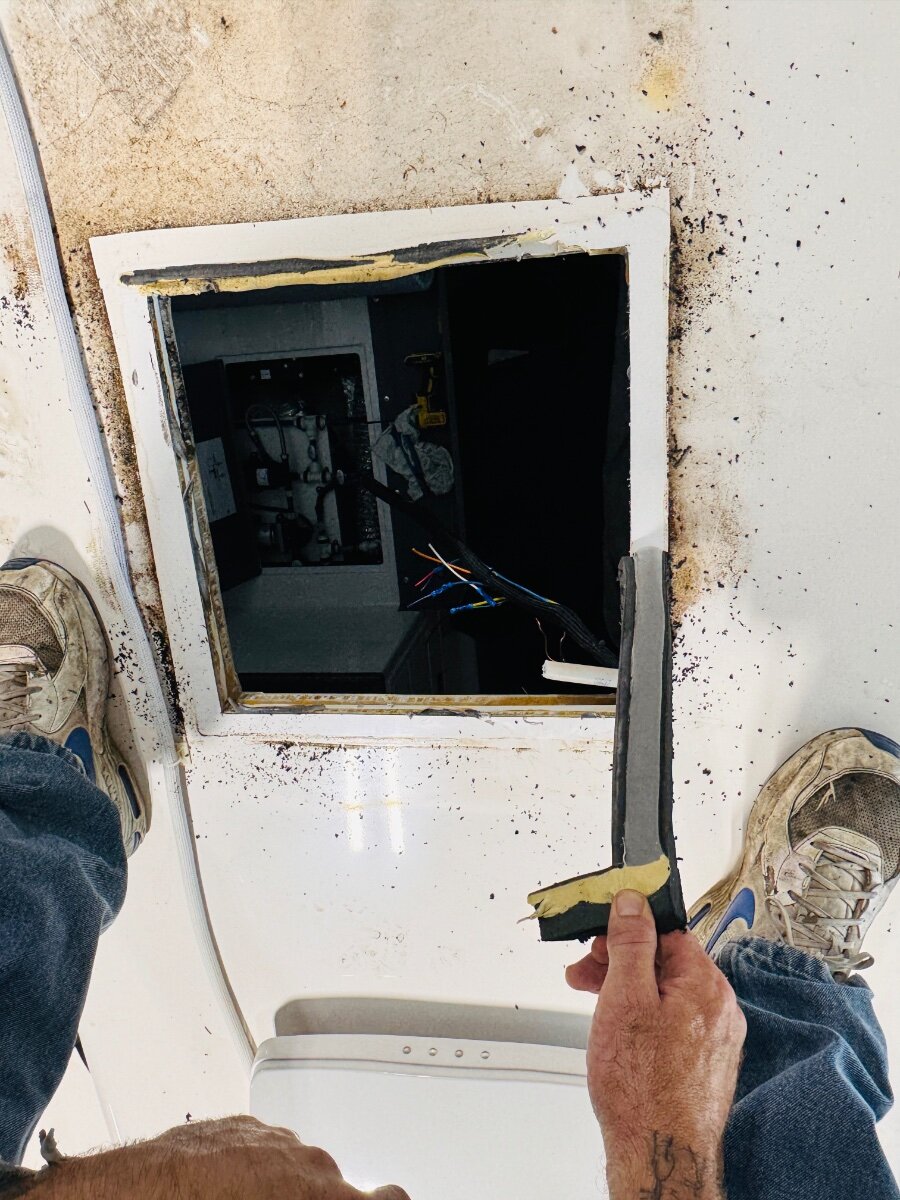
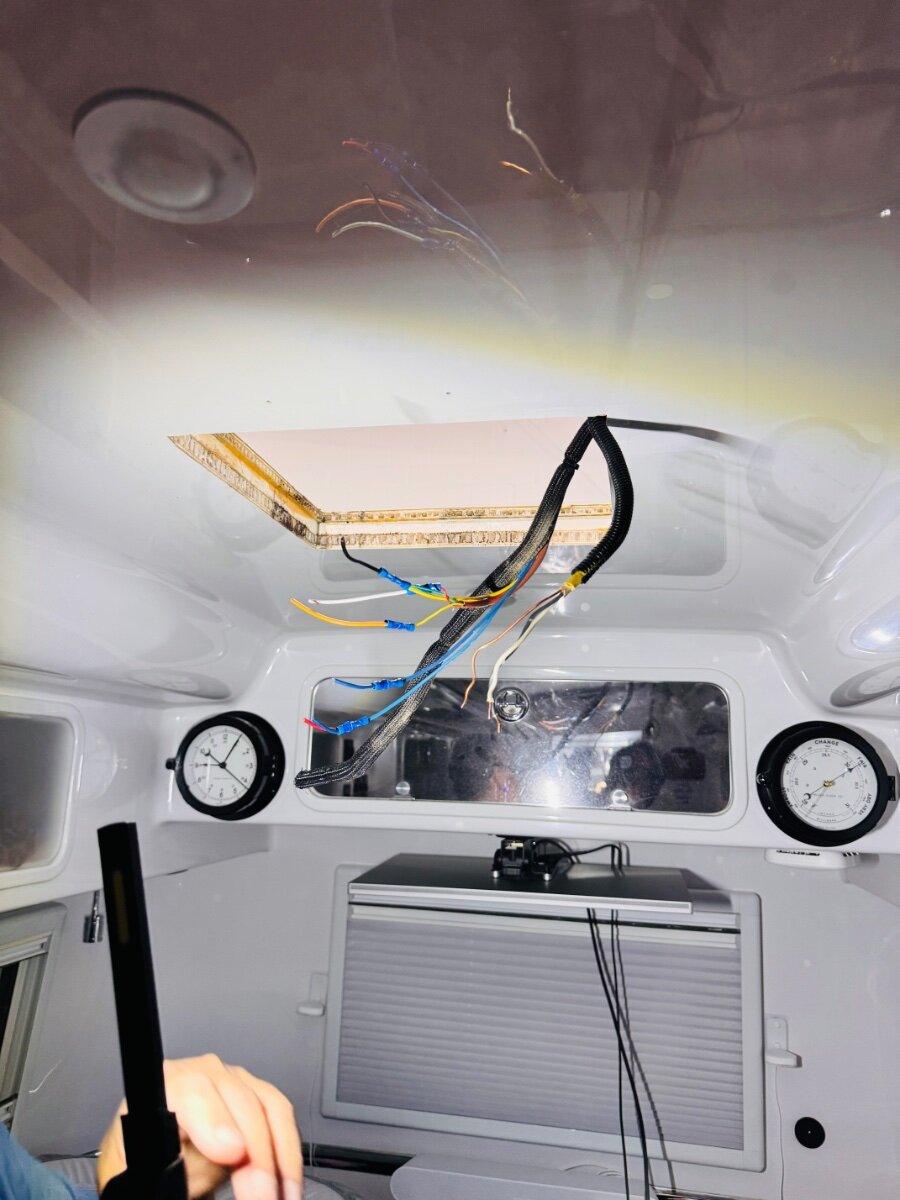
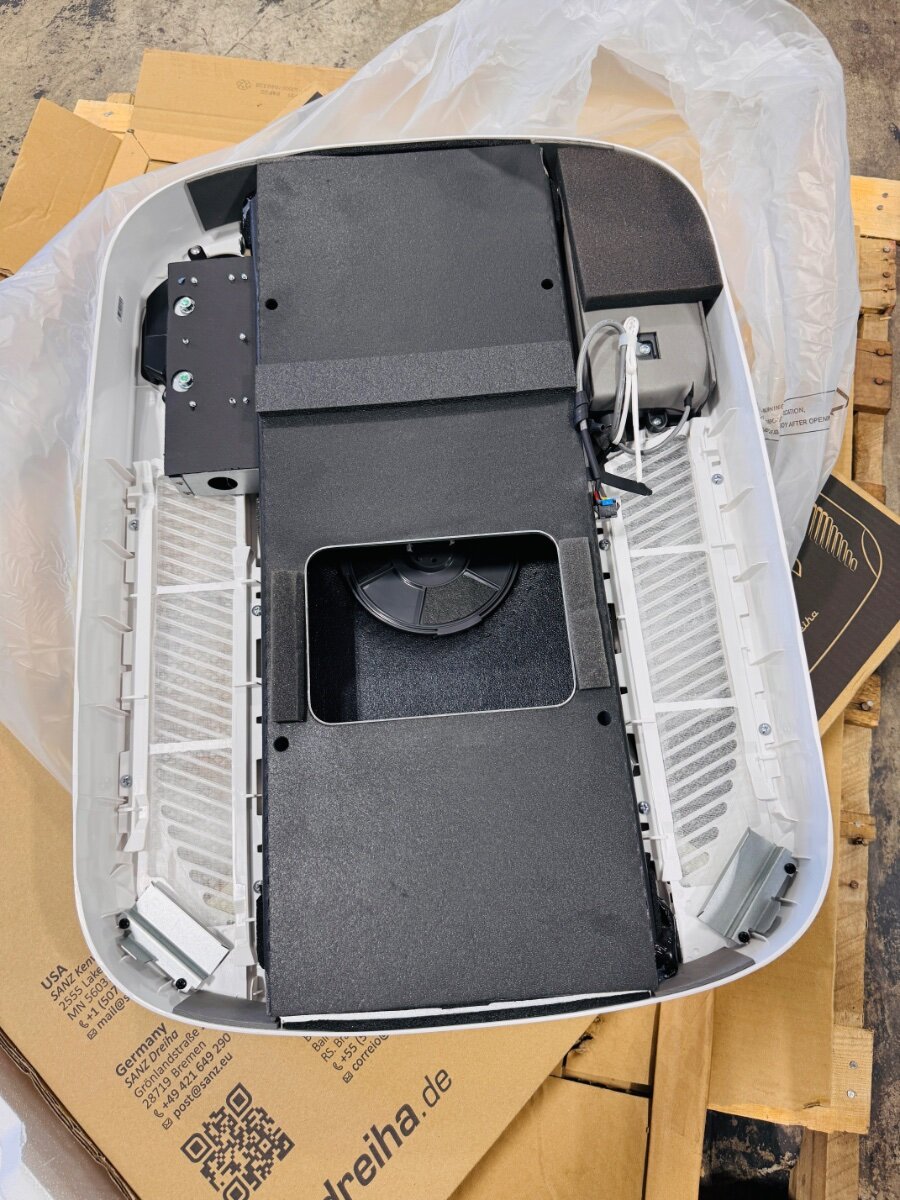
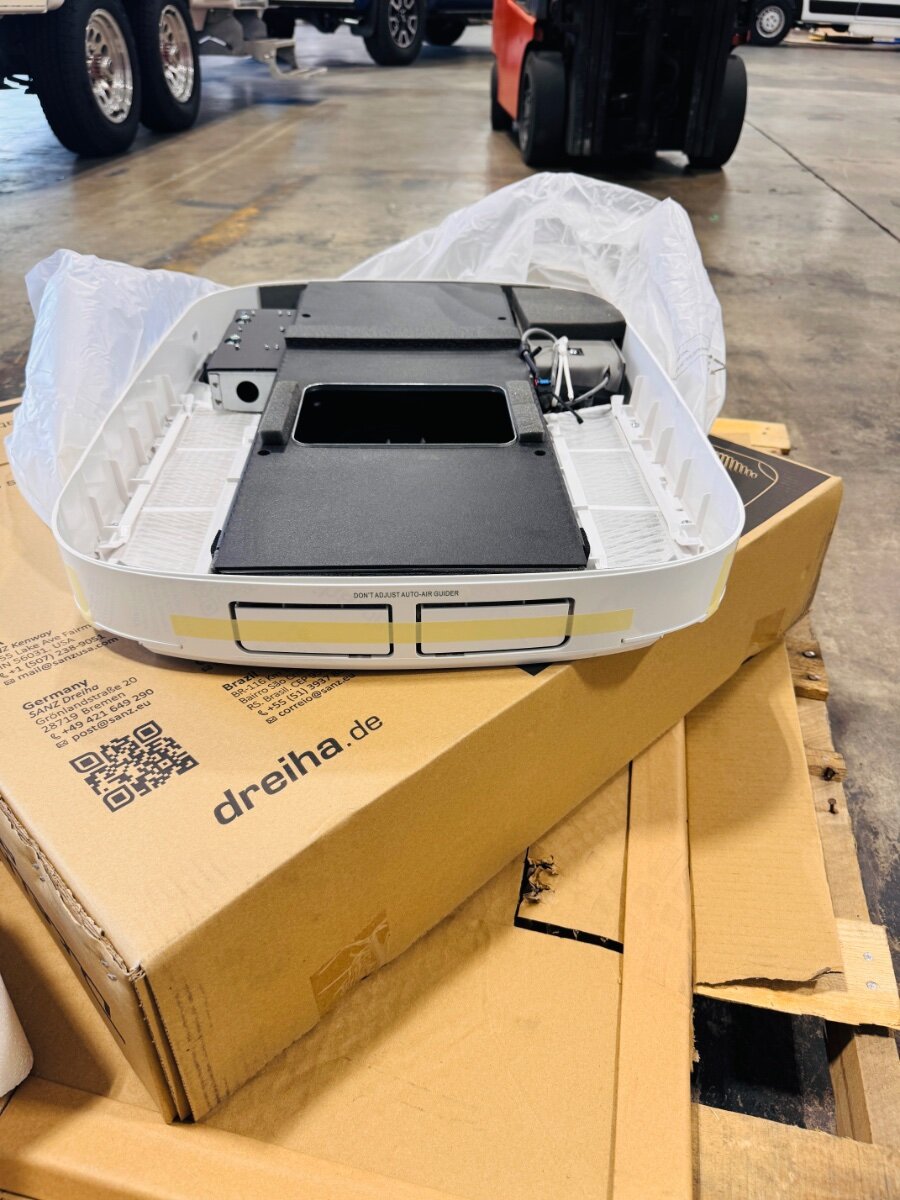
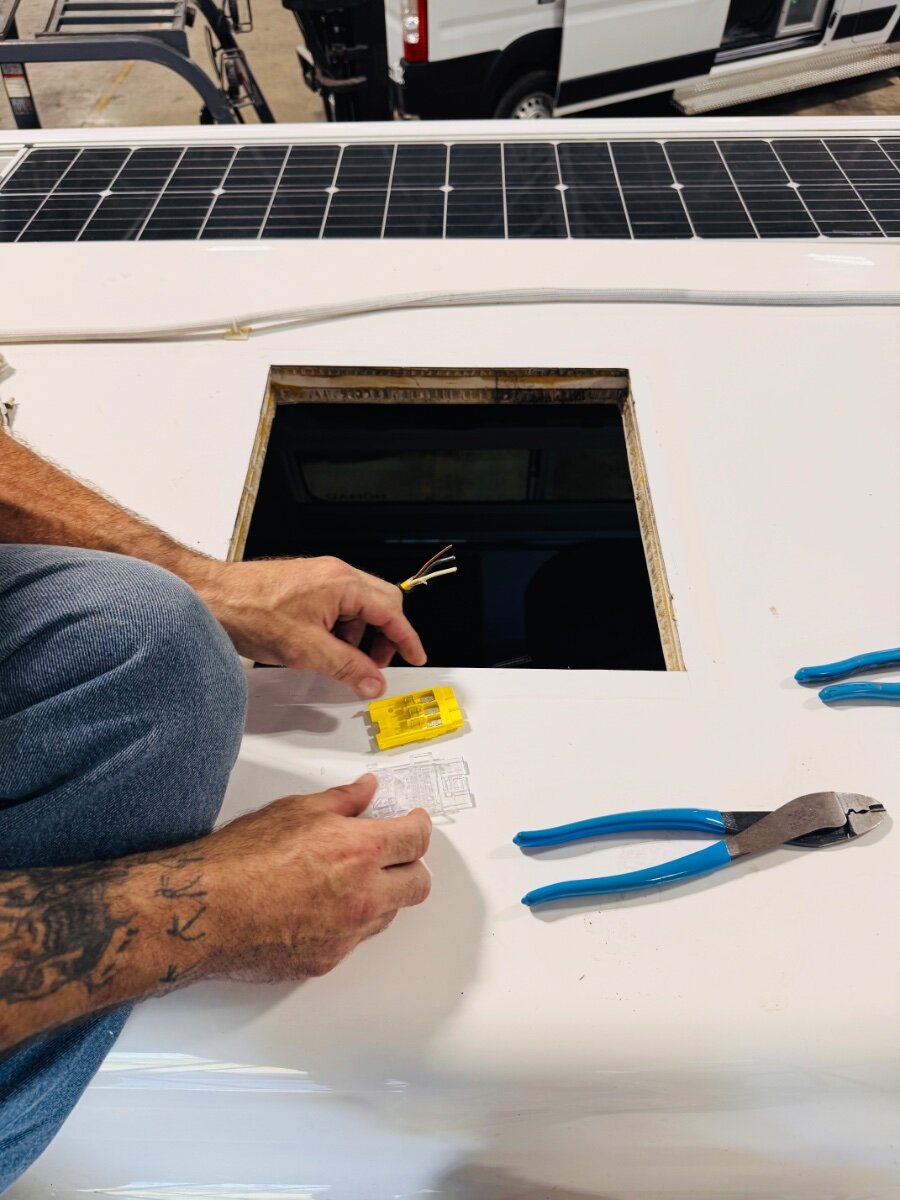
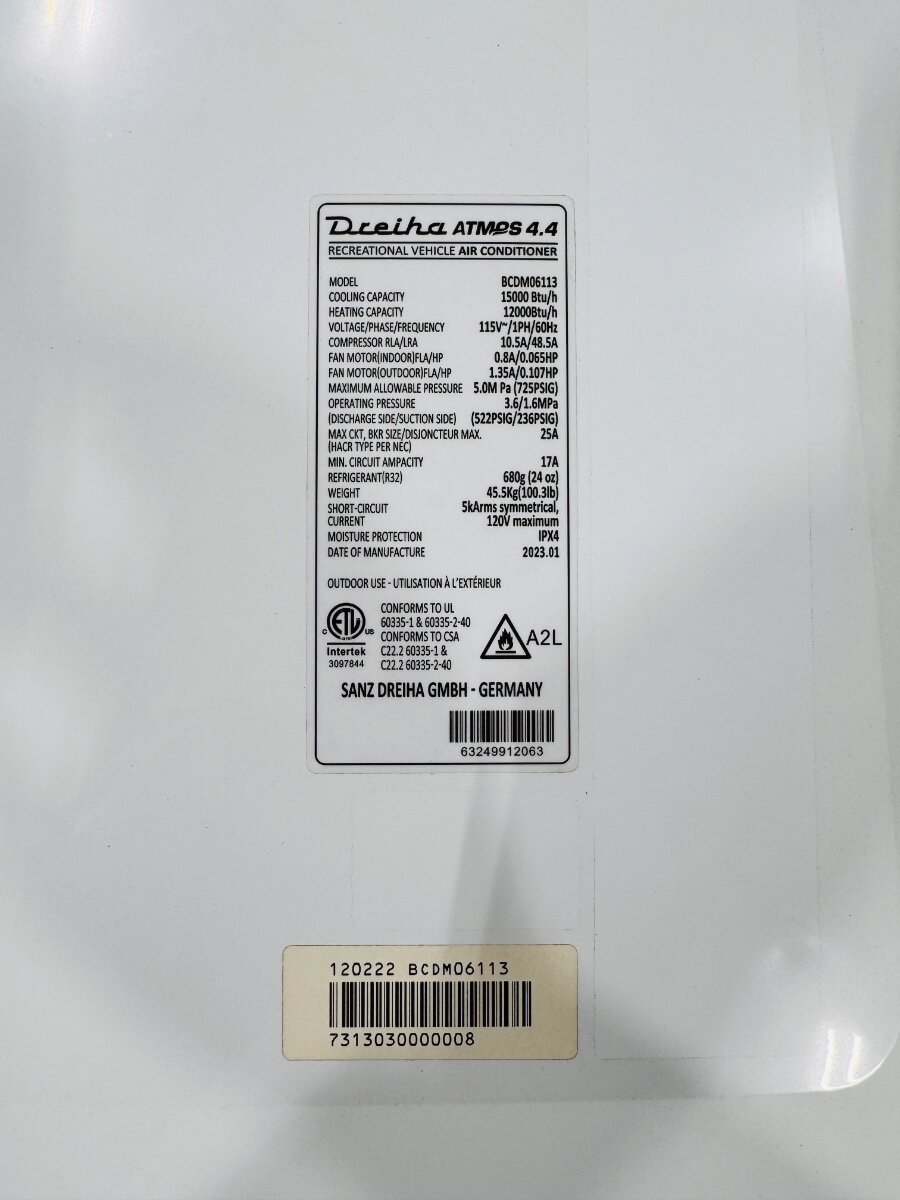
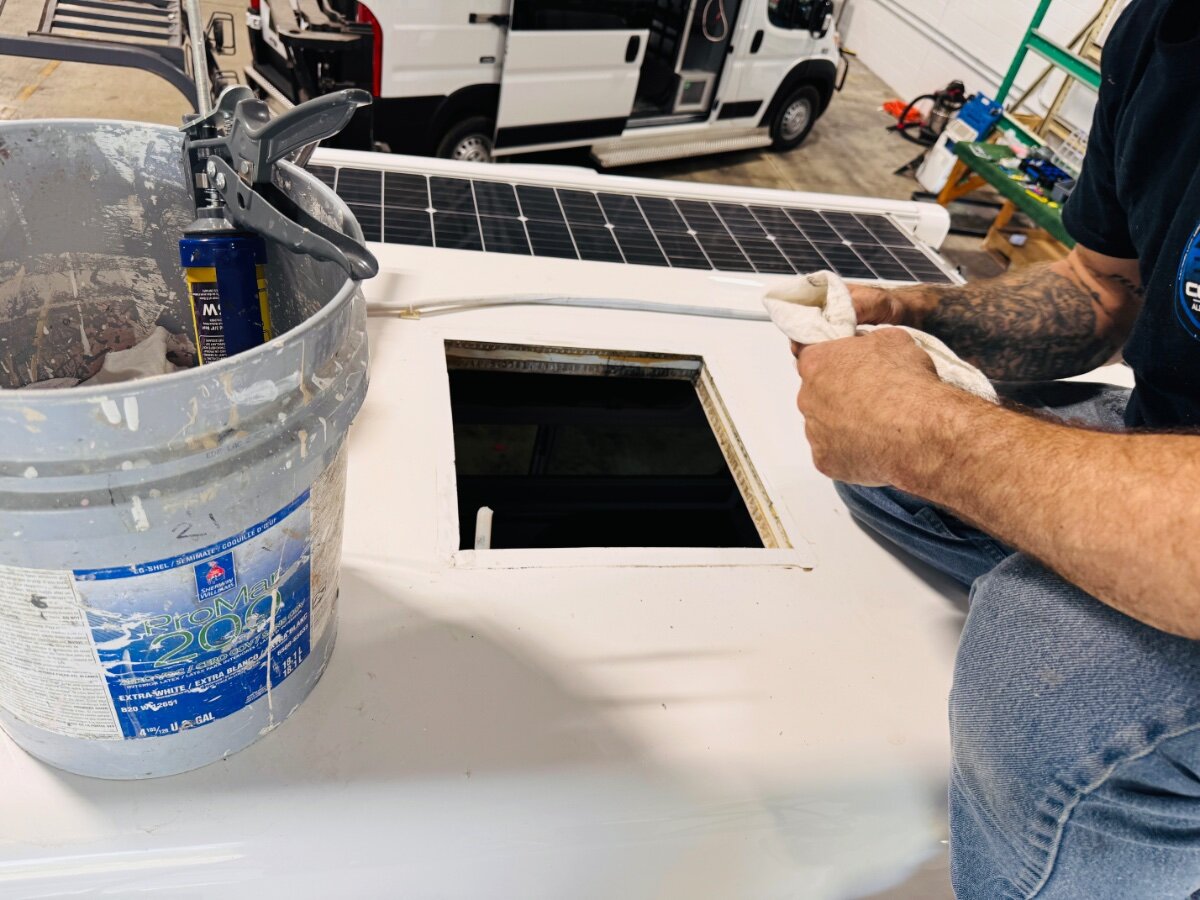
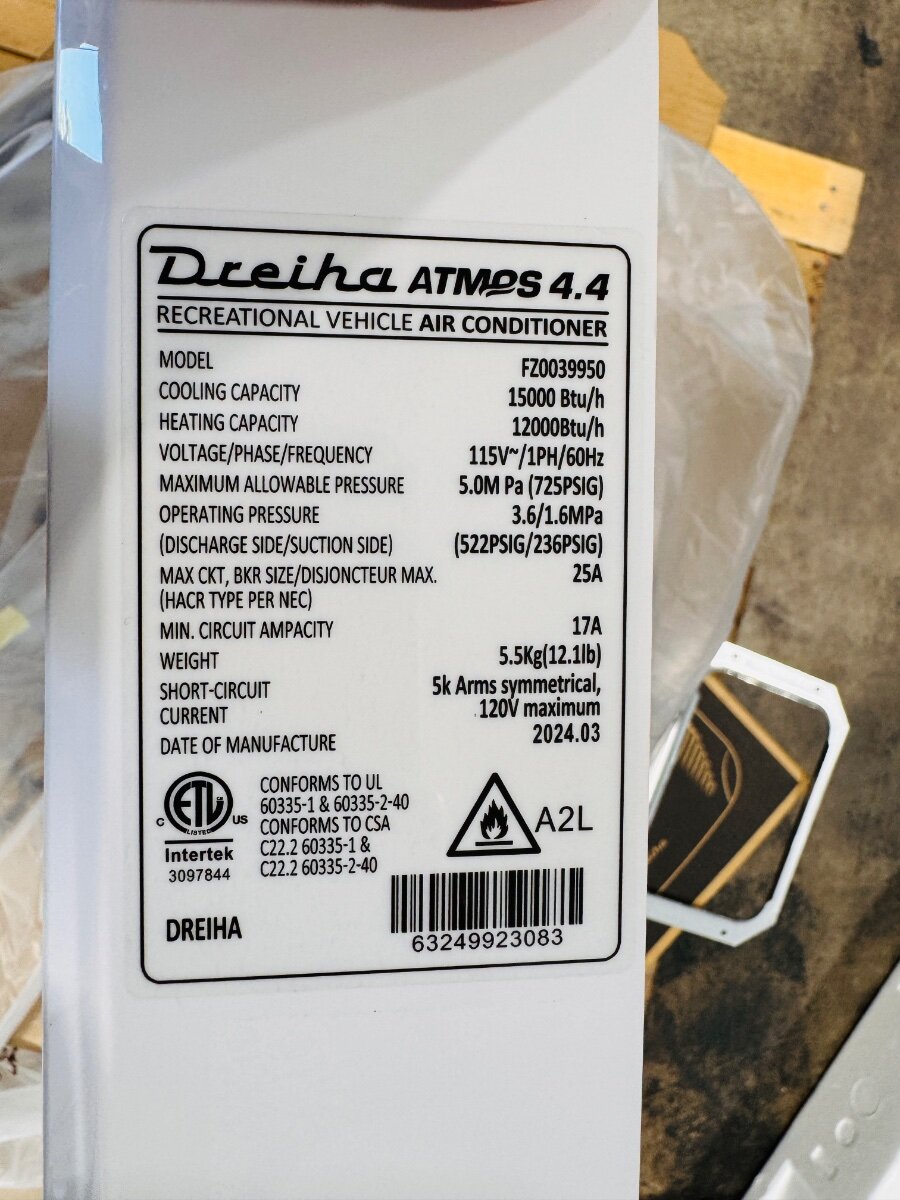
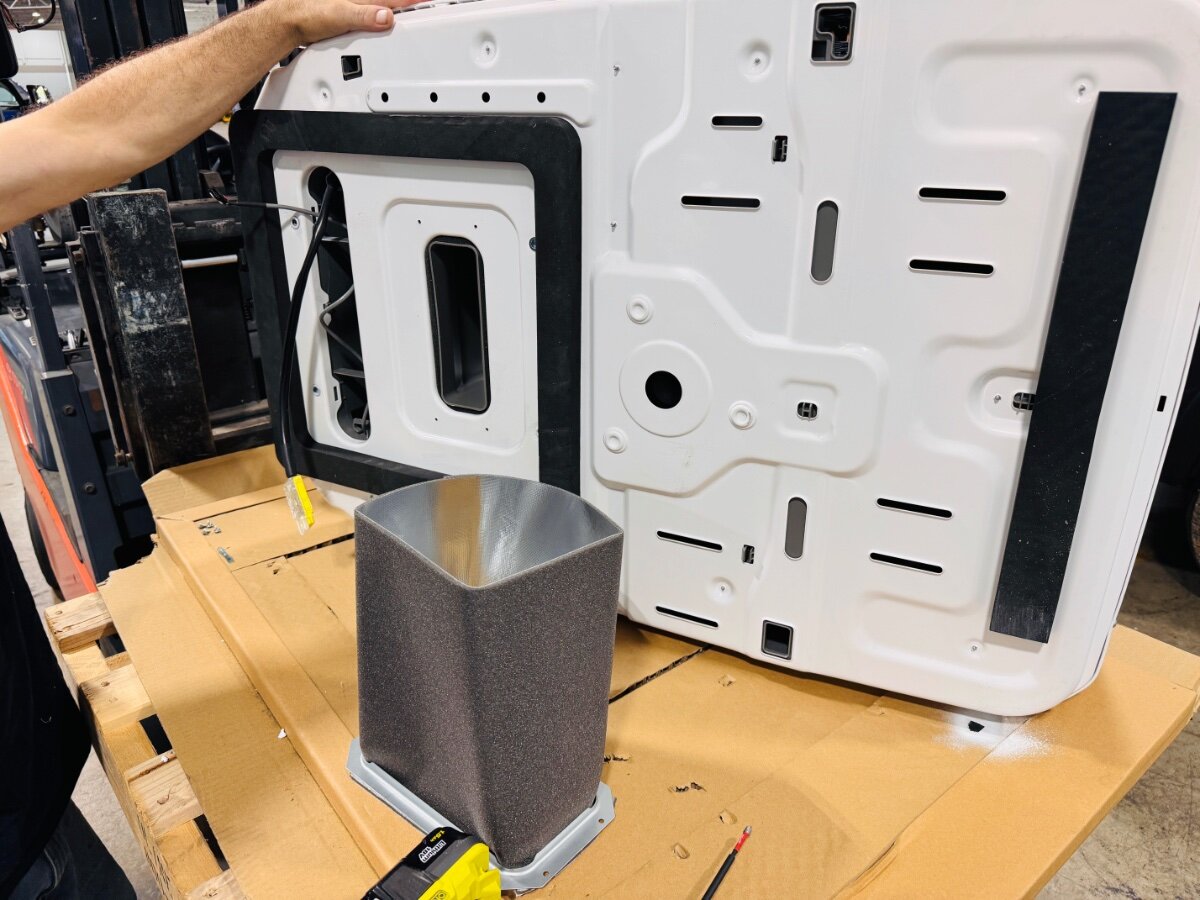
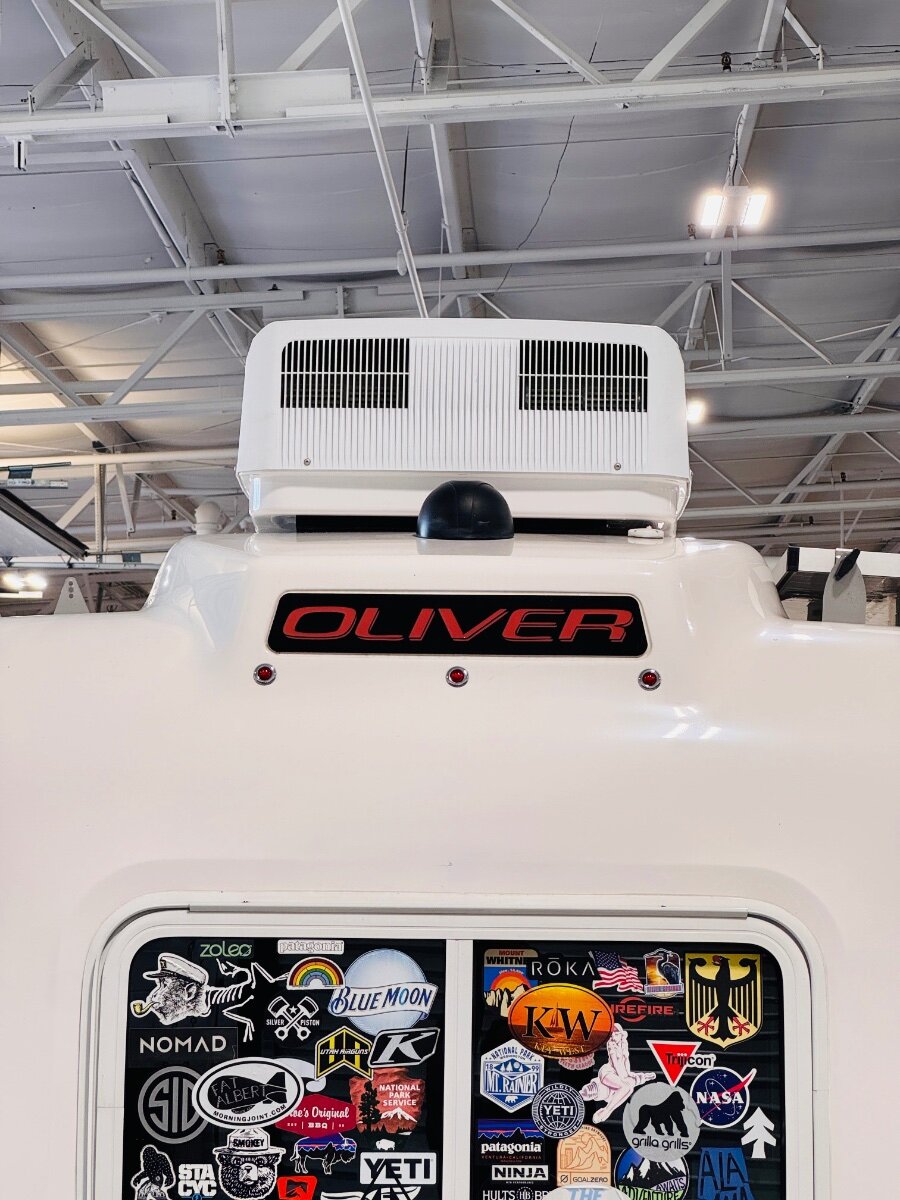
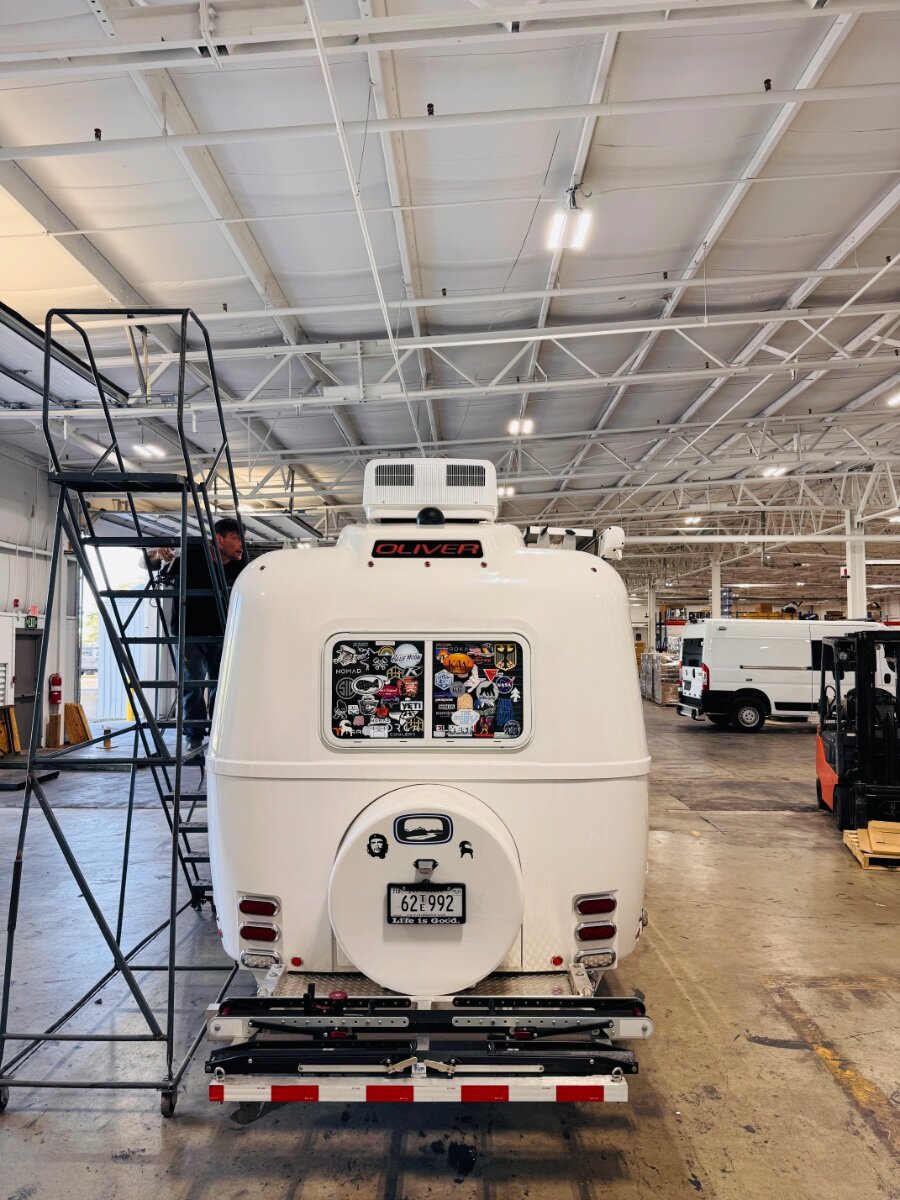
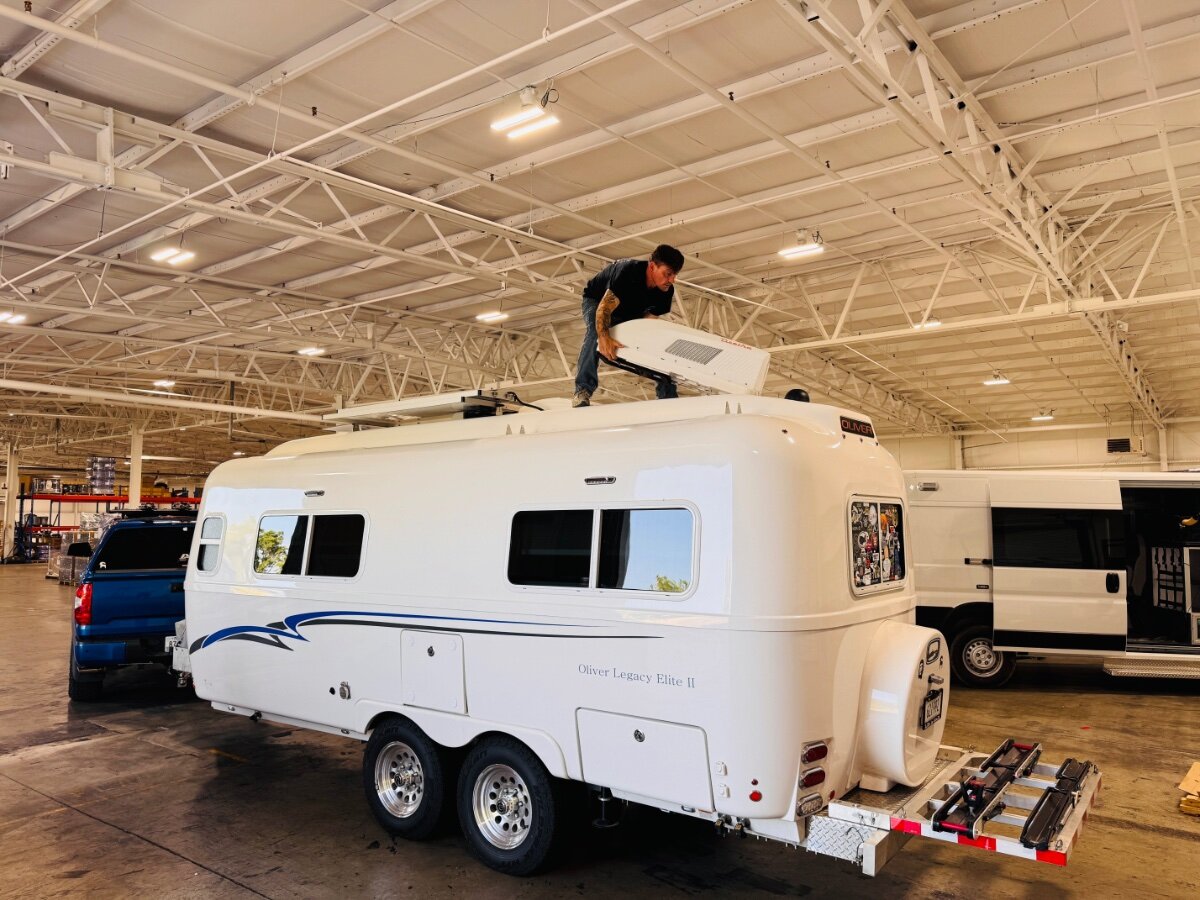
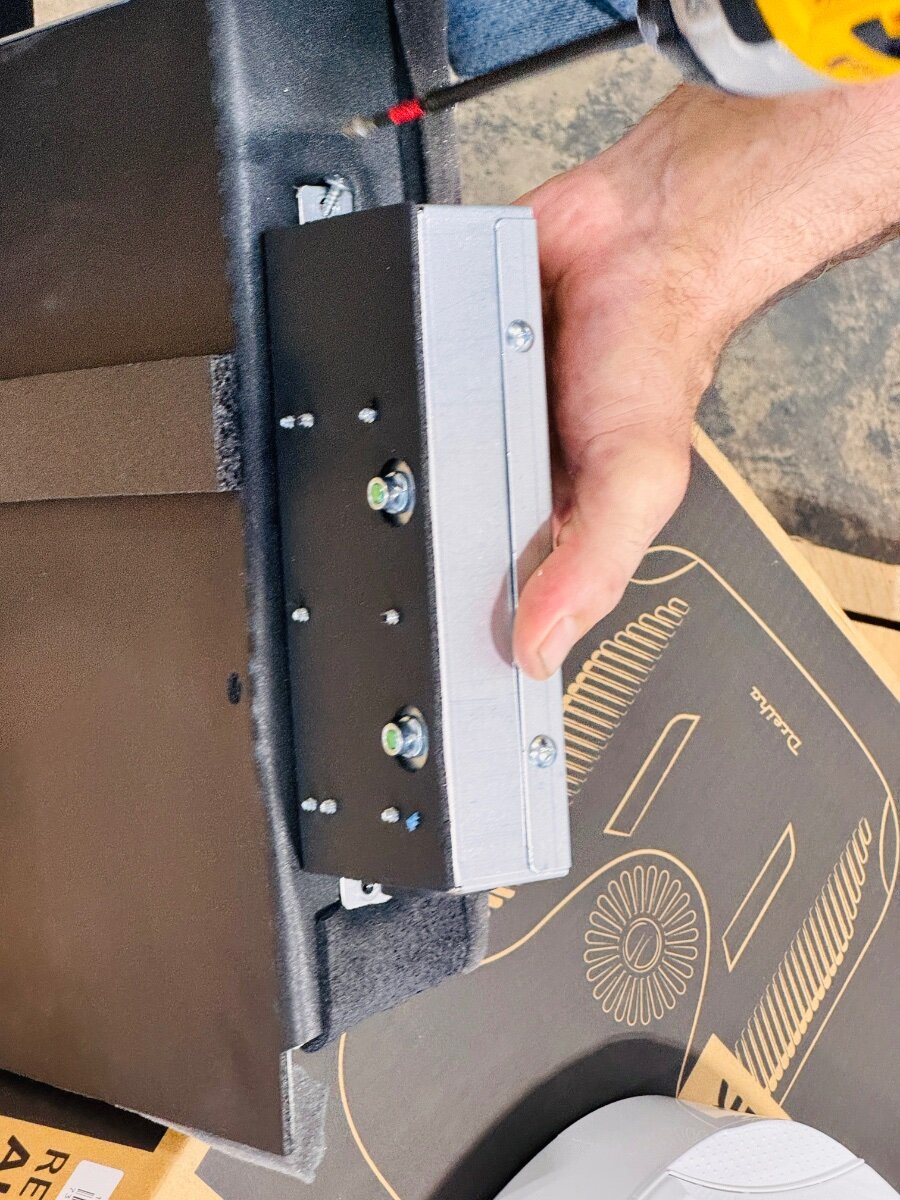
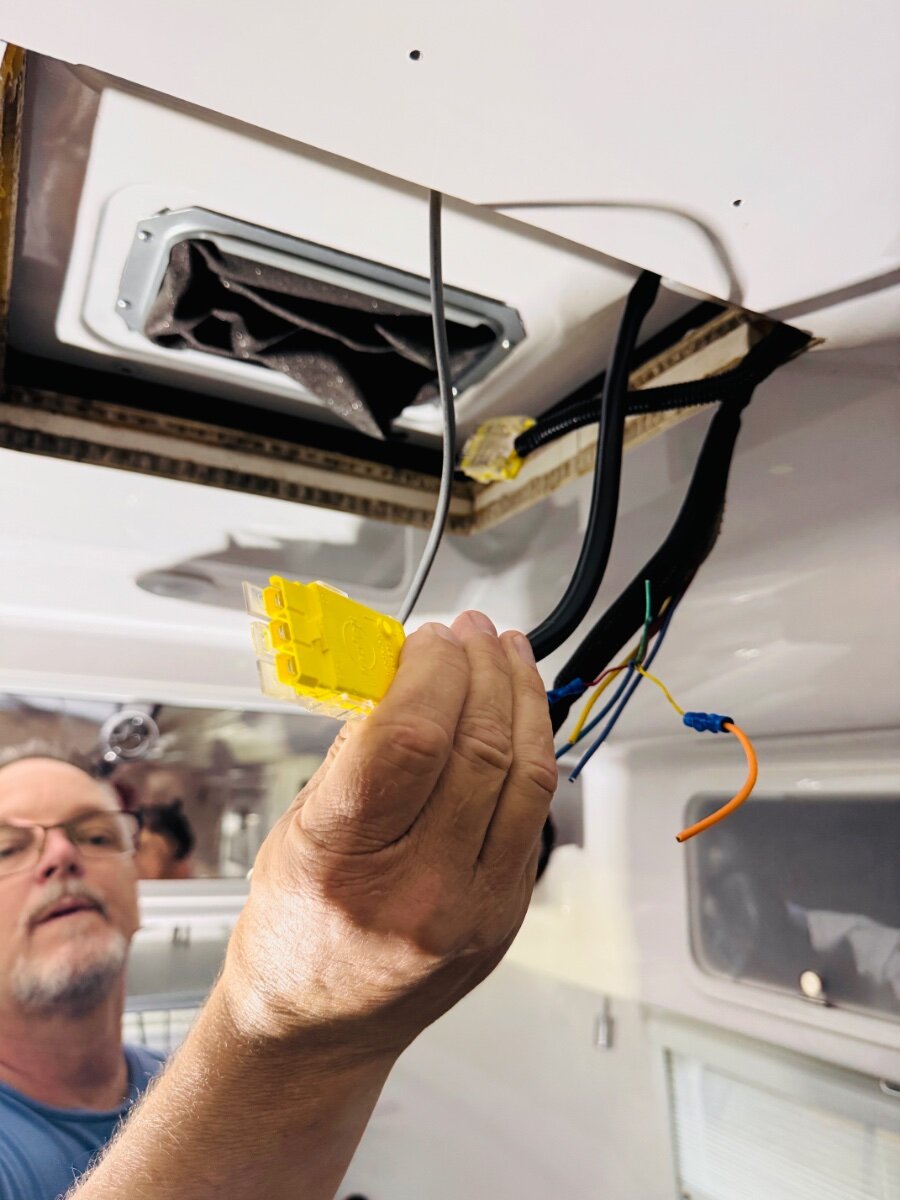
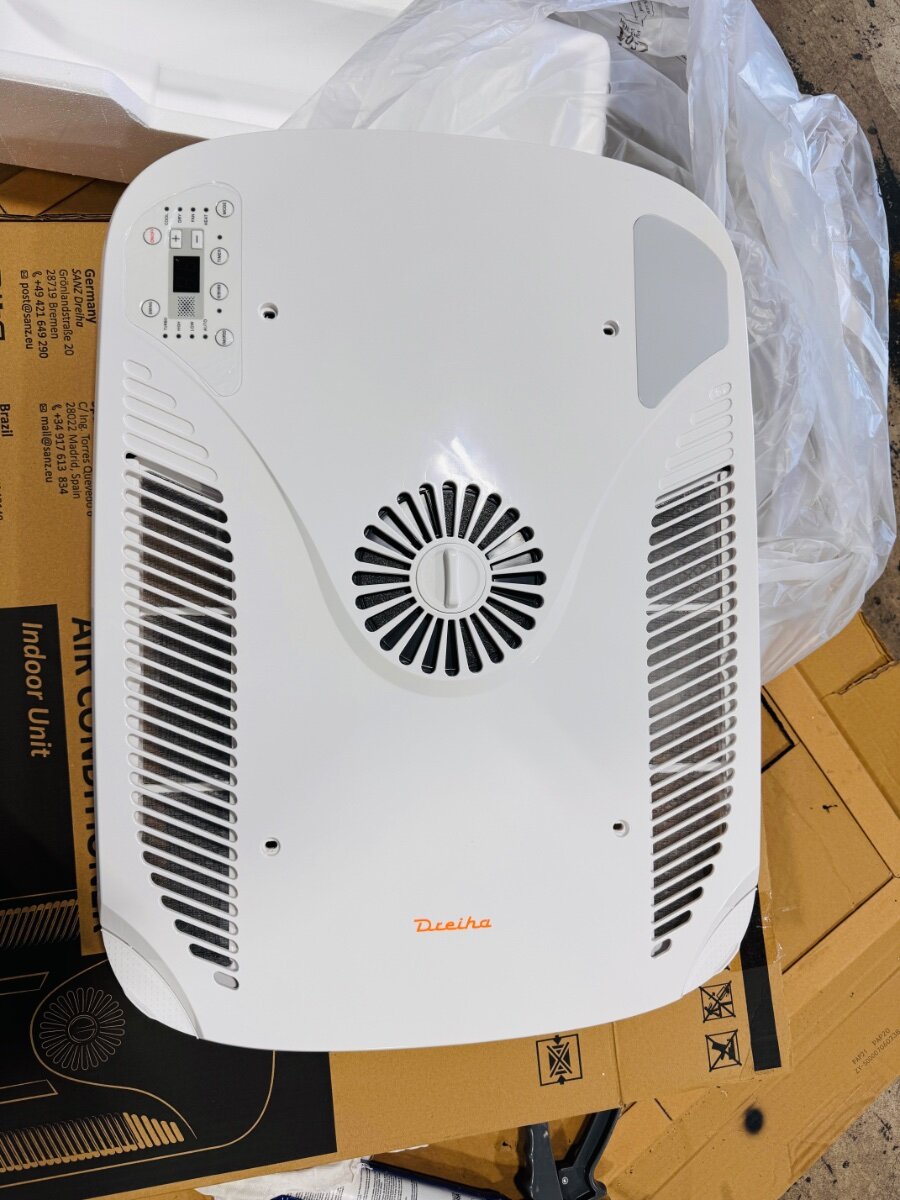
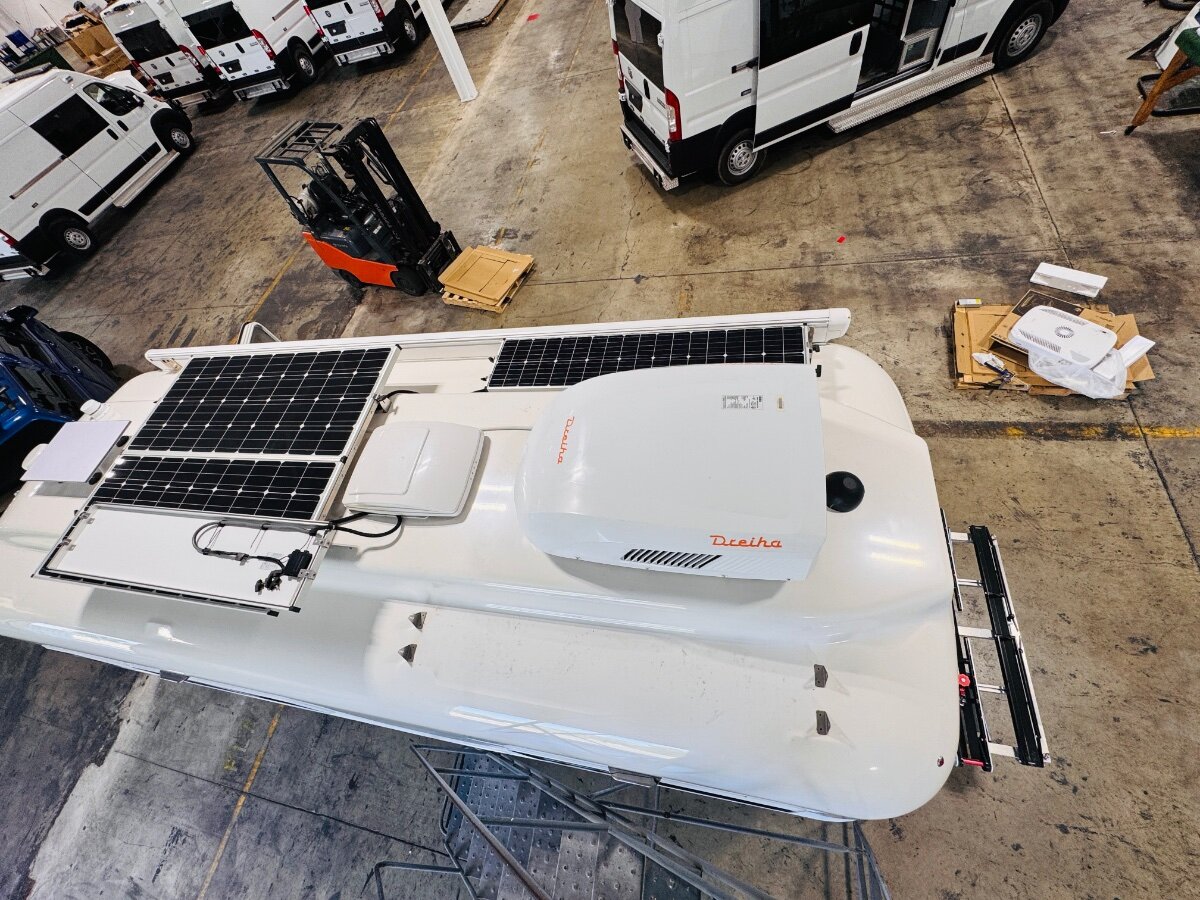
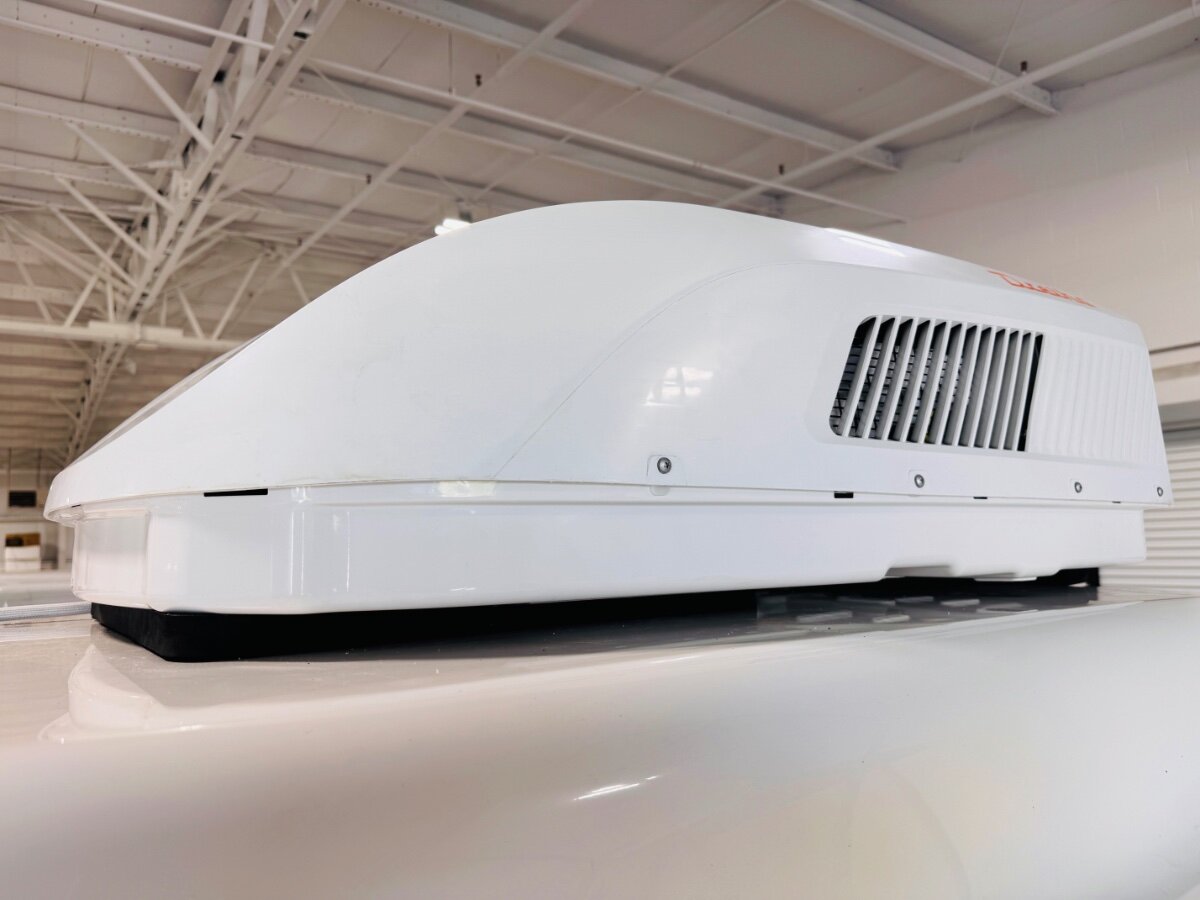
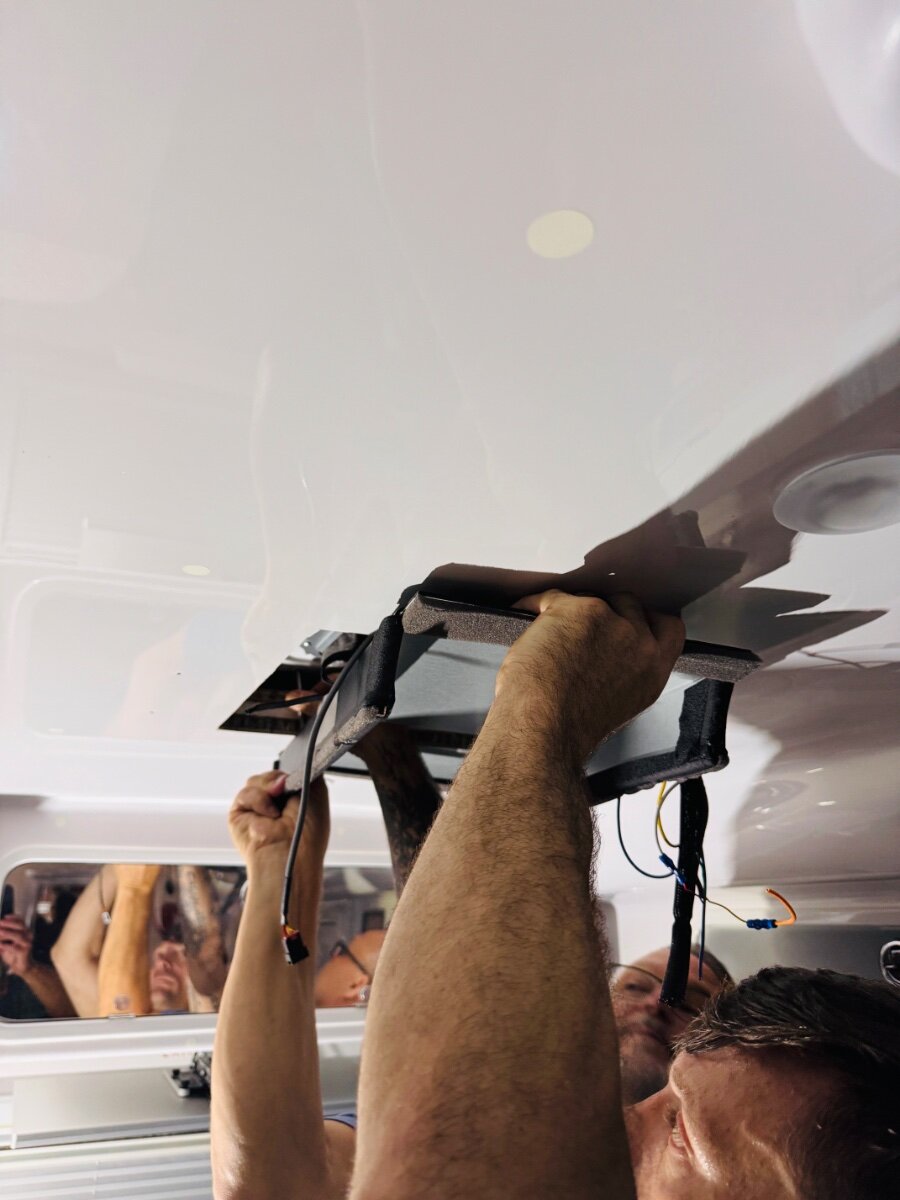
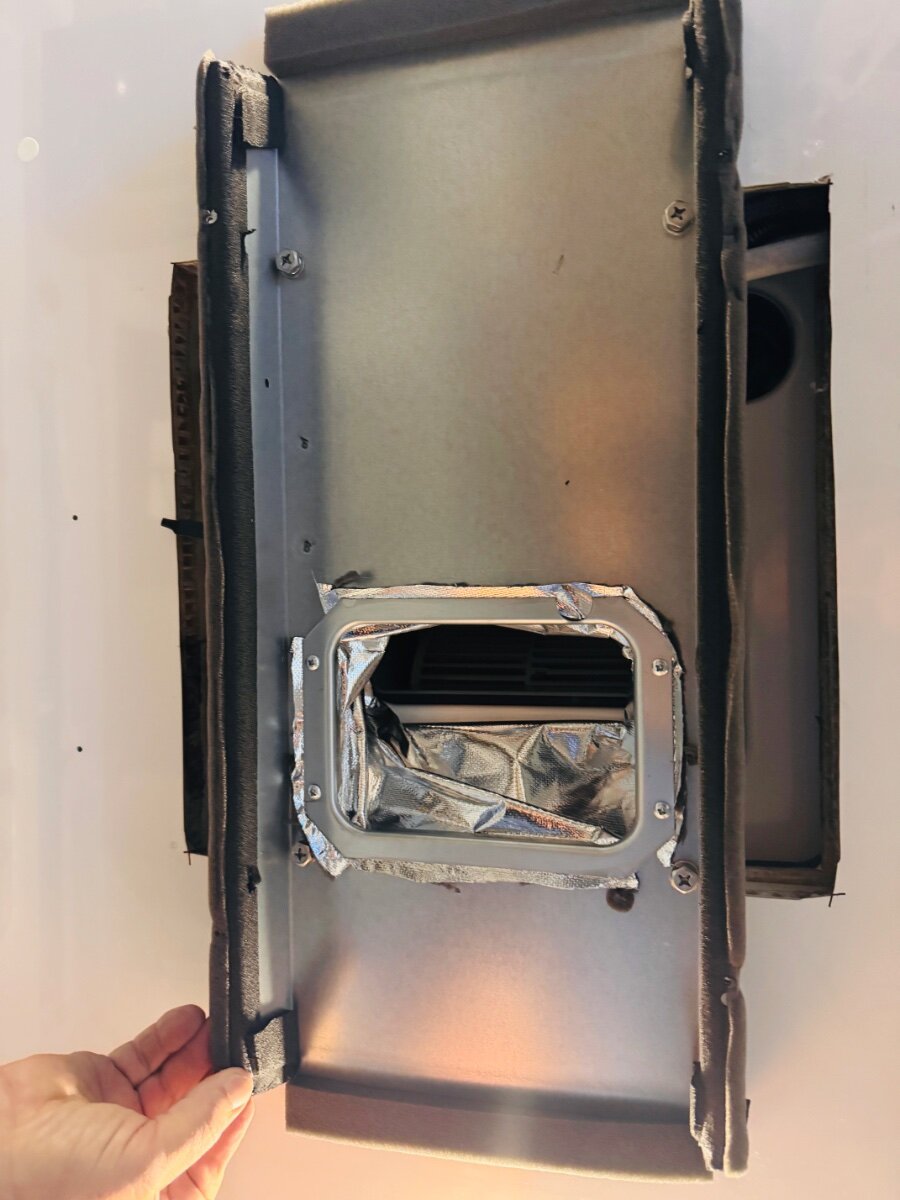
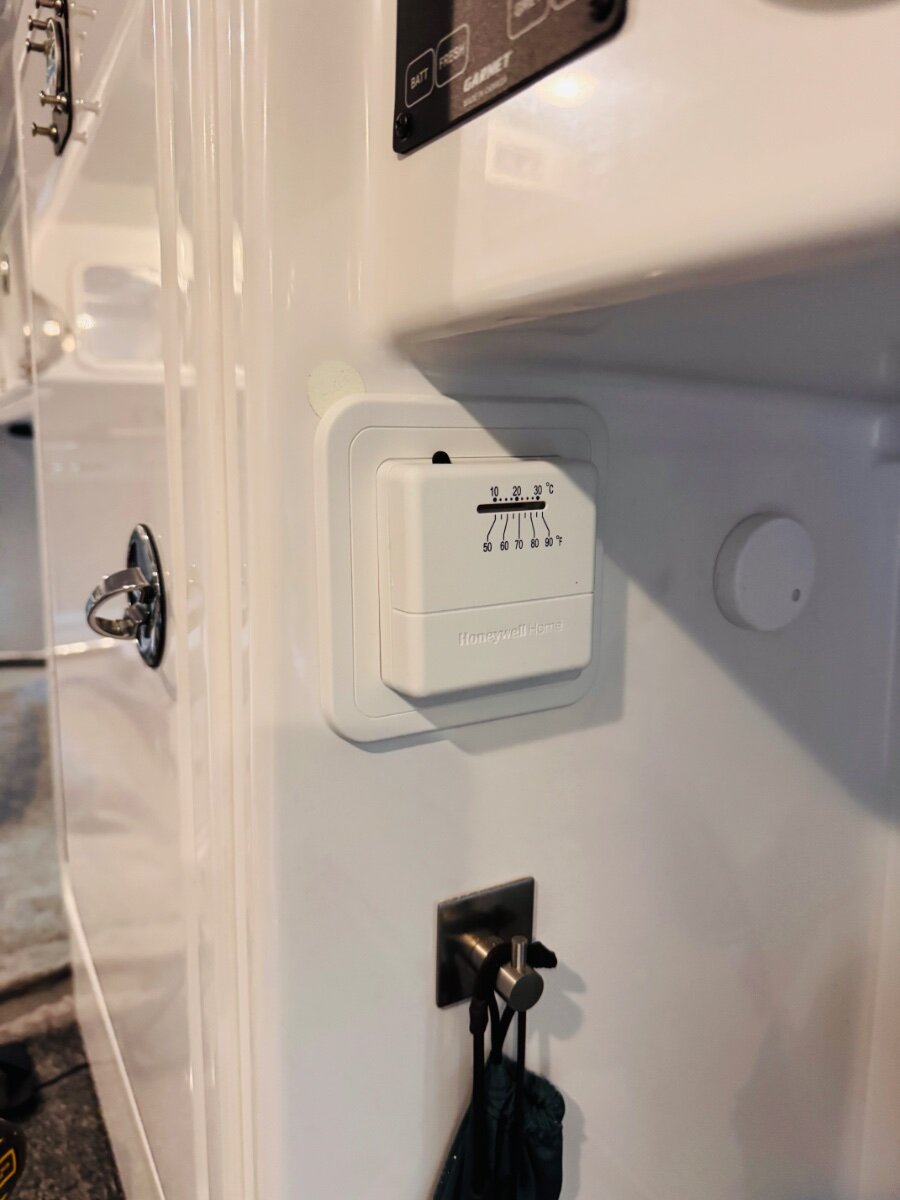
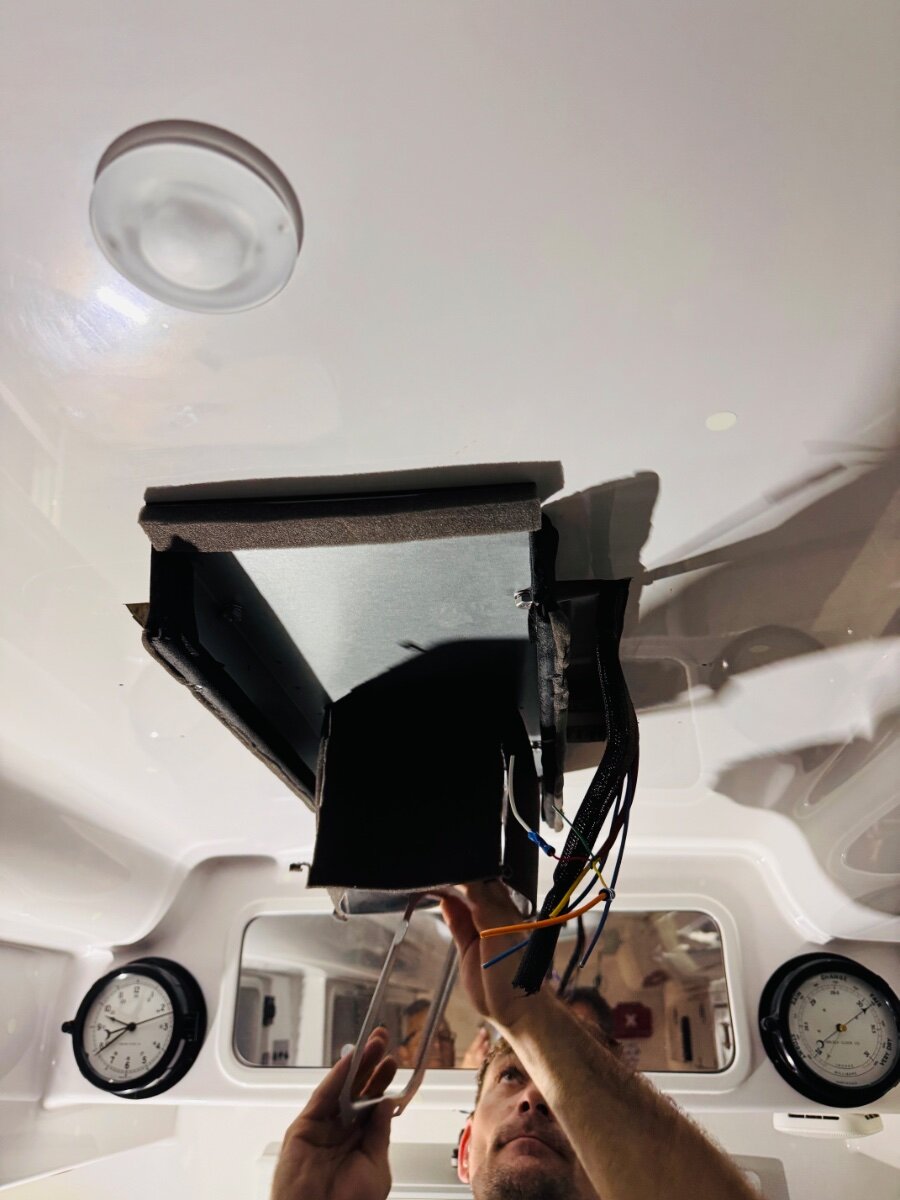
On the last leg of our summer family vacation we stopped at my dad's in MI. Next morning, I drove down to Elkhart, IN and had SDG install the Atmos 4.4. Guys were on time, efficient and knowledgeable. Installation went great! Pics below: They now offer SoftStart as an option on their website but I brought my own SoftStart Breeze (smaller version) . Atmos 4.4 Pics Removed the old Dometic Penguin II, cut drain line and plugged. Cleaned surface, applied very small bead of Dicor self-leveling on the inside perimeter of fiberglass 14 x14 opening Removed interior shroud. Penguin shroud was screwed to fiberglass ceiling, the 2 holes on each side will barely show after Atmos plenum installed. Fixed mine with a couple of the small glow in the dark dots we use on the ceiling to amuse the kids. Kevin was able to use the wiring for the original thermostat location to power the Suburban propane heater control. I may change or remove this later. They used Molex connectors instead of JXN box additional pics The new unit is a good bit quieter (6-10db) depending on mode and has around 40% less draw on the battery. On high it was pulling 1200 W vs 1800 W for the PII. Fan only was under 300 watts. They were done with the install in 2 1/2 hrs. App and remote are working well but still figuring it all out. I know this is short but on our way home to TN. I did find out that the Atmos 4.4 is designed so that the fresh air coming in and the exiting conditioned air is in a sealed unit and does not contact the outside (humid air). So running the fan only does not introduce humid air, it only re-circulates cabin air. Still awaiting answer on how exactly AUTO mode works. From the manual, it only states that it senses ambient air and automatically heats and cools but nothing about a parameter. You actually cannot set the temperature in that mode at all as far as I can tell. I did notice this unit manufactured 3/24 is using R-32 refrigerant. Best, Mike
1 point
-
The wet bolt is only pressed into the shackle strap. I don't have a hydraulic press either but I do have a vise and a big ole hammer. Remove the zerk fitting from the end and drop it into the shackle strap orienting the grease exit hole 90 degrees to the strap. Loosely clamp the bolt into the vise and using your big ole hammer tap it down until the backside of the bolt head makes solid contact with the strap. Replace the zerk, or leave it out for now because you're probably gonna have to hit it again to make the shoulder seat against the strap on the other side. DO NOT use tightening the nut in an effort to pull it into place, you will only strip the nut and could damage the threads on the bolt. FYI: In American English, a vice is an immoral habit or practice (or the second in command after the President) and a vise is a tool with closable jaws for clamping things. But in British English, the tool is spelled like the sin: vice.1 point
-
Edit: @CRM has located a photo of the underside of Jim's "The Beast." It had four leaf spring packs rather than five so now I wonder if the axles were 5200 pounds when originally built.1 point
-
I figured that you would know the story behind it! Another cool find on that same page are pics of Jim Oliver's first LE2. Was surprised to see that it had 4 leaf springs, at least at that point... http://oliver.hewus.com/Trailer/Other_Trailers/The_first_22_foot_Oliver
1 point
-
Yep, and a little elbow grease! Clean surfaces with rubbing alcohol to get the goo off and sometimes that's all you need.1 point
-
Just got this today and it looks great. Thanks to those who suggested it! amazon.com/dp/B00H7LPKKU?ref=fed_asin_title1 point
-
I just spent the weekend in Iowa and Minnesota. My cousin's son picked me up at the airport, and drove us around Des Moines area (freeway/county paved/ gravel combos) in a late model gmc sierra 2500 duramax. Ride in the back seat was absolutely comfy. Great seats, great ride. It's a long ways down for my short legs from the cab. Grateful for grab handles and smurf steps/bars. Great truck. And beautiful. Not for me, as I don't need it, with a shorty elite I, but a very comfy/lux ride, all around.1 point
-
I'm interested in these, as I will be in that area this fall.1 point
-
This subject is of great interest to me as I am located in in Western Washington State. Hohenwald is a l-o-n-g way from me, and I am having some issues with a recent swap of the Penguin to FreshJet3 A/C's. For those who have an interest, Bretz RV in Liberty Lake, Washington still does not have a functional service department. Their Missoula, MT location does have a service department, but it has NO ONE there who has been trained by Oliver (on site or back at Hohenwald). Due to distance, I decided not to call Bretz at Nampa/Boise, ID. The whole concept of "distributed Oliver sales and service" will eventually depend on Oliver owners having confidence in the ability of their local "Joe's RV" not only being able to sell them an Oliver, but also be qualified to maintain it. (For a $110K trailer, that confidence will make or break a sales decision.) At this point, those of us in Washington State are seeing little reason to be confident of any of that.1 point
-
$52 was for greasing zerks. As far as costs for installing Alcan Springs and shocks, I don't know those costs until I talk to the service guy that would be doing the work. Several Owners have installed Bulldog shocks, but there seems to a report supply issue. I'm watching carefully. Keep everyone posted on the install and what you were doing for the 50, 50, 500 mile torquing of the new bolts. Find out what you can on those shocks. I may also consider having Alcan do the work also.1 point
-
We have a 2018 Silverado 2500HD LTZ 6.0 liter crew cab that tows our Elite II. We have plenty of power and the ride is okay for a 3/4 ton pickup. Buy the make that makes you happy.1 point
-
I found WD40 works well to remove VHB adhesive residue.1 point
-
Look for an old-school trailer shop. Not a company that sells RVs and pretends to service them. Not a truck service center that works more on repairs and high-end, high $$$ truck accessories. Just a trailer service co, that has a dozen cargo trailers and another dozen simple flatbed trailers on their lot. Unless you want to be r@ped in service costs and get a B- or C+ installation m. Hey Scotty, if you live west stop by with your Oliver and new parts and we’ll get er done together! If you live east, go see our OTT Elder, our most knowable forum member @ScubaRx, either way it’w be great! Best wishes, JD1 point
-
Love you, Steve! No wonder your 3500HD and Oliver are upgraded to carry 18,000+ combined GVWR! 🤣1 point
-
I have mine sitting in the garage. It hopefully will be my next project. Please post your post install numbers.1 point
-
@Heather and Eric You can also use a hair dryer to help loosen the double sided tape to get the adhesive to warm up and release from the gelcoat. If you warm it up enough you may not need to use Goof Off.1 point
-
The Victron Linx Distributor is a very clean option to manage connections --- nice one, @Jps190! Thanks for the post.1 point


.thumb.jpg.e34bf01ef7f7d5e99ad31856d45afbeb.jpg)


-
Recent Achievements
-


")


")


")


