Leaderboard


Popular Content
Showing content with the highest reputation on 09/07/2025 in Posts
-
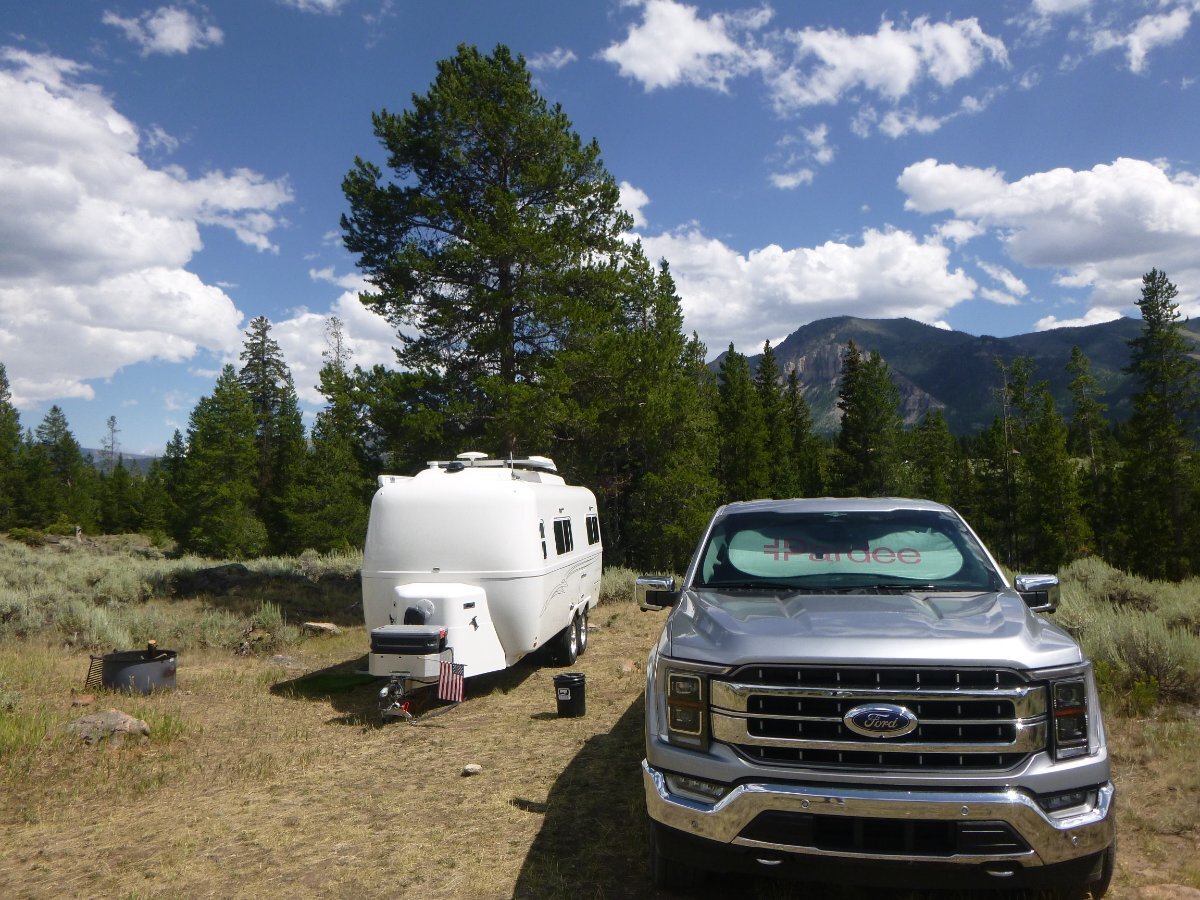
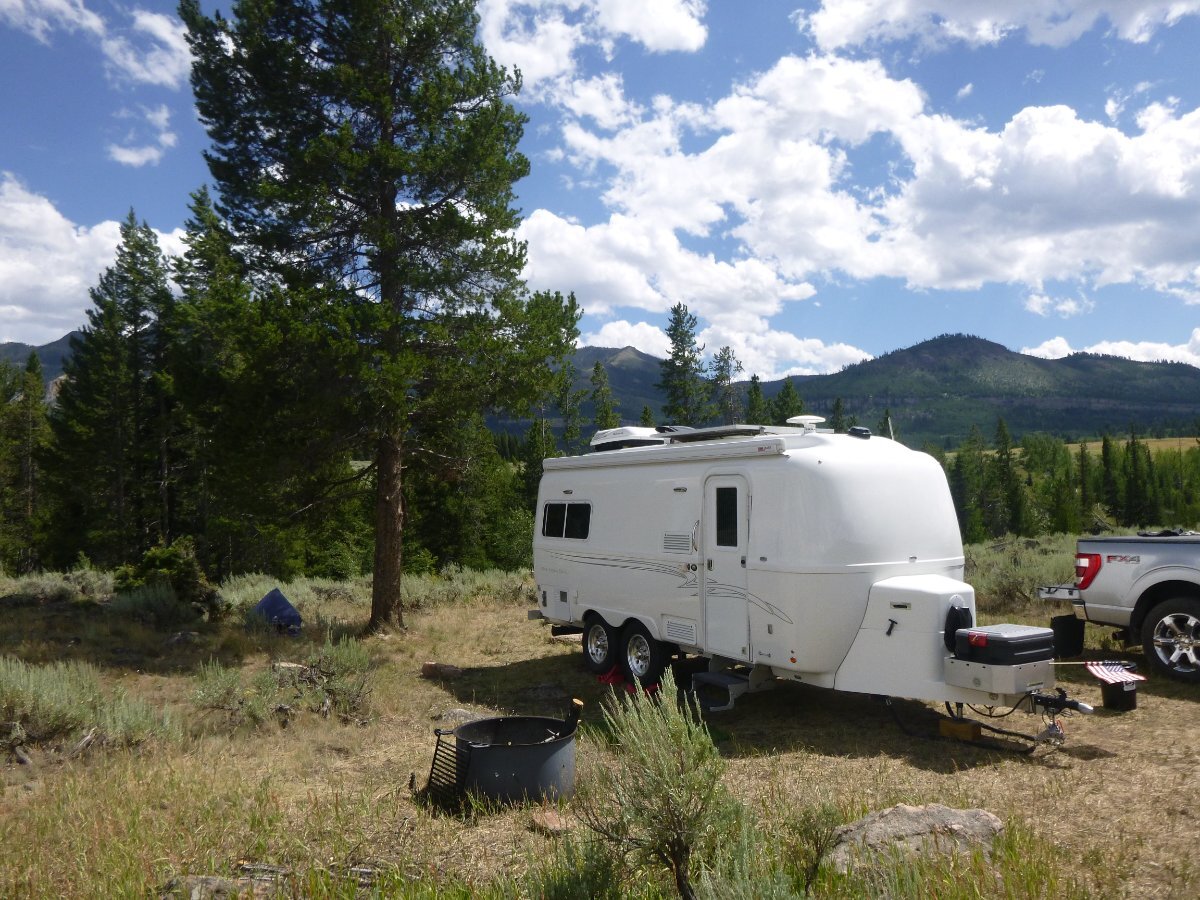
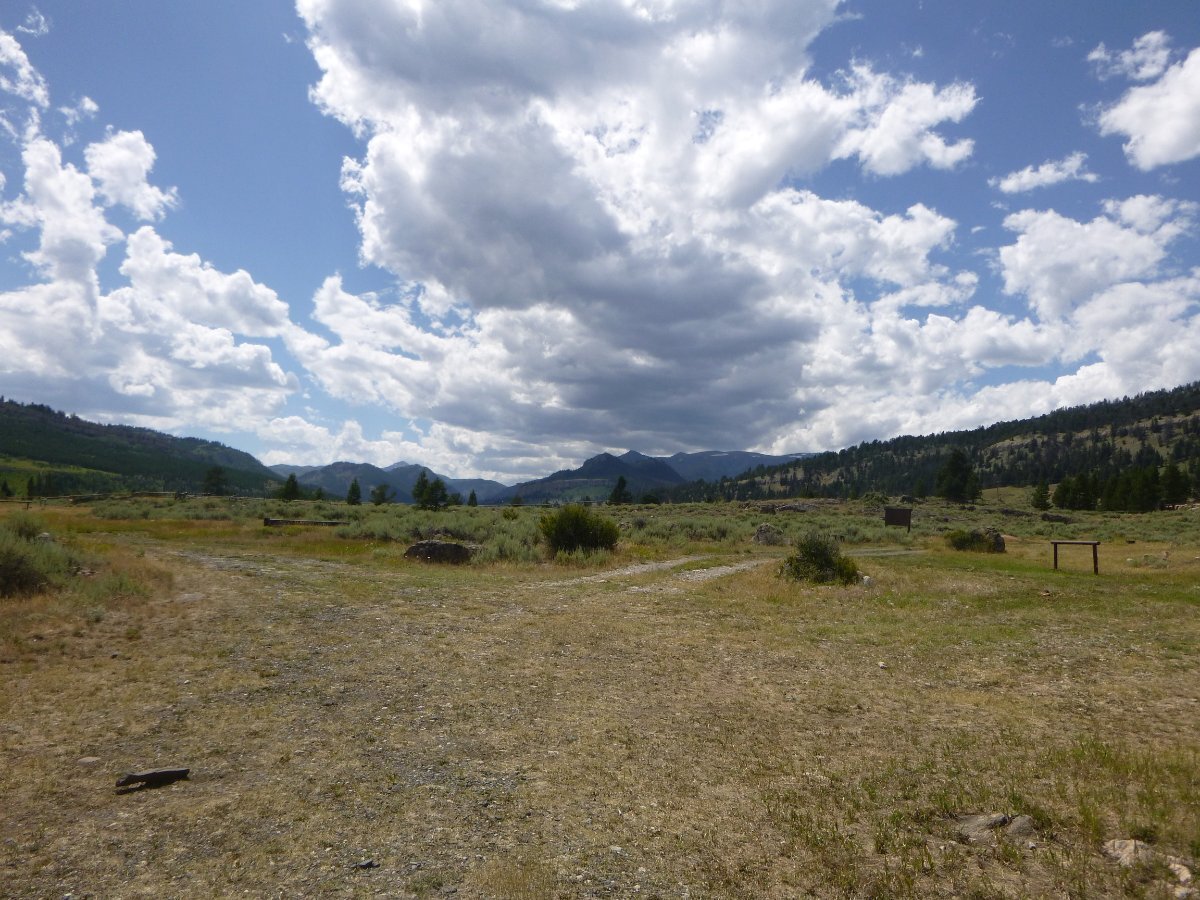
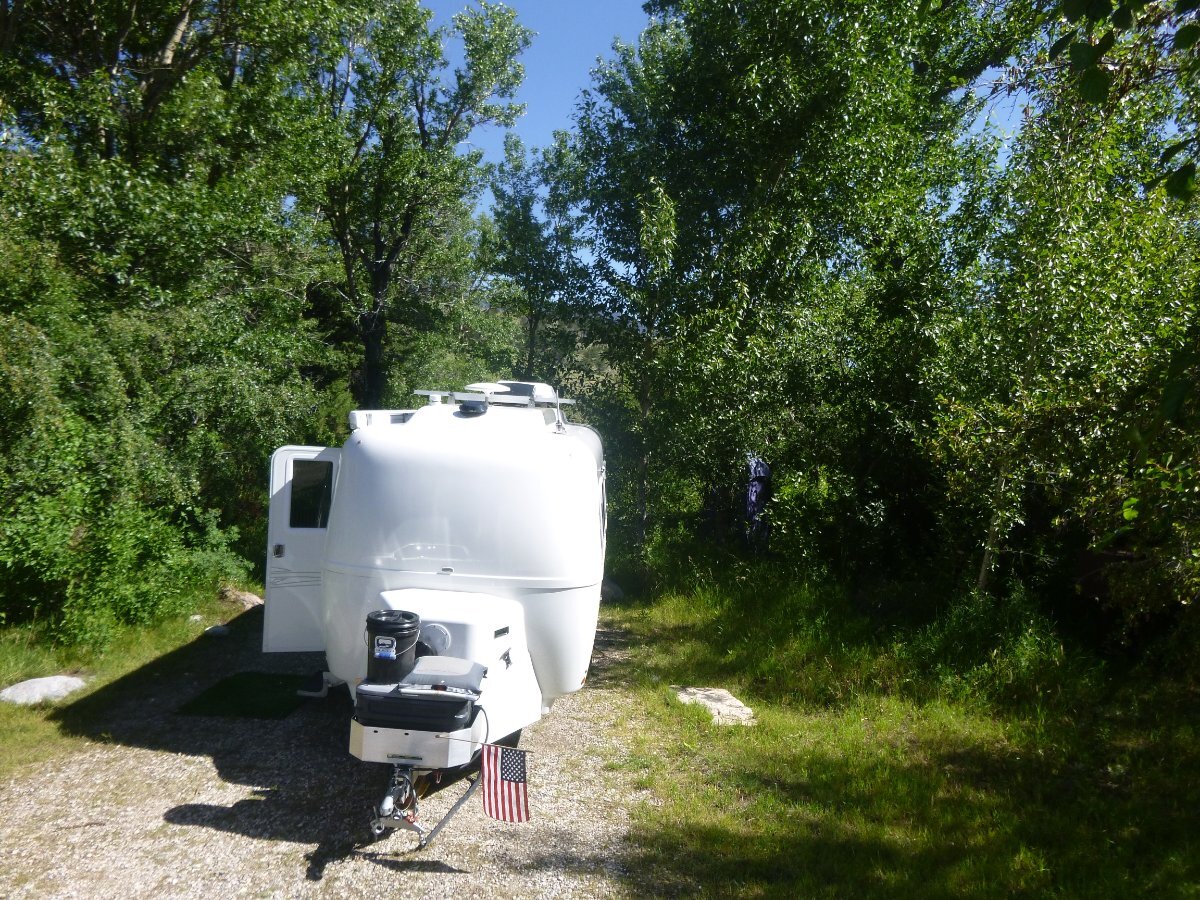
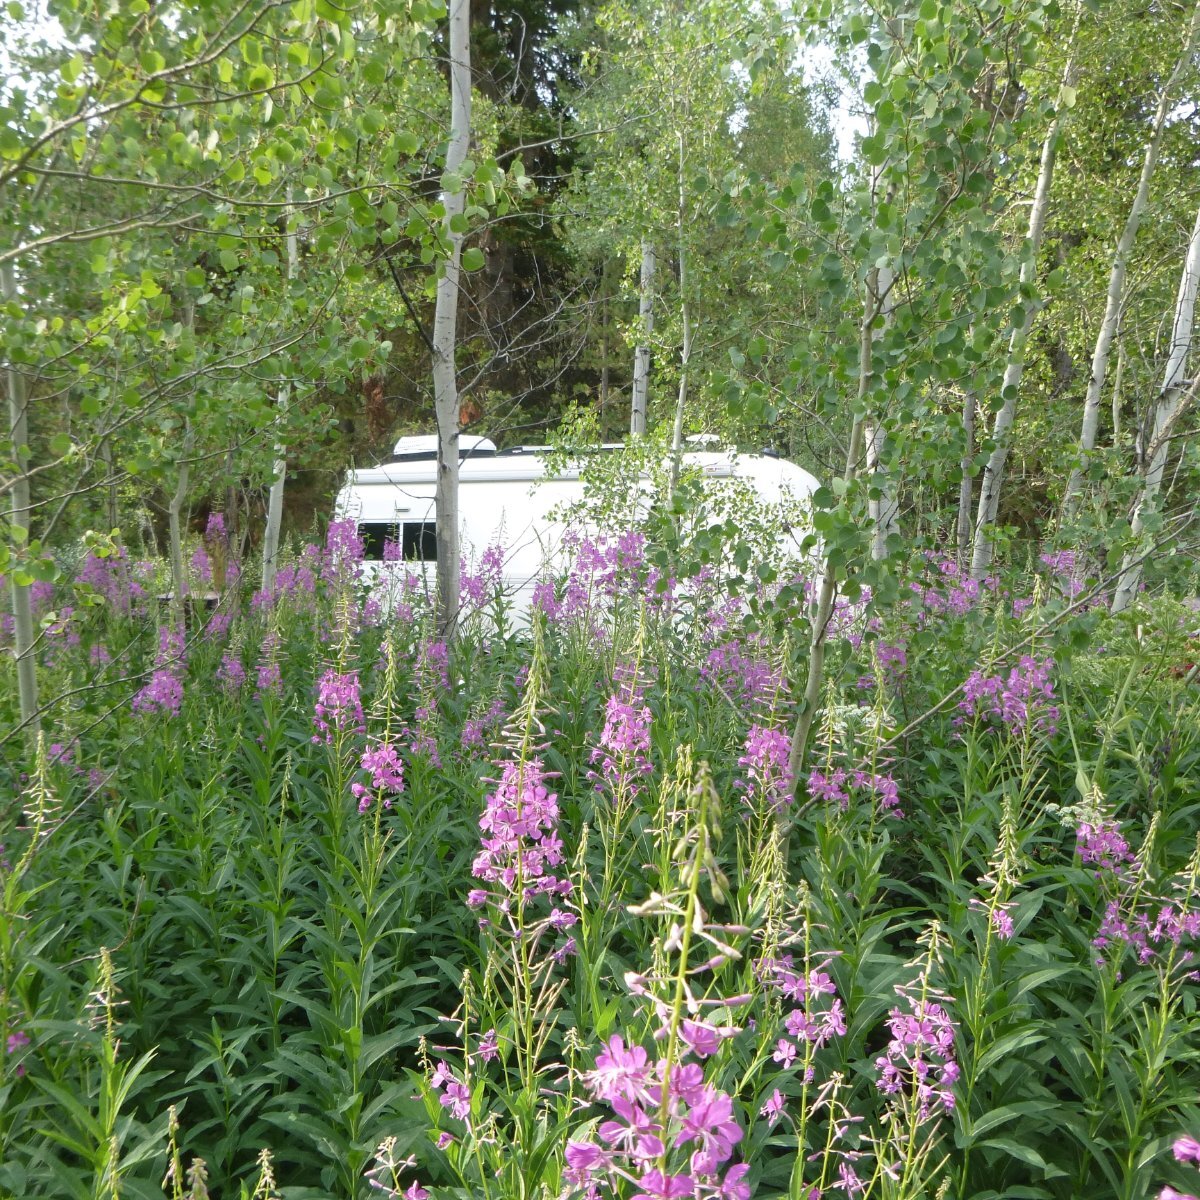
Here's another camping site just off the Chief Joseph Highway - and - this one's free. No water or electric or dump but there is a pit toilet and fire ring. Crandall Creek is at the bottom of the hill behind my Ollie and there are some nice fish in that creek. GPS - 44.848679, -109.639157 Bill p.s. note the last pic - there are times when the wind comes straight off those mountains in the distance and it can blow fairly hard.
 4 points
 -
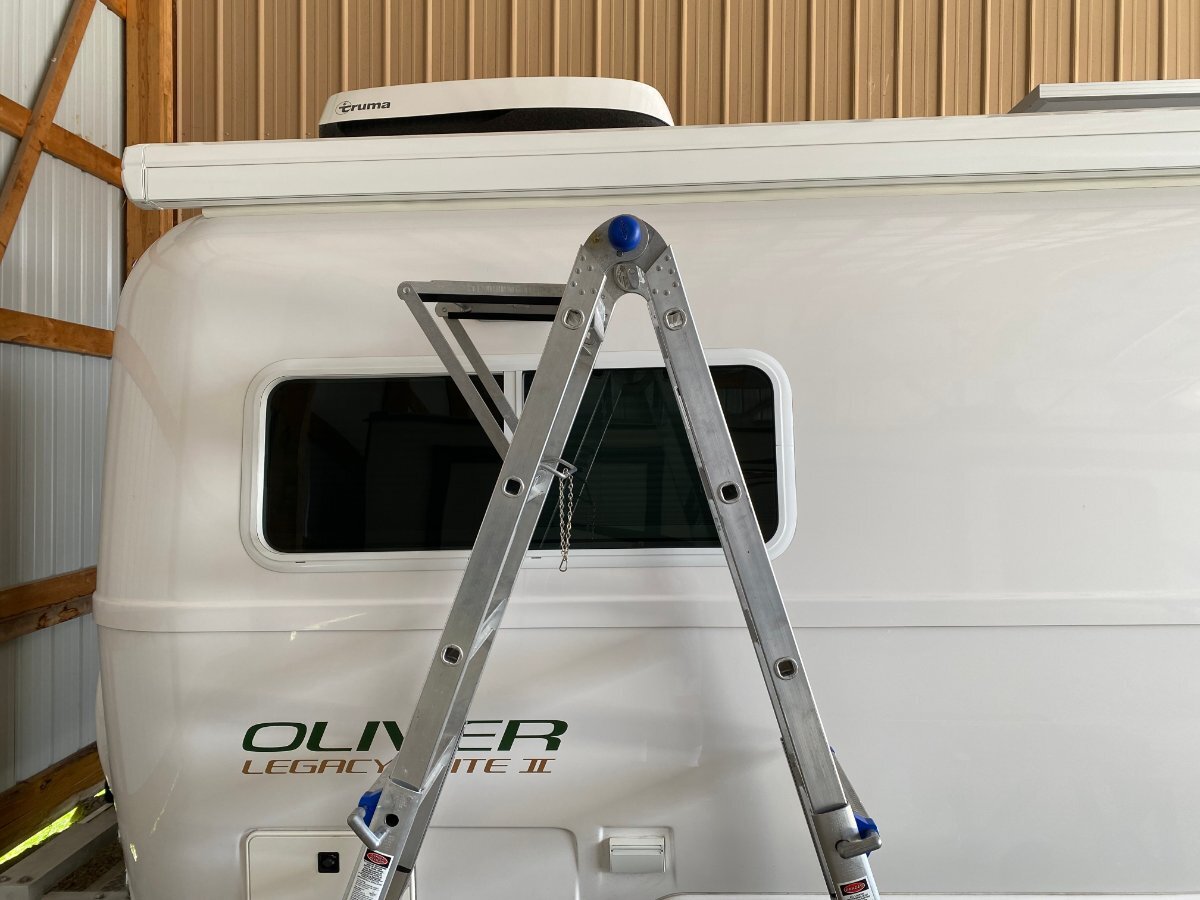
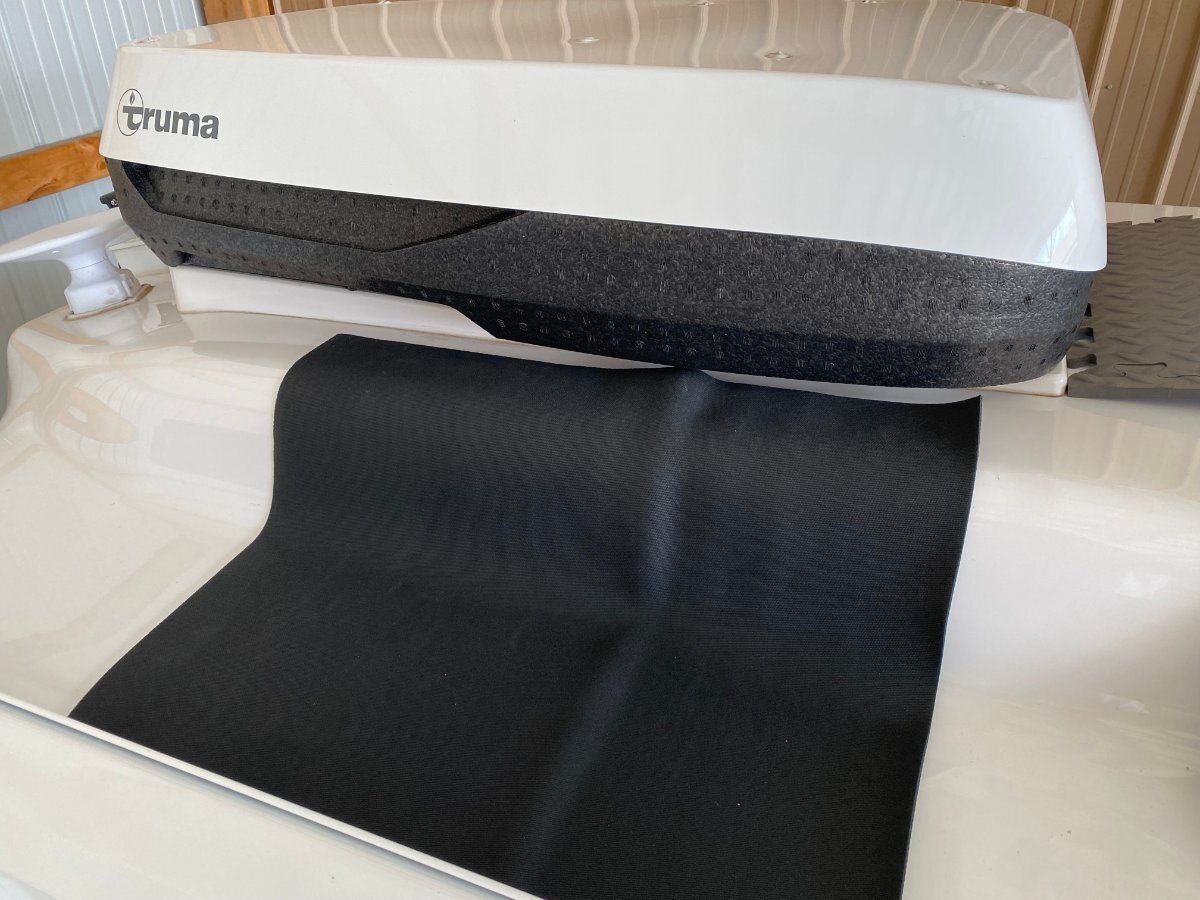
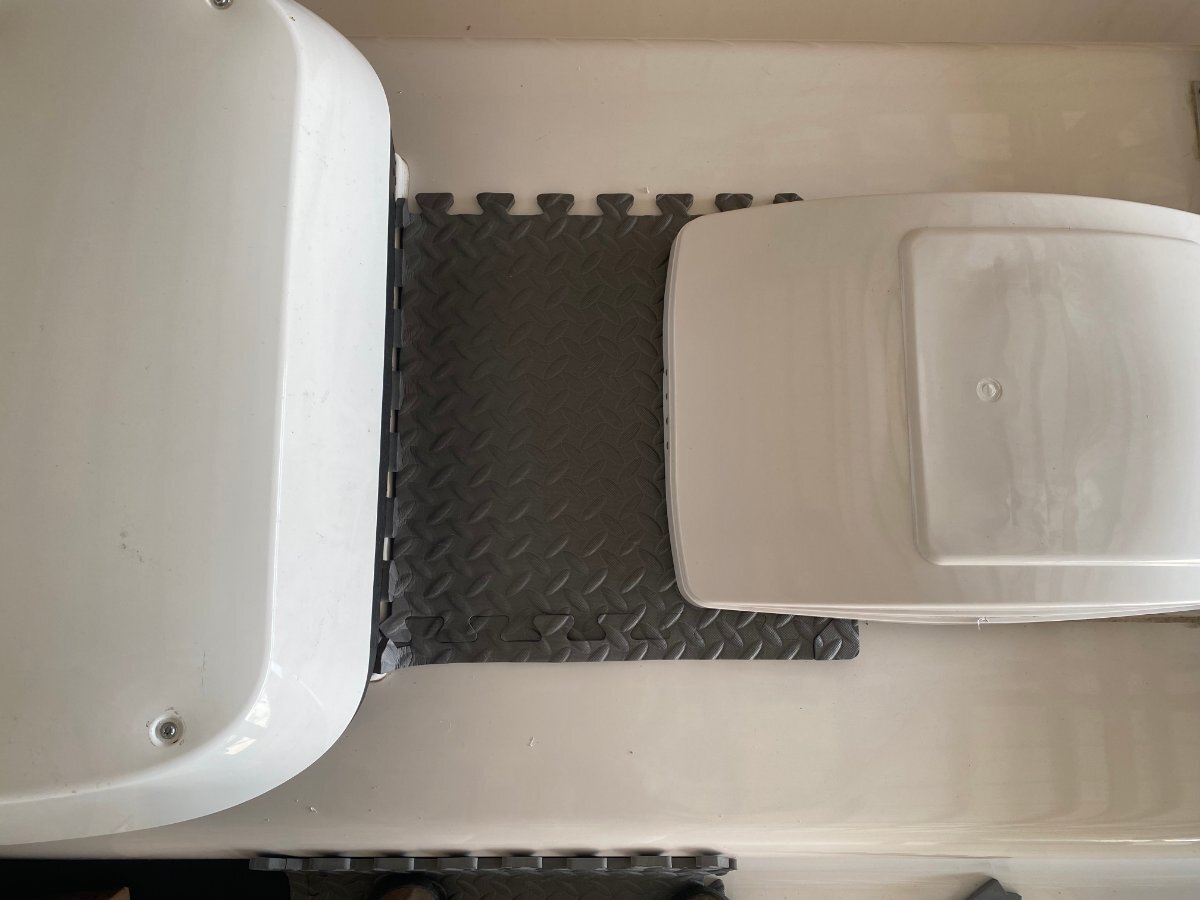
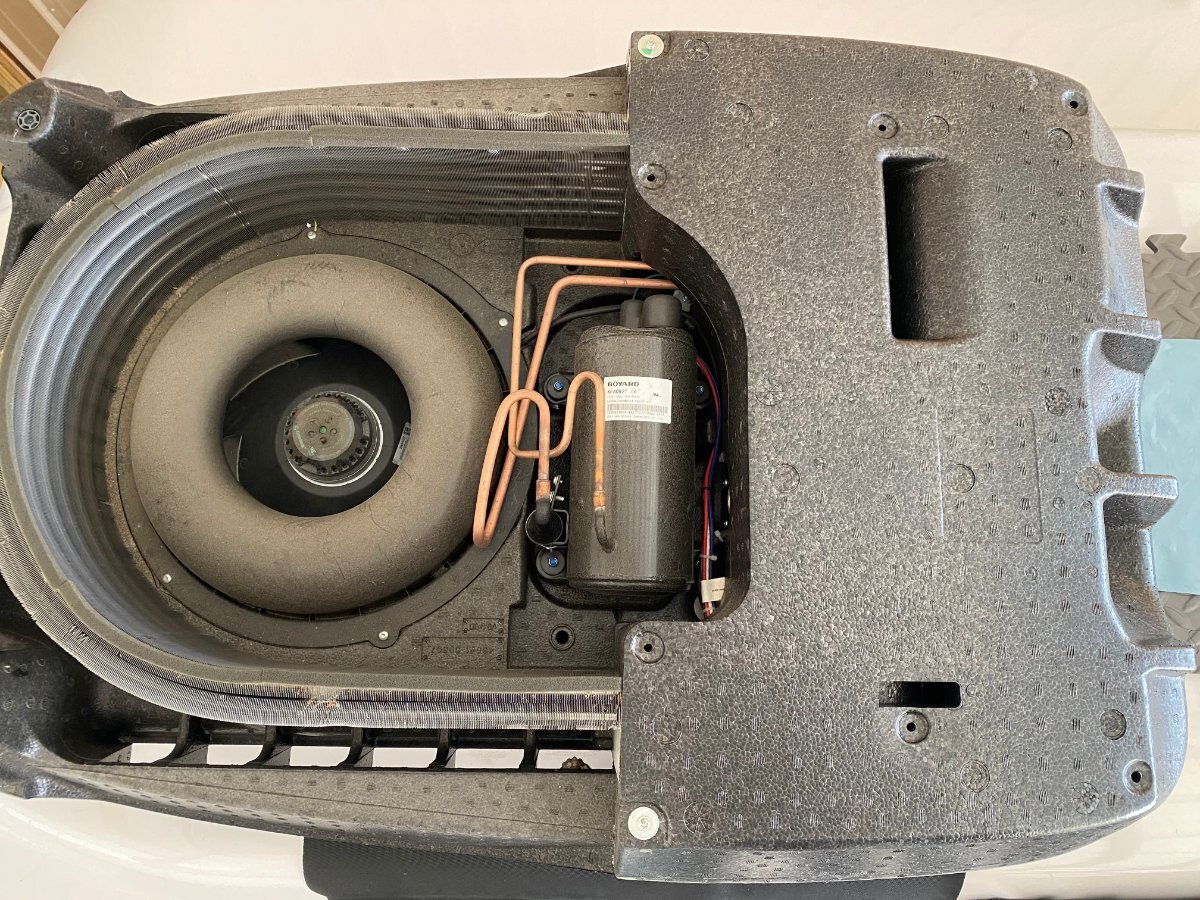
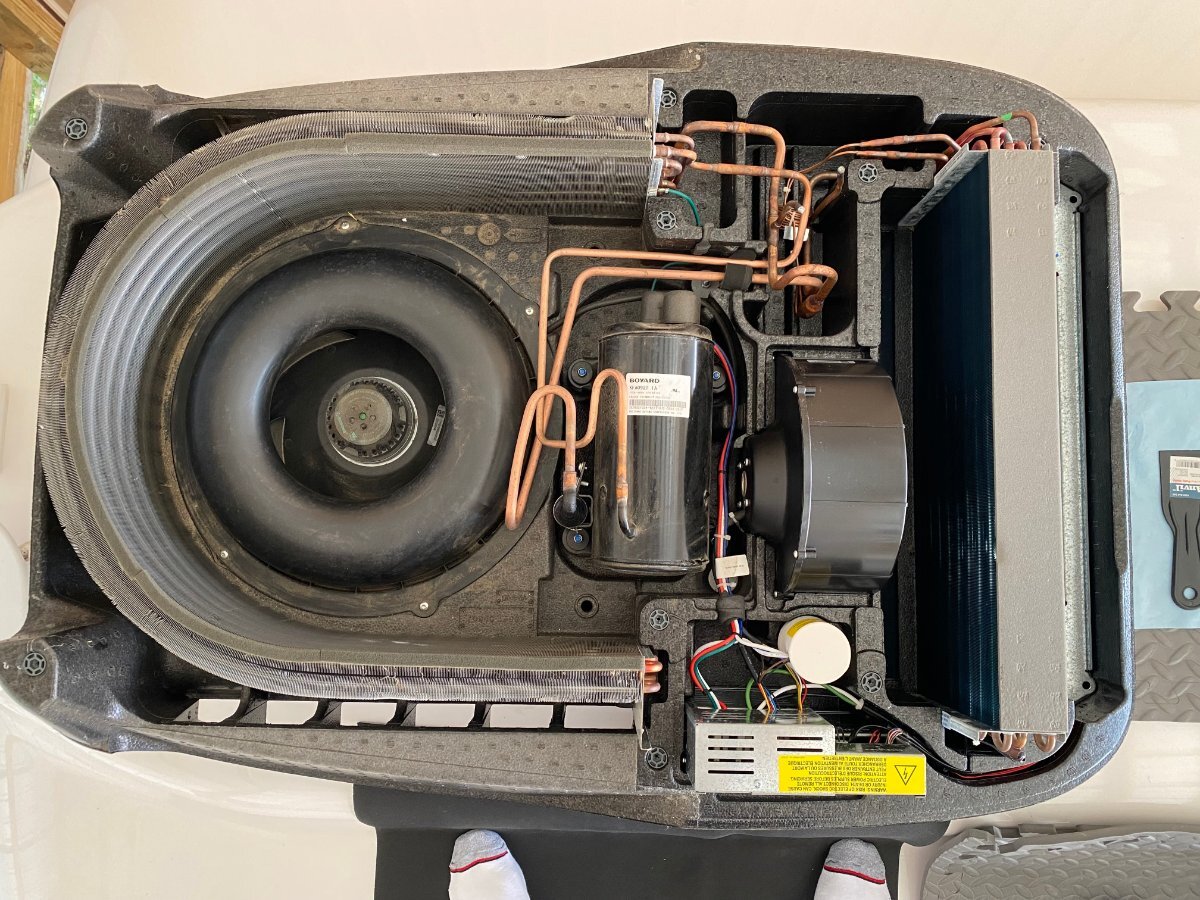
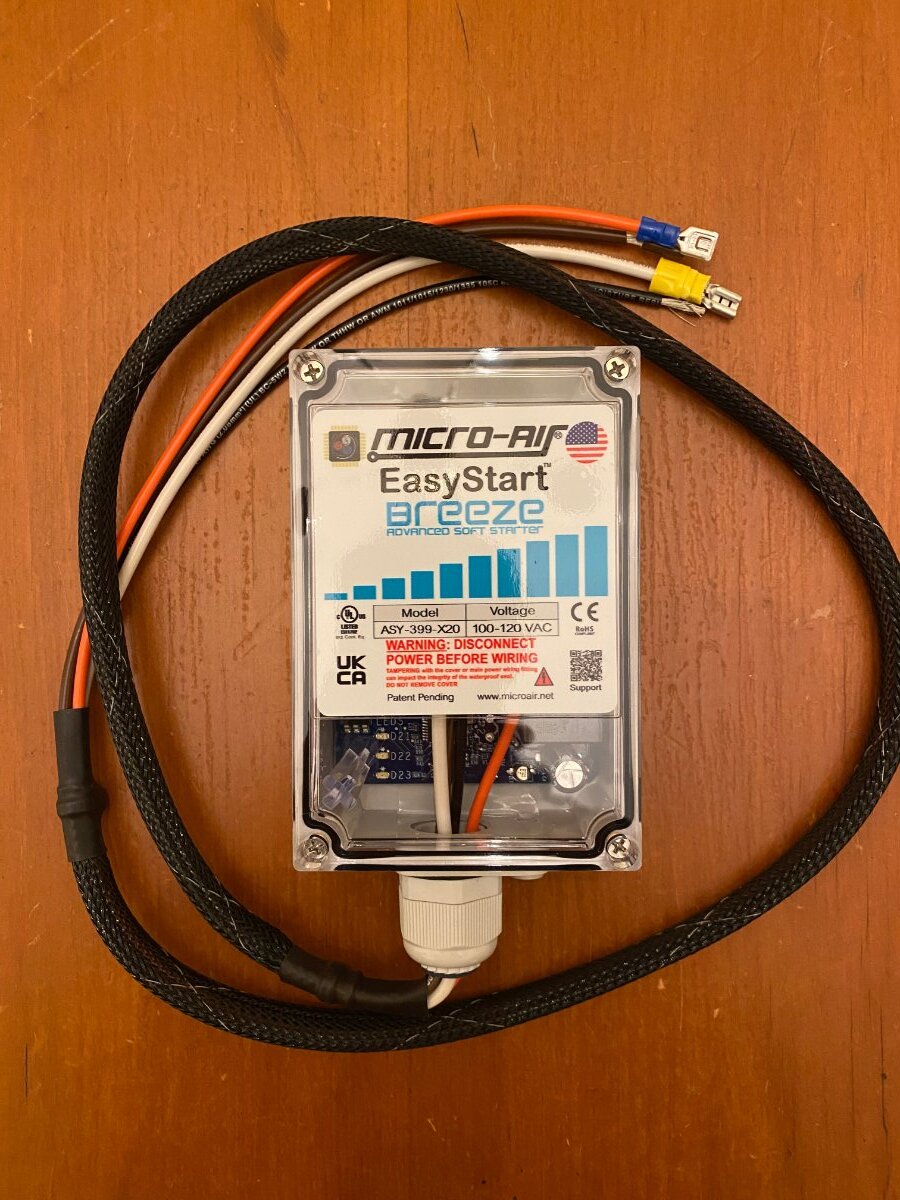
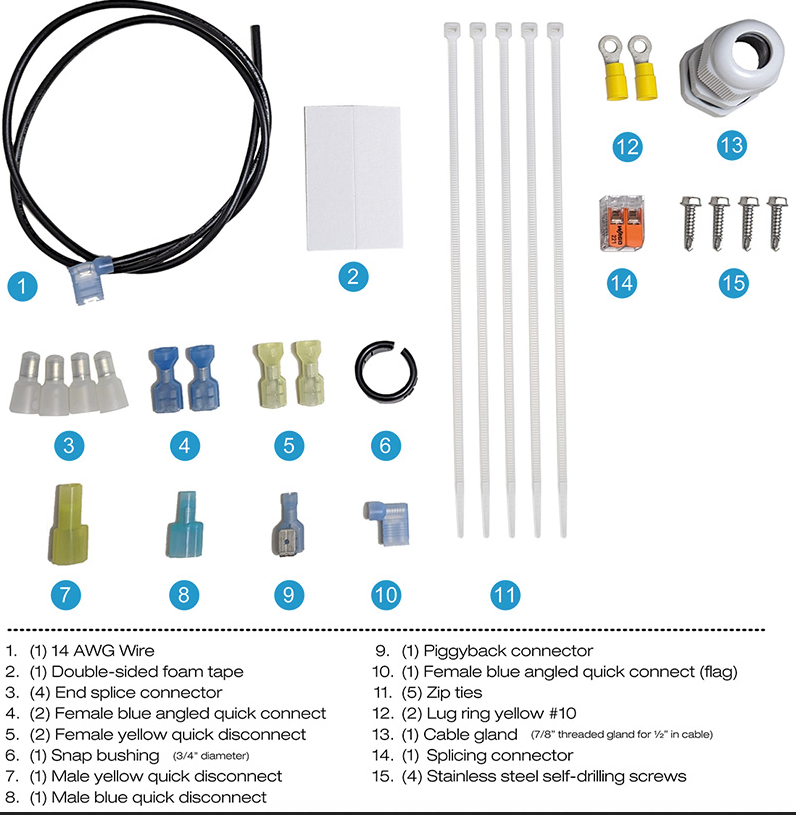
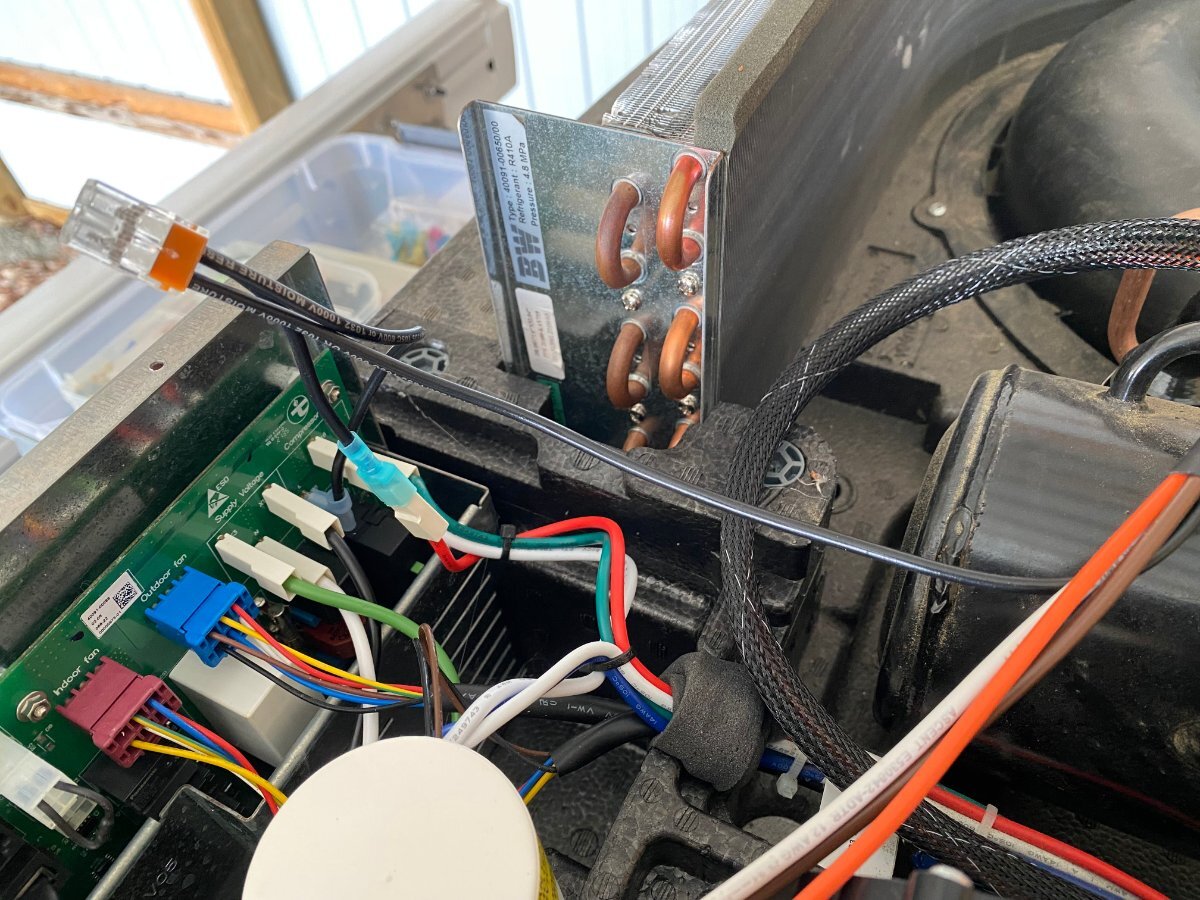
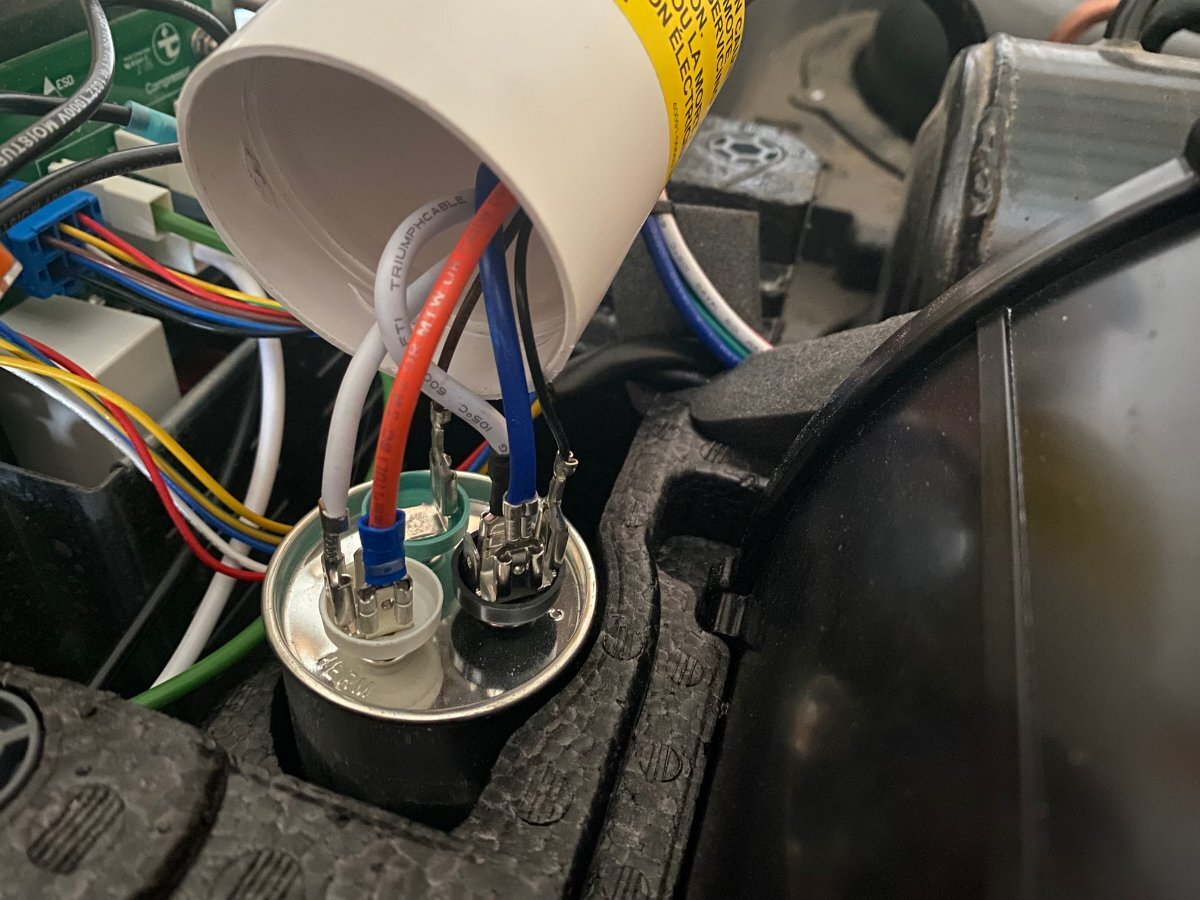
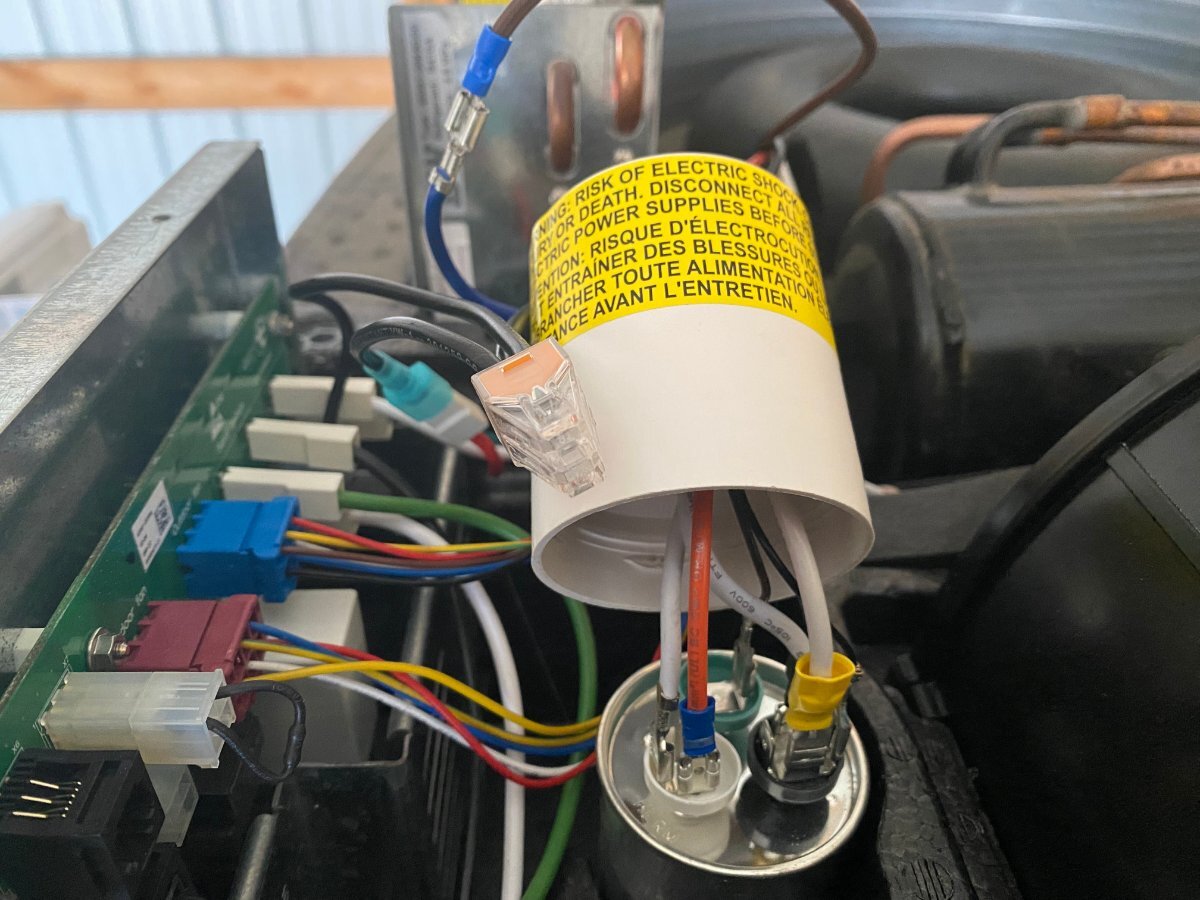
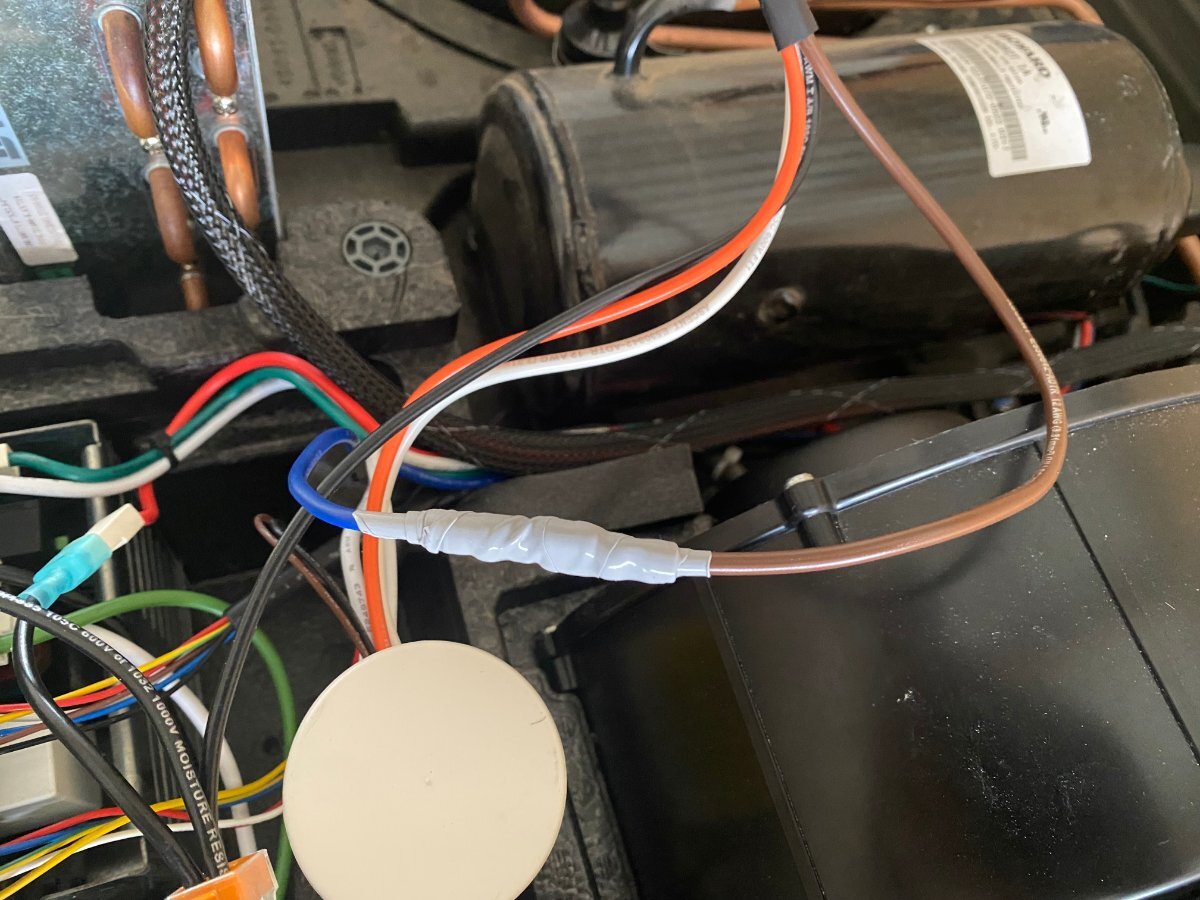
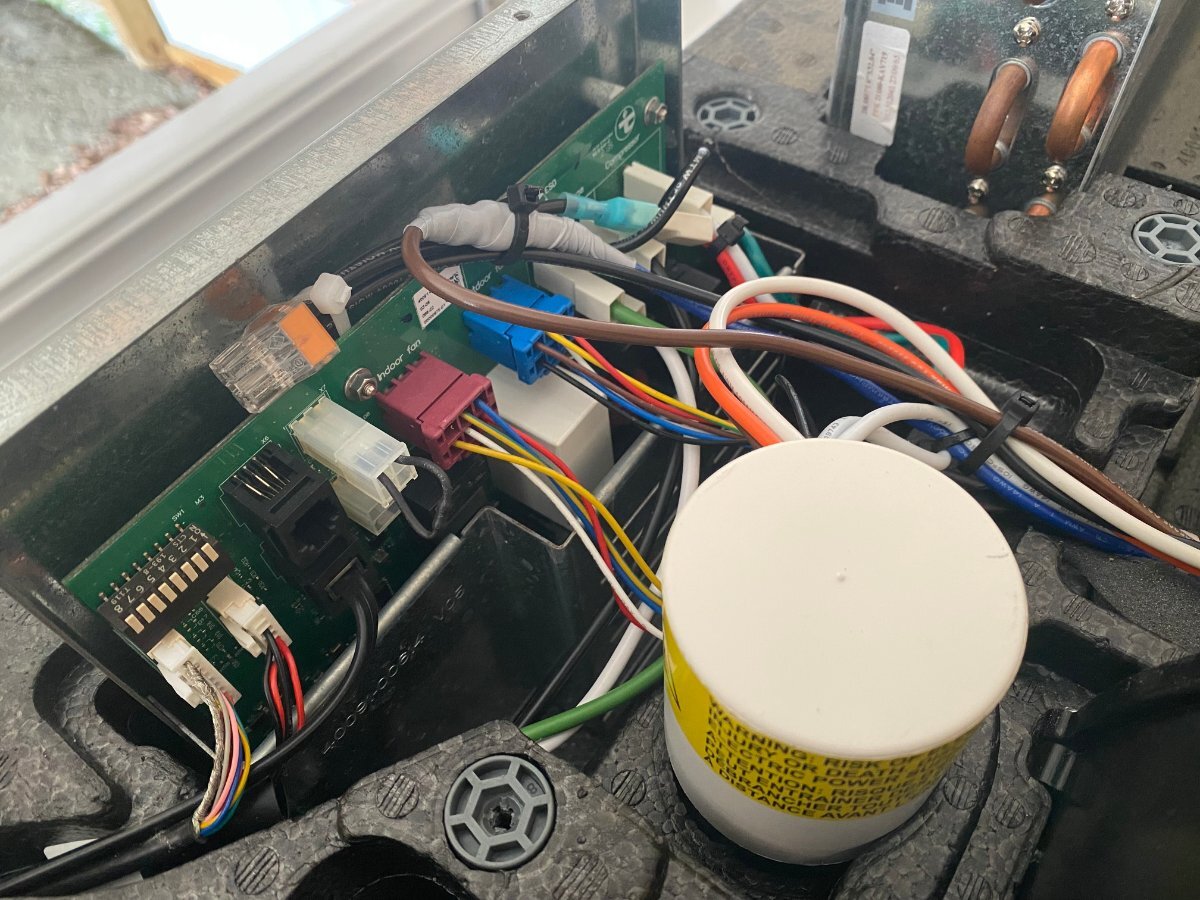
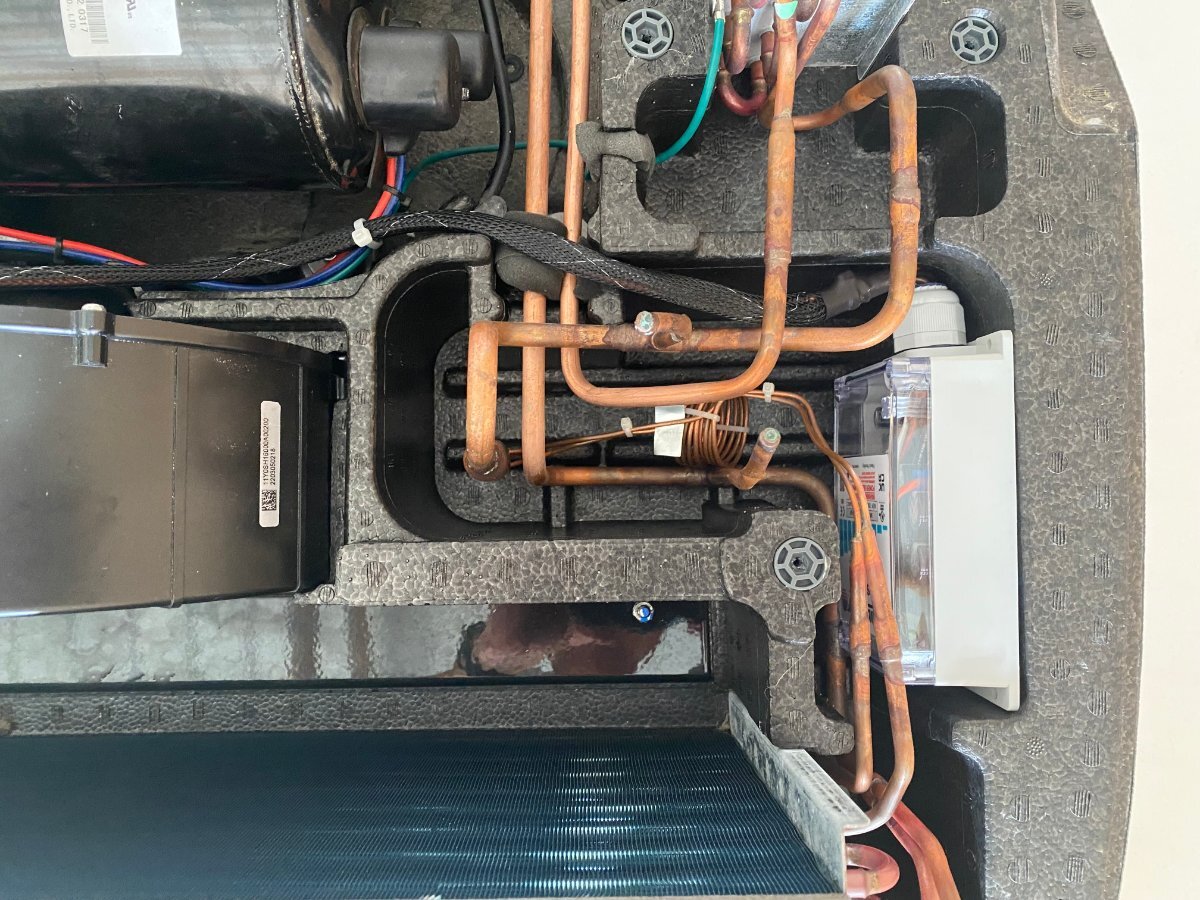
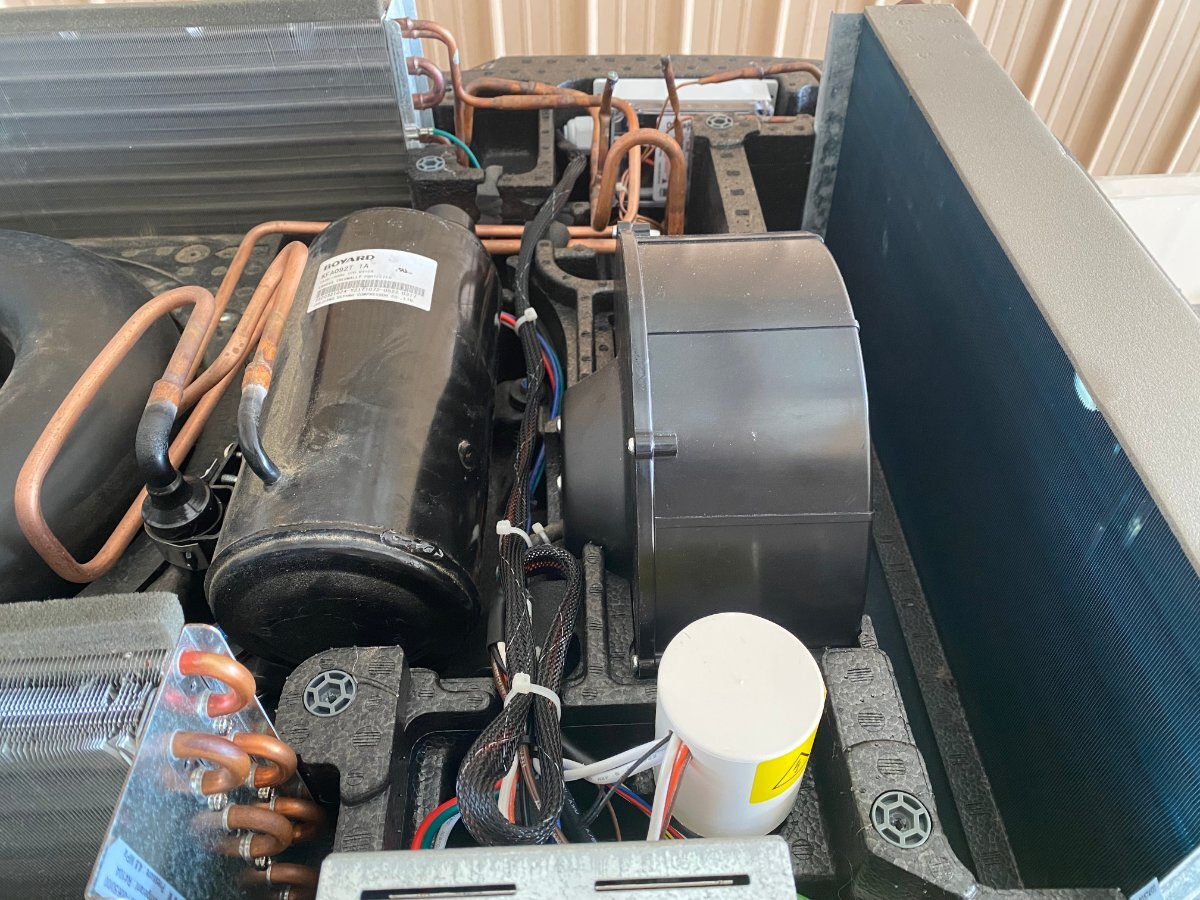
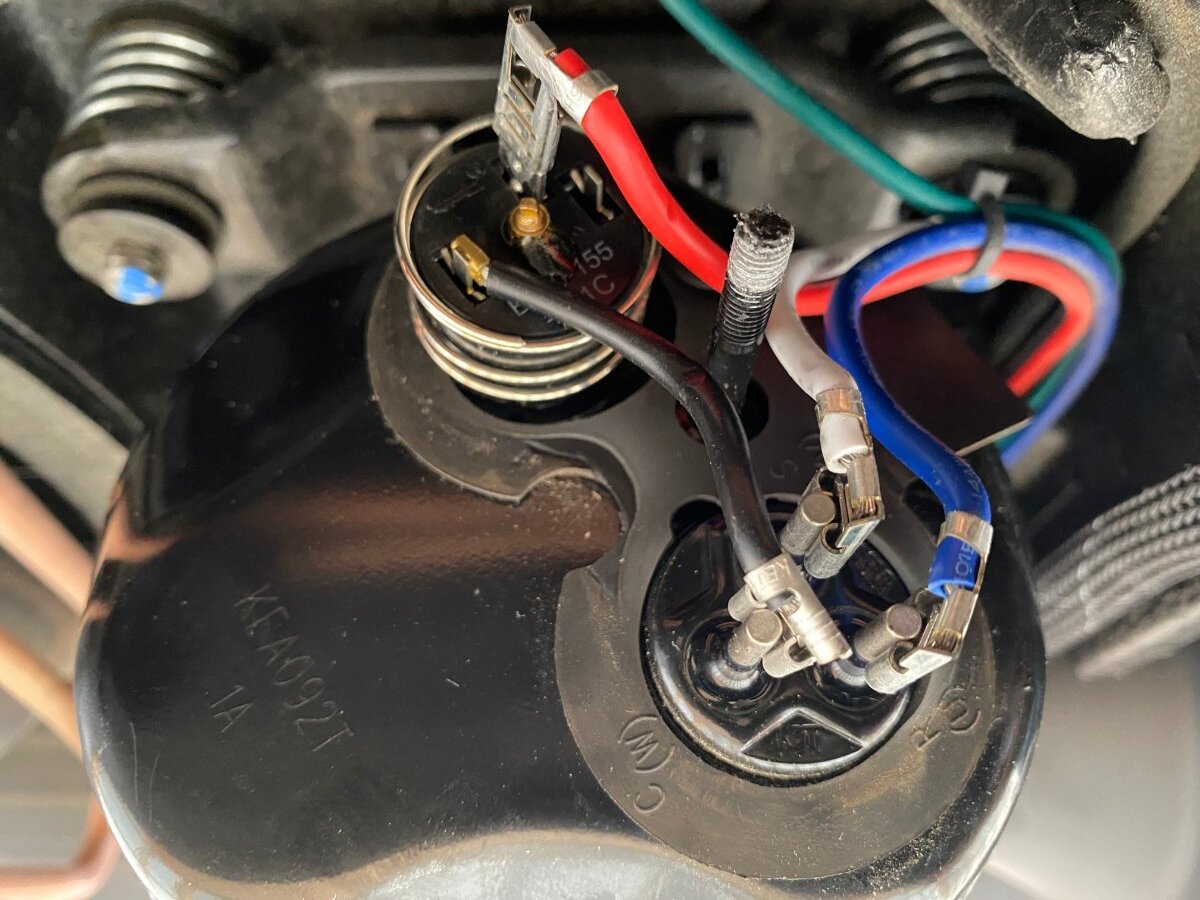
Since purchase of my OTT last year, I had been thinking of installing a MicroAir EasyStart on my Truma A/C. However, I wasn’t sure if it would allow my Truma A/C to run off my Champion 2000W generator, especially since I run it on propane and often camp at elevation. Fortunately for me I met @mossemi at the Oliver Rally last May and it turns out that he has the same generator and like me, runs it on propane. He told me that with the EasyStart, his A/C ran fine off his generator even at elevation. Thanks to Mike for that info. So now you can imagine my excitement when they announced that there were going to be ten EasyStarts given away at the Rally! But alas, I was not one of the winners. However, I met a nice couple from Oklahoma who did win one. And as luck would have it, they had decided not to use it, so they graciously gave it to me! Although I made several attempts, they refused any compensation. So I owe them a big thanks. Below are the details of my installation. First, thanks to @Patriot for previously posting this video: SoftStart Install on Truma A/C I found it to be very helpful for understanding how to remove the A/C covers, where to mount the EasyStart, how to run the wiring, how to get access to the control board and for making connections to the capacitor. However, DO NOT follow the detailed wiring instructions because the video is for a SoftStart not an EasyStart. Next, a couple of thoughts on safety. After I removed the A/C cover I found an old mud dauber’s nest. Fortunately it was not inhabited at the time. But they seem to like that area, so beware. Second, the video doesn’t mention it but you should make sure that the capacitor has been discharged before working around it. Since I’m not a qualified electrician, I won’t comment any further. Finally, I used my 17’ Werner ladder to get access to the roof. The optional Werner platform made this much easier. Also, accessing the roof from the curb side felt safer since the awning acts as a short railing. I used a sheet of rubber tool box liner and a piece of interlocking foam utility mat to protect the fiberglass and provide slip protection. With those additions, I felt safe enough to work in my stocking feet. As shown in the video, the white cover can be taken off by removing the eight screws (covered with lap sealant) with a T30 Torx driver (note that the two screws at the back are shorter than the others). Following that, removal of two additional T30 screws allows the foam cover to be lifted off. Be careful as you work with the cover off because the exchanger fins are easy to dent. Access to the silver electrical box is achieved by removing three T15 screws (one on top, and one on each side). Here’s the EasyStart device that I installed and the universal installation kit that comes with it: In general, I followed the wiring instructions provided by Micro-Air. I will say that I found the generic wiring instructions to be a little confusing (did I mention that I’m not a qualified electrician?). However, I was able to find specific wiring instructions for the Truma (that even I could understand) here: EasyStart Wiring Instructions for Truma A/C Although not necessary, I first removed the cap covering the wiring connections to the compressor motor with an 8 mm socket to confirm the wiring colors at the R, C and S terminals. (I don't know why but this photo is upside down and I couldn't figure out how to change it). I did deviate slightly from the installation instructions in one aspect, as I chose not to cut any wires but instead use terminal connections. That way, if I ever decide to remove the EasyStart, I can put everything back exactly the way it was. So instead of cutting the Red wire coming from the control board, I removed it and installed the provided 14 gauge Black wire with female terminal in its place. I then cut the Black wire and crimped on a male terminal to the portion not used and connected it to the female terminal on the Red wire that I had just removed. Finally, I used a WAGO push-in wire connector to tie these two to the black wire on the EasyStart. Next, after removing the white cap from the run capacitor, I installed the Orange wire from the EasyStart onto the Herm terminal next to the White wire. Then, I removed the Blue wire from the capacitor terminal and replaced it with the White wire from the EasyStart. Finally, I connected the Blue wire that I had just removed to the Brown wire from the EasyStart. Here’s a look at the wiring after everything was tidied up with zip ties: Overall, I’m pretty happy with the installation. However, looking back there is one thing that I wished I would have done and that is to add a bit of HVAC tape to the top of the EasyStart to give some additional support. I’m not sure how well the double sided tape will hold to the foam, especially given the conditions that some of our roads are in. I’ll probably go back and do that at a later time. BOTTOM LINE: After the install of the EasyStart, I noticed a very gradual ramp up of the compressor, as expected. More importantly, I can report that my Truma A/C runs very well with my 2000W Champion generator running on propane, even at 6000’ elevation. Added bonus: Unlike before, I can now run the A/C off my 15 A circuit at home. If you have any questions about this install, feel free to comment below.
3 points
-
Ditto. I also like having multiple energy sources vs. all electric. As stated if you are tied to the shore power for all energy needs that is fine. Unless you have a problem and then one would be SOL. At least with Propane, Battery and Shore power there are work arounds that can employed. Options make for a better experience. All eggs in one basket not so much from my experience anyway. GJ3 points
-
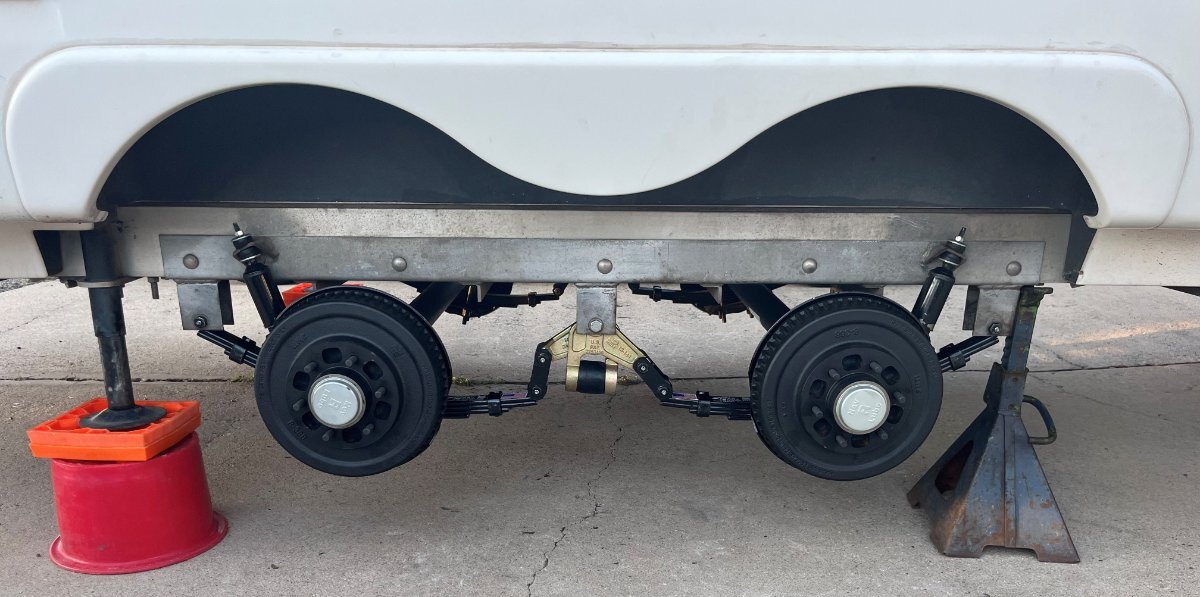
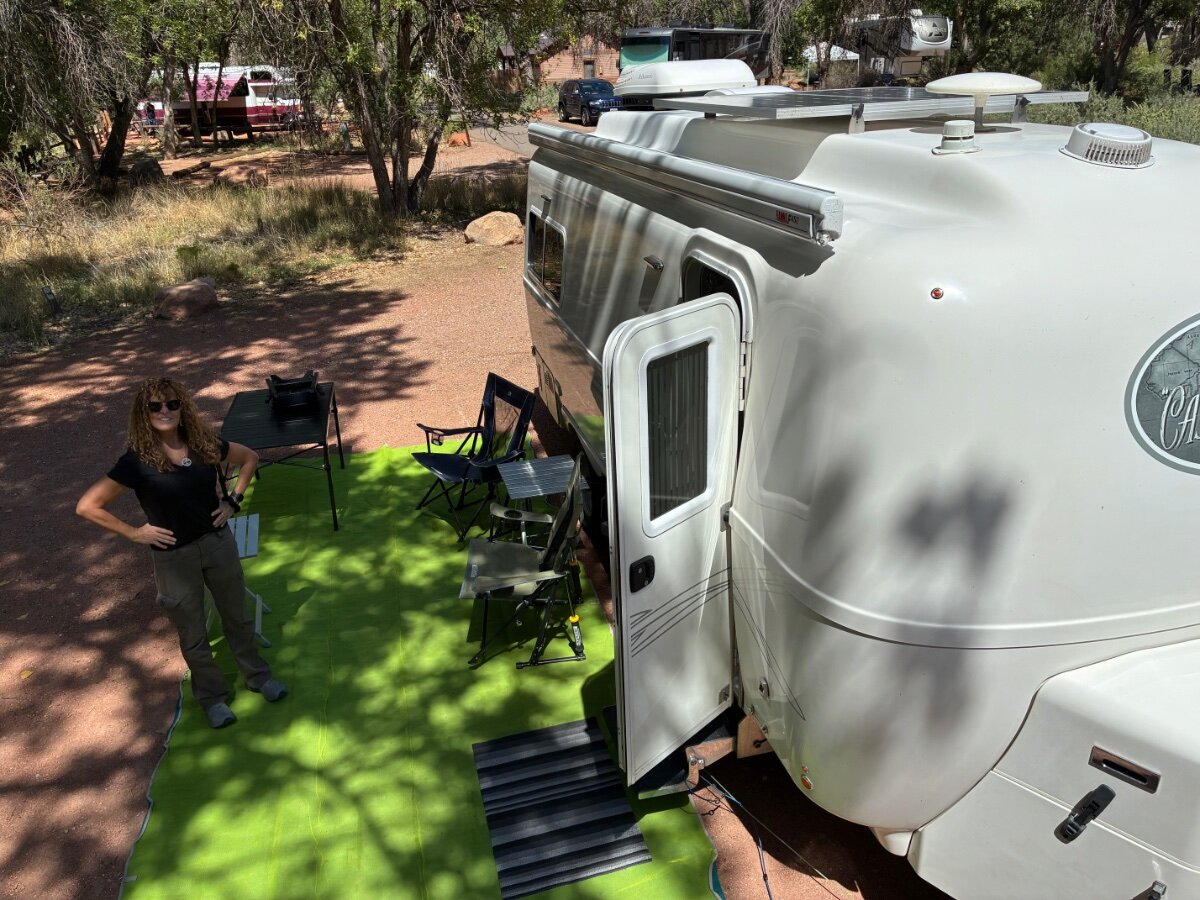
Finally done! Worked on this every-other-day this week. Looks great, doesn't she?! Alternate days are for Pickleball. My body can only take one kind of daily trauma! 🤣 Days on the court cannot be combined with hours climbing under truck or trailer! How many times did I get down on the driveway, sitting on a milk crate, craning my neck to fit under the Oliver fenders. or lying down on the ground, and then climbing back up? Way too many times, no matter how well I plan having parts and tools required! UPS came early yesterday allowing me to finish with new E-Z Flex equalizers from eTrailer (2-day ship only $6.50 extra, adding another $316 to the grand total)! You should check your equalizers. Some may have upgraded leaf springs without the equalizers being removed and cleaned up for inspection (it's the right time to do it). Details on this and other concerns soon. Look for a new thread on this subject. All that's left now is to torque and grease the wet bolts (our son Adam will power the torque wrench under the trailer and the DeWalt power grease gun makes this easy). Mount wheels & tires and test drive. I'll tow some miles on local highways and hilly/winding roads, then retorque the U-bolts upon return. Park the Oliver to free up my driveway again. Another trip to Southwestern Colorado is just 3 weeks away!
3 points
-
In this view of the Tetons I'm headed WAY up the Gros Ventre River. Just north of the "major" (not) town of Kelly this was a place I could not resist to take the first pic. However, if you are ever near Moran Junction look for Elk Ranch Road and head for GPS: 43.82592677366998, -110.50216569188429. Here there are some old buildings and great views of the Tetons without being around 1,000 of your closest friends. Also, note that there is plenty of room to turn an Oliver around here. Finally - if you are in this area and have never eaten Dornan's Pizza (on the upper deck)(GPS:43.65754766116248, -110.71075629684981) , it is pretty good with a great view of both the Tetons and planes preparing to land at the Jackson airport. While at Dornan's you can also get gas, beer, wine, fishing stuff and a small selection of grocery items. Bill p.s. If you decide to go to Dornan's and you are towing the Ollie - a couple of suggestions- 1. Go early. The pizza place opens at 11:30 am and there will be a line of 20 to 50 people at that time. 2. Do not park down in the "store/gas area" with the Ollie. If you can pull down into that area so that you can turn around and head out. Park on the side of the access road and walk the short distance down into the store area. p.p.s. HERE is another review of Dornan's
3 points
-
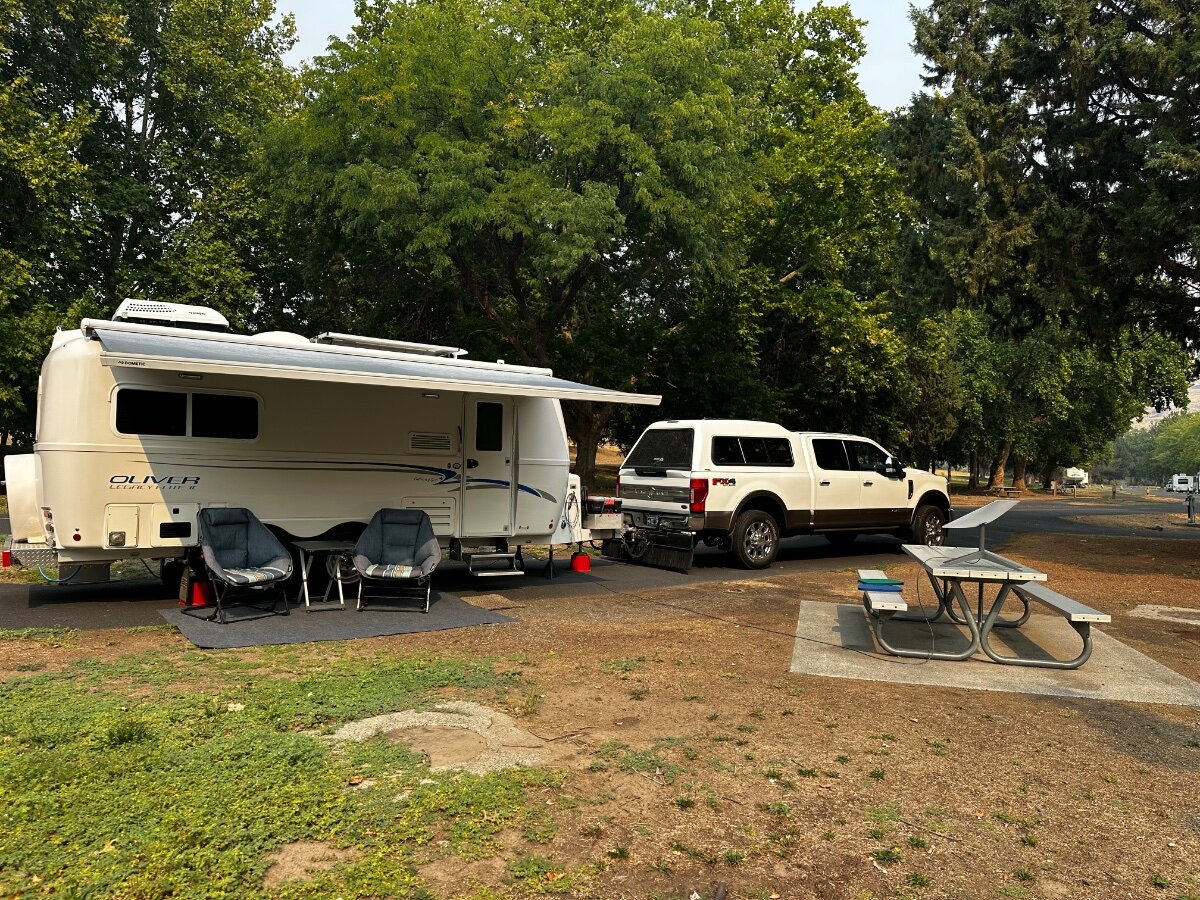
At Chief Timothy Park site 7 near Clarkston Wa A 1980’s COE park on an island in the snake river (connected by causeway) now managed offline by Vista Outdoors under a lease next stop Hells Gate SP on the snake river About a month out from Alcan Springs appointment!
3 points
-
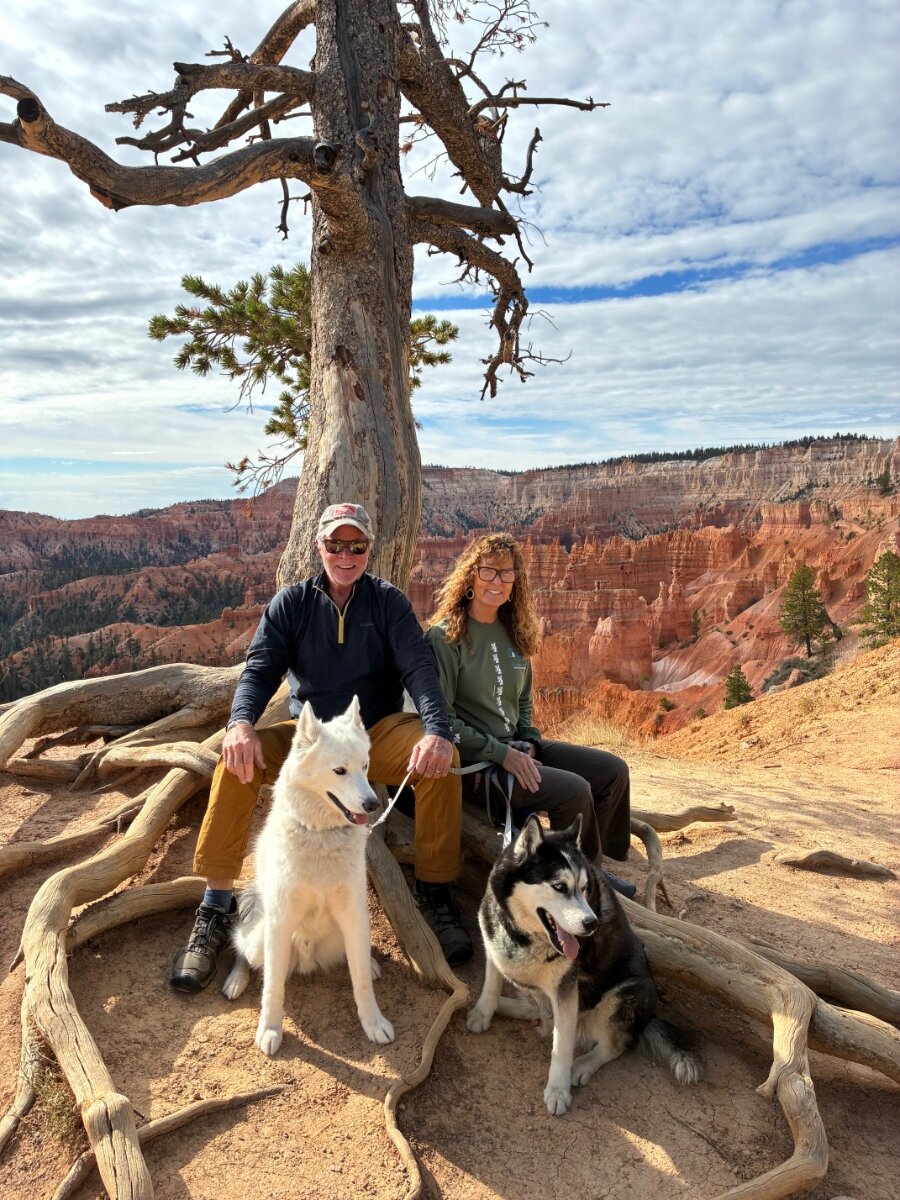
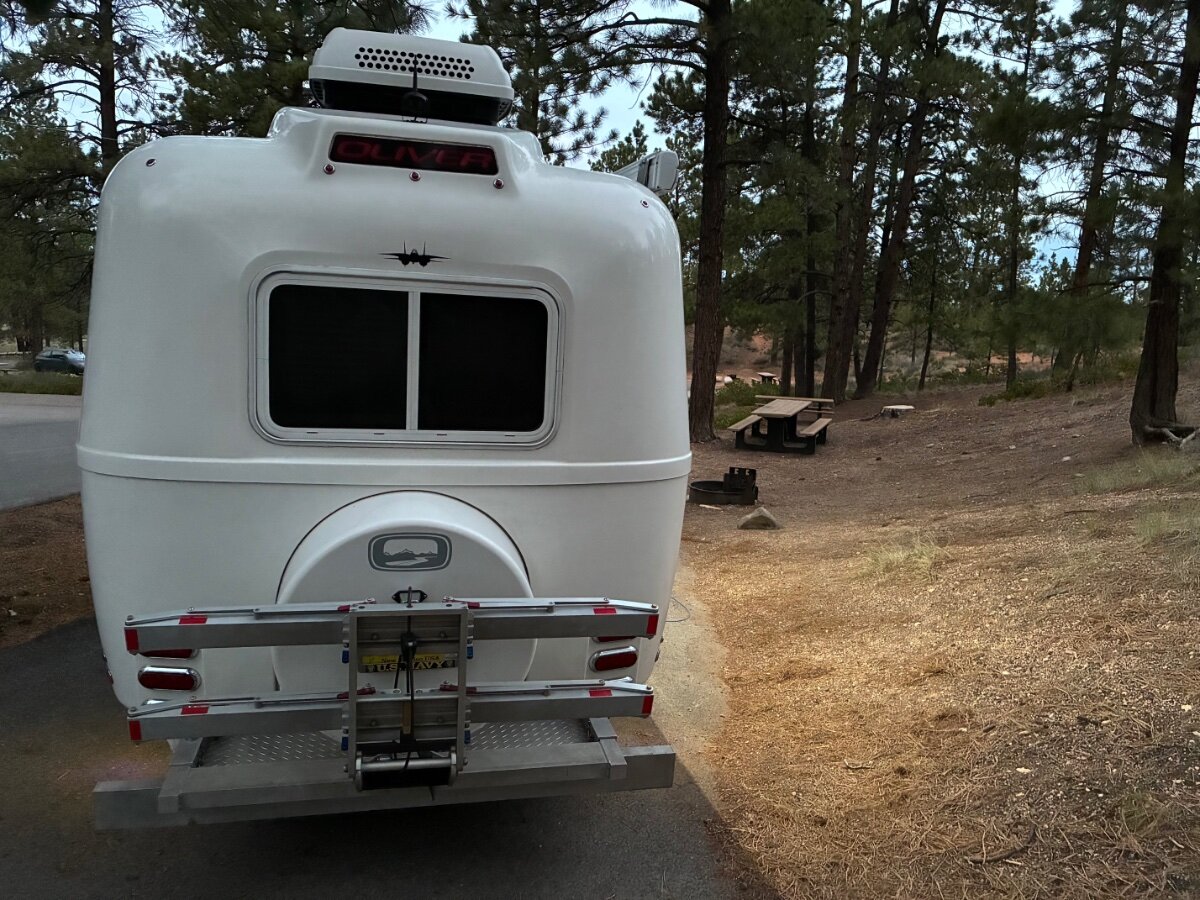
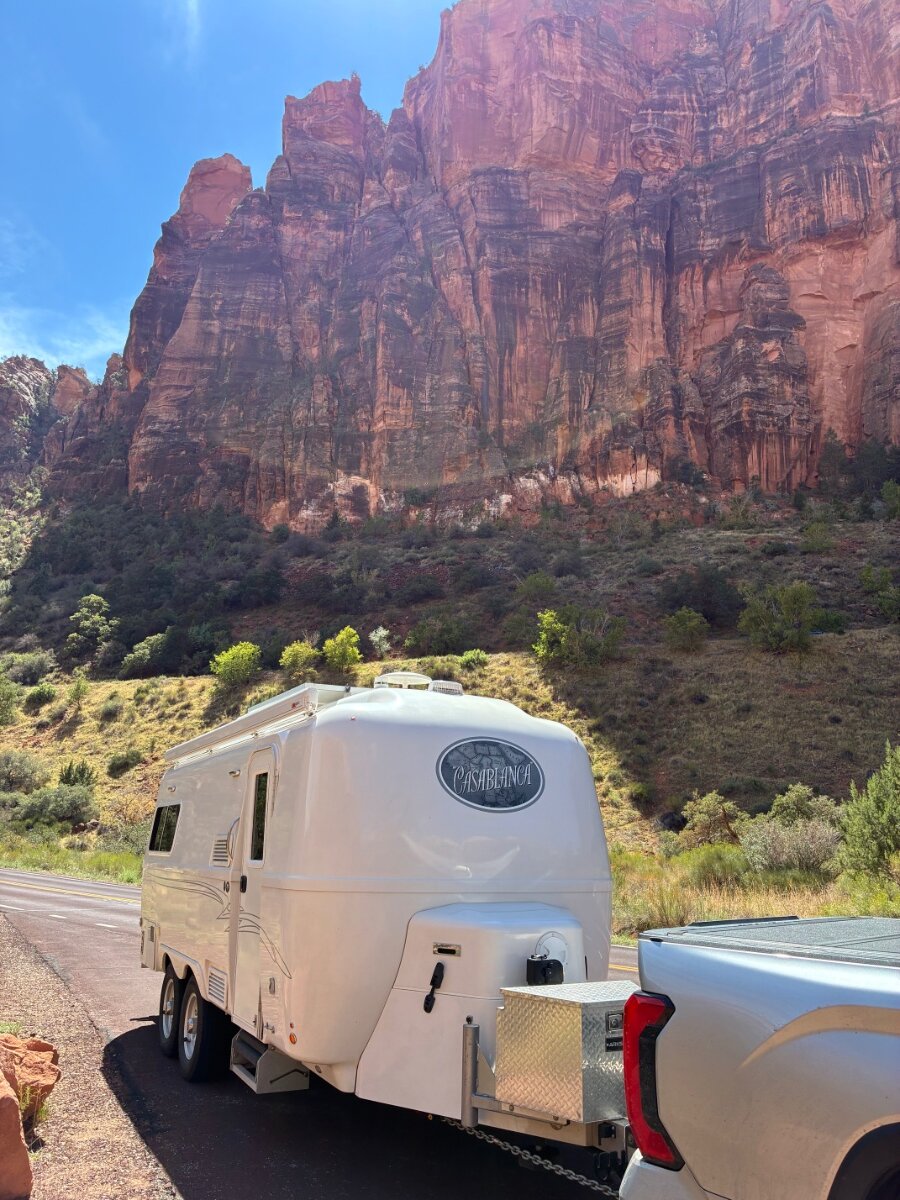
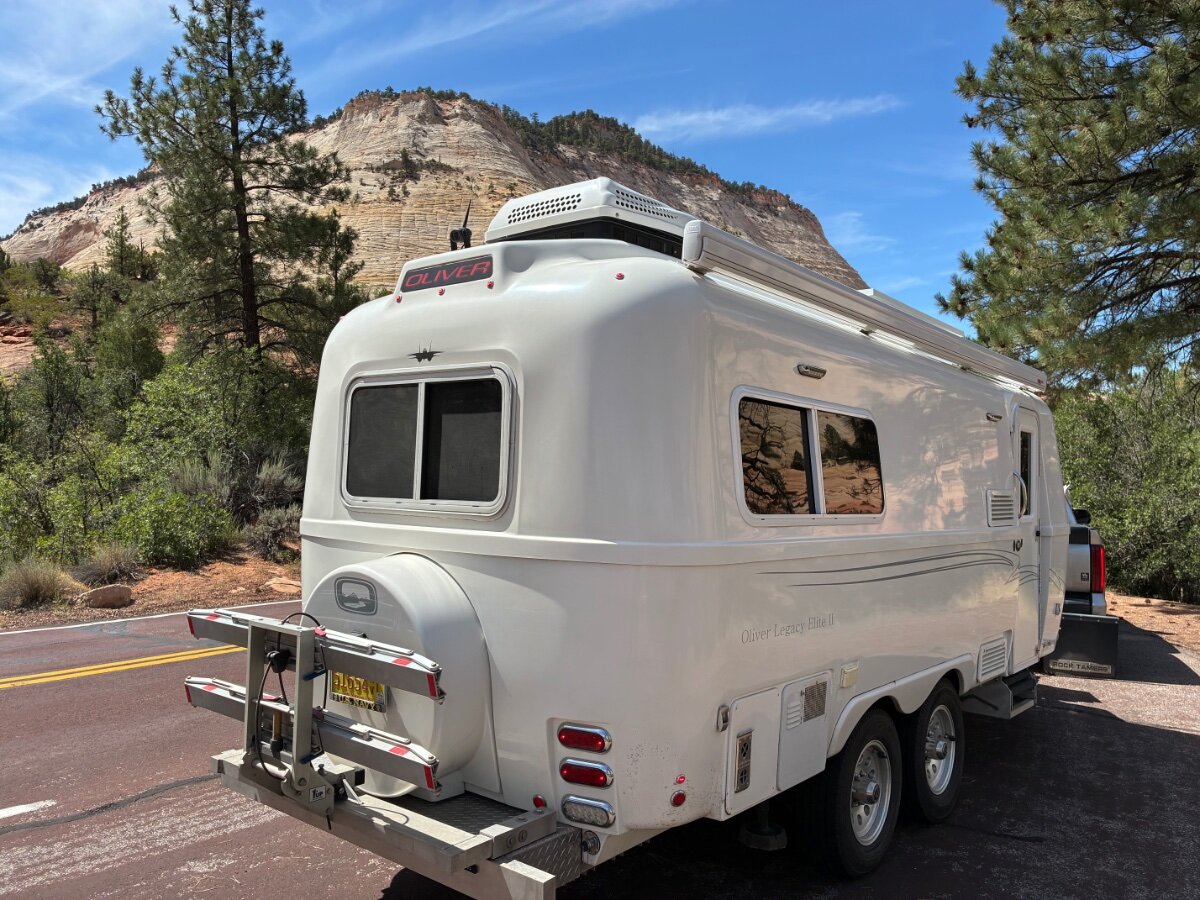
Just departed Bryce Canyon NP arrived Zion after a beautiful drive…. Safe travels and Cheers to all y’all road warriors! Best,, A & D (Magnus & Oscar, too — woof!)
3 points
-
You may find success by re-graining the stainless finish on your existing sink using red and/or gray scotch brite hand pads. I did this with great success on a stainless oven door which had been heavily scuffed during transport. Looked like new after application of some elbow grease. https://specialtystainless.com/tips-stainless-steel-countertops/articles-about-stainless-steel-countertops/graining-blending/2 points
-
Yep - Lifetime warranties are also questionable.🤪2 points
-
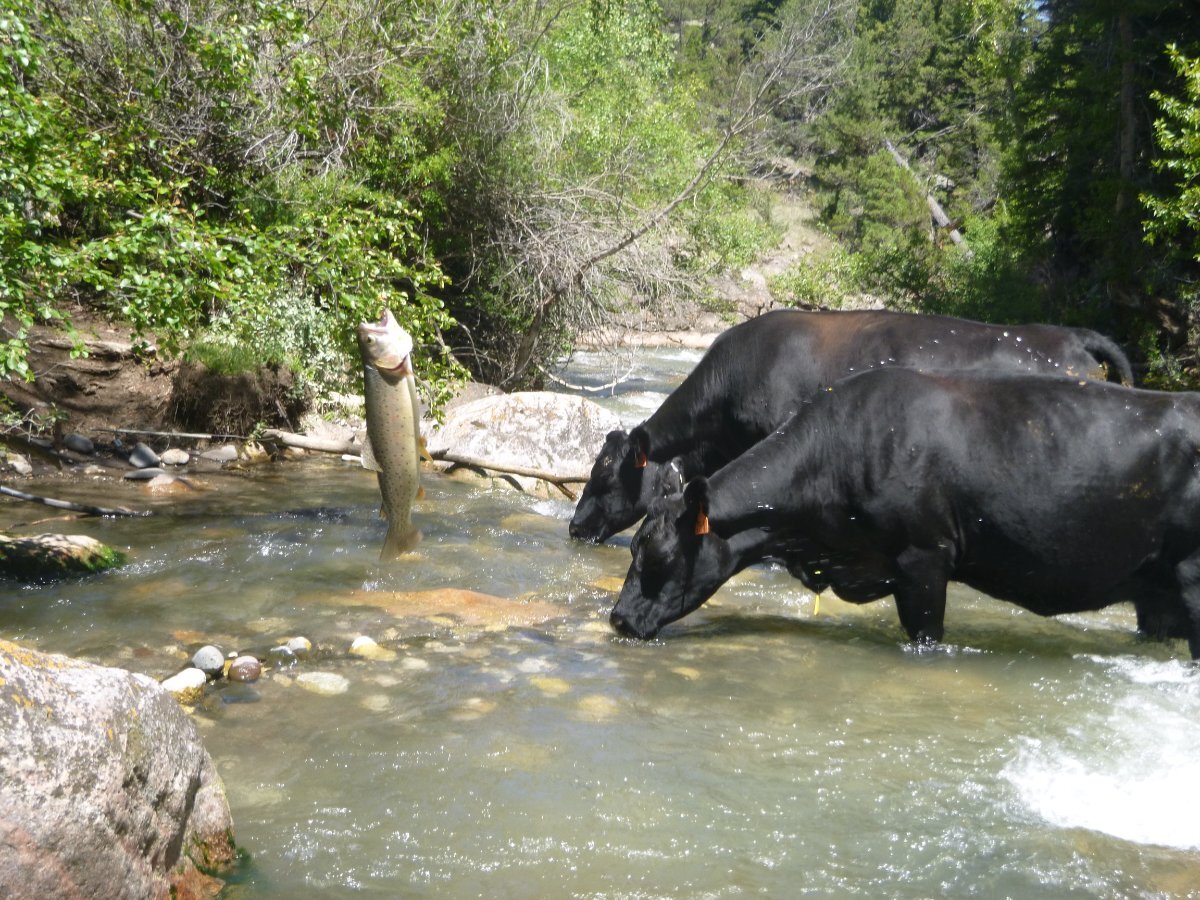
Dead Indian Creek is right behind Twist and is full of cows and fish (see second pic). This campground is located right on the Chief Joseph Highway about 35 miles north of Cody, WY. Bill
2 points
-
We’re near Orofino, ID at The Pink House BLM campground. Leaving tomorrow (Sat.) away from the smoke that has been in this area for 2 days now. Great campground with full hookups for $18 ($9 for those with the senior pass). The Clearwater River is at the backside of the campground.
2 points
-
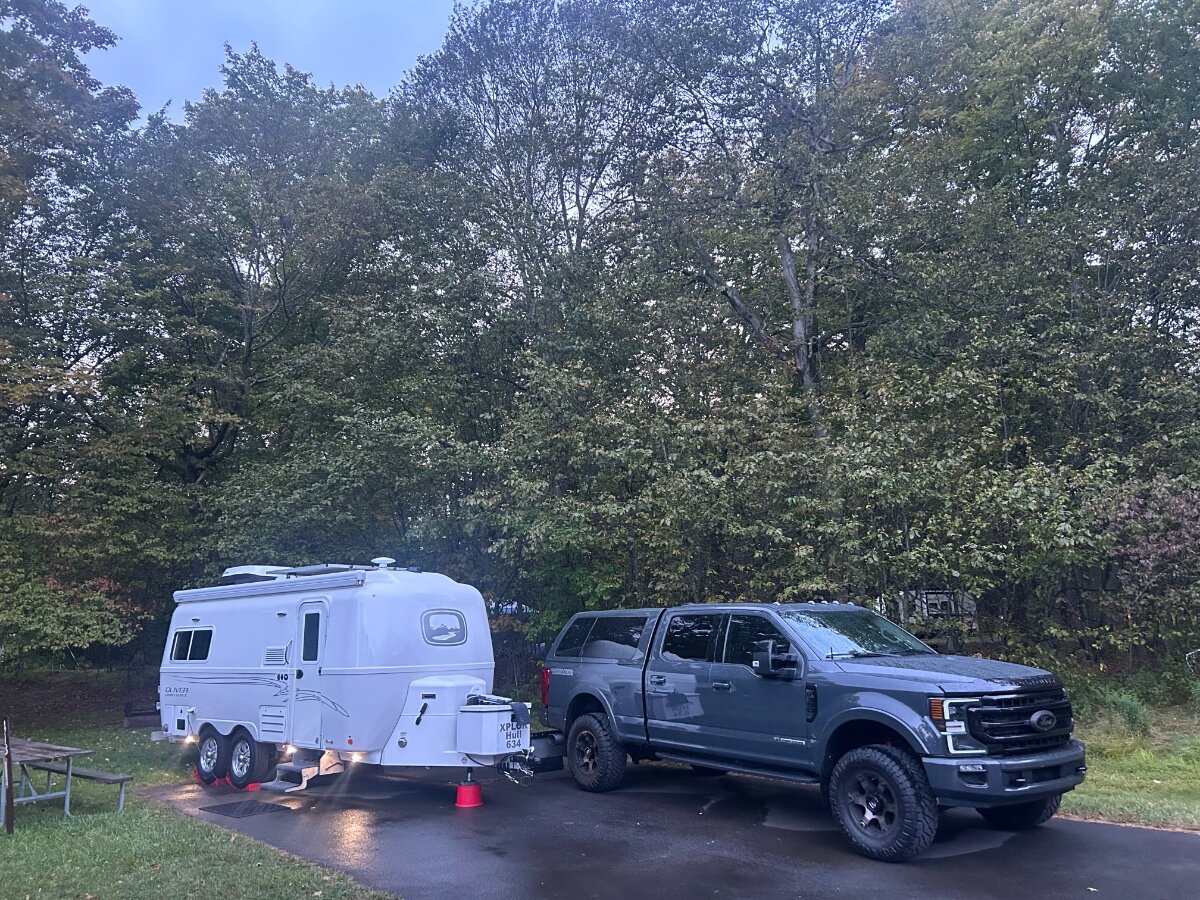
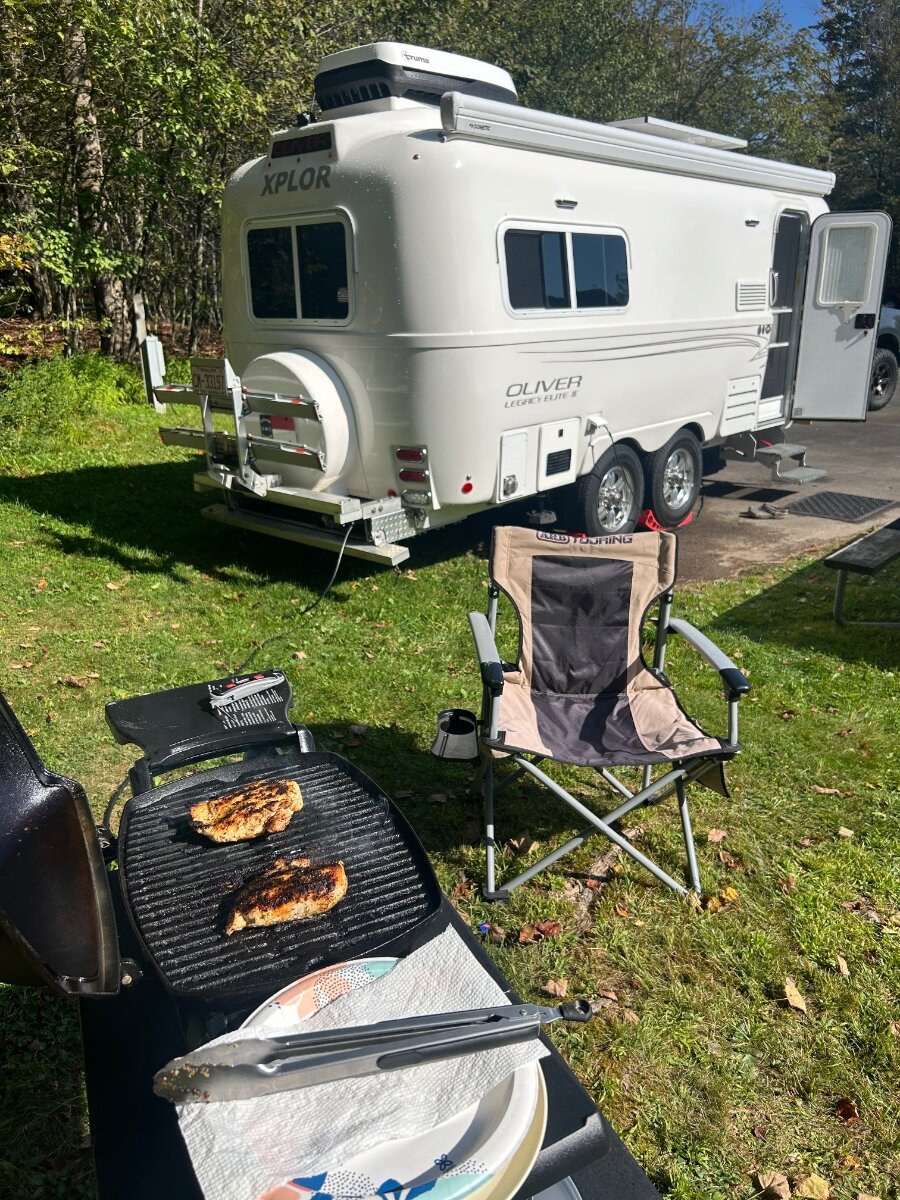
As we make our way north, we booked a few nights on the fly here at Promise Land SP near Greentown, Pa. A really quiet and well kept park. Nice clean bathhouses too! Our low tonight it will be 60 and breezy. Perfect with windows open wide for great sleeping weather! $27 a night electric only. The Pennsylvania Pocono Mountains have a special beauty about them. This pic was just a quick ✅ of our courtesy lights before dark last night. Love the Oliver exterior lighting when its needed. Spicy Kickin Chickin on the grill!! 🤪
2 points
-
Yet another Ollie "in the wild" - This time it is at the Box Creek Trailhead due west of Moran Junction, WY. Bill
2 points
-
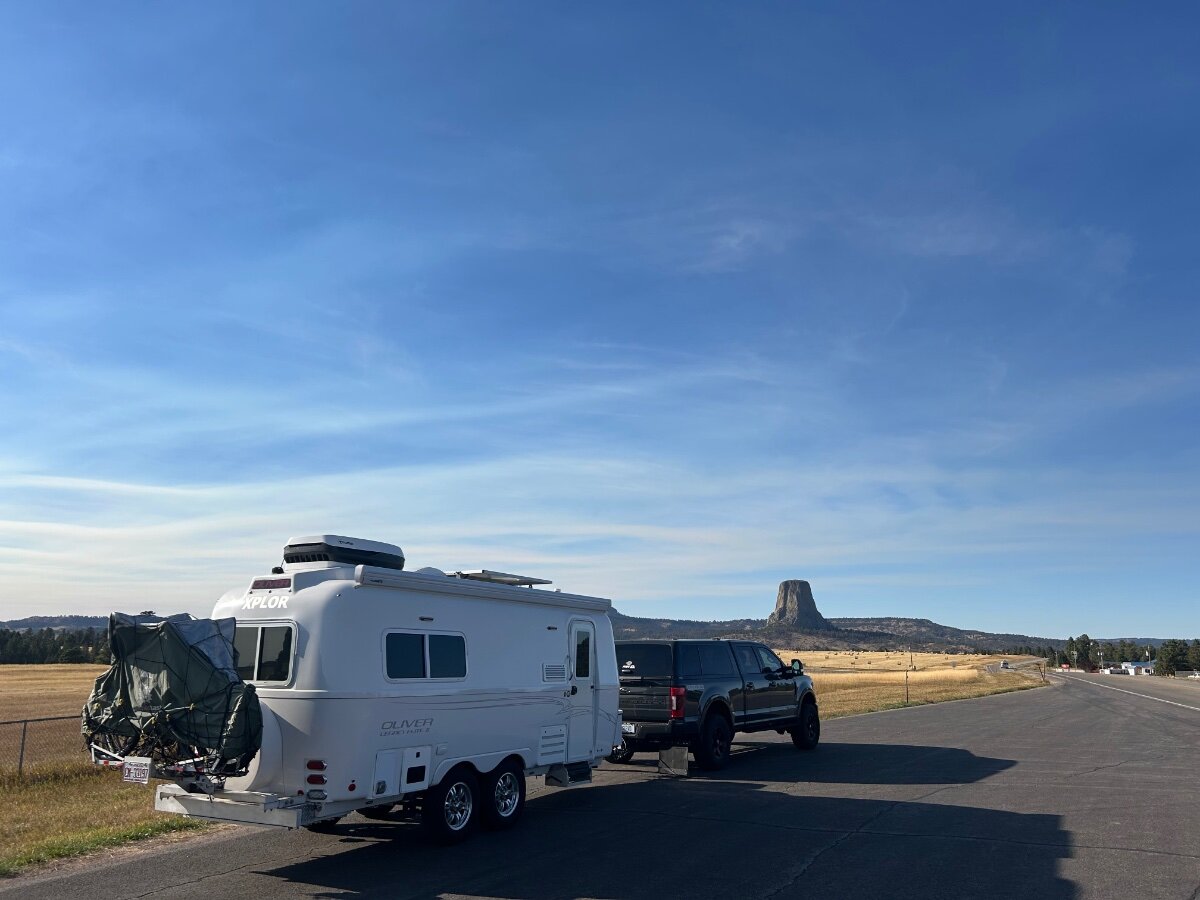
Yes, good eyes! It’s a 1Up USA Super Duty tandem rack. Pic is last fall out at Devils Tower. This rack allows for full rear light and brake light visibility even when the bikes are covered.
2 points
-
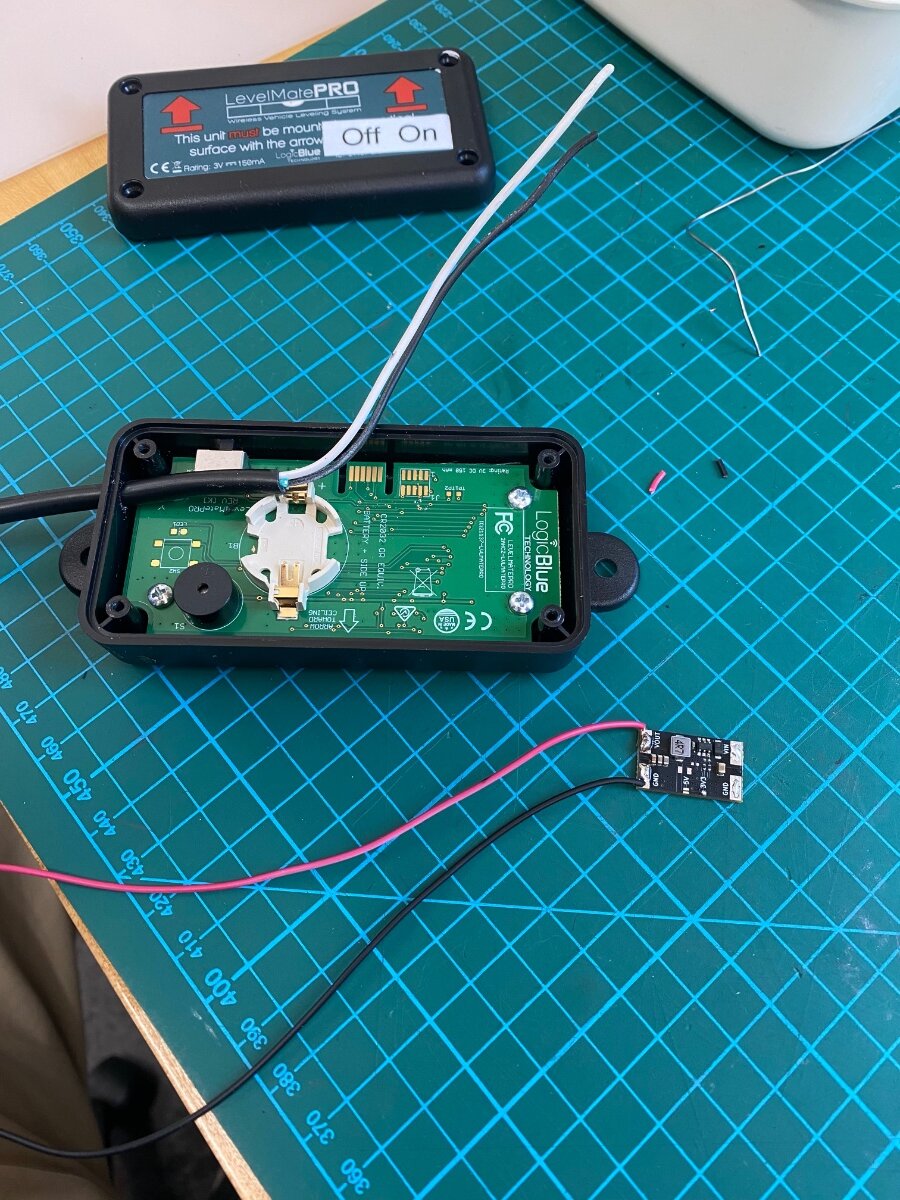
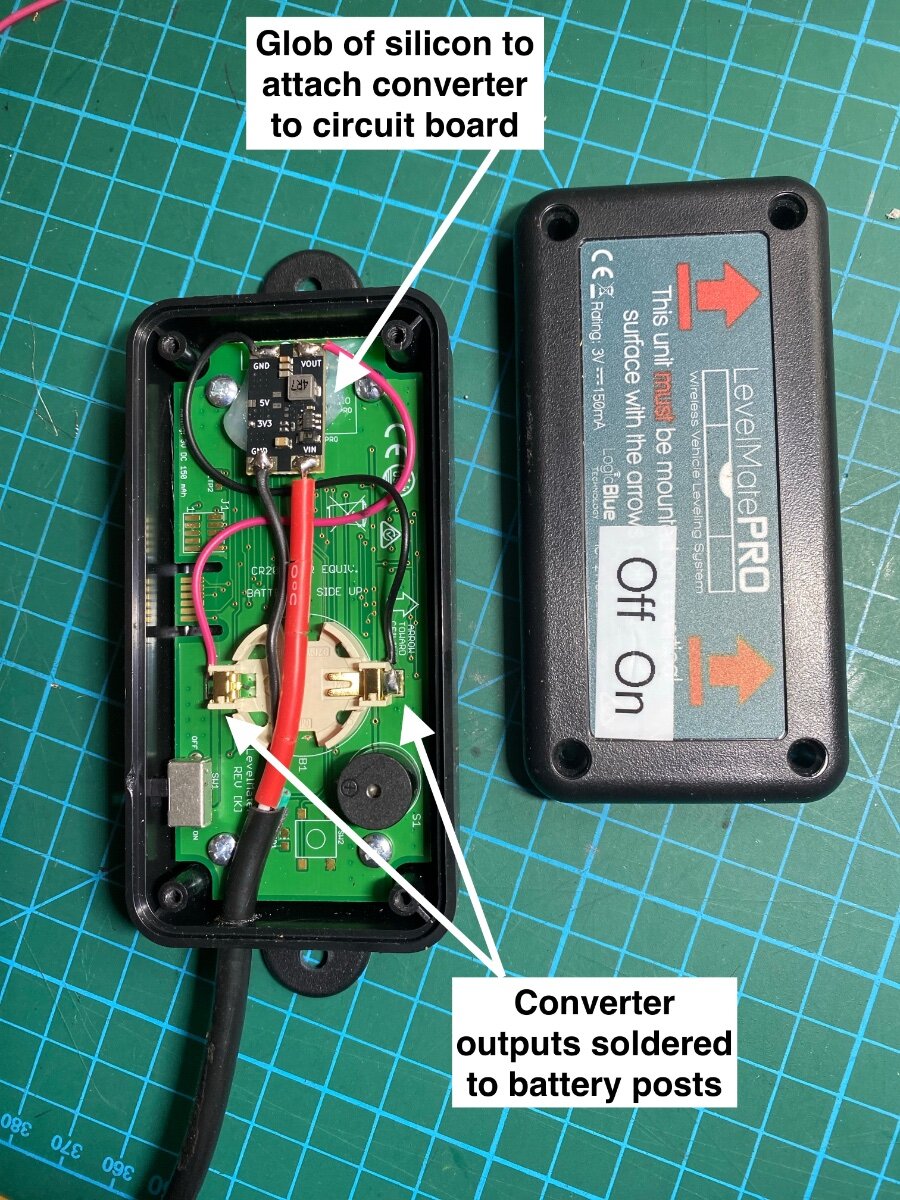
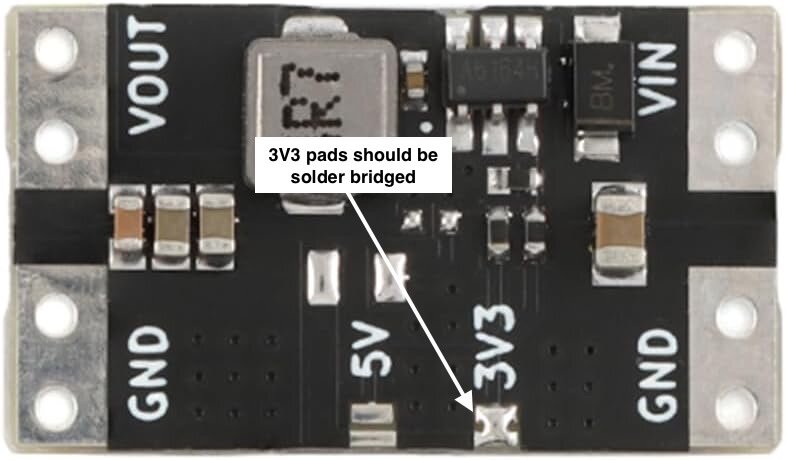
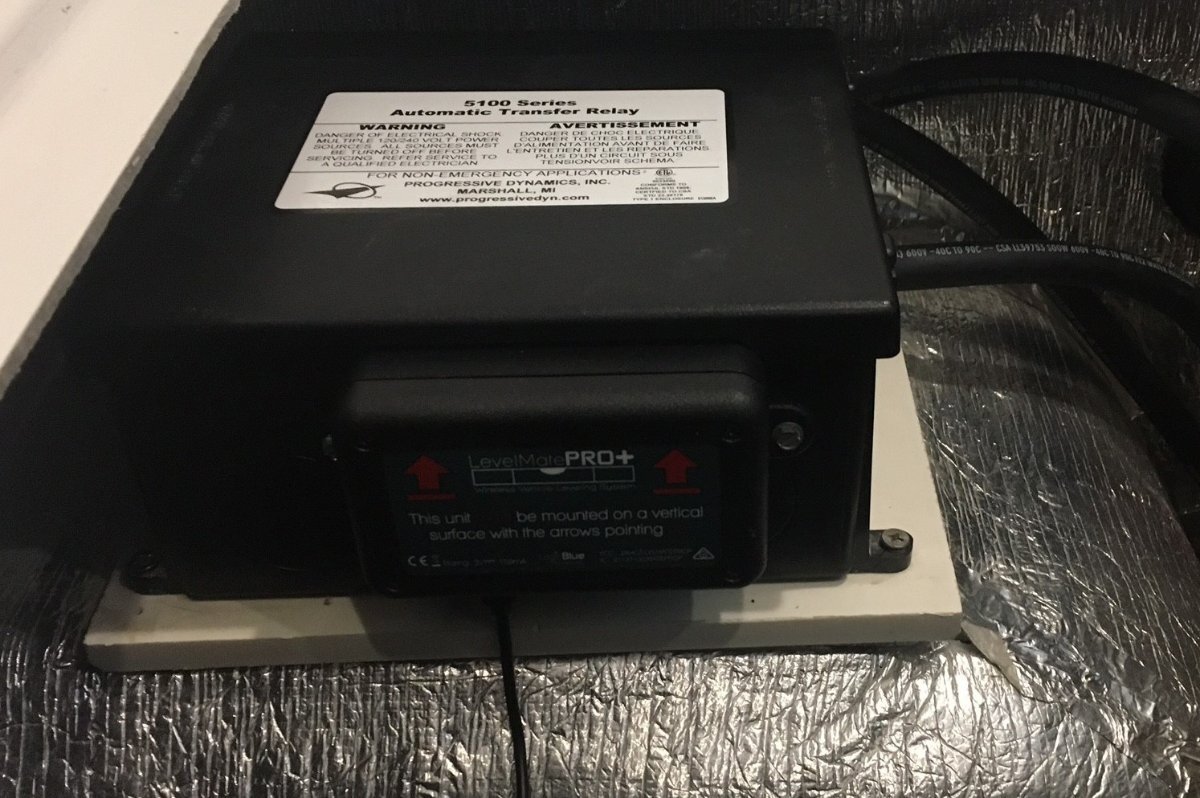
The LevelMate PRO is excellent for quickly leveling the trailer, and the battery is supposed to last six months. But I often forget to turn mine off and it always seems to be dead when I need it. In fact, it’s died so many times that I even kept extra batteries taped on the cover, quick release thumb knobs, and a screwdriver in my hook-up kit for changing the battery. Then on top of that, it has to be recalibrated for the slightest alignment changes when removed for battery replacement. I was fed up, and not willing to shell out another $150 for the USB powered LevelMate PRO+. So I spent $9 for a pack of ten voltage converters, and I hardwired the LevelMate to the trailer battery! The converters have an input voltage of up to 16VDC, and an output of 3.3vdc. They're small enough to mount inside the LevelMate case, the parasite drain is next to nothing, and the power switch will still remain operable. This is a simple modification requiring only basic electrical knowledge, some wire, a fuse, and a soldering iron! For the wire, I used an old charger cord. Hardware or auto parts stores will carry In-line fuses. Procedure: Open the LevelMate case and discard the battery Use a glob of silicon sealant to glue the converter on the LevelMate circuit board Drill appropriate sized hole for the power wire Verify the factory soldered a bridge across the Converters 3V3 pads to set output to 3.3vdc Solder jumper wire from converter GND to LevelMate battery pad marked “-” Solder jumper wire from converter VOUT to LevelMate battery pad marked “+” Solder Negative power wire to converter GND Solder Positive power wire to converter VIN Connect power wires to any negative and positive power source via a 2 amp fuse. My LevelMate is mounted in the garage space for optimum BlueTooth range close to the leveling switches. Power is available from the garage light, or you can pick it up from the “load side” of one of the breakers under the street side bed, or the dc power panel. Converter: https://a.co/d/7nvhv0A Note: This converter has a input of 4.5 to 16 vdc. Don’t be tempted by myriad of attractive looking 12vdc converters because they will not withstand the Oliver’s 14.5 vdc charging voltage. Now if I could only come up with ideas for the extra nine converters. . . Hope someone finds this useful! Cheers! Geoff
1 point
-
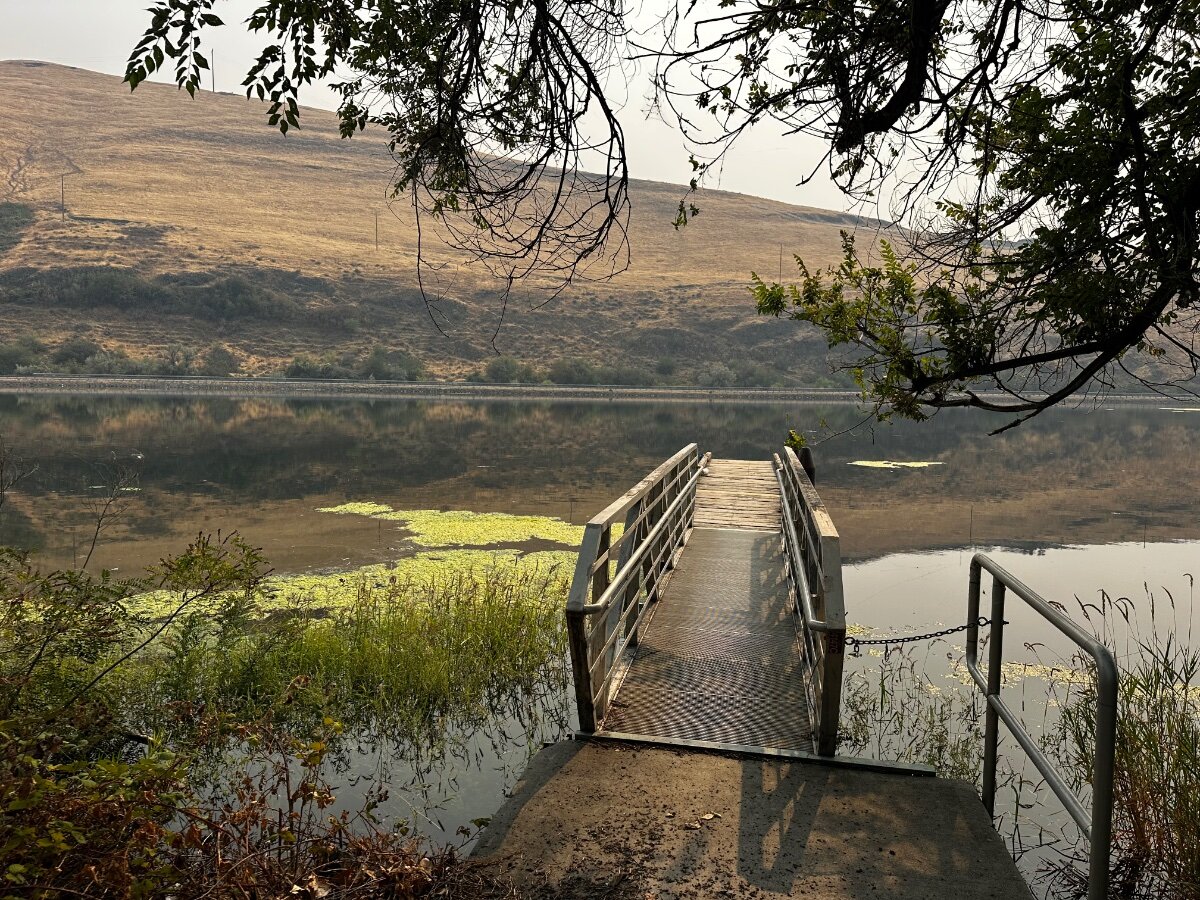
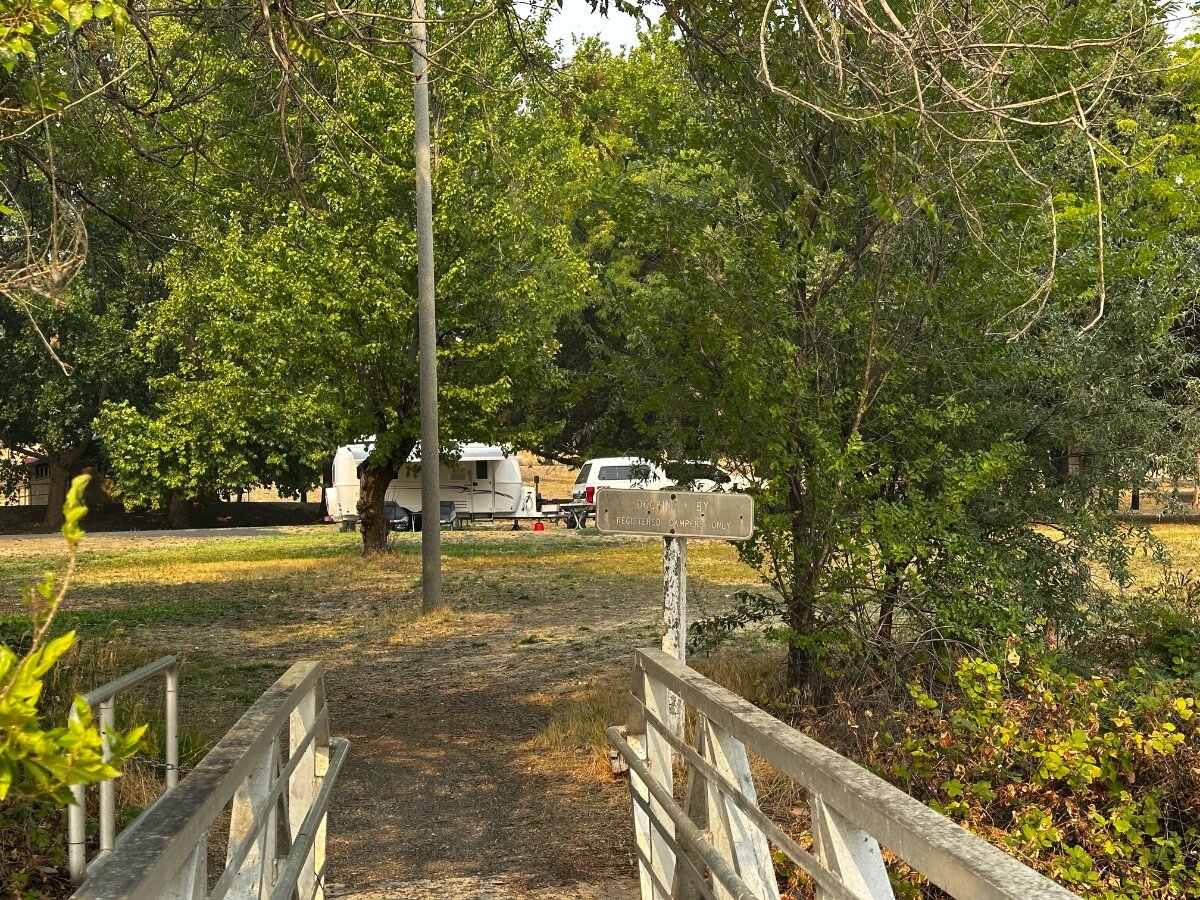
We came in at the state park, older narrow bridge but great views! We’ve had a nice relaxing stay.1 point
-
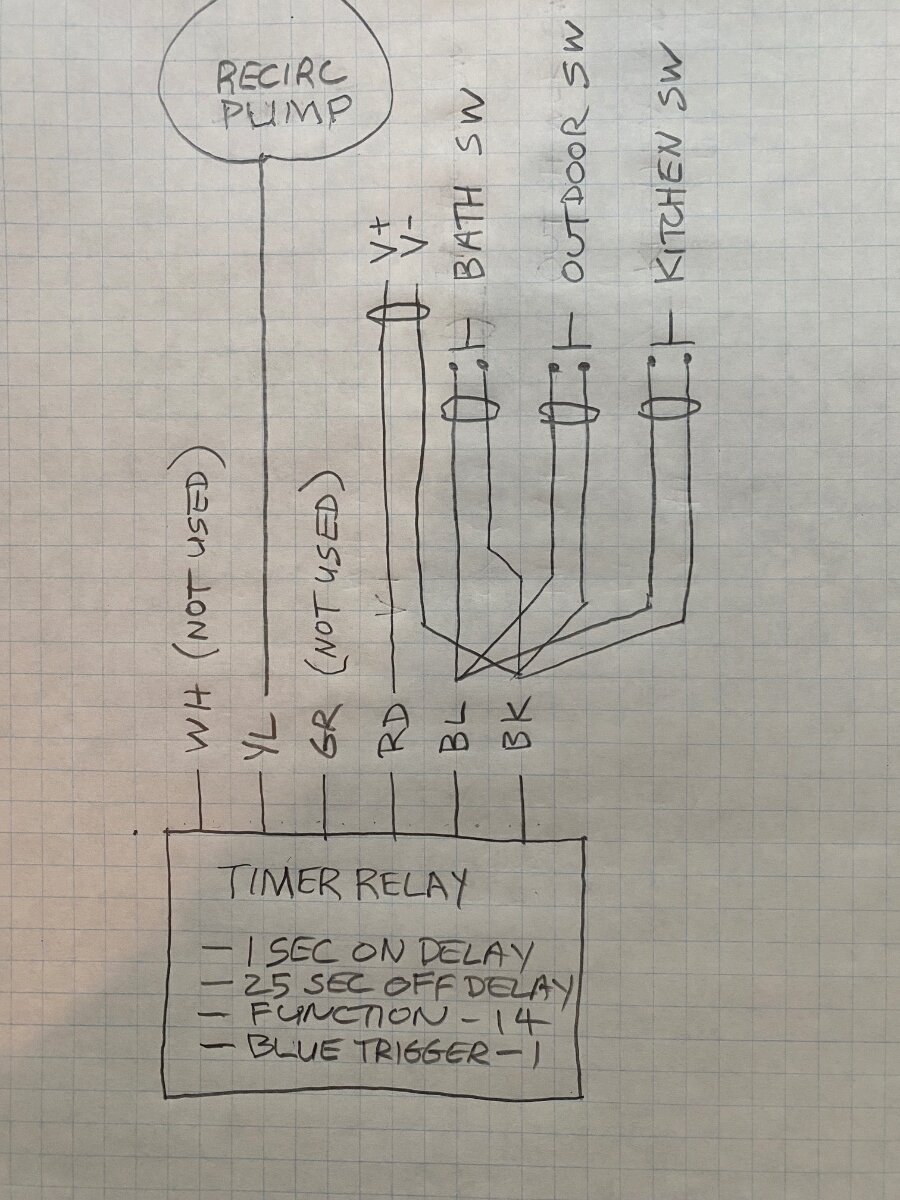
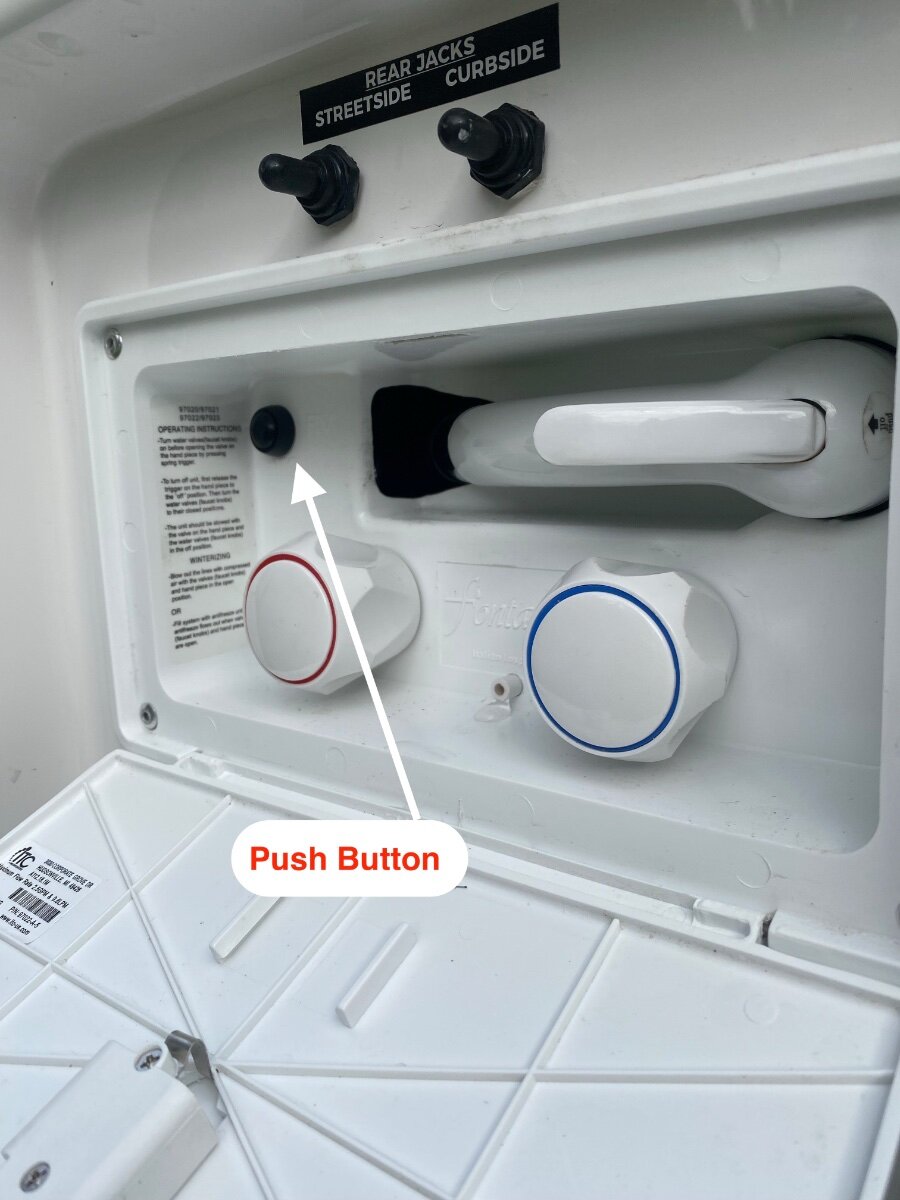
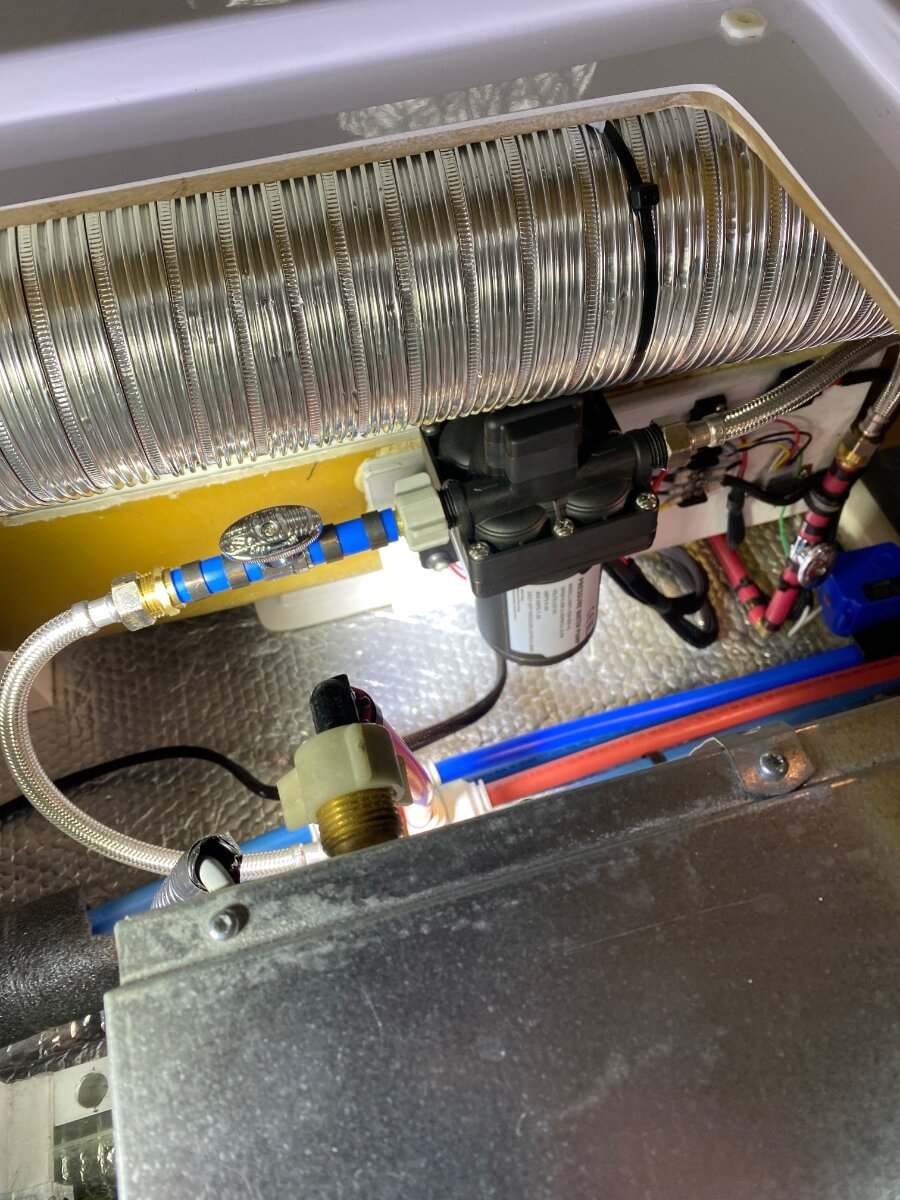
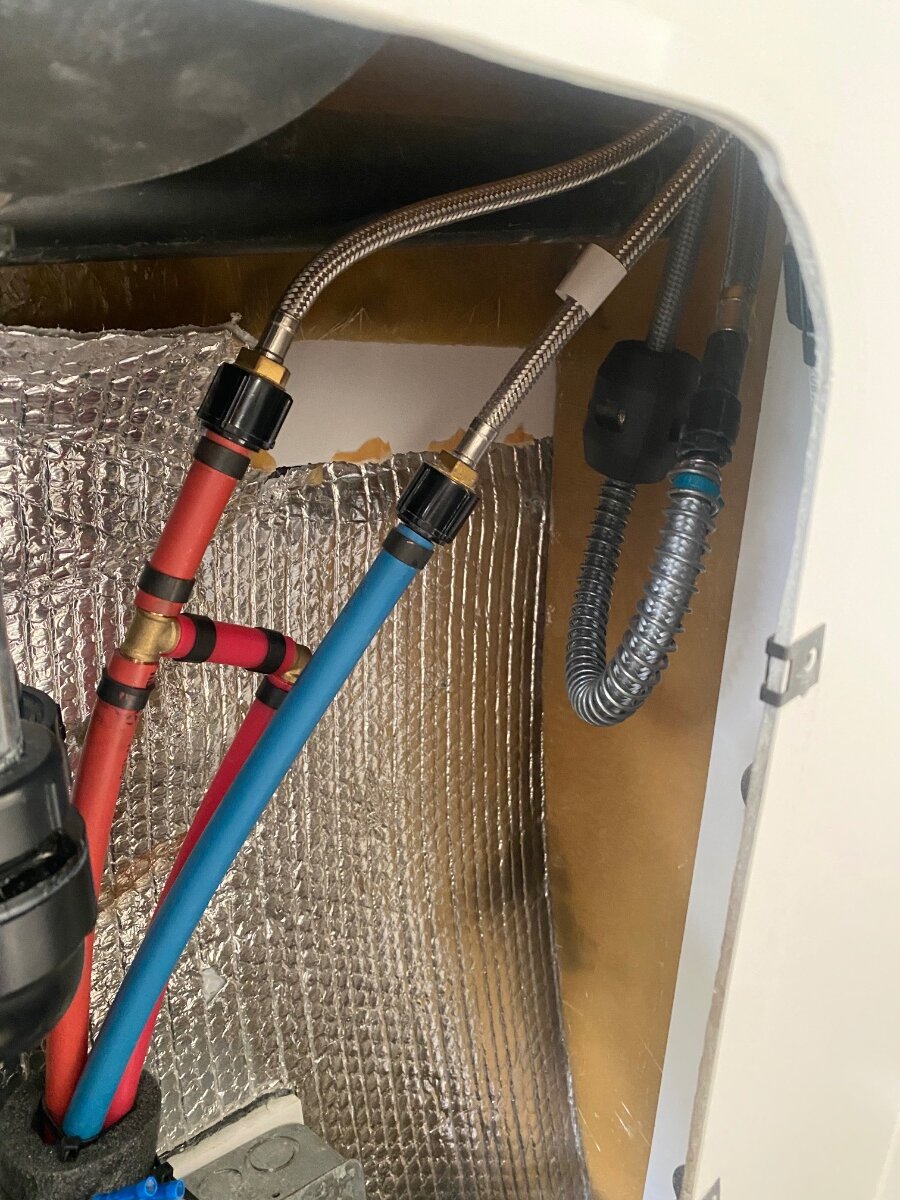
This is yet another modification for instant hot water. I was inspired by @Minnesota Oli who brilliantly installed a timed solenoid valve to circulate hot water from the bathroom faucet back to the freshwater tank. This saves from wasting water down the drain while waiting for it to get hot. I loved the concept of using a timer, but I went with a recirculating pump instead of a solenoid valve. We’ve used this design for about a year now, and it’s been very luxurious and effective. Not only does it help conserve fresh water, it prolongs the grey water tank volume which is now our most limiting factor when boondocking. The recirculation pump is started from momentary push button switches installed at each faucet. The button(s) activate a timer/relay that runs the pump for 25 seconds. Experimentation showed that 25 seconds sufficiently heats the pipes to deliver hot water at full temperature. The pump circulates the hot water back to the hot water heater, rather than into the fresh water tank. The new recirculation pump is the same model as the existing main pump. It was connected with flexible faucet hoses to reduce vibration and isolation valves so it can be used as a spare if needed. The pump was mounted on a plywood board fastened with construction glue to the vertical fiberglass surface by the furnace return vent. Note: Pump pressures can vary, so it might be necessary to slightly adjust the pump pressure switch to overcome the house pump pressure. Also, the pump may not overcome some of the higher city water pressures if a pressure regulator isn’t used. . . as it should be regardless. The Oliver has two separate hot water loops that I joined together so that the kitchen faucet is included in the recirculation loop. Being a shorter loop, there was less water wasted while waiting for it to get hot, but it's used more frequently so it's worth it to join the loops. There is plenty of room under the floor and behind the cabinets to run PEX return lines. “T” fittings were installed at the kitchen and bathroom faucets, and at the water heater input as shown on the drawing. Note: There was a buried 3-way valve, flexible by-pass hose, and a (clogged open) check-valve for water heater isolation. It was restricting flow and pinching the furnace duct so I completely removed it. The Water Heater can be easily isolated other ways if the need arises. The momentary push buttons were arbitrarily programed so that they must be depressed for one second before the pump will start. The buttons were non-intrusively mounted in 1/2” holes. The bathroom button is behind the existing bathroom pump switch, the kitchen button is above the sink, and the outdoor shower button is inside the shower wand enclosure. The sheathed button wiring is joined together under the street side bed along with the timer. I used terminal blocks, but wiring could be joined with any number of splicing methods. The button wiring carries no measurable voltage or current, it’s simply a switch to “low” (ground) for the timer trigger. Wire runs to the bathroom and outdoor shower switches are pretty straight forward, the bathroom vanity shelf needs to be removed for access. The kitchen switch wiring is laid under the liners in the upper cabinet, through the attic, and down the rear wall next to the clear AC drain tubing. I used a programmable timer/relay for the pump. An inexpensive (re-usable) Programer is also needed to program the timer. The Programer has built in App and Bluetooth for programing it on a smart phone and I’ve provided a screen shot of the program settings. This is truly simple to do, and quite fun! As many in this forum know, the Tuma Comfort II water heaters have a built-in circulation pump, controlled by temperature sensors, that keeps a small internal tank ready with hot water. Only one part (unavailable to public) differentiates it from the Truma Comfort II “Plus” that has a full hot water recirculating system. It took a few years, but I finally have the design details for that part and I’ll try to fabricate one when the Truma is removed for the up-coming factory recall work. More to come if I’m successful. The Truma “Plus” recirculation system provides true instant hot water (when not in Eco mode) because it keeps hot water circulating through the system based on temperature sensors. My system has a 25 second delay before the water is hot, then it cools down until the button is pushed again. This is less convenient, but more energy efficient because it doesn’t periodically cycle. I’m still on the fence which system is better, but fortunately the recirculation loop installed in this modification will work for both systems. Hope someone finds this useful! Cheers! Geoff Shopping list: Sureflow pump https://a.co/d/cSLUWEF 10 amp Timer/Relay https://a.co/d/g6C1zaZ Timer/Relay Programer https://a.co/d/9h1HtK6 Momentary switches https://a.co/d/i9wwhNs Terminal Blocks https://a.co/d/bkgrKhh Red PEX and fittings Flexible faucet hoses 1/4 turn valves
1 point
-
That's fantastic! Wish I could be there -- but I see my friend @J Yoo will be there!1 point
-
43.8615070064639, -110.29443105837858 Yes. It is actually a decommissioned National Forest Service campground. There are still a pit toilet and bear boxes there and there is non-potable water. No garbage service nor electric or dump. Note that the reason the Forest Service decommissioned this campground was due to bear activity some years ago. In the past several years I've seen a couple of black bears wander through camp, and there has been Griz poo and tracks observed within a half mile. I never walk around my campsite or anywhere in the camp without appropriate protection on my person. Bill1 point
-
From the north -- I forgot about the bridge at Deception Pass State Park ... otherwise I only know of the ferries from Mukilteo (north of Seattle) and Fort Casey (from Port Townsend on the Olympic peninsula). I had the great fortune of spending six months on Whidbey Island and it was glorious.1 point
-
That is some fine work, John, excellent job!! You'll not only have the confidence in your equipment going forward but you'll also have the knowledge (and tools) to tackle any situation that comes along should something go wrong. Regarding having the parts and tools required at hand I still struggle with that as it seems like no matter how simple the job I find myself running back and forth to the garage several times to retrieve nearly all of the tools I own!!1 point
-
No ferry! There are a couple of bridges across to the island. It’s a different world here, for the last week the temperature has stayed between 52 and 62. Quite a difference from triple digits in south Texas!
1 point
-
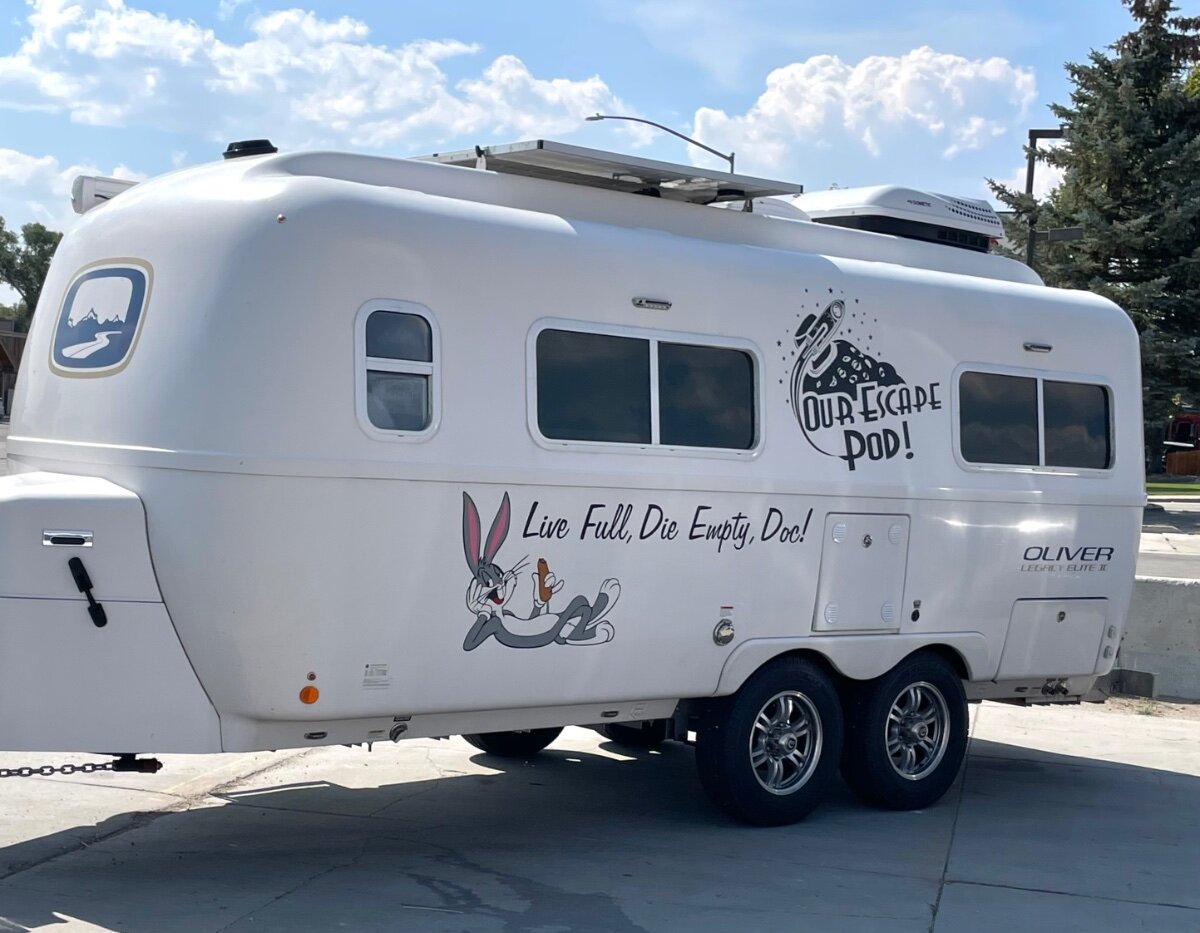
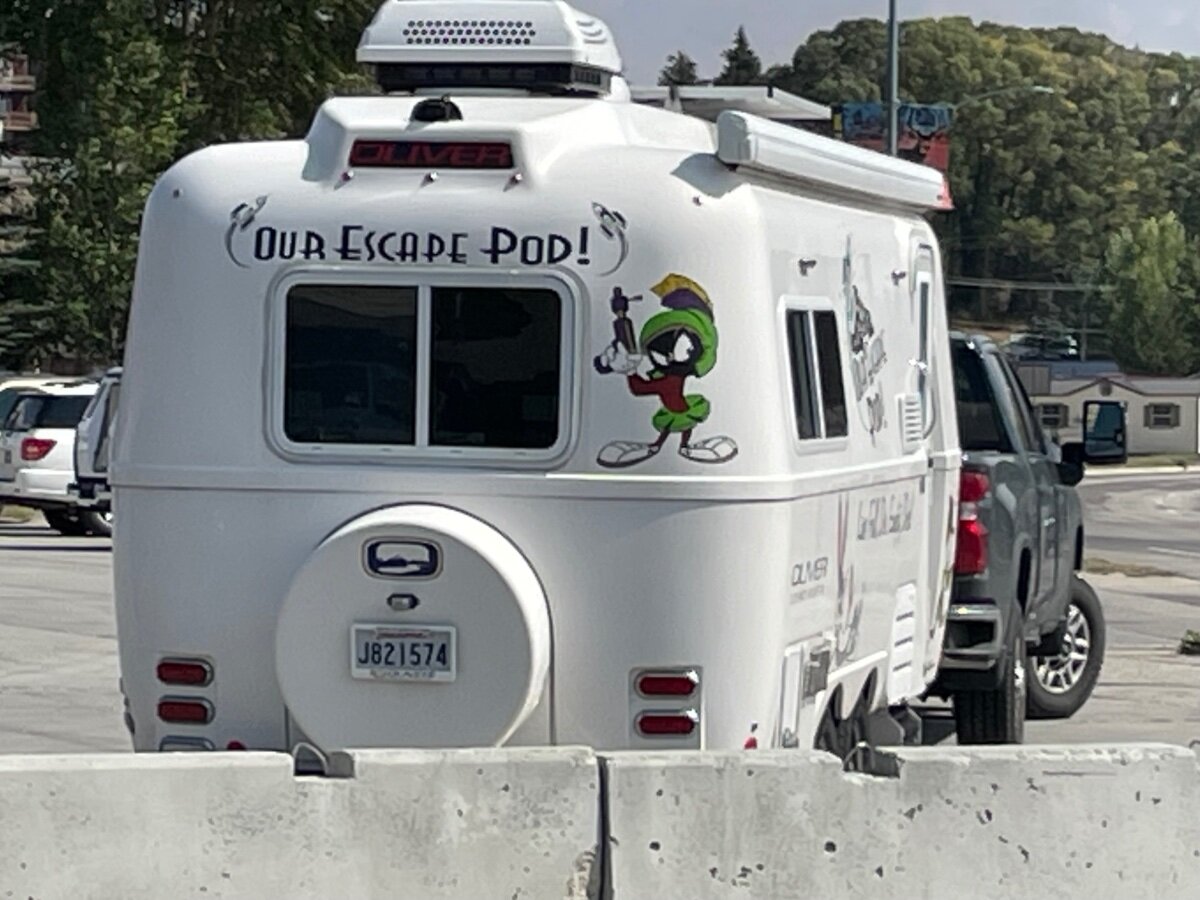
It was me! …. Hull 1060 So far, I think I’ve seen 4 or 5 Olivers this summer (4 months on the road so far, but 3 of those months were in Wyoming)… and Bill is the only owner I’ve had the chance to actually meet! Does anyone know who owns “Our Escape Pod” and their hull number?1 point
-
It sure is! And as usual Geoff... You can wire anything that comes to mind (we are not worthy) 🤣! This is a GREAT upgrade for anybody who already has the PRO vs. the preferred PRO+. When we were shopping for ours two years ago, I came close, but soon realized the PRO+ included a wiring harness. Anybody reading not have one, OMG get one and pay $120 for the PRO+ vs. $100 for the PRO. I paid $102 Nov 2023 for the PRO+! I stay in the driver's seat of the truck to level. I open the app and move back and forth to get as close as possible. Then Chris gets out after I tell here where to place the Andersen levelers. When she gets them in place, I pull up or back depending and we can be at near perfect level, set the parking brake and we're done! Running this device on battery - OMG NEVER! I would be truly upset if the app could not find the device (for a dead battery). I wired ours under the rear dinette seat, where our B+ and B- buses are located in reach of the PRO+ included wiring harness (no splices or butt connectors required). The side of the PD ATS provided a good horizontal surface, installed in a just few minutes (see pic). We would not leave home without these accessories: https://www.amazon.com/LogicBlue-Technology-LevelMatePRO-Wireless-Leveling/dp/B083ZMZPR8/?th=1 https://www.amazon.com/ANDERSEN-HITCHES-Accessories-Leveler-Leveling/dp/B01MQNGOWD/?th=1 https://www.amazon.com/ANDERSEN-Accessories-Stabilizers-Jackstands-Quickjack/dp/B0888SDR63/?th=1 If you have the PRO, certainly work Geoff's mod ASAP! If not, buy the PRO+ and if you do not have either... Get out of the dark ages! 🤣 (life is short)
1 point
-
Have you tried barkeepers friend on the rust spot? And thanks for the heads up on Dawn dish soap. We use it for just about everything.1 point
-
In other words, you don’t buy green bananas Bill? 🤣1 point
-
Heck - at my age, I just enjoy waking up! 😇1 point
-
Me too, dawn is my favorite time with coffee in hand!1 point
-
For sure, we're all different! 🤣 At home 6 years ago, I removed our electric induction cooktop (it was an older cooktop, perhaps not the latest technology), ran natural gas pipe to a new cooktop. Then I used the 8 AWG wire that was for the cooktop and added a sub-panel so that our fridge and Emeril Oven would have their own 20A circuits! It's been a great kitchen mod and we would never go back. So, quite the opposite from Rob's comment. We like the simplicity of gas, what you see is the heat applied. And when camping, we must have LP for outdoor cooking, and our fire ring for sure. The LP Atwood furnace is another must have, don't want heat pump running above our heads! We're going to keep those two 30# LP tanks in addition to more/better batteries! We prefer the stainless sinks too, but can see how this would make installation easier and costs lower for OTT. This thread seems like fantasy-land to me. Out of all of us reading and writing, who is in the market for a new Oliver anyway? Not us! There is only room in life for one Oliver, for sure. I'm truly glad we prefer what we already have with mods already made. It's like when OTT went to touch lights, nothing but problems. Our old switched lights, working now 10 years, and would not change a thing. Don't want those new windows either! 🤣1 point
-
Agree, we like our LP, too!1 point
-
A fellow Forum member and renowned fly fisherperson - Boudicca. Bill1 point
-
AND - somehow that Oliver meets up with another Oliver just outside the town of Meeteetse, Wyoming!
1 point
-
Greetings to the Oliver I saw parked at the Ridley’s parking lot in Pinedale! I think you are from Louisiana — but there’s no mistaking your Oliver! “Our Escape Pod”!
1 point
-
I saw my first spruce grouse ever this week in Two Medicine GNP. I thought it was a ptarmigan but the ranger corrected me. You see ptarmigan don’t visit that area. He added that the NPS had just finished a study on ptarmigan camouflage in the wild. Of all the adaptations in wildlife, silent p is the most rare. 😁1 point
-
I assume the power for the breakaway brakes comes directly from the batteries. So, when I switch the batteries off the breakaway feature is disabled. I only switch off the batteries when in storage and I can’t move the trailer without the batteries switched on (raise and lower the front and rear jacks). In fact, the first thing I do when taking my trailer out of storage is to turn on the batteries, so I’m fairly confident that towing with no breakaway brakes is not an issue. Mike1 point
-
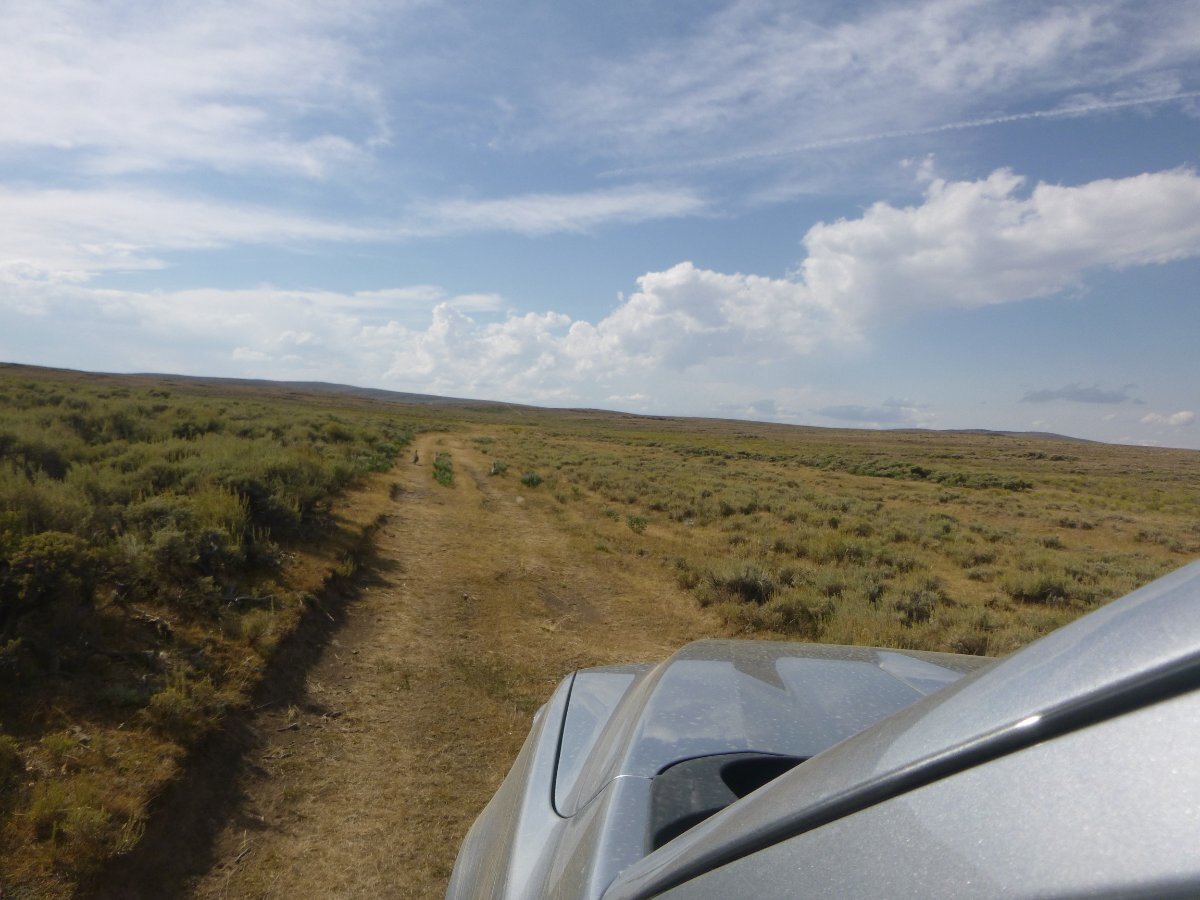
AND saw some of these (for those that have never been in this area of the country, the second pic is about all you can see for as far as you can see - sharp eyes will note the three sage grouse at the left hand side of the road).
1 point
-
It’s been a great trip so far - this is our first 2 night stay. We have gone up to Glacier and then up to Coleman in Alberta at the base off Highway 40. Close to 100 miles of gravel and very dusty road. Then into Kananaskis Country and up to Banff, where everything is full-we got the last site in the 600 site RV park. The “long weekend” filled Lake Louise so you couldn’t even view the lake. We then connected with 93/95 and are down close to Kimberly in BC. As we entered Kananaskis Country the scenery changed dramatically! Massive mountains- folded and rising 6-7 thousand feet from the floor- more and more glaciers. A really different feel than our section of the Rockies in Colorado and Wyoming. Very “Individual” and massive.
1 point
-
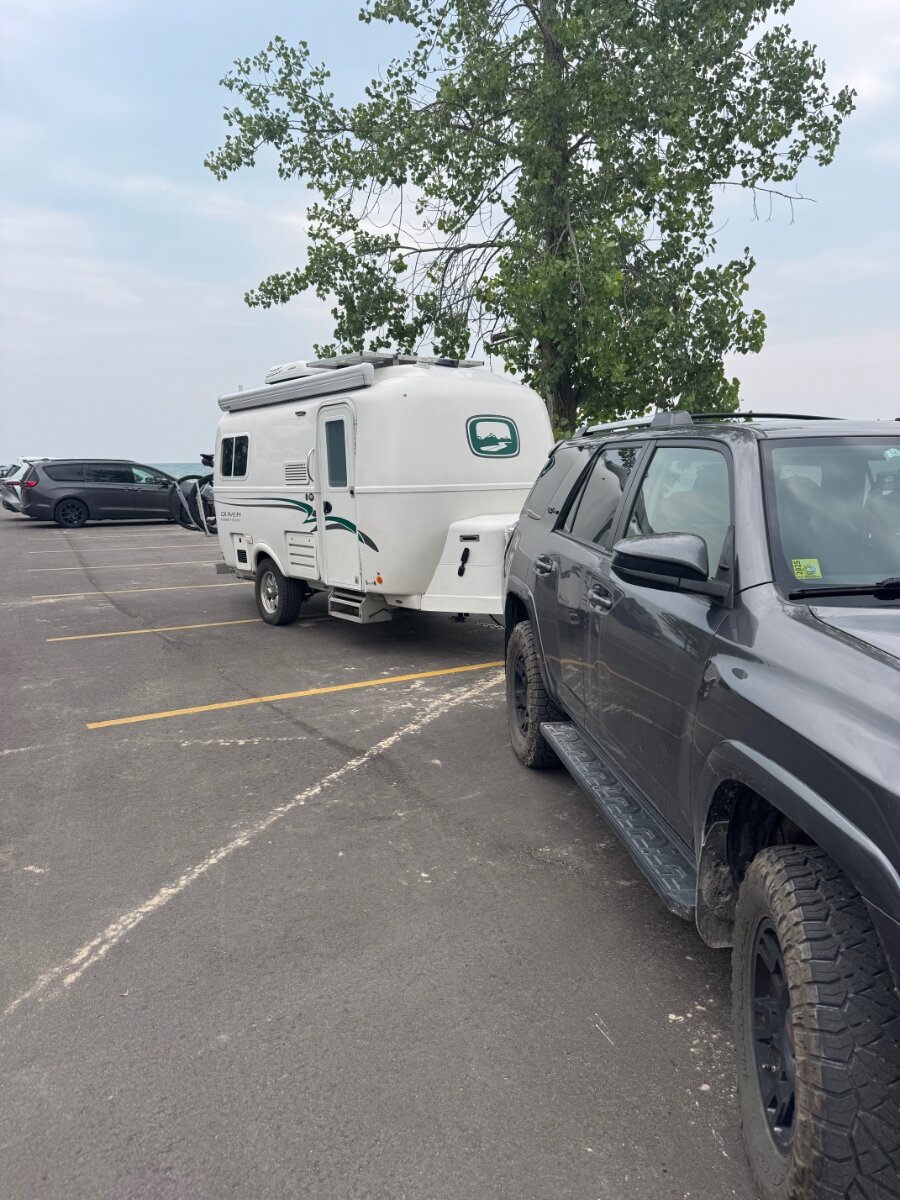
Well it finally happened. After a year of cross crossing the country, my wife pointed out this Oliver from Pennsylvania today at Tawas Point State Park. Haven’t met the owners yet.
1 point
-
We meet a couple from AZ at the Buck-ees in Amarillo. We saw another Ollie going west on 40 about 3 hours west of Oklahoma City. Our Ollie count during our 7,000+ mile trip was 3.1 point
-
Great idea!1 point
-
I've read and participated on this form for over 4 years. There's always been a strong bias expressed in favor of 3/4 and 1 ton trucks. I think some of the cautionary feedback is coming from this bias. Initially I towed with a 2016 GMC Canyon Diesel using the Anderson hitch and it performed just fine for me. I don't disagree that a heavier truck is a better (more stable) TV. My current TV is a Mercedes 3500 van, but the main reason for the van is cargo, not tow, capacity. Wasn't the question of the BW Continuum hitch setup the point of this thread? The Sierra EV curb weight is over 8500 lbs. That's about 1000 lbs more than a Sierra 3500. I don't think an Anderson, BW Continuum or any other anti-sway or weight distributing hitch would be needed with a Sierra EV in combination with an Oliver LE2. I can't find that GMC has a hitch recommendation. As far as driving dynamics are concerned, the Sierra EV will probably be a great TV without a special hitch. As to the range anxiety that some have raised, maybe that's an issue for some. I think you've stated your expectations well and an EV will work for your use case. Until someone tries, we won't know how well an EV truck performs in real life. Keep us posted. Steve1 point
-
Did you miss the Oliver Rally in Guntersville Maybe you attended and loved the rally experience and want to attend another rally this year. Here is another opportunity for Owners of Oliver Travel Trailers for October 2025. The last gathering of Oliver Owners just before most winterize. If you are a member of the Oliver Travel trailers FB Group, there is a link there to join the Ollie Rolling Rally facebook group. All the information for this Rally will be under the events tab in that group. There are 25 sites already booked , several sites still available in the park. Electric and water at most sites. the address of the park is: Lake Mineral Wells State Park, 100 Park Road 71, Mineral Wells, TX 76067 ( https://tpwd.texas.gov/publications/pwdpubs/media/park_maps/pwd_mp_p4503_103f.pdf ) However, if Facebook is not your thing, I am also posting on this forum. Next opportunity to start booking a site starts May 20th. Contact TPWD at 512-389-8900 and let them know you are attending the Texas Oliver Rally (or go online to https://www.reserveamerica.com/ Remember once you have booked a site, let me know on the Ollie Rolling Rally FB group or here so I can be sure and add your name, hull #, and site # to the list. Here is a link to the list if you choose to add yourself, and it has a place for you to indicate if you plan to attend the BBQ meal and/or Pot-Luck. https://docs.google.com/spreadsheets/d/1JPSsJth_EGWro75oJLbW6lk0SA1eYLZr5-prV1QHM-0/edit?usp=sharing Last year was our first Rally in Texas for Olivers. We had almost 50 Olivers at this rally. This year, we will have a BBQ meal provided by United RV, Reps from Girard Awning, Truma, and Oliver and we rented a hall at the park for two days, as well as a Pot-Luck lunch with live music. We look forward to seeing you there.1 point
-
Sorry, if you can slow down I can tell you a few things. I’d rather not have to, I’ve been down this discussion too many times but you started the discussion so I feel I have to address it. And I’m not trying to start a forum war, but I think you’re not aware of the facts. Any electric truck on the market has better HP and better torque than any ICE. 754 HP and 785 lb.-ft. of torque, from zero to full speed. What does an ICE Sierra have? 350, maybe 400. This is just physics. Now if you’ve ever driven one, or watched some videos this is a long established fact. Do you know the TFL channels? Old time truck guys with the biggest truck channels on YouTube, They cover EV trucks and constantly relate how they can’t even tell they’re pulling a trailer. No heating issues, they don’t even show the temps because they never change. These aren’t ICE - they have midsize payload (2k) and tow capacity (10k), with HD+ performance. On range sorry that’s just misinformed - a trailer affects range on a ICE or EV exactly the same - this is just physics. All the folks who are towing now, with these trucks are talking about their ranges on the forums and these are real numbers. In addition to no maintenance and lower running costs, they have other advantages. How would you like to not use your truck or trailer brakes going down the IKE? Or using a trailer gain of 2, because you can capture that energy back into the battery? Look, to be honest I’m not interested, if you don’t like EV’s or whatever that’s fine, I don’t care, people asked what I’m driving and I answered, I don’t need another lecture about ICE and don’t need to be tutored about a subject I’m well informed on, especially when I drive the damn things. I’m sure you mean well, but let’s just talk about the trailer OK? And to be clear I’m not soliciting unasked for advice about my tow vehicle. If we can drop that subject, I’m happy relating my experiences with this rig if anybody is interested. By the way I’ve driven ICE trucks my whole life and EV’s the last decade so have been on both sides of this equation and understand it intimately. ☮️1 point
-
We have been known to order a pound of brisket, set it on the console and much away while driving. It can be a little messy but they do a good brisket at Buc-ee’s. Just pick up a few extra napkins. Mike1 point


-
Recent Achievements
-


")


")


")

