Leaderboard


Popular Content
Showing content with the highest reputation on 02/02/2026 in all areas
-
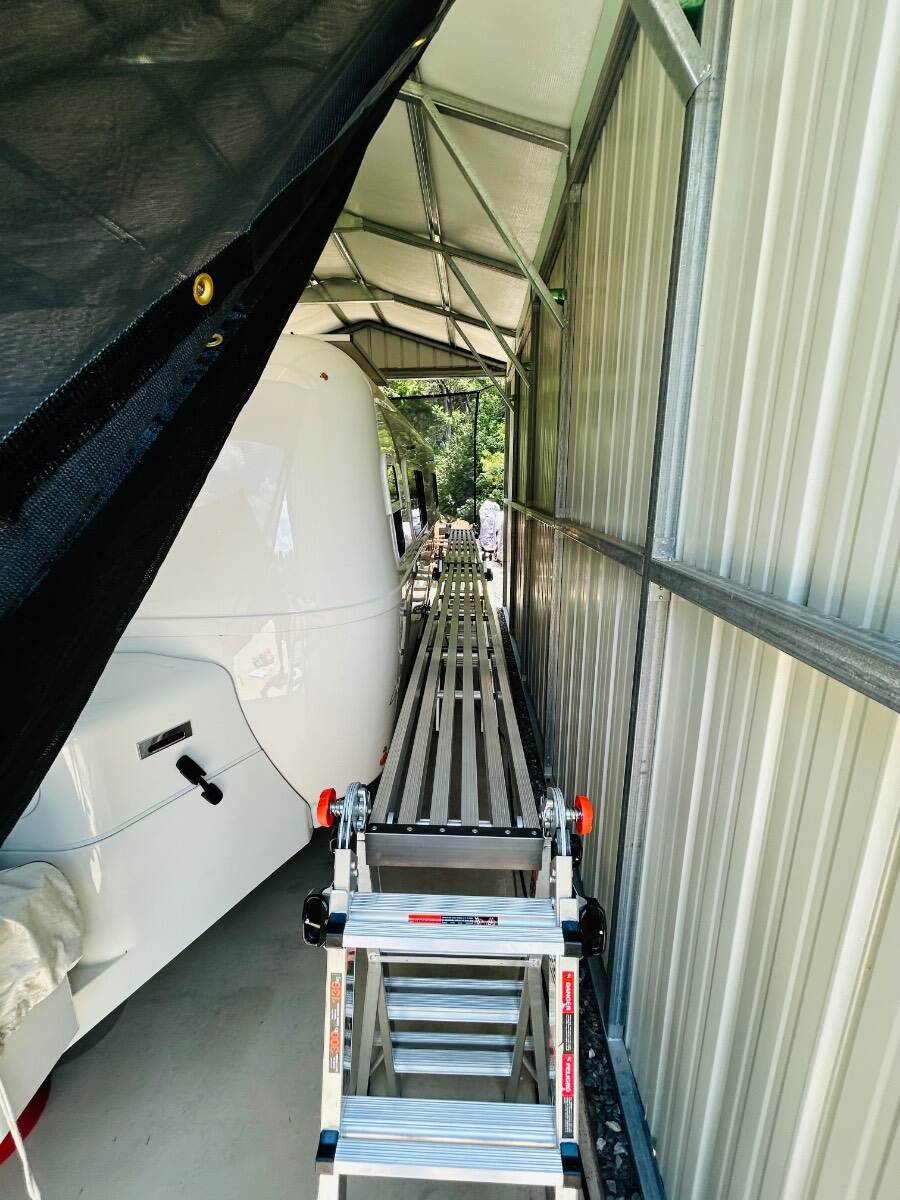
@ripple963 We have used a Calmark cover since we took delivery of our Oliver in 2020 and still do along with our “Ollie Hangar”. Keeping the weather and especially the UV rays off the ceramic coat treated gelcoat and caulked areas is highly recommended when storing your Oliver. We have never experienced any gelcoat damage using our cover. The Calmark cover with a zippered entry door allows us quick and easy interior access where shrink wrapping your entire Oliver may or may not. If you opt not to cover your Oliver, you may want to consider buying a cover for your Truma AC to keep birds from nesting in it. I will say that it sure is nice to remove the cover in the Spring to a clean and polished Oliver. All the best with your decision. We use the Little Giant ladder/plank system which makes covering and cleaning our Oliver much safer and easier than hanging off a ladder.
 3 points
 -
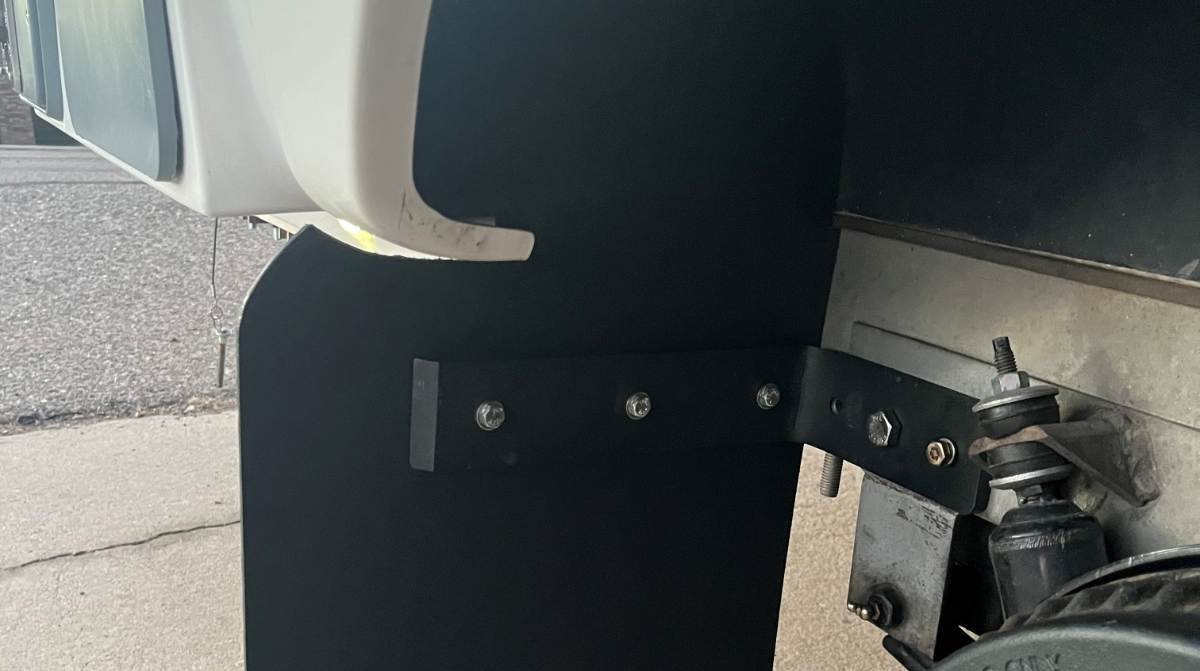
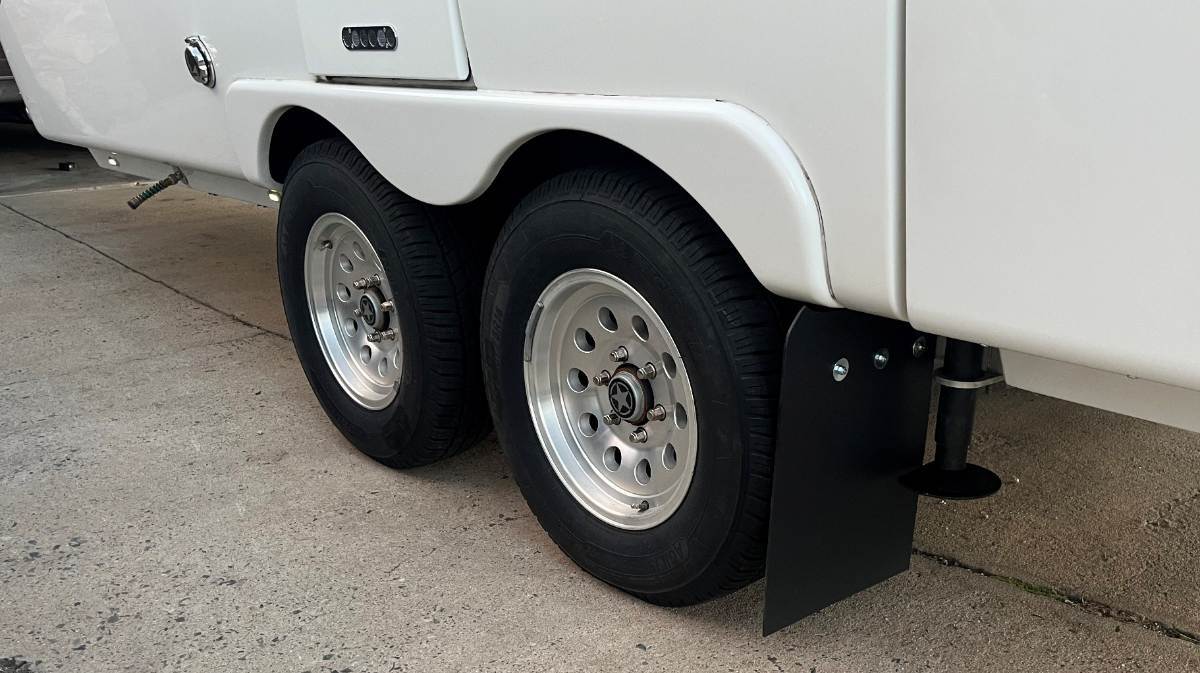
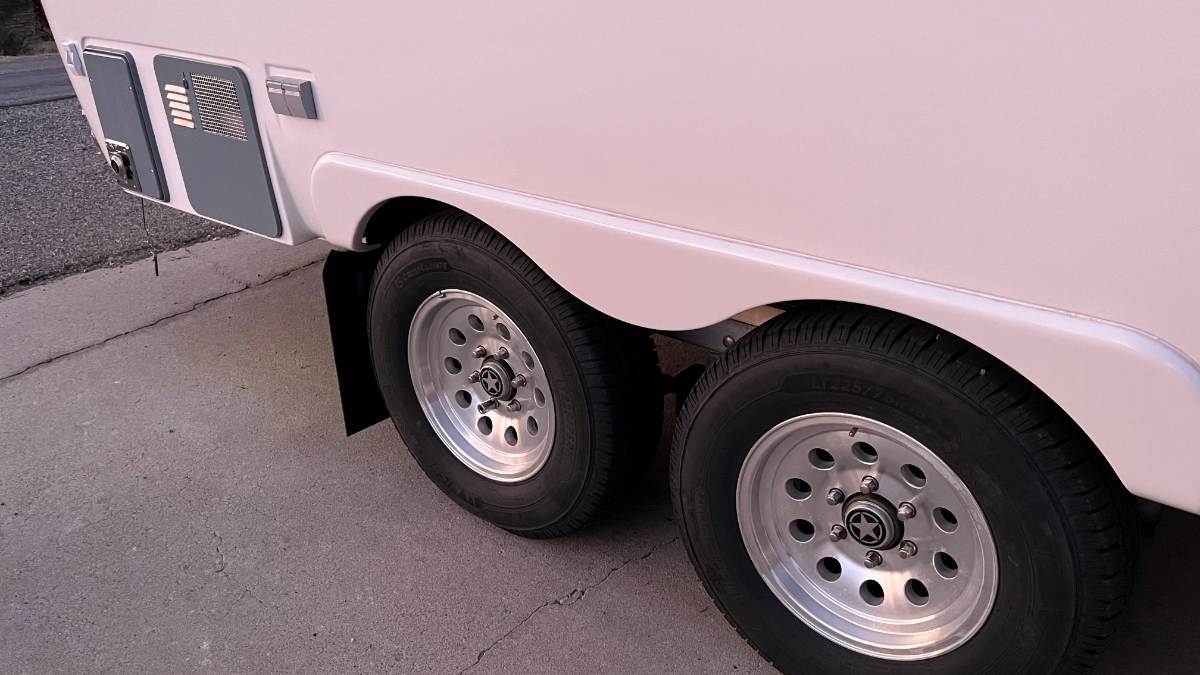
One week on the road. Besides 700+ miles so far, we’ve run 30+ miles on washboard dirt, and through some muddy washes too! No dirt on the rear lowers and no splatters front of Ollie due to the wider TV mud flaps! 😎
3 points
-
As jd1923 stated, his Calmark cover he sold me is a great investment. Here in Minnesota the summers are hot and humid, winters are cold and with lots of snow. We keep the Calmark cover on the Oliver when not in use (only takes 10 min max to cover it by my self, not afraid of ladders!) It keeps all of the nasty green pollen off in the spring and summer, Keeps the oak leaves and what ever wants to fall on the Oliver safe and clean. Never any mold and the cover breathes plenty good. When there is an abundance of snow on top I just use a soft floor brush to push it off. Also the cover has a nice zipper spot at the door so you can get into your Oliver to do a winter check if you want.3 points
-
I know our Olivers are hail resistant, but can anyone in Florida confirm that they are also iguana resistant?2 points
-
Curious - I sent CalMark an email asking if they still made covers for the Oliver Elite II and what the pricing might be. Below is the reply I just received back from them: Dear Bill Thank you so much for reaching out and requesting a quote from us. We truly appreciate your interest in our covers and the opportunity to be considered for your cover needs. We wanted to share a quick update on timing. Our current production schedule is already fully booked through the end of February. At the same time, we’re in the process of improving and expanding our cover product line, with new options and updates launching in March. Because these changes may affect both available choices and pricing, we aren’t issuing new quotes right now—we want to be sure anything we provide reflects the most accurate and up-to-date offering. We absolutely don’t want to leave you waiting, though. As soon as our March details are finalized, we’d be happy to reconnect and provide a Fast quote customized to your needs. If you’d like, we can keep your request on file and reach out right away when the updated information is available. Thank you again for your patience and understanding. Please feel free to reply with any questions in the meantime. Natalie Miller President/Owner CalMark Cover Co. Inc. (800) 838-72362 points
-
Bill, With no frost in the ground the big melt on is On in beautiful Western NC!!😄 It was beautiful winter scenery while it lasted and now all this snow melts away into our water table. Just an FYI Matt and Rodney were with out power for several days. Their area got hit pretty hard. 👍🏻 Onward David2 points
-
We live in North Idaho, where we experience snow and ice. We use a Clamark cover for our Oliver, and it has been excellent. Our Oliver is parked on the side of the house next to the garage and fence, so it doesn't get much direct wind. To protect against any potential damage, we place padding on the sharp corners, such as the bumper and solar panels, ensuring that nothing gets scuffed. I haven't noticed any signs of the fiberglass being scratched since we have a ceramic coating. If it were exposed to more wind, however, that could be a concern. Putting the cover on can be a challenge, but we've developed a great system that makes it relatively easy. When we take the cover off, we roll it up so that it fits in a plastic tote. We roll it in a way that allows us to simply lift it out at the end of the season and place it on top of the Oliver. Then we roll it forward and let it drop off the sides. This method is much easier than the first time we rolled it on on the ground and tried to lift it up and over.2 points
-
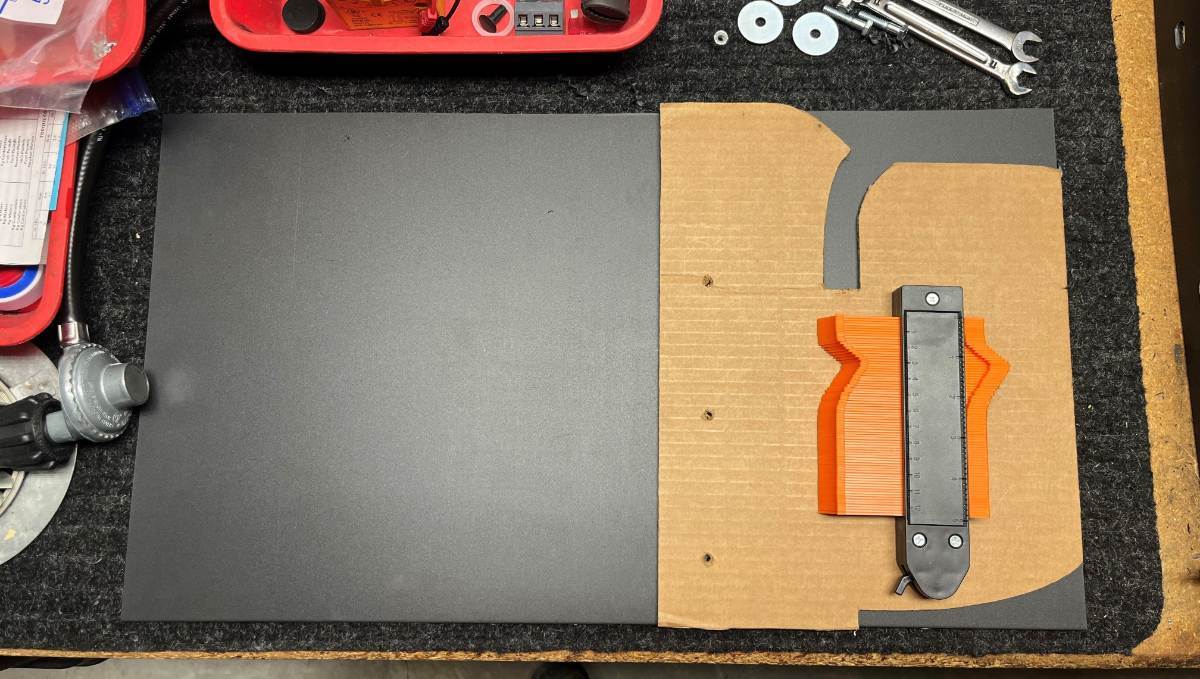
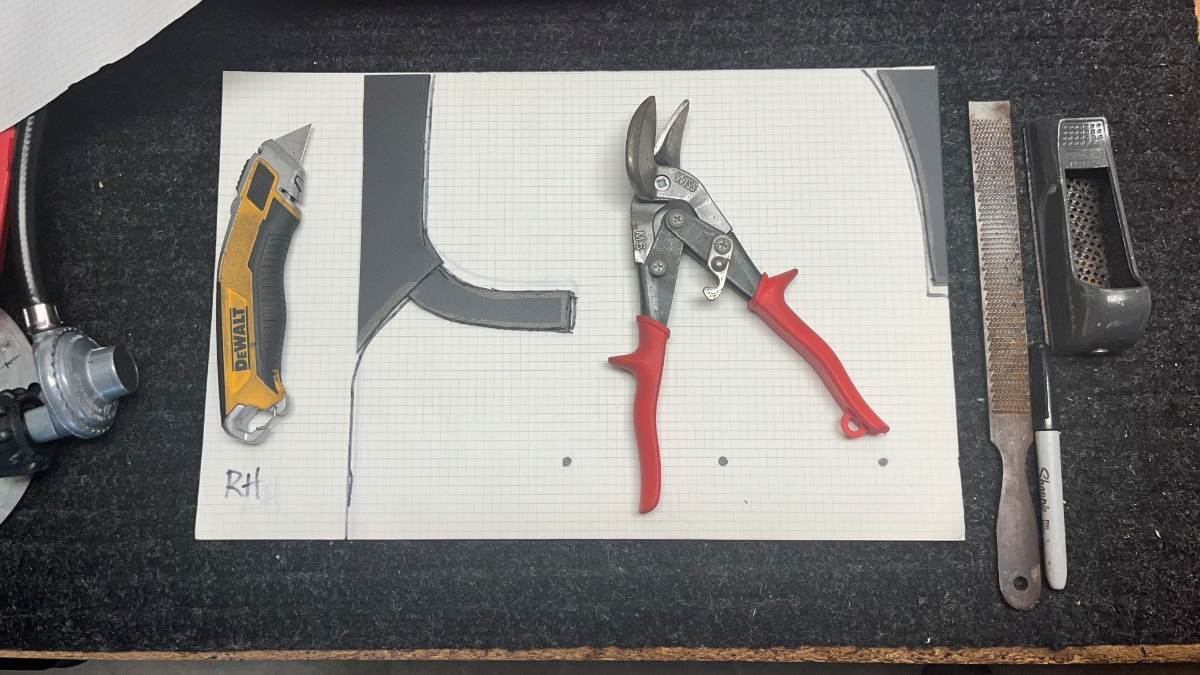
Next step; cut stock for the Oliver flaps. The stock was 24x36" so I cut every flap sideways making them all 24" long to start. I cut the Oliver 13 1/2" wide to stick out 1" beyond the tires and I made the area under the mounting bracket a 13 1/2" square which made the mud flaps sit 4" off the ground. It's too difficult to work with the full length of stock when cutting a pattern to fit around the curved body of the Oliver. So I cut a piece of cardboard 13 1/2" wide like the flap and 10 1/2" tall, the measurement from bottom of bracket to the top. I drilled the 3 mounting holes into the cardboard for alignment. I used the little curvy tool (stocking stuffer from Chris a few years back), took a few measurements and started to cut away at the cardboard making the opening longer and wider. I wanted at least 1/4" clearance above the fender and 1/2" below, so not to touch and to allow for cleaning the fiberglass. Another cut to follow the pattern of the inside wall until the cardboard was perfect. Then traced it onto the poly stock and cut some with a razor-knife and the sideways tin snips worked very well. Used razor blades, a grater block and files to clean up the edges, and voila! 😎 Afterwards, I traced the finished mud flap onto graph paper so I can share my template with our Oliver friends who would like to copy the design!
2 points
-
Wow, that blower is almost half your age!1 point
-
Beware of Falling Iguanas in Southwest Florida!1 point
-
You can almost bet on that one.1 point
-
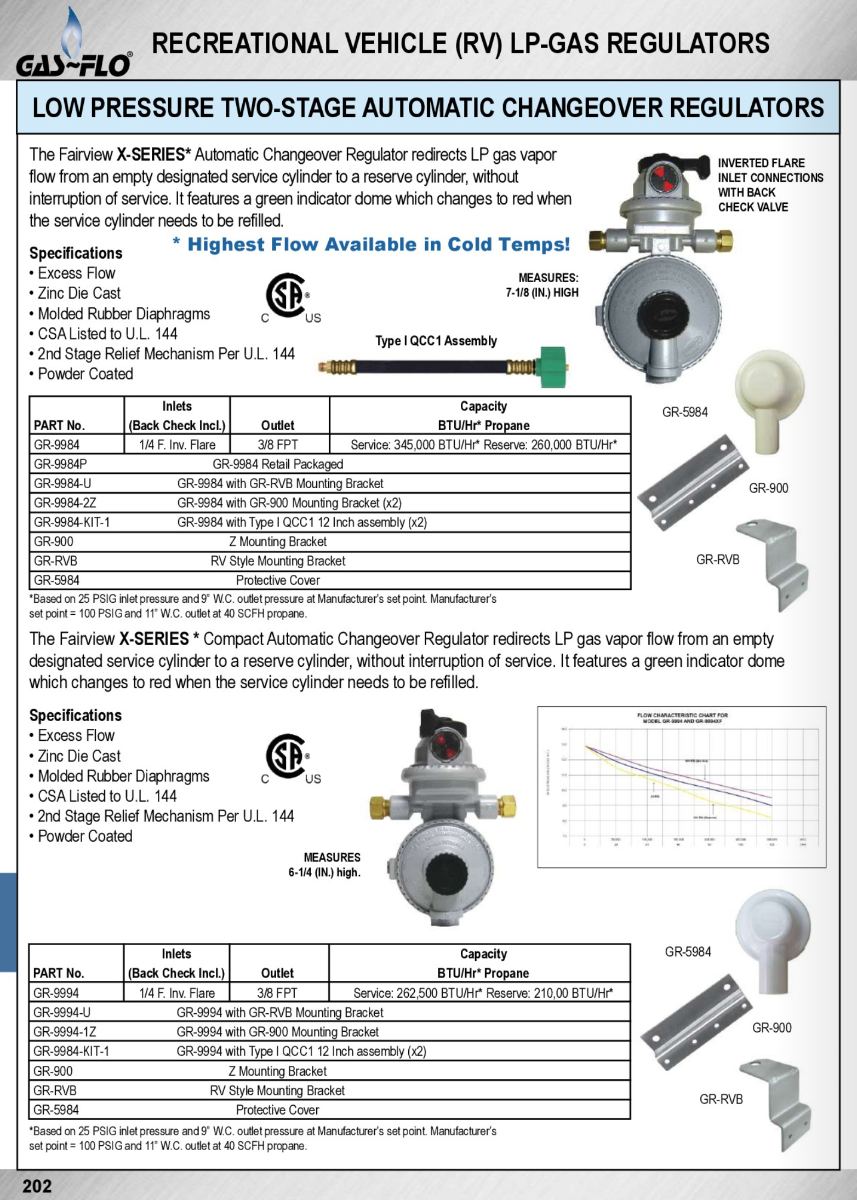
I checked AC out yesterday, the version they sell is the 262K BTU version (bottom in data sheet)GR-9994. Amazon has the GR-9984 with 345,000 BTU version (top of data sheet) for about $95 and E-Trailer $125 or so...
1 point
-
I'm not sure if this is still the case, but in summer of 2024 while I was at Oliver for service, Jason E. said CalMark no longer made the covers "specifically" for Olivers and he could not get more either. I was hoping to purchase one then. I have since purchased a non-CalMark cover from another Ollie owner at the Hiawassee, GA Egg rally in 2025. The previous owner built an aluminum cover for his Ollie. Honestly, I have not yet taken it out of the bag it came in - I camp too often during the winters.1 point
-
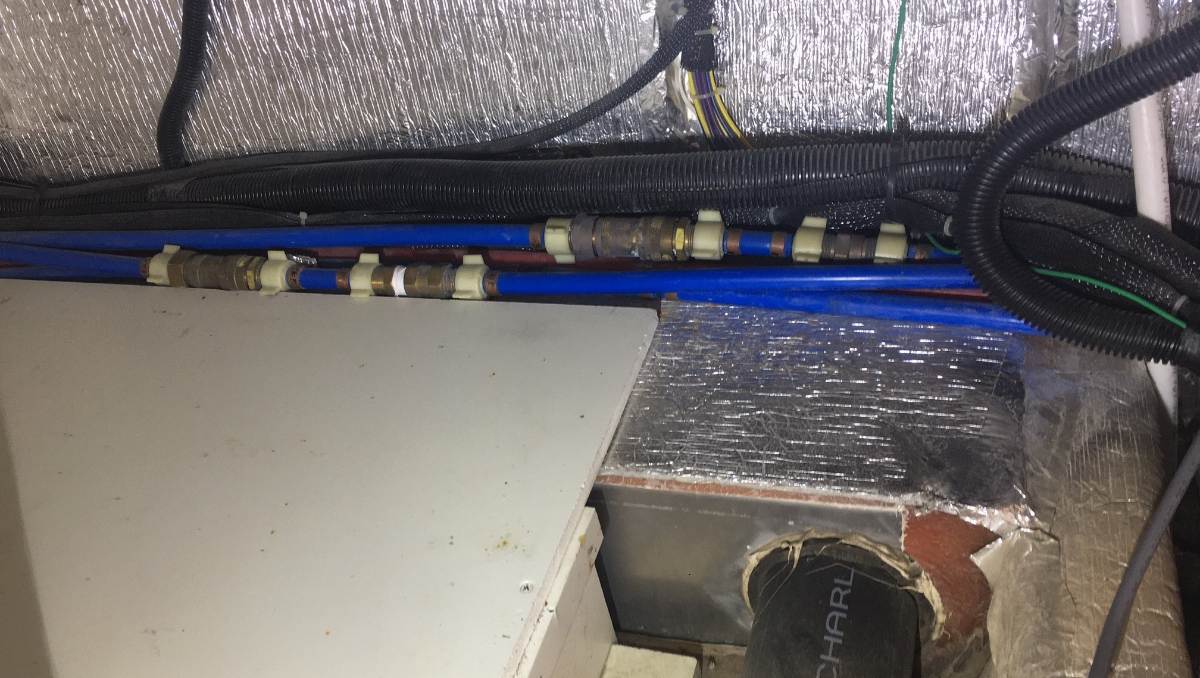
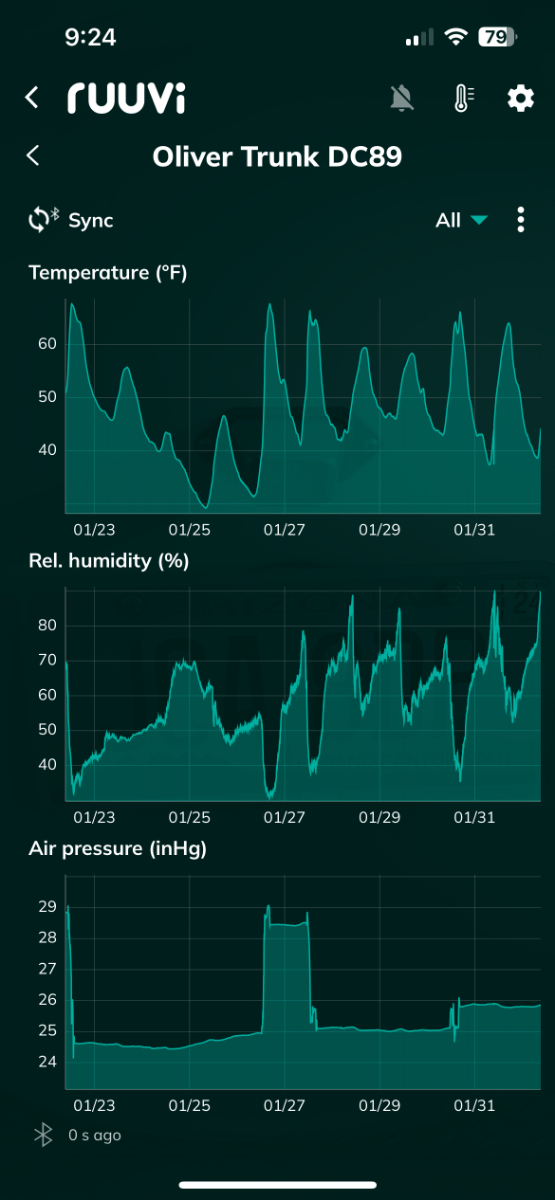
Yes, as I wrote, "the water inlets plumbing is very close to the furnace." It's not like the furnace and water lines are front and rear! The majority of water lines are within a few feet of the furnace. Yes, the inlets are on the streetside of course. What is that, six (6) ft or 2M from the furnace? I call that "close!" Also, there should be no water from the backflow preventers (check-valves) to the inlets (see pic). The water inlet should not be frozen unless it was not allowed to drain or the check valve has failed allowing water to pass. Therefore, if all is working correctly, the inlets having no water could not freeze. The water lines are full from the check-valves to the water pump (and back to the outdoor shower), and ALL of these water lines passing directly by the furnace! The water should conduct the heat from the furnace as well. I have added vents for basement airflow. I have also added a return air filter to slightly impede cold air from being pulled from the cabin center aisle vs. the air space of the basement. No basement panels are opened! My Ruuvi to check basement temps is directly under where you see the backflow preventers and restrictors in the picture. Cabin temp right now is 65F and rear basement temp is 43F. In our hull #113, when the cabin is heated by our furnace to 62F (our sleeping temp) the basement reading will be above 32F. The colder it is outside, the more often the furnace will cycle, spreading some heat to the basement. Someone else would have to chime in that does true winter camping! Notice at dawn on one day the rear basement temp fell down under 30F for a couple hours. We were still at home on 1/25 and it was cold, thermostat set to 45F at that time!
1 point
-
It was 8 degrees about an hour and a half's drive west of Patriot (assuming dry roads and probably a 1,000 feet in altitude). However, there is not a cloud in the sky. That means - let the melting begin even though it is not forecast to be above freezing today. By Wednesday the forecast is for highs around 50 degrees - still a bit below normal but virtually all of the snow will be gone (I hope). Bill p.s. hopefully the folks in eastern TN did OK with this storm. They were hit very hard a week ago with the ice which basically shut Oliver production down for the week.1 point
-
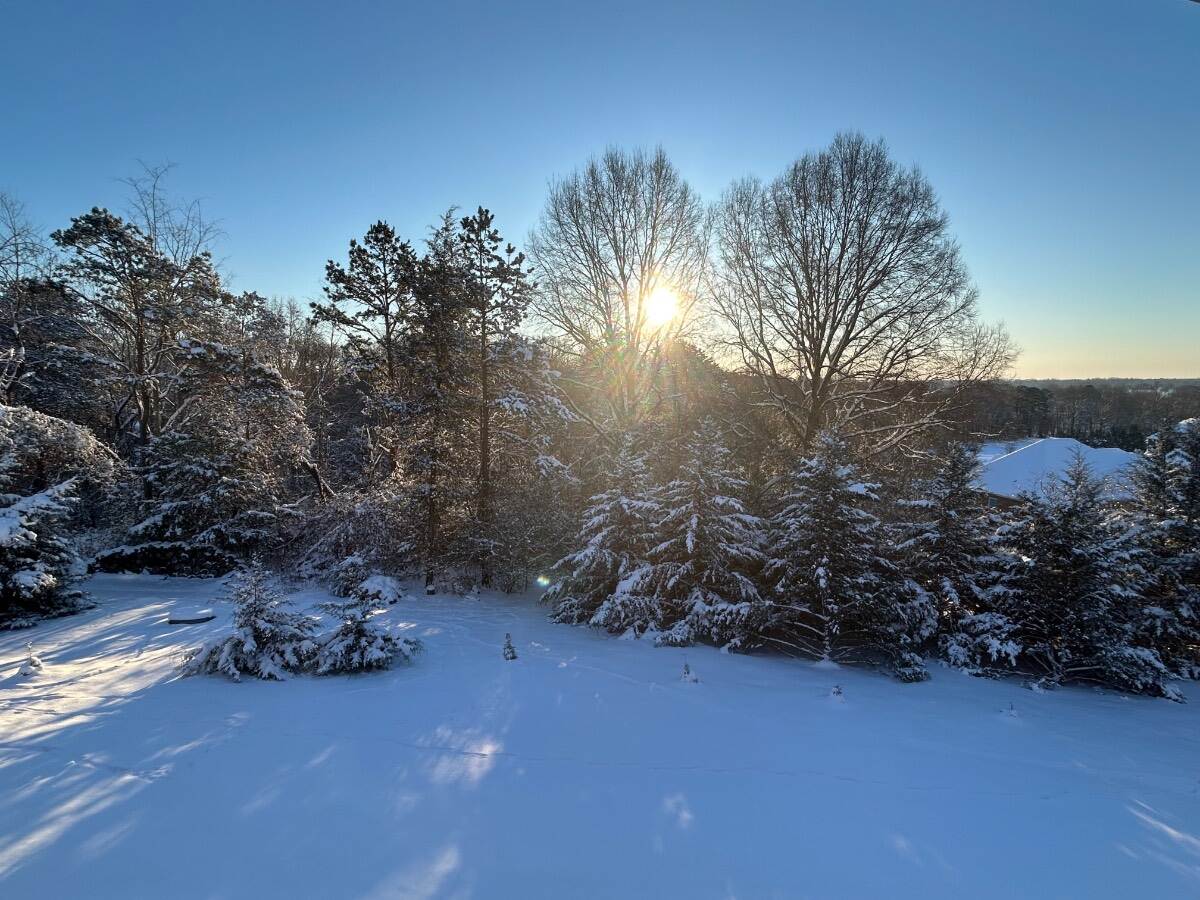
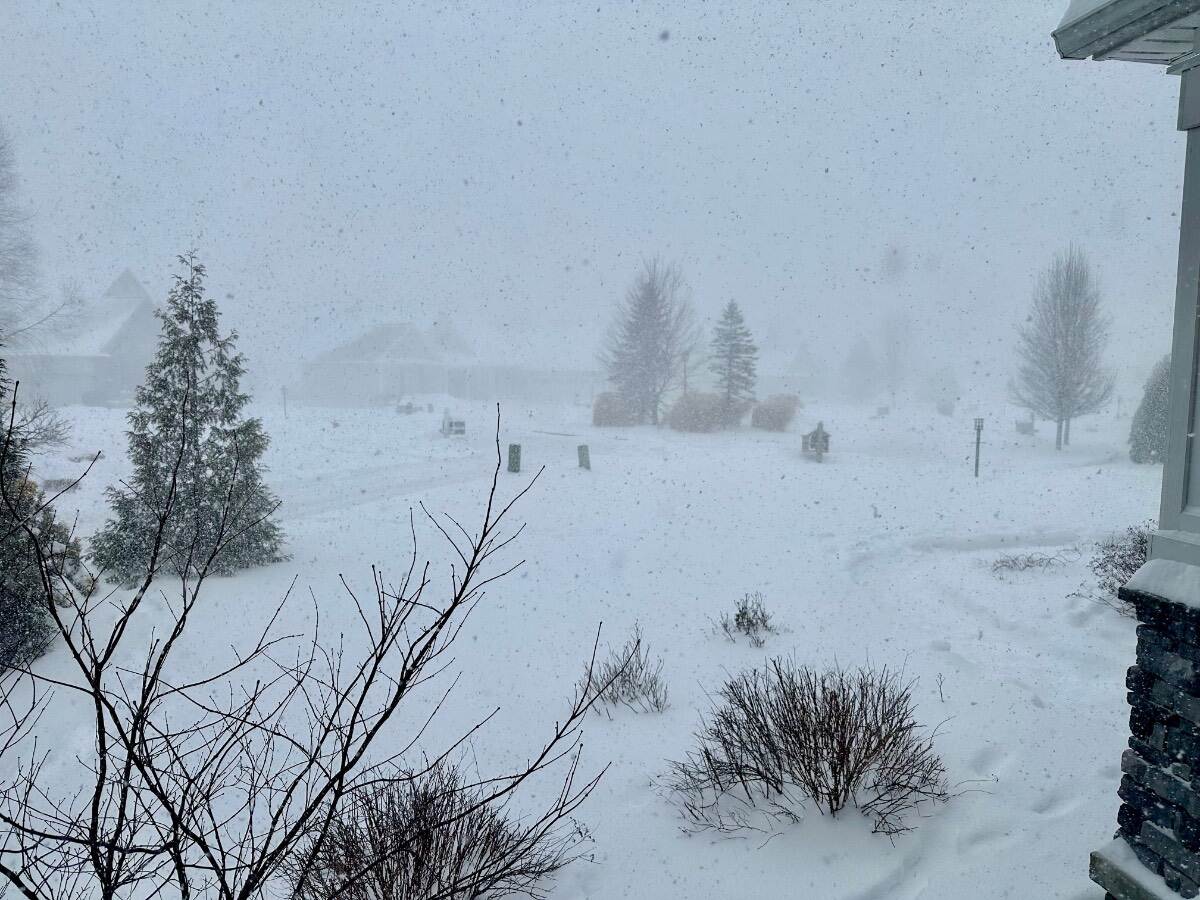
Woke up to a gorgeous Western NC winter wonderland sunrise this morning. (Photo off our back deck). A chilly 14d! I think we received well over 10” of snow as it continued to snow here on Blueberry HIll until midnight.
1 point
-
Got out the snowshoes and went around the house with the roof rake today. Was starting to get ice dams up there. At least we're through January!1 point
-
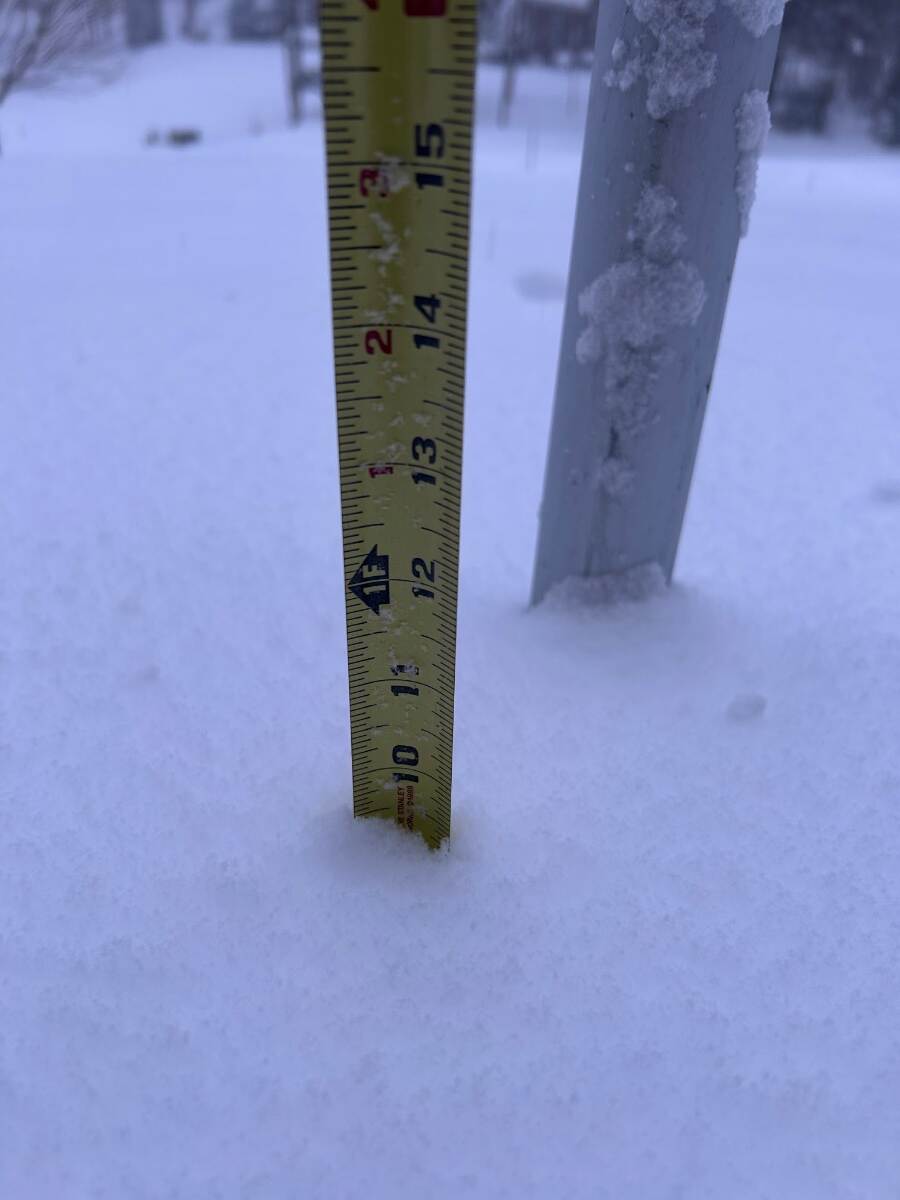
About an hour ago we measured approx 9.5”. The snow is now suppose to stop at midnight.
1 point
-
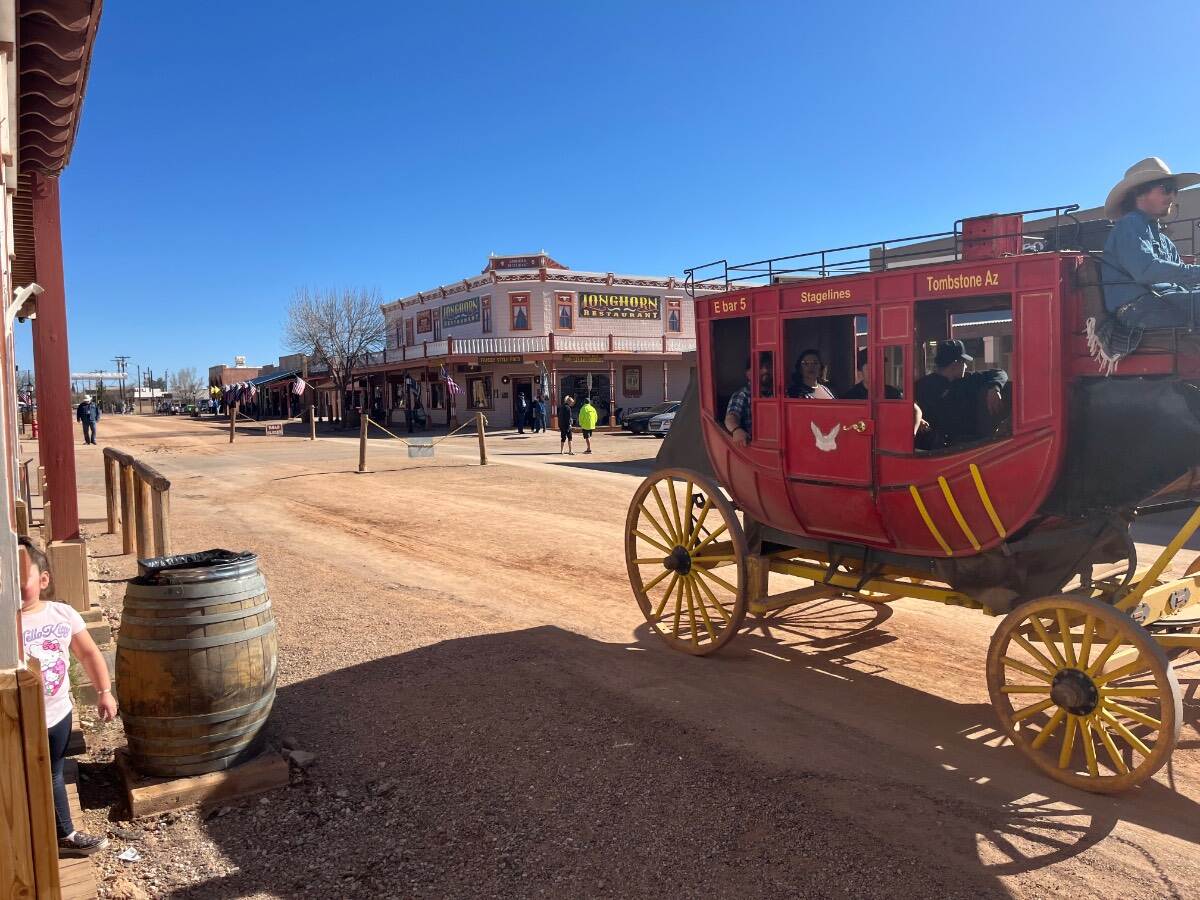
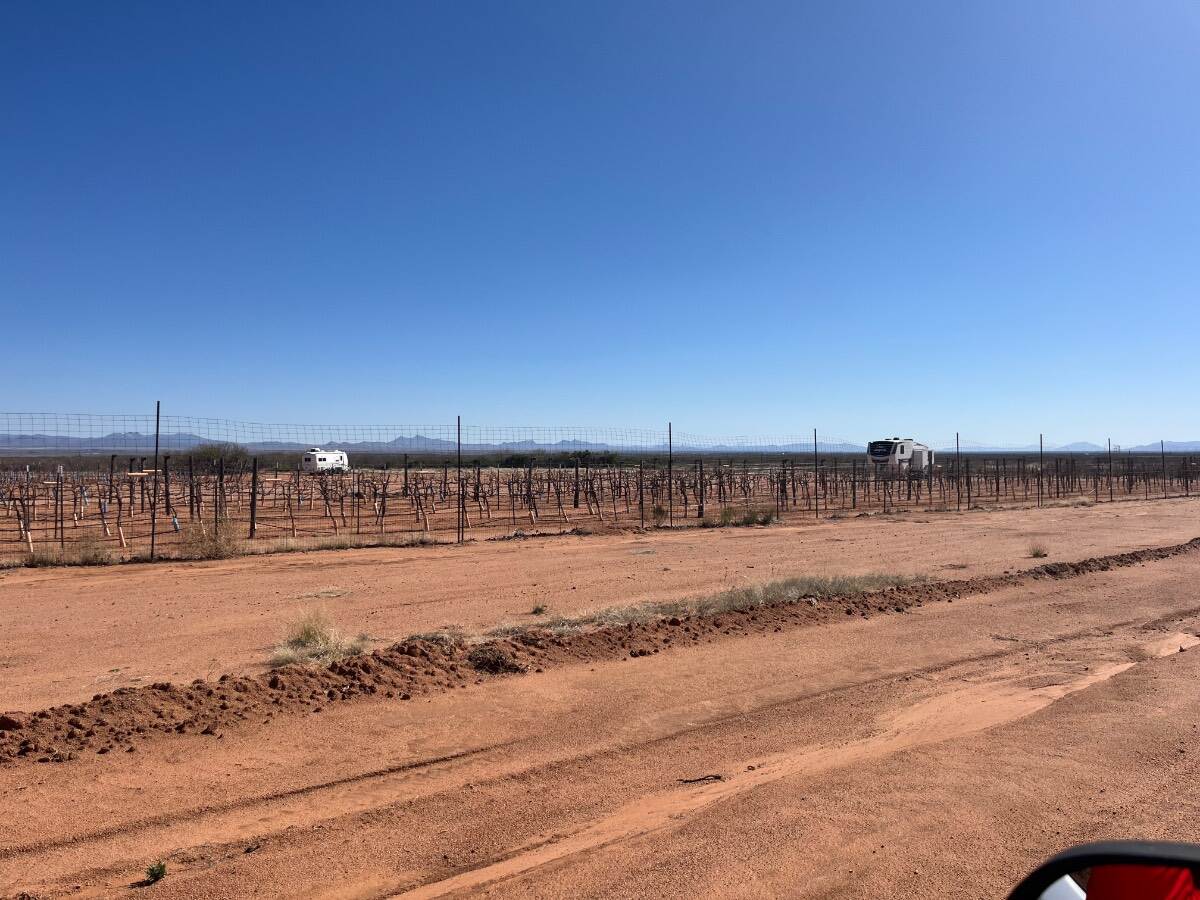
And we thought a couple cloudy days, high of 50F at altitude in the Huachuca Mountains was not good Arizona camping! Was a sunny 65F today, lunchtime in Tombstone! Camping two nights at Hofmann Vineyards in McNeal AZ. Heading back to The Valley tomorrow, where highs will be in the low 80s! 😎 IMG_7362.mov
1 point
-
These southern storms are not good. At least the snow in the south melts fast (hopefully). The northeaster of this past Monday dumped 14" to 20" of snow depending of where you were in Maine, on top of an existing 6". The weater since then has been below zero at night and if we are lucky will get up to 20 degrees in the day. This morning it was - 3 degrees. Looks like this snow will be on the ground until spring time. In Maine we will miss the present northeaster hitting the southern states at this time. Hopefully Punxsutawney Phil tells us it will be an early spring.1 point
-
So here’s yet another very disgruntled BB “ex” customer! I’ve followed Mark (GrandAdventure YouTube channel) for many years, and like Will Prowse I believe he’s also pretty fair on his content.1 point
-
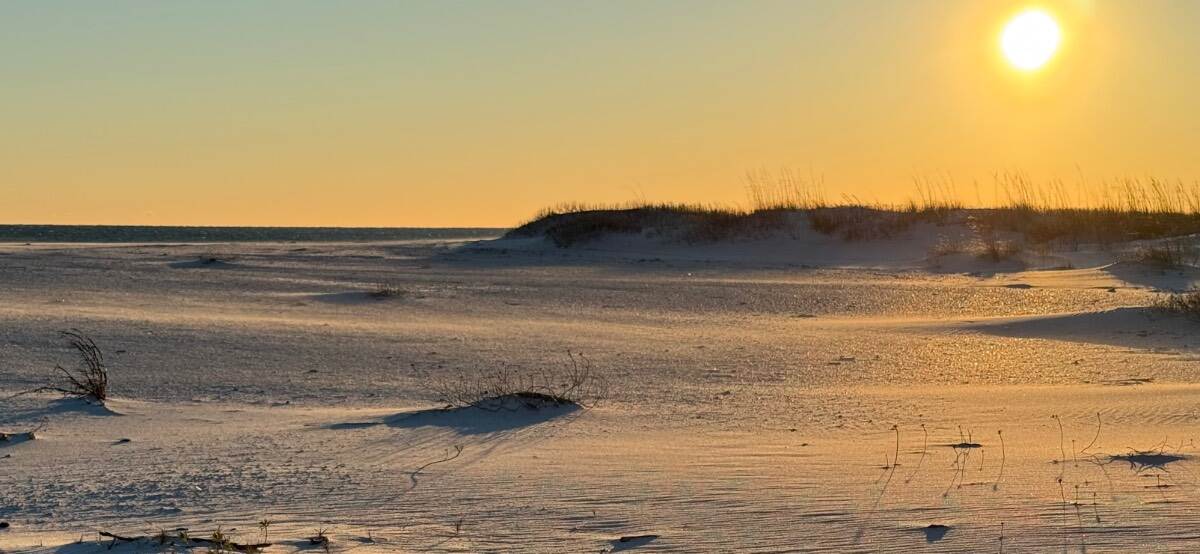
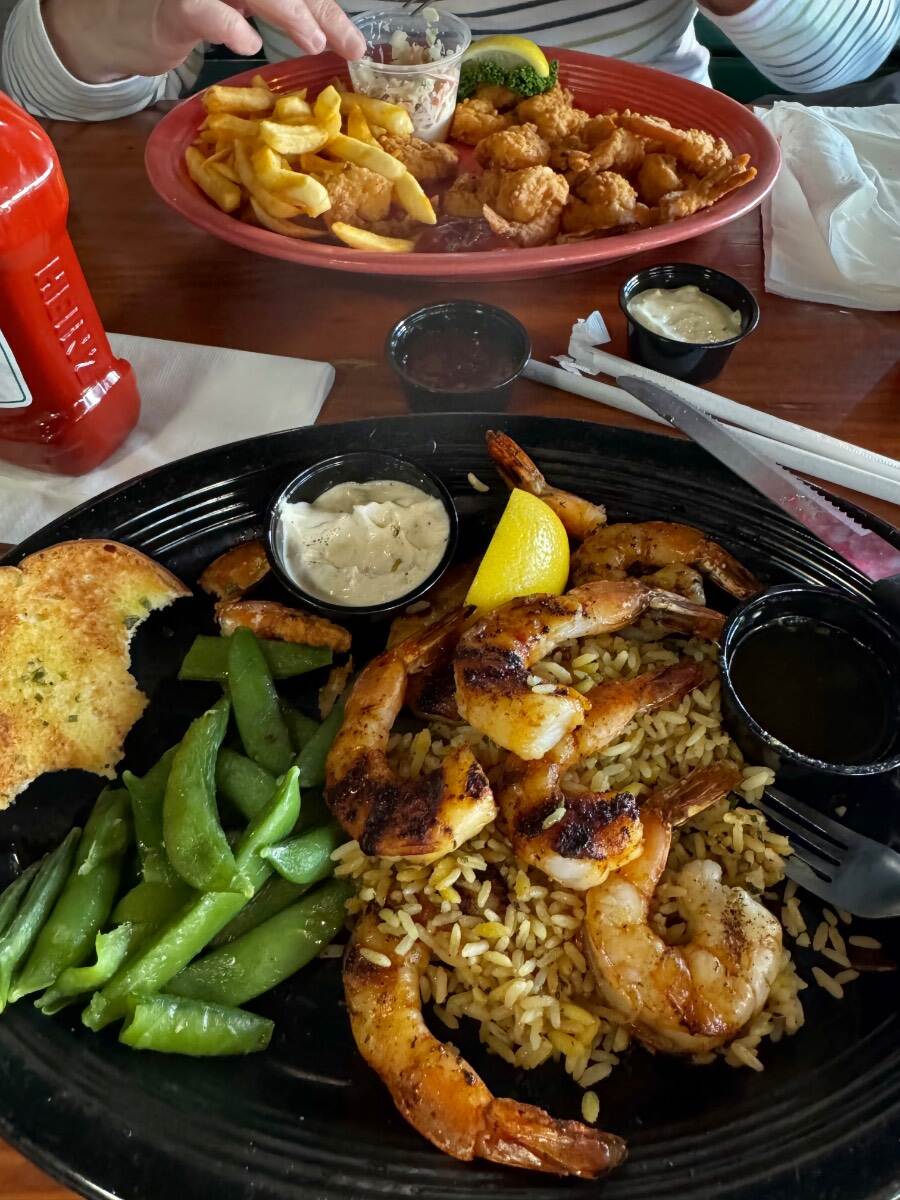
Home in northern Ohio. That mailbox is about 30” off the ground, and you can’t even see the road our daughter says 12-14” reported. Here on Gulf Islands National Seashore in Florida’s panhandle. Lunch
1 point
-
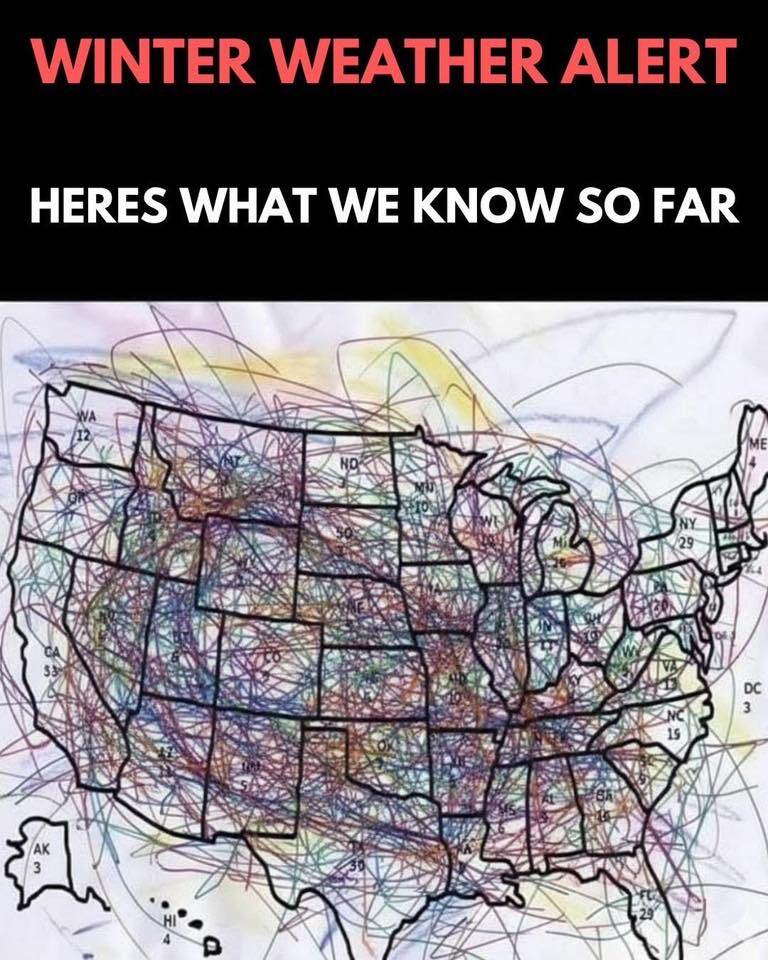
After having more than my fill of the latest “state of the art” weather forecasters, here is what we know so far. 🙄 😂
1 point
-
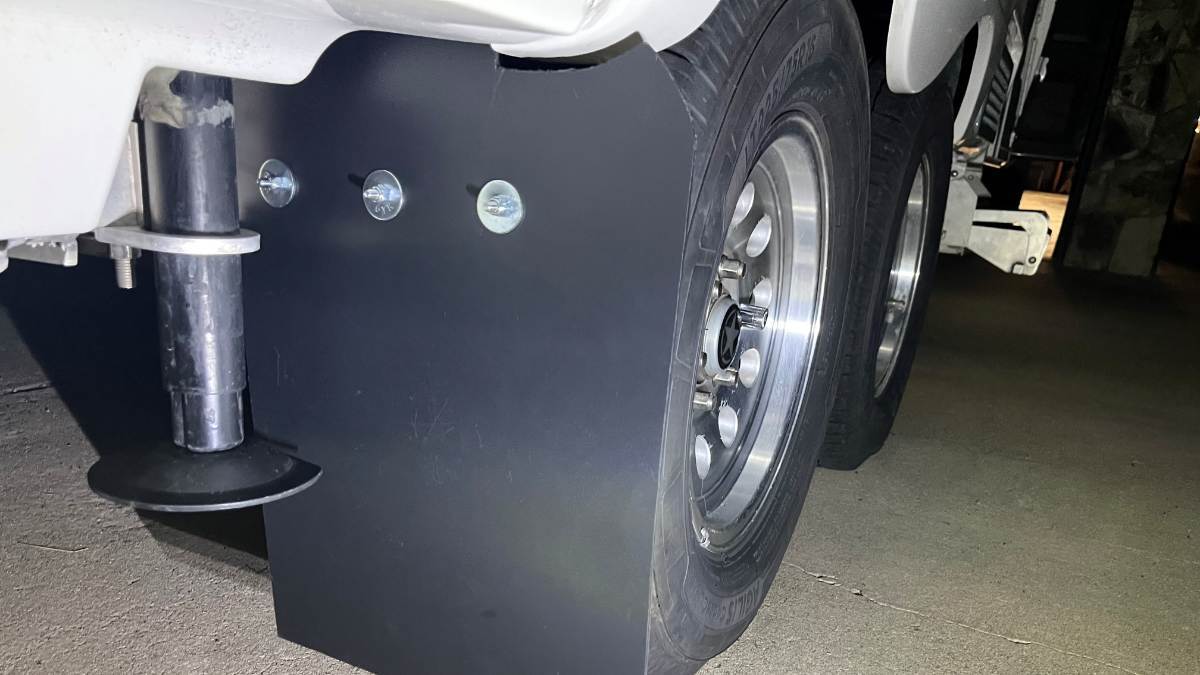
It took a couple days labor, but I take my time and enjoy the work! $50 in parts for both truck and trailer, you can't beat it. 😎
1 point
-
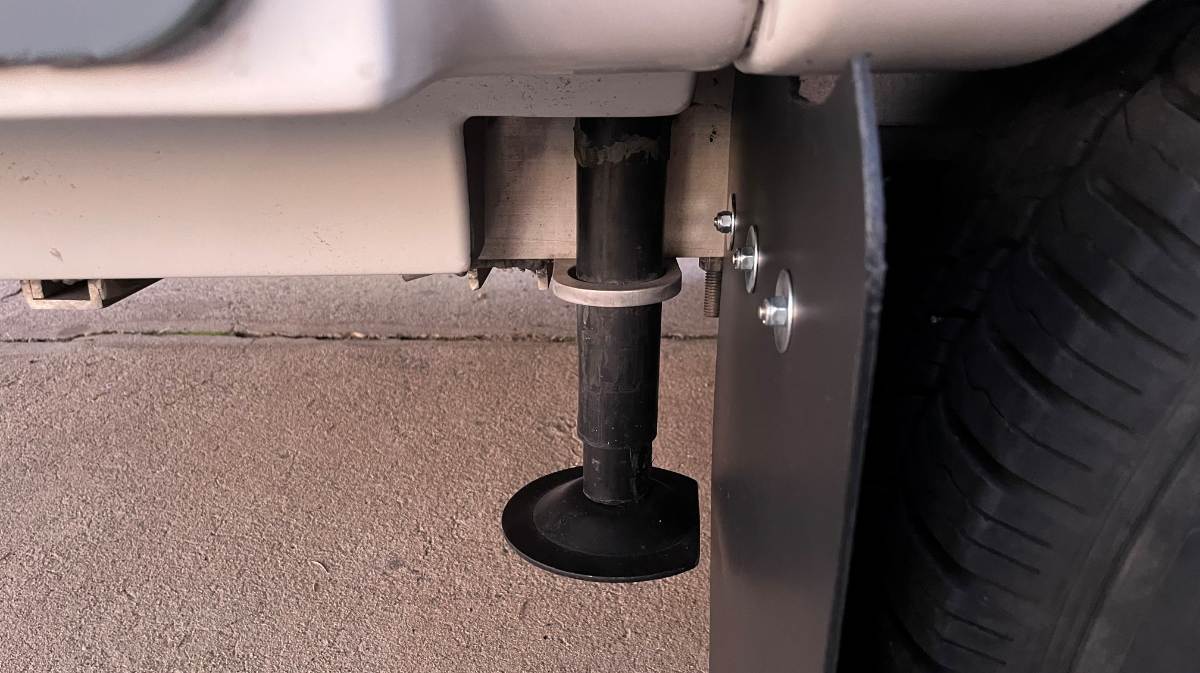
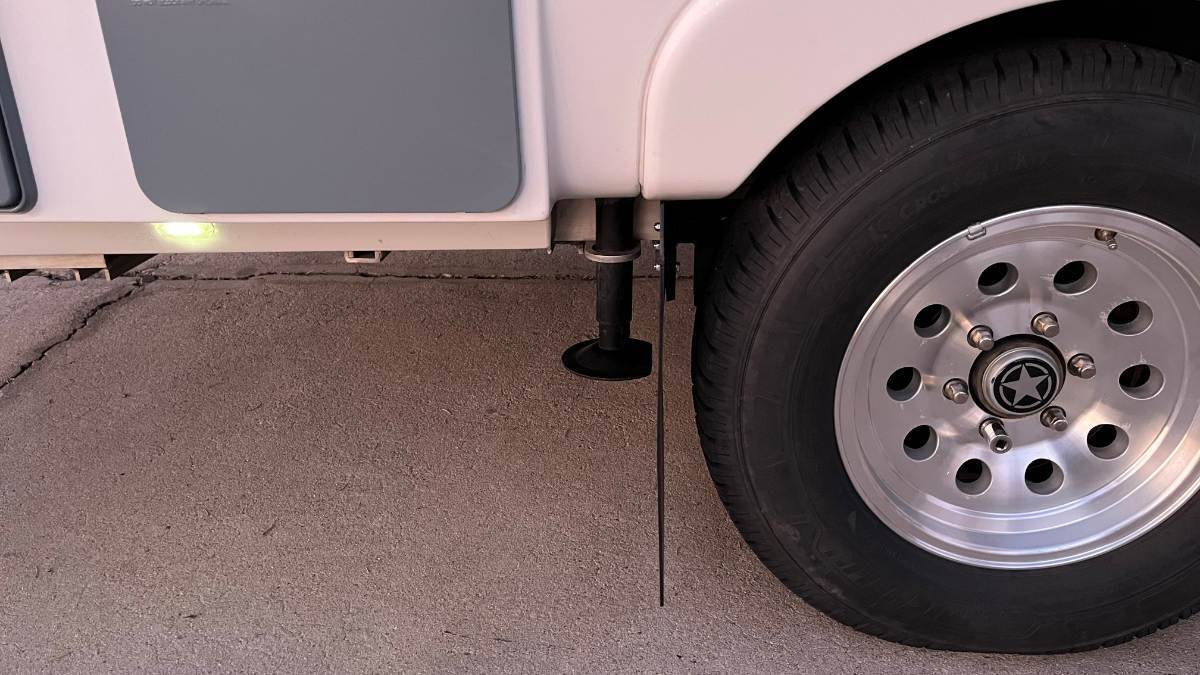
I cut the base of each rear stabilizer jack to have one flat edge. This allows more room for the flap to arc rearward while towing and so the flap material is not always hitting the same point on the arced edge. I don't believe the strength of the part was reduced much and these parts are readily available. I already have one spare! Use a 10" steel cutting blade on a chop saw and this is quite a strong piece of metal. By the time it cut through it had melted a ring into the plastic plate below. Filed the edges smooth on my bench grinder and steel brush. I may hit the open edge with spray paint later. So, the right side is done and I'm very happy with it! 😎 Several views to follow...
1 point
-
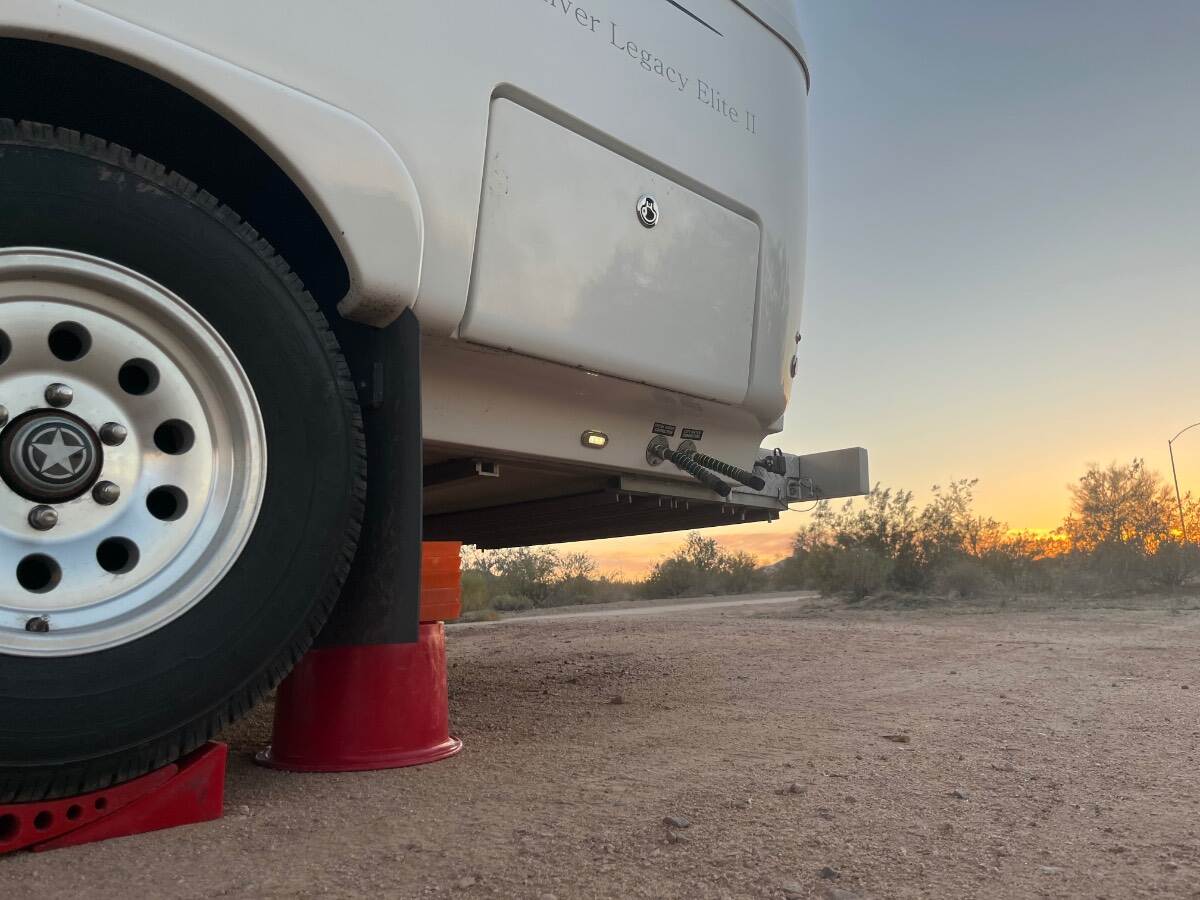
I do so annually for bearing and brake service. I also think it a good idea to stack up your dunnage under the jack you are using. That shortens the amount of jacking you need to do, and and also the lever arm against the jack should there be a problem. In this case leverage is bad. GJ1 point
-
I did mention the method I use was not the official OTT position, but so many of us the Oliver stabilizer jacks for quick jobs like changing a tire. Another thing, I did not state to jack the axle. That would be wrong, as stated in the instructions @Patriot cited. They do so because someone inexperienced could use a floor jack and jack up the middle of the axle. If doing so, it would likely bend, throwing off the alignment of the wheels attached to that axle. It's good practice to put a jack stand under axles when working on a truck or trailer, period. I've been doing it for 50 years and all professional mechanics would agree. People have literally died, crushed under vehicles 100s of times since the model-T. You jack by other means and place the jack stand for safety. It has a rounded top holder that the axle fits into nicely and you place it as close to the wheel as possible. In the case of a trailer, adjacent to where it is u-bolted to the leaf springs. I promise, any axle is strong enough regardless or 3500 or 5200 lb. ratings. You can go without for a tire change, but be careful, and you certainly should for maintenance work like packing wheel bearings on a trailer. I have one jack stand and a bottle jack in my TV toolbox and if I did not already have these tools for decades, I strongly recommend the combo unit that Patriot linked. That tool must be awesome, great idea! Get one. OK, so what I found today is going to be revealing! These instructions are quoted from the 2016-OTT-Owners-Manual.pdf: Loosen the lug nuts on the tire you want to remove. Check for a stable footing under the jack and place an ABS footing pad or block of wood about 4” in height below the jack foot plate. Raise the jack until the tire clears the ground, then finish loosening and removing them. Pull off the old tire, slide the hubcap out backwards and insert it on spare. Set spare tire evenly on the lug nuts and hand tighten lug nuts. Retract jack back to travel position. Now tighten lug nuts completely. Lug nuts should be torqued to 90 ft lbs. Place the flat tire in the spare location. From at least 10 years ago, OTT knew and put in writing that you could, should use the stabilizer jacks to change a flat tire when on the road. Then they hired lawyers who got in the way of physics and the basic common sense of good mechanics. I rest my case. 😎1 point
-
Yes. We’ve done it multiple times. A year or so ago we were at Pinnacles National Park and it dropped below freezing at about 10pm and was 19 when we woke up. I didn’t warm up until later in the afternoon. At Zion a couple of weeks ago each night got into the 20s and didn’t get above freezing until late morning due to the mountains shading Watchman campground. Mike1 point


-
Recent Achievements
-


")


")


