Leaderboard


Popular Content
Showing content with the highest reputation on 05/28/2026 in all areas
-
It had lost prime. I connected city water to boondock connection. Turned on water for 20 seconds or so. Connected my boondock hose to boondock port. Turned on pump. Sucked up a gallon of water lickety split.5 points
-
Assuming the valve set up is correct, and the pump screen is not plugged, them many have found that the boondock hose seal was worn or the boondock hose fitting was not FULLY and FIRMLY tightened. As a result, that connection sucks air and little or no water moves on board. Suggest double checking that connection and raising the boondock container as high as you can so reduce the hydrostatic head to the pump. This will assist in getting the pump to self prime. Ours takes about a minute a gallon to boondock onboard. Hope this helps GJ5 points
-
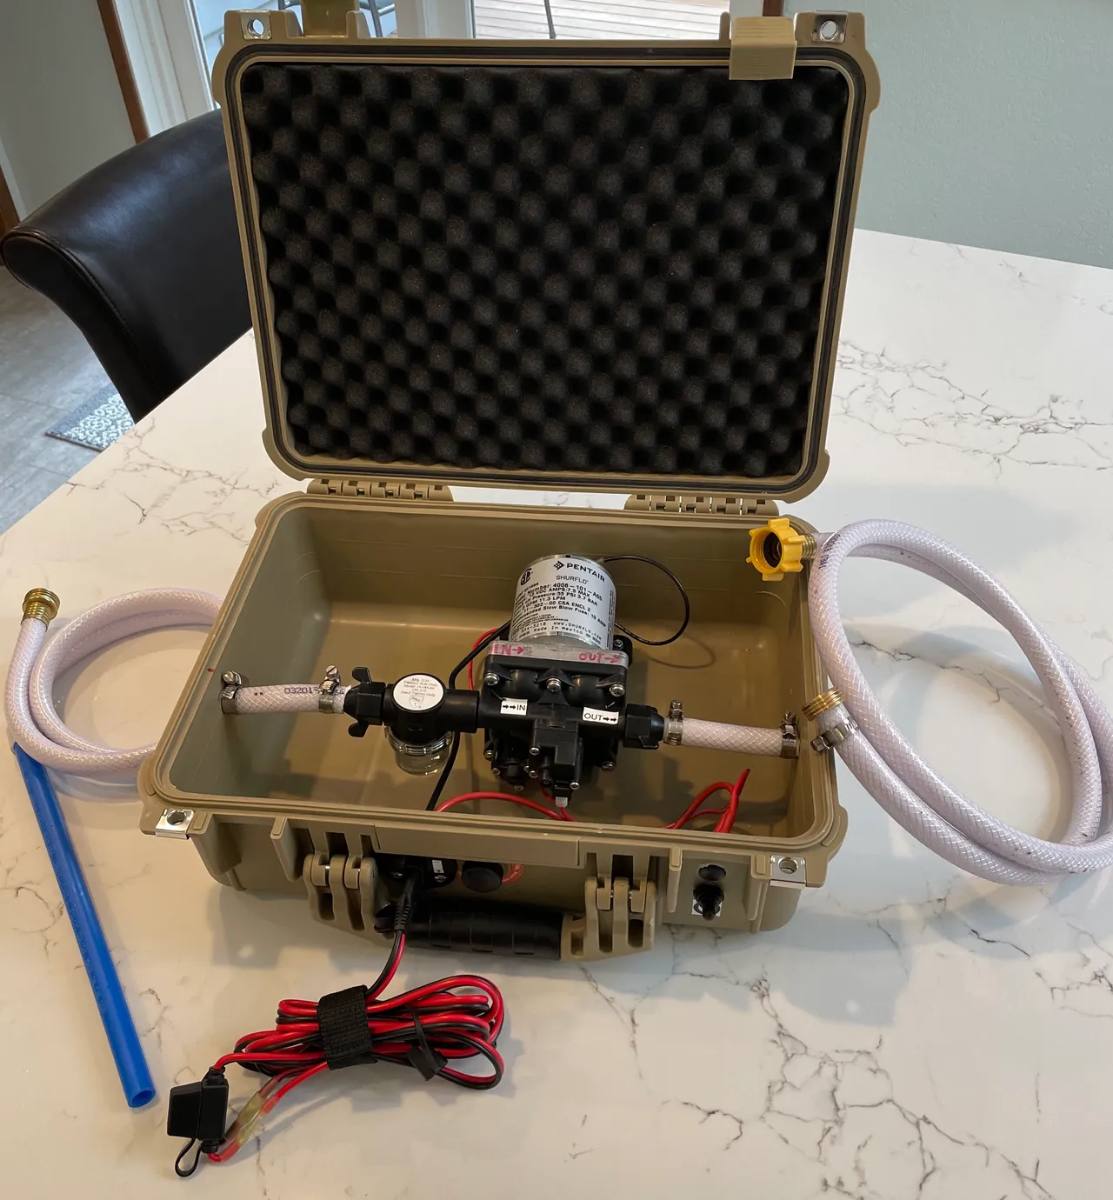
I carry a backup pump and have had to use it to fill through the normal fill port (not the rear suction port.) If you ever want to build a backup pump system...here's our article on that topic. Backup Water Pump Hope some of the comments like the one above about checking for air leaks have helped. Let us know your outcome.
 4 points
 -
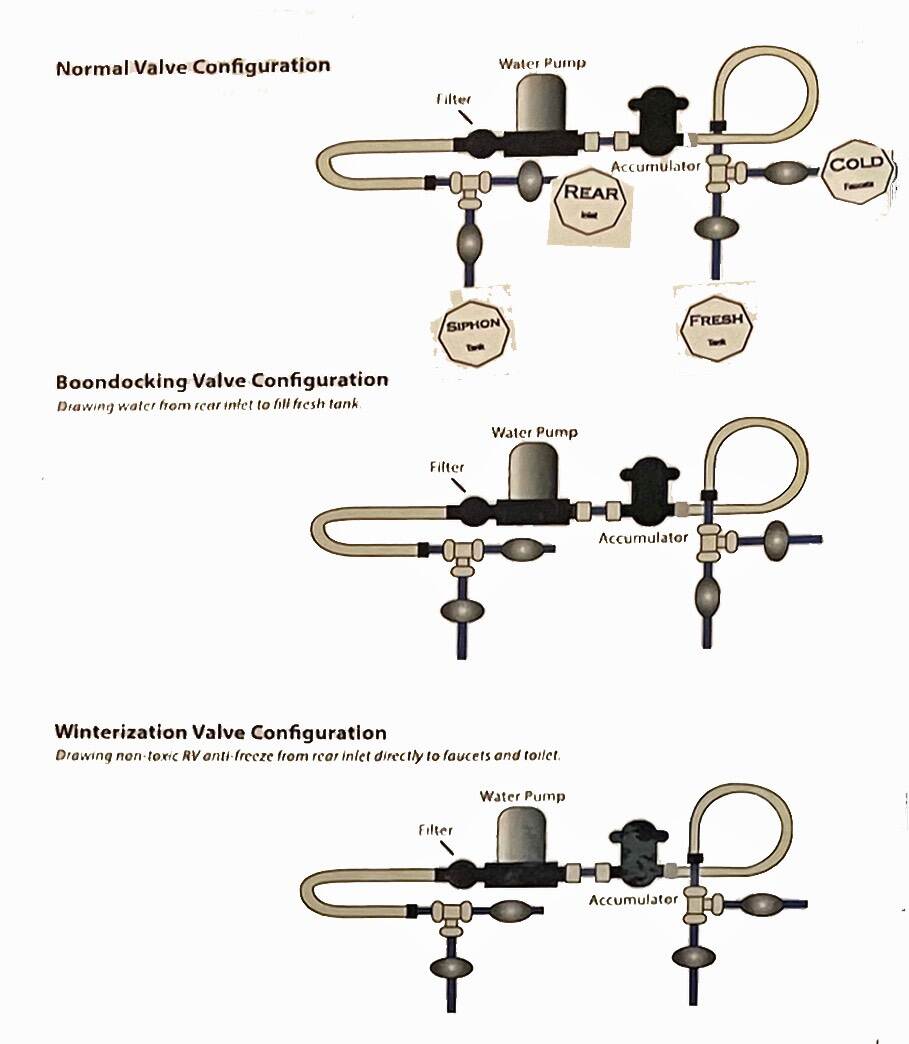
I assume you are trying to fill your fresh tank from a "container" using your rear boondocking port to suck in water through the on board pump. Q) Was the pump able to pump any water out of your tank before you started? It may have lost prime. If you lose prime you can often get it to reprime by either removing and checking the water filter (near the pump) or by opening and closing each of the valves and ending back on the boon docking configuration. Our 2019 Has this Valve Configuration...not sure if it's the same for you but just as a cross check for sucking in thru our rear port.
3 points
-
Rally Early Registration is open and saves you $ as price will go up later. Rally link: https://olivertraveltrailers.com/events/oliver-owners-rally/ See Jason on the Morning Coffee Youtube just released...he also discusses the Rally Registration and Fee's in the video.2 points
-
Thanks! Our 2010 did not come with a boondock connection and I'm going to have to build one of these before we start our big adventures.2 points
-
I don't take the room to carry a ladder. With an old metal milk crate, I can reach up to our awning safety strap. Not going on the roof for anything! And for your dipstick and anything in the engine bay or an open truck bed, ya gotta get on of these! Somebody linked this in another post and I bought one. We always put it on our curbside rear truck wheel which allows Chris to climb up and reach in for cooking equipment. https://www.amazon.com/dp/B0002Q8TWI/2 points
-
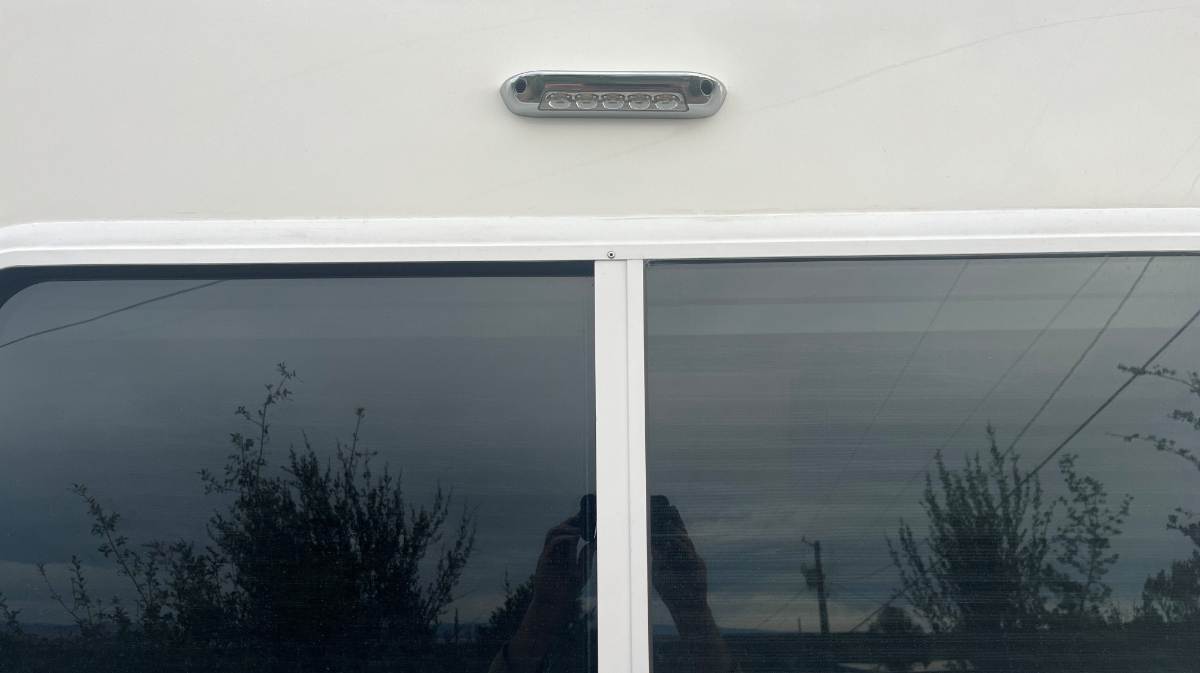
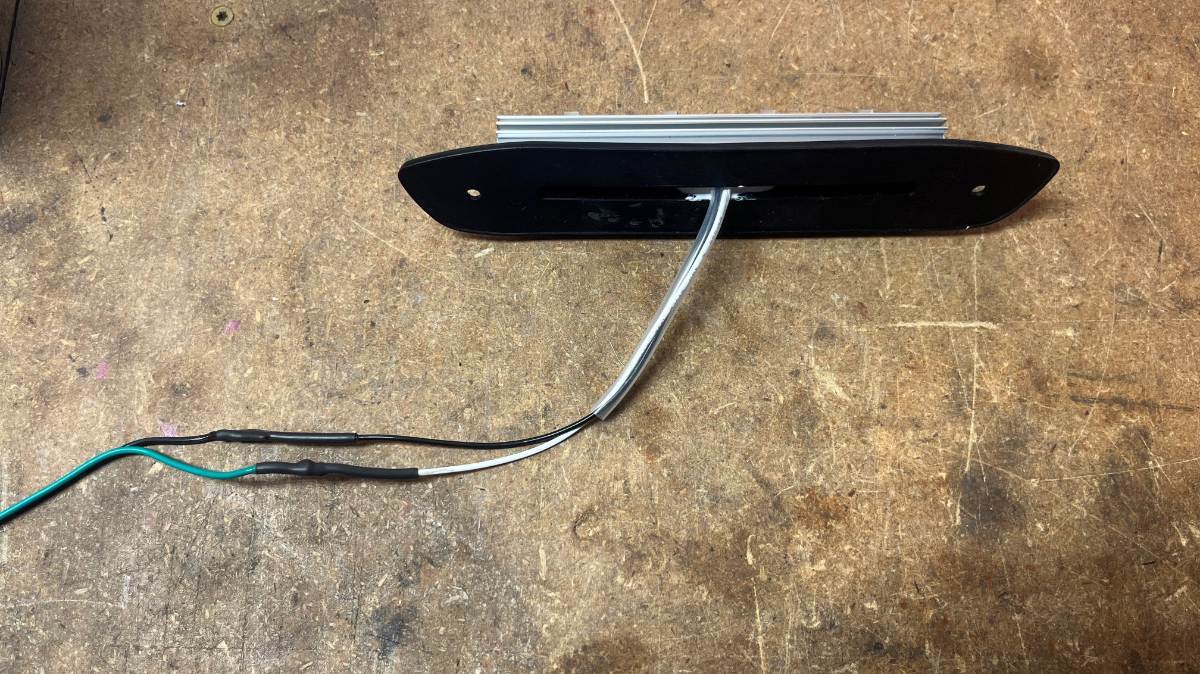
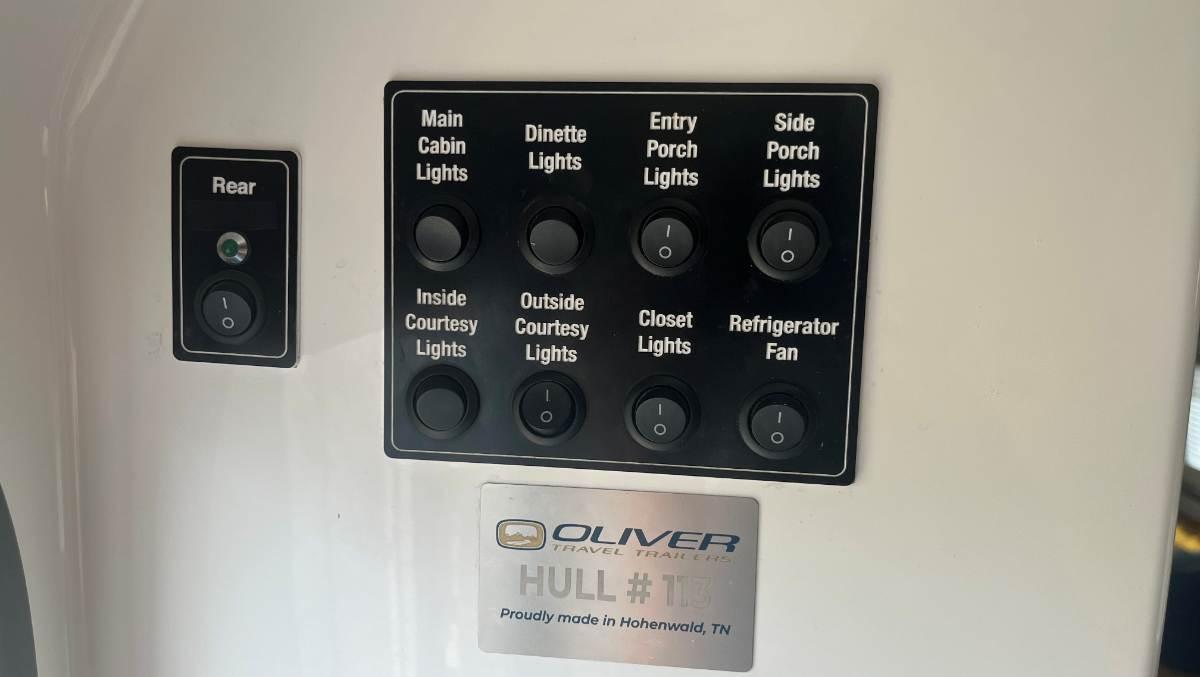
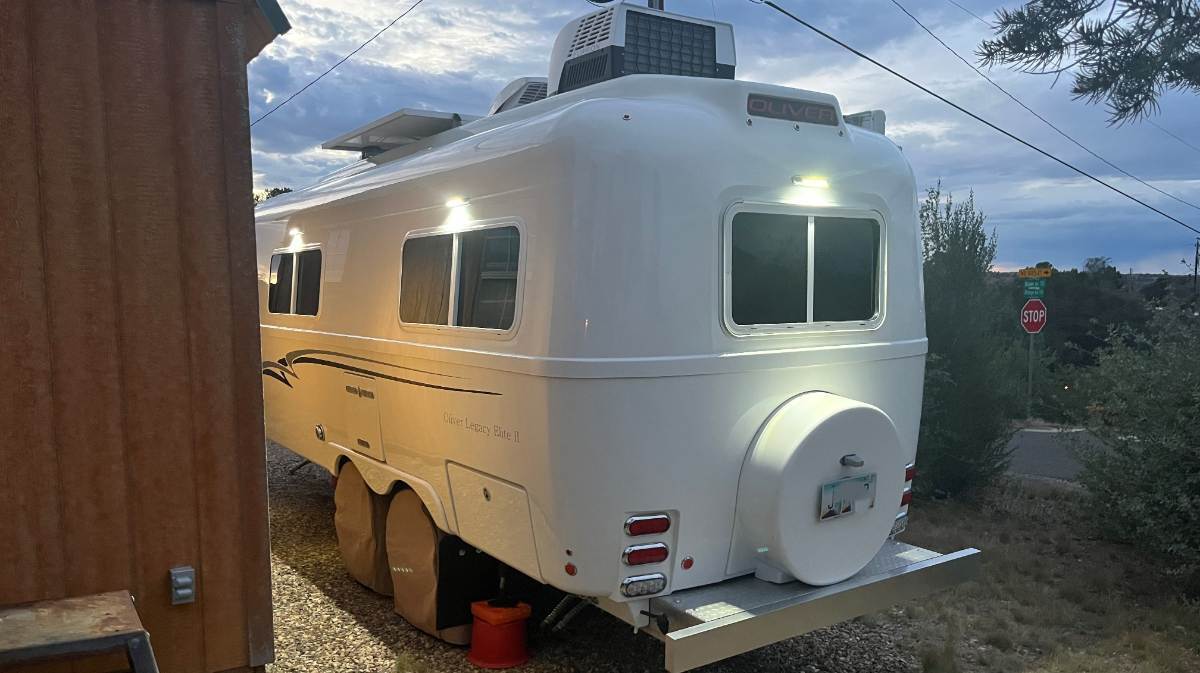
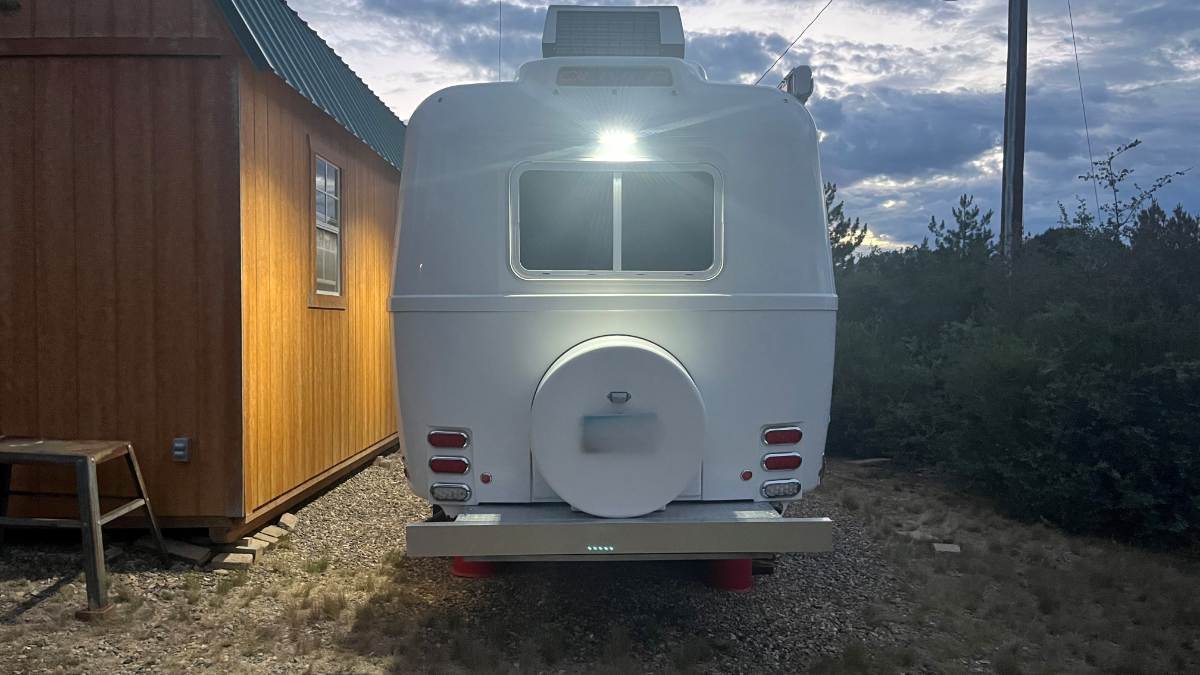
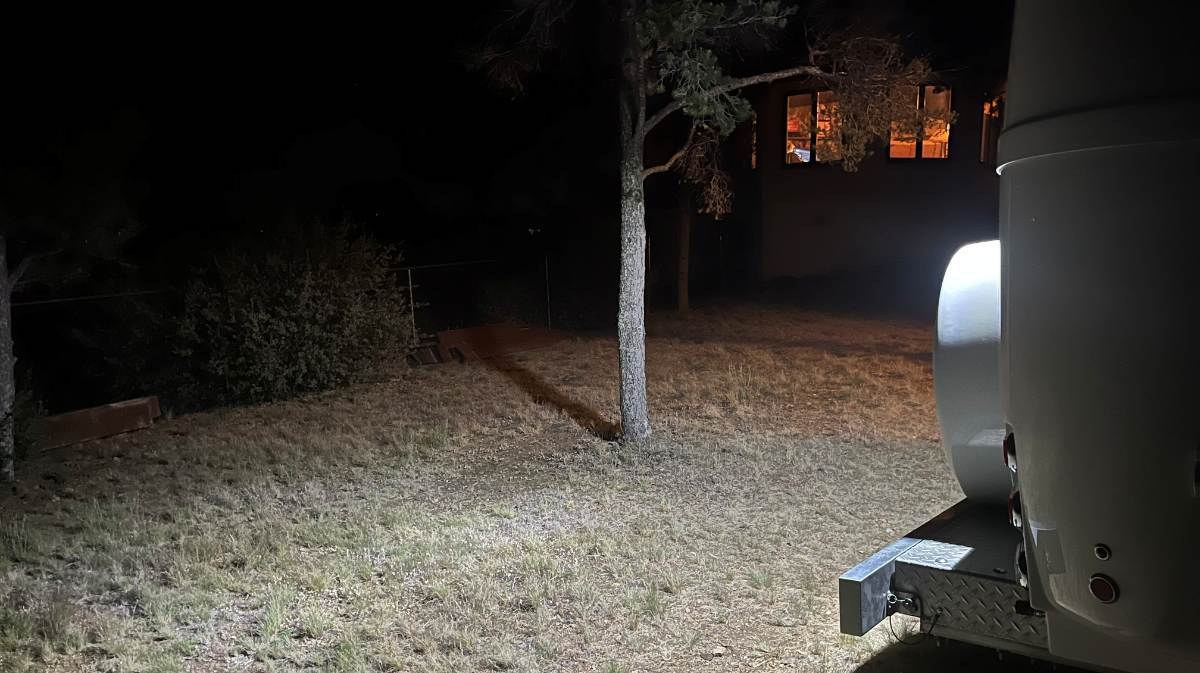
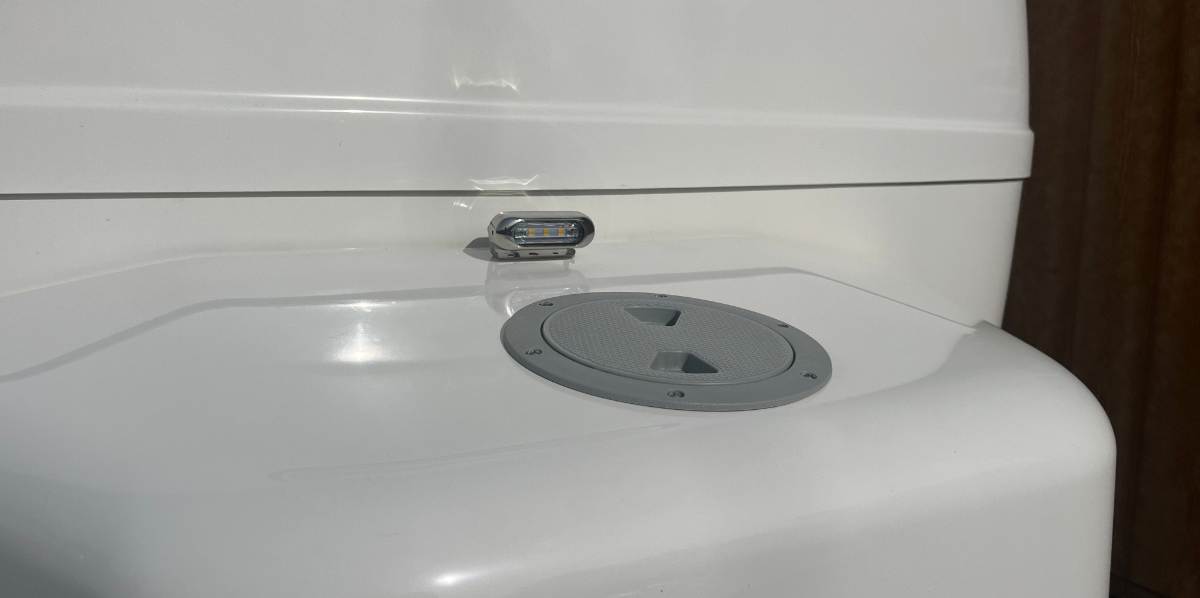
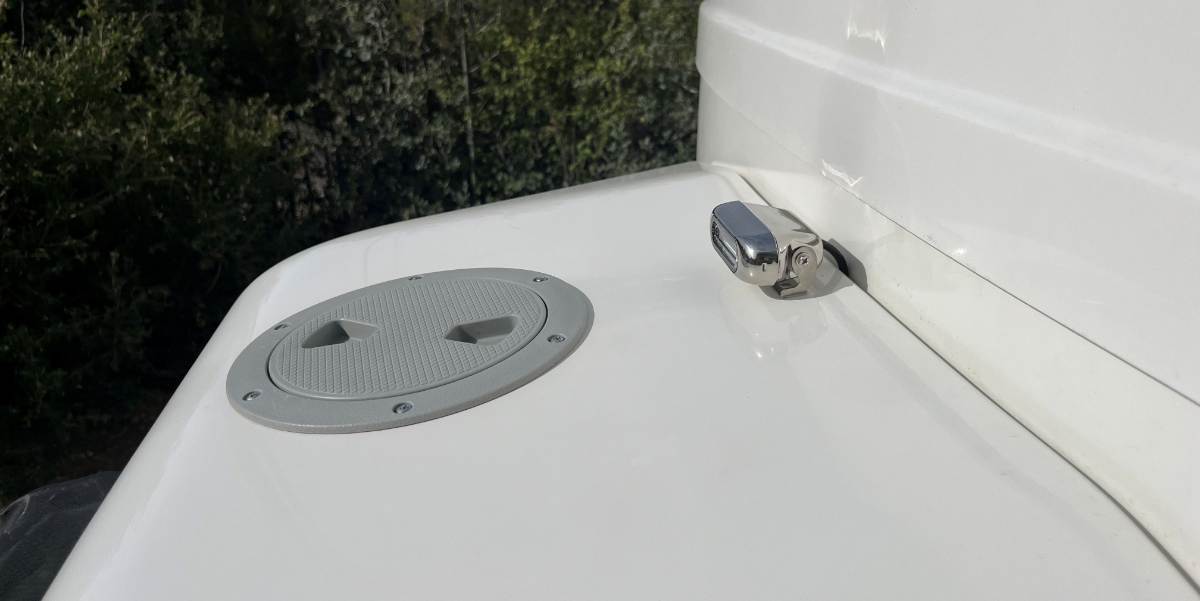
The Oliver Porch Lights are bright for a dark campsite, so we rarely use them. But if you need to light up the area they work great. I've often wondered, why isn't there lighting on the front and rear of the Oliver? I asked a year ago about replacement lights for our OEM Porch Lights and just purchased some recently. OTT should install these lights in all four directions. I would have done one up front too, but running wire would be difficult. I got something else for up front, more on that later. https://itcshopnow.com/products/assurance-exterior-flood-light?variant=50392962007319 I carefully measured the four Porch Lights OTT installed, as the distance from hull belly line, which btw holds a tape measure nicely, up to centerline of the Porch Light at the mounting screws. Turns out they were all installed at different heights +/- 3/4". As a special bonus, this light is 1/4" off from front to the rear mounting screws. My new Rear Porch Light, I promise is the straightest of the bunch! 🤣 It's not easy to choose the best spot to drill into the exterior of your hull, this one especially. I cut away some of the white insulation in the back of the attic. I used a 2-ft piece of metal fish-tape with the ends curled back, running it down the inside of the back exterior hull. Repeatedly, it measured 12" form the bottom of the OLIVER taillight to where the fish-tape hit the top of the rear window frame. It measured 12" so I figured I should go 10" max. Looking from the outside, there is a flat fiberglass frame around the rear window. Above that, the top rear is convex. I had to find the best spot so that the approx. 8" x 1 1/2" light would sit flat in both directions. If not water would get behind it. I drilled a 1/4" hole centered to the window, so the light is just above the flat frame area of the rear window. I soldered and heat shrink extra length of wire to the light. If they only attached 18" of wire! Offset the splices so that they would fit nicely into the drilled hole. It wasn't an easy pull but a few ins and outs and the light pulled flush (would be easier with 2 people, one in one out). I eyeballed the light level to the window frame. I wanted to VHB the light housing vs. drilling two mounting holes but the design of the light would not allow for it. They do not include hardware. Found the stoutest 1" course thread screws that would fit the openings and I drilled 6/94" holes after marking the centers. Wiring? I wanted to add the new rear light to the Side Porch Lights (streetside). However, I could not find the switch leg in the back corner of the attic and I did not want to remove all the stuff out of the kitchen cabinets. But that would be the right way to do it. Cabinets empty, you can easily run wiring up to the main switch panel. Our hull had a rear camera and a separate switch to power it. I removed the camera a year ago, so I'm using this separate switch with existing wiring. I copied something Geoff did, where he used a Sharpie to black out the word "Awning." Mine has a thin cut piece of black tape over the word "Camera" so it just reads "Rear" now! 🤣 I had to wait patiently for dusk and dark tonight! The hull looks great with the new Rear Porch Light to compliment the side lights. And finally, it alone lights up the yard! 😎
1 point
-
I've pumped from our 35-gal aux tank in the truck about 30 times. Only once it would not pump. My son was using the Oliver and he's new with RV stuff. He kept trying the water. Normally, when we here a first gurgle from the pump, we stop and refill the tank. Yes, when you loose prime, water will not pump regardless of the valve configuration. To fill water that one time, we had to tow to use a pressurized hose. I filled the FWT, then primed from the boondocking port and finally attached the hose to the City Water inlet to prime all faucets, the HWH and toilet. I wanted everything full! Also, we pump often when the truck is attached or at a distance, so I connect the 10 ft plus 25 ft hoses we carry, from truck bed to boondock port. Length of hose has not mattered in our case. However, OTT installs a basic water pump which we replaced with a REMCO US-made variable speed pump, with a little PSI and GPM bump over th OEM pump. 😎1 point
-
The new Apex X23 model comes with a Houghton 48 volt AC / heat pump..1 point
-
Alternatively, I bought three solar motion lights for camp security and general outdoor lighting. Once camp is setup, they are staged forward facing on the propane tank housing, rearward facing on the spare tire cover, and usually on a picnic table or other strategic location. I instantly have light when and where I need it, and a deterrent to unwanted visitors!1 point
-
I had just asked last week about what they are upgrading older units to now days at the factory, Dometic Freshjet was the reply. Price was $4600.00 for upgrade.1 point
-
I read they resorted to the Dometic FreshJet, but not certain of the series model. That said, in viewing the recently released ‘2027 Oliver Legacy Elite ll Platinum Model Walkthrough’ video, a Dometic is perched atop! AI states the Dometic FreshJet sits slightly lower on the roof than the Penguin ll. Dometic FreshJet (Series 5): Measures exactly 10.5 inches in height. Dometic Penguin ll: Measures 11.25 inches in height. When AI is asked if the FreshJet is quieter than the Penguin ll: Yes, the Dometic FreshJet is significantly quieter than the Penguin ll. I’m only presenting facts, not a personal recommendation.1 point
-
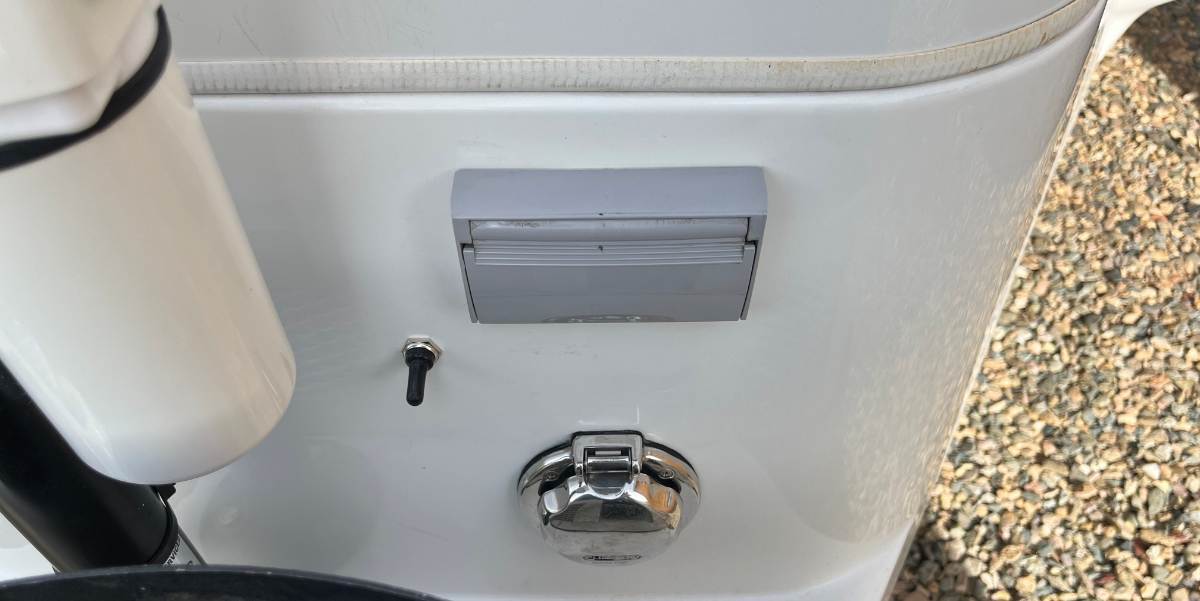
I've considered adding a forward facing light to the front jack housing using the existing light switch.1 point
-
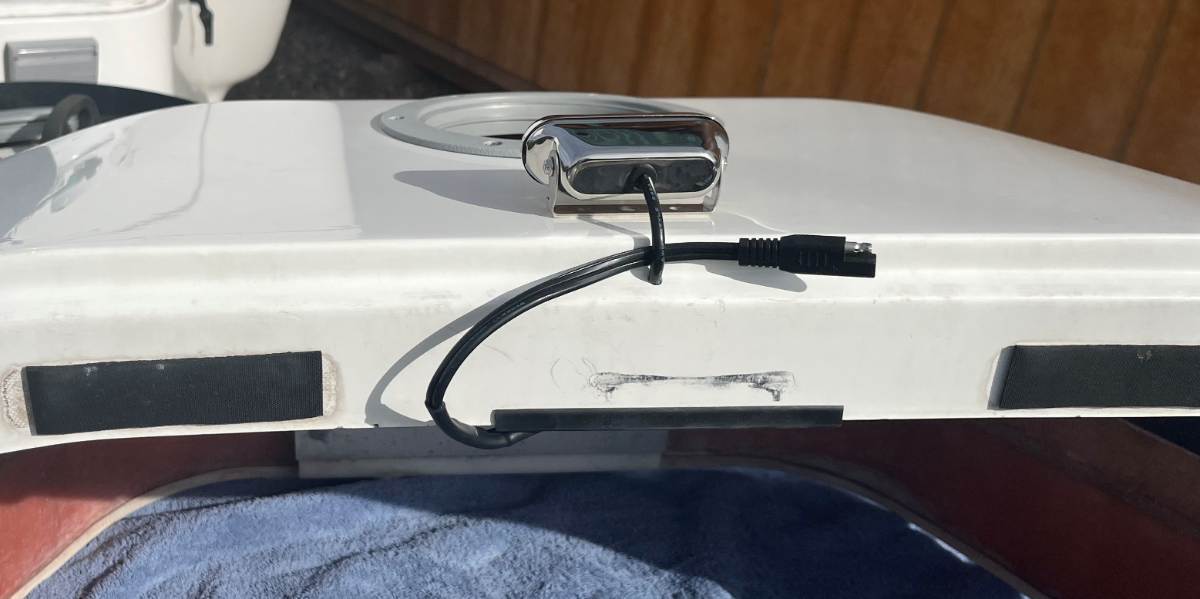
Finished my install on a front light, but won't be able to see how effective it is until it gets dark tonight (more pics after). My hope is that when the TV is attached, I can unhitch when getting to a campground after dark and see what's stored in the truck bed. I got this Docking Light on the same order as the Porch Lights. https://itcshopnow.com/products/exterior-led-flood-boat-docking-light I used 3M 4950 VHB tape to mount it the the top of the doghouse. There is of course a wire harness, so I drilled into the doghouse but not on top, just behind it where there is room and it's out of sight. I used a 13/64" drill bit which is a hair over the diameter of the wire loom. The picture shows the SAE disconnect wrapped up, only so it could be seen in the photo. Got to have a disconnect to fill the LP tanks. I tapped into the power for the emergency brake which is unfused 12VDC (the brake switch still has a direct connection). Added an inline 2A fuse and a switch in front of the doghouse. Added wire loom and tied up everything. Chose this location for an easy reach from either side, somewhere out of the way, and with a straight line for drilling the hole. The light draws 0.3A and provides 290 LM at 5000 K. Can't wait to see it at night! 😎
1 point
-
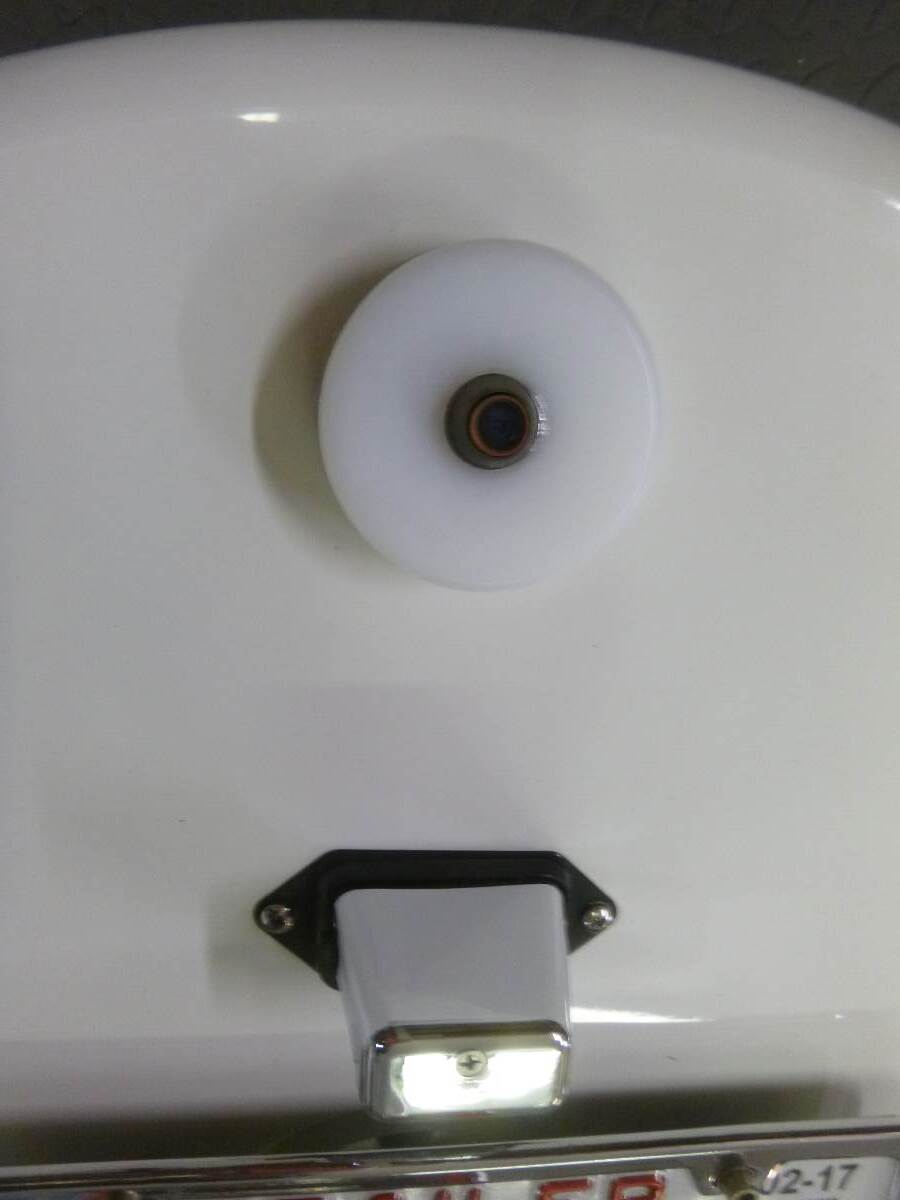
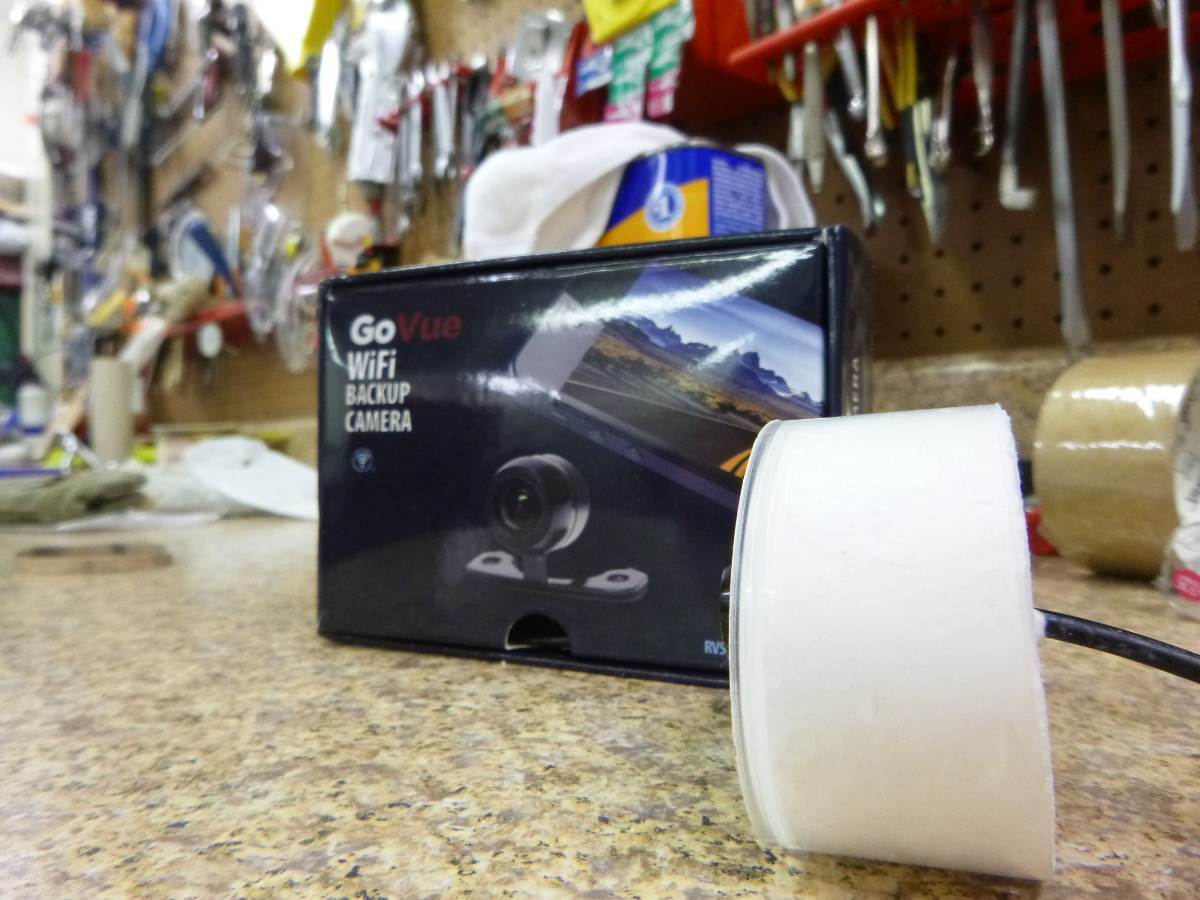
When Twist was in production I asked that the trailer be wired for a rear camera but I would supply and install my own camera. I decided that I would mount it in the spare tire cover. For security purposes this is a good place. However, for traveling down the road - not so much. The spray from wet roads makes this camera location virtually useless and even when its not raining it is difficult to use the camera in order to see beyond the vehicle that is directly behind me. Therefore, for driving, I now have another camera mounted in the usual high position (up near the marker lights) but still retain the lower camera too. If you decide to do as I did and mount a camera in the spare tire cover - PM me. The spare tire cover is NOT "in line" with the body nor the rear bumper. Because of this I needed to put a spacer in so as to compensate for the different angles. Bill
1 point
-
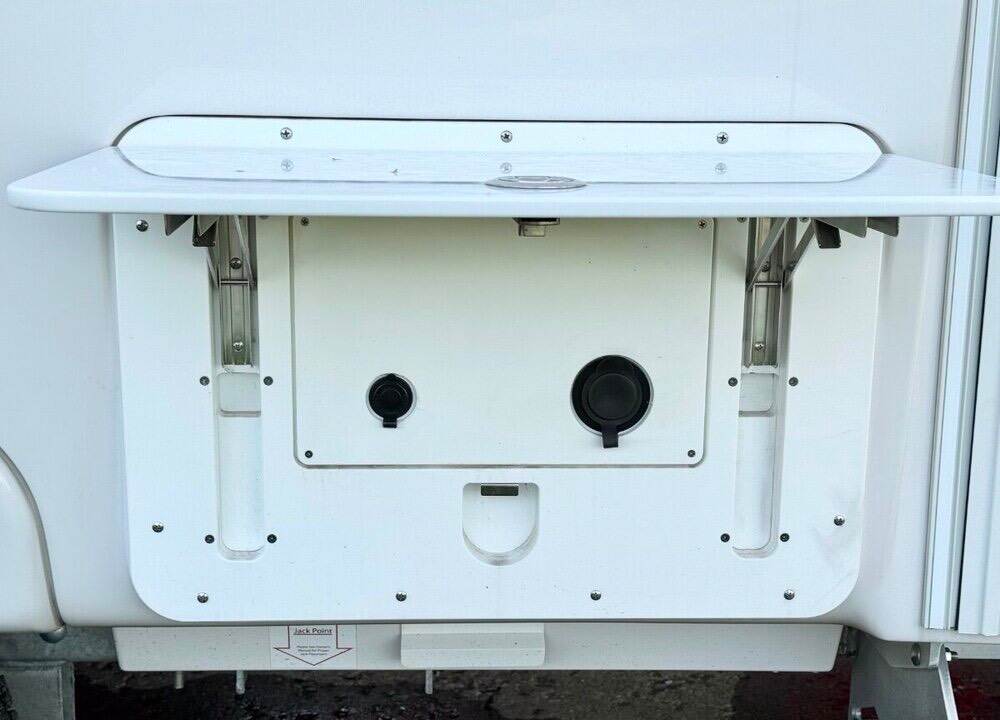
My 2023 has the same outlet, and I think Tom is correct in that it is for AC power to the fridge. I used that outlet with a 12 ga extension cord to supply power to my exterior AC outlet under the folding table. I tapped into the fridge's 12V DC power for the cigarette outlet.
1 point
-
The correct size metal ring ABS flange is available on Amazon. You will have to glue a short length of 3" diameter black ABS pipe onto the outlet of the flange, using the proper cement for ABS plastic plumbing pipe, to extend it down into the black tank rubber collar seal. You can measure the length of the pipe on your old broken flange to determine the length of pipe to glue to the new flange. Here's the link to the flange and the ABS pipe. Lowe’s also sells the proper primer/cleaner and cement for ABS plastic pipe. CLOSET FLANGE ABS TKO 3" by SIOUX CHIEF MfrPartNo 888-ATM Silver-Line Plastics 3-in x 2-ft Pipe in the ABS DWV Pipe & Fittings department at Lowes.com1 point
-
While everyone's corrective actions and associated comments have only validated my procrastination for tackling this problem, all the information provided thus far is most valuable. In looking at everyone's broken flange pictures, I have to wonder: Had Oliver clocked the flanges such that the Johnny Bolts would be positioned closer to the end of the slots, instead of midway nearer the insertion reliefs, would these flanges be less prone to failure? I'm not suggesting this would solve the inherent problem, but it seems to me that the plastic flange might be stronger and less prone to flex with the bolts positioned near the end adjacent to the flange retaining screws. I'm coming up next and have a couple of stainless-steel ring solutions on deck. Thanks for all the tips.1 point
-
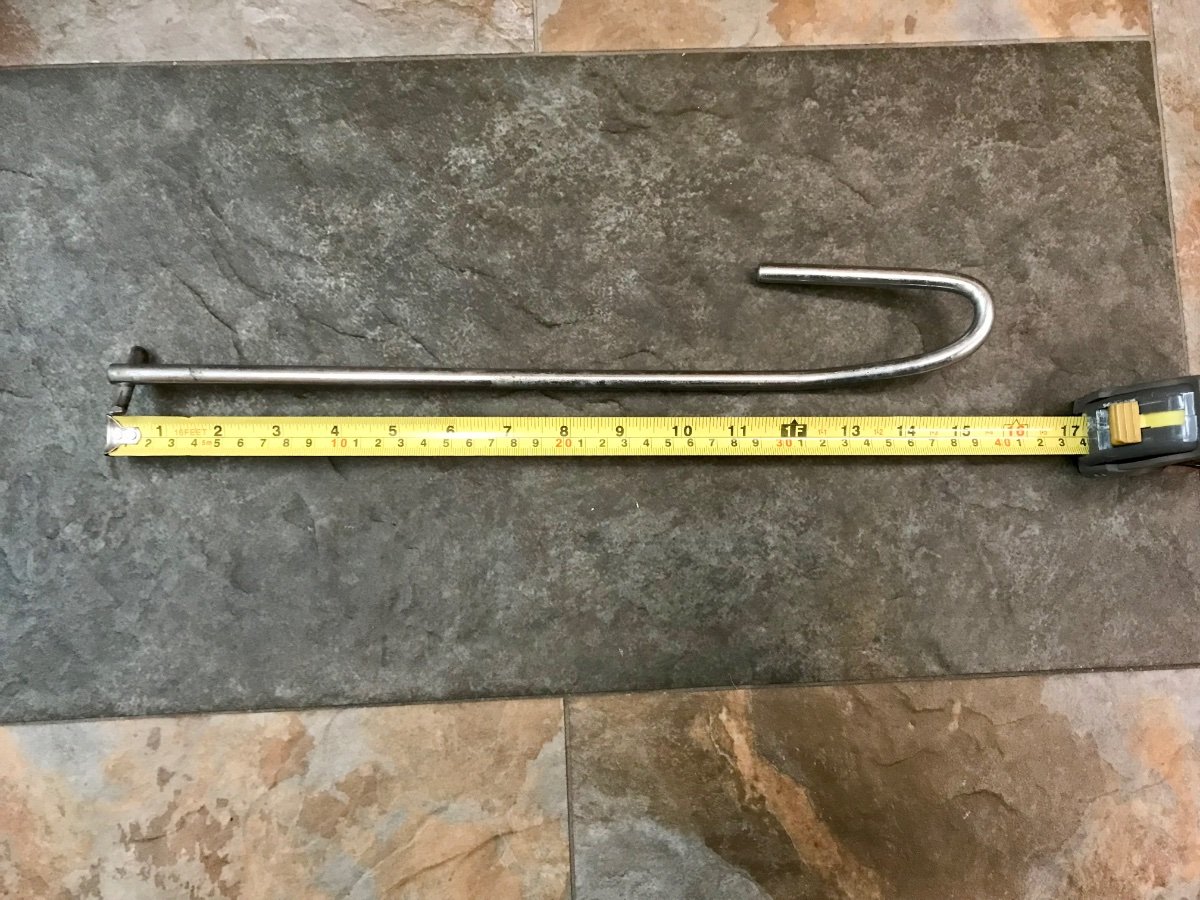
This was the biggest PITA that I have had with my Oliver. The 4 screws are 1" long and maybe #12. I did drill new holes with a 13/64” bit. The existing screws were sealed with a white product that was probably silicone. If you have replaced a closet flange at home, just forget what you know, because this is a new experience. My advice is to try a stainless steel, 2 piece repair ring before removing the original closet flange. Now that I have said that, feel free to do what you want, but I’ll tell you about my mistakes and successes. I will say the I did use an ABS flange with a stainless ring by Sioux Chief from Lowes, but it was the 3rd one I tried. The first 2 were ordered from Home Depot as well as the 2 foot section of 3" ABS pipe. It took HD about 6 weeks to complete that order. Make sure the closet flange will fit inside a 3" schedule 40 ABS or PVC pipe. I removed the existing flange by removing the 4 screws and trying to pull the flange up. That didn’t work because of the rubber bushing in the top of the black tank and the flexibility of the tank itself. I could pull the flange up about an inch, so I put a couple of wooden wedges under the flange and then used a flat pry bar on a piece of 1x4" and worked a couple short pieces of 2x4" under the lip of the flange. I was then able to use the pry bar again and when the flange was about 3" up from the floor, it would stay in that position and I was able to remove the wood and pull it out. The rubber bushing came out of the hole in top of the tank and came off of the pipe because it wouldn’t fit through the floor hole and ended up on top of the tank. I noticed that tank hole was about 3/8" closer to the street side wall than the floor hole, they were misaligned. I didn’t think it would be a problem because Oliver was able to install it. Oh Boy, was that a mistake. After receiving the parts from HD, I cut a 4" long piece of the ABS pipe, beveled the bottom end to match the original and glued it to the closet flange. Then I put the rubber gasket in place on the top of the tank then inserted the flange through the floor and into the rubber gasket and pushed it into the gasket and got to within 2" of the floor where it stopped. So I removed it and applied some silicone grease to the shank and tried it again. This attempt got to within an inch of the floor, so I placed a short 2x6 on top of the flange and tried standing on it and it stopped about 3/8" from bottoming out. Throughout all of this effort I’m thinking the flex of the tank is preventing me from it seating completely. And then the stainless ring of the flange popped out of its slot. So I started over with the extra flange I bought and it would not fit flush either and then I bumped my head and the light bulb went on, the flange was bottoming out on the lip of the hole. Upon further examination of the original flange, I realized the that the 1/4" tall bottom ring had a different profile than the original and that was catching on the edge of the floor hole. I found that the Sioux Chief flange had a matching profile by looking at Pinterest pictures and confirmed that through their website. And the new flange had the same result, so I got my jigsaw out and enlarged the hole and it still wouldn’t bottom out. So I made a cup of coffee and tried to think of a way to push the top of the tank up from the inside. The picture below shows the piece of scrap rod that I bent into a J shape and reached into the tank through the Flange and pulled up on the tank while standing on the flange. I moved around the hole at 3, 6, 9 and 12 o’clock and the tank top moved up at each position and the flange was resting on the floor when I finished. I screwed the flange down and reset the toilet. Finally success! And by now you have figured out that I have the ability to make a long story, longer. And I am persistent to the point of stupidity! And I just had a new thought, has the tank moved from its original position and that caused the misalignment? Mossey
1 point
-
I wonder what the "deck/wall" starts to look like after years of people walking on it. Can you screen that wall area at all when that is down? If not, I don't see myself keeping my wall open while camping.0 points
.thumb.jpg.e34bf01ef7f7d5e99ad31856d45afbeb.jpg)


-
Recent Achievements
-
")


")


