Leaderboard




Popular Content
Showing content with the highest reputation on 07/14/2026 in all areas
-
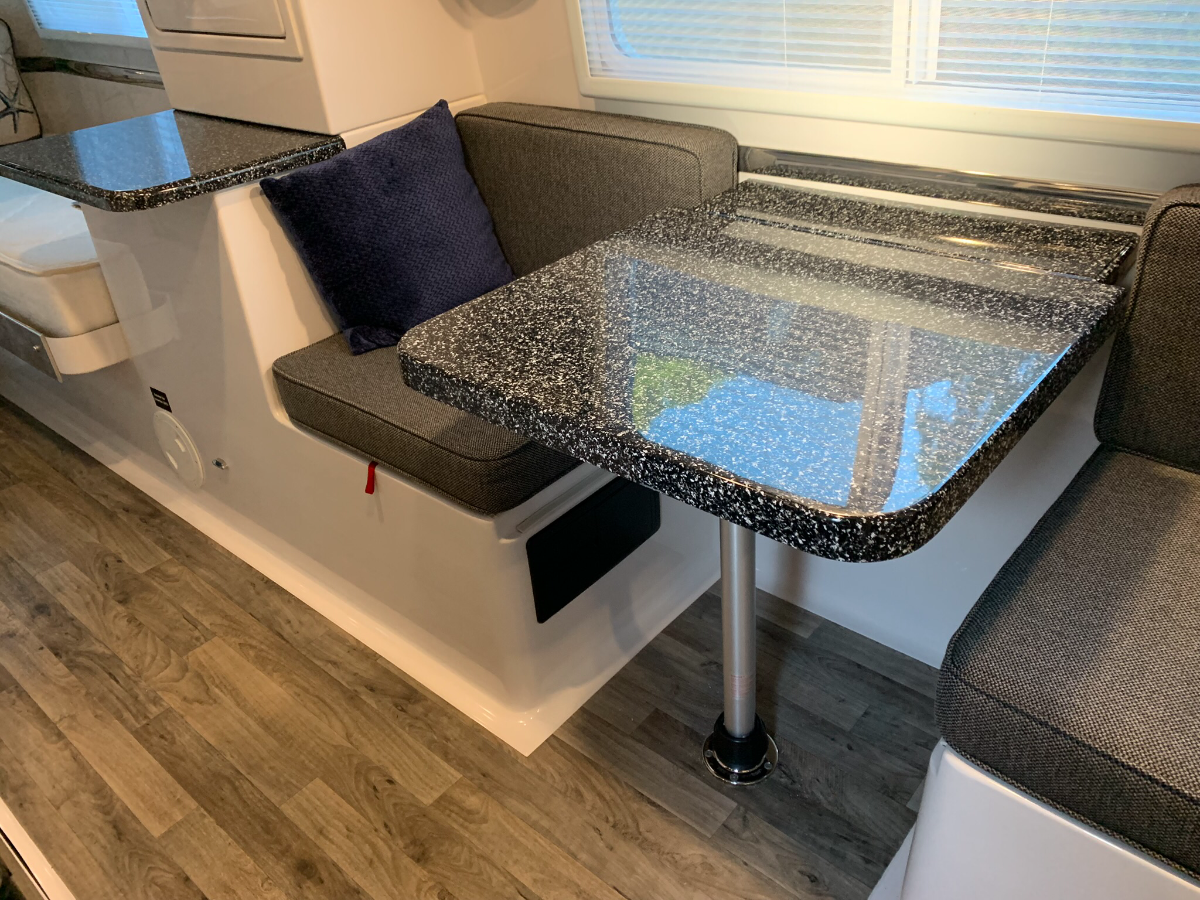
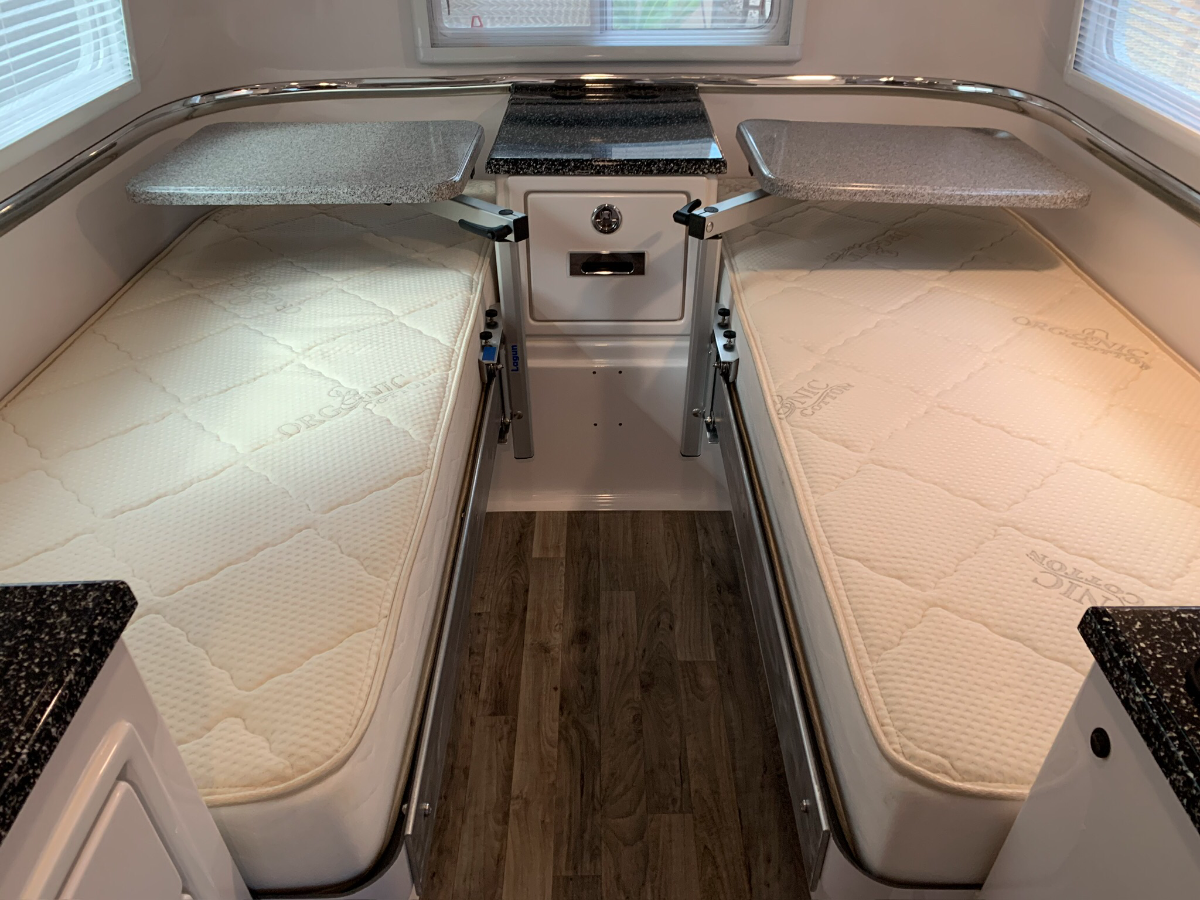
Same here! My pantry shelf mod involved extending it out to make it even with the adjacent twin bed with heavy duty Velcro for securement. The additional length provides more counter space/staging area. I also extended the dinette table an additional 7” for an equivalent bump out; making its utility for dining much better. I previously installed sliding Lagun tables for each of the twin beds and used the original Lagun tabletop for the pantry extension, likewise the original pantry shelf for the dinette table extension. We’ve been very pleased with these mods. Here’s a pic of the two Lagun tables, a much more challenging mod I must say! For those that have the Lagun option, you know the nightstand drawer is restricted when this table is in use. In my year model the nightstand tabletop can be lifted off, allowing access to the drawer content from atop; which was acceptable, since I preferred the leave the Lagun mounted for daily use and stowing it was a PITA. By design, I can now open the drawer even with both Laguns permanently mounted; and the wifey is now happy to have her own bed table, being I tended to ‘hog’ the original one for self use! There have been a few mods featured in this forum on relocating the Lagun mount to the side of the nightstand to enable front drawer access and my mod, as well.
 5 points
 -
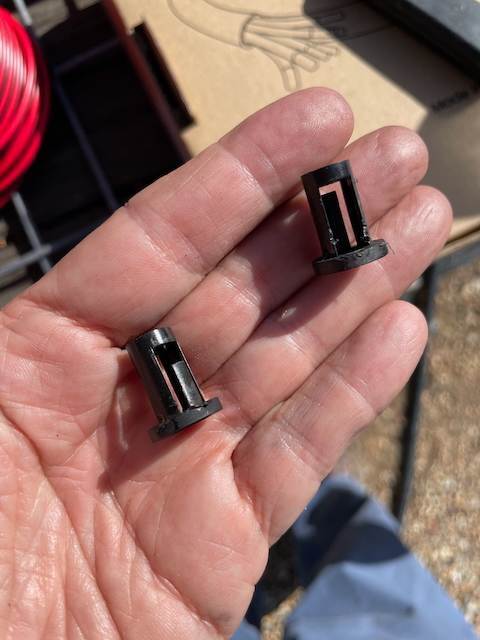
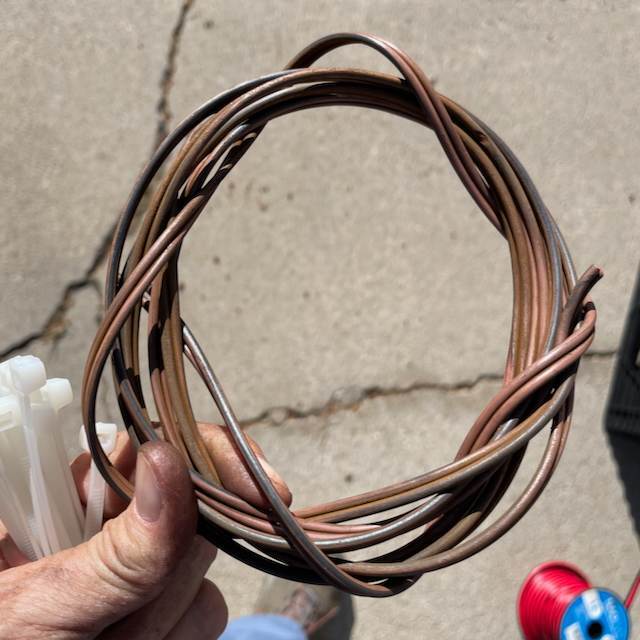
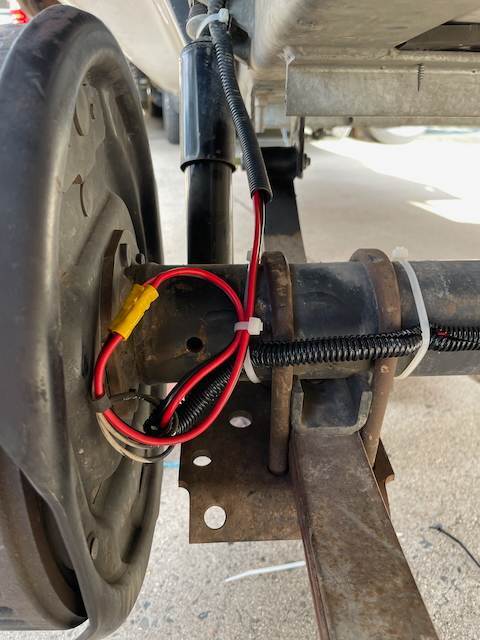
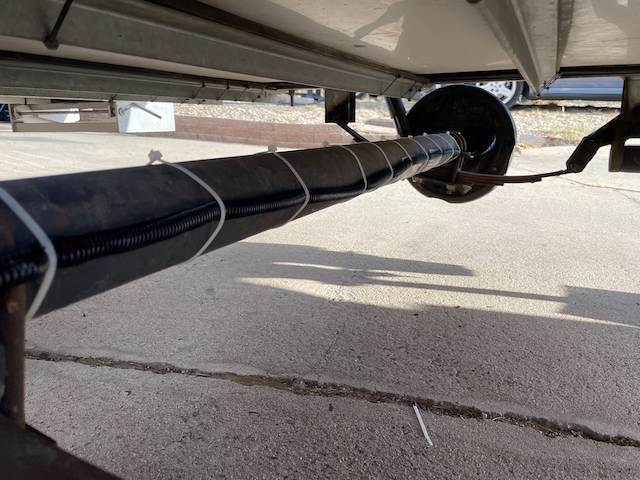
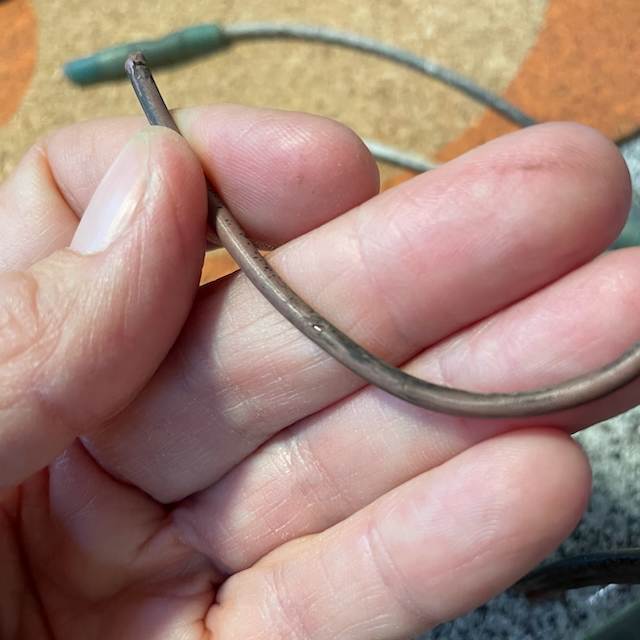
BRIEF UPDATE July 14, 2026: I accepted the generous offer by John @jd1923 and Chris to come farther west to Prescott and tackle this 'Check Trailer Wiring' issue. While my Oliver was jacked up, I was able to take care of some other regular maintenance work, and John helped out with that as well, but I will focus here on the trailer wiring. The main job was to replace the brake wires beginning at the left side (below the battery box) where the wiring exits the hull, and connecting new wires to each of the four brakes. John suggested pulling the new wires through the axle by taping them to the end of the old wires, for various reasons, but once the taped joint reached the opposite side and I needed to pull it out through that small hole in the axle, the tape broke apart. I tried pulling the new wire through that hole with some needle-nose pliers but the wire was so soft that small pieces were breaking off. So we reverted to my initial plan (based on several others here on the forum), and ran the new wires along the rear side of the axles, using split loom and zip ties to anchor it. We found that the butt connectors I ordered from Amazon did not hold; John tested one and the wires pulled right out without any effort. He had some older style butt connectors that we used, with much thicker metal inside, and then we added tape on the connections. I will probably come back to those taped joints with some liquid tape to try to weatherproof them better. (I saw that someone had used a clear sealant -- if anyone knows what that is called, I would like to find it. The liquid tape I have is black like tar.) The finished job looks really good. Note that I haven't tested by towing yet. After the rewiring, I measured the amperage at each wheel, after disconnecting the 7-pin connector from the truck and pulling the Emergency Brake pin. Each one measured about 3.0, with the left front measuring slightly higher. This was a good result in so far as the power was flowing from the Emergency Brake battery (I believe on the Oliver, this is the trailer battery; SOB trailers have a separate little battery for this power). After the tires were back on and everything was back in place, I tested again using the power from the truck through the 7pin connector, with John's son Adam helping me by being at the controls in the truck. Measuring the two main wires exiting the hull (below the battery box) the amperage was 1.85 and 1.71 on the left front and rear wires. This measurement is obviously without being in motion, and my understanding is that the truck will not provide the full power to the brakes in this case; I'm not sure what amount should be expected here, but power is flowing to both wires from the truck. Quoting from @Geronimo John in an older forum post, "... modern brake controllers sense when a vehicle is stopped and back off the power flow to the magnetic coils when stopped..." Yesterday, John and I performed another set of tests on the 7pin Cable wires where they enter the hull and exit the cable, inside a double sized junction box behind the small panel below the vanity sink (see earlier photos in this thread.) We tested amperage for each of the wires, and the 7pin cable seems to be working fine -- even jiggling the wire at the connector and below the Oliver -- so we elected not to replace it. Of course, once again, this is not in motion driving down the highway. None of this is definitive until I actually tow the Oliver, tomorrow morning. I will report again in a few days, and try to add some photos here for clarity. I don't think this is resolved yet, but making progress on eliminating things is good. Many heartfelt thanks to John, Chris and Adam -- they have all been extremely gracious hosts and very helpful, and have cheered me up as well. Many thanks as well to all the other forum members who have been helping out with ideas and links and questions. Now we are heading out for some fun! EDIT: Added Photos with captions. Some of these might be helpful for others. These are the grommets that come with the Dexter Axles -- the wires pass through these from left to right side of axle. NOTE that they have sprung tabs on them to keep them in the axle; when you try to remove them, the tabs break off. They are not rubber grommets they are stiff plastic. I tried to replace the missing one with a rubber grommet (I cut it to place it around the existing wire) but my rubber grommets were not deep enough to cover the thickness of the axle. These two came from a new Dexter axle that John ordered. This is one of the nicks in the wire where it passed through the hole in the axle without a grommet. There was a larger section of exposed copper, but I can't find it this morning. This is the brake wire pulled from the front axle; I didn't see melted insulation nor other nicks exposing the copper here. (The original rear axle wire is still inside the rear axle --EDIT: but it is cut loose from the brakes. There's a new brake wire run outside that axle as well.) John's handiwork -- thank you John. Butt connectors splicing original to new brake wires, before being wrapped in tape. I would have preferred heat-shrink style for better weather-proofing, but this is what we had to work with. The front axle with new wire from left to right brake assembly. Butt connectors (both images after crimping); the new heat-shrink style on the left didn't hold the wire at all -- it pulled right out. The old style held, but is not weather-proof. They are taped for now. I'm seeking a good quality liquid tape or other product to address this.
2 points
-
Oh thanks for asking? I was okay not thinking about the price of it. It’s over $760 for the 14K, but I think many move up to the 20K. I will not use the capacity of the 20K. I only own one trailer. I also ordered their locking pins for $63. They are the highest quality pins I’ve ever seen. I’m truly amazed. All three are keyed the same for convenience.2 points
-
Yes you are correct, and that is for the VAST majority of trailers/TV's that use the Anderson. But.... The vast majority of OEII's just don't sway, even under extreme circumstances. Properly loaded they just don't sway. For that reason, many of us have no need for that great feature of the Anderson "system". Starting with John Davies, we lube the ball to reduce the wear. I am not suggesting that all new owners assume the same is for their setup. Get some experience and then decide how your rig handles under extreme conditions. If after a few years you figure it out, then join the "Don't lube your balls" team. LOL GJ2 points
-
Agree, started participating in this thread almost 10 years ago. At home working on Ollie, it’s raining, so cannot finish everything today. Hopefully will be on the Blue Ridge Parkway camping soon, will take some “Where’s Ollie” photos, too!2 points
-
Look at using King StarBoard for a better waterproof mounting board. It can be cut and shaped using regular woodworking tools. I get mine from McMaster Carr but there are less expensive places to get it. A shipment from McMaster Carr usually arrives the next day depending on where you are. I think I have ordered some from TAP Plastics https://www.tapplastics.com/product/plastics/cut_to_size_plastic/king_starboard/526?gad_source=1&gad_campaignid=21137328659&gbraid=0AAAAAD_hg_I8XrL-S3Ima0ZSWbIsffsZk&gclid=CjwKCAjwmdLSBhANEiwAkREMN3hswfK8uVUE38-cgCmjAoCwEzeXRTPZLhht1xFJJ1A8-NIIMHzIkhoC2_gQAvD_BwE I don’t know why that link has to have so much gibberish in it. Bill2 points
-
Here’s a nice video on the last 100 years of Texas State Parks. I’m sure most states have a similar history. We’ve stayed at state parks across the nation and appreciate what they provide. BTW, H-E-B is a Texas supermarket chain headquartered here in San Antonio. https://youtu.be/1rHgTkBGv_w?si=qCcsBz99Cxvy1hmU1 point
-
Yep and Yep. At least for our older trailers, annual cleaning (or more often in some locations) and gutters are the only fixes that worked in our case. GJ1 point
-
To each his own, but from what I’ve seen from trailer sway videos, I’d rather have more protection than less, so I’m willing to forgo a little wear on the ball in the unlikely event that I would have to take evasive action at highway speed. So I’m stayin’ on the “Don’t lube your balls team” for now. 🤣1 point
-
I'm installing a 2-5/16" Bulldog on Thursday. My B & W Stow and Go has both a 2" and 2-5/16" ball. Plan is to inspect the 2" Bulldog, and if it looks good, I will paint it gray and keep it as a back-up.1 point
-
Where did you move from? We lived in IL, VA, AZ, TX, FL and back to Arizona. We know Texas, lived in Georgetown/Austin area for 9 years. We spent a weekend in almost every corner of the state, our son playing USTA tennis tournaments. But back then we stayed in hotels. Arizona is 51% public lands between FS and BLM, 31% Indian territory and only 18% private land! To get more public lands you must visit Alaska. It's a boondocking paradise out here, camp almost anywhere you want. 😎 So, you have the desire and the need, but is the solar awning worthwhile at that price point? $5K is a lot of money. For about the same money in parts cost, I installed a complete Victron MP2 3KW inverter-charger, 50A DC-DC charger, MPPT SC and 400W suitcase solar and 900 Ah Epoch LiFePO4, OMG! The Renogy 400W suitcase, with Victron 30A MPPT SC, wired it to an external port, internal wiring and external cabling and connectors for about $600 total parts costs (no labor). We hardly use it! I find solar panels are a pain to setup, they charge slowly and you have to be at one campsite long enough to need it and take advantage of it. Ease of use in a solar awning would be great! Just push the button, But what if the sun is on the other side? Are you going to spend $10K to equip both sides? Don't think you can always park in the direction facing the sun. When parking I'm worried about being level, being out of the afternoon sun and wind direction too! If your at Port Aransas nicely park with the curbside of your Oliver facing the sun as it rises from the east over the gulf and you want to be there for a couple weeks, the solar awning might the right choice. We have a simple manual awning, no solar and we used it 4 times in 180 overnights. Everybody has different needs in an Oliver. For us, we don't camp anywhere for longer than a week, most of our stays are 2-5 nights. our 900 Ah will last that long running the A/C for half the week along with all other electrical needs. Solar charging is more beneficial for those that stay put for a few weeks, because if you move more often DC-DC charging is much more efficient. We added a Victron Orion 50A DC-DC charger, total parts cost today with say 80 ft of expensive 4 AWG wire should be about $800 plus labor and any TV alternator upgrade when necessary. Please do not ask OTT to install this as they want $2K just to install the charger and wire the Oliver side, and the truck side wiring is left up to you. We love this mod and connect it every time we hitch up. Our Orion XS 50A DC-DC charger on average produces 40 Ah for every hour towing! Drive an easy day, engine running for 5 hours and you will have 200 Ah added to battery SOC. You've been at a campsite 3-5 days and your battery SOC% is low, it's time to move on to your next location, charging as you tow to your next campsite. This is our favorite and most effective electrical upgrade by far (besides the Victron Mulptiplus II). I'm the tech/installation guy, though my wife Chris loves this mod! She's checking the Victron Connect app, while I'm towing, checking as our SOC% keeps growing! Not that I have one, but my vote would be NO on the $5K awning, but of course you need to weigh your options for the camping life you desire. I knew very little of our needs 3 years ago when we purchased our Oliver. If I had better understood the value of the DC-DC charger, for our on-the-move travel style, and I did that upgrade ahead of the suitcase solar addition, I may not have added the suitcase. We do appreciate our rooftop solar, no fuss no muss, keeps the batteries charged when parked, runs the fridge while towing, etc. You can always hold off for now and upgrade later. (Some of the mods I mentioned are in the links below.) Best wishes to you and your new Oliver! JD1 point
-
It's plastic, not pvc...by water pump, accumulator and shower. You should have it also since you have a 2022 model :) John1 point
-
I suggest using Riv-Nuts and bolt them down if you are having such a problem. GJ1 point
-
@John Dorrer did I miss this info in the thread? What type of hitch do you use on the truck? I just upgraded my hitch on my new truck to a Shocker hitch, but I only have two long test drives under its belt. I was just wondering if a shocker-like hitch could reduce any excessive bouncing when hitting bridges or other repetitive oscillations on the rig.1 point
-
Yeah, 100% on our short term radar, just not today 🙂 There's more than you would think, between National Parks (Big Bend for instance, you can't "boondock" but there are a number of park-interior primitive campsites you can bring a trailer to), state parks on the gulf shore, and National Wildlide Refuges! The difference in public lands was definelty something that took getting used to, moving down here though. Our primary immediate use is going to be gulf shore off grid camping. The awning is pretty mind-bogglingly expensive at 5k though, and the x23 has 400 on the roof. Back of napkin says a 400w folder + the roof solar should be sufficient. Per dc to dc, that's good to hear --- I like that it's off the shelf with the new trim (it's not really a new model, imho.) Long way of saying I think we're going to opt out of the awning for our build. Thank you for the info and thoughts!1 point
-
Same Obeaming as Ronbrink for over a year; we like them alot and so much better than O original junk. Used high quality double tape with no problems and easy.1 point
-
Last year I found the same issue with the screws coming out of the pvc mounting boards. Service had no suggestions to offer except to replace the pvc mounting board. I don't think the pvc material is the right thing to use for this mounting board, but that's what they use. My brother and I discussed this issue and came up with a simple solution. On my Oliver (and others might vary) there is enough space below the pvc board to place a narrow strip of thin plywood -- just long and wide enough to use to sit below those locations and to reinstall some longer screws through those clamps. I keep checking the existing clamps, and have tried adding some superglue in with the screws, and that has worked on two of them, for now. I don't want to have to take everything out to fix this issue. I don't have the tools to cut this piece of wood, but that is my plan. @Galileo on an Elite II Twin Bed model, it's below the curb side bed close to the stove location, where the plumbing equipment is mounted.1 point
-
We actually like the Velcro. I don’t know if others had this small storage area shown to them as a “secret compartment” - but I think the Velcro is more apt to keep it that way. Anyway - we go in that compartment so seldom that there’s not a huge convenience or time saving benefit for us. I’m also fond of leaning on that surface or putting quite a bit of body weight on it while extricating myself from the (king layout) bed. So making it readily movable will make it easy to bend those slides at least, and likely to send me crashing to the floor in the middle of the night at worst.1 point
-
I don’t think I’ve seen any white plastic (PVC) pipe - only PEX. Where is there PVC?1 point
-
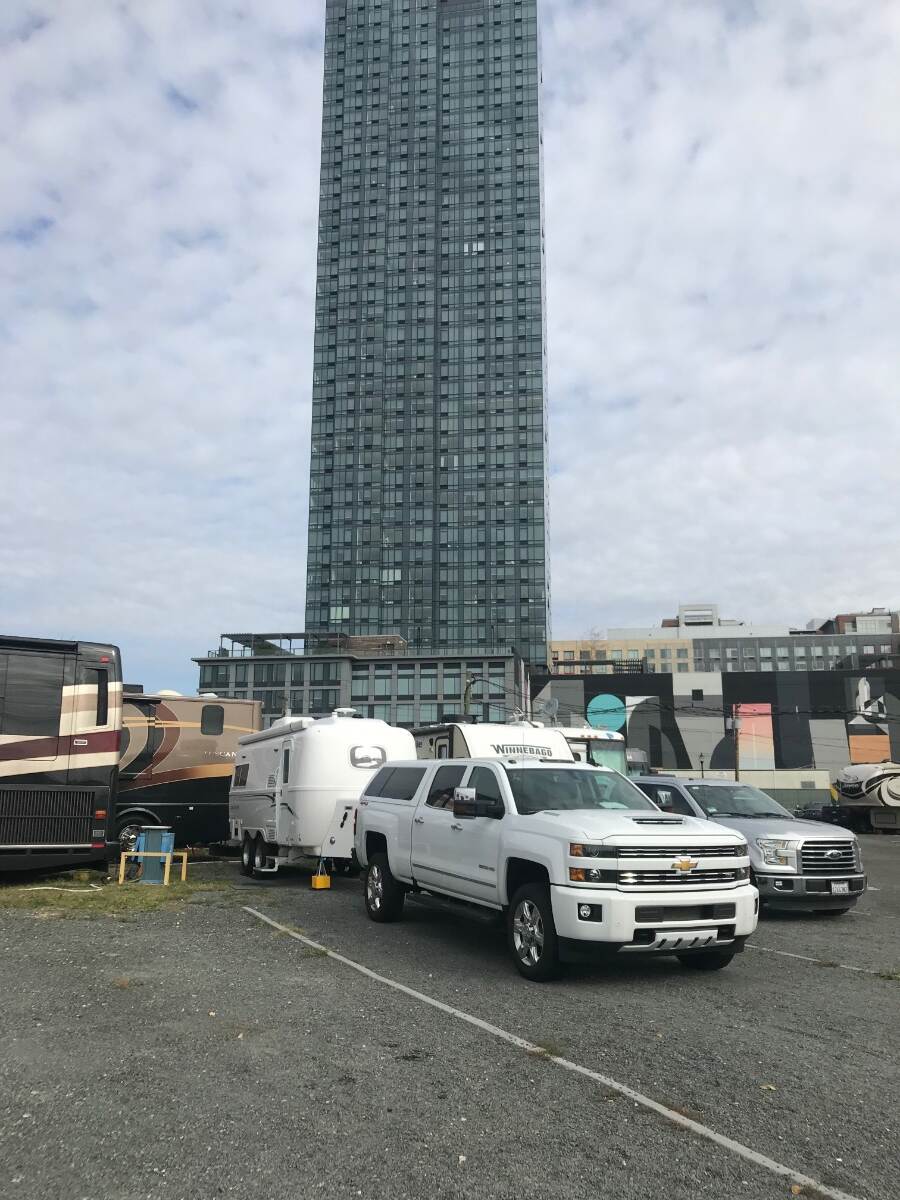
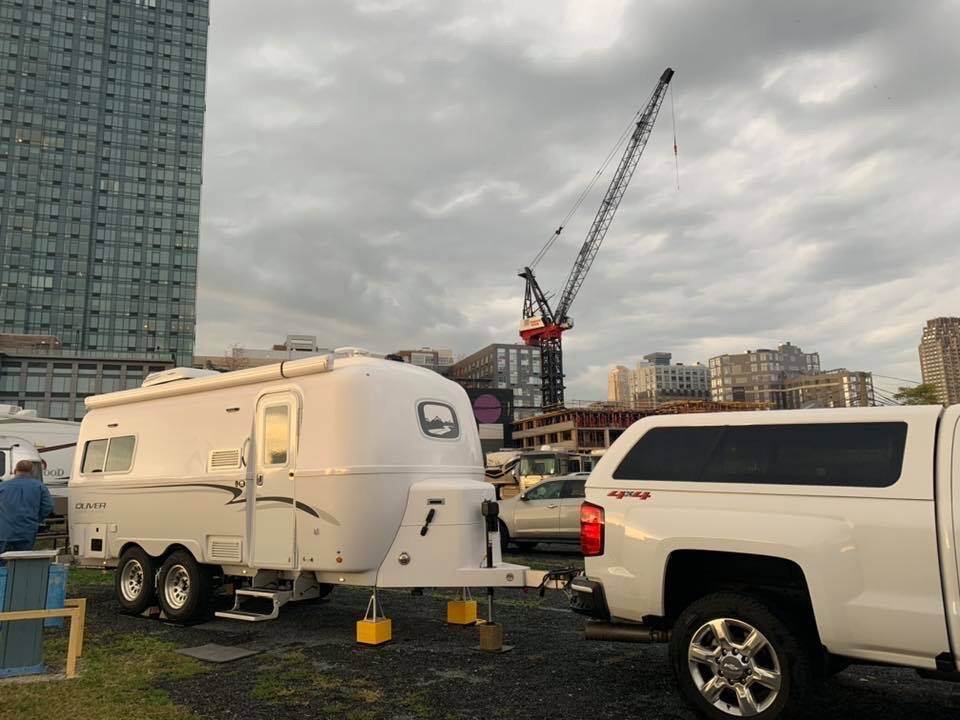
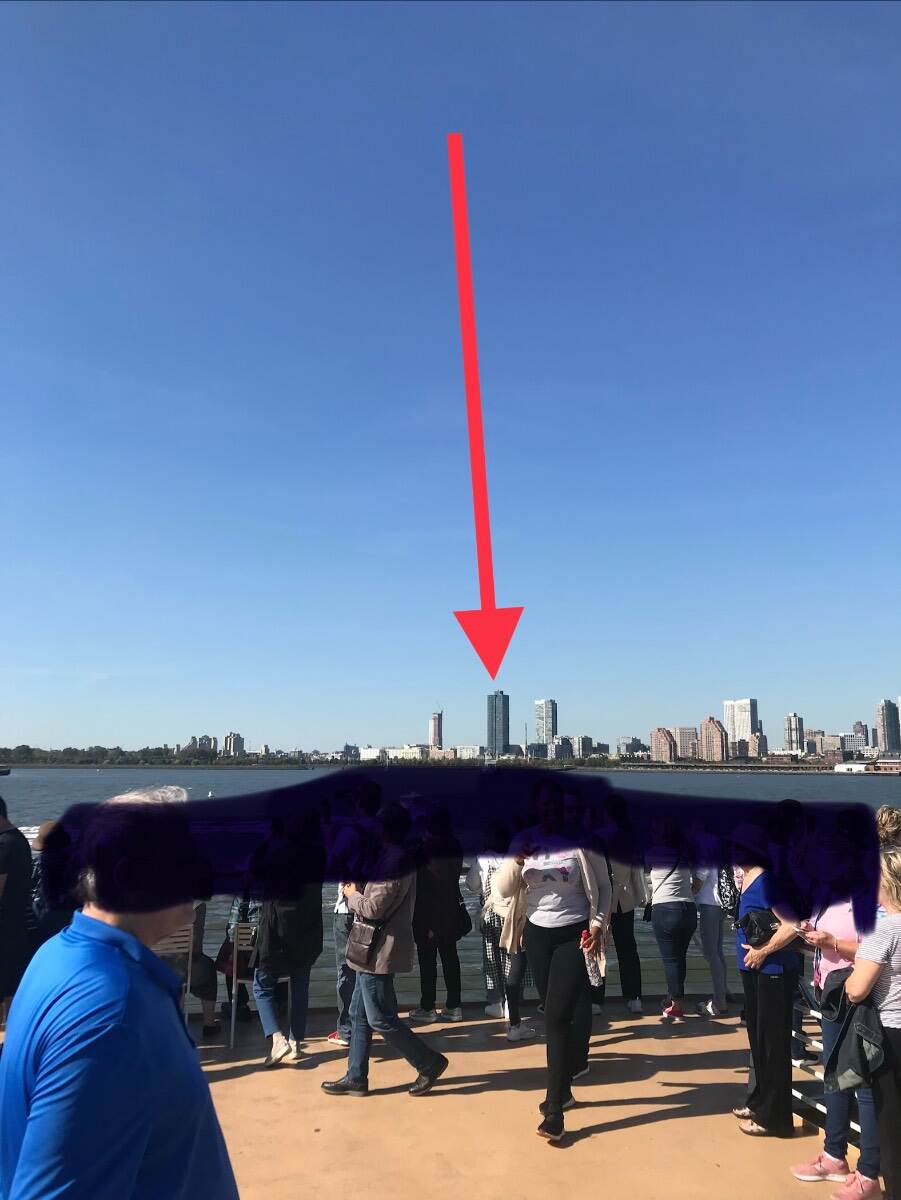
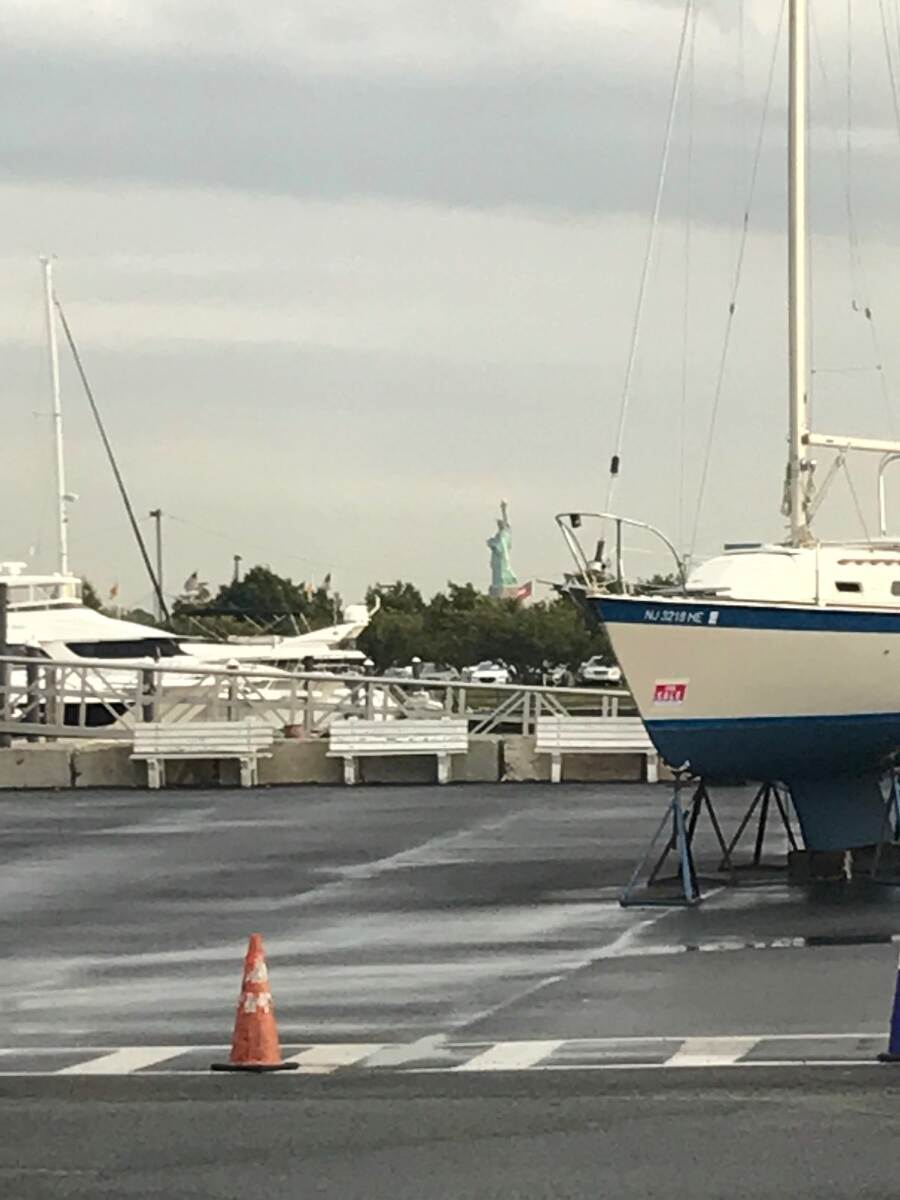
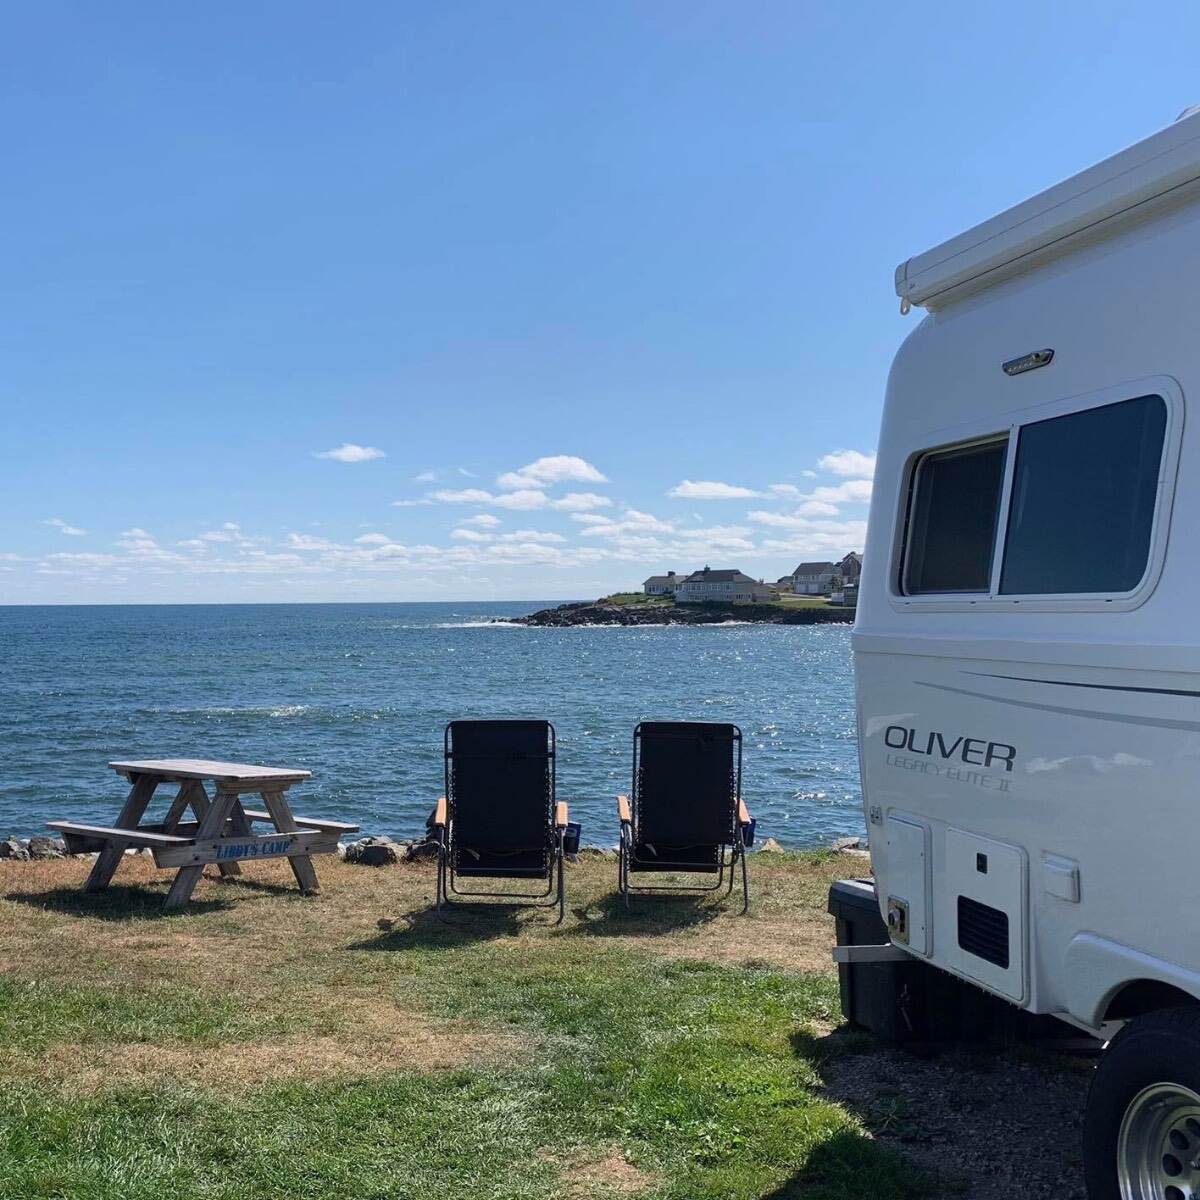
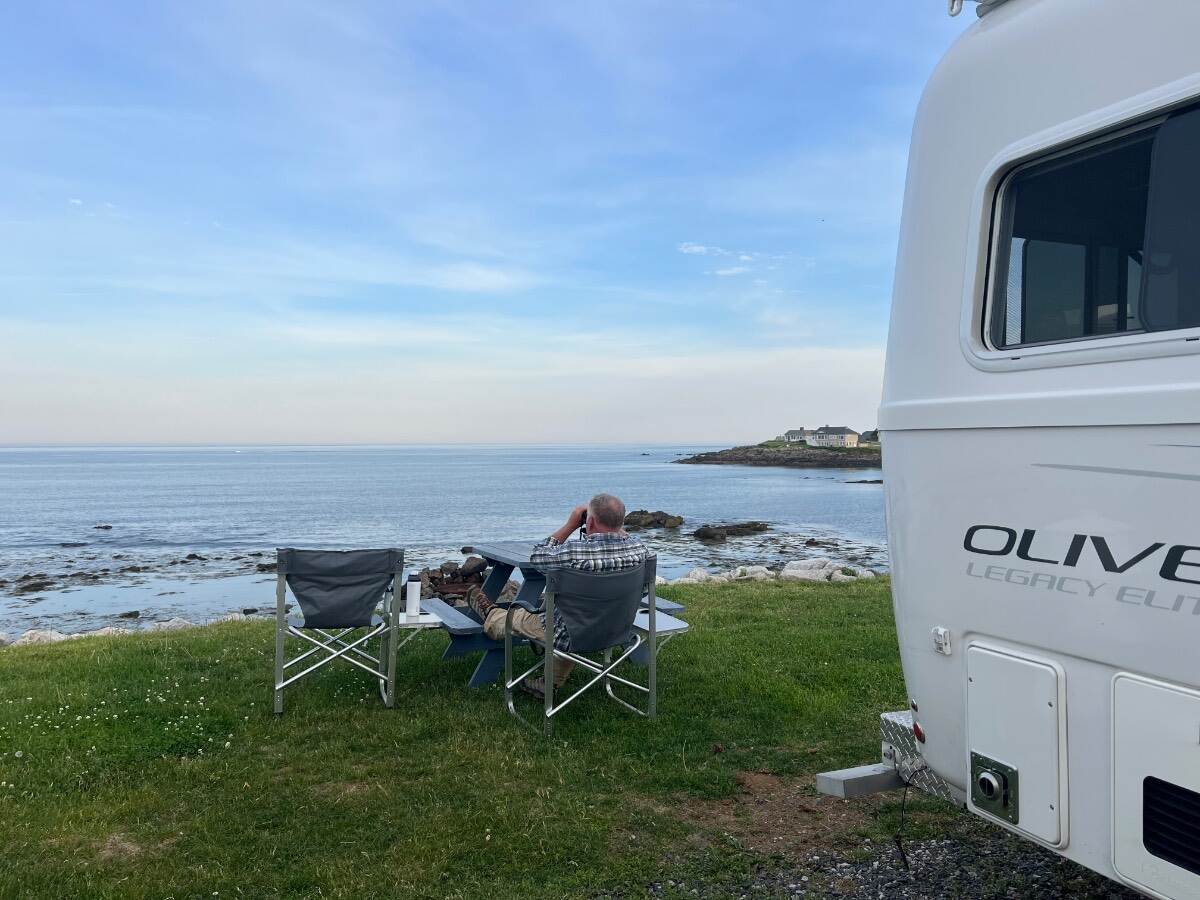
Over the past few days I’ve looked through all 39 pages of this thread. Very pretty pictures of “Where Is Ollie”. I have pictures of a not-so-pretty location. During late September, 2019 our Oliver was here for a few days We were parked near the base of this building A hint as to the location A screenshot from the campground’s website At the next campground after my one-and-only venture into NYC our Oliver was parked here. A much better looking location. September 30, 2019. And then again in June of 2026. Libby’s Oceanside Camp, York, ME. One of our favorite campgrounds. Bill
1 point
-
Congrats!1 point
-
If anyone's got any thoughts here I'd appreciate it. Right now we haven't optioned either the solar awning nor a second awning. We don't boondocks un our current trailer, so we don't have a lot of context there. My thinking is that: 1) We'll park when boondocking where the awning is going to be much more useful on one side than the other. 2) The solar awning sounds great but just sounds like something that would wear prematurely, and obviously isn't flexible. 3) A 400w foldable + the roof solar should be sufficient if there's good sun. We've got some time to nail this down and would love people's thoughts.1 point
-
Excellent point! As others and self, the best position with the three-way is having fans in the upper vent whereby the fans blow outward and thus, pull air upward and out.1 point
-
Congrats from Hull #1045, Jolli Olli. Happy Camping.1 point
-
Thanks for the welcome all. We're really excited 🙂 Mike & Carol --- any tips vis a vis the Tacoma?1 point
-
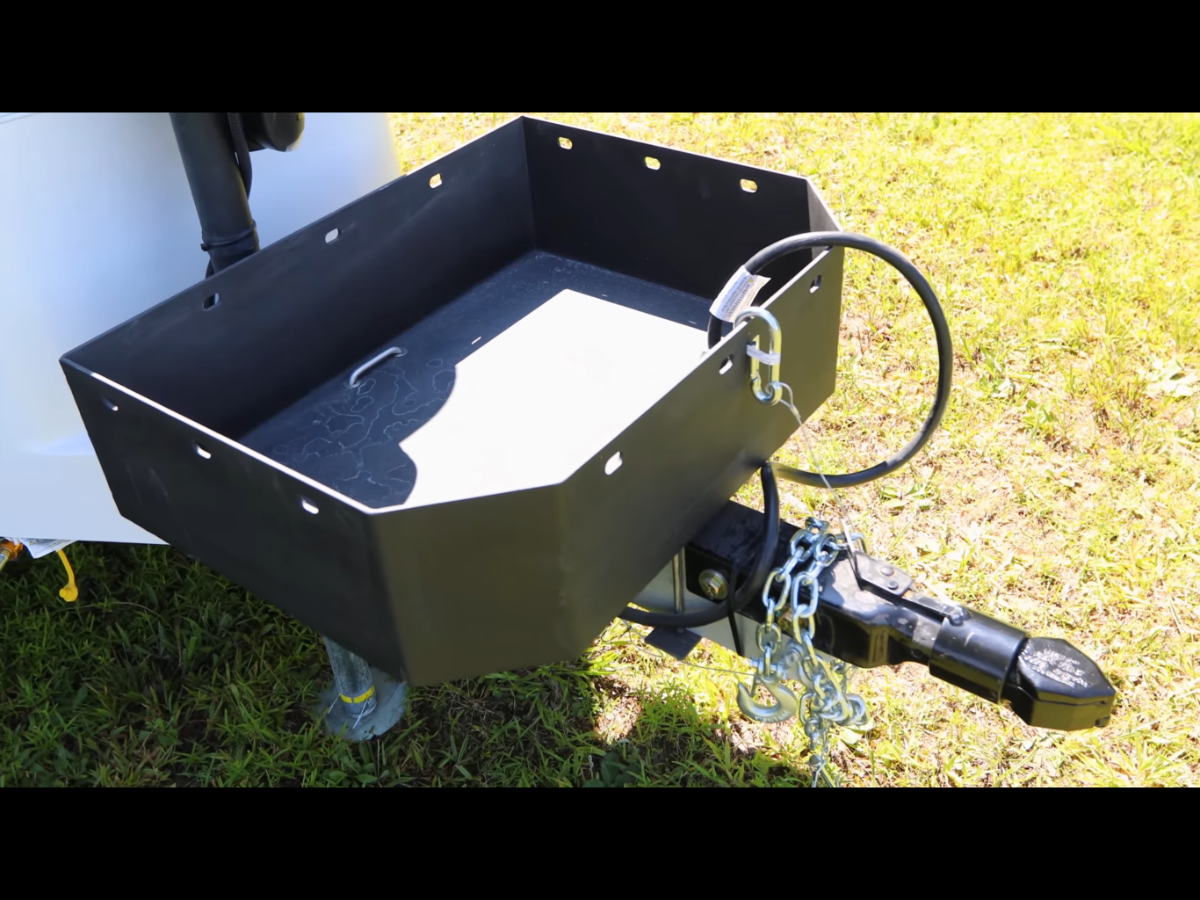
Yes, you are correct. Oliver has had to source another coupler supplier. Bulldog is supposedly in bankruptcy proceedings as of Oct of 2025. Hopefully they will restructure. Pic of new coupler -
1 point
-
Welcome and Congrats and enjoy the delivery day! There is something really special about taking delivery of a brand new Oliver, it was for us. Before you know it your day will be here!1 point
-
Welcome! I initially towed with at Tacoma as well. It didn’t take long to upgrade to a half ton. Will be interested in how it goes for you. Mike1 point
-
Congratulations and welcome to the Oliver world!! Many good times ahead, I am sure.1 point
-
@bugeyedriver has a similar coating on the front of his trailer. It is white and provides great protection. Mike1 point
-
We’ve got half as many years and maybe a third of the miles, so I’d expect you have more wear and tear. I do all my own cleaning and polishing - so I’m intimately familiar with the whole front end of the trailer. The upper half gets WAY more abuse from bugs - especially in the Southern states. I’ve only spotted one tiny nick of any significance and it doesn’t even penetrate the gelcoat. I’d guess our “paved roads” mission combined with our low-slung tow vehicles (and not doing burn-outs on gravel) keep the nicks to a minimum. Just from a drivability standpoint, I avoid the jacked-up, high ground clearance vehicles like the AT-4 (or is it ATX?) trim level on our GMC Sierra. Just keeping the truck body close to the ground keeps the amount, trajectory, and velocity of road debris mitigated adequately. I like a vehicle that my wife can enter and exit without a rope ladder - and also at least a bit of ability to see objects close to me when maneuvering in tight parking lots.1 point
-
We’ve towed now for 10 seasons, 100K+ miles. We have quite a few nicks and chips on the lower front of the trailer. When the CGI guys refresh my ceramic coating next time I’m going to have them put their film on the front. Mike1 point
-
What a scare that must have been. Glad you are ok. I wonder if it helps that attaching an Andersen anti-sway hitch requires me to lock the coupler on the ball and then raise the ball quite a ways in order to get the hitch attached? If the coupler were not secure on the ball I would never be able to connect the Andersen,.1 point
-
Florida state parks have a 50 per cent discount, for Florida residents, from a few days ago, until January 13. https://www.floridastateparks.org/learn/florida-state-parks-annual-pass-discount1 point
-
That is a nice video. This article reflects the other side of that shiny coin: https://tex.org/why-federal-and-state-owned-land-is-so-rare-in-texas/ The bottom line started when the early Country of, then the State of Texas, essentially used land as a resource to sell to keep the government operating. I am glad they are playing catch-up. John Davies Spokane WA
1 point
-
B & W stow and go, 2" and 2-5/16". I just got a new Bulldog 2-5/16" that I will be installing this week. I don't think I will ever know whether I didn't have the ball fully captured, or whether this was the perfect storm, bad bridge joint and new Alcan 5-leaf springs. That new hitch is interesting. What is the cost of the Shocker Hitch?0 points
.jpeg.0f93612bbf4fb0d95523906b33480b7c.jpeg)
.jpeg.7457453c7ac37518691adc6a5238294f.jpeg)














-
Recent Achievements
-