Leaderboard




Popular Content
Showing content with the highest reputation on 07/16/2026 in all areas
-
John and I don’t think the wire pulled from the axle looks like the culprit (though only the wire from front axle was pulled, the other is still in there, cut free)… only the small section near the hole with missing grommet was nicked. However, there were no warning messages yesterday. Today will be a longer tow, and I will keep the forum updated. UPDATE: It was about 650 miles from Prescott AZ to Cimarron NM, with zero warning messages, but it's still not definitive -- I will tow 300 miles in about a week, and another 500 miles the following week. Remembering that I towed 1,000 miles without these messages at the beginning of my trip, I believe time will tell.3 points
-
Time will tell! John and I don’t think the wire pulled from the axle looks like the culprit (though only the wire from front axle was pulled, the other is still in there, cut free)… only the small section near the hole with missing grommet was nicked. However, there were no warning messages yesterday. Today will be a longer tow, and I will keep the forum updated.3 points
-
Ours too, but we're hoping to go camping for a few days next week! 😎 We just had a guest Ollie here, for a few great days! 😂 But now she's gone. You might know who. Woke up yesterday, looked out our living room window and I got scared! Thought for a moment we still had a Dometic P2, oh NO! 🤣
 3 points
 -
I just noticed that with the exception of the dealer in Canada, all of them are now gone. All sales have officially moved back to Hohenwald. I think this will come as welcome news to many potential new owners. Many were opting to actually come to Tennessee for their pickup and delivery anyway. It has been reported that many dealers were taking payment, handing over the keys and sending people on their way without any kind of walk through. That's just not acceptable. Other dealers were selling the trailer, allowing the new owners to pick up their unit in Tennessee and still charging them $1.2-1.5K for "cleanup and delivery". That's just wrong. I believe this is a wise and good move for Oliver. They gave it a good run. Sometimes things just don't work out as well as predicted. Good job, Guys...1 point
-
I got this idea from a social media posting, but here's a quick mod that makes the "secret compartment" below the Pantry easier to access: 1. Pulled off VELCRO from cabinet. 2. Installed a couple 8" drawer slides from Amazon: 3. Replaced the VELCRO onto the drawer slides: 4. One and done, can't even tell the difference; except for the convenience factor - time for a cold one. Cheers! A & D
1 point
-
Congrats on your trailer. We mostly boondock with our trips running from 3 weeks to 7 week at a time. We purchased our Oliver used and it came with two awnings. In the eight years of owning the trailer, we have NEVER USED THE DRIVER SIDE AWNING. The drive side awning did come in handy for broken parts one occasion. Based on our experience, a driver side awning is dead weight. Best of luck, Olivers are great trailers.1 point
-
Yep and Yep. At least for our older trailers, annual cleaning (or more often in some locations) and gutters are the only fixes that worked in our case. GJ1 point
-
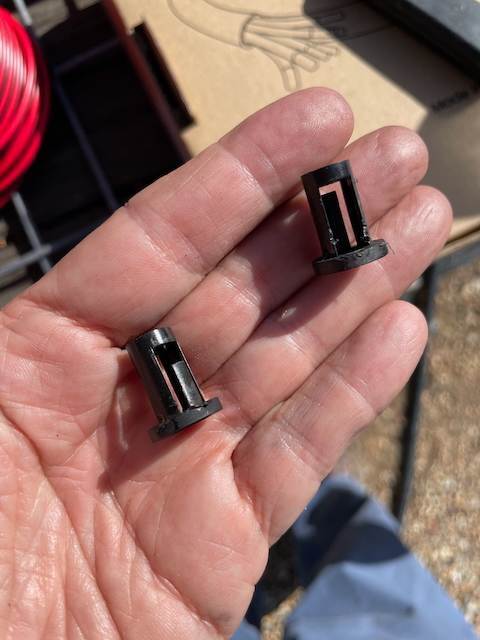
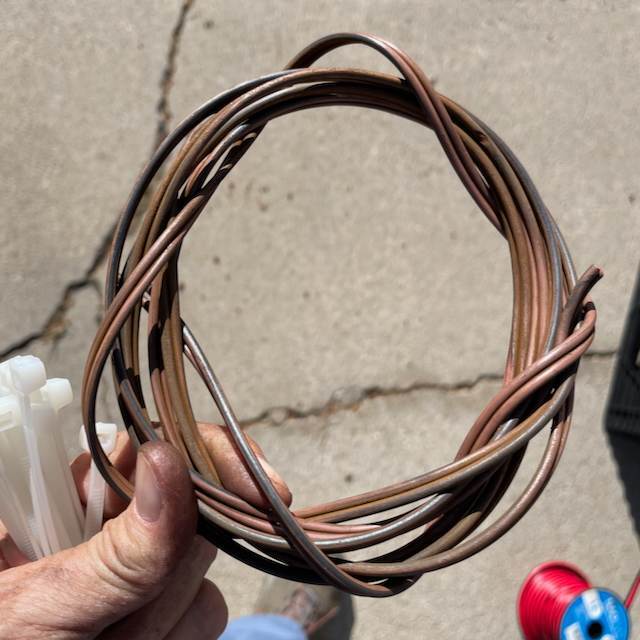
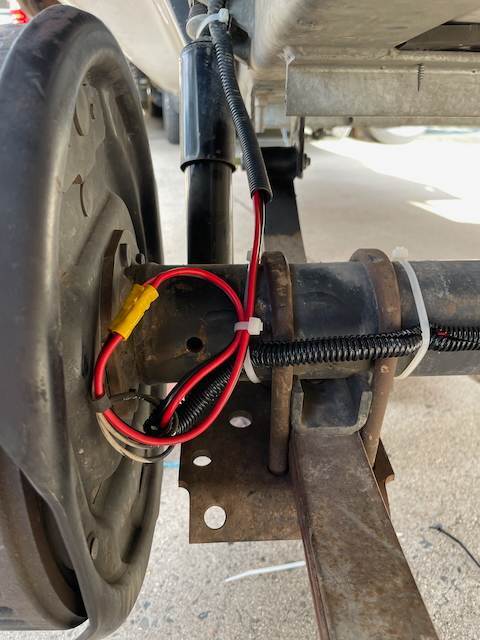
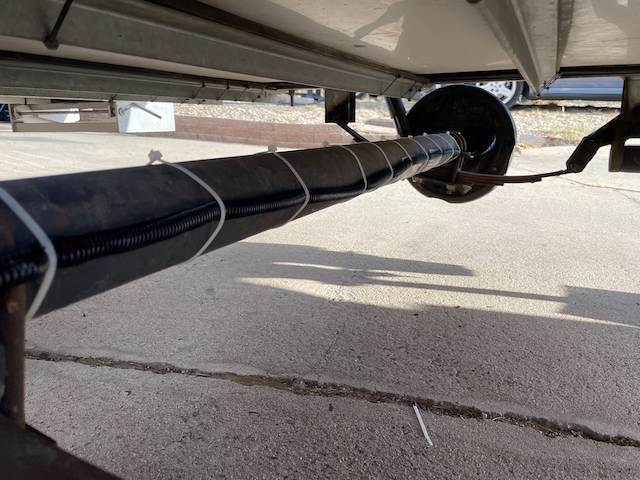
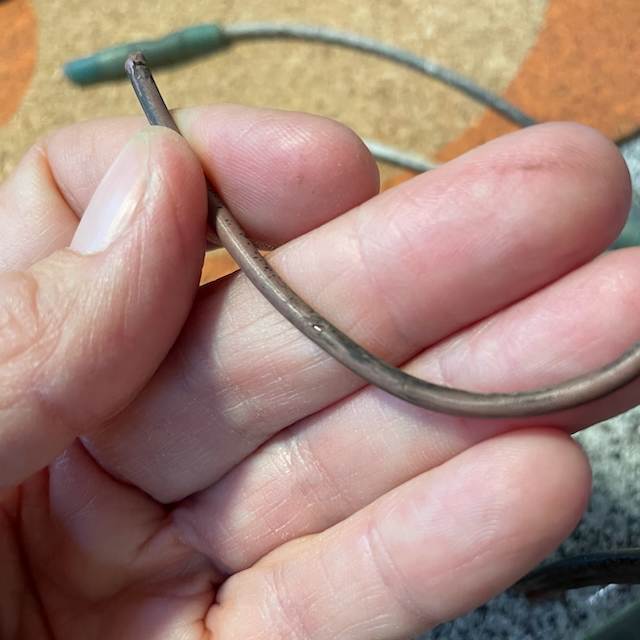
BRIEF UPDATE July 14, 2026: I accepted the generous offer by John @jd1923 and Chris to come farther west to Prescott and tackle this 'Check Trailer Wiring' issue. While my Oliver was jacked up, I was able to take care of some other regular maintenance work, and John helped out with that as well, but I will focus here on the trailer wiring. The main job was to replace the brake wires beginning at the left side (below the battery box) where the wiring exits the hull, and connecting new wires to each of the four brakes. John suggested pulling the new wires through the axle by taping them to the end of the old wires, for various reasons, but once the taped joint reached the opposite side and I needed to pull it out through that small hole in the axle, the tape broke apart. I tried pulling the new wire through that hole with some needle-nose pliers but the wire was so soft that small pieces were breaking off. So we reverted to my initial plan (based on several others here on the forum), and ran the new wires along the rear side of the axles, using split loom and zip ties to anchor it. We found that the butt connectors I ordered from Amazon did not hold; John tested one and the wires pulled right out without any effort. He had some older style butt connectors that we used, with much thicker metal inside, and then we added tape on the connections. I will probably come back to those taped joints with some liquid tape to try to weatherproof them better. (I saw that someone had used a clear sealant -- if anyone knows what that is called, I would like to find it. The liquid tape I have is black like tar.) The finished job looks really good. Note that I haven't tested by towing yet. After the rewiring, I measured the amperage at each wheel, after disconnecting the 7-pin connector from the truck and pulling the Emergency Brake pin. Each one measured about 3.0, with the left front measuring slightly higher. This was a good result in so far as the power was flowing from the Emergency Brake battery (I believe on the Oliver, this is the trailer battery; SOB trailers have a separate little battery for this power). After the tires were back on and everything was back in place, I tested again using the power from the truck through the 7pin connector, with John's son Adam helping me by being at the controls in the truck. Measuring the two main wires exiting the hull (below the battery box) the amperage was 1.85 and 1.71 on the left front and rear wires. This measurement is obviously without being in motion, and my understanding is that the truck will not provide the full power to the brakes in this case; I'm not sure what amount should be expected here, but power is flowing to both wires from the truck. Quoting from @Geronimo John in an older forum post, "... modern brake controllers sense when a vehicle is stopped and back off the power flow to the magnetic coils when stopped..." Yesterday, John and I performed another set of tests on the 7pin Cable wires where they enter the hull and exit the cable, inside a double sized junction box behind the small panel below the vanity sink (see earlier photos in this thread.) We tested amperage for each of the wires, and the 7pin cable seems to be working fine -- even jiggling the wire at the connector and below the Oliver -- so we elected not to replace it. Of course, once again, this is not in motion driving down the highway. None of this is definitive until I actually tow the Oliver, tomorrow morning. I will report again in a few days, and try to add some photos here for clarity. I don't think this is resolved yet, but making progress on eliminating things is good. Many heartfelt thanks to John, Chris and Adam -- they have all been extremely gracious hosts and very helpful, and have cheered me up as well. Many thanks as well to all the other forum members who have been helping out with ideas and links and questions. Now we are heading out for some fun! EDIT: Added Photos with captions. Some of these might be helpful for others. These are the grommets that come with the Dexter Axles -- the wires pass through these from left to right side of axle. NOTE that they have sprung tabs on them to keep them in the axle; when you try to remove them, the tabs break off. They are not rubber grommets they are stiff plastic. I tried to replace the missing one with a rubber grommet (I cut it to place it around the existing wire) but my rubber grommets were not deep enough to cover the thickness of the axle. These two came from a new Dexter axle that John ordered. This is one of the nicks in the wire where it passed through the hole in the axle without a grommet. There was a larger section of exposed copper, but I can't find it this morning. This is the brake wire pulled from the front axle; I didn't see melted insulation nor other nicks exposing the copper here. (The original rear axle wire is still inside the rear axle --EDIT: but it is cut loose from the brakes. There's a new brake wire run outside that axle as well.) John's handiwork -- thank you John. Butt connectors splicing original to new brake wires, before being wrapped in tape. I would have preferred heat-shrink style for better weather-proofing, but this is what we had to work with. The front axle with new wire from left to right brake assembly. Butt connectors (both images after crimping); the new heat-shrink style on the left didn't hold the wire at all -- it pulled right out. The old style held, but is not weather-proof. They are taped for now. I'm seeking a good quality liquid tape or other product to address this.
1 point
-
I suggest using Riv-Nuts and bolt them down if you are having such a problem. GJ1 point
-
Agree, started participating in this thread almost 10 years ago. At home working on Ollie, it’s raining, so cannot finish everything today. Hopefully will be on the Blue Ridge Parkway camping soon, will take some “Where’s Ollie” photos, too!1 point
-
Never thought it would last this long! Since we’re not able to travel for a while it’s inspiring to see everyone else contribute with really interesting places to keep it going. I had our Oliver in the driveway last weekend for some maintenance and at one point I just sat at the dinette and thought we’ve got to get on the road soon! Mike1 point
-
Where's Ollie is my favorite thread and it's 10 years old! Thanks @Mike and Carol for getting it started!1 point
-
When I first tried to get one of my track liners out with a small screw driver it also started to crack. I was extremely paranoid to continue on. I tried other things to clean the tracks. Then I final gave it another shot. when I loosen the sides with the picks I do at least 6-8" ahead. Then using the 90 degree pick I place it under the bottom side of the where I am trying to pry that side out. Since I get it out far enough to grab with my fingers I pull it up a little then continue to work it with the picks while slowly rotating the side side out. I still had one side start to crack. I have no idea if those track liners can be purchased to replace the old ones. I did get daring on one window a slide the track liner one way be a few inches. It was snug so I stopped not wanting to any more damage to the fragile track liners. I do agree, these windows suck! What happens when these windows fail completely? Is there a way to salvage this expensive shell to make it back into a usable camper??? I know that components in the camper are going to fail. There are things that will be hard to replace, Like the bathroom door/ handle, the fridge, all of the windows. I know that many Camper Trailers with 22K miles and 6 years old would have started to fall apart already. But these are not a cheap A-- Trailers. I bought Oliver for the quality and longevity and not an Airstream. Sorry for the rant.1 point
-
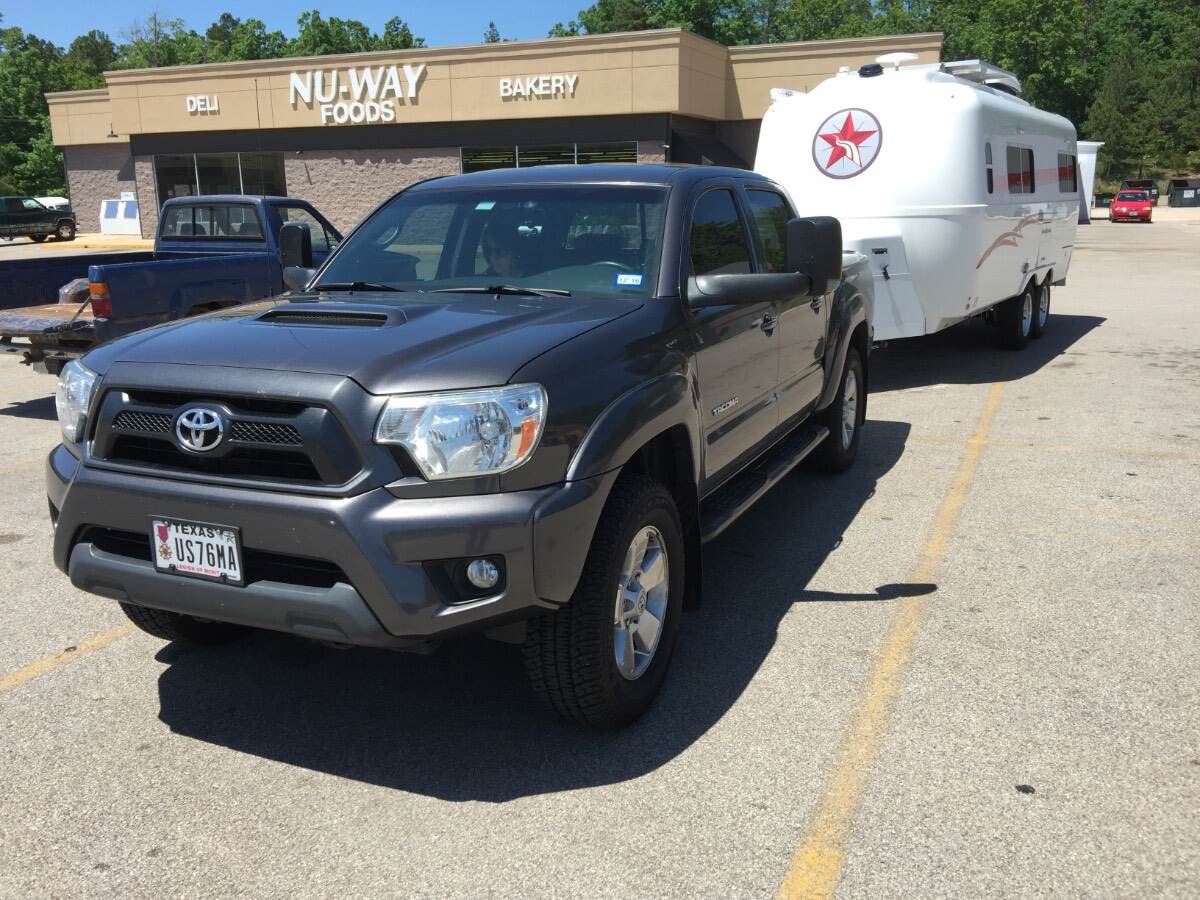
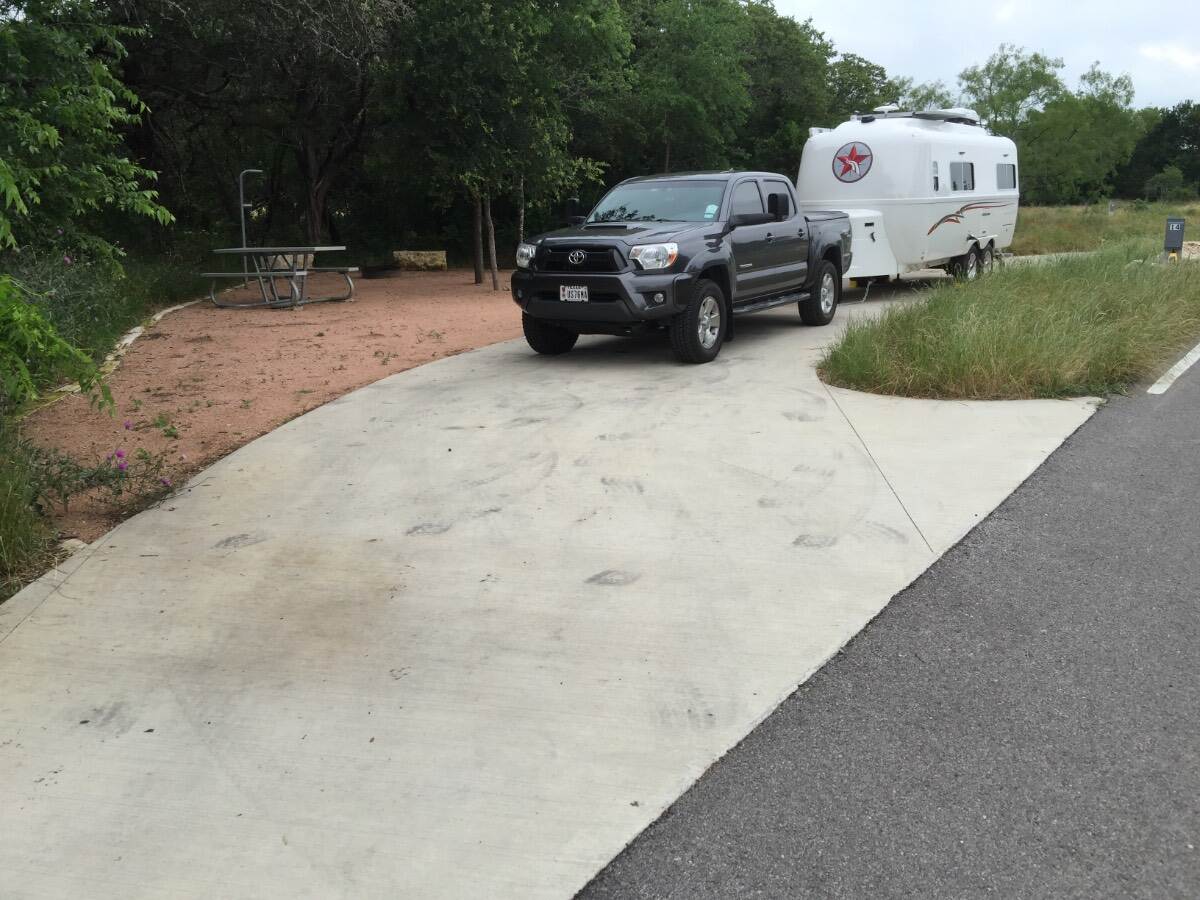
My Tacoma was a 2012 and I had installed the TRD Supercharger, so plenty of power. The limitation was weight and range. Be careful not to overload - tongue weight, your body weight and cargo add up fast. I was stopping every 200 miles or less to fill the gas tank. Also, be aware that the overall weight of the Tacoma makes it easier for the trailer to push around in certain circumstances. I was always cautious on downhills and downhill curves. We’ve always liked the Tacoma’s we’ve owned, they just aren’t optimal for towing a 6,000 pound paperweight! After upgrading to a couple of half tons we’ve now been towing with a 2500 diesel for the past 5 years and the difference is night and day. A Tacoma will do the job, just be wary of its limitations! Mike
1 point
-
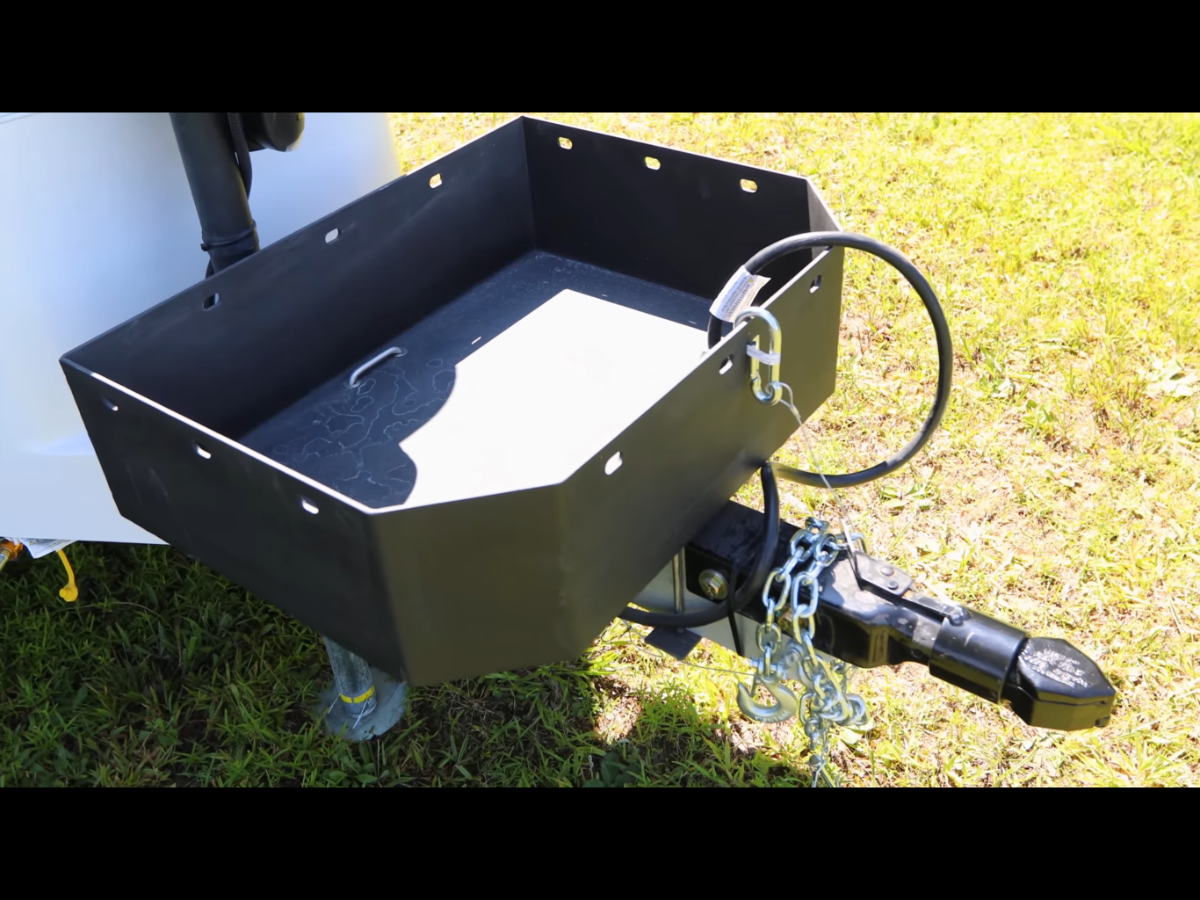
Yes, you are correct. Oliver has had to source another coupler supplier. Bulldog is supposedly in bankruptcy proceedings as of Oct of 2025. Hopefully they will restructure. Pic of new coupler -
1 point
-
Welcome and Congrats and enjoy the delivery day! There is something really special about taking delivery of a brand new Oliver, it was for us. Before you know it your day will be here!1 point
-
Welcome! I initially towed with at Tacoma as well. It didn’t take long to upgrade to a half ton. Will be interested in how it goes for you. Mike1 point
-
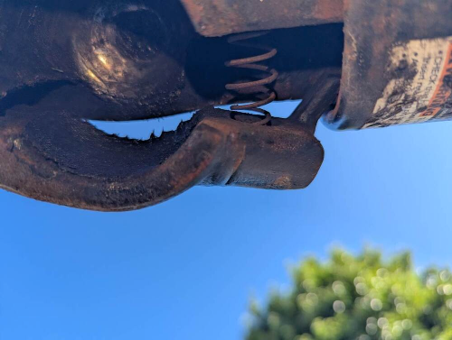
First, I would suggest a serious de-greasing: So much gunk in any hitch can cause it to stick when hooking up. GJ
1 point
-
Okay, thanks. I still can’t imagine the Bulldog popping off of a correctly sized ball. Mine is sort of close fitting. I’d still check the diameter accurately just in case and at least settle that question. Anyway I hope you can figure out what actually happened.1 point
-
B & W Stow and Go with marked 2" & 2-5/16" on the top of each ball1 point
-
John, if the hitch was closed and locked closed…..maybe a dumb question but are you sure that your hitch ball is in fact 2 inches and not 1 7/8? Accurately measure with calipers.1 point
-
Bob, Any time your weep holes are blocked by felt or debris, water cannot flow and escape/drain. My weep holes are not blocked by felt and are clear. We have never had an issue with water intrusion on our 2020. I am meticulous about keeping the window tracks clean after every trip. I use compressed air from a can on trips or my air compressor at home. On much longer trips I will still periodically check my window tracks for dirt and debris to prevent this exact issue. Along with window gutters which do a good job of redirecting light rain off our windows, I have found it’s really critical to have our Oliver dead level when set up. When level even in a hard rain I have watched my window tracks slowly fill up with water and drain out the weep holes as designed, but the trailer must be level. We have been through some really hard “car wash” side way rain type thunder storms as recently as the last Oliver Rally and have not had any water intrusion. I attribute this to clean windows tracks and a level rig. I am not sure you can replace the felt, I think not. The exterior rubber seal covering your window track should be snug tight against the window glass and seated in the window track. When I reinstall the seal after cleaning the tracks, I install it with a slight angle from the glass to the edge of the frame. You also do not want any gap in this exterior seal along the track. A gap in the seal will allow in more water than the window track can handle and this will result in a trickle or overflow into your interior wall. Not the best window design IMO as it requires regular inspection and cleaning. Hopefully Oliver has addressed the window design with new tilt out windows which hopefully completely eliminate this issue. Others will surely chime in with their thoughts and suggestions. The above process has worked for me since we purchased our Oliver new in 2020. Patriot 🇺🇸1 point
-
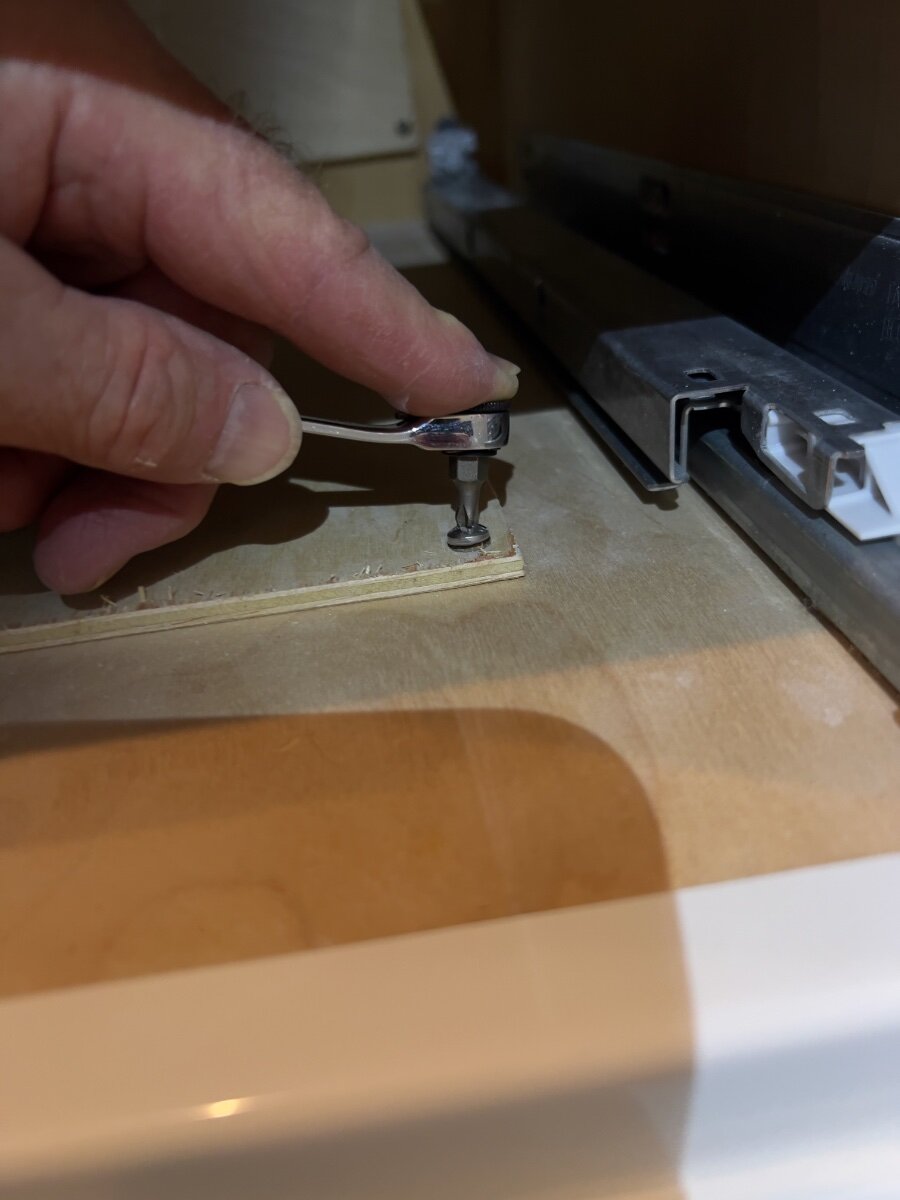
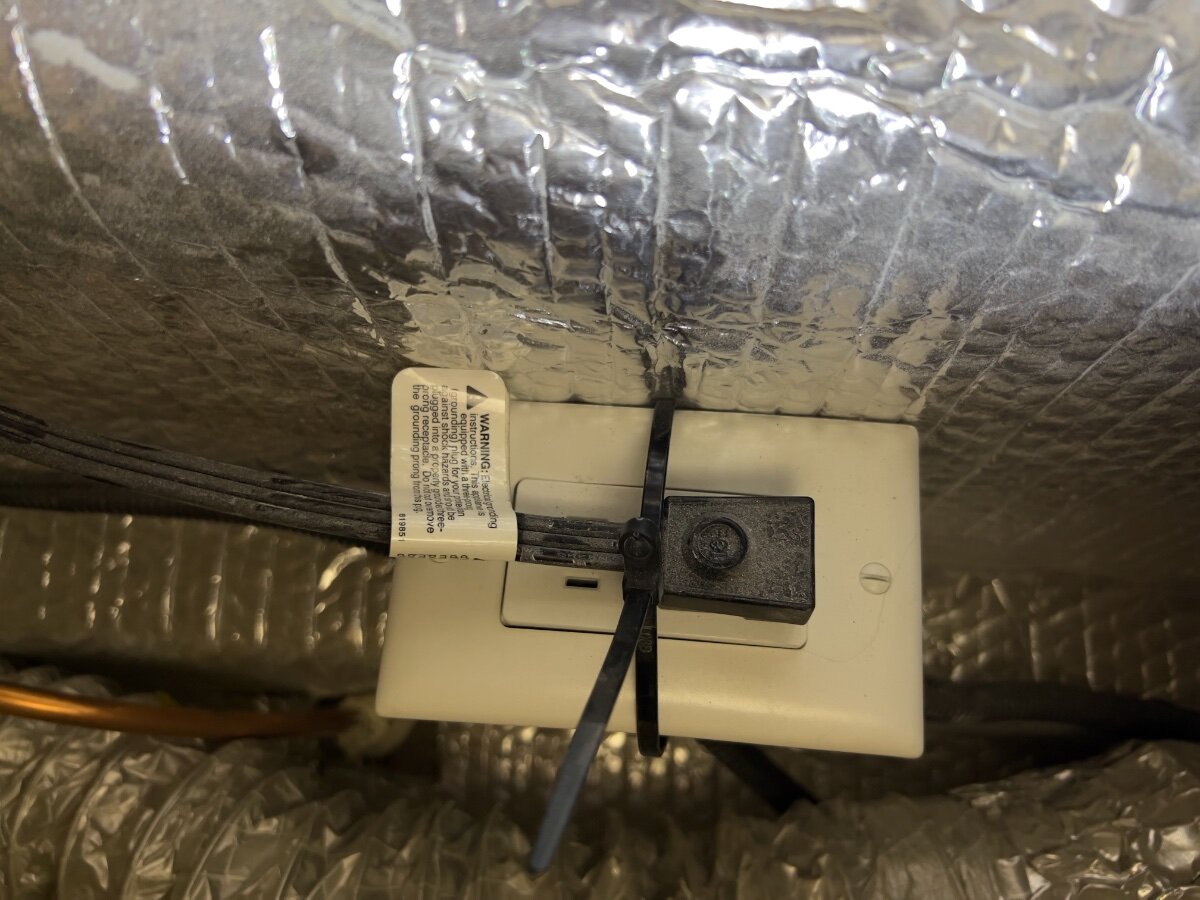
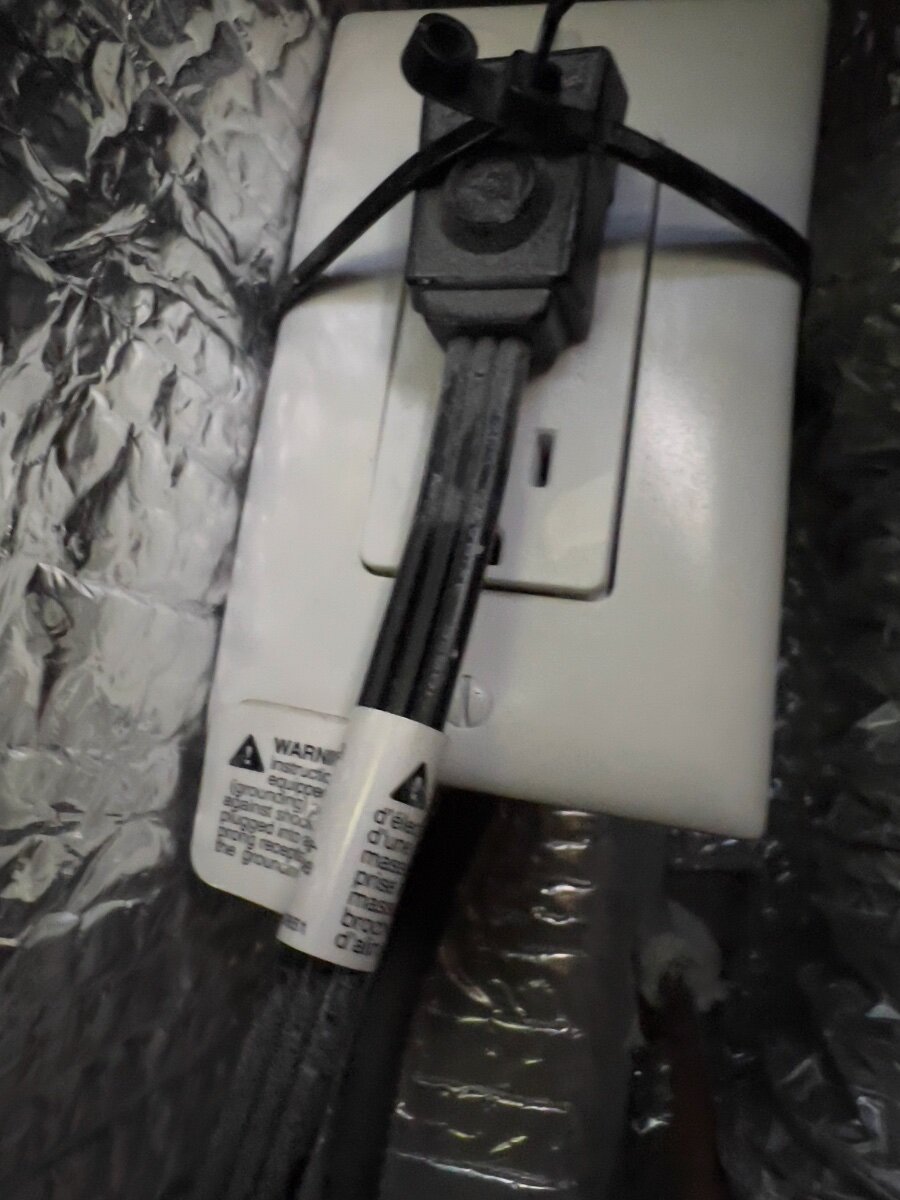
Yesterday, I retrieve OTT LEII Hull 990 from storage to prepare for a photo trip to shoot fall color in The Smoky Mountains National Park. Upon arrival home, I unhitched, connected shore power and turned ON the Norcold 3-way Refrigerator. The refrigerator would not startup on AC shore power and the fault indicator on the door displayed an "A". I consulted the Norcold N41x_ N51x_Service Manual and found troubleshooting steps in P. 21. I checked the AC breaker in the power panel under the rear dinette seat, which was ON. I checked the GFCI protected outlets and they were ON. Next, I removed the exterior access panel to the refrigerator, next to the entry door. I removed the AC supply line from the refrigerator (located in the lower left, near the control board cover) and found NO AC voltage on the supply line. This morning, I phoned OTT Technical Support and described the problem and symptoms and asked if there we any other breakers or fuses between the breaker panel and the refrigerator. Mike Strong informed me there were none. He did, however, tell me the refrigerator AC supply line plugs into an outlet below the left/forward galley drawers. This outlet is accessed by removing the bottom two drawers and removing a thin plywood hatch attached with four wood screws to the bottom panel of the drawer cabinet. I proceeded to remove the drawers and found the plywood panel. Removal of the wood screws requires a short Phillips screw driver. I used a small ratchet set with a ¼" Phillips No. 2 bit to remove the screws. I found the outlet and the AC supply line to the refrigerator. The AC plug was partially dislodged from the AC outlet. I reinserted the plug and tightened the zip tie, which had been installed to prevent the plug from vibrating or otherwise coming out of the outlet. With AC power restored, the refrigerator now operates normally. The first step in the troubleshooting flowchart on P. 21 of the service manual calls for checking the AC power input to the refrigerator. However, it provided no clue to the existence of the concealed AC outlet beneath the galley drawers. My thanks to Mike for informing me where to find the concealed outlet. Our trailer was delivered in mid-February, 2022, and now has traveled over 12,000 miles. I suspect the cause of the AC plug dislodging from the outlet was vibration while underway. I would expect other OTT owners will have similar experiences. See photos below. Access hatch removal AC outlet as found with plug dislodged (note position of zip tie) AC outlet and plug with zip tie relocated and tightened Regards, Don
1 point
-
The glides are soft-close style with a detent in the retracted position, just like the Oliver kitchen drawers... We ordered the slides yesterday, they arrived here this morning, it's an easy/quick DIY mod for less than $12: Cheers!
1 point



.jpeg.0f93612bbf4fb0d95523906b33480b7c.jpeg)
.jpeg.7457453c7ac37518691adc6a5238294f.jpeg)






-
Recent Achievements
-