Townesw
-
Posts
511 -
Joined
-
Last visited
-
Days Won
18
Everything posted by Townesw
-
I was also displeased with the documentation provided on Oliver University for the equipment on my Oliver. I took pictures of the identifying information or data plates on each piece of equipment and then downloaded and printed the specific manuals for the model number and, if applicable, the serial number range, for the equipment onboard my trailer. You can often find installation and service manuals also, which will provide more information than is available in owner’s or user’s manuals alone.
-

Timken Wheel Bearings - USA manufacture.
Townesw replied to BackofBeyond's topic in Mechanical & Technical Tips
From Timken regarding my bearings purchased through Amazon ”Thank you for the clear pictures. I can confirm that all the markings line up with the packaging and everything appears to be genuine Timken product. In the future, please take the extra time to purchase from an authorized distributor.“ -
When I was using the Andersen system I also loosened and tightened the chains to hitch and unhitch. I carried a 1/2 inch drive ratchet with a real 1-1/4 inch deep socket on it in the truck. Using the front jack to raise the rear of the tow vehicle puts a lot of wear and tear on that jack.
-
Timken Wheel Bearings - USA manufacture.
Townesw replied to BackofBeyond's topic in Mechanical & Technical Tips
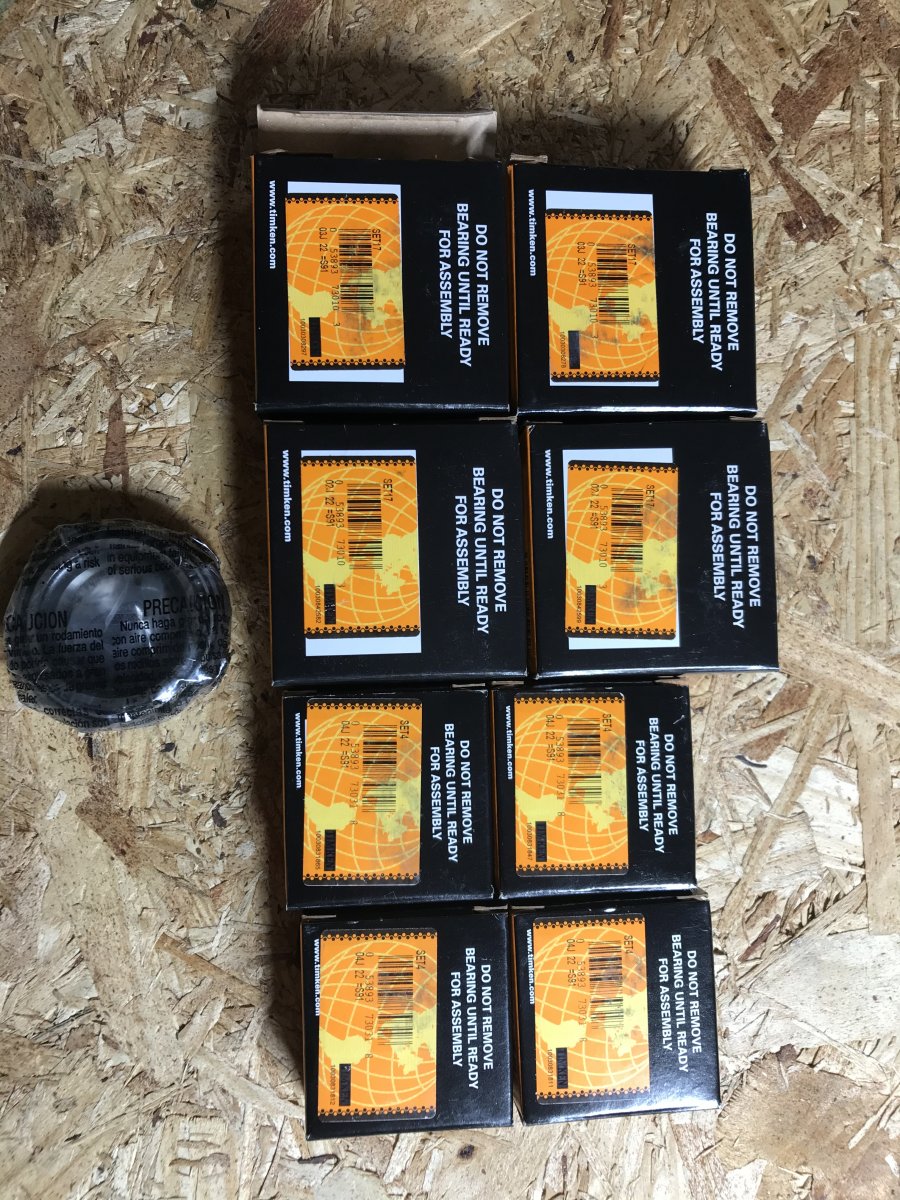
John, compare these to your boxes. Do they look the same? Also, zoom in real close and see if you have these details on your boxes I couldn’t see them until I zoomed in to read the very small print in the long and lat lines. I bought these June 2019.
-
Timken Wheel Bearings - USA manufacture.
Townesw replied to BackofBeyond's topic in Mechanical & Technical Tips
John I didn’t save a link to where I bought these bearings, but they were packaged just like other Timken bearings I have handled in the past and they look and feel better than Chinese bearings I have seen and handled. I’m satisfied with them. If I send you my spares will you let me know if these are real or counterfeit? Thanks, Bill -
Timken Wheel Bearings - USA manufacture.
Townesw replied to BackofBeyond's topic in Mechanical & Technical Tips
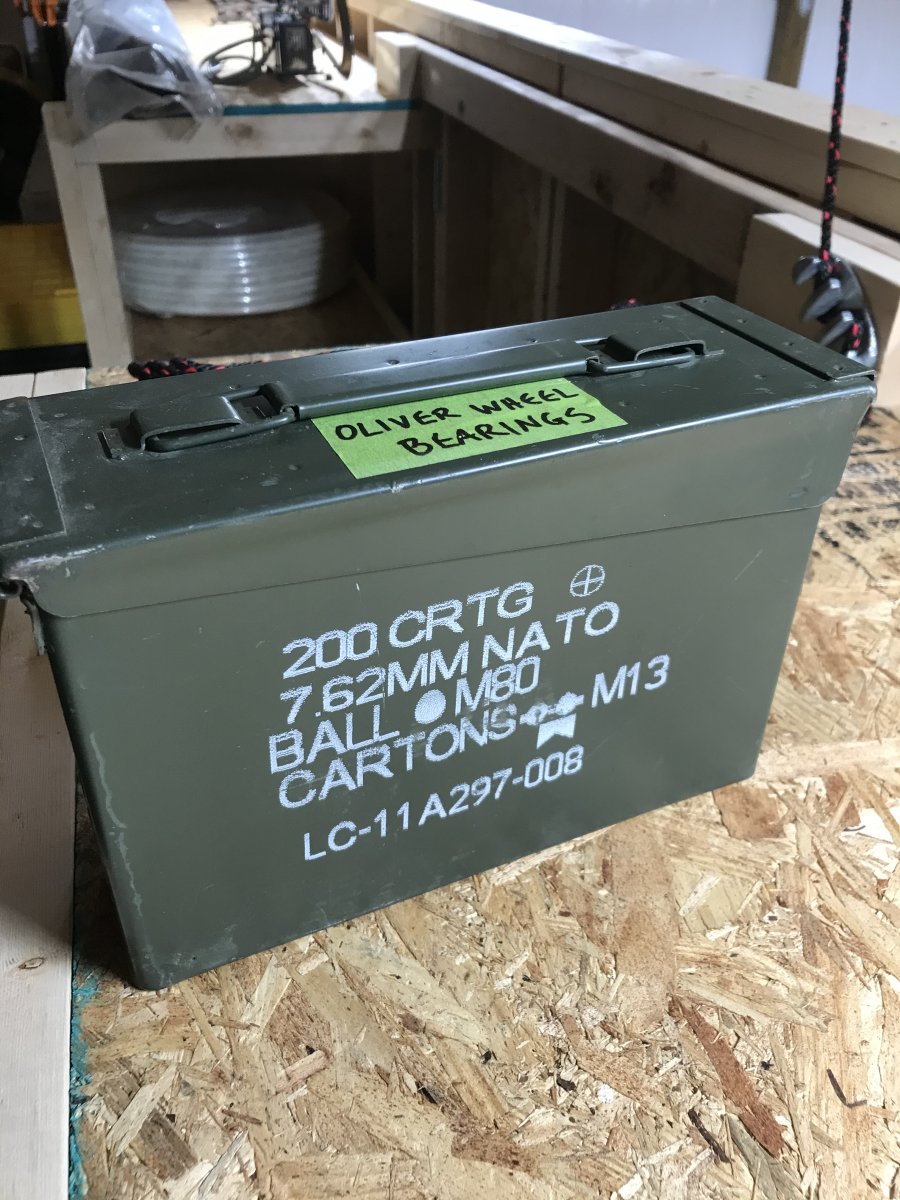
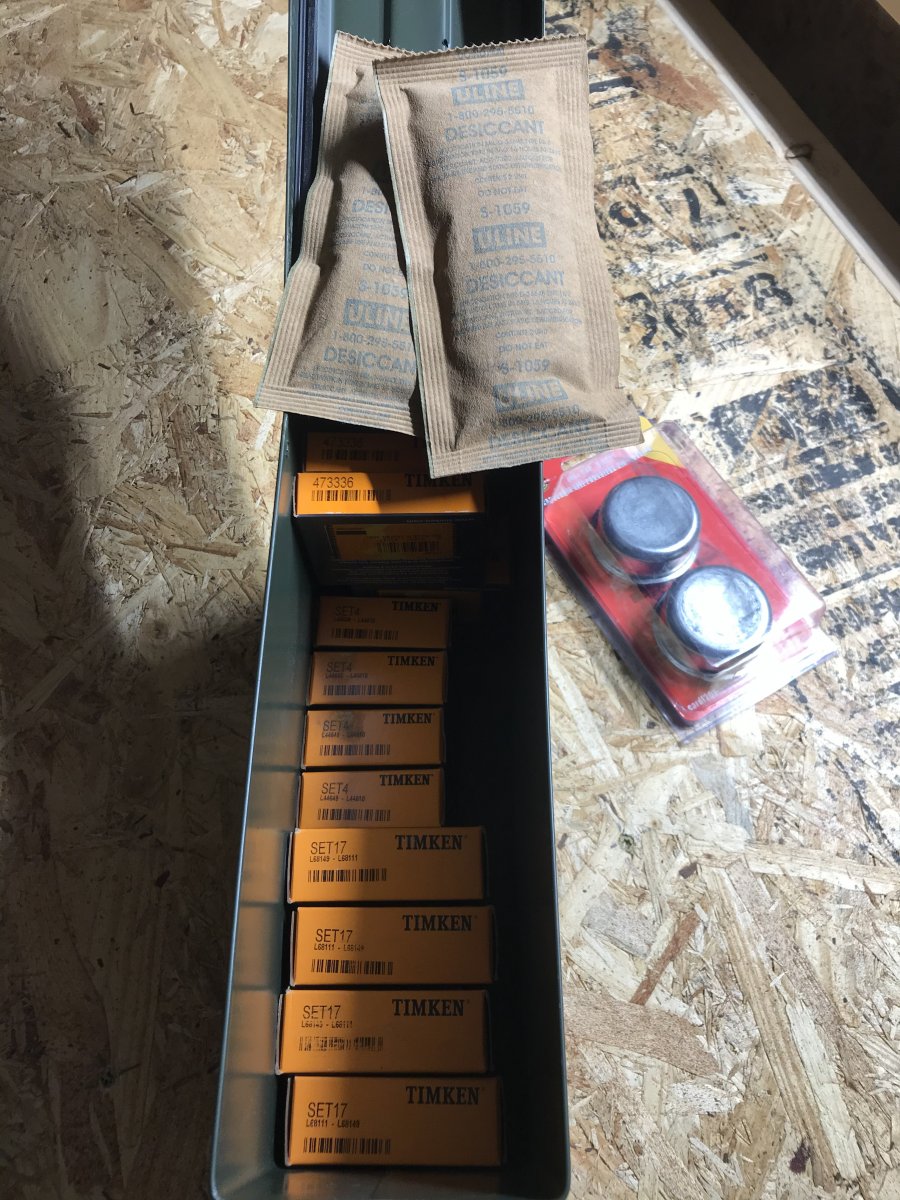
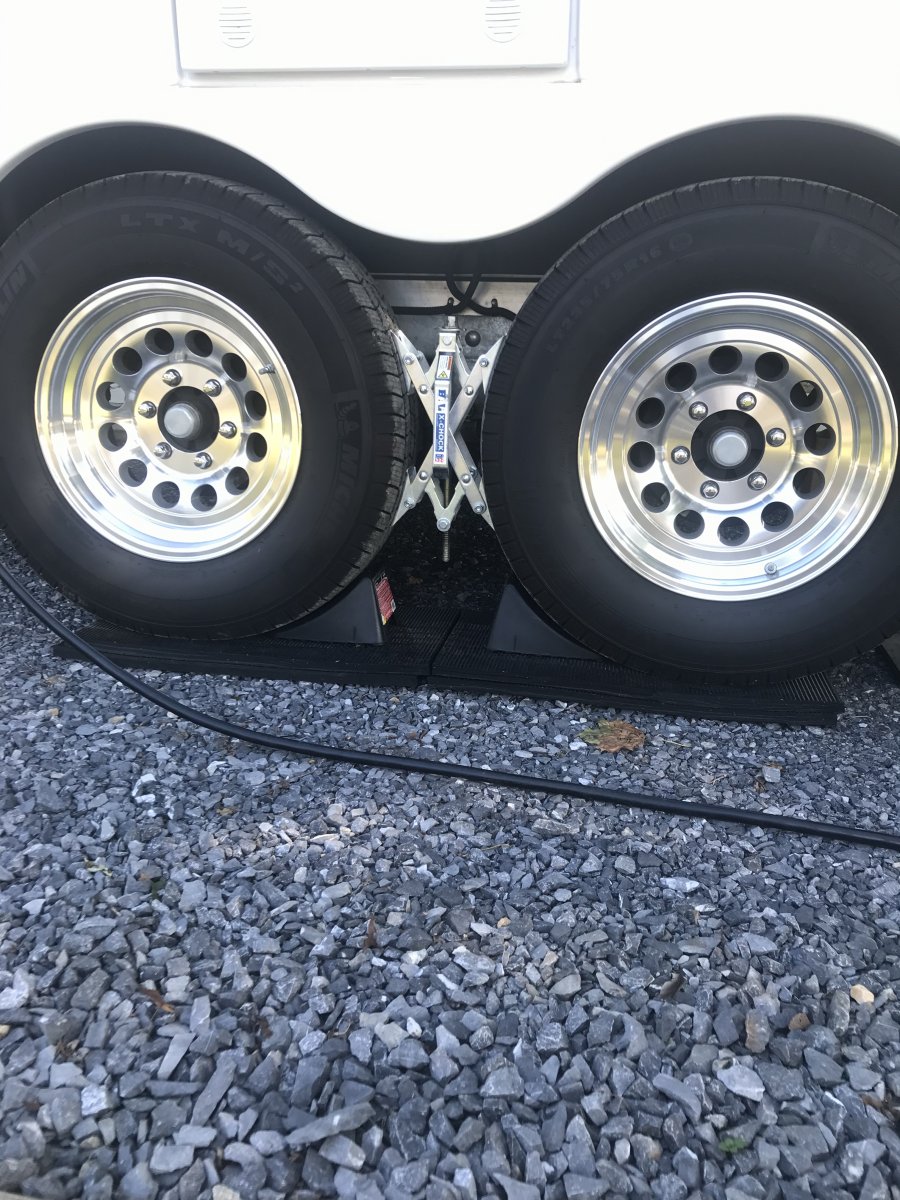
I service my own bearings. I ordered enough USA made Timken bearings and seals to do all 4 hubs twice. The Timken bearing sets were individually packaged in a sealed plastic wrap inside a box unlike the Chinese bearings I see usually loose in a clamshell blister pack. I agree with BackofBeyond, the bearings themselves look much better than Chinese bearings. I replaced the original bearings and seals at 6000 miles with USA made Timkens. I put the other 4 sets, along with a couple of extra hub caps and 2 packs of desiccant in a 30 cal ammo can. Before I service bearings again I will order 4 more complete sets to have on hand. When I service a hub I have to use a new seal, so all all I’m saving by cleaning and repacking all of the used bearings is about $44, so I just go ahead and use new bearings and seals on all 4 hubs. I removed the wheel centers from all 4 wheels. I check the hub temps by hand or non-contact thermometer when I stop after having been running at speed for a while. I can also adjust bearing play if necessary without having to remove the tire/wheel assembly and then go through the complete wheel nut re-torque procedure. I installed Dill TPMS sensors inside each tire. The Dill system displays the pressure and temperature inside each tire. Whoever is riding co-pilot occasionally checks the Dill display to see if a tire is running a pressure much lower than the rest or a temperature much higher than the rest. It’s interesting to watch the pressure and temperature vary due to ambient air temperature, speed, road surface, wet or dry pavement, location of the sun, etc. https://www.dillvalves.com/wp-content/uploads/2019/09/Trailer-TPMS-Catalog-Page.pdf Well that’s enough rambling. I guess I should have just said that I agree with BackofBeyond regarding USA vs. Chinese bearings 😜.
-
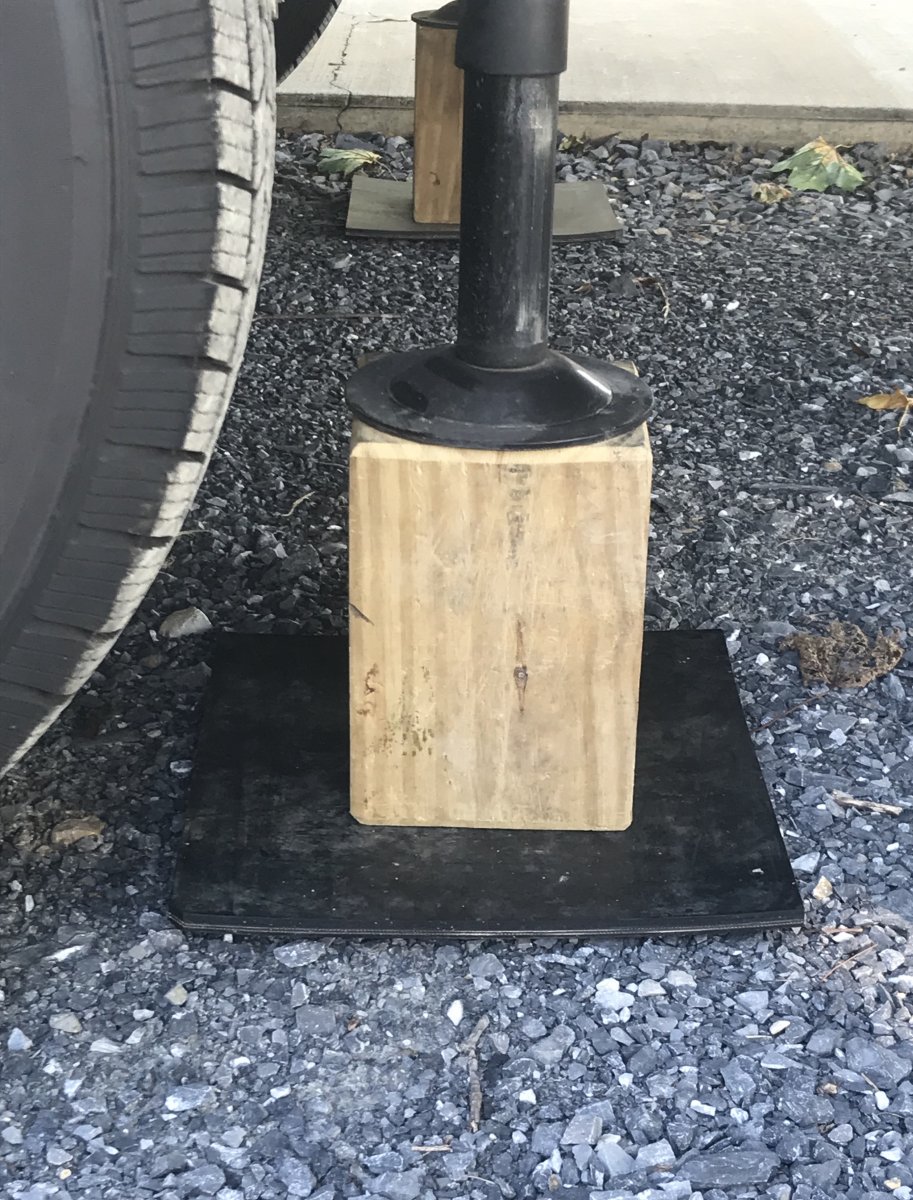
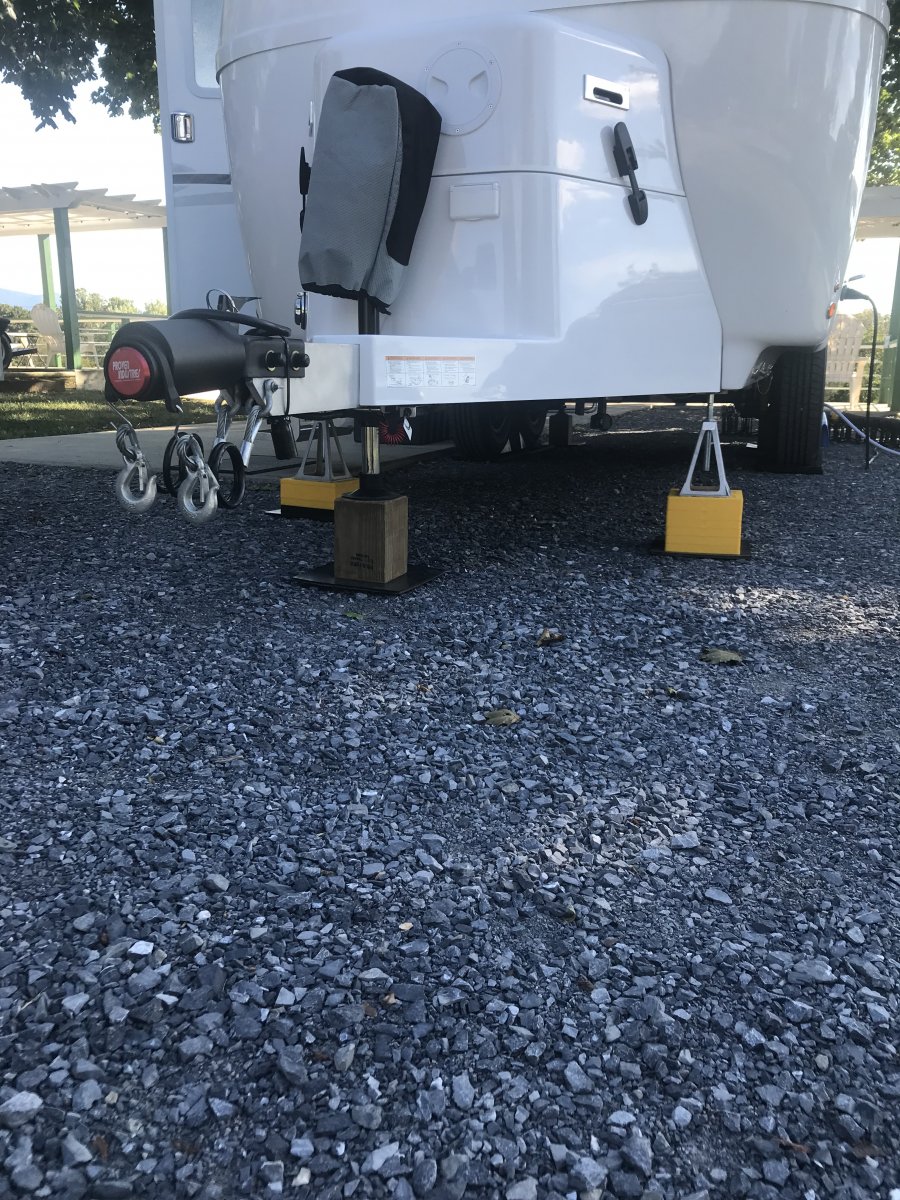
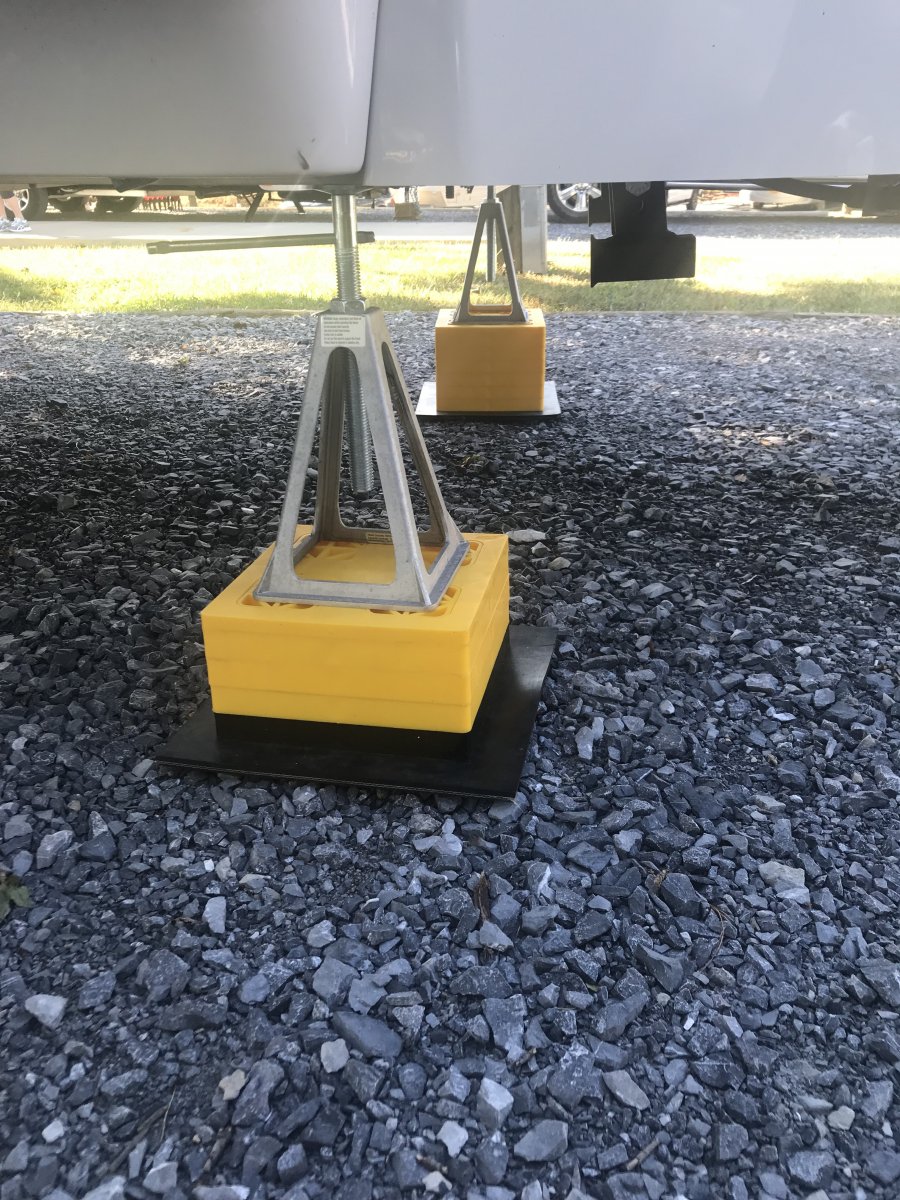
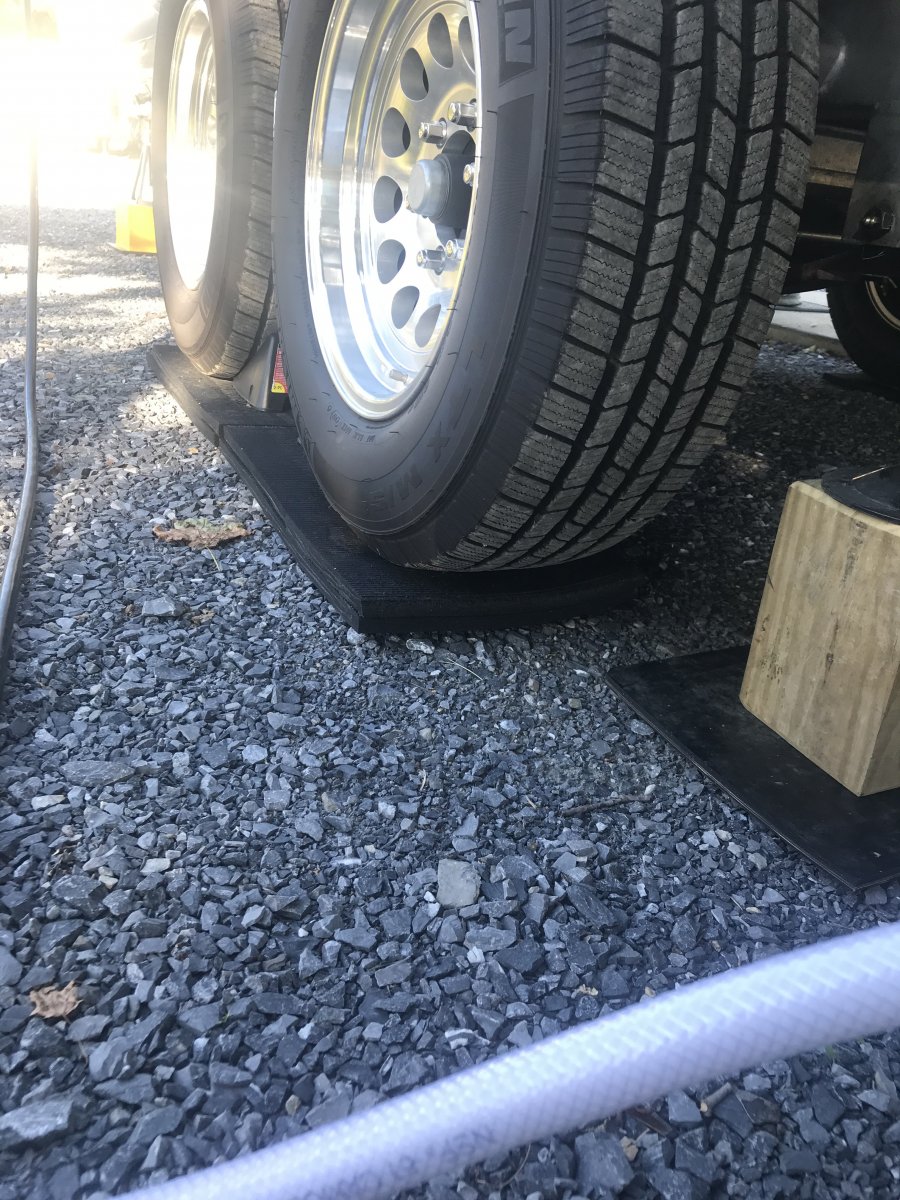
Don’t buy these https://www.amazon.com/gp/aw/d/B0751TG8MH/ref=sspa_mw_detail_1?ie=UTF8&psc=1 I tried to use them on 2 separate occasions (on gravel and then on asphalt) and they just scoot along in front of the tires. Read the reviews and heed the warnings. I use a stall mat from Tractor Supply cut into 12x24 inch pieces. Works on any surface, conforms to unevenness in the surface (unlike hard plastic or wood), and leaves space to use a chock effectively. I also use an old piece of heavy conveyor belting material cut into squares that fit in a milk crate, and 6x6x8 inch tall blocks (left over from shop construction) that can be used as shown or laid down. The 8 inch height dimension was arrived at using the highly scientific and extremely accurate TWIH method of sizing things, and further validated by TLAR analysis. (That’s What I Had and That Looks About Right) I only use these jack stands if we are setting up for extended stays or if I have to set up with the front end elevated. These don’t carry the weight of the trailer, they are just snugged up to reduce movement in the front.
-
Listen to what these folks are telling you about the 3/4 ton pickups. I started towing our Elite 2 with a 1/2 ton Chevrolet gas burner using the Andersen. It was okay but I was only 20 pounds under my max GVWR and a 400 mile day on the road would wear us out. You can make all the weights work out on paper but you can’t get a feeling for how that loaded vehicle is going to ride or perform under the conditions you will experience on the road. I traded up to a 3/4 ton Chevrolet 2500HD with a Duramax Diesel. No worries about exceeding the GVWR and it it pulls and stops the Elite 2 great. Very comfortable ride. My wife enjoys driving it. No need for the Andersen. Uphill, downhill, dry or wet, hot or cold, accelerating onto the Interstate, rough roads, dips or humps at bridges, strong cross or headwinds in wide open areas, pressure waves created by passing semis, avoiding animals in the road, whatever, much better experience. And after a 400 mile day I don’t feel like crap while I’m setting up for the night. But on second thought, go ahead and start out with a 1/2 ton. That way when you do trade up it will make you appreciate the 3/4 ton that much more.
-
I recently realized that if my factory supplied power cord was missing I would have no way to connect shore power to my camper. I do carry a 25 foot 30 amp extension cord. I am going to add one of these to my kit https://www.campingworld.com/m30a-f30a-90°-locking-ring-adapter-85558.html This should allow me to use my 30 amp extension cord as a primary power cord. Disclaimer: I haven’t tried this yet. We are on the road. I’ll have one waiting for me at home to try in a few days. Edited to add: This adapter works with a 30 amp extension cord to serve as a primary shore power cord.
-
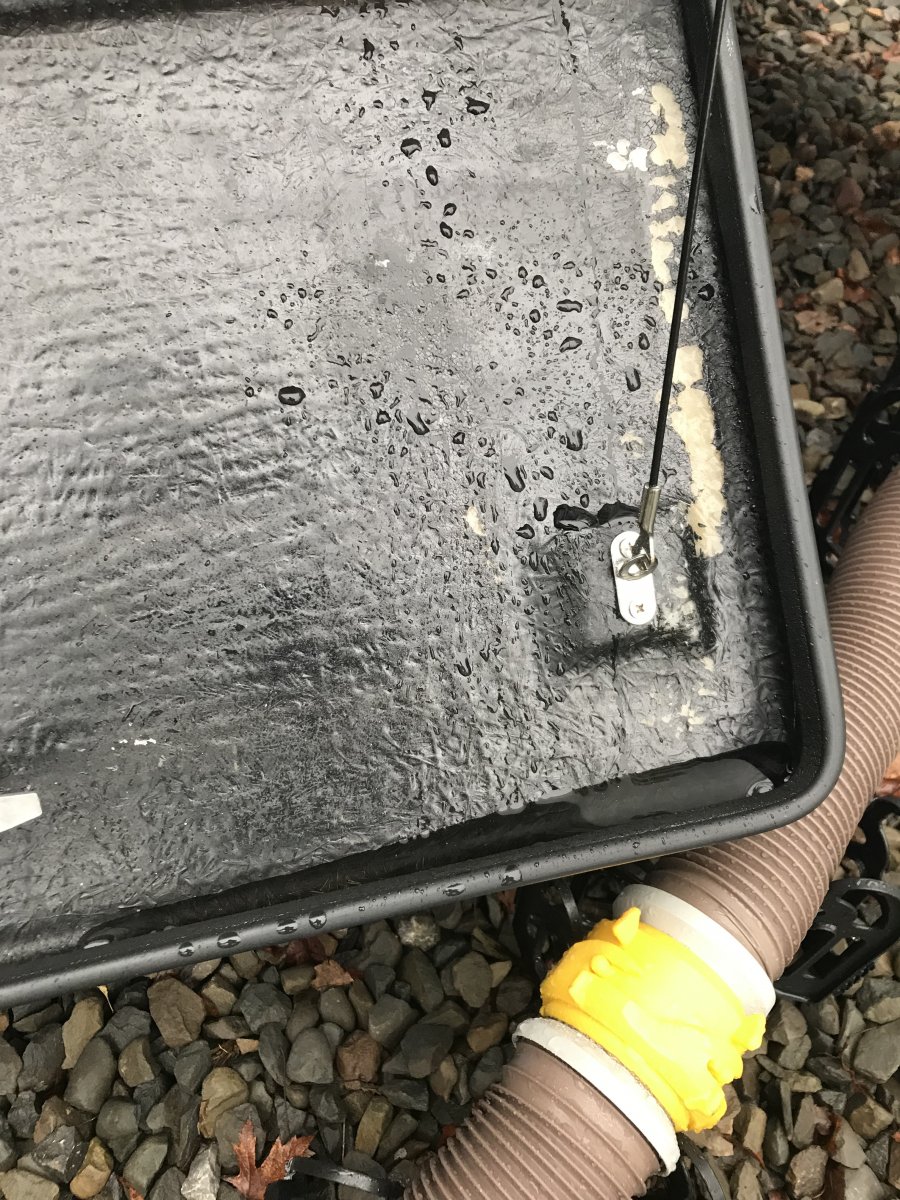
I had considered replacing the black and gray manual valves with Barker Electric valves because I don’t like the way the water runs onto the open basement door when I have to dump in the rain.
-
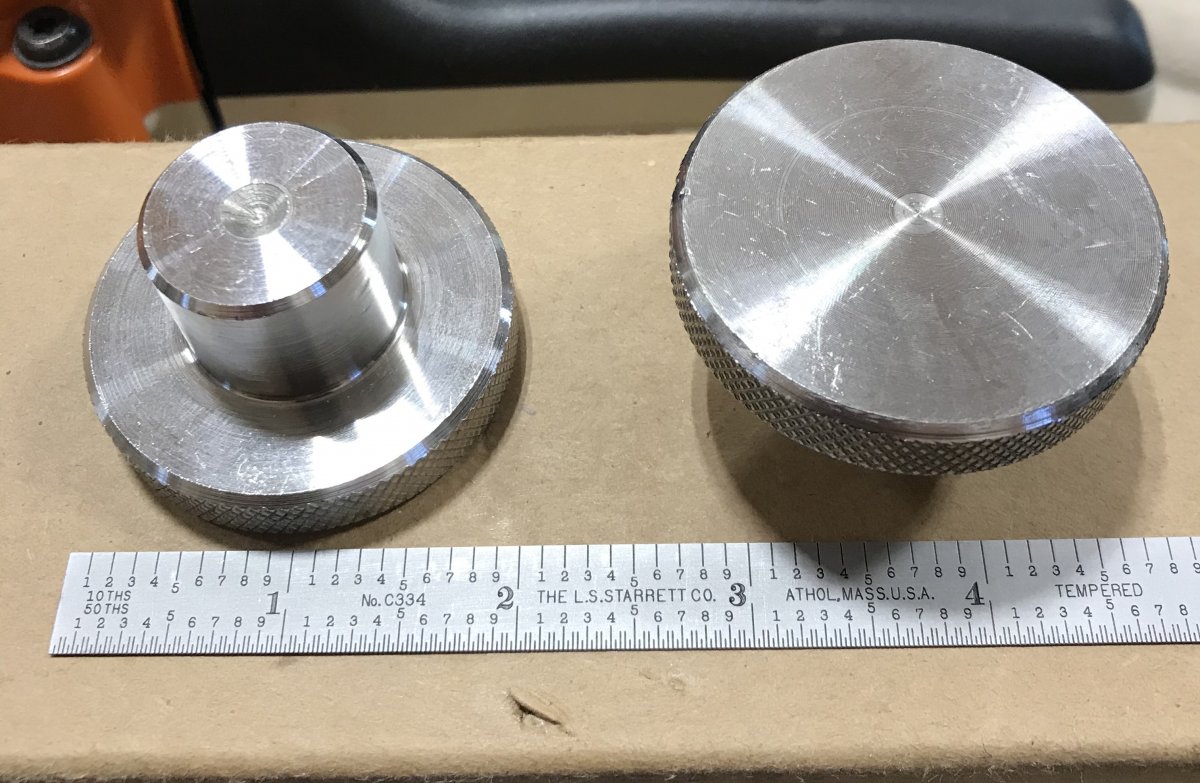
Now you need to replace those black handles with some 303 Stainless Steel knobs https://www.mcmaster.com/#60205K37 drilled and tapped for M6x1.0 threads.
- 17 replies
-
- 2
-

-
- modifications
- drain
- (and 1 more)
-
Hello to the Oliver Elite parked in the Pleasure Pier parking lot in Galveston at 3pm February 4. Hull 313 is parked in Hitchcock TX headed south tomorrow. Mods please add to the correct thread. Couldn’t remember the name of that tread.
-
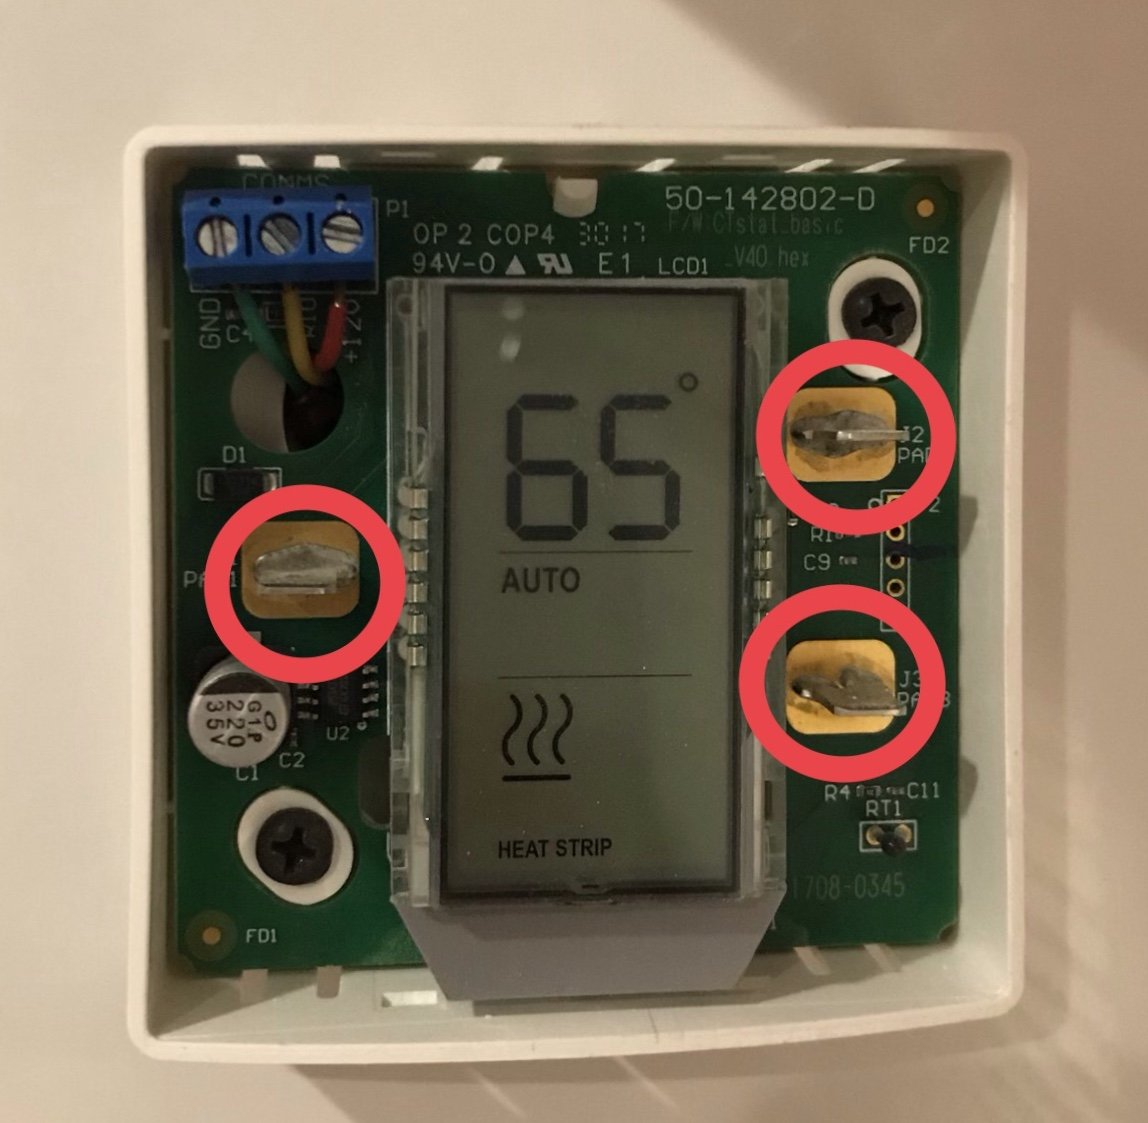
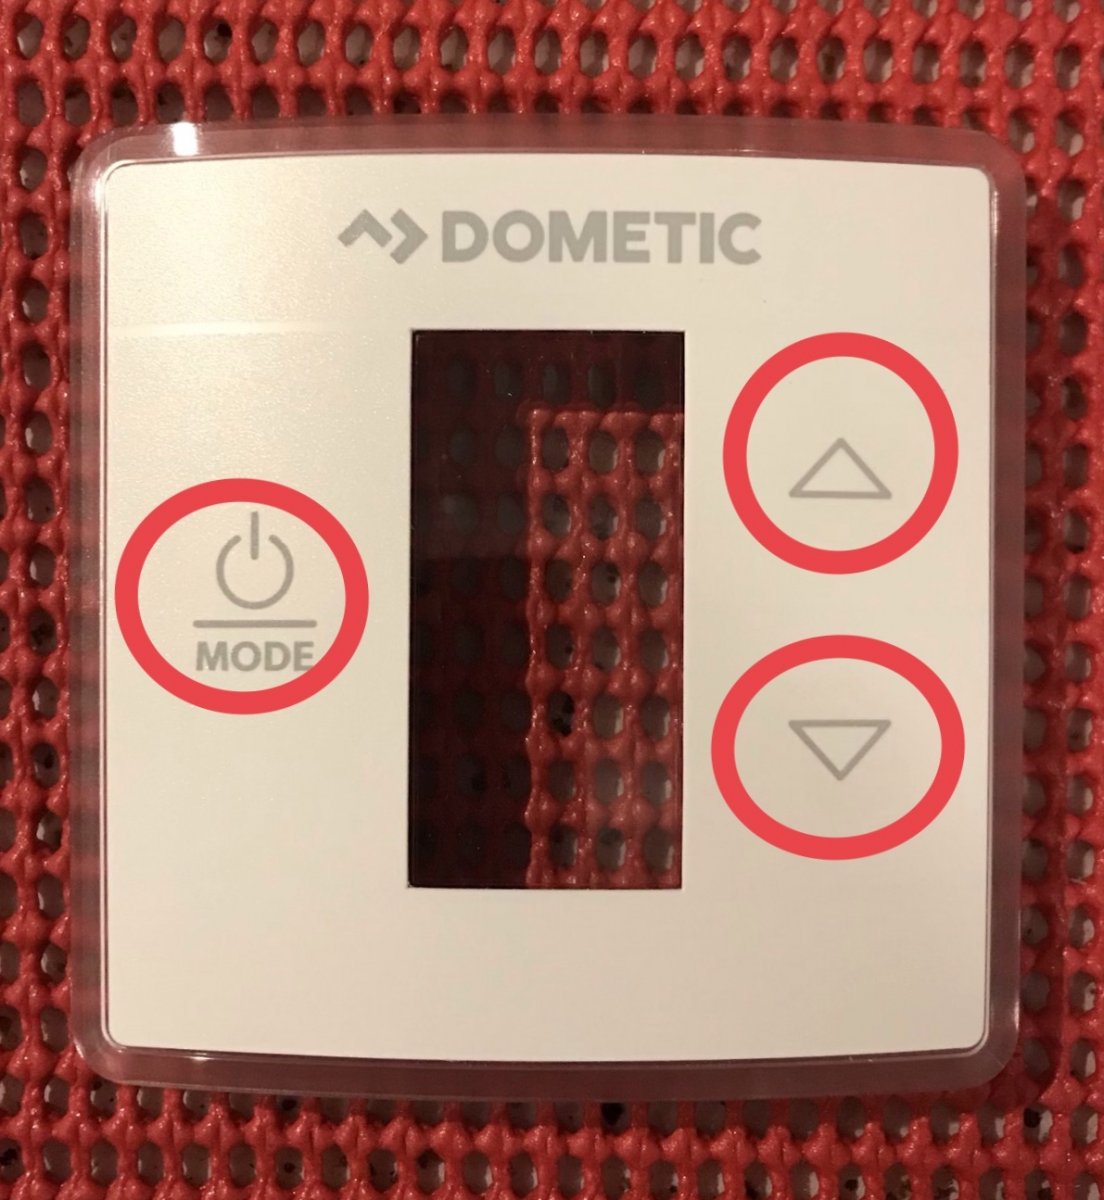
Let’s test the faulty faceplate theory. Take your faceplate off and try just touching the 3 tabs that are circled in the following picture. Those 3 tabs correspond to the 3 “buttons” on the faceplate. Don’t push them, just lightly touch them and nothing else. I just did it to mine and I can operate all modes of the heating and cooling system with the faceplate removed.
-
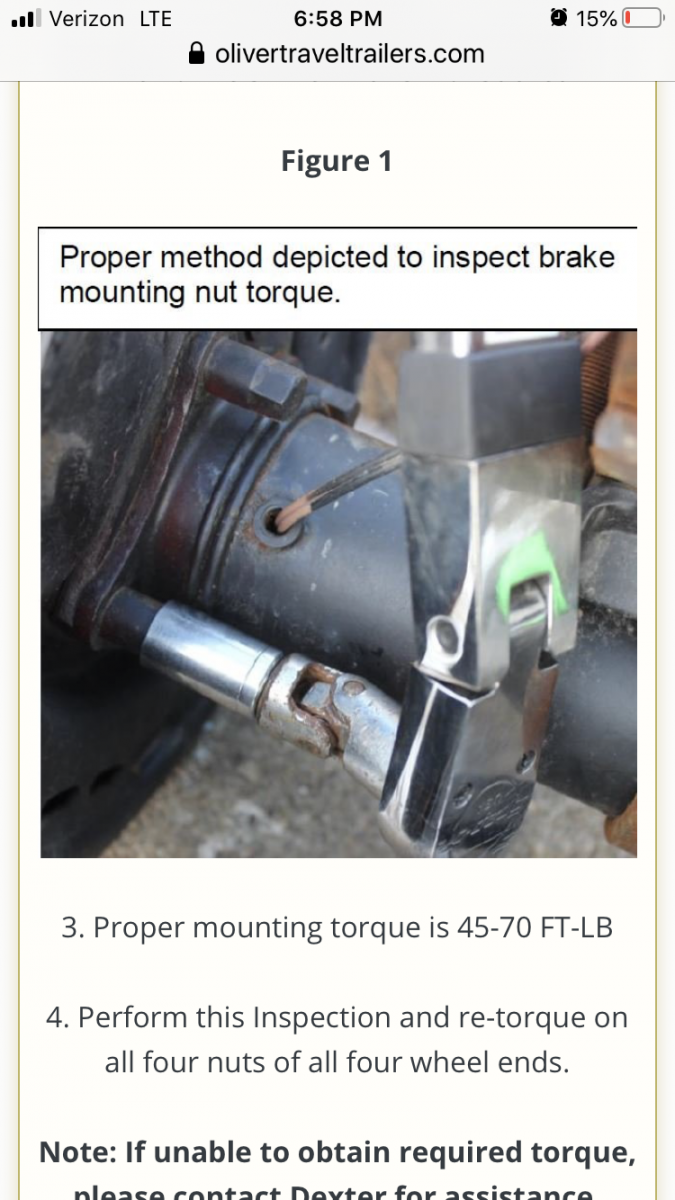
Dexter Axle BULLETIN Reference # 1ZP9-ABC12-19
Townesw replied to BackofBeyond's topic in Mechanical & Technical Tips
I don’t think a torque setting between 45-70 lb-ft applied with a torque wrench using a universal joint as shown in this photo actually transfers the set amount of torque to the fastener. From what I have read it is much lower and can vary greatly depending on how the torque wrench is supported and the angle of the universal joint. I checked mine earlier this year and found that I couldn’t get a socket/torque wrench on them so I tightened them as tight as I could using a 9/16 inch box end wrench. May go back again with a socket on a longer breaker bar. If all 4 nuts fell off the tire/wheel assembly isn’t going to come off because the hub/drum is held in place by the spindle nut. I don’t think the backing plate can move far enough into the hub/drum for the mounting studs to clear the holes in the backing plate mounting flange. Don’t get me wrong, I want my backing plate nuts tight, but I’m just thinking about what might happen if all 4 nuts fell off.
-
Dexter axle, grease zerks, and non-Euclidian Geometry
Townesw replied to nrvale0's topic in Mechanical & Technical Tips
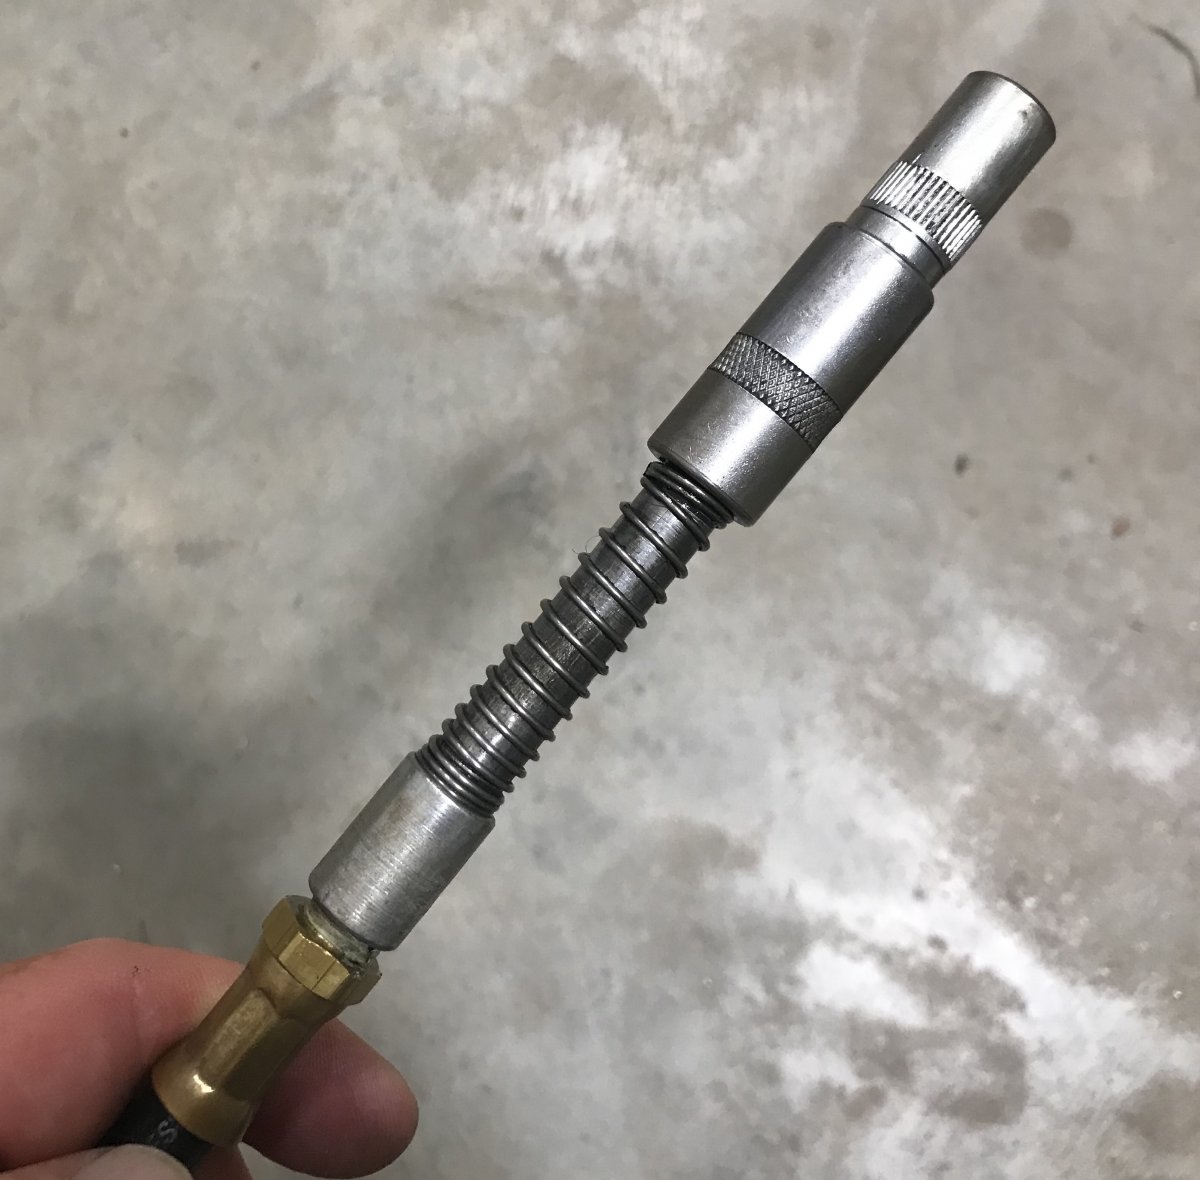
I’ve got 2 of these Alemite guns with hoses. They have a pressure release valve. Will still get a drip from them occasionally but not like the Lincoln or Lubrimatic I have or have had. https://www.skf.com/alemite/products/grease-guns/professional/pistol-grip-gun/index.html -
Which portable black water cart do you have
Townesw replied to Trainman's topic in General Discussion
Disregard -
Dexter axle, grease zerks, and non-Euclidian Geometry
Townesw replied to nrvale0's topic in Mechanical & Technical Tips
Also, I have this coupling on all of my grease guns. A long hose helps also. I sometimes use both hands to get the coupling on a zerk and then have my wife squeeze the grease gun handle.
-
Dexter axle, grease zerks, and non-Euclidian Geometry
Townesw replied to nrvale0's topic in Mechanical & Technical Tips
Well you’ve got me wondering now. Back your rear axle up on something-a leveling wedge or a stack of blocks, anything to raise that back axle up. The equalizer should rotate as shown in the picture below. Then feel for the zerk as shown and see if it is easier to access. If it works then do the same to the front axle to make the other zerk accessible. Edit: Actually, raising and lowering the front end with the jack might produce the same effect. Let me know how this works.
-
How do you clear your notifications?
-
Thanks Jason! This new forum software looks great! Questions: 1)On the old forum I could click on the banner at the top to go to the Oliver website. Clicking on the banner above no longer goes to the Oliver website. How do I get to the Oliver website from this forum? 2)There used to be a “slide out” or “drop down” menu with a tab to access Service. How do I access Service now? 3)How will posts created in the old forum react to being modified in the new forum? The following picture is a test insertion And we can now insert videos B6B3F93C-8AE7-416C-AE1E-C6CCE4A1A808.MOV
-
Looking for the best way to change out the bathroom faucet
Townesw replied to Markmck's topic in General Discussion
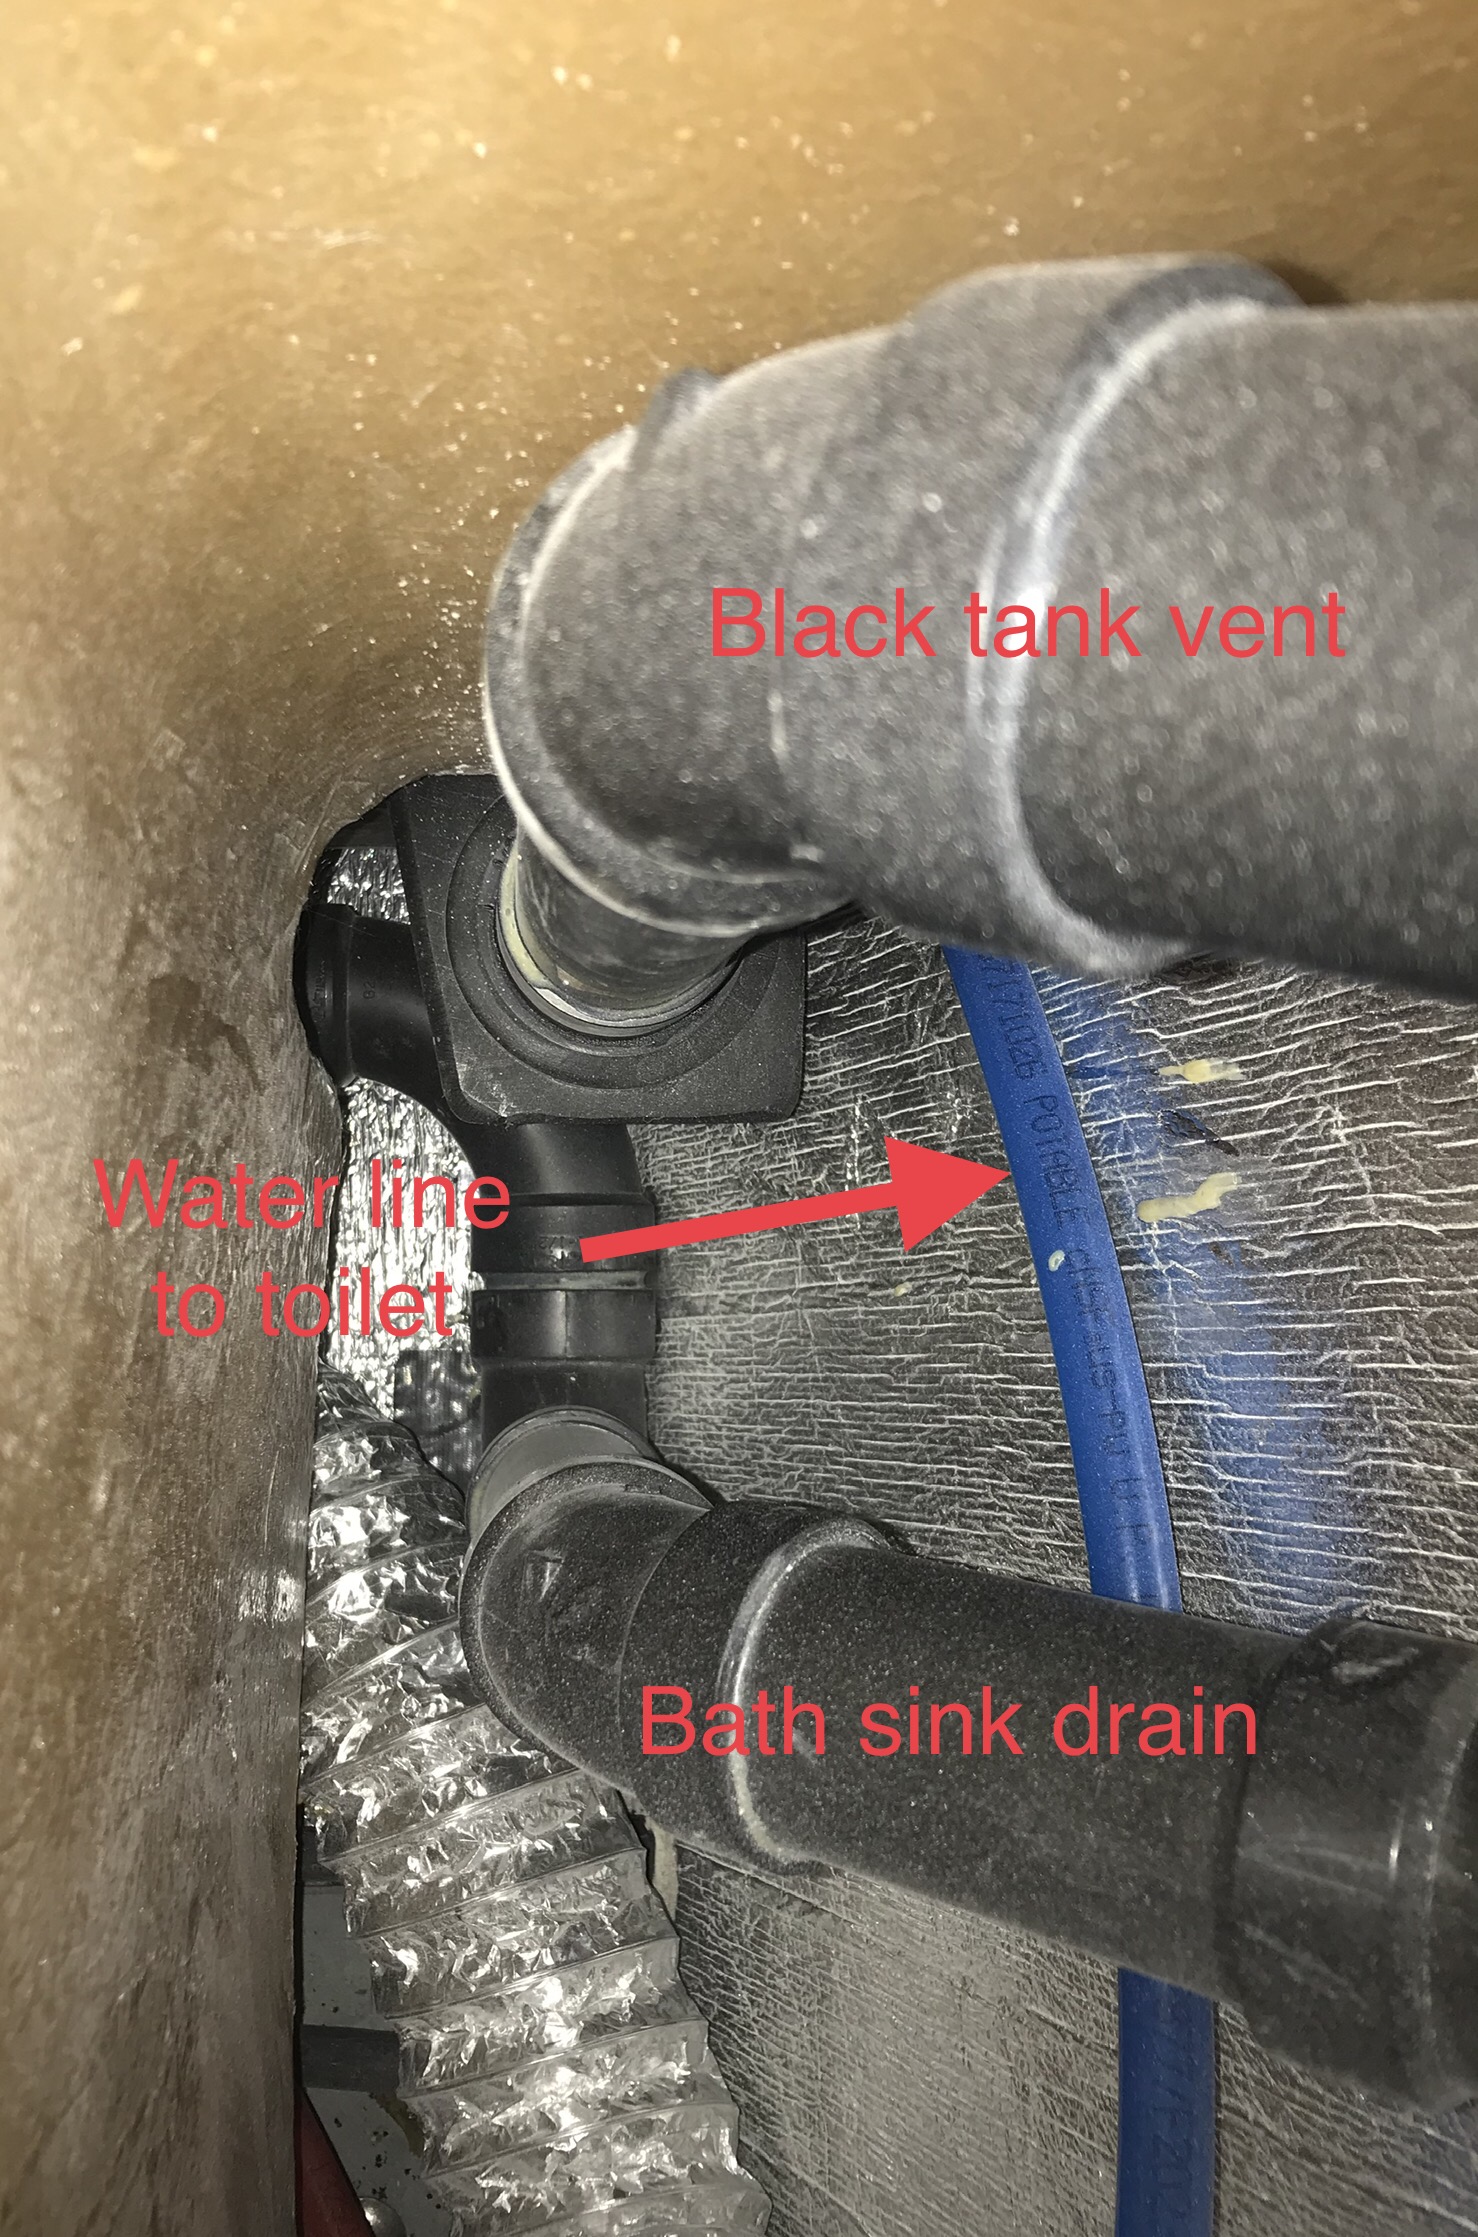
John, here’s the water line you mention
-
Looking for the best way to change out the bathroom faucet
Townesw replied to Markmck's topic in General Discussion
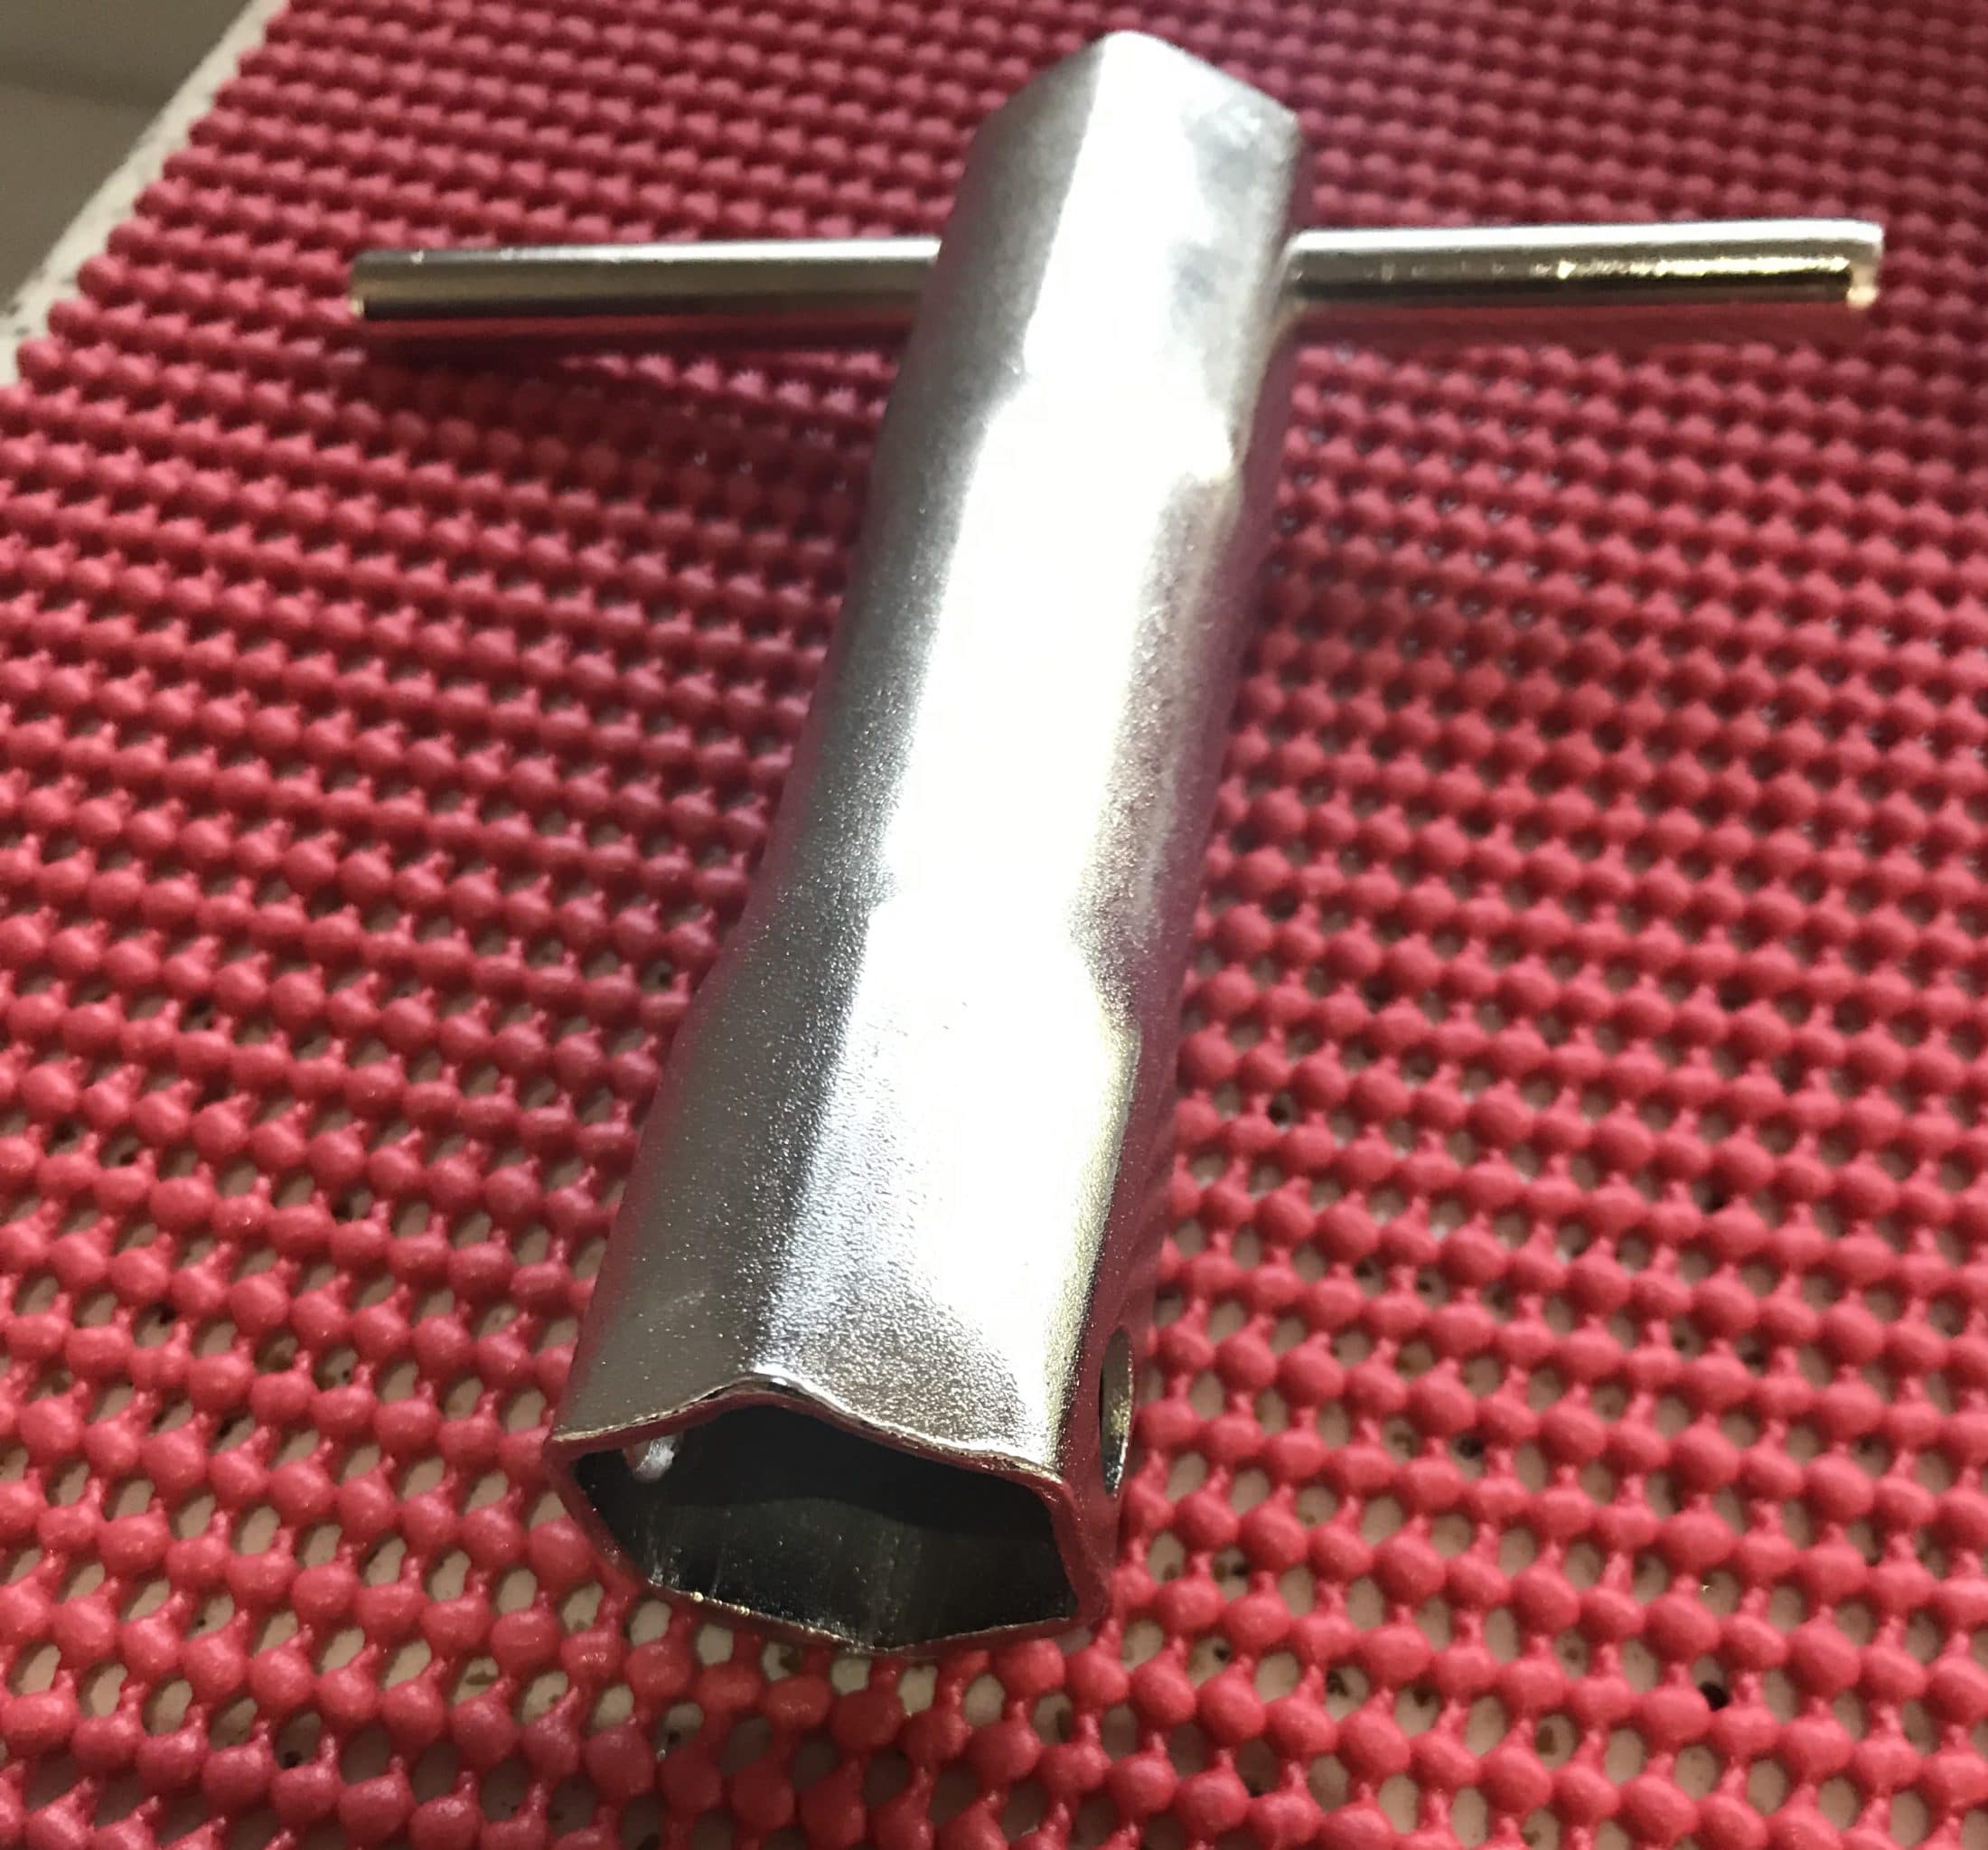
Thanks John. The wrench comes in a set like this https://www.harborfreight.com/shower-valve-socket-wrench-set-96322.html?cid=paid_google I used the 29/32 x 31/32 wrench. You can get the wrench set at “most good hardware stores”. As for the pictures, I take and edit them on my iPhone. It’s often frustrating but I can do it sitting in a chair in the shop. -
Looking for the best way to change out the bathroom faucet
Townesw replied to Markmck's topic in General Discussion
Stuff you will need https://www.americansealantsinc.com/adhesivecleanerandremover/ https://www.americansealantsinc.com/asi-335-neutral-cure-silicone-sealantadhesive/ PLASTIC razor blades. Do not use steel. Change these plastic blades often. https://www.oreillyauto.com/detail/b/titan-5120/paint—body-repair-16614/body-repair-16510/body—trim-tools-25197/razor-blades-scrapers-17948/1c24653634cf/titan-scraper-blades/12038/4753744?pos=17 Remove the steel blade from this holder and insert a plastic razor blade. https://www.oreillyauto.com/detail/b/titan-5120/paint—body-repair-16614/body-repair-16510/body—trim-tools-25197/razor-blades-scrapers-17948/1c24653634cf/titan-scraper/12031/4753743?pos=18 -
Looking for the best way to change out the bathroom faucet
Townesw replied to Markmck's topic in General Discussion
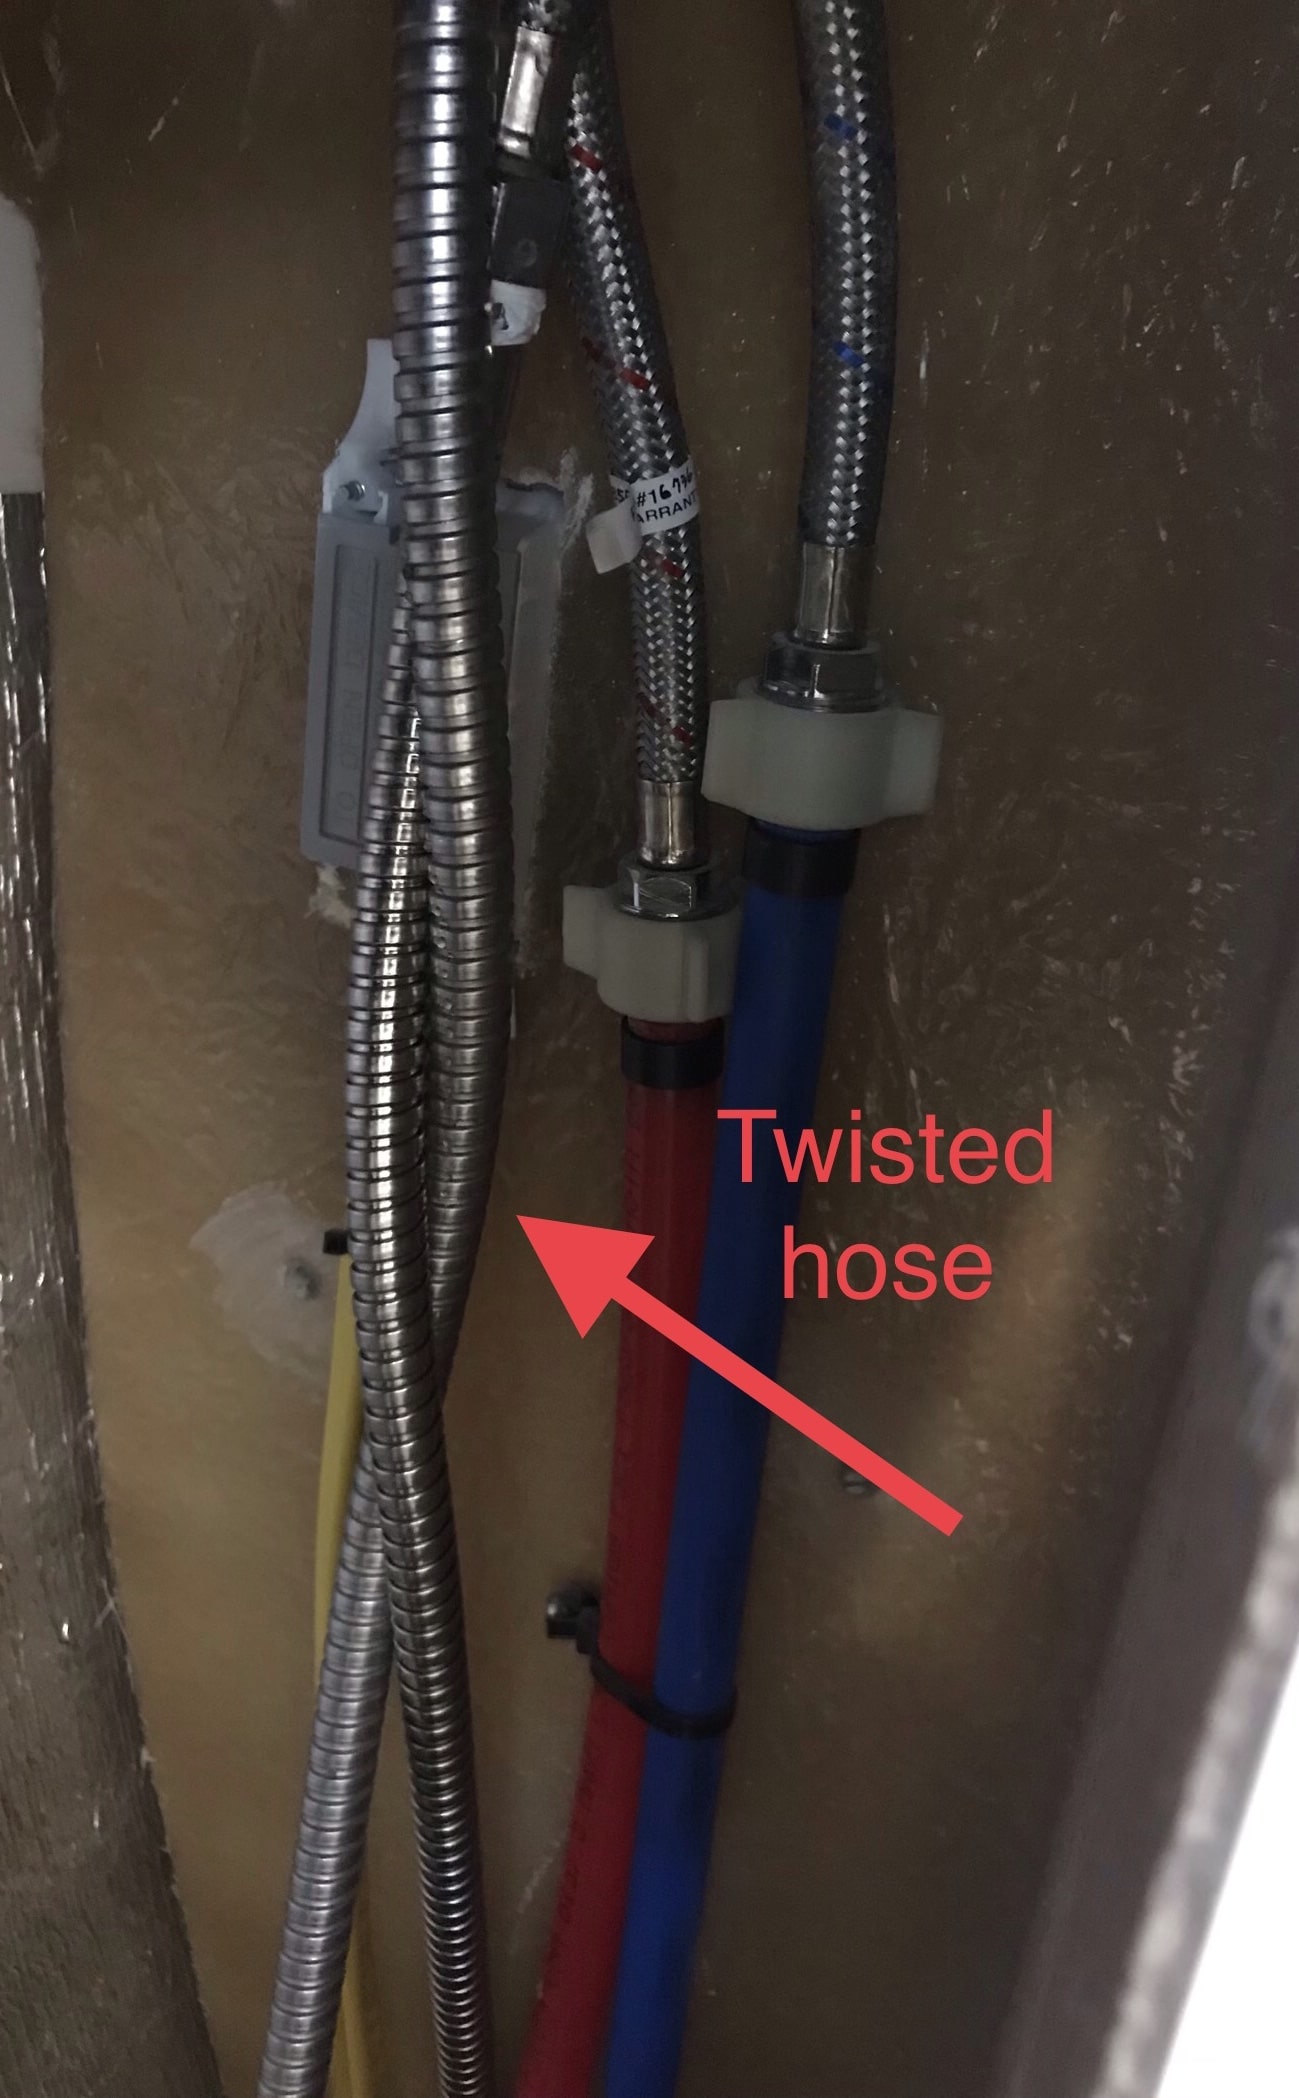
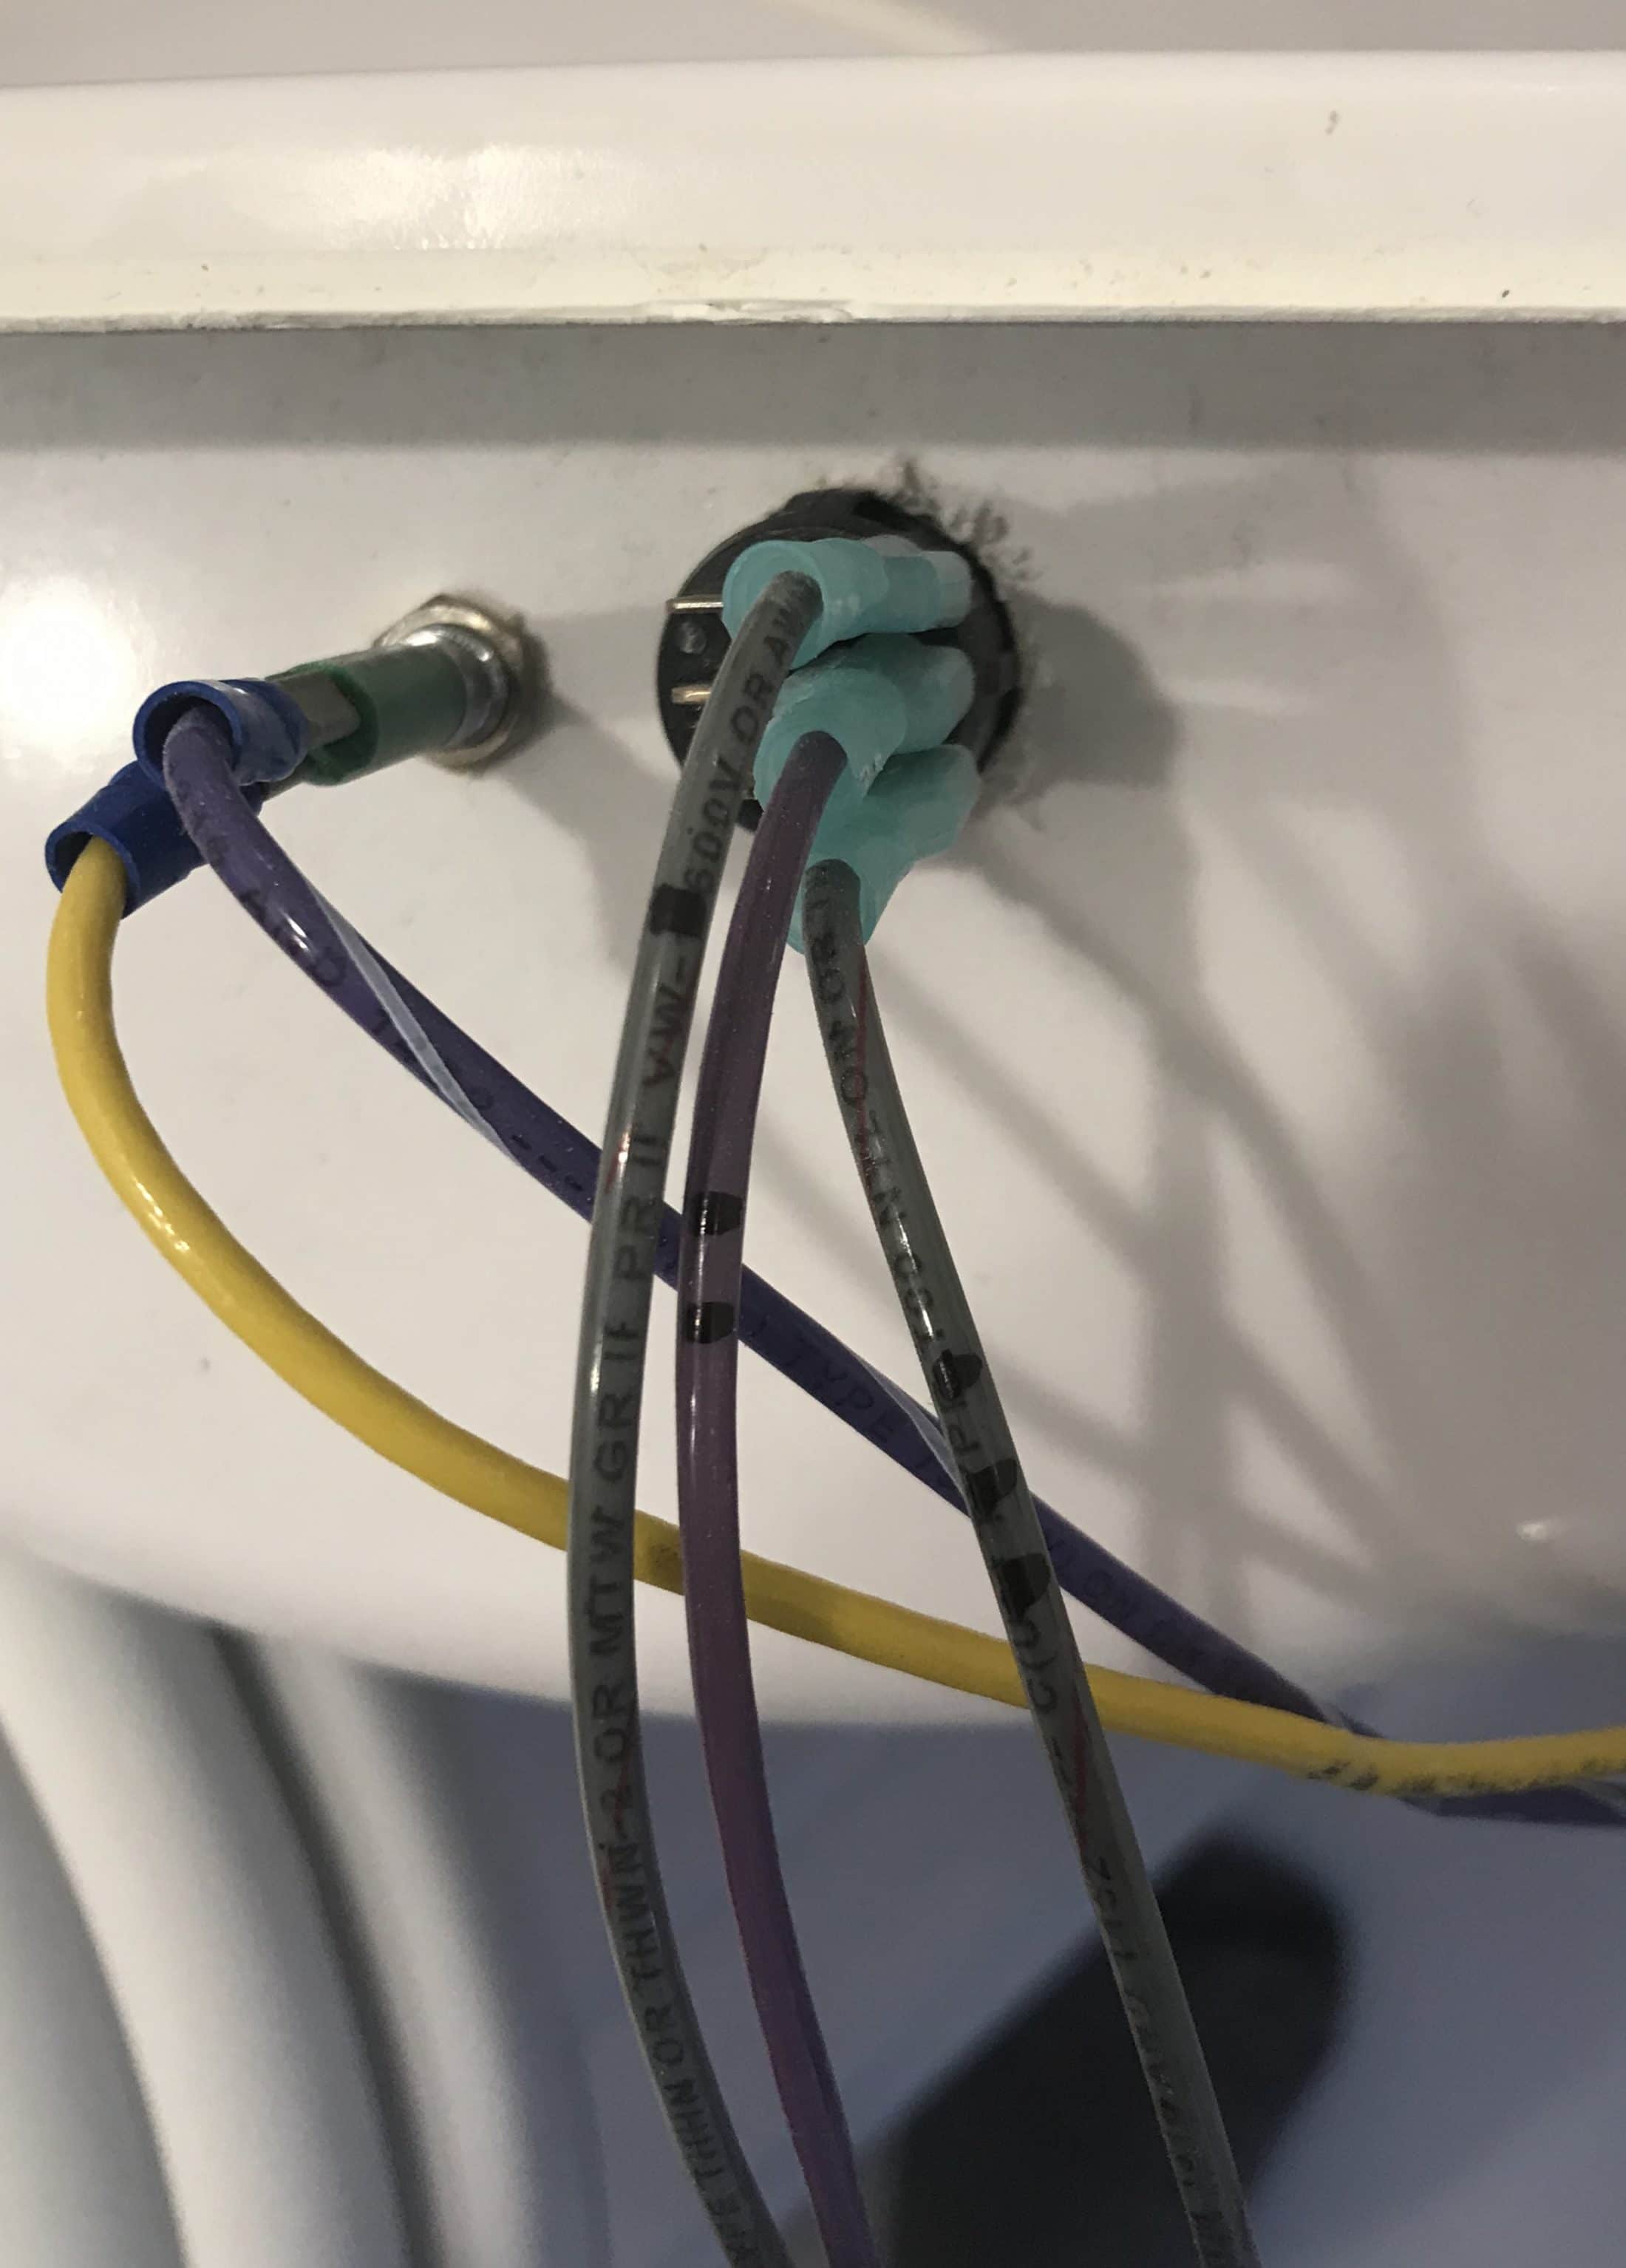
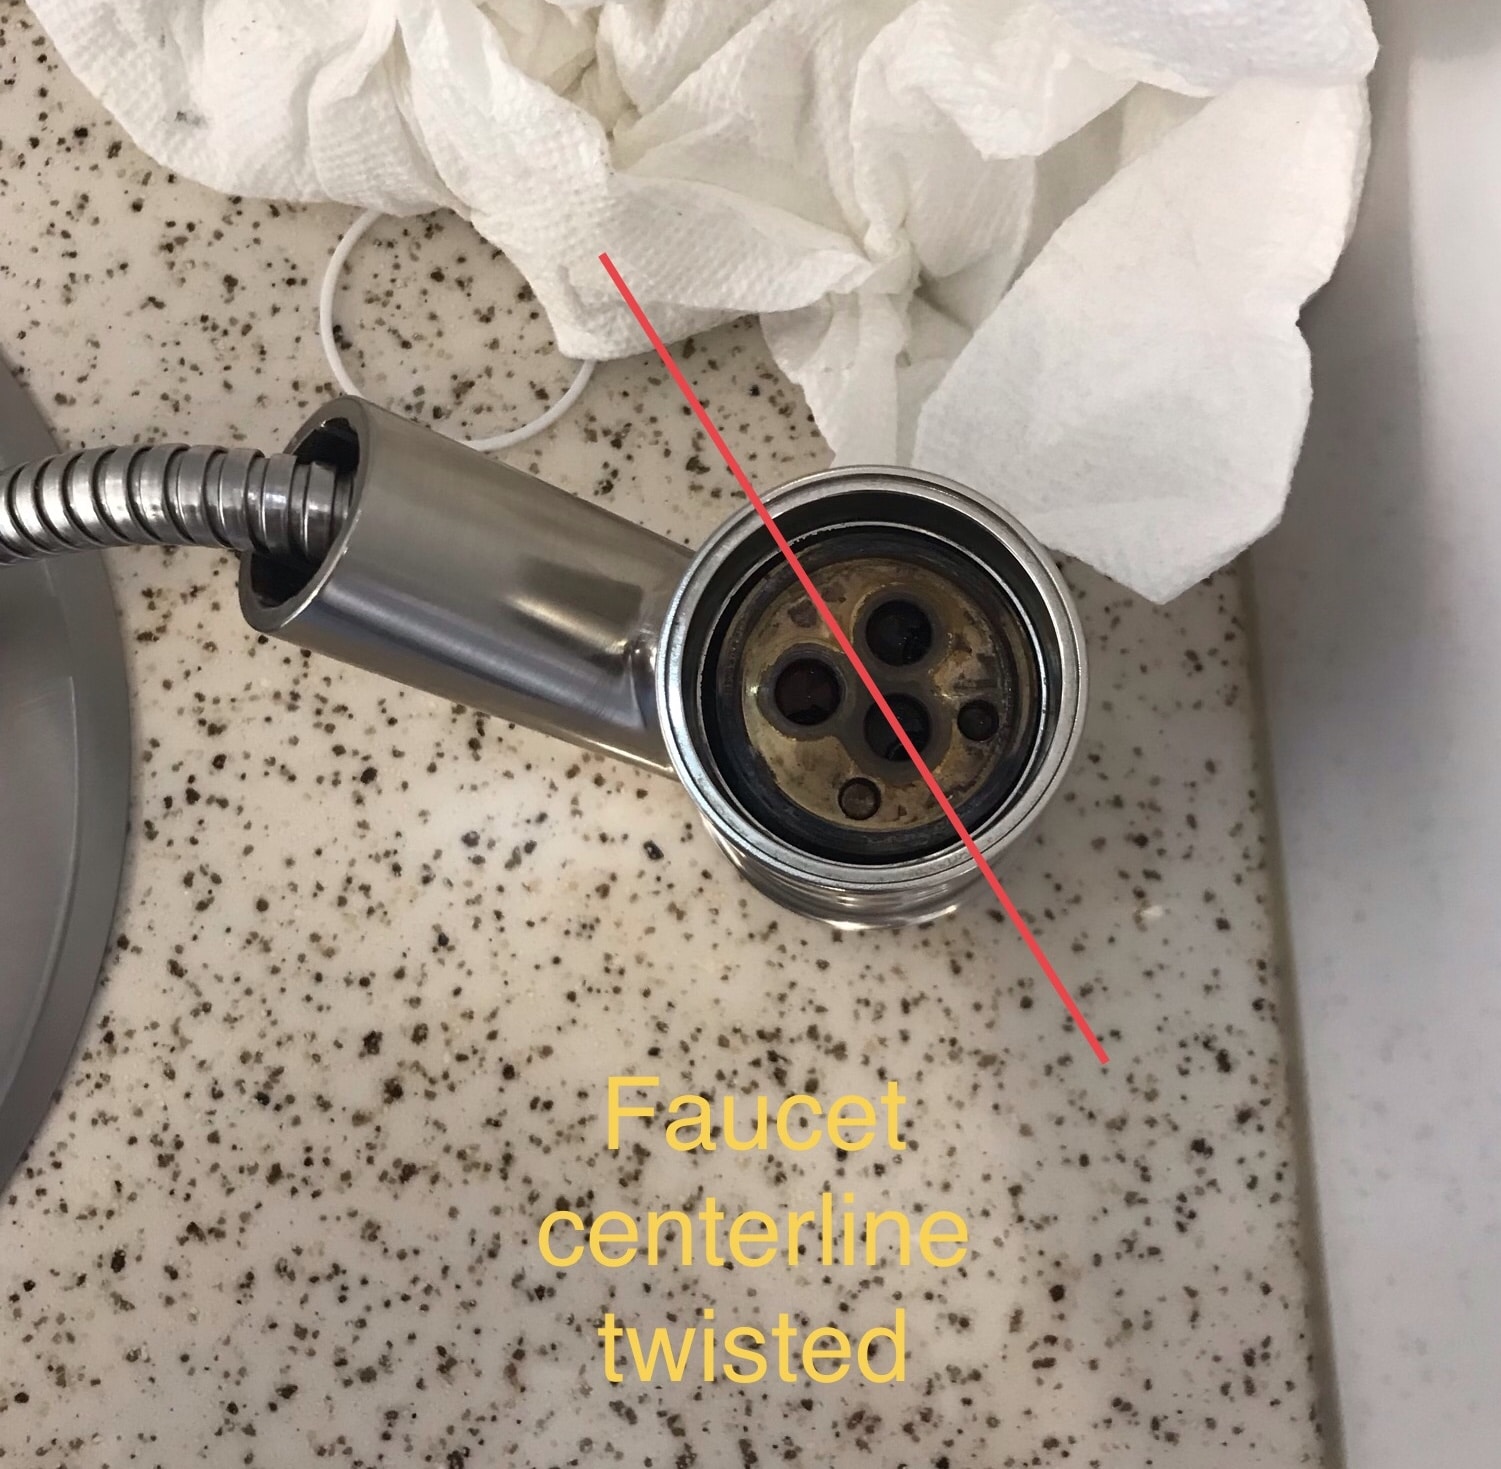
Make sure hose is not twisted. It will pull out and go back in much easier. Mark these wires before you unplug them
-
Looking for the best way to change out the bathroom faucet
Townesw replied to Markmck's topic in General Discussion
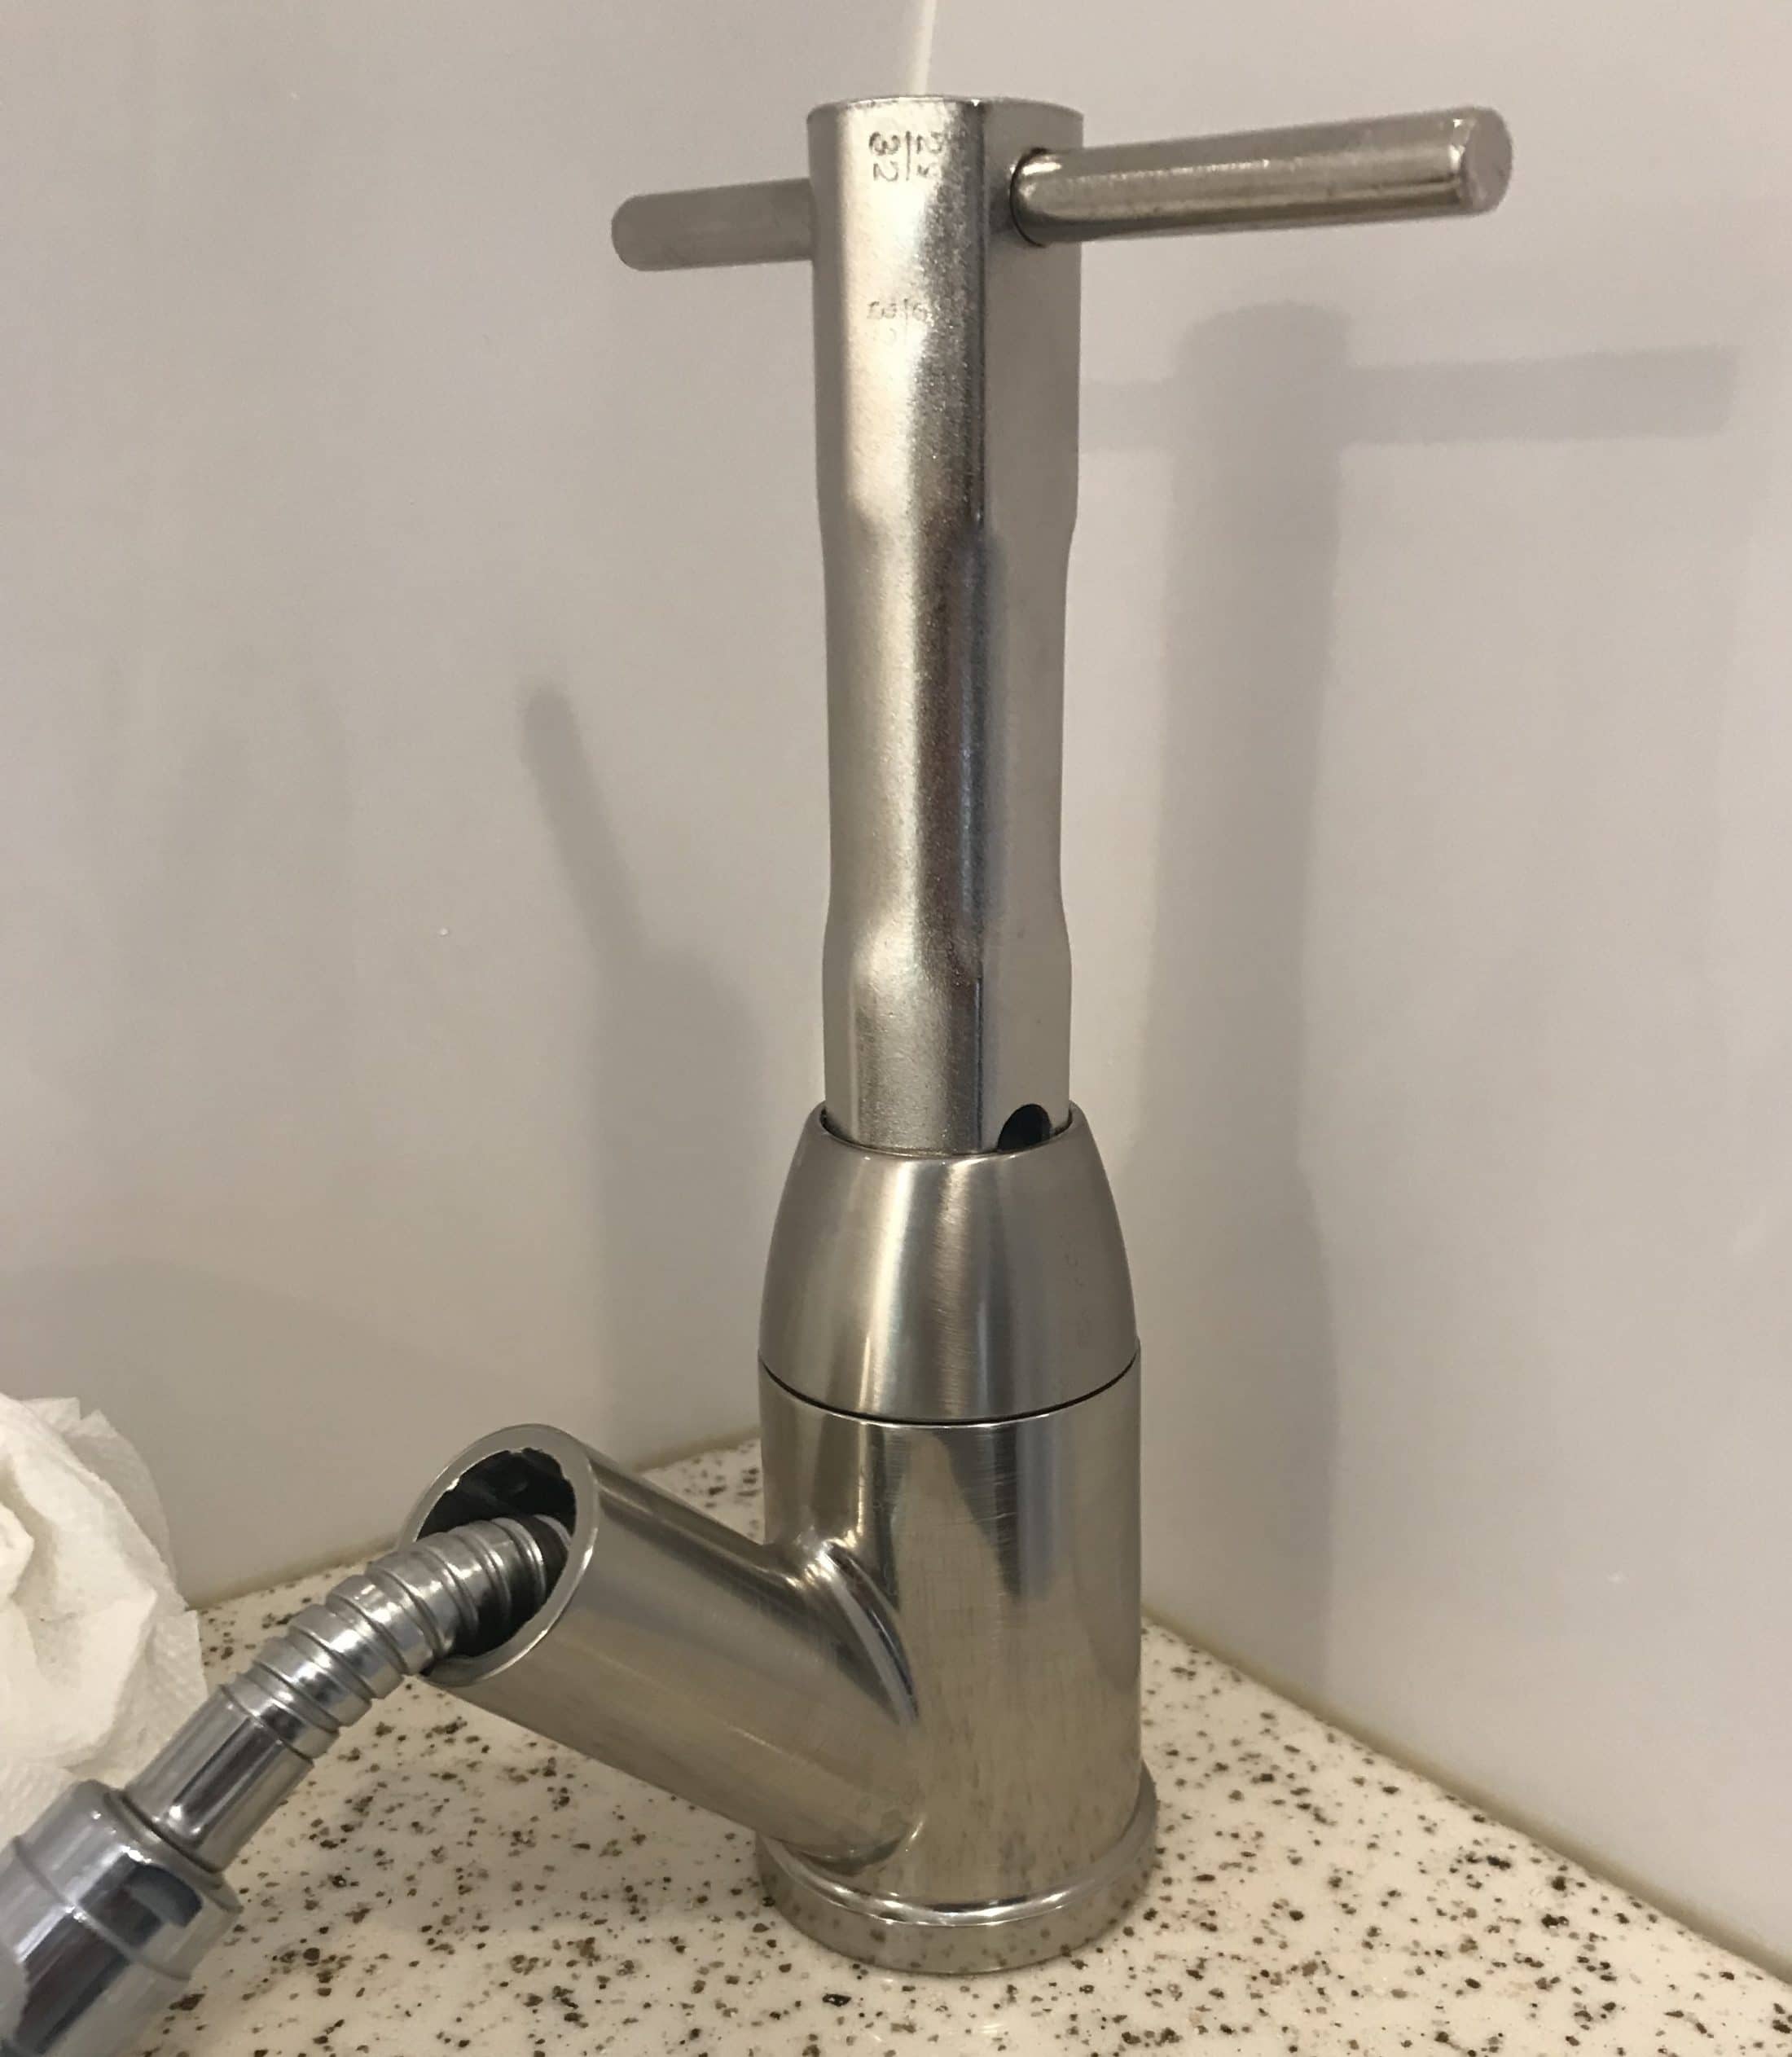
I’ve been under my sink to realign the faucet after replacing the cartridge. Use plastic razor blades to remove old caulk from the shelf and vanity. ASI 0240 works real well to remove old caulk. ASI 335 is what I just used to reseal my shower pan. I think you’ll need one of these wrenches to keep from having to use a pair of Channellock plies which will mar your new faucet Wrench in use What it looks like under there Be sure to “clock” the faucet centerline so that it is perpendicular to the wall otherwise the wand will either hit the wall or swivel out from above the sink and the hot vs. cold adjustment will be awkward.