Leaderboard


Popular Content
Showing content with the highest reputation on 11/30/2020 in all areas
-
A few photos, and a video of the fan running. We had a good rain this morning, so I could check for leaks. Everything looks good. 20201129_124314.mp4
 4 points
 -
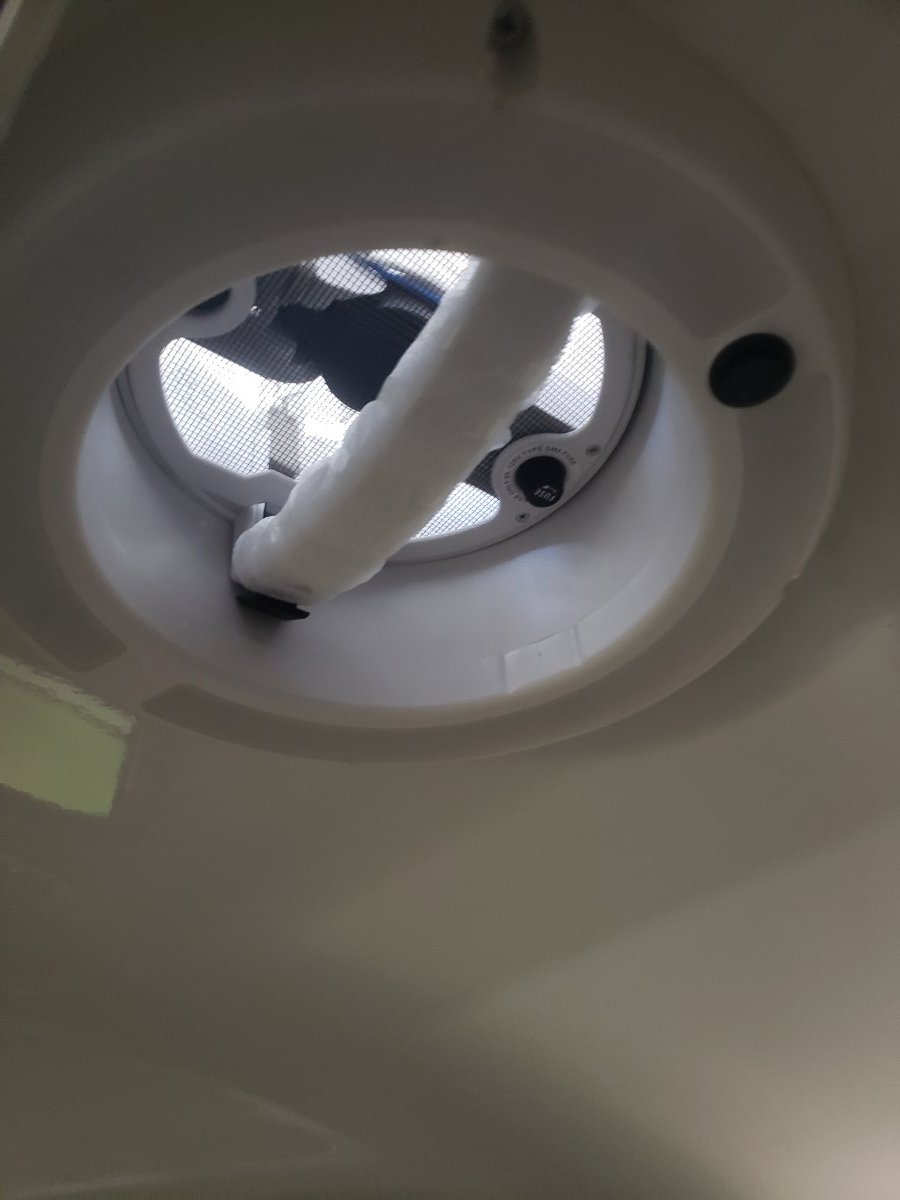
We installed the maxxair dome plus yesterday. Since Paul had already removed the old ventline and cleaned up the caulk on the roof, the install took less than an hour. (Would have been even less, but I inadvertently dropped the four screws for the interior trim ring into the shell and turf blocks where we park the trailer. Took a good five minutes to find them.) We bench tested the fan and light in the workshop before installing. It is indeed much quieter than the old ventline and the led light is very, very bright. The screen is indeed removeable from the inside for cleaning, but requires removing four tiny screws to do so. The handle for opening and closing is much beefier (our first ventline handle cracked), and it has a button to release. That motion is a bit sticky. The interior trim ring is almost 3/4 inch deeper, to accommodate the light, which might be important to taller people. I don't know about the trim ring on the unlit fan. We bedded the van with grey butyl tape before Paul fastened the screws. He added some extra at the curve of the hull. We'll run a bead of caulk around the ring when we do some other caulking. We did need the provided extension tube to reach through the two hulls. Paul cut it to length. We were able to use the original rough opening, without enlarging it, though it was very tight. The trim rings are larger in diameter than the ventline, so all original screw holes are covered . Maxxair provides a real gasket to seal the opening dome to the unit when closed, much superior to the foam weatherstripping of the Ventline. The unit itself is all plastic, but a thicker guage than the Ventline, and everything is white, inside and out. Hopefully, the quiet operation will last. I've read some reviews that the fan became louder with months of operation. We'll see. I ordered ours from rvupgrades. The price for the fan with light was just $4 more than amazon price for the fan without the light. Free shipping on $99 or more, so I bought a new water filter cartridge instead of paying $10 shipping. Sherry4 points
-
On the other hand, I found this Victron video, where at 5:10 he explains why connecting the panels in series would be beneficial. So there’s definitely a trade off. If you spend most of your time in full sun conditions, then maybe rewiring your panels in series would be wise. Of course, your MPPT controller would work automatically with either, which has me wondering if you could create a simple way to switch between the two configurations to match whatever conditions you’re in.3 points
-
Did you use your suitcase panels on this trip? Didn’t you have plans to wire the portables in series? Wasn’t it your intention to add another MPPT CC for the suitcase panels? Am I making you feel lazy by reminding you of all the projects you are neglecting while you mess around with duct work? Mossey3 points
-
John, I'm no expert on solar either - still learning - but I have a totally different understanding of MPPT vs PWM than you have arrived at. If hooking solar panels in series was the only way to take advantage of MPPT controllers, then very few would be using them. I am seriously considering a MPPT controller WITH my parallel solar panels to get 10-30% more energy out of each panel. They are especially good in the winter, when solar panels produce even more voltage (due to efficiency at cooler temps). Here's my interpretation of what I've read/learned... Single/Parallel panel example: The bottom line is that all solar panels put out 16 - 20 volts BY THEMSELVES - they have to be higher than 14-16 volts required to charge 12V batteries of all sorts. A PWM controller will not be able to take full advantage of the higher voltage being produced and loses up to 50% of the wattage. On the other hand, a MPPT controller can utilize the extra voltage and increase efficiently over a PWM controller by ~10% - 30%. So as an example, given a single, parallel 175 Watt panel during a full sun day, a PWM controller would put about 90 Watts of charge into the battery while a MPPT controller would put anywhere from 105 - 140 watts of charge into the battery. Multi/Series panel example: This one is easy - a PWM controller will fry with voltages higher than 20 or so. A MPPT controller will take higher voltages from series connected panels and efficiently charge a battery bank the same as it does for a single panel at 20 volts. Conclusion: Since MPPT controllers optimize any panel or set of panels producing more than 16 volts, there are compelling reasons to convert a system to MPPT (even with a small number of panels in parallel in my humble opinion). Compelling reasons to go with series over parallel? Not sure in a system with only a few panels, but obvious reasons would be to use smaller gauge wires and/or have significantly longer wire runs to the panels. I personally will start with just an MPPT controller and see what the gains are in my current setup. If there is a true advantage to series, I'm all in but I need proof before I rip things off the roof and rewire my panels. 🙂3 points
-
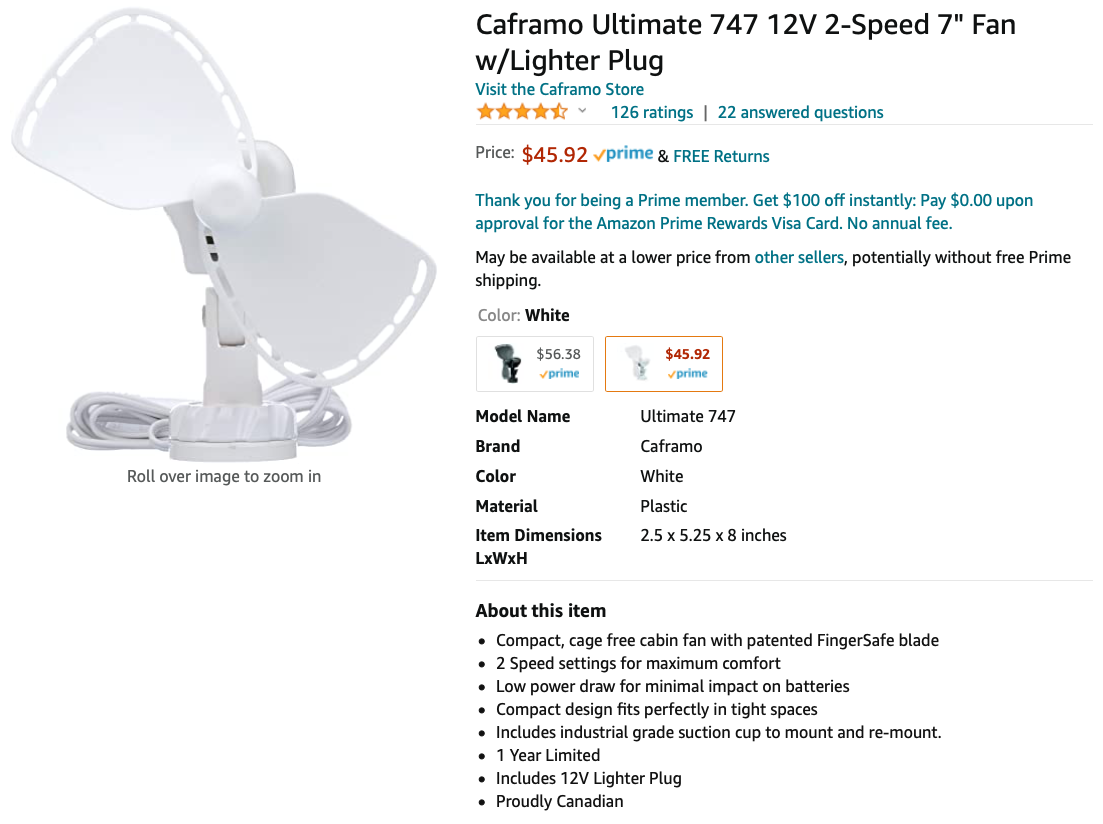
I agree wholeheartedly! My wife is quite sensitive to the temperature, and I wanted to try a fan to make her more comfortable. We sleep with our heads at the rear, and I thought @John E Davies's fan was too large for our needs. I found the Caframo Ultimate 747 12V 2-Speed 7" Fan w/Lighter Plug for $46. It has two mounting options. One mount is a suction cup. The other is a permanent mount that can be screwed into the underside of the overhead cabinet. The mount is about 3 inches tall, and the fan is easily removed from and reattached to the mount. My initial plan was to use the permanent mount, and I had plans to either tie it into the 12 V system, or to install a 12 V cigarette plug receptacle into the overhead cabinet using some of the guidance John Davies provided in this post. (Our trailer has only two cigarette lighter receptacles, one under the dinette and one above the kitchen. Susan sleeps on the street side bed, so they would not be closeby.) I decided to first use the suction cup mount to decide on an optimal location to place the fan. The fan power cord was not long enough to reach the dinette, so I used a 120 V plug--transformer--cigarette plug receptacle adaptor that we have for a 12V ice chest, as an extension cord. This fan worked really quite well, and Susan was pleased. She decided that she did not want the permanent mount, but preferred the suction cup option. The suction cup was plenty strong, and we even drove with the fan attached, without problems. So in the interest of domestic tranquility, we are not using the permanent mount. We also have much greater flexibility in where to place the fan using the suction cup. When removed from the underside of the cabinet, the fan is quite small and stores easily. In future we will use the suction cup mount, along with either the 120 V plug--transformer--cigarette plug receptacle adaptor. The extension cord traveled nicely behind the dinette cushions and below the pantry door. I have found extension cords on Amazon with cigarette plug and cigarette plug receptacle receptacle at each end, and we might try that instead.
2 points
-
Wow, that is really interesting, it refutes all the many claims I have read that series is better for shade, she shows clearly that parallel in shade is better. Very informative, everybody should watch it! OTH she says that for shady conditions EACH panel should have its OWN controller, to maximize current. I can’t see that happening in most RVs. “So, this kind of shows you, that if you do have some partial shading, and it’s on only one of the panels at a time, so say you’ve got a chimney that you really have no control over, or if it’s on a sailboat, and you’ve got the mast that is kind of important, if you’ve got partial shading that’s going to be changing, it’s better to wire them in parallel to give the parallel path for the non-shaded panel. Ideally, and I know I say this a lot, ideally each panel should have its own charge controller, that way you will get absolute maximum performance, but if it’s not an option, wiring in parallel with partial shading is your better solution.” This video convinced me to keep the roof array “as delivered”. IMHO, folks who want a more reliable supply of amps when camped under trees need to get a portable panel and park it at an angle facing unobstructed direct sunlight (and rotate it and/ or reposition it a few times each day). I have one coming for Christmas. I may mount a more efficient MPPT controller for it inside the trailer, I will see how the suitcase unit does first. I am still going to replace the Zamp controller with a Victron MPPT, locating it under the street side bed, for a variety of reasons. Thanks so much! John Davies Spokane WA2 points
-
John, I knew that I had read some info on shading and series vs parallel when we were trying to determine best setup for our 6 x 100 watt panels on the boat. This set of tests is 4 years old, but probably still relevant. https://www.altestore.com/blog/2016/08/wiring-shaded-solar-panels/#.X8UsyWlOkwA2 points
-
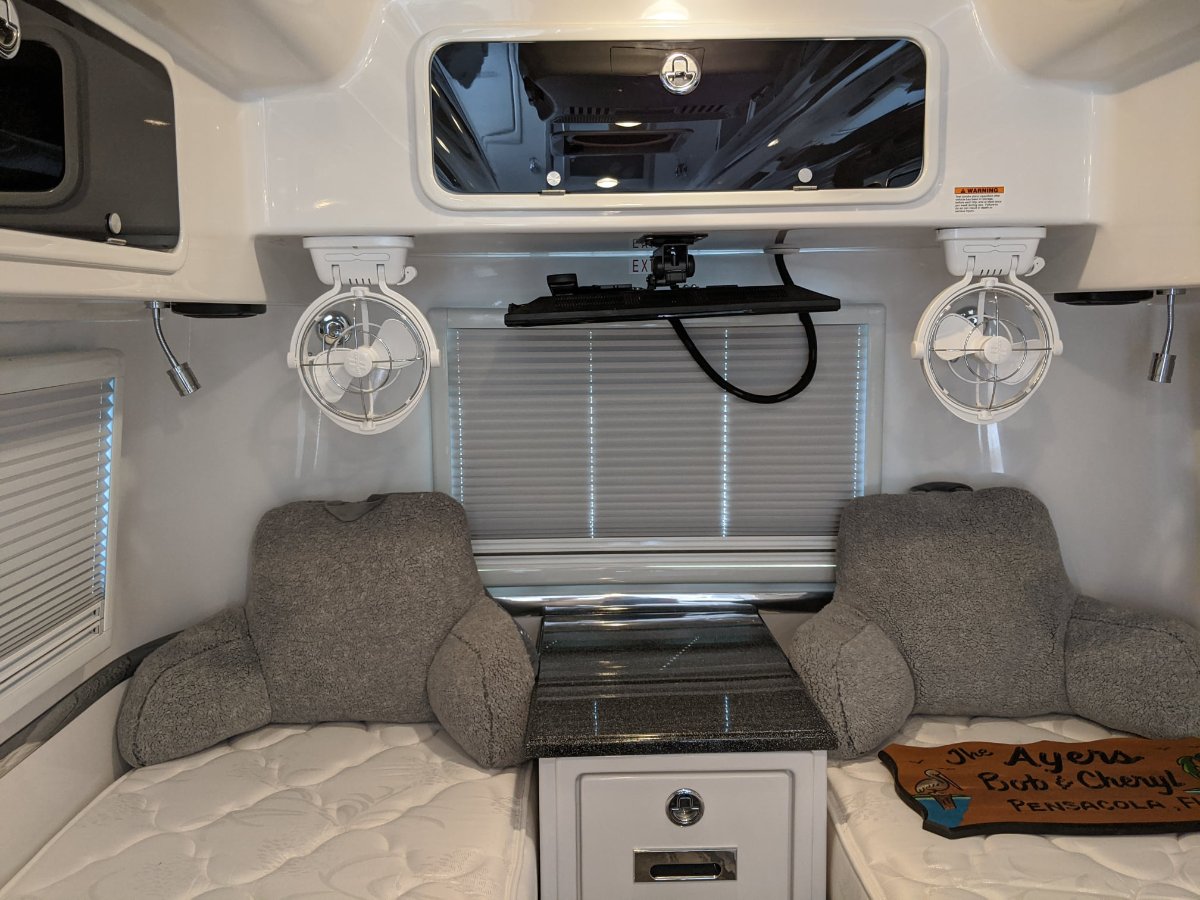
My single Caframo located in the rear curbside corner works extremely well and it sips power (0.35 amps on High). Normally it is pointed down a few degrees and rotated in a 45 degree angle toward the street bed, where my wife sleeps. We both sleep head to the front, so we get the air on our faces. Even on Low or Medium speed she gets plenty of air, I get enough leakage to stay comfortable. If I am camping alone I point it towards my side. I highly recommend this fan, you could always install two and both have full control, though as noted above they are not remote control. Yes they are pricey, but I look at expensive upgrades as “making it easier to resell the trailer” though you never ever get back your investment in the upgrade part and labor cost. If the labor is your own, it is easier to deal with. https://olivertraveltrailers.com/forums/topic/3305-how-to-caframo-sirocco-ii-12-volt-marine-cabin-fan/ These really are quite nice, and I think Oliver should offer a pair of them as factory options. John Davies Spokane WA2 points
-
I've never had a BU camera on my trailer, my Garmin GPS has BU input, but the Garmin BC35 from all I've seen on YouTube just didn't rate well, maybe it has improved over the past year, or two. I just wind all the windows down and the wife stands at the trailers rear and jumps up and down if I need to stop. trainman2 points
-
You could try bending out the clip a little for a tighter fit. We had trouble with ours coming loose but the solution had nothing to do with the blinds - I just lowered the tire pressure down from the absurd level that Oliver used to use.2 points
-
We ended up with a CD slot mount; was able to swap out the ball joint on the CD mount for the larger ball on the Garmin 890 mount. Works well with the dash configuration of our 2013 F350, putting the screen just below dash level. There is a tiny bit of vibration, but not enough to bother seeing navigation. It does take a bit of practice to use the touch screen while the screen is on the mount because of the slight wobble. We decided the arm on the bean bag mount would not be high enough for the screen to clear the dash. And the larger screen takes up a lot of the view out the windshield. I really like the powered magnetic mount; you can easily remove the unit to store it out of sight when you leave the vehicle. And, if the co-pilot needs to make changes, it can be done without the cord attached, since the power supply connects to the mount and not the back of the Garmin. It is supposed to run off battery for about an hour. The Garmin paired easily with my phone (Samsung 10e) The traffic alert worked well; I was surprised that it even picked up an accident on our remote state highway. Haven't experienced any bad weather yet, to see how weather alerts go. It does have a nice screen that shows road conditions (color coded). I found it once, but haven't been able to find it again. But, honestly, the navigation is pretty intuitive. The only complaint I have, after 1 day, is that if you zoom out to show more of the route, after a while it zooms back in. I'm going to research to see if there's a way to turn this off. I can remember a setting on my car satnav; hope Garmin has the same. We're on the road to Hohenwald right now. Spending Day 1 in Burns Oregon at the Historic Central Hotel. We've stayed here before and it's amazing. Self-check in, like Airbnb. There are 12 rooms and I think we are the only occupants. By the time we get to Hohenwald, I should be able to answer more questions about the Garmin 890. https://historiccentralhotel.com/2 points
-
Kinda of tangential to this thread but now that I've been FT for 1.5ish years and had some time to experiment... Attaching shelves and similar to the walls... You can see the dollar store baskets I've been using for shelves above. I've tried a couple of things to attach them to the walls with no real luck until(!) now. I've been through suction cups, industrial suction, cups, command strips, industrial velco, and a combo of velcro and command strips without much luck. Temperature cycling in the winter really seems to do a job on the suction cups and if you go anywhere bouncy then the velco + command strips option eventually fails as well. The area that has been hardest is above the sink + stove where there's lots of moisture and temp changes. A possible solution? Yes: "Nano Tape". It appears as though Nano Tape may just be a trademark name for a particular type of clear, double-sided, directional tape. Aka: https://www.amazon.com/s?k=Nano+Tape&ref=nb_sb_noss_2 and in particular, the one I purchased: https://www.amazon.com/s?k=EZlifego&ref=bl_dp_s_web_0 There are some YT videos of this stuff with mixed reviews so let me tell you what I did. It appears surface prep is pretty important. 1. I roughed up the plastic on anything that I needed to attach to walls with a piece of fine grit sandpaper. 2. Cleaned and dried both the plastic basket/shelf and the wall with generic "windex". 3. Mounted the shelf. Press firmly! 4. Left it in place 24 hours before "loading" it up with the usual contents. So far both I've loaded the baskets up with sizeable salt and pepper shakers, spices, keys, pocket knives, cell phones etc to the point where I thought sure it would come off the wall the next time I pulled but everything has been holding up. No spills yet and it has been 2-3 months for the stuff above the sink.2 points
-
The biggest loss with PWM is related to the voltage drop from the PV (~19V) to Vbat (13-14.5V) through the charge controller. Vdrop is ~6V * ?Amps = lost power. Other losses may occur in ZAMPs controller but they are going to be small relative to this loss.1 point
-
On the boat, with six x 100w panels on the hardtop Bimini, Paul compromised. Each two panels are wired in series, then all three strings in parallel. The two panels in series were selected by likeliness of being shaded at the same time. But then, we have all those shading obstructions, mast, boom, and, underway, sails. The Victron equipment has been great. We haven't had to plug in since the install, and even when the alternator failed in the last trip, the batteries were always charged.1 point
-
To get a charge from your tow vehicle, you’ll need heavy gauge wiring and a battery to battery charger. The existing wiring is too small for the distance between the alternator and the trailer batteries, and modern truck electrical systems will not supply a continual voltage from the alternator high enough to charge a bank of batteries. It’s a wiring/electronics issue and not a battery issue.1 point
-
We had these on our boat and were one of the first mods to the Oliver. They work great.
1 point
-
The most significant difference is that black collar that you can see in dedroll's picture above. This collar keeps rain and dirt out of the area between the outside housing and the hitch ball/anti-sway material on the inside. It also keeps this anti-sway material from trying to rise out of the housing. Both of these (the rain/dirt and the rising material) can and did cause these units to develop noise that was fairly annoying. Other than that, there is no real practical difference in the way they work or perform. Bill1 point
-
Well you’ve definitely gotten me interested and thinking about this again. I would definitely like to get more out of my solar panels, especially in the winter. This past trip was a bit painful being in full sun and seeing at most about half of the rated capacity. I know that the most effective modification would be to make my panels tiltable, but I always seem to plant the trailer on a north south axis for some reason.1 point
-
Thanks for the replies, this is all very complicated, isn’t it? I hate being the pioneer in stuff like this, certainly somebody has already done these rooftop tests.... but I haven’t found one yet. As I mentioned before, the only one was for series vs parallel with a MPPT controller in full 100% sunlight, and there was zero difference in the current output to the batteries. I will hold off on this part of my winter projects until next camping season when I can do some realistic solar gain tests using two of those reverse adapter kits; thanks so much mjrendon for the tip, I had not seen those before. I would need the MC4 connectors and tools anyway, to complete the roof cap change if the series turns out to be better in “challenging” solar conditions like the typical partial shifting shade in a USFS campground. But I really hate those SAE connectors for this type of application. My gut feeling is that with identical panels, series will be better. For those of you who have added extra smaller panels on the roof in parallel, the system will choke on those if changed to series. In that case for series, it would be best to move all small (matching output) ones to their own dedicated MPPT controller, with the main Zamp panels going to the main controller. That will involve more expense and running roof wires, and not worth the effort unless you are truly anal... John Davies Spokane WA1 point
-
We were having the same problem shortly after delivery so we just place a drop of caulk on each lower window clip only; this will solve the problem.1 point
-
I installed the factory back up camera after delivery, It is pre wired on the 2019 Oliver. The switch panel has a blank spot you’ll need a switch, It is powered through the trailer it is not wired to the reverse lights, For the unit to work the main switch must be on before traveling this will power the camera. The monitor will power up were ever you plug into 12v source, the tv or inside the trailer. Easy install, in my opinion its the best setup. You can use the camera any time hooked up to tv or not, instead of having to put the tv in reverse only, you just need to remember to switch the unit on before heading out,1 point
-
I always buy my GPS, etc. from these guys, https://g.factoryoutletstore.com/cat/18937/Garmin-7-Inch-GPS.html I purchased the 61LMT-S 7" model for a lot less money as you can see in the ad. This GPS does just about everything and weather and traffic can be added and still spend less then $200. I have an iPhone that will do the extras if needed for free. I guess you buy what you think you will need, but we all know most of what we pay for is never used. trainman1 point
-
Before you change your roof cap, an easy way to test the series vs parallel setup with would be to use three connectors like these To convert to series simply unplug both PV panels from the Furion roof connector and convert them to them both to MC4. Next connect the panels in series and use the third connector to convert the series chained panels from MC4 back to Furion. Plug this into the roof down link using a single port. Make sure you double check polarity before plugging into your new MMPT charge controller. Simple to test both modes...1 point
-
Thank you for this write up!1 point
-
Mike, ask and ye shall receive..... https://olivertraveltrailers.com/forums/topic/2577-how-to-fix-your-waste-tee-handles-so-they-won039t-break-off/ I have not done my “transit valve” handle up front, so far it has held together. FYI I think those cables could use some lubrication. Unhook them at the valves, pull the inner wires all the way out to clean them, if they are really nasty you will have to get creative to spray cleaner through the housings. Or take them out for cleaning. Have fun. John Davies Spokane WA1 point
-
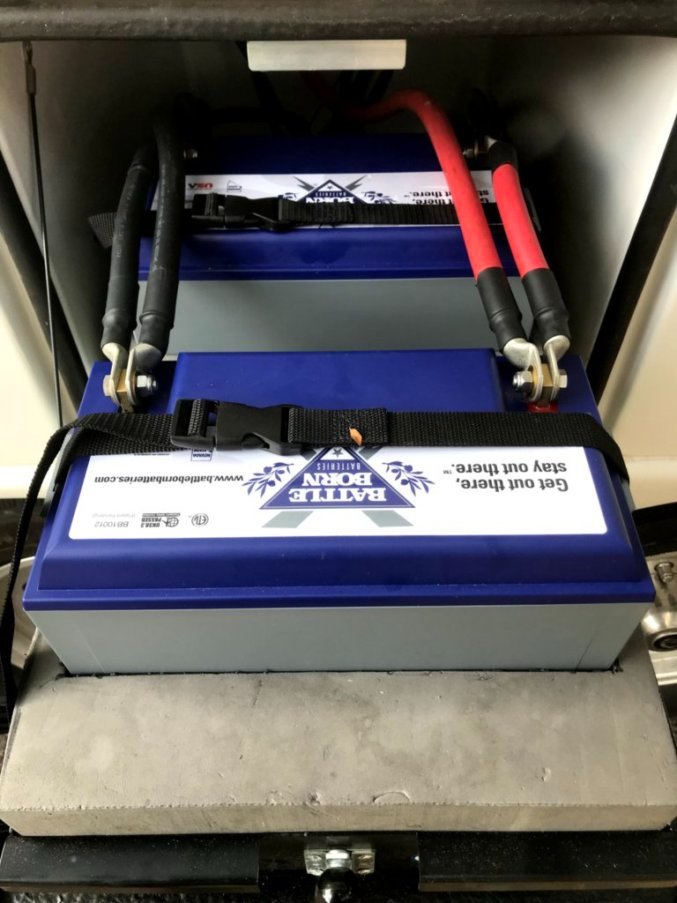
Note: I started this post this morning and then got busy with Christmas decorations, so if there are additional posts on this subject that I have not read, I apologize for being redundant. It's time I add more information from my point of view to my question. I have already acquired the following equipment for my solar replacement, which I do plan to claim for a tax credit. 3 - Battle Born BB 10012 batteries. 1 of my original lead acid batteries failed which led to the lithium upgrade. 2 - Zamp 90 Watt Long Solar Panels B Stock These panels are considered seconds, sold by Zamp through Amazon. A solar panel is required for the solar tax credit but these are sold in pairs. 1 - Victron SmartSolar MPPT 150/45 Tr. Why not take advantage of the tax credit? 1 - Xantrex PROWatt 2000 Inverter. Original failed. Associated cable, connectors, mounts, switches and bits and pieces. So, I have put a little thought into this project. But I have never read anything about Victron MPPT CC's requiring 24v inputs. I do know they support multiple voltages. I think a 24v input would make sense if you needed to run new cable from the roof to the CC anywhere in the cabin or lower hull, but you have already indicated that you are going to use the existing Zamp cable run. The smaller cable requirements of higher voltage would certainly ease any new cable runs. When I run my panel numbers using the method at this website Sherry posted, I would waste 128 watts of solar energy with my panels is series. And I don’t believe that Zamp PWM CC's are junk, they just aren’t as efficient as any quality MPPT CC. All of my Zamp equipment has provided good service for 3 years and I can’t think of any Zamp problems mentioned on this forum, but maybe I have forgotten them. Mossey1 point
-
Thanks for pointing this out. I guess I could periodically rotate them like tires... I know that Overland has a 4P system and it will be interesting to find out if the cable configuration contributed to the issues that he is having with his batteries. Soon I will be adding two more batteries in a bus bar configuration with trailer positive trailer connection attached at one end and the negative trailer connection attached at the opposite. I will post images of that setup once completed.1 point
-
I used a dense closed cell foam and a base of plywood with cut-outs to hold 2 battleborns in place. It didn't have any signs of movement or damage after >3000mi.
1 point
-
Like Overland posted, the tray is 14" X 21" on the LE2. Just looked at Ollie's battery tray and saw the next Ollie project. There are pull or pop rivets protruding 1/8" on both interior sides of our tray front & back. Going to place at least 1/8" thick plastic, stealing one of Debbie's cutting board again, between battery and tray with holes drilled at rivet locations to keep rivets from damaging batteries. The actual width of the tray is 14 1/8" to 14 1/4", but rivets protrude 1/8" on each side making 14" wide tray clearance. You could gain up to 14 1/8" to 14 1/4" tray width by installing flush head rivets or flat head screws pointing outward from the battery, if additional width is needed.1 point
-
Hi Jairon, these are factory installed Lithiums. Just picked up on the 18th this month. As far as insulating, I'd recommend just buying a roll of Reflectix BP48010 Double Pack Insulation, 48 in. x 10 ft. It's twice as thick as what Oliver uses and I've already added an additional layer of this Reflectix on top of what Oliver installed on the basement door, so in essence I tripled the insulation - I removed the factory piece of reflectix and used it as a template. I'm doing that where ever I can reach on the outer hull in the basements too.1 point
-
Hi Fritz, I use SensorPush Wireless Thermometer/Hygrometer for iPhone/Android - Humidity & Temperature Smart Sensor with Alerts. Developed and Supported in The USA. Have used them for years in many other applications. Love them. They can be calibrated if needed and if you have a wifi hotspot in your Ollie, for example, you can monitor them remotely as well. I'm using velcro to secure them in different places around the inside of the Oliver. I put one outside when camping or when parked in my RV garage, but they are not waterproof, so you can put it anywhere it's protected from rain, but can't really have one on the outside while driving or anything.1 point
-
The series/parallel trade off is a bit tricky. Like John said, in parallel lower voltage from one panel will bring down the voltage of the entire array. In full sun, that’s never really an issue since panel voltage stays pretty consistent until a steep drop off with very little light. It’s the amperage that varies with stronger or weaker sun and in parallel, the amperage is additive. In series, it’s the opposite, low amperage from one panel is a bottleneck to the others while the voltage of the panels is additive. Again, not a problem in full sun even if the amperage is changing, since the amperage of each panel should track pretty closely with the others (so long as your panels are all alike - adding in a half size zamp panel like I have would cut the current of the larger ones in half!) Also, as John points out, the panels themselves are made up of modules of grouped cells connected with bypass diodes that allow current to go around a shaded module to minimize current loss. I think the problem with running panels in series though is that you won’t have bypass diodes between the panels so if one panel has reduced amperage, the other will as well, and that can affect total power even more than the loss of voltage. The advantage of running them in series is typically smaller wiring, but in this case you’ve already got the heavier gauge wiring in place. I guess you’ll get less resistance nonetheless and possibly more headroom for the MPPT to do its thing? Of course in the end you have to ask how often it is in the Ollie, with a fairly small array of two adjacent panels, that you’re going to see significant shading on one panel and not the other. Certainly it will happen on occasion, but my personal experience is that we’re almost always either in deep shade or full sun. I’m not sure it’s worth the trouble myself but I’m definitely curious to see the results and maybe learn something new.1 point
-
Thanks on that John. Much appreciated.1 point
-
I am not familiar with the BC35 wireless camera, but I would worry a lot about signal loss, especially if you have a long pickup with lots of gear like generator, tools and bikes crammed in the bed. A wired one going to a transmitter near the front of the trailer up HIGH works fine, from my experience. If you do put a wireless one in the Ollie, do mount it up high so it transmits through fiberglass rather than dense objects like your spare wheel, truck tailgate and stuff piled in the truck bed.... try for direct line of sight through your TV back window. Do NOT drill any holes until you have found a good location by trial and error. I would rather have a high quality image and slow jerky frame rate than what the current cameras offer...😠 https://olivertraveltrailers.com/forums/topic/1973-how-to-install-a-garmin-bc-30-backup-camera/ John Davies Spokane WA1 point
-
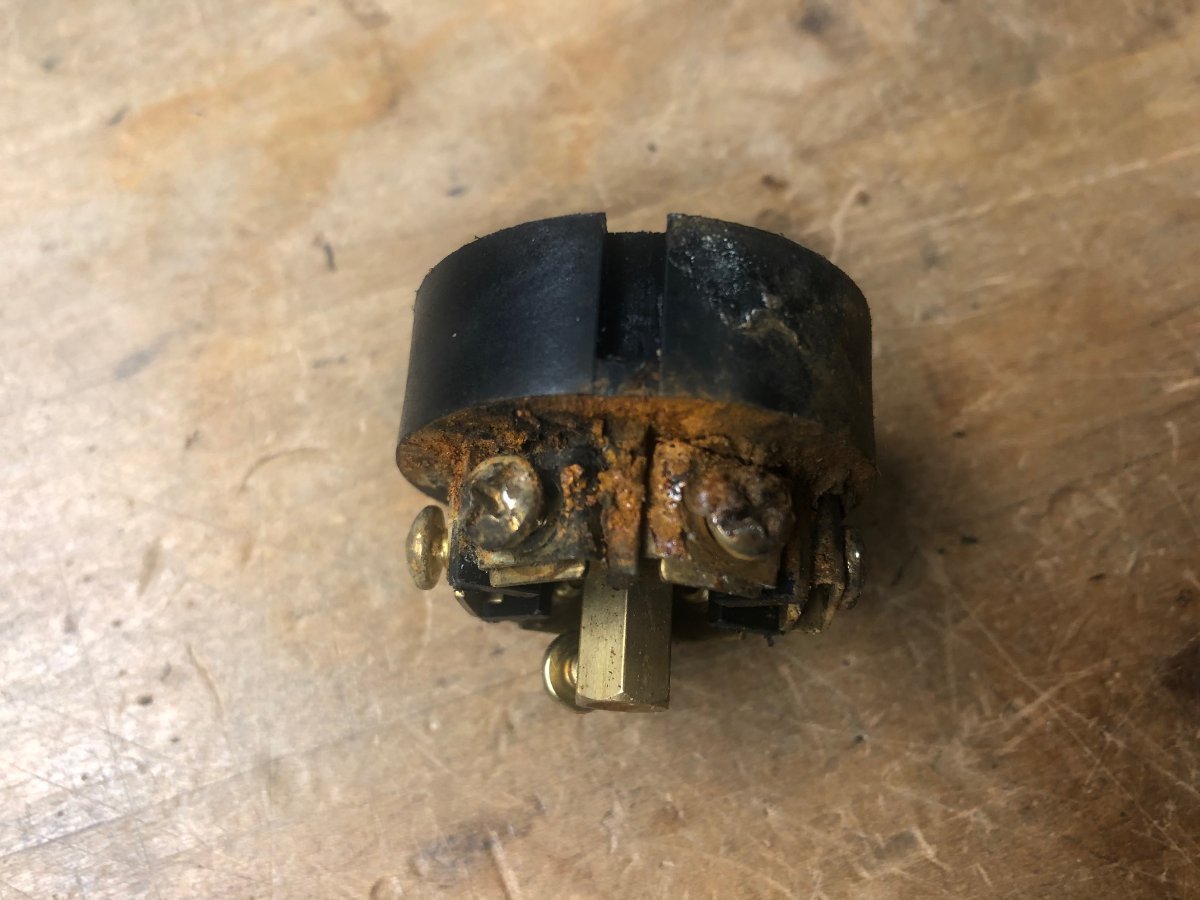
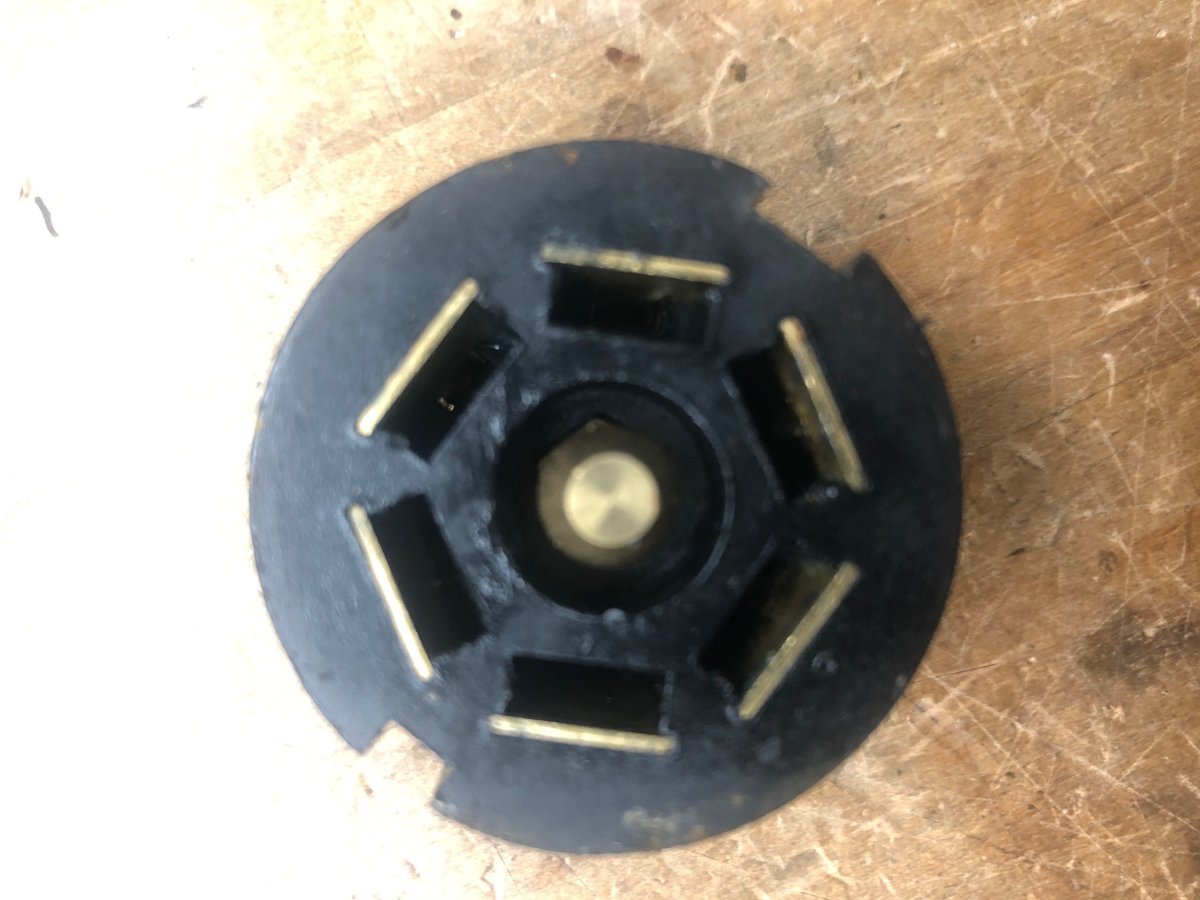
We ordered a plug cover, hoping this will prevent corrosion such as pictured above. https://www.etrailer.com/Trailer-Plug-Covers/Optronics/ACP7B.html?feed=npn&gclid=CjwKCAiAnvj9BRA4EiwAuUMDf8n3IupBLlkaiKR7gn70_wBw_1R35JYFvGHSVDniWO0Th7U_FyU0HxoCdVgQAvD_BwE1 point
-
You might continually bang it if you don’t buy a Legacy II!! 😜 Mike1 point
-
No - someone out there wants you to simply change the way YOU think 😜 to match the way THEY think.1 point
-
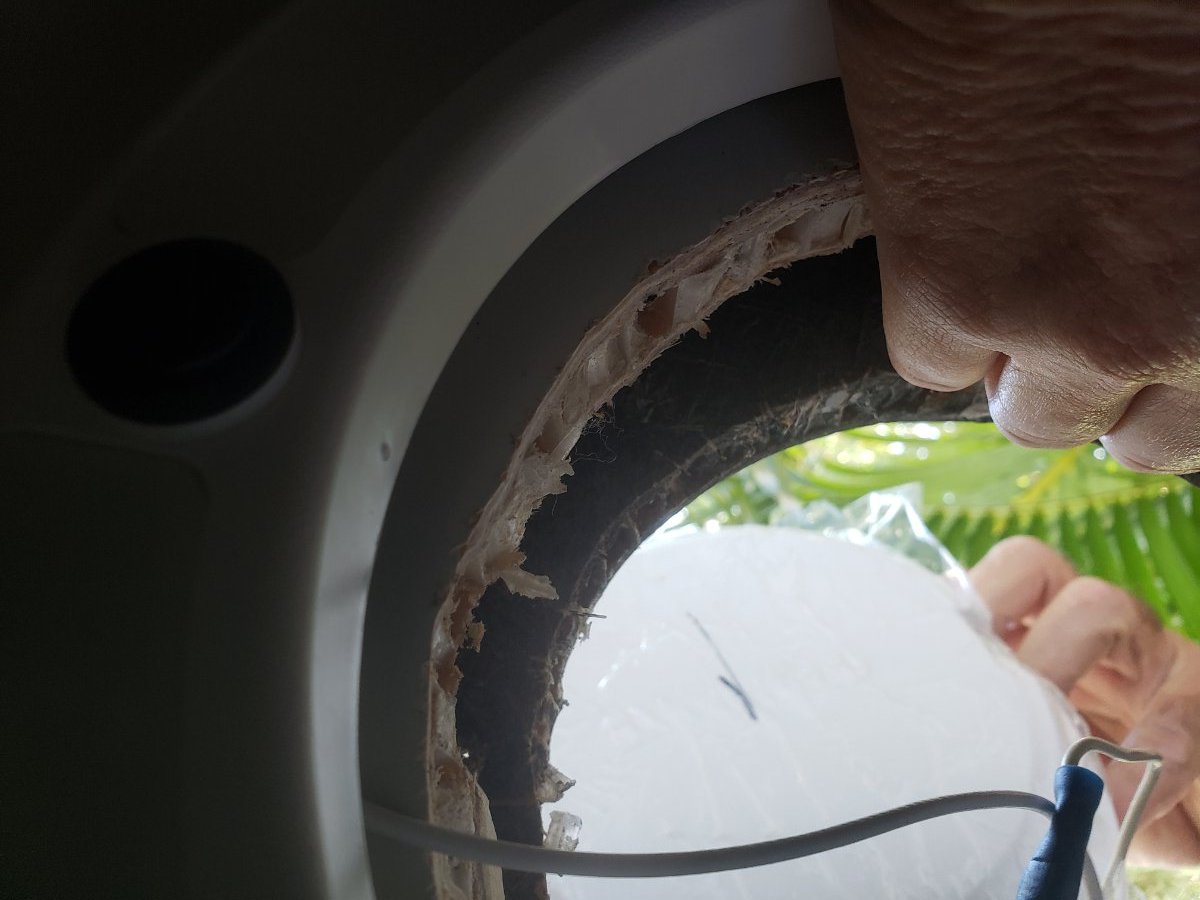
In late October this year I took my Elite II Oliver (Hull 615) to Republic, Washington for Elk hunting. There was 2 to 6 inches of snow on the ground and temperatures of 8 degrees F at night, and highs of 22 degrees F during the day. I stayed in an RV park so as to have AC power readily available. I have a 5 probe digital temperature system installed in my trailer. Probe #1 is near the propane tanks, #2 is under the forward dinette seat, #3 is under the drivers side bunk, #4 is under the passenger side bunk, and #5 is attached to the spare tire. (Note, numbers 2, 3, and 4 are as low is I could get them.) During my first night I noted that #2 temp was at 28 degrees, #3 was at 22 degrees and #4 was at 38 degrees. The "ducted" heat kept ONLY the starboard side of the trailer above freezing. I put small AC heaters under the dinette seat and under the port side bunk. After that, all internal temps stayed above freezing. The drivers side bunk area never got above 36 degrees, even with the 300 watt heater. Having foreknowledge of the expected temperatures, I pumped 8 oz of pink antifreeze into all 3 of the exterior water fittings. I then wrapped the fittings in pipe insulation. I believe that I had not done that, all three fittings would have frozen and cracked. I completely forgot about the exterior shower, but evidently lucked out as there has been no leak so far. I intend to purchase 3 each 100W DC heaters, and install one under the forward dinette and 2 under the drivers side bunk. There is a spare fuse for the drivers side awning which I will use to wire all three heaters through. Have not decided where to put the switches yet. NOTE: Pulling the Olly over salt covered roads can cause a real mess inside the RV 7 pin plug. Oliver service talked me through a very strange set of symptoms, but a set they knew quite well. Symptoms were - with trailer in a camp, no AC connected, occasionally the outside lamps of all 4 of the trailer running light/turn signal assemblies would come on (very dimly). The would stay on until late at night when the battery charge fell below 12.6V. Then they would go out. Service said "it is stray voltage from your 7 pin plug, take it apart, clean it and put some dielectric grease in there." When I took it apart it was so corroded that I replaced the 7 pin plug. Remember, this trailer was delivered to me last March (2020). Service told me that they have switched to a molded 7 pin plug to prevent recent trailers from experiencing this problem. The exterior of the plug looked pretty good, but the interior was a mess!
1 point
-
John, Fine fix and photos. Should last a long time, too.1 point


-
Recent Achievements
-
")


")


")


