Leaderboard


Popular Content
Showing content with the highest reputation on 07/21/2022 in all areas
-
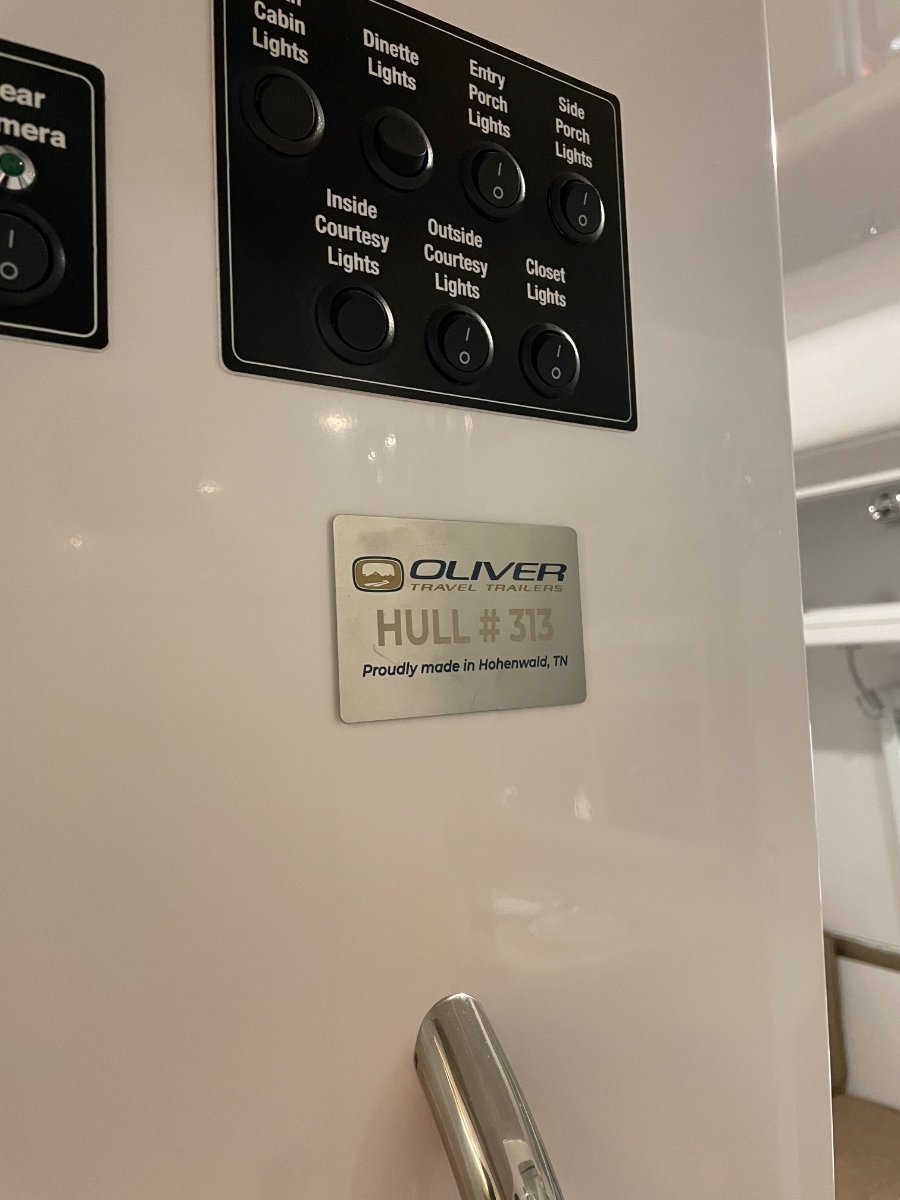
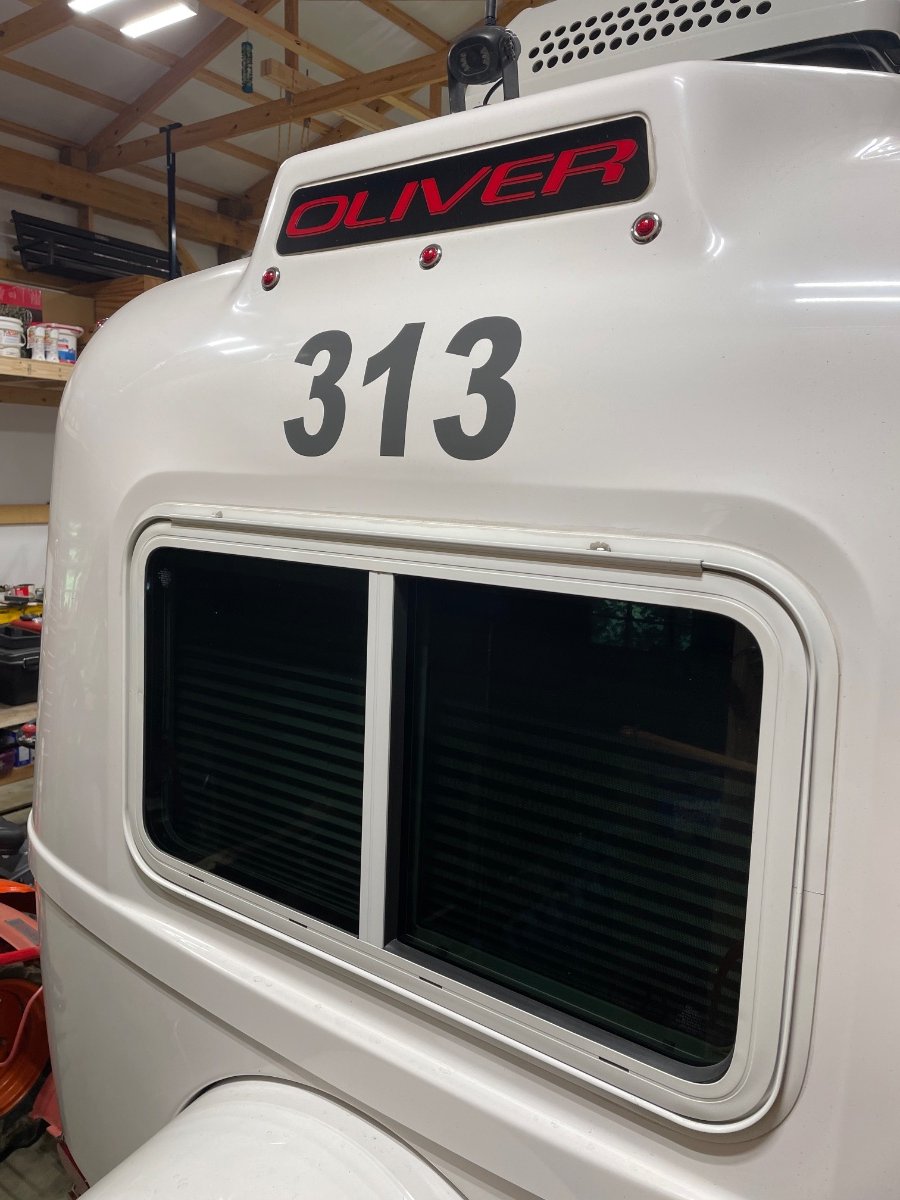
@Margaret At the time your Oliver was built your hull number will be the last 3 digits of your VIN number. Later production Olivers have a hull number not indicated in the VIN. The hull number indicates where in production history your Oliver was built. I have hull 313 so it was the 313th Oliver built. When you ask questions about your Oliver and readers know your hull number it gives us some idea of what might be going on with your Oliver. Some problems are known to be associated with a particular range of hull numbers. Owners that have Olivers built around the time yours was built may be able to provide help because they have already experienced the problem you are having. By listing your hull number in your signature line readers have some idea as to how to better respond to your questions. Look for VIN sticker on left front corner Or on a sticker near the hinges on the door Your Oliver might have a hull number plaque near the door Some Olivers have the hull number on the top rear
 5 points
 -
Last pics.
4 points
-
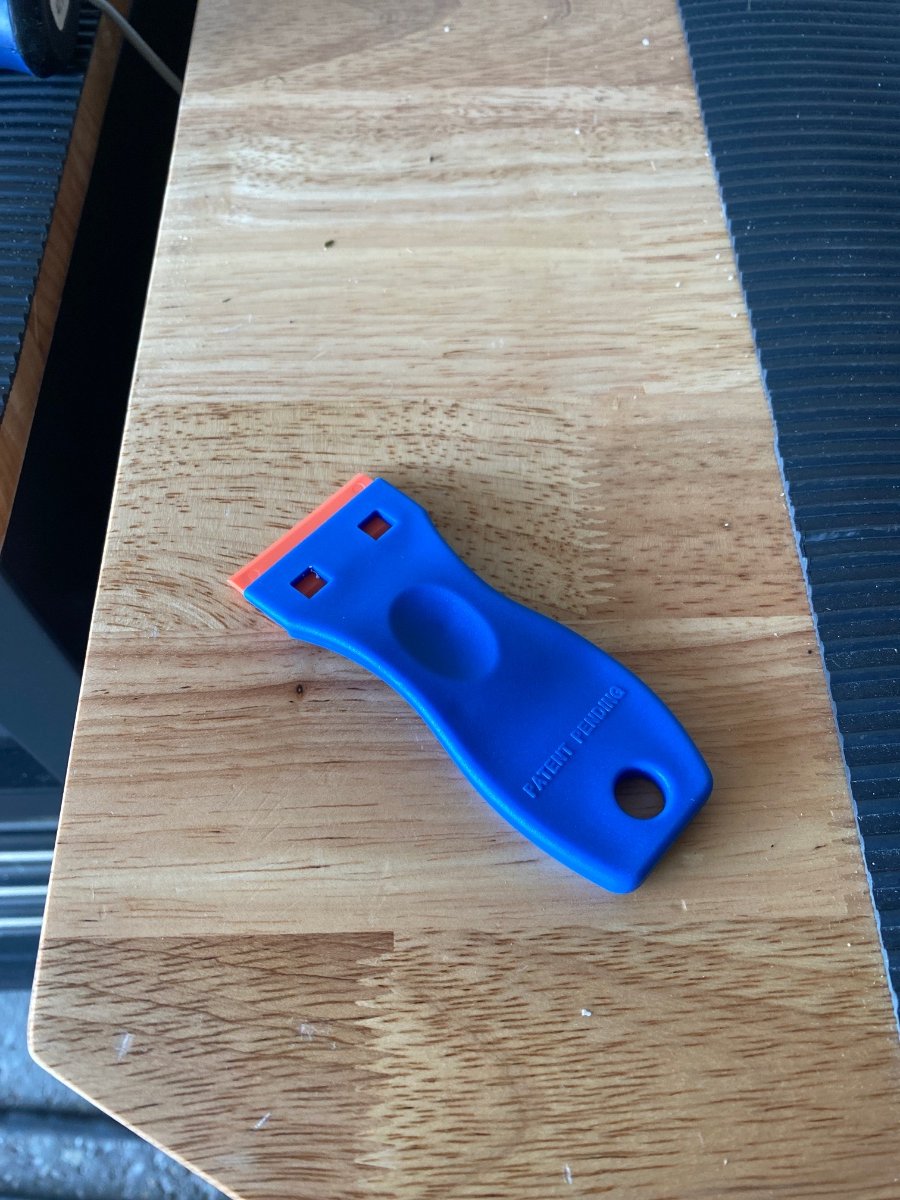
For anyone removing the awning seal adhesive or other “sticky stuff” from the hull, here’s a tool I’ve found very useful on the Oliver for removing caulk or adhesive without damaging the gel-coat. Plastic razor blade scrapers. Gets most of the stuff off, then final cleanup with isopropyl alcohol or automotive wax/tar remover. Limited-time deal: Plastic Razor Blade Scraper, 2PCS Scraper Tool with 60PCS Plastic Blades, Cleaning Scraper Remover for Stickers, Decals, Adhesive, Labels, Paint, Glass, Car, Window, Stove Top, Caulk, No Scratches https://a.co/d/4bf3egM
3 points
-
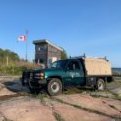
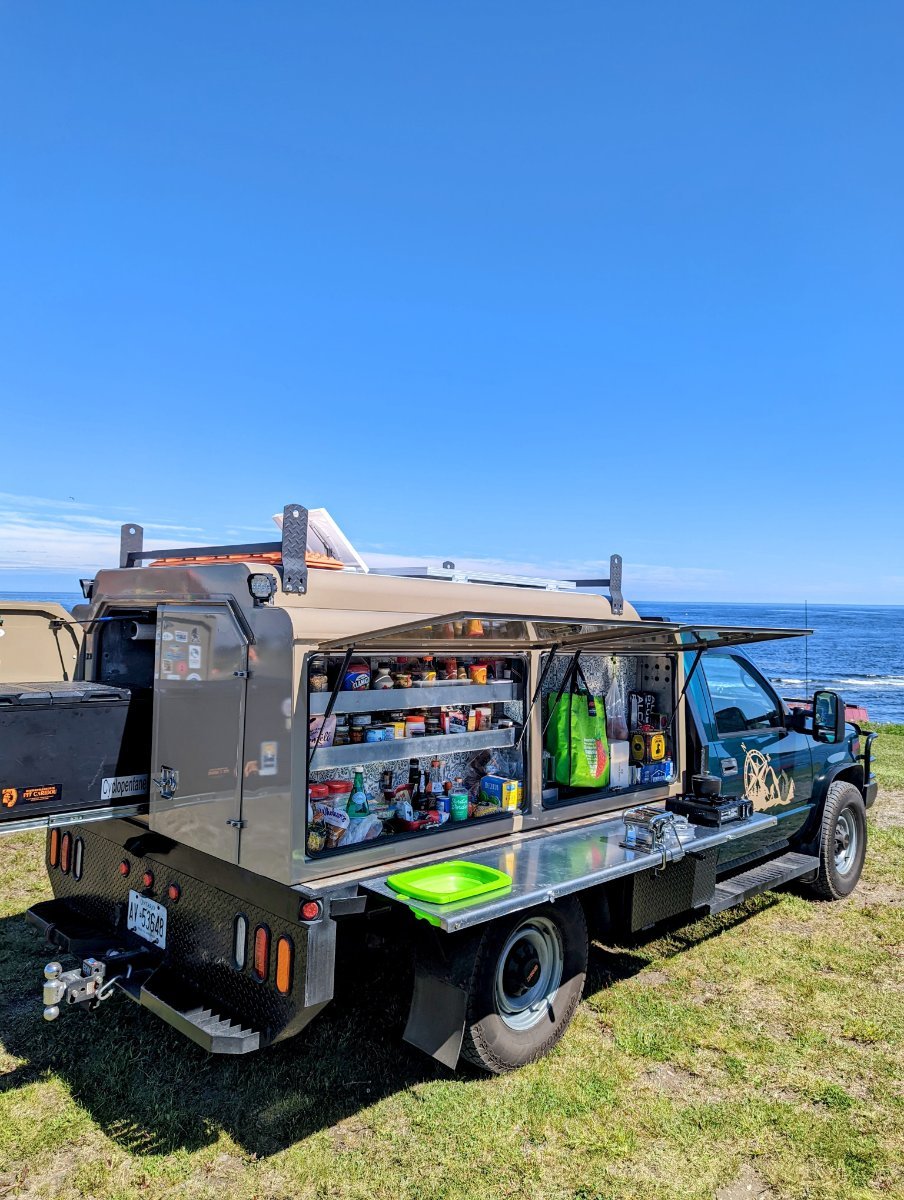
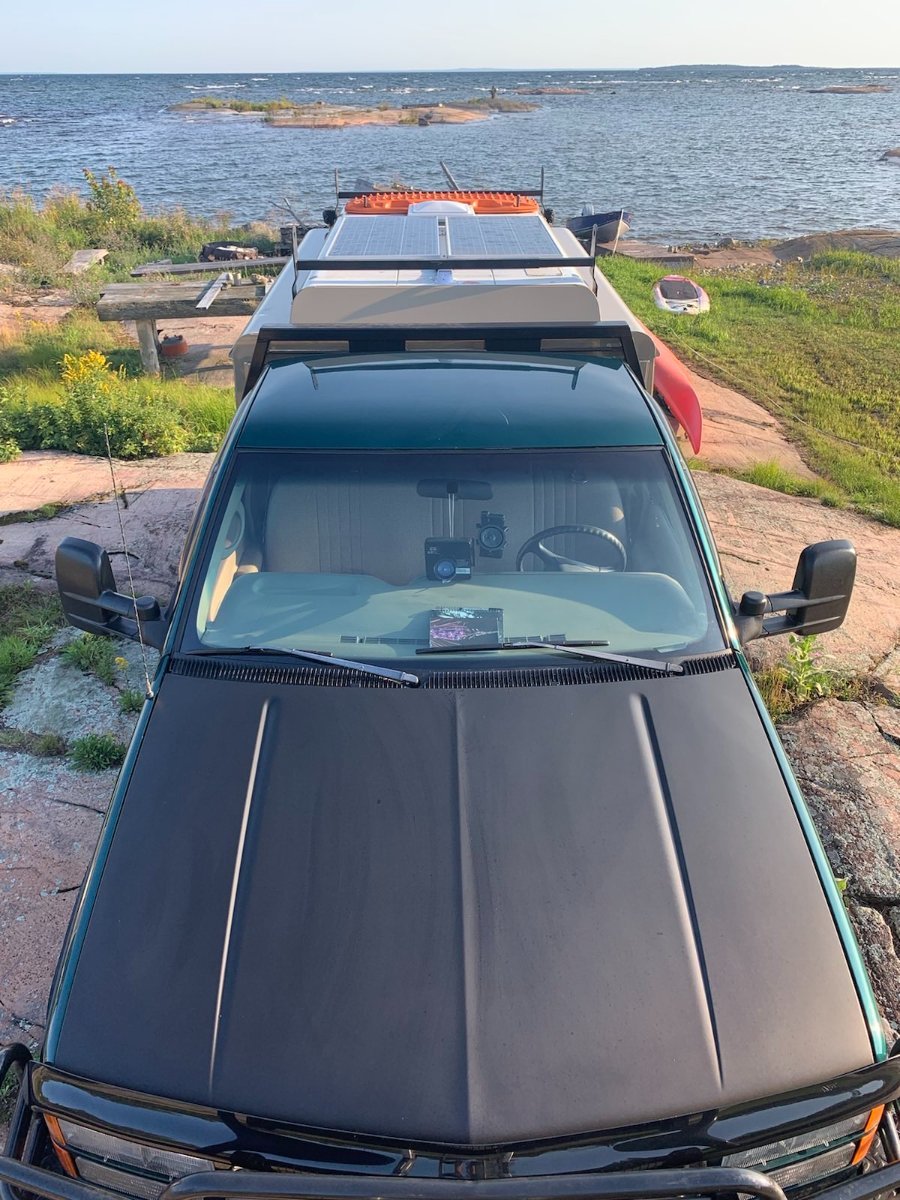
Hello fellow owners. Thought I'd put up some pics of our tow vehicle. Our truck is an old school GMC 3500 hand shaker 4x4. We picked up our trailer April first of this year and have rolled around 15000km since. We are taking a 2 week break at base camp before we head of to Northern Michigan site a Superior Lake tour. Thought people would like to see pics of the rig.
2 points
-
2 points
-
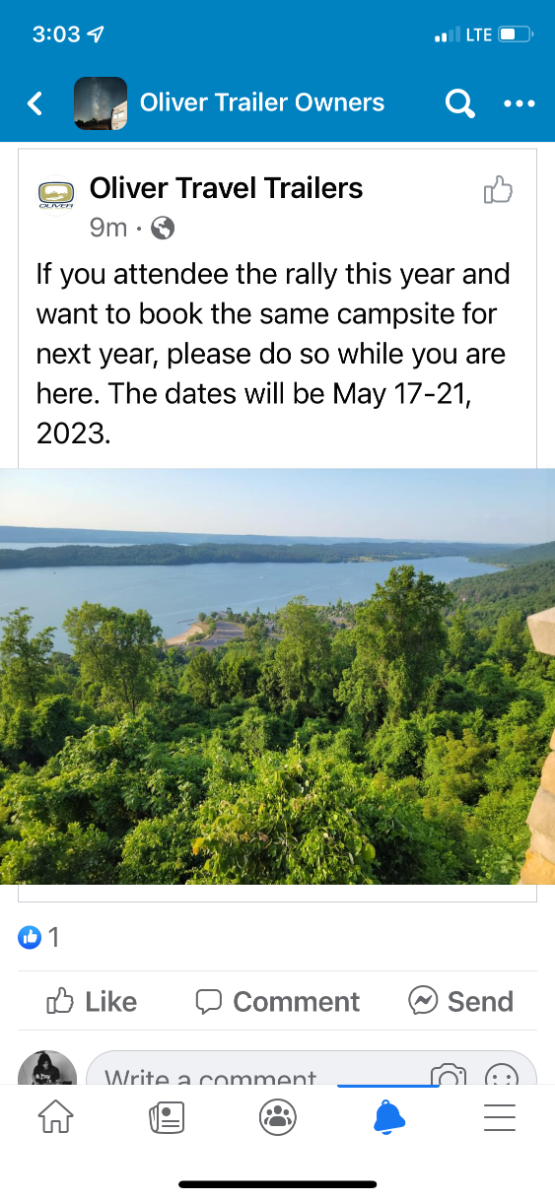
Here’s the Facebook post from Oliver with the actual dates of the rally
2 points
-
I installed the new flange OTT sent as a warranty replacement. Black ABS plastic. Decided to go ahead and use it since this is warranty work and any parts changes I made would be on me. I did put a little silicone lube on the pipe to make it easier to insert. I also noticed something that may be the root of the problem: the 4 screws that secure the flange to the floor are larger in diameter than the holes in the flange, so the screw threads were biting into the flange as well as the floor. I believe at least some of the screws were bottoming out in their countersinks without pulling the flange tight to the floor. The screw felt tight, but it was only tightening against the flange itself. Before installing the replacement flange I drilled out the screw holes so the screws turned freely in their holes. The toilet seems much more solid now. We'll see how long it lasts. Next time, if out of warranty, it'll be a metal flange...2 points
-
I'm sorry I don't recall the part number, and it isn't clear to me that the same cap would fit your awning anyway. My awning is powered. I would contact Panther RV and give them the model number of your awning. I found them very helpful, and the part they shipped was the correct one.2 points
-
I saw someone recommend those plastic "razors" a couple of months ago and bought one on amazon. It comes with about 100 blades and it was only about $12, WOW, what a great product. I used it to remove the caulking around the access panel on the bathroom vanity and it worked better than anything I've ever used in the past to remove silicone caulk with no worries about damaging the gel coat. I highly recommend it! albert2 points
-
Well, I missed that entirely - my bad, I did not interpret her description as saying that they have already been replaced. But new batteries should NOT take any time to function normally, they come mostly charged. Margaret, my apologies, and please fill out your Signature with trailer and tow vehicle information. John Davies Spokane WA2 points
-
@Margaret, how is the a/c doing now, and are you feeling any better? You're better off inside in the low 80's resting, than working outside in the 90+ heat, with your symptoms. Rehydrate, copiously, preferably with Gatorade or pedialite, imo.. Not a medical professional, just a mom, and that's the advice I'd give our daughter.2 points
-
I know some of you have either removed or considered removing the weather strip along the awning. I for one, love sitting under a short-set awning in the rain. I usually have stuff on a table outside the door and I don't like the idea of having water streaming down between the awning and the side of the camper. With that said, my '17 ILOVHER has needed a replacement weather strip as it's starting to deteriorate. (btw, I have the manual Fiamma) This last rain storm had water coming down in the middle and the brackets were not blocked with debris....had just cleaned and waxed. I reached out to Oliver to see if I could obtain a new strip and was told they offer a new 'J' channel style in addition to the old. I'd like opinions on whether the J style is worthwhile as compared to the old. It seems to me it would collect more pine needles and need frequent cleaning of dirt/mold. I also read the strip is now placed lower than they were on the '17s. If you have the J style strip..how do you like it? Can any of you provide photos? Thanks in Advance! Claudia1 point
-
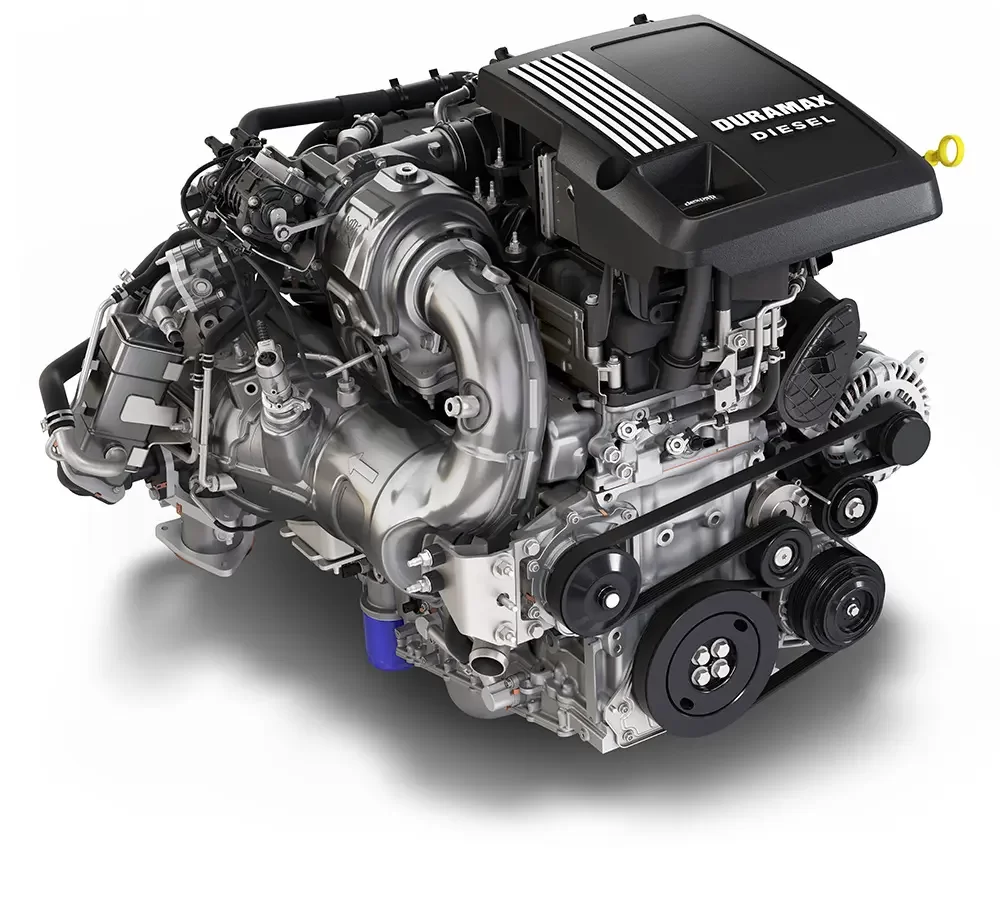
Thanks for sharing the links john. I value your knowledge and experience as an engineer (which I am not) and I really appreciate all the contributions you make on this forum! I'm simply sharing my experience - in which I have been very impressed. I am also a member of the 3.0L Duramax facebook forum. I don't really do social media but you can get a lot of info and guage the "pulse" from the groups function of Facebook (including Oliver). It's true that many owners have experienced the crank/no start problem. It's also true that a great many of owners have not. In a year and 7 months of ownership, I have never had it happen. I don't know what the percentage of units sold have reported this issue but I'm going to guess it's a significant minority. Also, if you read about the problem, it doesn't leave anybody stranded as the truck starts on the second try. I haven't had a single problem with the truck. Now, it's early at 18k miles - and I do wonder - because I come from a bias of extremely good reliability experience from my trust old 2007 Toyota Sequoia. I strongly considered a Tundra (2020 or 2021 model at the time) becuase of the demonstrated reliability but they suck gas, a lot of gas, and the towing package and tech on the GM was way ahead. The LM2 engine was built from the ground-up for light duty trucks in joint collaboration with Issuzu Heavy Industries. My understanding is that Issuzu has an excellent reputation for durable small deisels in Europe and Asia. I bought it because the technology and efficiency are remarkable. The author of the two articles you cited says so himself - quote - "the LM2 is inherently balanced and provides a very smooth and powerful driving experience. It is one of my top five favorite engines on the market." As for why they are replacing it, I'm going to guess it has to do with it's size. It doesn't fit into new vehicle models as the author states. It requires significant height in the engine compartment at a time when manufacturers are designing vehicles with more and more emphasis on aerodynamics. If you look at the Chevy Silverado /GMC Sierra, they have a very tall front hood and square profile. The 3.0 deisel takes every inch of space and I think the Silverado even requries a different hood with slightly higher profile than the gas engine models. I will report back if I have any problems with my truck as this form is a helpful resource for Oliver owners. Right now, my experience (n of 1) is that a 3.0L deisel mated to the 10 speed transmission are excellent to pull an Oliver Elite II.1 point
-
I'd personally never put gas, or a gas genset on the bumper, but others might. For a number of reasons. Rear end collision hazard, top among them. Difficult to use rear exit window in a true emergency. Theft opportunities. Changes tow balance, etc. There is a tray available for the tongue, if your trailer doesn't have one already. All you need is a small, lightweight genset to charge the batteries, imo. We only carry a Honda 1000. It charges batteries, when solar fails in crummy weather. It won't run ac. Slightly heavier, in the 220 to 2400 watt range, may run the ac for you, as well. Still something I can lift and move. Not as easily, but possible. Does your trailer have the front generator connection? We do, though we've never used it.1 point
-
That is one of the most versatile, functional and "Brava Alpha" TVs I have ever seen! Phenomenal work. Appreciate the photos.1 point
-
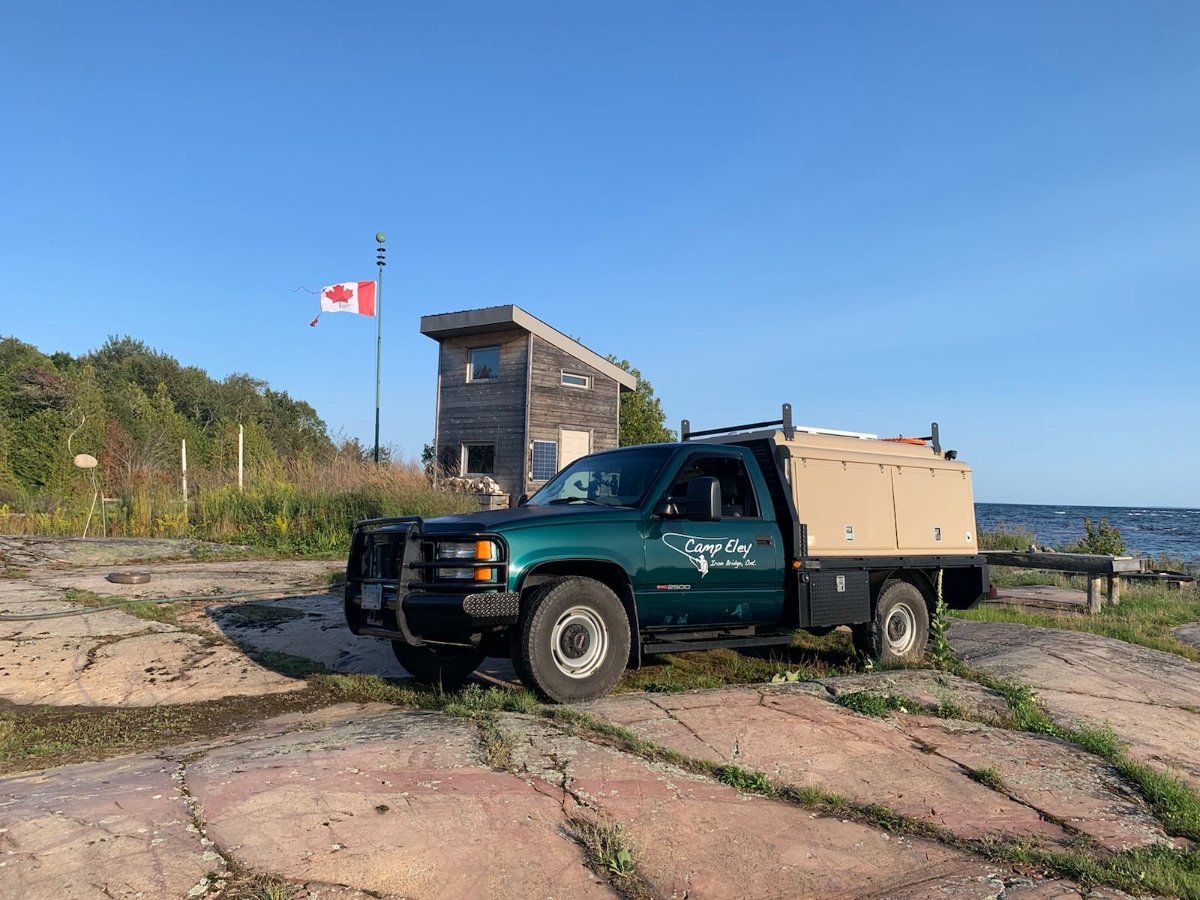
Hey Kirk thanks. It's a work in progress but it makes a great vehicle to explore with while base camp stays parked. Now if the borders can stay open this winter I'll add much needed stuff to the build while in California😉1 point
-
That is a unique TV! Happy travels - Mike1 point
-
1 point
-
I don't carry bikes, but I feel your pain. A carefully worded weight restriction, including "no trailer connection" from their legal team might just allow them to offer the 2" hitch again. Maybe. One bad apple (that we know of...) spoils... it for everyone. Keep asking, folks. People who buy the best trailer tend to buy better bikes and better bike racks, imo.1 point
-
Nice comparison! I’m all for the new quieter AC!!1 point
-
No worries Bill, thank you.1 point
-
I will add that Oliver Sales or Service (?) will send you a complementary hull number plaque as shown above for you to apply near your entry door, normally it would be below the switches, but you can use your imagination. My 2017 LE2 Hull 218 did not have one, they sent me one a few years ago. It did not come with adhesive, I used double sided Scotch tape. You can also look at your trailer registration, the VIN is on there, so the last 3 digits should be the hull number. Normally when you submit a Service Department request (Ticket) they ask for that. So did you in fact install new batteries? I was more than a little confused about that post. What kind and how many? John Davies Spokane WA1 point
-
I removed mine the day it came home from the factory, due note it does remove with no problem as it was new and just installed. Older ones will most likely need some help as the sticky attaching glue will be harder to get off. I used a commercial product sold at body shop supply stores, it's runs $25.00 per gal, but boy does it remove grease, wax, glues, etc., this product can soften paint in some cases, so testing with it is always recommended, ok for fiberglass. Do not go looking for this product at Home Depot, Lowes, Ace Hardware, etc., they don't have it. its professionally sold only. The product I use is, 5900 5 Star Xtreme. https://5starxtreme.com/cleaners/5900-maxx-solv-wax-and-grease-remover I paint a lot of models, plastic and metal, I use it as a cleaner before I paint. trainman1 point
-
Not for nothing, as a friend used to say, I doubt the new batteries made that difference. Especially with 110 outlets, which have zero to do with your batteries (unless you'retalking about running them from the inverter. Plugged in, your charger/converter steps 110 down to 12v.) Bouncing down the road could jiggle some connections. A new campsite on return might give you more clean power. Or, fewer campers on the same run might give you better, cleaner power . Glad everything is working, and I have my fingers crossed. I'd still schedule a good rv tech and inspection, were it me. I'm certain replacement of the batteries was a good idea, though. 5 years is likely end of life, especially when your trailer may have not been well maintained by previous owner. What batteries did you buy?1 point
-
@Margaret I have a newer thermostat so I can’t be any help with yours. Looks like there is a Dometic 3314080 and a 3314082. Do you have a manual for the thermostat? This might be it https://www.dometic.com/externalassets/thermostat-control-box-ccc2_64755.pdf Here is a users guide for a similar thermostat https://www.intechtrailers.com/images/info/PDF/Dometic/thermostat-guide.PDF
1 point
-
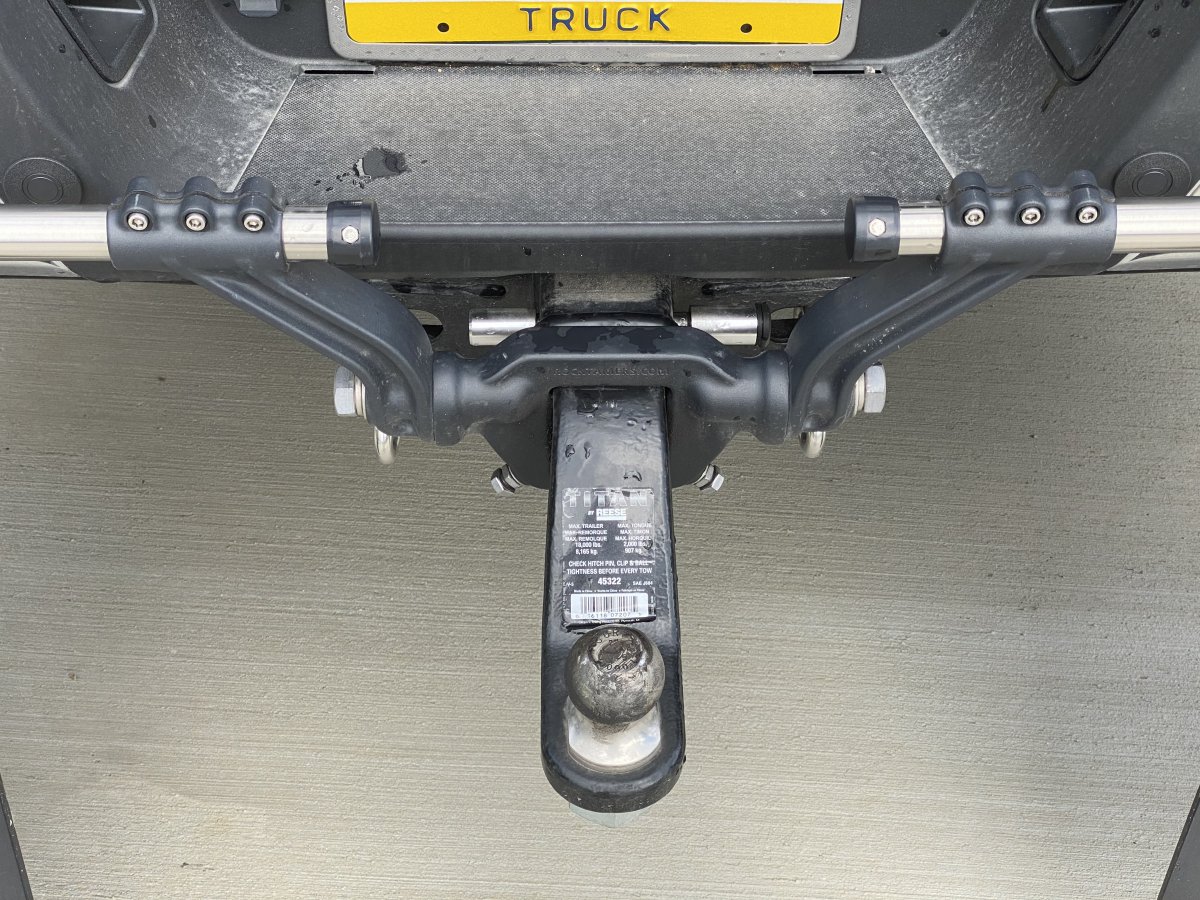
The Andersen greaseless ball has served me well with no noticeable or excessive wear with the bulldog hitch and no greasy mess to clean up and zero squeaks. I shed no tears when we sold our Andersen WDH after purchasing a TV that does not require a WDH.
1 point
-
This is discouraging, I will be picking up our Elite-2 in August and am just now discovering that my 1.25 bike rack will not be an option. Why wasn't that explained to me when I was putting my build-sheet together? My Swagman XC2 bike rack is not RV approved, I didn't even know that was a concern. The only approved racks are 2" shafts and the Elite-2 has a 1.25 receiver. Ugh! If I can't use the 1.25 receiver what good is it!1 point
-
My wife and I completed the Great Loop in 2017 aboard our 36' Kadey-Krogen Manatee. The 90 hp diesel pushed us along our 5,300 mile route at an average speed of around 7 mph. Following the seasons in a counter-clockwise direction it took us a year to complete the adventure.
1 point
-
Not sure if this has changed since my 2018 LEII but we do not have a light in our pantry. I have been through a couple of stick on lights and finally found one I like. Sunbeam+ Under Cabinet Light. It comes with adhesive metal tabs the light is magnetic and sticks to the tabs. It needs to be easily removed because it recharges with a USB type C plug. It is motion activated and turns off automatically after 20 second. It has three color options, light blue, amber and white./ $22.00. I will update this post after traveling to update how long it lasts on a charge and if it falls off the magnets during traveling. https://www.acehardware.com/departments/home-and-decor/novelty-items/miscellaneous-novelty-items/6012170 lightvideo.mp4
1 point
-
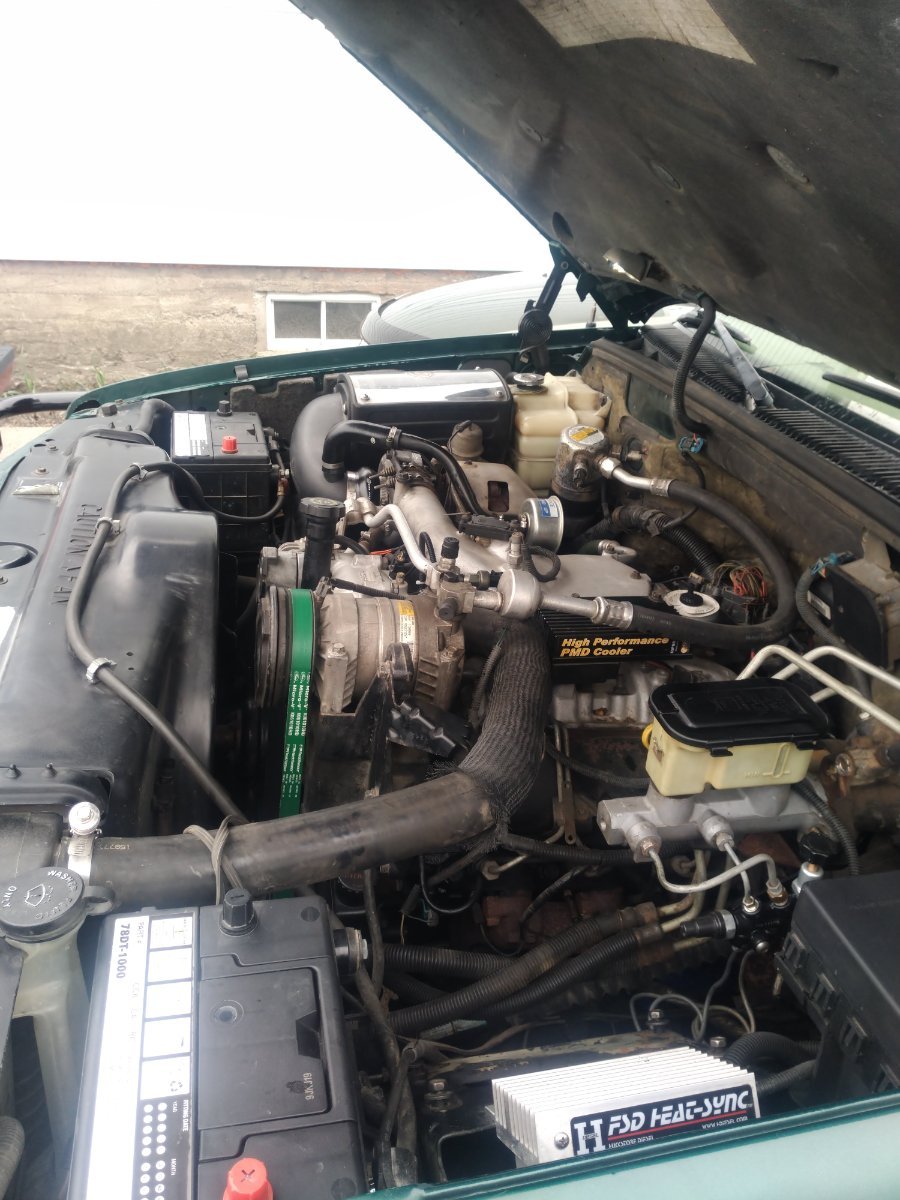
The 3.0 Duramax is a powerful and efficient motor but it has some pretty significant design faults that are enraging some owners, a redesign is coming that will hopefully fix them. I personally would not keep any modern diesel beyond the warranty period, and I would accept the idea that the entire cab (or body on an SUV) of your 3.0 truck might have to come off at a GM dealer to fix it. If it won’t start part way through your dream vacation, you might regret your purchase decision… especially if you are completely stranded in northern British Columbia with NO cell connectivity, no dealer within 300 miles and no way to get to your destination in Alaska or to return home. Think about that for a while 😳😳 https://pickuptrucktalk.com/2022/01/3-0l-duramax-diesel-long-crank-issues-continue-to-confound-dealers-frustrate-owners/ https://pickuptrucktalk.com/2022/04/replaced-already-new-gm-3-0l-duramax-diesel-lz0-coming/ OTH I do love how the turbo is mounted up top where it is super easy to service. Unlike the new Tundra/ Sequoia gas V6 and all V8 turbodiesels… John Davies Spokane WA
1 point
-
There is a slight difference in generator charging your former Casita and your present Oliver. The Oliver has a built in Electrical Management System (EMS) that most likely your Casita did not have. If you don't have a neutral bonding plug in your generator the EMS will prevent the generator from connecting to the electrical system in your trailer, but for the time being it's OK to bypass the EMS.1 point
-
As we say in Florida, "When your up to your butt in alligators, it’s hard to remember your objective was to drain the swamp". The Honda EU2000i will provide enough power for most things in the trailer with the exception of the air conditioner unless your Ollie has a EZStart installed. You will have to manage your power consumption and not overload the generator as JD mentioned above. Mossey1 point
-
I realize that sounds harsh, but it was, for us. Over our many trips, we've driven most of the Alaska named highways,,and we'd do most of them with our 4x4 truck, and our elite. Unless you're really tall, the elite is lighter, narrower, and easier to maneuver. We've not taken our elite to Alaska, as we routinely deliver motorhomes. We fly home. That begs another question. Its often still snowing or snowbound, along the route in early may. Snow can start in September. Getting 5 months would require patience, and alternate travel plans. 7 would be tough to do. My cousin lives summers in Cantwell, in a dry cabin she built when she was in her twenties. She grew up there It's spectacular. But, I'd plan on getting out by mid September, latest. Unless you ferry to the "tropics " of Juneau, an ferry out, as we have done. Still, the Yukon and bc can be uncooperative on the way home. And, you'll have a hard time finding open campgrounds in bc or the Yukon. We've camped in closed campgrounds in the Yukon many times. Not a huge deal, if you're self contained, and self sufficient. The only services in most are free firewood and pit toilets, anyway. Keep toilet paper in your pocket.1 point
-
Four 1/4” SS bolts through 4 holes drilled in the bottom of the basket.1 point
-
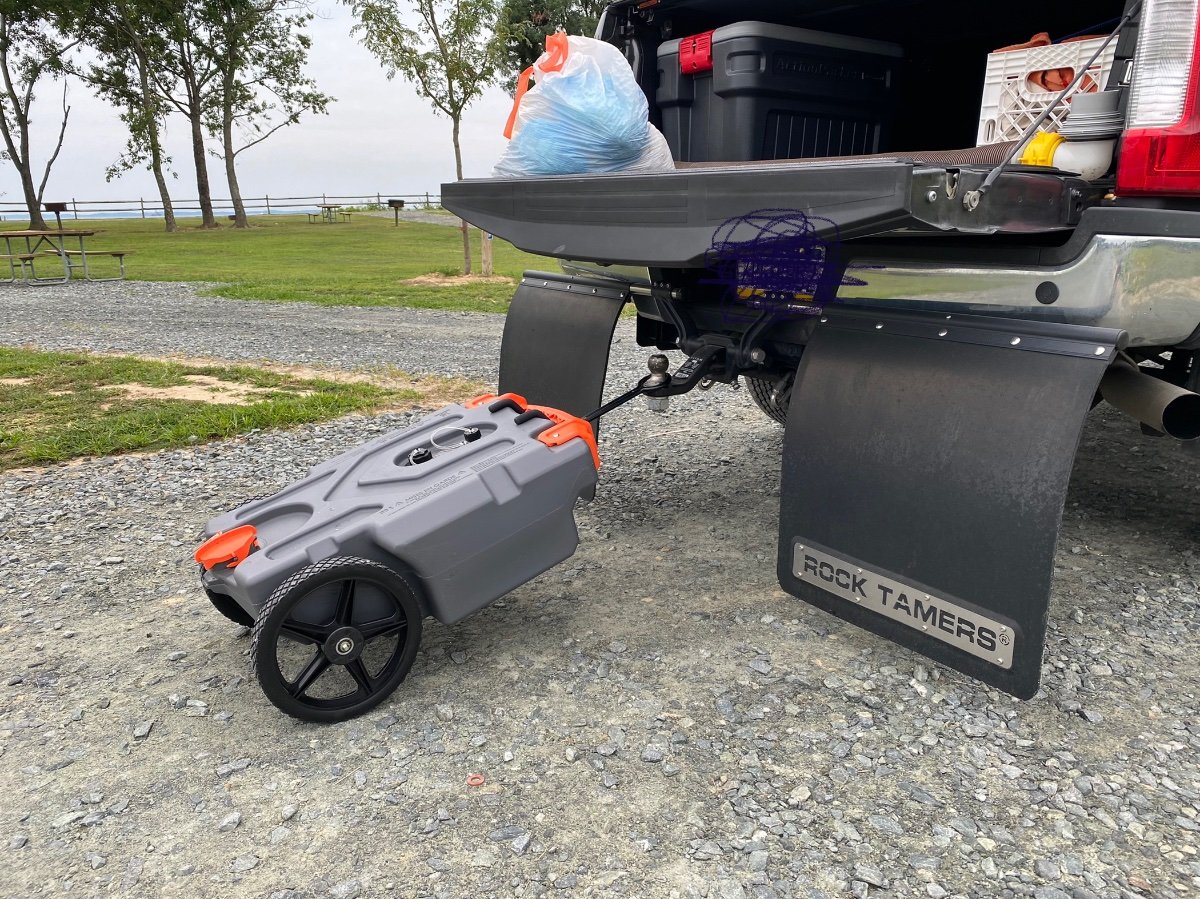
No need to lift or carry a full tote tank to empty it. We have the Camco 15 gallon tote and it’s worked well on the few times we’ve needed it at campgrounds that weren’t full hookup sites. The tank comes with a hitch attachment to hook to the ball on the tow vehicle to drive it (slowly) to the campground dump station. Sewer hose, connectors and rinse hose also included as well.
1 point
-
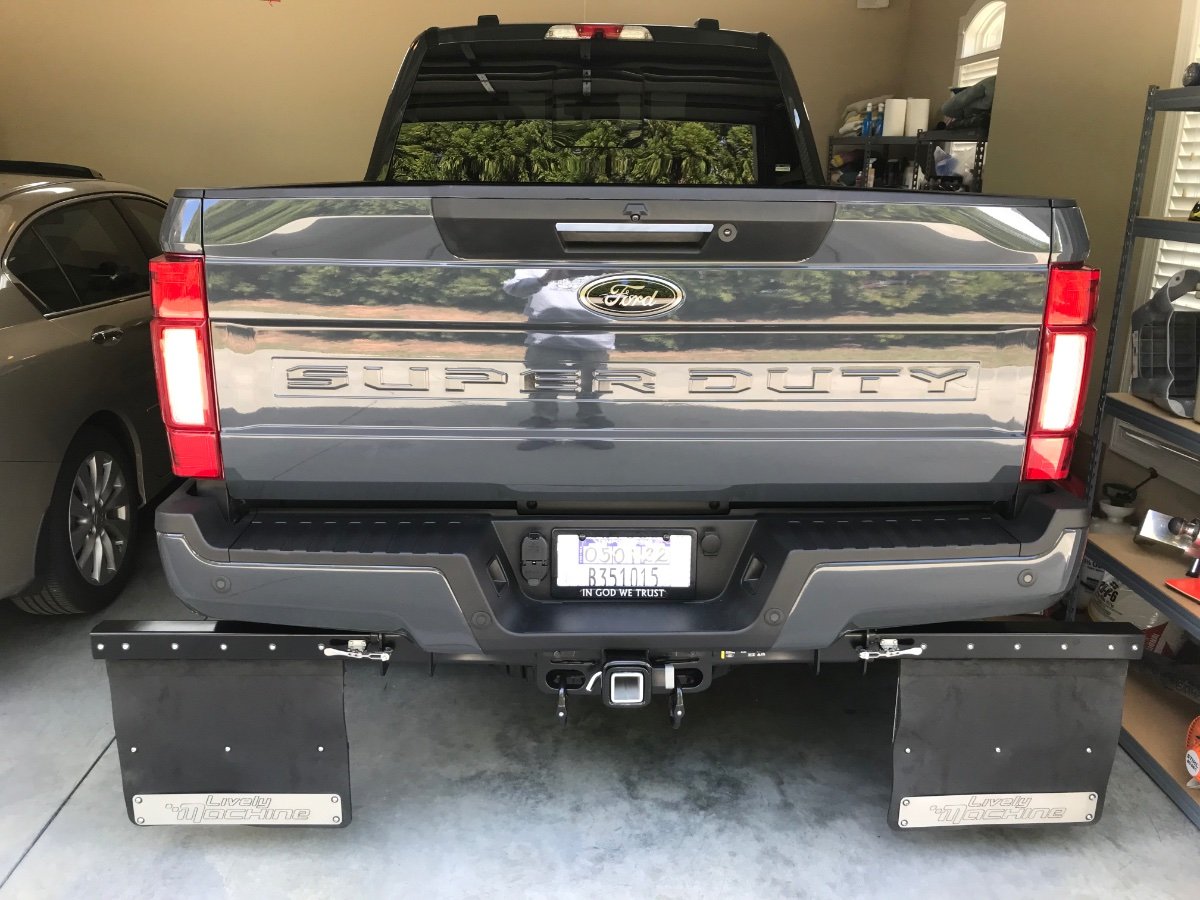
Bill, I am very happy with these “Rock Stoppers” they are made by Livelymachine.com and are designed Super Duty specific. I don’t know if they fabricate Rock Stoppers for other trucks. I can report they work excellent and protect the front of our Ollie and keep it clean. If anyone has questions PM me.
1 point
-
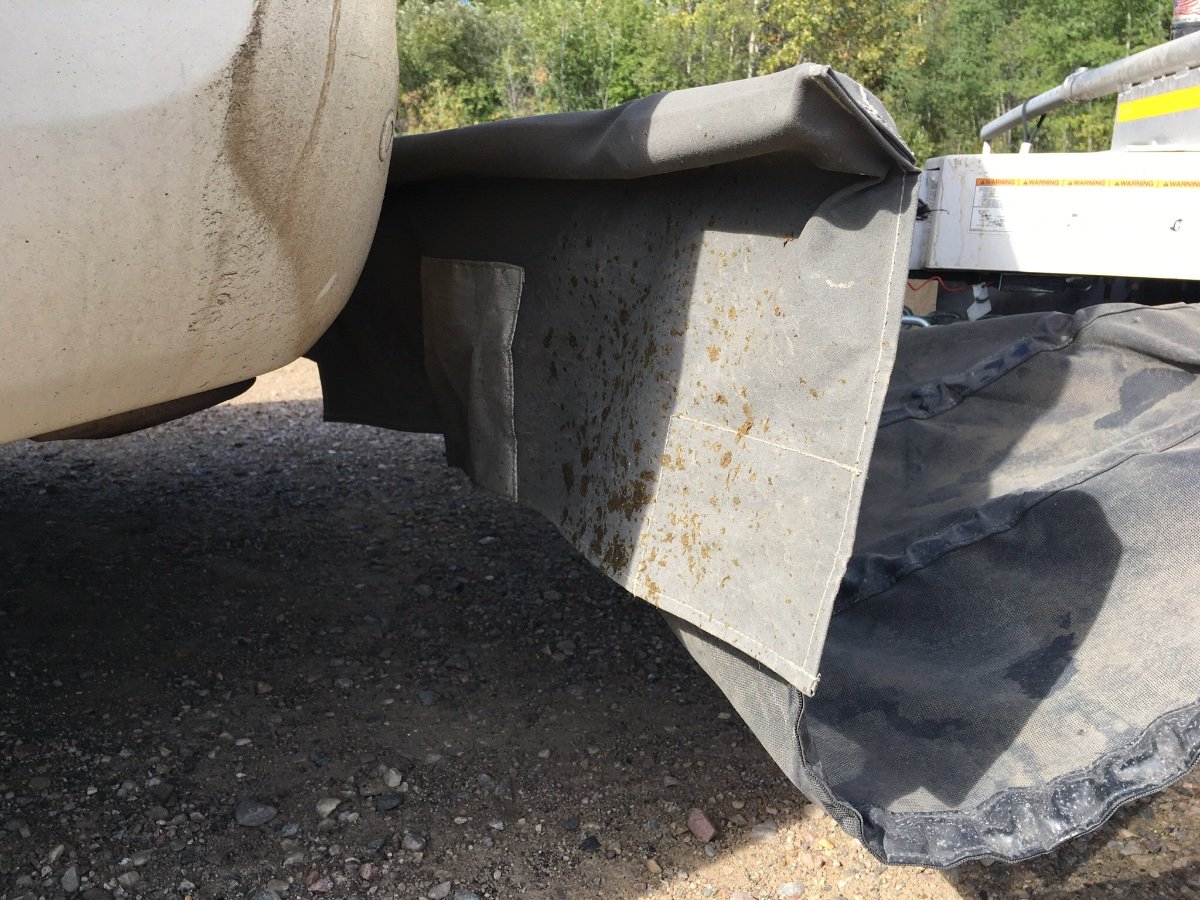
I would be a little cautious, they actually should sail back at an angle. The Rock Tamers I have (hanging on my wall gathering dust for four years) are a very similar design, the Australian instructions say they should be rotated to give a static angle of say 20 to 30 degrees at the top of the flaps, so that they will sail at a 45 degree angle at highway speeds. That way stones will be deflected down to the ground instead of bouncing straight back onto your truck bumper and bodywork….. The USA instructions are completely silent about this, and most Rock Tamers I have seen here are installed dead vertical. It is just something to be aware of and to keep an eye on, it may not be an issue with yours. But if you see gravel lying on top of your bumper, and tail light or tailgate paint chips, that is why…. https://www.clearviewaccessories.com.au/wp-content/uploads/2019/03/RT_MANUAL.pdf Plus if you are towing on gravel, or fresh chipseal, and you pass over a deep dip, they may hit the surface and throw up a ginormous rooster tail of gravel right onto your Ollie. That unfortunate characteristic is unavoidable with this design, it is what it is. You need to go with a completely different design like a Stone Stomper to avoid that. Which BTW is also effective against Wood Bison manure from the highway (Yukon Territory). Notice how much cleaner (relatively speaking) the A frame of the Ollie is, in relation to the truck, flaps and the cloth mesh, which very effectively keeps all the “chaos” at ground level, as well as off the rear hatch and glass. In pouring rain at 60 mph the back glass stays practically dry… 😳 John Davies Spokane WA
1 point
-
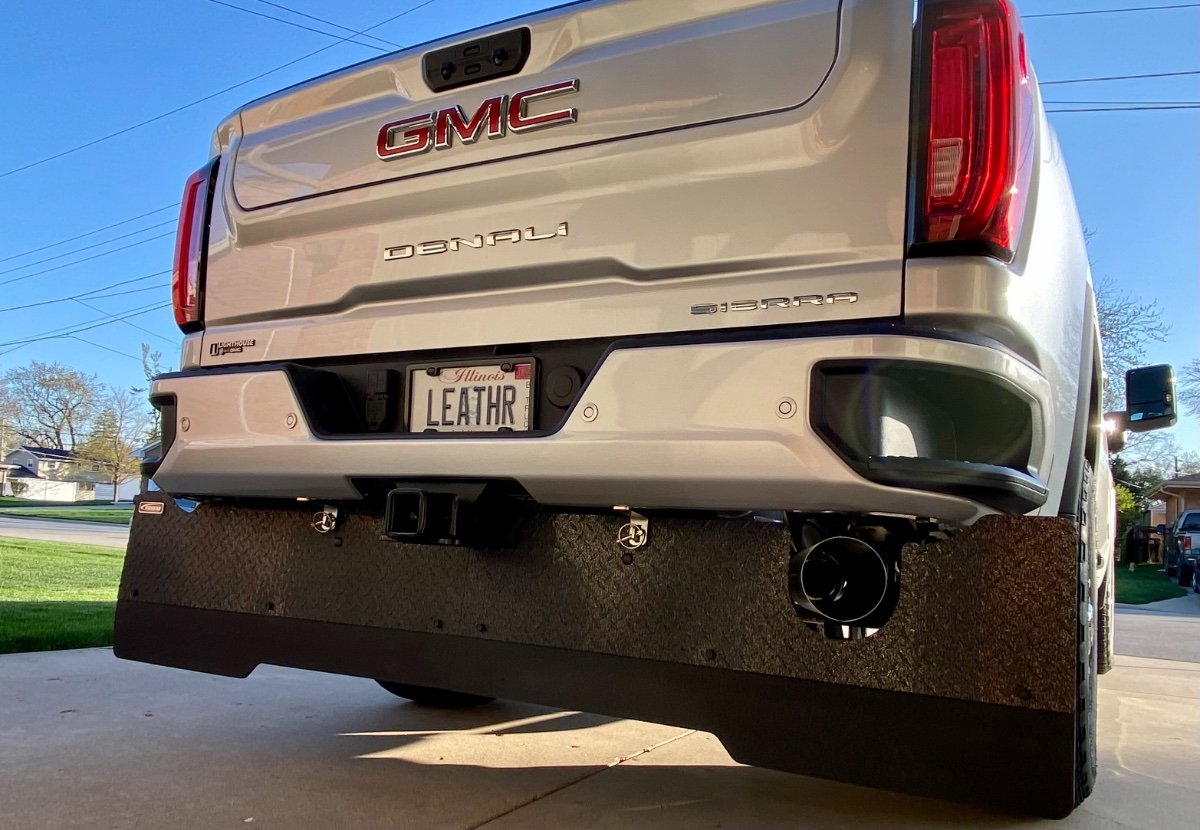
Nice flaps, Patriot! It is always good to see what accessories others are using. This was a major concern for us, too, before we took delivery of our Oliver. After we placed our order it took some time to find what was right for us to protect our investment. We ordered and installed this "Rockstar Full Width Tow Flap" prior to delivery of R-Villa on May 17 this year. Now, after towing with it for 4,500 miles, we are thoroughly satisfied and would purchase this flap again. The fact that it affords protection across the full width of the truck is a big plus for us. The ease with which it can be mounted and dismounted cannot be overstated. The most difficult part of the job is getting down on my 71 year-old knees! Seriously, it takes about 30 seconds to remove the flap by removing the two lynchpins (on either side of the receiver) and lifting the flap slightly up and rearward off the mounting brackets. The flap will fit in the bed of my truck with one end low and one end high; we now have an ARE truck cap installed which is not shown in the photo. (The flap is about one inch too long to lay flat in the bed!) If we are camping with the trailer parked for awhile, I can easily remove this flap to save fuel mileage while we are exploring. When we are ready to hit the road with the Ollie, it is a snap to put it back on. Available at: www.agricover.com
1 point
-
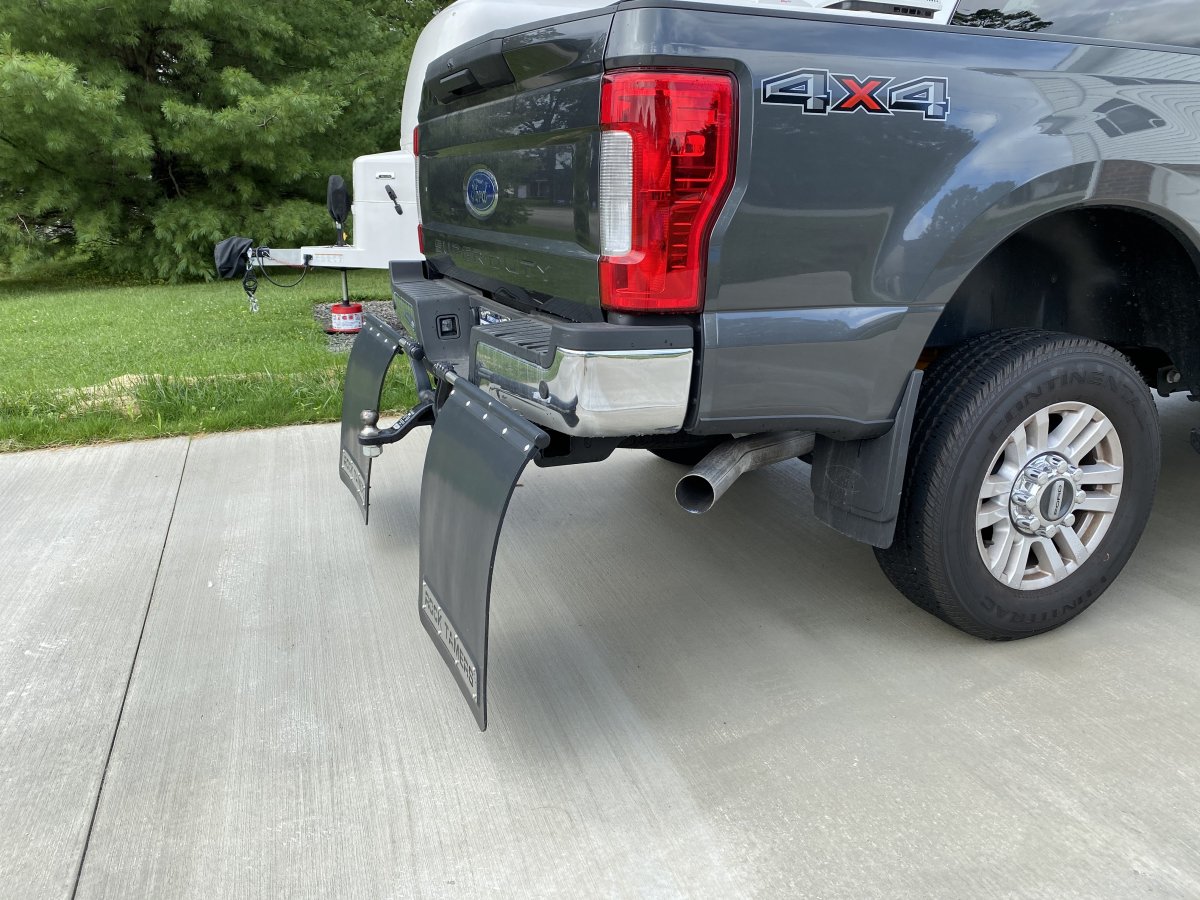
I have them on my truck and have been very happy with them. They seem to do the job well. The front of our Oliver is still like new. I don’t drive at high speeds on unpaved or gravel roads though like some of the more adventurous members of the Oliver family. Our driving is typically all highway driving. The only gravel roads we typically encounter are usually just the KOA campground roads which are very low speed limit. I do have mine angled slightly as John mentioned above. And I had to order the 2-1/2” hub for the Rock Tamers since my F-250 has a 2-1/2” receiver and ball mount.
1 point
-
I used them for a year, behind a Ram 3500, and I was very unimpressed. Most folks do not adjust them correctly “Aussie fashion”. They should sail at a 45 degree angle to the road at your typical cruising speed. You can’t really tell if that is happening, unless you have a chase car, but you can adjust them so they have about a 20 degree static angle back. When the are set correctly, they deflect stones downward to the pavement, not straight back at the TV. And onto the the top of your bumper and the back of the tailgate...... If you add a strip of rubber ( I used the three inch cut off pieces from trimming the flaps) at the TOP of each flap, when you rotate the flap to 20 degrees the extra strips will rest against the bumper and seal that huge gap on top, stopping a lot of the small stuff from getting past that direction. That also stabilizes the whole assembly a little. I had to add two slopper stoppers to keep down unwanted motion, it was pretty floppy without them. They are really bad on undulating gravel roads, they must be low to the ground to be effective, but every time you drag them into the ground in a dip, they send up a ferocious rooster tail of gravel back onto the trailer. IMHO they should be removed entirely for low speed forest roads where they might drag. Or you could rotate them up close to horizontal. I still have mine, I keep them handy for a future trailer rental or other non-Ollie use. Do they compare to Stone Stompers plus trailer chassis guards for effectiveness? Not at all. If a SS is a 10, Rock Tamers are a 3 or 4. They are probably the best alternative solution out there, just set them up right and be aware of their limitations. John Davies Spokane WA1 point
-
But wait, there's more... Rated for vehicles including motorized RV and off-road use; not approved for trailer use including travel trailers and fifth wheels. https://www.rvupgradestore.com/Let-s-Go-AeroBikeWing-2-Two-Bike-Carrier-Rack-p/b01311.htm0 points


.thumb.jpg.91ab93de4a01f9040d89cc75c92a3115.jpg)


-
Recent Achievements
-


")


")


