Leaderboard


Popular Content
Showing content with the highest reputation on 02/29/2024 in Posts
-
No. We have the Lithium Pro Package, which includes 390 Ah capacity (3 Lithionics 130Ah). The Lithionics have Battery Management Systems (BMS) which will automatically turn them off if they reach about 10% State of Charge, protecting them from overdischage. For many years I used 12V deep cycle AGM batteries to power my CPAP machine on wilderness river trips. I had to monitor them closely to avoid discharge below 50%, to avoid damaging them. Now I use LiFePO4 batteries with built-in BMS on wilderness river trips. They are much lighter weight and yet provide a greater discharge range. That experience persuaded us to spend the extra $$$ on the Lithionics package for our Hull #1291.4 points
-
I know you are joking. Disclaimer: Just to educate the absolute newbies, soap/soapy water is better. None of us ever use flame to find gas leaks. Including @Jason Foster above, I'm sure. That was a joke, for sure. A propane sniffer is even better.4 points
-
I'm not @SeaDawg of course, but I can chime in @dewdev since my name was used. You just start typing the @ symbol followed by the name you want, and it will show up in a drop-down menu to select. The name is then tagged when used and the forum member will be notified which is a great feature.3 points
-
Personally I prefer Art's (MaxBurner) security plan: + + + + + + + + ARFF WOFFFF Chomp. Problem gone. 🙂 GJ3 points
-
We have hull #676 with the Norcold 3-way refrigerator and usually have no problems. We do freeze blue ice to take with us to keep lunch cold. The only time we have had problems with the refrigerator cooling is when we are parked in the sun with very higer temps (90+). To solve that I added to fans in the upper vent to pull air up through the refrigerator as @dhaig mentioned. I also used the same fans as he mentions. For wiring I just connected to 12 volts and ground wires below and open the lower vent to turn it on or off. I have thought about wiring it up to the panel on the wall at the door, but so far I don't turn it on or off that much so I haven't bothered.
 3 points
 -
I was curious, too, @routlaw. I looked up the 19' zone Peregrine (first one.) It listed at $139k AUD, which at today's rate is around $90k USD. Pretty good price, imo, for all they got. We've had two wonderful camping trips in Australia. The variety of outstanding campers and features available there are amazing. But, they also have some run of the mill stickies available for those who don't or can't spend up. The base price includes solar and lithium, but other options can drive it up. Wait list (looks like sold only in Australia) is around 10 months. https://www.zonerv.com.au/off-road-caravans/peregrine/?hsCtaTracking=55468c5f-b426-4ed6-bad7-449500fda63d|2569a05d-413c-4476-b34e-6c897aded12e2 points
-
My interest in this mod is two fold. First, to create more even heat distribution within the cabin area. Second, to keep the basement above freezing as we like to camp in the early Spring and Fall. I think Oliver has overlooked the benefits of proper return air placement and what it can do to increase cabin comfort and durability of the plumbing systems between the hulls. As for between the hulls, yes, there is reflectix insulation on the floor of the outer hull, but it is also mostly an unconditioned dead air space and it gets cold down there! Especially the rear corners where there is a lot of vulnerable plumbing. The beauty of placing the return air ducts far from the furnace is that it turns this under floor space into a giant plenum where conditioned cabin air flows from the return grilles back to the furnace warming the entire area, not to mention more evenly heating the cabin itself. My test showed a dramatic increase in temperature below by moving the vents further away from the furnace. There was definitely more air flow from the vent on the same side as the furnace. But that's not surprising and could be adjusted for if one was so inclined. Just remember that your furnace has a minimum cold air return volume requirement, it's in your owner's manual. I think if you have properly sized return air vents, then outside air being sucked in through the drainage scuppers wouldn't be a issue, but this needs to be tested. This is also a simple passive setup, no fans or other support needed for it to work. I will say that if I was out in extreme cold for long periods, I might need to employ other measures. Time will tell. Now that I have these sensors, I can keep track better of what's going on between the hulls. I'll also probably add a 4" return vent in the bathroom on the side of the vanity under the TP holder. Not a lot of flat wall real estate in the E1 to place a vent but I think I can just fit one in there. More testing to do, but may have to wait until next winter unless some Arctic blast hits us again. Cheers. Dave2 points
-
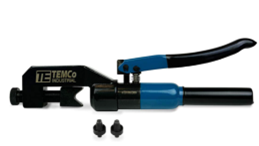
Recently, I received the best of battery cable tools! I did not have these tools when I added the Victron SmartShunt (to start this thread), so the hack saw and crimper/vise worked for one shorty cable. I'm working on my truck this week, adding a tuner and gauges set, new starter batteries and all new battery terminals. These tools will be in use very soon and again with a future LiFePO4 upgrade! These are the tools I purchased but I didn't want to pay these prices! I wanted a die-based hydraulic crimper. The "Dieless" crimpers create a triangular-shaped crimp vs. the hexagon shaped crimp dies. Klein Tools 63035 Cable Cutter, Utility Cable Cutter Cuts MCM Copper and 350 MCM Aluminum Cable, with Shear-Type Hook Jaws, 16-Inch Handles - Wire Cutters - Amazon.com TEMCo Industrial Hydraulic Cable Lug Crimper TH0005 V2.0 (11 US TON) 10 AWG to 600 MCM Electrical Terminal Cable Wire Tool Kit with 32 Die Sets - Amazon.com The 16" Klien cutter cuts cables up to 4/0 AWG like butter. When I looked at Amazon 3-4 weeks ago it was $90. Today at $68 is a good price. I found an eBay auction, where the seller had 4 of them at $52 ea. I bought one and the next day all 4 were gone! Found the TEMCo TH0005 on eBay too, a "used-once" set. Seller had it on a 7-day auction, opening bid was $69. I contacted the Seller to see if he would offer a good buy-it-now price. I thought he would come back at $100 or something. He changed the auction to buy-it-now at the same $69 price, OMG! I bought it in a heartbeat. Paid for it on Sunday, shipped on Monday and received it Wednesday (yesterday). eBay can be this or that, often gets a bad rep. I started with eBay as a Seller 23 years ago and have sold 100s of old car parts, used sporting goods, etc. I buy used USA made tools very often on eBay. With a little time and patience, I saved over $150 on just these two items. Check 'em out!
2 points
-
Yea I saw that. My slide rule must have needed some grease for that calculation! 🙂 GJ2 points
-
John, haha! Love your plan, we are on the same plan! 😄 I agree and use pretty much the same plan. On our 42 day 6000 mile trip last fall out west we topped off one tank 3X during the trip and again when we arrived home. Never a concern of being out of LP. We have 30# tanks and never ran into any issues getting a refill. We don’t swap tanks on refills for many reasons. We also never got into our second tank. We don’t use tank sensors. Based on our use, I don’t see the need for LP sensors along with the added frustration of reading about the failures and complaints. Hang On to your hat in Amarillo, that’s a windy place. You and Wendy go enjoy a big steak at the Big Texan! Safe travels and hope to see you both at the rally! David & Kathy2 points
-
FYI- the rubber “Halo Rings” allow the bottles to sit a bit higher in the rack giving the sensors a bit more space. Makes a tight fit - and keeps the rust from taking over on the bottom of the tank rack.2 points
-
Hey, GJ: Concur 100%, but we've only found 4 hub caps on the Casablanca....🤪2 points
-
If you are looking to buy a new Oliver Travel Trailer here are some things to consider. With the implementation of the new dealer network you now have several new options available to you that previously did not exist when you could only go to Hohenwald to buy a trailer. There are two ways to approach the first step. If you live a long way from Hohenwald and don’t want to have to drive that far to see the trailers you should check the Link on the Oliver page that will show you where all the current dealers that will be selling Oliver’s are located. There are currently 18 different locations spread across the United States. There are future plans to add new dealers here and in Canada. With the information on the locations of the dealers, if one is close to you and you want to do business with them that is perfectly fine. If one is no closer to you than Hohenwald you may choose to contact the sales team there. When contacting Hohenwald a member of the sales team will take your personal information and work with you to get you the exact trailer you want in the shortest time possible. They can take an order from you and get you into a queue to have the trailer of your dreams built for you. The current wait time after ordering is around four months. If you live in a state that does not have any dealers, they will see if there is a trailer already built and available at one of their dealers. If so, you could have your new trailer in a matter of days rather than months. Even if there is not one that is just like you desire, if a dealer has a trailer on order that is still early in its build, Oliver will work with that dealer to attempt to have the build altered to be what you want. Doing it this way will still get you a trailer much quicker than starting your build from scratch. If you live in a state that has dealers, Oliver’s agreement with those dealers is that you will be referred to them. Another option that was not previously available to you is that if you already own an RV of some sort and want to trade it in, many of the dealers might be able to do that whereas in Hohenwald, that was not and will not ever be an option. You can also buy a trailer through a dealer, do all the paperwork there and still pick it up in Hohenwald if you want to. And, as always, you are free to buy a trailer and take delivery in Hohenwald if you so choose. Both of these options are a good choice if you want to do a plant tour prior to pickup. At some relatively near future point (certainly this year) their plan is to have all sales conducted through the dealer network. The rumor that they will stop working on trailers older than two years or out of warranty is patently false. Service will continue to be done in Hohenwald. The rumor was started by a fired service employee. He and his wife propagated this rumor as well as other false information about the Oliver TT after he was terminated. It was posted both here and on the various FB pages. He has been terminated there as well and the false statements have been removed. As always, the Oliver sales staff will still be available to assist you and the dealers with any questions and issues. If none of this works for you, my suggestion is to take the list of dealers from the website and call each of them and tell them what you are looking for to see if they have one is stock that would suit your needs.1 point
-
I finally got around to purchasing some temperature sensors so I could experiment with different cold air return locations. The original 6x10 grille (45 cu. in. free air flow) was installed right next to the furnace in my front dinette seat (Elite 1). I never understood this decision and wonder if anyone knows why Oliver put it there. It is within inches of the furnace and two supply outlets. This is not desirable for even heating and does nothing to create air flow below between the hulls, which would help keep that area warmer in colder temps. My experiment showed much better results than I anticipated. First I sealed off the OEM return with tape. Then I cut two 6" holes in some cardboard and replaced those with the rear curb and street side fiberglass seat panels. I then placed sensors on the floor of the basement down with the plumbing on each side under those holes. I placed the third sensor under the sink. When I turned on the furnace, there was very positive intake through the 6" holes, which by the way, provide a bit more free air flow than the OEM grille (~56sq.in. for 2, 6" round versus 45 sq.in. for 6x10 OEM grille, which actually has 5x9" free air flow). I brought the interior temps up from 58* to 68* in about 10-15 minutes. You can see the temperature difference in the pic below; and this is with the return air holes cut in at seat level, not at floor level and as far to the rear as I would want them! I also noticed a big improvement in heat distribution throughout the trailer, although in our small elite1, heat was never a problem in the cabin. So, before I start cutting holes in my trailer, I ask if there is something I'm missing here, and why didn't Oliver do this to begin with. It seems like a very simple way to markedly improve the performance of an already stellar trailer. Any comments appreciated! Thanks. Dave
1 point
-
A bit of a lengthy video, but wow how about the quality of this trailer from Australia. I'm just blown away at how NA is still stuck in the dark ages with quality/decor of RVs/Trailers! Love the air suspension, and the almost Oliver sterile look inside the traier. They didn't mention anything about heated under belly, so maybe not good for NA weather!1 point
-
Watched all of the first one, awesome. I wonder how much these things cost? You are so right and have known for years the Aussies put NA to shame on the RV industry which on the whole is a bit of a cruel joke. The windows and suspension on this rig is incredible and up to the task for the rugged Australian outback. I would own one in a heartbeat and never look back. Love the all AC power situation to. We have induction range in our house and love it, wouldn't go back to gas for any reason. The exteriors are not the coolest looking thing but otherwise hands down better engineering and design.1 point
-
...and another one, that nice air suspension again, and don't those rock tamers look familiar, i.e. @John E Davies! 😉1 point
-
Another vote for the hydraulic crimper with dies. The quality of the crimp is outstanding and far surpasses results you can get with a stab crimper. Really, there is no comparison, particularly in applications which might be wet or corrosive. Coupled with quality lugs properly sized for the wire, adhesive shrink tubing like that made by Anchor and you will get really professional results. I have used mine to rewire a number of boats that live in saltwater and am very impressed with the results ... particularly when coupled with tinned multi-strand wire like that market by Anchor. Available at West Marine and other marine supply outlets. Expensive components but you will not use all that many and the results are as good as a professional shop will provide.1 point
-
ABSOLUTELY!!!!! In fact - if you even think that you smell propane (rotten eggs) don't even switch on a light or strike a match or light the furnace or light the fridge (assuming propane fired fridge) or anything that could cause a spark or open flame. Bill1 point
-
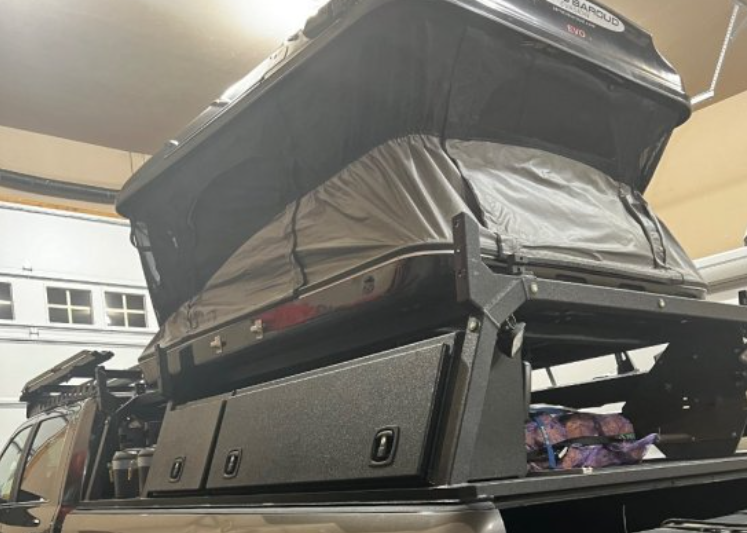
That's our longer term plans, too. Get somewhere interesting, use the Oliver as a base camp, and explore areas unreachable by most trailers or vehicles. That's when a rooftop tent or sleeping area in the vehicle comes in handy. We had a big family sized RTT a few years ago, but it was a real PITA to fold up tight enough to get the cover on. So you tended to not open it at home to air/dry it out. Next time will be a James Baroud like Kirk's
1 point
-
We were there nearly 3 weeks, but we were gone by this time.1 point
-
I wish you had stopped by out at Dome Rock. It's not crowded there and there were several Oliver's camping.1 point
-
We are closer to weekenders than full-timers for sure. Many here have travel-trailered more in the last 1-2 years than we have in our lifetimes. We go for at most 4 weeks annually and 4-5 shorter trips, hopefully more when fully retired. We just spent a week in cloudy/rainy days in Yuma, the Q and West Valley. We used the Xantrex 6-8 hours a day for kitchen appliances and TV at night and occasional quick microwave. We got down to 64% after 5 days out (the last 3 nights we had hookups). I calculate that if we instead had 600AH LI batteries, the monitor should read 78%, all things being equal. The usage is in the storage, the recharge is in the solar, generator or shore power. If I can get 80% of 600AH LIs, vs. 50% 450AH of LAs, we can camp at the same use rate 2.13 times longer! Good sun, chargers or connections will of course extend what's onboard. It does take patience to watch the monitor read 64%, thinking it could quickly go lower. Would be nice to experience LiFePO4 batteries! 🤣 Are you with LI worried when it reads under 50%? You shouldn't be.1 point
-
Good luck. @jd1923 Likely, your solar won't keep up with battery capacity, unless you severely curtail power consumption. As in, no microwave, no inverter, etc. even in Arizona sun. We'll look forward to your reports. Weekend camping, no issue.1 point
-
@ThomB87, the fans are installed in the top vent. When they are running the movement of ward air from the upper vent is noticeable. There is very little fan noise. As @Ray Kimsey describes, only a 12VDC and a ground connection are required to run the fans. Attached to the fans is what looks like another wire, but is a temperature sensor. This is run down behind the regfrigerator. A small remote control panel is also attached to the fans with 5 or 6 feet of wire. I ran wires for the remote control up behind the main control panel near the entry door. There is an access hole behind the control panel, with a round cover. This is inside the forward most storage compartment above the refrigerator and microwave oven. I did not like having to remove the lower panel to access the fan controls. Also, the fan control has a bright blue LED which is visible outside the trailer if located behind the lower panel. Access from inside the trailer requires only opening the storage compartment and removing the round cover. This location also contains the annoying blue light on the remote control, which cannot be turned OFF.1 point
-
Wow, so why do you need an Oliver! I imagine in your most wonderful part of the country, that at times you 'overland' and for longer travels you pull the Oliver!1 point
-
Most folks add a fan interior, to circulate air, and a fan in top vent to aid in exhaust.1 point
-
Thank you, Bill. This makes so much sense! When I upgrade to LI, I really only need to change the configuration on the Blue Sky solar charger set for LI batteries. Given 90% of the time we are not plugged in, and live in sunny Arizona, any LI upgrade will get to 100% by solar on most days. Yes! 😊 The LI upgrade at $2K will be enough and I can wait on other related upgrades, e.g. the PD charger and the 2KW Xantrex inverter, until one fails. Thanks again.1 point
-
I really like your hard top rain and wind shielding "Guest House". Safe for Alaska and Canada (Generally speaking). And will encourage guests not to stay more than a few days. Sweet build for sure! GJ
1 point
-
I pre freeze at the Ranch ten small water bottles. Then put them into the freezer and refrig compartment they aid in the cool down process GREATLY! GJ1 point
-
I'd guess that if hull #117 doesn't have it (and it doesn't) then yours will not have it either! Depending on your intended use - don't forget that the old charger will still work with LI - it simply will not get the LI's to full. That is another benefit of having the solar - because - it will get the LI's to 100% There fore, unless you really have to have them at 100%, there is not necessarily a rush to get a new charger. Bill1 point
-
There for a second I thought that you were going to say you used a lighter!😬 That would NOT be a good thing!1 point
-
We've passed that place dozens of times over the past 50 or so years. We've stopped there a time or two but never actually ventured into the back to see "The Thing". For all those folks that say they hate the desert and rarely travel West of the Mississippi River, you're never even gonna have the chance to know...1 point
-
I use the cheap, tried and true method of lift and shake.1 point
-
If I possessed your physical attributes I would have those 30 pounders as well :) And you read our minds concerning the Big Texan! But not the 72 oz. Sadly we are unable to make the rally since Oliver service (annual maintenance) was booked up and we have our revisit with CGI mid April. We have a plan for northern Maine and the Havelina Rally in Texas with Ohio golfing in between. So the month between CGI and the Oliver rally is no longer time we can spare. You and Kathy have a blast out there John1 point
-
Like having an older home where the only GFCI outlets we have are in the bathrooms. I ran 125' of 8 AWG burial cable, installed a 60A service panel in our shed, and a 10 AWG feed to a 30A outlet for our RV pad. Y'all should think about doing the same, being able to run A/C during summers, no cable overheating issues, etc. Often multiple GFCI outlets are run on the same household circuit which could be the cause. But basically, a GFCI outlet is not designed to feed a RV 30A power panel!1 point
-
Same thing here, and we have the lithium enabled Xantrex converter/inverter. Every few months it trips the 20A GFCI in the garage. No specific environmental changes that I can infer, it's just sitting there. Nothing else plugged into that circuit, either. Now I've added a small green LED nightlight on that circuit that I can see in the security camera. Every once in a while I check in to make sure it's still on.1 point
-
Wish you had the Elite II like most of us! And your older hull seems to have a different layout than the late models EIs. I wonder the same, why our return and main ducts are within a few feet of each other (all rear curbside on the EII), not much heat getting to the bathroom. I have seen several other mods regarding this question. Changing the return location is something new here! Does it make sense to heat between the hulls so much? Isn't the reason for the dual hull construction to be an insulation layer? Otherwise, you'd be blowing a lot of heat to the outer hull, dissipating to the exterior. We will likely never do serious winter camping but would enjoy better heat/airflow in the interior. Thanks1 point
-
We use the Truma hand held unit. As previously mentioned you need to take the housing cover off. I have been happy with the results. Depending on amount of use (i.e. stove, furnace, grill, fridge, fire pit) I will periodically or every couple of days. I may consider switching down the road. I paid around $75 for the unit.1 point
-
We've had issues with mopeka and pro smart so I went back to my fail safe plan :) We have 2 x 20lb bottles and open only 1 at a time. If the open 1 runs out, we switch over to the other and go fill the empty. We have a pretty good idea if we need to fill before we run out. Cold weather usually depletes ours in 1 week and if we don't run the furnace we get about 3 weeks. If we cooked every meal in the trailer I'm sure we wouldn't get close to 3 weeks. 2 to 3 meals, and coffee most mornings, a week is about all we do inside. If anywhere close to those times we usually stop, when convenient, and top off. We ran out this morning :)BTW and knew right away in Tucumcari, switched over and all was fine. We were stuck in those 48-63 mph winds for 3 days so I couldn't follow my "gettin' close" plan. Now that we're in 25 degree temps again we'll refill on the way to Amarillo today. Don't get me wrong...if 1 bottle gets depleted, we fill it asap. I'm not trusting my plan with 1 bottle empty. I tried the sensor route and am not spending any more money on them. Works for me so far. BTW...full timers for 4+ years and lovin' it :) If I was part-timin' I wouldn't have a clue as my time line would be tossed out the window. John1 point
-
Same here - LPG mode is our boon docking configuration as well. We've yet to experience any issues with either keeping items frozen or freezing thawed items in any of the 3 modes of our Dometic fridge. We normally travel with the fridge in the DC mode and a bag of ice in the freezer to accommodate the occasional adult beverage at the end of those long tow-days. FYI: We had a 3-way Norcold with separate/dedicated freezer compartment in a previous TT and it was awesome for freezing items fairly quickly in any of the 3 modes of operation. Cheers!1 point
-
Our Norcold 3-way will freeze things. Shelf work for you.1 point
-
More than a few of us, myself included, have found that our trailers look just fine with the eight FOUR center hub caps and their supporting "Cones ???" removed. This is especially true of owners that routinely shoot their hubs with an IR temperature sensor. With the cones and caps installed, it is difficult to get a good bearing/hub temperature readings. This is the topic of several members here on the forum. GJ1 point
-
Thanks, Dave for posting your experiment results! It would be interesting to see how the new/improved under-floor airflow performs at some lower outside sub-freezing temperatures, and whether there's any need to attempt to "balance" the under-floor airflow to obtain equal warming in the 4 primary under-floor locations of interest (water pump, outdoor shower, galley sink area and bathroom sink/toilet area). Your proposed mod is pretty easy to implement if it performs well in all locations in lower temperatures. Some have expressed concern in earlier posts about too much suction in the under-floor area bringing in cold/damp air through the under-floor drain scuppers. I have no idea how much under-floor suction you might need before this becomes a significant issue... I have been thinking about pressurizing the under-floor area with a fan in each of the 2 rear corner locations where you would have the new vents, and allowing that air to return via vents from under the bathroom sink area into either the bathroom or the adjacent closet area. Your approach is a little cleaner in that my fans would require routing 12v to the fans and providing an on/off switch mechanism (either manual or via a temp sensor or sensors under the floor)...1 point
-
Was definitely worth it to us mostly because of my Father-in Law...I could see him smiling at us :) If you go, make sure to read the literature posted on the walls along the way!!! John1 point
-
We’ve driven by “The Thing” probably 20 or 30 times over the years, the latest on our way to Quartzsite last month. I always say that we need to stop sometime. Maybe it’s best we don’t and keep it a mystery? Mike1 point
-
GJ, ya know they make truck mount vises! Amazon.com: Forward 1705A 6-Inch Hitch Vise Truck Bench Vise Mount Trailer Fits 2" Hitch Receiver : Automotive1 point
-
There are some learning curves with fabricating your own 4/0 cables. The below is the process that I have used successfully. Specialty Tools Used: If I needed to purchase tools for a 4/0 AWG cable efforts, I would spend the bucks for that Klein Standard Cable Cuter and a Hydraulic Crimper (shown above), or the one like John Davies suggested some time ago Amazon: TEMCO TH1818 Hydraulic Crimper Summit Performance: Klein Tools Standard Cable Cutter 63035 (16.25” long) 4/0 Cable Fabrication Procedure: I have found it very useful NOT to cut the copper bulk cable to length until AFTER you have completed the full lug insulation on one end. Failure to not do so will result in more cable wastage, and utterance of “Bad Words” as JD has mentioned occasionally. That said, one "trick" I stumbled on to help with getting all the copper stranded cable strands into the lugs is related to how I strip, cut and insert the cable to the lug. The amount of insulation to be removed varies by lug size and the length of the hole that your wire is inserted into. But for this description, let's say you want to have 3/4" of bare cable to insert into the copper lug. In this example I would: If the bulk cable does not have a perfect “clean cut”, then carefully cut it square with the cable cutter. Now mark the bulk cable with a paint marker ¼” from the end, and again at ¾” from the end. Use a tubing cutter (or a fancier insulation removing tool) circle cut the cable insulation (only) at the two marks. Only remove the ½” of insulation as you will be leaving that ¼” of insulation intact on the bulk cable. With the ½” section of insulation removed, now you want to loosen the ¼”" band of insulation by twisting the ¼” band of insulation on the bulk cable. Leave it in place to manage the strands of copper. Carefully done and you will have all the copper strands well managed by the ¼” band insulation on the end of the cut to length cable. Use a bench vice to hold your 4/0 lug. Since you have broken the bond of the ¼” band section of insulation, you can more easily insert the cable into the lug by pushing it into the lug as the ¼” of insulation retreats in front of the lug. As the ¼” band approaches the end of travel, remove it and you can finish insertion by twisting the cable into the lug as you push it. Only twist in one direction. Crimp the lug onto the cable. Now cut the cable to length and repeat the process on the other end. NOTE: Always purchase extra cable and lugs. There is a learning curve involved. GJ
1 point
-
I agree with Mike - thanks for the post. I too do not have holes drilled in my awning mounts nor did I remove the "seal". Yes, keeping this area clean is a bit problematic but I serious do NOT think that it looks bad - in fact, I think it makes this area look a bit more "finished" and it does keep rain from coming down that side of the Ollie. The washing/keeping it clean is also not really that much of an issue in that I do clean the roof every time I wash Twist anyway. A strong stream of water and/or an electric power washer easily keeps this area free of "stuff". Like Mike - I too noticed something that I'd like more information on - the white "hood" over your rearview camera. How's it working? What material did you fabricate it out of? Did you do it "freehand" or with a template or ....? Thanks! Bill1 point
-
Nope. I use the lighter method to determine if I have any leaks.0 points


-
Recent Achievements
-


")


")


