Leaderboard


Popular Content
Showing content with the highest reputation on 07/18/2024 in all areas
-
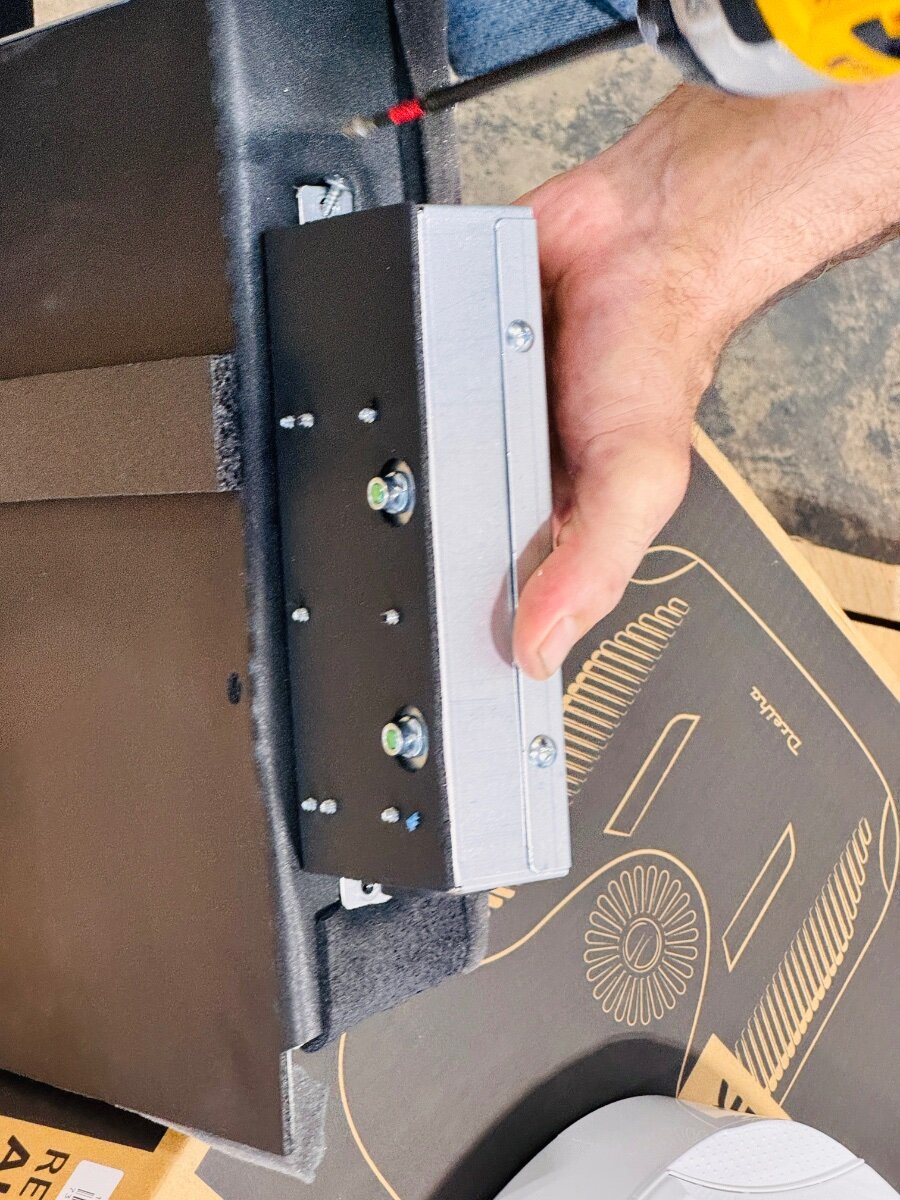
When preparing our 2022 Elite II for a weekend outing, I found error code [20] displayed on the inverter remote panel. When an inverter reboot produced no change, I consulted the section of the Oliver Owner's Manual Optional features book which addresses our Xantrex Freedom XC Pro 3000 watt inverter. To my dismay, Error Code 20 does not appear in the table of error codes. Codes 1-19, and then 21 are listed, along with their respective meanings, but not Code 20! Since I was at home with good internet access, I checked the Oliver Knowledge Base. Sure enough, Xantrex Error Code 20 is covered in detail there. Included are instructions for resetting the inverter to clear Error Code 20. I followed those instructions. They worked. I hope this post helps someone else who encounters Error Code 20.8 points
-
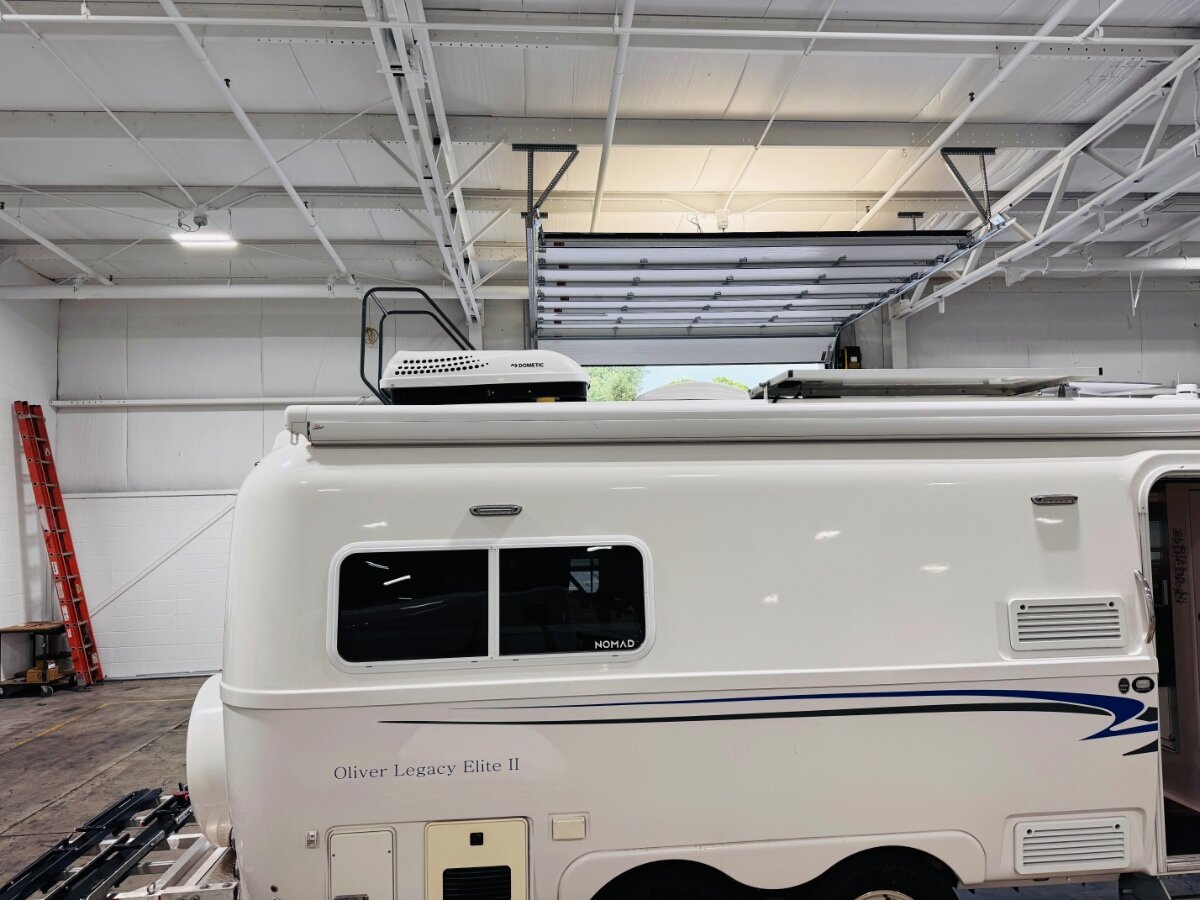
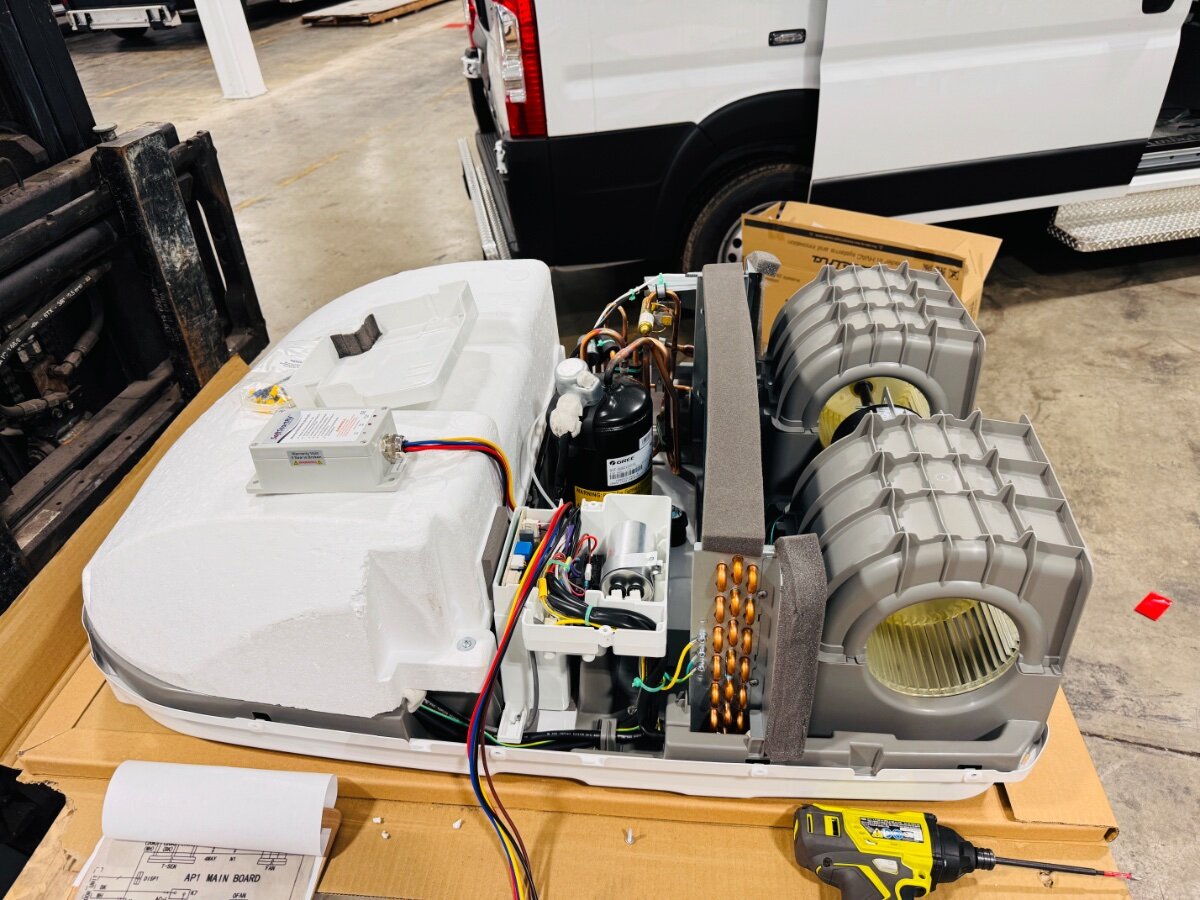
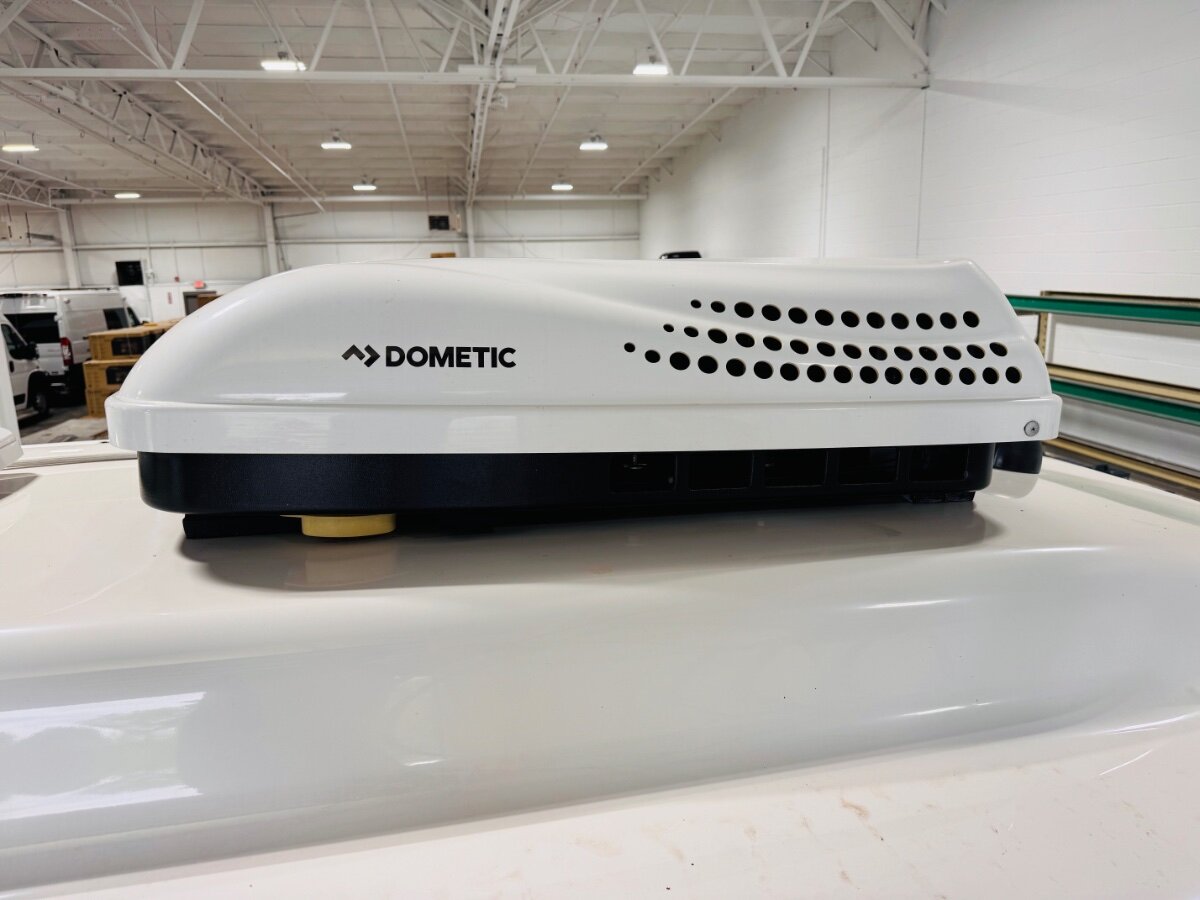
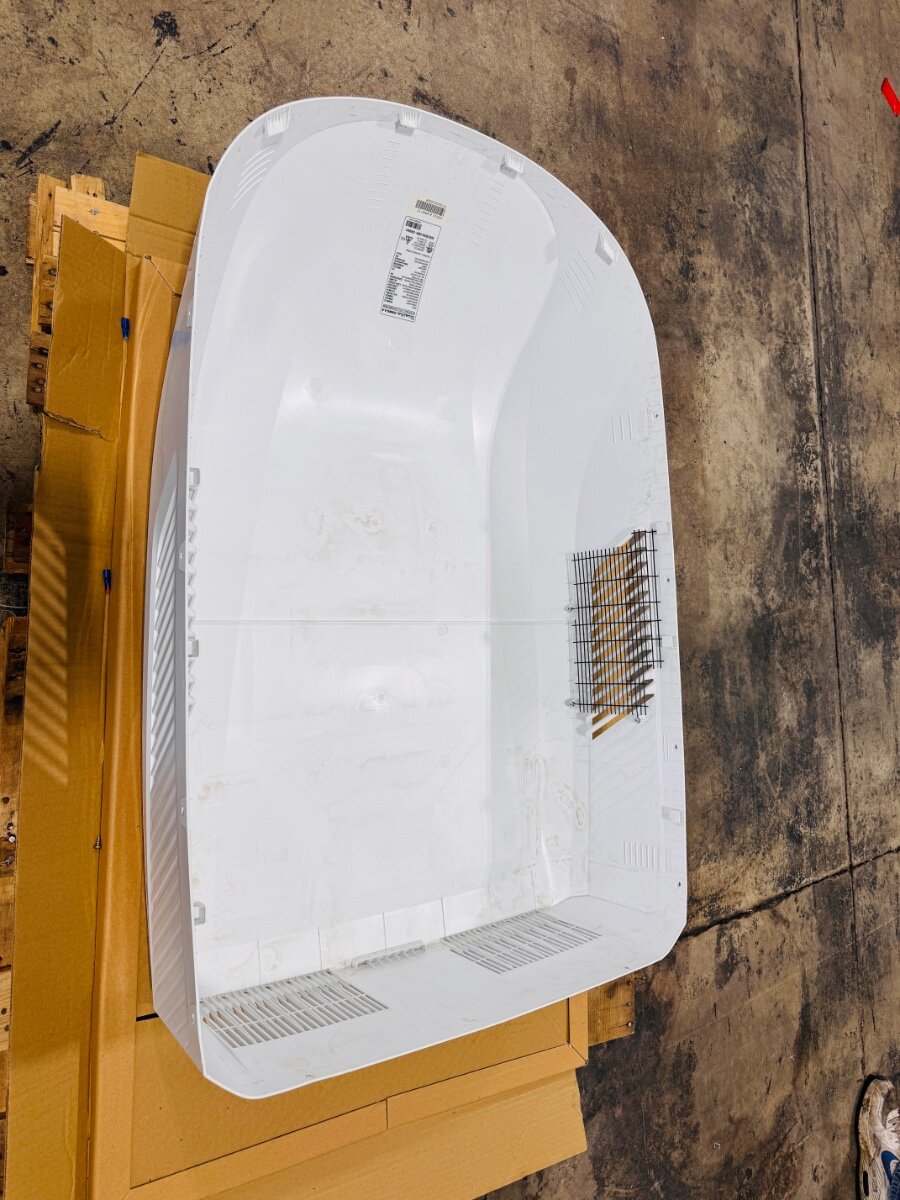
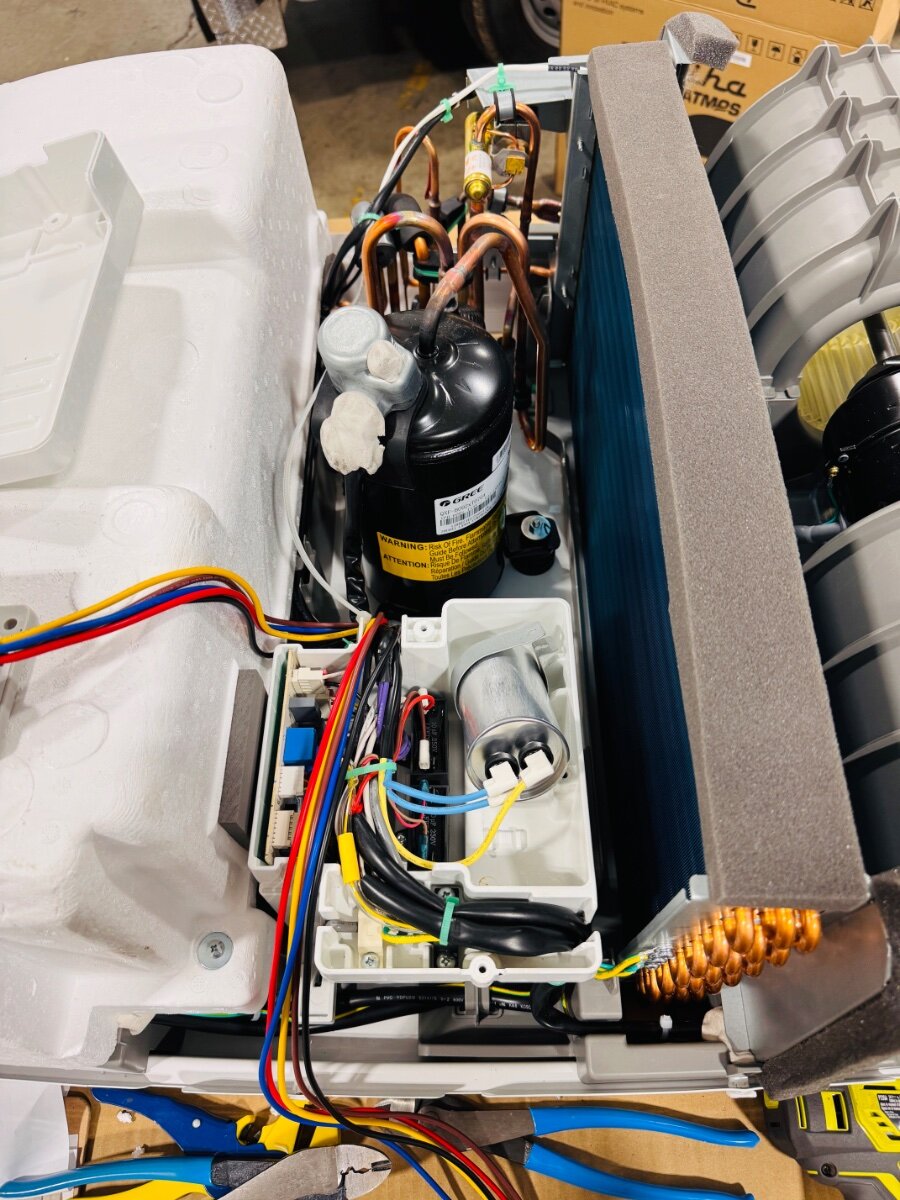
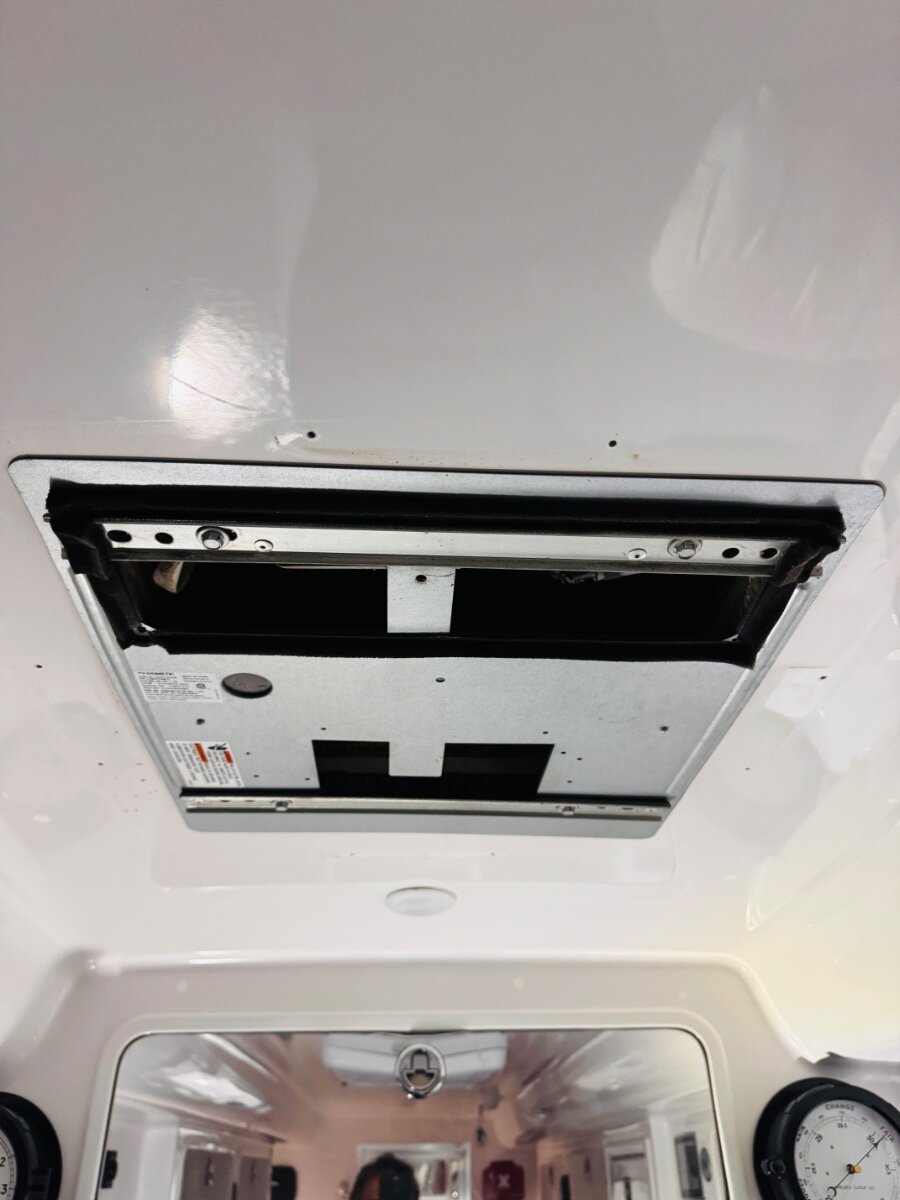
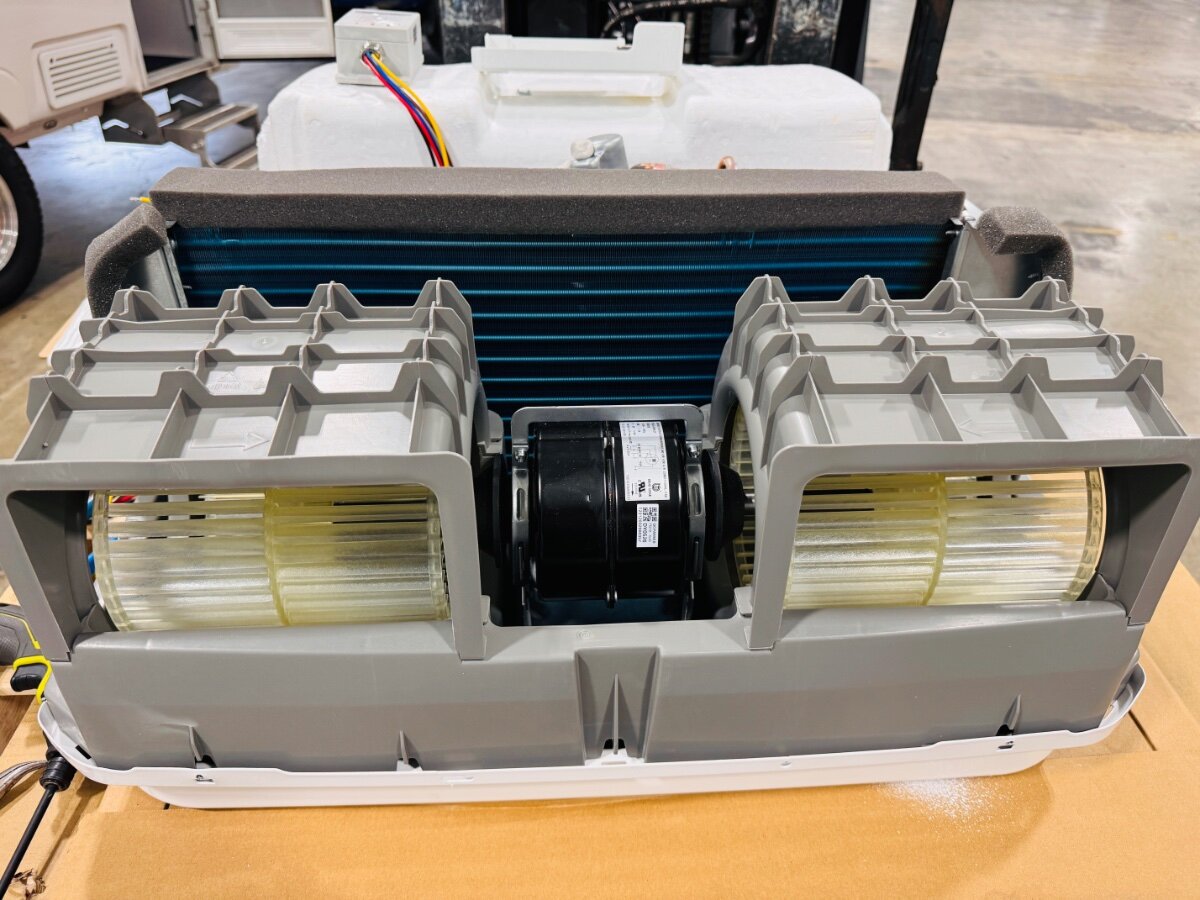
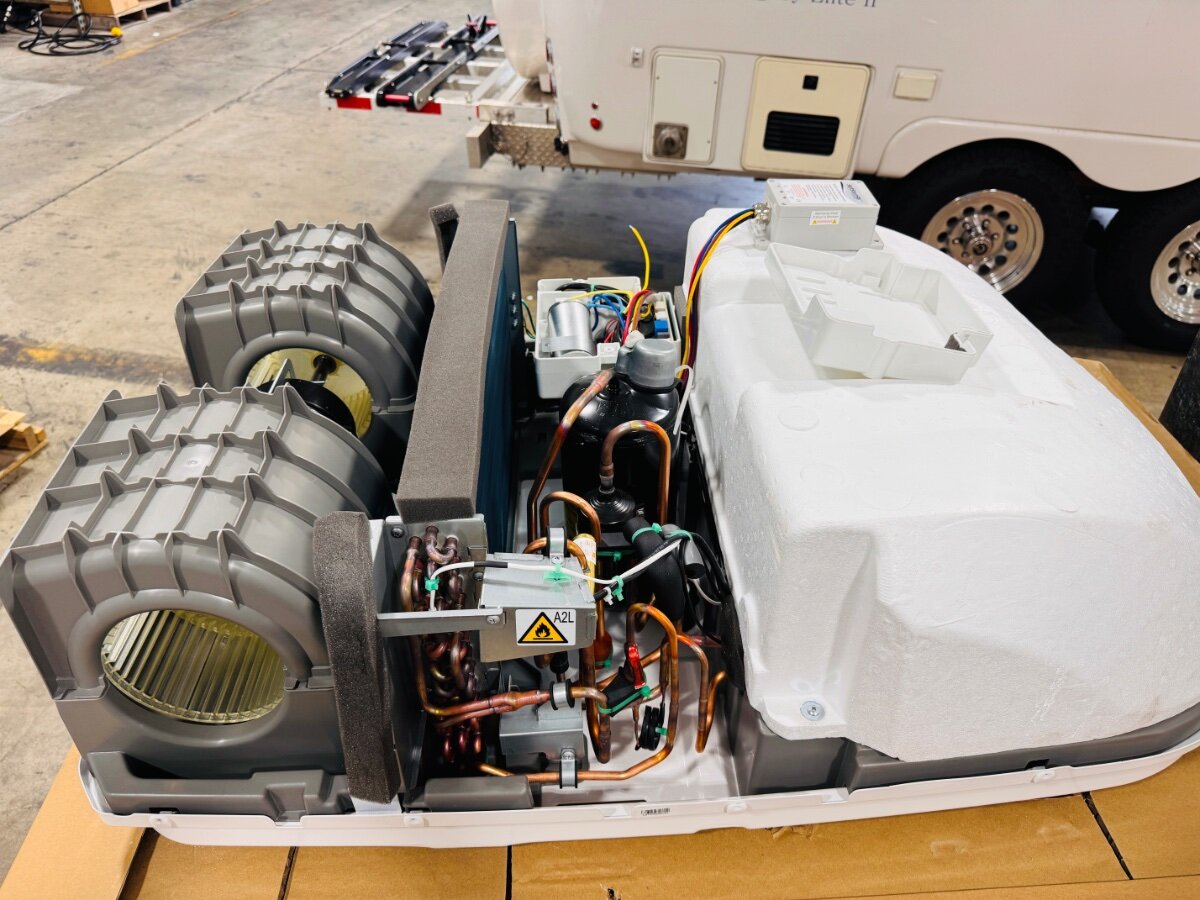
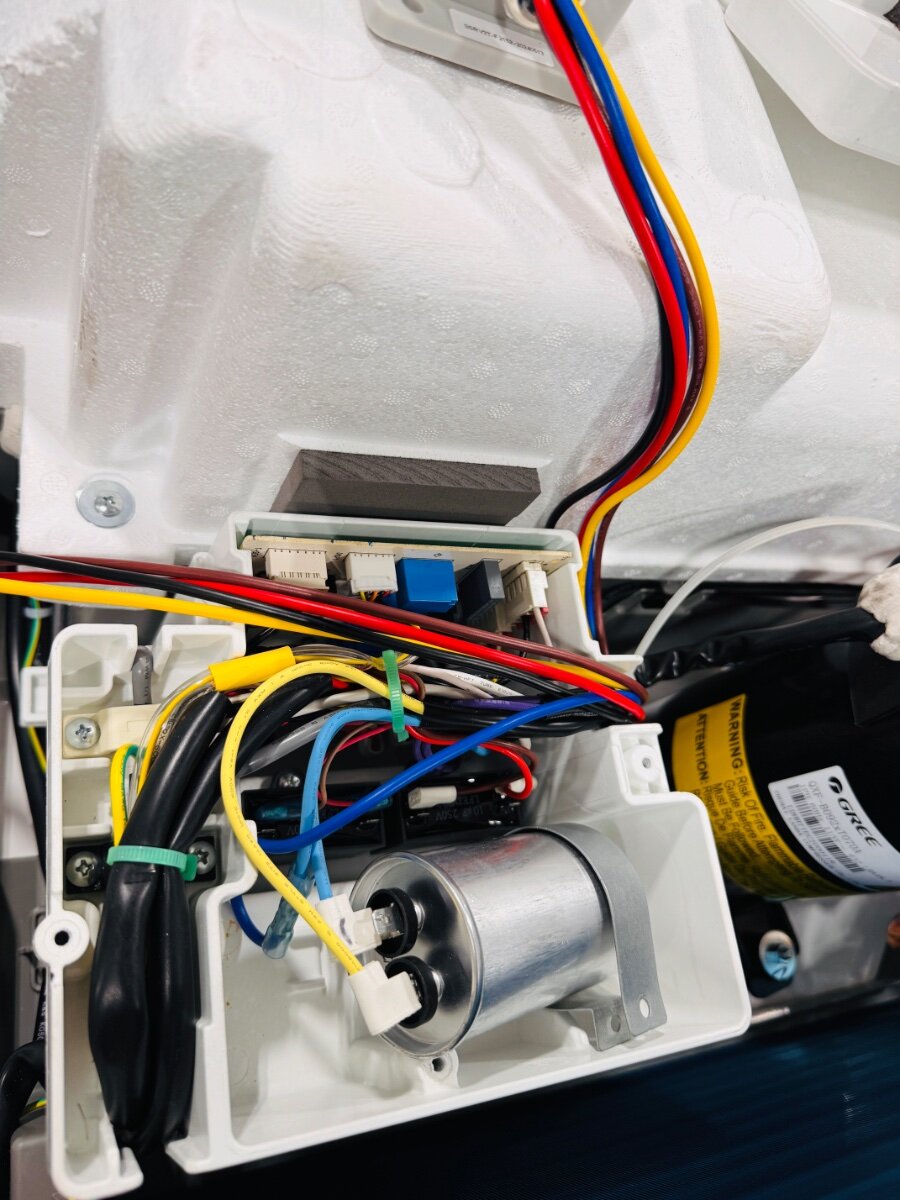
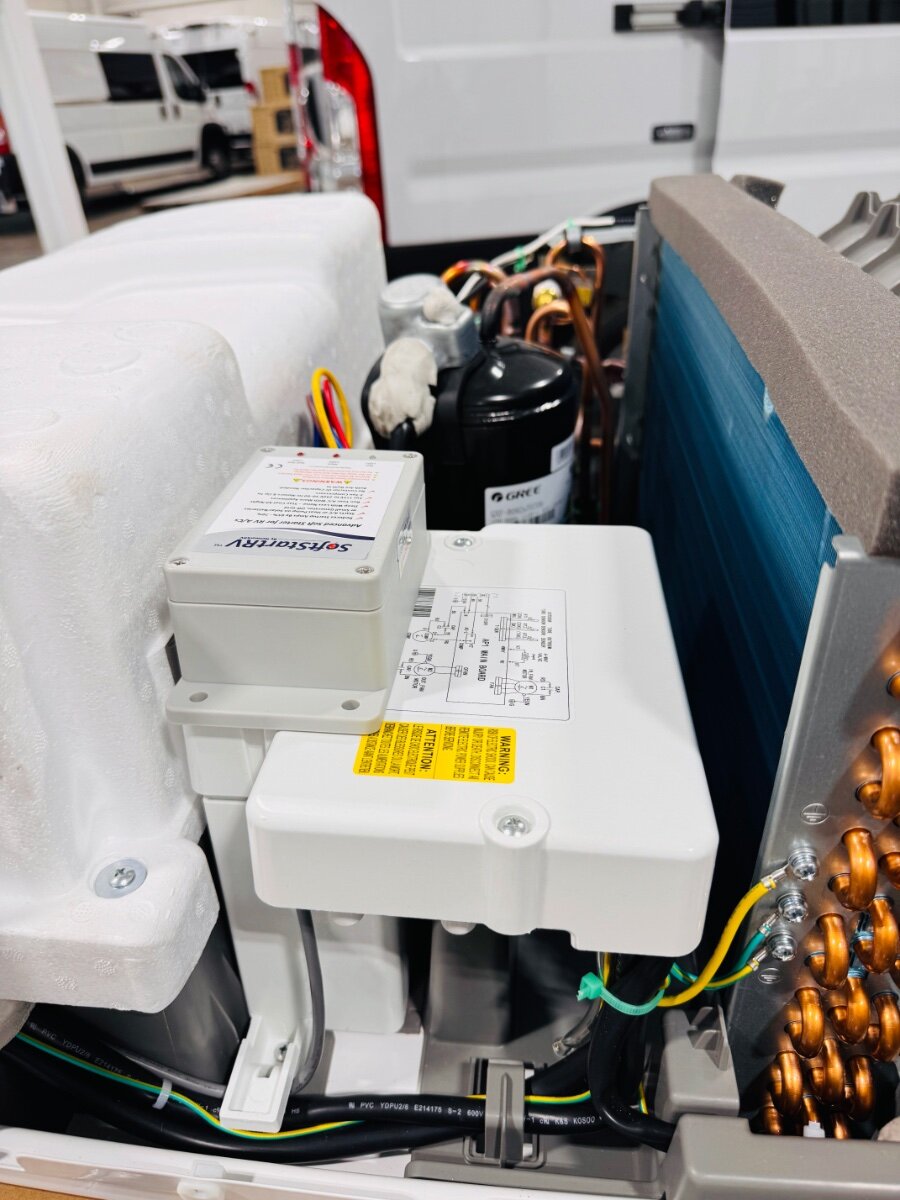
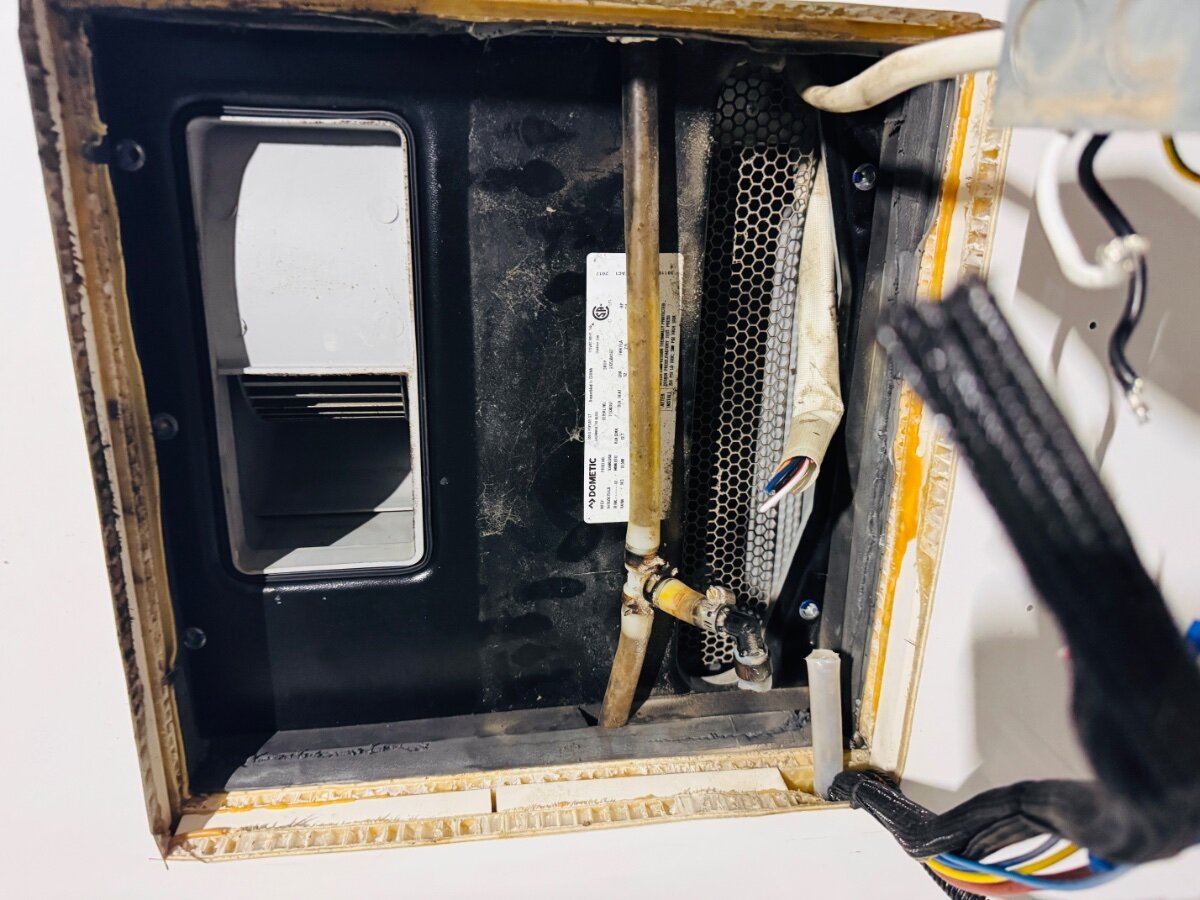
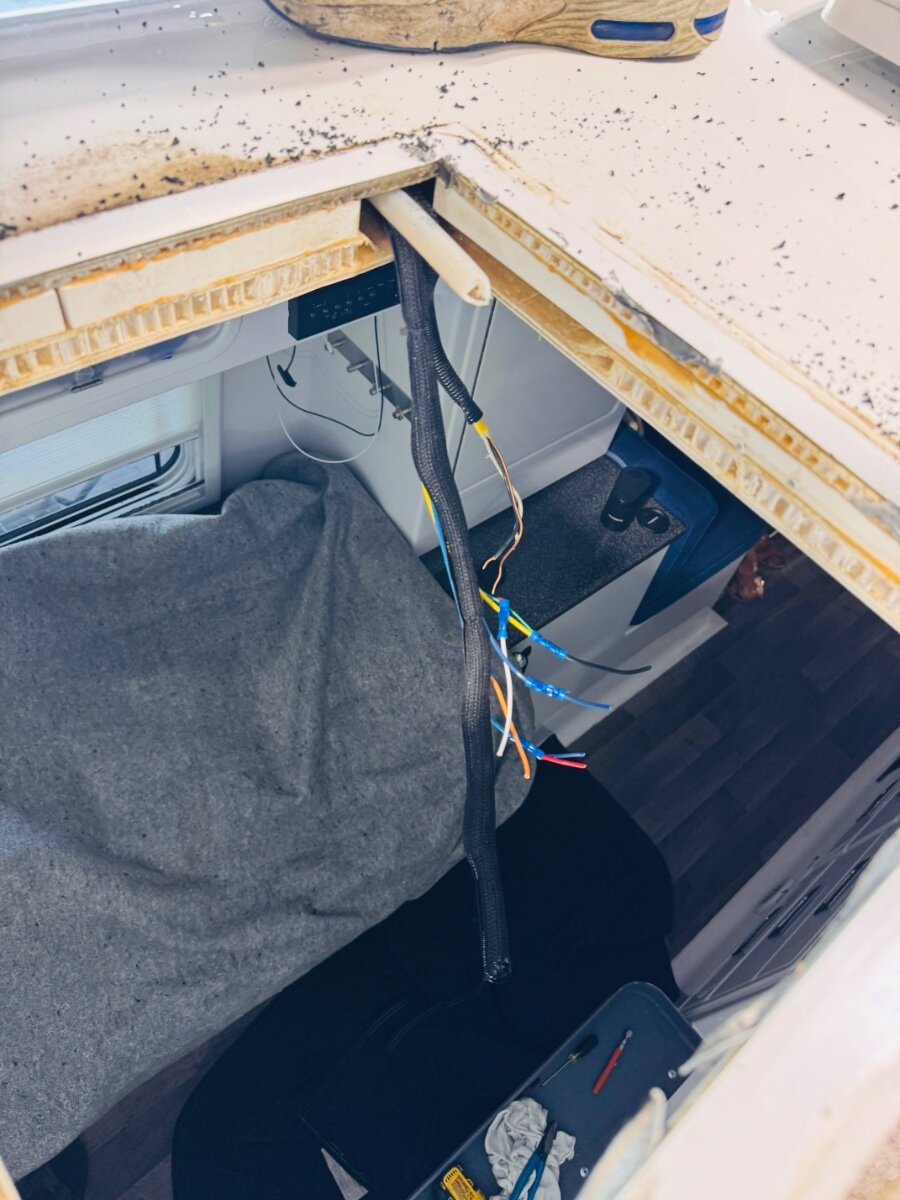
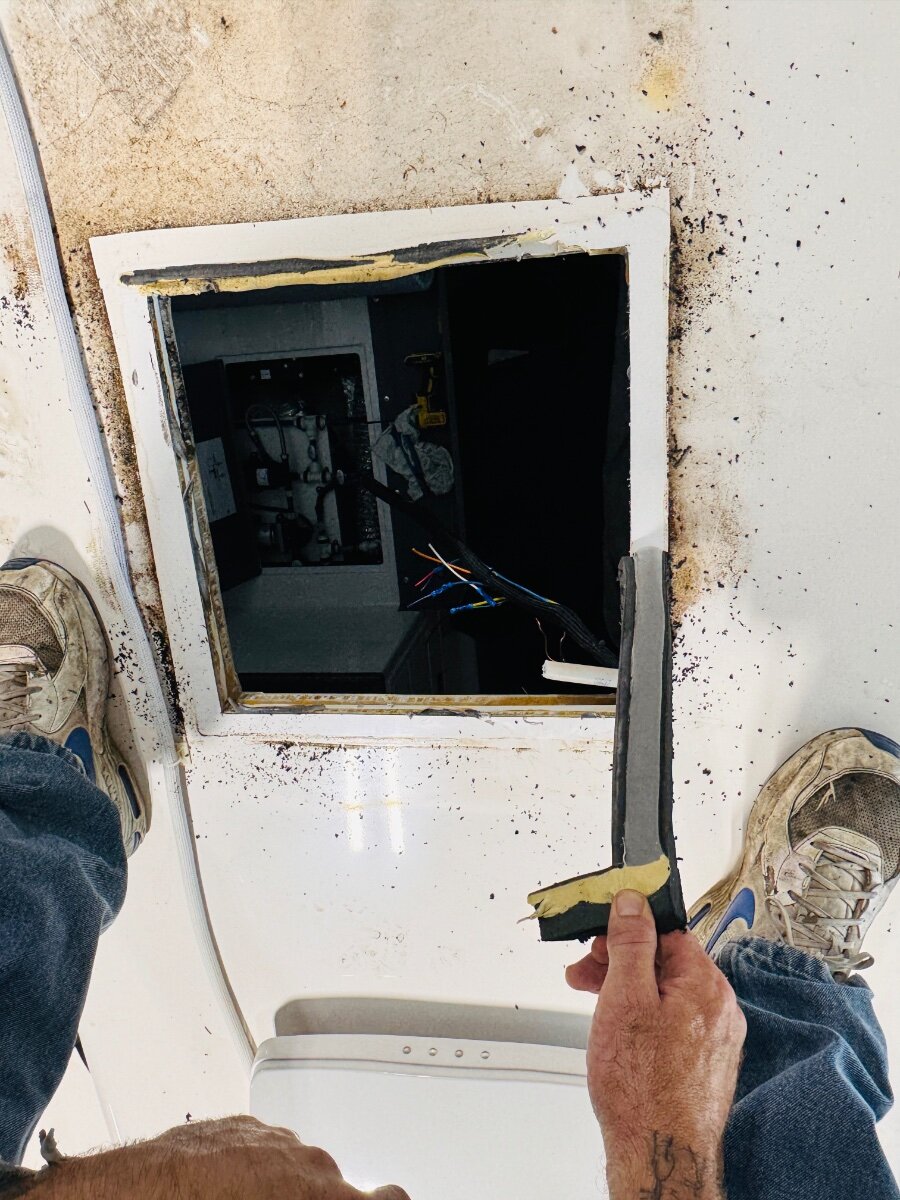
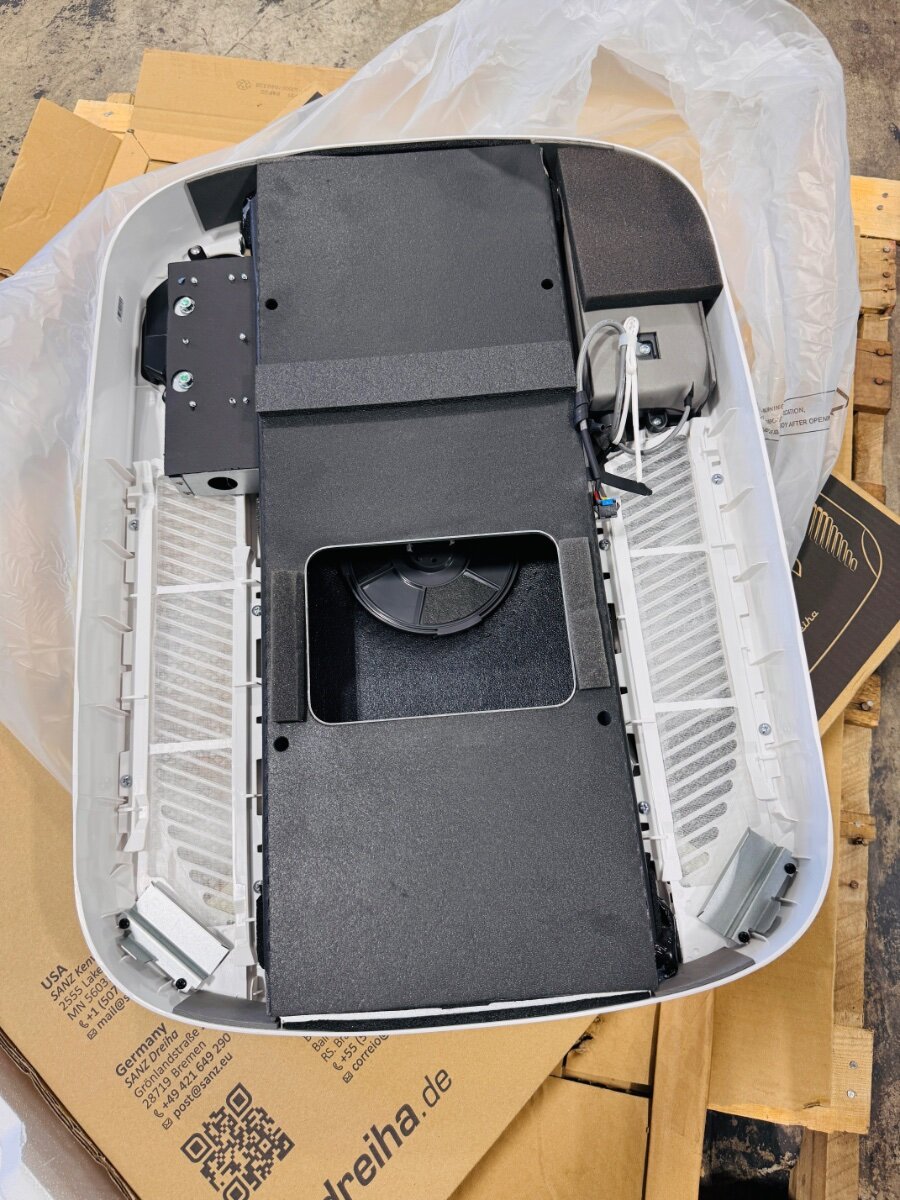
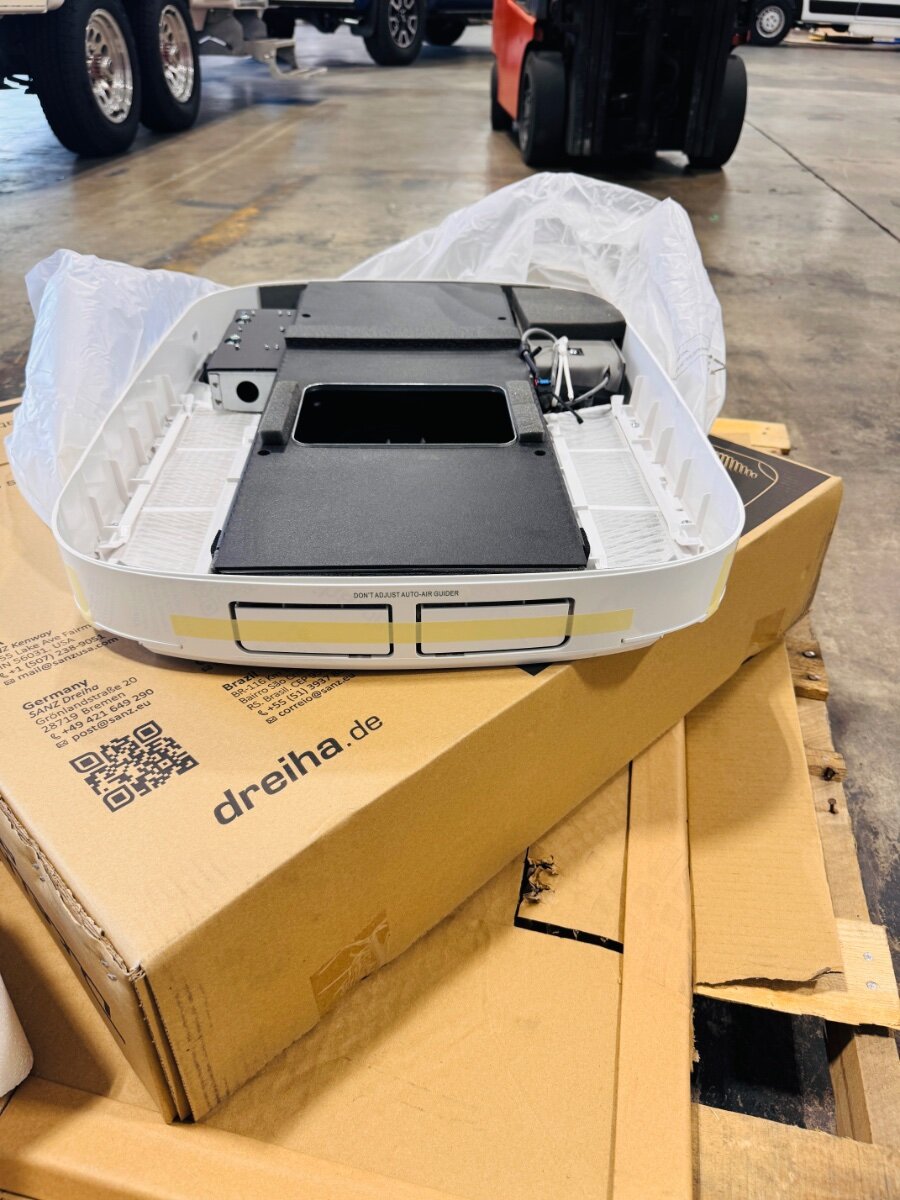
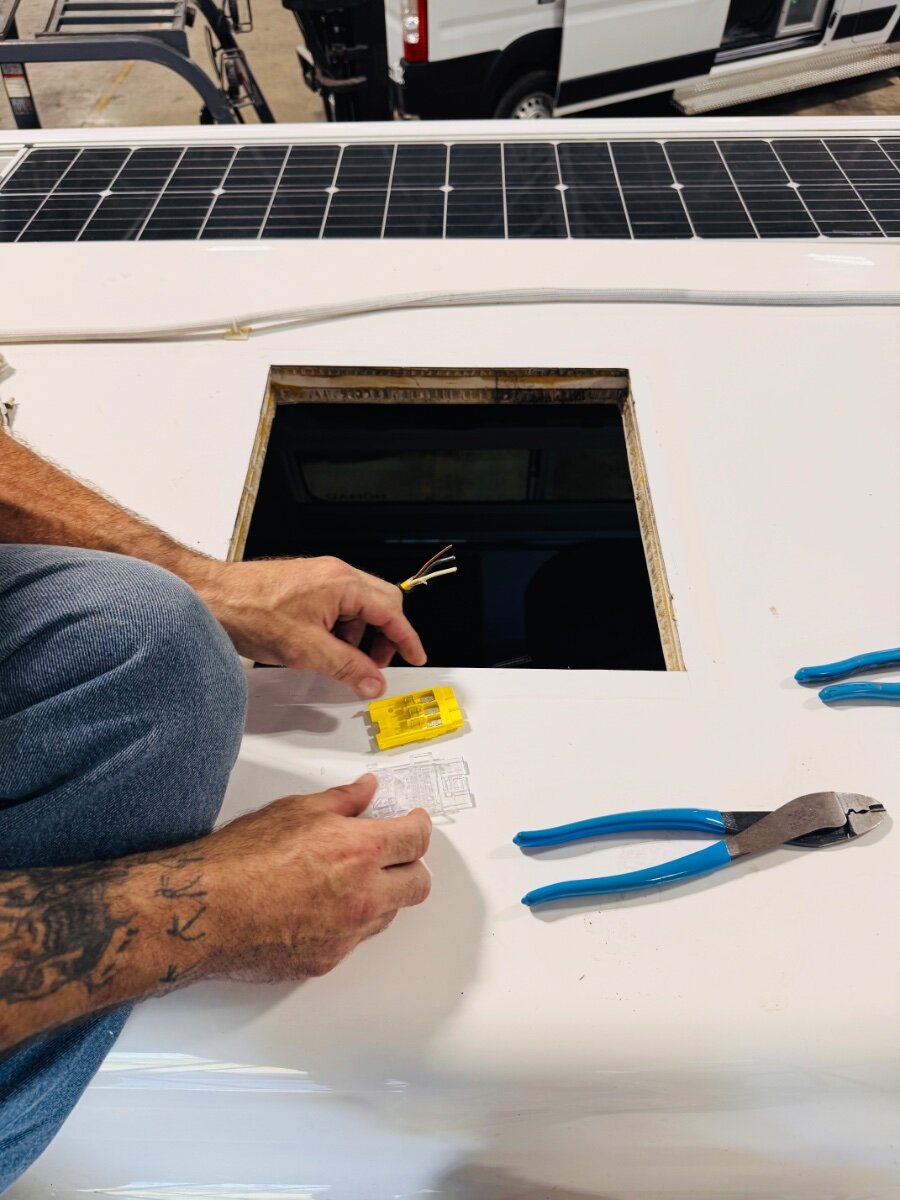
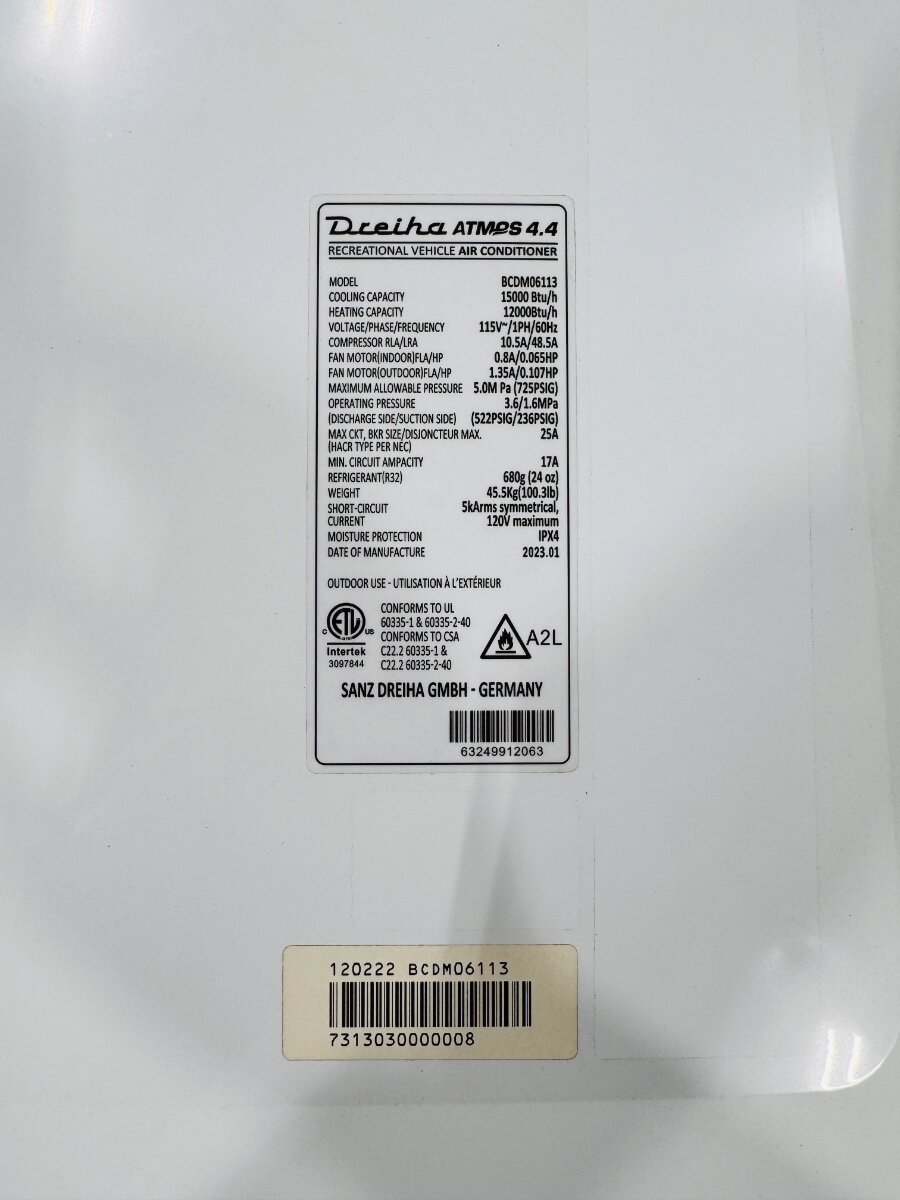
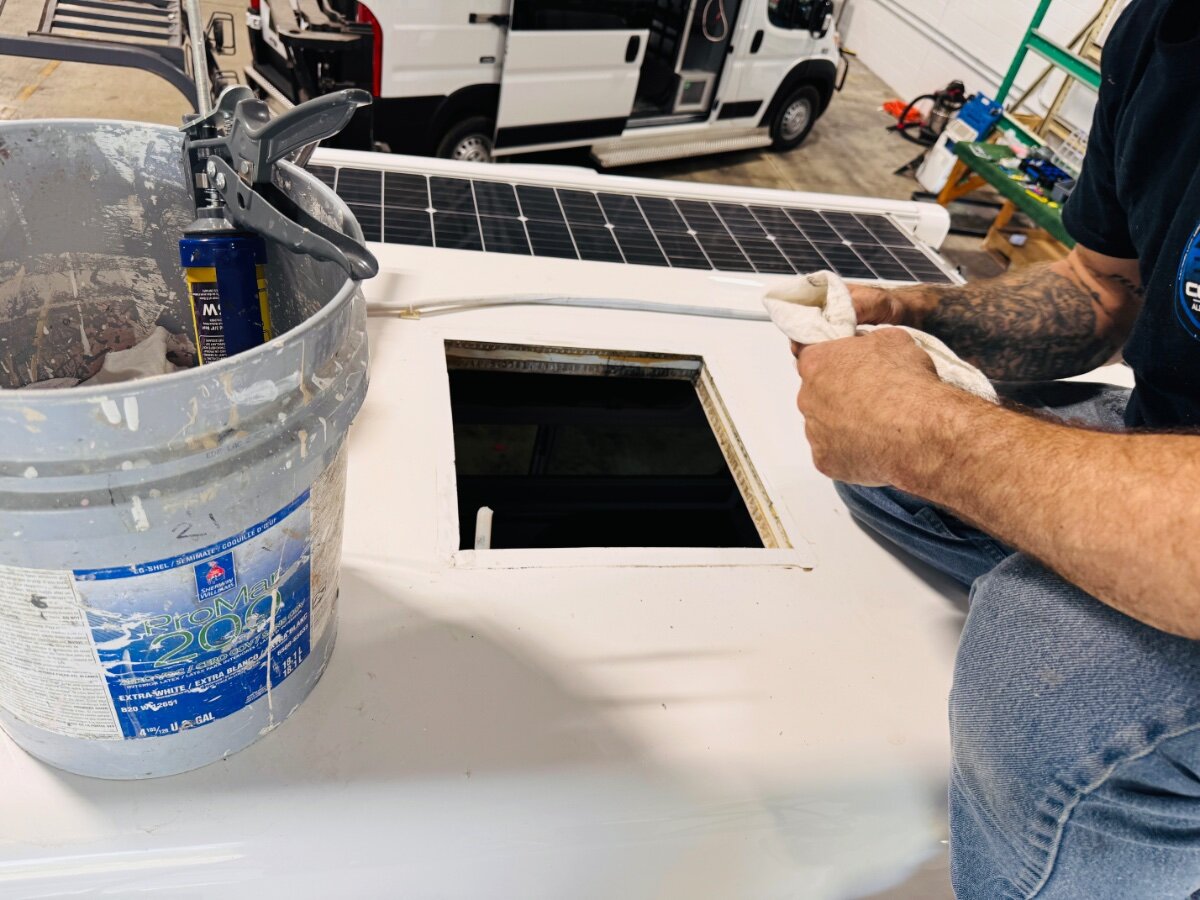
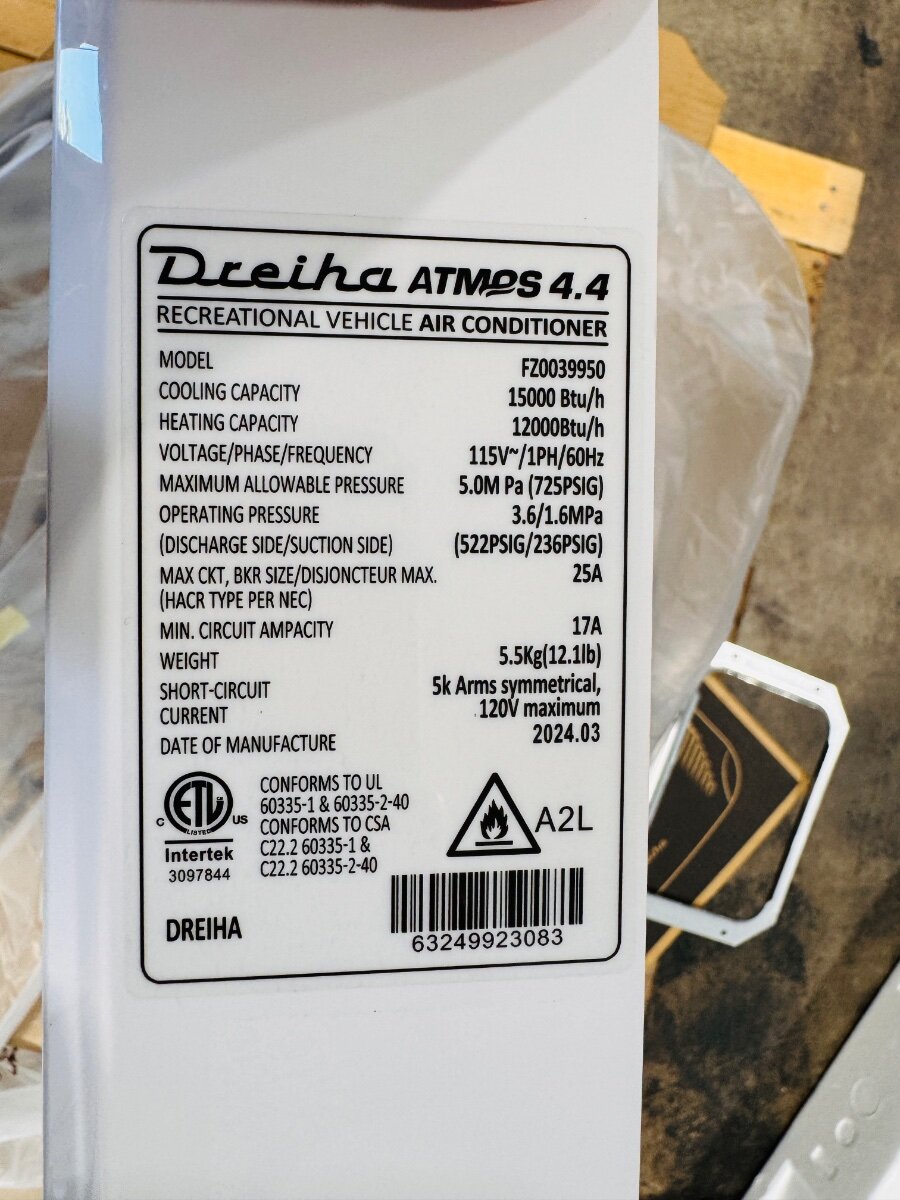
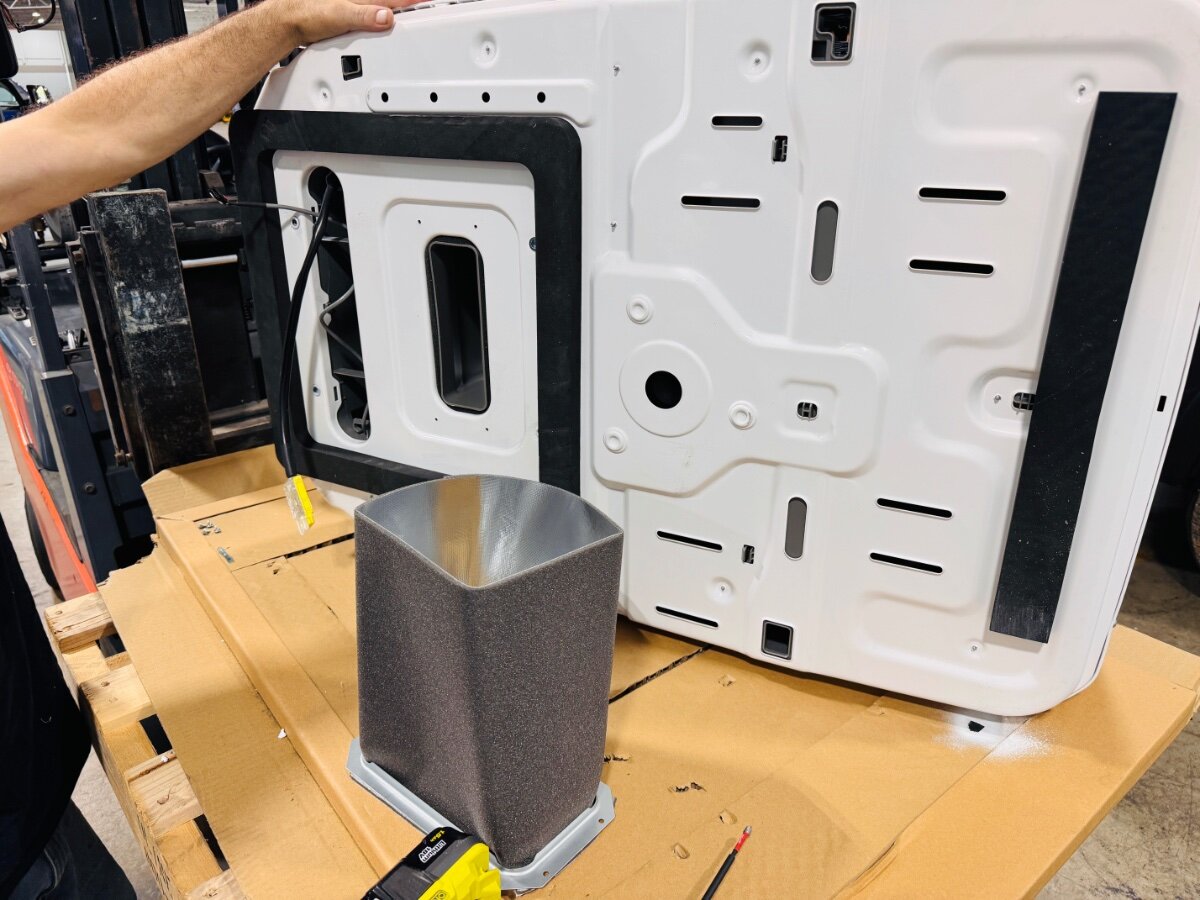
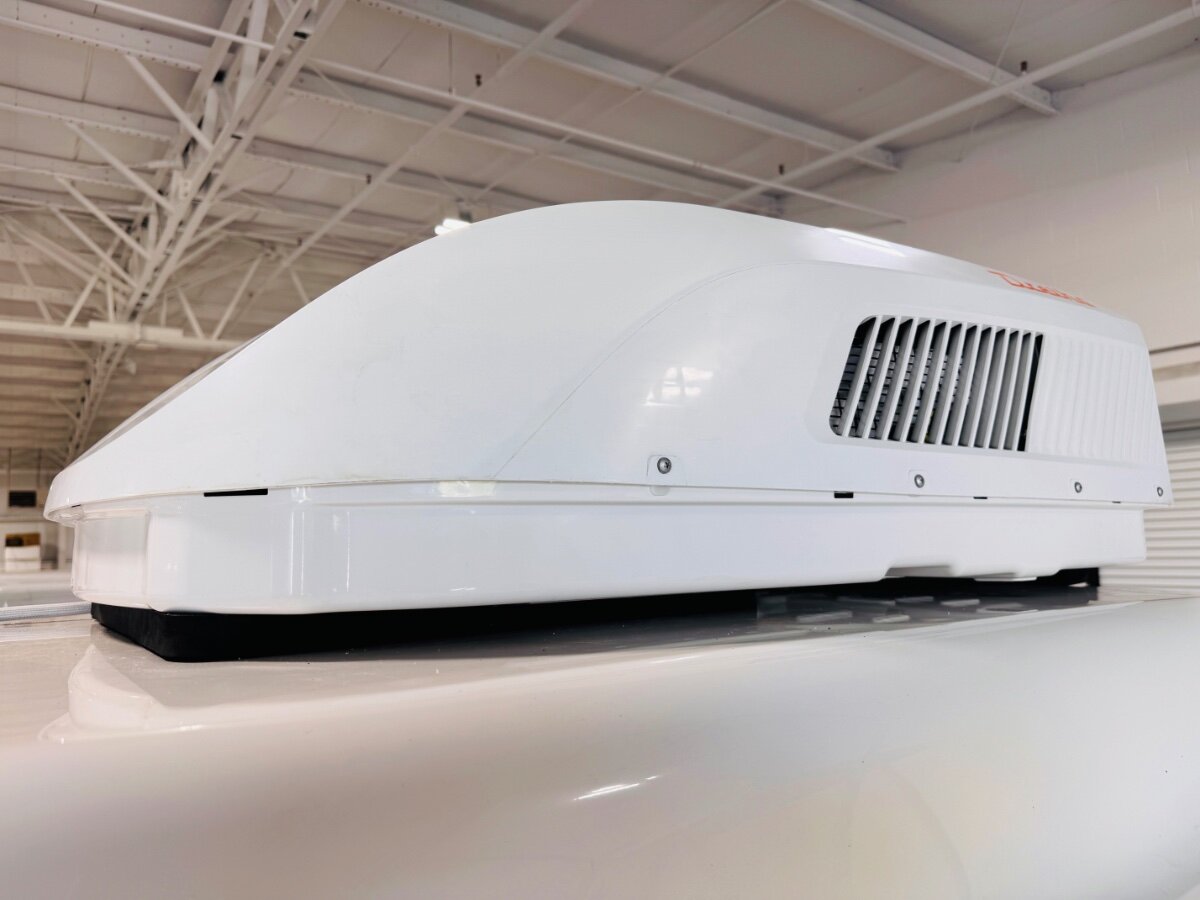
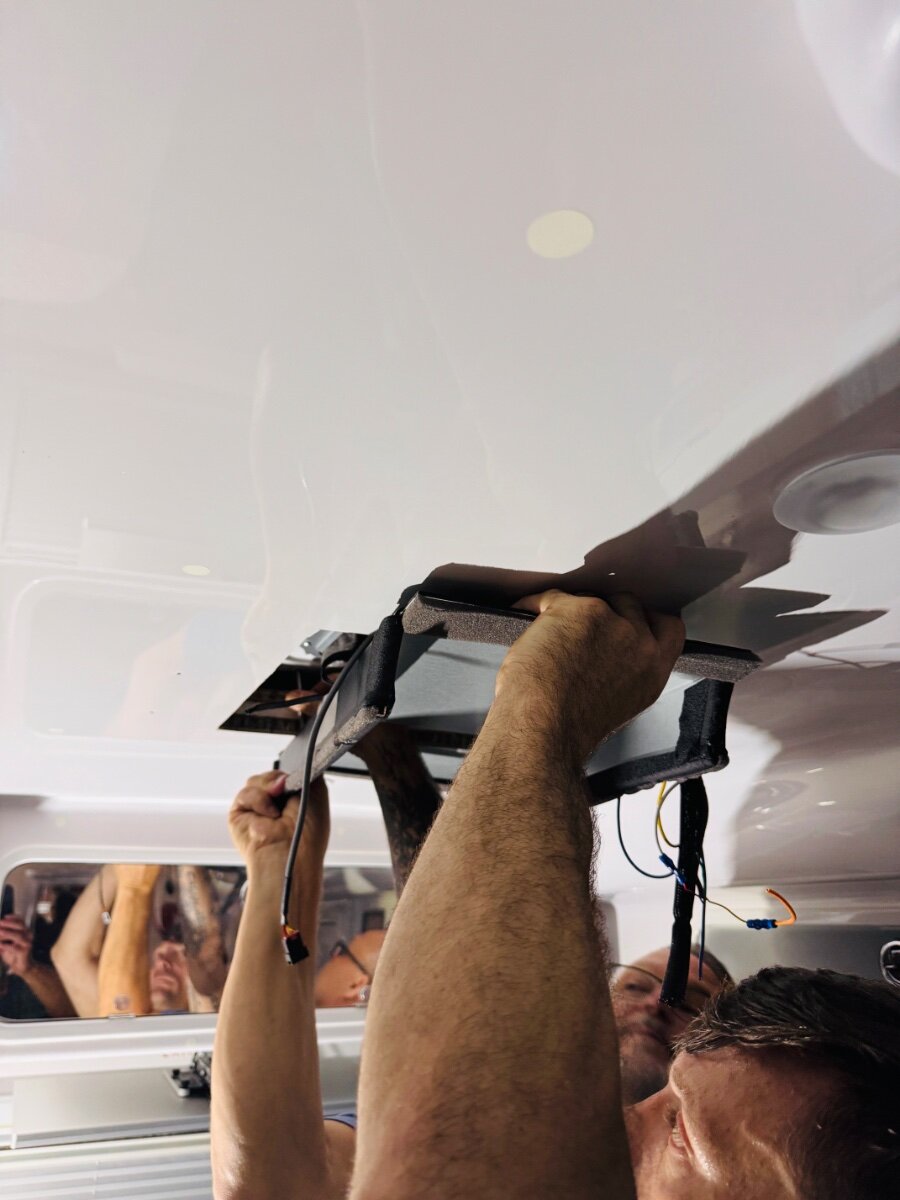
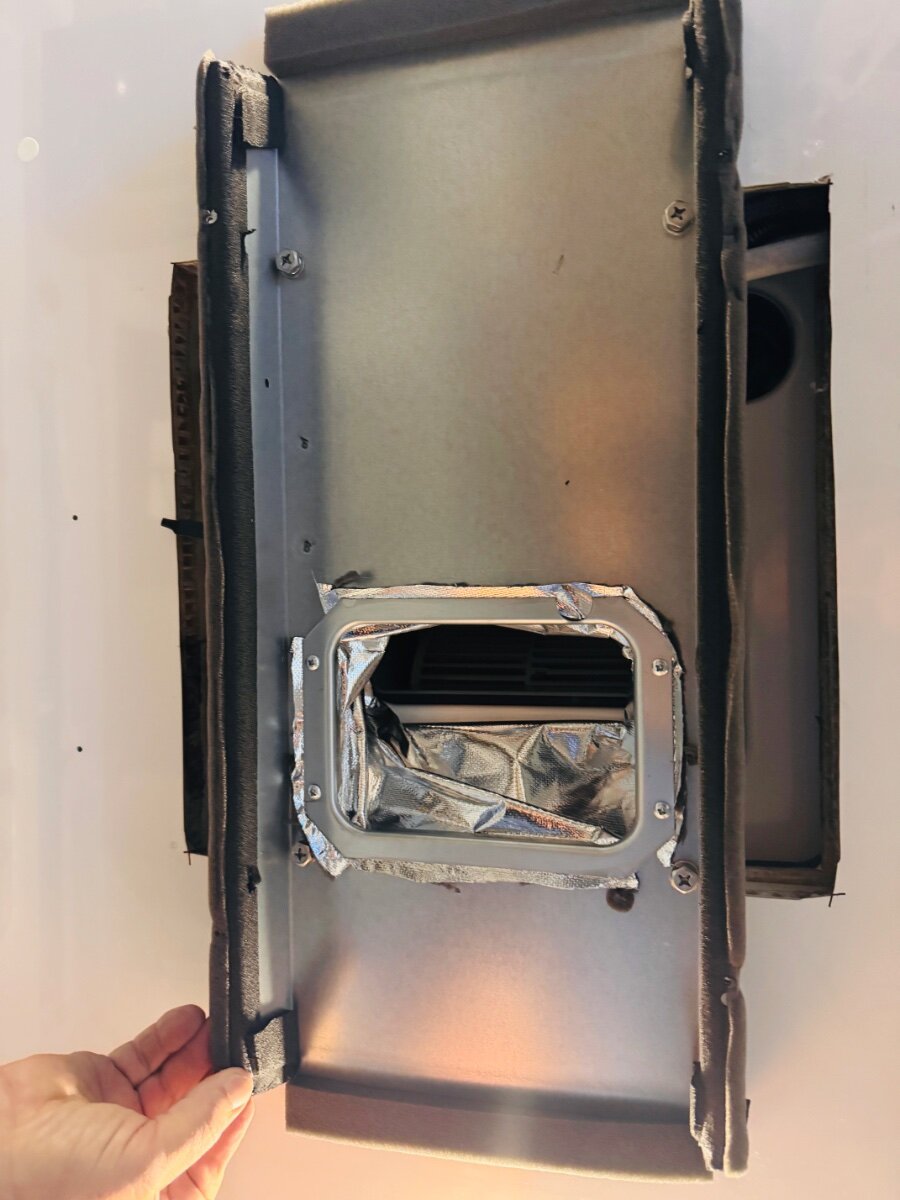
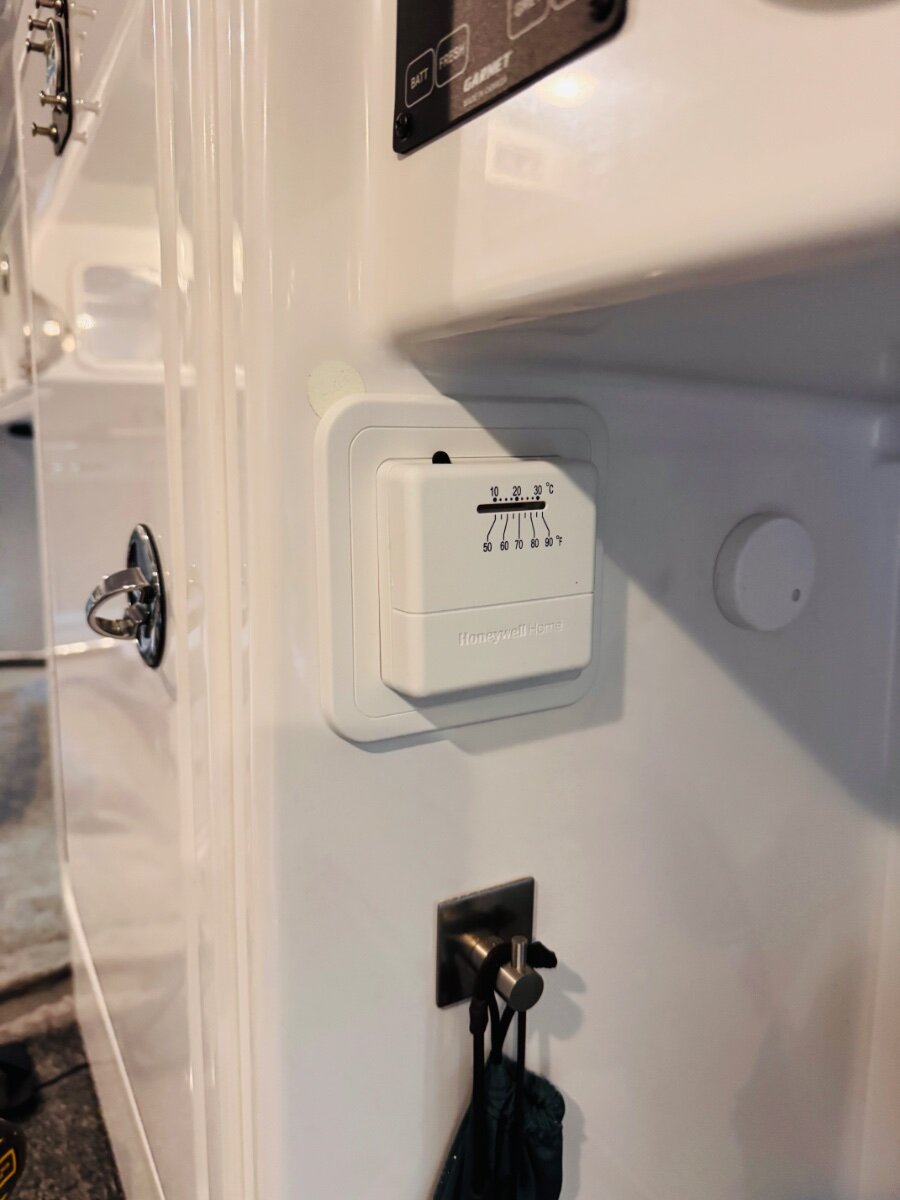
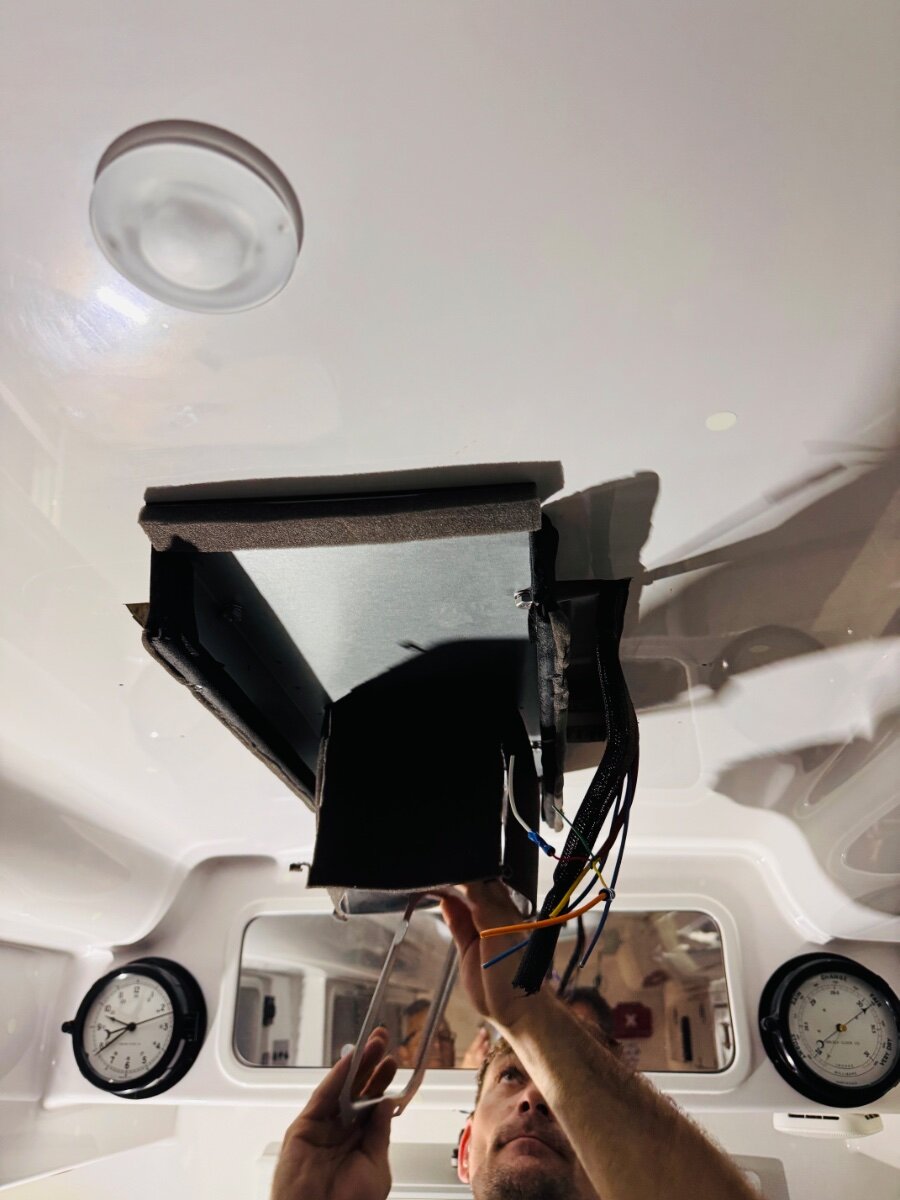
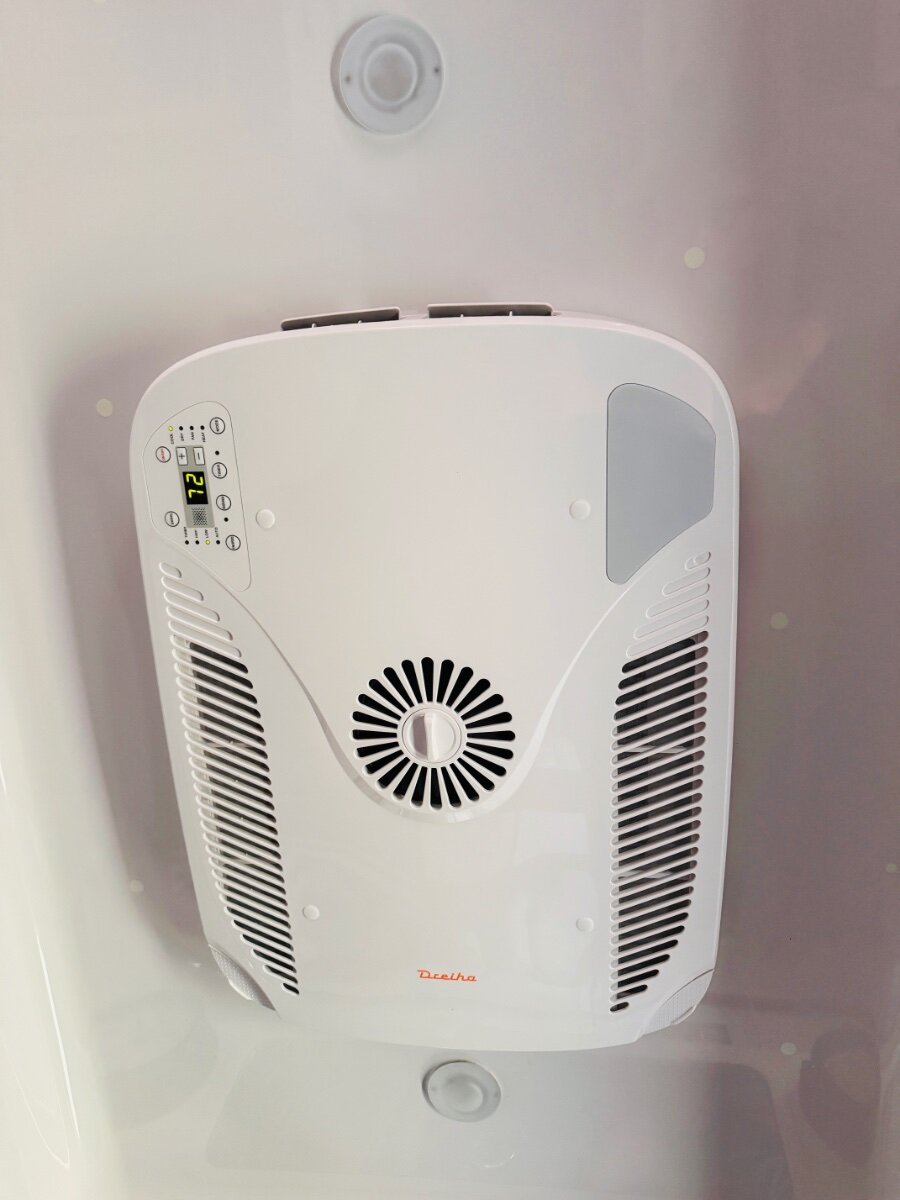
On the last leg of our summer family vacation we stopped at my dad's in MI. Next morning, I drove down to Elkhart, IN and had SDG install the Atmos 4.4. Guys were on time, efficient and knowledgeable. Installation went great! Pics below: They now offer SoftStart as an option on their website but I brought my own SoftStart Breeze (smaller version) . Atmos 4.4 Pics Removed the old Dometic Penguin II, cut drain line and plugged. Cleaned surface, applied very small bead of Dicor self-leveling on the inside perimeter of fiberglass 14 x14 opening Removed interior shroud. Penguin shroud was screwed to fiberglass ceiling, the 2 holes on each side will barely show after Atmos plenum installed. Fixed mine with a couple of the small glow in the dark dots we use on the ceiling to amuse the kids. Kevin was able to use the wiring for the original thermostat location to power the Suburban propane heater control. I may change or remove this later. They used Molex connectors instead of JXN box additional pics The new unit is a good bit quieter (6-10db) depending on mode and has around 40% less draw on the battery. On high it was pulling 1200 W vs 1800 W for the PII. Fan only was under 300 watts. They were done with the install in 2 1/2 hrs. App and remote are working well but still figuring it all out. I know this is short but on our way home to TN. I did find out that the Atmos 4.4 is designed so that the fresh air coming in and the exiting conditioned air is in a sealed unit and does not contact the outside (humid air). So running the fan only does not introduce humid air, it only re-circulates cabin air. Still awaiting answer on how exactly AUTO mode works. From the manual, it only states that it senses ambient air and automatically heats and cools but nothing about a parameter. You actually cannot set the temperature in that mode at all as far as I can tell. I did notice this unit manufactured 3/24 is using R-32 refrigerant. Best, Mike
 7 points
 -
I just got a text message from Truma Aventa today. They have partnered with SoftStartUSA to offer soft start technology for starting their AC units. This will make it easier to start the Truma Aventa AC units and will take less starting amps while connected to shore power and for those that have lithiun batteries and solar power during off-grid camping. As well, thouse using inverters and generators will benefit from the lower starting amps.3 points
-
Thanks for reporting on the install, much appreciated! Anxious to learn more of your thoughts once you get further down the road, and gain experience on the workings and comfort of the unit.3 points
-
Yup just saw that. Here's the link with announcement and contact details if you wish to schedule a service installation. https://mailchi.mp/trumacorp/truma-coolers-winter-camping-and-more-17304172?e=65dcac5d9f ...and response from Truma re cost "The cost of the soft start is $425 plus tax and mobile service calls where applicable"3 points
-
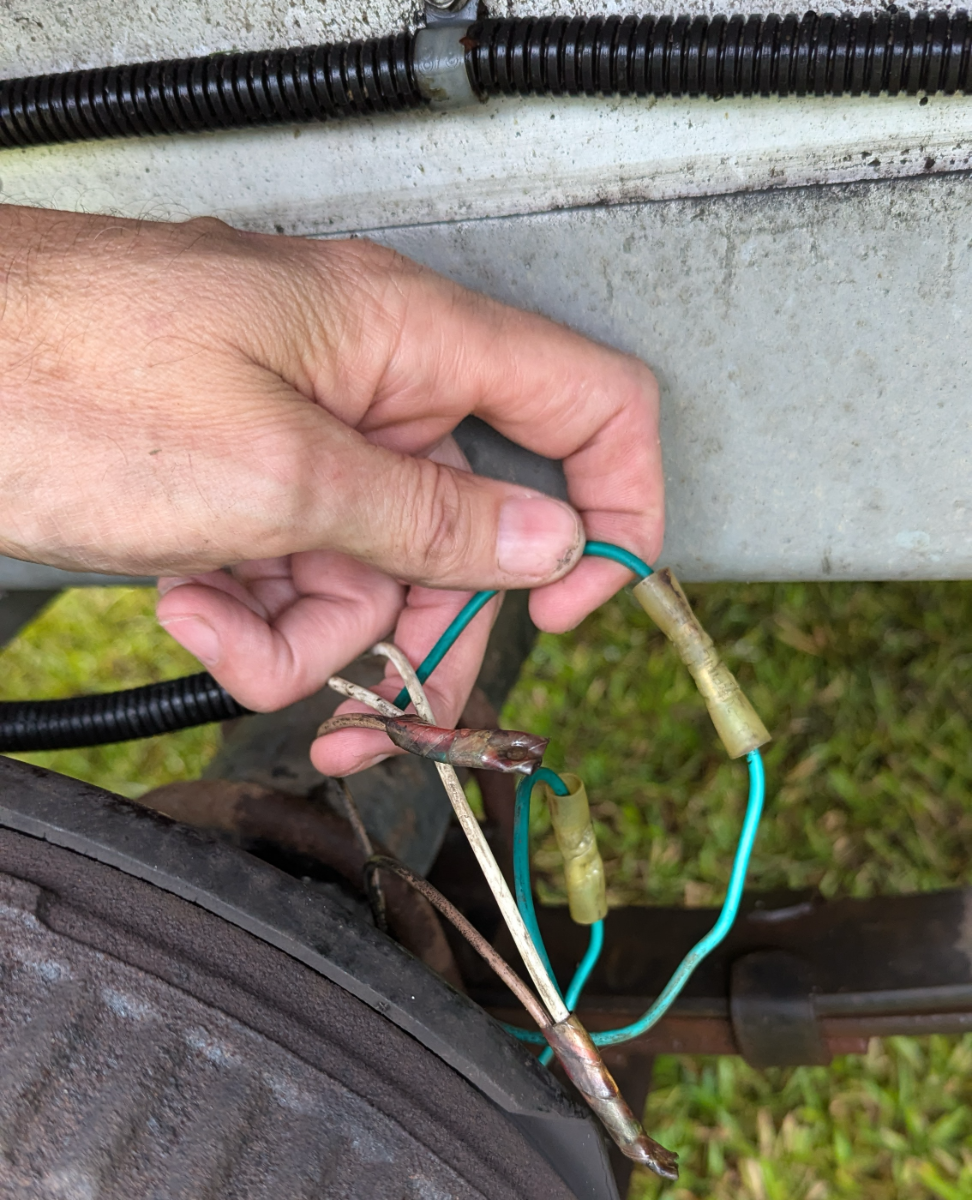
Those butt splice connectors on the green extender wires were too large AND whoever put them on did not bother to shrink wrap the ends, and they were quite large open ended connectors. Water traps for sure. Everything is reconnected and heat shrink wrapped ends are done too. No truck errors in the drive way, but I never did get those. Will test drive soonest. Finger's crossed.2 points
-
Zooming in on this thought. The jacks are a standard jack which is modified by Barker for OTT. Their standard jack has a round mounting plate with three bolts. OTT production makes and sends Barker a two bolt tab that Barker welds to the shank of their standard jack. Production ordered out 48 of them in May and according to Service they are out of stock. I find this to be a bit off. More likely the Production Team is holding on to their remaining supply of "Post Assemblies" for..... wait for it... production. In the last week, at least four ownes have needed these assemblies and per Service have called Barker. But Barker does not have any of the mounting tabs so those owners are basically screwed. As of yesterday, Barker has no pending orders from OTT, and none will be made until OTT makes the brackes. OTT Service needs a reserve stock in addition to Production stock. Until this is done, if you drive away with a down jack, you likely will be "Screwed". The three jacks are rated for 9,000 pounds total. The safety factor for a screw jack is generally considered to be 3, but this may need to be adjusted for specific applications. For example, if a screw jack failure could injure people, some recommend multiplying the critical load by an additional factor of 0.6, resulting in a final safety factor of 5, Since the failure of these jacks could kill, the 5X safety factor is in play. Bottom line these jacks are the right jacks for our trailers. JD: Can you please post a link to your excellent DIY guide for jack maintenance? AMEN! Note that the jacks have a clutch that protects them from over extension/retraction. If you damage the jack by driving off with it down, the bent section will prevent the jack from moving when you try to retract it. That's when most blow the 30 amp fuse.2 points
-
When we pulled the wires from the axle there were wear spots in the middle of the wires too in several places. Mine are now zip tied to the outside of the axle. I had service check when they replaced my brakes in May and they left the wires on the outside. Mike2 points
-
When I serviced my bearings, I cut back all the wires to clean copper and replaced all those old crimps. It's easy enough to run new wire if needed. I would suggest using the old wire to fish new 14 AWG wire, interior to the axles, not exterior using wire ties to the axles as John E Davies showed in an old post.2 points
-
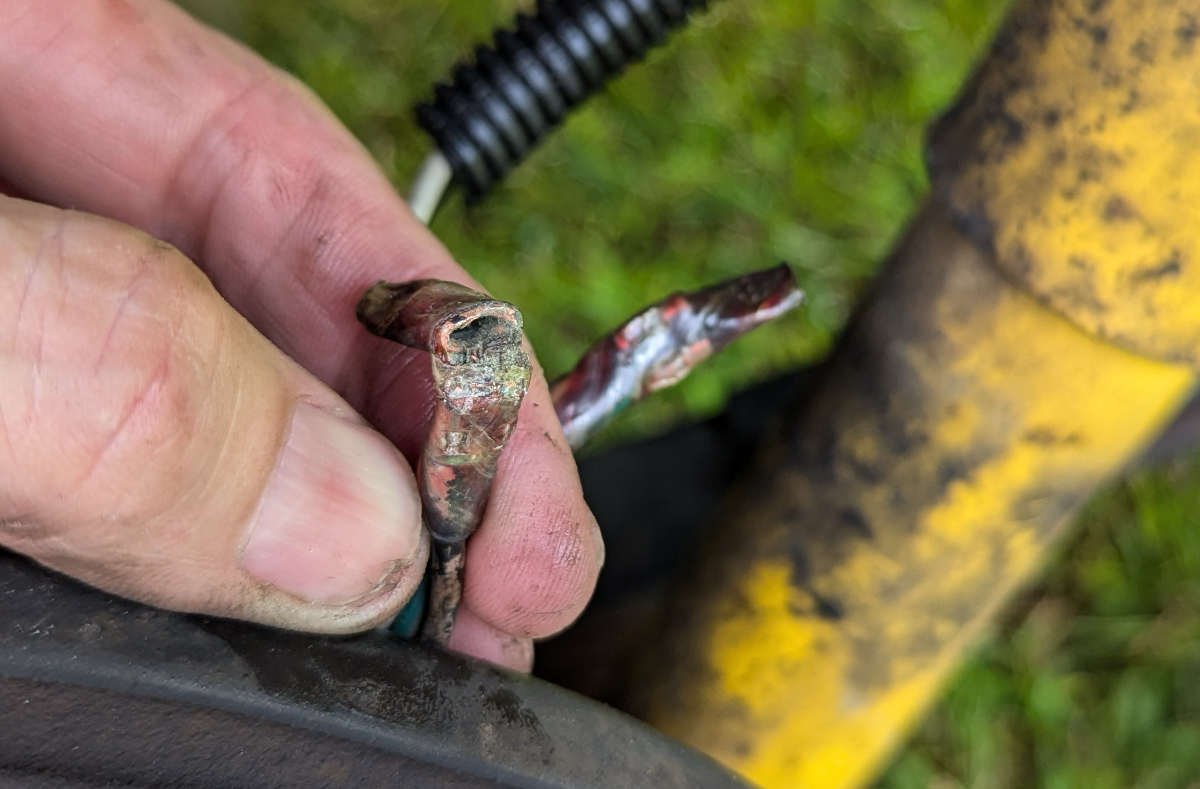
Well, as some of you know I've been posting a "ton" of stuff on the FB group. I'm trying to share and received some good suggestions for troubleshooting all my brake issues. I was inspecting the brake wire bundles on the street-side wheel well when one of the very hard plastic sealed connectors broke off. I discovered even more corrosion (pictured). No wonder these newer trucks think there's an issue with the brakes, cuz there is. The voltage drop / resistance must be the issue. I'll get someone to press on the brake peddle while I have a multimeter on these. I'll compare the rear wire bundle to the front bundle, which I've not touched yet. To see if I can see a difference. If I do the test correctly. I placed new temporary connectors on the rear bundle at a harvest host in a very wet grassy field, after a huge downpour. Fun times. But the truck did not gripe about breaks for 2.5 hours going home, until the very end of the trip, after going through a HORRIBLE rainstorm on I-20. There seems to also be wire "extenders" on the green wire on the front bundle, and I don't like the look of the NON-sealed connectors. I cannot wait to see what they look like. I have shrink-wrap sealed connectors on-hand I will use. Any suggestions are welcome, especially as it comes to testing the voltage from the 7-pin to the bundles. Just things I've not yet done before. Kind of fun though. Thanks,
1 point
-
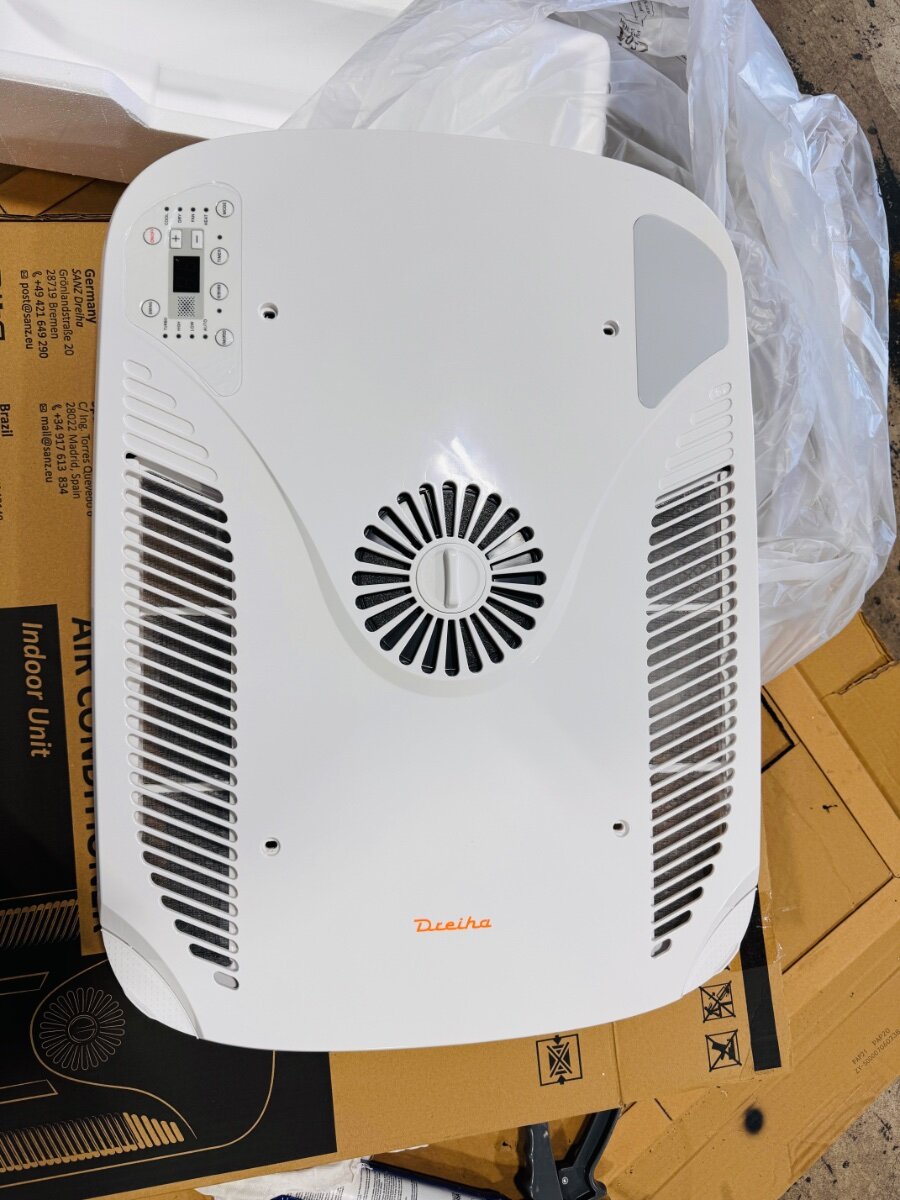
Anybody considering the little Houghton 9.5K model, now would be the time to buy at 11% off! I'm still undecided and delaying this upgrade since I am spending $$$$ on batteries and inverter now: RV Air Conditioner Low Profile 9.5k Quiet AC Unit with Optional Heat Pump and Remote Control, Non-Ducted - RecPro1 point
-
I remember removing excess wire. Voltage varies and is controlled by your trailer brake controller. I get Chris to apply the TV brakes, on and off as I check the brake action and adjustment. i would still run the wires through the axles. You just need high-quality, better insulated wire and you can add grommets.1 point
-
Would you mind adding the direct link to this thread? I have tried tracing various Knowledge Base information from older posts, only to find the information missing, but it still might be helpful. I use the Knowledge Base a lot, as I continue to learn about the OTT. Also related to the Xantrex manual and codes: OTT Service department and I both tried to find the definition of "nAt" to no avail. I will make a separate post for that issue, but wanted to note it here.1 point
-
While at OTT Jason and I were talking about using the hull numbers to track service tickets. Unless I misunderstand him, and he seemed pretty clear, they have no way in their system to track repairs via the hull numbers. The numbers are "more for the owners", than OTT themselves. They "currently" pretty much track only via the owner's name. So, if you sell a trailer, the next owner would need to know your name, and likely have their database updated. I would think they have all the VIN numbers too. Since the VIN numbers no longer correspond with the hull numbers, it's not as easy now to use the hull #s. The VINs have "rotated" back around with new suffix numbers so they can no longer use the last 3 or 4 for the hull #s. Maybe many of you knew this already. BLUF: If we say we own hull # blank, it means nothing to OTT. They key on our name only, or mostly. They're just for us "fun monkeys" to use. Do you think Hull #s should be put on the back of Ollies by default? That would be a fun poll to run on FB.1 point
-
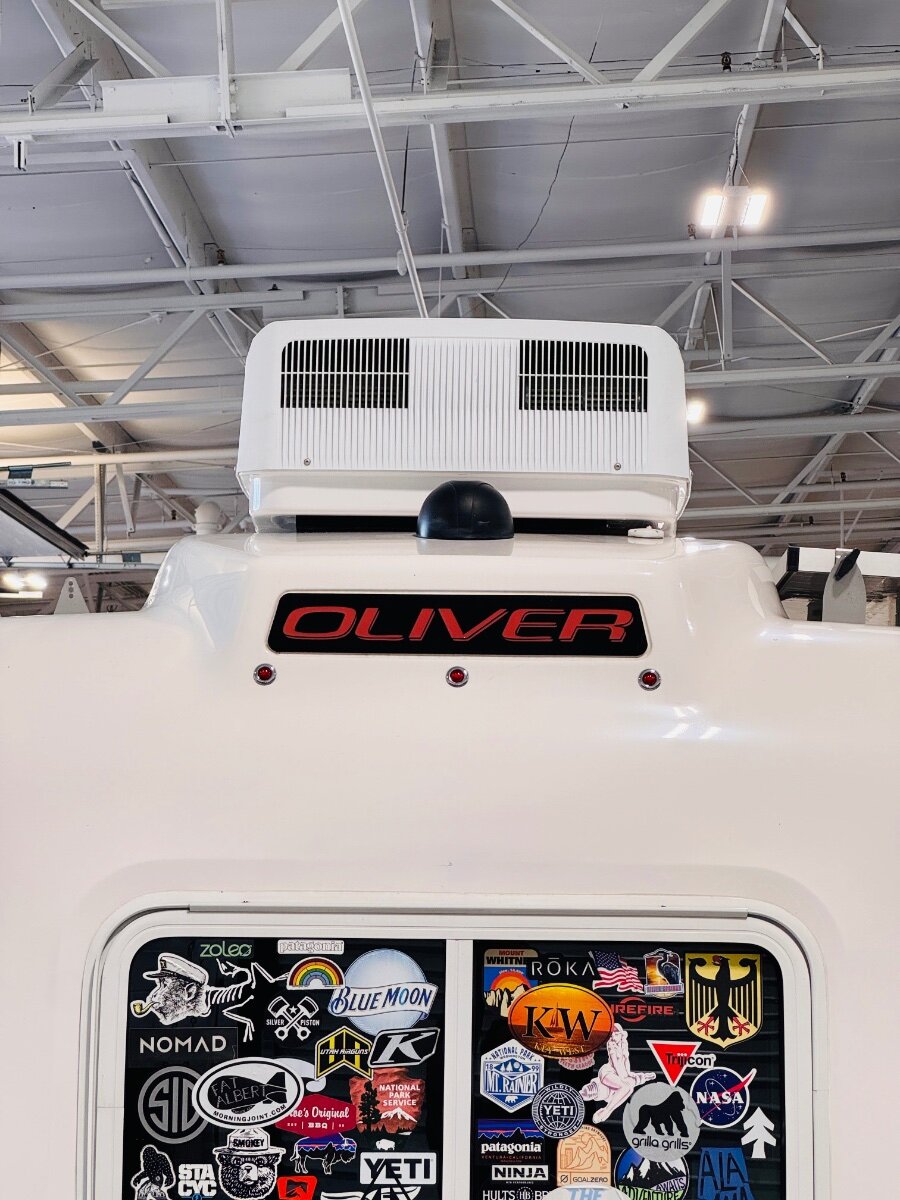
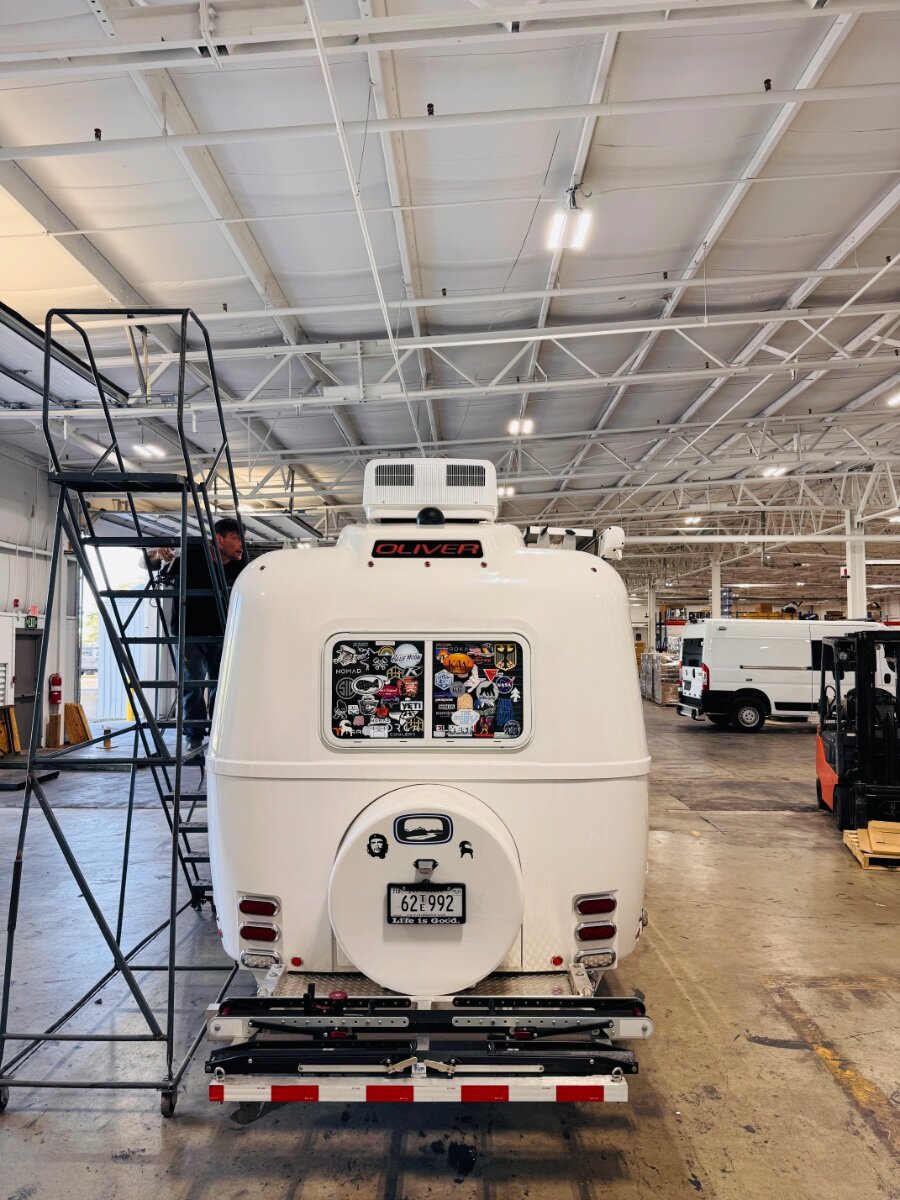
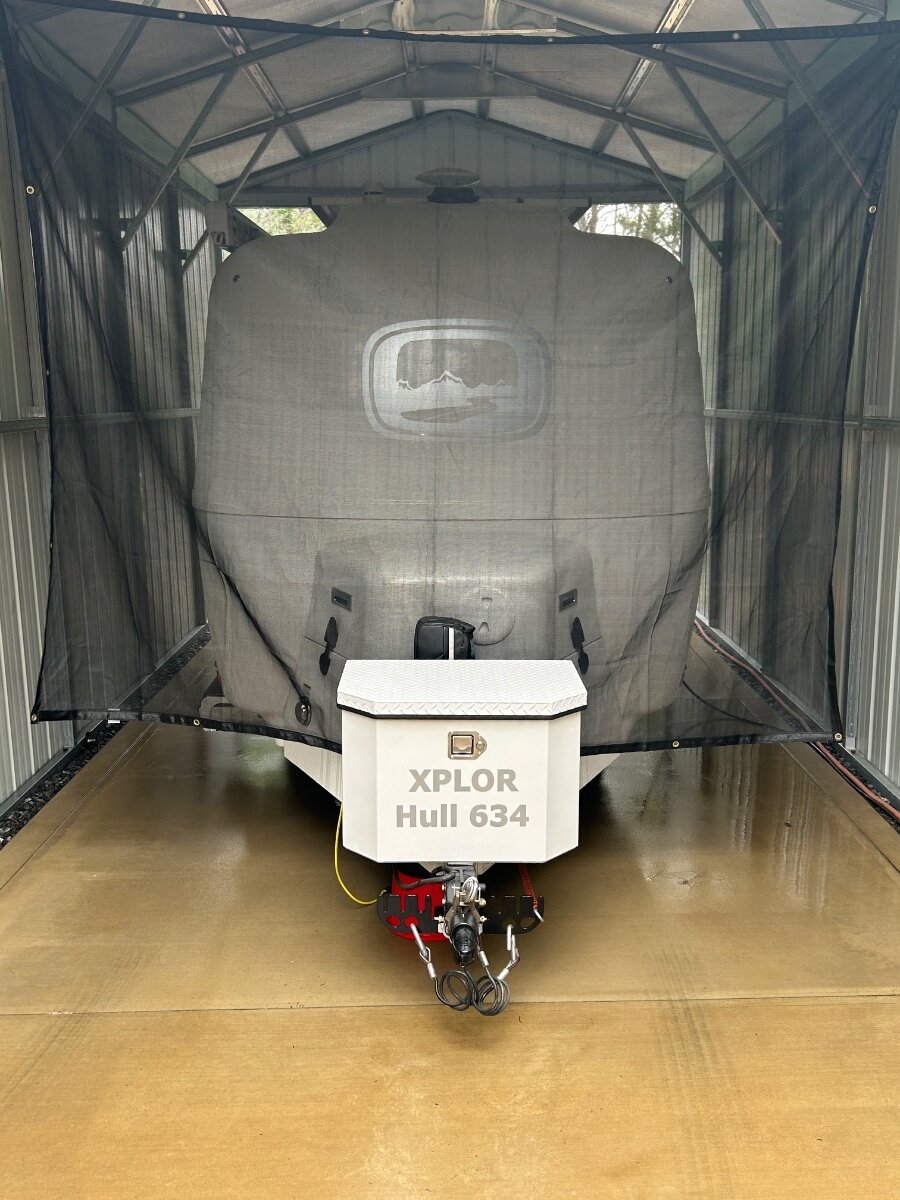
When we ordered our Oliver in 2020 we opted out of the Hull # rear display. I ordered and installed this custom graphic in the front for a quick glance while we are camped. We finally decided on the name “XPLOR” on the rear as it’s just how we roll.😊🇺🇸
1 point
-
JD: One of the reasons that JD suggested the exterior routing acrosss the axle is that the wires were being damaged at the entry and exit points. I totally agree that the wires should be 14 ga as you suggested.1 point
-
You could hang one of these guys to remind you to "duck."
1 point
-
Art, Understand there has not been any Dexter 5 leaf spring failures, yet. 🙂 Feel fortunate that Oliver installed the 5200lb axles and 5 leaf springs on our 2015 LE2 # 75. We used to support a fleet of industrial mobile machines (before retirement) equipped with hydraulic, pneumatic, electrical, mechanical, and electronic equipment. We supported the field technicians trying to make life easier for them with parts stocked and durability. We standardized hydraulic pumps used as much as possible and air compressor/hydraulic motors so folks in the field and rebuild shop would needed less parts that worked on more machine applications, point is well taken on standardizing parts when possible. 👍1 point
-
I did my career at Honda of America, Mfg in Ohio. We of course tracked every units build and history with the V.I.N.. I thought Oliver was doing the same with the Elite and Elite II builds, using either the "hull number" or some other identifier... but I realized when they sent out the mass-mailings on the Bulldog hitch recall that they weren't doing anything at all like that. THEY upgraded my hitch from the 2" / 7000 lb Bulldog to the 2 5/16" / 12,500 lb version. Even though they had done this... they sent me a recall notice. If their build records were complete... this would have been unnecessary. Evidently, at some point in their production run... there was some 5,000 lb Bulldog hitches that had gotten inadvertently installed. Maybe even just one?? But because they couldn't ascertain the production window where they KNEW there were good parts... they had to go back and check all or nearly all of them, because the risk was just too great. I suspect that this has shined a light on why they might want to be doing something like this going forward.1 point
-
Gotta love the "Fall Colors" in the Rockies! Great snapshot, @Patriot!1 point
-
John, Our # 75 LE2 received 5200lb axles with 5 leaf springs (originally for a Legacy Elite) because Oliver ran out of 3500lb axles with 4 leaf springs during manufacture of our Ollie. The 5200lb axles have larger drum brakes, too. We are not the original owners, but learned this information on this forum. Off the shelf Dexter axle/brake/spring parts are available for our Ollie and I have always liked the fact they put higher capacity axles on our Ollie during manufacture. I would be happy to take more bracket photos, measurements and compare with your photos/measurements, if needed. Here's our center hangar:1 point
-
If the axle label is missing, Dexter engraves the axle serial number on each axle. I gave Dexter the serial number off of one of Ollie's axles a few years ago and Dexter emailed this axle spec sheet back to me. With this information a Dexter dealer should be able to supply an axle built to original specifications. At the end of this informative video, Dexter mentions engraving the serial number on each axle in case the label is missing.1 point
-
Would not recommend using them like this. Plus - I have no idea how the occupants ever reached that first step.
1 point


-
Recent Achievements
-
")


")


")


