Leaderboard
Popular Content
Showing content with the highest reputation on 11/16/2024 in all areas
-
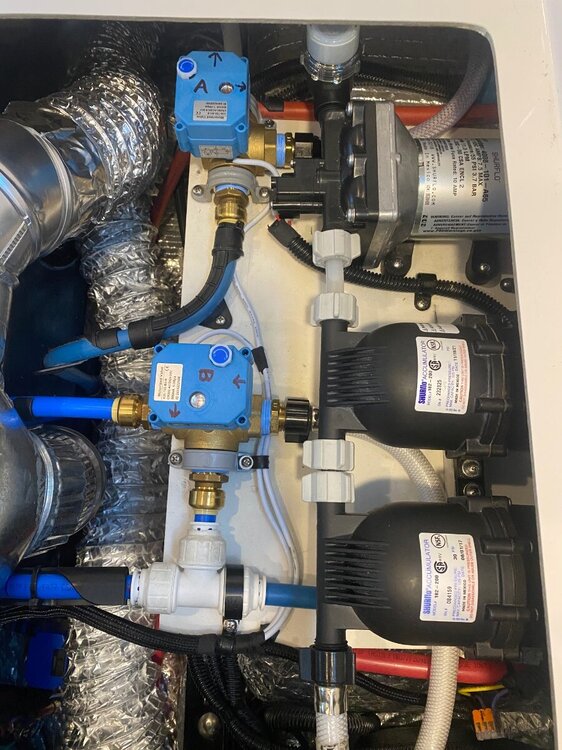
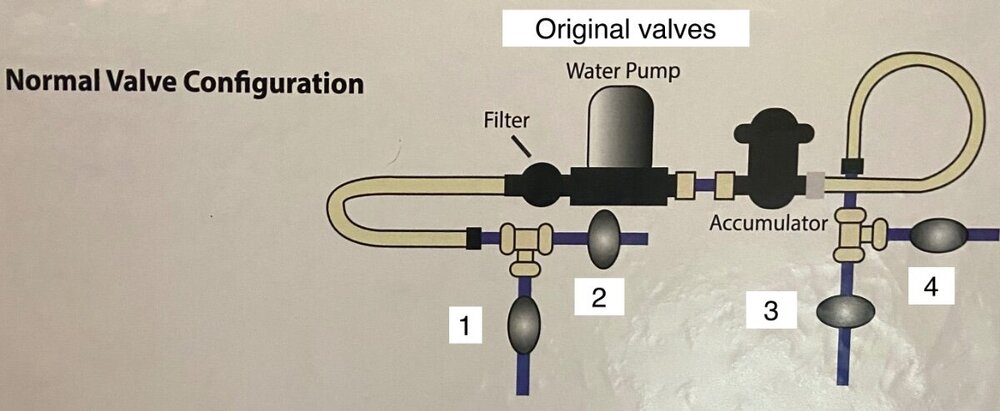
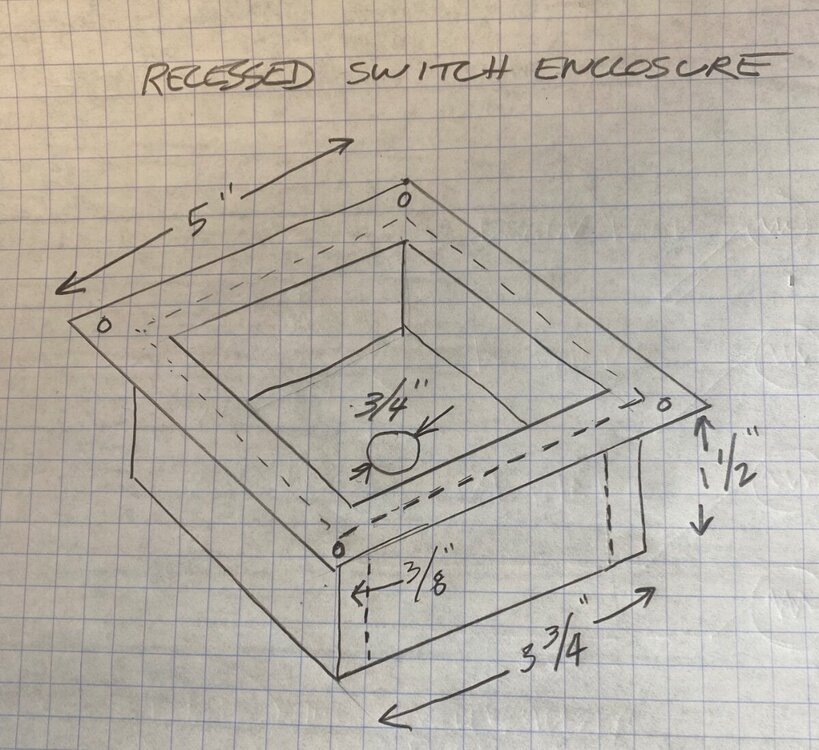
This modification improves electric valve control by adding a rotary switch to select the four different valve line-ups: Normal, Freshwater Drain, Boondocking, and Winterization. I was really inspired by JD1923 and C&M Currie who replaced their quarter-turn valves with electric valves so they didn’t have to lift the bed mattress to change valve positions. This is a fairly extensive modification because the heater vents had to be removed for access to the valves, the new electric valves had to be installed, a recessed enclosure was needed to protect the switch, and number of new wires had to be run Four of the original quarter-turn valves were replaced with two 3-way electric ball valves in the orientation shown in the photo. I used 3/4” valves with 1/2” adapters and SharkTooth PEX fittings for better flow. A little heat helped to slightly bend the PEX pipe into position, and the valves were clamped down with 1” electrical PVC clamps. A 1/2” electric ball valve was used for the freshwater tank drain. There was limited room to work in this area so it helped to pull out the PEX drain pipe where it penetrates the floor. The switch was mounted on the forward facing wall of the outdoor garage where it’s more convenient to conduct the valve operations. To keep it out of harms way, I made a recessed mounting plate out of 1/8” hobby plywood and moulding stock as shown on the drawing. The plywood can be cut with a razor knife if needed. The following legend helps explain how the rotary switch is configured. It shows the original five quarter-turn valves and the replacement motor operated valves. It also shows the four switch positions as they correlate to the valve line-ups, and the wire terminals used per the wiring diagram. Original Oliver Valves 1 2 3 4 Drain New Valve Identification Switch Position Switch Terminals Valve Line-up A (3-way valve) B (3-way valve) Drain 0 None Normal* Open Closed Closed Open Closed 1 1-2 3-4** Freshwater Drain Open Closed Closed Open Open 2 5-6** 7-8*** Boondocking Closed Open Open Closed Closed 3 9-10 11-12** Winterizing Closed Open Closed Open Closed * Valves in the de-energized position ** Terminals used for optional LED indicators *** Terminal-8 is Jumpered to Terminal-10 The rotary switch needs jumper wires that can be pre-wired on the bench using ring terminals. This will keep them in place while connecting the field wiring using the included forked terminals. The valves use very little current so the +12Vdc can be picked from any convenient power source and protected with a 5 amp fuse, I used a nearby breaker. An internal capacitor powers the valves back to the “Normal “ position when de-energized (Position-0.) Five wires were encased in 3/8” split sheathing and routed under the floor to the valves. This included three power wires for the valves, one ground wire daisy-chained to each valve, and one spare wire for an optional pump LED that I’ll cover in a different post. I also added an optional 1/8” plywood label board with LEDs to indicate which valve line-up is selected. I printed out a switch label, had it laminated, and glued it on piece of 1/8” plywood with holes drilled for the LED’s. This was a fun project and just as I finished, I had a big surprise! 😃 Another Oliver owner, Taylor.Coyote, just happened to drive by. 😃 It was great to meet Chris and I look forward to meeting again. Cheers! Geoff Shopping list: 2 - U.S. Solid 3/4” 3-Way Motorized Ball Valve #USS-MSV10004-G 1- U.S. Solid 1/2” Motorized Ball Valve #USS-MSV00007 4 - 3/4” NPT male - 1/2” PEX fittings 2 - 3/4” NPT male - 1/2” NPT adapters Four position, 12 terminal (6 contact) rotary switch Taiss #LW26-32 0-3/3 3/8” split wire sheathing Misc. PEX fittings Optional PEX crimp cutting tool Optional PEX crimping tool Optional - Amazon 12 Volt 5mm LED Lights with mounting bases7 points
-
They would sell really well here in CT because people here already drive like they have no windshield!5 points
-
3 points
-
2 points
-
Ah, yes, the Oliver Motorhome. They never sold well, possibly due to the lack of a windshield. You don't see them very often.2 points
-
2 points
-
My wife Jane (Hospice nurse) and I (former Bosch employee) retired earlier this year and after a cross country trip to California from home base in Chicago by car, decided we needed to investigate trailers. We had followed Oliver for a year or two, and looked at fiberglass truck bed campers prior to purchasing this Elite2. Very happy with our decision - but making many rookie mistakes as we weren’t camper prior. So far, only correctable mistakes and a few serious close calls! We head to Hohenwald tomorrow for a factory tour. Currently enjoying Green River Lake State Park in Campbellsville, KY ( beautiful park)! hope to meet you all in our coming travels! Rich and Jane Walker1 point
-
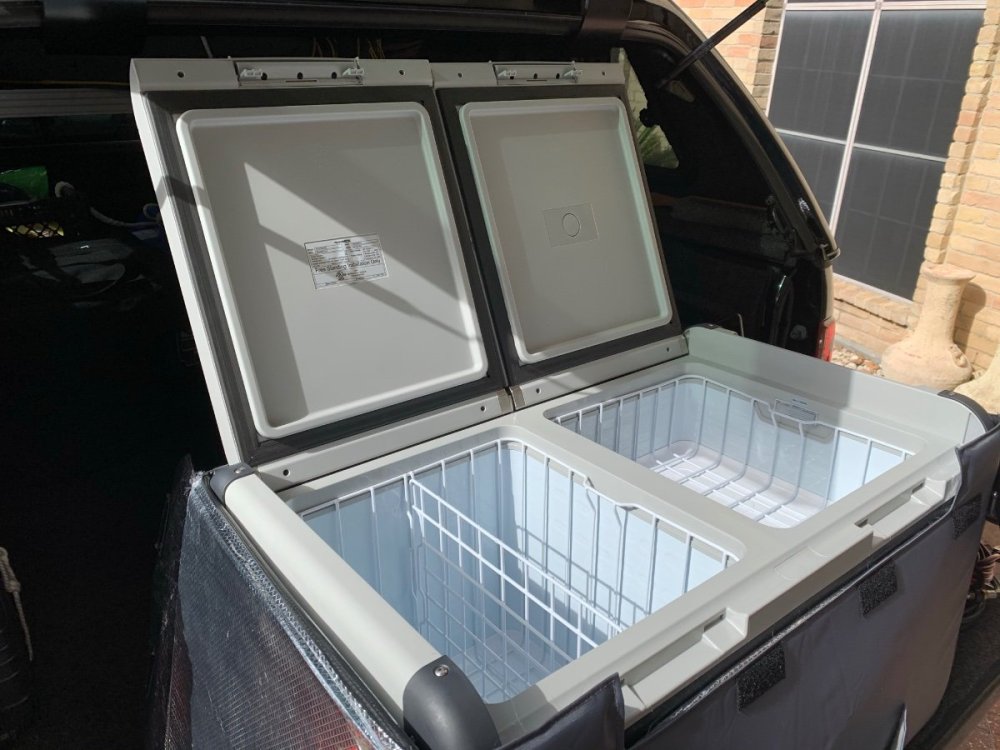
Howdy i have been lurking on this forum for over a year gleaning information from you knowledgeable folks ! Patiently preparing and learning we recently acquired a very lightly used 2022 that the original owners had only acquired a few items to outfit the trailer. they only used it twice,it’s just like new ! first trip is in the planning stages. 😵💫😵💫😵💫 recreation.gov…….too many APPS and not prepared yet I never imagined outfitting a travel trailer could be so time consuming! I guess ADD has a deep grip on my brain 😕 I hate shopping and I’m getting pretty lazy also . with Black Friday coming up real quick I’m asking for suggestions on a few items….maybe we can save some coins on BF i have searched and searched until my eyes glazed over So I am asking for suggestions we need in no particular order a truck bed freezer that will fit under a tonneau bed cover 19” max ( not too big ) an outside rug chairs and table Volt meter 30amp and 110 pedestal testers pedestal surge protector bulldog hitch lock……. …$265 for a small piece of iron pipe 🤔🤔🤔 inside trash can … pots,pans,plates,silverware,knives a good 10” wok for induction cooktop shower floor covering ? Dri deck or bamboo ? why is this needed ? The fiberglass floors feels good on my feet’……but the first shower hasn’t happened yet A fuel can for generator gasoline Plastic storage bins for truck bed and back seat for clothes and personal items We have Acquired coffee maker, water kettle, rice steamer,small space heater ………thanks to all of the information on this forum Any suggestions on this list of items is appreciated hope to see you out on the road soon and thanks for the wealth of information !1 point
-
I second this suggestion. I installed the Truck System Technologies TST 507 TPMS on our Ollie and our previous TT. Wouldn’t consider towing a trailer without this important safety equipment. Now on clearance for $149 at TechnoRV!1 point
-
I overlooked a few things We are parked inside with the windows open in insulated building at our house and so far haven’t needed the dehumidifier, but I’m sure we will need it at some point Natures Head, I got a little tiny trash can for the toilet tissue disposal and a sewer hose for dumping the grey tank came with the trailer we have the Anderson leveling set but not the red buckets for the jack feet to land on I plan to start out with marine treated rough cut 8x8 cut offs left over from a pole barn build for the jack feet to land on , if I get tired of loading and unloading these substantial hunks of wood we can make the move to the plastic buckets we also have the power cords and water hose with inline filter and the water pressure regulator the previous owner had a full collection of fuses in a plastic box 👌🏻👌🏻👌🏻 we have a big breaker bar and lug nut sockets along with some tools1 point
-
I think you can probably eliminate the pedestal surge protector, you should already have a hard-wired EMS (Electrical Management System) in your Ollie. Since your TV is a half ton PU, my advice is to carefully consider what you plan to put in the bed because it’s pretty easy to exceed your max payload capacity. I feel your pain on that hitch lock!1 point
-
My 2 cents: We've done fine with just the Norcold 3-way trailer fridge. It holds more than we expected. Harbor Freight has inexpensive multimeters. We have the Progressive Industries 30 amp surge protector. It's an outlet tester, too. https://a.co/d/7r1GfAS We have the Fort Knox hitch lock. A bit cheaper. https://a.co/d/2mTY5Z7 Trash can that hangs on pantry door: https://a.co/d/c1gUm5B Agree on Magma pots, TPMS, and rubber chocks. Especially TPMS! I'm too tall for a shower floor cover. We have a small mat that fits the shower floor. During the day it keeps dirt, etc. off the shower floor. In the morning, it becomes the bath mat. The are other products reviewed on our blog. Have fun shopping.1 point
-
Lodge cast iron has a 6.25 inch mini cast iron wok and a 9 inch.1 point
-
Congratulations on your 2022 Oliver. I'll chime in on pots, pans and knives. Check out the Magma line of pots and pans made for boating and camping. The 7 piece set nest together and fits in the galley overhead compartment. They are durable and we are very happy with how they perform. For cutlery Victorinox makes a wide variety of affordable knives that perform well and they're durable. When we were outfitting our Oli there were a few people that had an Amazon page with items they purchased for their Oliver. I can't find the links at the moment but hopefully someone else can and post them for you.1 point
-
I drive my raft trailer on some pretty rough roads. I have learned over the years that RED Loctite is the only version that keeps the screws holding it together in place--most of the time! I still have to replace screws, and red Loctite occsionally. If you ever drive your Oliver on rough roads, I recommend red Loctite.1 point
-
1 point
-
1 point
-
1 point
-
Except for the fact that the best way to ge loctite to release is to apply heat. The heat of a normally operating engine for example is not enough but say a propane torch or propane gas stove is I’d imagine is ample enough heat to release the loctite.1 point
-
That is the 'million dollar' question. When it was assembled at the Dometic factory did it have two screws on each element or one. That would be a Dometic QC question. I am not sure what happened with the Gliddenwoods stove, I was just posting that their issue looked similar to ours, and what our involved. By the time the burner caps became loose, and then fell off, I fount one screw in the drawer below, and one was in the remaining element. I searched all over for the other two screws. The heat shield below the stove, may have helped those screws find a really good hiding place. Kind of like where socks hide in the washer or dryer... This D21 assembly 'Process Change' to add blue Loctite to the screws tell me, this was a re-occurring problem, and this is how they chose to address it. And I am good with that.1 point
-
We also had this issue while up in northern Canada last summer. We believe it was a problem for a couple of years, we just were not aware of it until it was loose enough to start coming apart. When we returned home I got ahold of Dometic and received the following email reply. ===================== From: CustomerSupportCenter [mailto:customersupportcenter@dometic.com] Sent: Friday, September 1, 2023 9:46 AM To: BryanB Subject: RE: Dometic.com Support Form - US - productsupport - rv - b2c Hello Mr. Bjornstad: I was able to reach out to our engineering department. The engineer indicated the information directly below: “the bolts used to secure the burner caps are common M3x24mm socket head screws. They can be found at most hardware stores. He should apply blue Loctite to the screws before putting them in.” ===================== Yes, there are threads in the underside of the burner caps. The burner cap is made of 'pot metal' so if the screws are not of the exact sizing and ARE NOT 'Loctite-d' in, they may vibrate out again or worse yet, they may strip (as ours did) out of the soft pot metal burner cap. There was no indication (blue) of there being any Loctite around our screw heads when we were taking it apart to repair it. So the Loctite comment above may be a revision based upon customer experience. The following is what we did to fix the issue. We only had one screw per element and no Loctite at the time so we were at a less than ideal situation. turn off the gas at the tanks, remove the stove from the countertop, disco your gas fitting, turn stove upside-down and, make a note of the 'ignition wiring' if you have to disco more than one of them, remove the underside heat shield, (you have to cut the zip ties to remove it, replace zip ties to reduce vibration on re-install), re-insert the screws, apply Loctite where the screw head comes in contact with the assembly, then re-install the stove ‘Check Gas fitting for leakage’. We actually became quite proficient at this and I would be able to do it (less Loctite) as Maggie was doing 'meal prep', so I was done when she needed the stove. That is until the loosening of the screws and vibrating caused the 'burner tube' coming into the mixing bowl to break. At that point the stove was UNSAFE to use. So I put it in the back of the truck, got a brass plug for the gas supply line and covered the area with the 'Oliver supplied' sink cover, and taped that down. That gave us a larger meal prep area, and more outside cooking. Our final resolution when we returned home (because stove was basically shaken apart) was to replace our D21 (AMZN Dometic outlet), because we were unable to find the replacement parts that broke as a result of the ‘burner caps’ coming loose, and shaking/breaking apart the internals of the stove. When the new stove arrived, I took it apart at the bottom and made sure all 4 screws were there and sure enough, signs of blue Loctite on the screw heads. I have discussed using Red (hi-heat) Loctite thru PM's with others on the forum. The caveat is 'if you want it to stay put, Red would not hurt, if you have need to get in there and remove those screws and do other work, Blue would be better'... So I will stick with the Blue for now, as I do not believe that the original stove had any Blue on it. In fact, I do not believe we had two screws in each burner cap to start with. Never did find the two missing screws and I searched the entire enclosure and behind the false back of the drawer area. We can now look back at it as a learning adventure. Yah, may not take as many 'wash-boardy' roads less travelled, and will probably even go slower than we did... We learned a lot about the Oliver, Appliances (lost the WH too), about repair in remote locations, phone conversations with SeaDawg & Outlaw Oliver, and our own tolerances to experiences when dealing with and overcoming unexpected issues that arise, but GAWD, did we enjoy the adventure even with the adversities. So much so, WE ARE GOING BACK again this camping season, with the intent to make it to AK this time. Cannot wait to try (after a local shake-down weekend) our new Dometic stove and WH (another thread)... the adventure continues. B~Out, First edit, if others end up purchasing a new Dometic D21 Stove... the Brass elbow attached to the stove is now pointed 180 deg. opposite the supply line. So I just disco'd it, put on some YELLOW Teflon tape and then tightened it up to the orientation of the old one, and hooked the gas line back up. Second edit, Some of your appliances are going to have 'Metric' in them, especially if they are used outside the US. Just be Aware. Third edit with pics: once you have the stove exposed, you remove the heat shield screws (sm. red circles), notice wht. zip ties.. Your burner cap screws pass thru here (black arrows). The large red circle is the broken supply tube between control knob & mixing bowl. I tried to get some aluminum tubing to repair it. Even thought of sacrificing the stem to the coffee pot... I was told, that was NOT an option.1 point
-
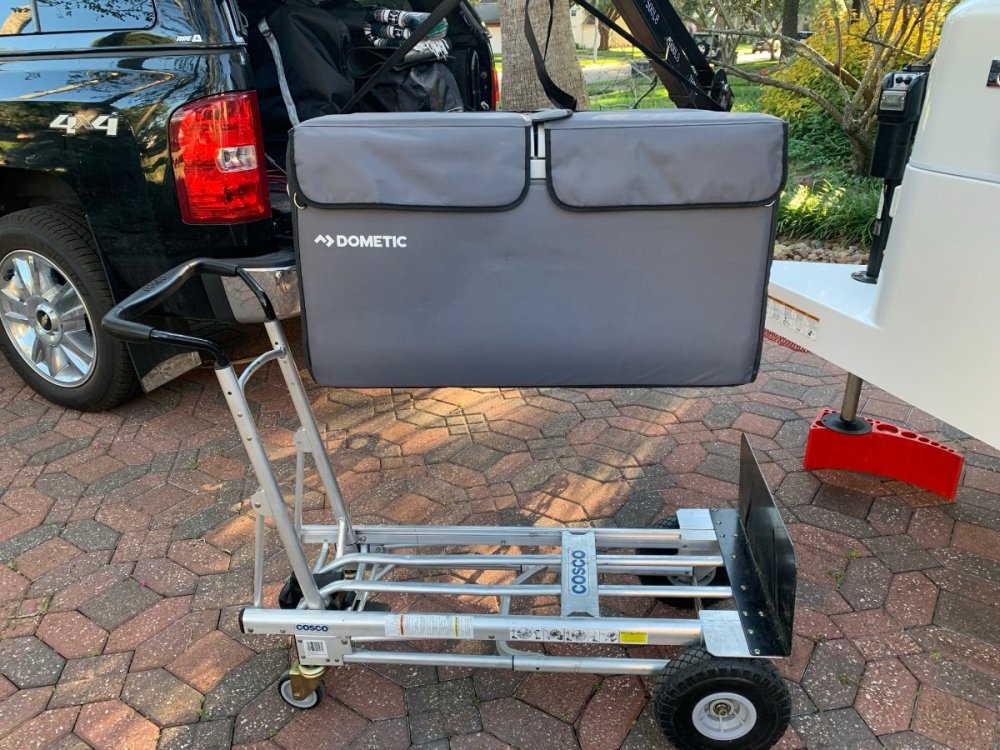
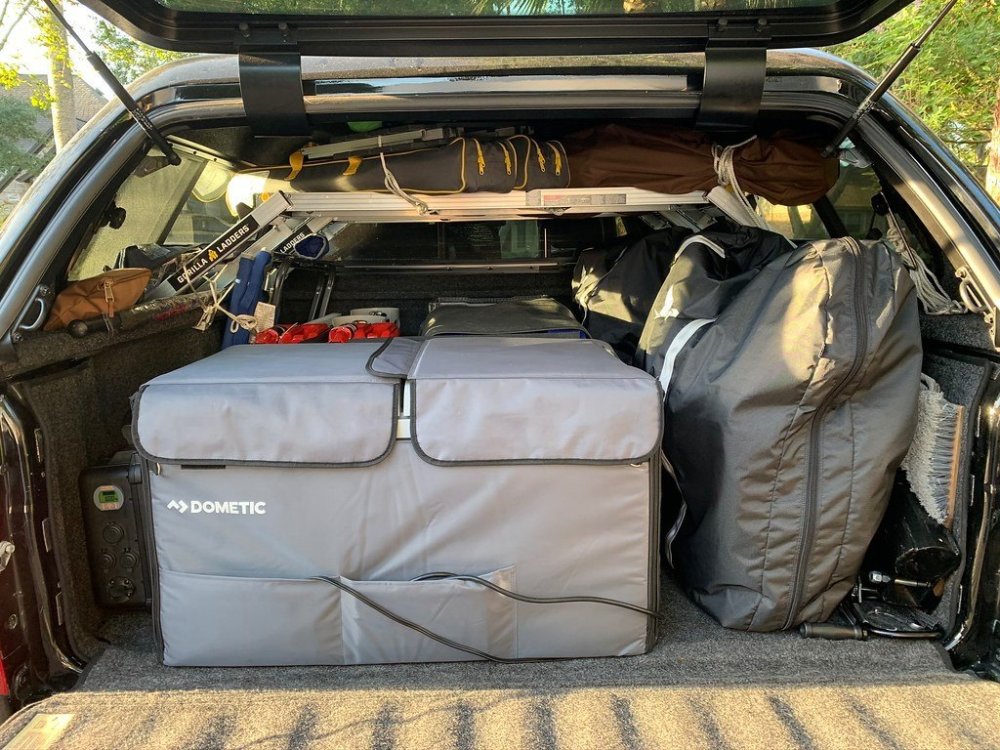
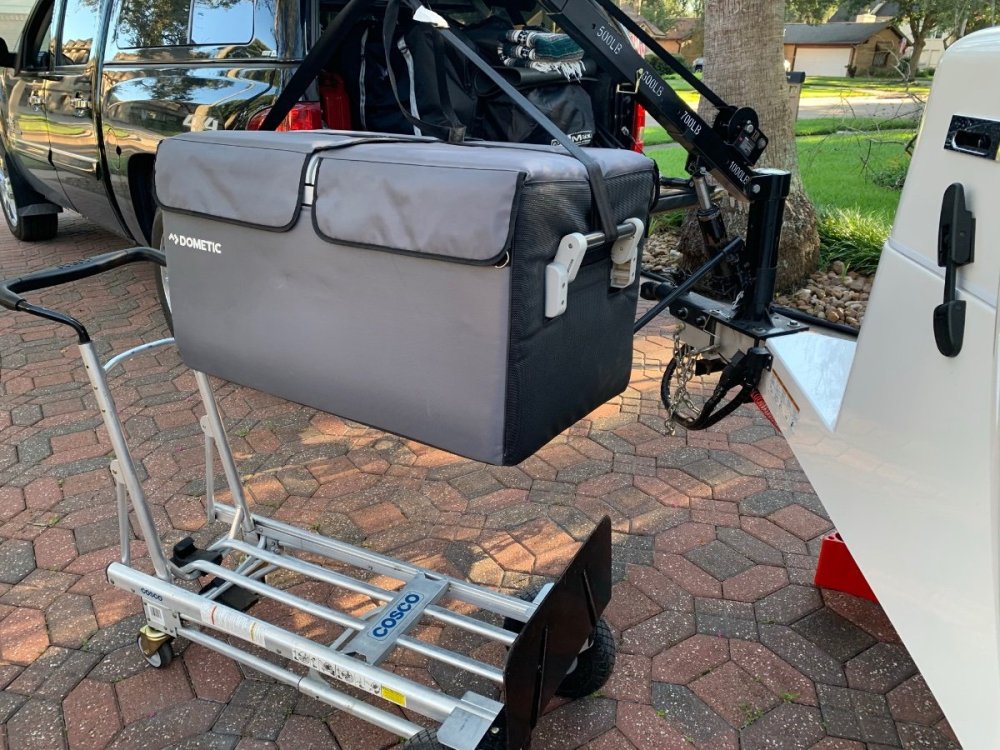
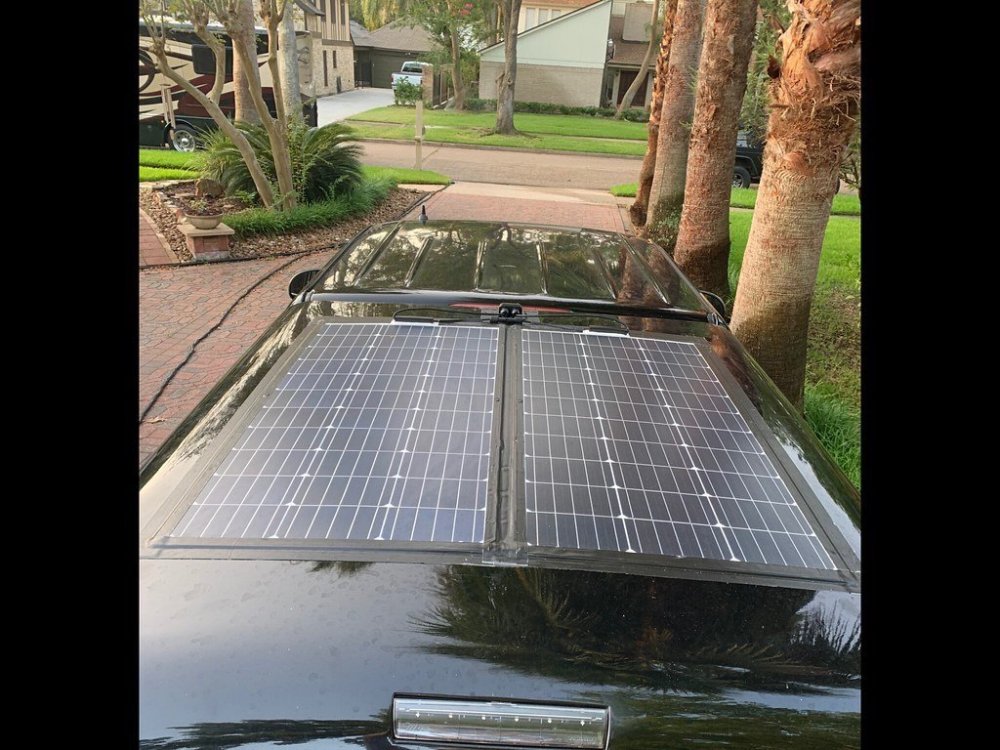
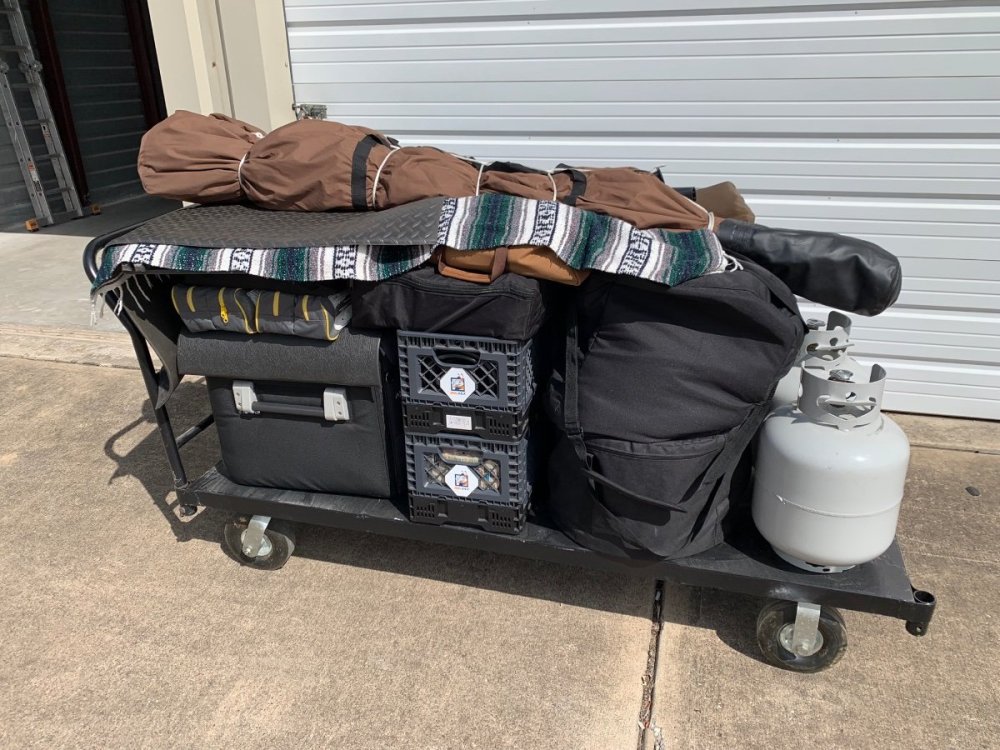
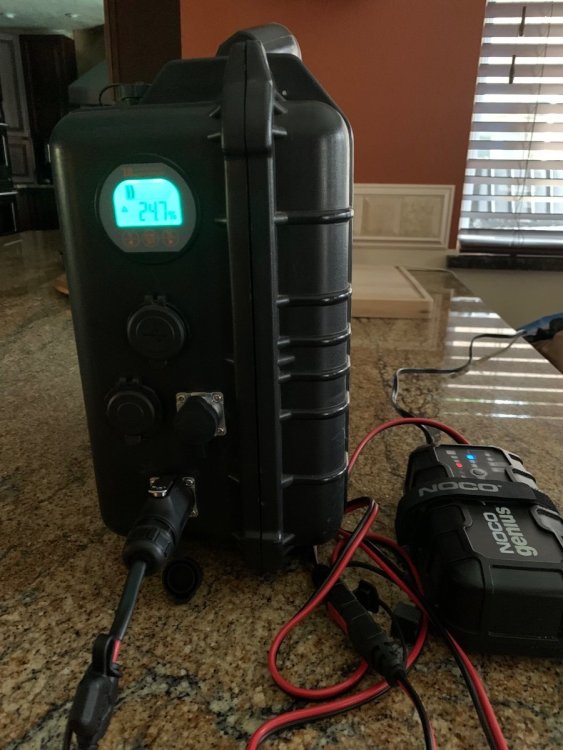
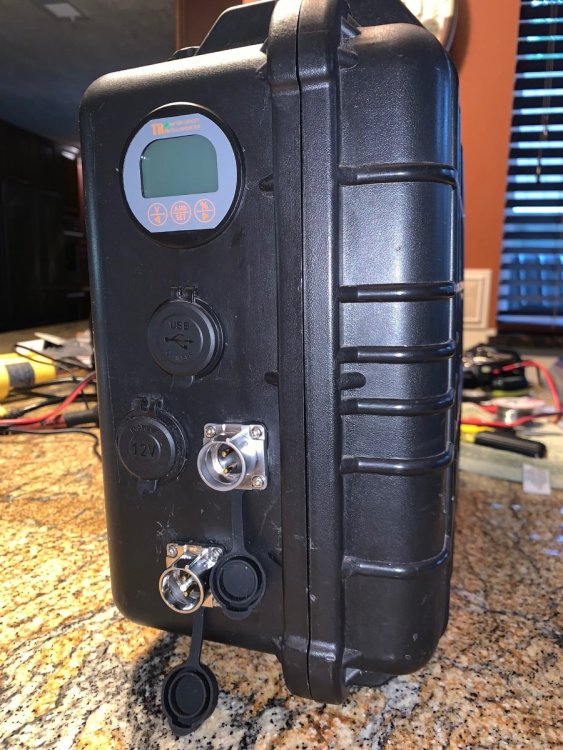
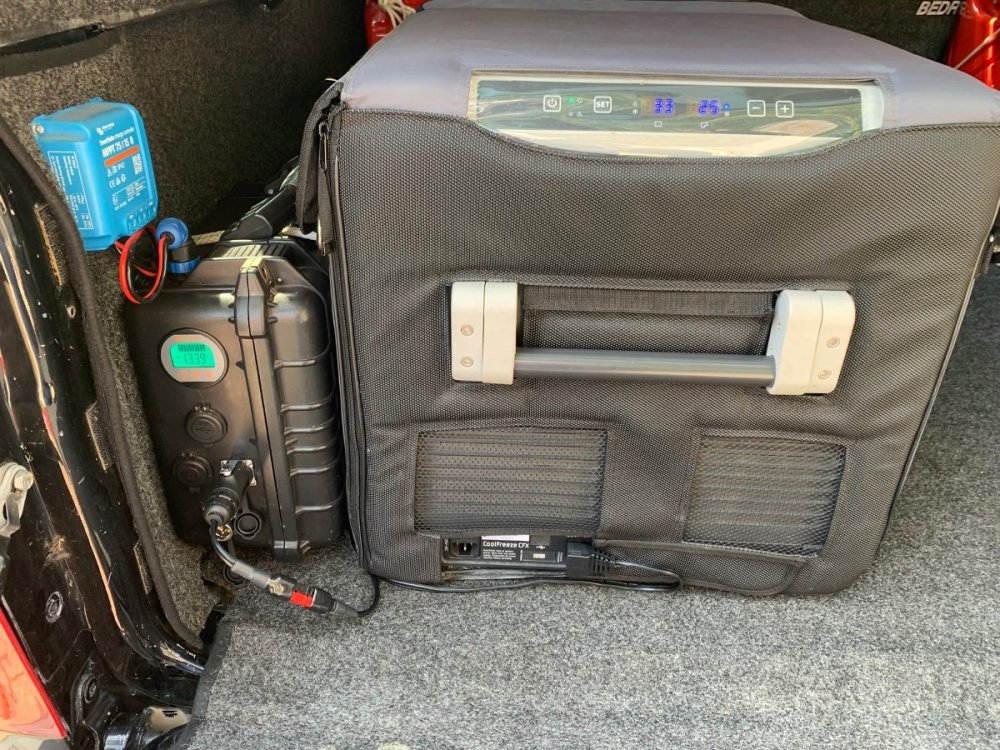
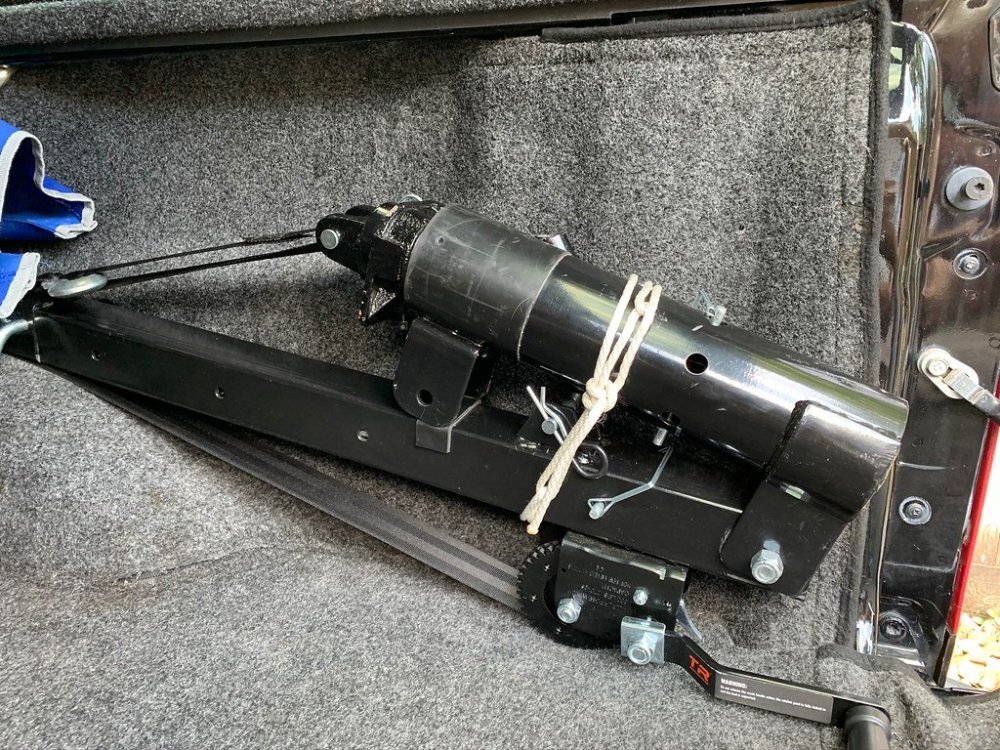
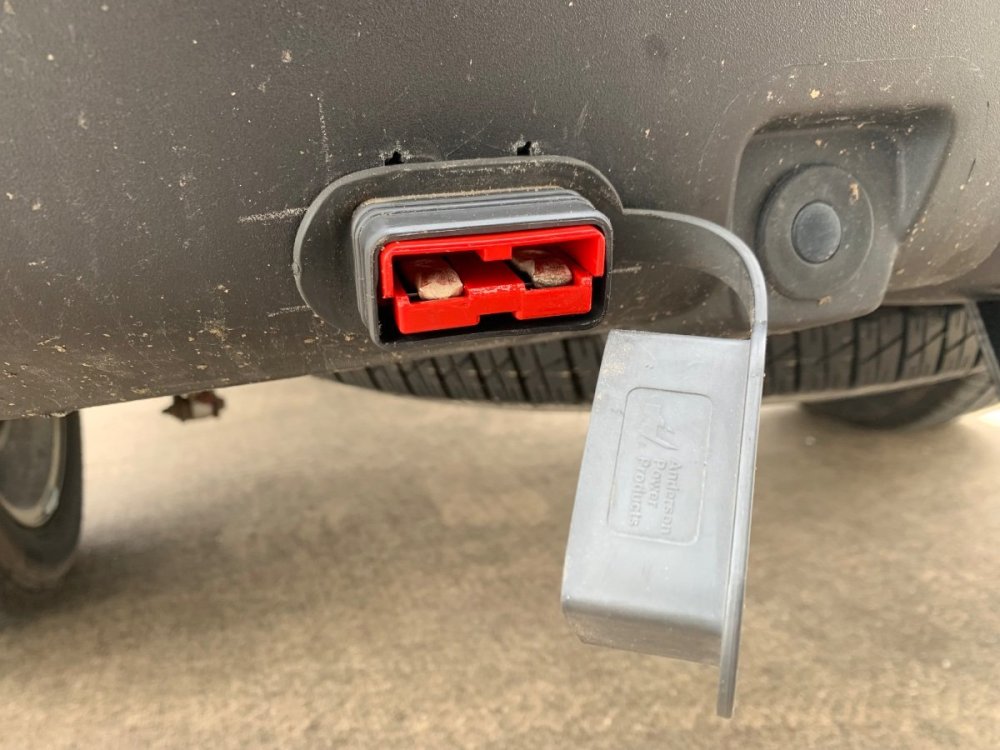
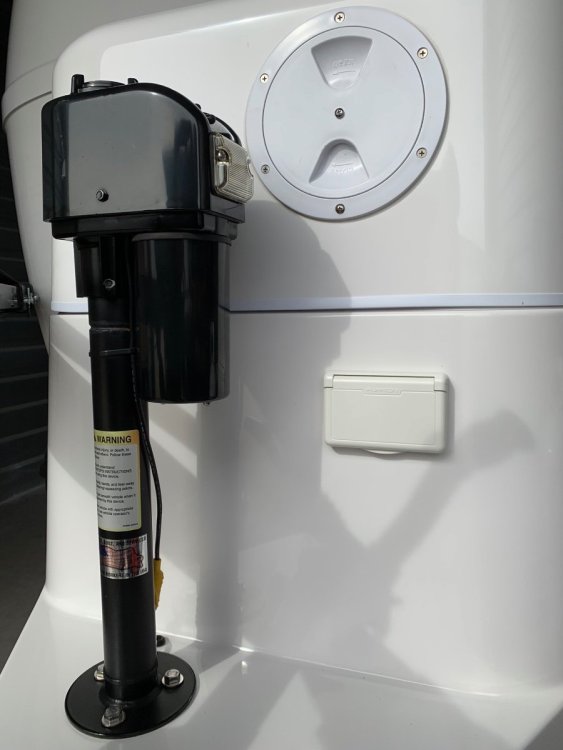
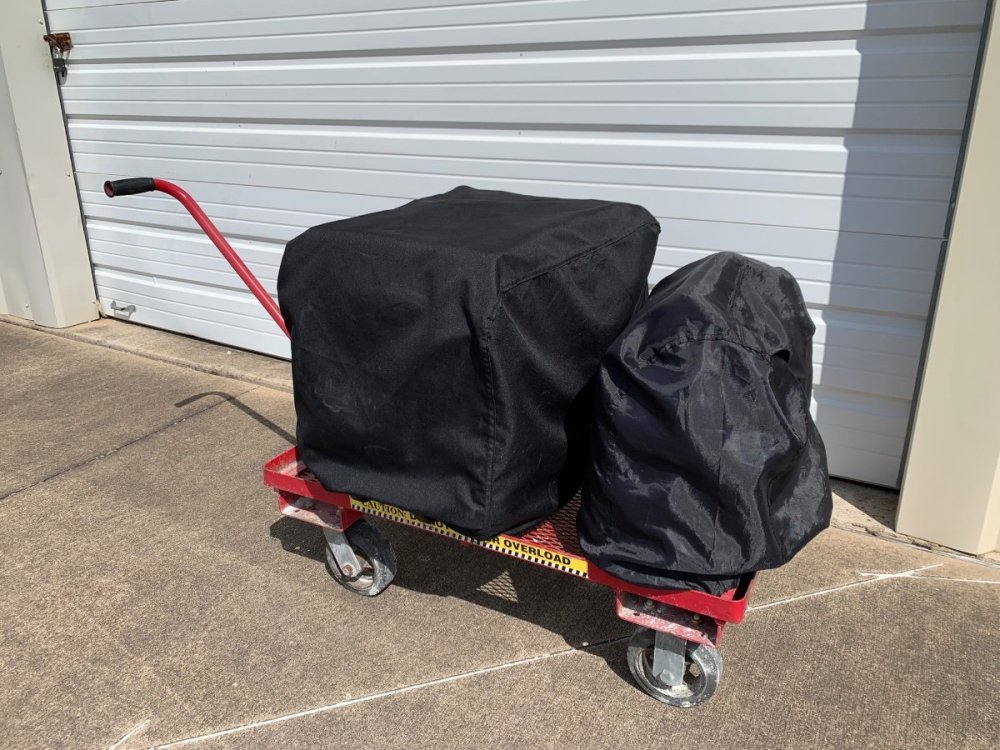
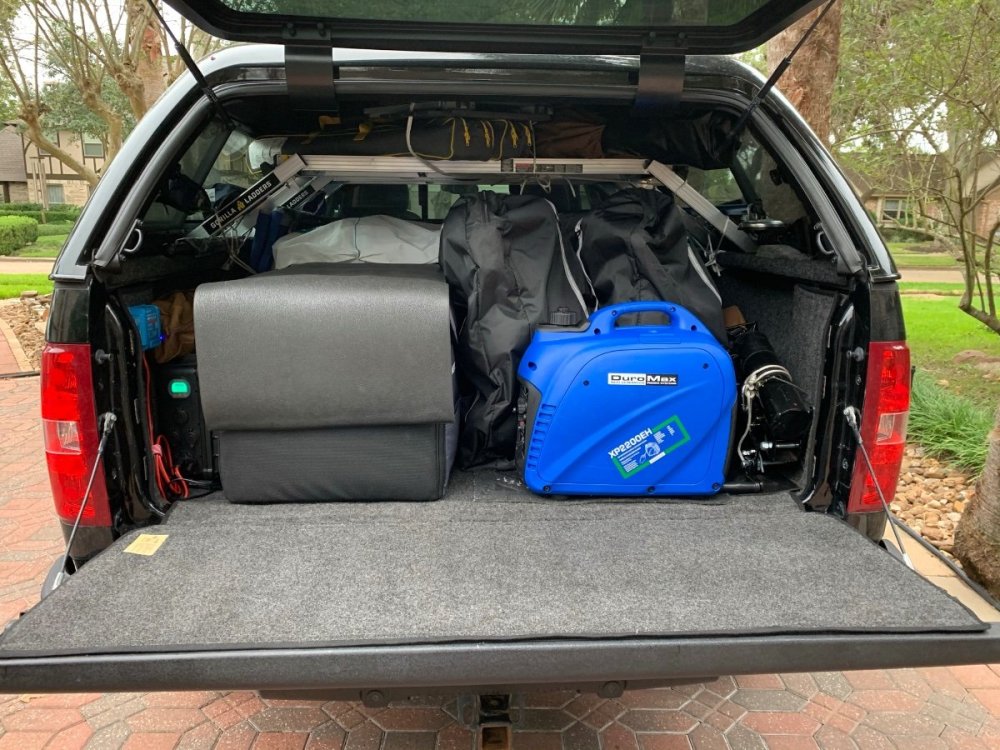
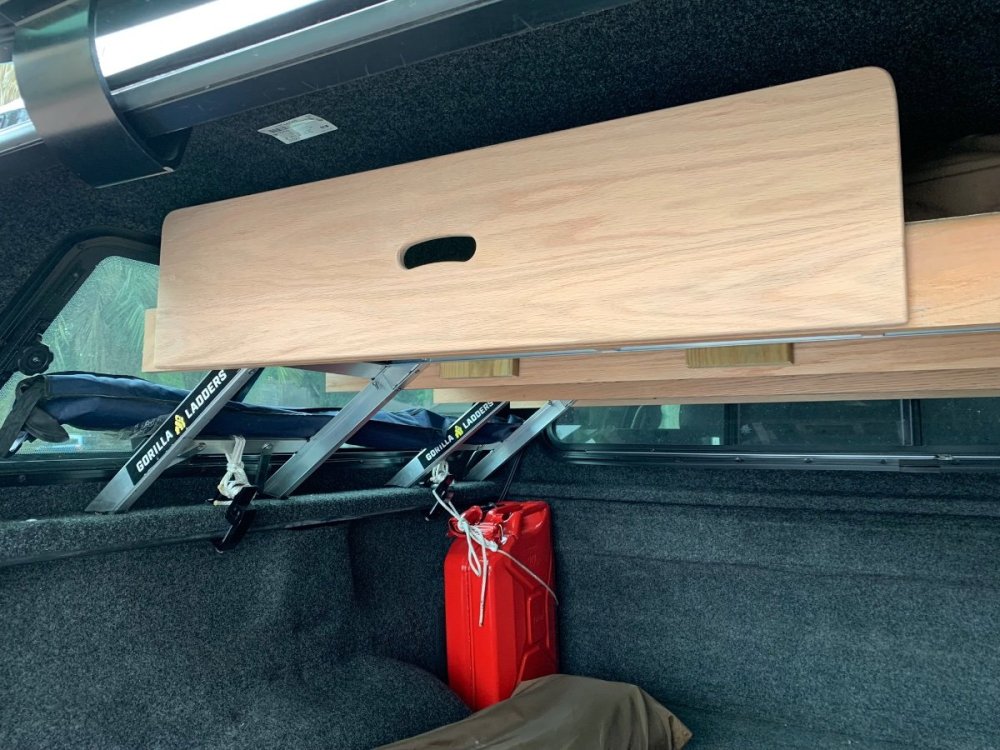
My auxiliary fridge/freezer setup may be of interest to some. THE UNIT: Dometic CFX 75DZW, acquired a month prior to delivery of our 2020 OLEll, #579, in January of that model year. It has not only served us well on all of our ‘Oliver Travels’, but also during extended home power outages due to ice storms and hurricane events. I generally stage it in the house on a cart to bring up to temp, then start loading a day or two prior to departure. The cart really makes it easy to transport outside to the TV. For added efficiency and protection, an insulated cover was installed, as well as a layer of Reflectix on the sides and top between the unit and outer cover. THE LIFT: Fully loaded, the Dometic is way too heavy to carry out and lift into the truck bed. I mentioned usefulness of the cart, but also have a hoist staged on the trailer tongue for this heavy lift, as well as others such as the 30# propane tanks, generators and ebikes. The hoist conveniently folds and travels in the truck bed when not in use. THE POWER: The unit operates with household current as needed, but when underway a 100ah lithium portable power station I built keeps it running for the most part. Occasionally in camp it does require a NOCO charge, but a 200W solar array atop the TV’s cap helps to maintain adequate power. However, as backup I have run it on the move utilizing AC from the trailer’s inverter via a short extension cord to a front-mounted outlet. I can also power it from an Anderson plug installed at the bumper to power a DC/DC charger in the trailer. As a side note, I converted my Viair to utilize the Anderson, as well. THE HAUL: The unit is transported at the tailgate for convenient access, next to the power station, and can easily be pulled out onto the tailgate with help of furniture carpet slides affixed to the bottom. I keep a dedicated neoprene mat across the top to further protect and insulate. The picture is a bit deceiving, I now position it with the freezer/compressor end facing rearward; there is about a four inch space for ventilation with the tailgate closed. THE STORAGE: I’m fortunate to have a storage facility nearby, which is a good thing since the HOA will not allow! I have a large platform cart where most everything that goes in the TV under cap is staged in readiness, including the Dometic. However, the portable power station resides in the TV along with a couple of NATO gas cans and other miscellaneous items. The generators are similarly stored.1 point
-
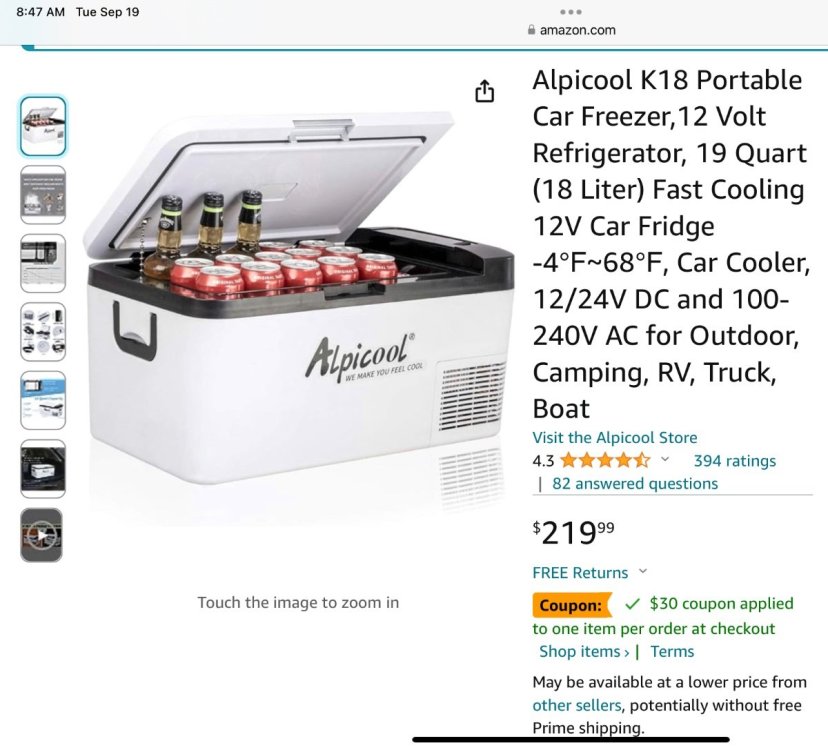
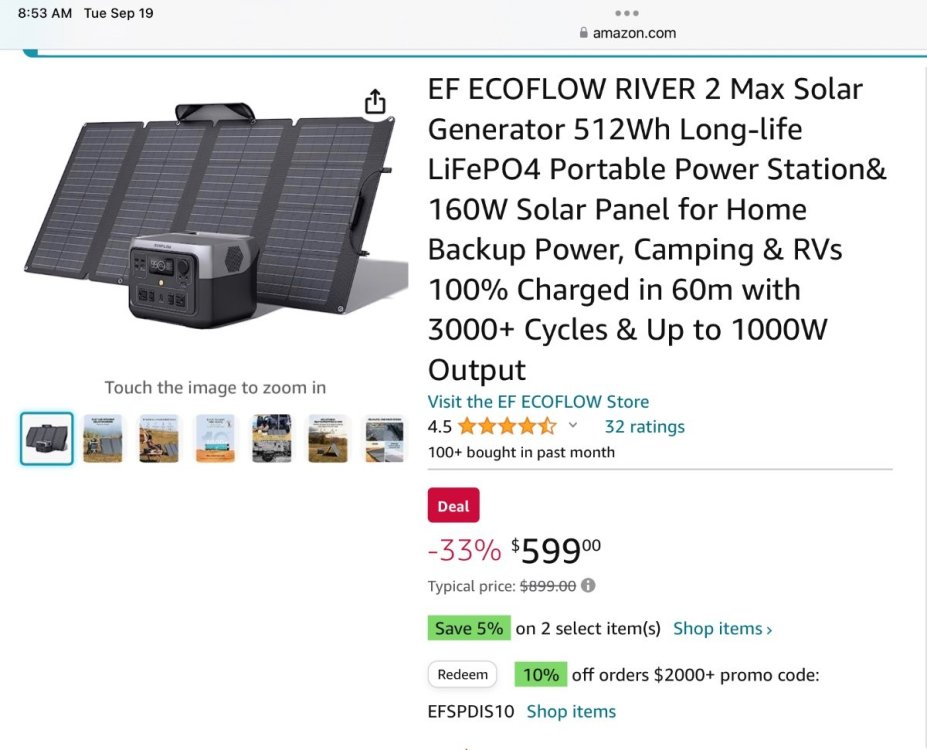
If you don’t feel the need for an expedition grade cooler, or don’t have the cash, these Alpicools will work fine. They make a number of different models, all are very affordable. This one shows an extra $30 off applied at checkout, it might apply to others, you would need to look….. I imagine that they are clearing out excess summer inventory. I have this 19 quart size, I picked it expressly because the height closely matches a milk crate, so I can place milk crates with camping gear around the cooler and still have a flat ”floor” for other stuff on top of it. It rides in the back of my LC200 and is easily accessed by raising the upper hatch, leaving the tailgate closed. VERY handy. I use the following power pack/ inverter to keep it operating when parked, the truck supplies 6 amps to recharge the pack and also cool the fridge when the engine is running (this is called pass through charging, many do NOT do this). Plus it is a LiFePO4 battery, just like in your Ollie’s lithium package, and it charges fully off shore power in just one hour! Woohoo, that is neat. I really like this combination. This item too has an extra discount over the already hefty price cut! The solar panel is compact and light, and very well made, the only downside is that it is a lot harder to prop at an angle than is a heavy harded side one. At mid day you can just let it lie flat. John Davies Spokane WA1 point
-
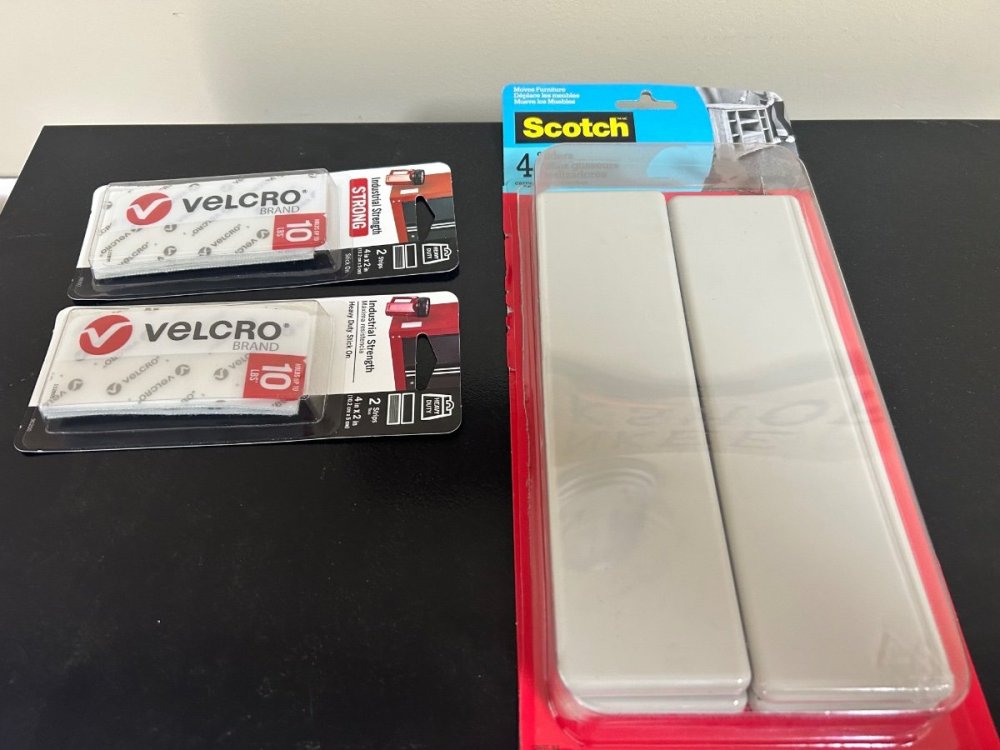
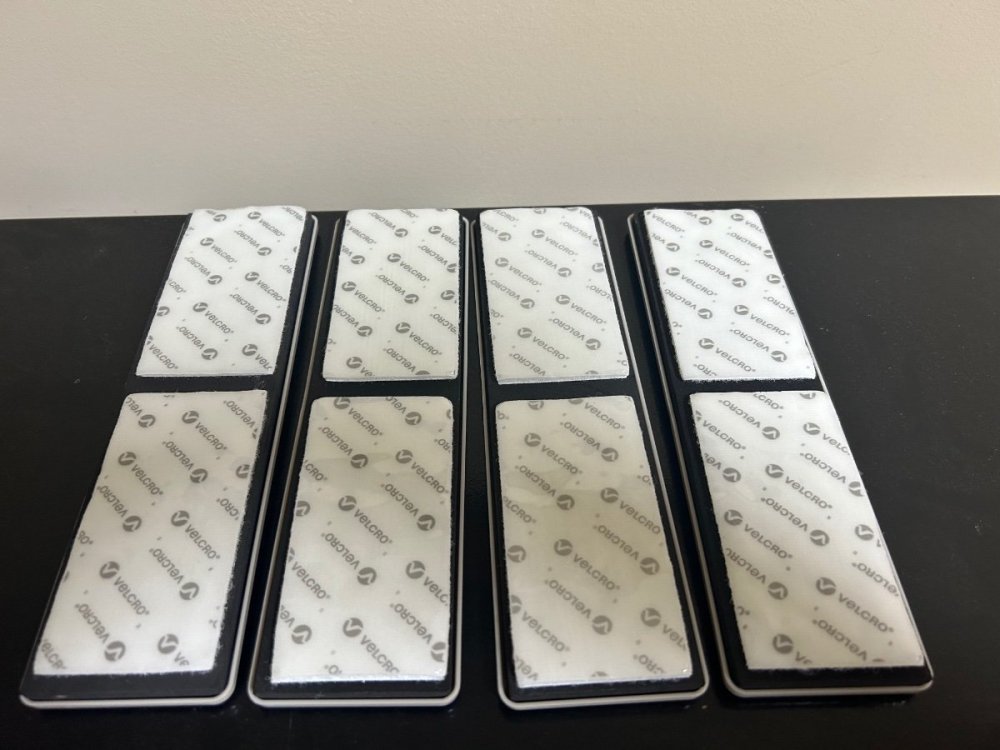
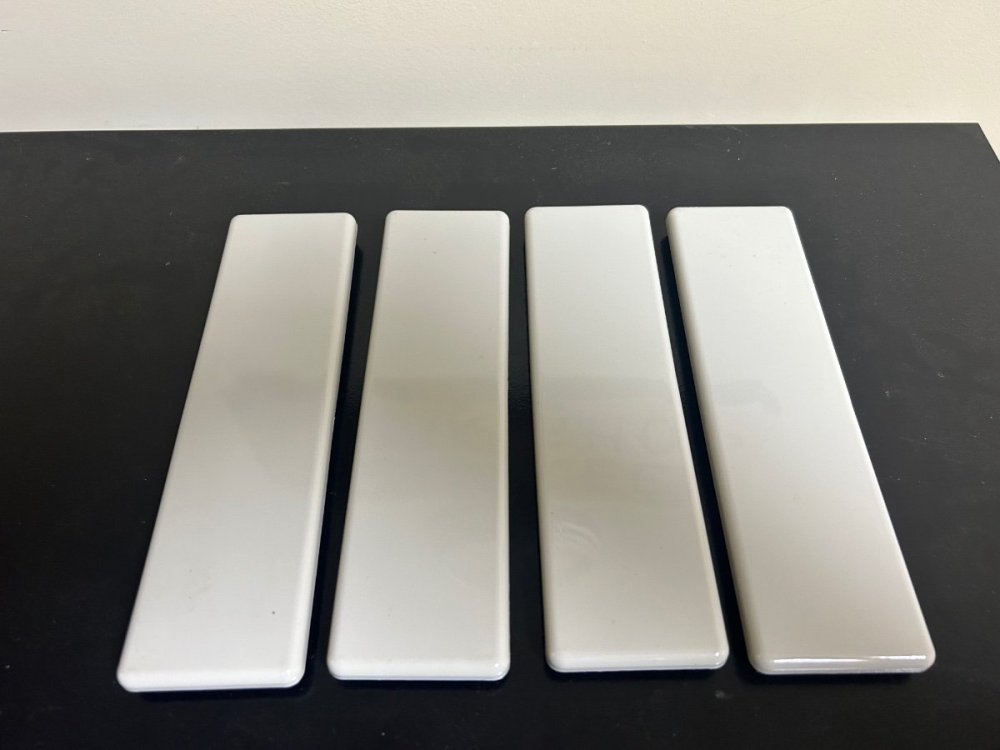
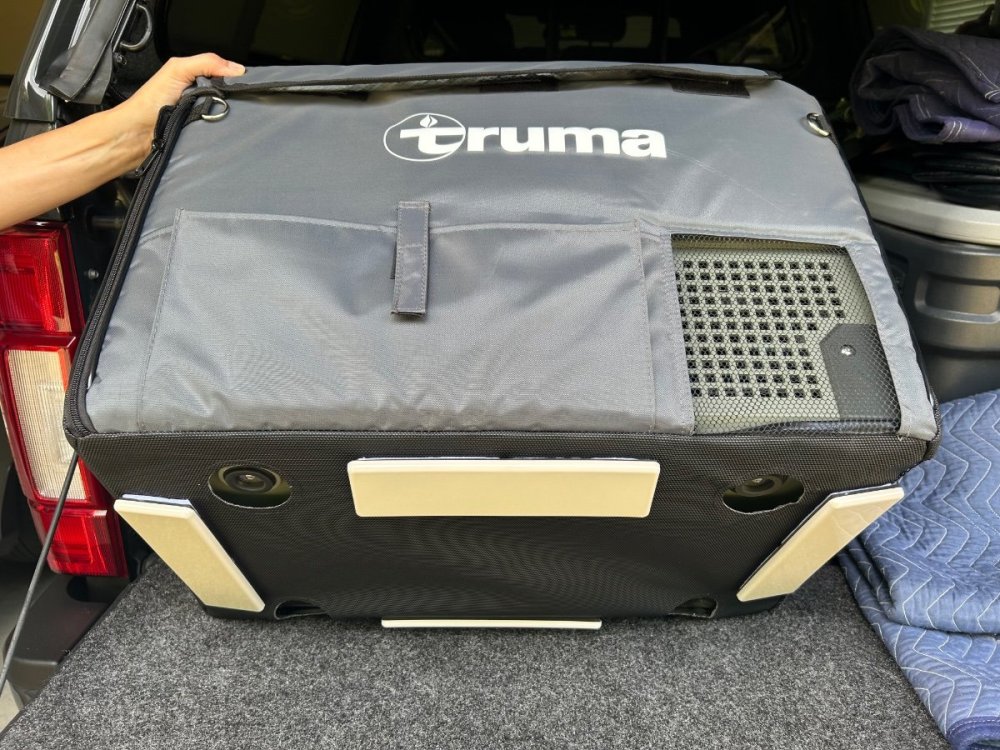
@Ronbrink I happen to be over at Lowe’s this afternoon and scooped up a (4) pack of these furniture sliders. My plan per your suggestion, is to install these on the 4 corners of my Truma C36 insulated cover length wise. This hopefully will make it slide easier on the bed rug then out onto the tailgate bed rug. Thanks again for the mod idea. Patriot🇺🇸 I installed the above furniture glides and they really work great. We can now slide the Truma out with out giving us immediate access without having to lift it off the bed rug. A keeper.1 point
-
Just got our D21 replacement today...no blue locktite, whatsoever, on the screws on the new unit purchased from Dometic. I loosened the new stove's screws and put on red locktite, hoping it never loosens in the future!0 points
-
Recent Achievements


.thumb.jpg.e34bf01ef7f7d5e99ad31856d45afbeb.jpg)












undersideofstove12vdccomingin..jpeg.79ea61d199dd8b4e33a78f44d289b461.jpeg)
afterheatshieldremoved.jpeg.f146698fa58116135949f641b71669a2.jpeg)





.thumb.png.fbbde3486e933f990ff511bff8d6bda0.png)
