Leaderboard


Popular Content
Showing content with the highest reputation on 12/04/2024 in all areas
-
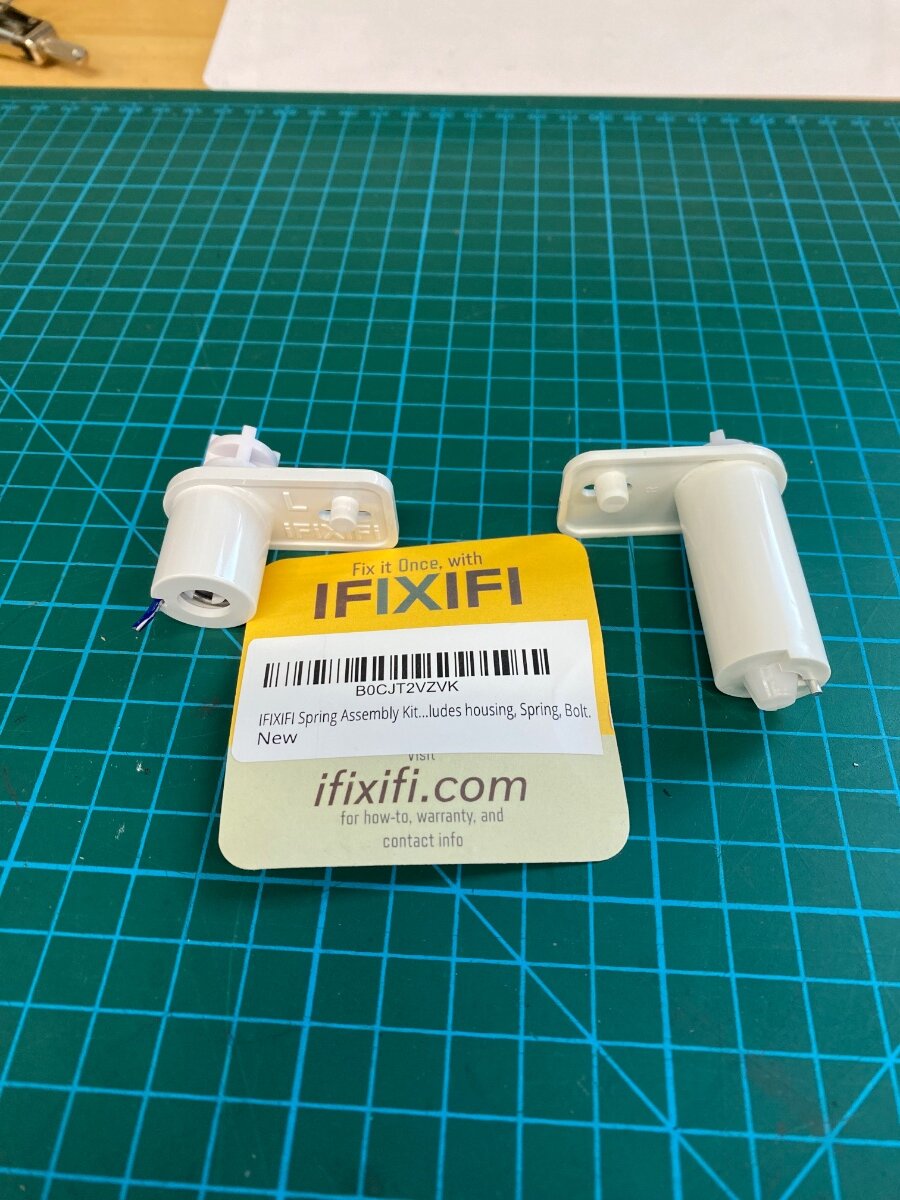
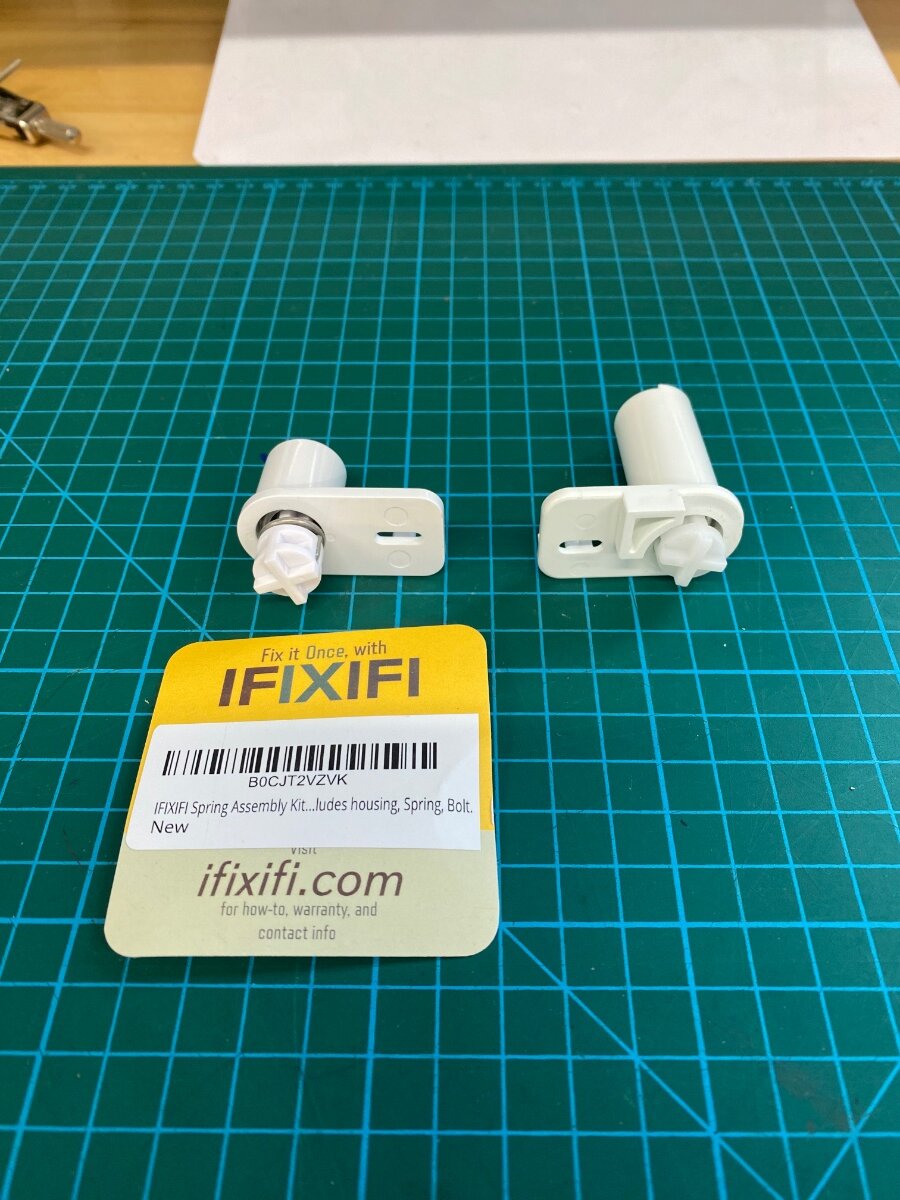
Hurray! Dometic freezer hinges work in the Norcold! Although I repaired my old broken Norcold hinges, I had also ordered a replacement right-hand hinge while they were still available. It was then I noticed that Dometic freezer hinges looked very similar. The major dimensions were the same, only the spring barrel was shorter, so I ordered a left one from a family owned Oregon company called iFiXiFi, and it works perfectly. It's so nice to have that door snap firmly closed again! There are actually several aftermarket Dometic hinges on Amazon, but the iFiXiFi brand seemed better and they also have Youtube videos that cover the design and quality of their parts and installation methods. It was about $35 for the Left hinge including the shorter spring and hinge pin. You may notice from the photos that the Dometic style hinge does not have the "90 degree open stop" as does the Norcold. This is to prevent the main door from bending the freezer door past 90 degrees to the point where it could break. The Dometic refrigerators have stops moulded into the frame for this purpose. You can retain this feature by using a Norcold right hinge, which are still available, with the Dometic left hinge. Otherwise just be mindful of it. Amazon https://a.co/d/fftOAMe IFiXiFi installation videos: https://youtu.be/fXQCQgKwjGo?si=ES5rrbr0vK1UJB2N I also recommend this video, it was the method I used. https://youtu.be/8Ae0ncOSu9U?si=wBuMTqLK6erE5Jqi I should mention that AliExpress also carries a Dometic hinge kit that comes with the left and right hinges including springs and pins for $29, but I can’t vouch for the quality. Cheers! Geoff
 5 points
 -
Copied from Casita Forum
4 points
-
As an example, this was an image generated by a few simple text prompts of our dog living the good life on a motor scooter in Italy (which I can assure you she has never been. She may be a spoiled pup but not that spoiled 🙂), using a very basic AI image generator software program. There are far more powerful AI tools available for photo and video. Unfortunately we have reached the point where any photo or video on the internet is suspect, with basically anything being potentially faked.
3 points
-
New Episode returning to Hohenwald3 points
-
Hi Steve, Neat video! I just spoke with Oliver sales. They still take trailer orders at Oliver Sales and Service, but if you’re in a state that has a dealer, you need to go through a dealer to place your order. If your state does not have a dealer you can order directly from Oliver. You can still opt for the Oliver experience and take delivery at the Sales and Service Center in Hohenwald. You may want to edit your video at the 12:05 minute mark. Cheers and Happy Travels! Patriot🇺🇸2 points
-
Well - it finally happened to us. We broke the hinge on the Norcold Fridge in Reset (Hull # 1030 LE I). Easy fix right? It is if you can source the parts. For reference, the parts are Left Hand Hinge - Norcold 619042 Right Hand Hinge - Norcold 619041 Unfortunately, I have only found a source for the Right Hand Hinge. The Left Hand Hinge seems to be very elusive. Have a service ticket in with Oliver to see if they have a source, as well as a request in directly to Norcold. Does anyone have a favorite source for Norcold parts that you could share? Or a spare hinge that I could purchase from you? 🙂1 point
-
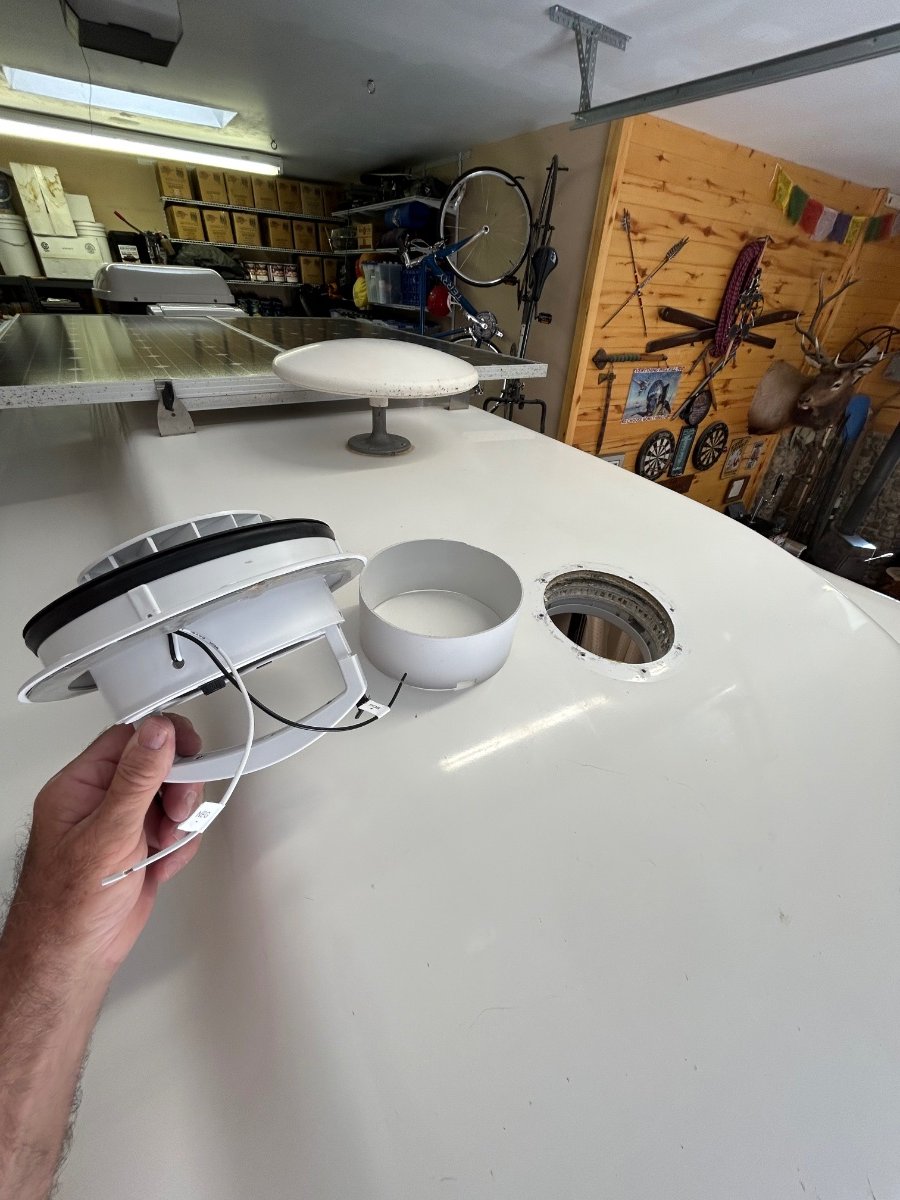
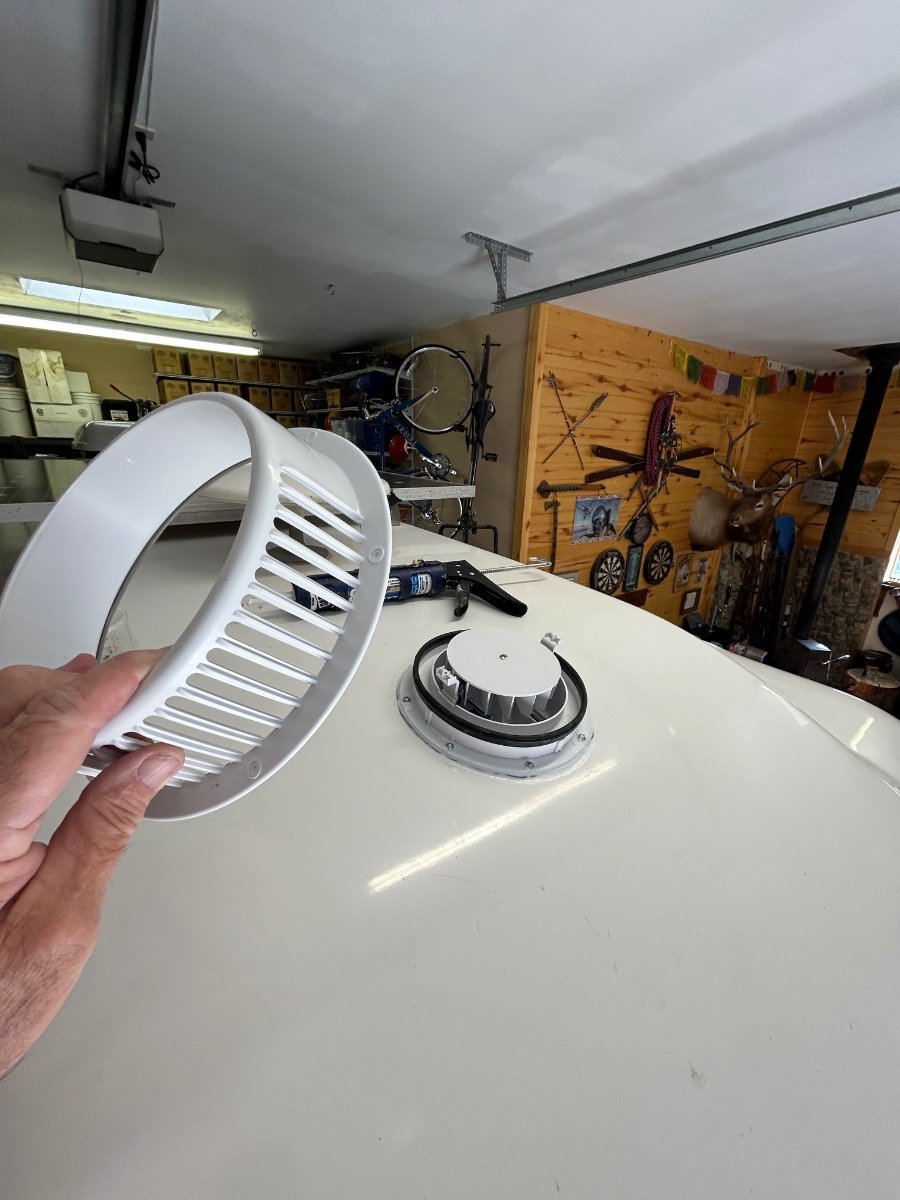
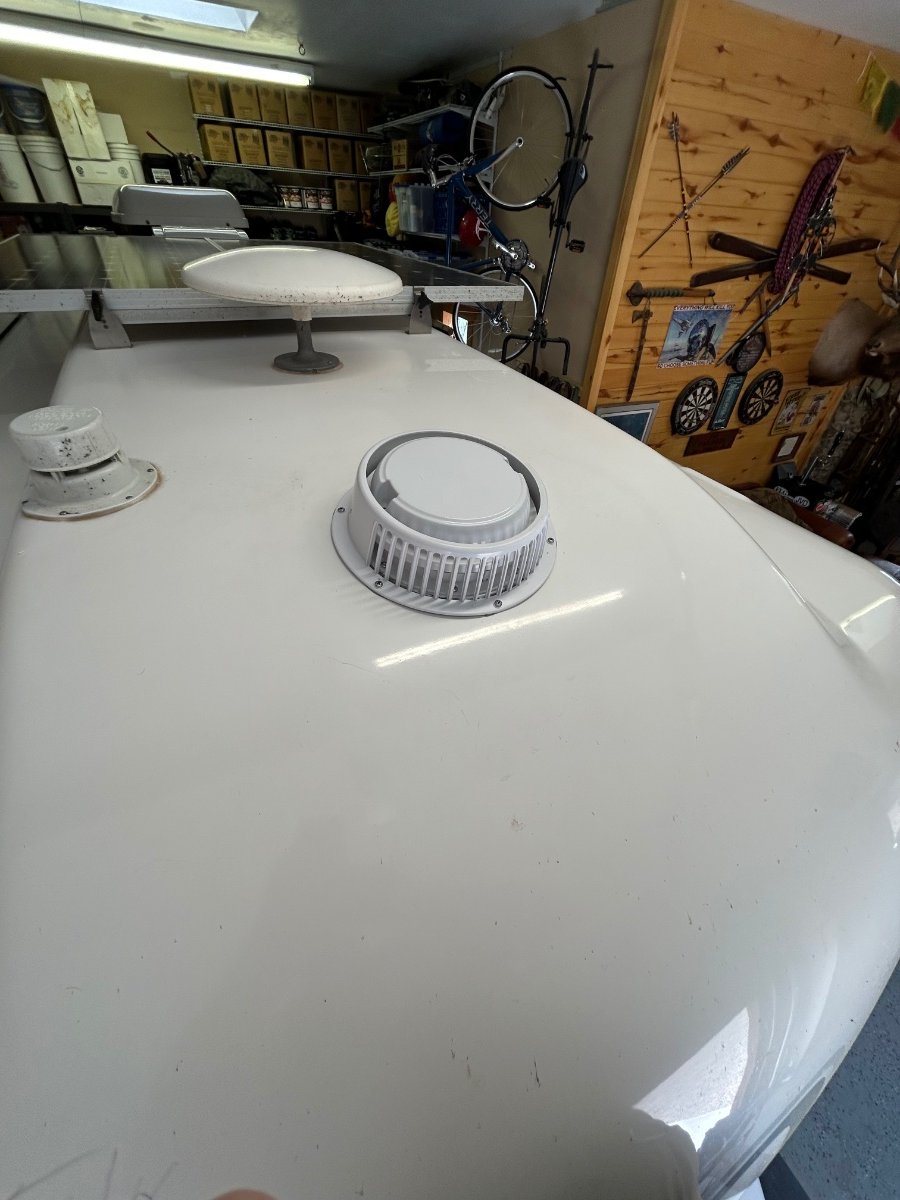
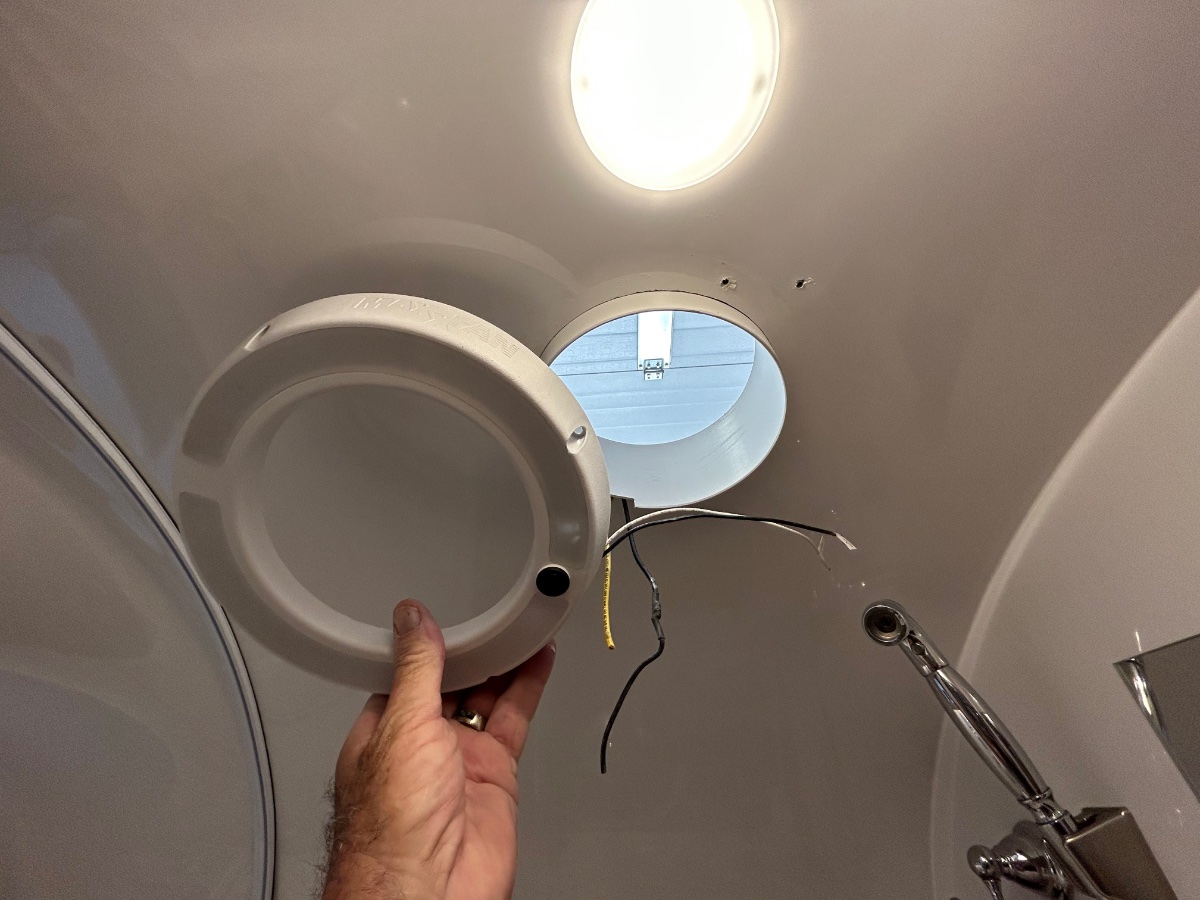
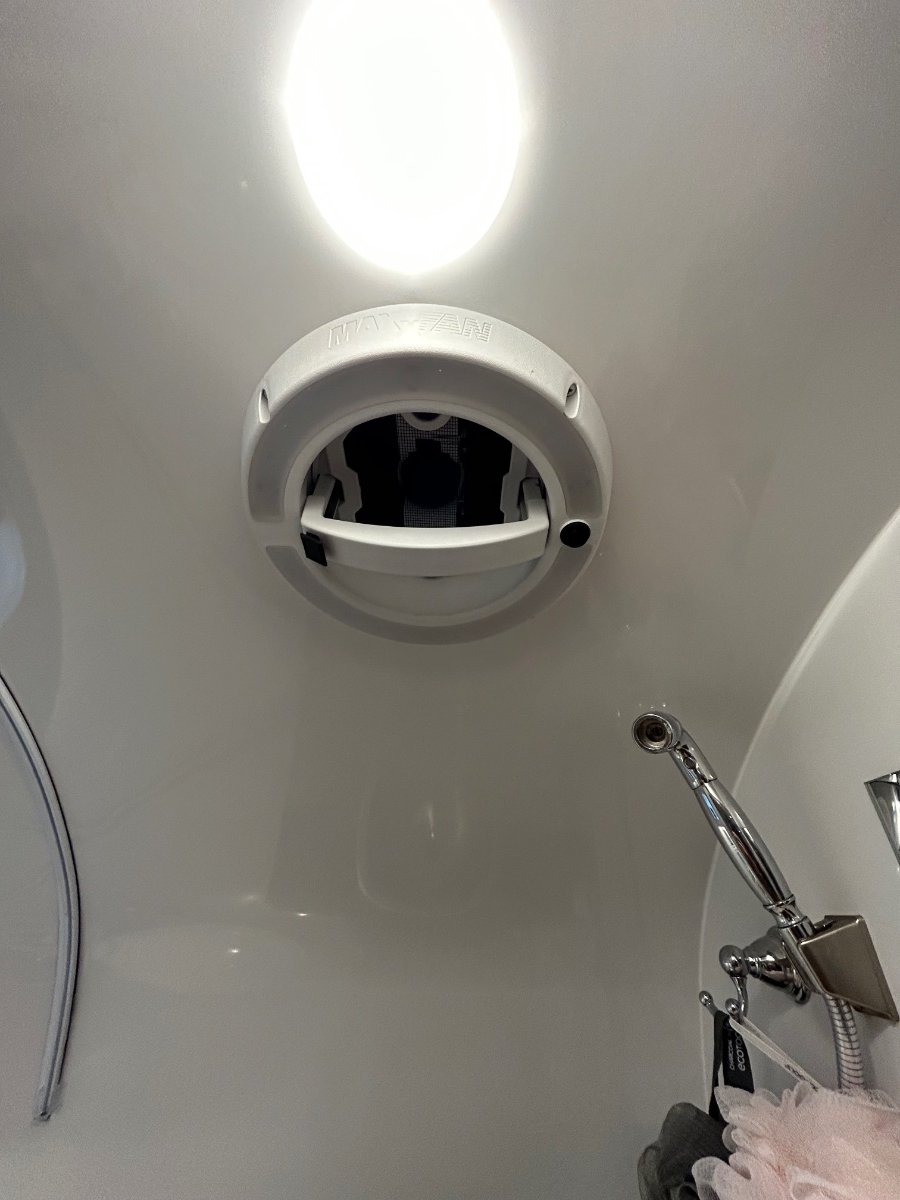
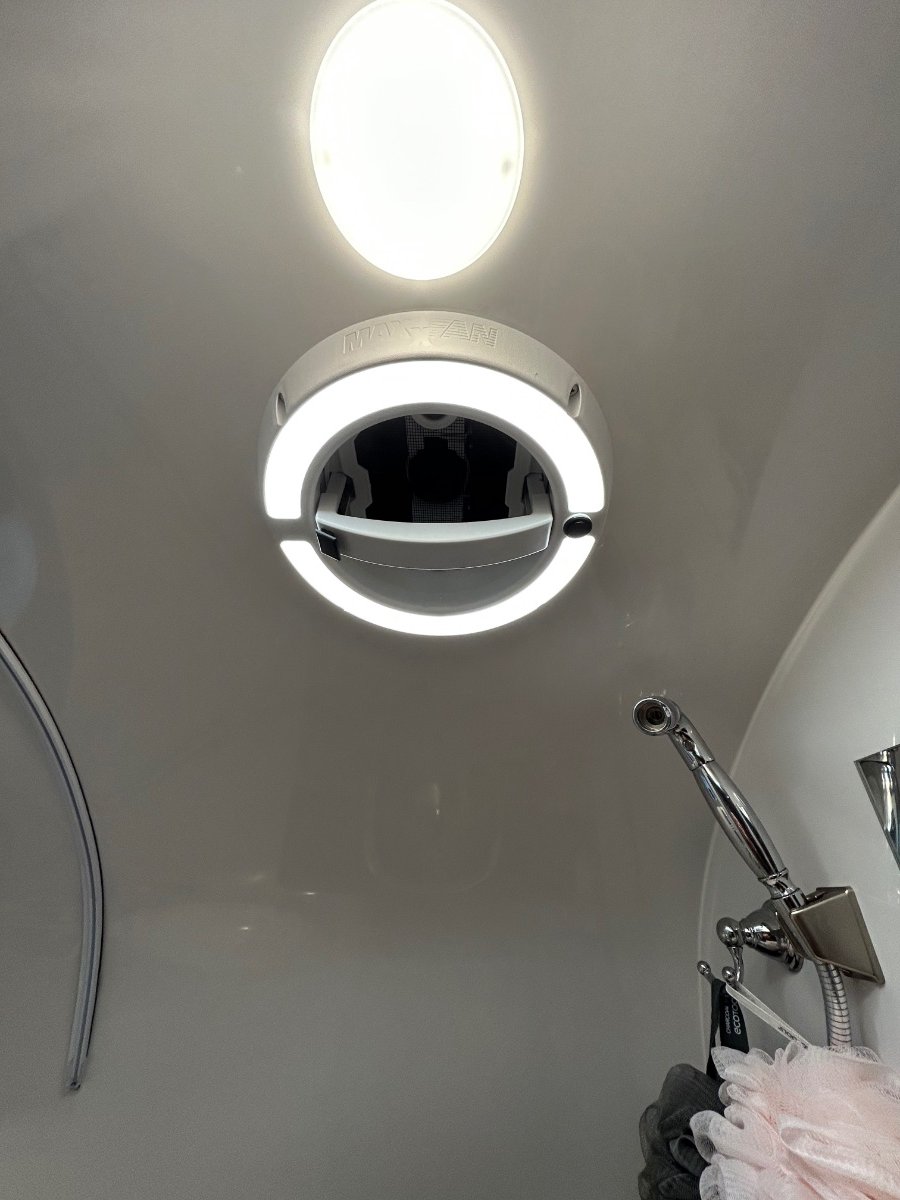
Ok... I love these forums! Nothing like great ideas shared by a group of common minded OTT owners. I'm thinking I stole this one from a comment that @SeaDawg mentioned a while back regarding his "LED-lit" Shower Fan. Well, Diane read his post and thought it would be a good upgrade - so, the new MAXXAIR w/LED unit arrived yesterday via Amazon (Happy Wife - Happy Life category). This would be the short story of its installation... First off, the original VANAIR Ventline fan assembly operated perfectly - no leaks, no bearing wobble, smooth actuation, but alas, no LED. It's the exact unit we had in our previous SOBs. BTW: Its up for grabs - a "freebee", I'll cover any CONUS shipping costs for anyone needing a Ventline. There was major brain cramping involved to plot-out a list of instructions for the R&R drill, especially the Removal phase. The first "R" was straight forward - using a plastic "razor" scrapper to remove the butyl tape from the gelcoat. Cleaned gelcoat with a fresh microfiber cloth doused with an ounce of rubbing alcohol. 2. Filled original mounting holes with clear silicone, they will be further sealed with the butyl tape attached to the new fan housing. 3. Cut-to-fit the included plastic sleeve that fits between the top flange and bottom (shower side) trim piece. Applied clear silicone around circumference of plastic sleeve and upper gelcoat. BTW - the OTT factory fan hole was exactly the correct diameter - no additional cutting was needed (WHEW!). 4. Mounted new assembly up top, carefully pre-drilled/chamfered 8 new holes in exterior gelcoat. Lightly torqued-in stainless screws enough to "push" butyl tape out from flange. Trimmed tape and applied clear silicone around perimeter of flange. 5. Rain guard: The new unit included a "rain-guard" which may be helpful if operating the fan in a heavy downpour. Applied butyl tape on the RG flange and carefully pre-drilled/chamfered 6 new holes for the RG. Trimmed tape after torquing screws in and then applied clear silicone around perimeter of RG. Attached fan cap with the provided 2 white screws. 6. Applied clear silicone to the trim piece groove where plastic sleeve seats. Carefully pre-drilled/chamfered 4 new holes for the trim. Connected 12vDC power to fan motor and LED - used solder and heat-shrink for connections. Tucked wires inside trim piece and mounted it with 4 screws. 7. Unlike the Ventline unit, the MAXXAIR has a locking mechanism when depressed allows the fan lid to open/raise. Its raises/lowers smoothly. Fan and LED each have separate switches. And as, I believe, @Patriot has recently said, "Let there be light!" One and done... Happy Wife.
1 point
-
Is this for real?1 point
-
Thanks for posting this. Late last year or early this year Steve Landrum posted that he had just received a call from Scott Oliver that moving forward all sales would be through the dealer network. Then, recently someone posted on Facebook they were going to order through the Mothership. I commented that it had to be through a dealer and cut and pasted Steve's Forum post. Almost immediately someone from Oliver posted on Facebook that trailers could still be ordered from the Mothership. It would be nice if there was an official announcement from Oliver. I felt like a Jack A__. Things must have changed. Steve posted what came from the his conversation with Scott. 🙃1 point
-
Sadly it’s an AI generated image hoax, just like the Caterpillar CAT truck hoax that circulated on the internet previously. The folks that create these do it to get clicks on their webpages. The power of the AI image tools now lets anyone create photo realistic images and video. https://tfltruck.com/2024/09/video-is-a-caterpillar-pickup-truck-really-coming-the-answer-is/1 point
-
We've been very happy with the replacement. We bedded it with butyl tape , and "built up" the low areas. Quiet, effective, love the night. It is more difficult to raise than the old ventline, but a) it doesn't leak, b) love, live love the overhead light, and c) it doesn't open underway. In all fairness, we never had an issue with rhe old vent line opening underway, either. Also love the serviceability. Fuse is easily accessible, unlike the ventline. We installed per instructions, 4 years ago, with the possible exception of using our go-to butyl tape instead of sealant/caulk .1 point
-
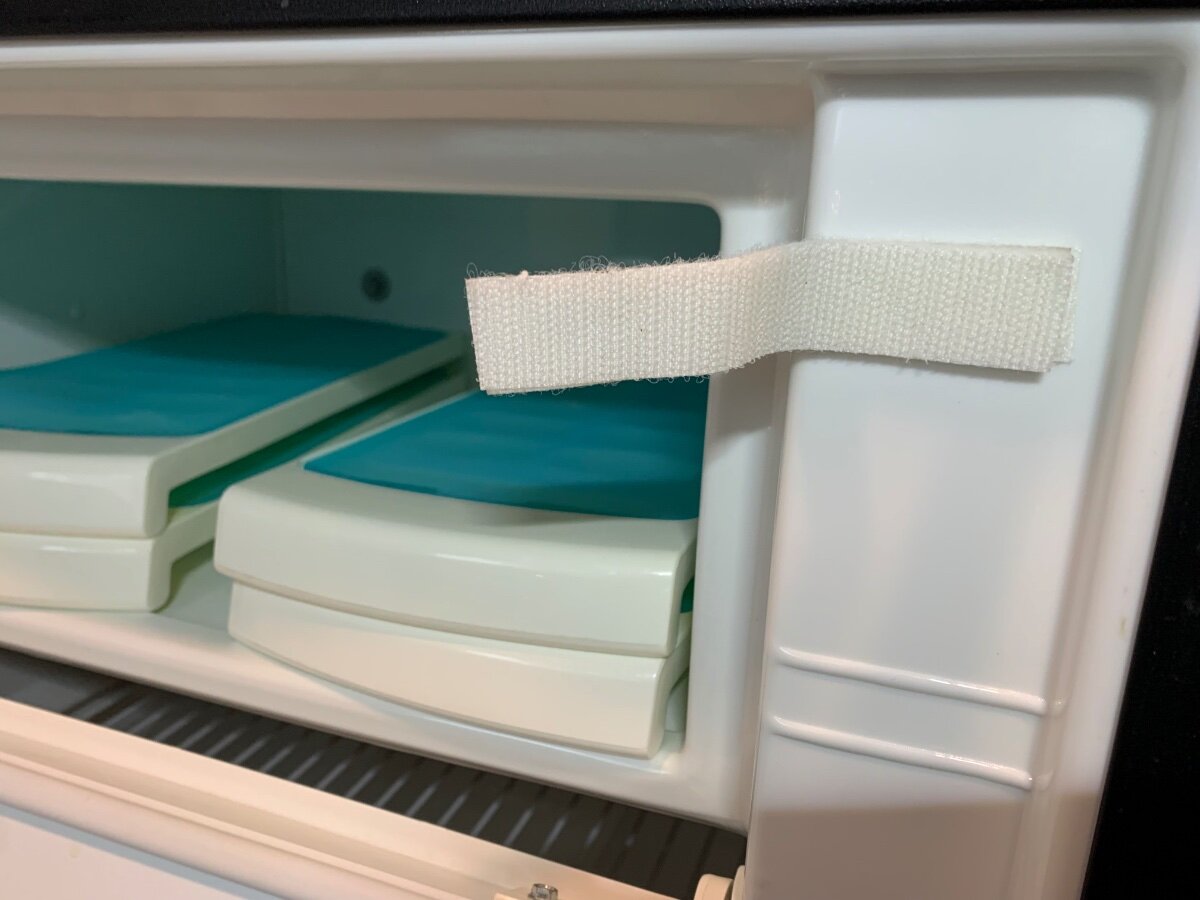
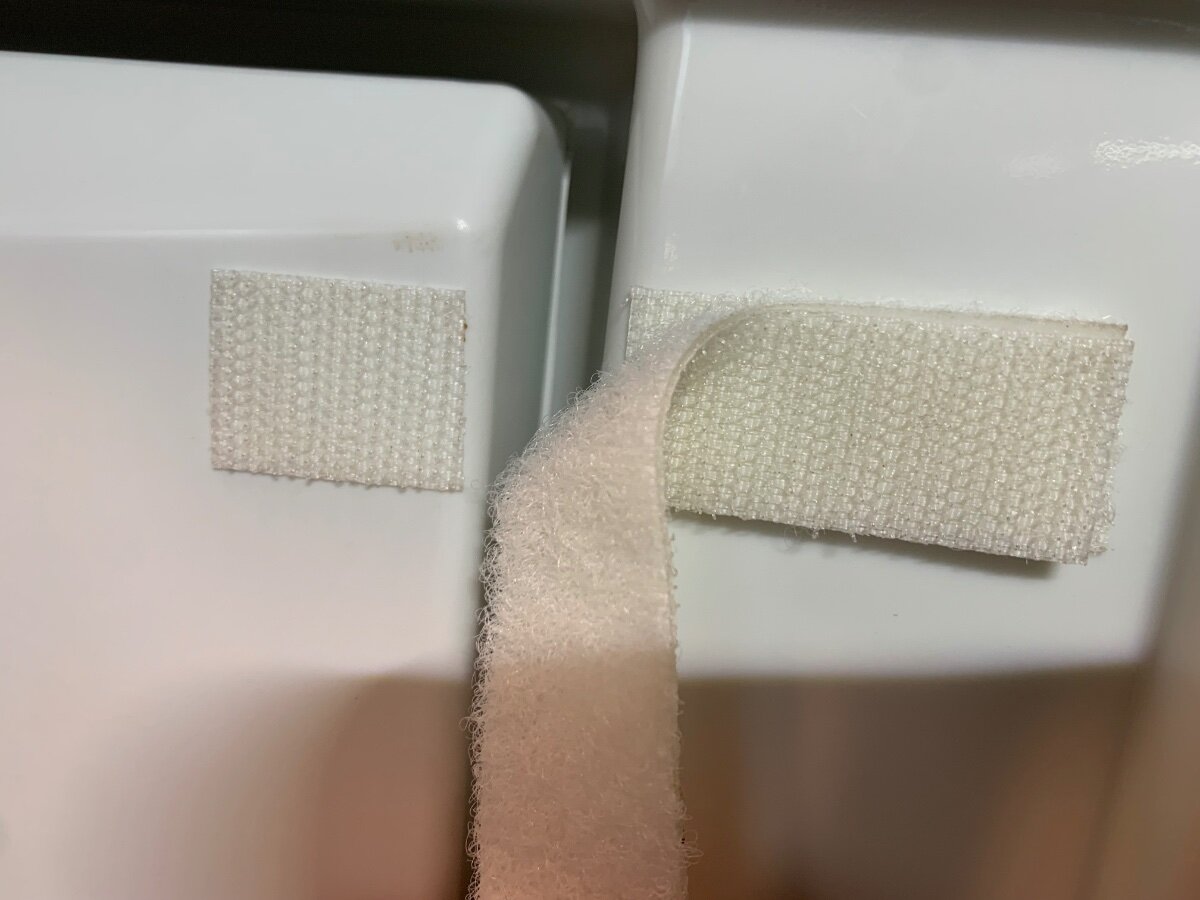
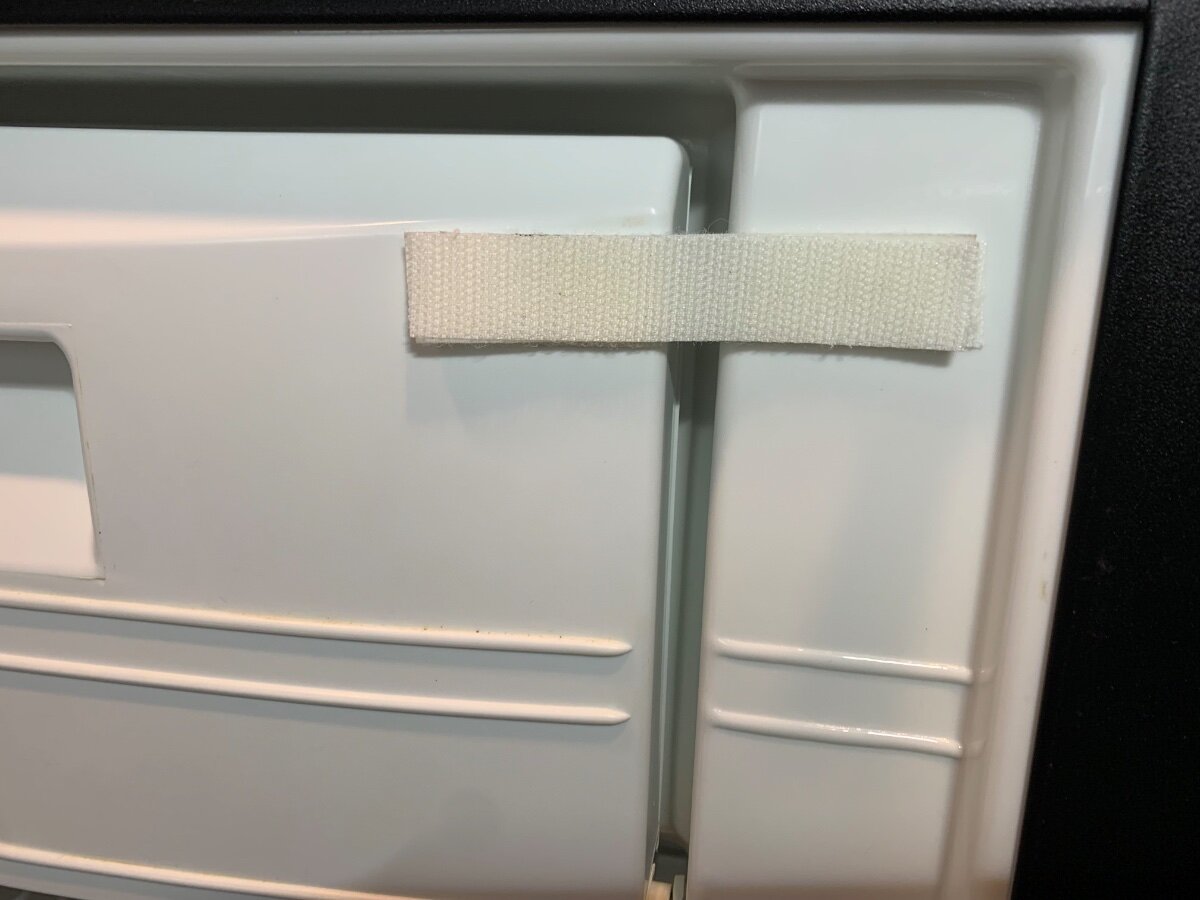
Wow…so far so good here with the Velcro strap. Have you considered a heavy duty zip tie?1 point
-
Our TV comes unlatched about half the time...and that's highway driving - not on dirt roads or across open fields! We've had 2 break in transit and one of those was WITH using a velcro strap. It, too, came loose! We've since switched to using a dog collar (size XS, 8-12").1 point
-
Yes, in our new fan it is hard to open because of the stress. To open we have to push the black release button and the opposite side of the handle at the same time. The new fan has a different sound from the original. A bit louder l think.1 point
-
JD: Thanks for the compliment.... I think??? LOL Seriously though, would it not be pretty cool to cherry pick our what must be about ten million OTT forum posts (more or less) and gather them up as a tutorial for new and potential owners? Could be a Oliver University crash course based upon all the mistakes us ROF's have already done. About 27% of the time I like not making an OOPs myself. Prefer that others do it first and I can read about it. But at times I just like to make the mistake myself.1 point
-
Asking @SeaDawg, @MAX Burner, @Mike and Carol, @Galway Girl and others who have installed this, couple of questions... Re the outside installation, it seems like such a pull on the plastic to torque down the eight screws giving the fan is flat and the outer hull is so round (why doesn't OTT have a flat area here in their hull design?). With a dry fit it appears the front and back are both 1/4" off the surface. That's quite a pull on this light plastic and could interfere with the fan up-down movement when installed on such a curve. Any issues? Art mentioned this briefly on page one, but no comments from others. The instructions mention mounting the fan with the switch to the front. At first, I thought they meant the power button, but they must mean the mechanism button since it is what holds the fan down against the wind when towing. The picture Art shared shows the handle sideways vs. front to back. The instructions do not mention having the sleeve on when mounting the fan to the roof, but it appears that only with the sleeve on would you get the fan mounted in the correct position. Thanks.1 point
-
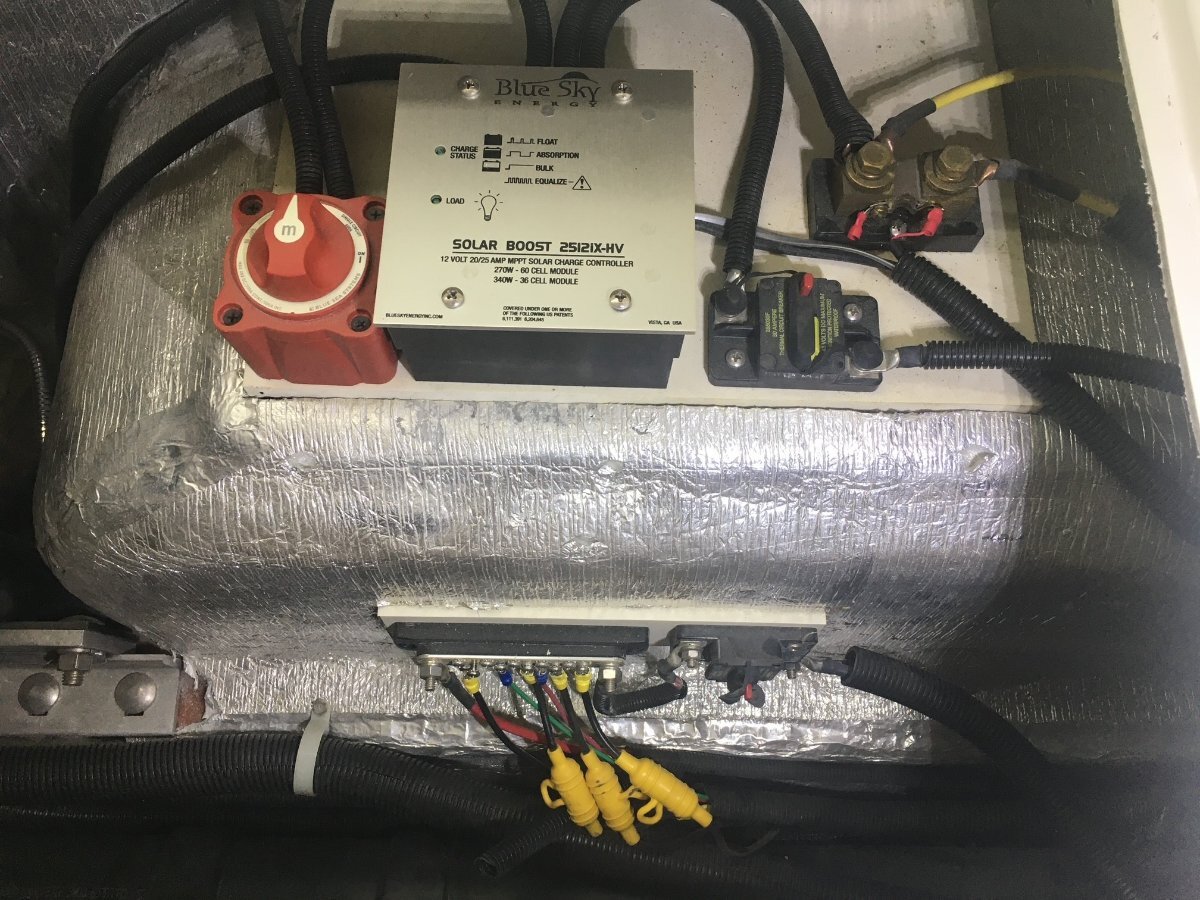
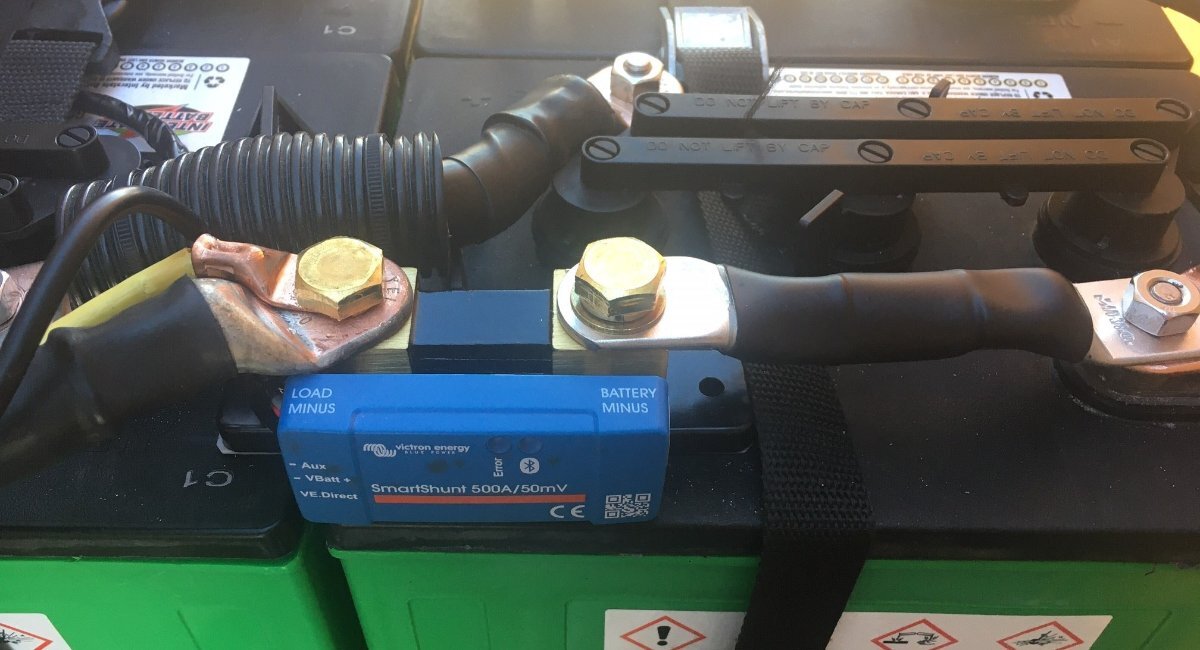
Thank you, our forum friend, no dummies here! I've respected many of your special posts as well. PM me if you want info specific to your hull. My first pic is the original Blue Sky Solar install, where you can see the OEM shunt (top-right). Our hull is dated 2016 and yours 2018. Nothing wrong with the original install but I can only read status, when sync'd, and while watching the installed screen inside the Oliver. The Victron SmartShunt has built-in Bluetooth and an app for reading on your phone. The second picture shows the Victron SmartShunt installed (at battery ground), the simplest installation possible. I have revised my installation since, after installing the Victron Multiplus II Inverter/charger, where I have it at the inverter, but still closest to the B- battery ground terminal. If I was to but a new Oliver Elite II (not happening for us, I'm a "always buy used" guy), I would have OTT install the solar array with wiring to rear dinette seat basement area (please NOT under the streetside bed) and I would install a Victron MP2 and pick from so many choices of LiFePO4 batteries on my own (Black Friday deals now 15% OFF). Battleborn batteries and Lithionics, good for the wealthy 3-6 years ago are now WAY bettered by LiTime (lowest cost), Epoch Essentials and others where 600AH cost <$2K or less! More info here (page up to first post)!
1 point
-
Might something like THIS work for keeping that door closed? Bill p.s. "invention is the mother of necessity" and I really like your work.1 point
-
My temporary fix is working well enough and may tweak a bit for a more permanent solution, since parts are not readily available.
1 point
-
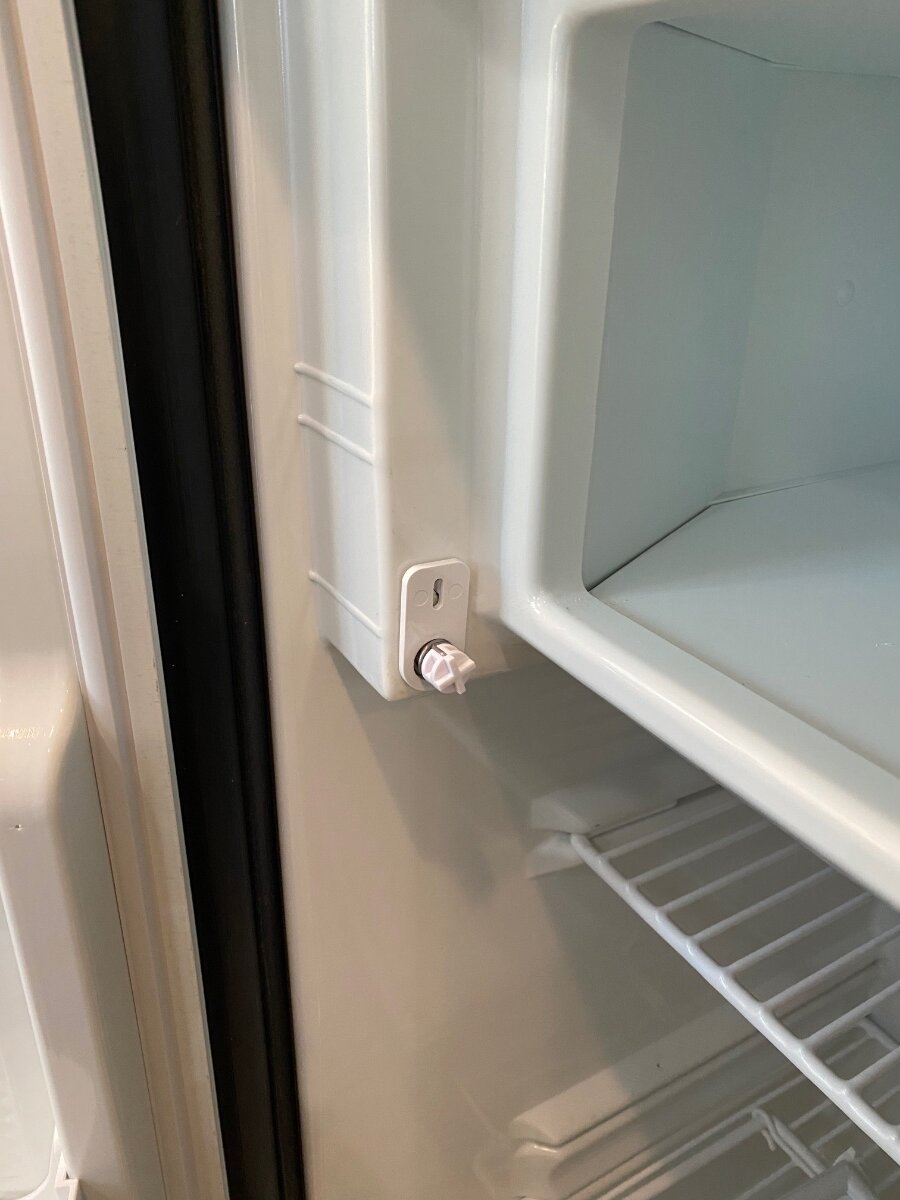
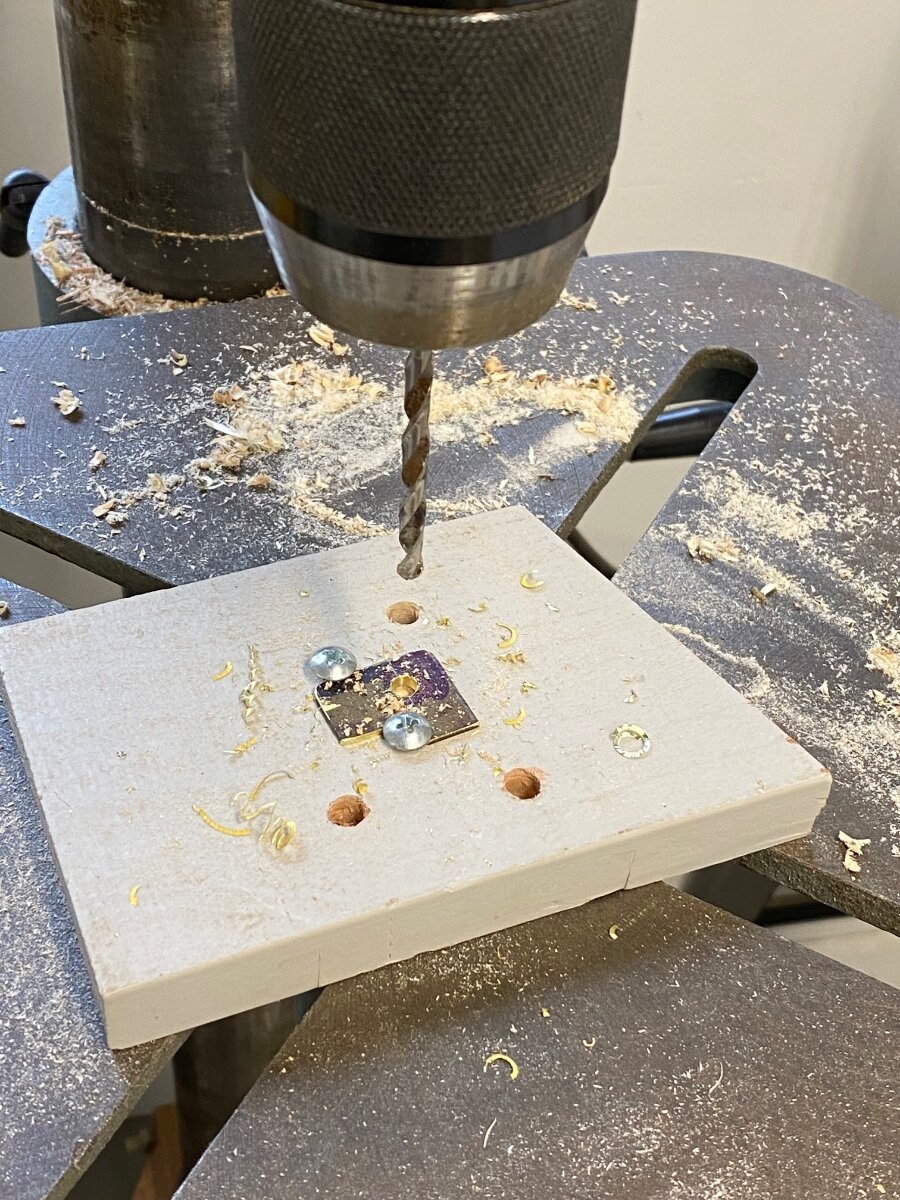
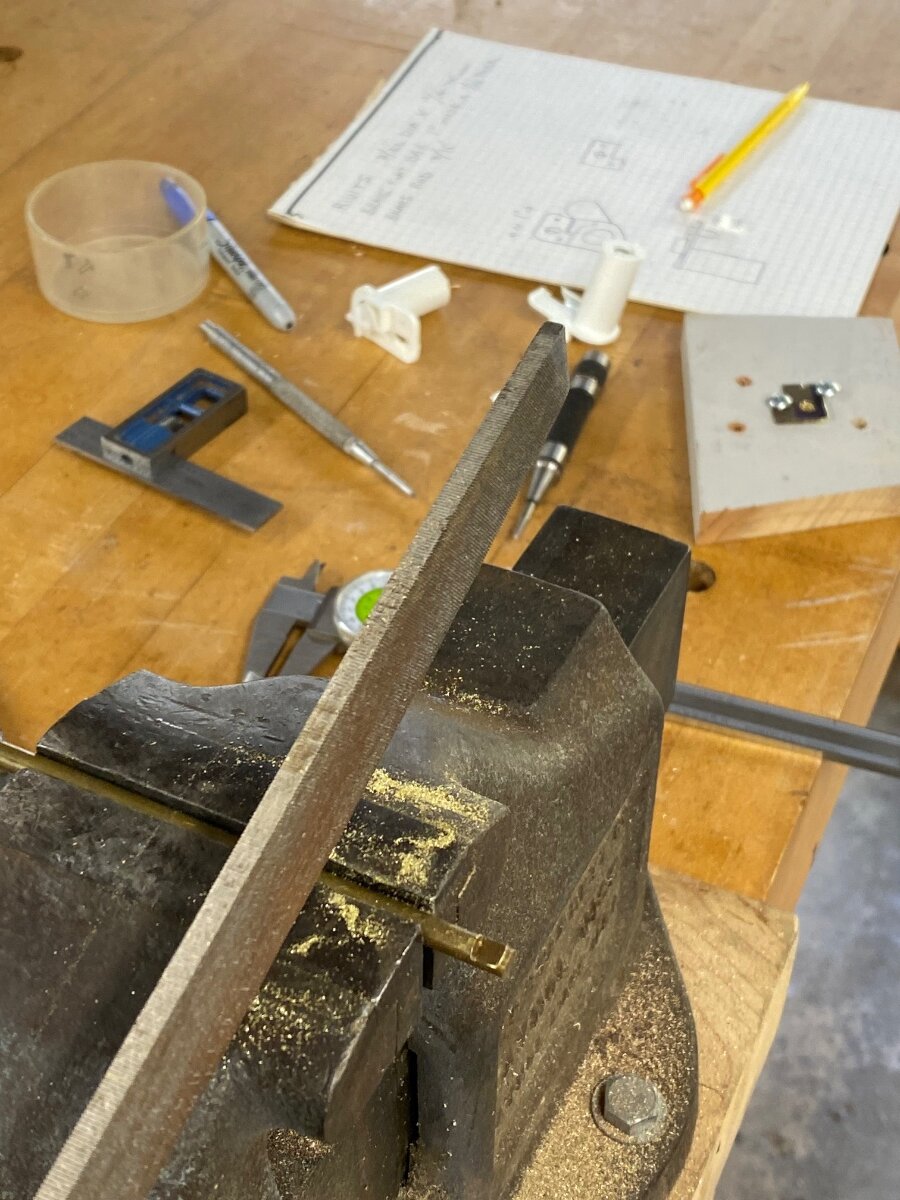
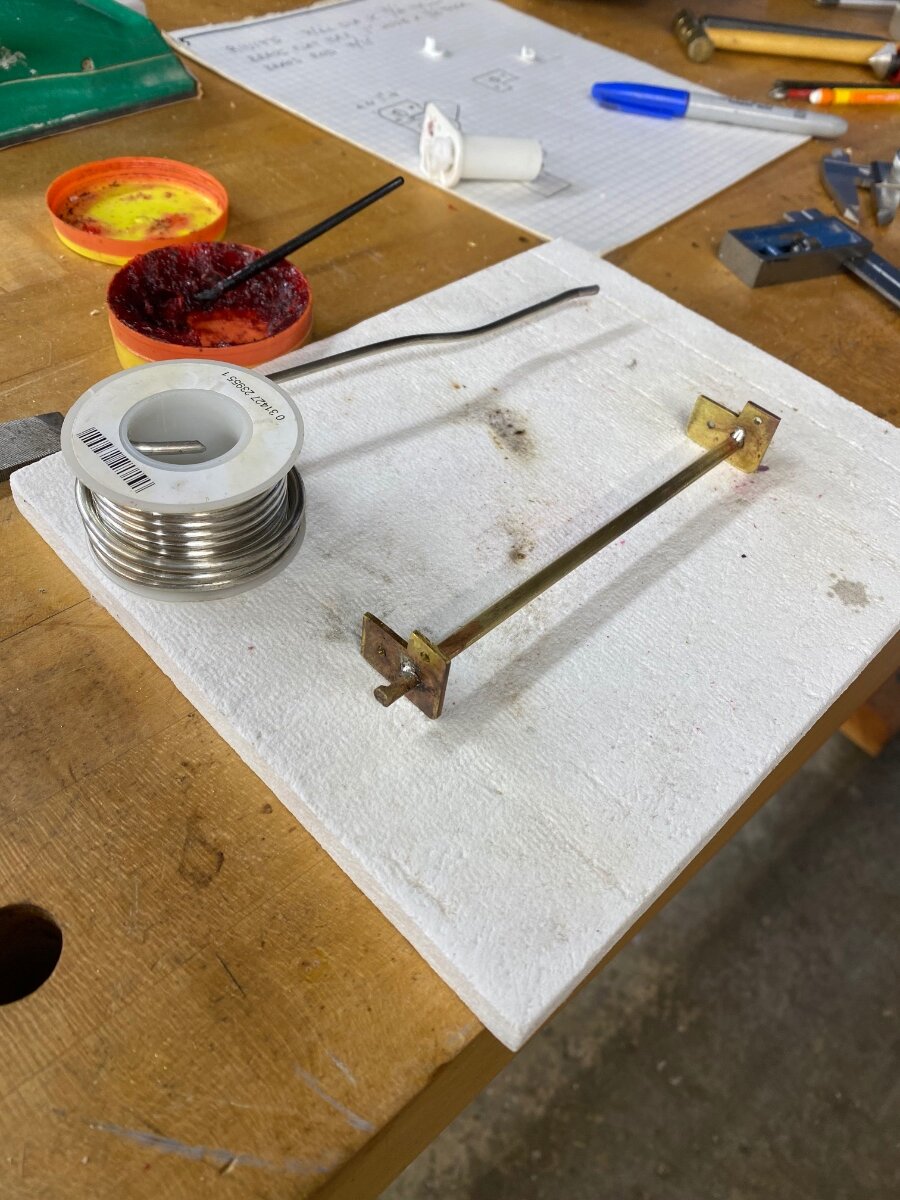
Oh boy, another one bites the dust! Those little notched pins for the freezer door hinge broke off on ours too, and now the door won’t stay closed or seal. I searched the net for new parts and nobody had the left spring holder assembly. But while searching, this post popped up and I found out Im not alone! Apparently Norcold is out of business and these parts are no longer available. So short of replacing the whole fridge, I figured out a way to repair them. I cut out pieces from 1” x 1/16” brass bar to “sister” onto the broken spring holder assemblies. Holes were drilled for a 3/16” brass pin and 1/16” rivets. I filed notch’s on the brass rod to match the original pins and soldered them into place with plumbers flux and solder. I trimmed the excess, and filed it flat. The new brass piece was riveted onto the hinge with 1/16” diameter x 1/4” flat head brass rivets. Fortunately I had all the brass and rivets in my stash, but most hardware stores carry this stuff. It was a little tricky to install the hinges with enough spring preload, probably because the repaired hinges were stiffer and wider than the originals. Here’s what worked for me: Put the repaired right spring holder assembly in it’s final position on the fridge wall. Remove the right door mount clip from the door. Install the left spring holder assembly onto the door mount clip so it has spring pre-load. Mount left side door with spring holder/clip assembly onto fridge while maintaining spring pre-load. While holding door in place, use left door clip to wind some pre-load and screw it on the door. Hope this saves someone a new fridge! Cheers, Geoff
1 point
-
1 point
-
Episode 9, Part 1:1 point
-
Bill, thanks for that info about the possible recall/warranty. I wanted to switch to the Maxxfan Dome w/LED even before the gasket malfunction, hoping 1) the fan would be quieter than the Ventline, and because of 2) the locking handle, 3) the easily removed screen for cleaning up there 4) the easy to get to quick-blow fuse, 5) that cool LED light and 6) to test my roof sealing and caulking abilities for the first time ever... gulp!1 point


-
Recent Achievements
-


")


