Leaderboard


Popular Content
Showing content with the highest reputation on 08/25/2025 in all areas
-
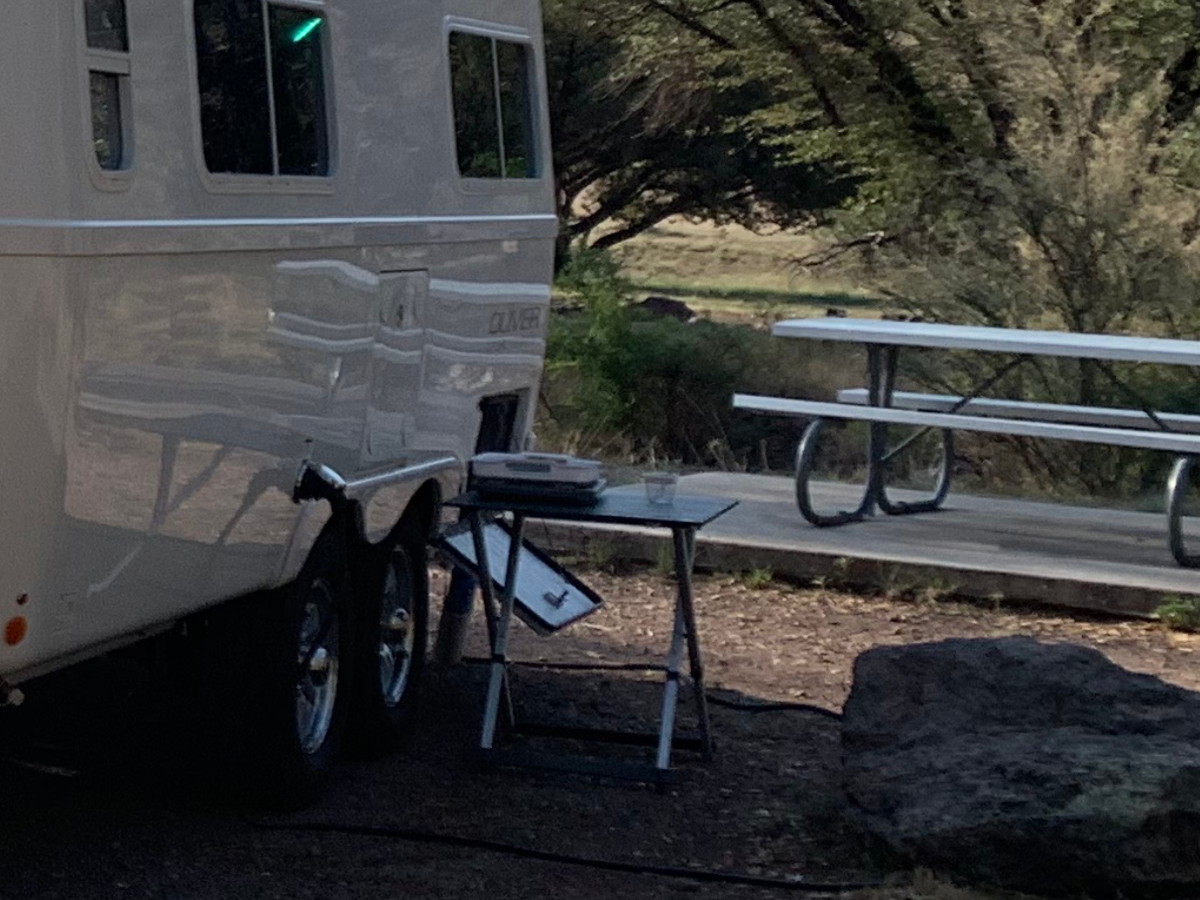
V.2 Updated outdoor Hitchen to house my camp stove and propane hose as well as attach a Lagun table. Like several of us, I prefer to cook outside and digging my camp stove and table out of the back of the truck can be a pain. Hoping this latest version will work well. The use of a Pelican case as a outdoor kitchen is popular in the overlanding community and should be easier to setup and stow than pulling cooking gear from the back of the truck. A pair of cables will be installed on the lid of the case so it rests parallel to the ground and can act as a surface upon which the stove can sit while cooking. Last image is the from a overlanding site. For those wondering why I don’t use the rear receiver to haul bikes, well I did this in the past but found that with a dog I would rather be on foot with her than on wheels without her. I also prefer not to cook inside the trailer as I detest cleanup of cooking residue (yes, I am lazy).
 5 points
 -
Alcan negotiated with Dexter and they agreed to refund my shipping cost. Thanks to Lew at Alcan for working this out for such a positive outcome, to David for this good idea, and to Ron, Ken and @2008RN for your related comments. They promised a 2-week rush build, and today, exactly two weeks after I entered my complaint, I have new axles delivered! They sure are pretty this time, so the extra time was well worth it.😂 I'm working this week, followed by 10 days off. So likely this Friday or latest Monday, I'll hitch up the Oliver and park it on our driveway. Then all I have to do is figure out, how in the heck to install new Dexter D52 axles and Alcan Springs!!! Love the challenge of a new project, learning something new and the achievement! I'll take pics and start a new installation thread when I get into it. Can't wait to see a picture of our Oliver sitting up in the air without axles, leaf springs, wheels or tires! Or perhaps to be safe, I should remove and replace one axle at a time! 🤣
4 points
-
If you look VERY closely at the left side of this photo you can see the tongue of our trailer 😂
4 points
-
Here you go:4 points
-
Same with us. But then we fill our FW tank and our 35 gal supplemental tank with soft water from home to avoid scaling in the water heater and that gets us through most outings.4 points
-
We did not add that, but it is possible the prior owners did as they did a lot of deep winter camping. Thanks Tim3 points
-
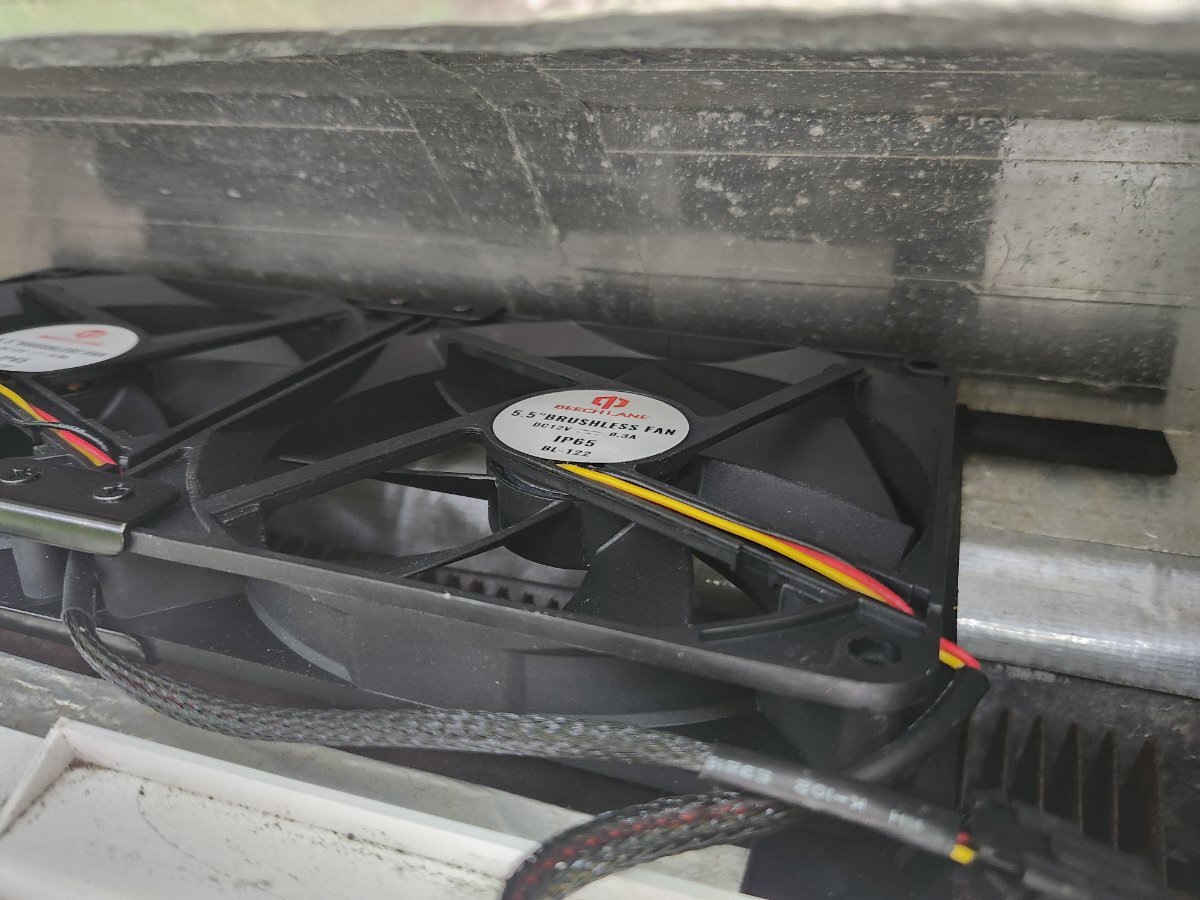
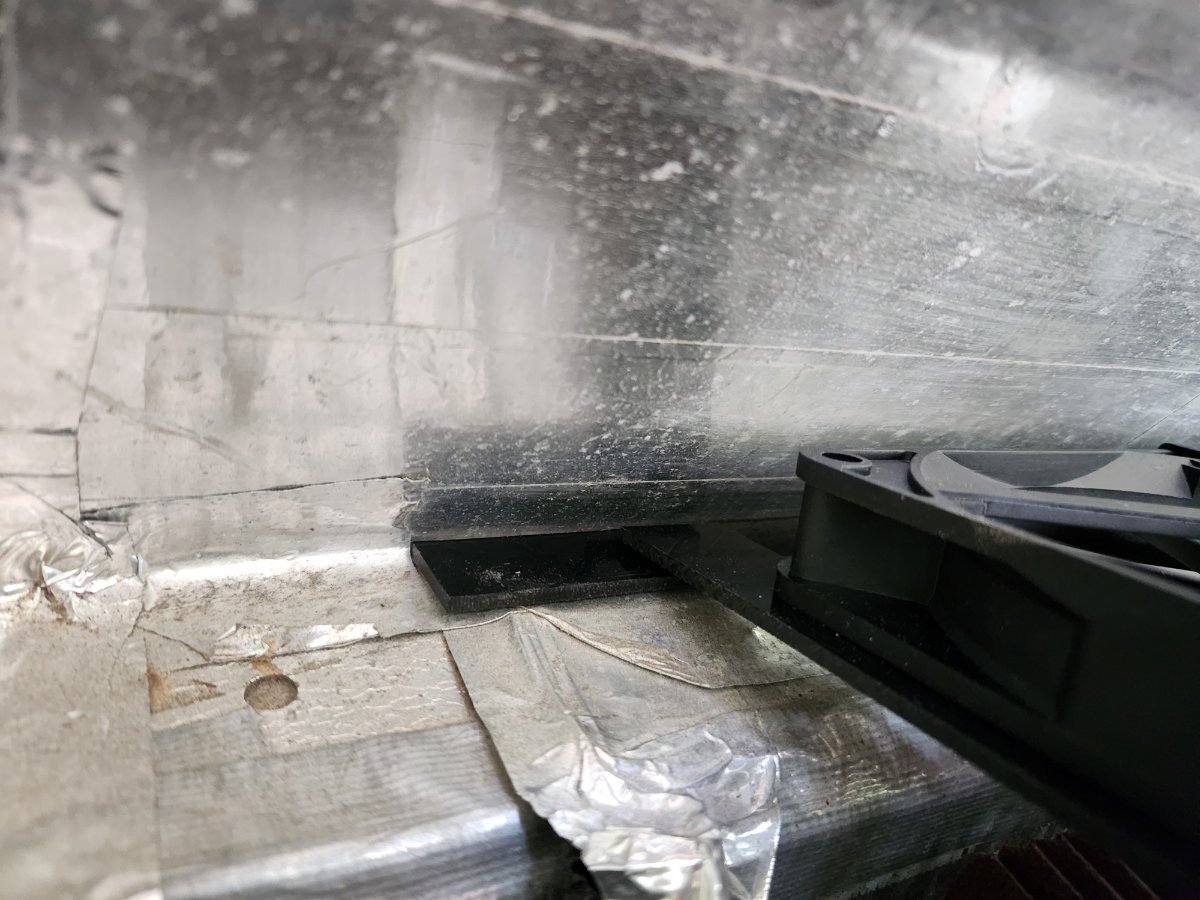
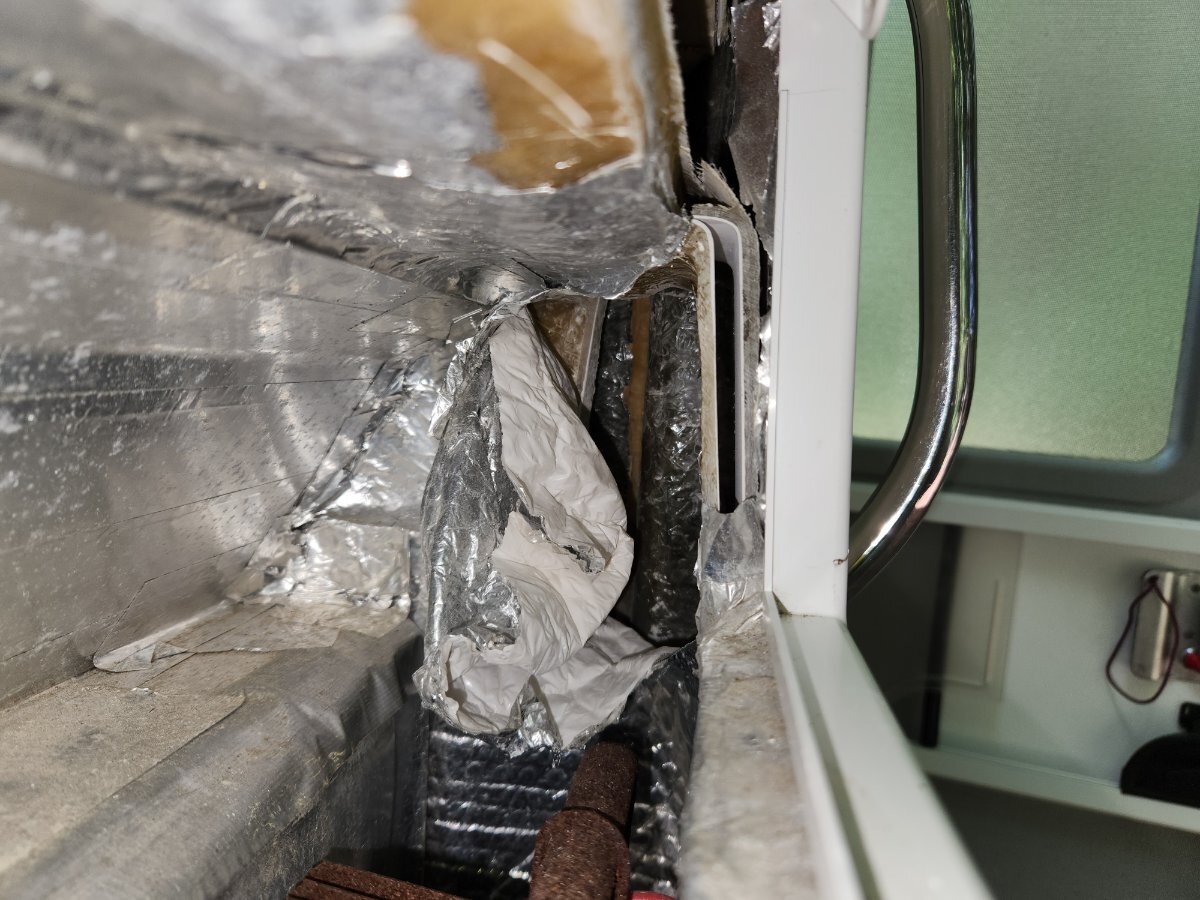
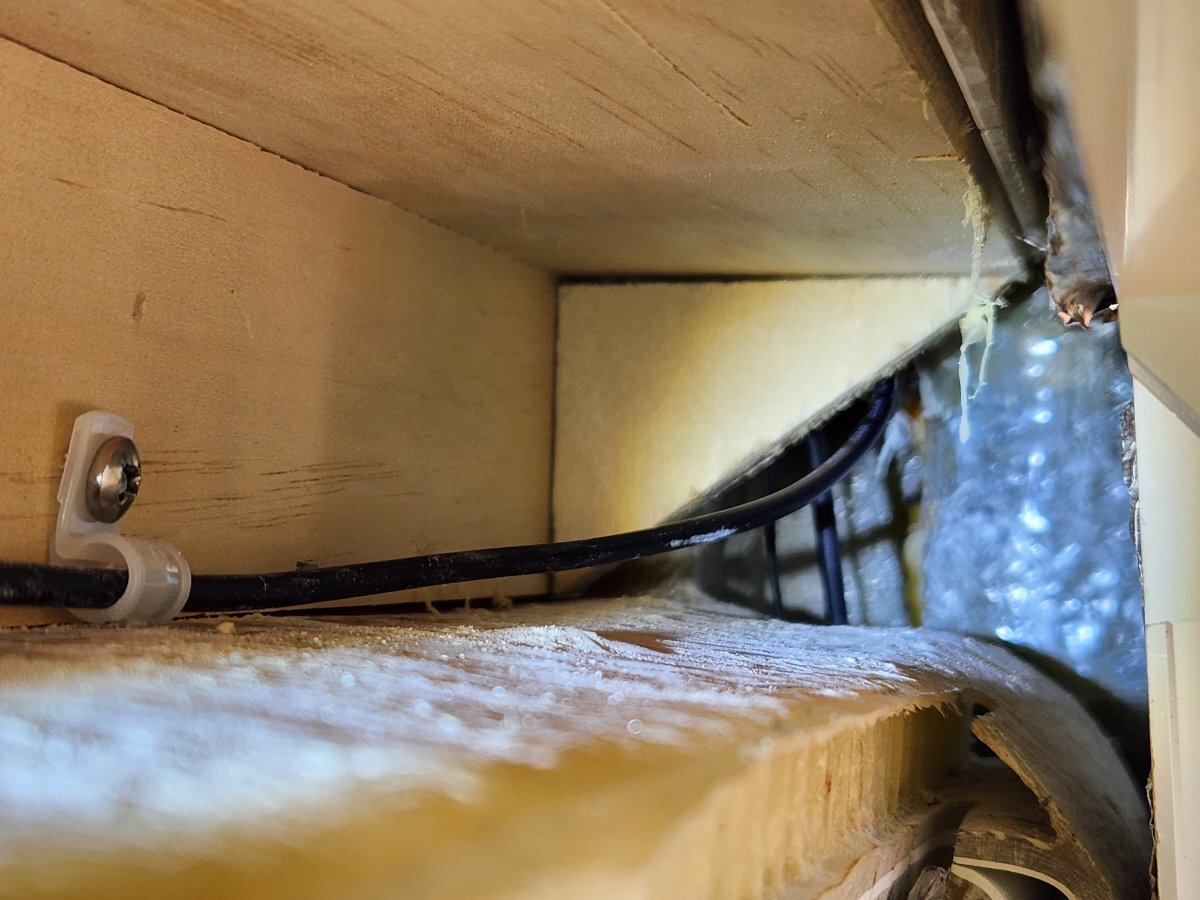
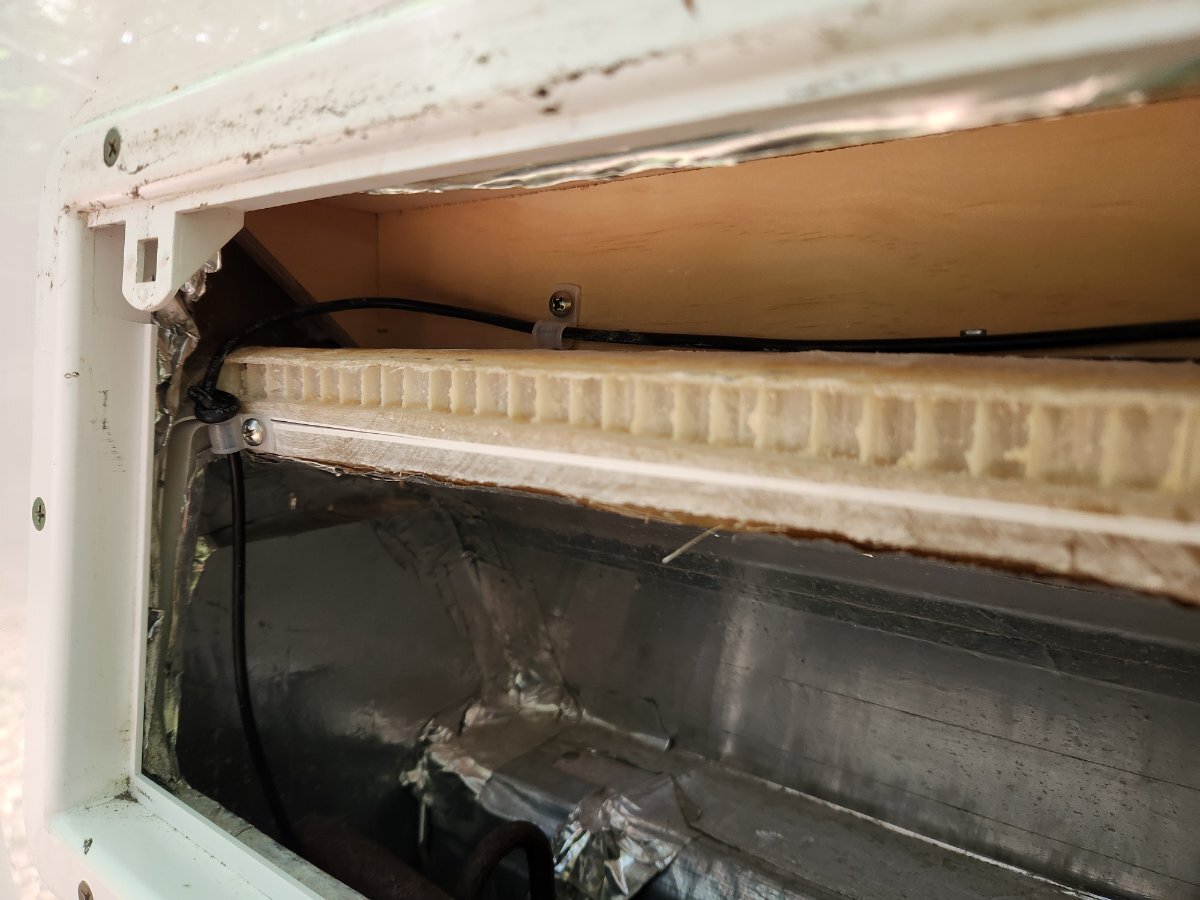
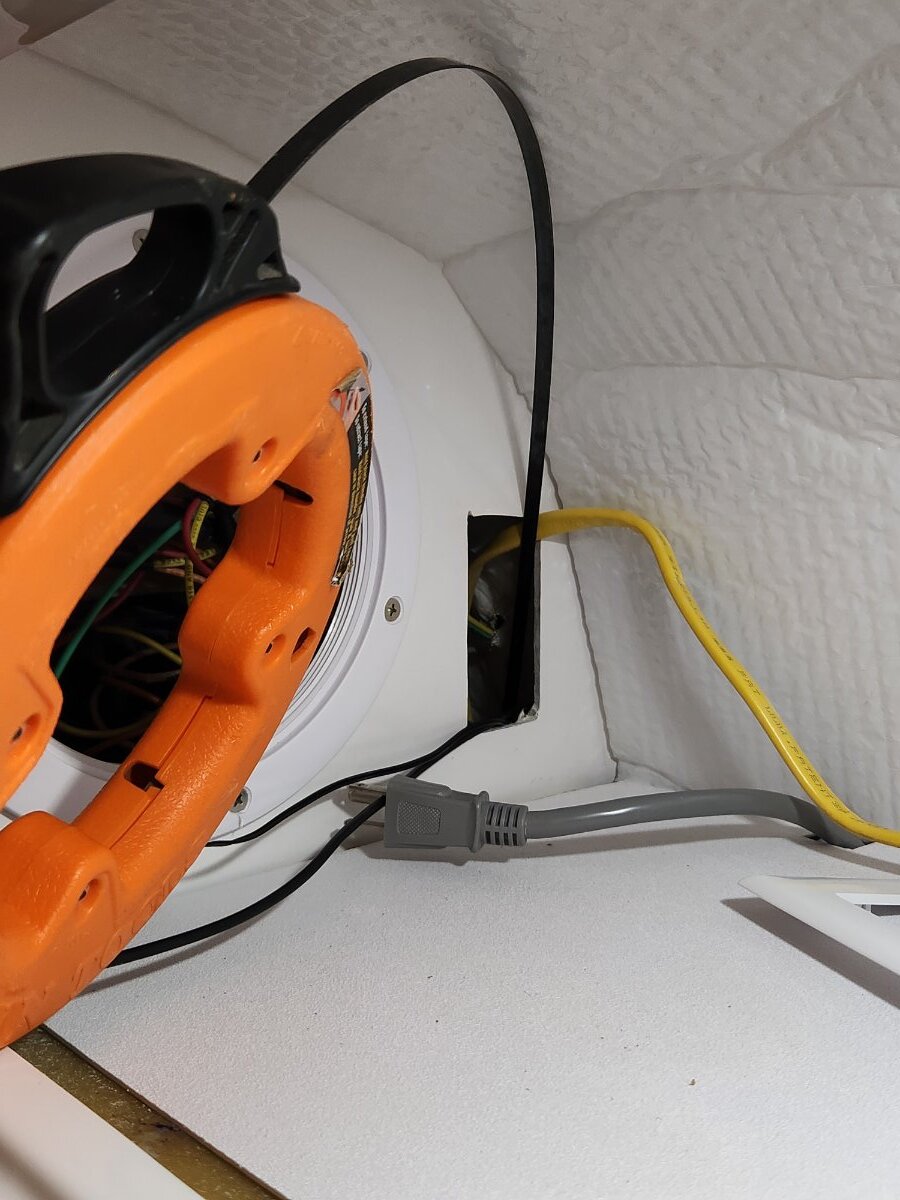
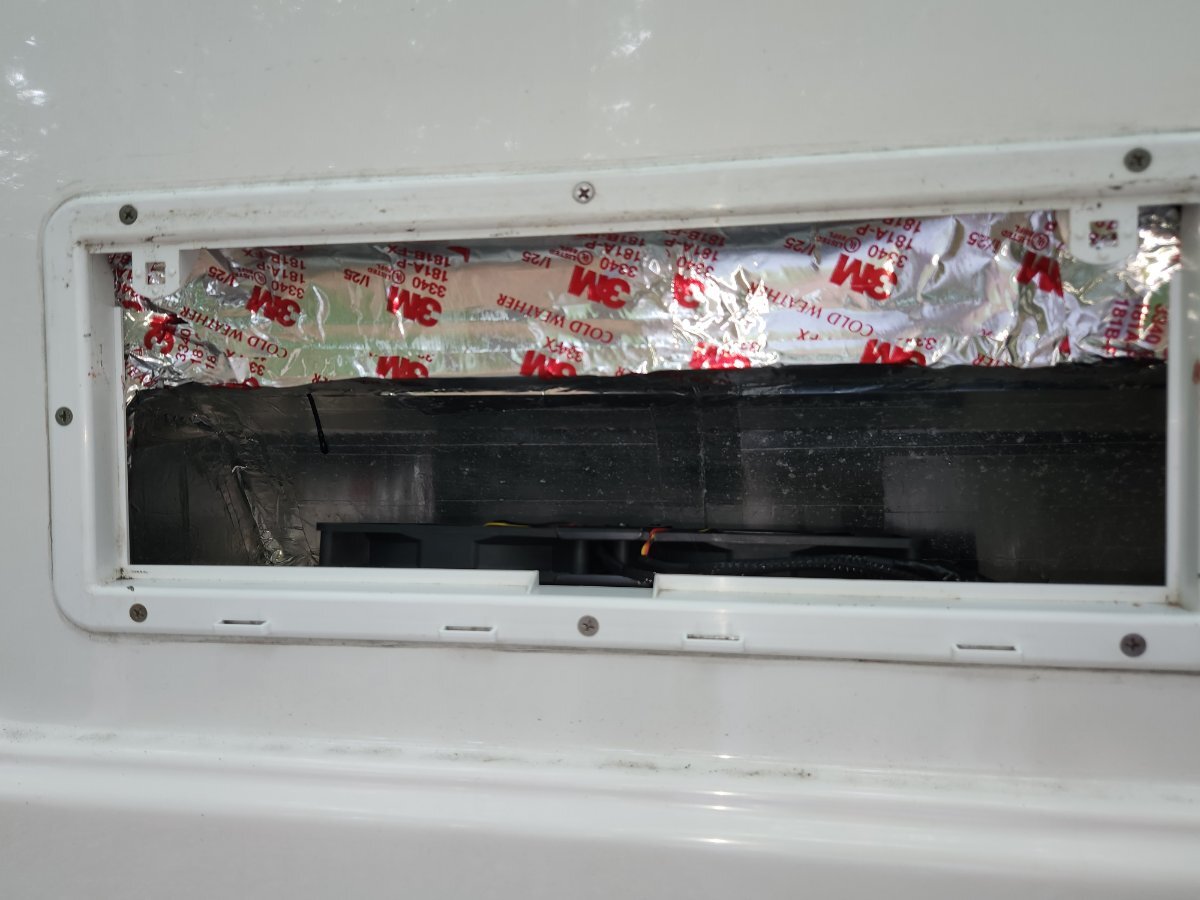
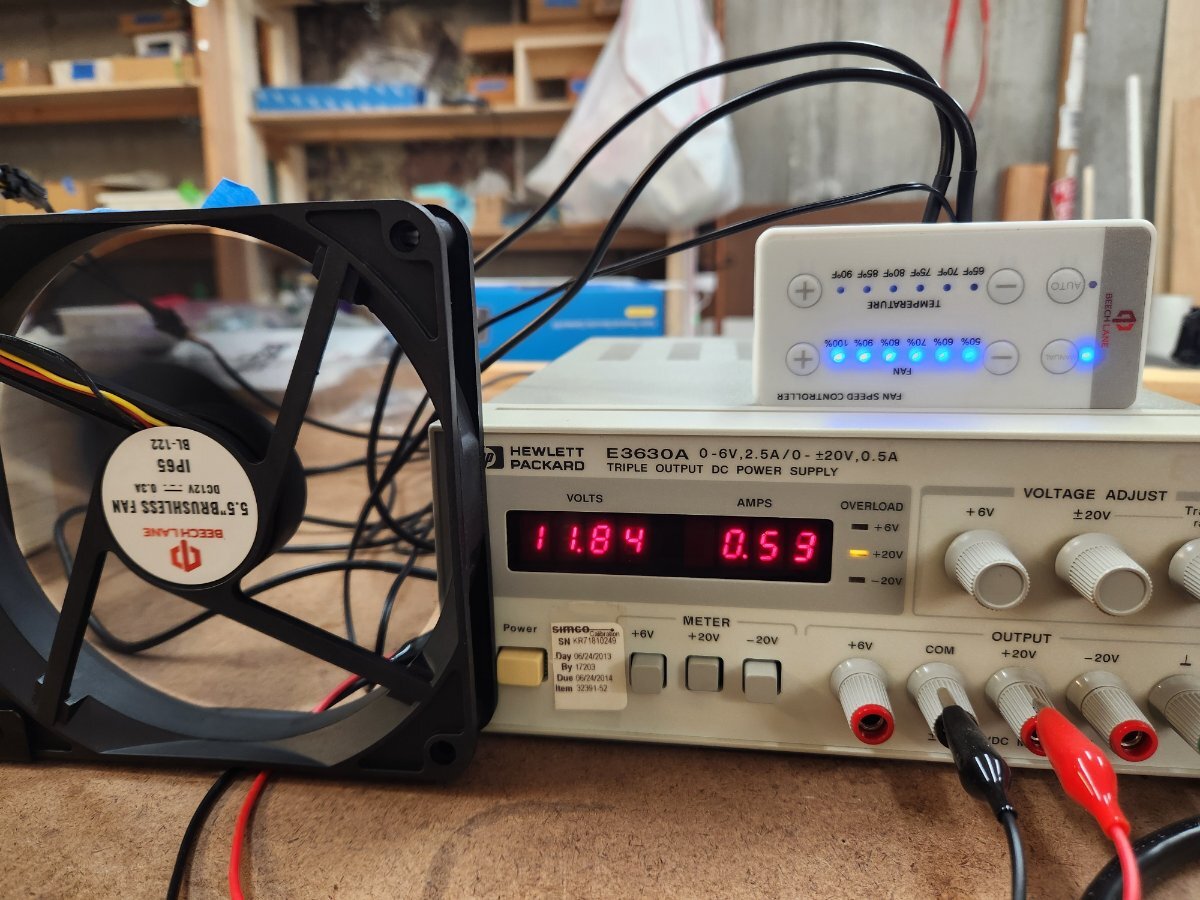
Finished the install. A somewhat complicated project but definitely helped by all the great info posted in this thread and elsewhere. Thank you very much! To summarize: As the brackets supplied by Beech Lane weren't going to work in our 2021 LE2, hull #701, I rearranged the fans to bring the cables to the front and then fabricated a mounting bracket from some ABS sheet I had in my shop. ABS is great stuff, nearly indestructible and easy to glue with ABS glue (a mix of acetone, MEK, and dissolved ABS. Don't drink it.). Nothing else works, including epoxy. The fans and bracket sit atop the space, let's call it a plenum for simplicity, in which the 'fridge coils reside. The rear longitudinal piece, which has foam tubing on it in the final version (not shown) sits snugly in the vee of back wall. The tabs on the lateral pieces sit atop the hull honeycomb behind the grille surround and are screwed vertically into the honeycomb with 8x1 1/2" stainless sheet metal screws. The fan assembly isn't going anywhere. The three cables from the controller run through a new 1/2" hole drilled in the cabinet wall and downwards. One you find the right spot with the fish tape it is straightforward to push the cables & tape downwards until they are visible from inside the plenum. The fan power cable and connector are routed to the right, wrapped in electrical tape, and secured against the wall using 3M 3340 HVAC tape. From there it passes through the bubble wrap insulation and up to the area to the left of the upper cabinet, behind the 6" round access panel and switch panel. It is necessary to pull the bubble wrap insulation and original HVAC tape away to access this space from inside the 'fridge upper vent area. Meanwhile, the controller and fan power wires are routed across the top of the vented area and secured to the plywood. It is necessary to remove a piece of foam secured by HVAC tape to access this space. From there the power wires are routed down the aft side of the 'fridge coil space and secured with cable clips. As suggested by @RonbrinkI spliced the power cables into the existing +12V and ground by removing about 1/4" of insulation, wrapping the fan power wires around the 10 ga. 'fridge power wires, soldering them in place, then covering with shrink wrap and electrical tape. The power cable supplied by Beech Lane is too short to reach all the way down to the bottom of the 'fridge so you'll need to add length if you go this route. I used 18-2 cable from a big box store. The OEM Beech Lane cable is like 22-2 and somewhat difficult to solder, so be forewarned. The controller & fan power wires were secured with cable clips and 8x1/4" stainless sheet metal screws. The temperature sensor was provisionally mounted in the upper aft part of plenum and secured with 3M HVAC tape. Not sure whether that's the best place or not yet, it may be better off further down the plenum. The pink foam which had formed the front wall of the uppermost part of the area behind the upper grille was replaced and secured with HVAC tape. Last, the controller was mounted to the rear wall of the cabinet using heavy duty Velcro. I used two 1/4" wide strips of hook material on the back of the controller and two 1" squares of loop material on the wall. There's no need for more than that as the controller weighs very little and using more hook material will just tend to pull the loop material off the wall if and when you need to move the controller. We'll see, we're not going anywhere 'hot' until February when we'll be in central Florida. Bench testing showed about 0.6 A draw, or the amount shown on the fan label, when the fans were set to run at 100%. Thanks to everyone and I hope this helps. Tim
3 points
-
Table and swingarm get stored in truck. Upright mounting plate is bolted to pelican case so it can be adjusted up and down.3 points
-
Our Mini got to go on its first trip. We recently went to Maine on a short 10 day trip. As many have said, it was a game changer. So easy to setup and use.3 points
-
We’ve always drank the water from the fresh tank. A properly sanitized RV fresh tank is no different than any other plastic container that is used to carry and store water. But then again I drank from garden hoses, hand pumps on old farm wells and public water fountains and even artesian springs in many locations without a worry our ill experience most of my life. Unfiltered well water was all I knew until I was an adult. We use a Costco pitcher filter these days for consistent flavor in our morning coffee or tea.3 points
-
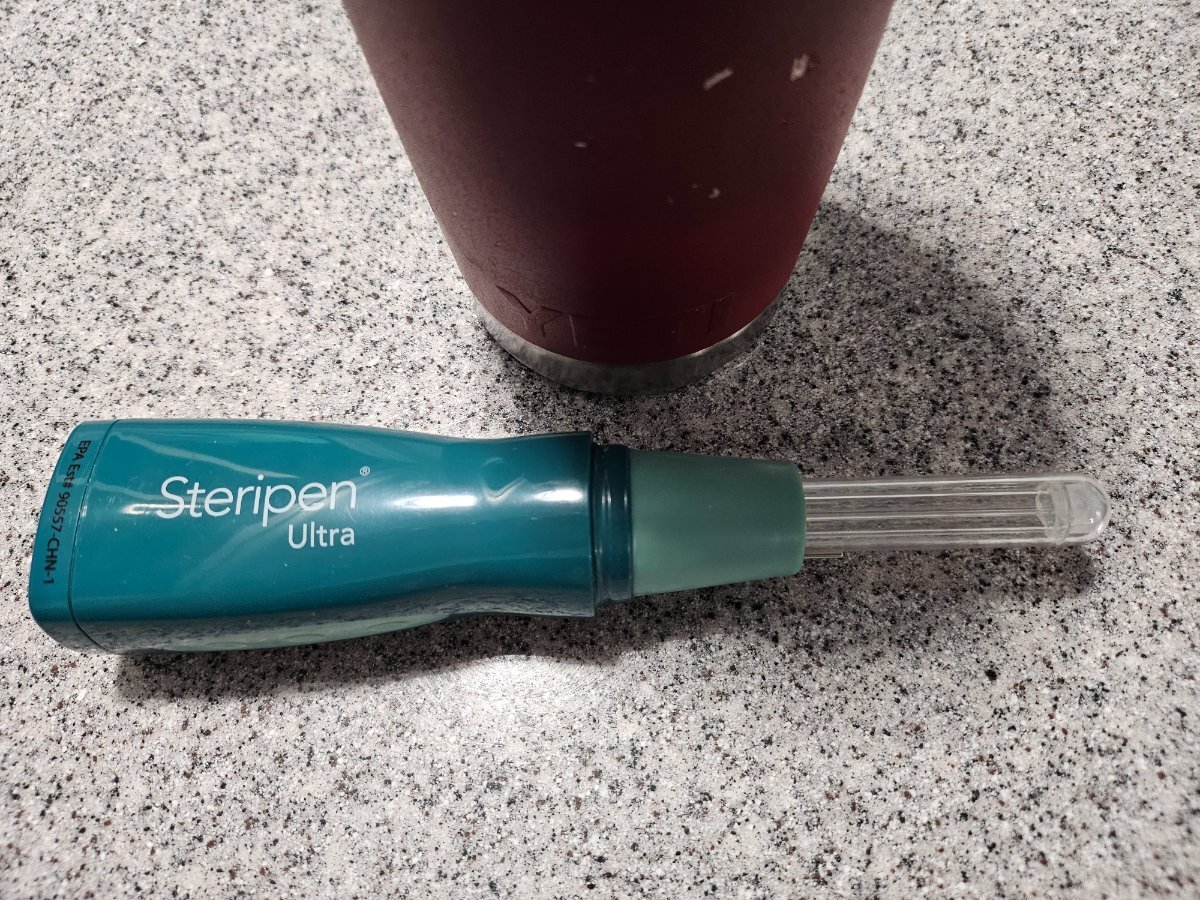
Yes I do. After sanitizing the water system before this year's walkabout, I used a hospital-grade water filter, the Ultra Mini, by Clearsource and filed and emptied the tank three times to remove any residual taste from the sanitizing process. We've been on the road for almost three months now and every drop of water that goes into the tank first goes through the Ultra Mini filter, which removes tiny bacteria, like Giardia and even viruses. Water from the faucet then goes through a BRITA pitcher. Tastes great. Weighing in under 8 pounds, it is very convenient to use.3 points
-
Yes, we drink and cook from our fresh water tank. I sanitize the tank if it sits for more than a month and use two water filters. Never had a problem.3 points
-
We have quite a bit of chlorine taste at the home tap. So all of our drinking water goes through a 3 gallon Berkey filter. I know that's not a purifier, but it at least tastes good. When travelling, we use the Berkey to fill eight 1-gallon square water bottles, as found at Wal~Mart. We bought them once, and have refilled them dozens of times. The square jugs fit nicely on the floor of the closet, next to a crate where we keep the Keurig and a counter-top pitcher. (Actually, a Brita pitcher, but without the filter, which we found *added* a nasty taste.) Eight gallons lasts us a long weekend. For extended stays where we will have access to water, I can refill using my home-made filter system. I just use the output hose to refill the gallon jugs. Or if no potable water is available, I can use my Lifesaver Jerrycan water purification system. https://lifesaverusa.co This is what we used when camping in the square drop before we got the Oliver.
3 points
-
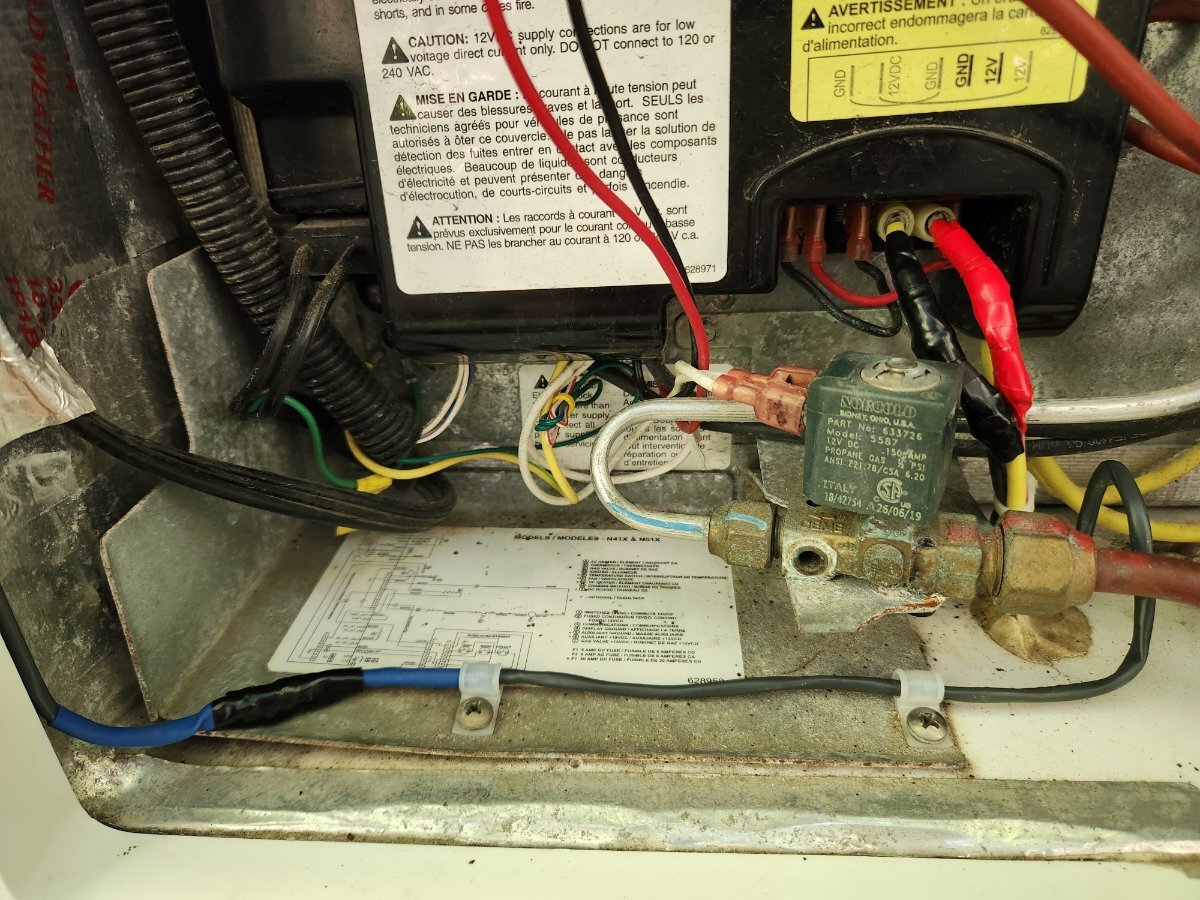
Forgot one. You can see the black & red power wires for the existing fan (mounted on the coil fins) rising vertically from the control box. Perhaps it is thermostatically controlled. I'd didn't bother to figure it out.
2 points
-
Here is a screenshot of the Pioneer sound level in DB in the Ollie. My friends phone showed 38 DB. He has the Penguin 2 on his custom rig (pictured) and he was amazed how quiet and how low the wattage is on the units.
2 points
-
Problem solved!2 points
-
Oh, the changeover regulator works fine, it's just the indicator that stops working. In essence, I just added a couple of new indicators for $30. instead of replacing the whole regulator for $75 and then have the problem happen again.2 points
-
From Seal Beach to Pinnacles NP, Yosemite NP, Crater Lake and then to Theodore Roosevelt NP. 9500 miles and the Ollie tagged along perfectly. Our longest trip and it was great. Stopped by the headwaters of the Mississippi and then 3 nights at Smokemont in the Smokies where I first started camping as a kid in the 60’s.
2 points
-
We just use the auto-changeover regulator. When the first tank runs out it automatically switches to the second tank and the indicator turns red. I check the indicator every day or two. When I see red I plan to replace the empty tank. Haven't run out off propane in 26 years.2 points
-
We use a Zero water filter for drinking. Before our water goes into our sanitized holding tank we use the Blu Technologies water softener and the 3 stage filtration system. They sell filters that claim you can use lake or river water if you want to. Yep we are water snobs.
2 points
-
Theodore R NP site 21 in Cottonwood
2 points
-
I use the LifeSaver Jerrycan water purifier for our drinking water, coffee and ice. Fill it and the freshwater tank before leaving on a trip, and on occasion refill the LS from the freshwater tank when traveling. If ever our home water in the freshwater tank is exhausted, I would not hesitate to use sourced water with this water purifier. However, we do carry Ozarka Spring Water as a backup and for convenient cold water stocked in our Dometic DZ portable cooler. If our Oliver is in storage for a couple months, the freshwater tank will be drained and sanitized prior to next use. I do carry the recommended Clorox in the event remote sanitation is deemed necessary.
2 points
-
That's a reasonable question, from a scientific perspective, I suppose. But, even if the answer is a hard NO, it's not likely to sway the argument in my household. 🤣 Our concern is more about taste (and maybe a bit of a YUK factor?). I can imagine us using the fresh tank for drinking only if there is some post-tank purification (like a fancy filter or RO or whatever). So far, I haven't come up with a practical way to pull that off.2 points
-
Yes. Never had an issue. Sanitized several times a season and especially if sitting for over 2 months. I never leave water in the tank. We use the On The Go Water Softener, which helps prevent any calcium build-up. We also use a high quality water filter, as post previously by Steve Morris (not the cheap blue Camping World Special).2 points
-
To my surprise, our answer has become NO. We use it for cooking and washing dishes, but not for filling our water bottles. Water bottles always get filled from one of 2 places: 1) Buy bottled water from the store 2) Some places (like certain visitor centers in national parks) give away GREAT water. In the truck, we have about 20 gallons worth of collapsible water "bags" to take advantage of this when it happens. I would love to stop doing #1. But my adorable wife is very picky about the taste of her drinking water. 😃1 point
-
Beautiful campsite at Joshua Tree. On the way to California leaving from Palmetto Ga. Spent 2 nights heading to Seal Beach CA to meet the kids and grandkids for a week of R & R.
1 point
-
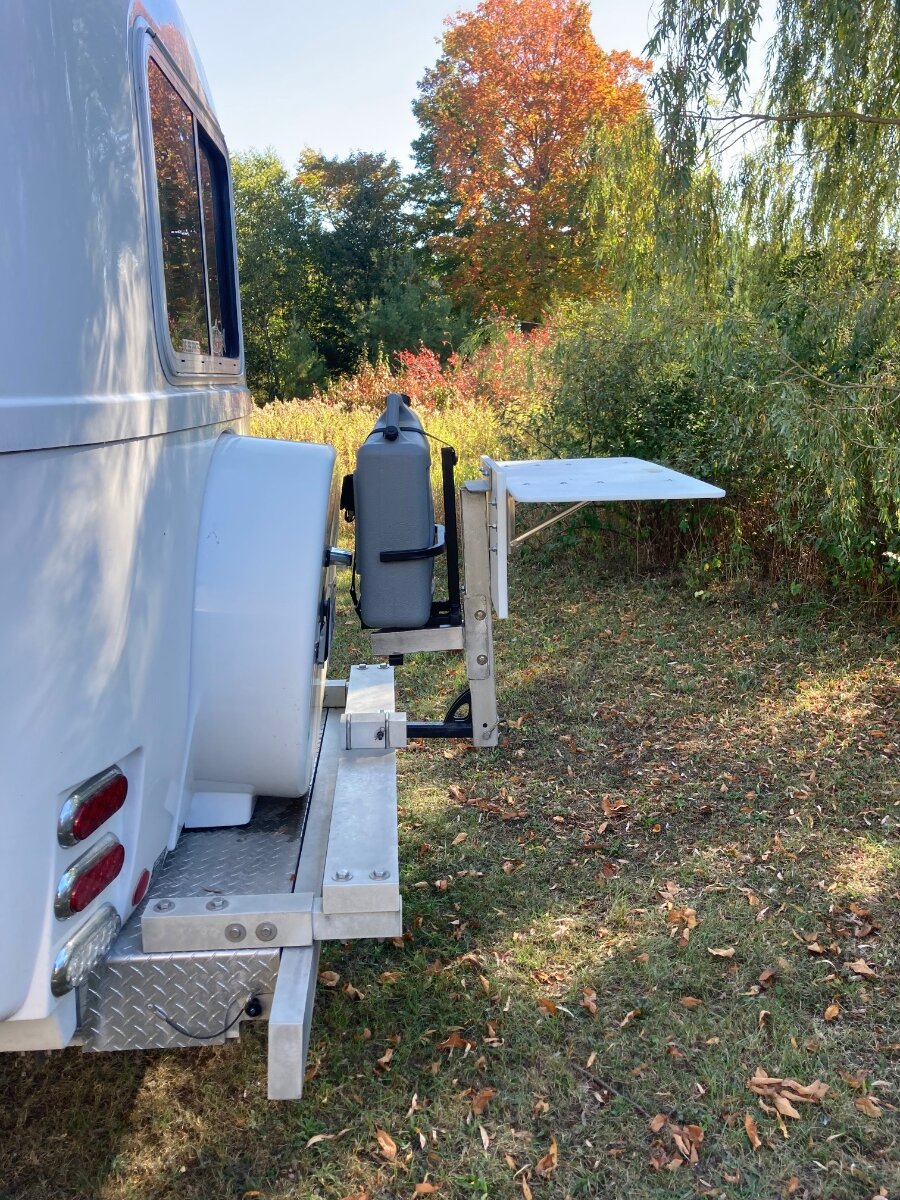
Ever since Oliver went to the compressor fridge I have been envious of the integrated table where the lower fridge vent used to be. Here is what I came up with for when I dont drag a bike along. It was built with what I had on hand, including a old bike rack, fishing cutting board, boat stern transducer mounting board and a broken dock leg. Plan is to add a lagun mount on the lower rear so I have additional counter space. Since the propane quick connect is in the rear this will be where I set-up the outdoor kitchen. Will circle back to provide update on how it works out.
1 point
-
Spent the night at Fish Creek Campground in Glacier National Park - Lake McDonald - 91 F yesterday. Heading to Alberta this morning. Can’t go through park on “going to the sun road”. They have a length limit on all vehicles, and Carlotta can’t make the cut. The campground is full, but very quiet. Last weekend before Labor Day. No decisions yet on where to stay. We’ll go to Coleman through Pincher Creek and see what people say. Great maps from multiple sources :https://cms.albertaparks.ca/parks/kananaskis/kananaskis-country/information-facilities/camping/camping-in-kananaskis-country/1 point
-
Using the auto changeover regulator definitely has its pros and cons, but not trusting it is operating as designed or deemed dependable is of dire concern to many. This is good advice regardless of the mode of operation, and key to ensure one’s propane supply never leaves you empty. However, stuff happens and my contingency is to carry a spare cylinder and regulator.1 point
-
I’ve been plugging the power cord into the outside trailer outlet when on shore power and into a Jackery when not. I just coil the power cable so that it fits in the cut out in my case. The Ethernet cable for the mini router sits in there, too. The dish sits on top. The case was from Amazon, not expensive but got great reviews and has worked well. Cut outs for the mini, mount, power plug, mini router and cables.
1 point
-
The GasStop has a ‘purge’ feature, which is an important first step when opening a cylinder tank valve. By pressing the pressure gauge several times, the lines are re-pressurized and the internal automatic safety shut-off valve is reset. Just opening the tank valve without purging will not get the propane flowing again. Many have experienced when first opening a tank valve that an appliance will not light and thus, encouraged to go inside the Oliver and turn on the cooktop until there is a flame; basically purging air out of the lines. However, I find this procedure unnecessary since installing these GasStop devices.1 point
-
Crater Lake and Yosemite also! Nice trip. Were the California Condors hanging in the trees above the Pinnacles NP campground? Keep an eye on the big tree on the ridgeline above the campground - its the one with the green below it from all the Condor poop. They often hang out there. We got treated to a show put on by nine of them a couple of years ago. Kind of makes you hopeful when you consider they were near extinction just a few short decades ago.1 point
-
Ray, it looks like you've been a long contributor over at airforums. Can't see why that can't be the case here as well. It seems to me these brake threads just got too personal. Believe me, I know how frustrating troubleshooting can be. My wife will tell you I can be a bear to be around when some device is defying my efforts to make it perform as it should. Leave if you feel you must, but consider sticking around. Now that your brakes are working you can get out there and share your BoondockingOliver stories with us. Safe travels.1 point
-
OK folks, let's all relax and get back to normal 'decorum on the forum'. Different approaches and solutions to confounding problems are understandable and toleration of different approaches is encouraged. The forum Guidelines state: You’ll find a wealth of experiences here, and many owners willing to share their experiences. Have fun, but please keep others’ viewpoints in mind. Respectfully state your point, share your information, or ask your question. Keep it casual and friendly. Reread your post before you hit submit. Is it helpful? Thoughtful? BoondockingAirstream, so glad your brake issue has been resolved. Your towing safety is paramount.1 point
-
Beech Lane attaches labels to both sides! Look at the two photos I attached, and Ron's, and note the side where the wires are showing which is the exhaust side. When you look at the my first picture and Ron's you see the wires and the fan bracketing (the exhaust side). My second picture show just the fan blades, with wiring and frame on the back side. I did not realize these were "designed to be in the lower cabinet." I must have missed that as I'm not one to carefully read instructions vs. just start installing parts! 🤣 My thought when installing was exactly what Ron stated here. I also tried the additional interior fridge fan that Ron suggested, but returned that one as I could not measure fridge interior temperature improvement, it took valuable fridge space and you could hear the fan when sitting at the dinette. Geoff ended up with a superior installation with his great knowledge of wiring sensors and switches. The Beech Lane control box, although I installed it in the interior cabinet above the microwave where the LEDs are not visible, you still have to reach in there every time you turn the fan switch giving it power. Correct it will not remember a previous setting when last powered on. I do not use its temp sensing function, even though it's wired for that. When camped on a hot afternoon, I will turn the panel switch on and then the fan to 50% speed on the control box (the lowest speed setting) and generally I hear the fan running after dinner or before bed and with the panel switch turning it off is easy! It appears in Geoff's installation the fan is powered by temp sensor where ON/OFF is automated! 😂 I was able to feed wires without removing the microwave which is a bit of a trick! DC power is located through the bottom vent and it's easy to feed new wires to the upper vent. Then I poked through the upper insulation with an electrician's steel fish-tape to push new wires to the panel switch. With a curved section of fish-tape I was able to follow the curve of the hull up into the cabinet above the microwave for the fan control.1 point
-
@Ronbrink Yes! That's exactly what I said! However, the Beech Lane fans blow inward the with label on the outside (at least the ones I bought). This would be the right direction if mounted in the bottom vent as intended by design, but the wrong direction if mounted in the top vent. Cheers! Geoff1 point
-
I felt the same way until recently. There could never be enough cold water, with room in the fridge for at most 6 water bottles. We make ice too, but for drinks other than water. I long pooh-poohed the idea of an extra fridge, but it makes all the difference in the world to ALWAYS have fresh cold water! We keep 1-2 of these pitchers full in the outside fridge and one inside. When the inside one empties, I bring in one from outside and refill one so we always have one cold in and another cold one outside. Another 6-8 store-bought water bottles outside too for anybody who needs one. Now I'm getting thirsty! It's how we roll. 🤣 https://www.amazon.com/dp/B08VFK4WS6/?th=1 https://olivertraveltrailers.com/forums/topic/11018-dometic-cfx5-refrigerator-tow-vehicle-installation-with-solar-power/1 point
-
I like cold water too to drink so I freeze ice cubes in the freezer and pop out a few in my glass then add the room temperature water from our jugs. I will pop out the rest of the ice cubes and put them in a quart freezer bag. I then make more ice for later. It's worked for me. Jihn1 point
-
No drinking or cooking from on board water tank. Wont even use it for filling pet water dishes.1 point
-
We don't drink from it at all, but we do cook if the water will boil. We have a 5-gallon water container in the truck bed. The challenge we face is that we prefer cold water. While the refrigerator can hold more food than we anticipated, we don't have an effective solution for keeping cold water on hand. We often forget to fill small plastic bottles and put them in the refrigerator and like our bigger Stanely-style water containers.1 point
-
We had a great visit to Crater Lake National Park in Oregon. We stayed at Mazama campground, which is pretty large (6 loops), mostly no hook ups except for a dozen or so electric sites in loop F. It’s about 6,000 feet elevation, temps this week were low 40s at night and mid 70s during the day. Not bad for August. It’s been 100 degrees back home in Texas this week! There’s a nice camp store and lodge close by with a nice gift shop and restaurant (we didn’t utilize). The lake itself is pretty awesome. It’s the deepest lake in the US, almost 2,000 feet. No inlet or outlet, fed only by rain and snow melt (44’/year). The movie at the visitor center was interesting and explained in detail how the crater was formed. We did a hike part way around the crater, which is at 7,000’. Our campsite is a short pull through on a one way road that put us on the wrong side for this type of site. Our door opens to the street and we have everything else on the other side. All of the pull throughs on this side of the street have the same issue. Not a big deal, just a bit tight maneuvering in to the site.
1 point
-
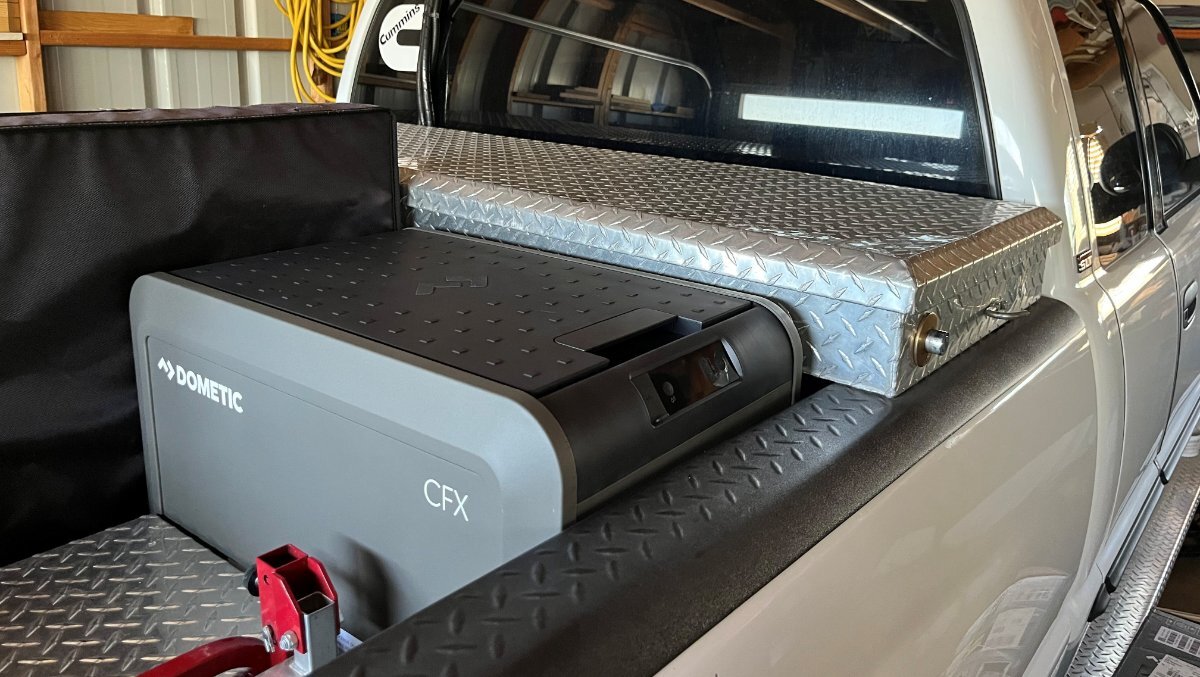
After deciding on which model to buy, what size would fit, and whether to go single or dual zone we went with the newest Dometic model CFX5. The single-zone 45L model fit perfectly in the front curbside area of the truck, behind the toolbox and in front of the wheel in arms reach from the passenger side truck door, so convenient holding cold water and food while towing! I built a stand to fit the cooler above the corner of the wheel well and bring the control panel to the proper height, just above the truck rail. Notice one stand support is cut short to clear the wheel well. There are four 6mm threaded sleeves built into the bottom of the fridge to hold it down. I let the refrigerator sit for 48 hours after having it sideways when mounting the platform. It looks very good installed, doesn’t it?
1 point
-
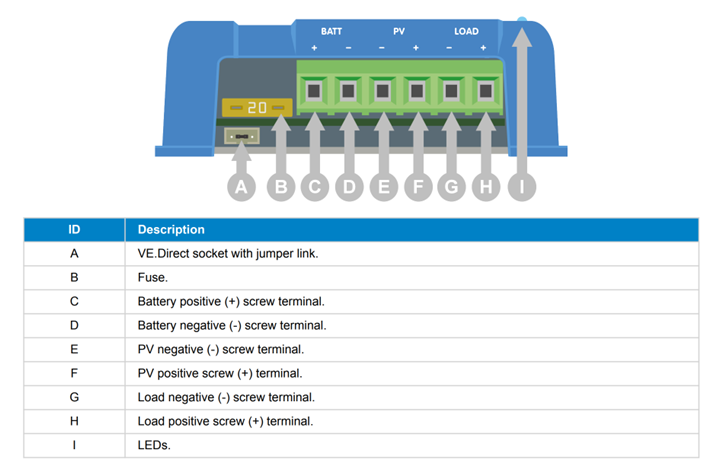
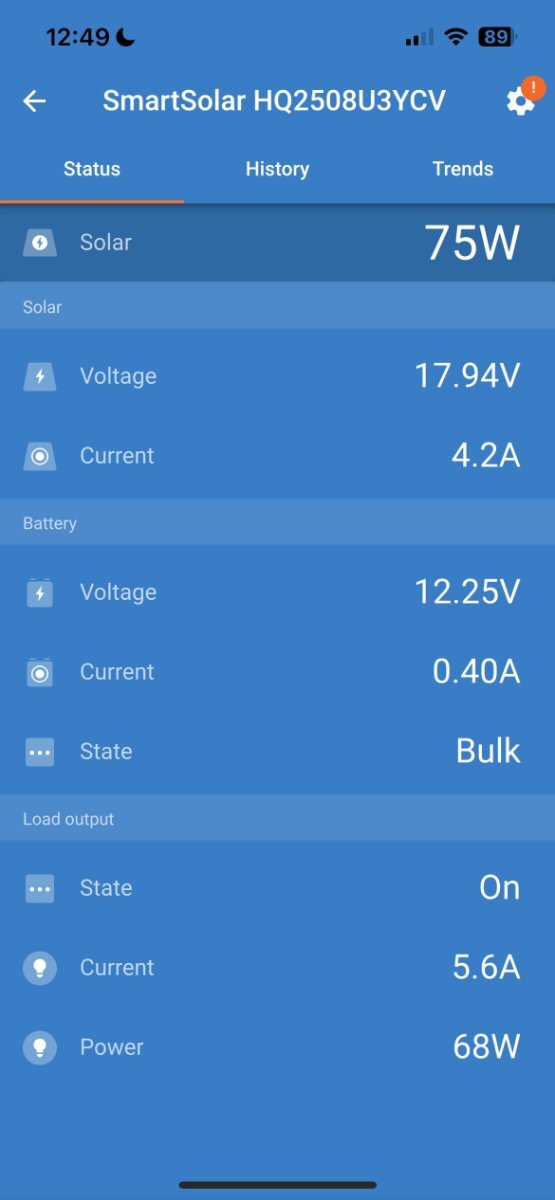
I’m really happy with the results! The 100W panel is regularly getting 70W, during the day, sitting flat, not angled to the sun. When getting high of 75W it handles the 5.6A required by the CFX5 with compressor running (observed 0A with compressor OFF, 3.7A lowest reading with compressor running and 5.6A highest reading), plus another +0.4A charging the TV starter batteries. This adds to 6A provided by solar. The Pepwave router was also running behind the scenes and it draws +/- 1A. This particular Victron SC has a terminal for 3 pairs of wires (see graphic). One pair for the battery (BATT), Solar Panel input (PV) and LOAD an output circuit. I thought this is a handy extra. I could have wired the CFX5 cooler to battery, but this LOAD circuit allows for special monitoring (the Pepwave is wired directly to the batteries).
1 point
-
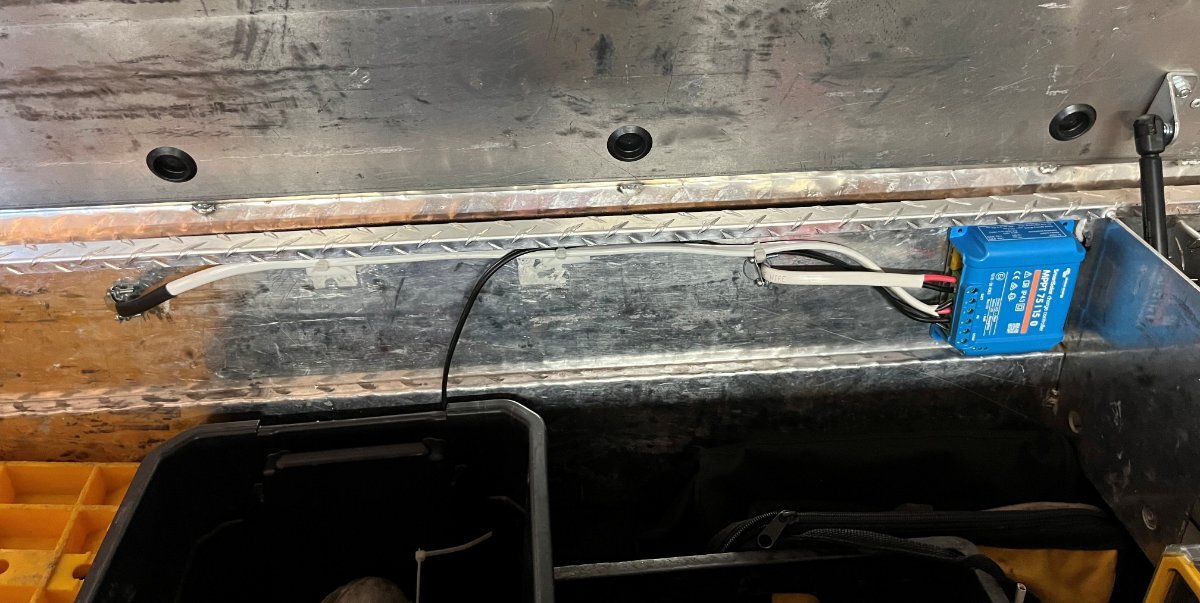
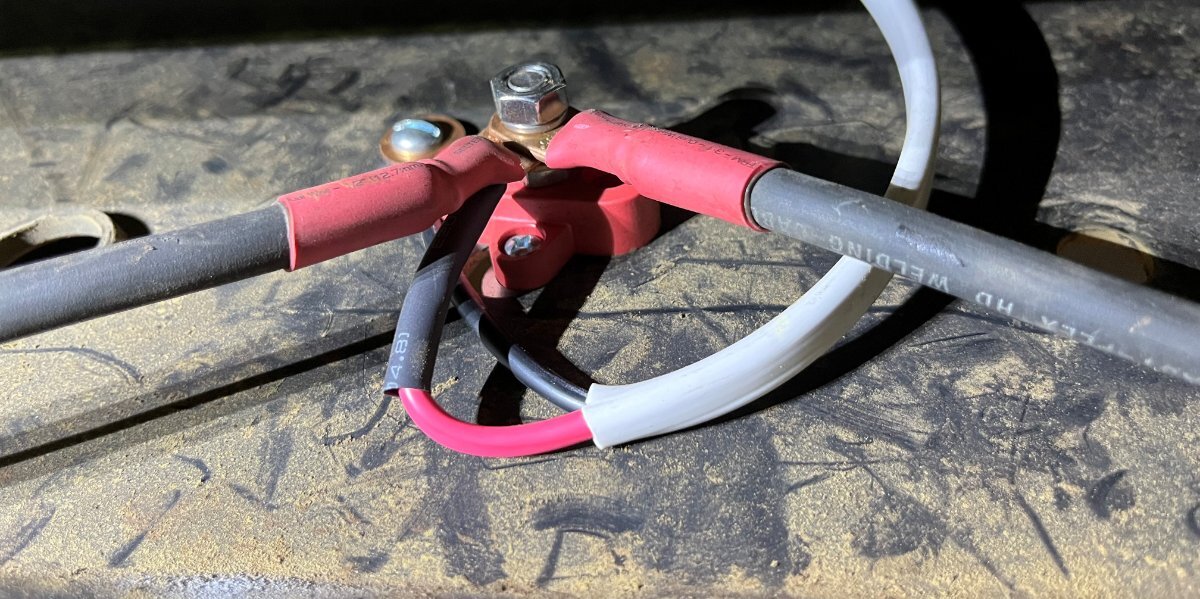
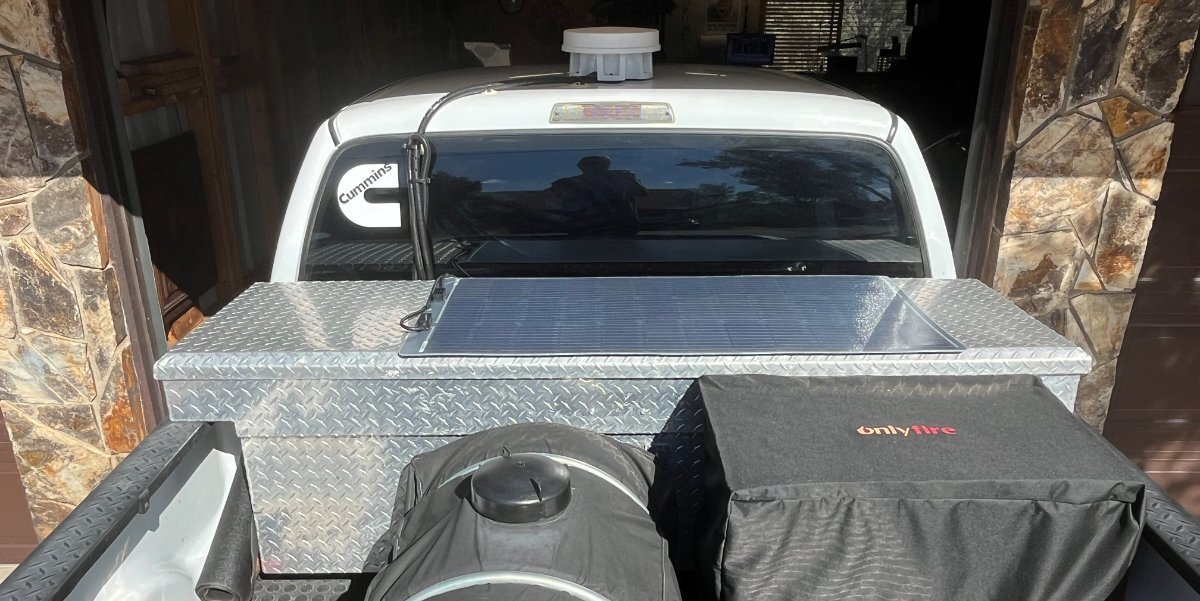
I came up with the idea to add a 100W Renogy flexible solar panel and a small Victron MPPT 75/15 SC. My goal was the solar energy should be enough to replenish the truck starter batteries while running the CFX5 refrigerator and our Pepwave router system. I had already upgraded the TV with a HO alternator and AGM batteries. The solar addition should keep my TV starter batteries fully charged, except in the mornings after running the router and fridge without sun overnight. After a few hours of late morning sun fully charged again. I have a spot in the bed where I could mount a second solar panel if needed. Those of you who have a truck cap should mount 2-3 of these 43x23” Renogy flexible panels in a heartbeat! I will share links for components used in a later post. I got the installation done Friday. I deleted the solar wire terminals and used butt crimp connecters and heat shrink adding a few feet of flexible 10/2 wire (left cable in the picture). The black wire pair is coming up through the bottom of the toolbox from the cooler. The short wire on the right exits the toolbox and goes stgright down to the frame where I intercepted the 4AWG wire from my DC2DC charger installation adding a simple single bolt buss for lowest possible resistance. Yesterday I thought I should trim the panel narrower. The Renogy panel is 23” wide and the standard truck toolbox is 21”. The job would have been easier if I had trimmed it before mounting it, but it came out very nice with a little extra effort. I used a boxcutter and a 1 1/4" bracket clamped to the edge of the panel and trimmed that amount off both sides, filing the edges smoothly afterwards. VHB tape was used to mount the solar panel to the toolbox lid and to mount the solar controller inside the box. I also purchased an inexpensive waterproof grill cover to protect the Dometic CFX5 cooler. They make an insulated cover for about $150 but I wanted more airflow than insulation and wanted a cover that would easily come off and on. I have a 1” piece of Styrofoam inside the cover to insulate the top from direct sun.
1 point
-
We took a 5-day trip and we absolutely loved having the extra cooled water and fridge space. On our way back home we stopped at a butcher, removed the drinking water from the fridge and set the thermostat down to freezer temps. It kept our steaks, chops and hamburger meats nicely frozen on the way home. On our first trip, I had 12VDC from the truck batteries wired to the fridge to run while driving. When camped we merely plugged in the fridge using a 110V extension cord plugged into the Oliver. The 110V connection will override the 12VDC, so you can have both wired to the CFX5 (not true in earlier models).1 point
-
That’s a great setup you have created. I will have to try your recommendation of using the outdoor shower during the Summer months as I keep the trailer Winterized during my Winter camping from Dec-Mar.1 point
-
I set up a dedicated table at the garage and use the outdoor shower for a hot water wash and rinse; tub, dish drainer, soap, sponge and shower head holder all kept within easy reach. Maybe you could extend the hose to reach your table when used as a wash station.
1 point
-
Progress today. Got the water jug mount bolted on. Likely will not be used to transport full jugs, rather as a spot to place my Dometic Go water jug and usb faucet for washing dishes. Jug rack has been moved farther rearward to gain additional clearance since taking this picture.
1 point
-
This Spring some of my graphics and the trailer decided to part ways. Some of the graphics just stopped adhering to the hull. This is what is left. Its like the adhesive just evaporated underneath the vinyl.1 point


.jpg.623219bf7c8f2451bf2d4fa8240146c9.jpg)


-
Recent Achievements
-


")


")


")

