Leaderboard


Popular Content
Showing content with the highest reputation on 10/01/2025 in all areas
-
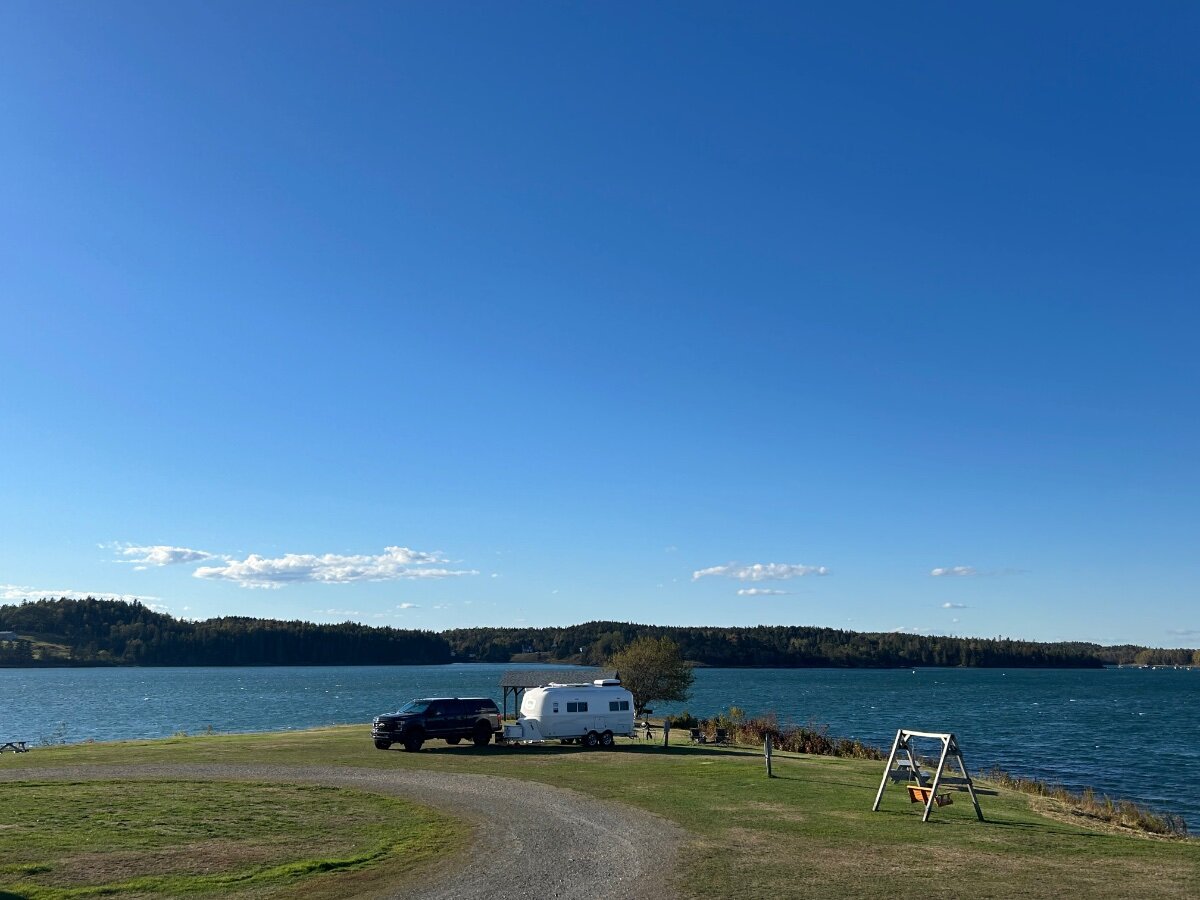
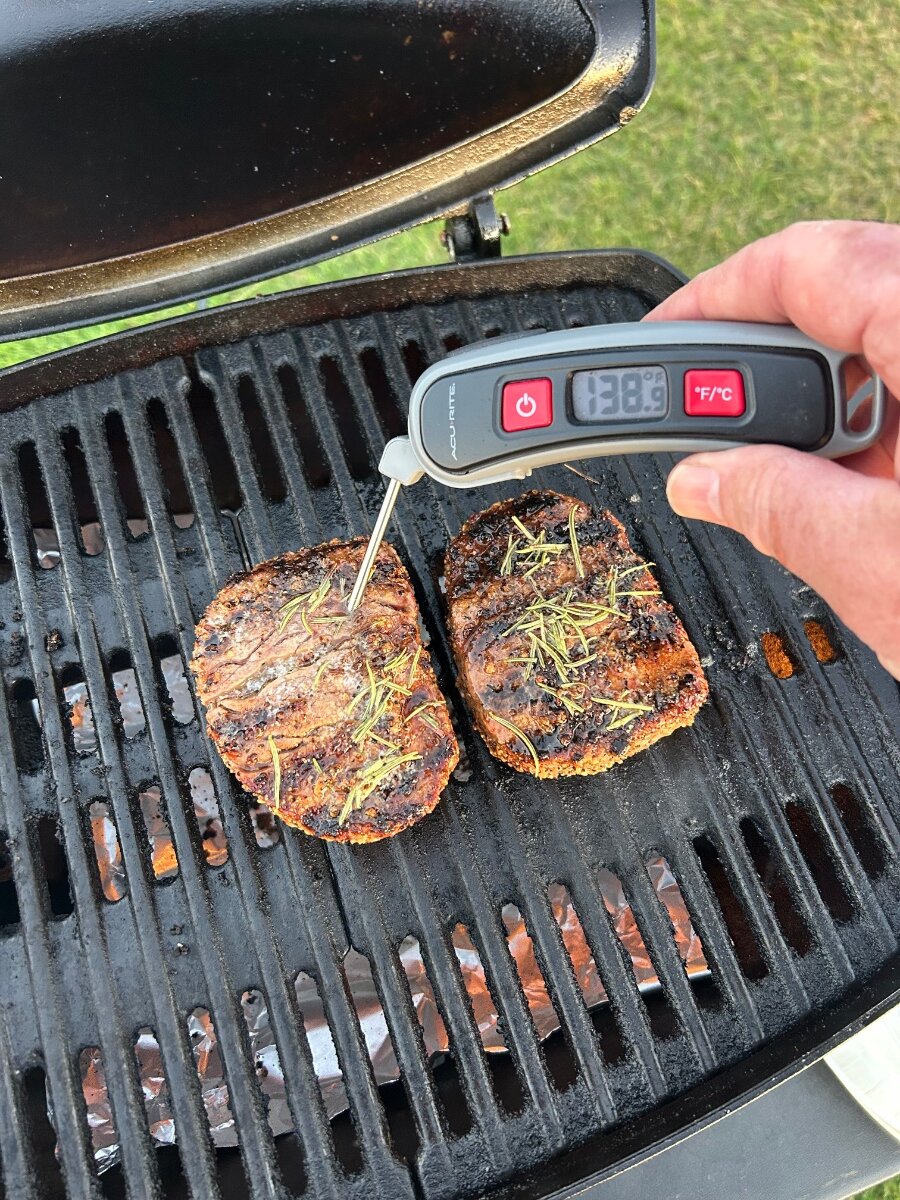
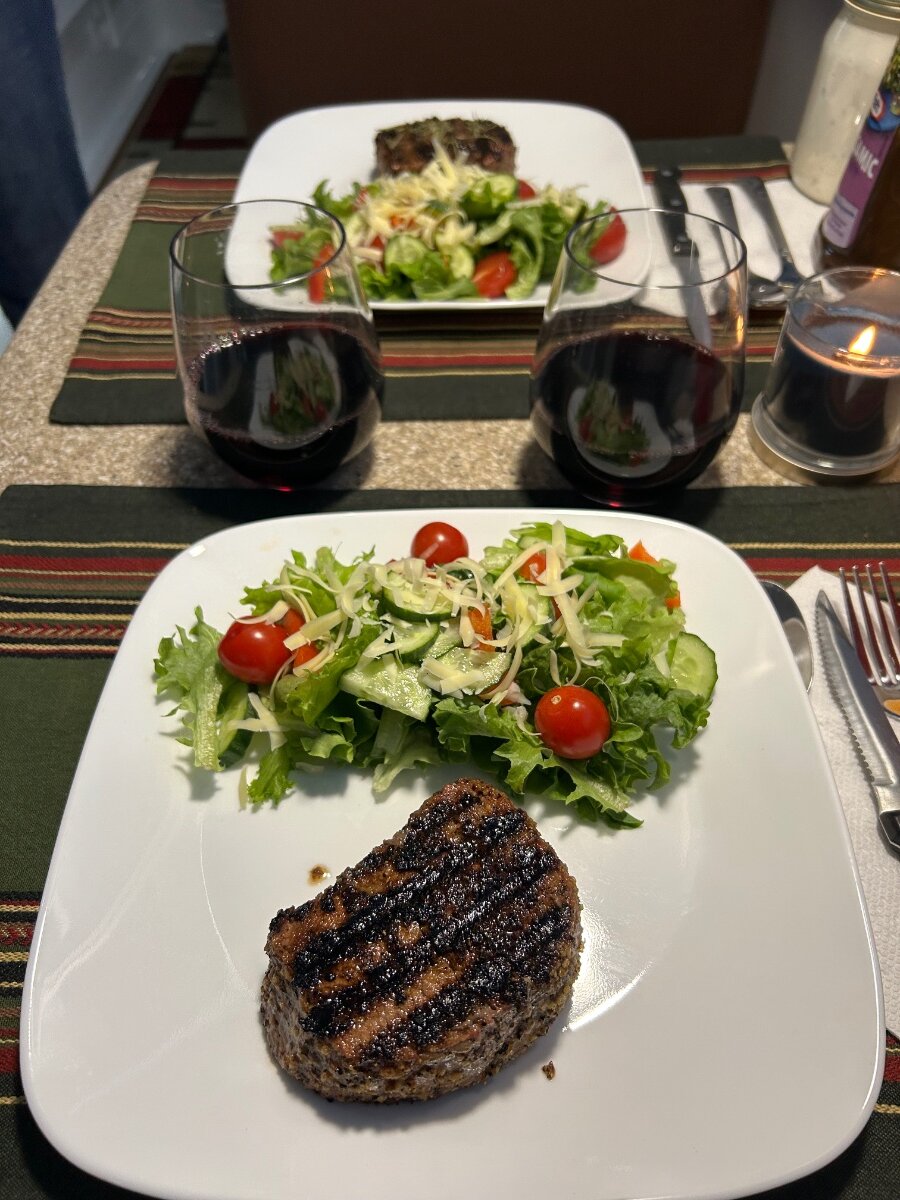
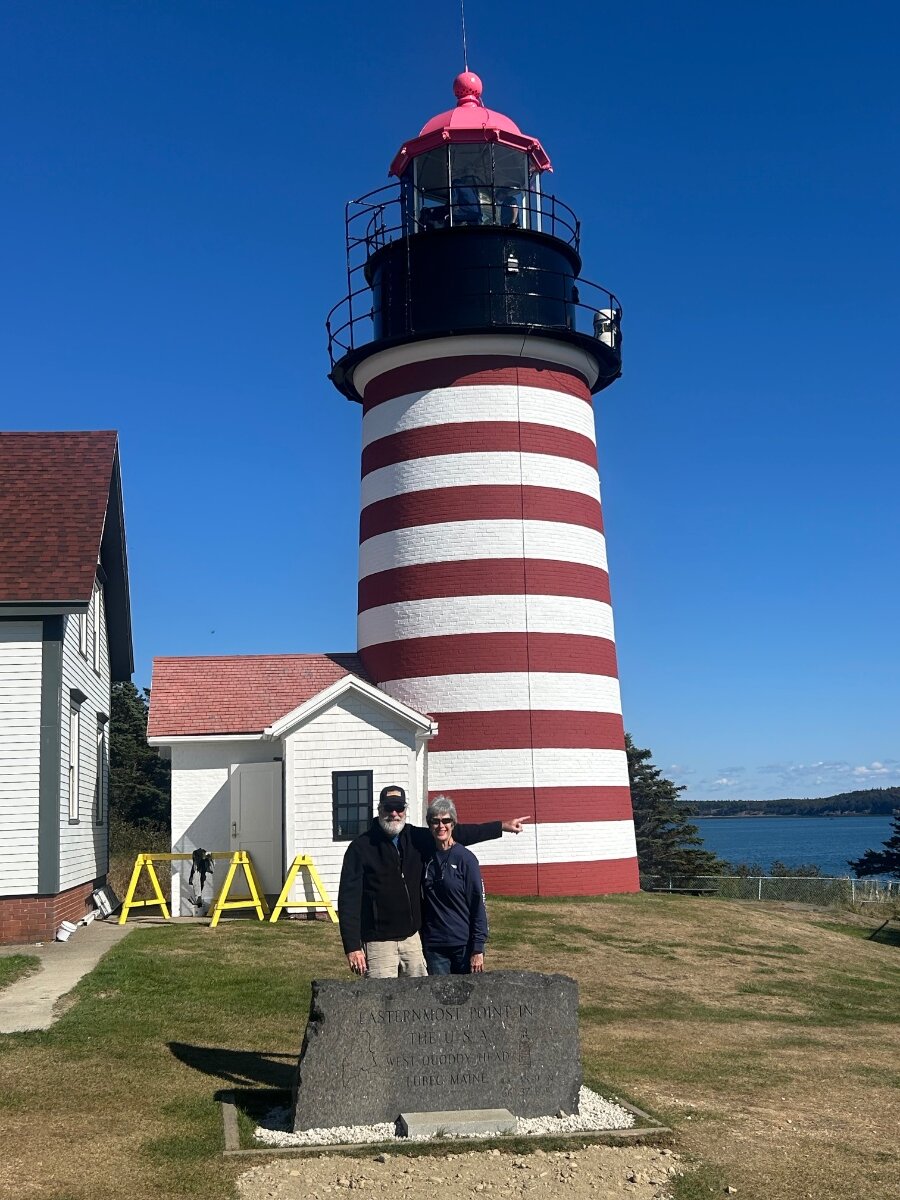
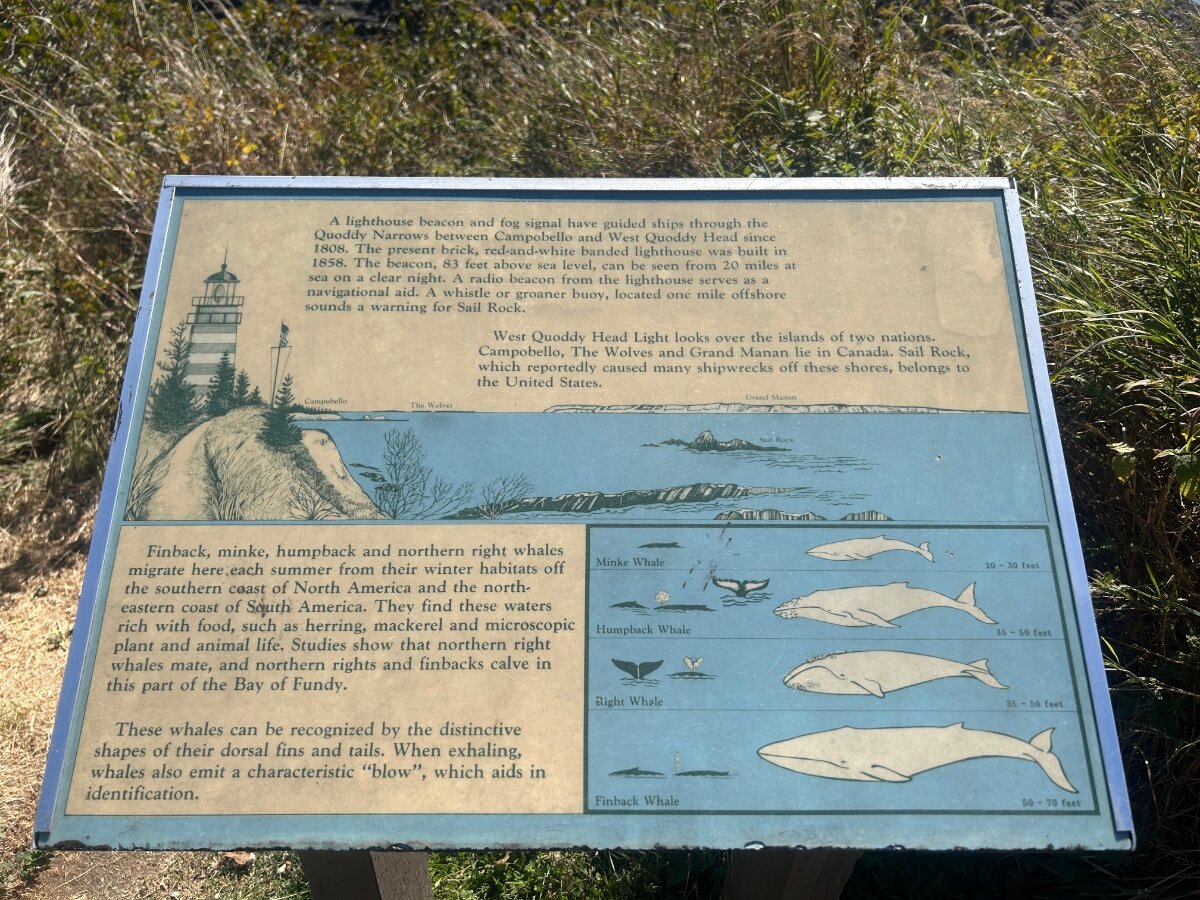
We like this place so much we extended for a week. If we were any closer to Johnson Bay we would be in the water 😄. We are looking at Canada. The waves crashing on the shoreline here make it pretty dreamy when drifting off to sleep with the windows open. Our Weber Q1200 busy with the beast. Plated..at 138d West Quoddy Light house which was freshly painted. It can be seen 20 miles out at sea. IMG_4206.mov
 6 points
 -
Great news!!!!! Oliver (Jason Essary) called me and offered to cover the BBQ which I accepted. What this means is those of you that paid for their dinner will be reimbursed. Please extend thank yous to Oliver Travel Trailers for their generosity. There is still a cost for the hall rental and the music at the potluck which comes out to $12.00 per campsite. Paula and I discussed how we would handle this and have come up with this: The money we will be reimbursing will be less $12.00. those that paid for 1 dinner will get $13.00; those that paid for 2 will get $38.00; those that didn't pay for dinner please bring $12 so Paula and I may be reimbursed for costs we covered.3 points
-
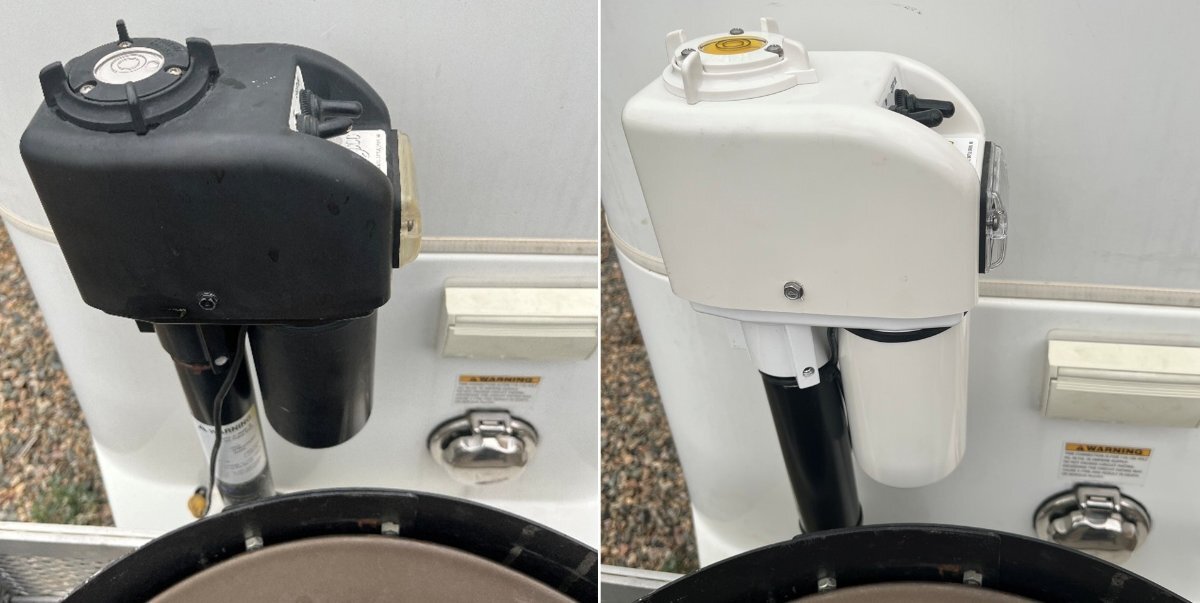
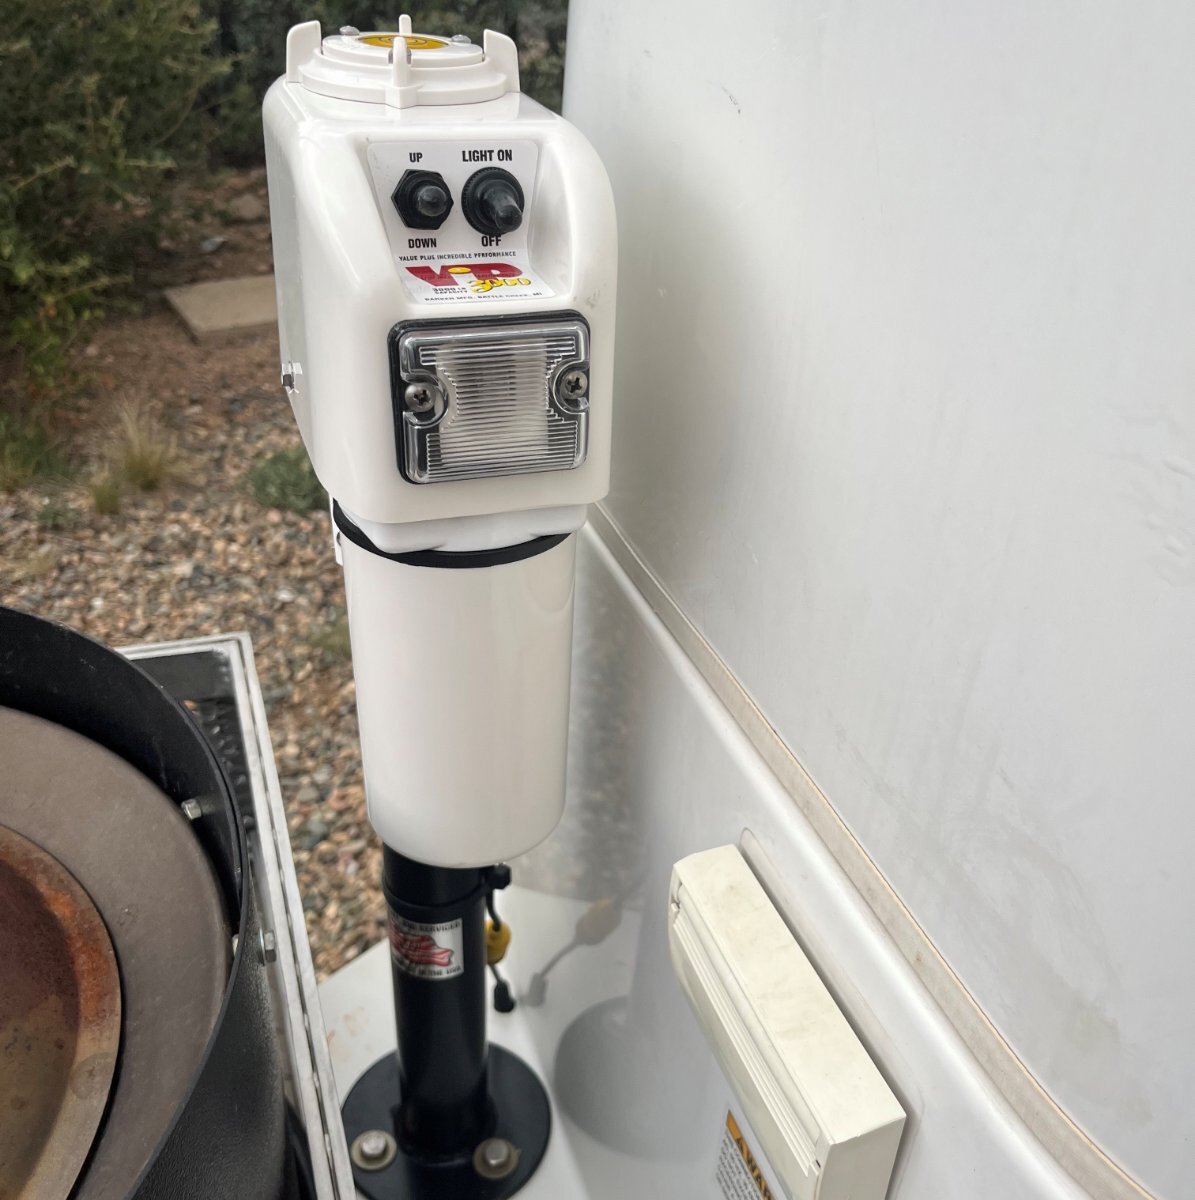
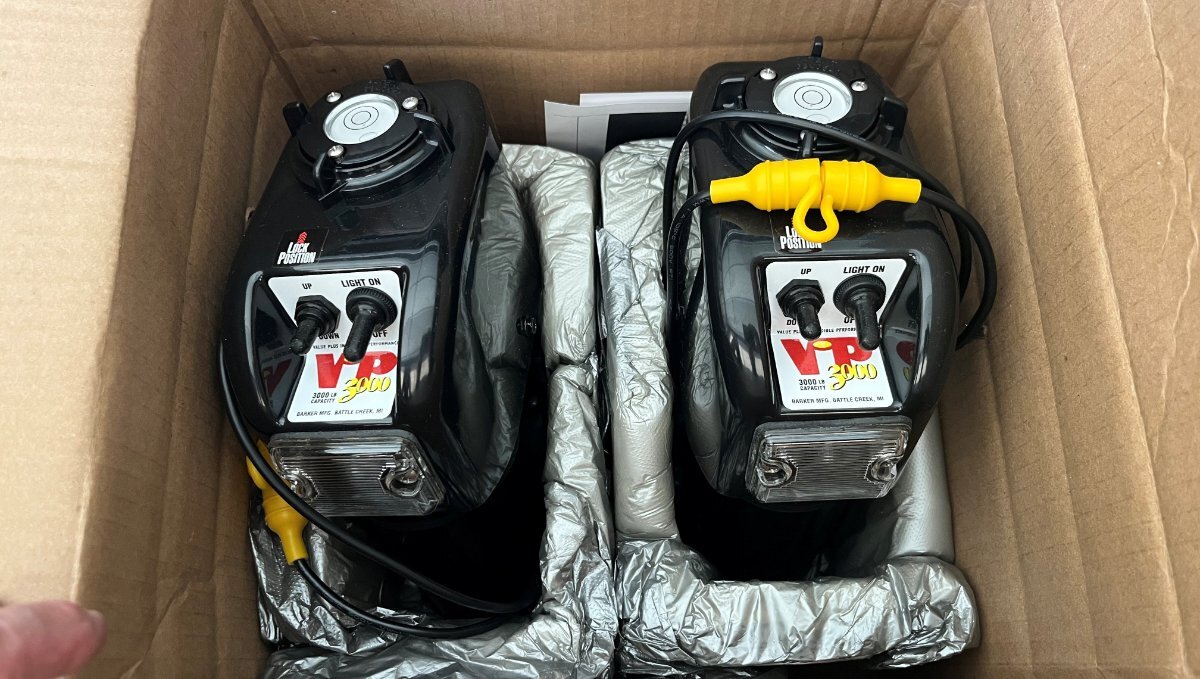
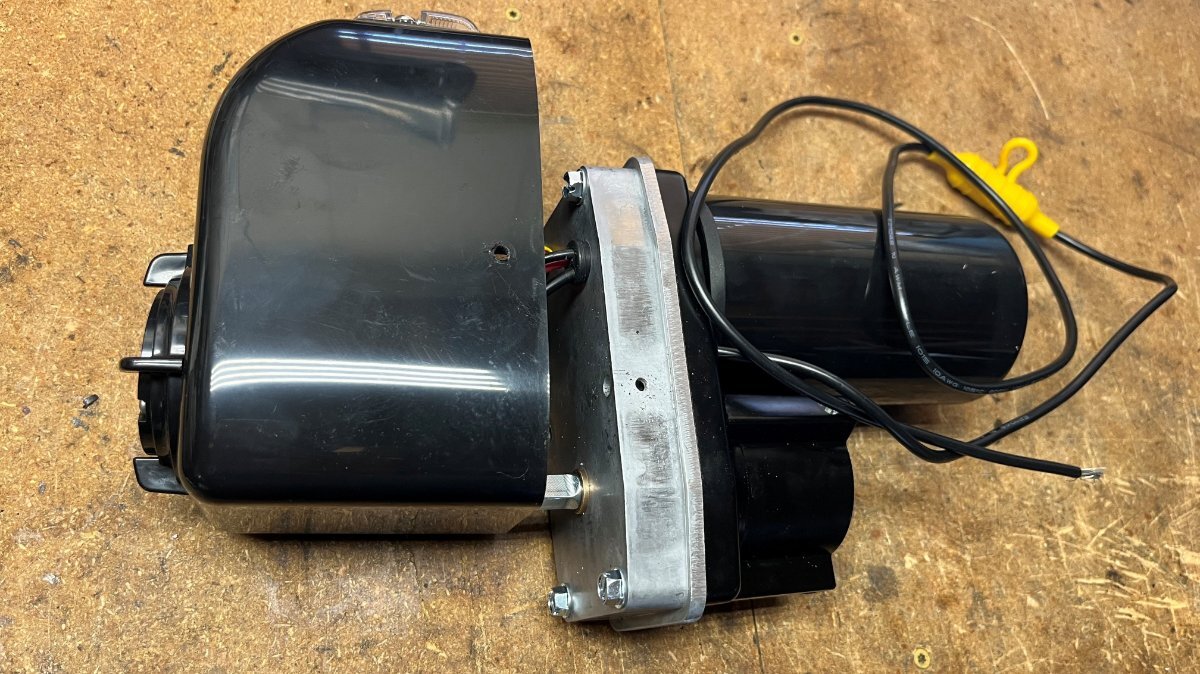
New motor heads, rebuilt post assemblies, all parts cleaned and painted and I'm ready for assembly! It's not easy to get the posts out and back in. To get them out, I removed the motor heads first, removed the long mounting bolts and used a hydraulic jack to break the old caulk bead pushing the post up. You could do this with the stabilizer jack itself if the motor heads clear the fiberglass of your bed platforms. Ours has 1/2" clearance on one side and only 1/8" on the other. OTT could cut the basement opening 1" further to the rear so that we have proper clearance, but it is what it is! 🤣 Put new butyl on the posts where the old markings showed the correct position. One is likely enough, but I ended up using two strips of 3/4" butyl on each post. Afterwards you can pushe the excess butyl down aring the post. You really have to cock the post on an outward angle to get it past a mounted support on the frame. Then get underneath to mount the nuts on the long carriage bolts. The aluminum bracket should be pushed in to support the post. Some thread locker on the bolt mounting the foot and all done in working these steps, now looking pretty good! The reman motor heads are standard VIP 3000 heads, meaning they are wired through the top vs. at the motor bottoms. Cut off the heavy gauge wire on both sides top and bottom as these are not used. The two lighter gauge wired, red and black are what is wired. Before crimping make sure the switch runs the motor in the proper direction. If it's running the wrong way swap the wires. I need to add 1 ft lengths of 12 AWG wire to reach the tops.
3 points
-
We live in Ohio and winters are very unpredictable. The first winter I left the batteries in and turned on the heating pad, moved Oliver to the horse barn, non hearted but doesn't get real cold. After the first year I just started unhooking them and bringing them inside. It is not that hard to remove and re-install them. I color coded all the connections, took pics, all the overkill you can do to make sure I put them back correctly. Now if it gets real cold for some period of time I am not worrying about power going out and the battery heating pad not working. House has generator, also way better insulation than barn. I did call Lithonics a few times and they were always very responsive and helpful. Just the way I am doing it now.2 points
-
@Boudicca908 The man made mounting material or as I refer to as PVC, does not hold screws or threaded fasteners very well when using the same size fasteners as were original installed. I would suggest removing one of the existing screws and then finding the same type of screw that is one size larger. I think they are common pan head screws and installation and removal can be accomplished with a Phillips screwdriver. Some type of adhesive may help, but anything like epoxy may make removal difficult. So if you do use an adhesive, use it sparingly. You can always add more the next time. Mossey2 points
-
@jd1923 If you care - get yourself a cover for that new jack - the white ones yellow badly after a year or so out in the sun. Bill2 points
-
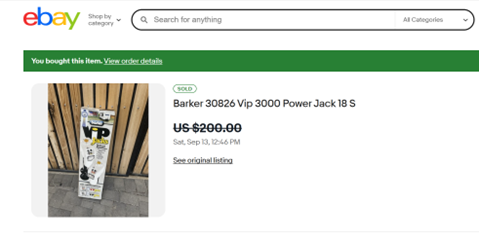
While I was online searching for VIP 3000 motors, I ran across an eBay auction. The listing was for a new-in-box VIP 3000 30826 (in WHITE)! Some of you know, I do have good luck in finding deals when it comes to my projects! 🤣 The eBay auction was for $250 plus tax and shipping but it also had the "Make an Offer" option. I offered $200 and he took it. Was $258.60 OTD? These are $500+ retail!
2 points
-
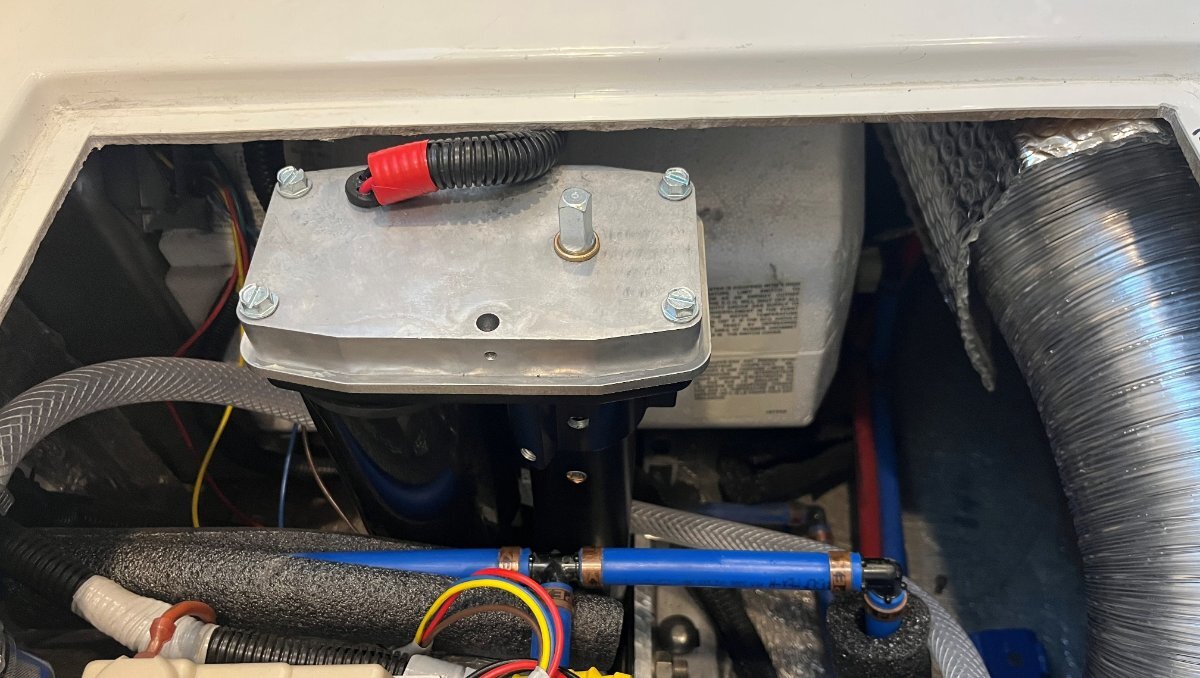
The failure on the rear curbside jack started with a clicking noise, the jack slipping not lifting and I could hear the motor slowing too. The worm-drive gear is connected to the motor, so the motor needed to be replaced. I figured I would rebuild both sides with new parts. Looking online it's near impossible to find these motors. I had the part number provided in the Barker VIP 3000 installation manual. I called Barker to see if they could provide an online retailer. A few minutes on the phone with Donna at Barker and she informed me that they sell remanufactured motor heads for only $75! I found some online listings at $150 to over $200 for the motor alone (but TG they on back-order)! I ordered two heads over the phone with shipping $185 total. Look at these beauties! Need a need front motor head? Call Barker! Three Allen screws, plug in power to the fuse and you're done in 5-min! Do you pay somebody to work RV service for you, like servicing jacks? You can replace the head for less money, new gears nicely greased, the switches are all new, shiny plastic casing - nice!
2 points
-
Do you live in a freezing climate? Will you keep you batteries heated? Will you keep your rig plugged into shore power? I would research those questions first. Lithium batteries don’t like to be charged in cold weather. You may want to remove your batteries for winter. I have kept mine in but monitor throughout winter for right temperature. As far as the Calmark cover, you can loosen the straps and lift the cover to get into the battery cabinet. It’s a pain especially in winter. It would be nice to have an access zipper flap added.2 points
-
Bessie....for our Dads...Bob and Wes...and the result is our lady Bessie :)2 points
-
Shawna and I will be there. Looking forward to it!!!1 point
-
Agree…this is the one I got that’s specifically for the barker jack. https://trailersphere.com/products/clever-cover-forbarker-jack-the-wenatchee1 point
-
For the couple of times during the winter months that you may want to check on the batteries I'm guessing that the price that Calmark would want to install an access flap would be a bit high. Living in western North Carolina, our temps don't usually get very cold for very long. I do not charge my lithium batteries from the time I put it to bed until about a month before I wake it up in the Spring. When I wake it up, I simply plug in a small (25 watt) solar panel and leave it that way for a month or so. Then when I uncover the trailer, the batteries are fully charged and ready to go. Bill p.s. But, as aaronorange says above - you should answer the questions he proposes before you decide what to do about your cover.1 point
-
@jd1923 John, as expected another amazing retrofit/job by you! 👏 🙇1 point
-
There are always some that say you can't do stuff when often you can. I would search the GM/Chevrolet and Duramax forums. Also, Dill tech support may know something.1 point
-
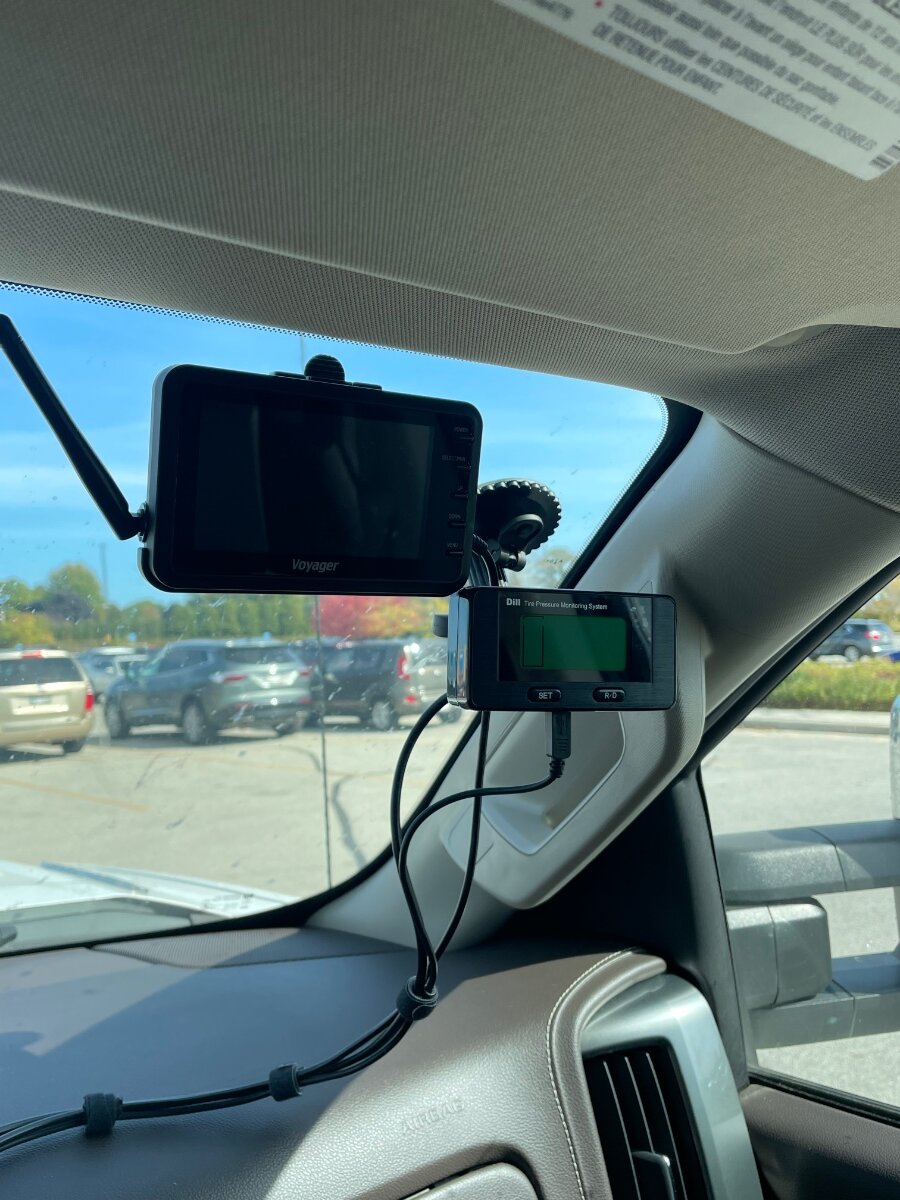
@jd1923Yes Sir, the app displays pressure and temperature. I really like the Dill system but I want to do away with the windshield display. I’ve been studying the internet and my truck’s RPO codes trying to come up with a way to display the trailer sensor feedback on my 2019 (built August 2018) Duramax Infotainment System. I have the I06 radio and the Z82 towing package but I don’t have the additional RPO’s to do what I want to do. Some information online says that you can’t add the stuff I need but I’ve come across discussions in forums that say that you can add add stuff after production.
1 point
-
I usually ask service to check my TV spare condition and pressure when I go in for tire rotation — and most recently, I requested it when I replaced my TV tires. HOWEVER, when the tires were replaced, and they checked my TV spare, something happened, and it triggered issues: Warning Messages on the dashboard alternating between “check trailer wiring” and “trailer brakes connected”. I will start a new thread for this, when I get it resolved — but just wanted to make a note that there’s a control module (computer) located somewhere near the TV spare — so be aware of that. **I don’t want this comment to distract from the main thread.**1 point
-
I for one, miss your contributions to our Forum! 😂1 point
-
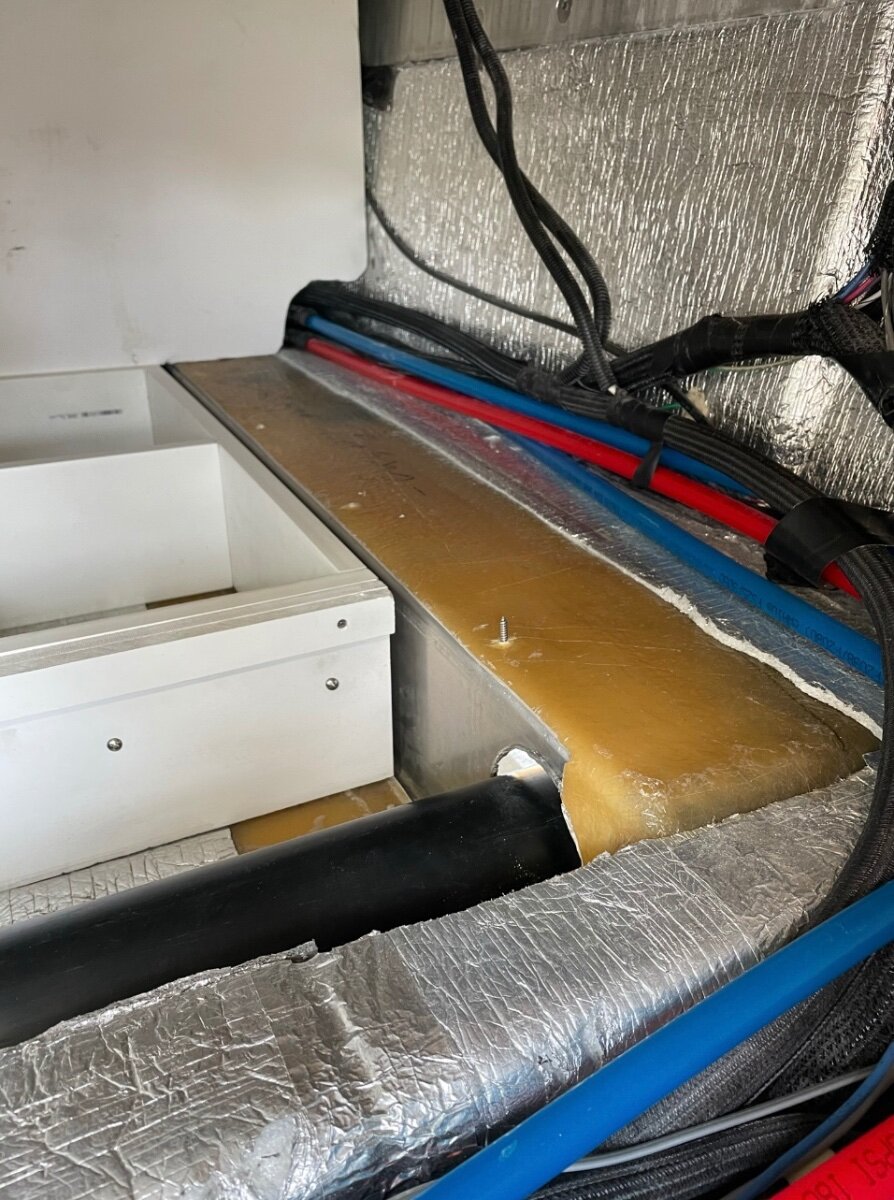
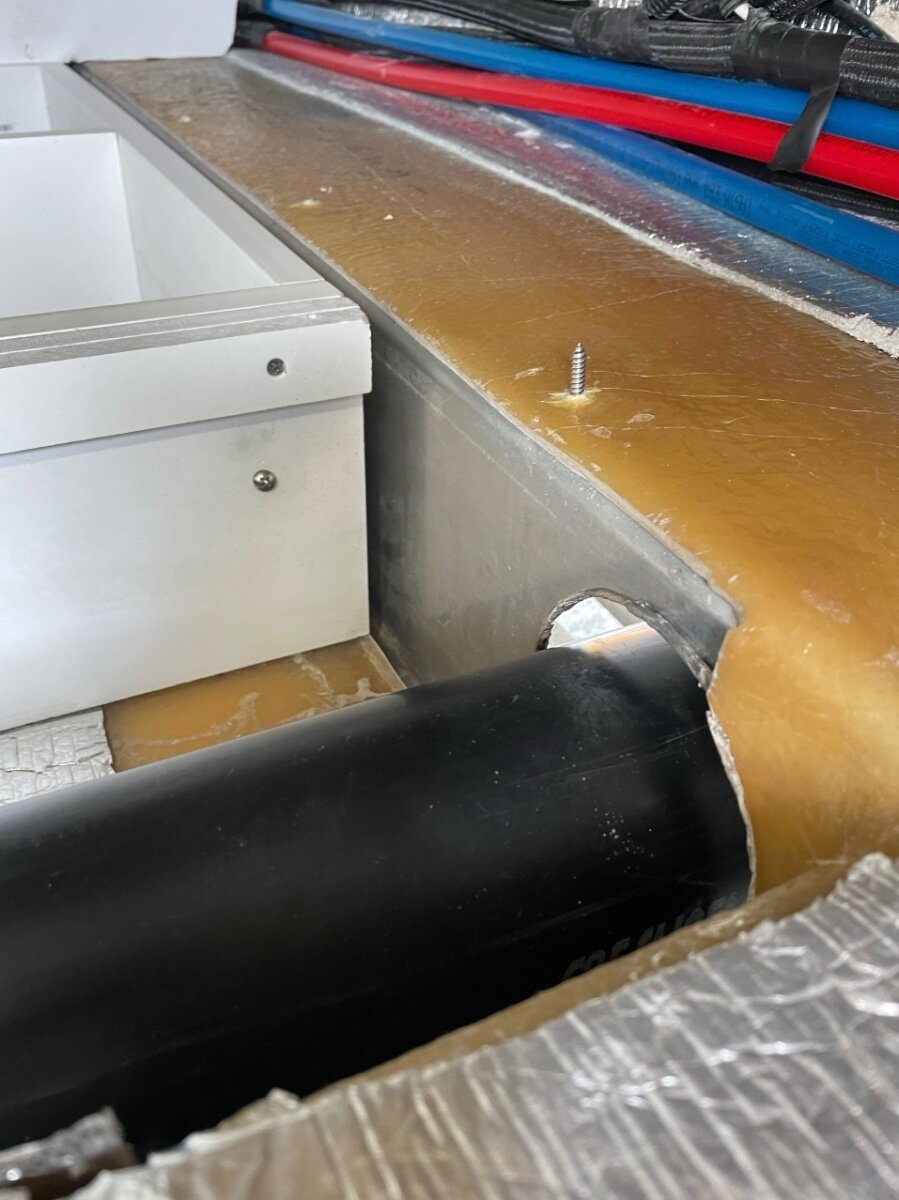
Yes that was an in process photo. In fact, the aluminum plate closing off the rear end of the trailer was never sealed so I removed the plate and put butyl tape all around and reattached it. As far as the soil pipe, there is a rubber grommet that tightly seals between the pipe and the aluminum plate.1 point
-
I fully agree with your statement. I'm also interested in these but have no experience. Bluetooth, do they have an app to read tire PSI and temps?1 point
-
One more recommendation for a SafeJack kit, compressor (I have a Viair 400p), plug kit, and torque wrench. Your experience was a wake-up call for me to get solid lug nuts.1 point
-
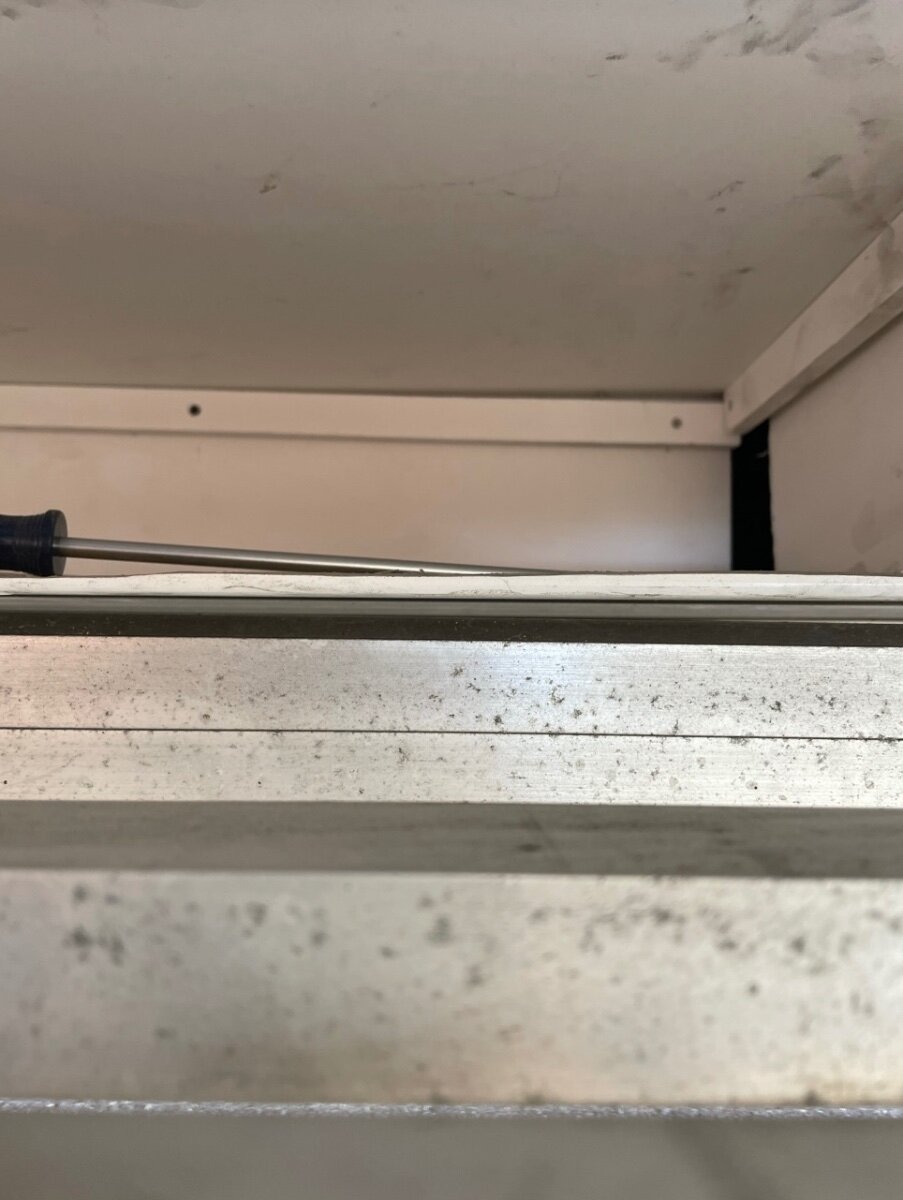
My basement area collapsed a couple of years ago in a very similar way as yours. On mine the rails that supported the basement floor was held to the wall sections with screws that penetrated the wall by only 1/4 inch. As shown in the photos I made a framework to support the floor out of vinyl 3/4 x 5 1/2 material. I would recommend not using wood anywhere in the trailer. Vinyl board and stainless screws. The actual basement floor rests on the framework and is attached to the framework with stainless screws. I also reinforced and sealed the aluminum plate that closes off the rear of the trailer. About half of the sub basement was uninsulated so I also added complete insulation in the area.
1 point
-
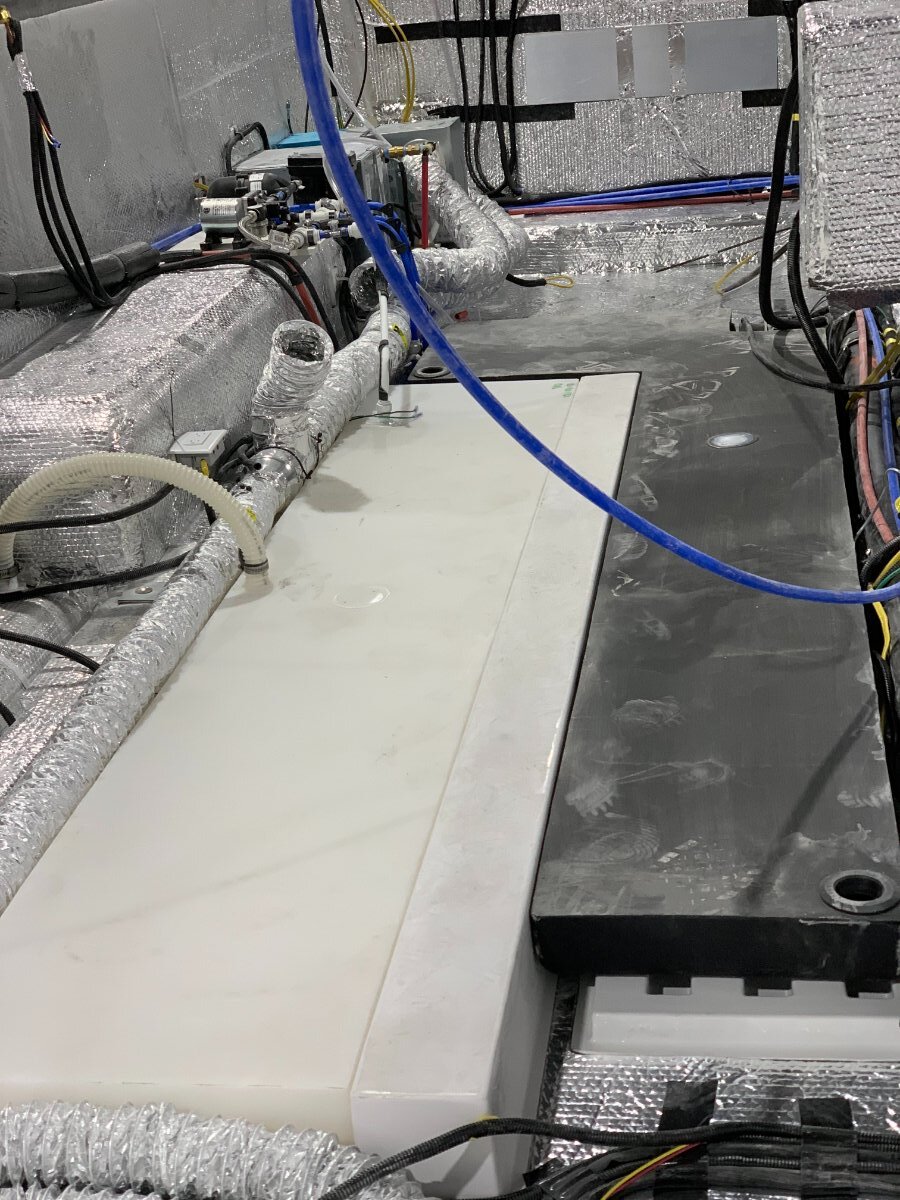
I think the grey tank is below the lowest part of the insulated floor. This is a picture taken at the factory from the front of the trailer before the inner hull had been installed. You can see the L-shaped grey tank is the full width of the floor where the basement access would be.
1 point
-
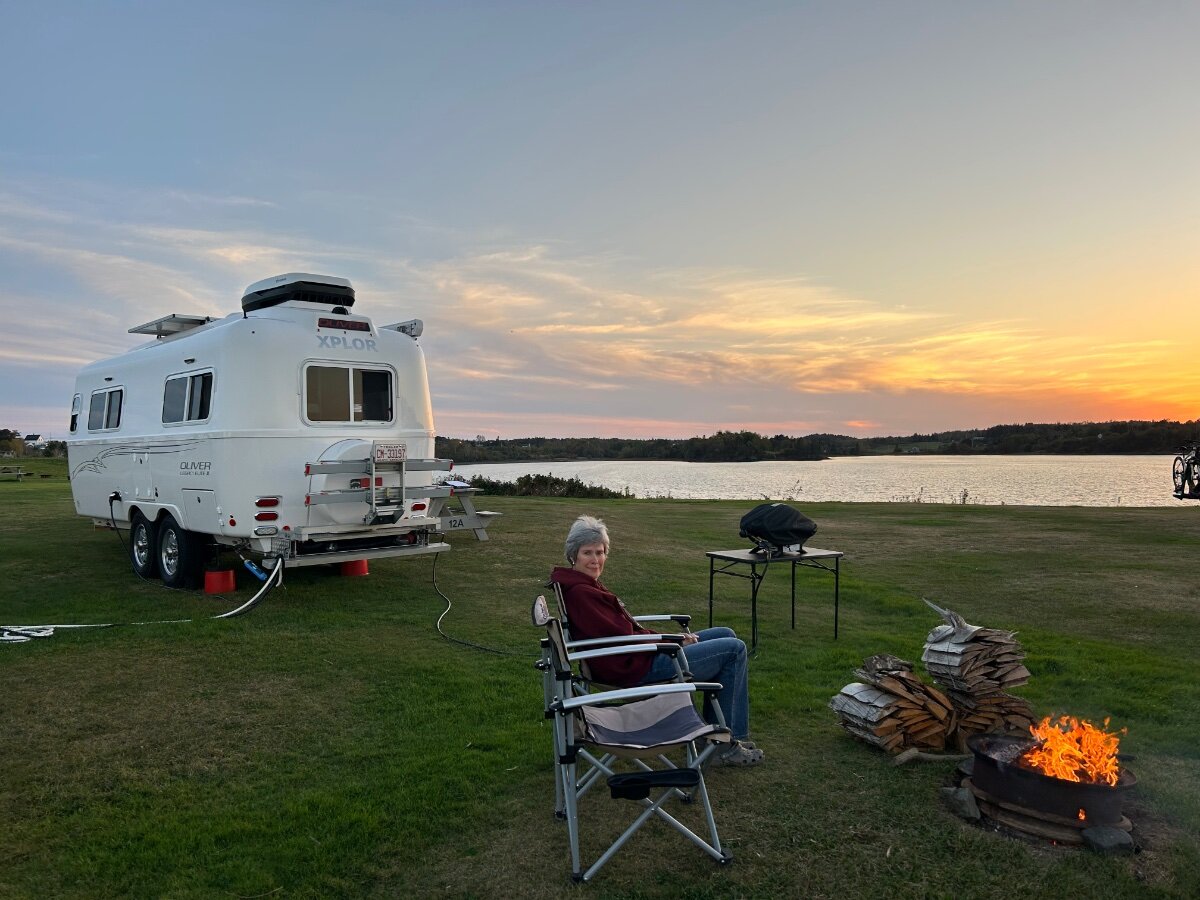
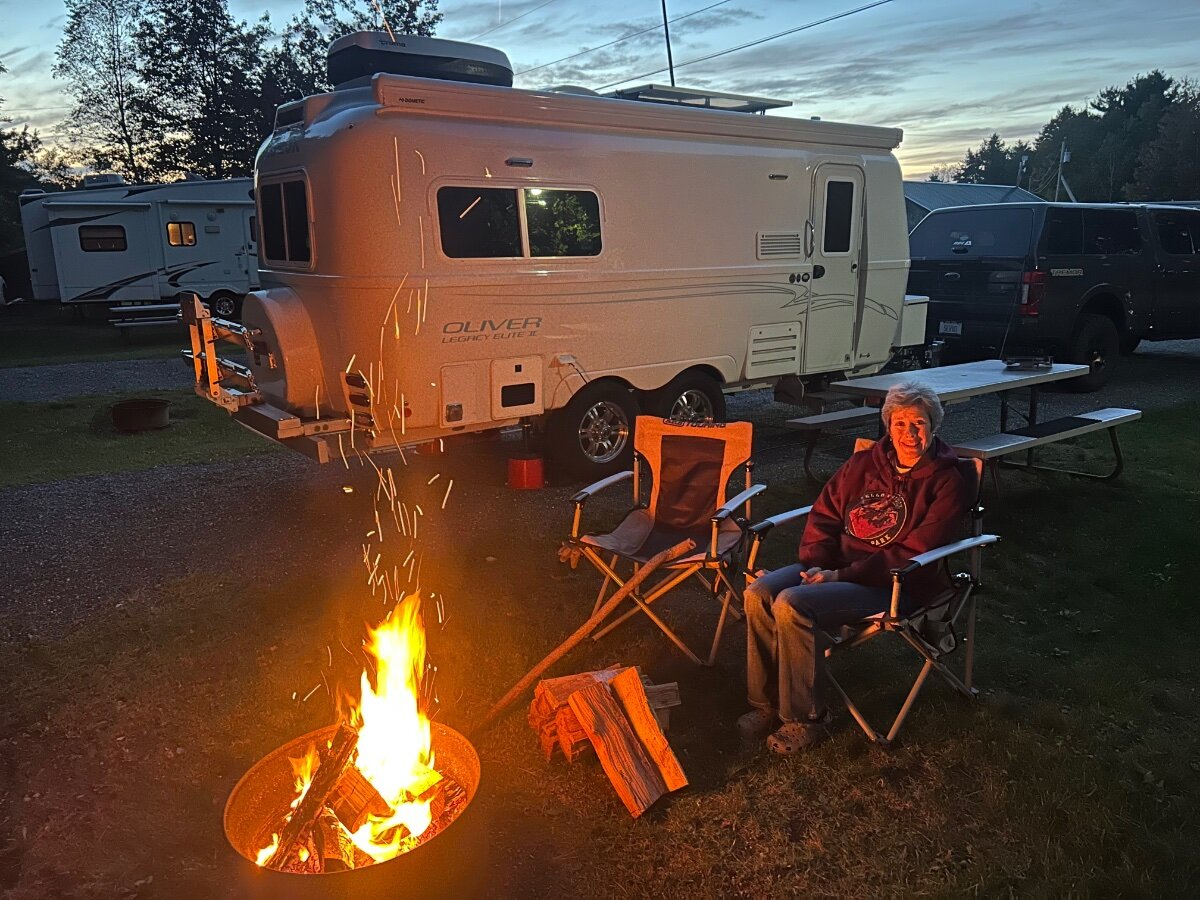
Making our way north we landed a nice W/E site at Sunset Point, CG in Lubec, Maine. The sites here are all W/E and this little CG is located right on Johnson Bay. It’s a quiet little CG with 41 sites and Lubec is the furthest town east in the US. IMG_4180.mov IMG_4180.mov
1 point
-
"The Wonder Egg" - because 17 years ago when it was in production, an Oliver travel trailer was cutting edge manufacturing technology in the fiberglass trailer world. It was a wonder the factory was so eager to accommodate any modification I wanted them to make to hull #14. Solar power was not common way back then, I have the first 2000w inverter, they also wired it for my ham radio hobby which makes it so simple to connect my radio on the inside to a long range antenna on the outside. They placed the springs above the axle to make it easier to maneuver and park in heavily wooded areas. They added an analogue phone line connection near the dinette (hahaha). I have specialized graphics which required them to reposition the license plate. I've now gone to disk brakes - uncommon on single axle trailers, making it even more wondrous! There were perks to being an early bird.1 point
-
I read in your other post that unplugging and plugging the inverter makes a noise. This and your test shows you have power to the inverter. The noise means it’s doing something internal. Time to get in the phone with Xantrex Tech Support. You have power in but nothing out. They will have tests for you to do and next steps. Your issue must be the inverter is not powered on or something else internal to the inverter. Good work so far! Keep us posted.1 point
-
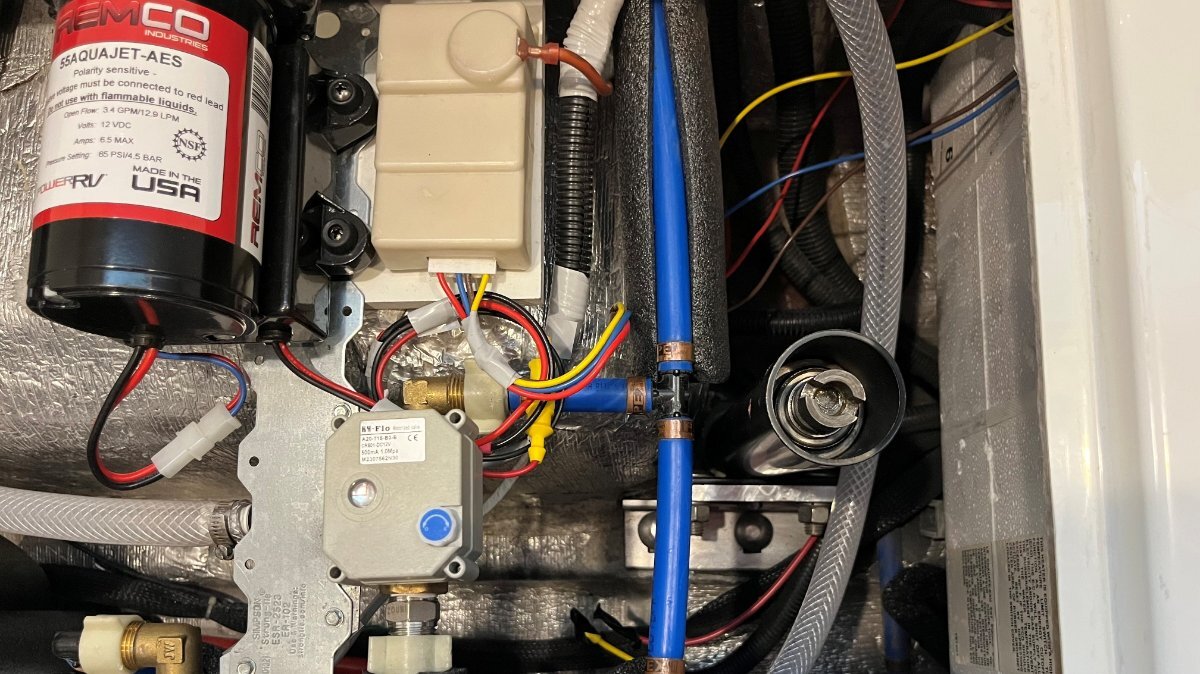
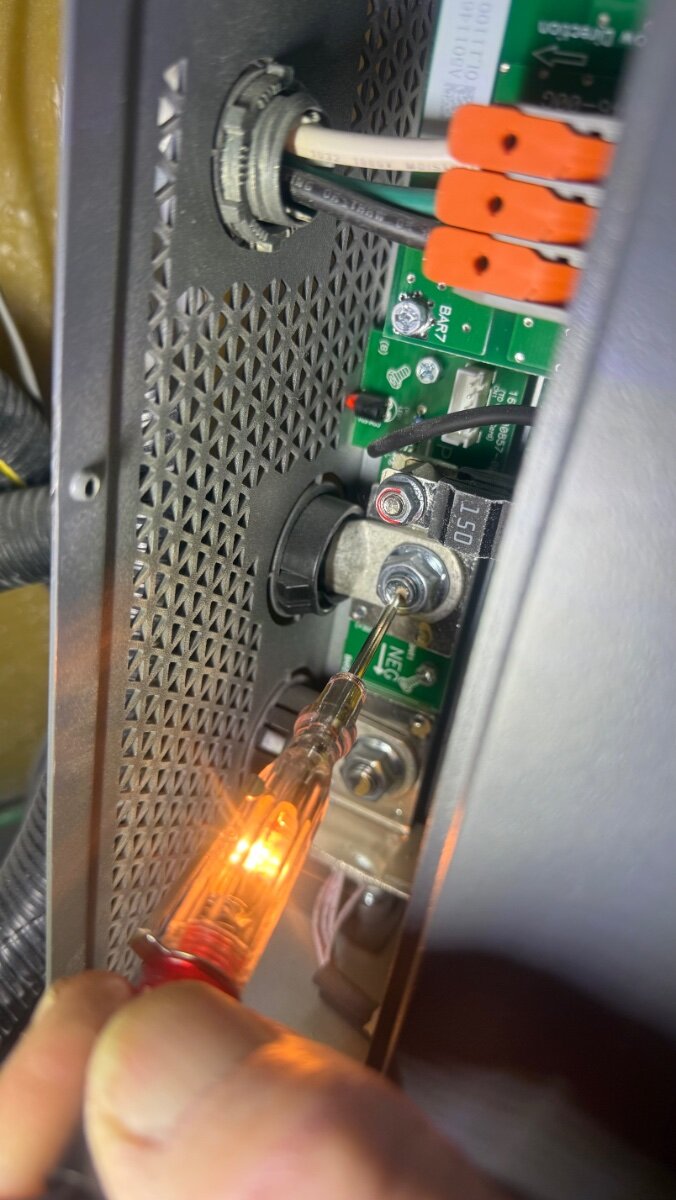
I tested and do have 12v power on either side of the big breaker. I also tested(picture) inside zantrex panel and have power there as well
1 point
-
I don't see an air compressor in the photos above. But, if you did have an air compressor (or some means to re-inflate the tire), you could have simply "pluggged" that tire without removing it. Note: Plugging a tire is not necessarily the easiest thing to do either. I takes some practice to do it properly. But, in certain situations it is the easiest, cheapest way to get back on the road quickly. Many local tire shops will give you an old tire to practice on. Tire plug kits like THESE can be found at WalMart and almost any automotive parts store. Bill1 point
-
While not the safest - I've just used the stabilizer alone for changing a tire. Again - this is not the safest procedure by any means. The "hub caps" remove from the back. Therefore, if one is simply checking the torque of the lug nuts , the removal of the hub cap is a bunch of extra work. Bill1 point
-
I have my crew cab rear seats folded up, and I carry my torque wrench in the folded seat on rolled up towels.1 point
-
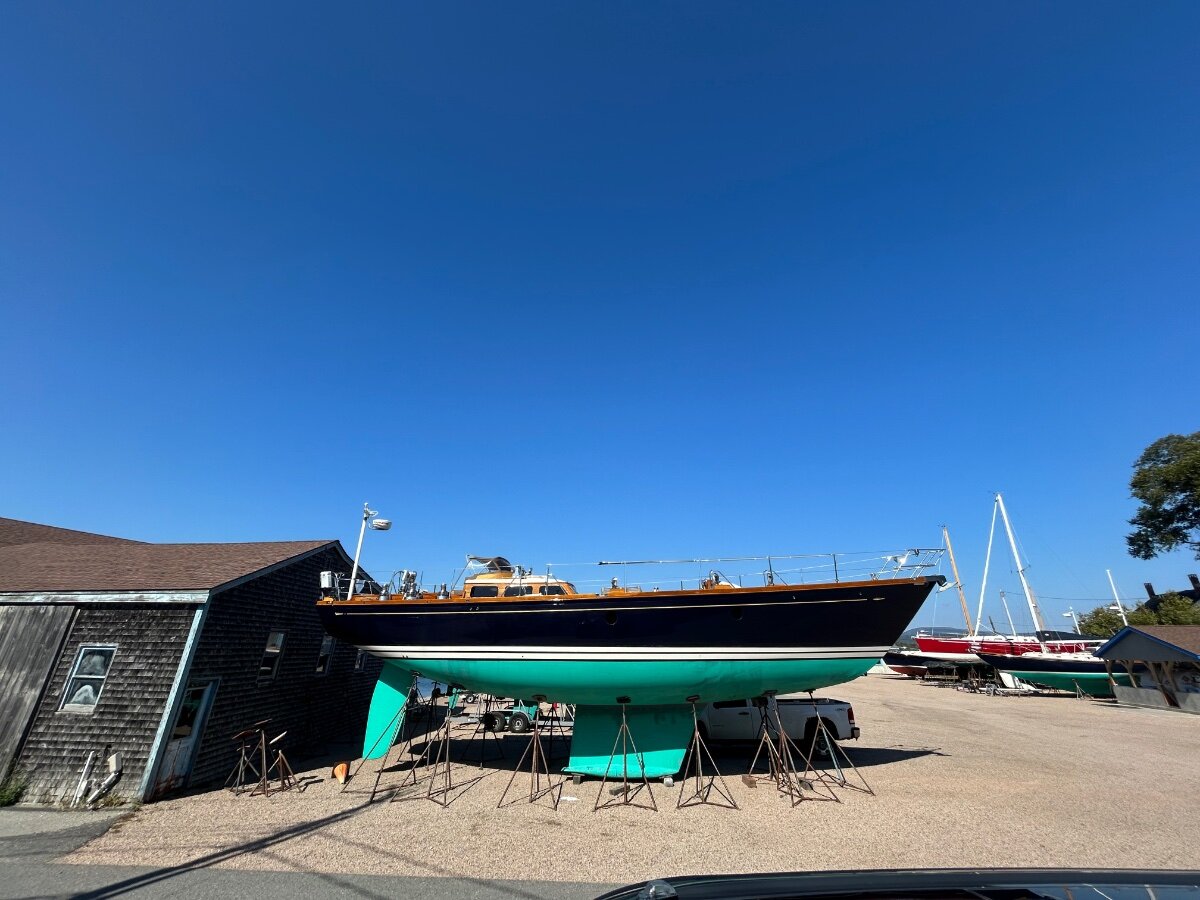
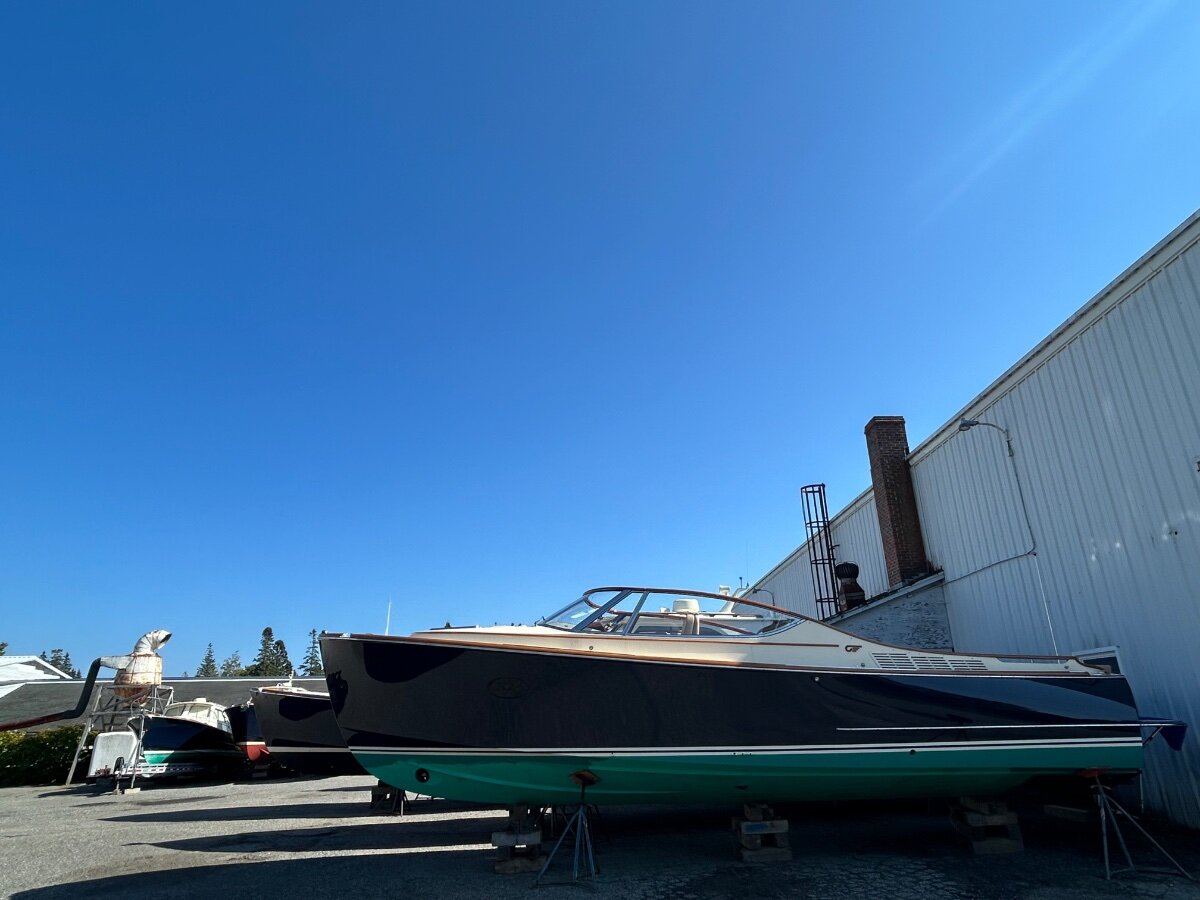
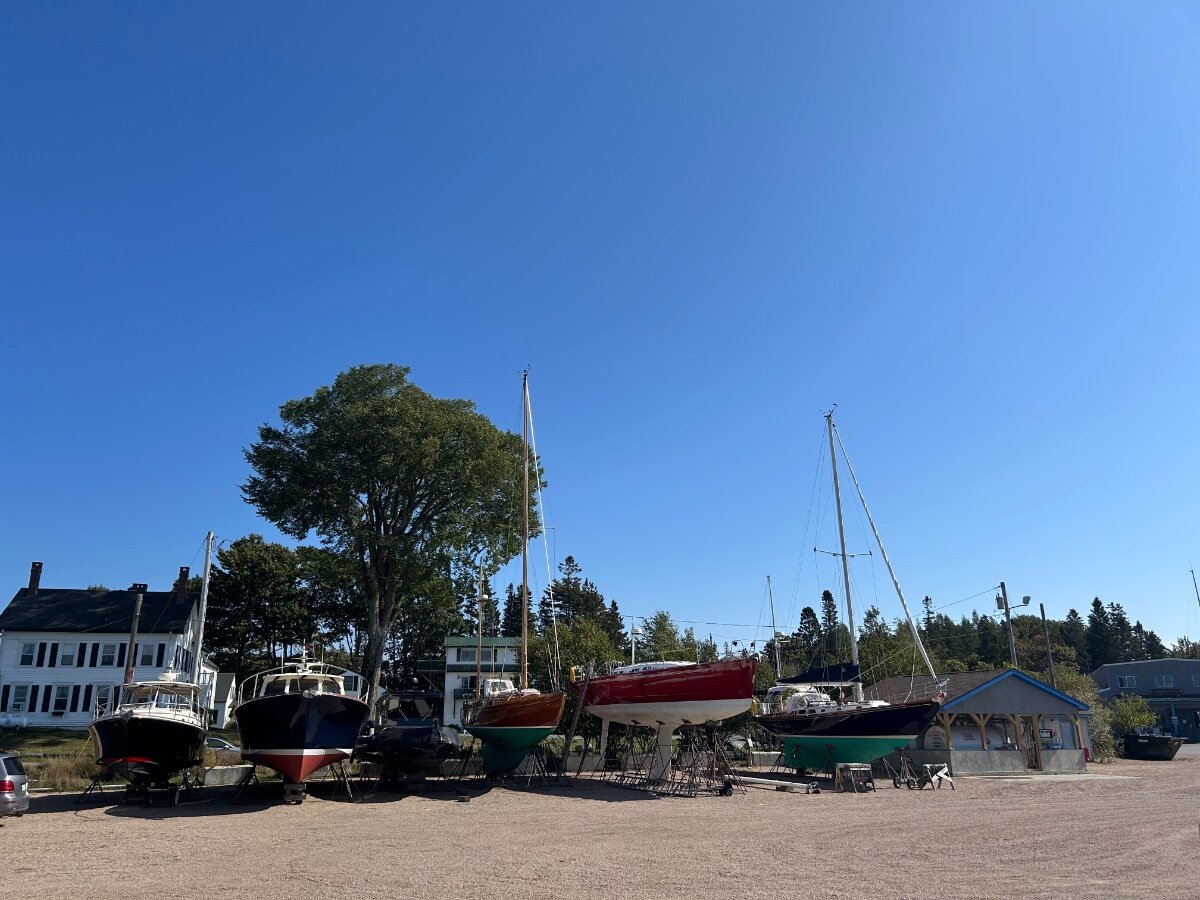
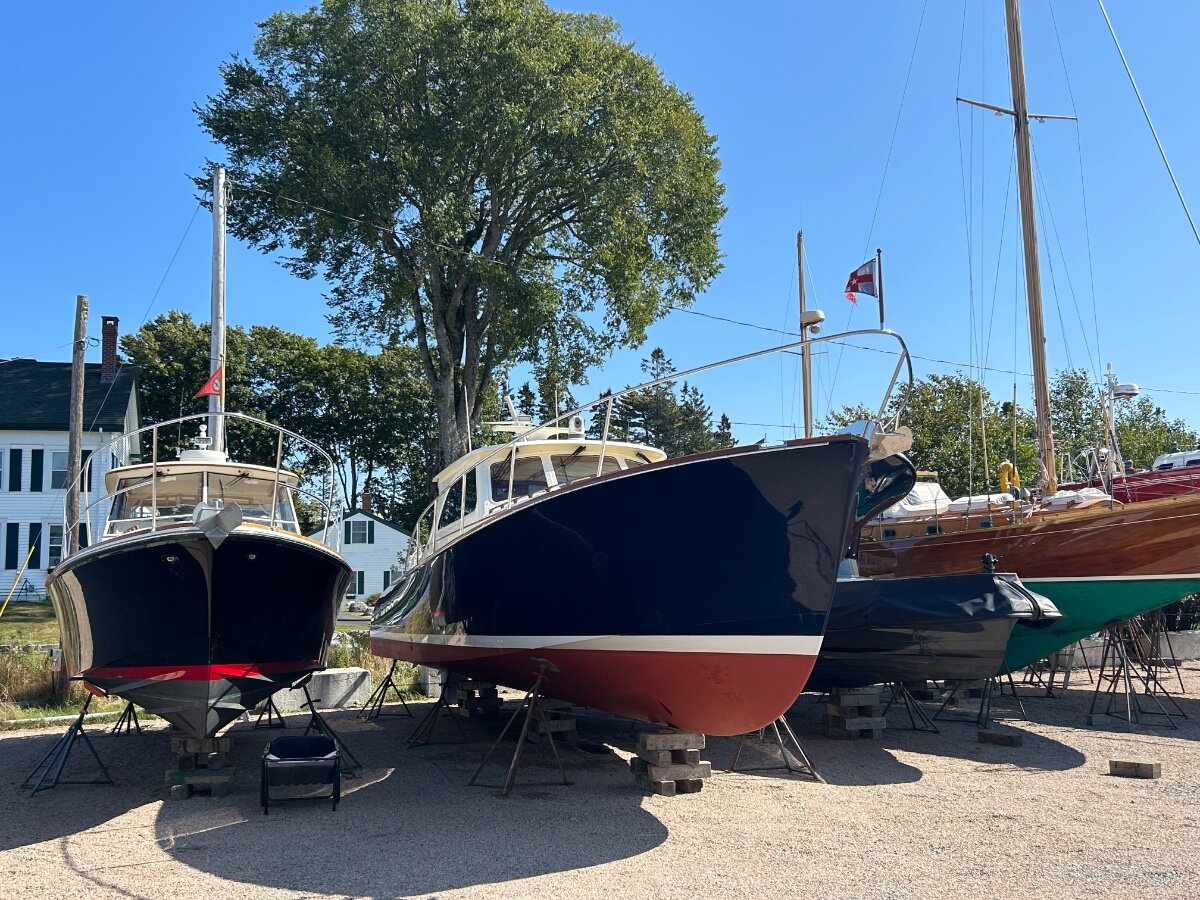
Yesterday it was a beautiful day in SW Harbor, Me and we decided to take a drive over and visit Hinckley Yacht. My sister was their Director of Marketing there for a number of years. Hinckley hand crafts really gorgeous yachts. It was neat to see a few of their beauty’s on dry dock for repairs and upkeep. IMG_4126.mov A little windy during this vid.
1 point
-
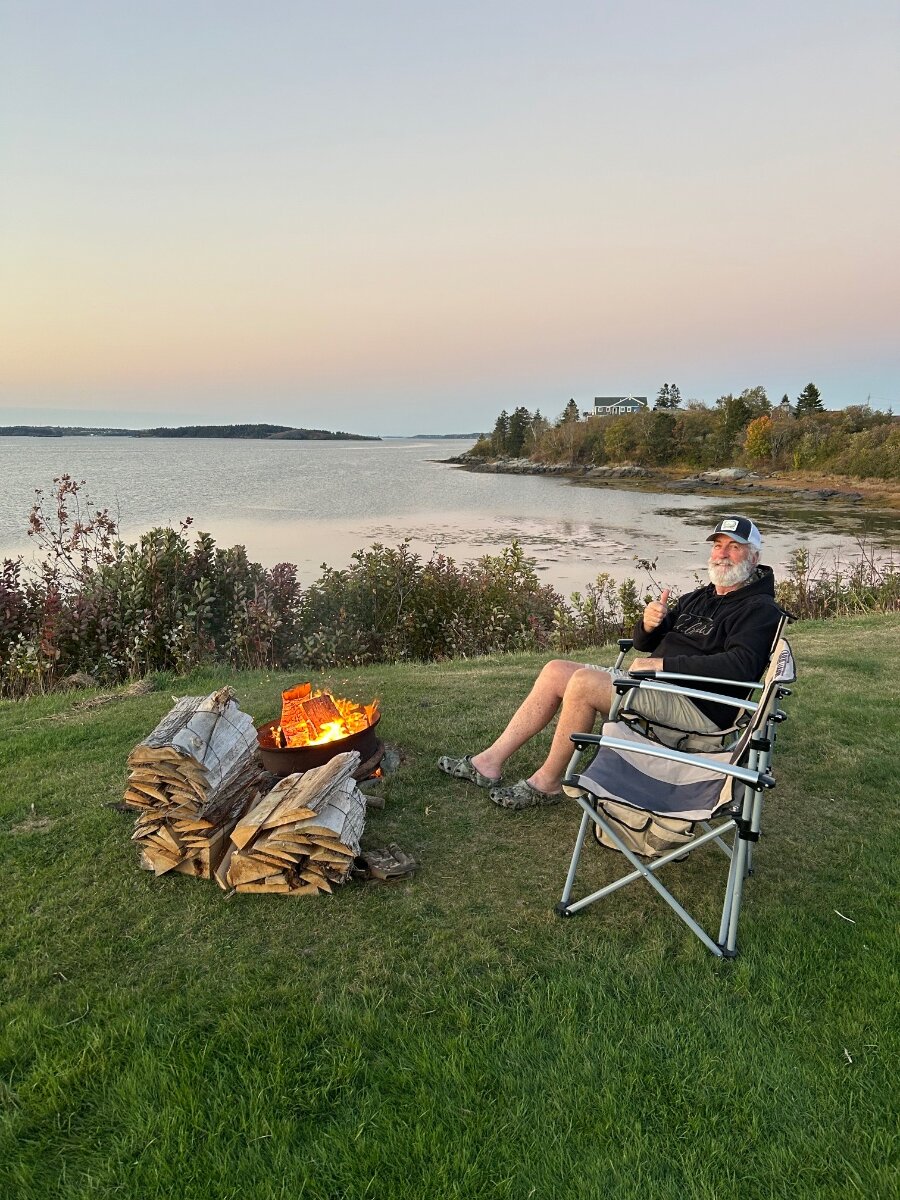
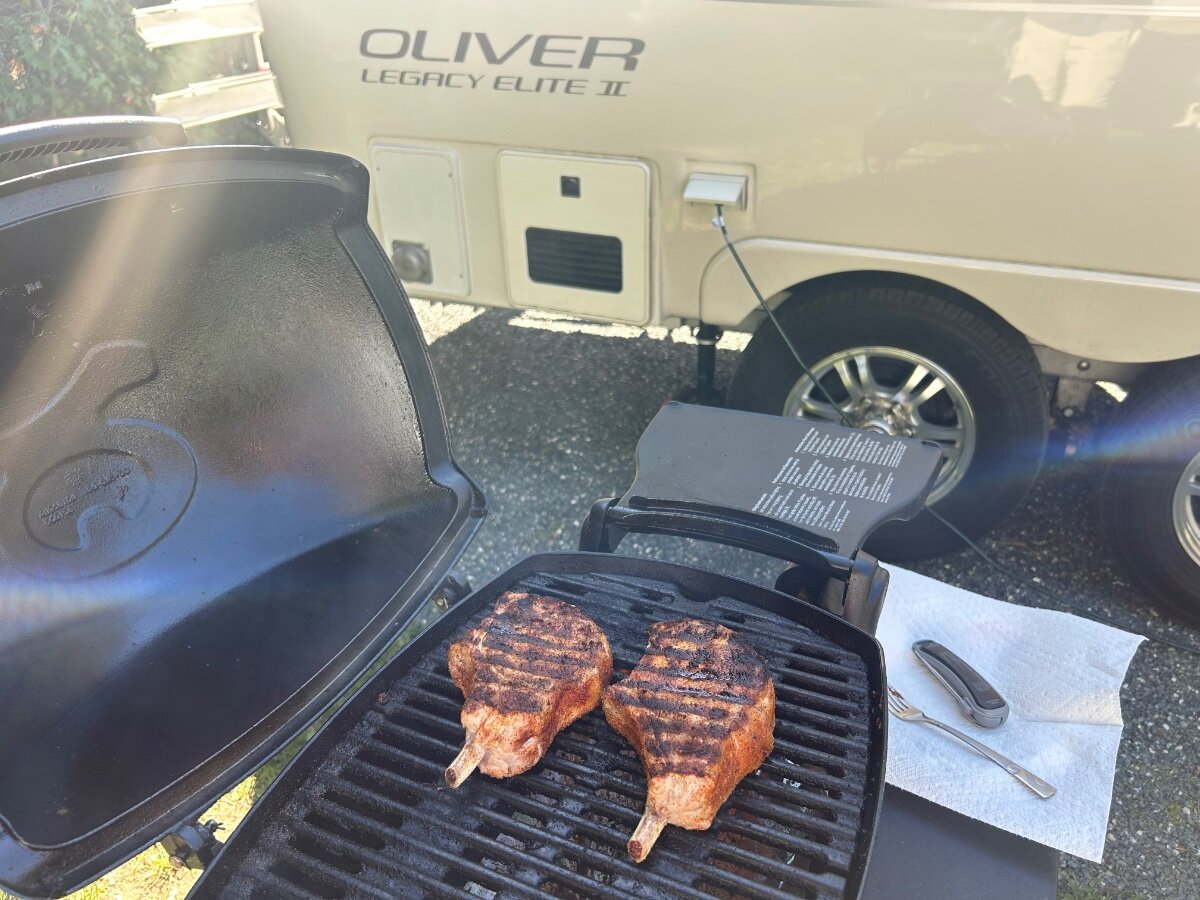
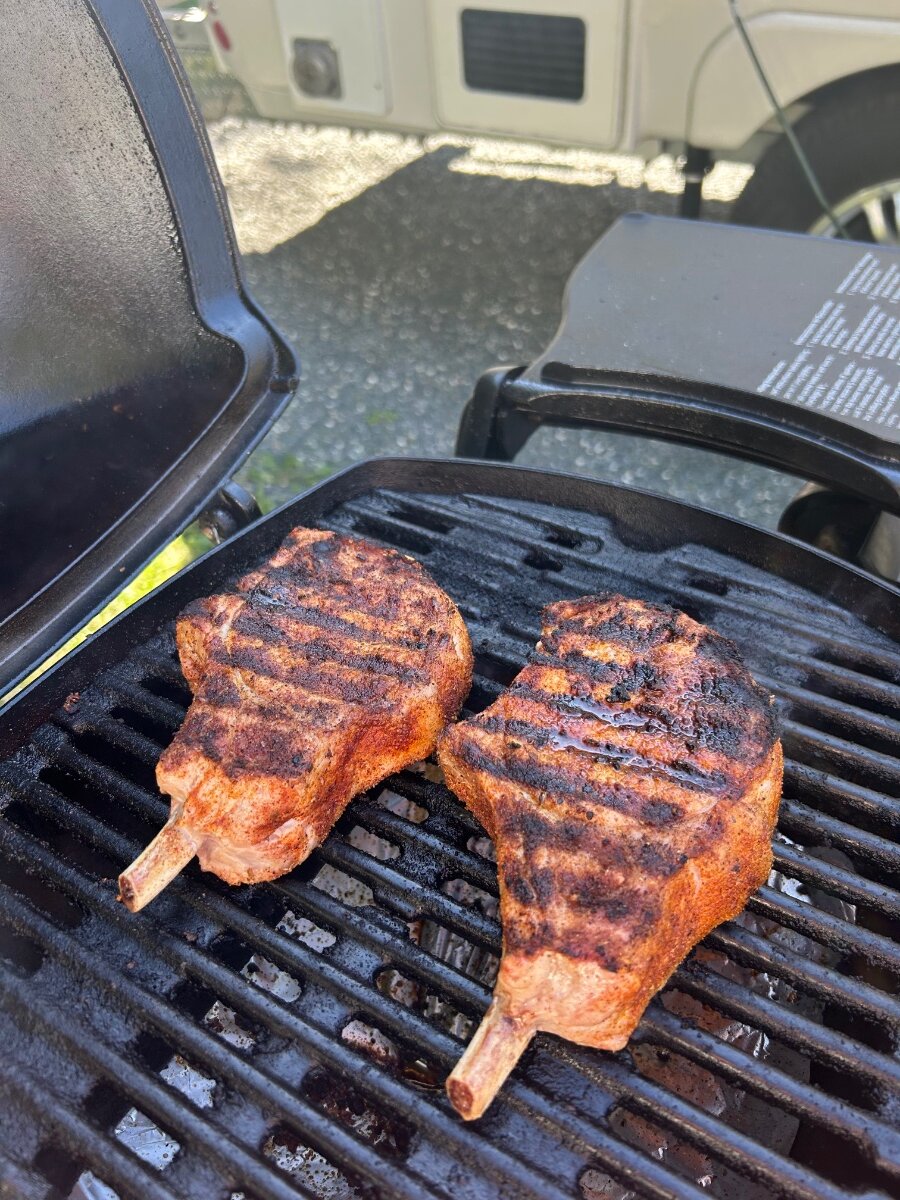
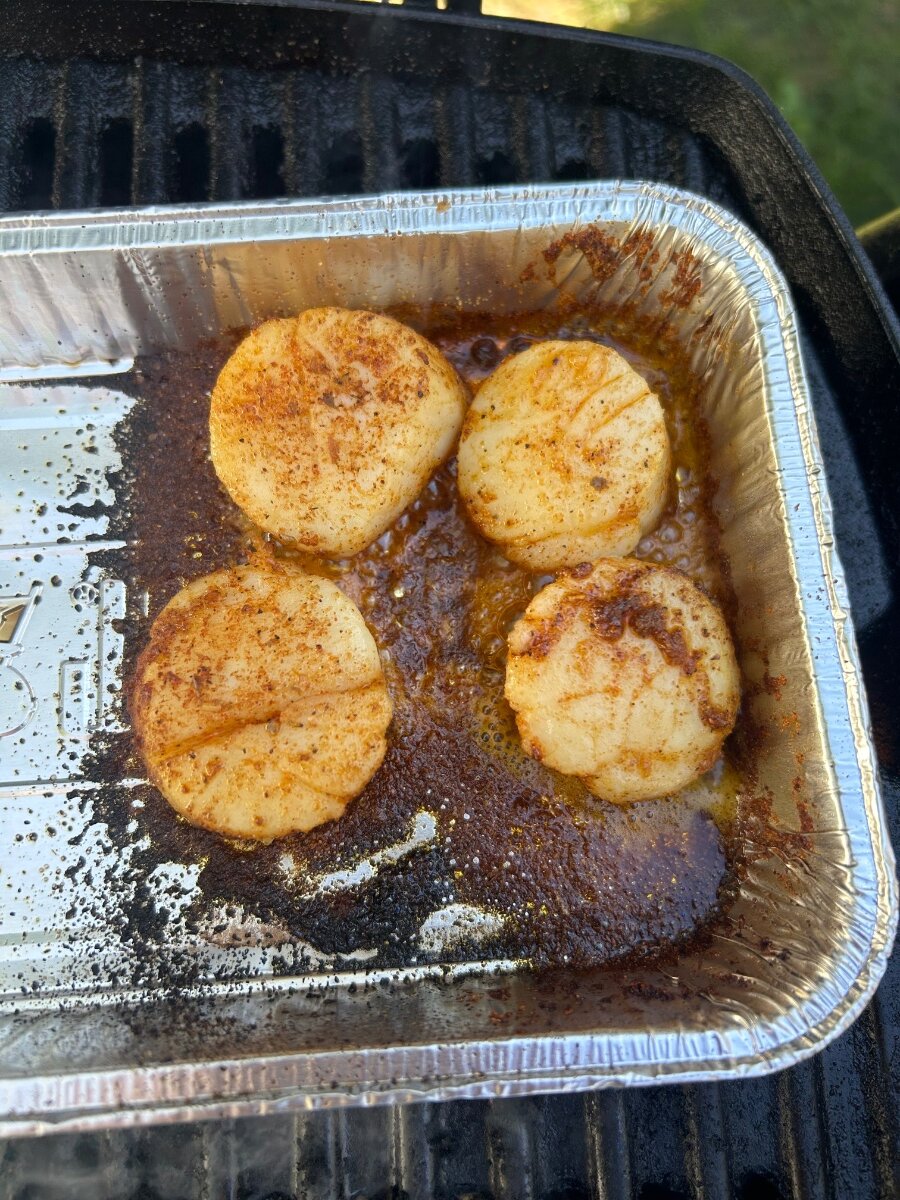
Camped in Ellsworth as we continue our trek north towards the border. Grilling with our trusty and seasoned Q1200. Still chilling in the beautiful coast of New England fall temps. Went by a “Provisions market” today and scooped up a few fresh cut bone in pork chops and some fresh scallops. Cajun blackened bone in chops and butter/garlic blackened scallops and a fresh salad were “Cheffed up” for lunch. Feeling very grateful for such a great meal. 👨🏼🍳 Gotta have a nice fire to warm our bones!
1 point
-
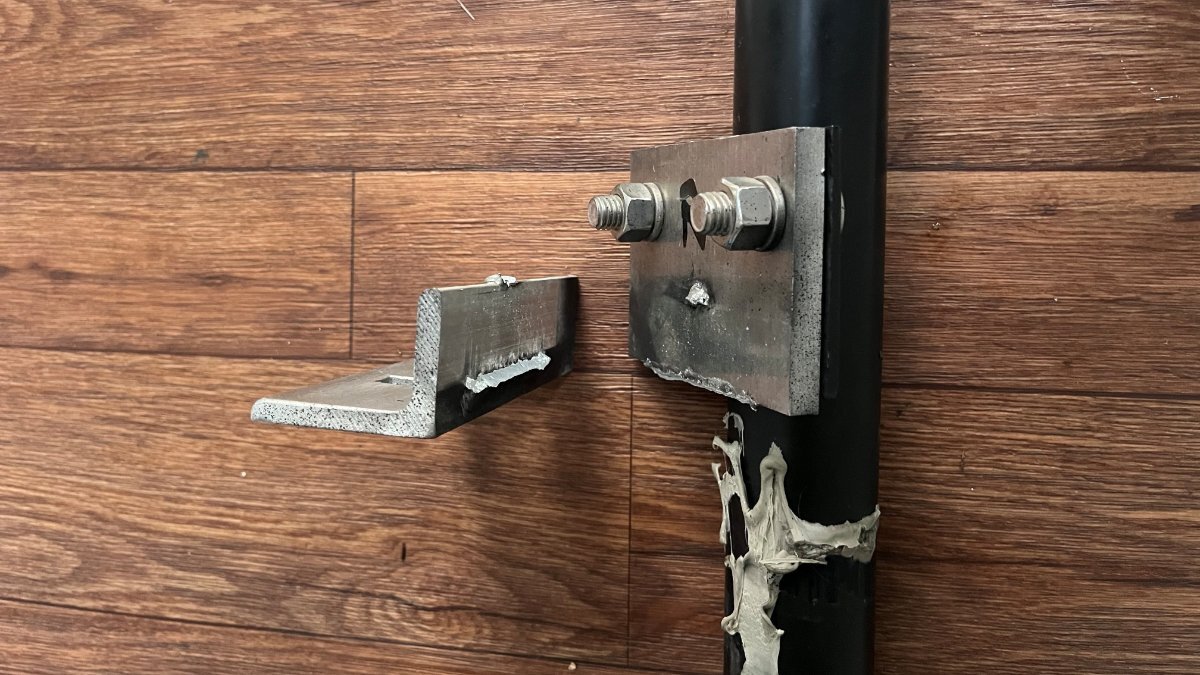
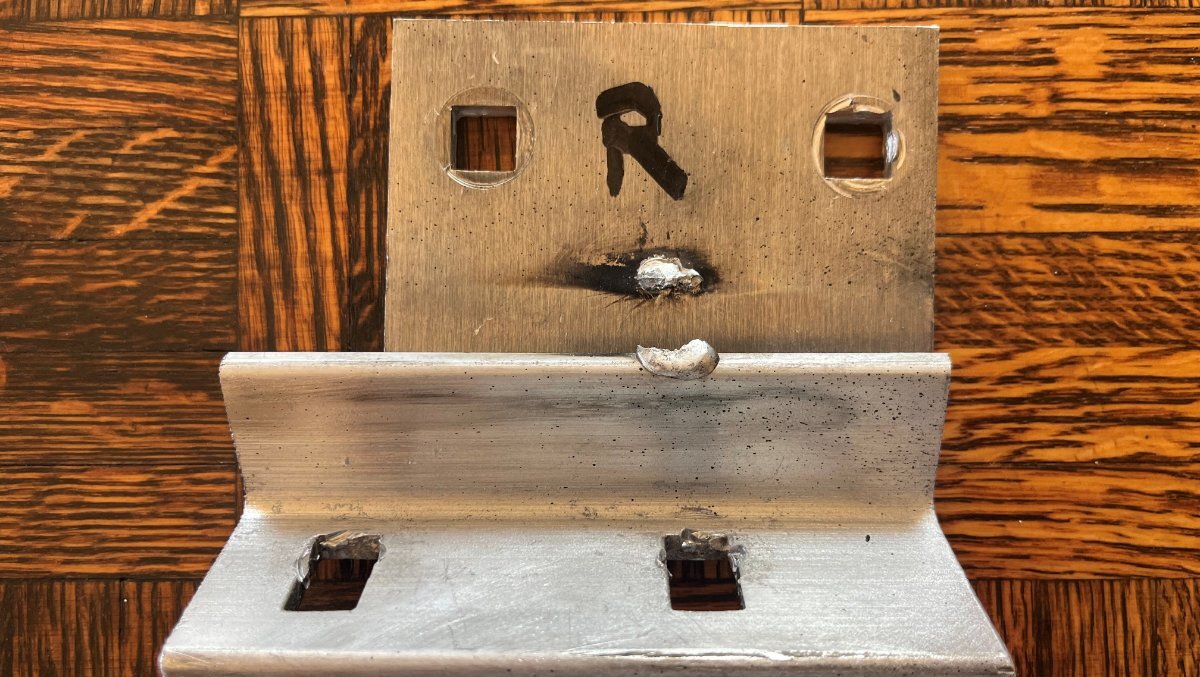
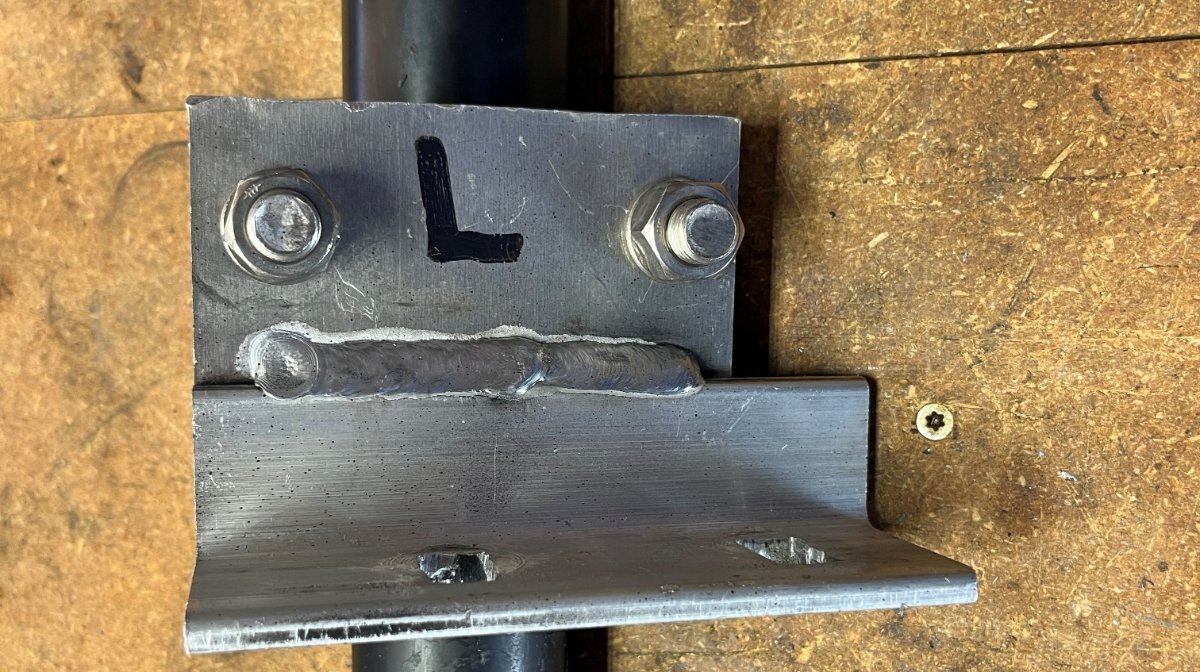
So, here's where this project went a little of course... Next step was to test the jack. Something happened that I could not imagine. It started lifting the hull, wheels not yet fully off the ground and BANG! The jack and hull dropped, OMG! 🫢 I asked Chris to come out so she could operate the button as I watched the jack. As soon as she pushed to lift the hull, I observed the outer post lift up into the hull. The outer should remain fixed, welded and bolted to the frame. I thought, the weld must have broke (it did)! I figured that when remounting the alignment would be slightly different and this could put new stress on the weld. I didn't pay much attention to the welds when it was out since they had lasted 10 years. I talked to a couple of Oliver Elders, first was Ken @mountainoliver who told me that years back some Oliver owners found out that OTT did not finish the welding job properly. Then a conversation with Steve @ScubaRx confirmed this fact! I wrote a Service Ticket and Mike at OTT responded promptly. He was thinking it was a Barker issue, but after our call I realized there was nothing OTT could do except perhaps pay for me to hire a local welder. IMHO, this was certainly an OTT installation issue. The installation procedure is to bolt the two aluminum blocks into position, tack weld them when in position, then remove the assembly to complete weld along both upper and lower surfaces. Turns out they forgot to finish the job on the curbside but did the full weld on the streetside (pics of both below). Next time y'all have your beds off and basement doors open, take a flashlight to inspect yours to confirm you have a full weld on top. Your top weld should look like my 3rd picture. If it only has a tack weld like the 2nd picture you need to remove the bracket (the jack can stay in place if you like) and have it fully welded properly. Thank goodness this happened while home AND that when it failed it did not damage the fiberglass under the bed. On this side we have 1/2" between the top of the motor head and the fixed fiberglass. When it failed it merely pushed the basement cover and bed up and down a couple inches.
0 points
-
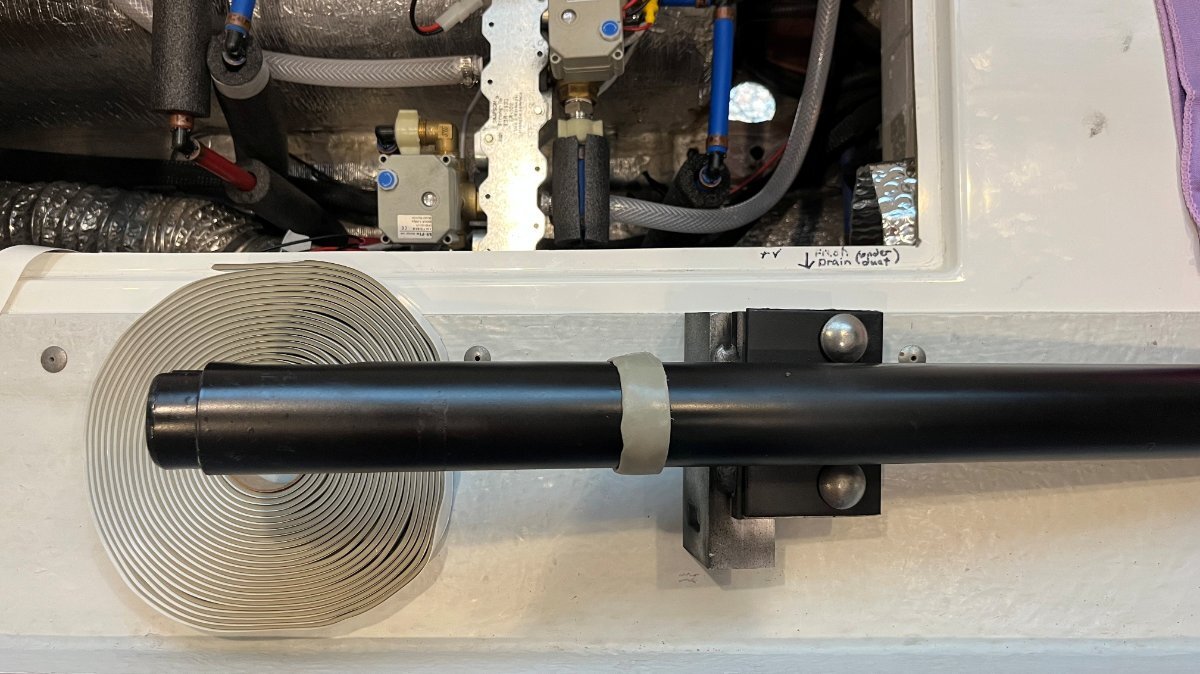
Ken, hopefully this picture was taken during work in process. I'm sure you must have closed off and sealed the opening around the drain pipe. It almost looks large enough for an Arizona Pack Rat! Don't let the cute picture fool you, they are monsters of collection and destruction! 🤣 Regardless, this opening is certainly large enough for field mice and many kinds of insects! I pushed in a large bead of dum-dum (butyl) around mine.
0 points


-
Recent Achievements
-


")


")


")

