Leaderboard

.thumb.jpg.e34bf01ef7f7d5e99ad31856d45afbeb.jpg)


Popular Content
Showing content with the highest reputation on 11/30/2025 in all areas
-
They also replaced the plywood subfloor with a composite, which is a big plus.4 points
-
Good for them. Each manufacturer has a different market. I'd decline, just as we declined on the smaller Casita, 17 years ago. To me, a separate shower is a waste of valuable space in a small trailer. But, for others, it isn't. The hard part for me is the cabinetry, and carpeted walls.3 points
-
Yes, It is likely that you have "tripped" one (or both of the "breakers" that look exactly like the one in the picture you post right above this post. If either of the two of those are tripped then you should see a little yellow "flag" that will stick out the side of that black plastic. In order to reset it all you have to do is push the little yellow flag back in. Bill2 points
-
This thread has been a real eye opener and very helpful. I’ve been a travel trailer owner since 1995 and have had two tire problems that were easily resolved because we were near tire dealers. I always travel with a pile of tools but have never been prepared with impact wrenches, deep sockets, torque wrenches or tire repair kits. I will be soon though. Hopefully I’ll never have to use any of this stuff. I will take the advice given here to practice jacking, removing and replacing a tire here at home so we’ll both know what to do. The Word DIY document is very good and I will print two copies and store them as recommended. My brother in law blew out two tires on the highway last summer on the first and second days of a month long trip and ended up buying 4 new tires. Those tires were less than 3 years old (not an Oliver, a big 5th wheel). Thank you for this. I hope to contribute to this knowledge base sometime. Jamie2 points
-
That's a good start, for sure.2 points
-
Roger, that was my thoughts as well. For a multi-speed inverter with the ability to slow down both fans to meet an infinate number of settings (Humidity/Temperature/Desired Supply Air Fan), a Cielbo would seem to be not necessary. However, for RV A/C unit that has multiple supply air fan speeds (Most Do) AND a mult-speed compressor (Cheaper to make than an Inverter style Air Compressor, i.e. an "Old Style" Unit), then the Cielo system would likely be a wonderful mod... so long as it does no harm over time due to so many restarts to the unit self and the soft start system if employed. Of course that's my hesitance and cause for a pause to access for unintended consequences that generally pop up over time. GJ1 point
-
NuCamp released this new model recently. As a former NuCamp owner I can share that their trailers are high quality and very well built. The Haven will be a good choice for many. I am not ready to trade in my Oliver (yet) but I sure do like all the natural light and views the NuCamp windows provide; my main complaint regarding my Oliver.1 point
-
@Steve and Cindy, the RJ45 connector is reasonably well protected from rainfall when in use. The original Furrion cover acts as a small roof over the pass-through connector and cable when in use. When not in use, the black plastic cap for the pass-through connector fits into the RJ45 port and the Furrion cover closes over it. We have used the Starlink PoE setup through one thunderstorm will no ill effects observed. I examined the connector following the thunderstorm and did not see the need to add any further protection. Regards, Don1 point
-
I will give Casita a little credit. They are certainly taking “little bites” out of the fiber glass travel trailer market for folks who just cannot justify 90-100k for an Oliver. Smart forward thinking with their R&D folks with a larger/longer camper and dry bath to boot. And oh gee, how interesting? Casita must be listening to their customers! 🤔 Might be just me, But I bet they sell quite a few baskets of those eggs! 😄 https://casitatraveltrailers.com/lc/1 point
-
At home I use a small platform. In the field I turn off the fridge and lower the nose of the trailer way down to make it easier.1 point
-
Thank you Taylor, now you helped me! I really like the design of this Jumbo Step and had not seen it before. I have a platform like Steve’s but this one with steps to climb up and the railing gives you something to hold onto. Not cheap, Amazon has them for $170. But they had one “Like New” for $123 and I just got it! 😎1 point
-
I use the same thing. It gets me high enough that I can lift the 30 pounder up over the fiberglass.1 point
-
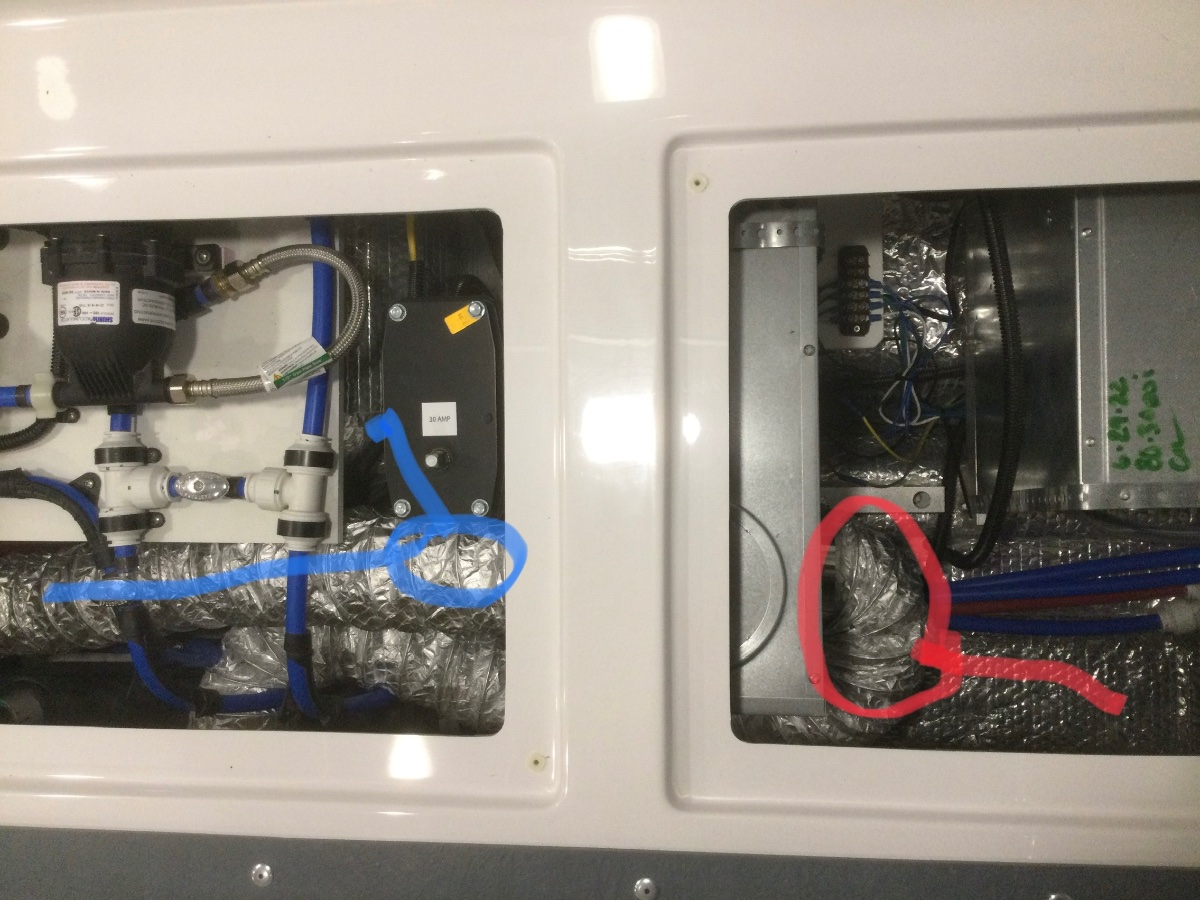
I switched the supply lines around. The red line is now connected to the defuser under the bed from the right side of the furnace. It is a very short line about 3 feet in length from the furnace directly to the defuser. I disconnected it from the left side of the furnace and re connected it to the right side of the furnace. Then I shortened the other blue line by almost 2 1/2 feet and connected it to the left side of the furnace so that runs to the bathroom. The red line makes a tight 180 degree turn more than I would have liked but that’s the amount of line that I had and it may provide a little resistance to the air flow which is a good thing. I’m amazed at the difference it made in the bath room. Its hard to calculate the difference but It’s at least 3 time as much heat coming out of the bathroom defuser than before. And the other two defusers seem to be putting out just as much air. See video. Bill IMG_0165.MOV
 1 point
 -
@Ronbrink, that's a marvelous solution to clean drinking water and some winter camping situations. It looks really pricey, at first, at roughly $300 for the can and replacement filters, but 500 gallons of clean water for $300 is less than you'd pay in the grocery store, and no wasteful packaging. After the first round, replacement filters were 5 for $40 on their website. Now, 6 cents a gallon. Smart improvement. Cpuld be very useful for some folks. Thanks for sharing.1 point
-
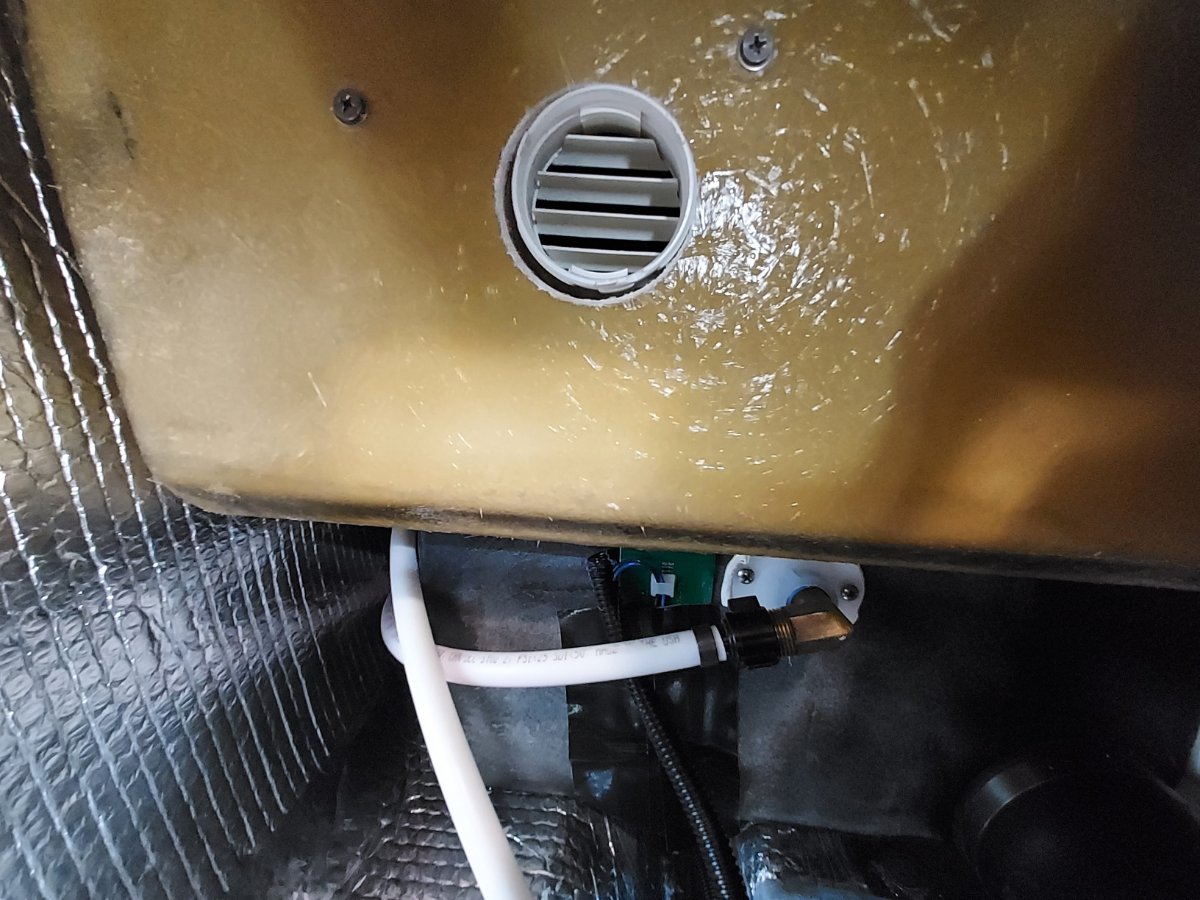
jd1923: It sounds like you found the vent in the bathroom under the toilet paper holder, which is good. In my 2018 Oliver Elite II, we had a similiar low amount of air coming out of the vent covers. After talking to Oliver service, we ended up temporarily popping off the vent covers at each vent and removing the plastic diverters behind the cover and then reinstalled the vent cover back on. These plastic diverters were restricting the air flow. You might want to considering removing the plastic diveters, if they are still installed, as their removal greatly improved our air flow. Also, place you hand in front of the bathroom vent to feel if you are getting air coming out of that vent. If you have no air flow at the bathroom vent. (I have seen on this forum where some people have found that the vent piping was not connected to the vent outlet.) If this is the case, you can remove the front bottle plate (4 screws) in front of the bathroom vanity so you can reconnect the vent piping to the vent cover.1 point
-
We’ve got one too, doesn’t put out much but it is there!1 point
-
I encourage you to place your new return air vent in the wall between the toilet and the front dinette seat, as shown in the attached photo. This location enables return air to flow through the street side bottom of the trailer, under the battery box and eventually back to the furnace on the curb side. To be most effective, return air vents need a minimally-obstructed path back to the furnace. A return air vent in the recessed front of the vanity would have quite a tortuous path back to the furnace.
1 point
-
I am a fellow cold weather camper and considered doing that as well but decided that doing so would result in insufficient total free air flow from the furnace likely leading to furnace heat exchanger overheating and short-cycling of the furnace. To work properly, the manual says the furnace needs a minimum of 25 sq. inches of unobstructed supply duct airflow. A 4 inch flex duct has 12.56 sq. inches of airflow as it leaves the furnace. Since there are only two supply ducts from the furnace, both must be completely unobstructed to achieve 25 sq. inches of unobstructed airflow. All duct work creates friction and turbulence which reduces the free flow of air. Rigid duct minimizes restriction of airflow but the flimsy flex duct used in the Oliver really reduces airflow in anything but short absolutely straight runs. Dedicating one 4 inch duct to a long run to to the bathroom would cause such a restriction that the furnace would be subject to short cycling and poor heating performance. I am sure that is why Oliver put the splitter into the long duct run to the bathroom so it feeds two registers, one being closer to the furnace. To further complicate things, in my LE II, Oliver put a reducer behind the bathroom register that necks it down from a 4 inch duct to a 3 inch duct further restricting airflow into the bathroom. They may have done this to make it feel like there was more air blowing into the bathroom (higher velocity but lower volume). I don't thing changing this from a 3 inch to a 4 inch would make much difference though, given the long duct run to the bathroom. I really wanted to turn my bathroom run into a straight, untapped duct run to the bathroom (i.e., eliminate the splitter) but determined it would not be acceptable without adding a third duct run off of the furnace, but that is next to impossible to do in my LE II, given the way Oliver installed the furnace in a vertical orientation. The furnace can be installed vertically or on its side. If Oliver had installed the furnace on its side, it would have been easy to run a third duct off of the furnace. It is not feasible to make that change now. I think probably the best that can be done now is to add a return air vent to the bathroom and add ventilation between the bathroom and main cabin as you are planning. I am getting ready to add a return vent to the bathroom in my LE II. I will probably put it in the recessed front of the vanity behind the towel bar, so that return air will directly warm the plumbing under the bathroom sink.1 point


-
Recent Achievements
-


")


")


