Leaderboard


Popular Content
Showing content with the highest reputation on 12/04/2025 in Posts
-
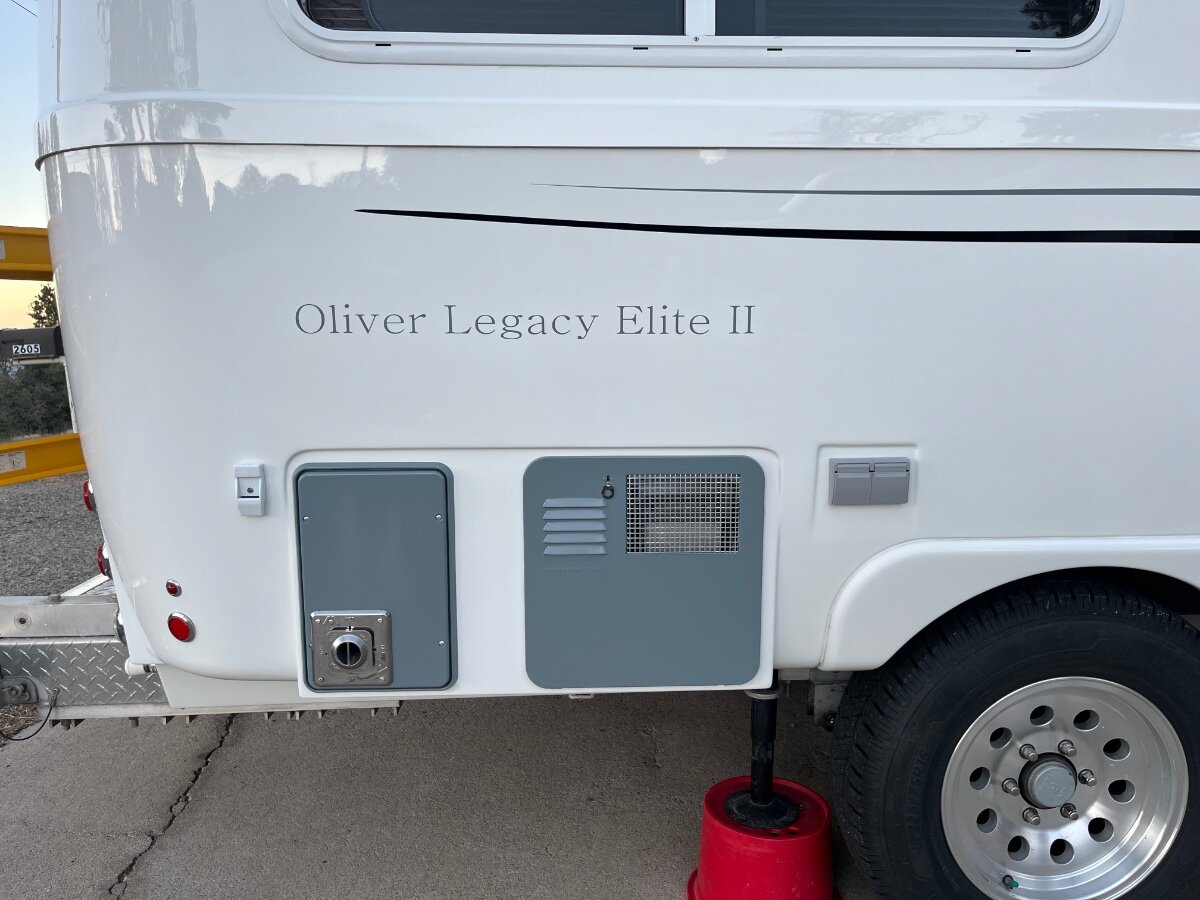
French Glen / Steens MT petroglyphs and painted rock CG white spar / Prescott Sedona
 6 points
 -
This ???? Is hard for me to believe that its the same OE2 MaxBurner and I saw last summer up above Alpine AZ. Are you SURE that your Detailer didn't snuck in and swapped out your 2017 for a new one? Seriously nice job. GJ
5 points
-
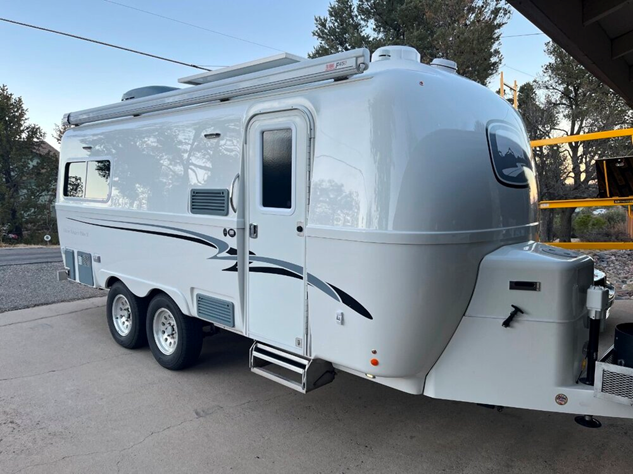
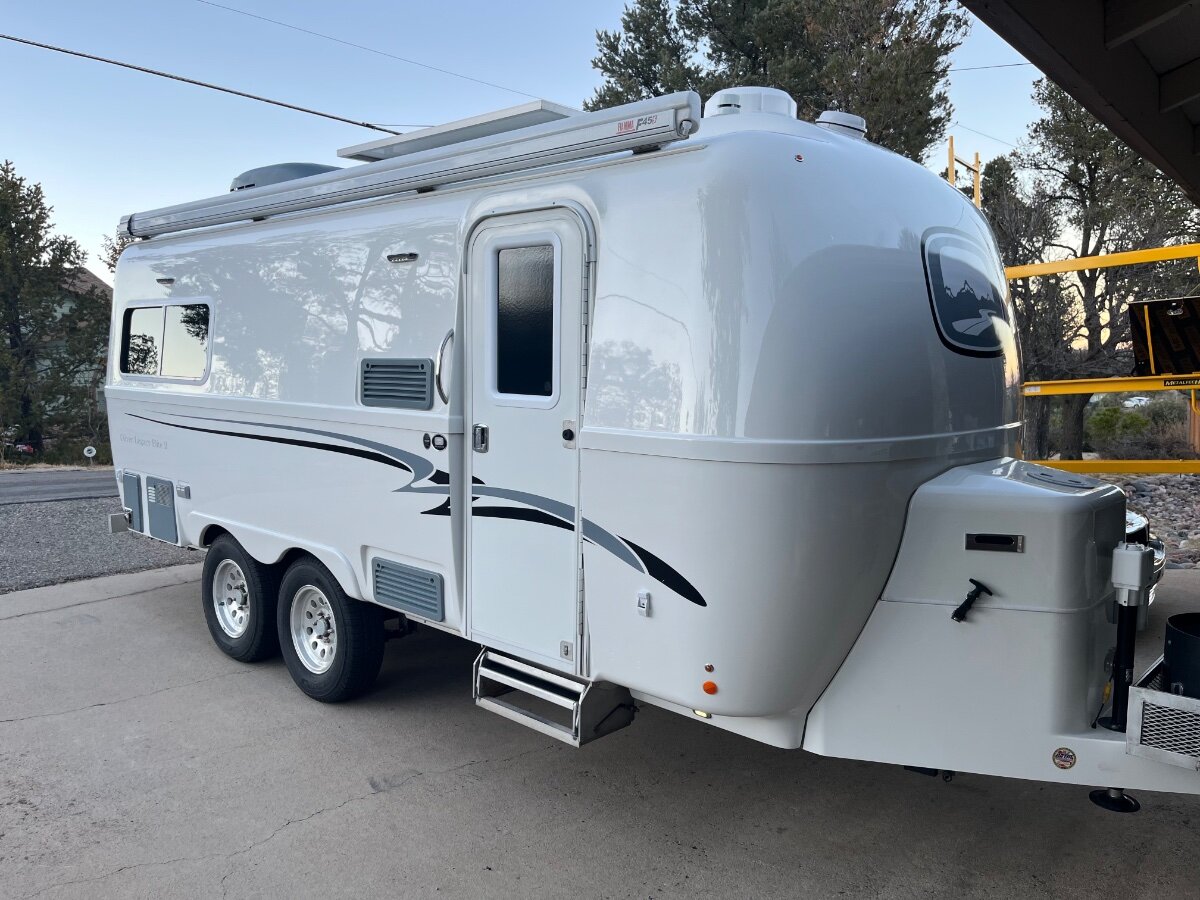
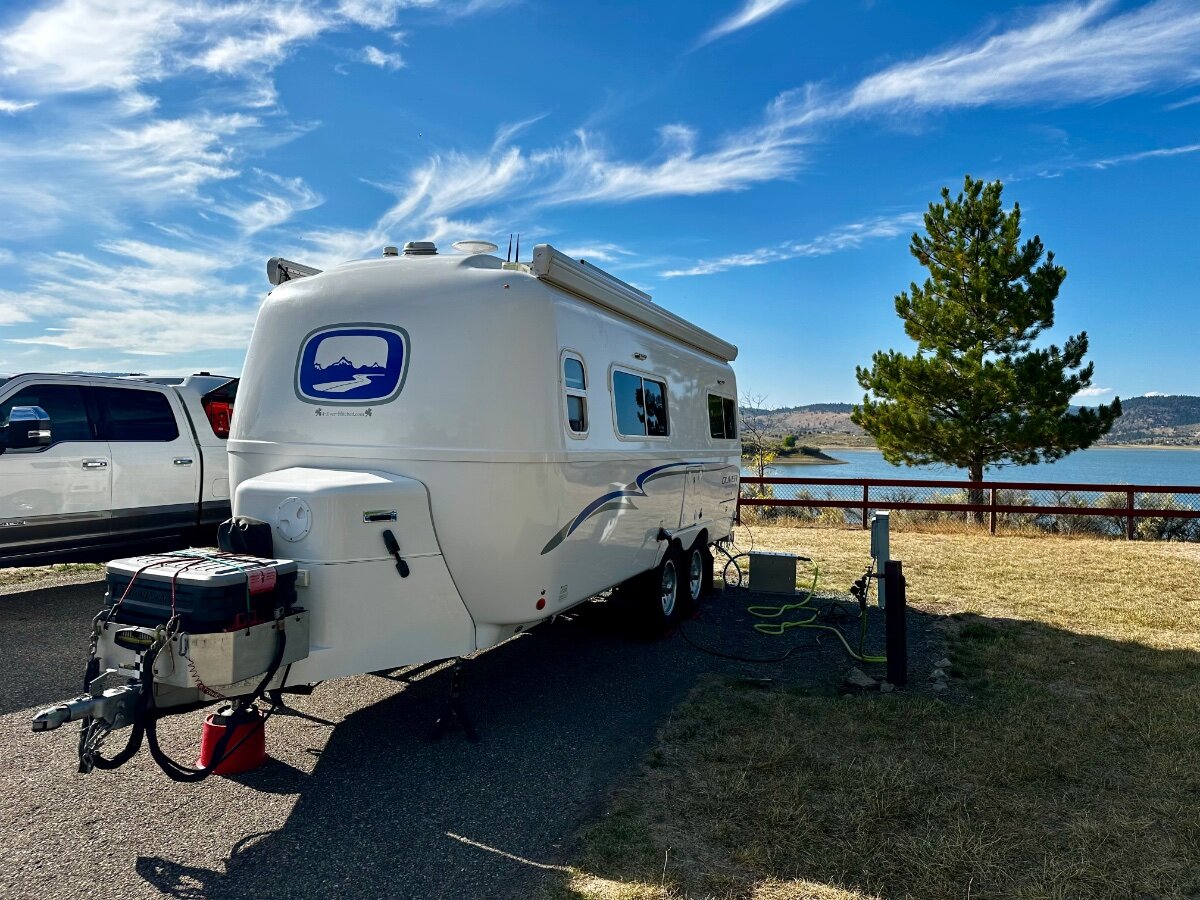
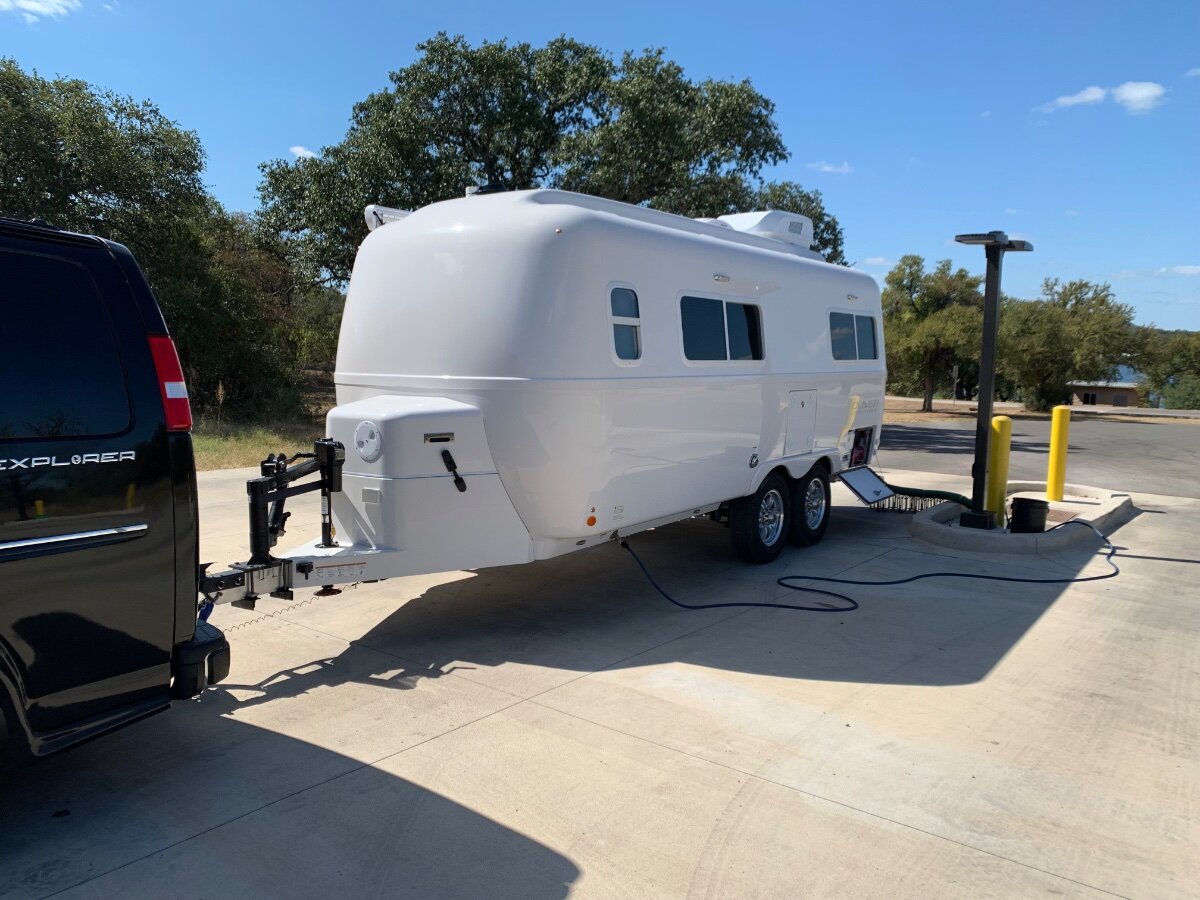
John, my good friend! I’ve been away from this forum and very busy! Like my new theme? (grey accents to match our graphics and tow vehicle). Found a local guy. He brought back our pasty 10-year-old hull to looking factory fresh again! Didn’t cost near the CGI advertised price. 😎 I was cleaning and painting parts while it was in the shop and it took me 2 long days to install everything including the new A/C (I removed the old unit, temporarily patched the 14x14” opening so the detailer could clean everything up top!).
4 points
-
Ditto for me. Relatively speaking, our installs are at the lower end of the scale of difficulty. Without additional monitoring devices (think Victron stuff here) there is some requirement for having a bit of experience with energy usage. Speaking for myself - while using my "old" lead acid batteries I never had an occasion where the batter charge of those was below 83% FULL! So, when I got my LiTime Li batteries that had even more amp hours of capacity AND they could be discharged much lower than the 50% limit of the old lead acid batteries, I found myself virtually bathing in a wonderful supply of energy. I should note here that I VERY RARELY have a need for air conditioning and I am VERY conservative of even using the furnace (think blower motor using electricity here). But, if you are in a similar boat, you too can do this conversation VERY easily. But, if you want/need more bells and whistles then adding what you need is really not too difficult. Bill3 points
-
When I got the Starlink Mini, I ditched the weBoost and now rely on Wi-Fi rather than a cellular network in areas with poor cellular service.2 points
-
Great looking restoration and appearance upgrade, and looking forward to details of the new air conditioner install and first impressions! I have a feeling you will be using that scaffolding more often now to keep your Olie lookin’ purdy!2 points
-
Just got 2 230 amp hr Litime with blue tooth. Charged 1 to 100%. Will do other tommorrow2 points
-
I’ve had most work done (bearings, brakes, etc) locally. Most maintenance is generic and can be done by any experienced RV maintenance person or by the owner. Mike2 points
-
Beginning to research what I need to do to upgrade to lithium batteries. starting from zero. So don’t even know what I don’t know yet. I am pretty handy. I manage power plants for a living. So I think I can do it myself once I know what needs swapping out. any help would be appreciated!1 point
-
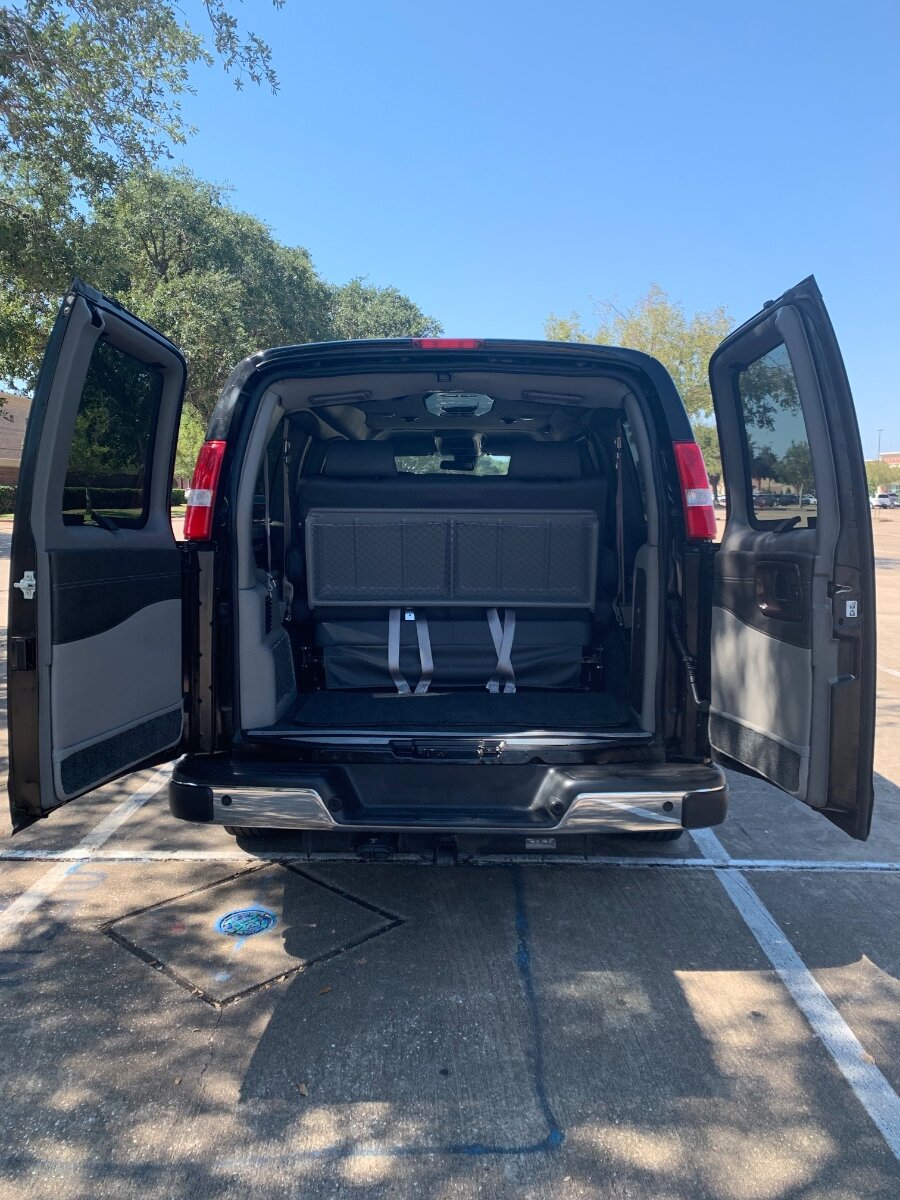
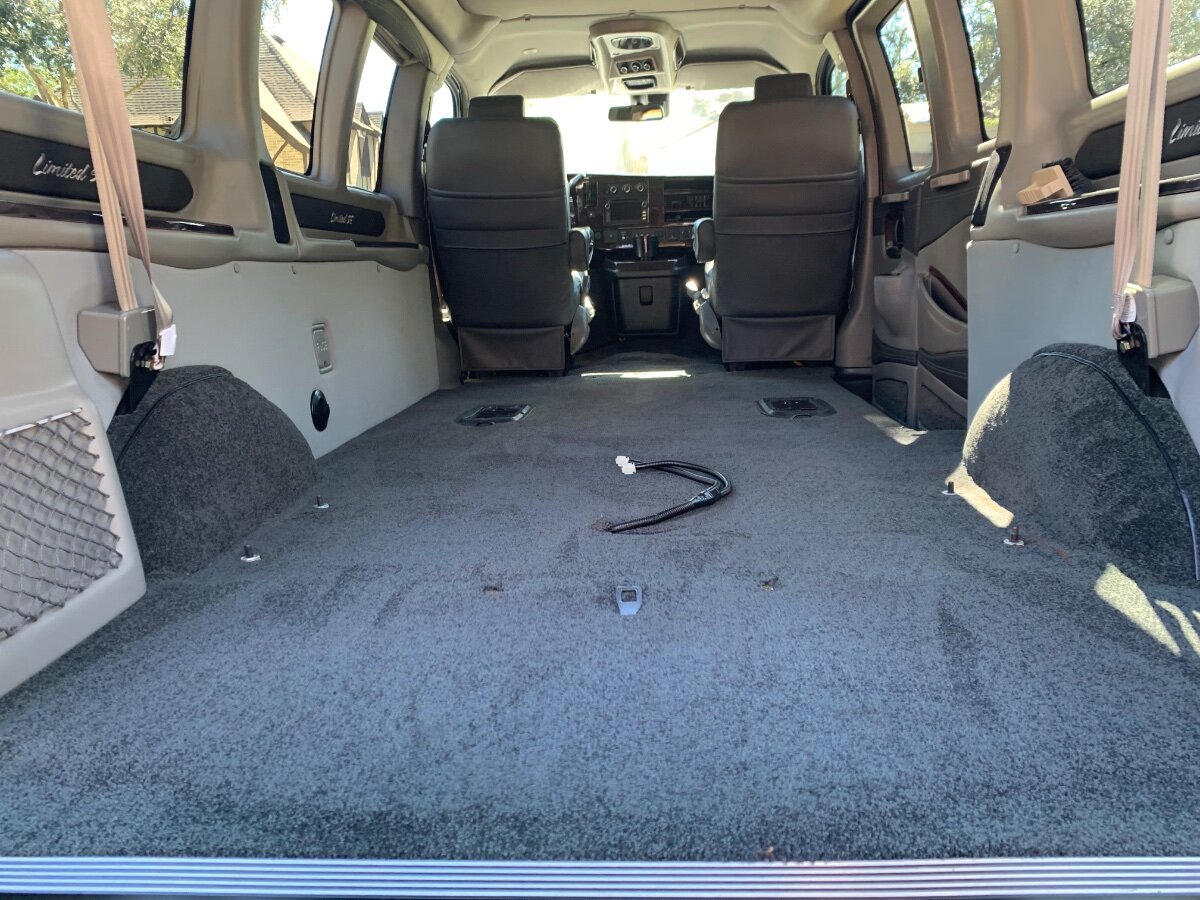
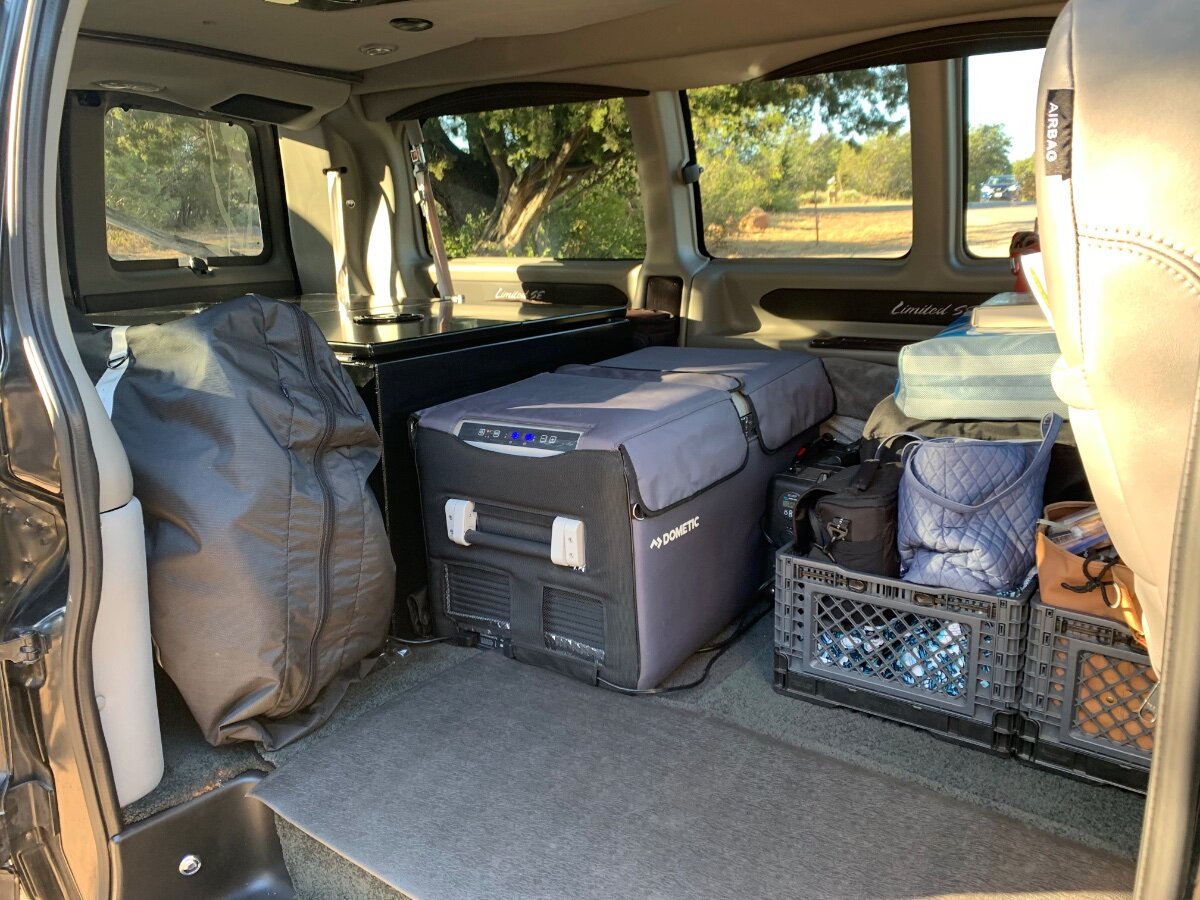
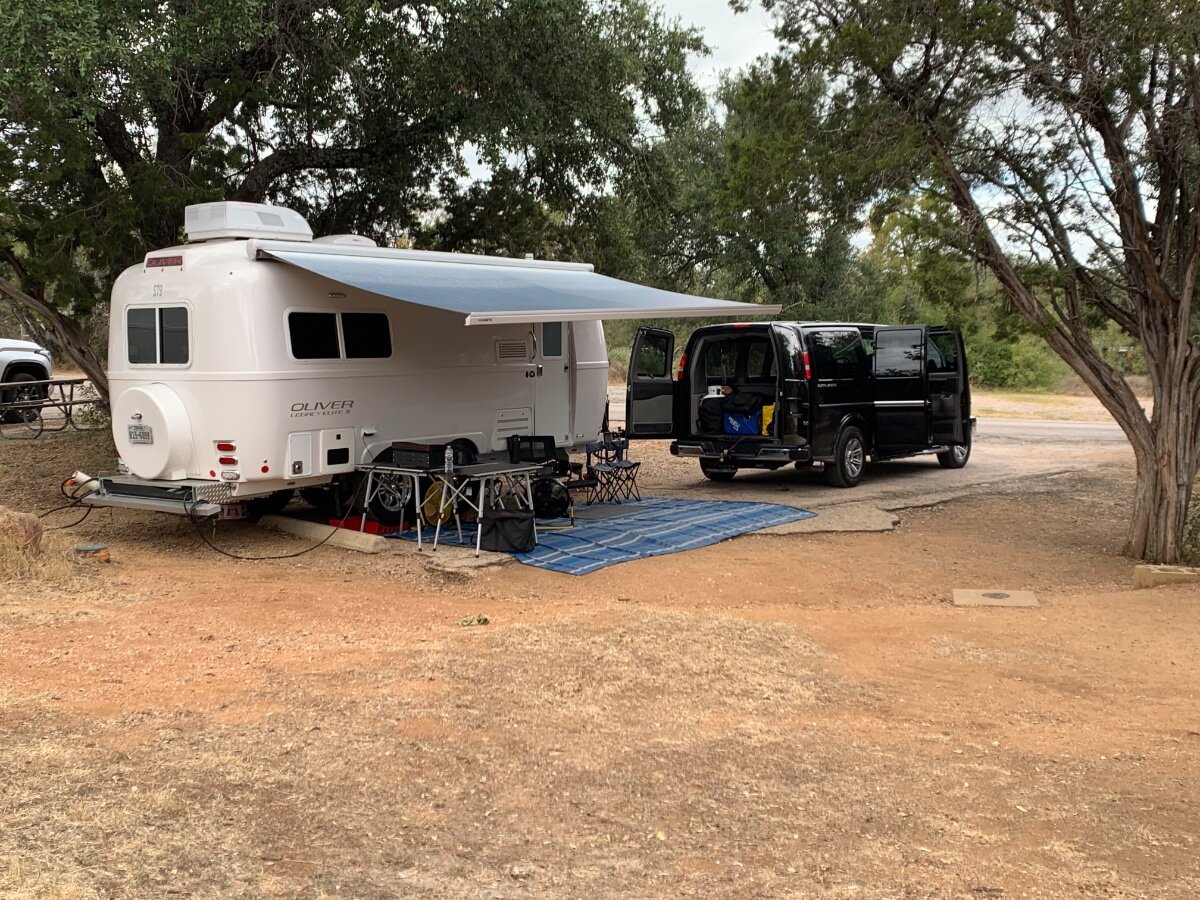
After several months of researching a suitable replacement TV, a van was decided to be our best choice based on perceived criterium, ie engine/drivetrain, cargo/tow capacity and tongue weight requirements for our OLEll and style of camping. The former 2012 Silverado 1500 4x4 was reaching ‘retirement age’ and I’ve been pushing its limits, regarding carrying capacity, for a couple of years. I will acknowledge up front that we are not minimalist! That said, this Explorer conversion van well exceeds my expectations in both spacial and towing considerations, as well as comfort and convenience. BTW, I told my wife “remind me to never buy another tow vehicle days before a planned trip!” Although ‘well appointed’, the passenger seats had to go; at least when towing our Oliver. The two second row captain’s chairs are easily removed via a release mechanism from the floor mounting base for occasional use, as needed; the third row couch/reclining bed not so much and will go to storage. By removing the passenger seats, I now have 10’ of open cargo space from the rear doors to the front seats; the Silverado’s bed only measured 5’8”, plus limited space in its back seat. Having double doors on both side and rear of the van vastly improved access to the cargo area. The two vehicles were positioned end-to-end to facilitate easy cargo transfer for organizational purposes. Ultimately, two storage boxes were acquired to safely stow much of the cargo; specifically, underbody tool boxes. Yep, delivered one day before our departure to the Texas Oliver Rally at Inks Lake SP, what was I thinking! The boxes are serving their purpose by providing secured organization of supplies and gear, with ample room for our folding e-bikes, Dometic fridge/freezer, portable power station, generators, spare 30 lb. propane tank and a couple of small bins. Camp R&B, Inks Lake SP, Site 227; Texas Oliver Rally, October 20-25, 2024.
1 point
-
I am on my fourth (and hopefully last) mattress for my twin bed E2. Each version was a improvement over the prior and so far v.4 has all of the attributes I was looking for (easy to move mattress to access valves under bed, firm base so bed can be used for sitting during the day yet soft enough to be comfortable for a side sleeper). If the deep memory foam mattresses work for you thats great. Consider this an option for those of us who want something firmer yet easy to move to access the hatches beneath the bed v.1 was the standard cushions. Not comfortable for side sleeper v.2 was a 4” thick air mattress on top of standard cushion. This was firm but with a dog and cat quickly sprung a leak and I was back to v.1 v.3 was a custom cut innerspring mattress with a 30” wide Hest foamy topper. This worked great but after two years of travel the mattress developed sagging tendencies and since it was radiused in only one corner it could not be flipped or rotated v.4 is a hest sleep system (30” wide) which features a inflatable base made like a inflatable stand up paddleboard with chambering so that it inflates perfectly flat. The 2-3” thick memory foam topper is attached to the inflatable base, which once inflated in place is secure but is easily flipped-up as a single unit to access the hatches beneath the bed. v.4 has only been tested a few nights but will soon be on the road for 2.5 months of daily/nightly use. Will report back with updates
1 point
-
Those guys are a lot faster than I am! But if I could do two axles at their pace, it would be $300 a year cost. Ten years that I hope to be around say $3,000. The Dexter NeverLubes I understand should go ten years. So, mathamatically speaking, I am financially well ahead in getting the 5200 never lubes with their better brakes. RIght? GJ1 point
-
Ditto. Love our Battleborns. But knowing what's out there now, as posted many times by many owners, the cost of three of them (300AH) and the cabling could lead me today to another larger single battery. PS: In addition to the SOC capability, our 2019 OE2's do not have a master 350 amp shut off switch. Yes there are lots of opinins as to where to mount it, but 95% see the need to ba able to stop the source of power in an emergency QUICKLY. So please add that to the need to do list. Below is John Davies' approach. John Davies Master Battery Switch.docx Note that his install was for 200 amps and inside the cabin basement. I suggest using the 350 amp version as it is higher than the fuse in the 4/0 cabling. Also, I suggest mounting it in the battery box to not delay exiting a smoke filled trailer in an emergency. Get out and shut it off outside. Always grab your fire extinguisher and have it handy. But get the family out first.1 point
-
I put some caulk UNDER not around the furnace frame and none around the windows. Looks much better now!
1 point
-
Thank you Rideandfly (Bill); do you use Visible as your discount provider?1 point
-
I'm going with NO silicone after spending many HOURS removing all the caulk on caulk spread aimlessly through the years. Compare this picture to the ones above! And notice all the CR@P on the ground, never again! 😎
1 point
-
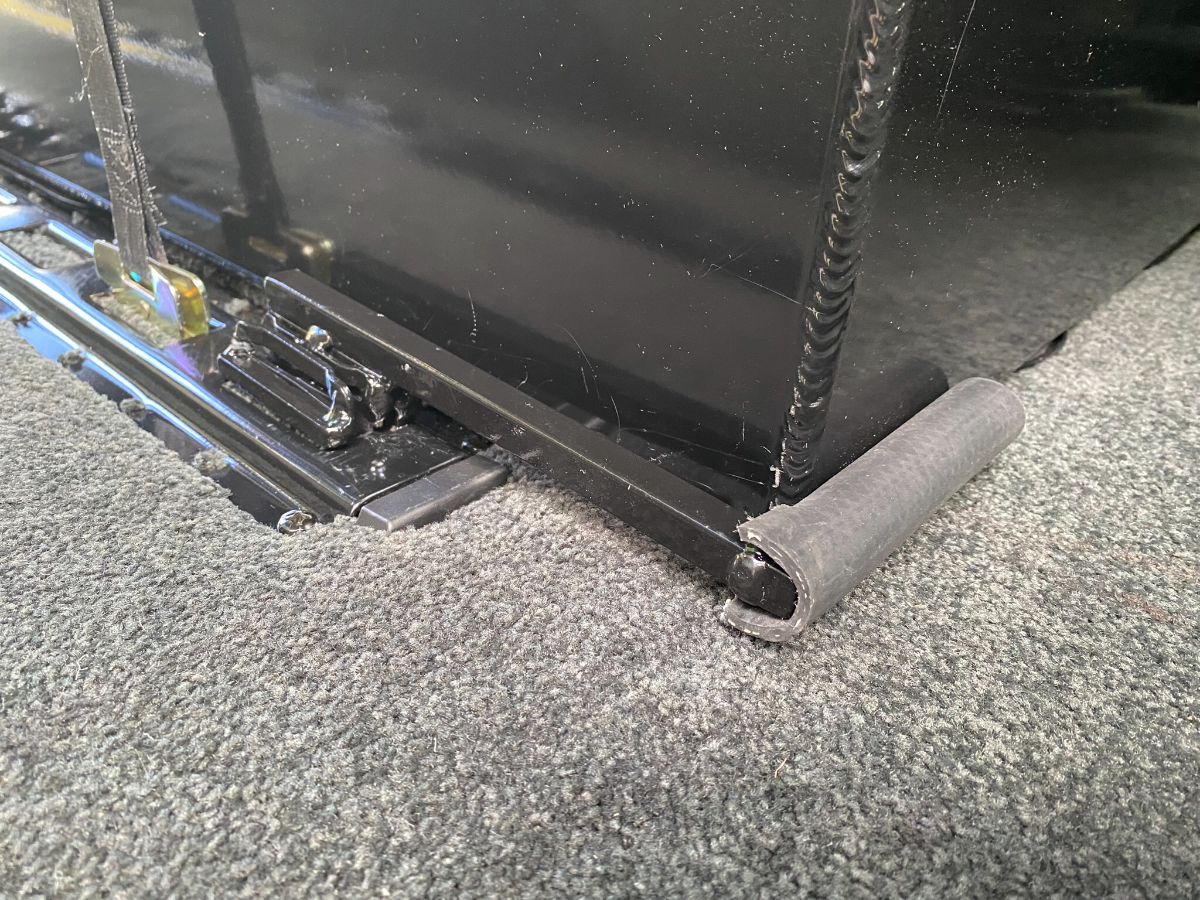
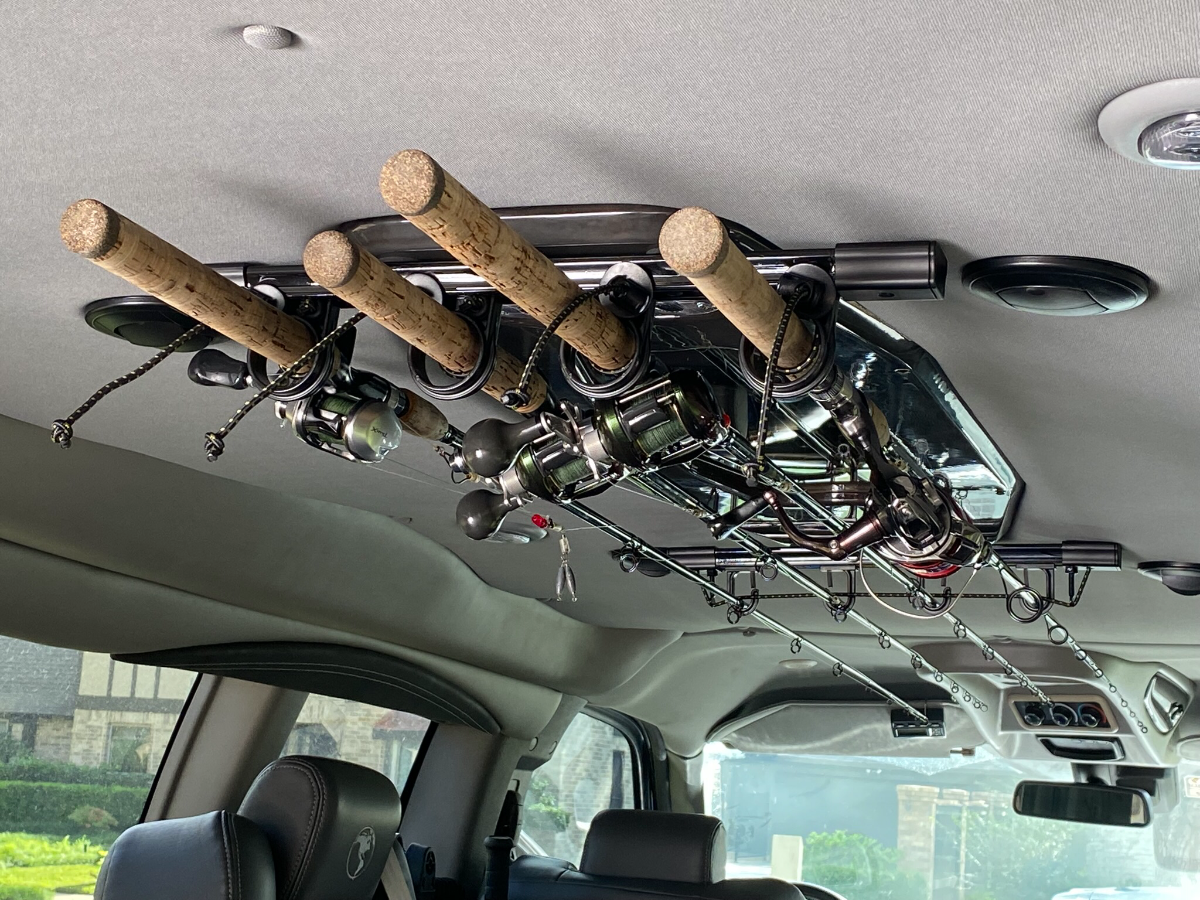
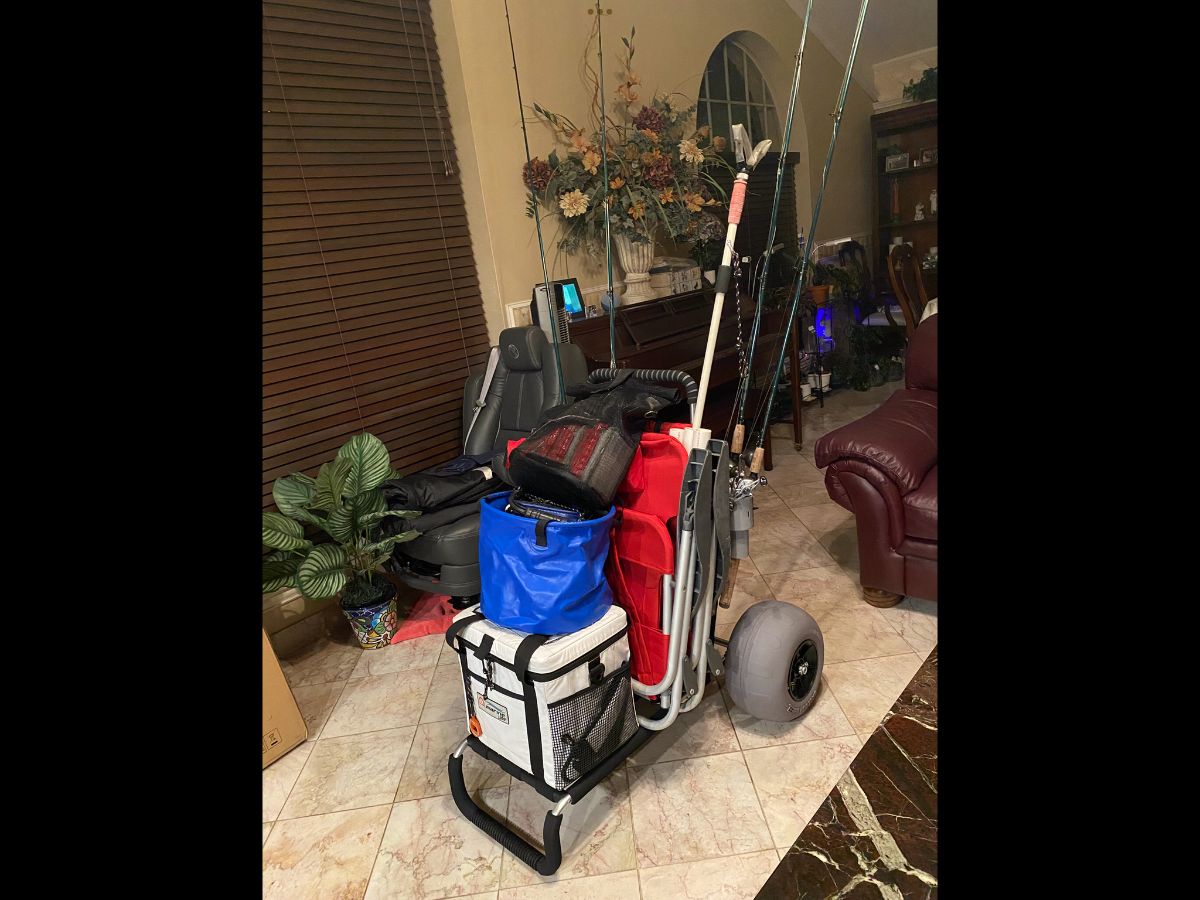
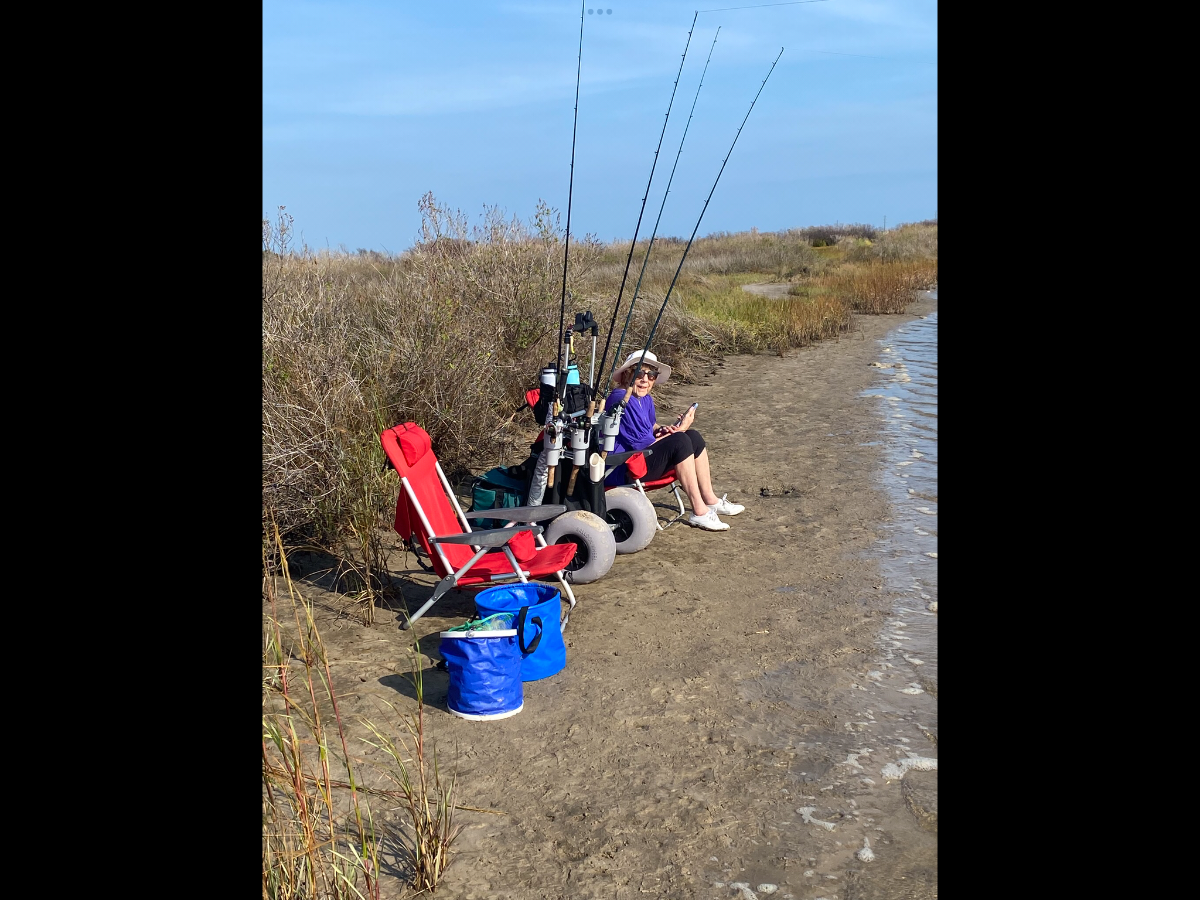
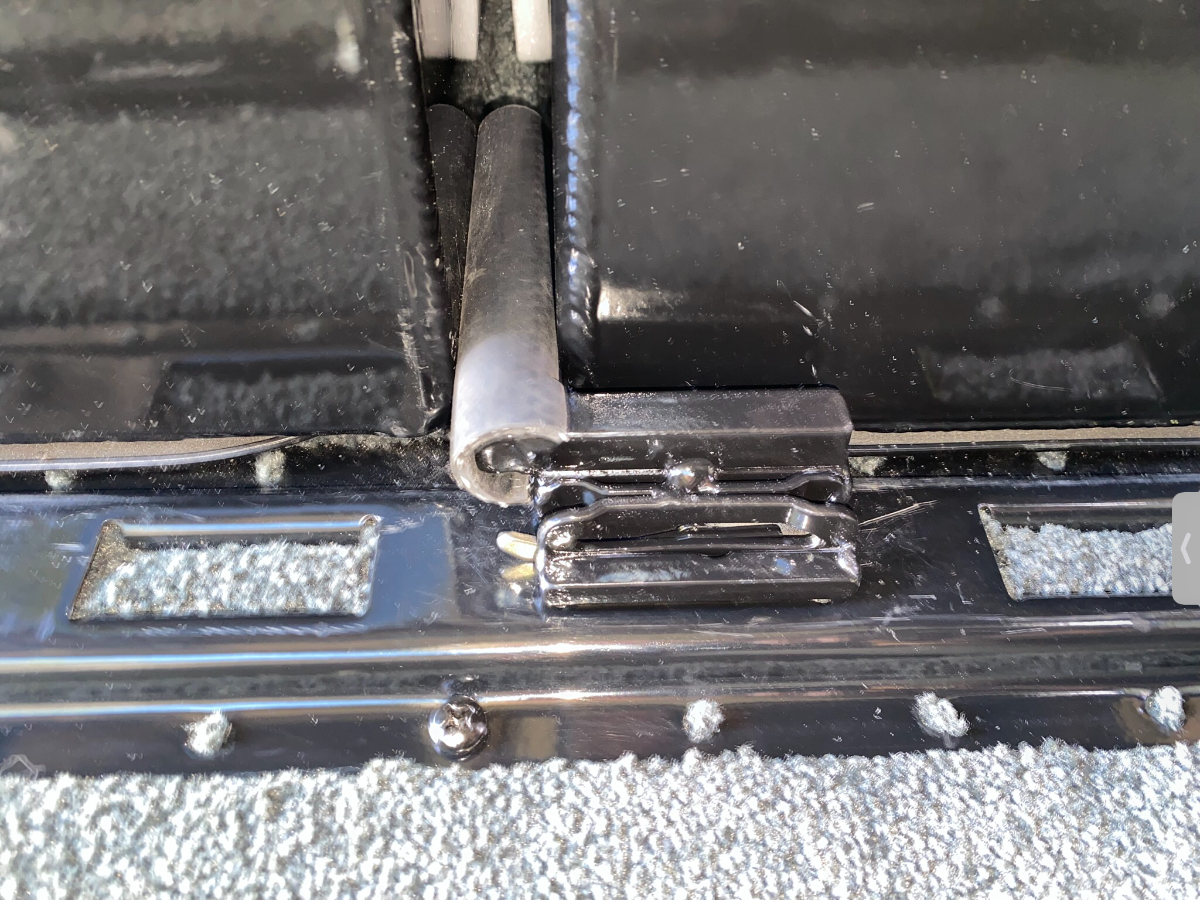
Lessons learned from our previous trip to Galveston Island SP, better cargo securement and improved fishing equipment handling. In an effort to better hold the two cargo boxes in place during transit, I welded some adjustable stops to mitigate movement. Although the ratchet straps are still necessary for hold-down securement, they allowed said boxes to slide a tad. I simply modified some rail system fasteners to make stops, which worked great in application! I also wanted to incorporate fishing into our coastal trips to share the same joy of angling I’ve had most of my life with my wife. During a prior trip we had to carry all of the equipment to fishing spots, a burdensome task for these elders. Upon return home I ordered a beach cart, problem solved! Our last trip proved much easier and enjoyable, wherein the cart could be loaded for fishing connivence or for a relaxing evening just sitting on the beach to watch the moon rise and sun set. I also addressed an issue in transporting my rods and reels in the Savana. Here are some pics: Set of stops readied for installation. Forward cargo box stop in place. Rearward cargo box stop in place. Beach cart mockup. Dismantled cart and fishing equipment staged for transport. Fishing spot setup. Rod and reel holder in Savana.
1 point
-
With shop rates getting to the point of about $150.00 per hour, you are probably a touch low on the $50. But around $75 per wheel would probably get it done. Bill p.s. while just about any boat or regular trailer can do this job - I'd ask around a bit to get some recommendations. Bearing service is NOT difficult. But, if it is not done properly it can cause you some real headaches down that lonesome road.1 point
-
Very nice JD, 👏👏👏👏1 point
-
You’d need the smaller snap-ring pliers, a 1 7/16” socket and breaker bar to service the brakes. Then a torque wrench at 150# to reinstall. Dexter via Alcan replied the spindle nuts are reusable. Easy job, no grease to mess with! 😎1 point
-
This seems like a lotta money for things that I can mostly do myself, not to mention the 1350 mile one-way trip. Personally, I wouldn’t want to repack my bearings, how much would it cost to have a mechanic do this? $50/wheel? That seems reasonable. I’d grease the zerks though. The folks on this forum seem pretty well informed and capable. Jamie1 point
-
Cave Creek Regional Park, our 3rd visit! Site #9 is the best spot in the park! Better yet, @ChristianD will stop by soon to meet. They live only 15 min away. 😂
1 point
-
Over Thanksgiving week, my wife, daughter, dog and I drove out to Yosemite and Sequoia National parks. I let the dog do most of the driving 🙂 Camped at Yosemite Pines RV park, which was very nice, but a bit far from Yosemite. Made for some long morning and evening drives. Spend about 4 days there. My daughter worked from the RV one day via Starlink. That was our first experience with it and it went really good. Sequoia we stayed at Lemon Cove RV park. Decent place and much closer to the NP gates. Saw a bear on Bear Hill one morning, so we decided not to hike that area that morning. Had lunch with some deer then drove up to Kings Canyon, which was better, in our opinion, than Sequoia. All beautiful places though. The Oli towed great the entire trip and was nice to have some of the updates I had done previous to this trip. The new axels and Alcan springs felt great. The new Tosot AC/heater worked well for night time when I ran it for heat since I was plugged in to campsite power. No reason to burn through the propane while hooked to electrical. New Truma water heater worked perfect too. Overall, a great trip and no issues with the Oliver. It was also nice to have our daughter fly in from Denver and spend the week with us.
1 point
-
@Gene G. Most here have gone to Epoch (15% OFF ended yesterday! 🙃) or LiTime. Search for these keywords. Install new batteries, get rid of extra wires in bay in preference of new internal busses. Change charger configuration or replace charger for LiFePO4 type. That’s all. I installed 600 Ah Epoch summer of 2024. Just purchased on sale another 300 Ah Epoch Essential and soon we will have 900 Ah snug in the bay! 😎1 point
-
I also found it useless! Removed the rooftop rectangular antenna box, inside HW and cabling. Patched the Fiberglass on the roof for all the too many drill holes made in installation! Weboost is old-tech. Phones today have very good internal antennas! We went with a tow vehicle mounted Pepwave router and Parsec cell antenna with a T-Mobile 5G business plan! 😎 It doesn’t boost cell, but we’re online and text more often vs. talking when traveling. We’re connected wherever we travel, Chris can use her computer while I’m towing or away from the trailer in a day trip. We add Starlink when there’s no cell service Boondocking!1 point
-
If that 12v circuit breaker with manual reset trips again, plan on replacing it! I replaced the cheap, low quality stock breaker in my OLEll with a high quality Blue Sea Systems breaker. Problem solved!1 point
-
Be a bit careful in that there were MANY reasons Oliver chose to go the route they did. Actually one of the reasons was that WE (the current owners) were asking for ways to get service, delivery, and even new Oliver sales in locations other than Hohenwald. Oliver considered the risks associated with external dealerships and service centers and decided that as long as they could align themselves with ongoing operations that mirrored the family oriented operations of Oliver Travel Trailers, they would stand a chance of actually developing a "win-win" for the company and its customers. Unfortunately, it appears as though finding these family oriented businesses that treat customers and their product in exactly the same manner was a bit more difficult than planned. Obviously the aftermath of the Covid era has not helped either Oliver or the entire RV industry in general. Bill1 point
-
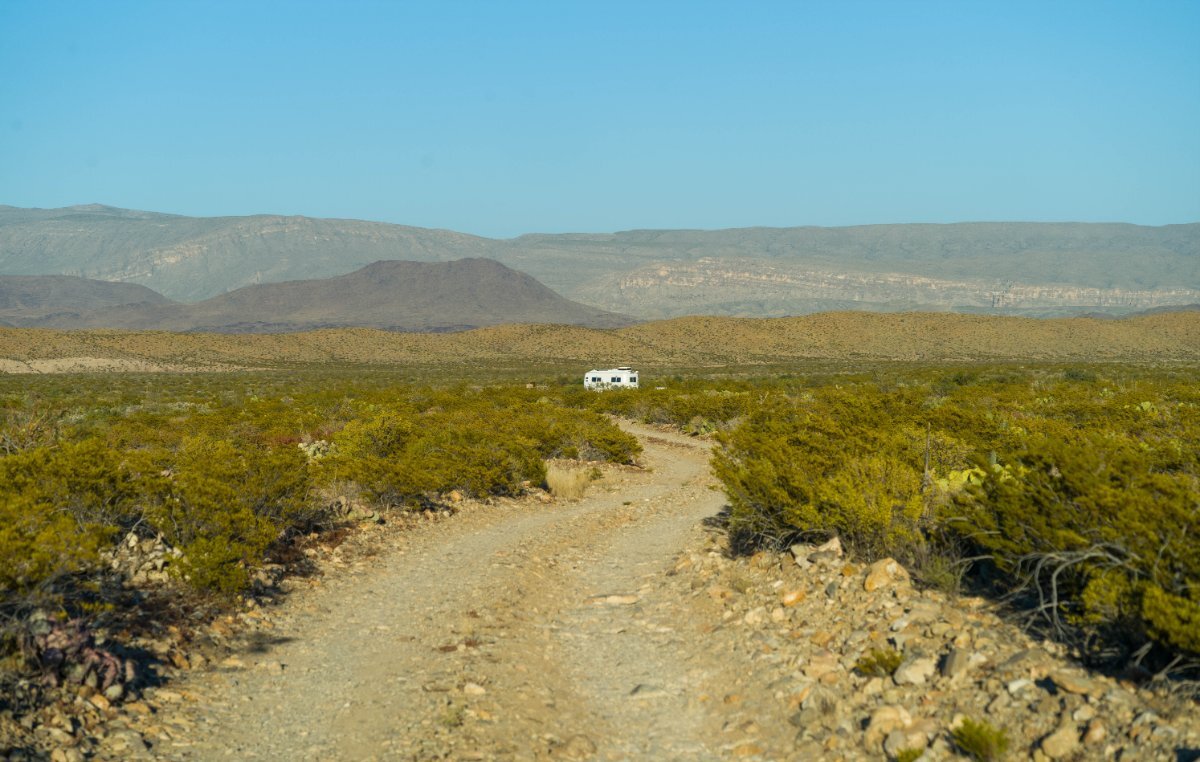
Been here for the last 5 days. Chihuahuan Desert, Big Bend NP
1 point
-
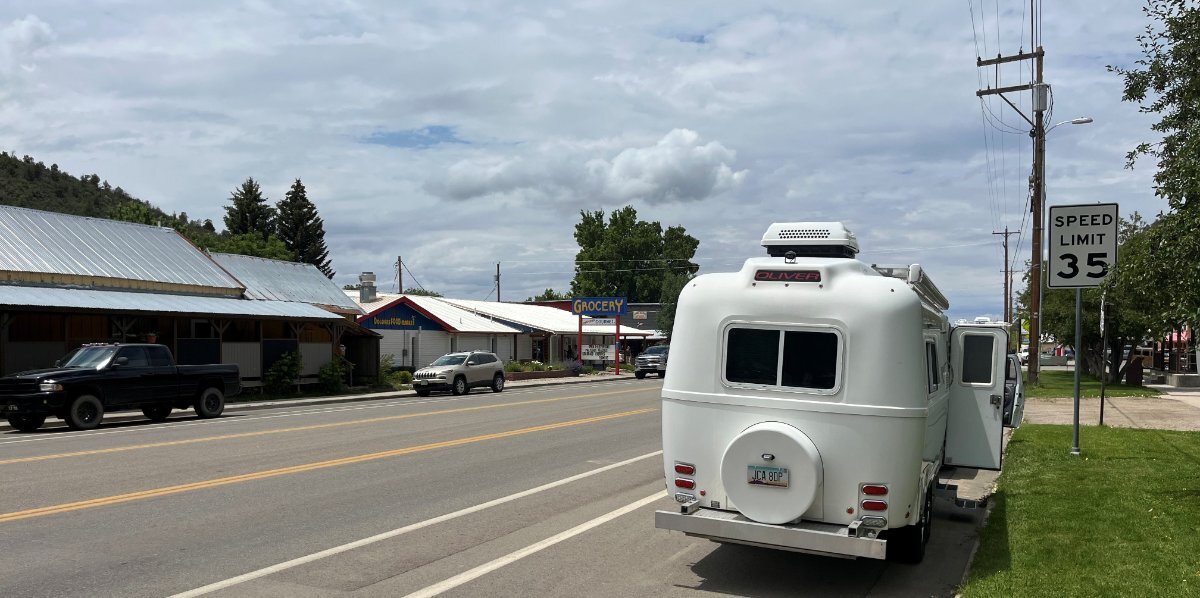
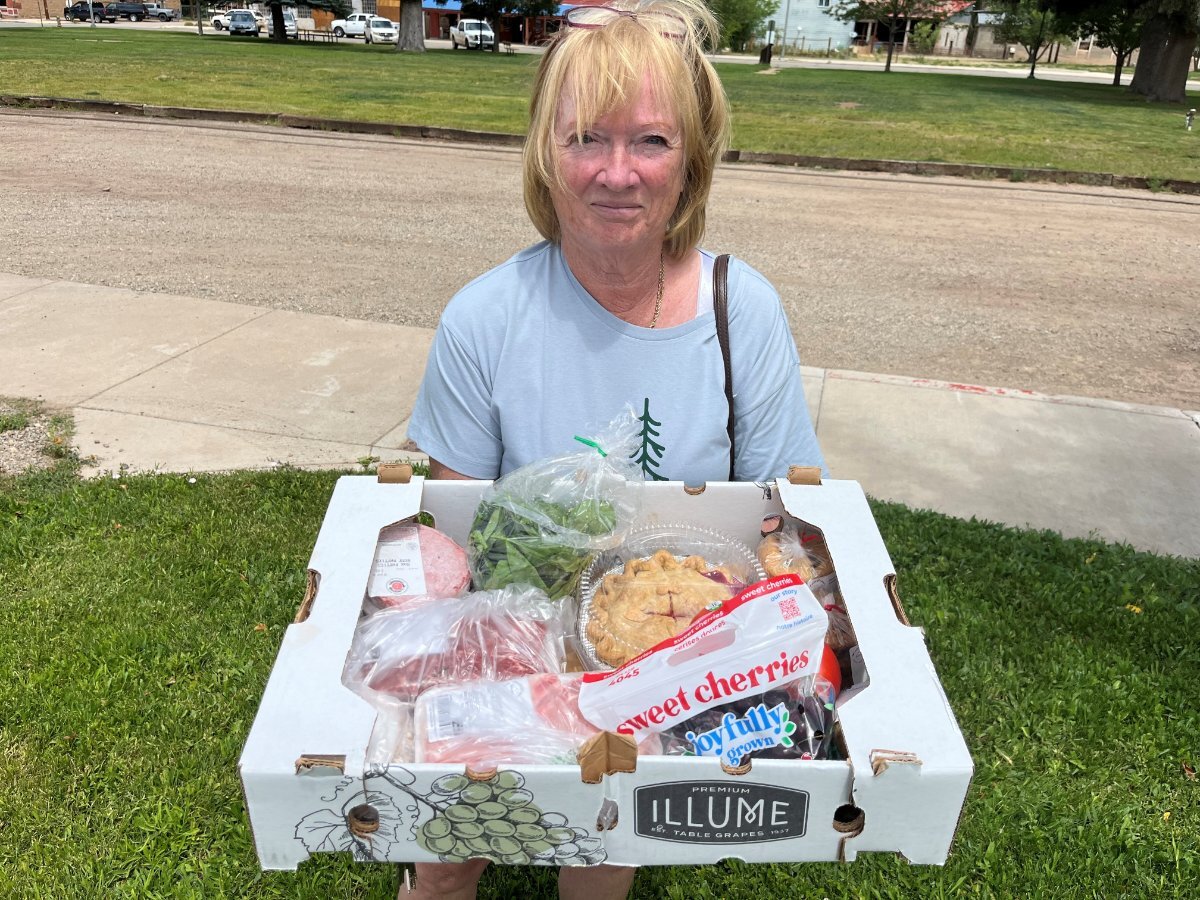
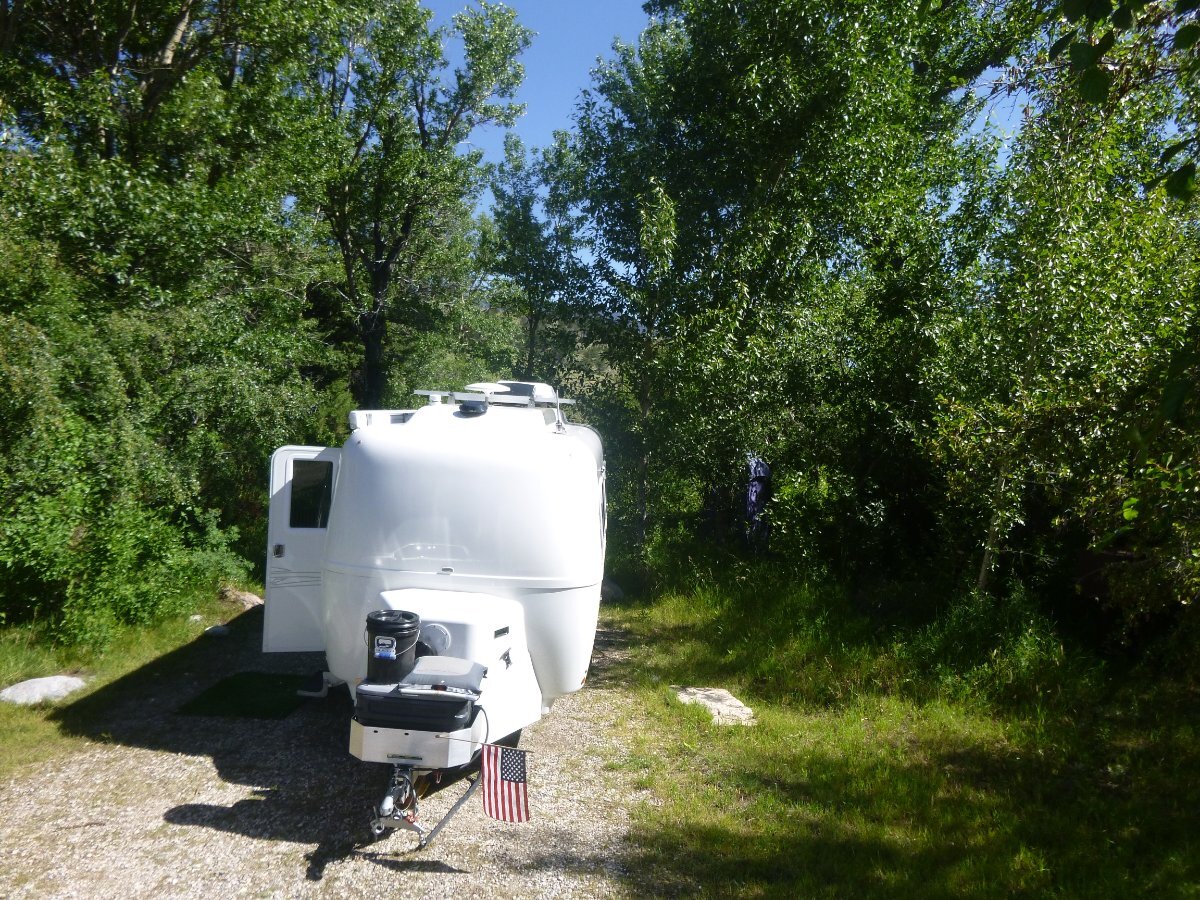
We're in site 5 which sits by itself for $35/night. Sites 3-4 were also nice and 1-2 are down in a bottom, all for $30. I imagine they're less busy since they are dry sites (good water offered at the farm), they're not keeping up the property so well and the river decks are not level and a bit creaky. Most RVers want hook-ups , but we wanted to be close to town and be alone. The RV park next door with hookups cost double and ALL the National campgrounds are closed now (we drove to McPhee Campground today). Not sure, are they closed after October 1st, or due to the Government shut-down? The Recreation.gov website is presently nonfunctional! Regardless of where you stay, come with empty fridge and shop at the Delores Market! Onsite butcher, great produce variety, local fresh baked goods and the best Cherry pie anywhere. They were out of pies when we stopped in late Sunday (got a small pumpkin bread instead, yum). We got an apple pie today with brown sugar crisp top! Yep, we've been there twice in just 24 hours! Pics from when we were here late june...
1 point
-
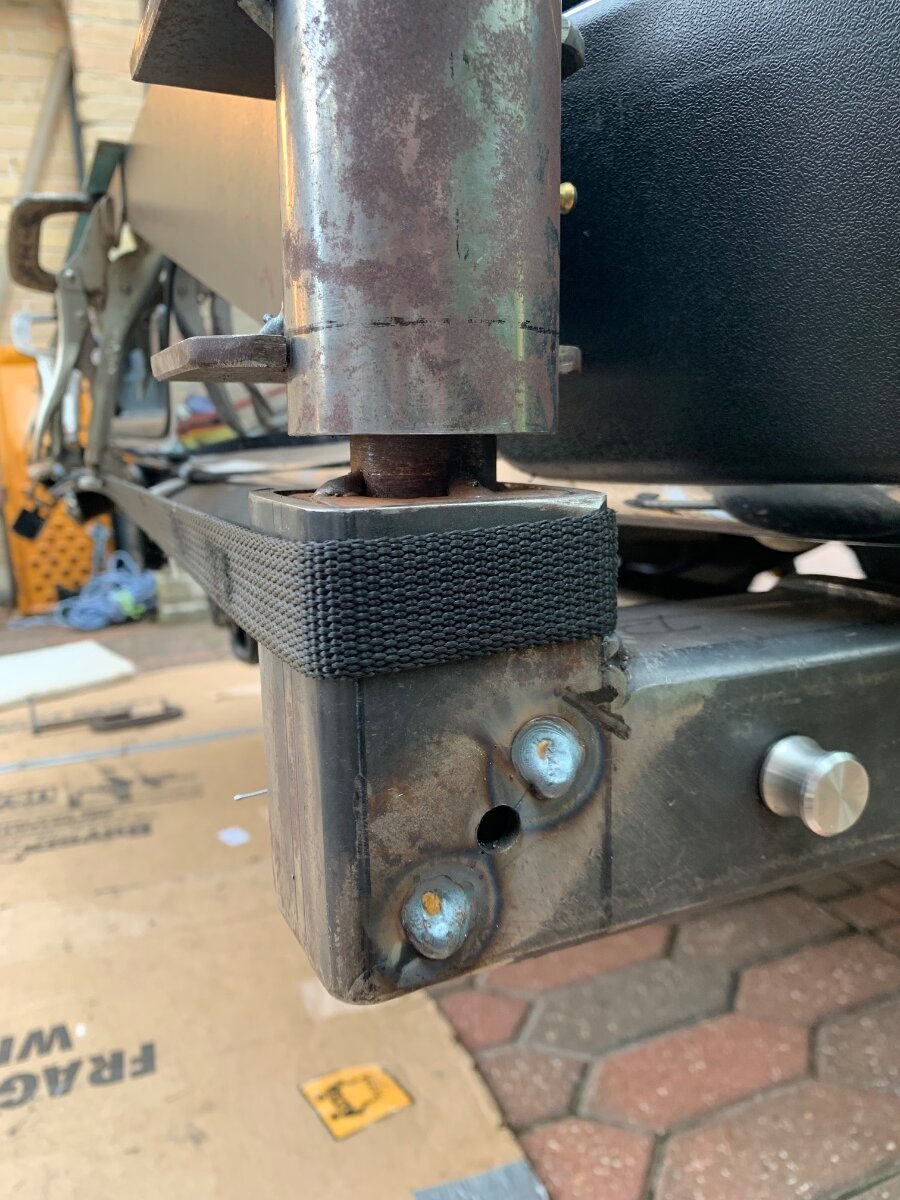
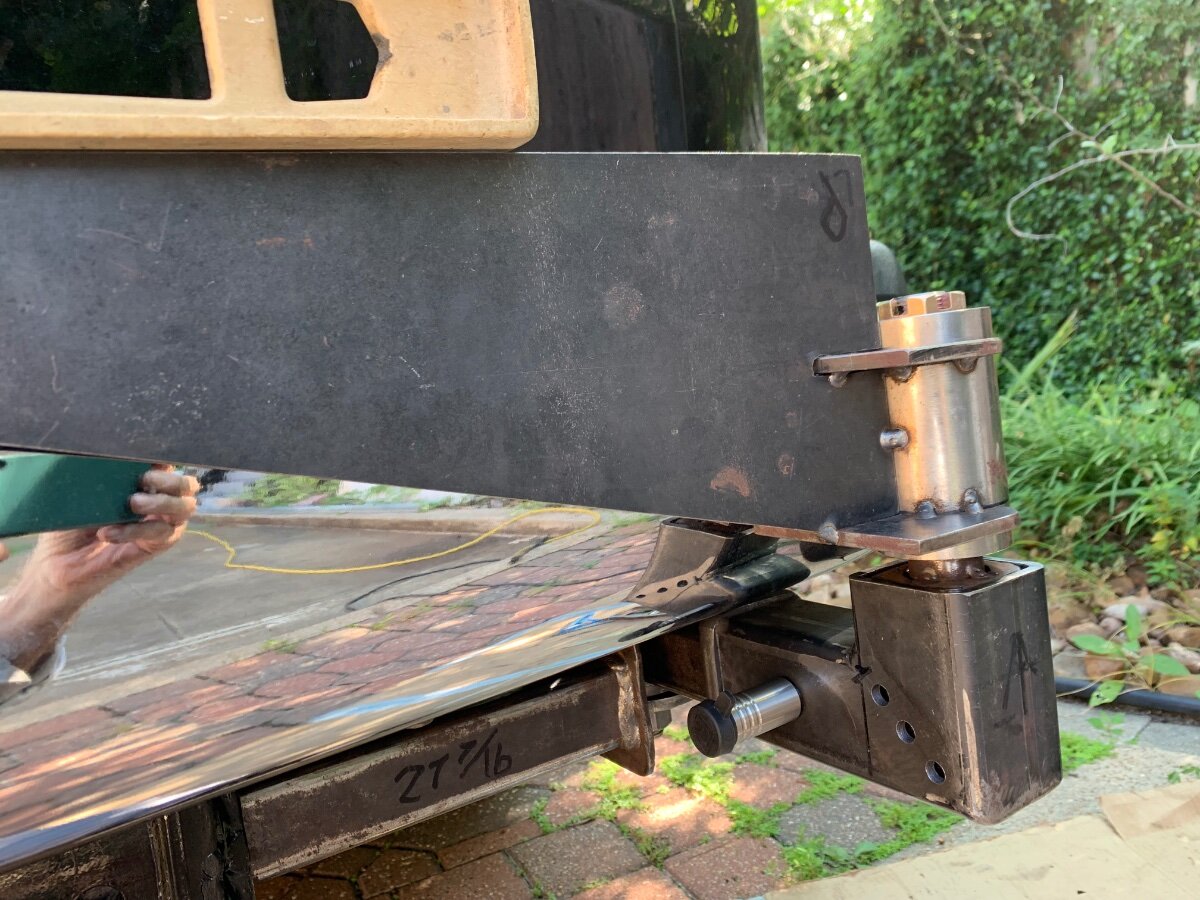
More progress, dual swing arm alignment. And yes, I was very nervous about welding on the Savana; one precautionary measure was a total battery disconnect under hood. Once aligned, spot welds were made at predrilled holes on each of the secondary receiver hitch/spindle bearing hinge assemblies. Finishing welds were then completed in the shop.
1 point
-
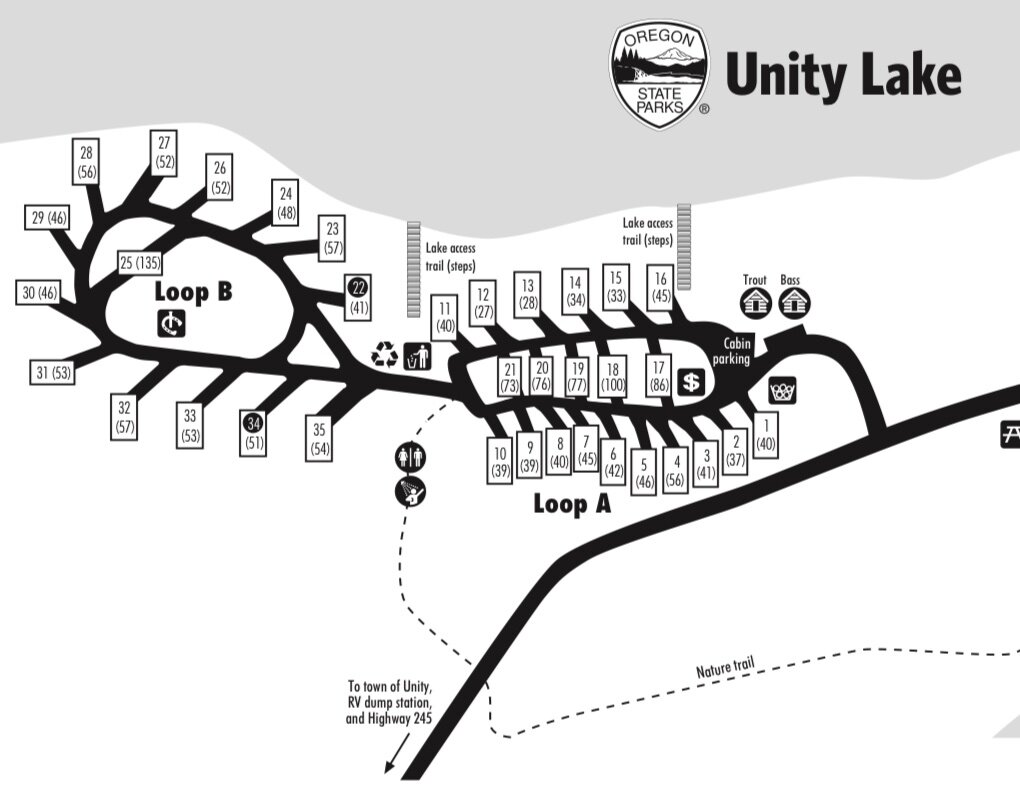
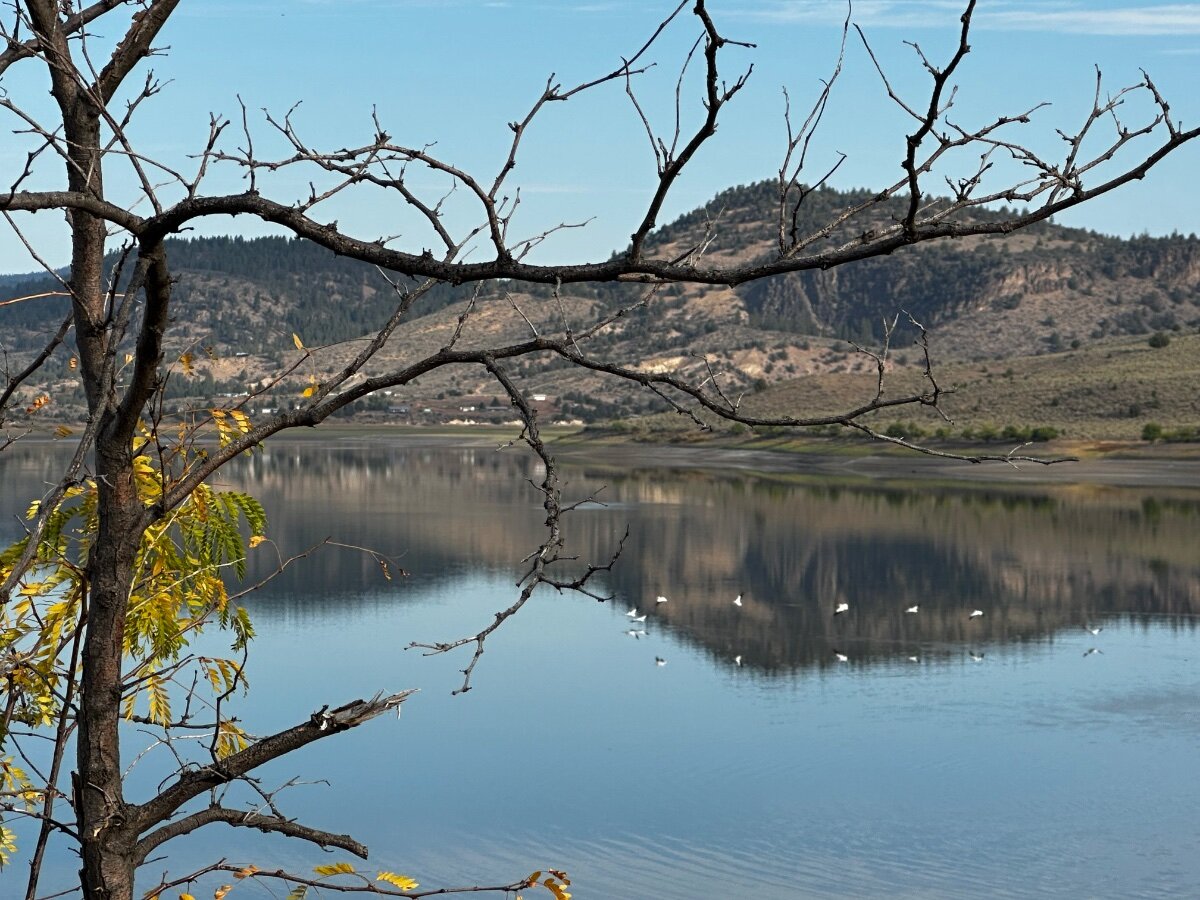
Unity Reservoir -Oregon Electric & Water Sites Great spot to watch migratory birds. Bookable on Oregon State Parks
1 point
-
Last night in East Glacier. We saw 2 other Ollies (including ADKcamper) 4 Casitas, 2 Scamps and 2 Escapes. A veritable fiberglass convention 😃1 point
-
In this view of the Tetons I'm headed WAY up the Gros Ventre River. Just north of the "major" (not) town of Kelly this was a place I could not resist to take the first pic. However, if you are ever near Moran Junction look for Elk Ranch Road and head for GPS: 43.82592677366998, -110.50216569188429. Here there are some old buildings and great views of the Tetons without being around 1,000 of your closest friends. Also, note that there is plenty of room to turn an Oliver around here. Finally - if you are in this area and have never eaten Dornan's Pizza (on the upper deck)(GPS:43.65754766116248, -110.71075629684981) , it is pretty good with a great view of both the Tetons and planes preparing to land at the Jackson airport. While at Dornan's you can also get gas, beer, wine, fishing stuff and a small selection of grocery items. Bill p.s. If you decide to go to Dornan's and you are towing the Ollie - a couple of suggestions- 1. Go early. The pizza place opens at 11:30 am and there will be a line of 20 to 50 people at that time. 2. Do not park down in the "store/gas area" with the Ollie. If you can pull down into that area so that you can turn around and head out. Park on the side of the access road and walk the short distance down into the store area. p.p.s. HERE is another review of Dornan's
1 point
-
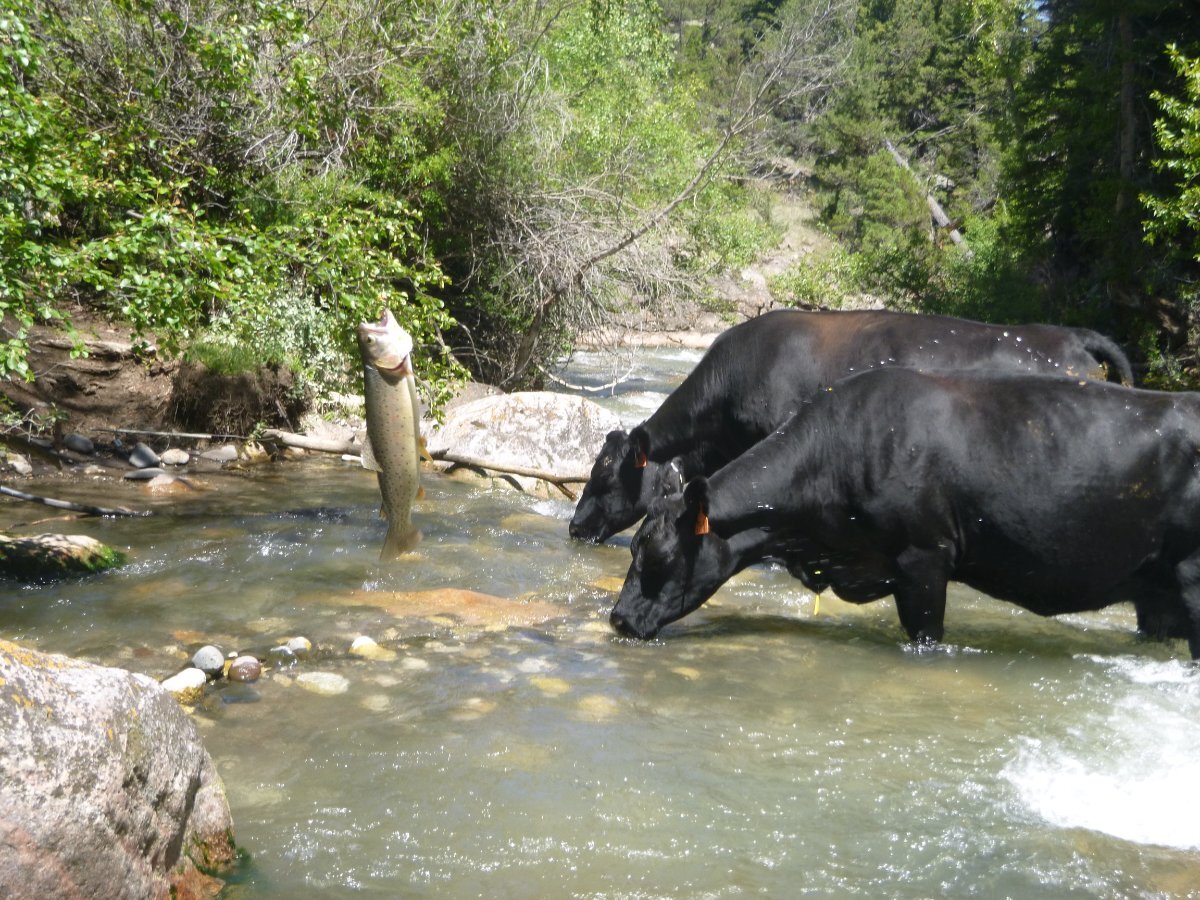
Dead Indian Creek is right behind Twist and is full of cows and fish (see second pic). This campground is located right on the Chief Joseph Highway about 35 miles north of Cody, WY. Bill
1 point
-
For anyone that has actually been to Atlantic City, New Jersey - Here is a picture of Atlantic City, WYOMING
1 point
-
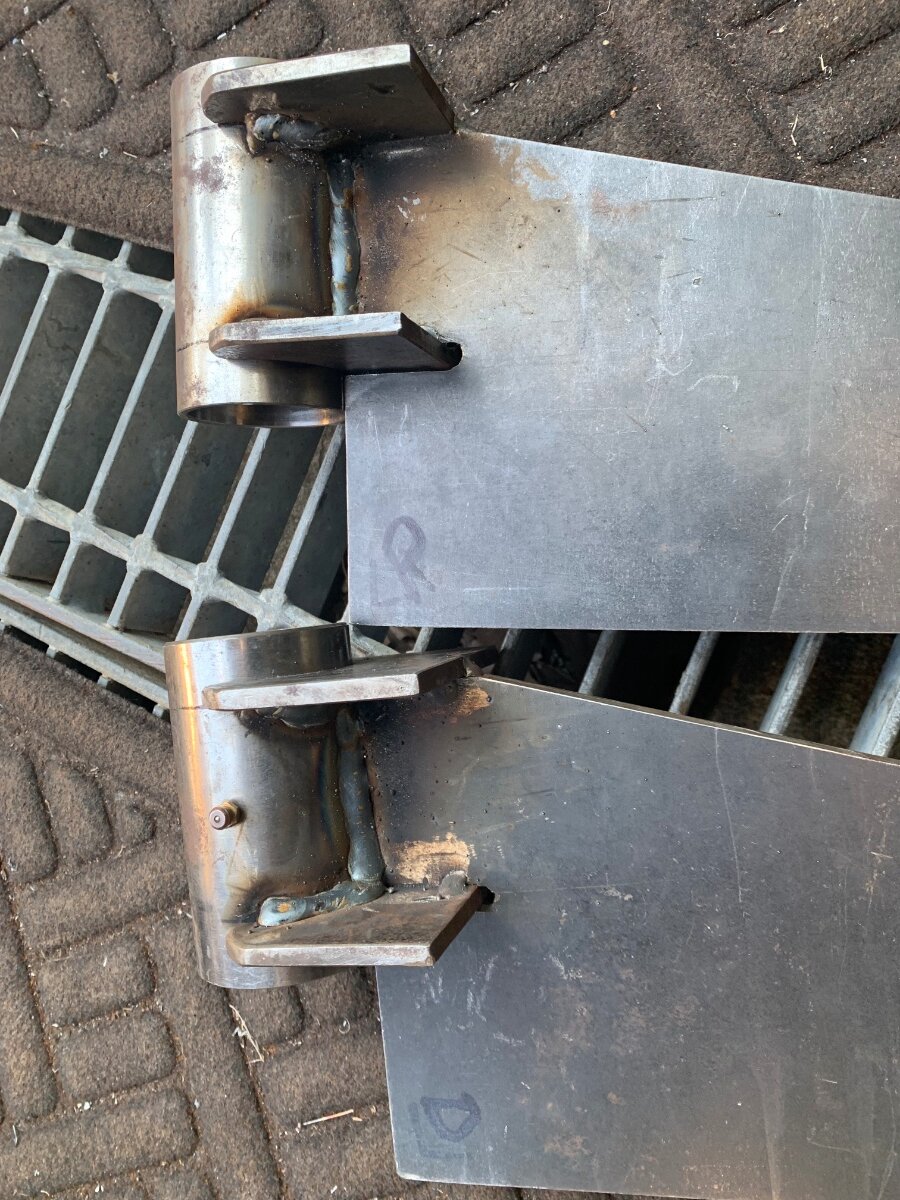
Slow progress, but progress none the less! Secondary receiver hitch/spindle bearing hinge assemblies furthered by addition of gussets for strength and support. Once welded out, a square tube will top each gusset to complete the swing out carrier arms. Custom racks will then be fabricated to hold and secure respective jerry cans and spare propane tank.
1 point
-
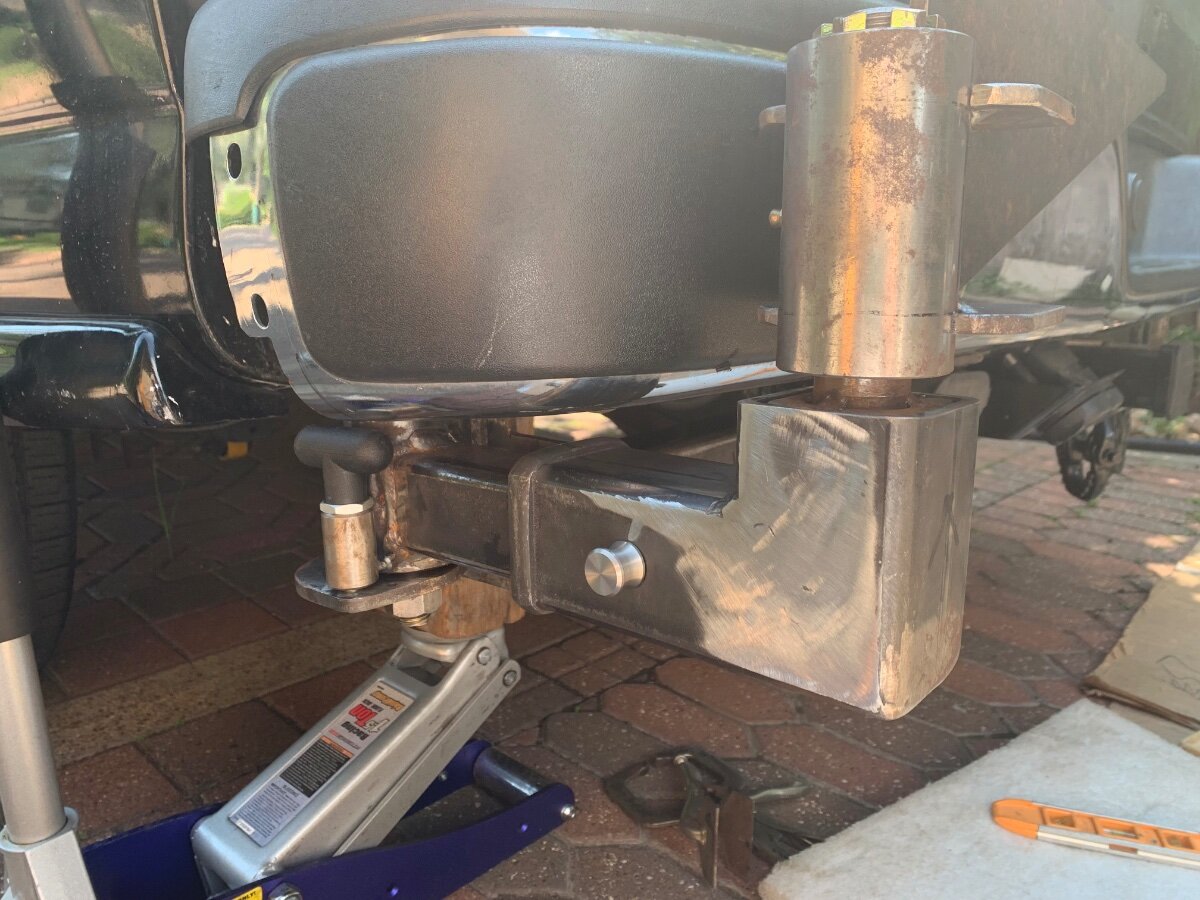
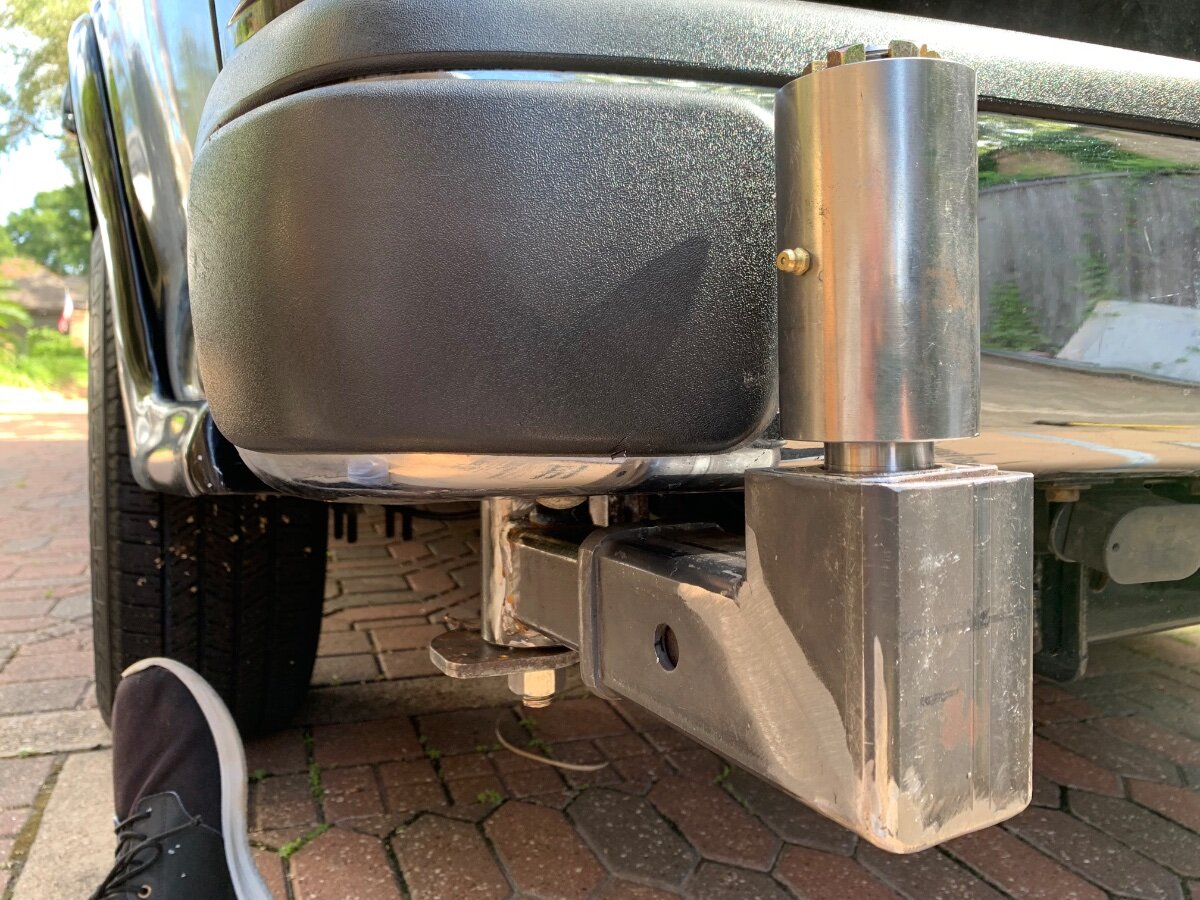
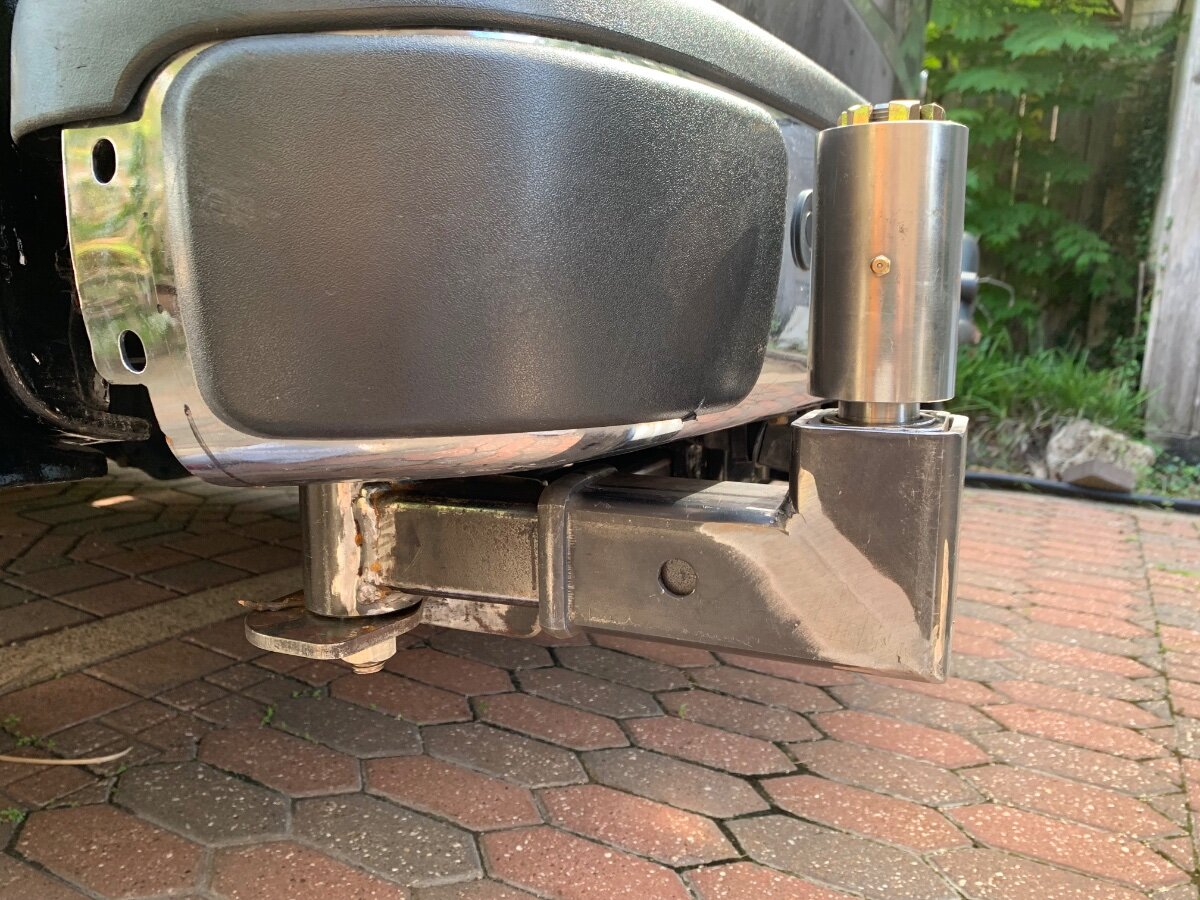
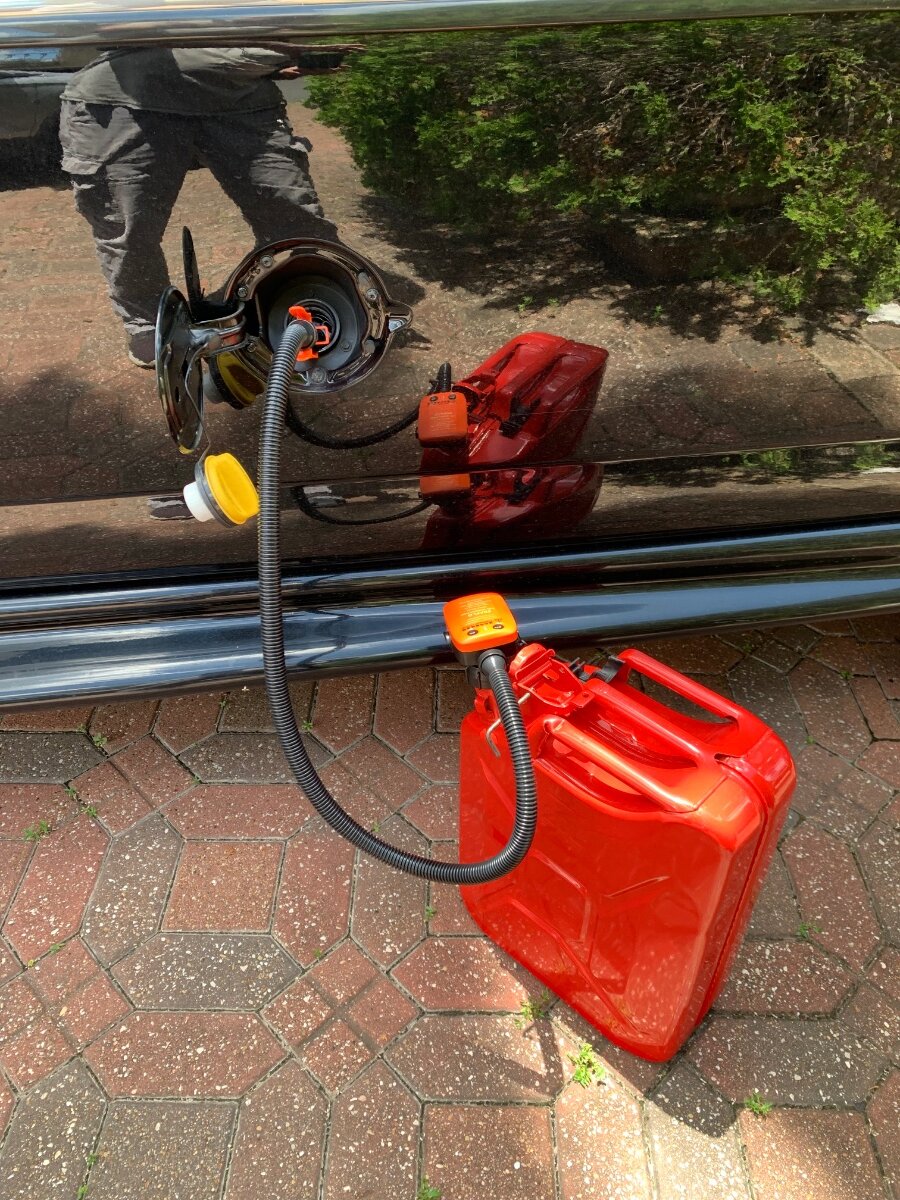
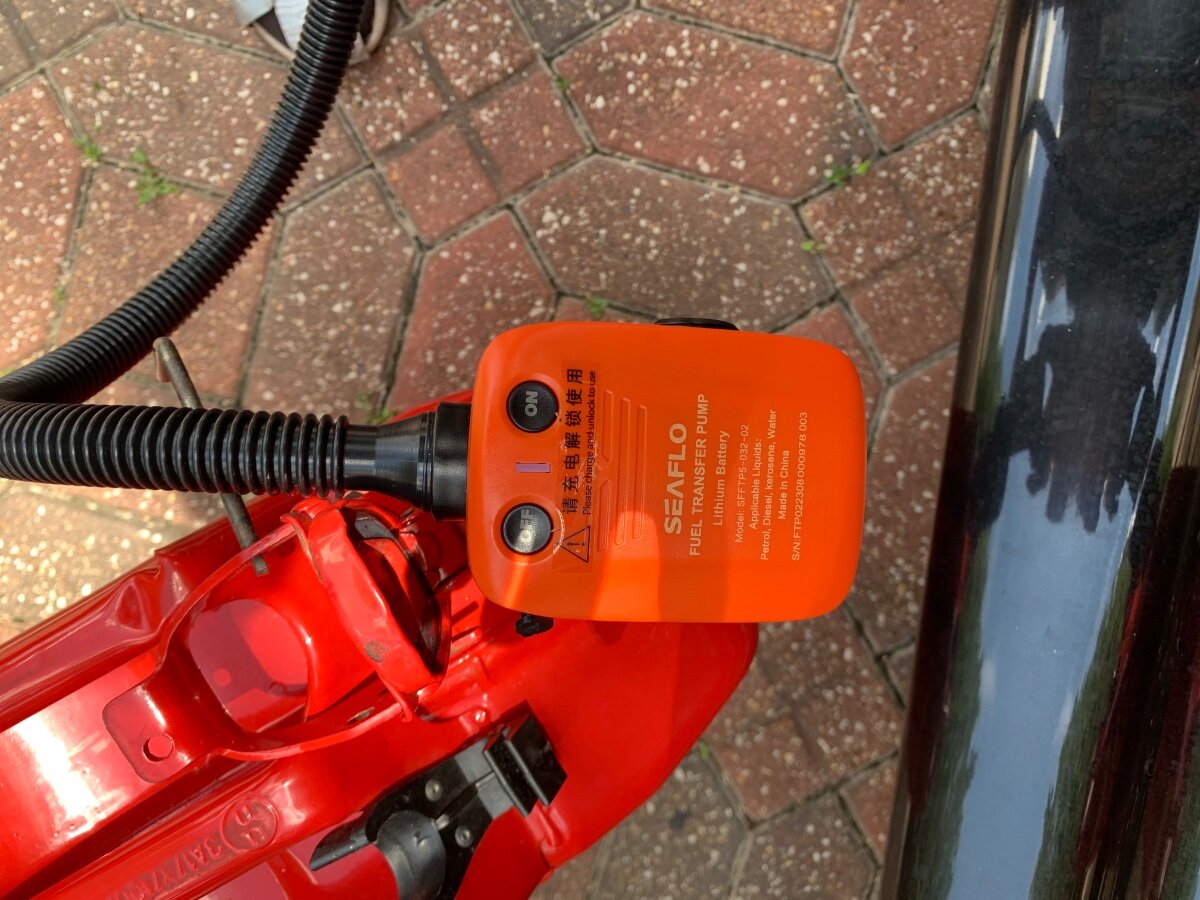
Mock up of secondary pivot components using a modified receiver hitch and spindle bearing hinge. A swing out carrier arm will be welded to these sleeves and span the width of each rear door. Drivers side shown where the jerry can carrier rack will be mounted. As a side note, electric fuel transport pump; stowed in a small Pelican case. I should be able to swing the mounted jerry cans completely out and refuel without removing them from the carrier rack. However, the fill hose would need to be extended a couple feet.
1 point
-
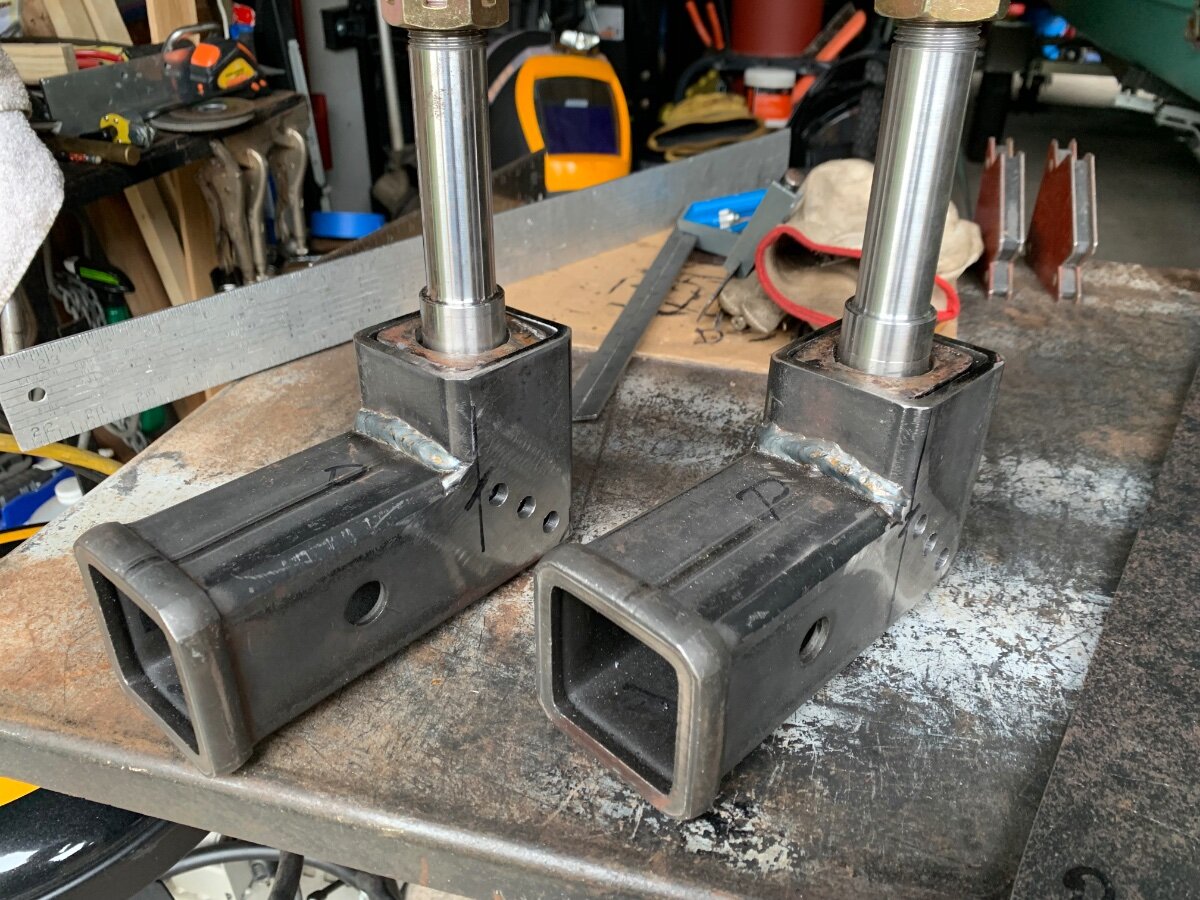
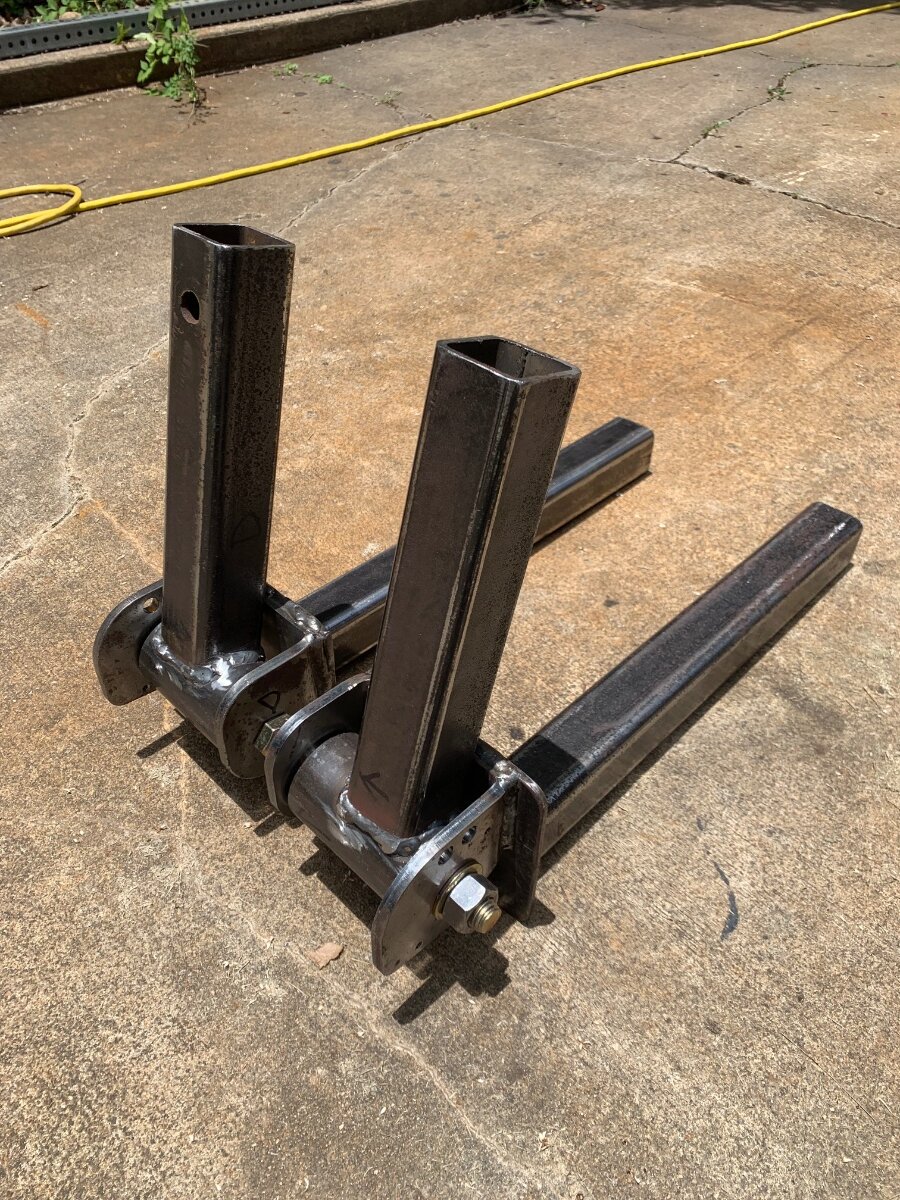
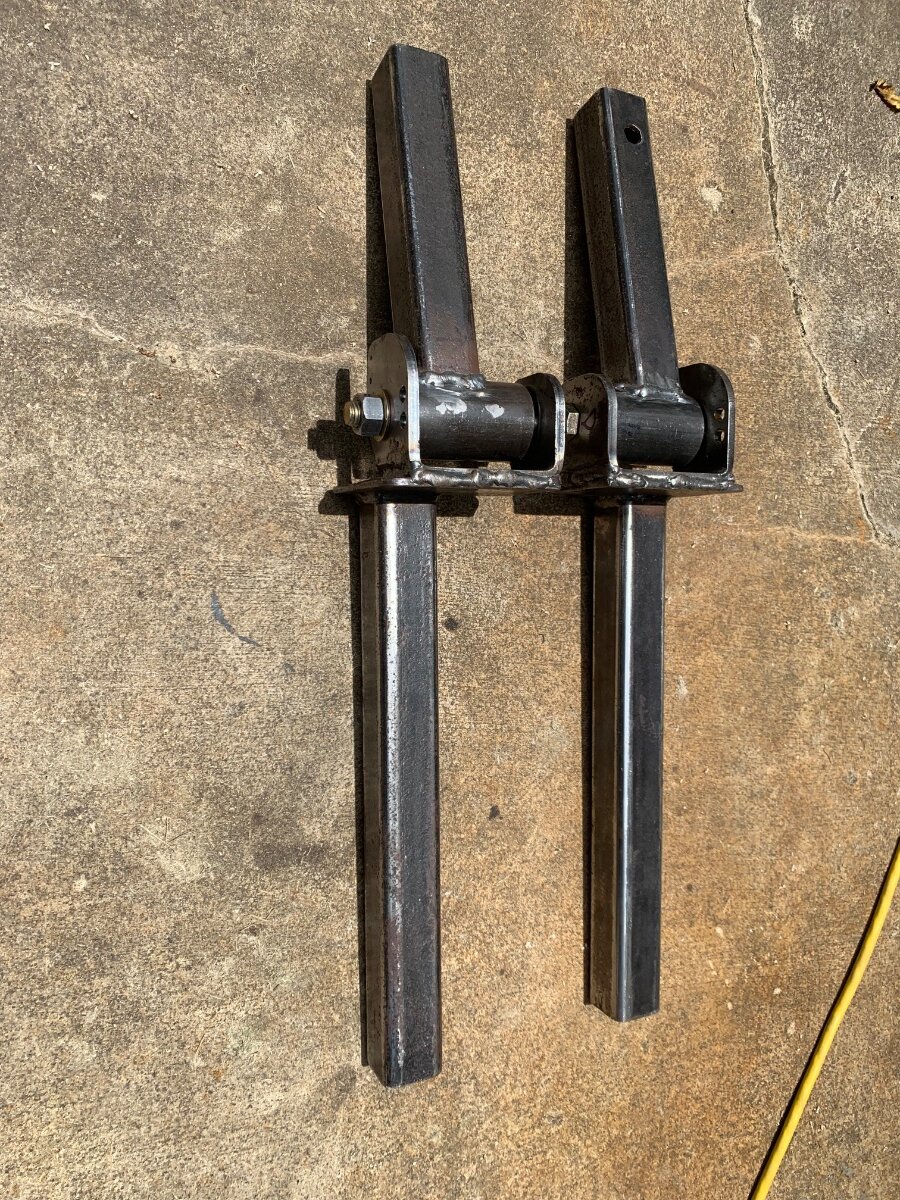
This is a slow progression, but my design-as-I-go method of doing things usually works to my favor. Each of the swing racks will have dual articulation to provide adequate clearance to enable the rear cargo doors to fully open. Here are some pics of the two primary pivot and arm assemblies. Awaiting delivery of additional supplies to further fabrication of secondary components. Standby! To anybody having the patience or curiosity to continue tracking this build, you are appreciated. I’m aware this may be beyond scope of the forum, and even though such tow vehicle mods are oftentimes of personal and individual importance, they should be shared in interest of others.
1 point
-
Among my many friends and acquaintances, I can count zero who actually enjoy caulking. My husband does a better job than i do, so he usually gets the job if we had to flip for it, I'd be seeking a coin with both sides head, and call tails. Yet another reason I like butyl, where applicable. We caulk around the edges to shield, but butyl does the job.1 point
-
From where I’m standing, your caulking looks great! Mossey1 point
-
The only thing on that list that I'd be willing to pay someone to do is recaulk any roof fittings that need it, and that's only because I find getting all the way up on top of the roof awkward and I'm terrible at caulking neatly.1 point
-
I just got done with a trip 7,000+ miles. Wife is doing a deep cleaning after 48 days of travel. When I went by Hohenwald, and met another Owner and learn about the plastic in the lines, and adding flexible line in-between the PEX and the water heater Tee. So after reading this I decided to check all of the hand tightened fittings. Every one of the white fittings were loose, so they all got tightened. I didn't have any leaks luckily. I will have to put this on the maintenance list also.1 point
-
It’s always a good idea to ocasdionally check ALL your pex compression fittings for tightness especially during or after a long trip. Just a little hand snug, no need to over tighten or you risk replacing a cracked fitting. Safe Travels!1 point
-
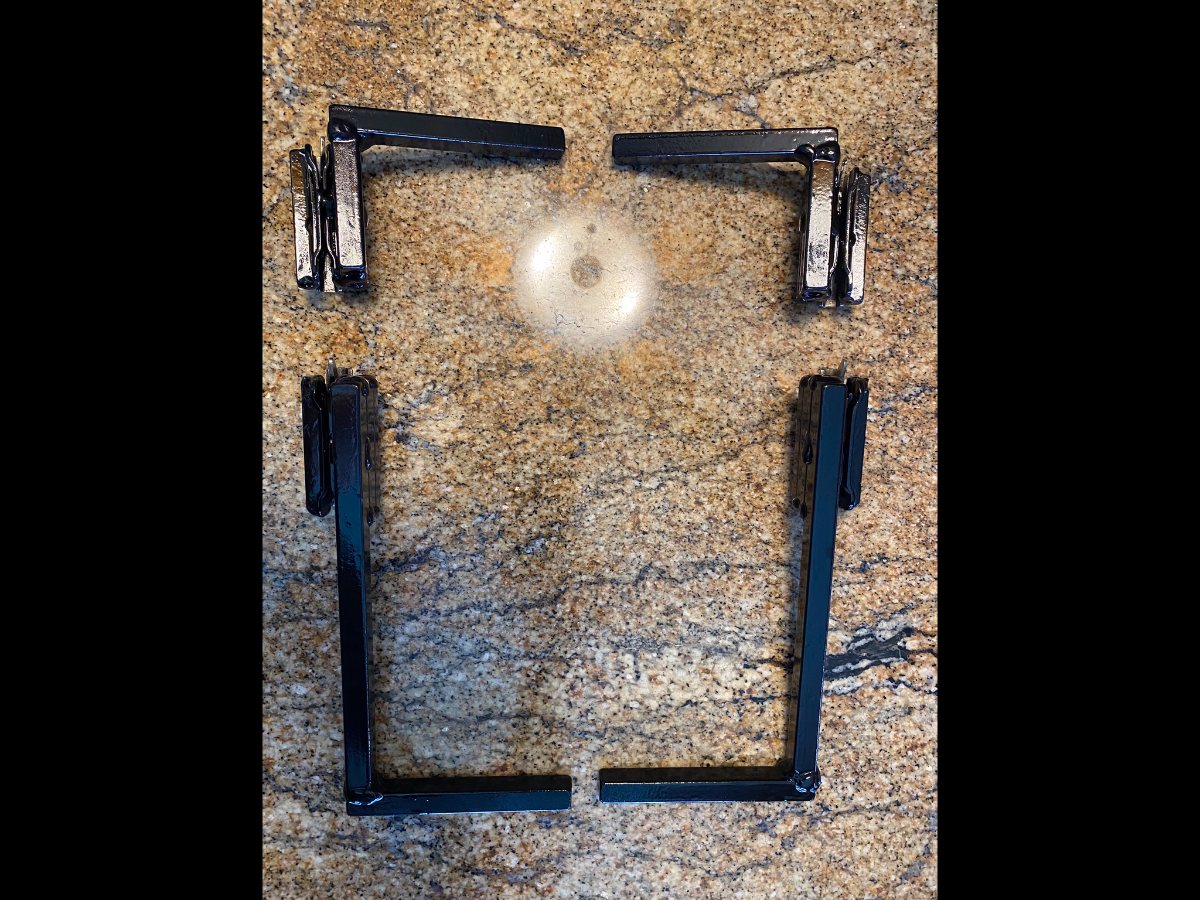
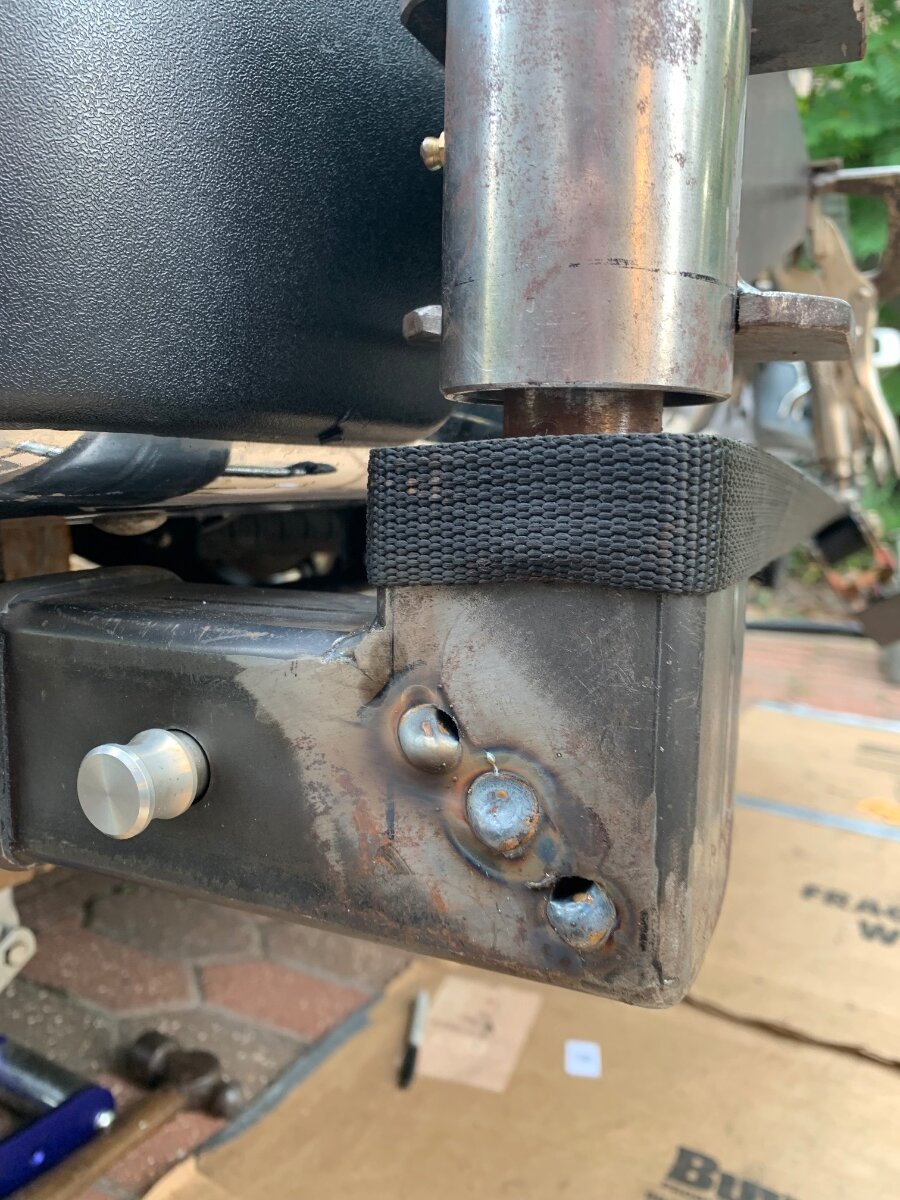
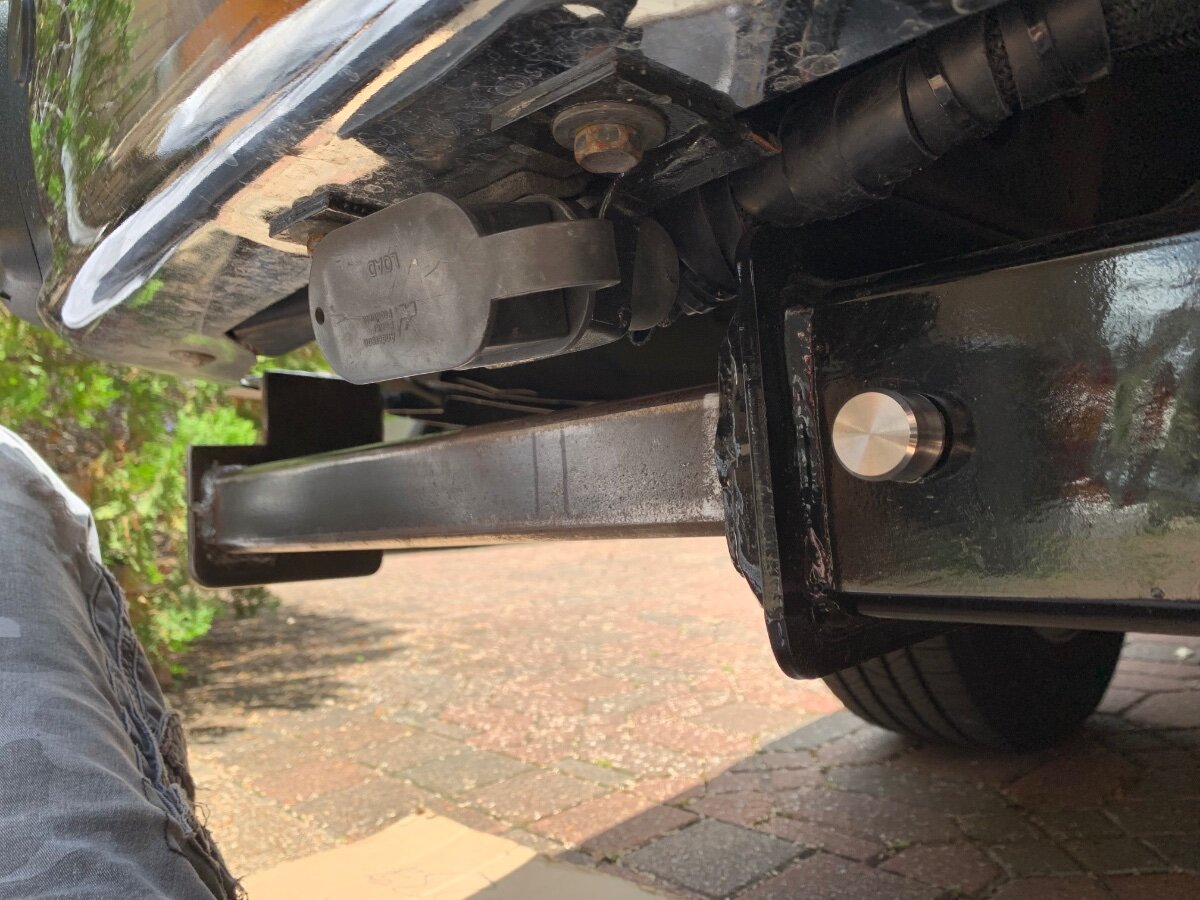
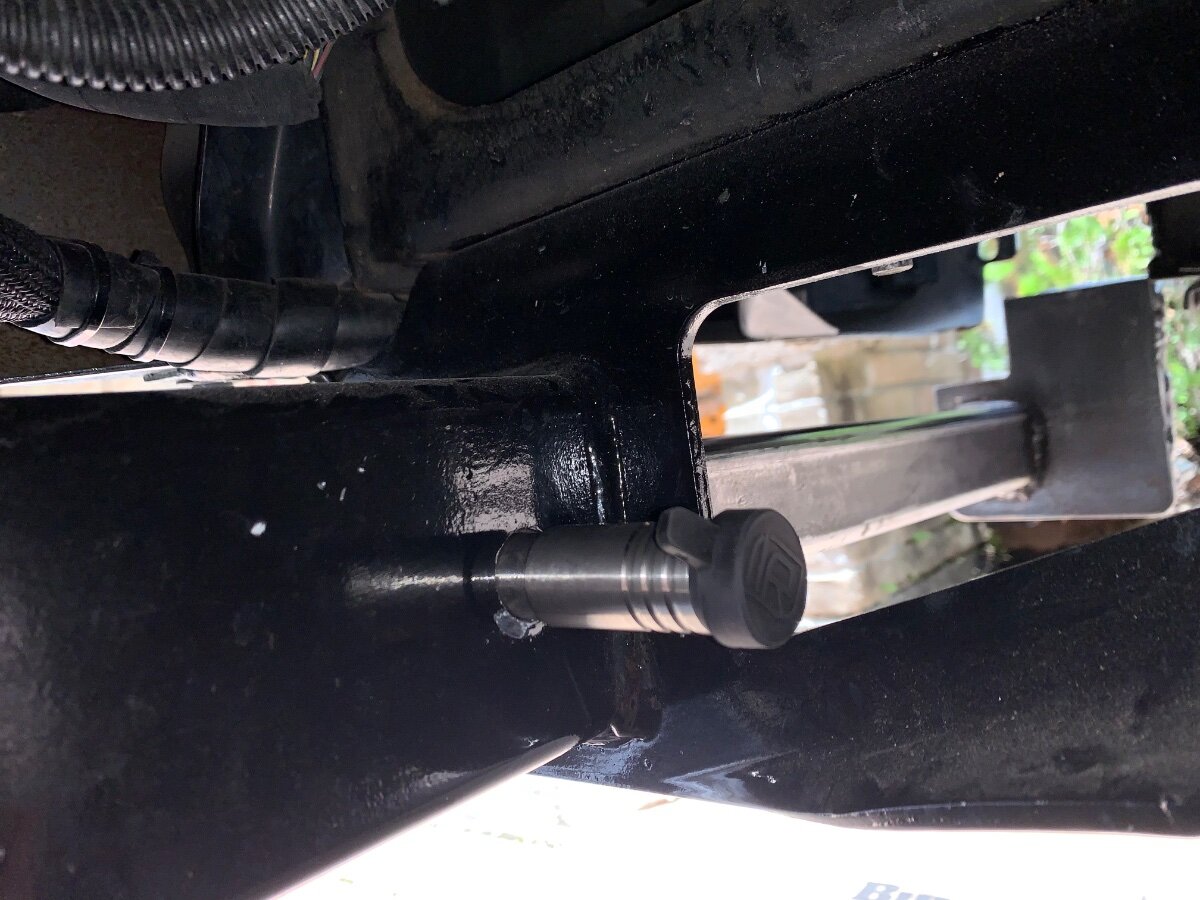
Yesterday I finished welding on the two primary swing out carrier hinges and fitment of the locking pins to secure them. Carrier hinge assemblies mocked up on the previously modified receiver hitch. Locking pin fitment for securement, underside view. Locking pin, rear view.
1 point
-
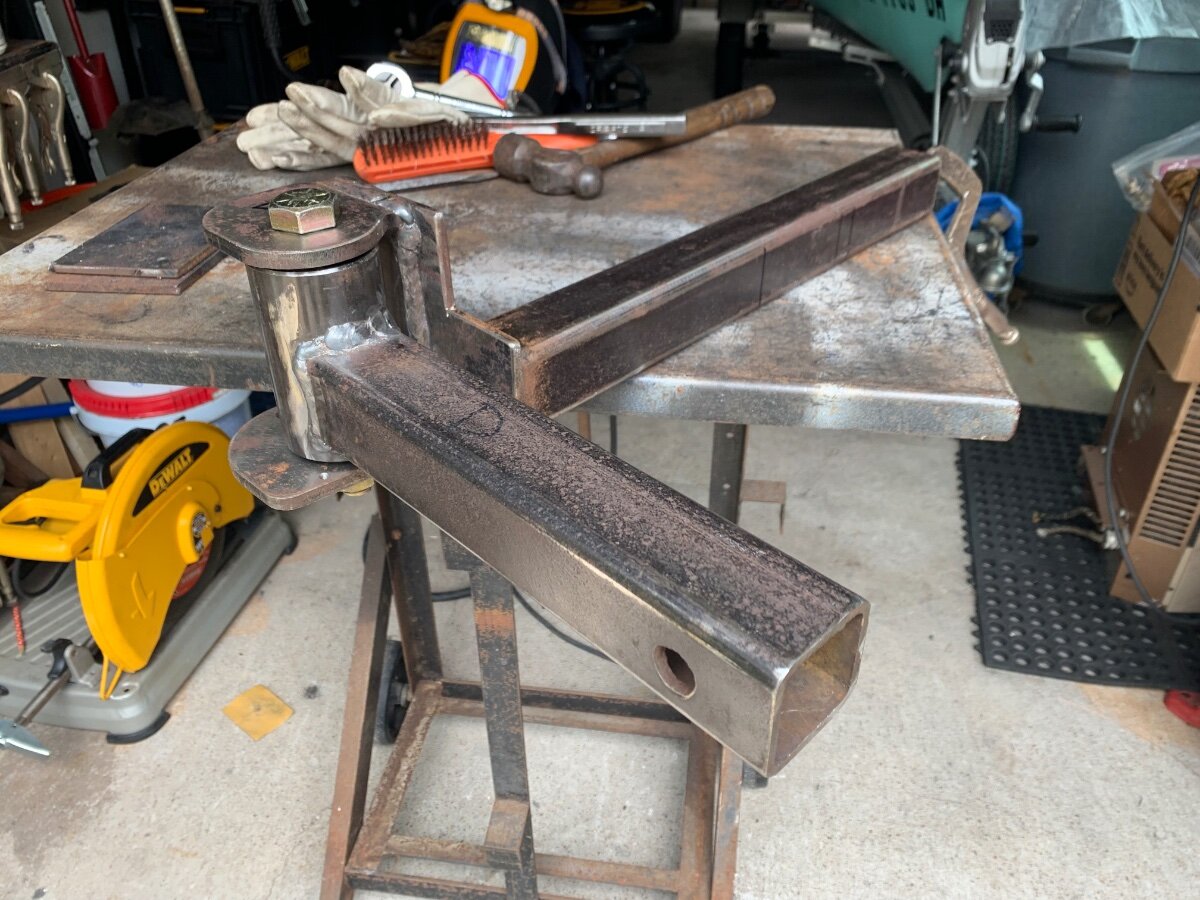
I’ve nearly completed Phase1 of the swing rack builds. The rear receiver hitch was removed from the Savana to enable some preliminary modifications, specifically welding reducer inserts in each end of the hitch’s cross tube, drilling holes for locking hitch pins and repositioned Air Lift auxiliary fill lines, and repainting. Once the paint is fully cured the hitch will be reinstalled in readiness for Phase2, actual fabrication of the individual swing racks. Unlike a pickup truck having a dropdown tailgate where a single swing arm would span the width of the vehicle, the van has two rear half doors and thus, separate swing arms for the custom racks. Also, unlike conventional installs where a vehicle’s rear bumper is either modified or replaced to accommodate a swing out carrier hinge, I’m making use of the stock receiver hitch to support the pivot points from below the bumper, whereby avoiding inherent door operation and clearance issues. The receiver hitch, as removed, plus preliminary holes drilled at each end for additional locking hitch pins. Reducers to transition the 3.5” OD square hitch tube to a 2” ID receiver. Reducers welded into hitch tube at each end. Matching .75” holes drilled in hitch tube for use of locking hitch pins to secure pending swing racks. Modified receiver hitch primed. The two hitch tube ends with installed reducers will now serve in like manner as the hitch ball mount receiver with locking pins. Final topcoat of paint applied. Modified receiver hitch ready for installation pending paint cure. Note the two small holes drilled in the support arms next to the voids where the Air Lift Schrader valve fill hoses will be repositioned. And that is it for now!
1 point
-
That was lucky! 4-5 weeks ahead I looked at both parks plus ALL of the Maricopa Regional Parks. There was not a single night available for the week of Feb 24th, in any local park between Prescott and Tucson. Then two weeks out a Thursday night at Catalina opened up and I grabbed it. A few days later the Monday night opened at Lost Dutchman. That was our first night out and I like when the first day is less driving, Lost Dutchman being half the distance to Catalina from our home. Then a week before Catalina had a Wednesday opening so we got 2 nights, at two different sites of course. I wondered, what would they do for a flood? Our visit to Catalina SP was OK, not great. After the first night we moved to the new site at noon and had the day to investigate. I wanted to see the town of Oracle AZ and drive into the north end of Coronado NF to take the back route up to Mt. Lemmon. We got a few miles past Oracle and there was an obvious Temperature Inversion. All of the dust from the dry conditions of the valleys were trapped so that we were driving through a huge cloud of dust! After sneezing a couple of times and the look of things we abandoned our trip. You could not see through the haze at all, not a single view of Santa Catalina Mountains while climbing up! One reason for your visit was to meet friends who had recently purchased a home in nearby SaddleBrooke Ranch. We played pickleball with them and others in the community on two evenings and had a great time. Dinner at their home the first night and a good strong hot shower the next morning! Drove up to Wickenburg for our last night, taking a detour around Phoenix to Gila Bend, Buckeye and up. We often prefer driving the back way up Hwy 89 to Prescott vs. I-17 (currently on a 5-year construction plan to widen it). This picture was taken from Constellation Park (found on Campendium $10/night) looking down at the town of Wickenburg. There was one site left available at 5PM! It was a short and sweet trip and we're back home today for the day of rest!
1 point
-
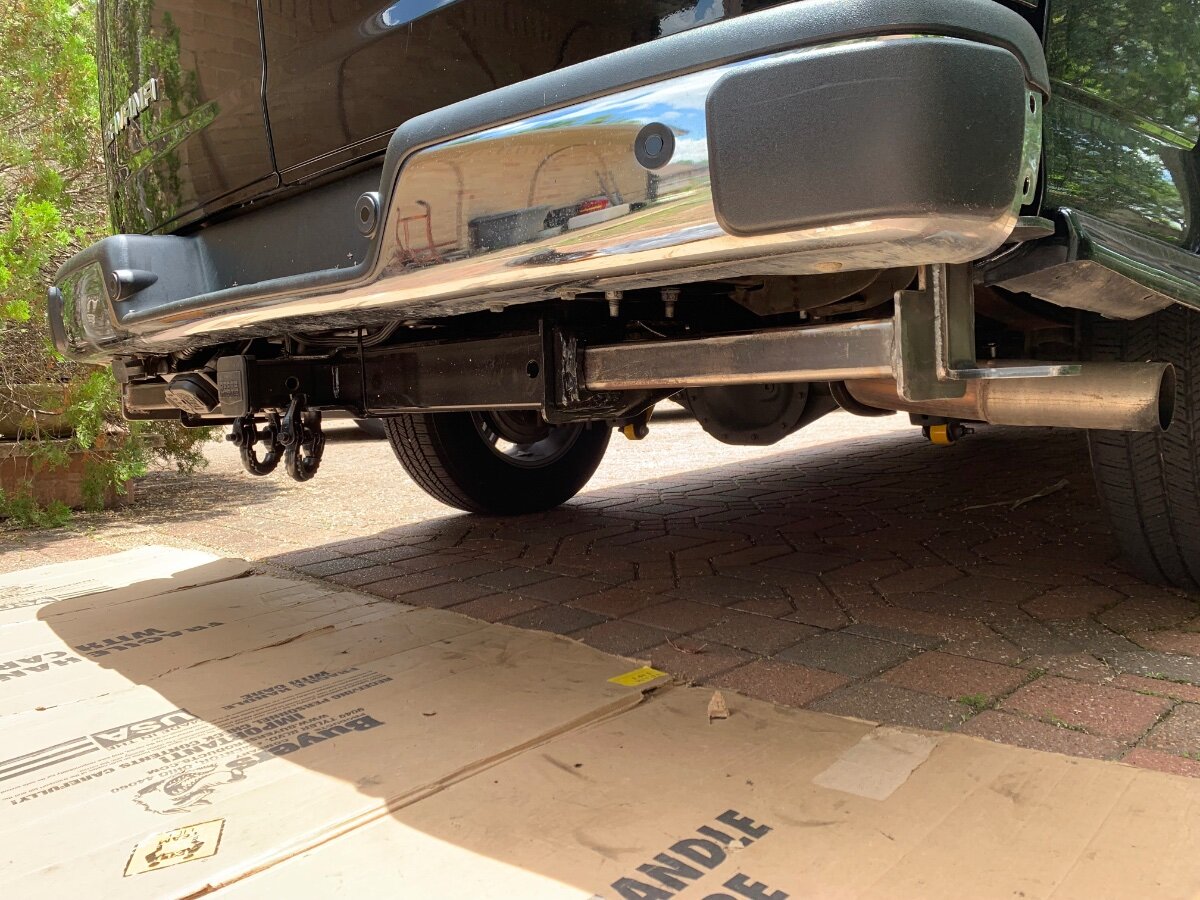
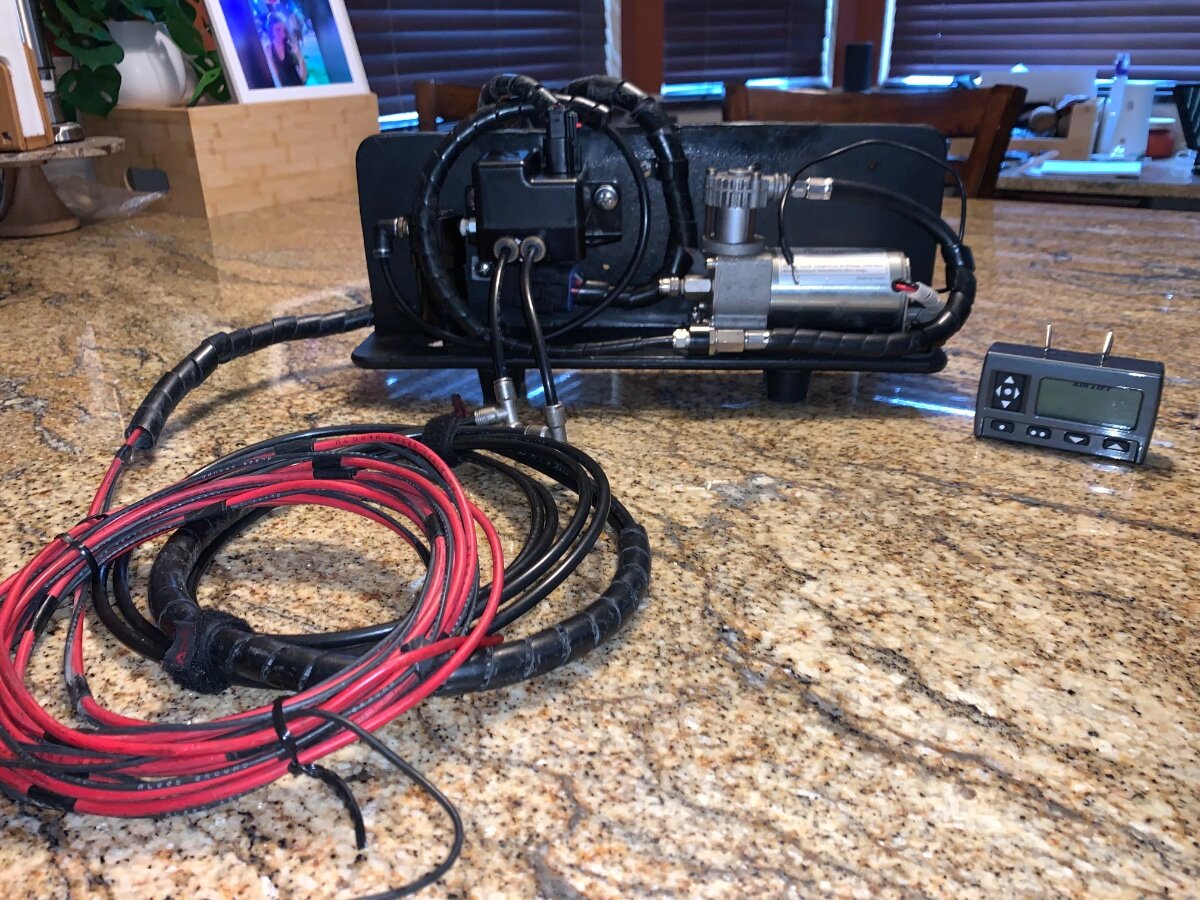
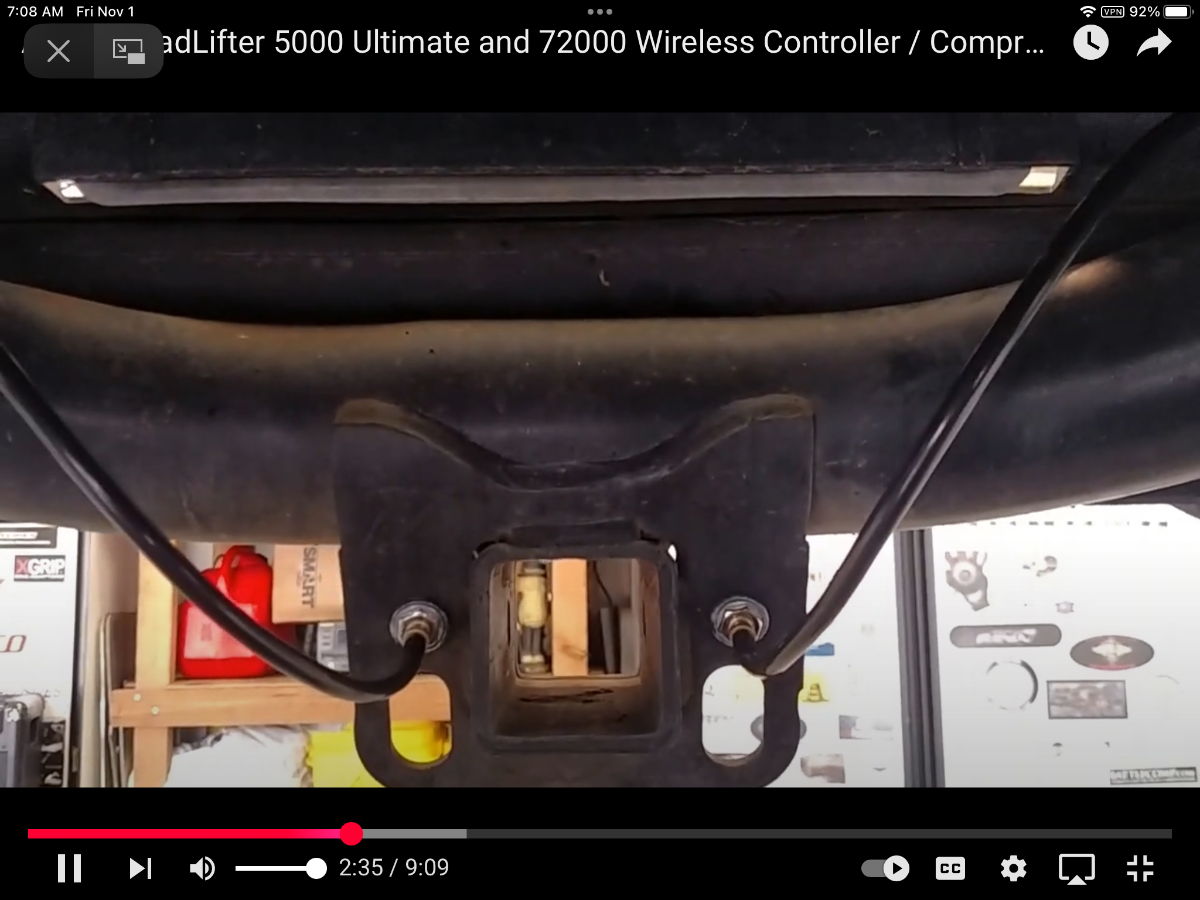
Well, upon removal of the AIR LIFT pump assembly from the Silverado a few days ago, I realized that system would require a reconfiguration to better serve the selected Savana mounting position. Yesterday said pump and new airline hoses were installed. Today the wiring harness will be routed to the engine bay to complete this project. BTW, the original AIR LIFT air springs remain on the Silverado and can be individually inflated with the Schrader Valve terminated supply airlines left in place. Driver’s side airbag at 0 psi; 5 psi minimum upon install completion, as recommended to prevent damage. AIR LIFT pump assembly readied for install. Pump assembly with airlines, wiring harness and remote control. Pump assembly securely mounted atop the trailer hitch receiver. Once the wiring harness is connected, care will be taken to further protect with wiring loom and mounting straps tidied up. Potential location on backup fill ports in the event of a pump failure (screenshot taken from a YT video).
1 point
-
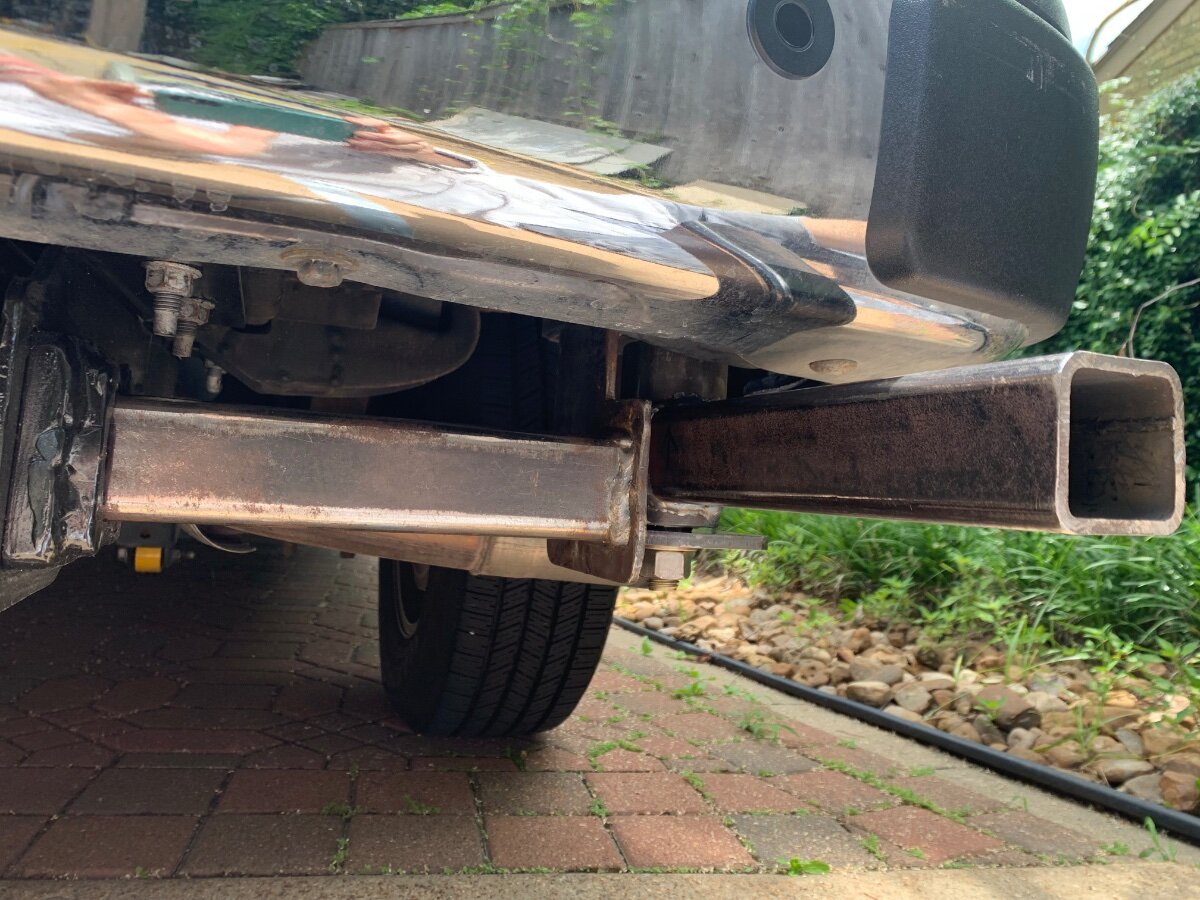
Yesterday I installed new AIR LIFT LoadLifter 5000 Ultimate Adjustable Air Springs on the Savana. I knew prior to departing for the Texas Oliver Rally that my receiver hitch was an inch shy of the recommended ball height with the trailer in tow, and that was after maxing out the pin hole height adjustment. As illustrated in the first picture of this post, the van and trailer were ‘well poised’, but once loaded with cargo for the trip there was a slight squat. Regardless, it was always my intent to install airbags for ease of adjustment in varying conditions. Today I will remove the AIR LIFT pump assembly from my former TV and reinstall on the Savana. Problem solved! As a side note, I really liked being able to inflate the airbags, via a remote, to tilt the Oliver upward when dumping the tanks and hopeful this new setup will provide like benefit. Inks Lake SP did it right with their new dump station! At some facilities however, raising the trailer’s nose is a must to fully empty the tanks. Did someone say ‘airbags’?
1 point
-
A stand alone GPS / mapping unit which does not require an active cell signal is a must in many areas ... particularly in the west. Garmin makes many good units aimed at RV'ers. We use a Garmin Overlander and, as we do a lot of our travel and camping off the beaten track, we feel it is worth the relatively high price. A paper map is always a good backup and will astound your children and grandchildren!1 point
-
An alternative way to clean the maxfan is to just remove it entirely. If you don’t mind getting on the roof, you just raise the fan to it’s in use position, that exposes 4 screws, remove the screws and the whole assembly lifts out. All that remains is 2 wires and the inner and outer trim rings, I just cut the butt wire connectors and removed the whole unit, disassembled the fan and thoroughly cleaned it. Reassembly was just new butt connectors crimped into place, drop the fan back in and reinsert the 4 screws, done! Steve1 point


-
Recent Achievements
-
")

")


")


