Leaderboard




Popular Content
Showing content with the highest reputation on 09/16/2026 in all areas
-
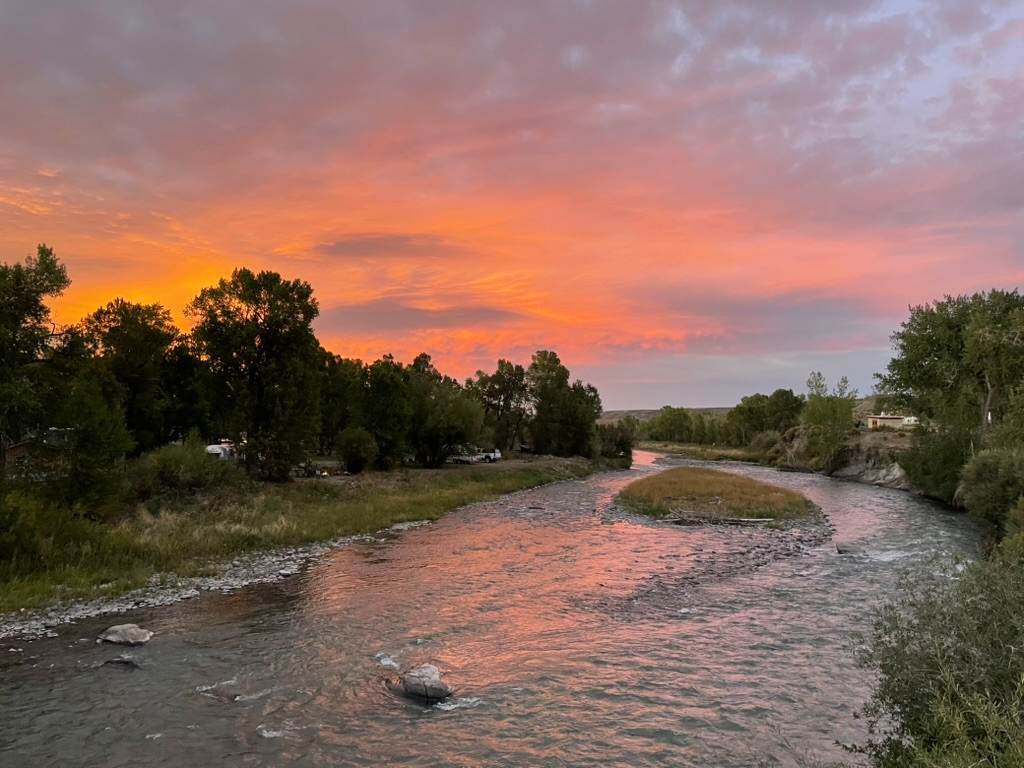
Wyoming sunsets are glorious.
 5 points
 -
That's just funny "Where is Ollie" I just joined your forum and my real first name is Ollie. haha3 points
-
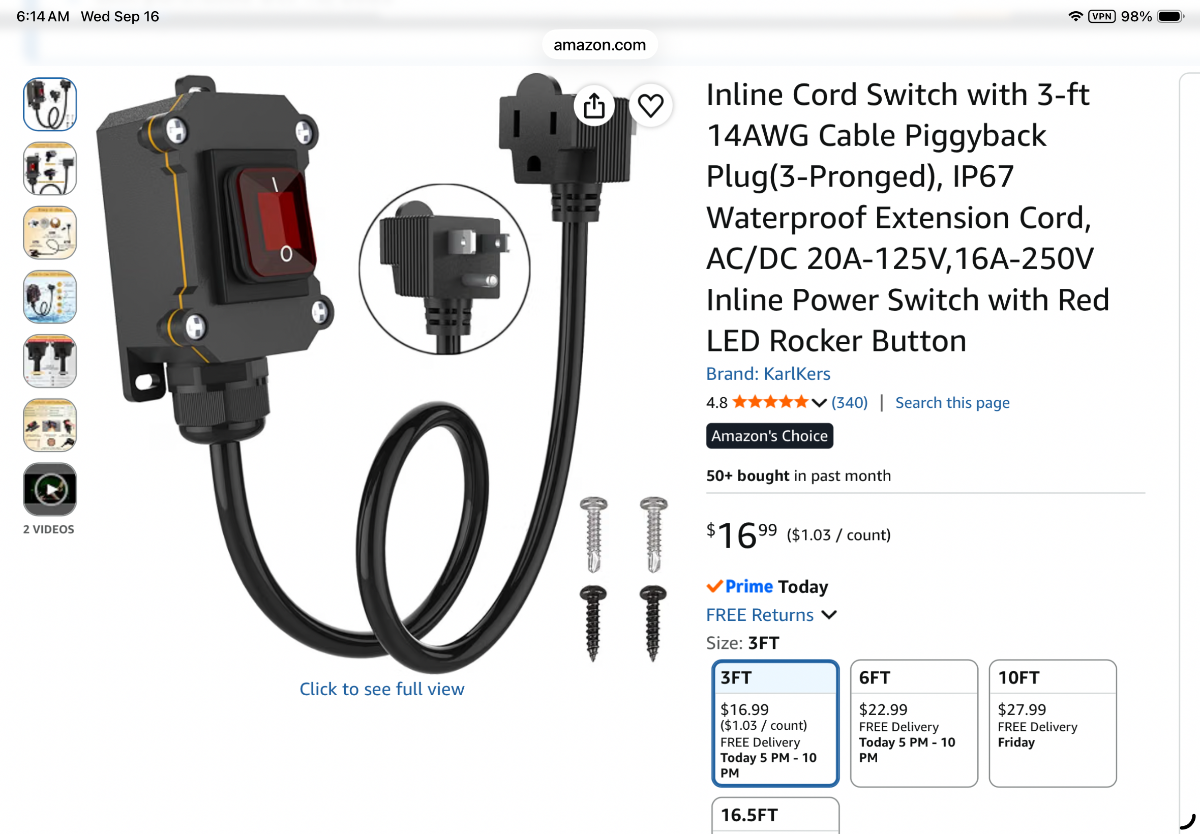
I bought this in order to use the outdoor plug. It not only allows clearance for the SL brick, but serves as a convenient power switch.
3 points
-
I just went back and read the early posts from 2016. Interesting some of the names that were on the forum a lot and now are not. Lots of old timers still here though! Mike3 points
-
Welcome! Soon we need to find Ollie in an Ollie! 😎2 points
-
We don't have Oliver's factory solar system and inverter. When away from shore power, use a similar switch mounted in Ollie's battery box with our system. Installed two Epoch 105AH lithium batteries, using up to 2 solar suitcase panels for charging or gen-set on poor solar days. Stole @Snackchaser ideal (Thanks Geoff) converting the TV cable inlet to the Starlink Mini power outlet using a 12V/24V to 48V step up DC to DC converter. Need to install a small interior switch so turning the system on/off can be done from inside Ollie, too.2 points
-
When I installed my wet bolts I started with the Alcans and torqued them to the spec. I was unable to get grease in them unless I loosened the bolts. I did not matter on what pressure was on the wet bolt from fully loaded, slightly load to all pressure unloaded. I was unable to get grease in them unless I took the loosened the nut on the wet bolts. I also noticed that the ez-flex did not move freely when they were torque down, but it did move freely when the wet bolt nuts where loosened up. BTW the hangers on mine where spread apart some without the nuts tight. tightening the nuts cause to bring the hanger ears back to together. I dropped a leaf spring back down. I measured the width of the hangers, the bushings and then the shackles. I added up the hangers and bushings then I measure the depth off the shoulder to the base of the bolt on the Dexters and the measurement was .010 more than what I added up. I did the same thing for the shackles and bushing. I got the same results the Dexter shackle wet bolt was .010 more. I really was surprised they were both .010 longer. I would have thought with the galvanizing on the shackles it would have been different. I measured the old Dexter shackles and the Shackles I made and painted (A whole different story, I covered in the gigantic thread I believe) The width was within a .001. Note I did not measure every shackle, hanger and bushing. I just did the ones on the one leaf I lowered. I decided to use Dexter wet bolts instead of the Alcans . After I did that I was able to get grease in all wet bots. A couple I had to still jack up the trailer to remove some weight to get the 2 wet bolts to take grease, I am OK with that. The ez-flex moves freely now. As for the dexter wet shoulder bolt and smaller thread. The way they designed the bolt all of the downward pressure is on the 9/16 thickness of the bolt. In order for the step down to break you would need a lateral force again the Assembly, or the nuts on the wet bolt being overly tight, then extra lateral force could snap the step down section off. I have heard of rumors that The Dexter bolts have snapped, but I have never read of an occurrence happening on the Olivers. I torque the Dexter wet bolts to 40ft/lbs. Over the last 12K miles they have not loosened up.2 points
-
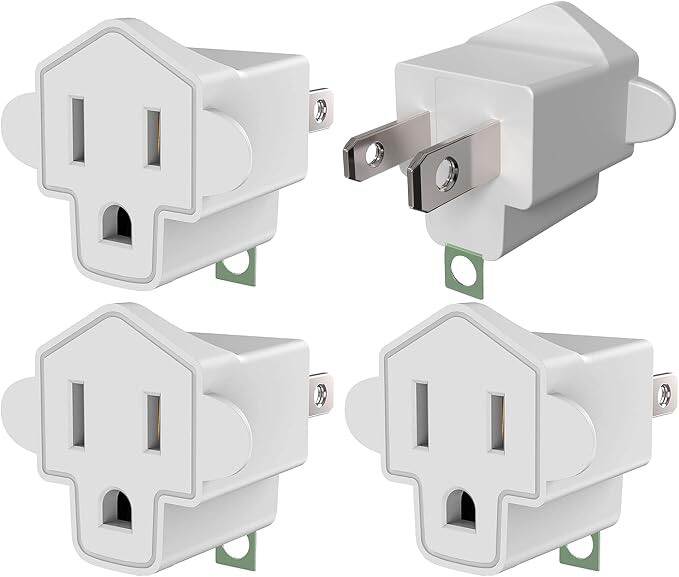
I had the same issue with the plug and the outside outlet. Just buy one of those cheap 2 prong to 3 prong adapters and it provides enough clearance to use the outside plug. Fortunately I discovered this issue at home while testing my Mini and various mounting spots.
2 points
-
I don't know enough about it to give specifics, other than to say that they did something to avoid the new parts from rubbing against the other parts. @ScubaRx might help explain this better. I don't want to use the wrong terminology. Are you going to be at the rally? We could all get together and have a powwow about this topic!2 points
-
I just make calls using my phone -- though I've 'enabled wifi calling' as required. It's only dropped like that on two or three occasions, as I mentioned. An extension cord -- I should do that. Would save me from having the window cracked open! :)2 points
-
I have read through most of this (long) thread several times and ... I don't follow all of the concerns regarding wear caused by the Alcan parts, though @ScubaRx did a great job helping me understand some of the concerns. Since I had my new Alcan Springs installed this summer, and asked them specifically about some items, I want to say that Alcan has made adjustments based on feedback and experience for their Oliver installations, so people need to be aware that some things are not the same compared to early installs. With all the interest and all the questions, I wish Alcan were coming to the Rally to talk springs! (Hint Hint Oliver Mothership!)2 points
-
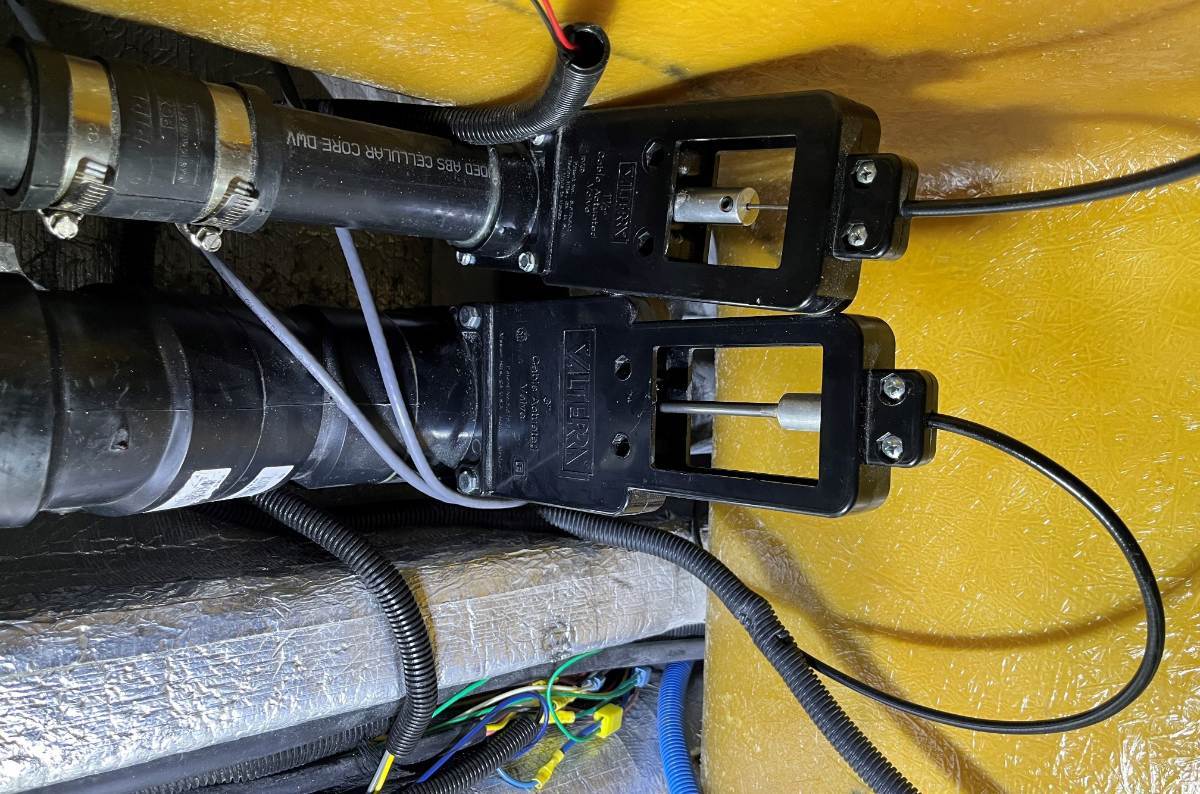
I agree with JD's thoughts and recommendations. The rear gray water valve is a bear to take apart. But it appears that your problem likely is the vent valve up front. I would add that if the valve is not closing there could be two causes. The valve is partially clogged. That can turn into a mess for sure to also deal with. I would approach it this way: Step 1: First try servicing all your cables as in the below DIY. Such a DIY is long overdue for your hull 99. Mine was and it is 342. That process may result in the valve clog getting mushed and then flow down to the dump station. If that does not fix the try Step 2. Step 2: At a dump station, from inside, flood the gray water lines with a LOT of water. Use your pump hot water at both sinks. Then try max flow with the pump and a garden hosed flowing into the bathroom sink. Suggest having a watchful eyed helper. Step 3: Send a garden hose with the end cut off it from the rear of the trailer to see if you can clear it that way. Be sure to open the gray valve outside to clear the pathway. Step 4: Consider getting help with a camera inspection. Hope this helps. GJ DIY - Sanitary Drain Valve Cables.docx2 points
-
Hello Ron, with the 2015 hull #99, very nice! 😎 There's not a plumbing diagram that would help. My understanding is if the waste valve is closed the pop-up shower floor valve really doesn't matter. If you want to replace it anyway, maybe somebody here knows the make and part number or inquire with OTT. You know, if you close the "back flow" valve when the Oliver nose is down, there would be grey water in the plumbing that would then come out when towing. Make sure your front jack is lifted when you're closing. We use the LevelMatePRO and always have our front up 1/2" or more when camped. We close the bathroom valve before releasing the jacks to tow. During travel, I use the kitchen sink to wash my hands to leave that valve alone. If you open the valve with the nose down with Grey Tank on the full side, water can back up to the plumbing under the shower that you may see later. Given all this, if it's still leaking on the shower floor, your waste valve could be jammed up, not closing fully. With the tanks empty, remove the valve and give it a good cleaning and lube. Under the front dinette seat, it's the 2" line at the top of the picture. The 4" is the black water drain and you might want to service that at the same time. The main Grey waste valve is under streetside bed, jammed against the floor where the two lower screws are VERY difficult to remove. I serviced ours last year since the pull handles were getting very hard to pull. This thread may be of interest. Best wishes, JD https://olivertraveltrailers.com/forums/topic/10711-waste-valves-restoration-and-upgrade/
2 points
-
It has been a long time since I have been on the forum. We had 359, 2018, and went a lot of places, really enjoyed the experience but other life choices got in the way, and we let it go to some good folks that were sure to enjoy it. One of the key reasons for selling was the crowds that seemed to be everywhere we went. A few questions for the forum - has the crowding subsided at all, and Wow, the prices now - seems $100k is the entry price for a II, - do the newer owners feel the value is still there from a quality and feature standpoint. I'm really liking most of the changes - and am actually looking at the smaller Elite - but not sure the price differential is worth the downsizing Thanks for any feedback..1 point
-
Our previous Tundra's name was Stan 🙃, photo taken at W. Kerr Scott Dam and Reservoir,1 point
-
You're welcome, Ron. Ours was too and there are a few reasons... The pull cable is very short and it turns 90 degrees. It's in an awkward place to pull, whether standing outside the bathroom, sitting on the can or wherever, you can't get a straight pull! And a gunked up waste valve blade will make it worse. You can remove the waste valve, clean and lube the blade, lube the cable and it could help. You can't change the 90 degree cable run and the awkward location of the pull handle. We love the new electric one! Without the cable, push the button and I can hear it open or close in just a second! Check my thread linked above if interested.1 point
-
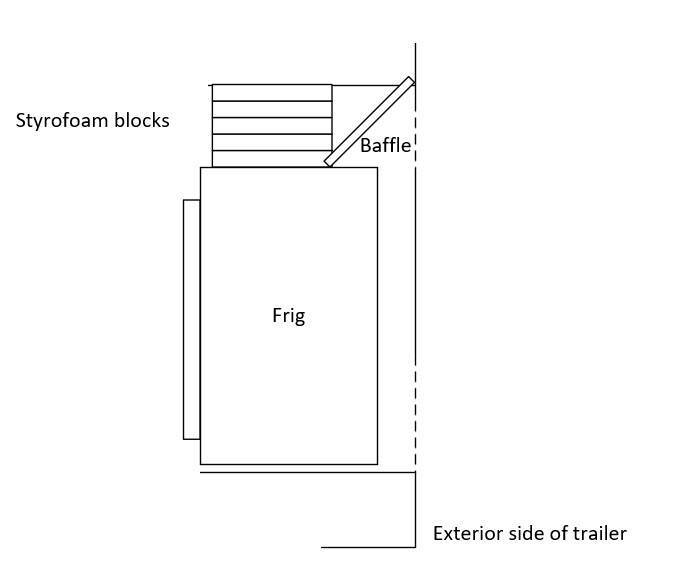
In our TX heat this summer, the good old Norcold really struggles. On hot days in the sun, I open/remove the lower hatch and place an electric fan on a small folding table to blow into the lower space kinda aiming the fan up a bit. This is the little table we use. This is the fan we use (we think the Vornado's are worth their premium price). In addition, we have installed computer style fans in the upper section. Our 2019 LEII has a baffle that directs the air flow out of the upper opening. Looks like yours is missing or they did not use them at the time of your build. I've attached a copy of the manual. The "N" code is for no cooling, which can require resetting the power board (see page 24 in manual). Hope this helps! Norcold N41x_ N51x_SM.pdf
1 point
-
I’ve been using Starlink in the Northwest for years, since being a beta tester for the first generation round dishy. Iv’e found that a pole mounted dish often get better sky-view angle over trees. I have a simple pole mount using a 10' stick of Electrical Metallic Tubing (EMT) that I carry under the trailer frame (see Tacky Starlink Dishy Mast). It was an easy and inexpensive mod, quick to set up, and it doubles as a flagpole if you're feeling patriotic. I stopped using a tripod stand a long time ago. When not using the pole, I just lay the Mini on whatever is near by, or even on the ground. A permanent mount is not optimal in tree county. We don’t use a dedicated carry case either, we just toss it on the bed or on the back seat. I’m all for having less stuff to pack up and carry. The Mini is watertight and robust, and you would be hard pressed to damage it. I prefer running the Mini from DC power over using the inverter for AC power. It's more power-efficient, especially if you leave it on 24/7 like us. The wattage losses from converting DC to AC, then back to DC add up. So I use a Victron DC voltage booster and it’s been a popular solution that has worked flawlessly for years. See: Starlink Mini installation, cracking the 12 Vdc barrier . . . or not! It’s nice having a portable battery pack for backup at times when there is no sky-view at camp, or to share internet with your buddies. I made a bunch of the “Everlanders” designed rechargeable slim packs that last several hours, but commercial options are also available. We depend on the internet for cell service, so battery packs or inverter AC power is not a good permanent solution for us. The bargain priced Mini router is usually not needed... until it is. Keep in mind that the farther you get from the dish, the weaker the WiFi signal, and the slower the internet. Weak WiFi can be mistaken for poor satellite reception, so try the router if you're seeing the spinning wheel of frustration! These can also be powered by 12 volts DC. See: The new Starlink Mini Router, for what ails you! for power options. So anyway, that's my two cents. Have fun in BC, but watch out for cell phone roaming charges, and don’t bring any produce back! We just got detained on the USA side last week because we declared a couple ears of BC of corn. They could have just taken the corn, but instead they made us maneuver the trailer into the humiliation parking area, then kept us waiting in the detention facility for an hour while they searched our stuff and freaked out the dog! But I have to say, the lab did a nice job at de-lousing and folding our shopping bag! Cheers! Geoff1 point
-
We have a 2022 Elite 2. I don't think the quality of our particular unit is as good as ones from earlier years. Maybe it was the rapid expansion of production due to COVID, or maybe ours was just built on a Monday, can't say, but we've had quite a few issues. OTOH, there are things missing on the current models that we enjoy on ours. We like the rear window that can open, the built-in sound system, the larger freezer in our fridge, the reading lights on both ends of the beds, and a few other details not present on the new units. I don't think we would buy another new Oliver at the current price points. (If we were buying today, we'd be looking at a Wingamm mini-motorhome.)1 point
-
I took 5-6 years to make a choice. Started Oliver, went through the Airstreams, Escapes to Bigfoot, and almost last minute fortunately went back to Oliver which was the absolute right choice. I’ve only become happier with it as times gone on. But unfortunately during that period the price got seriously jacked up. Originally I think it was running in the 60’s which was fine but now is over 100k. On the good side it was worth the wait, the only two features I wanted in the trailer was an induction stove and frameless windows - both which happened to drop in 2026 when we were buying. More luck, the ‘27’s dropped the valances, roller shades and single control windows which I prefer. So it was the right time for us regardless of the price. As for value the nearest competitor is Airstreams which are roughly the same price. But there you get (crummy IMO) manual awnings, no battery with little upgrade options, 2kW inverter IIRC, no compost option (LOVE THE COMPOST TOILET lol …) and a trailer which leaks. As many Airstreamers have said “it WILL leak”. As for pizzaz the Airstreams are awfully cool to look at, but so is the Oliver. Not a lot in the West and I constantly get compliments “that’s the prettiest little trailer I’ve seen”. Under the hood the Oliver is just superior in every way too. Not looking down my nose on Airstream - I wanted to buy at one point, but being an engineer I looked deep into them and they’re consumer grade honestly.1 point
-
$100,000 has a BUNCH of sticker shock value. However, - roughly speaking - the value of a dollar declines around 50% every seven to ten years or so. So, I bought my Oliver is 2016 for about $55,000 and to the degree that inflation statistics are true then my Oliver would "normally" be priced at around $110,000 in today's dollars. And, today's Oliver has a number of what used to be options already included in the price plus a few things that have been improved over the past ten plus years. Finally, I look at the value of my net worth compared to ten + years ago and realize that I'm in better financial shape today then I was in 2016. Come on back to the Family! We're waiting for you. Bill1 point
-
Thanks - we did a lot of boondocking, and don't have a problem getting there, gravel, dirt, or whatever. Good point on the class b, 100 grand for a lot less capability. We usually carried extra 10 gal of h2o and had the composting toilet - still undecide on this going forward. The shoulder seasons will be targeted this time around, now that "work" is behind us.1 point
-
We find it reasonably easy to escape crowds but it depends on your style and setup. A few of our rules that have led to success. We almost never camp on friday and saturday nights. We rarely hook up to anything ( water, electricity, etc). With these two alone we find crowds are easy to avoid. We purchased in 2023 and it was pricey then but its all a matter of perspective. Alot less than a class a, b or c and we already had our tow vehicle. So all in all the quality and manufacturer support structure make it worthwhile for us.1 point
-
We got our trailer in 2019 and feel like the crush of people in the outdoors was and is still significant. Our solution has been to spend most of our time off the grid, off paved roads and away from the national parks except for the off season. We have had fantastic trips Nov through Jan in the southwest the last couple of years. Count us out for mainstream campgrounds, state and national parks May through August. We must work to avoid crowds but have always found wide open space in the west side of the USA. Lots of BLM and other remote space to explore. If you are opposed to gravel roads and off-season travels, you will likely be crushed by the crowds. Yep, 100k for new trailer is a big bite. We found ours used in great shape. We did have to upgrade solar / batteries and few other things but got great value buying used. Water is the gating item for extended off the grid travel. We equipped our truck with an additional 30 gallon water tank enabling extend time off the grid. Best of luck. Hope to cross paths in the open spaces out west.1 point
-
It’s the Starlink router, RJ45. The dish came with a pretty long power cable and we got a similar length cable for the router. We ran the cable from the dish back to the trailer, through the dinette window (screen slightly open) to the router that we set on the dinette table. Beside the tonneau cover and tongue box we’ve used the picnic table to set the dish on, and we’ve also just set it on the ground. Just wherever has the best shot to a clear sky in the right direction. If we’re gone for the day I just bring it inside until we get back.1 point
-
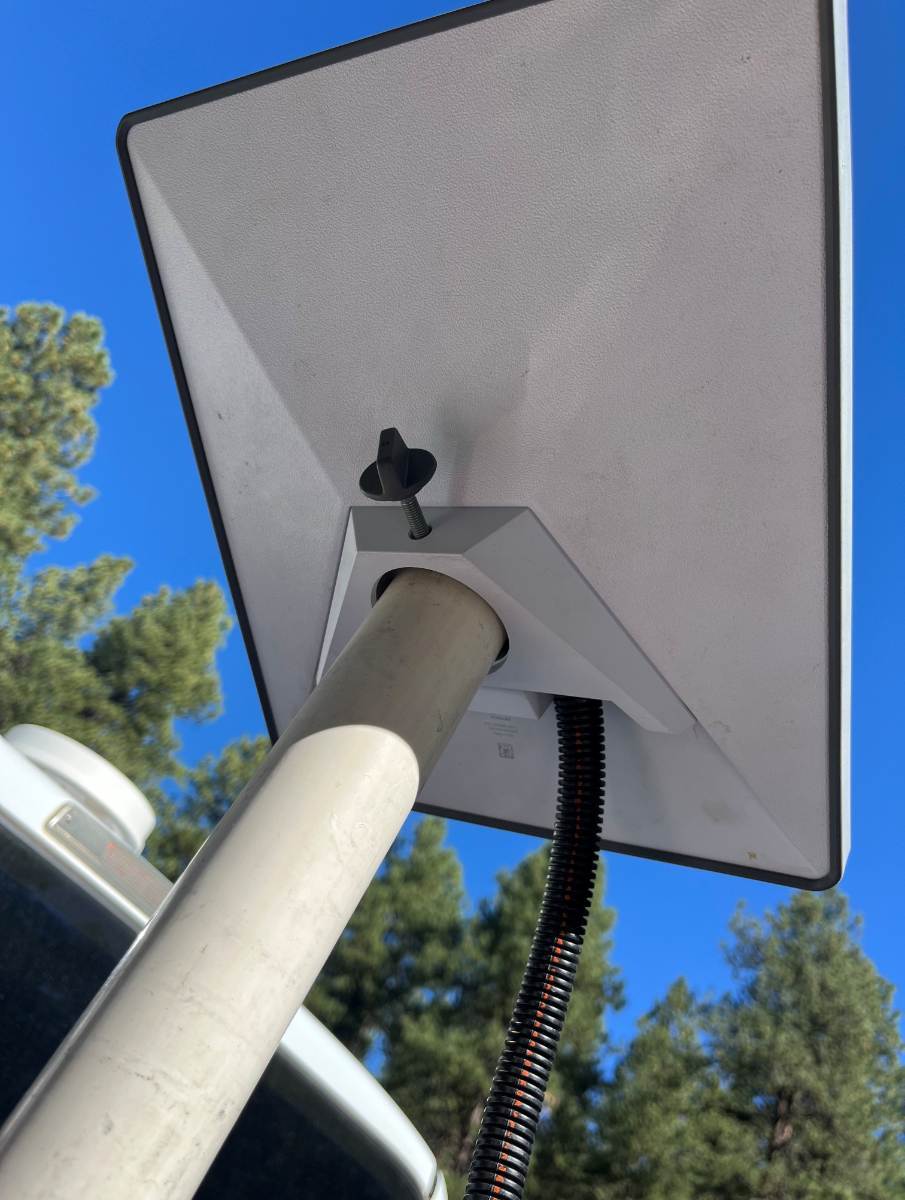
Hello again Bob, and thanks! I merely purchased a 4 ft piece of 1 1/2" PVC (2" OD) and a coupler from Lowes. Sawed the PVC in two 2 ft sections and the coupler will join the two only in the truck installation (pic1). The lower 2 ft section is permanently mounted to our extra fresh water tank. This works in an open bed but the lower section could be bumper mounted or to the side of a truck cap or the Oliver front basket. For the "umbrella stand" option the set screws from the stand fit into the drill holes. There is also a 3rd drill hole up top (cannot be seen in pic) to hold the Starlink set screw. Half fill the umbrella stand with water and it's not going anywhere! Good sale price on this today at $27! https://www.lowes.com/pd/Patio-Premier-Patio-Premier-Square-Blow-Mold-Umbrella-Base-Black/1002629278 Starlink includes two mounts. Mike mentioned he would merely lay the Mini on a flat surface. He's using the simple base mount that has a kickstand to produce the correct angle. I started the same way but found often in the woods finding a flat spot to support the dish is difficult. Starlink includes a second mounting plate (pic2) which comes with the 2" mounting hole with set screw. Notice the two drill holes in the upper post. If I'm using the umbrella stand, these line up with those set screws. I love the 1 1/2" PVC mount and would not stray from this. If I was to buy a stand again, instead of the umbrella stand which is large to store, a folding tripod would be OK, if I could find one that would hold the 2" pipe. I wouldn't want to get into camera stands, 1/4-20 screw mounts with adapters. IMHO, a soft 1/4" screw should not be the only thing holding the dish, not in heavy weather. No skinny stands, no long poles, no suction cups, nothing fancy for me. Just open your compass phone app, mount the dish pointed north, check alignment on the Starlink app, just a one minute installation required with this setup! 😎 Sorry, acronym from eBay sales, means "New in Box."
1 point
-
That stand looks pretty cool. What parts did you use to make it work. Also the battery looks like a Dewalt 20V battery. How did you wire into the battery. I like the idea of not using cables if possible and if I use a cable I only what to use one. Either RJ45 or Power. I have a tonneau cover so placing it on the cover when needed would be great, when not possible I would like the stand instead of just sitting it on the ground, and the stand had weight in the base it would be even more stable on the Tonneau. Thanks for letting me know that you arrived at your current setup through a process. I liked to know that. I know your setup is more complex than I want now, though it works great for your needs and you arrived at that over testing and growth. Sorry but what is NIB"🤔 I have a question for you and @Todd B how can you mount the mini on a pole or a tripod, Most tripods are 1/4-20 threads and I have know idea what the pole size @jd1923 uses. Special Addapters or does the mini come with all of those mounting options? Sorry for basic questions, When I was a machinist/ automated equipment tech, and then IT, I usually tried to wrap my head around a situation before I would implement. I am kind of anal retentive at times. I like seeing things from different angles before I purchase something. I do not mind fabricating/ buy adapters to make things work, but it nice to have an idea which way I will move before I purchase something. Sometimes it works and sometimes it is working through a problem/situation to come up with a solution. If someone else has a good solution that works, I do not mind leveraging those solutions. Why reinvent the wheel if someone else has already done it. (Off topic) I built a 42' x 16' free standing awning off the back porch with plastic corrugated roof special ordered from the east coast( my wife's idea), I want a plywood with metal roof. The awning roof cantilevers over the roof on the house . Living in Oregon in with many trees and 90+ humidity in the winter I needed a way to clean the awning roof, because of the debris, moss and lichen growth. When I first tried to do this I made a 3 nozzle sprayer on rollers to hook to my pressure washer. It failed miserably. I ended up recruiting my son, and we both stood on our metal roof, one sprayed the roof with water as the other used a micro fiber mop head on a 16 ft paint roller pole to clean the roof. This worked but it was very labor intensive. I found an old high end pressure washer at an estate sale this year. My son and I made the base so I could tow it with the mower and put a removable hose real on the base. I went over every part of the sprayer. It looks like brand new accept for the dented Honda gas tank. It took a 3 iterations with the old 3 nozzle sprayer, but I got it working great, and at half throttle. Had some fun at full throttle where the sprayer was floating 4ft above the roof because of the spray pressure. When I got it dialed in it took 1.5hrs by my self without getting any over spray on the metal roof, as compared to 4hrs for 2 people and both of us getting wet on a metal roof. The point of the story I may be slow and with limited resources, but I never gave up on finding a solution.1 point













-
Recent Achievements
-