Geronimo John
-
Posts
2,346 -
Joined
-
Last visited
-
Days Won
67
Everything posted by Geronimo John
-

Battery and Solar Disconnect Install Questions
Geronimo John replied to Tony and Rhonda's topic in Ollie Modifications
Good safety tip JD. For our replacement 3,000 watt inverter I was able to reuse the OTT OEM 300 Amp for the protection of the 4/0 cables that feed the Inverter. In all three cases the fuse protects cables not attached loads. The inverters self protect if you overload them. But if your cables are too small they become a problem. Especially if your OEM cables were sized for 250 amps with a 400 amp fuse. So, in addition to checking the inverter manual for fuse size, VERIFY your cables are rated for the fuse size as well. Ditto. I suggest that if you are installing such a safety switch, that for the minor cost difference, get the 350 amp Blue Sea switch. That way when you upgrade to the 3,000 watt inverter you don't also have to upgrade the switch too. Why? The switch must always be rated higher than the fuse protecting the wires. I wish that I had thought of that one two years ago! Great reminder as well! GJ -
Battery and Solar Disconnect Install Questions
Geronimo John replied to Tony and Rhonda's topic in Ollie Modifications
😊 😊 😊 GJ -
Arizona to Minnesota w/o Reservations!
Geronimo John replied to jd1923's topic in Campgrounds & Parks
Suggest getting a copy of the Alaska Mile Post. No worries as there are boondocking sites EVERYWHERE in Canada and a bit less so in AK GJ -
Battery and Solar Disconnect Install Questions
Geronimo John replied to Tony and Rhonda's topic in Ollie Modifications
Battery and Solar Disconnect Install Questions But be sure to know that they are two different things with two different purposes located in two different parts of the Ollie. The Solar Disconnect (DISCO) only needs to handle the power of the solar panels. Likely 200 to 600 watts. The Battery disco needs to be able to handle 350 Amps at say 12.7V which is 4500 watts. The Solar disco can be less easy to get to. Generally, it is used for maintenance and storage purposes. But the Battery disco needs to be where you or a first responder can get to it in a dire emergency fast. GJ -
Battery and Solar Disconnect Install Questions
Geronimo John replied to Tony and Rhonda's topic in Ollie Modifications
Safety John says that the foil in our Ollies is very conductive. Somewhere on the trailer it touches aluminum or a grounded item. With 250 amps potential, I know for sure an owner would not intentionally have a hair raising experience by changing a fuse and having a wrench touch the foil. Likely be a bad day and one would "say some bad words" like John D would surely say. But more likely, a metal tool/case/toy/etc. could easily find it's way over to the fuse. It likely would not do anything. Until you hit the "Right" bump and it is bounced across this device. Then you'll have a really bad day. Recommend you cover it or insulate the surfaces in some way. GJ
-
Can I tow an Oliver LE2 with a 2006 SR5 Tundra Double Cab?
Geronimo John replied to Dirt Duff's topic in Towing an Oliver
Roger JD.. I was responding to Rivernerd, but failed to make that clear. Fixed it above. Good clarification. Thanks! GJ -
Can I tow an Oliver LE2 with a 2006 SR5 Tundra Double Cab?
Geronimo John replied to Dirt Duff's topic in Towing an Oliver
I would wager a penny that your truck is much heavier than my 2019 F-150 so you have the weight and power with the 5.7 to do the LE2. Just be aware of brakes and going down hill. Use your transmission to save the brakes, anticipate the down hill runs and power down accordingly. With the 5.7, some rear shocks and air bags and E-rated tires I think you will be good to go. Oh, my 2005 had the same frame and much more as our tundra. It only lasted 300,000 miles of tough drivers before we had to put her down. Glad you have that 5.7. GJ -
In concept I agree with both points...to a point. I very rarely use ours for backing up Ollie. The vast majority of our miles are solo. So I prefer to get out and access the situation, some times two or three times for a difficult back in site. Generally speaking I travel with Ollie during daylight. 99.9% of the time my parking lights are off. So, I chose to power up our rear view camera from the parking light circuit in the attic. On a few rare occasions it was also helpful to flip on the parking lights just to see what was going on behind me. One example is there was an erratic driver behind, then to the side of us. He came within 6" of the side of Ollie twice. I slowed down, and kept doing so until he got the message and passed us. The dummy was was reading a road map while drinking coffee at 65 MPH. Accident avoided. Another was to see if my son was still back there after a fuel stop. So in addition to backing up, they can be handy at times for other purposes.
-
When I am traveling in mountains on roads new to me, I fire off a Garmin RV GPS Navigator, Google Maps, and try to have a map handy when both are in a disagreement with each other. I like having both running in parallel. So long as they agree, I'm hammer down and enjoying the view. But when one starts getting squirrely, then it's time to figure it out. Time to stop and take a gander at the map. Generally the Garmin RV Navigator is the one to follow.. right into a traffic jam that Google Maps was trying to navigate me around.... Drats Foiled Again! .
-
For sure you are not a light weight camper! Great installs and planning. What size fuse taps did you use for the three additional loads? GJ
-
Can I tow an Oliver LE2 with a 2006 SR5 Tundra Double Cab?
Geronimo John replied to Dirt Duff's topic in Towing an Oliver
I had a 2005 Sequoia with the 4.7L. It worked pretty well on the flat lands. But in the hills not so well. In fact, my son and I got passed by the US Olympic Cycling time seven times north of Denver when we were goin up-hill (Not mountain, hills). My son was handing out free ice cold waters to the Cycling Team as they passed, we picked up their empties on subsequent down-hill runs. We all were laughing our heads off. That 4.7 will work, but just not enough power for even hills let alone mountains. Once we finally got to flat lands we were fine and smoked them all! But my son said, "Dad, you need a truck". It would have been ok (Not OK) if I had he 5.7. But in the mountains it was sketchy. The next year I bought a F-150 Crew Cab 4x4 FX tow package. With the addition of Bilstein 5500s shocks on the back and Firestone airbags I could not be happier. Since we USE our truck off road hauling free flying (No motors) glider pilots up to mountain launches, for us, getting a F250 or larger was not practical. Besides we use our TV as a daily driver as well. So the F-150 SuperCrew was and is out ticket. PS: By the time you get decked out, your OE2 will most likely be around 6,000 pounds. With your mountain use, I am with the above owners. Get a truck. In your case one with four wheel drive and off road package (Something like the Ford FX4). Then there is the tire swap on the TV to meet your style of travel. I have Nitto Recon's on mine. -
That's good. GJ
-
You are correct. Here is a bit of context as to the problem and how to reset the check valve without a lot of fuss: DIY - Check Valves for RV Water Pumps.docx It worked for me on SOB trailer. GJ
-
Andersen WD Hitch Periodic Maintenance?
Geronimo John replied to Galileo's topic in Mechanical & Technical Tips
Hitch Rattle: As stated above, the noise is the receiver slop at this connection. I do not notice it with our rig and the Anderson in play. However I like it as when I am using my front jack to hook up/take off the Anderson chains, I use the front jack to raise the back the truck a bit. I observe as the Anderson receiver moves up in the stationary TV hitch. When this angle stops changing, this tells me that I have "erased" the tongue weight off the TV, and I am now lifting the truck. Not something I want to do too much; as at some point I would damage the Jack. So, I consider the sloppy fit as a visual safety warning for my jack's long life. GJ
-
I have a slightly damaged one and appreciate the source. Mine is a PLASTIC fixture coated with fake chrome. It certainly is not worth $44 in my minds eye. Guess I'll use s small dab of JB weld on the screw hole and re-drill it. At the Rally I asked Jason about the black gaskets. He indicated they remove the gasket and silicone the fixture on 3 1/2 sides. Leaving a weep at the bottom.
-
Andersen WD Hitch Periodic Maintenance?
Geronimo John replied to Galileo's topic in Mechanical & Technical Tips
Short answer: No. Long Answer: The Anderson Chains are under very high tension when properly loaded. I would guess something on the order of 1500 pounds. Since the force vector of those combined maybe 3,000 pounds of tension is resisted by the ball, and the ball is say a foot above the chains, you have 3,000 foot pounds of torque lifting the rear and pushing down on the TV front (Load transfer). The ball sees only the 3000 pounds of thrust horizontally from the chains. The truck sees the opposite force via the whale plate in the opposite direction. These forces create a huge amount of torque due to the one foot separation between the two. With my TV loaded and not connected to Ollie, the front axle is about 400 pounds lighter than the rear axles. With the Anderson in play, they are almost exactly equal. If I have a 400 pound delta X 20' long lever arm, that says the torque would be 8,000 foot-pounds. That would lead one to conclude that my WAG of a combined 3,000 pounds of force from the Anderson chains appears to be well understated. What do yo see on the scales as far as front end weight change with and without the Anderson in play?? -
New axles may not fit all older sub-frames
Geronimo John replied to Wayfinder's topic in Mechanical & Technical Tips
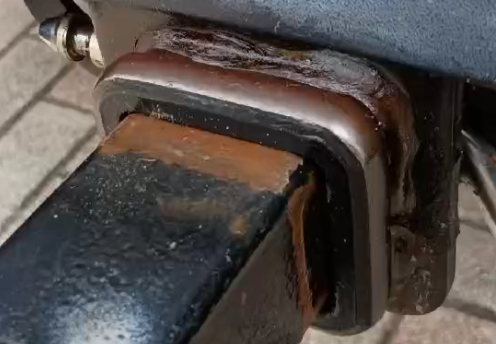
I suspect that he is concerned about needing to do an absolute clean off of the HDG material for a critical structural weld. The threshold for "Well Enough" in this case needs to be very very high. Axle Info: 2018 LE2 #342 SC 50.5, D35 Original axle capacity -
Our older Ollies have absorption based refrigerator systems. They have an open flame burner that drives the refrigeration process. If the system has a combustion issue, it will generate CO. If you have critters flying into the cabin via the refer vents, your box is no longer sealed properly. That could for sure put you and others at risk. Seriously recommend you: Replace your CO/Propane Detector if there is any doubt about it's age or in our case with these type of refrigerators if the detector is over 4 years old. Reseal the combustion area from the cabin area. Most of us use Foil Tape. Buy 3M foil tape. GJ
-
Rear Electric Stabilizer Jack adjustment - help?
Geronimo John replied to tallmandan's topic in Mechanical & Technical Tips
Thanks for the update. Certainly we are all glad that they continue to stand up and make it right! -
New axles may not fit all older sub-frames
Geronimo John replied to Wayfinder's topic in Mechanical & Technical Tips
Chris: I have CONFIRMED that Dexter does make the D60 5200's with the SC of 50". They have been in use at OTT in some hulls under #100. GJ -
Lori: While you are down there, check that the power is still firmly connected to the pump. We seem to have more than a few owners with loose power plugin's this year. I believe that if you see the LED "i am on" light at both the bathroom and above the stove area, then you have power going to the pump. But if that plug is vibrated a bit loose the pump may run and then not run depending on what mood the connector is in at that moment. If it is not firm, pull it apart and for grins check for any corrosion. A small nail file has helped me out in the past. Geronimo John
-
Mine has been a tired hose bibb gasket on my water transfer hose and/or the hose was not tight on the Ollie boondock connection. GJ
-
Made in USA leaf springs
Geronimo John replied to Mountainman198's topic in Mechanical & Technical Tips
I can't wait to see the GIF that a certain Moderator is sure to post! LOL GJ -
Made in USA leaf springs
Geronimo John replied to Mountainman198's topic in Mechanical & Technical Tips
Now I understand why the new Oliver's cost so much. Its the cost of bandwidth we consume on the web! Street legal 250cc Enduro with a X2 seat and super duty bulldog shocks and Alcan springs! Oh, with a lithium battery and a Truma hand washing station. GJ -
This thread is a follow-up thread of John & Debbie's 3500 pound vs. 5200 pound axles on a LE2. In this thread my intent is to discuss the type of lubrication system/processes that Dexter offers in axles for out OTT's. Old school is the tried and proven manual annual cleaning and greasing of axle bearings with a seal replacement. Yes an annual PITA. Then Dexter began making their EZ-Lube and NevRLube axle lubrication systems. They apparently have stopped offering the old school design. So if you want a new axle it will be EZ or NevRLube designs. With many owners choosing to retrofit their Ollies with the 5200's, it was stated that there have been zero failures of the new NevRLube axles. This simply is not an informed statement. There has not been a lot of knowledge in our area, but for other trailer designs the NevRLube' S were a disaster. Both designs have their challenges. Here are some opinions from outside our egg shell: https://www.gdrvowners.com/forum/operation/suspension-amp-brakes/95041-dexter-nev-r-lube/page2 So what are your thoughts as they apply to our OTT's specifically? GJ