
jd1923
-
Posts
3,854 -
Joined
-
Last visited
-
Days Won
314
Everything posted by jd1923
-
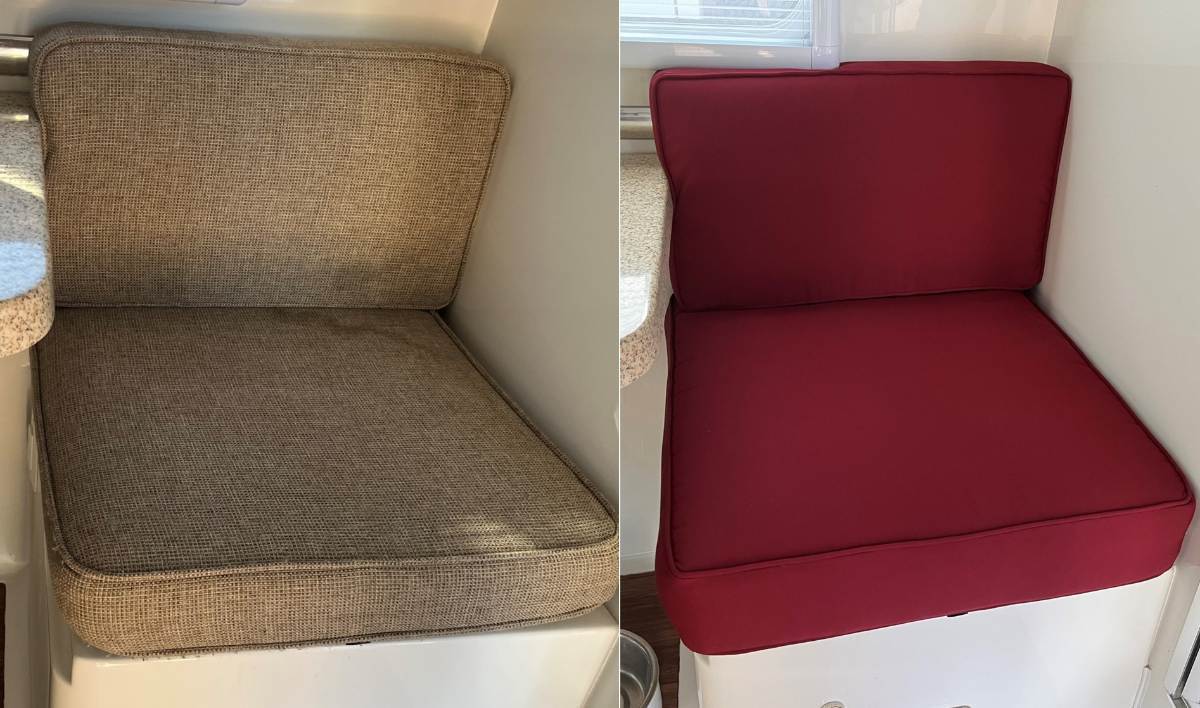
We had the same fabric in our 2016. Thought to replace rather than clean. The fabric was worn fuzzy too, not just dirty. They unzip so could be put in the washing machine. They could get more fuzzy and the stains may not come out. Air dry so not to shrink. For $500 we have not only new Sunbrella fabric, but new 5" dense foam (was 4") and a nice new RED color (fabric comes in many colors). And they are much more comfortable! 🤣

-
That's for sure. There's no sound reason OTT locates them back there. Some of us have real mattresses! No longer am I moving my bed to change a fuse, or Chris' bed to change the water valves. When I moved ours under the rear dinette seat, I found all I had to do was cut the power wires shorter for the 3 jacks because the wires go towards the front anyway. https://olivertraveltrailers.com/forums/topic/10469-goal-to-minimize-the-need-to-move-the-beds-while-camping/
-
Reasoning is I wouldn't think with how heavy your tow vehicle is that a WDH would be necessary. What you describe is the way my truck felt towing prior to upgrading leaf springs. The Alcan springs will eliminate 90% of the porpoising and so made the tail-heavy feeling go away. BTW, both Bill and I had measured tongue weight with a Sherline scale at 580 LBS. Most Oliver owners with 2500 series trucks do not use the Andersen WDH.
-

Pepwave Cellular Router and not the common install
jd1923 replied to jd1923's topic in Ollie Modifications
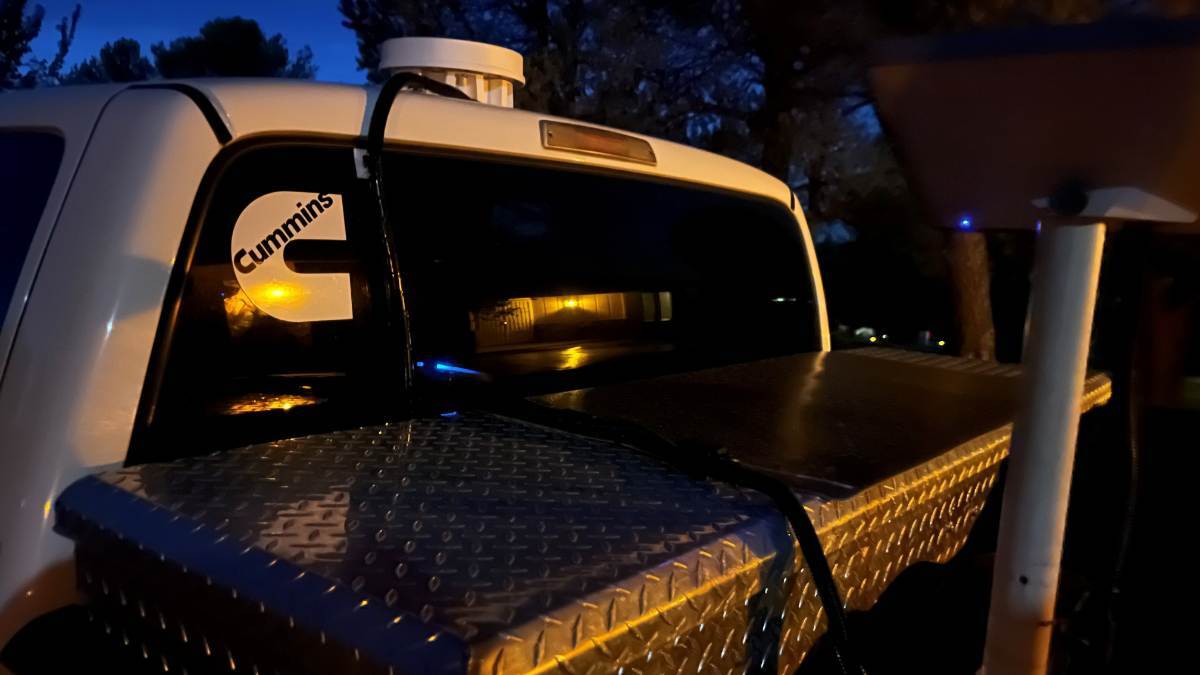
While traveling we've used our Starlink Mini often. Though more often with cell coverage we are able to use our our T-Mobile 5G SIM on our Pepwave router. I have also used the Pepwave with 5G service as a backup to our home network. Twice while teaching, in the last two years, our Sparklight service has gone down, and I've logged into the Pepwave Wi-Fi to continue the Zoom class sessions. Over the last two years, 5G service in our neighborhood has gotten better/faster. I decided to cancel our home cable service which has grown in cost from $40/mo eight years ago to $86/mo lately for 300 Mbps service. I've worked out a complex installation that allows us to be logged into the same Home Network whether we are physically at home or on the road with the Oliver! To date we have only used the Starlink powered by battery, connecting via Wi-Fi using the built-in Starlink Router. I just finished a more complete installation where we have the Starlink powered by 12-24V DC-DC charger (thanks Geoff) and connected by Ethernet cable to the WAN port of the Pepwave. This will start to get technical for many of you... Internet connection comes into Pepwave router by means of the Parsec 5G antenna (priority #1) or when needed by the Starlink Mini via the Pepwave LAN input. The Pepwave can if needed also share bandwidth between WAN connections for greater overall speed. The Pepwave router will also broadcast Wi-Fi but like any Wi-Fi broadcast it has distance limitations. The Wi-Fi coming from our truck installation by itself will not pass through the garage and the walls of our home to the other side of the house or our lower level where it's half underground. But it does fine more than 100 ft radius around any campsite. At home, we've been using a Wi-Fi 6 Mesh network, a main with two satellite routers to cover all the area on our 3/4 acre property. Including the Oliver which is parked 100 ft away! Now that we're not using a home-based modem anymore, I thought "How could I repurpose this system connected to the Pepwave?" I installed the Mesh Wi-Fi main unit in our truck connected by ethernet cable to a LAN output of the Pepwave. It's so cool that when I read the label on the 120V power adapter for the mesh unit, the output was stated at 12VDC 3.5A which means all I had to do was to cut off the adapter and connect two wires to the 12VDC in the truck! I mounted it in the back window behind the rear bench seat, behind the driver's head. Out of sight when driving and good line-of-sight out the rear of the truck. Where our truck is parked most of the time, backed into the driveway, the mesh satellite in my office also has line-of-site to the main. Our "Home" network is getting 300-400 Mbps down and about 20-50 up from this installation, 5G cell through the cell antenna on the truck! I then parked the truck in the garage where the Wi-Fi signal must travel through 3 walls. We could still stream TV at about half these numbers. Half speed is also about what the Starlink Mini delivers day-to-day. Yeah, good 5G service is 2-4 times faster than the Mini. I've canceled our cable Internet service. The savings of $86/mo in two years will pay for everything spent in this installation; the Pepwave and antenna, the Starlink Mini and accessories, the converters and cabling, etc. Now here's the real kicker! 😎 I setup a home network on the Wi-Fi mesh. We have all of our laptops, cell phones, network printer, TVs etc. all connected to the same "home" network. We also have the TV in the Oliver on the same network. Regardless of whether we are home or away the network login is constant so no need to reconnect ever to another Wi-Fi. If we need Starlink, when traveling, or for emergencies when at home and the cell network is overloaded, just mount and connect the Starlink Mini and it feeds the same home network. If we wanted to connect to a public or friend's Wi-Fi we can also input that to the Pepwave "Wi-Fi as WAN" so it becomes the Internet source for our home network. It's a lifetime, seamless setup! 🤣 So, you might be thinking a router with antenna, the Starlink Mini and a Wi-Fi Mesh could pull a bit of power from your truck starter batteries. Yes, and it will over time. Earlier I had installed a 100W Renogy flexible solar panel on our truck toolbox along with a small 15A Victron MPPT SC. This small solar setup always keeps our truck AGM batteries to 13V+ and powers everything listed above. It also has ample power for our Dometic CFX5 45l fridge in the truck bed! 😎 One exception is when I have the truck parked inside the garage for more than a couple days. So then I connect a battery charger, quick connect leads already installed above the front bumper. I got done yesterday as the sun was setting and this picture shows it all. Notice the Starlink Mini mounted top right with the small blue power light on. You can see the Renogy panel on the toolbox, the SC is installed inside with outputs to battery and the fridge in a separate circuit. You can see cable looms, going up to the antenna and to the Starlink running across the box. The Mini is removable but the cabling stays. If we ever camp where the Northern sky is blocked where the TV is parked, then the Starlink would be mounted elsewhere, Starlink Wi-Fi login, powered by battery again. We find this is a rare case where we camp most of the time out West. The Pepwave install was shown earlier in this thread and is behind the rear bench seat below. Lastly, notice the blue light in the truck rear window. This is the Arris Mesh. I had purchased this mesh network 6 years ago, so it was great to reuse it, no cost. If I was to purchase new today there are better and smaller products available, though this system as a whole works great. We've got more installed in our tow vehicle than most have in their homes and RVs put together. What a great upgrade! 🤣
-
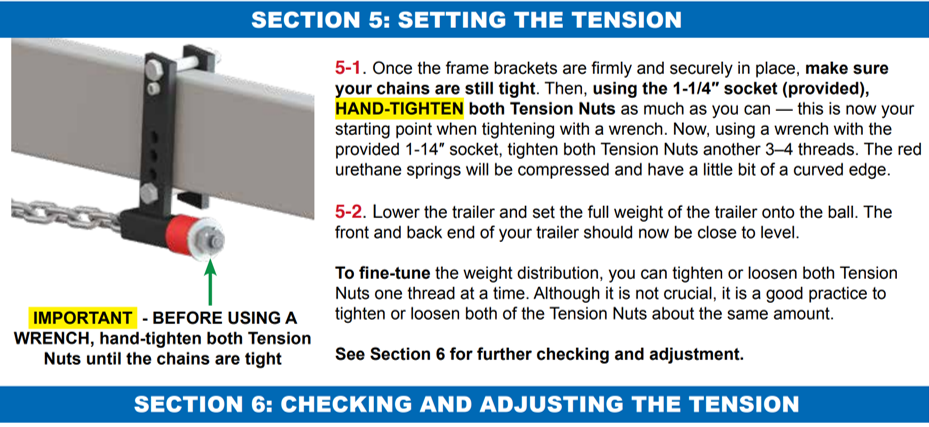
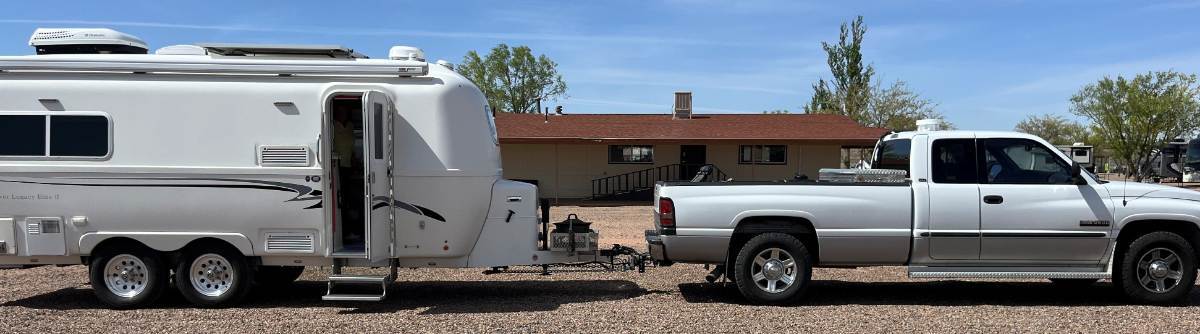
Dan, you are correct and if "two techs" made such statements, the were absolutely WRONG in stating such nonsense! See PDF page 11 of the Andersen Installation Instructions which I have also captured in the picture below. It states first hand-tight and then use socket and tighten to 3-4 more threads showing. The WDH only works from the chain tension. If you kick on the chains properly adjusted you should hear a bass note hum from the tension! 😎 I used the Andersen before we upgraded to Alcan Springs. My older Dodge 2500 is borderline, owners manual stating it's needed when over 500 LB tongue weight or 5000 LB tow weight. The Oliver exceeds both numbers. The Oliver would cause our rear to sag 2" and the Andersen when adjusted would bring the height back up to perfectly level (see pic). Without the Andersen we would have serious porpoising. Turns out the Alcans allow the Oliver suspension to manage itself eliminating the porpoising, so we stopped using the Andersen WDH after the suspension upgrade. First thing to do for your 9K LB 2500 series EV truck is to remove the Andersen WDH! CAUTION: If you remove the Andersen WDH also replace the ball hitch <OR> if you continue to use the same ball mount provided by Andersen, lock the base with the collar pin. If not there is only a circlip holding the hitch ball in place. If @Douglas Rink is towing with a 1/2 ton truck then it is suggested but a waste of money for the 2500 series truck. Anybody need a good used Andersen WDH with a new 2 5/16" ball and cone? Andersen-WD-Hitch-Installation.pdf
-
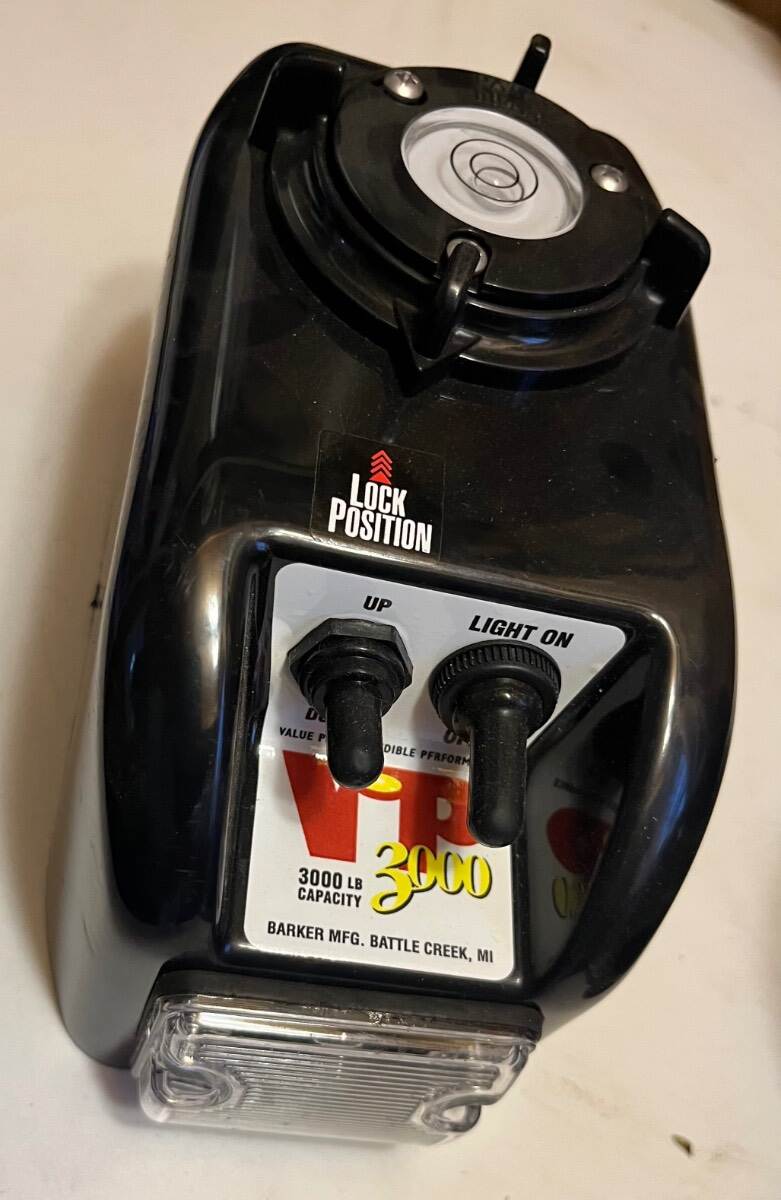
Dennis, PM me with your address and I’ll put a brand new original in the mail to you. 😎 Barker is great. I purchased two reconditioned heads for our rears and they came with new plastic covers, switches, etc. which of course you don’t need when replacing the rears. It would be my pleasure!
-
It's Time to Get Insurance!!! It's an exciting time!!!!
jd1923 replied to FirstApex's topic in General Discussion
We use Progressive, but not the online application. Find a local independent agent, I applied online years ago and costs were double. Was with GEICO for 10+ years, but they became extremely annoying. We run full coverage when we're traveling and then when I know we'll be parked at home for a few months, a request to my agent and he changes coverage to COMP only which saves about half the cost for that period of time. We own more cars and trucks than drivers in the household, so we always have 1-2 vehicles on comp coverage only. I had to file a car accident with Progressive recently. They want you to use their app, take pics and a movie showing the damage. In a few days they reply with a settlement and set it up to pay you electronically. Same day I had money transferred. Then it's up to you to get quotes where you want it fixed. If quotes are more $$$ then you'd have to communicate with an adjuster for approvals. Given you'd prefer to go to OTT that should be OK with most insurance companies. They likely would not pay travel expenses, so the Oliver would have to be cross-country towable to get it there or transportation costs may be exorbitant! Ours is insured for stated value equal to the actual cash we paid for our used Oliver plus all (documented) upgrade costs kept in a spreadsheet. When buying new you have a current receipt for cost paid, but without a stated-value policy, if totaled they will deduct depreciation as they see it. Congrats on your new Oliver Apex, it's only 3 weeks away! 😎 -
"Couple times" did it ever run correctly? "Low nighttime temps cause the propane to contract" Have you tried it when it's warmer out? Why not take time now to fix the actual issue? It's August now vs. March so certainly no need to heat tanks this time of year (if ever). And you can work on this middle of the afternoon, not waking up middle of the night. Get error codes if present. Don't assume12V at the ignitor just because of a "max battery pack." Are you hearing ignition? Test for 12V+ and actually see or at least hear the ignitor clicking for actual verification. Then are you getting gas? The heater fan will blow to "clear out the ignition chamber" as a process step whether LP is present or not. Is your LP regulator supplying LP at the correct pressure? Gas in the lines? We usually light the LP stovetop to clear the lines of air but you may have an induction cooktop. Is the hot water heater working correctly? If you have the rear LP port run something back there to verify good gas flow. We had issues our last trip out with LP keeping our older 3-way fridge running overnight. It ran fine on DC and I was worried about the new LP regulator I had installed. While parked at home this August, I ran all LP appliances to be sure (stovetop first, then the furnace, HWH and fridge). Cleaned the sail switch in the Atwood furnace which barely needed any cleaning. They all tested/worked well when at home, so my conclusion was that the old fridge will have issues running on LP when at 7600 FT elevation like our last campsite. Now is the time to get yours fixed when you're not out camping. Some of our members from up in Montana or Minnesota can chime in, but unless you are camping regularly below 20F a heater blanket should not be necessary. LP will not vaporize at all when -44F but certainly will for occasional drops below freezing (32F). Your Truma should still be under warranty, so you could schedule repair service. You will want to go through testing steps regardless, know that you have LP and 12V+ present and record any error codes if possible.
-
I believe if we were ever to mooch-dock with family, I'd use the wet bath inside or better yet borrow the family shower in the house! 🤣 I use the outdoor shower boondocking when miles away from others, and yes we're always "in the dirt." I thought of an outdoor shower mat, not like the one Steve showed but something perforated. But the issue with either kind is afterwards you have a big dirty shower mat to clean. Too much trouble. I wear water shoes when showering outside. They get a little dirty on the bottoms and I take them off as I'm stepping on to the camping carpet. When they dry out, just rub them together to remove the dried dirt and put them back in the truck. Also, where we generally camp the shower water is absorbed very quickly in the ground, rarely creating puddles or mud. 😎 I also use water shoes in public showers at campgrounds for health concerns.
-
Elite 1 reasonably towable with 2026 4Runner?
jd1923 replied to JackStraw's topic in Towing an Oliver
2026 meaning you just bought it? Thinking of buying it? Is it true all 2026 4Runners have 2.4L 4-cylinder engines? Wow! We had an older 4Runner with the 3.4 v6. Sold it for a GX with leather and the 4.7 v8. We never even towed with it, but it needed more power just around town! If possible ditch the idea (or get the dealer to take it back) and get a 5.7L v8 Tundra, any half-ton American truck, or the midsize trucks with special towing packages. OTT claims the Elite is 3700 dry weight, 5K GVWR and 370 LB tongue weight. Doable yes, reasonable no. The stock 4Runner is made for suburban driving with some gear, occasional dirt roads. The little engine is certainly not made for towing and will wear quickly as well as the drivetrain and suspension parts. Another point I always make is the very, very short wheelbase. The WDH will help, but tail wagging the dog for sure! -
Please take before and after movies, pre and post Alcan upgrade. 😎
-
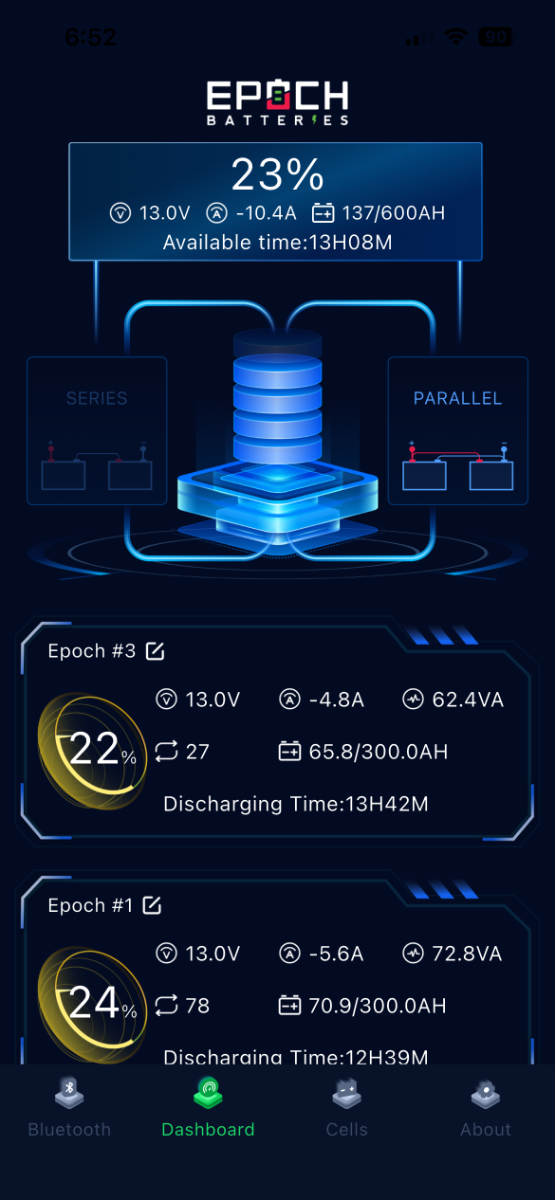
We just spent 4 overnights between Flagstaff and the canyon. Not exactly the desert SW at 7600 feet but it was the week of July 20th with highs in the mid-to-high 80s, everyday up there (116F in Phoenix). Two of 4 nights we had monsoon rains and we had to cook indoors using a pressure cooker one night and Emeril oven another (microwave removed for the Emeril). We often use a portable induction cooktop but not this trip. We had the A/C on 24x7 in fear of overnight rains, when generally after dinner we would open windows. A couple nights the old Dometic 3-way fridge had the "Check" (LP) light come on, likely from the altitude, so we also ran the fridge on batteries for about 60 hours over the 4 days. With the Victron MP2 inverter/charger we can run the Chill Cube A/C, The Emeril Oven, the fridge, the TV and soundbar, etc. all at the same time without worry as to what we can or cannot run on electric. Coffee every morning with an 1100W electric kettle. With 900 Ah LiFePO4 batteries we have power to spare. I can see what you're saying, but of course with the old Penguin A/C you're not running A/C at all when unplugged. The P2 would bring 300 Ah down to ZERO in 2 hours. I thought we had all the power we needed to run A/C for 4 days straight, and we did but had not counted on running the fridge on electric too, which hour after hour takes quite a bit of Ah. The picture shows our remaining Ah on our 4th night at 7 PM. Epoch #2 was below 20% and it stopped showing up on the app (notice the pic shows 600 Ah total since it cannot see one battery). By morning SOC was 18% and when we got home late afternoon SOC was 43% with battery #2 again reading, recharged from the DC-DC charger. SOC of 43% might not sound too good, does it? But keep in mind 43% of 900 is 387 Ah. Instead of driving home, if we had driven to another campsite we'd be back in business for another couple days. I'd give up our 900 Ah right along with my right arm! 😎 But if you have no interest in upgrading your A/C and running it off-grid then 300 Ah is good enough. Those who go from 300 to 600 Ah can get down to 50% SOC and be at 300. If you have small Ah capacity, you always need it full. Having greater capacity allows you to run at lower SOC%. We were able to run A/C for 100 hours straight, including when towing, with our setup! And if you're always running near 100% SOC, the DC-DC charger will get lonely with no work to do! 🤣
-
Nice shower! Being a man, and given our usual boondocking spots, I'm out there showering in underwear without a curtain. Chris showers inside but I'm outside whenever possible so I don't get the entire wet bath wet! When I do shower inside, I empty the room and then end up hosing the entire wet bath clean too! Most people do not realize dumping grey water is allowed in the National Forests wherever dispersed camping is allowed and when 200 ft from a water source (see USFS Dispersed Camping publication). I'm not certain, but I apply this rule to BLM lands as well. The high desert critters and bugs eat it up and by the next day you wouldn't even know it was there. Drain slowly so not to cause erosion, and an outdoor shower is a small amount of grey water let go slowly. 😎 USFS Dispersed Camping_stelprdb5196126.pdf
-
Hummers in Prescott.MOV
-
Welcome back, Dan! Too bad the fires kept you away from getting to Grand Junction! Wow, labor cost more than the springs themselves! I did the axles too which makes it a different process. Doing one spring at a time should be easy enough. PLEASE don't let anybody here tell you not to use your rear jacks to lift the Oliver! Then use one jack stand on the axle end where you are working. Have the Oliver hitched to your tow vehicle on as level a spot as you have. I know Art @MAX Burner did his, springs only, first but I could not find his post. Best wishes, JD
-
On second look, the length is certainly different! Epoch 300 Ah L13.77" W7.59" H9.76" and 57 LBS Vatrer 300 Ah L15.12" W7.64" H9.76" and 55 LBS Given the length of the Vatrer and the 14" wide battery tray in our Olivers... Only ONE (1) Vatrer 300 Ah battery will fit in the battery tray, NOT two! This can limit upgrade potential, but you can just barely fit three (3) of these in the battery bay with the tray removed, like I did mine. 900 Ah heated with Bluetooth for $1,800 is an amazing deal GIVEN these prove to be of good quality with long life. I spent $2,817 total for 900 Ah Epoch but list price today is $3,747 plus tax (1,249 each). Epoch used to give 10-15% OFF, these days it's more often 5%. One 300 Ah battery is one thing, and sure beats 200+ LBS of old AGM batteries! Though I'd love to see an Oliver owner mount 3 Vatrer batteries, 900 Ah for only $1,800! Watch this item. When they get popular like Epoch, they won't be $400 OFF anymore!
-
Looks like an Epoch clone from the outside, same casing and handles. But it's what's inside that matters and we won't know until Will Prowse cuts one open for review! 🤣 https://www.vatrerpower.com/products/vatrer-12v-300ah-bluetooth-lifepo4-lithium-battery-with-self-heating-200a-bms-supports-low-temp-charging-4-f-5000-cycles-2560w-power
-
The 3K model is enough, especially with your efficient Turbro inverter A/C (or your new Chill). I hope you bought one of the open box/used MP2s at half price! With the 4K model out, look for deals on the 3K models coming soon! I just looked again at the picture of your beautiful hull #45! Remove that king antenna and mount solar panels sideways. I'll bet today you can get near 800W up there! Install two drive motors so you can pitch the panels up on both left or righthand sides! Would be so cool. Consider my brain picked (just for now)! 😎
-
Not that we need this much power, but a new Victron Energy MultiPlus-II 12/4k/160-50 120V just came out for $1,105 (no tax or shipping cost with this vendor). It's at a good price, having paid $997 for the 3K model July of 2024. Also, very good customer service with InvertersRUs. They serviced a warranty replacement for me on a small Victron MPPT SC. All I had to do was to email the pic of the Victron Connect app screen. They shipped a new one out immediately with return label. It provides 4KVA (3.4 KW) inverted power and can charge up to 160A. It's 2" longer, the same width and 3/4" taller, plus 7 LBS heavier than the 3K model that several of us have installed, so it will just fit in the streetside basement. With a whole lot of LiFePO4 Ahs, you could use this kind of power, if you're still running an ol' school single-speed compressor A/C and don't want to worry about what else you power up! No Soft/Easy Start needed with this bad-boy and you won't ever get stuck with a Multiplus failing for low voltage cutout. With required input as low as 9.5V your batteries may cutout before the MP2 ever will! Wow, checking my thread above on page 1, it was two years ago to the day, when I finished my installation. We are rarely plugged in and never turn it off, so our MP2 has run 24x7 for a full 2 years now, always providing service without issue. 😎 https://invertersrus.com/product/ve-multiplus-ii-12-4k/
-
2015 Oliver Legacy Elite I air conditioner replacement recommendation
jd1923 replied to DBL-R's topic in Ollie Modifications
Yeah, I just looked up your Coleman model and it's the lowest profile I've seen at only 8.25". The Chill Cube is 6.25" taller (we park outdoors). I would take @CRM's lead on this. He has done more A/C research than any of us and looks like he may be in the market again with the "new Furrion low profile with heat pump." -
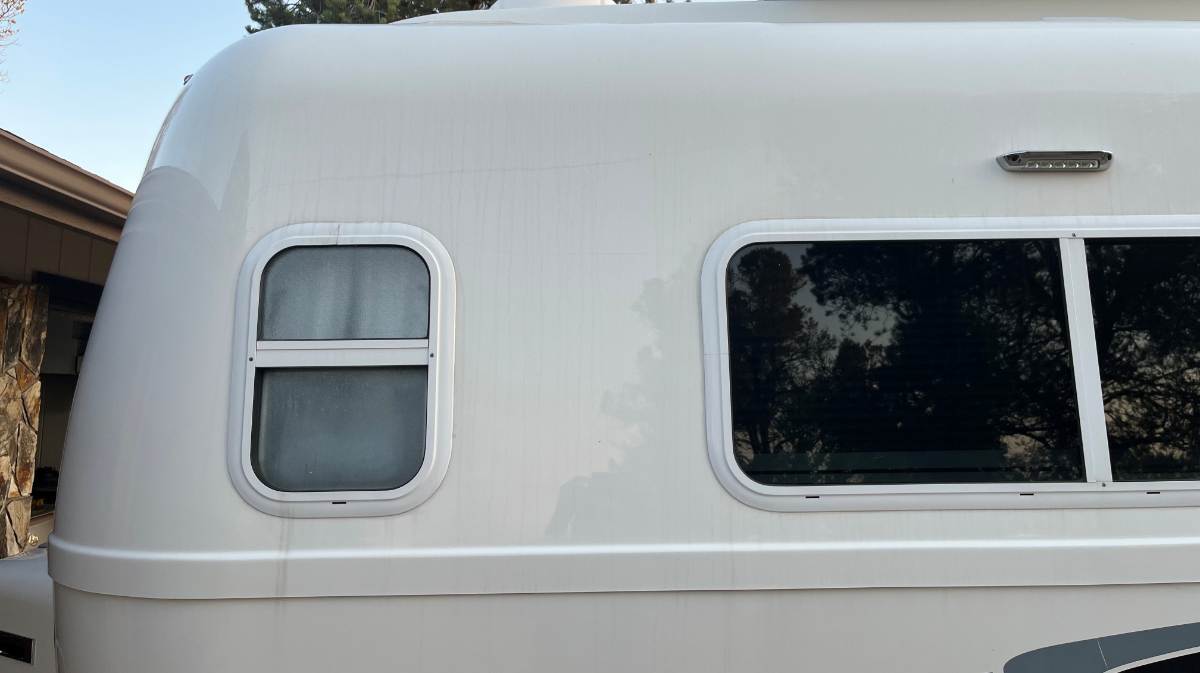
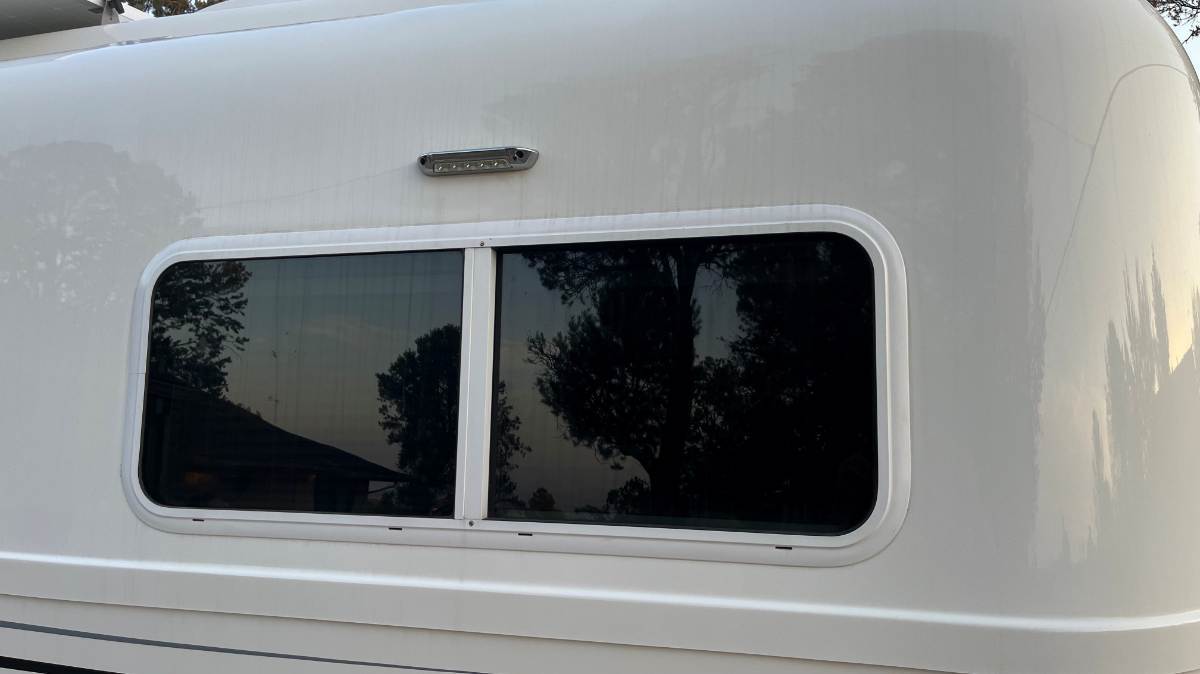
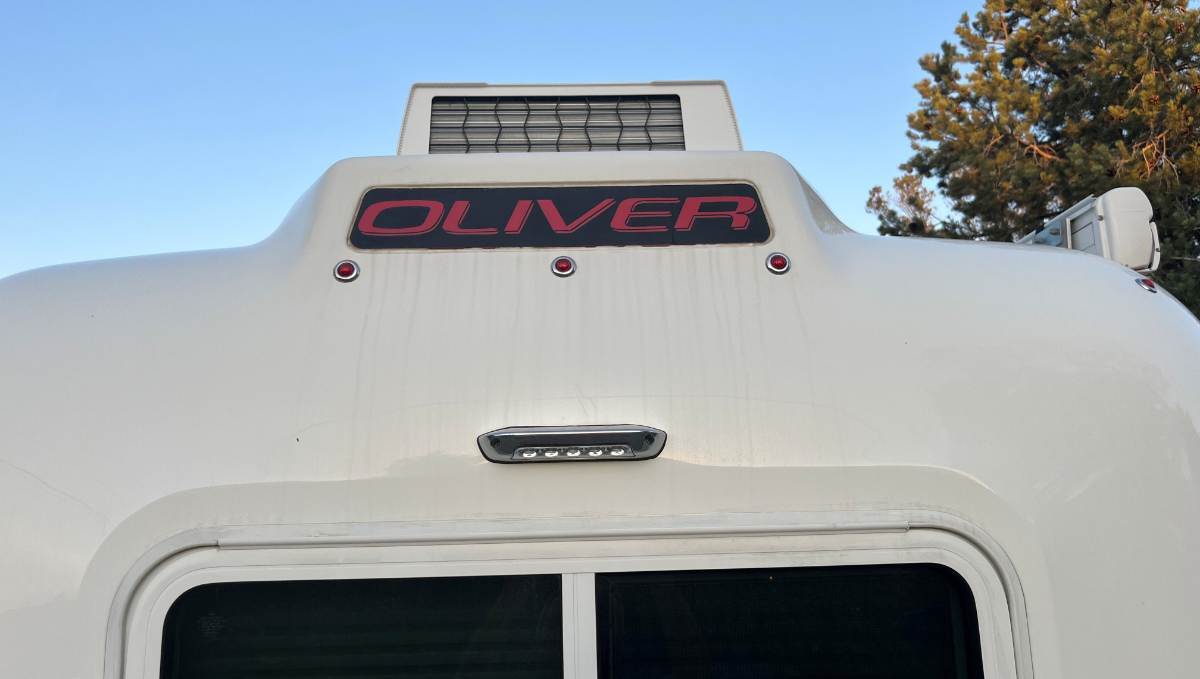
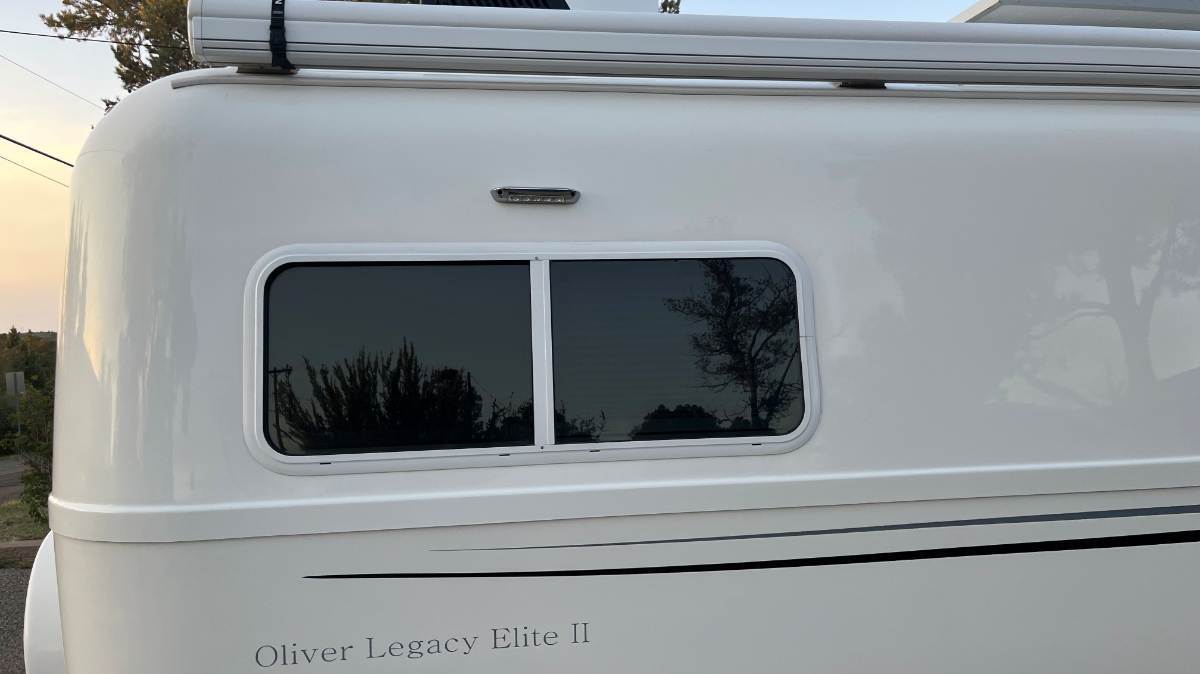
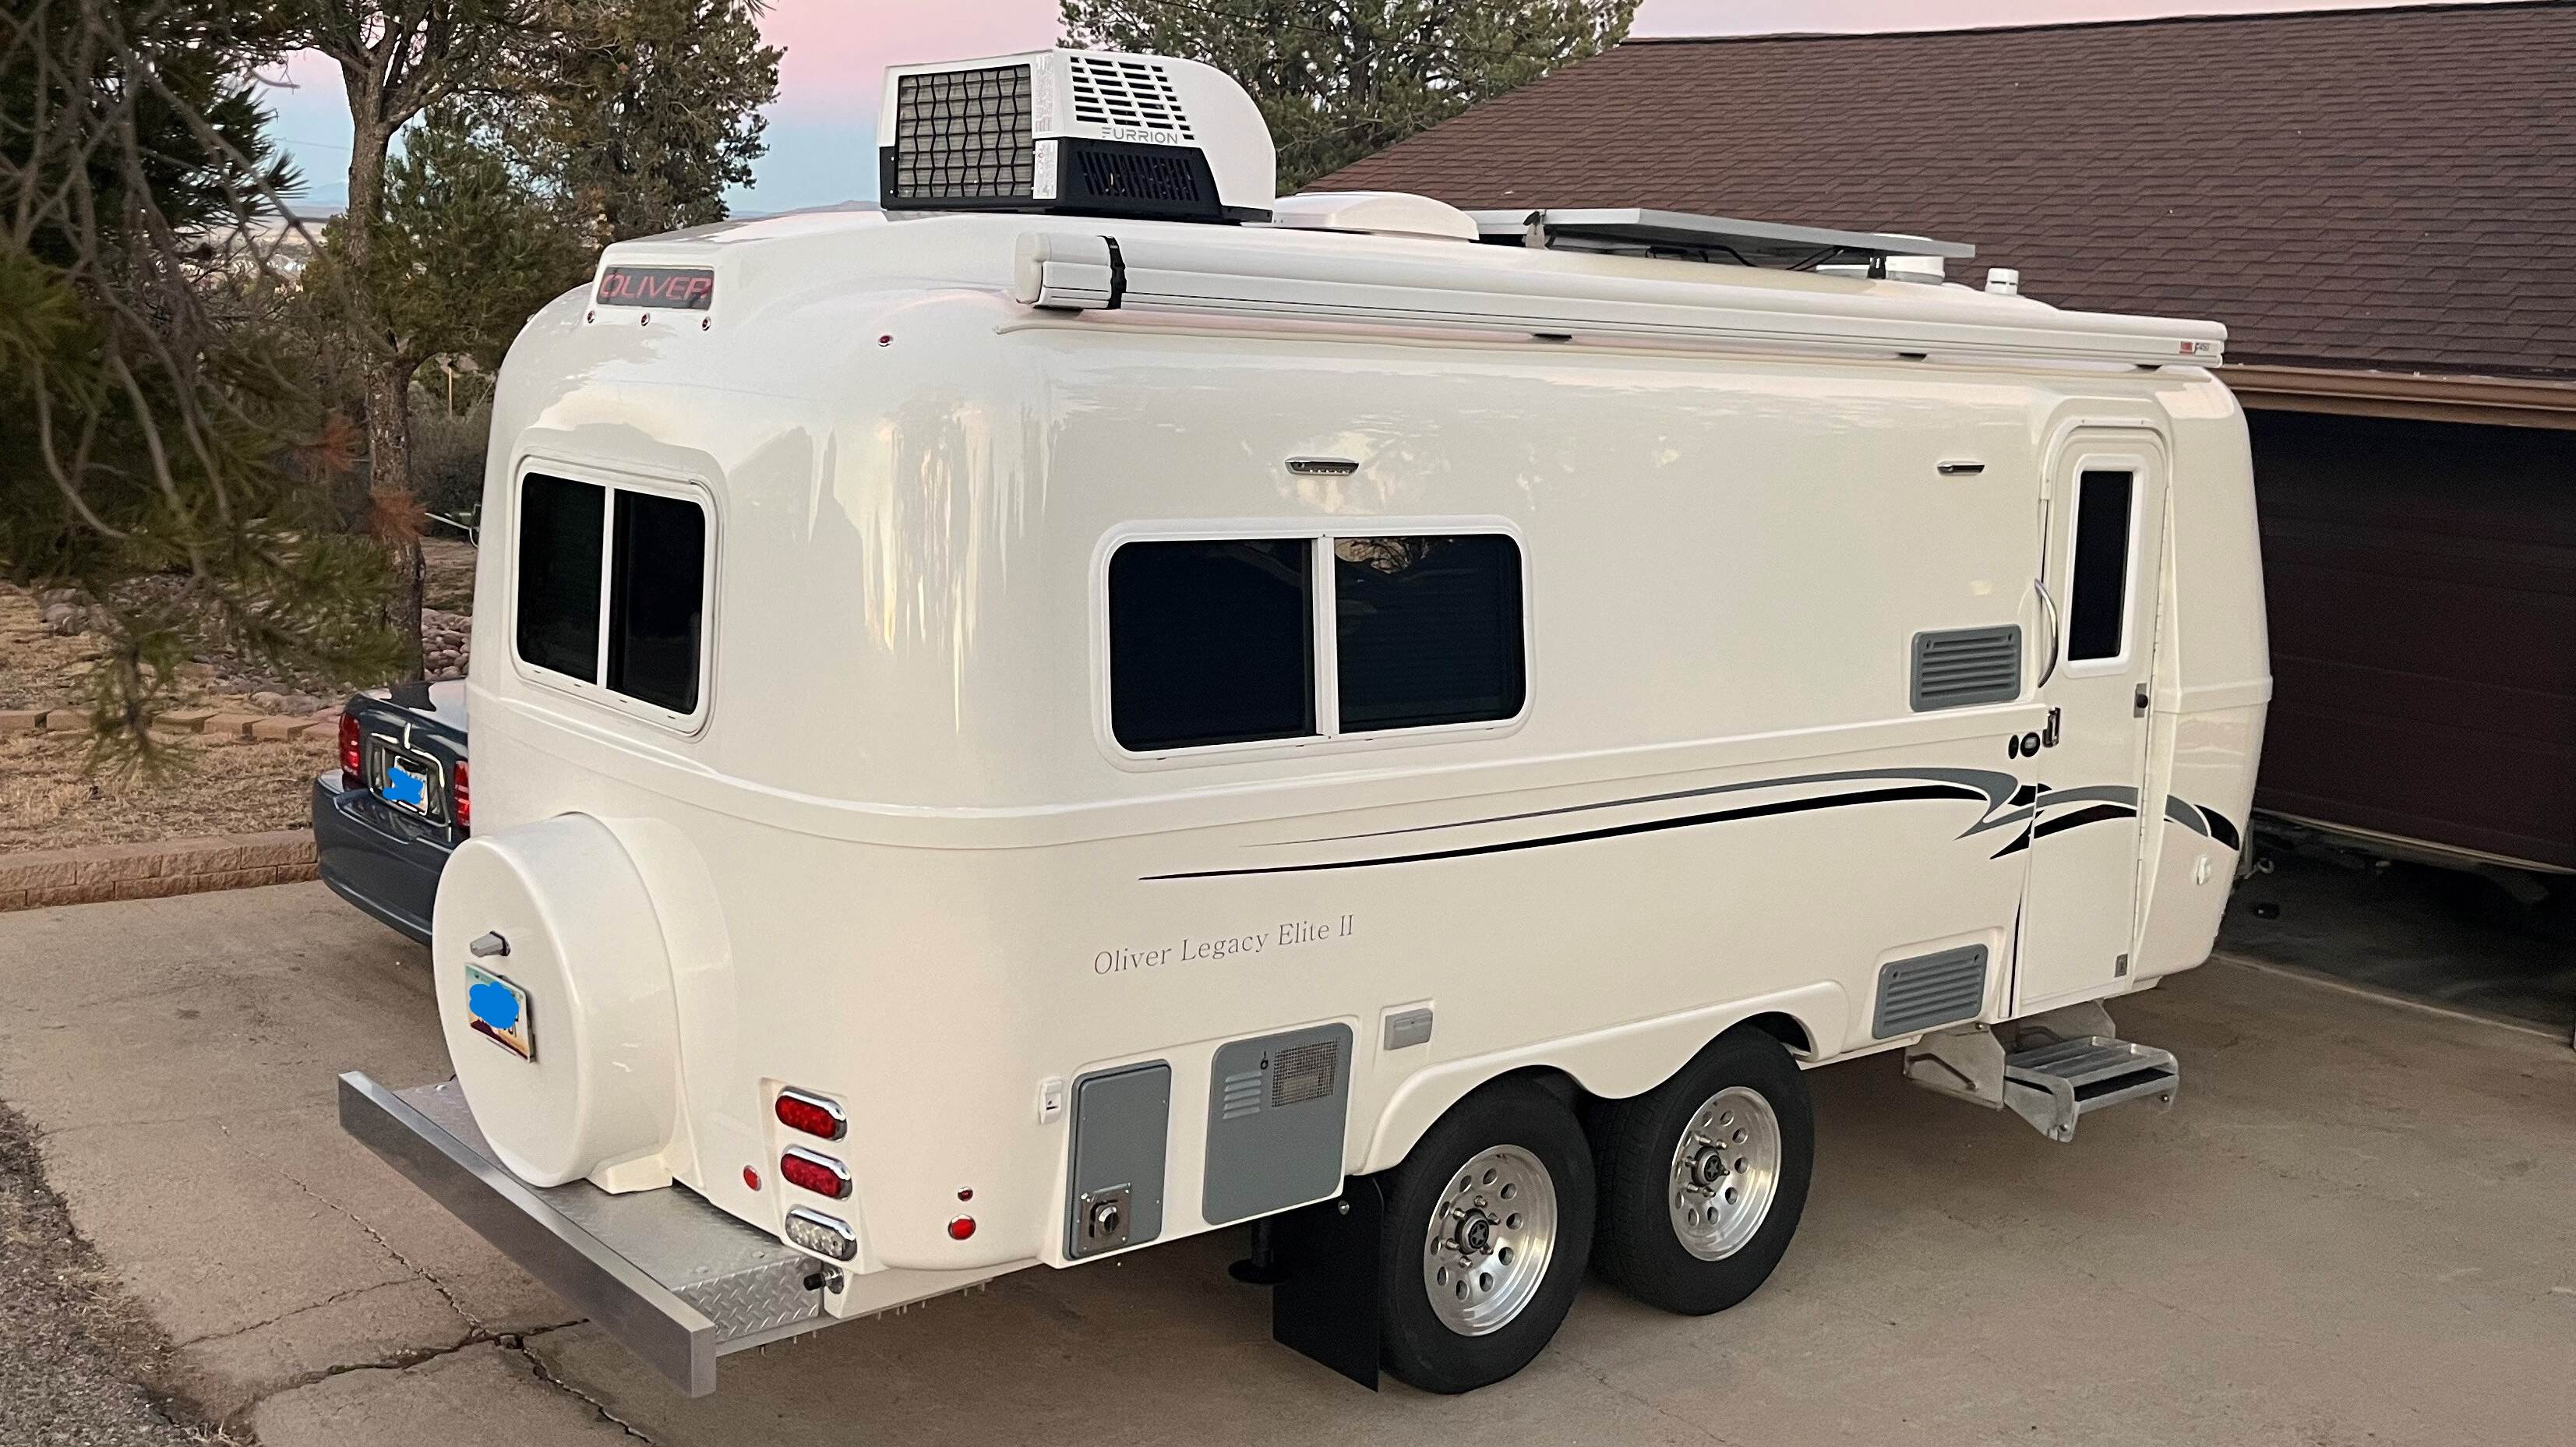
I have an ongoing experiment... For 3 years now, we've had a drip rail on the curbside and not on the streetside, the perfect A-B experiment! Keeping the roof clean? Yes of course, but everyday the breeze coming over our ridge will deposit more red dust on the Oliver! Pictures to follow will start streetside front and end curbside rear. Only the last picture has no pin-striping where the drip rail has been installed. I'm going to install them on the length of the streetside to copy the curbside and a section in the rear below the OLIVER taillight.
-
Last year and before, the free version was great. Click on a campsite, see reviews and they had a map link where it would launch Apple of Google maps for directions. It doesn't do that anymore, but states the $60/yr version does. Has anybody purchased their "RV PRO" version? Last year Campendium was our go-to app! For offline maps, get Avenza Maps! You can download any USGS (United States Geological Survey) maps for free and FS MVUM maps (Forest Service - Motor Vehicle Use Maps). I download them to my phone prior to travel online at home, or on Starlink when traveling. Even when there is no cell service you can still see the blue dot on the maps showing your location! 😎 We also purchased a sale-price subscription to onX Offroad which has public lands filters and shows where you can travel on dirt roads and disperse camp.
-
2015 Oliver Legacy Elite I air conditioner replacement recommendation
jd1923 replied to DBL-R's topic in Ollie Modifications
Wow, that's on BIG air handler/plenum! We love our Furrion Chill Cube. The air handler is built into the upper unit making it 3" taller on the outside but it's flush to the interior on the inside. It is also square shaped inside and out, so MUCH smaller the our old Penguin or your Coleman. I had to patch some screw holes on the interior because it was smaller. The Chill Cube does not require interior screws into the ceiling. Not sure if the Coleman used screws into the ceiling that if so may have to be patched. If you have a decent amount Ah in LiFePO4 batteries the Chill Cube can run A/C for hours, even days. I have linked my build thread below which shows the installation and interior pictures on page two. In the thread there is a mention of a model with heat pump if that is of interest to you. There are also mentions of a low-profile unit, but it is the tall non-ducted Chill Cube that is the efficiency beast! It's so quiet too. Half the sound on high and once it reaches set temp it will only whisper all night long! 😎 Watch the video on the Morton's web page: https://www.mortonsonthemove.com/furrion-chill-cube-variable-speed-18k-review/ -
Profile looks the same to me. Full width should measure just under 1". Yes yours, living in Nashville, sure got "Nasty" in just 2 years. Our Oliver started life in Florida and then moved SW. In my picture above the white rubber shown is 8 years old. Caution on installing the new rubber. The ones I removed were all about an inch too short. To compensate for shrinkage on the new ones, I cut them long cramming them into place. I over did it on one window. One piece after a couple of years, the top section had wrinkled and a bottom section had buckled in. I just noticed it last trip when monsoon rains caused a leak in that window alone. I recently ordered 5 ft more to redo that one window, thinking the AZ sun had hardened that piece in its current shape. Cut them long enough to fully fit pressing in firmly, but don't overdo it like I did. If it feels too long, you can always trim them a bit shorter, but of course you don't want to cut a piece too short. I used the hose cutter shown above. Didn't know about the back-order. My order is now two weeks old. They confirmed it by email, stating they would send a 2nd email when the order was processed and have not received that yet. I emailed them yesterday. No reply yet but hope to hear back from them next week.
-
Hey Taylor, contrary ideas are always good to read and understand! We all live and travel in much different climates, and yours and ours are quite the opposite. The high country of Arizona is the only place, in the 5 states we've lived, where temps changes more in a 24 hour day than from season to season. 68F at dawn today and 94F right now at 4PM. In January, it's often 18F early and 55F in the afternoon! We average 300 days of sun in Prescott and only 18" of rain all year, with a few days of snow Feb-Mar. You will of course get more rain in one month than we get all year. You also have tall trees, pine needles and sap droppings, etc. Only on rare occasion camping do we have tall trees above. We get a little red rock dust all over the Oliver almost every day of the year. You can barely see it, but it's certainly always there! When we used to go dirt riding often, when we hit puddles, better hose off the bikes when home. Otherwise the splashes of red dirt (sandstone iron-oxide) or white (limestone) will permanently stain if left on for too long. Summer afternoons, the roof of our Oliver is the hottest part. The other day, it was over 110F rooftop, 90F in the basement and I'm cooling the interior cabin to just under 80F. Every night the roof is the coolest part. We get dew/condensate on the roof nightly, frost when temps approach 32F and below. After sunrise, the condensate drips, carrying the red rock dust in lines all the way down the hull, in essence staining the fiberglass in its path. I can see you not wanting drip rails. Real rains like you get could be helping to keep your Oliver clean. I certainly would not think to add one, but the curbside one we have sure does the job! I'm going to see if that when the sun sets I can get a picture of the drip marks. They only come off with scrubbing. None on the curbside with the drip rail, but all down the streetside and rear. None on the front, perhaps due to its convex shape.