Leaderboard


Popular Content
Showing content with the highest reputation on 05/11/2022 in Posts
-
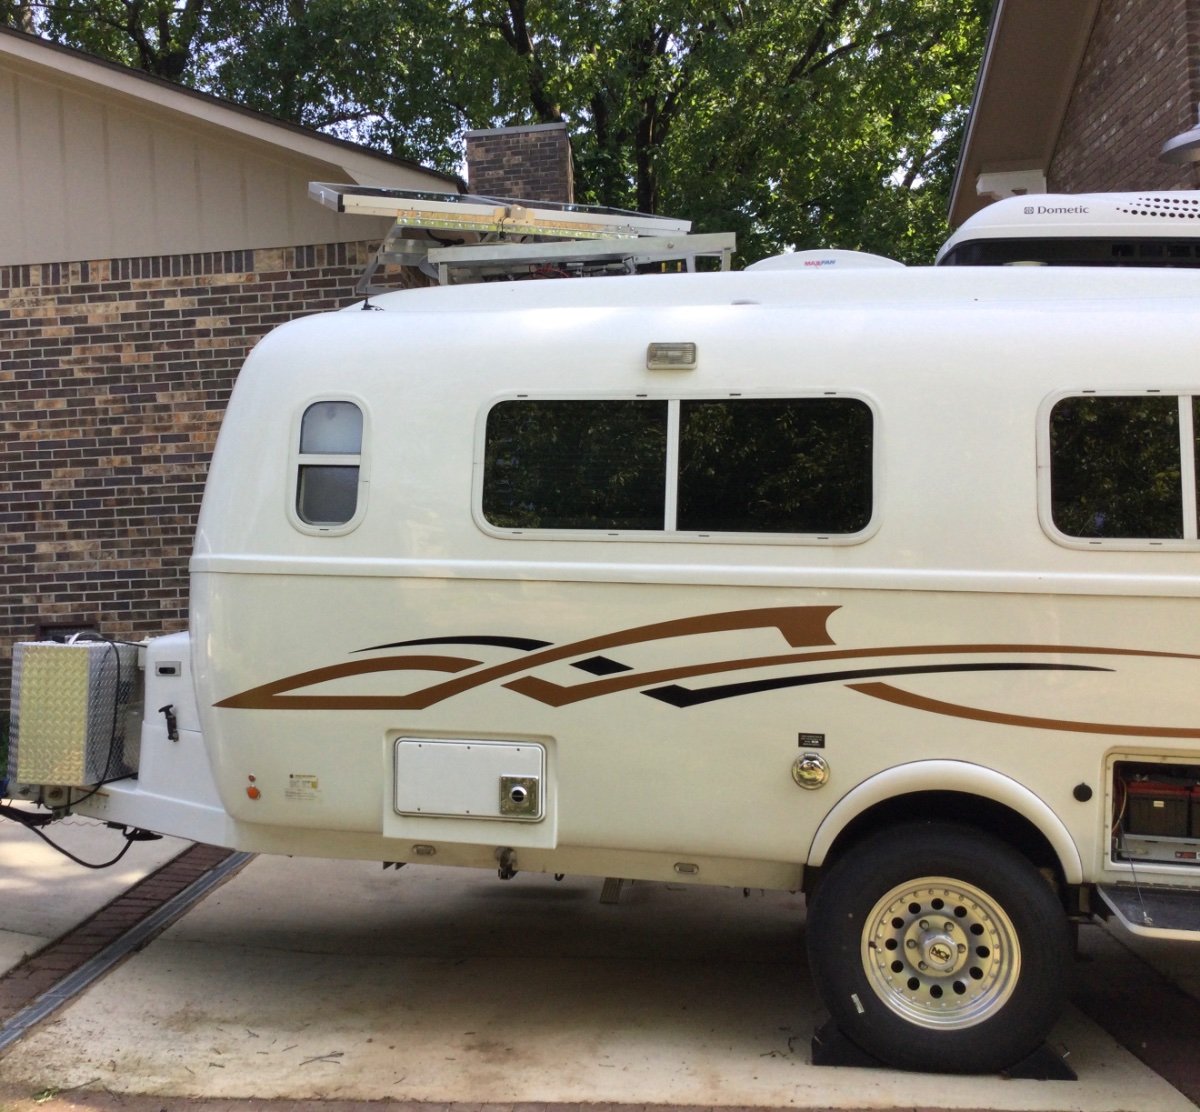
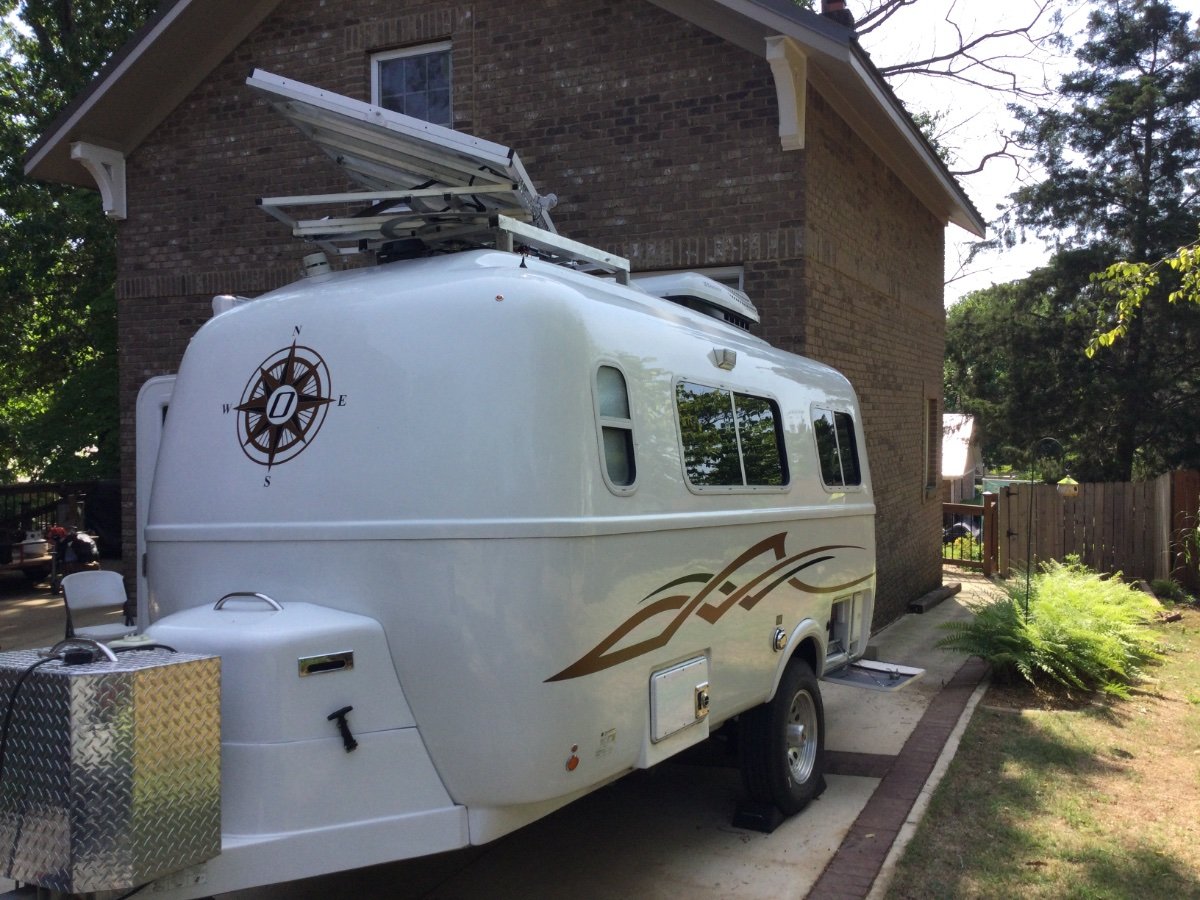
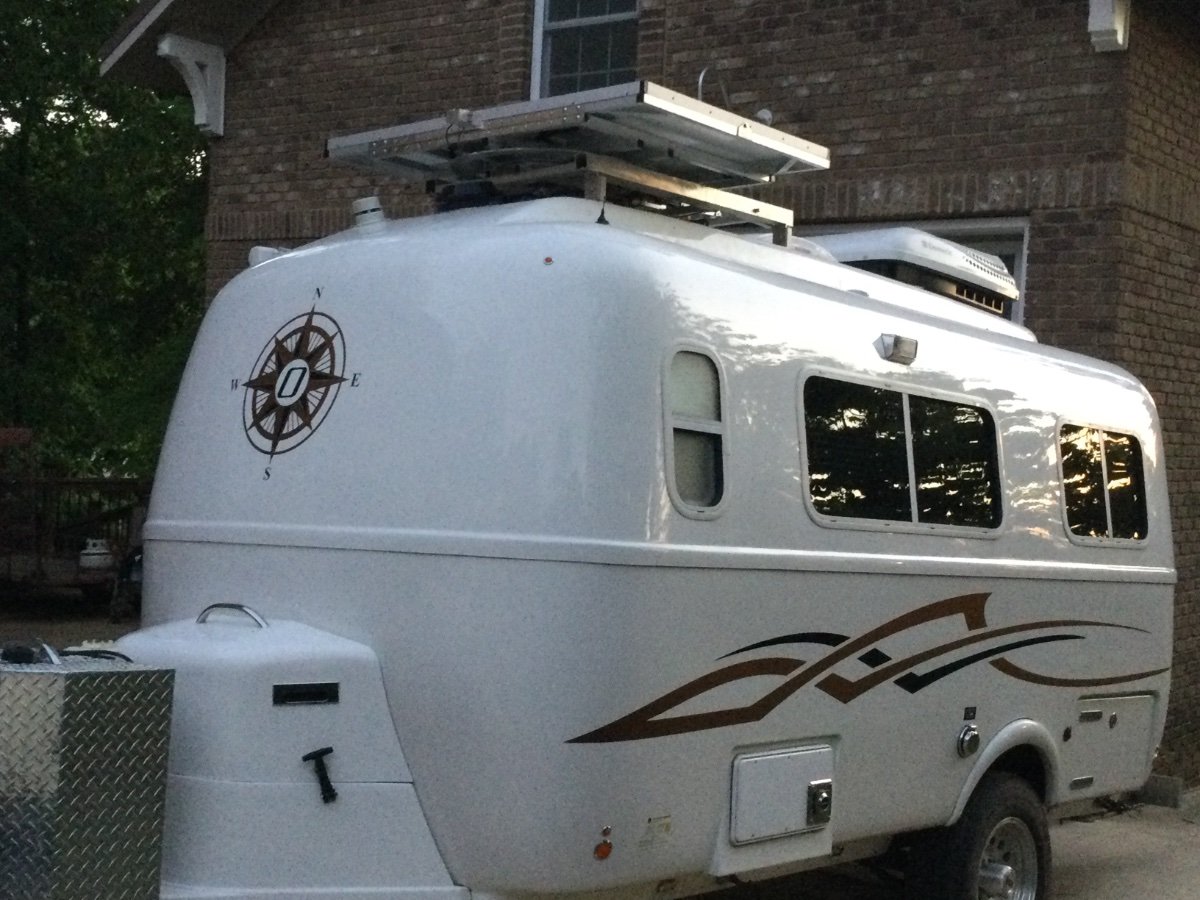
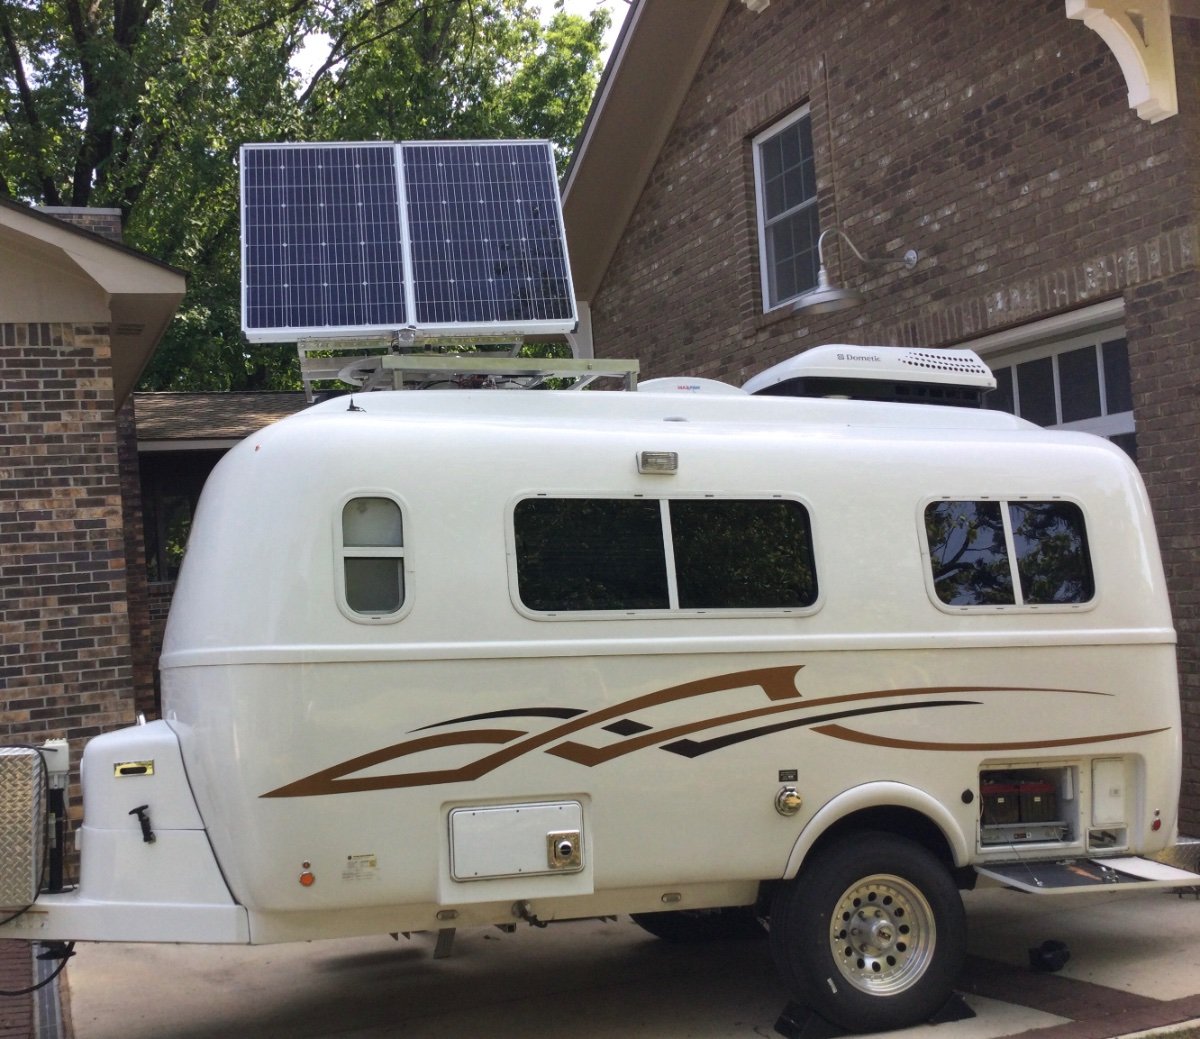
Sneak Preview Here are a few pictures of the new rooftop tracker. It has a smaller height profile than the AC It tracks dawn to dusk automatically resulting in MUCH more energy to your batteries The tracker detects high wind and Tow movement, shuts down and locks Existing Oliver solar panels can be retrofitted with a rooftop tracker. Built and installed by Oliver “Clean setting” lifts the panels high so they can be cleaned with a squeegee while standing on the ground - NO LADDERS ! 2 photos below. Sign up on list during the rally , no financial obligation, and get 3 year electronic warranty - FREE ! Video and more information coming soon Coy Questions ?
 6 points
 -
Indeed, thanks! The trout fishing was ok too!
3 points
-
Josh White from Oliver said that our Honda EU2200 will be able to run the air conditioner with soft start in our Elite II we’ve ordered. I can actually run the air conditioner in our Casita 17 without soft start using that generator. At least on low cool.3 points
-
I suppose that would produce it's own kind of miracle! 😄2 points
-
Virtually all generators will require the neutral-ground bonding plug.2 points
-
I have a Champion 2,000W. It weighs 38 pounds. It runs my AC. Mike2 points
-
We have the Honda. I can lift it and move it around myself. We'd need the companion one to run our AC, but lifting two lighter ones separately is a lot easier than 100 pounds of anything. Plus the Honda is so so so very quiet.2 points
-
Pretty heavy, at almost 100 pounds. I'd look at something lighter, personally.2 points
-
The one at the link would run your AC. When to get it is hard to say, depends on your travel plans. Mike2 points
-
There's something "funny" here but I just can't seem to put my finger on it!🙃 The folks with a Nature's Head don't want things too wet while the folks with the standard toilet don't want things too dry?2 points
-
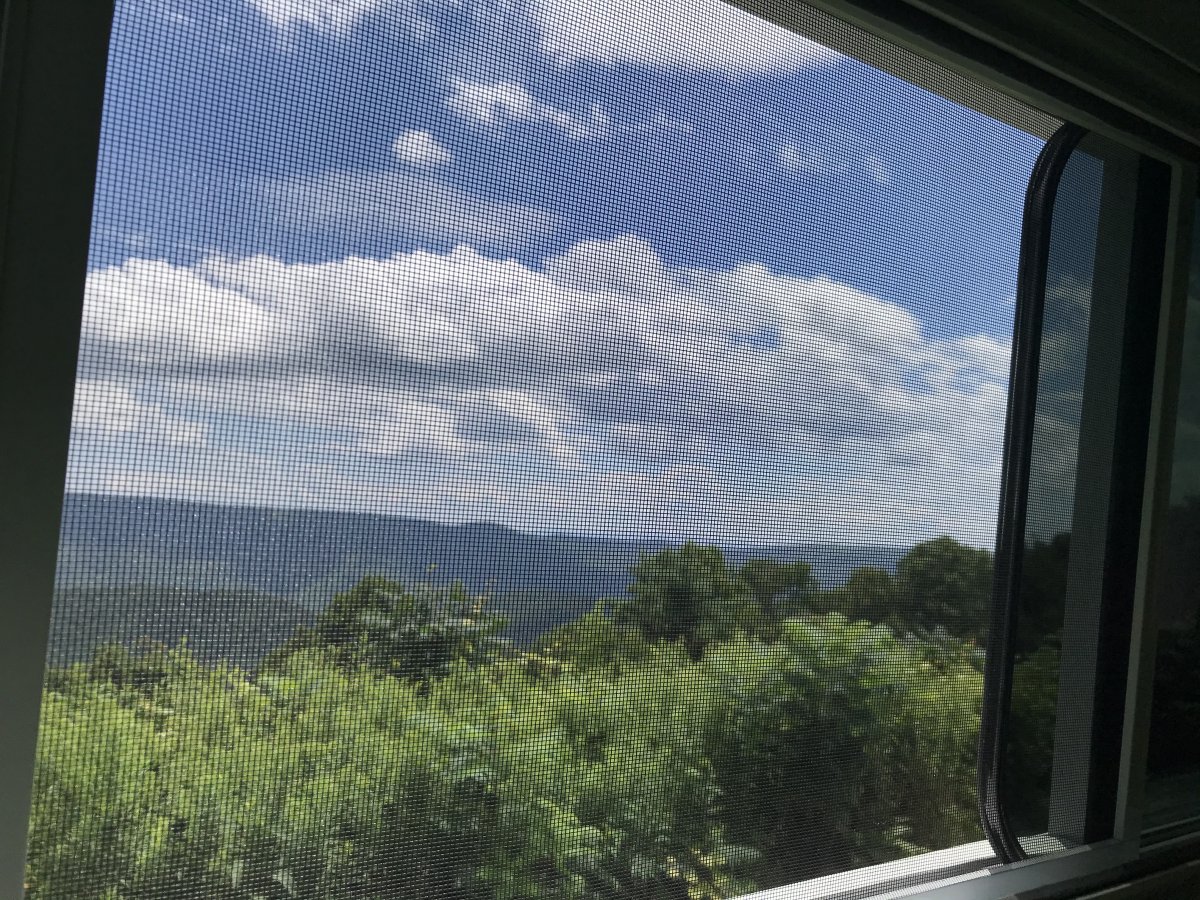
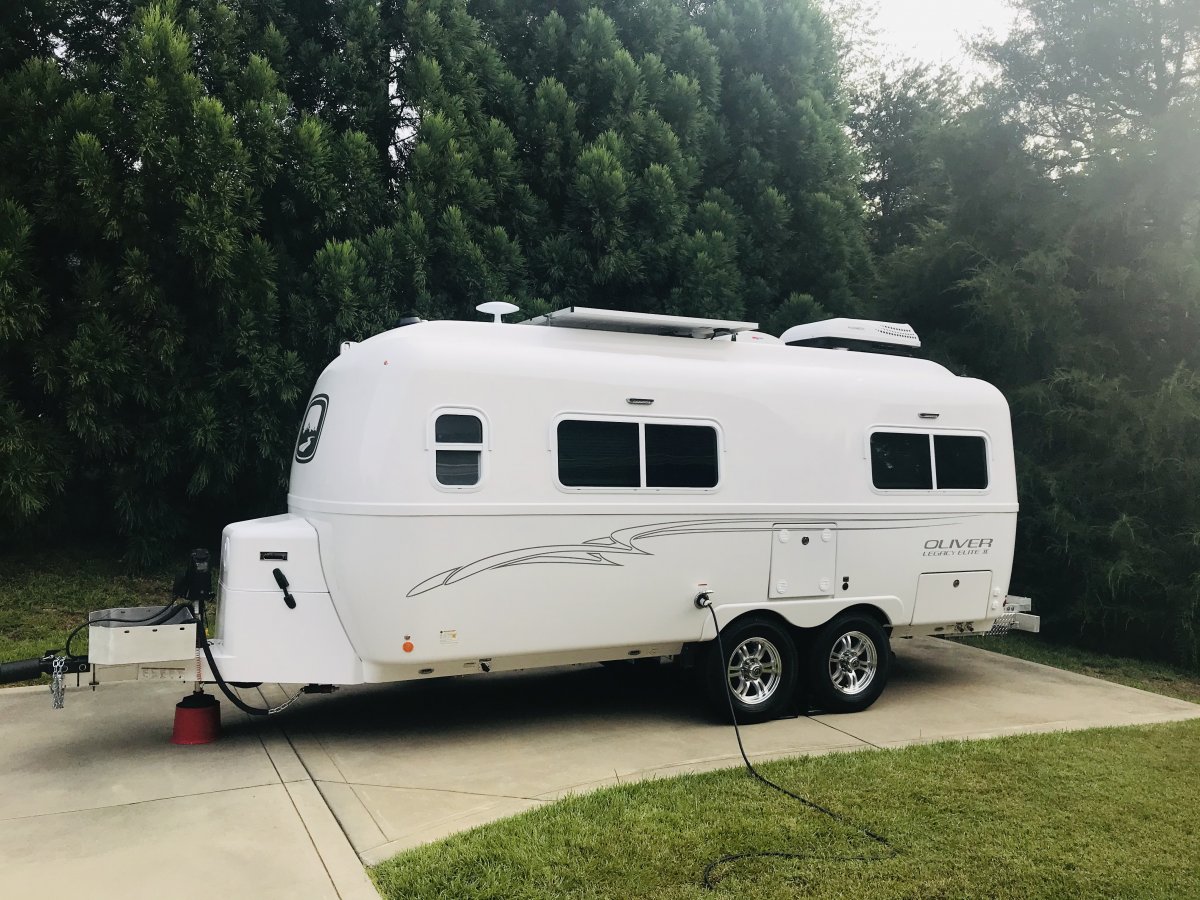
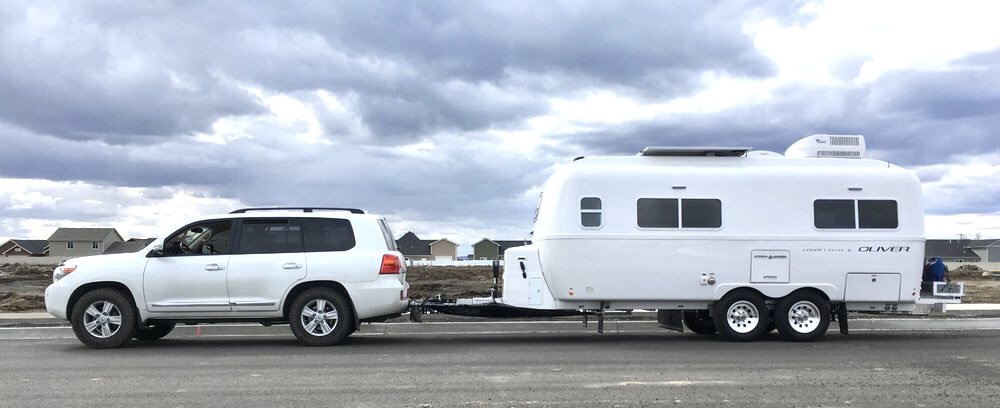
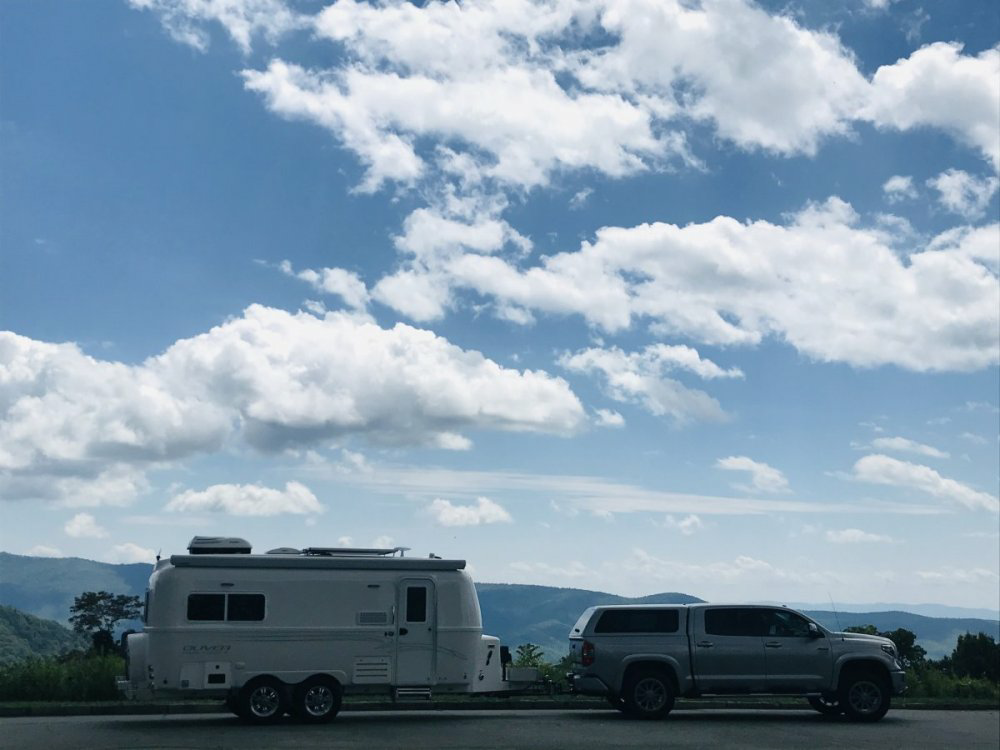
We just just spent a week at Bear Den CG just North of Spruce Pine, NC. ⭐️⭐️⭐️⭐️⭐️ with Hull# 634 which performed flawlessly. It was a well needed vacation post our blueberry harvest. We took time and spent a lot of time learning our Ollies systems- Love Love the Truma, long instant hot showers a win.I think it took like 6-8 seconds for us to have constant hot water at the kitchen sink and sink/shower. Microwave convection oven a must have for us. We were easily able to quickly cook/heat meals during a heavy storm one evening. Full hook ups allowed us to use our black and gray tanks seamlessly. The generator tray was extremely useful for a number of tasks. (We did not take our Honda generator this trip). Our AC kept us cool and cycled as it should. We did run the Dometic furnace on a cool 60 degree morning and it performed great. All in all a great safe week! A few photos....of our great State of North Carolina! 😊🇺🇸 Our Tundra CrewMax and it’s reliability delivered and performed outstanding. Check out Bear Den if your ever traveling the gorgeous elevations of the Blue Ridge Parkway. Happy Camping! Patriot
1 point
-
This is most excellent, if you want to understand why lithium batteries are so cool. "You have just sold your first-born into slavery, remortgaged the house, and bought yourself a lithium-ion battery! Now you want to know how to take care of your precious new purchase: How to best charge lithium-iron batteries, how to discharge them, and how to get the maximum life out of your lithium-ion batteries. This article will explain the do’s and don’ts." How to Find Happiness With LiFePO4 (Lithium-Ion) Batteries John Davies Spokane WA EDIT: That is a pdf that doesn't print well. I made a Pages doc out of it, that can be printed and added to your Ollie records, if you like. JD How to Find Happiness With LiFePO4 (Lithium-Ion) Batteries - Solacity .pages EDIT 05/16/23. Thanks to Jim and Francis for converting the article to a PDF: How to Find Happiness With LiFePO4 (Lithium-Ion) Batteries1 point
-
Today was the day I got to do the fun messy job of replacing the China Bomb wheel bearings/seals on the ILOVHER on over to USA made Timkens. This was quite the all day project as we also changed out the shocks and lubed the EZ Flex suspension. We beat the rain by a mere ten minutes! My only experience prior to this, was replacing entire preloaded hubs and manual brakes on my Casita which was easy compared to this. After figuring out the best way to jack the side of the trailer up. (Yes, we used multiple floor jacks, and safety jacks stands, chocks and wood cribbing all while being attached to my truck) All I can say is, Thank God my son was here to teach me and to remove the seals in those hubs! (His father owns an excavating company so he knows a bit about trailers/brakes) There is no way on Gods green earth I would have been able to remove them by myself. We had a puller and they would not budge. I think they were permatex'd in there. He somehow was able to use his strength, ingenuity and multiple tools to get them out without scoring. Here are some observations and or questions we had: 1. My son thinks that the shocks look too large for the application. We used the exact replacement that Oliver uses (Monroe 555025) He says they're nearly all the way compressed with the way the suspension sits and that is why potentially two of them were blown. His opinion is that they'd do more if they were just a bit smaller. I have no idea or opinion but it was the one job I was able to complete by myself so I'm good with it. 2. It was quite the surprise to see that the axle spindle did not have the Dexter EZ lube feature. My understanding is that this was not an option on an LE2 in 2017? I did not know this and bought new grease caps with the rubber insert. As much as I learned today, this was sort of disconcerting. Even my Casita had EZ lube axle and it was a 2007. I greased my bearings every year and it made it easy. All those great suspension features like shocks and a EZ Flex but no way to easily grease bearings?? What gives? I sort of dread doing this again. 3. What's with grease guns? OMG..I wanted to throw and shoot them with a real rifle like skeet. I used two separate guns and they both were being unruly and messy. I could have bought stock today in rubber gloves and shop towels! LOL 4. Bearing grease packer seemed like a great idea. Who knew you'd have to use all 200# of human body weight to press down in order for the thing to squeeze grease into the bearings? 4. I took the advice on the forum and replaced a few zerks with 90s and 45s and used plastic cap covers but OMG.. crawling under the trailer is not for the faint of heart or my elderly bones! I think I want/need a creeper. 5. Thank God for Harbor Freight! I now have all kinds of fun new cheap tools, like impact driver and a torque wrench which I properly learned how to use! I now can afford to go to the Rally. 6. The Nev-r-Adjust Brakes looked good but I think I'm going to go with manual brakes next time. I don't feel confident about what I learned about them today and how they actually DO need adjustment. We greased the important parts with a good brake grease. At least we didn't find any loose parts. springs or worn pads floating about. 7. Found four cracked lug nuts. Son says the sheath on the outside is cracked and I should consider solid replacements. Any recommendations? 8. Beer never tasted so good. Thank you for all of the forum help I've received, without you guys, I'd be dead in the water. See y'all safely at the Rally !
1 point
-
Congratulations and welcome to the Oliver family. Hope you can narrow down where the hum is coming from. Let us know if there are things the forum can help with. Mike1 point
-
I learned to sail on Chesapeake Bay - many fond memories. Crab cakes at a little dive in that big town of Suicide, MD after a day on the water🙂. Enjoy your new baby and welcome to the Family! The next time you are backing up your Ollie and thinking that it is a bit of a problem - recall those days trying to dock with a raging wind and terrible current. Land yachting is easier. Bill1 point
-
1 point
-
We carry a few of these in the camper and a couple in the TV. Convenient when you are only out for a few days and dont want to use the toilet. Just open and lay into the bowl. Double bag when done and throw in trash. They can be found at Cabelas and REI when in the road. https://www.amazon.com/Anywhere-Lightweight-Backpacking-Zip-Close-Towelette/dp/B089QRH56F/ref=mp_s_a_1_3?crid=WWFQZX6G6AGQ&keywords=cleanwaste&qid=1652302465&sprefix=cleanwaste%2Caps%2C233&sr=8-31 point
-
Good point! The lithiums draw a lot of charging power. Xantrex setting #28 will cap the total amount of amps the converter will pull for charging while still feeding the other 120v items in the trailer. Set it to 15 to prevent overloading a 2200W generator. (Remember to set it back to 25 - factory setting - when you go back to shore power.)1 point
-
Wow, David you are really organized. I'm impressed. We so rarely have any sort of reservations or a set itinerary. Sometimes we don't really know where we're headed until we get to the end of the street. Turn left we'll probably go North and East (maybe to Maine), turn right, probably West (Arizona, California...Alaska?) I do like the idea of keeping a log of what we do each day, but neither of us is motivated enough to actually write it. Thanks for the info.1 point
-
A cut off switch is OK, but not absolutely necessary. I would install it if it made you feel better.1 point
-
You don't absolutely need a 30A connection/3000W generator unless you plan to run everything on generator the same way you would on shore power (microwave and AC at the same time, for instance). A 2200W generator should be enough to charge your batteries and run an air conditioner with the soft-start feature, but you may have to pick and choose when you want to run the microwave, hairdryer, InstaPot or other high-draw appliances with the AC on. The advantages of the smaller generators are less weight, less noise, less fuel consumption, and lower cost. OTOH, the larger generators will let you use your Ollie as if you're plugged into shore power. If you do decide on a smaller generator, you may need a "dog bone" adapter to convert your 30A RV plug to whatever's on the smaller generator (often a standard 15A household plug). If it's a Honda you may need a neutral-ground bonding plug, too, to make your surge suppressor system happy. I do love my little Honda...1 point
-
Yes, our AC will come equipped with the easy start.1 point
-
Liana, does your AC have a soft start feature? We have a Honda EU2200i and I was hoping it would be capable of running the AC on our Ellite II when we pick it up in late August. Our air conditioner will have the soft start option. If the Honda alone won't be capable of running the AC, then I need to start shopping for a Honda companion generator.1 point
-
@SeaDawg -- thanks for the great summary! So here's my report: On entering, I checked my batteries; they were/are full. I turned on the Xantrex Inverter and things came to life; many things, as proven by the many little lights twinkling everywhere. Plus I tried a light switch. Opened the house fan to vent. Turned on the one propane tank (one was empty), and I used the gas cooktop to bleed the air out. Sure enough, there was air and it took a few tries to light both burners. I followed the step-by-step in the manual for the N500 model (starts on pg 217 in the manual) -- even though mine is a "400", the controls match the "500" manual diagram and labels. This allows for selecting the mode from the 4 options (3-way for sources plus the auto mode, on the control). And.... It worked like a charm! I could hear it clicking about 3 different times and then heard it kick on. After 5 minutes I could tell it was cooling. YAY! Since one propane tank was empty and I wasn't sure of the level in the second, I decided to turn the fridge off for tonight. Got propane, checked my tires and lugs, took stock of supplies, loaded linens and a few dry goods. And then I left, feeling a lot more confident. Thanks to all of you! I am sold on the idea of a remote temperature gauge -- actually I want to find the name/model/brand that Charlie Hall showed me when I met him at the factory -- Hey there Charlie! @Time2Go! -- Charlie & Cindy have a device that reads remotely (small hand-held reader) with multiple sensors that they have located in the fridge, the freezer, the basement and I think one is just in the cabin space. I think it includes a hygrometer, which would be great! I'm going to attach a photo of it here (except it looks like a broken link?) I also like the cold-sink idea to cut down on cooling time. And boon-docking is what I'm aiming for, as I work to get my legs under me on the process. Big hat-tip to the Oliver Forum for all the great discussion and advice. 234567788_CharlieHallTime2Gowirelessthermohygrometer.jpg1 point
-
You've had excellent advice so far. I'll try to consolidate,, in one routine, which was ours when we had 3ways. I have a dc compressor fridge now in our Ollie, but had two different 3ways in our Oliver, 3ways in other campers, and this was our experience, fwiw. Your friend was correct. Solar is plenty to run your fridge on gas, even in crappy weather, if all that is running is the fridge. (Gas mode does require dc power, but very little. The fridge won't shut down for low battery til you're almost flat. ) check your battery level when you enter the trailer, to make sure you're all good before you begin, since you have no power at the storage unit, before you turn on the solar and battery disconnect switches. If you have the norcold, make sure you are set to gas, not auto, because if you run out of gas, it will revert to 12v operation on its own, and that not only uses a lot of battery, but is the least efficient (and most power greedy) mode of the fridge. It will run your house battery down, even with solar, imo. In our experience, we found the fridge cooled faster if we loaded a couple frozen water jugs and cold, non perishable items in the fridge after turning it on, in the fridge compartment, not the freezer. (Cold water, beer, sodas, unopened chilled condiments, etc.). These cold items provide a steadying cold sink, just like your home fridge. The frozen water jugs went back in a cooler after fridge was at temp, and we loaded the food we wanted to take, and we used the thawing jugs for drinking water on the road. Resist the temptation to jam the fridge to the max. You need air circulation to keep the fins clear of ice. Especially, leave free space near the fins. Pack stuff close together, but not high items, there. Before you turn the fridge on, turn your gas valve on SLOWLY if you've had it turned off. Then, light a burner on the stove and run for 30 to 45 seconds, or longer, with a clear blue flame, to insure gas line is free of air pockets. (If you have air pockets in the line, you'll see a lot of orange or yellow, or sputtery flame, but that's ok. Wait til it's all blue flames, none missing, with tiny yellow tips above the blue, steady, and then you're all good to turn on the fridge. ) If you don't have one, I'd recommend a thermometer for the fridge. One with an outside wireless readout is great. After you've turned on the fridge, you'll hear it light off. (It usually clicks a few times, that's the igniter, then you hear a little whoosh as it lights. (It may do this a couple times, with a pause between attempts.) I could usually hear this from inside the trailer, if I wasn't running fans, and there wasn't a lot of ambient noise. After the fridge lights, if you go out and put your hand near the outside upper vent, you'll feel some heat exhaust after a few minutes, and you'll know it's running/flame is good. (Its hard to see the fridge flame, as its really small, even with the bottom vent off) After five or ten minutes or so, open the fridge, put your hand on the freezer bottom, and you should feel it's cooler than before, though not super cold. That lets you know it's started the cooling process. (30 minutes in, you can probably sense a bit of frost on the freezer floor with your hand.) Our gas fridge took about 6 hours empty to cool down to foodsafe temp of 41, three or 4 hours depending on ambient (outdoor) temperature if we preloaded with the frozen jugs and cold nonpershiables. Winter in Florida it obviously took less time. Summer, more. Working with a 3way is very different from a home fridge, but you'll soon find it's easy and routine, and a great asset for boondocking. It does require some getting "used to." If your subdivision allows overnight in the driveway for loading, like ours, I'd go get the trailer day before, start the fridge, and get on with enjoyment. It saves a lot of load tv/unload/ load trailer time. I'm sure others will find things to add. Steph and dubs alarm is great, if you camp with ac, which we rarely do. Fridge runs great on ac power, so if that's your plan, get their alarm.1 point
-
Glad you posted. Mine will shut the inverter OFF, but I have to get under the bed to turn it on! Appreciate that there are good suggestions here and that it's not necessarily something I'm doing wrong. 😄1 point
-
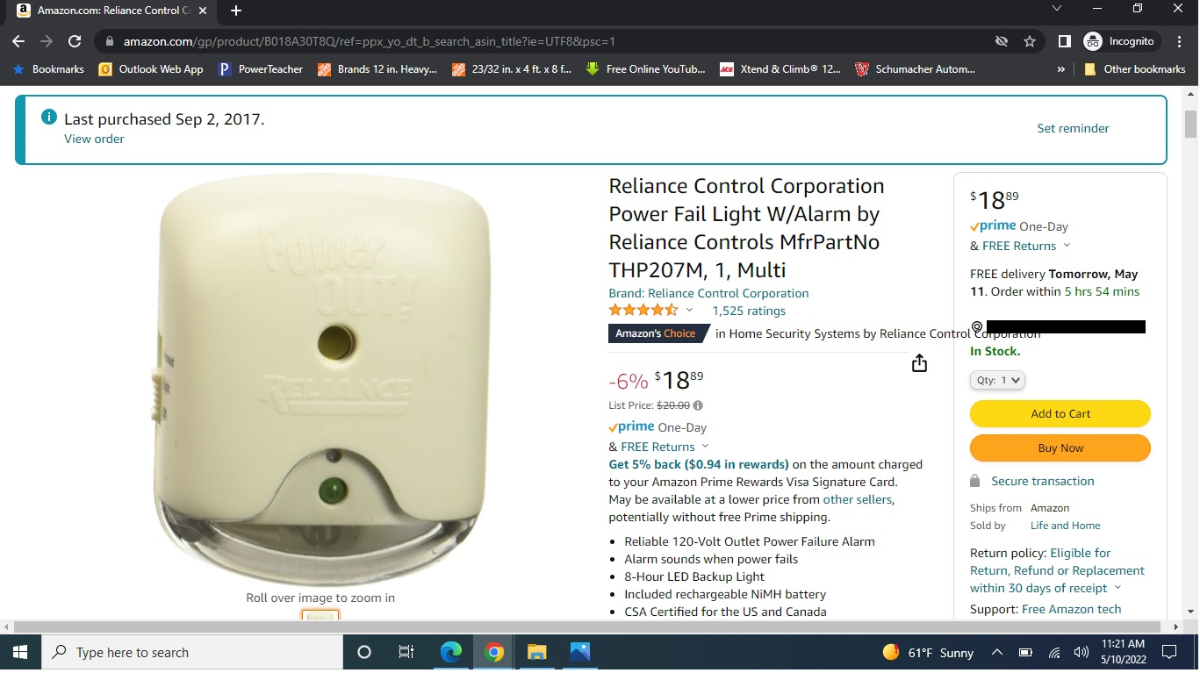
When we have shore power I leave our current gas/electric fridge on Auto. As a precaution in case the shore power fails while we're outside the fifth wheel, or if we're sleeping, I bought one of these AC power alarms. If shore power fails, the fridge goes to gas and the alarm warns me. I plan to do the same with the Norcold in our Ollie. (If we're dry camping, I'll put the Norcold directly on gas.)
1 point
-
I agree with this statement. I suppose it could be viewed as simply adding 'fridge power switch" to the routine list each time one sets up or leaves camp...1 point
-
One additional thought - Yes, the control board of the fridge also needs a small amount of battery power to keep the fridge running. This control board is what allows the fridge to "know" when to supply power to the igniter, when to turn the ignitor off, when to alert you that something is wrong or right, etc. But, again, like the igniter itself, the control board takes very little battery power.1 point
-
As has been pointed out on this forum in the past, it is not really advisable to routinely use the "Auto" setting on the Norcold 3-way due to the risk of accidentally drawing your batteries to empty accidentally. When set to auto and not hooked to shore power, the Norcold will automatically switch to propane. If propane is not turned on, then the Norcold will switch to 12-volt and you won't know. Even if set to Auto and you confirm that it is successfully running on propane, if the tank were to run out of propane and you didn't realize it, the Norcold would switch to 12 volt and once again, you would not know. The Norcold on 12-volt can draw up to 15 amp-hours per hour which puts a big draw on the batteries. If one manually sets the Norcold to gas but gas is not available, the refrigerator will generate an error message alerting you if the gas is not on, or if it runs out, prompting you to investigate why the Norcold is not getting gas. The choice of power source is best made as a deliberate decision. An exception might be if you were away from the trailer all day and wanted the security of 12 volt backup should the propane supply be interrupted to the Norcold while you are away.1 point
-
Once you have "filled" the main propane supply line with the method I suggested then there still could be a small amount of air in the relatively short line that goes to the fridge. But, that air will be expelled by the propane without difficulty. Your fridge will ALWAYS use your batteries for ignition of the propane since there is no "standing" pilot light - the fridge and your furnace both use electronic ignitors. Make sure that you are not confusing running your fridge on propane versus trying to run it on DC (straight battery power) The electronic ignitors take very little battery energy BUT when you run the fridge on straight DC they take a bunch of power out of the batteries. Easily - propane is the most efficient and best cooling for these fridges. Bill1 point
-
Bleeding air from the propane lines is simple: 1. Make sure that your propane tank(s) are turned on - the valve on the top of each tank) 2. Go inside the Ollie to the cooktop. 3. With a match of lighter in hand and flame at a burner on the cooktop, turn on that burner. When it lights you have basically bled the system of air. Many times you simply can not see any flame on the fridge. This is particularly so during daylight. When first turning on a fridge after a period of having it shut down, I'll make sure that it is turned on inside (auto or propane) and immediately go outside and place my ear near the lower fridge vent. There will be "clicking" sounds and then when the burner lights you should hear a "woosh" sound as the burner ignites. After that the fridge pretty much just does its thing. Bill1 point
-
Easily within 24 hours for both the fridge and the freezer. Do what ScubaRX mentions or if you do not feel comfortable with having the propane on while you are not with the camper then wait until you bring it home the day before you leave to get to the Rally. If you are leaving directly from your storage location to get to the Rally then have all of your food well chilled and/or frozen, turn on your propane and fridge as soon as you get to the storage yard and hit the road. Another hint: while you have your fridge in storage, keep both the doors (the fridge door and the freezer door) open and take some crumpled newspaper (10 sheets are more than enough) and place them inside. The newspaper will keep odors from forming in the fridge. Obviously, take the newspaper out before turning on the fridge and freezer for your trip. Bill1 point
-
Looks like a great campground!1 point
-
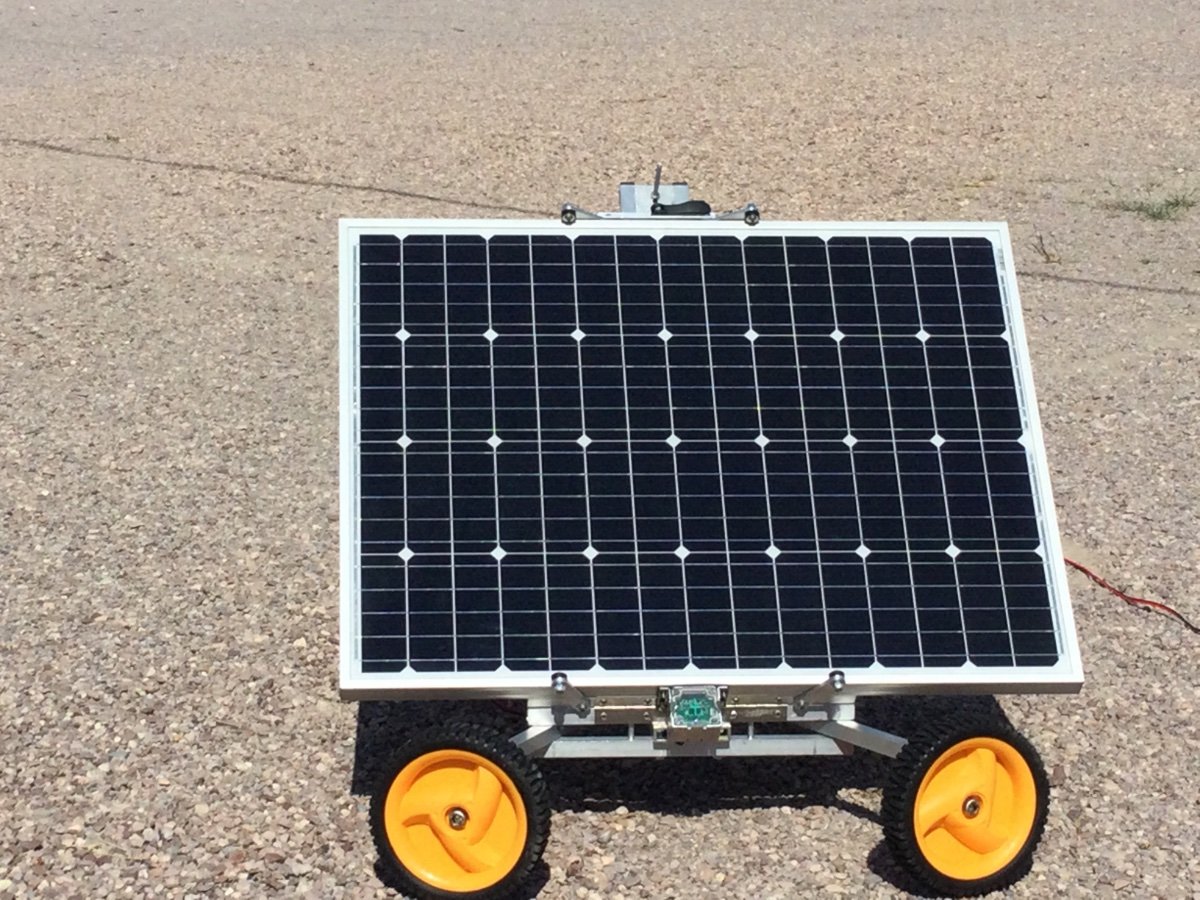
Fellow Oliver Travel Trailer Owners, Happy Camper Solar is currently in negotiations with Oliver Travel Trailers to offer new, fully patented solar accessories in the near future. These products are designed specifically for the Oliver Elite and the Elite II. These units are fitted on the rooftop with the solar panels. The tracker automatically picks up the solar panels and adjusts the panels vertically and horizontally AUTOMATICALLY all day to keep the panels directly pointed at the Sun to gain maximum solar efficiency. The first question in most Oliver Travel Trailer Owners mind is probably “ How Much ?” This is a part of the on-going negotiations. The units will be installed and serviced by Oliver Travel Trailers. At the upcoming Oliver Travel Trailer Owner’s Rally , I will have my Oliver Elite at the Rally with the ST 200 mounted on the rooftop. The rooftop unit is fully functional and we will be demonstrating the unit at the Beach Pavilion where the vendors will be located. In addition, I will also have the Solar MAXX, a portable mobile solar tracker that is easy to use and sets up in just a few minutes. All 3 products contain highly advanced electronics that automatically track the sun so your Oliver Travel Trailer receives significantly more solar energy than your panels lying flat on your rooftop. Next week I will be posting additional photos / video. I will save technical questions/ answers for the rally. My two partners,Joe McGinty andBob Starling, senior level electrical, electronic and energy engineers will be able to personally address your questions and demonstrate how the solar trackers work. I look forward to seeing you at Lake Guntersville State Park. The enclosed photos are the Solar MAXX Portable unit. Coy Gayle
1 point
-
Tallmandan mine would not turn on. Bought a new one problem solved.1 point
-
Thank you John, that answered several questions I had on my list to track down and a whole bunch more on top of that. Now the thread about venting the battery box is making sense as to why it should be considered important. From that article, it sounds like the battery box would be better off sealed to the outside, vented to the interior to be allowed to be maintained at the TT's interior temp (assuming it stays between 32-86F) Your Thoughts?1 point
-
Try the coconut coir bricks when you get a chance. We’ve found them better than the peat moss. Easier to travel with too. Good Luck.1 point
-
We have found through experience that excess moisture can definitely be a problem with the NH - we've encountered the problem more than once camping in high humidity. What happens is when it's humid inside the trailer the medium in the NH absorbs the moisture from the air and becomes way too wet. The lack of "good" airflow and extra moisture in the bathroom from showers exacerbates the problem as does running the bathroom fan with the door closed - which effectively reverses the airflow over the NH medium and if the outside air is humid, the medium quickly becomes too wet. We've taken several steps to mitigate moisture problems and haven't had any in quite a while. Here's some ideas that have been mentioned by others... 1. Run a small dehumidifier inside whenever the humidity outside is above 50% (almost always here in the Southeast). 2. Start with as close to 100% dry medium in the NH as you can. We use a coco coir brick and I add water to break it up a week before we leave. I then keep the inside of our trailer at a lower humidity and let the medium dry out. A tiny bit of moisture is ok to keep dust down, but dealing with a little dust on the fan / filter is much better than trying to dry out a soupy mess in our opinion. 3. In general, think about airflow over the NH medium and take steps to mitigate excess moisture if necessary. This means thinking about the airflow and quality of the air going through the NH during different scenarios - bathroom fan on/off, bathroom door open/closed, outside air quality, etc. You can also tell with experience from turning the crank whether or not the medium in the NH is too wet (heavy) or getting too wet and in need of some dry air for a while.1 point
-
Left click on your Forum name. Left click on "edit profile" Scroll down to where is says "signature" and then type in what you want to say at the bottom/signature. Left click on the "save" button and you are done. Bill1 point
-
3 D printing is most useful for a one-off prototype, or for making repair parts in the field (military) or in outer space, where a supplier is not readily available. it is way too time consuming and expensive for mass produced parts, that is what injection molding, die cast metal, and other methods are for. If the company wants to sell us Ollie trailer models in the future Ollie Store, they will have to have them mass produced in China by a toy manufacturer. An order of 100 would probably get the selling price down to a reasonable figure, I am guessing less than $100. A 3D printed one, with many hours and final hand trimming, unless you can do it yourself, would be way more than that. My son had a number of false starts before they got to this final version. John Davies Spokane WA1 point
-
We also use 6x6 pressure treated lumber are about 10 inches in length as BackofBeyond described for the rear stabilizers. We sanded them down and drilled a hole so we could run a line through as a handle for carrying. We copied it from Maniac. We use the Andersen bucket for the front and Andersen wedges for levelling. Works good for us.1 point
-
For over 50 years I use cut sections of treated lumber (Recommend washing them with soap before handling). Cheap and replacement over time is easy. I started out using 2X12 treated lumber on the base and then a stack of 2X6's above. what I soon learned is that when used in soft ground, the trailer weight through the 2x6 stack would break the larger base. Maybe I should have used better wood??? While on the road, I did not have an easy way to replace the broken base 2 X 12's. So I was forced to use two 2X6's as a base. i placed them side to side, and then stacked 2X6's turned 90 degrees to the base ones. Have not had any issues this way. The icing on the cake is that NOW, all of the dunnage can stack side by side in my front tub milk crate. However, this past year I noted that during our annual 8 month storage, termites were infesting the ground contact 2X6 boards. So much for modern "treated" lumber..... My fix was to purchase three concrete blocks at Home Depot. They are about $2 each, Store SKU #679311, 7" X 7" X 4". i have placed them exactly where I want the trailer to sit each year. Once the jacks are over the blocks, I still use a single 2X6 as a slip pad just in case the trailer gets moved while on the jacks. I leave the foundation blocks in place while using our Ollie, and have a great target to back the trailer into the dark barn. (For new Owners,: You need to almost always provide slip pads every time you use your electric jacks! Many jacks have been destroyed by forgetting to do so, and then forgetting to raise the jacks. The more elevation used by your slip pads, the less jack you have extended for leveling of the trailer. So, WHEN you do forget, (as 95% of all experienced owners have done at least once I would wager) the less probability of damage to your jacks. Why did I say "almost"? Some places we are forced to use have elevation changes that make their use not advisable. When this happens, I leave my Ollie hitched and only partially level. I then put a sign on my seat that says "JACKS UP?"1 point
-
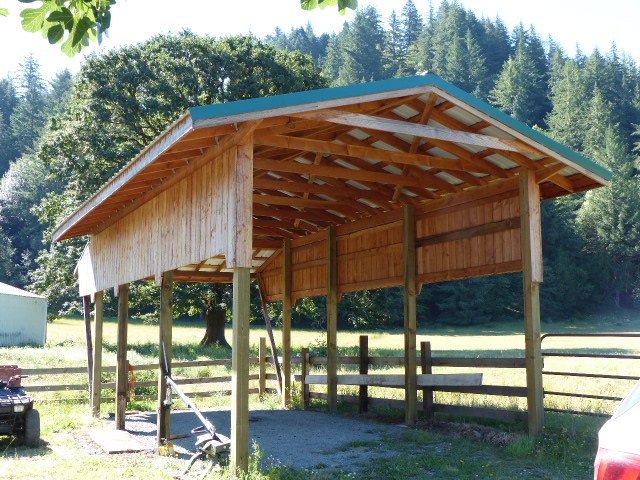
We would like to do this too . . . . unfortunately, our RV carport isn't at the house, but "at the ranch" - 1/4 mile down a private road. Not sure if the electric set up there will support this. We might consider building a new RV carport at the house as we can always use the other for equipment storage. It's a bit large for the Oliver, since it was built for a 30'l x 13'h fifth wheel with room for a slide. We have timber, a sawmill (photo of sawmill shed attached) etc. My husband is always looking for things to build 😊
1 point
-
Recently had a 30 amp out let installed on the exterior shop wall. Happy.
1 point
-
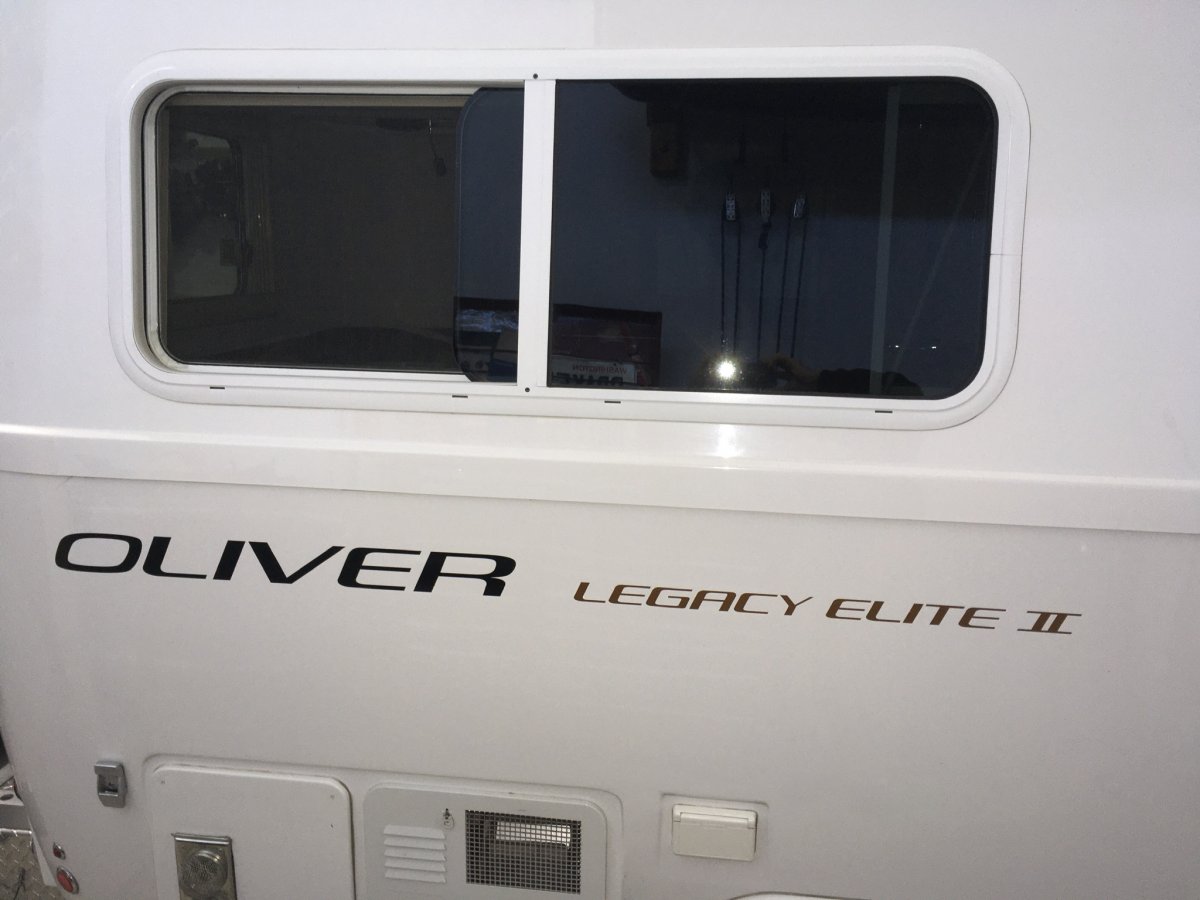
Susan, I asked for “Mouse” to be delivered with no side graphics. I wanted the descriptive labels, just no swooshes. The trailer was delivered completely naked on the sides, so I ordered two sets of the “Oliver Legacy Elite II” stickers straight from the Service Department, no worries, and installed them myself in a straight line. It is not at all hard, but it does take some prep, patience and care. If you don’t have all three of those, get somebody else to install them. I put “Oliver“ at the back on each side, mirror imaged side to side, see pics. I prefer this to the factory positioning. They are visually centered under the rear windows, and the bottom edges align with each other about 6 inches below the belt seam. I suspect that they will be reluctant to install them in a non-standard way, but maybe they could be persuaded to just leave them off, and put them in a galley drawer for you to install later....? John Davies Spokane WA
1 point
-
Thanks for sharing your New Oliver experience. I am jealous . . . . . . but our day will come . . . . . . 180 days and counting - that's less than 200 😁 I think I've asked before, so sorry if this is a repeat: What color are your graphics?1 point
-
Very pretty! I'm really missing North Carolina views right now. Thanks for sharing. Glad you had a fun trip. Sherry
1 point
-
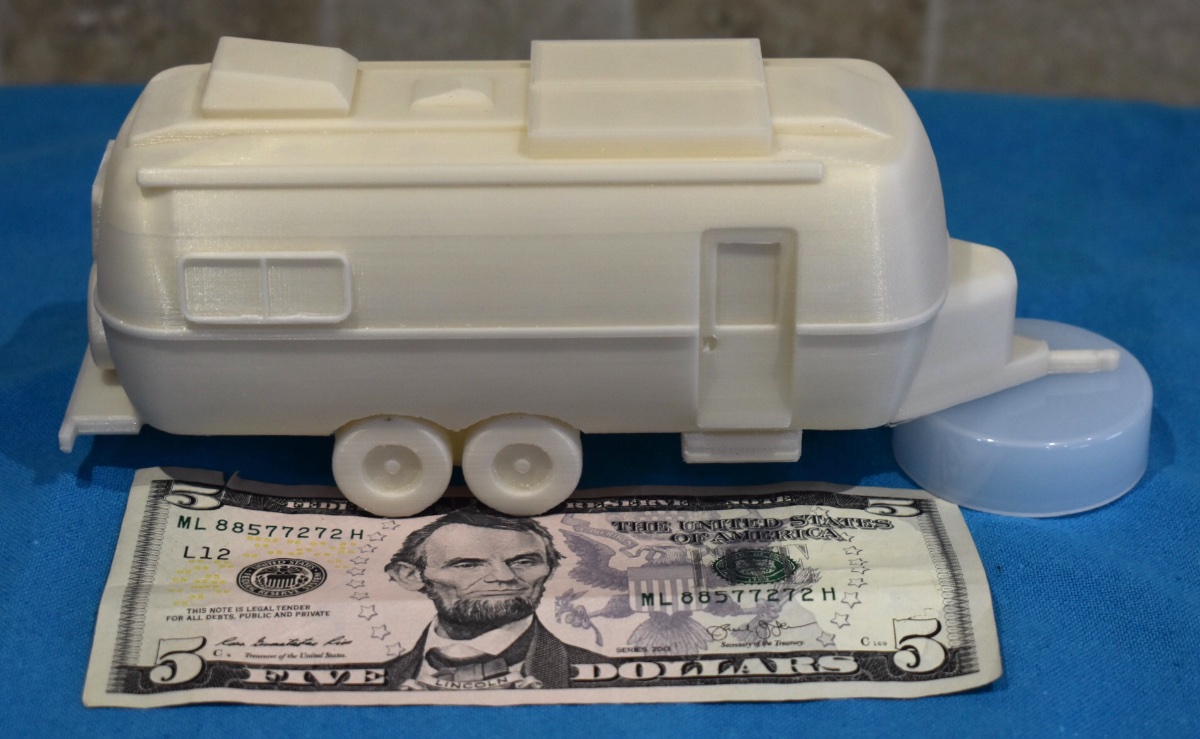
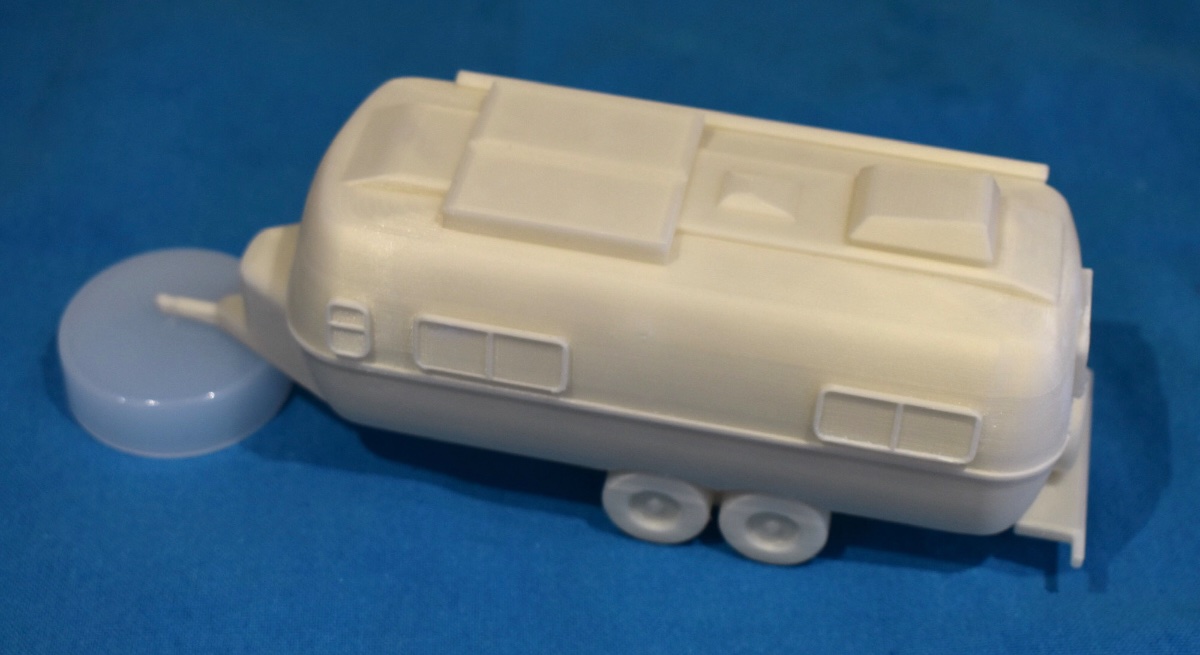
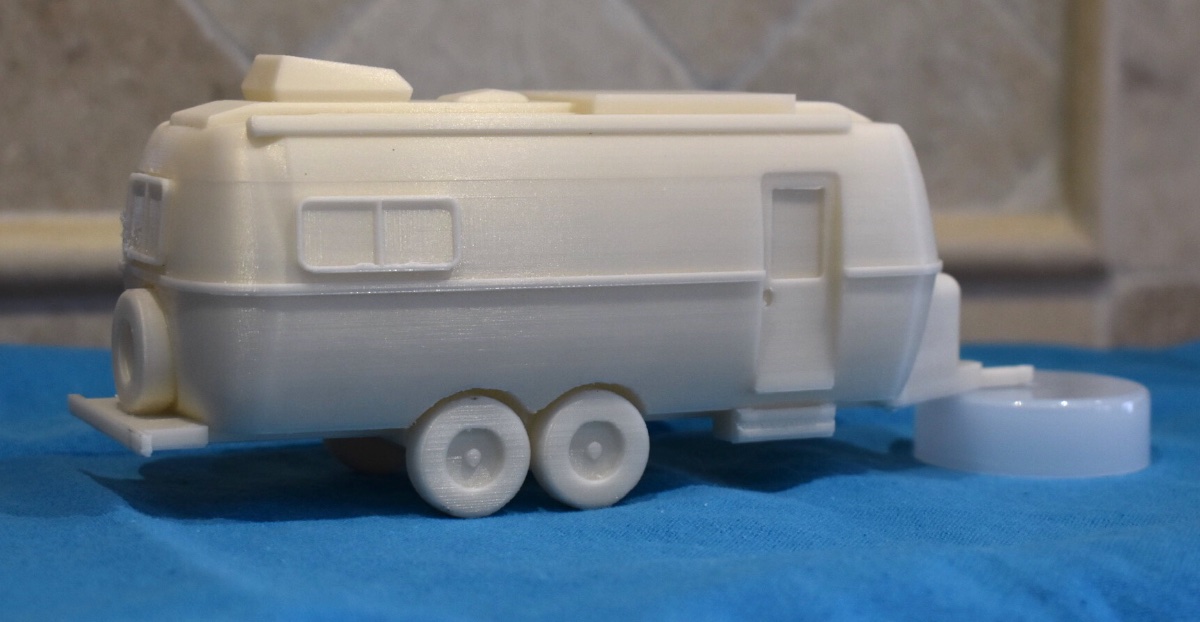
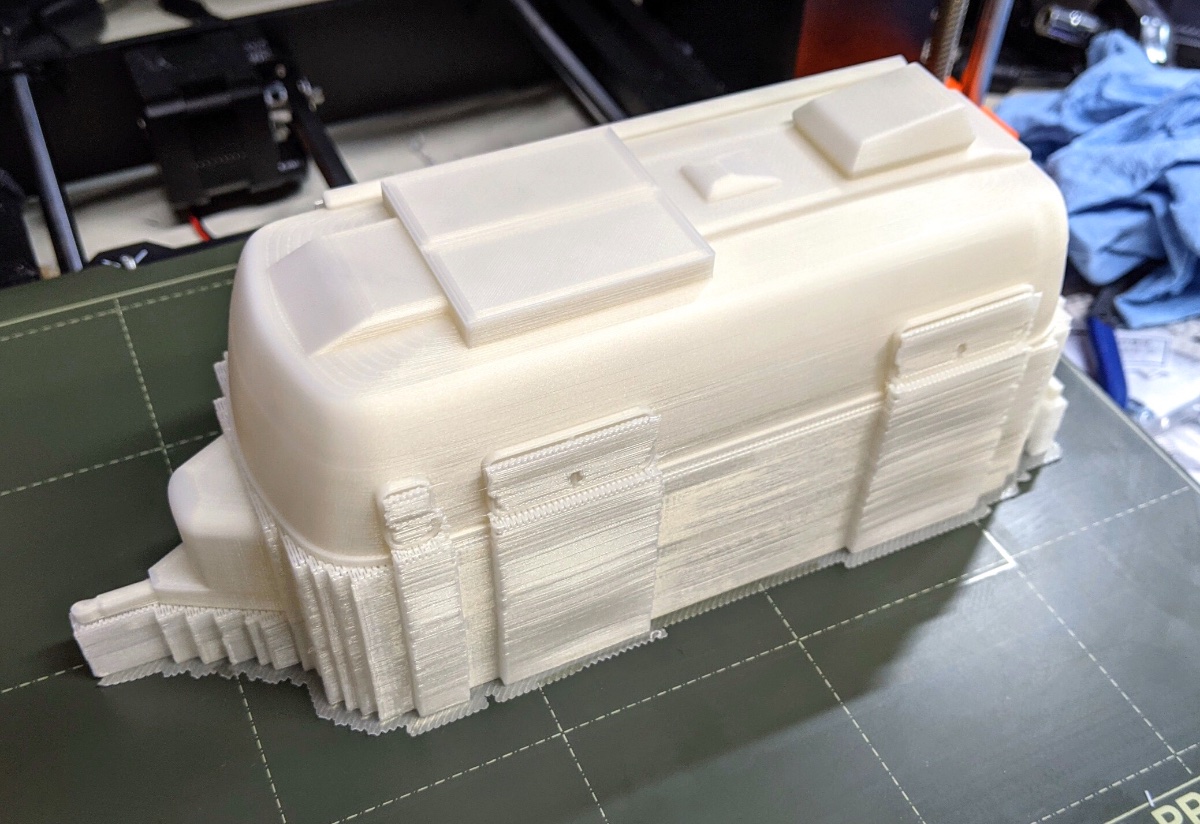
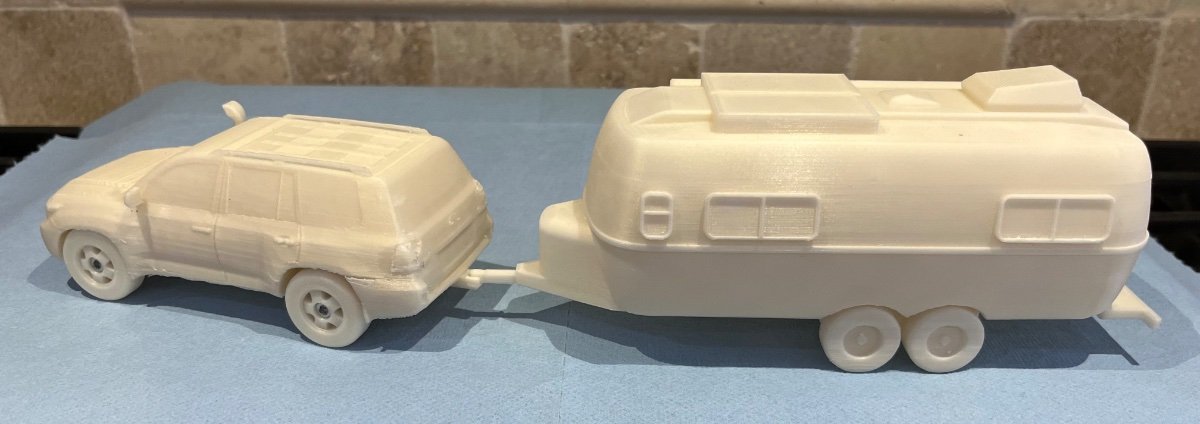
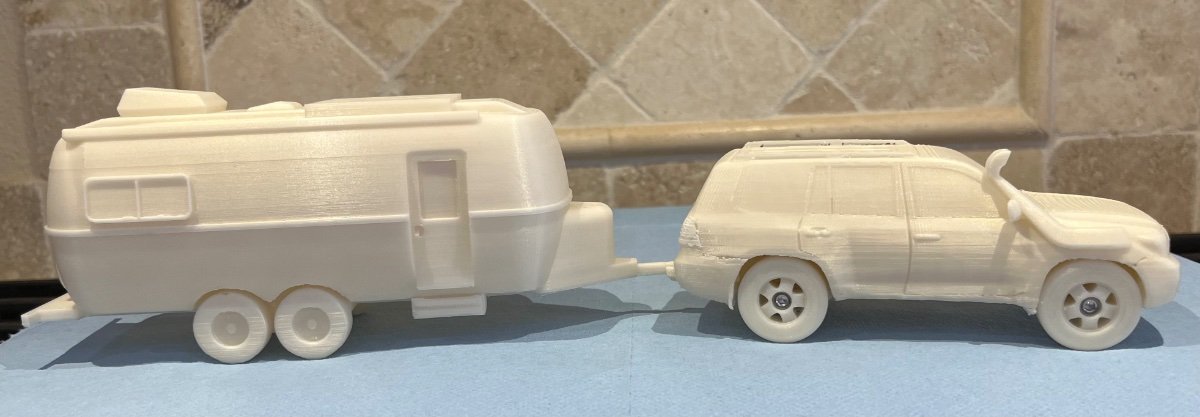
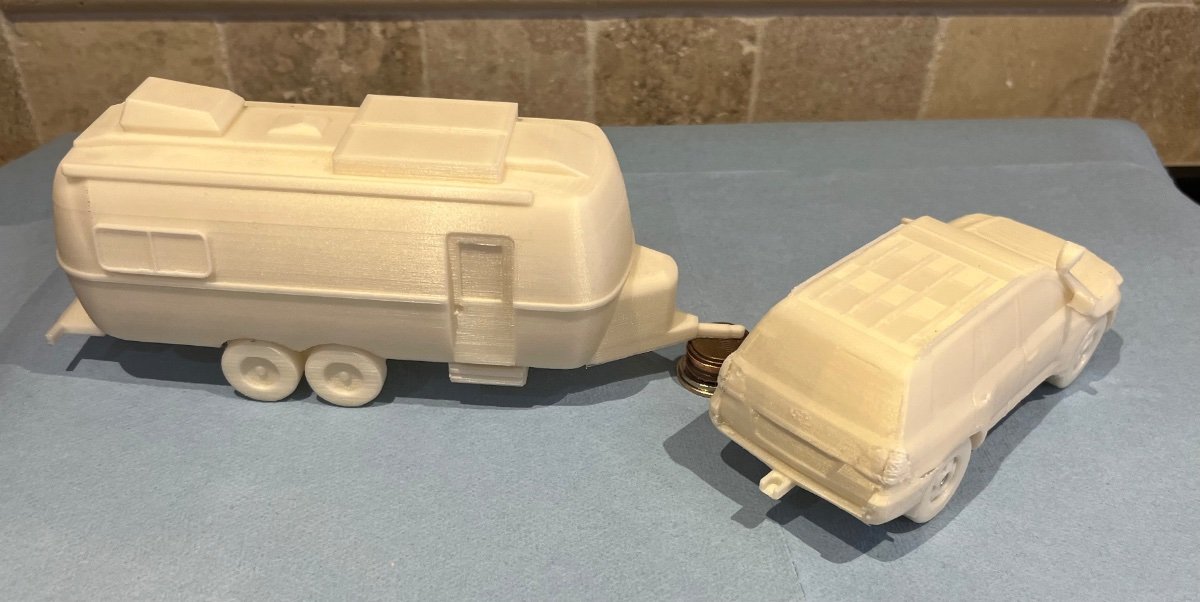
My son is a computer game programmer and they recently got into 3D printing. Here is what arrived for Christmas...... It was a total surprise. The $5 bill is for scale. The hull is exactly 6” long, the LE2 hull is 18’, so this makes the model 1:32 scale. There are lots of truck models in this size, my Land Cruiser 200 would be 5.9” long at this scale. ..... https://www.ebay.com/itm/Toyota-Land-Cruiser-4x4-1-32-Scale-200-VX-Wagon-SUV-Diecast-Model-Mini-4wd-Car-/362667098231 And this is what the model looked like before final trim “processing”, I have NO clue how that is done. They were not able to find an actual data file online, they did this completely from scratch using photos. They are willing to share the print file if somebody wants to try this at home. They are thinking about dividing the build into layers, so you could print the tires, frame and hull in different colors and then join them.... but it would not be too difficult to prime and paint the all white version. And no, they do not want to start mass producing these. That would be something for the much rumored, never seen Ollie Store in Hohenwald. Happy Holidays. John Davies Spokane WA EDIT: FILES AND BASIC 3D PRINT INSTRUCTIONS. NO GUARANTEES, THIS IS NOT PLUG AND PLAY EASY. If you cannot download these files directly from this thread, let me know and I will try another method. Thanks to my son Ian! oliver legacy elite 2 trailer davies.stl oliver legacy elite 2 trailer davies.3mf “Provided as is - this shouldn't be too hard of a print, but you'll probably want to have a basic handle on printing. The print specifics below are what I used to print it. They're not required, but might serve as a starting point. Print specifics: Printer: Original Prusa i3 MK3S, 0.4mm nozzle Slicer: PrusaSlicer 2.2 Filament: 1.75mm Prusament PLA (stock profile in PrusaSlicer) Perimeters: 3 Layer Height: 0.1mm Infill: Gyroid, 5% Supports: On Raft: 2 layers (not necessary, just makes it a bit easier to get the tires round) Model print scale: 850% (~200mm x 66mm x 82mm) Total filament (including supports): 143g/48m If you slice it yourself, you'll probably want to put support blockers in the wheel wells - cleaning supports out of there is a pain. This will require some postprocessing - mostly just removing supports from small gaps. If your printer isn't precise enough, or if you're printing with a larger layer height, you may want to do some sanding to get the curves more fluid.” I. D.
0 points
-
This morning I got a new Land Cruiser 200 to go with “Mouse”. Thank you Ian! I hope everybody has a very satisfactory holiday season. John Davies Spokane WA
0 points


-
Recent Achievements
-


")


