Leaderboard


Popular Content
Showing content with the highest reputation on 09/28/2023 in Posts
-
I passed an Oliver in GTNP on Tuesday 9/26 — they were heading south on the road. No opportunity to catch their state or identification, but it made me smile, to see another Oliver, looking good rambling down the road!4 points
-
Here’s the part that broke on our Dometic 311 toilet, and the repair process. Foot Flush lever - broken center shaft. No Dometic repairable parts. Note, we could still manually reach down and flush the toilet as temporary work around. 10 steps in the repair 1) ordered a new Dometic model 311 toilet with slow close heavy duty lid. Opened and inspected new fixture to assure all parts are there and no damage. Dometic Model: 311 Mfg#: 302311681 Amazon $261.00 Note: It comes with new seal already installed on bottom of toilet and new T bolts, nuts and plastic covers. 2) Turn off water valve behind toilet & flush toilet and inspect no water in bowl or clinging items down drain. Remove water supply line on bottom/back of toilet. 3) pop off plastic caps from mounting bolts on both sides of the toilet with flat blade screw driver. 4) use 7/16 wrench to remove the 2 toilet mounting bolts. 5) pull toilet straight up then pivot back out of bathroom. 6) on the mounting ring, remove existing t slot bolts and clean mounting ring and seal mating surface. If mounting flange has no cracks or breaks, then continue. (If you have cracks you can buy a steel toilet flange repair ring that mounts on top of the existing plastic body.) 7) insert new T slot bolts into flange so they are parallel to the front of the shower pan. ( 3 and 9 o’clock) 😎 Lower new toilet down over mounting bolts. The toilet will not be fully down on surface until you tighten the bolts. 9) use 7/16” wrench to tighten bolts alternating from one side then the other to compress the seal. Don’t over tighten either side, just slowly tighten until the toilet is flush with floor all around the base. 10) hook up water and test flush checking for any leaks around toilet base or water lines. This took me 30 minutes. The RV Park in Moab we were at let me ditch the old toilet in the shipping box in their dumpster. We are back to foot flushing. As an added benefit, our new toilet has a very substantial slow close lid.
 3 points
 -
I just viewed this YouTube video by 'The Fit RV'. It has a new lock that might satisfy some of the security concerns mentioned in the post. https://youtu.be/SVlGeO6RoKM?si=Gb0OrYhrs2SGJEbx Mossey3 points
-
Rebuilt the front axle brakes and greased all contact points with silicone brake grease. Today I will remove the adjuster spring on the rear and apply grease there, since yes, the pressure wash cleaned it dry. Installed the new shocks (don't over-tighten the rubber bushing). Amazon used was good for 3 out of 4, one was blown, as you could compress it easily by hand and it would sit there and return very slowly. I submitted a return on that one and ordered another one at the new price of $34. Good practice with new shocks, out of the box, is to fully compress them, and allowing them to expand, 2-3 times. My Timken seals arrived from eTrailer yesterday, so I will finish up the left side and start the right. They certainly look of better quality, with made in USA printed on both sides. BTW, if you have the original CHINA bearings, and they have been maintained, just clean them well and repack them and you should be fine for some time. For my Oliver, with dubious maintenance history, thought it was the right time to install new bearings. I like to get my vehicles fully serviced, while I'm still able to do this kind of work. And we're not like some of you who put 10K miles on a year! For us, 3000 miles would be a big year (I like to be home!). Like to plan our RV trips, driving just 2-4 hours a day, boondocking between other stops. I do not plan to open these drums, grease the bearings again for a few years, after I get them right. I understand the suggested maintenance schedule, often written by legal departments and not experienced mechanics. Also, not driving through major rainstorms, as JD had mentioned, which is a rare case in the SW. We pull over and wait out such storms!
3 points
-
Checked our Ollie's original yellow tag, RV Trailer Cargo Carrying Capacity in the closet. The original empty weight of our LE2 #75 was 4860 pounds with a cargo capacity of 2140 pounds. Our ready to camp weight is under 5000 pounds with empty fresh/grey/black tanks, with full 6 gallon water heater reducing Ollie's weight by placing the spare wheel/tire in the pickup bed, replaced two group 27 batteries with one Lithium 100AH battery , and replaced original LP tanks with smaller tanks. Our style of camping will not work for all campers here, but works great for us. Our entire rig weighs in at 11,100 pounds with a 2022 Tundra TV during our last camping trip with the trailer tongue weight fitting within the 9% to 11% of trailer weight as required by the Tundra's operators manual. The latest generation Toyota Sequoia has the same engine as our Tundra, but the new Hybrid Sequoia has more torque/HP than our non Hybrid Tundra. Previous comments in this thread are valid when interior space of the Hybrid Sequoia is compared to 4 door Crewcab pickup's available storage space. Our Tundra has plenty of power for our style of camping, but as mentioned above, I understand why some folks here need a HD truck for LE2 towing duty. HD trucks are not required for towing an LE2 Ollie safely if care is taken with overall weight management and complying with TV operators manual. I have not towed through any western US mountain passes yet with our current Tundra, but someone here recently posted in another thread about towing their LE2 with a 2023 Tundra through +10,000' mountain passes without any issues.2 points
-
When I repaired my fan cover I had to replace my old gasket. I used a adhesive backed foam molding that comes in a roll from the hardware store. I match the thickness of the old gasket which was thin about 1/8 of a inch, so far that has been working.2 points
-
Straight & level make me queasy! 🙃2 points
-
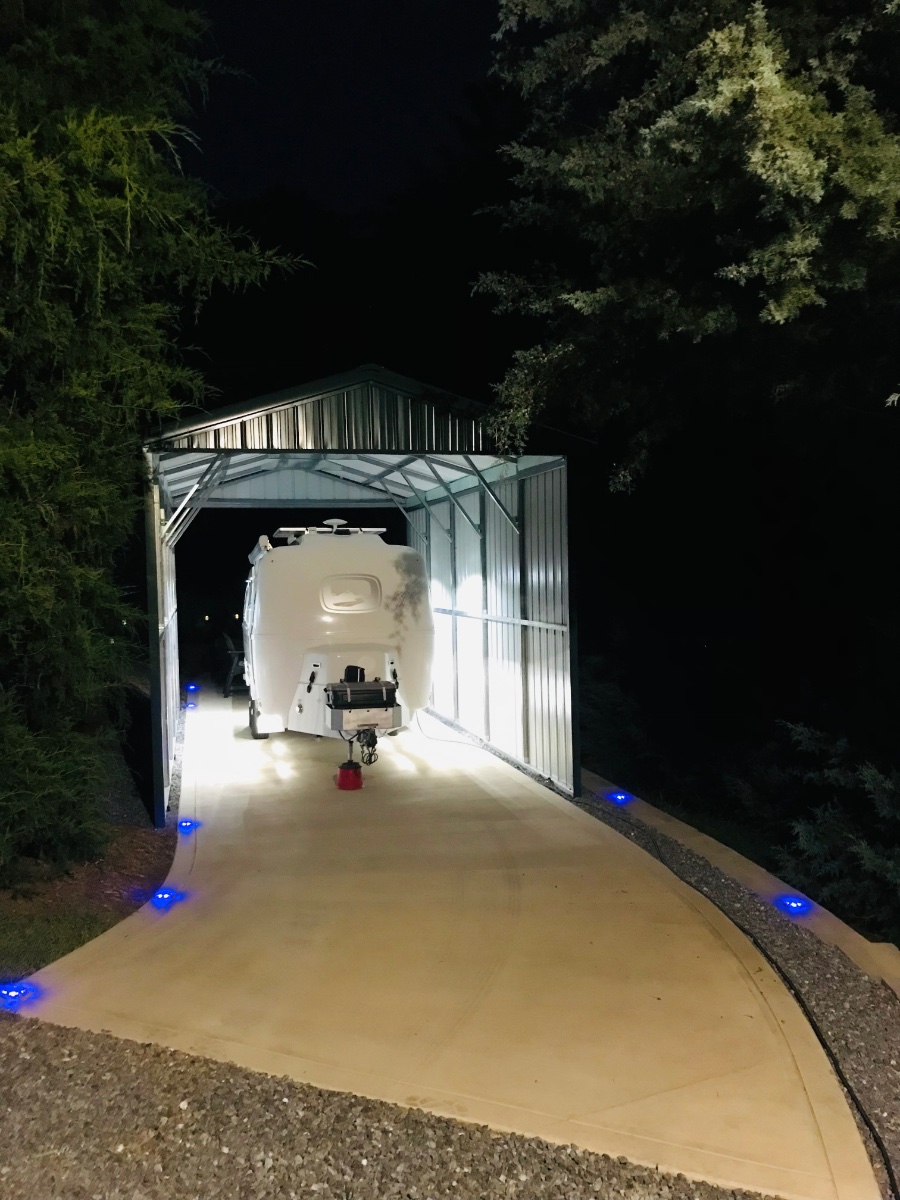
No... that's not a hangar, that's totally a MAN CAVE! HA!2 points
-
I still think this is caused by air pressure from the forward facing drain hole. My interim solution is a pair of the ever popular RV magnetic catches. Fit perfectly.
2 points
-
I just had an electrical system overhaul done by Royal Coach RV in Bakersfield, CA. They did an excellent job.1 point
-
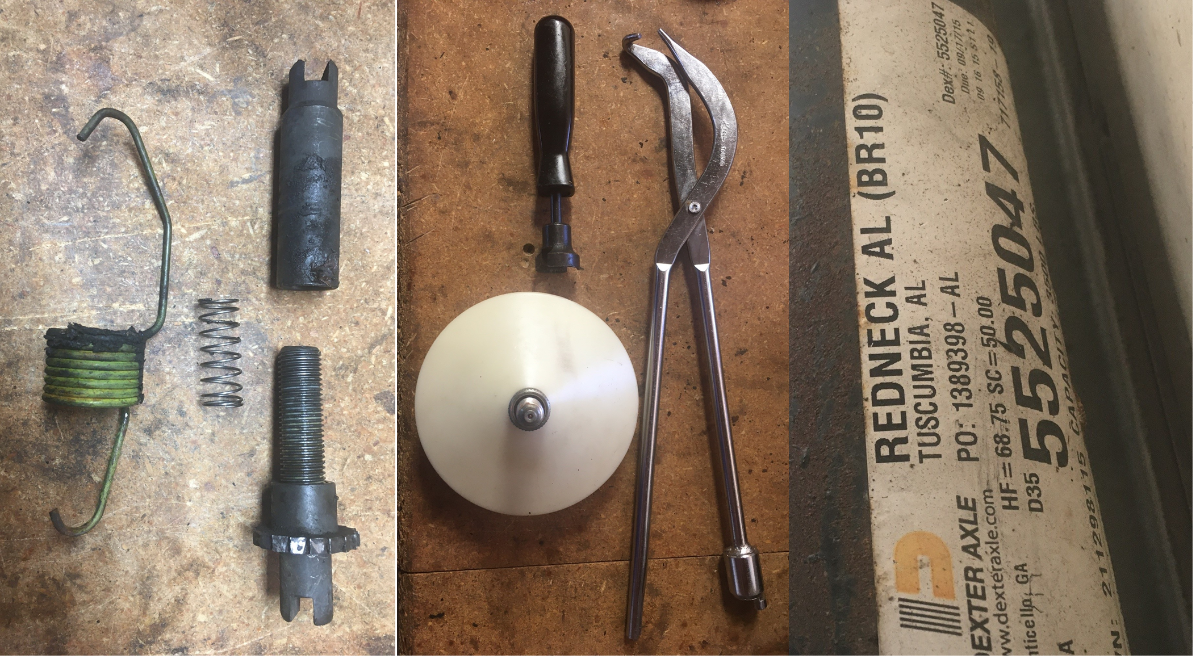
Thank you @topgun2! Got the streetside bearings done yesterday. I was able to find sockets the correct diameter to press in the races. Packed the bearings with a convenient tool, otherwise it's a large swab of grease in your palm. Removed the adjuster from the rear wheel to grease after having pressure washed this assembly. I ended up removing ALL the brake parts to grease the contact points and did some additional cleaning on the back sides of parts. When I work the streetside I will first remove ALL brake parts and pressure wash only the backing plates and suspension. You need these tools to do the complete brake job. Wondering how y'all use Brakleen and apply grease where it is needed, as this spray will remove the grease as well as pressure washing. But I really don't need to know, just won't use the messy spray. When I disassemble parts, I clean them by hand with GoJo hand cleaner, rinse with water and use compressed air to dry, and they will come out as clean as the one pictured above! The two axles both had identical labels, see label/part number, and there was another label "Nev-R-Adjust" on both. Love the REDNECK AL label - LOL! My front axle must be the older version. The only differences are as follows; There is a different top post which does not need the oblong assembly plate, there are two springs (easier to remount with drum brake tools) vs the one main cross spring. The self-adjusters are identical with one exception. The second one has the spring (pictured). I don't see any purpose for the spring, except to hold the adjuster nicely to the shoes during assembly. The spring is extremely light duty and can't do much, or is this the reason why some shoes "over-tighten?" Hmm, probably not. I've done brake jobs on a dozen 50s-60s-70s cars with drum brakes. They all had the two top shoe springs with oblong plate, never a large cross spring, and I don't ever remember having a spring in the adjuster! Tested the brakes, wheels on and truck attached. My son Adam hit the brakes as I was spinning the wheels. My heart sunk as the wheels did not stop! I could hear the magnets powered. What could be wrong? I had to rewire the front brakes, due to pack rats chewing the wires, but power to the magnet does not have a specific polarity. One wire needs power from the blue/brake wire and the other needs ground. They were working last week when I moved the trailer. Then we jacked up the other side, that I had not yet worked, same thing no brakes. Turned power up full on the brake controller and finally wheels would stop, but only a little. Symptoms are looking like a weak ground. It turned out to be the connection at the hitch. Our trailer plug, looking old, has a damaged/recessed ground blade. Must have achieved ground last time, but not anymore. Went on Amazon, ordered a new one and some dielectric grease! I'm thinking a day off this project, before I tackle the other side! 😊
1 point
-
I noticed this happening on our last trip. My temporary fix was obviously to stuff a sock in it. When we were back home I found that the plastic hood was deformed around the screw that mounted it to the inside handle. So this caused a small air gap around the plastic hood where it made contact to the frame. This resulted in wind getting underneath and lifting it open. The remedy was to use a heat gun and warm the plastic around the screw hole and then form it flat again. Once the plastic cooled off it stayed flat. I then added a flat piece of stainless steel as a back up plate. I did use some silicone sealant between the hood and the plate. So far it has cured the problem.
1 point
-
For a time those gaskets were being replaced under warranty. I'm not sure as to which dates are/were covered though. Obviously, a service ticket or call to the Service department will get you the answer. Good luck! Bill1 point
-
In the spirit of the debate tonight. Well Sir, you got one thing right, the Jack works! But when it comes to Navy, you should cheer…they need it. The Air Force is taking the Commander’s trophy this year. Cheers Brother! Aim High!1 point
-
Hi all! These topics here in the forums are auto-created when a new article is posted on the main website. Thanks for the feed back on the ones that were posted with broken links, it was something else I was testing out yesterday and were not actually anything to be posted here but the main website thought it was. Corrected! All of the manual information can be found in our University found here: https://olivertraveltrailers.com/oliver-university/ Thanks everyone! PINNED1 point
-
On the differences between brake assemblies, probably a redesigned version in order to manufacture the assembly more cheaply (inexpensively). Oliver purchases the axle assemblies by the pallet load and just grabs two at a time for each LEII. They don’t disassemble them for inspection other than checking to see that externally they aren’t damaged. As a side note, after pressure washing the brake assemblies I’d recommend removing the adjusting screw assembly and disassembling it and thoroughly cleaning/lubricating them. I’d be willing to bet that water made its way into the threads and will corrode/lock up the adjuster.1 point
-
Just for reference adding to the discussion, I replaced all of my brakes and hub/drums three years ago. In the process of pricing out the various components (at that time) Textrail (Sparta, TN) was the least expensive even with shipping. For example the complete brake assemblies were $46.03 each left or right for the self adjusting type. I’ve never had any problems with this type, don’t know just saying. The hub/drum assembly complete with bearings (chinese) and seals were $60.36 each. I also have never had any problems with the factory seals. Maybe because I polished the spindle seal area and pre lube the seals a little at installation. The prices from Textrail that I found at the time were half of my local Dexter supplier/trailer shop. With shipping, taxes, everything from Tennessee to my driveway in Virginia $571.03 I have since replaced the bearings with genuine Timken bearings purchased from an industrial power transmission supplier that I have dealt with for years at work and upgraded the grease to Red Line CV-2 grease. Timken bearings are not inexpensive but are of great quality. Also, Textrail is the axle supplier for Oliver (at least they were three years ago) and have offices all across the country.1 point
-
My 2020 Ram 6.7 Diesel has exhaust brake, I think it was standard or maybe it came with the tow package. Either way, like Patriot and others I use it a lot. Mike1 point
-
A quick internet search of your stated installed items reveals you've lost a little less than 350 pounds of cargo capacity. Toyota side rails 75 pounds each, total 150 pounds Toyota folding hard bed cover over 100 pounds Toyota bed mat 68 pounds Toyota Mud guards guessing less than 10 pounds Timbren SES rear suspension kit 12 pounds1 point
-
@jd1923 with that Cummins diesel engine brake, your truck and new trailer brakes should last a long time👍🏻. I rarely use my truck or trailer brakes on long mountain passes with the engine brake. We are really appreciating the diesel engine brake right now out here in the Colorado Rockies. In my experience, Ford absolutely nailed it on the diesel engine brake in our TV. It works excellent. Nice job on the rebuild! 👍🏻 Patriot🇺🇸1 point
-
jd1923, CRC non chlorinated brake cleaner is $6 at my NAPA store, on sale now for $5, I buy by the 12 count case when they heavily discount it. You have to be very wary of getting all that nasty dirty oil on a clean driveway, it may not all come out. It is better IMHO to catch it all in a pan using the cleaner, then let the solvent evaporate off for a few days. then wipe your pan with solvent and paper towels and let them flash dry before disposal in the trash. I have pressure washed AFTER degreasing the nasty bits. Be very sure to lube all the many moving parts of the brakes after a deep clean, they will not work properly otherwise. Don't forget the adjust linkage and where the shoes rub the plates. It sure does look pretty tho, I would have guessed that the paint would fly off. John Davies Spokane WA1 point
-
We keep Ollie in a 36'X36' hangar with three sides. It does not have power, occasionally take the solar panels or gen-set to the hangar to charge the battery in the winter. It has an asphalt floor. We have had mud daubers to get into Ollie's window drains stopping them up. Now we put tape on the drains to keep the daubers out.1 point
-
Just got back from a 2,000 loop around the west (California to Nevada to Idaho to Montana to Washington and then back home). I've had my Ollie for about two years and first ran the tires at 65 psi for the first year. Then in the second year, I ran them at about 60 psi. On this trip I ran them at about 55 psi. I've not noticed a change in mileage or handling or wheel temps (100 to 120 degrees) or anything in this unorganized and unscientific test. So, I think I'll keep them at 55 from now on. Oh, and for those interested I averaged 15-16 mpg on this trip.1 point
-
I've towed my '17 LE2 about 12,000 miles in two years with my '20 Tundra TRD Sport and find it more than adequate. I think the Anderson WDH is an absolute must with any half ton and I personally wouldn't leave home without it. The issue I have with my TRD is that the extra bells and whistles reduce payload. I pack light but if I were to tow in the mountains out west carrying more gear, I no doubt would want a 3/4 ton pickup!
1 point
-
Thanks, Brian, I appreciate the well wishes :) John1 point
-
Here's a close-up of JD's favorite part - the self-adjuster! It appears to be a good design (perhaps not). The spring is very straight and evenly stretched. I disassembled one brake assembly completely, lot's of work and some cussing will be involved in getting these back together! Good maintenance would include applying some silicone grease (I use Napa Sil-Glyde) on the shoe contact points and inside the adjuster. This is a good product for all automotive brake systems. I have a full set of drum brake tools, from back in the day when my '67 Buicks had drums all the way around. A tool to compress the shoe pin springs and another to stretch the springs.
1 point
-
not able to enlarge the shop due to existing setbacks and our house foot print on our lot We just finished enclosing an existing detached pole barn carport for a workshop and we are about to wire it and insulate it. Appreciate the help and suggestions, Thank You
1 point
-
Indeed, it is the upward travel that is lacking. Do you plan to carry an air pump? Run your trailer tires at 42-45 psi all the time and lower that number if you have more than say five miles of washboard. Rock hard tires and crappy suspension kill parts and belongings. John Davies Spokane WA1 point
-
And, this is the case with thousands of these brakes. Yes, it is unfortunate when they do not work as designed. Yes, they are much more complicated as compared to the manual adjusting kind, but, for many people who do not or will not adjust their own brakes, the automatic ones generally do the job. Bill1 point
-
Sounds like you’re gonna DIY the bearing overhaul! Did the same last May, went with the Timkens as well, from Summit Racing. The CRC degreaser and brake cleaners I used worked great along with a parts cleaning brush and drip pan. I also ordered a brass drift punch for use in driving out the races and the Red Line CV-2 grease that John E Davies highly recommends. I found placing paper towels under the spindle prior to installing the bearings useful in keeping grease off the underlying brake components. Since the wheels are off and grease likely leaked from the rear seals, take time to throughly cleanup residuals and wash the tires. If you haven’t done so already, now would be a good time the replace the grease zerks with the angled variety. Many install 90°, but I choose 45° from Grainger’s. Good luck with your endeavor!
1 point
-
Do yourself a big favor and ditch the auto adjust brakes for manual ones. New drums too, or the diameters will not match. https://olivertraveltrailers.com/forums/topic/2778-brakes-auto-adjust-vs-manual-adjust-what-are-the-differences/ Use Timken bearings and Timken seals too. You may have to supply those to your trailer guy. I doubt that they sell many due to the cost. Do you intend to detail the springs and parts when the brakes are off? There will never be a better opportunity. John Davies Spokane WA1 point
-
Thank you Bill! Everything will work out and settle down. I think the key here is not to let these things discourage us and prevent us from being happy, positive people. Cheers, Brian1 point
-
I know that it is rare - but - there are times that I actually am lost for words. Two punches to the heart and gut in such a short period of time are tough by just about any standard. It is good to know that your Mom lived a wonderful life. Hopefully Ford will take good care of you such that your memories of this time can be met with peace in your heart and warm thoughts of your Mom. Bill1 point
-
Chris, Thank you for the kind words. I remember your trailer delivery was delayed due to a loss. She was 96, had a wonderful life and a large family. You are correct that the 7.3L engine has had few failures considering its widespread deployment. There are a few instances on the forums where cams/lifters failed in MY2020 vehicles but very few that took the engine block with them. I never do anything half way! An extended warranty, esp on the drive train is a good idea. The pinion seal on my rear diff went out, replaced under warranty. The transmission was replaced under warranty and now the engine. I will have a new truck when I get this one back. It took some fighting but Ford GAVE me an extended warranty out to 96k for all my troubles. You just got to be that squeaky wheel sometimes to get them to move on something. Hope all is well with you, Stacie and the pooches and, of course, your extended family. Cheers, Brian1 point
-
Hey Christi, Is your Xantrex Inverter switching from battery to grid mode when you hook to shore power? I encountered this issue recently and am in the process of getting it fixed. The mechanic found that the screw that secures the grounding wire had come loose, and some wires got burned and will need to be replaced. (You may be more adept than I am with such things, but this is not a repair I would attempt on my own.) If the inverter is not automatically switching the grid mode, shore power will not charge the batteries, and the trailer will continue to run off batteries. This will run down the batteries, and you will get that chirping when you try to put a load on the electrical system and the lithium batteries are approaching low voltage cutoff. There is more info on this in the sections of your manuals on the inverter and the lithium batteries. You might also check to see if there are any error codes on your surge protector display. Hope that helps. Good luck with it, and let us know how it plays out. Tod1 point
-
What is the blink pattern on the battery LED? There are different patterns that can help diagnose the issue.
1 point
-
That's exactly right, an insulated 10'x12' bay door... The width of the OTT makes it very easy to slide right in (unlike the AS, which usually took a couple passes).1 point
-
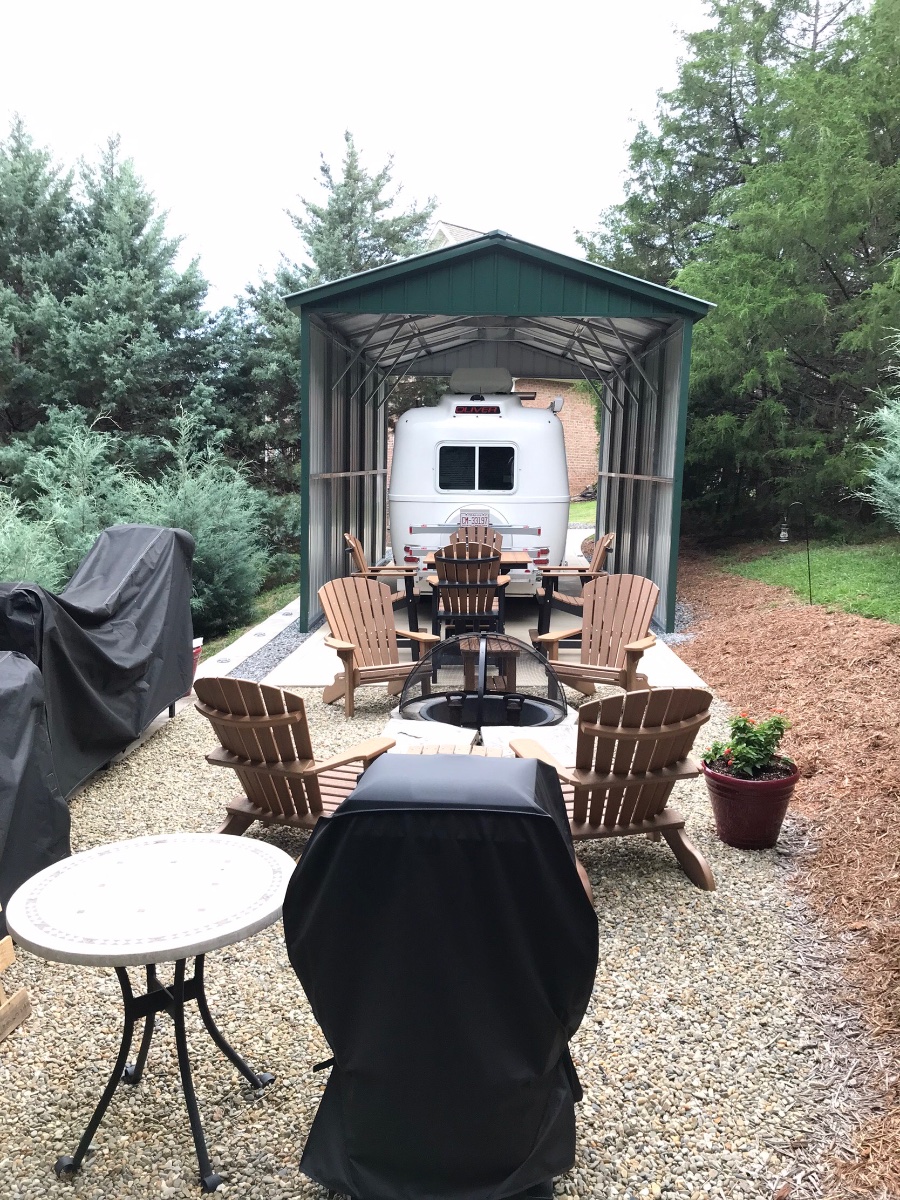
@SYoung Welcome to the forum! We park our Ollie here at our home. I had a 13X55’ slab poured and then had a metal building constructed to keep our Ollie out of the weather especially the sun. We also keep our Ollie plugged in to a 30amp outlet. I also bird proofed our “Ollie Hangar” to keep the birds from nesting and/or perching and crapping all over the roof of the Oliver. We are a year in and no birds nesting, perching or crapping on our Ollie. I blocked off every area or ledge they could perch or nest on with 2” thick hard insulation foam. My suggestion: add a 4-5” nice level gravel base or crusher run where you plan on parking under that pole barn. Figure out a way to bird proof it as much as possible. Birds will make a real mess on your gelcoat over time. Run a 30 amp power cord and a water line or hose if you can. Figure out how to keep the sun off of it while parked. The suns UV can be pretty rough on gel coat. We got a little creative and made a place where we can enjoy a campfire, tell a few tales, and even a few true camping stories. 😎 This works well for us and our Ollie is well protected from the elements. It’s especially nice when I wash the Ollie as it’s always in the shade. Welcome and I hope this helps! Patriot🇺🇸
1 point
-
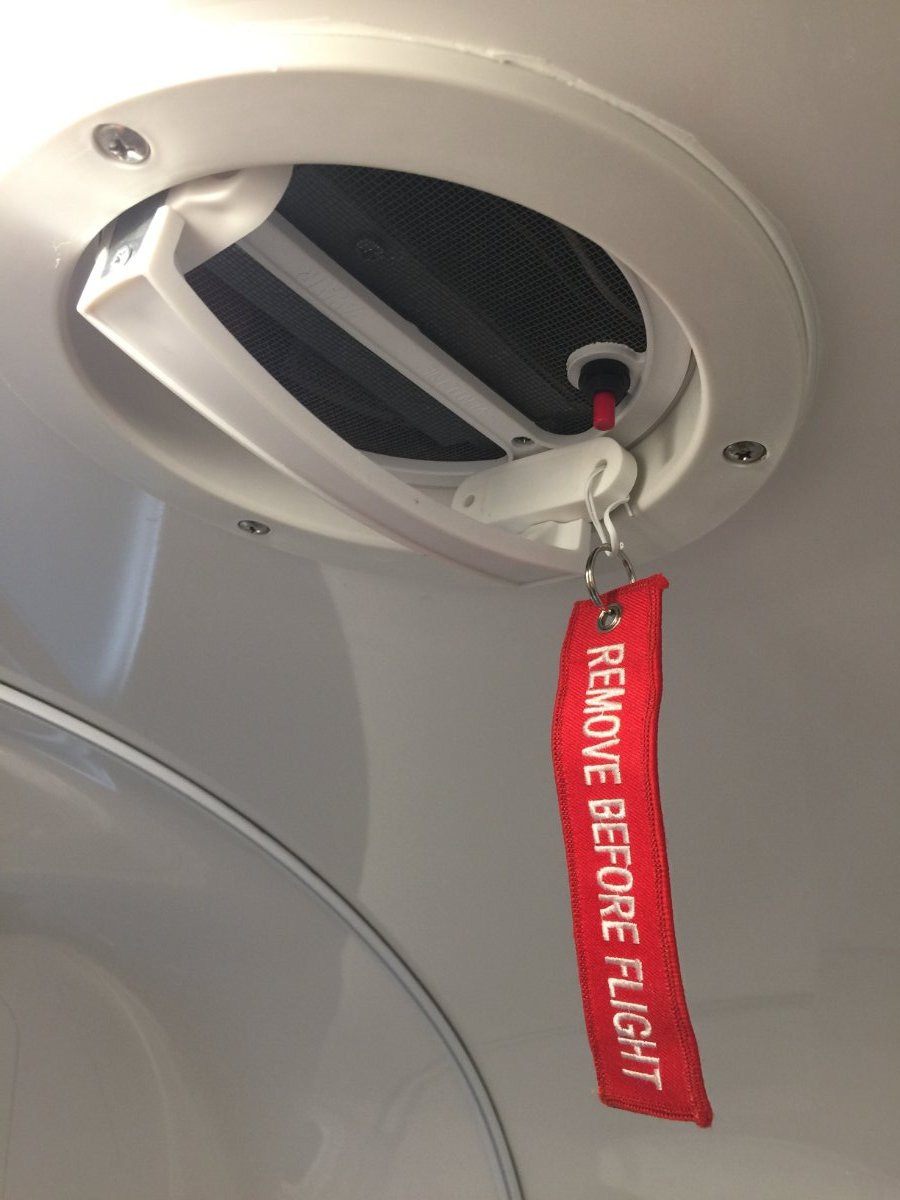
I'd go with, "Cassette Toilet Access." More believable.1 point
-
Agreed. If I were a thief and wanted in to either our battery or basement hatches a simple wonder bar or large flat blade screwdriver would suffice, no matter the keying of the latch. Luckily for us, Oliver battery placement is not industry standard and most people would not expect batteries to be housed there. However, I am toying with the idea of placing a static cling label on my battery compartment which states, "Sewage Dump Access".1 point
-
Initially we never had any problem with the bathroom fan cover on our 2019 Oliver popping open when traveling. But then the gasket on the fan cover came loose after about a year, and during annual service, Oliver replaced the gasket with a VERY thick gasket material (about 3/8” thick), so that the cover didn’t fully seat properly in the full “down” detent position, and that caused the cover to start popping open when traveling. I’ve since replaced the gasket on the cover with a thinner gasket material (3/16” thick x 3/8” wide exterior vinyl foam weatherstripping from Lowe’s) and now the cover pulls down into the correct detent/closed position (can actually feel it snap into place) and stays closed when traveling.1 point
-
I guess that is called "Yankee Ingenuity" in Connecticut.😄 Mossey1 point
-
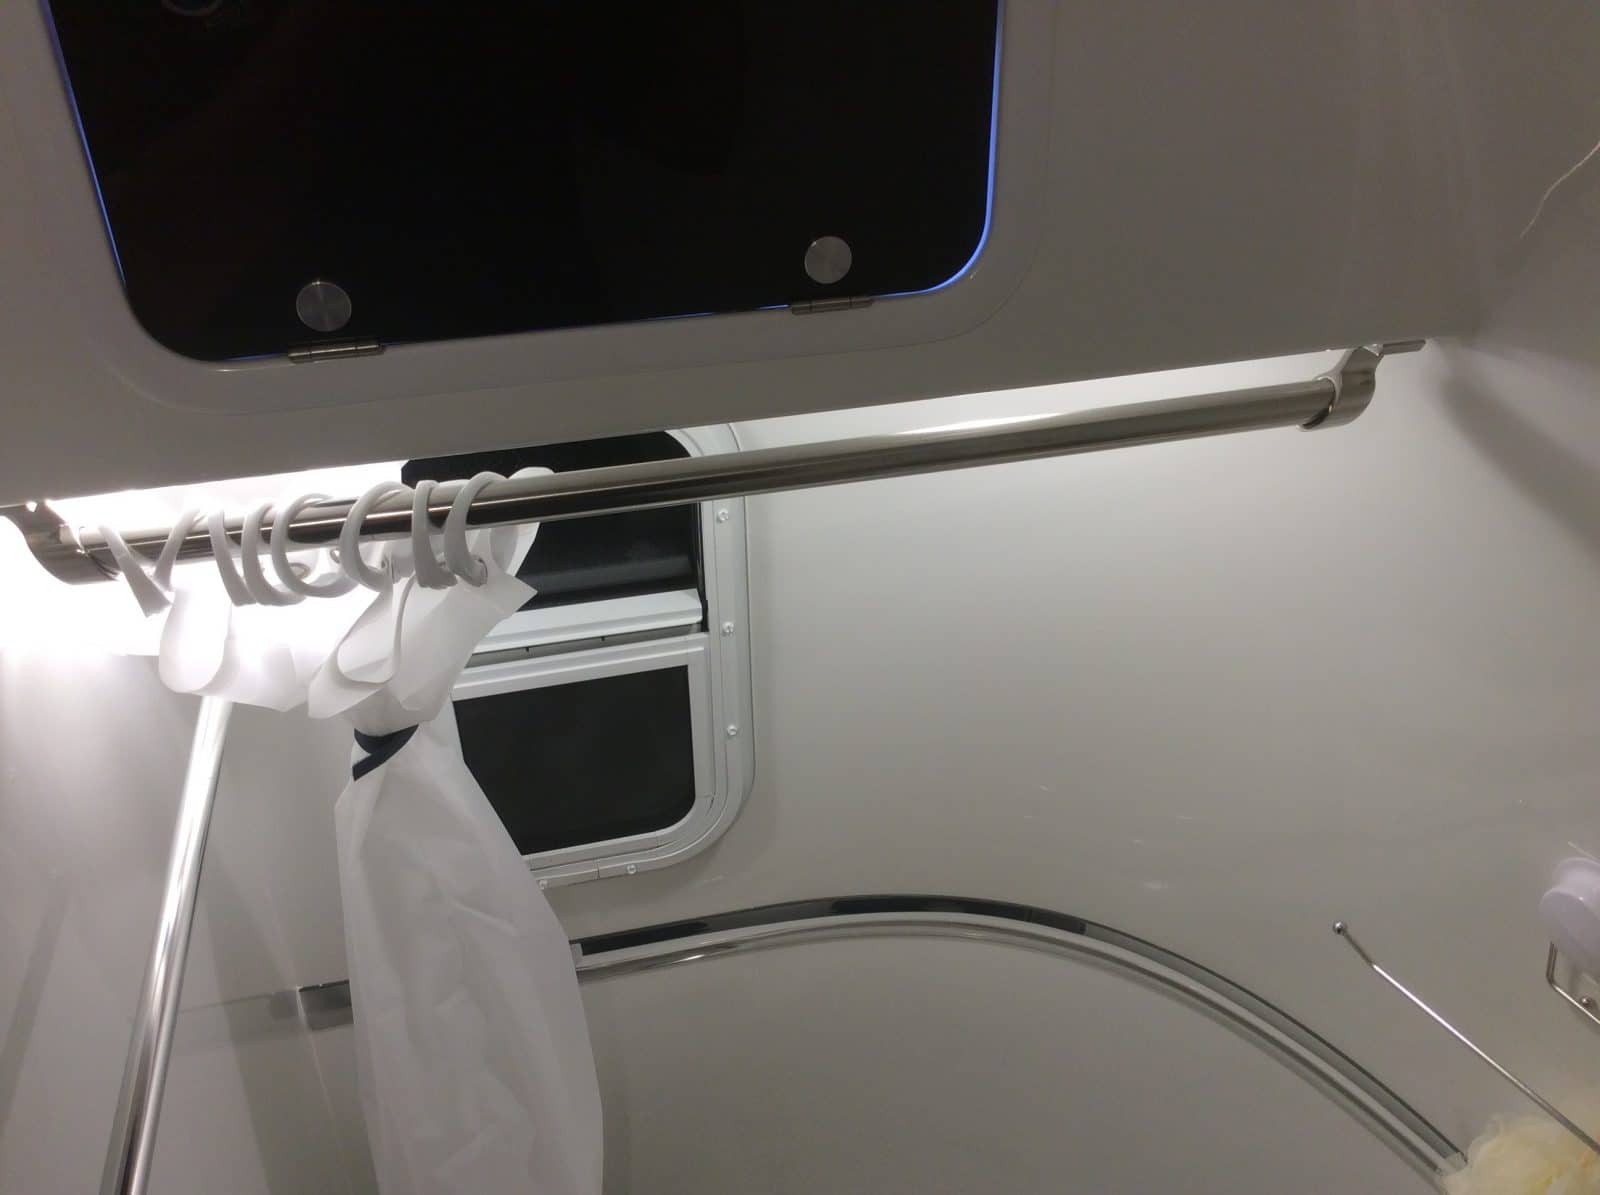
Our 2022 with the MaxxAir bathroom vent pops open on the highway. An empty plastic water bottle through the handle "fixed" it for now... 🙄1 point
-
We have a microfiber towel hanging in the bath that we use to wipe down after showering. When we travel, we roll it and put it in the handle to keep it closed when driving. It works well. Mike1 point
-
This is what we installed. It has worked out very well. The wife is happy so I am happy. Hope this help. Greg
1 point


-
Recent Achievements
-


")


")


")


