Leaderboard


Popular Content
Showing content with the highest reputation on 12/30/2023 in all areas
-
I've made some changes to the publication of the Oliver Outfitters Guide in our Blog this week. The list we've maintained features the most popular camping equipment as purchased and used by Oliver Owners. When you click on the link inside our blog, you'll connect to a personal Oliver Outfitters idea list on Amazon. The purpose of this list is to keep track of the various great items useful for Oliver Owners. NOTE: The idea list is compensated but with no added fees to users. ( As of November 30, 2023, Amazon's Idea Hub has been retired. This means that Idea Lists can no longer be linked to web-pages for compensation.) Here's the link to our blog where we've captured the non-compensated but still useful idea lists. https://4-ever-hitched.com/blog-articles/f/oliver-outfitters-guide Happy New Year Craig Hull -505 Galway Girl
 4 points
 -
An interesting visual map showing when to be off the road.4 points
-
Riverside Campground, Gila Box Riparian National Preservation Area, Safford, AZ. BLM campground $5/nt. Worth the 3 mile drive in on mostly paved, mostly single lane road.
4 points
-
No. Emergency situations while in the bush are addressed under Forum Rule 12.34B and you are allowed to communicated in any way such events. Also, they are not considered as hijackering. Something that this owner never does and can't even spell the work correctly. GJ4 points
-
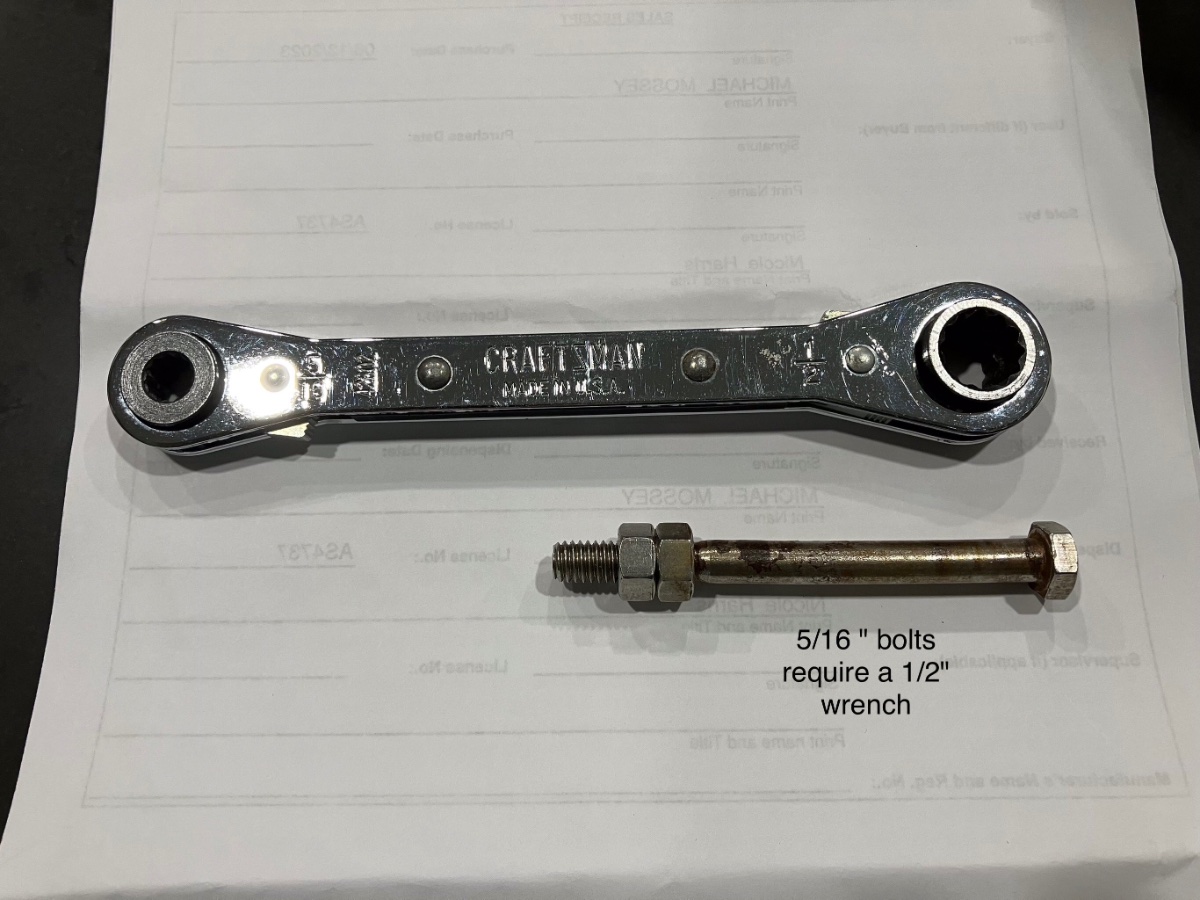
Before you replace it make sure the hex nut inside is not loose! Check out this thread4 points
-
Sorry I’m late to this topic! This is what I use, since I don’t own a 1/2" Allen wrench! Mossey
3 points
-
Thanks for the reminder on the fix! The location of the water inlet is one of the few things I believe Oliver could improve. As I age, my flexibility seems to disappear, and I’d love to not be bent over or on my knees trying to hook up the hose. I think I’ll add a quick disconnect to help attach the hose without a lot of fumbling.3 points
-
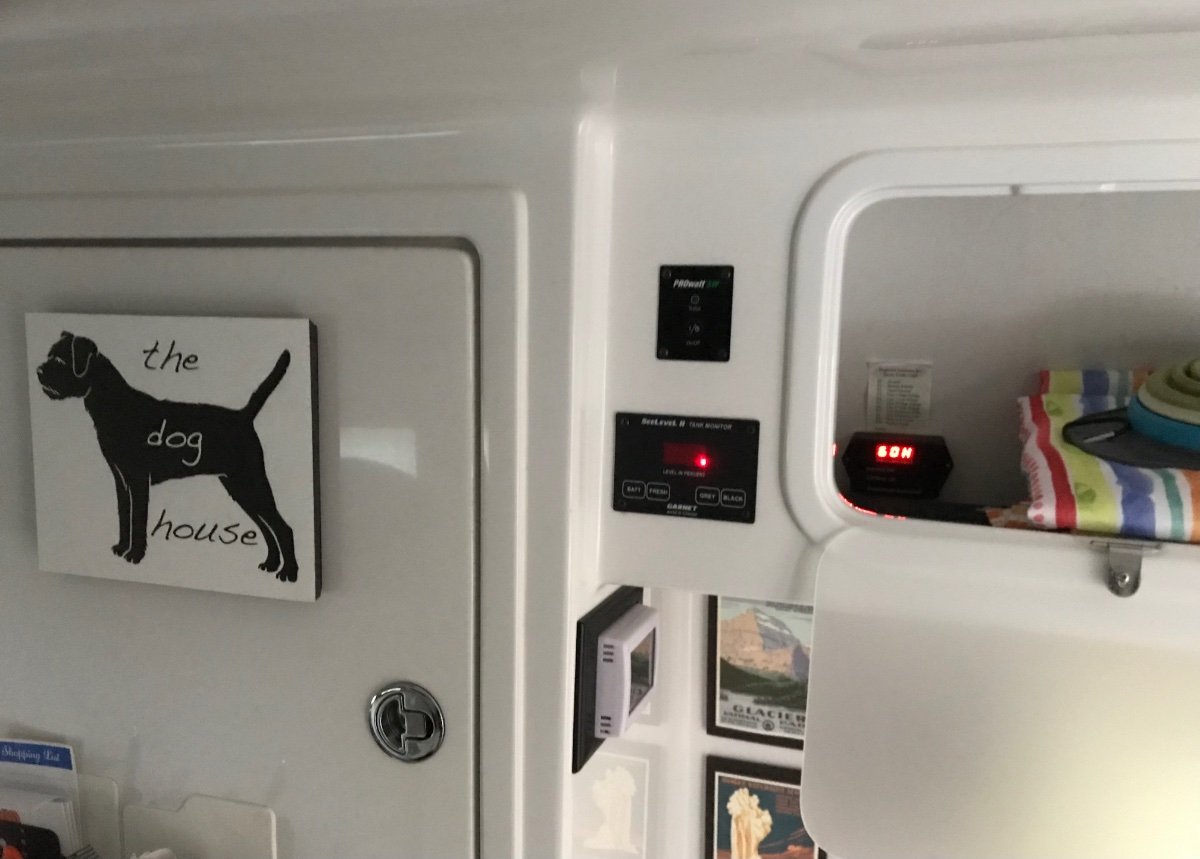
When Hull #050 was built, an Electrical Management System was not an option (in fact, there were NO options). I did a little research in late 2014 and decided on the Progressive Industries EMS. It was available with an integrated or a remotely mounted readout. Since my plan was to mount the main unit under the rear dinette seat, I opted for the remotely mounted one. When it came in, I was astonished at how butt ugly the readout was. I wanted it mounted where it was easy to see, but only if I wanted to see it. I mounted mine up high inside the cupboard.3 points
-
lastly, besides thanking @Galway Girl for the pic of her EMS, a thank-you to @Ronbrink, @topgun2, @CRM, @Geronimo John and @MAX Burner. Many of you warned me of the bright display! Yep, it's not of master-bedroom quality. So I was thinking, when do we first need to view this display. The answer of course is, when we first hook-up! So, I mounted mine right there, not inside the cabin at all. Many of you may have too much stuff in the Oliver trunk for this to be feasible, but I only place a few light objects back there (love having a full 8 FT truck bed, heavy stuff does not belong at the rear). I keep our shore power cord back there, the freshwater hose and a few other items needed upon hookup. So why not, when you have the hatch open anyway, put the EMS display there as well? I mounted the display with VHB tape to a L-bracket. Two screws to mount it to the flooring, using one existing screw. The opening for the data cable was already there, a little corner cutout, and it is so simple to run the wire under the pantry and streetside bed area. The display could be mounted high and out of the way of storage, but then not easily in view. For hook-up, I remove a parts bag, the power cord and hose, and it's simply in straight-line view. The attic, or anywhere else inside means you have to climb in, check status, and climb back out to finish. After installing, the screen read "No Power." I realized I had pushed the main switch off while I was working. Next thought was to protect the on/off switch while traveling. I mounted a simple L-bracket to keep stuff from hitting it while traveling. The 'pretty' install could include a screened type of enclosure for the display, but I prefer finishing the job today with spare parts when possible. Got done at sunset tonight. Time for a drink and dinner soon. I'm happy to be done with this upgrade, one item off the list, and it works well!☺️
3 points
-
For anyone interested, I posted more details about our experience building the garage on our blog, including some pricing and the vagaries of construction schedules.3 points
-
Don't bet the ranch on that - once down the rabbit hole the rabbits tend to take over!3 points
-
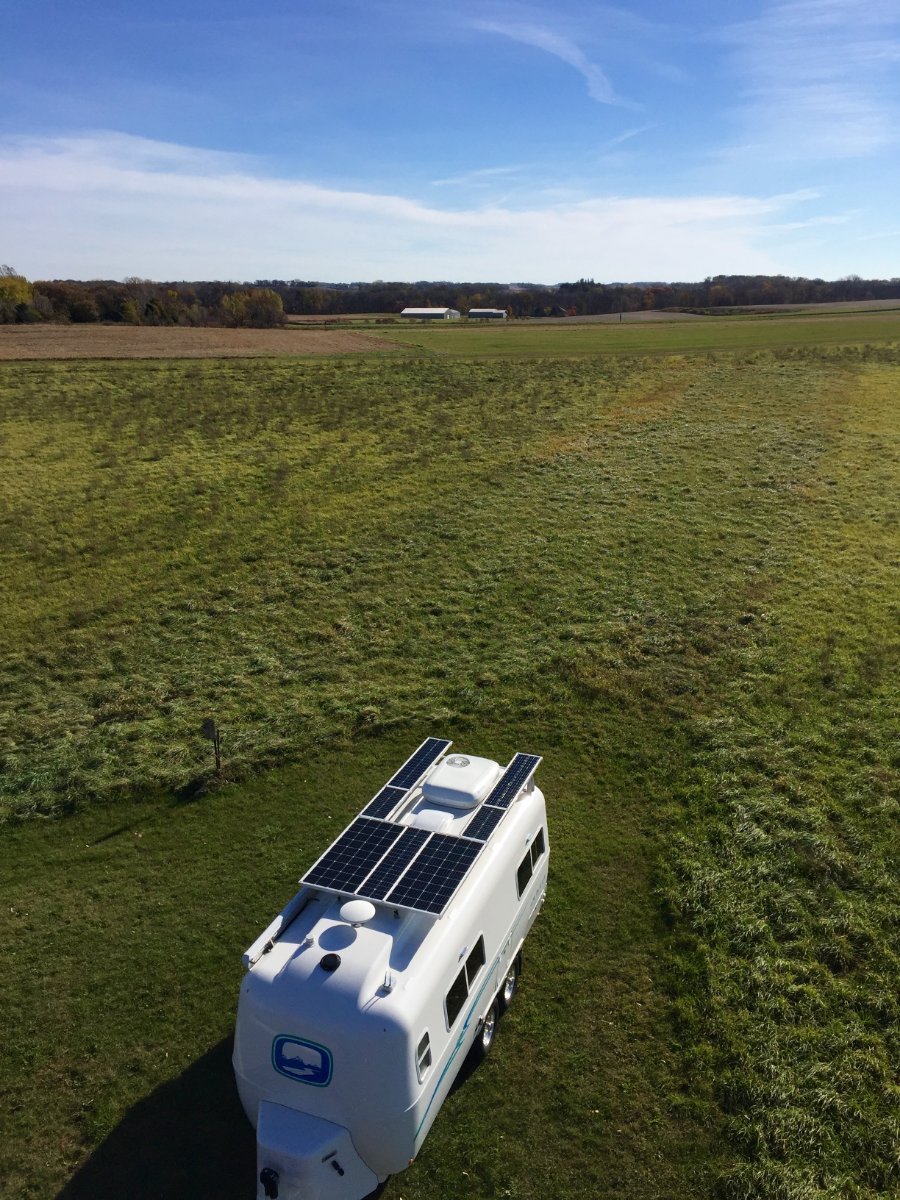
I wanted to add more capacity to my factory 340 watts because you have to remember those are rated watts not what you actually get to use, and the amount you actually get to use depends on where you are located and weather conditions. What I ended up with was additional Zamp panels, three 90 watts and two 45 watts equaling 360 watts. I went this route because it was the easiest way to fit them on the roof and merge them with the existing panels. Another consideration is when parked in partial shade the individual 12 volt panels wired in parallel that is shaded is the only one that is affected by that shading unlike when you have panels wired in series. So I have a total of 700 rated watts on the roof and in prime conditions here in Minnesota I can harvest a little over 500 watts. With that said it makes it harder for me to justify a dc to dc charger for when traveling for it has no problem keeping my 400 amps of Battleborns charged up. So far I'm happy with the outcome of the upgrade.
3 points
-
First, I would buy spare fuses for all the sizes and types your trailer has. The trouble shooting process that likely will follow WILL likely result in your needing them. 😞 GJ2 points
-
That seems like a good size. However, if you build a pull-through, you lose any storage on the back wall. Something to consider if you want to store some camping gear in there, too. We just built a 30'x30' wood framed garage with two bay doors, each 10' wide by 12' high, and some storage/work area on the side. The trusses are 14' up. The 10' wide doors are fine for an Oliver. No trouble backing in. I use a traffic delineator post as a target for the rearview camera. You can see it in one of the photos. (We couldn't do a stripe on the floor because our dually's hips block my view of the trailer wheels.) We didn't install a 30A plug because we don't intend to run the trailer A/C in there, but we do have a 20A circuit for battery charging, etc.
2 points
-
My factory installed our EMS remote display was installed under the street side bed. This was a great location for me because I then got the choice of where to move it to. I found out while researching a new location that I could purchase another remote display and link both the displays together in a mast/slave configuration. Ultimately I just decided to move the original display to a more convenient location, as shown below. My normal new site setup entails testing all outlets available at the pedestal. When I have determined the outlet I will connect to, I’m pretty confident it will work at that time, so the inside upper cabinet location is fine for me. If at a later time a condominium moves in next door and interrupts our power supply, resulting in reduced voltage, all I have to do is move the picnic tablecloth and the display with an error chart taped to the wall above it, allows for pretty quick troubleshooting. And if it’s raining or snowing, I don’t have to go outside to verify the pedestal is providing the correct voltage Mossey
1 point
-
Galway Girl: Your list reminded me. I bought a Clam tent (to over a picnic table) this summer off of eBay. It was new but the packaging had been damaged. Everything was in the package. Cost was $175. A lot less than retail. I consider it a real bargin as ebay has used one for sale on its site for more. Right place at the right time. Lucky I guess.1 point
-
That’s funny coming from "ol' squeaky" but does remind me, can I borrow that first dollar you ever made? I know you were saving it for a new fly rod, but I sure could use it for some new Victron kit! Mossey1 point
-
AND - Mossemi's "tool" is a bunch less expensive too. 🤑1 point
-
Problem solved.. Thank you to everyone who replied especially rich.dev for the tips and tools needed. Happy New Year1 point
-
For what its worth and I do not have the details on this - but - I understand that the water inlets for the 2024 Elite II Oliver's will be changing and simplified. I do not know if these same changes will happen for the Elite I or not. From what little I've heard - the city fill and fresh water tank fill will be combined and moved to the rear of the camper on the left side of the bumper. The "winterization port" will remain on the right side of the bumper. Bill1 point
-
Quick connects are one of the more useful things I’ve added, they really do help as we get older and less flexible! Also, I keep a foam knee pad in the basement for those time I do need to get down. Mike1 point
-
I can appreciate your thoughts with the age thing. I am there as well. I use a good soft towel/blanket to kneel on and the knee joints get a little movement they do not mormally get!1 point
-
As Rich said, just need a 1/2" hex tool to tighten.1 point
-
Hull 135 still doesn’t have an on board EMS. The PD power pole unit has worked well. This thread has me thinking though….. Mike1 point
-
Mine is. We like it. It's insulated (big roll batts), and pretty comfy in the seasons we use it. Your contractor did a nice job, from what I see in the photos. (I also read your blog.) We investigated both conventional framing, and pole barn (pole framed), and chose the steel sided , pole framed for a number of reasons. Investment/price, speed of construction, and availability. (We built during Covid slowdowns.) And, I'm familiar with both. (My family built a couple steel buildings, and a bunch of conventionally framed buildings. My brother sells pole barns in Minnesota. ) I like your sidemount garage door openers. (Still have to allow room for the overhead rails.) We looked into them, but our contractor advised against, based on availability, and size of our conventional garage door. Everything for us was an availability issue. Lumber, fasteners, pvc, wire... (except the steel) you name it. Garage door took six months. Windows, six months. (We ordered in January, at urging of our contractor, got them in July, I think.) We went to 6 different stores in three counties, for 12/3 wire one day. Omg. Thankfully, the pain is over, and we really are happy with end result. Back to the op, if you maintain 2' dimensions everywhere, if conventional framing, you'll save a lot of waste. Dimensional lumber is in 2' increments. Never do odd dimensions, if you can help it. Plywood/osb/Hardie panels, 4 x 8' , typically. Cutting takes time, and makes waste. (Honestly, cutoffs usually go to dumpster, even usable, unless you watch it, as we do.) If you can add length to 36', or more, I'd do it. 32' width, again, I'd do it. You'd be surprised how little more it costs to add a few feet, either way. There are major site prep costs that add more to most finished buildings than a foot (or 6) either way. Our home garage is 24 x 36, and we manage, but the Ollie sits in the side yard, and my husband's truck in a side drive. (My Silverado gets a garage spot.) 2 cars, workshop, and my truck. And, a bunch of very important shelving containing stuff, and more stuff. Lol. Good luck with your decision. I have to agree with the posters who said to build as big as you can. @RustyMD, if you can go 32 x 40, or 30 x 40, I'd go extra length before width, imo. Edit to add: if you are looking at a metal building, look at the newer crinkle finish for sides. It's a much less reflective, warmer finish. Not your standard shiny stuff. I love ours. The "garage" side in my photo is 32 x 36. The workshop side (behind the "porch" is 16 x 30. For reference. We went with one big garage door, because of the incline, and angles of backing. With a flat approach, or pull through, two garage doors would likely be easier. )
1 point
-
I agree with both of you, in a way. As per CRM, yea for sure. Heavy too!. As per Steve, yea great idea especially if your TV is a 3/4 ton or higher because such a design to be wind resistant/proof it would sure add PSI to your Ollie Tires. ++++++++++++++++++++++++ But, our OTT's are designed to be aerodynamically minimalists. Hence why I don't like and will not install ridged flat solar panels poking up into the airstream and obvious visual distractions from the elegance of Mr. Scott's design. Especially so to our audience with a minimalist's perspectives of architectural beauty. On the other hand, when we have proven, flat laid, Lightweight, efficient, flexible solar panels, that can last a long time directly adhered to the roof surface; that becomes a game changer for some of us. GJ Note: Can you believe that this pea brained Mechanical Engineer can use so many big architectural concepts and words in a row? OMG I may be turning into an Architect in my ole age. OK REDEMPTION is now necessary::::: It will be interesting to see how the CIGS panels actually pan out in direct sun, as well as the possible impact on the heat transferal through the skin of an OTT roof system. GJ Note: Whoo, that was close. Looks like I'm back to being a M.E. again. That rabbit hole could have been my demise. 😞1 point
-
Thanks everybody for the pictures and suggestions. Truth be I was plan on a 30’ X 30’ footprint. The other half is for a boat. I do think I’ll need a fair amount more for the Oliver’s and boat’s stuff. The pull through eliminating a fair amount of storage is bad but wow, Pull through would be nice. I’ll probably see if I can make it wider, like 40’. Thanks again.1 point
-
I'm assuming this is a steel building? If they use roll up doors, there won't be anything over the trailer, but they'll need enough height for the rolled up doors at the ends. For our conventional garage doors we installed side mount door openers instead of hanging them over the bays. They're very nice.1 point
-
You can adjust it in the xantrex app.1 point
-
We routinely replace trailer tires at five years. Maybe a waste, maybe good insurance. We run st tires.1 point
-
Something made 3 good batteries go bad after a 4th new battery was connected. I want to see the +/- signs on that 4th battery! No other way to be sure. Back in the day (50s-60s) my dad was a ME, a good design engineer, but he could not wrench a bolt to save his life - literally! For example, one time he asked me, "Do you have a knife." I replied sure and pulled one off my belt for his use. He then used it to remove a large screw and damaged the blade. I'm like, "Dad, are you kidding? Why didn't you ask me for a screwdriver?" My good knife was now junk! One day during the 80s, he went to start his car and it wouldn't start. He connected it to a charger and went back in the house to wait for a while. When he came back to the garage it smelled like burnt plastic. He had connected the charger in reverse polarity! The car was a 1982 Porsche 911SC. His mistake fried wire harnesses, fuse boxes, and more, lucky he did not burn down the garage, the house, oh dear dad. He traded it in the next week, claiming the trunk was never large enough to fit his golf clubs! Hey, we all make mistakes and for some reason the frequency seems to be greater with RVs! I've been repairing and restoring vehicles for 45 years and I make mistakes every day doing so. I started a thread a few weeks ago about my system not charging. I had the solar switch in the OFF position! Go figure. 🤣1 point
-
My 2018 drawer bottom thickness is pretty thin. Longer screws would not work. Fatter ones maybe. But I chose small SS bolts with small washers and nylocks. Art (Max Burner) and I replaced them and with the bolt heads/washers on top, they pilled down enough into the drawer base that they are not a problem. Certainly we'll not find any drawers up by the bathroom again. GJ1 point
-
Thought I would bump this. Love the pics! I searched for "drawers" in post titles and there it was, of course by @John E Davies! Thank you, John. My problem is with a herniated C3-C4 disc, I cannot stand to contort my neck anymore to look under tables, dashboards, etc. Too many decades of car repair and installation work and years sitting at computers, I guess. I wanted to look back there, given another JD post on loose plumbing, and we're installing a removeable kitchen shelf. I'll make another post on that. Thanks again JD! ☺️1 point


-
Recent Achievements
-


")


")


")


