Leaderboard


Popular Content
Showing content with the highest reputation on 06/26/2024 in all areas
-
The license plate mod was one of those that I wanted to keep for myself but I guess it's out in the open now. We had a total of 12" in two days, I live on 13 acres of land that you would call river bottom. Over the years that I have lived here I have built a half dozen water structures that deal with the large watershed that comes my way. My land is very soggy but no wash outs, thank God. Rapidan Dam is not that far from me it's on the Blue Earth River, so far it is still holding but a huge mess. I have the Lesueur River going right by my property and it has crested today. There are a lot of people in my area who were badly affected by this weather so prayers are appreciated.4 points
-
Allstays Ultimate CG Campendium recreation.gov3 points
-
Reserve America recreation.gov Campendium RV Parky3 points
-
Simply put - there is a ton of them. google is your friend on this one. Good luck. Bill p.s. also some Garmin units like the 890 include a bunch of camping data3 points
-
Note that - like anything else - these warranties are only as good as the company that issues them. If the issuing company is no longer in business 5, 6, 7, etc. years down the road then the warranty means little. As I said in a recent post, most, if not all, of these lithium battery "cells" are actually made in China. The batteries that we see are then either also made in China or assembled in the USA. And, the same can be said relative to the battery management systems that are such an important part of the overall battery. Due to this, in my recent purchase of a set of lithium batteries, I relied on a fairly well known YouTube "professional" who (I hope) knows much more than I do about the construction, operation and overall quality of these things. Hopefully, once this market settles down and a "normal" pricing level is reached all of us can approach purchasing batteries with the same kind of analysis that we presently do with AGM and/or lead acid batteries (i.e. you get what you pay for - in most cases). Bill3 points
-
I second the Epoch batteries. Great build quality. Those Dakotas are WAY overpriced. John3 points
-
According to Jason E., that's another premium one-off upgrade offered to owners by invitation only - not a cheap date, I've been told. Similar to OTT's handling of the one-off upgrade offered to increase the height in @Patriot's rain locker!3 points
-
In homes and commercial buildings you're dealing a much higher ratio of evaporator surface area to conditioned space so humidity rise will be much smaller, but it will still be there whenever you blow air over evaporator coils with condensation on them. And I'm not doubting your findings under your test conditions, I just know when I tested running the fan after shutdown here in Florida with +90% outside RH that the humidity began to rise immediately. I do see how skipping that first 52 seconds and then running the fan occasionally to sample the air over the thermistor might keep from having to relocate it and not release as much humidity into the cabin, though..3 points
-
Our 2021 OEII came with a 2" hitch mount rack receiver but the installation was (in my view and with respect to a lot of other good work done by the prior owner of our trailer) not quite up to 'factory standard'. In fact the U-bolt-based attachment method distorted the receiver shape just enough to make installation, and especially removal, of our 1Up hitch rack next to impossible. So I sought to improve upon it. After some research I settled on a receiver ostensibly designed for use on certain Lexus GX460 models: https://www.amazon.com/dp/B0BRKR1Q4X Drilling and attachment was straightforward given a drill press, a decent 1/2" bit, appropriate measuring tools, and a center punch. The aluminum is relatively soft and drilling oil was not used. I have not been able to get all the chips out of the interior, but did not try too hard to remove an end cap and access the box section beam interior that way. The hardware is 3 1/2" x 1/2" stainless with stainless and yellow zinc washers. We have not tested the setup on the road yet, but static fitment went fine. The receiver and backing plate are fairly heavy; according to the retailer, about 10 pounds. This item is designed for towing, when attached to a GX460; it is likely overkill for this application, but that's OK by me. A side benefit is the receiver has safety chain mounts through which a cable lock could be passed. I discussed this with Jason and he indicated the factory were considering offering a 2" receiver option moving forward. Our bike rack is 2", our cars and TV have 2" receivers, and use of an adapter was not appealing to me. In hindsight I might have painted it white, or silver 😀 Enjoy! Tim
 2 points
 -
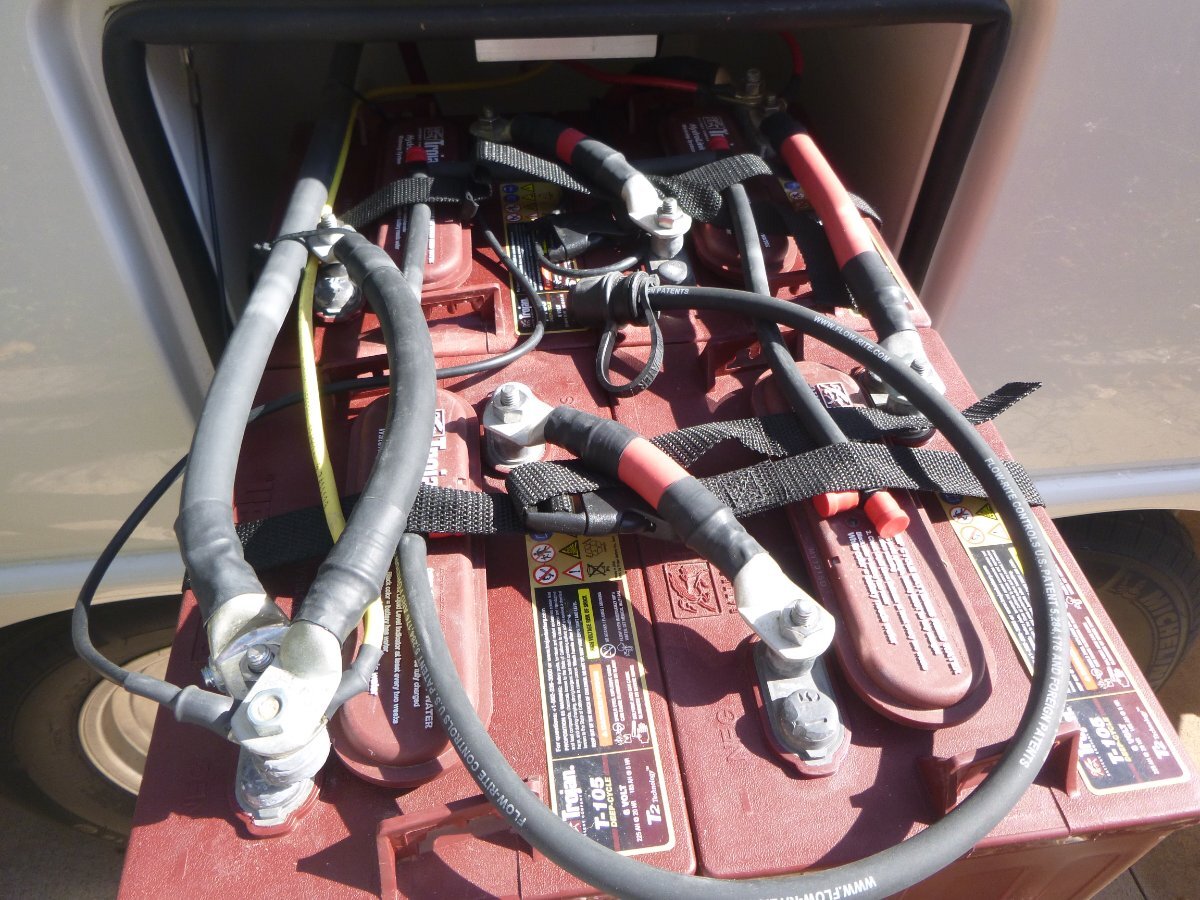
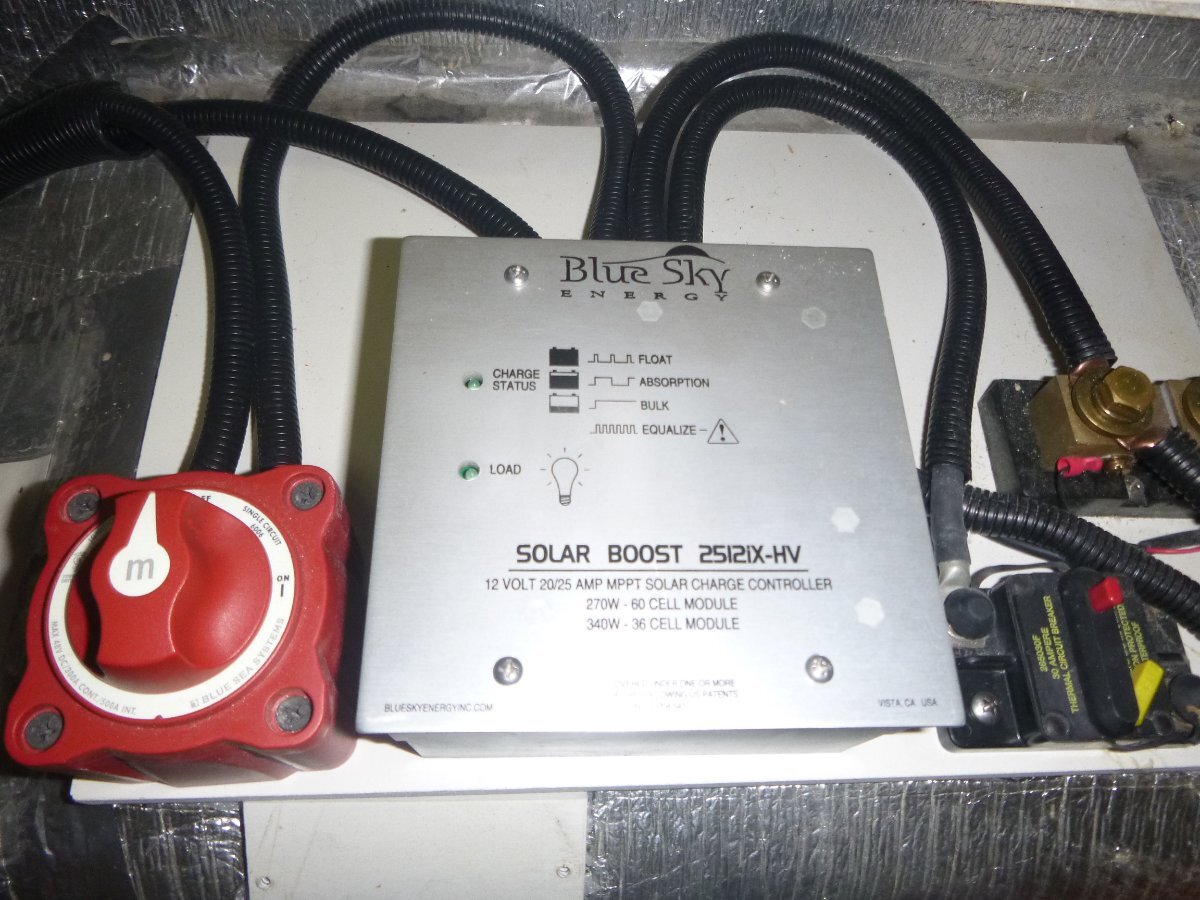
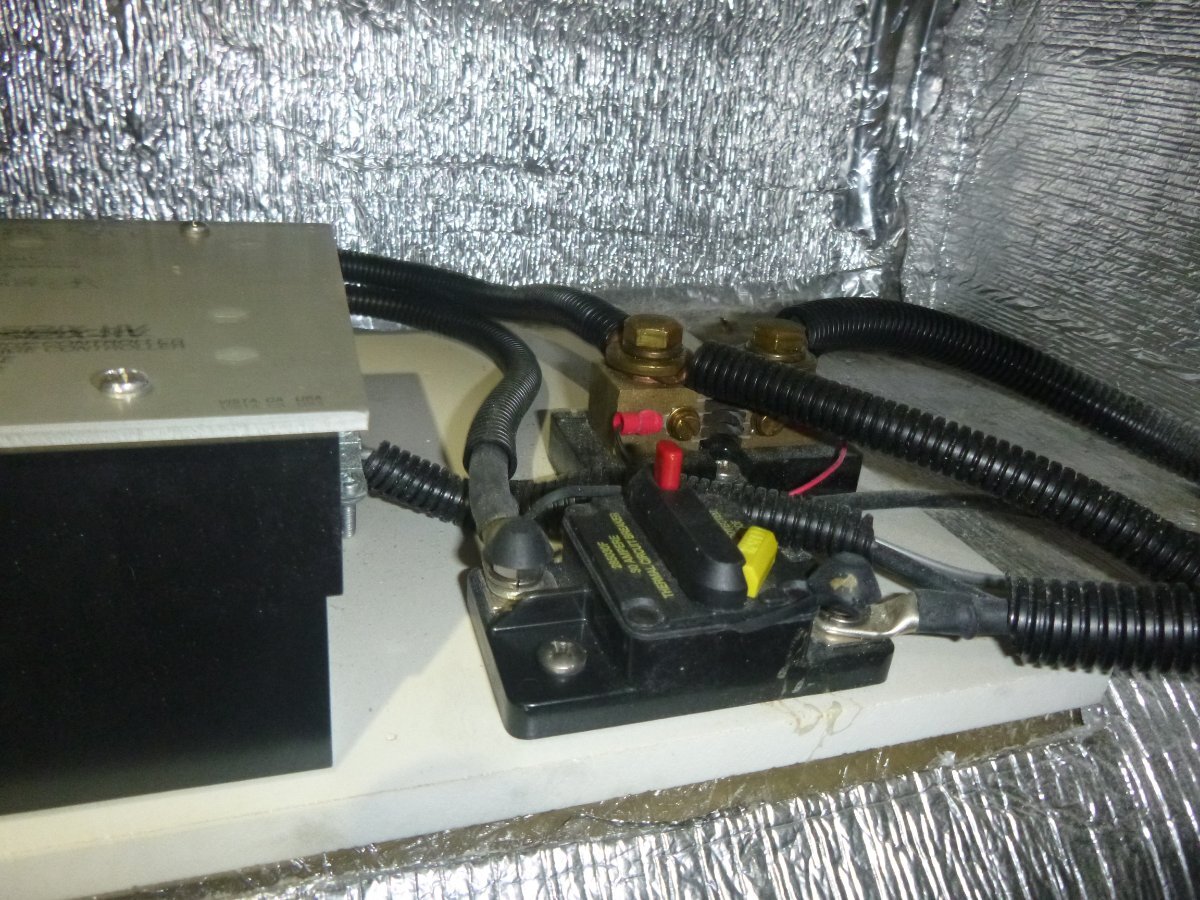
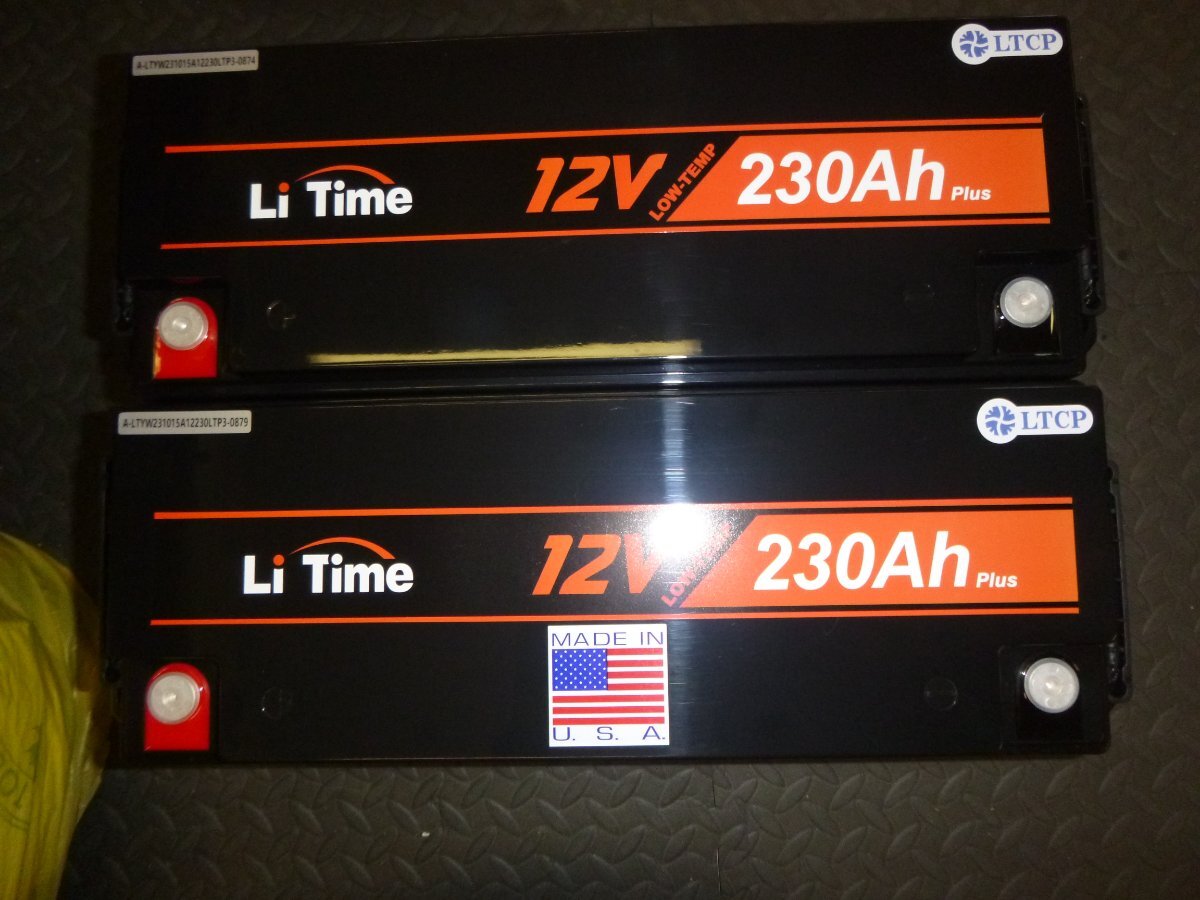
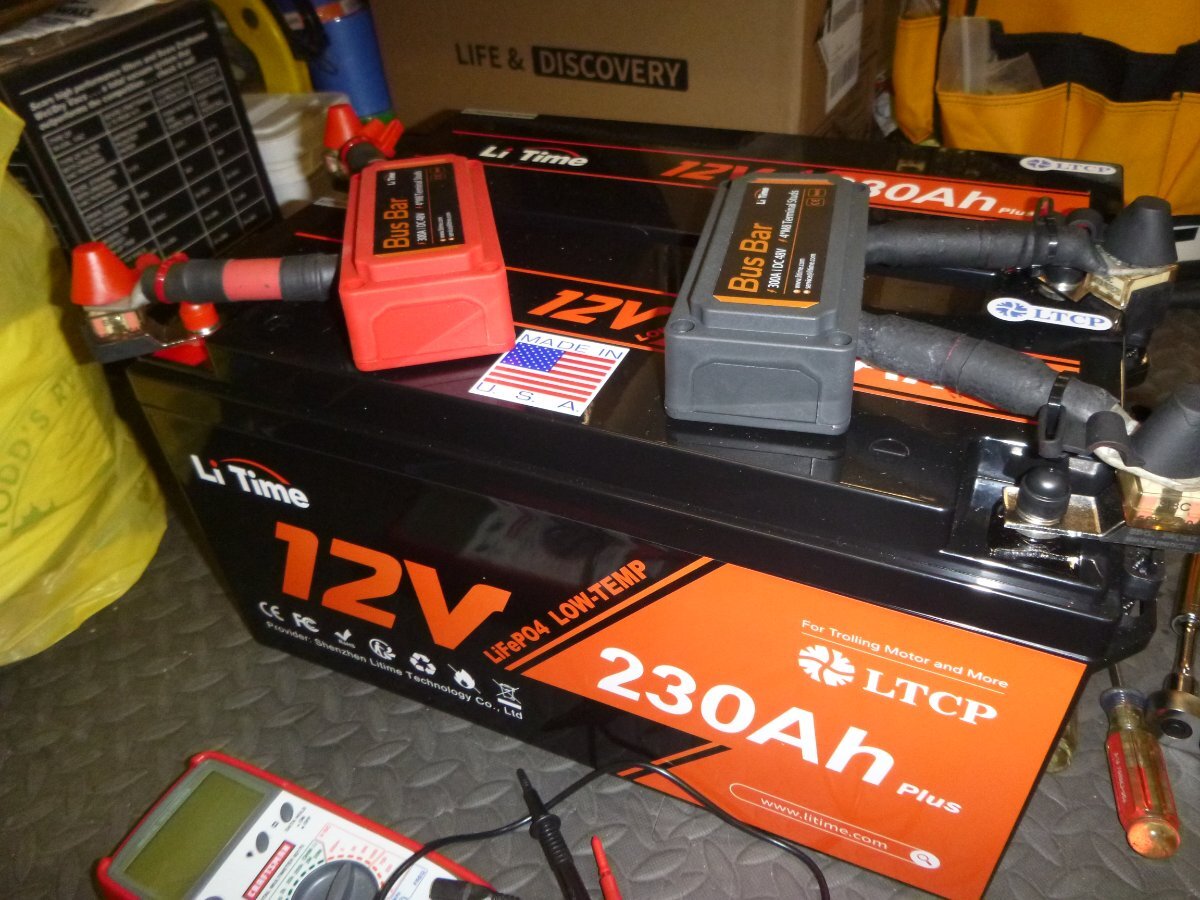
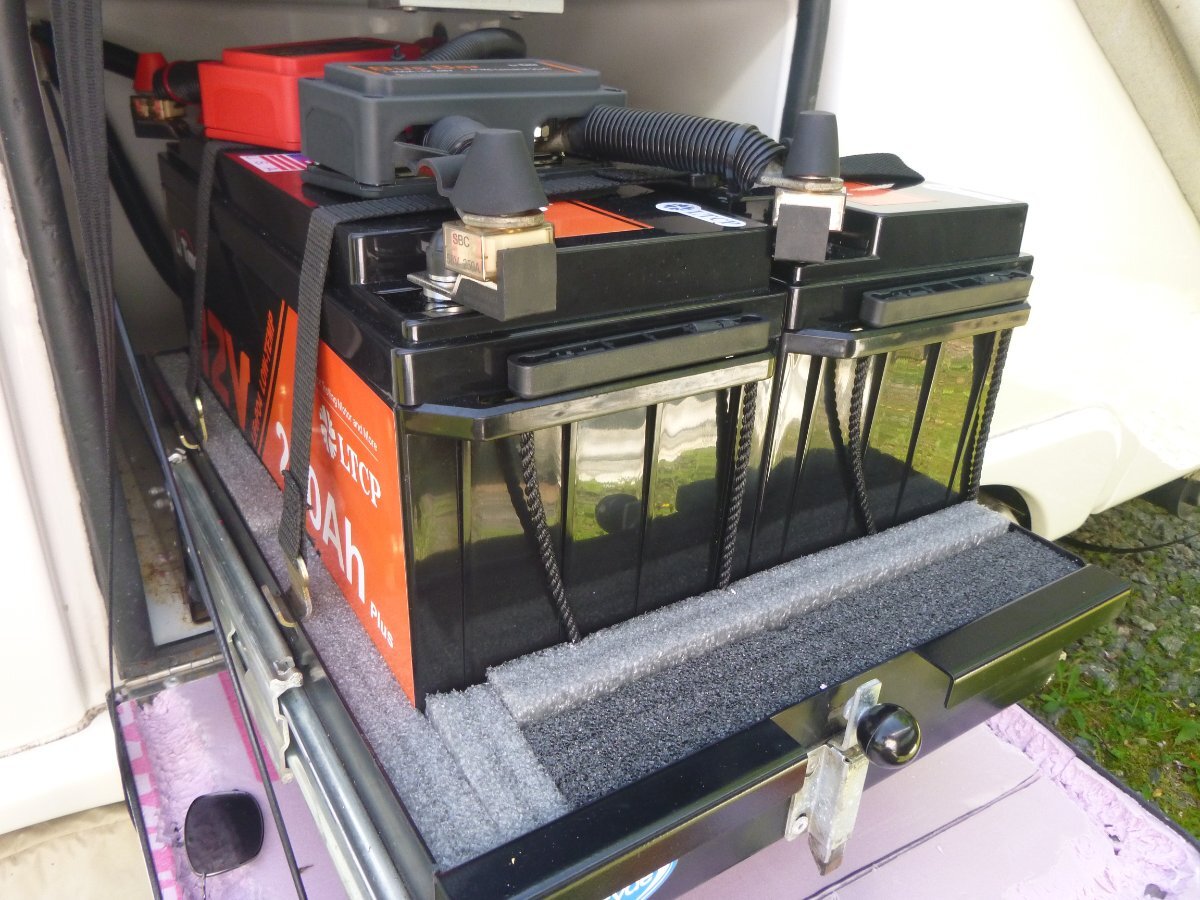
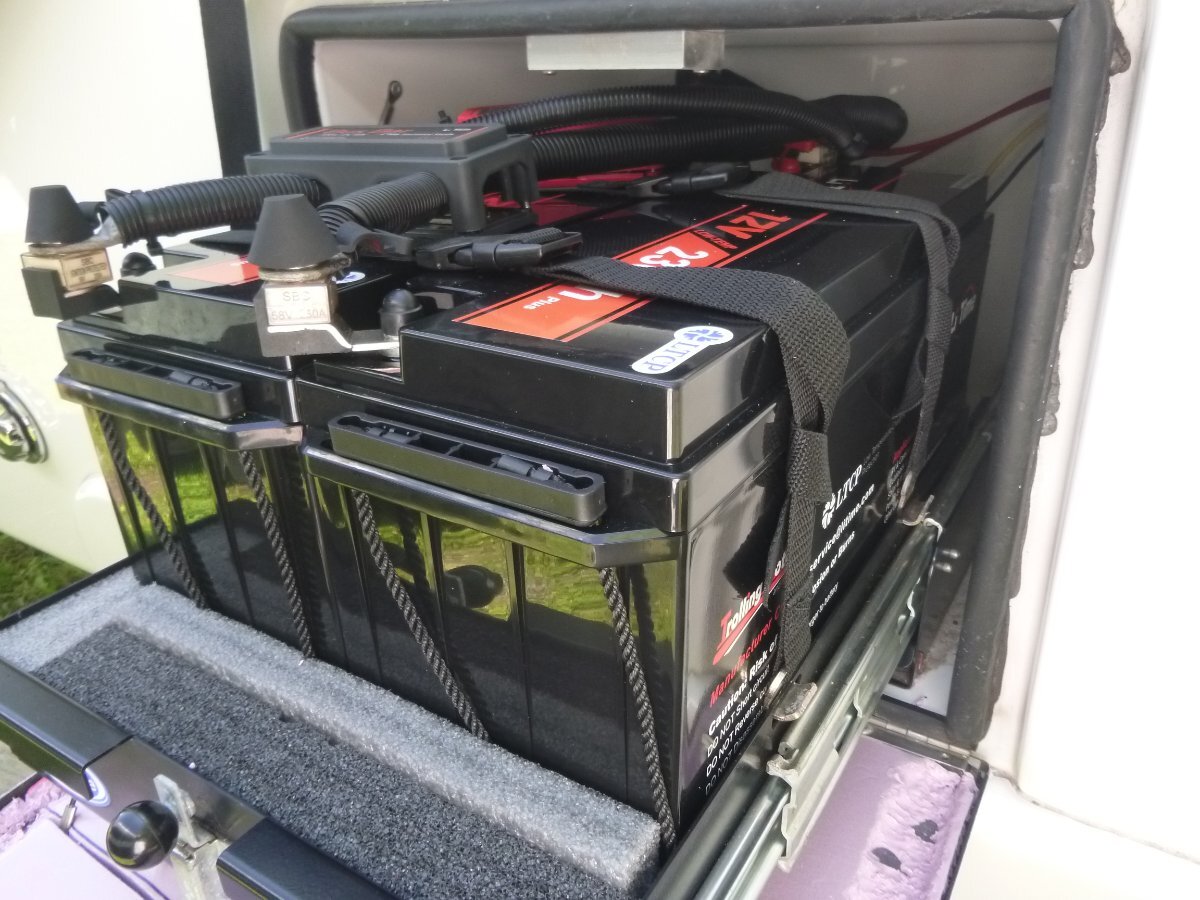
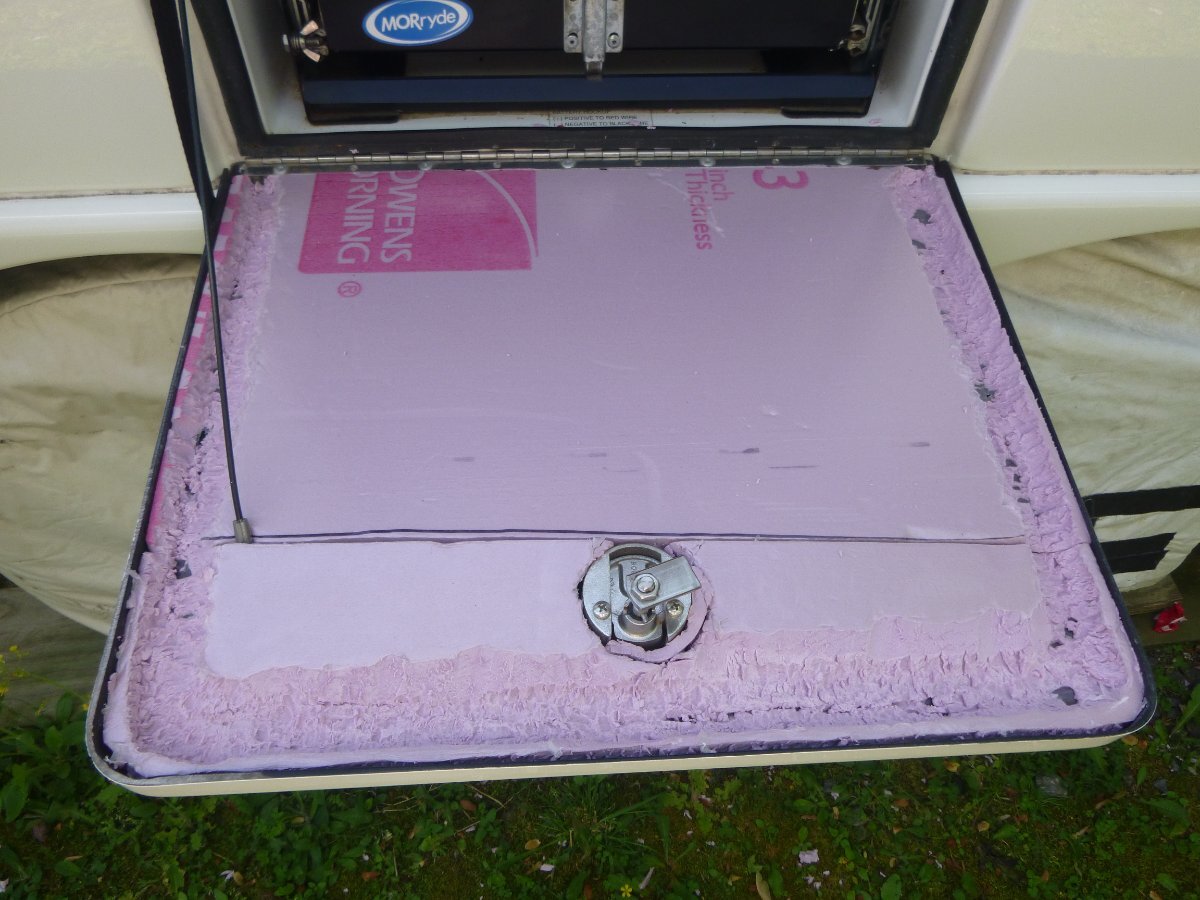
My Oliver Elite II is a 2016 model that I purchased from the factory with factory solar and 4 T-105 Trojan lead acid batteries. Over the 8 years with the lead acid batteries I never saw the charge level of the batteries below 83% full! Mind you that I'm very conservative regarding energy usage to include having only actually run the furnace twice over this time. I also never have the inverter on unless I'm actually using it and even then it was seldom used for more than 6 minutes at a time (a good sized baked potato in the microwave). However, even though the batteries were still performing as they should, I simply thought that as I approached my 9th year, I was simply taking too much of a risk that these batteries would leave me stranded while out in the middle of nowhere. So, in late 2023 I began my search for replacements. Since I do not live under a rock, I was reasonably aware of the "long-term" benefits of switching to lithium batteries. But, in the short-term, the expense of this kind of upgrade was a bit difficult to justify. Note here that I live in the mountains of North Carolina and do most of my camping in the summer at altitude in the Rockies where sleeping at night is usually a question of how many blankets versus will I be cool enough. Yes, the driving trip from NC to the Rockies each year can be a bit warm (think 100 degrees going across TN, IL, MO, KS and the eastern plains of the Rockies) and, yes, it would be nice to power the a/c via the batteries on rare occasion. But, I made the decision that until my current 2000 watt inverter dies, I would not spend the extra money to upgrade which would certainly add to the overall cost of the project. In addition, I'm not a big cell phone user and prefer a simpler life. Given the energy usage noted above plus I do not need to let anyone know that I'm presently on isle #5 at my local WalMart, and, I don't want or see the need to be attached at the hip with a cell phone. So, going into this replacement of the lead acids I simply assumed that I'd purchase something that I could "drop in", use the same wiring that came from the factory along with the same Blue Sky MPPT solar controller, IPN remote (shows typical shunt readings), existing cables, and not change a thing (or at least very little) from what has worked very well over the past 8 years. The price of lithium batteries was/is still coming down but was still too high to justify the extra expense versus the alternatives. OK - this is the base from which I started and certainly I recognize that my situation does not apply to everyone - nor should it. After looking at several alternatives I had almost decided on purchasing 4 VMAX XTR6-235 AGM batteries at $1370. Of course, another possible alternative would have been the Brightway Group EVGC-220A-AGM batteries at 4 for $995.00. But, I saw a YouTube video by Will Prowse that highlighted the LiTime 230 amp hour lithium batteries. Next it was the Christmas holidays and I saw that the LiTimes were discounted plus I could get an additional 8% off my order since I had served in the military. So, with 2 of the 230-amp hour batteries plus 2 bus bars, my total for 460 amp hours was near $1,075* – well within the cost of non-lithium batteries. Yes, I was aware that the LiTimes "only" had a warranty of 5 years versus the 10 years for Battle Borns or the 11 years for the Epoch. But, since most (if not all) of these lithium battery cells are made in China (with some assembled into the batteries we see in the USA) I figured that since the LiTimes are about half the cost, if they died at 5 years I would still break even versus the Battle Born's. The "final straw" was seeing Ronbrink's post** on his install of the LiTimes! Upon receiving the 2 batteries*** (3 days after order) I found that the battery terminals were recessed relative to the tops of the batteries. Therefore, I purchased 4 terminal blocks with 250-amp fuses at a cost of $68 on Amazon. So, I was just about set for the install at a total price of just under $1,150. Next, I took a hard look at the wiring necessary for the install. My original intention was to install the bus bars either inside the Oliver (near the solar controller) or on the wall inside the battery box. But, for the "quick and easy" install that I was hoping for it appeared that I could use the two 4/0 cables (each about 7 inches long - end of lug to end of lug) plus two additional cables of this length that (hopefully) I could get from a fellow Ollie owner. Indeed, Mossemi came to my rescue and supply me with those two cables that he no longer needed after his Lithium conversion. Putting this all together resulted in what appeared to be a nice tight package that I could simply "drop into " the existing space in the battery compartment. I "bench" tested the batteries in my workshop and even performed what is called a "top balance" on the two batteries just to make sure that they were ready to go (i.e. a "top balance" is performed by charging each battery to 100% and then connecting the two batteries together and letting them adjust to each other for 4 to 24 hours). Indeed, the 2 LiTime batteries easily fit into the existing space and I had some foam blocks that I used to make sure that the fit was snug. Also, the original Oliver tie-down straps could be used to hold the new batteries in place. When connecting the cables from the Oliver I found that I needed to slightly alter the openings into the bus bars so that the “tops” of the bus bars would seat nicely onto their bases. This was simply done using a Dremel tool. And, even though the LiTimes have “low temperature charging protection” (lithium batteries should not be charged when they reach a temperature of below approximately 32 degrees) I decided to insulate the battery compartment door with some ½ inch foam board. Finally, my original intent was to keep my original converter which did not have a lithium battery setting. These old converters will charge a lithium battery, but, it would not charge it to 100% full. However, upon resetting the Blue Sky solar controller from the Lead Acid parameters to the Lithium parameters, the solar panels would take care of getting the total charge in the new batteries to 100%. But, I saw a lithium capable converter on Amazon Warehouse for $147 and could not resist****. With a total cost of now just under $1,300 I was in the lithium world with (hopefully) longer lasting batteries and considerably more usable amp hours than the T-105's I started with. In addition, should the inverter decide to fail, I can now replace it with a 3,000 watt inverter and be in a position to run the a/c off the batteries for a short period of time. During the Owner's Rally and in the weeks after the Rally, the batteries, solar, and converter have all been working as they should. I would still prefer to install a battery cut-off switch but that will have to wait until the summer camping season is over. In a nutshell, here is what I did: 1. Disconnected the solar panels via the cutoff switch (street side bed) and opened fuses near the negative bus bar (also street side bed) and do not be connected to shore power. 2. Removed the old Trojan batteries (disconnect negative terminals first and take pics of wiring configuration prior to disconnect). 3. Cleaned all wiring connections. 4. Cleaned battery box and repainted tray. 5. Inserted new LiTime batteries and connected the two battery cables to the first and third bus bar posts, the main negative from the Oliver to the second post and the other negative cables to the fourth post. Performed the same procedure with the positive cables. 6. Closed the two cutoff fuses near the solar controller. 7. Reprogrammed the MPPT controller via the IPN Remote using setting provided by LiTime. 8. Disconnected the charge wire from my tow vehicle – actually I removed fuse #17 in my 2023 F-150. 9. Verified that the dip switch inside the solar charge controller was turned off – you do not want to “equalize” lithium batteries. 10. Verified that the solar system and the new converter were operating correctly and were charging as appropriate. Bill Notes *As of 6-24-2024 the price of 2 LiTime 230 amp hour batteries is $1048. **Part of Ronbrink’s install can be found at: https://olivertraveltrailers.com/forums/topic/3333-battle-born-lithium-ion-12-volt-batteries-in-an-oliver/page/3/#comment-98774 AND https://olivertraveltrailers.com/forums/topic/9395-prime-deals-on-battleborn-and-renogy-suitcase-solar/#comment-99676 *** I wanted 2 batteries to protect myself in the event one of the 2 developed a problem. ****Installation of the lithium capable converter can be found at https://olivertraveltrailers.com/forums/topic/4812-how-to-progressive-dynamics-pd4045-lithium-upgrade/
2 points
-
The Dyrt Pro ($35/year+/-) Reserve America Recreation.Gov This covers National Parks, BLM Lands, US Forest Service, Corp of Engineers (COE), State Parks, Harvest Host & Boondockers. That pretty much gets us everything we need. Don't forget some real gems get mentioned here and on Oliver Facebook.2 points
-
And yes, our hull has check valves and restrictors on the Fresh Tank and City Water lines (see pic). You may not need the following detail for a summer plumbing project, but when I am winterizing, I run air into all four (4) water inlets. First air into the City Water to drain both sinks, the toilet and outdoor shower. Then the Fresh Tank inlet for a few seconds. Then I connect to the rear port, after turning water valves to boondocking position and run air in for a few seconds. Lastly the toilet rinse inlet. Except for the first step that drains all the internal plumbing via the City Water connection, the other 3 just take a few seconds of air to clear those short inlet lines. You can bypass the HWH for a plumbing repair, but when winterizing, I bypass it to clear the hot water plumbing with the air and at the same time I pull the anode plug to drain the 6-gal HWH tank as well.
2 points
-
The check valves do not allow reverse flow out the hose which would lose pressure in the plumbing. So you would be blowing air in the allowed direction, into the hose inlets. I do it all the time since we travel on and off all winter and when home on the mountain it often gets in the low 20s overnight. It’s part of my winter return trip process to blow the plumbing dry while we’re still in the driveway!2 points
-
The 2017 manual has a very nice set of schematics for 12v DC, 120v AC and both pressure and waste plumbing. I am pretty sure the 2018 manual and maybe the 2019 manual also had schematics. They are not always 100% accurate, but do provide a starting point. The schematic @jd1923 posted also shows check valves at either hot water heater that the original owner specified the build order. Mossey2 points
-
2 points
-
hobojoe sent me a message asking for more details about my design and I am happy to share it. First, I need to mention that working with high voltage can be very dangerous and has the potential to cause serious injuries including death. I recommend hiring someone with the correct skills if you do not have them. I am a fourth-generation engineer in the electrical, electronic, radio communication, and computer fields and I am a senior member of the IEEE so I feel qualified to make these changes. Always ensure your RV is disconnected from AC power and that any inverter that might be powering your air conditioner is turned off before working on your air conditioner. I am not responsible for any damage you might do to your RV, air conditioner, or yourself. Making these changes will most likely void your warranty. Links for the wiring diagram and parts are below. I used the P1-5 program of the timer and set T1 to 45 seconds and T2 to 360 seconds, There has been some discussion about not wanting to purge the remaining cold air. If you want to avoid the purge you could use the P1-4 program and set T1 to 360 seconds and T2 to 45 seconds. The program on the timer can only be set while it is powered with AC. After it is set up it will remember the settings when it is powered off. If someone wants to try both of these settings in a very humid environment I would be interested in the results. Please reach out through the discussion thread if you have any other questions. wiring: https://trontamer.com/dl/wiring.png timer: https://amzn.to/3XGyA6O relay: https://amzn.to/3W2nacw cable: https://amzn.to/45GcxPy2 points
-
FYI: Here's a shot of the site near Waco, TX under the path of totality: IMG_1534.MOV Didn't expect either the 360-degree sunset or the 15-20 degree F drop in temp. Incredible experience.2 points
-
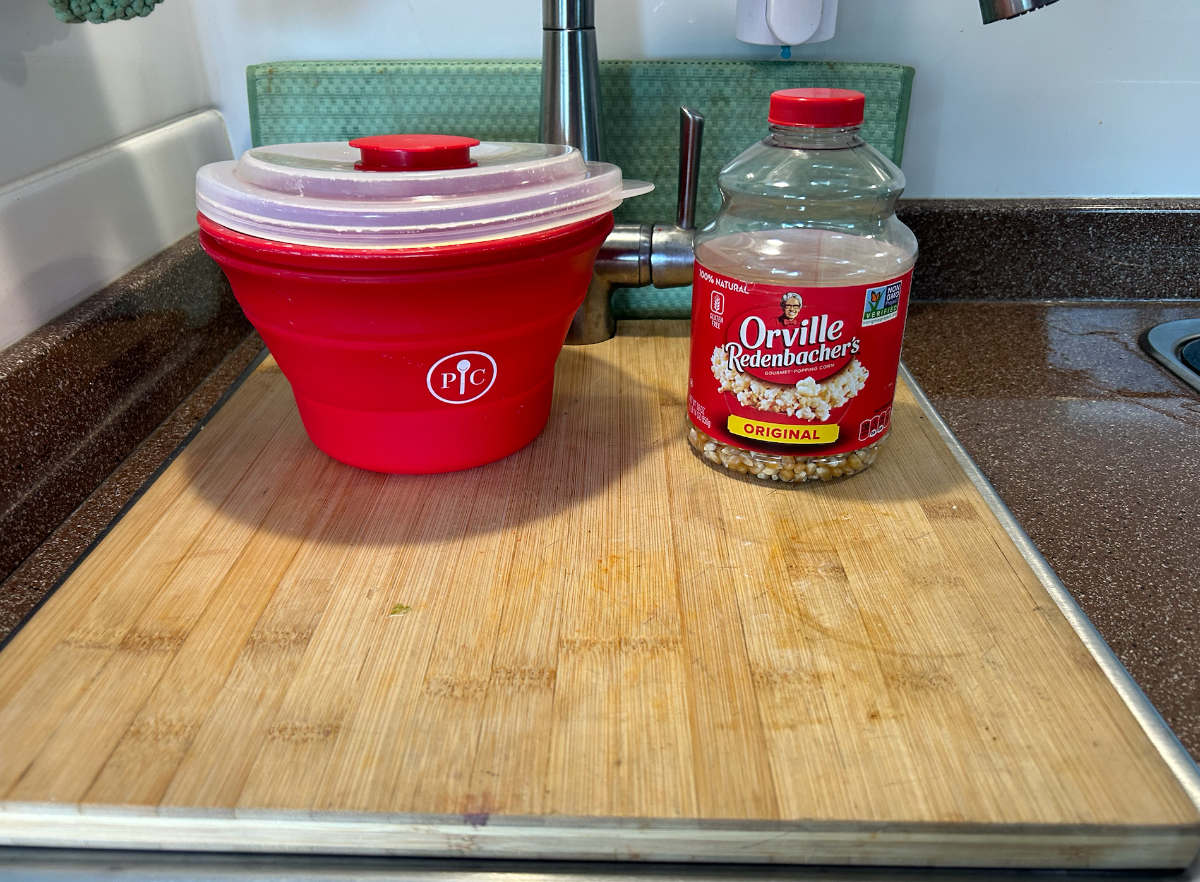
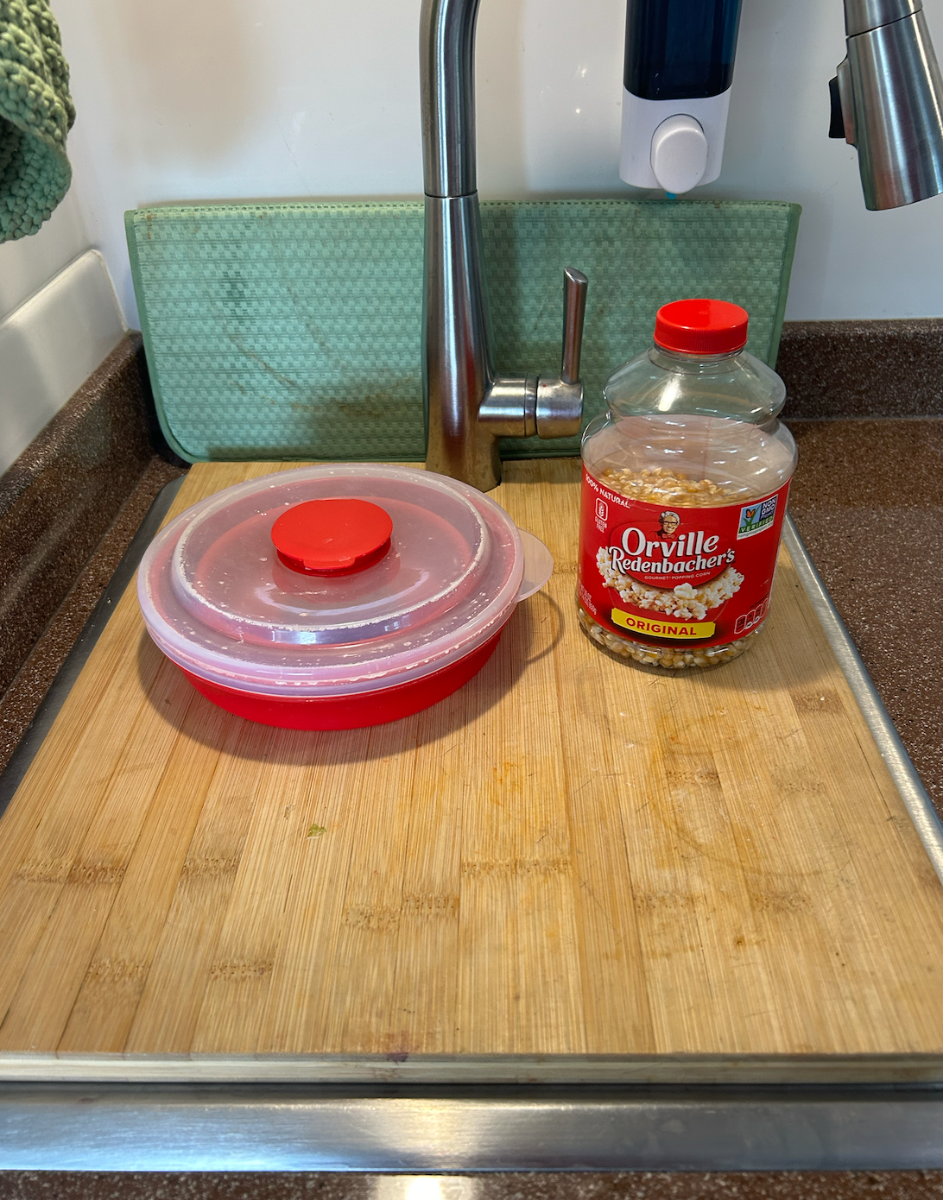
OK, so we're popcorn folks - not quite junkies, but close. The collapsible Pampered Chef microwave popcorn bowl does a great job "not burning" Orville's corn - slam a few dollops of Kerry Gold salted Irish butter into its integrated dispenser on top - and poof! A couple minutes later - heaven on earth! Yum
2 points
-
There is a new video on the Sprinter-Forum highlighting the Atmos 4.4 in a ‘non-ducted’ installation on a 2020 mini motorhome (make and model escape me). Unlike other videos posted in that forum, this one mimics more closely the perceived install in an Oliver IMO.2 points
-
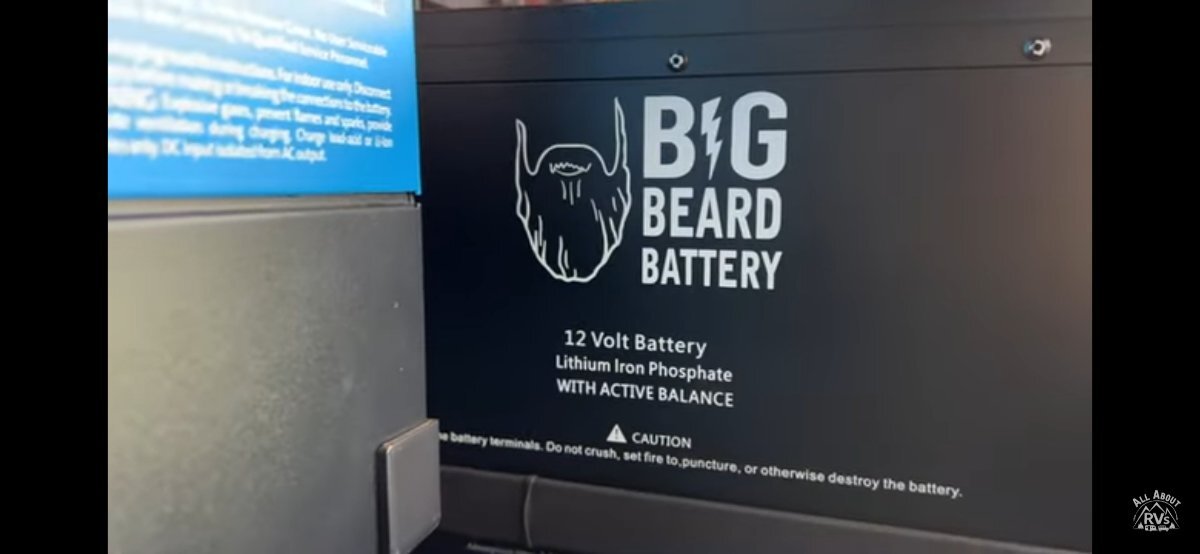
We haven't been to Athens and didn't know about Big Beard before reading this thread. You got us curious as to whether they actually build their batteries, or if they're just an online storefront. They have the same address (9024 US Highway 175 West, Athens, TX 75751) as the Big Red School House & Community Center - Athens, Texas. Maybe the facility name inspired the battery brand name. Big Red appears to be a RV tech training business. Big Beard seems to be a new player in the battery market, but appears to be legit. If we were shopping batteries then we'd check them out.2 points
-
Have you seen the dude? Personally, Chris and I are not beard people, don't get the big beard thing, let alone a naming your battery company as such. Beards, tattoos, piercings, young people needing a good bath and shampoo... I'll stop there. I would say that if there is a new viable battery company, producing great product in Athens TX (not just a website, would want to know of the manufacturing facility), I would support them. I prefer the small co vs online reputation. We have driven through Athens TX, a cute East Texas town like many others, a good half dozen times traveling from Georgetown TX to UT Tyler TX for Adam's tennis tournaments during high school and college. Love all the great small towns of Texas! In East Texas they have a local burger chain named "Jucys." Hey @Jason Foster what do ya know about Jucys? Can you FedEx overnight me a 3/4 LB butter burger with fries? (make that 4 orders!) Jucys Hamburgers | Best Burger in East Texas2 points
-
Found this. So, yes, lfp/lifepo4
2 points
-
Is the Bigbeard lithium phosphate (lifepo4)? Not finding the chemistry specs. Also concerning is a tag on "for indoor use only". Not impressed with their website. Maybe I missed something.2 points
-
Dude... "Everything DC" goes through the shunt. Otherwise, the SS will not monitor that input - in this case, from the solar modules. If you choose to include one of the available Victron touch screens, it will display the solar power input status. We use a dedicated Victron solar monitor in addition to the touch screen, yeah - I get it, overkill. What can I say, we like overkill... Cheers, brother!
2 points
-
Excellent point, brother! We like having that conversation at RV parks as well - it usually comes with a discounted nightly rate, too...2 points
-
jd1923, maybe a couple of reasons to want a separate charger/inverter. My older hull number trailer has separate units already and it all works well so I’ll probably just leave well enough alone. Also, seems like the newer trailers with the combined units are having issues with both. If one unit goes down nothing works. I seldom ever turn on the charger anyway, I let the sun do its thing. Seldom use my generator as well. We’ll plug in if it’s available, sometimes. Really the only thing that must be plugged in is the air conditioner, everything else can run comfortably on either DC directly or on the inverter. The only situation that we would have had a problem is when we were caught in the Texas deep freeze about four years ago. Several days with little sun and highs in the twenties and lows in the single digits. Fortunately we had shore power the whole time. It’s a blessing to be able to own a trailer that is set up so that it really doesn’t matter if we have power or not and can easily allow us to camp most anywhere. I love it when a campground apologizes for not having a site with water or electricity and being able to say that it doesn’t matter we’ll be comfortable anywhere.2 points
-
Almost all modern home and commercial air conditioning systems are designed to purge the remaining cold air after the compressor shuts down and their ability to dehumidify is not compromised. With my application, the air in my rig is dryer than it has ever been. That said, with a simple change to timer settings, the initial purge could be eliminated.2 points
-
Running the blower for 52 seconds right after shut down would defeat the purpose, I think... In my expedience, humidity starts rising immediately after the compressor shuts down if the fan continues to run. I wouldn't be worrying about a slight improvement in efficiency if I were trying to keep the humidity as low as possible.2 points
-
Hello Everyone, I do not own an Oliver, however, I have developed a novel solution to the Houghton humidity issue that I would like to pass on. My solution builds on the compressor relay idea that was posted by GSMBear. My Design also interrupts the low-speed fan power so it will run when the compressor is on, however, it adds a timer control to start the fan every six minutes to sample the RV temperature. I live in Oregon so it is not as humid here as it is in the south, however, this mod produces dehydrated air in the RV and the air conditioner discharges a lot of water it has pulled out of the RV, The timing cycle works like this: When the AC brings the RV to the target temperature and the compressor shuts down the timer will run the fan for 52 seconds to purge the remaining cold air. (Purging the remaining cold air improves efficiency.) Then the timer will shut down the fan and wait for six minutes. The timer will then run the fan for 52 seconds to sample the air in the RV. If the AC detects a temperature rise it will start up, else the cycle will repeat by waiting for six minutes. The net result is only 1/8 as much time is spent blowing air over the wet coils, dramatically reducing the water return to the cabin and giving the water more time to drip off the coils. It would be easy for the manufacturer to implement this solution in firmware and it is very frustrating that the manufacturer has not done so. On a side note, I would not be in favor of relocating the plenum thermistor as it may be used for other purposes like detecting a coil freeze-up. I installed the timer and relay into a plastic spacer that sits on top of the control box of my AC2801. The links below are for photos of the moded spacer before and after the installation. If anyone would like more details about my solution I would be happy to share. https://trontamer.com/dl/mod1.jpg https://trontamer.com/dl/mod2.jpg2 points
-
Good questions. Let's start with the second question. IF stands for the internal fan. This is the one that runs inside the RV. The wire that currently comes from the internal fan that is connected to the LOW terminal is disconnected and it is rerouted to S2 of the timer and NO of the relay. A new wire is connected from the LOW terminal to COM of the relay.1 point
-
Perfect, brother!1 point
-
I apologize for unintentionally creating confusion. The schematic diagram posted above was meant to illustrate the ports for the coil sensors. It also has the conceptualized wiring plan for the new relay. The conceptualized plan was drawn prior to knowing what my wire color choices were going to be limited to based on my wire supply. Please ignore the wire color labels in that diagram. To be more precise about your question though. . . When you open the cover to this control box, you will see the thin white wire from the factory connected to the low fan speed blade. You want to remove it from that blade and reattach it to the COM blade on the new relay. Then, take a section of your own wire that you'll need to supply (about 10") and connect one end to the low fan speed blade and the other end to the Normally Open (NO) blade of the new relay. In the pictures from the v2 PDF document, both of these wires are white with the new wire that I had to supply being the thicker wire. Hope this helps and I apologize for creating the confusion.1 point
-
Hello all! Just joined your wonderful forum today. We are a retired couple from Tennessee who are looking forward to owning a Legacy Elite II someday in the near future. So we’re newbie wannabes right now. We made the mistake, I guess, of first looking on line at the Legacy Elite II and now everything else just seems subpar. So, we’re pretty much sold out of the gate on Oliver’s quality and customer satisfaction. We continue to learn every day, mostly from this forum and other research what it’s like to own a travel trailer and why other brands of rv’s should be avoided. Once again, hello and we look forward to getting to know you all.1 point
-
@Against The Wind - Welcome to the community! We are backpackers and backcountry skiers, too - but we still absolutely love taking time traveling in our rig, "Casablanca." We developed a "less is more" attitude while experiencing extended periods in the high-country of the Rockies and that attitude carries over to our OTT. Like @Patriot mentioned (and Zak Brown Band sings) - "we've got everything we need and nuth'n that we don't." Keep us posted on your acquisition! Cheers!1 point
-
Just wanted to thank all of you for your thoughtful and considered responses. I now have my tickets to Thailand and will leave July 23rd. I will be rehoming my 100 year old mother into a nursing home in Thailand. The best nursing home there will cost $1,500 per month compared to something like $6,500 here. I am paying for a caregiver to fly with my mother so that I don't have to worry about possible issues on the flight over. Also have some sleeping pills for her. Time to put the RV contemplations to sleep for the time being and focus on more immediate issues.1 point
-
Based on this new info, and your apparent preference for a smaller camper, I'd say a truck camper or Class C. You'd have to look into tow capacities re your gyro trailer.1 point
-
Ours (2023 LE II) is held down by Velcro strips. Found this out while preparing for new tops Foy tops. 🙂1 point
-
😂 Got it. And the way you put it I won’t forget… thanks for the info. Will make it easier as I start mapping out my install.1 point
-
I'm like'n it!1 point
-
It would have to be completely cloudy and off-grid for ..... maybe a month or two before using all that, with some A/C usage. Also, I love me some of Todd's "Two Minute Tech-Tip Tuesday", but they have a lot to prove with those batteries. Maybe something about the name, "Big Beard Battery". 🤷♂️1 point
-
Case and point, my Xantrex 2000 is an inverter/charger. The inverter works as intended, however the charger (80A) only has an initial charge cycle which comes on when first plugged into shore power. Since there is no further charging capability, it necessitated my going to the storage facility almost weekly to reboot said charging cycle by unplugging from shore power and reconnecting. This task was really worrisome with the former four 6V Trojans to prevent discharge below 50% SOC, but not as much now with my 460 Ah LFPs that can take a deeper discharge and have double usable amp hours. To rectify the inherent problem, I recently installed a Victron Cerbo and 30A Smart Charger to assume the task of keeping the battery bank SOC in check. On Auto Start, if my SOC drops below 60% the charger is activated and set to turn off when 95% SOC is reached. There is also a Manual Start and Off mode; all done by way of the VictronConnect app. NOTE: I did talk with a Xantrex tech about the charging aspect and he confirmed it was not operating correctly; he recommended purchase of a new unit.
1 point
-
jd1923 I agree 💯. I basically did the same thing. I added the automatic transfer switch for the air conditioner and several months later switched to lithium batteries. However, I have not had any issues with running the Dometic air conditioner on the inverter. It does get warm but as long as my total watt load does not exceed 1,800 watts the Zantrex inverter should handle it. The specs say it is capable of handling 1,800 watts continuously and 3,000 watts intermittently. I have run the air conditioner for about a half hour and the inverter was very warm but I wouldn’t say that it was hot. It does have an overheating shut down sensor and it has never shut itself off for any reason. At some point in the future I plan on getting a 3,000 watt inverter but I’m not interested in one that also incorporates a charger as well. As of now I only use the air conditioner to cool down the trailer in the evening then open windows overnight unless we’re on shore power, then the air conditioner stays on if necessary.1 point
-
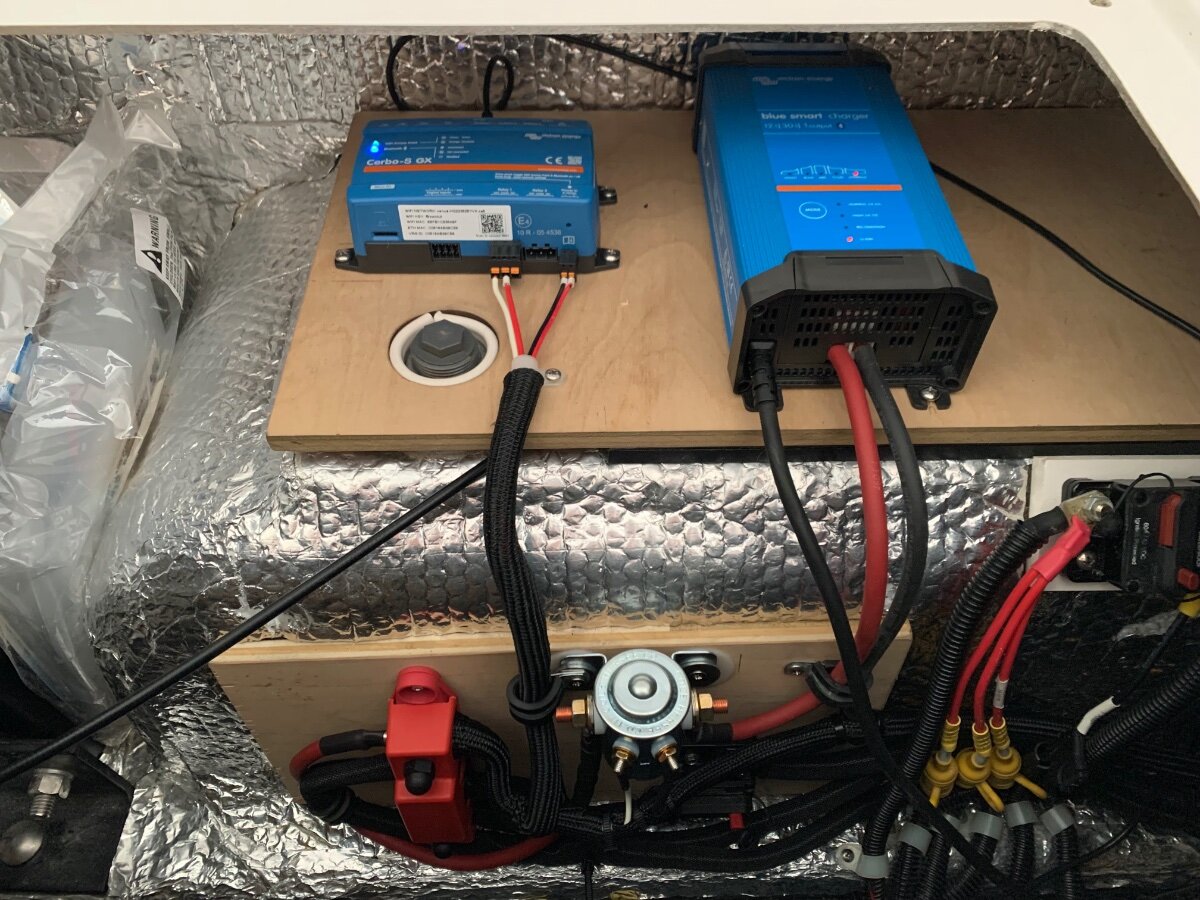
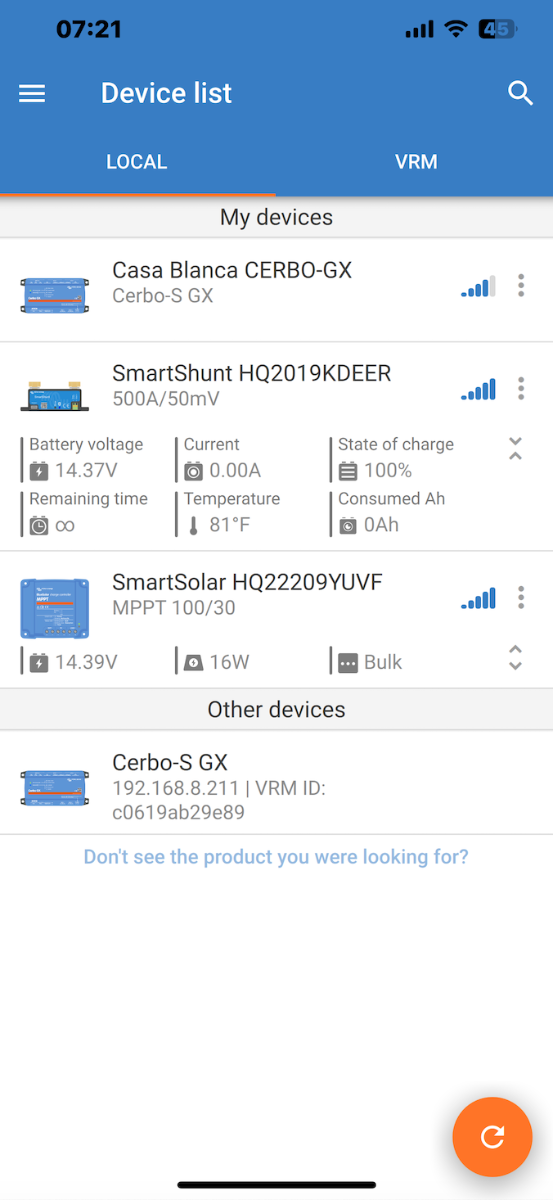
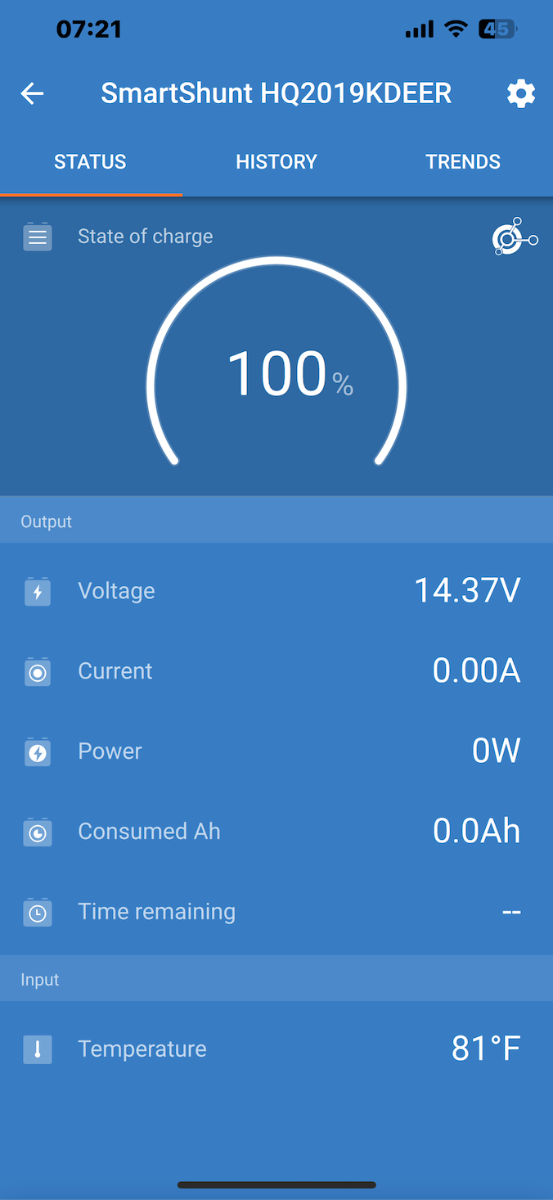
Hey, Chris: So, what @topgun2 Bill explained above is dead nuts on. At a high level, here's a description of the Smart Shunt: The SS continuously monitors multiple elements of the electro-motive force going through your DC circuitry - these elements include, current voltage, current, SOC%, useful battery time remaining, battery temperature, etc. Our's is mounted under the aft dinette seat where I'm pointing with my left index finger: The key here is to wire all your DC devices' negative connections through a "NEG Buss Bar." If you miss one and connect a DC device directly to the battery bypassing the SmartShunt, it will not be detected. So, the right lug of the SS jumps over to the negative buss bar and the left lug jumps directly to the battery bank. It's called, "Smart", because it's Blue Tooth-enabled allowing it to communicate to its corresponding mobile app. Here's what the Victron app's Home Screen looks like on my phone: At the top it shows the Victron "Cerbo unit" data block - this is sort of the central nervous system of both your AC and DC circuitry. The Cerbo unit tells the user graphically where AC and DC power is going at any point in time - either via the app or by the touch screen. This device is not required unless you desire it for extended boondocking or for your particular style of camping. Going down, the app next displays the SS status, turns out the SS's BlueTooth signal isn't very strong - but we can monitor this screen from the TV while under tow and track SOC status. After the SS data block is the Smart Solar MPPT Charge Controller data coming into the system. If we were connect to the TV when I took this screen shot (and the engine running) the app would also show the DC/DC Charger data - since we're not connected w/engine running the charger is OFF and therefore, no data block is displayed for it on the app. The next screen shot is specific to the SS: This gives the user a different graphic of the Home Screen that's specific to the SS. If your "Phase 1" includes Lithiums, suggest you consider including a SS at the same time. You'll be making rather large custom battery cables anyway, so with those tools (cable cutters, lugs, lug crimper, heat shrink, and heat gun) out and ready, it will be a straight forward process to make your SS/Bus Bar cables as part of this first phase. A note on the NEG Bus Bar: On our hull, the factory negative bus was a "pole type" bus that's grounded to the frame right under aft dinette seat. It wasn't robust enough to handle the additional negative connections, so that explains why we decided to upgrade to a Blue Sea Systems multiple lug bus bar. We used the same grounding point on the frame as was used for the factory pole bus. Hope this helps out, Chris. Good luck and keep us posted on your upgrade! Cheers!
1 point
-
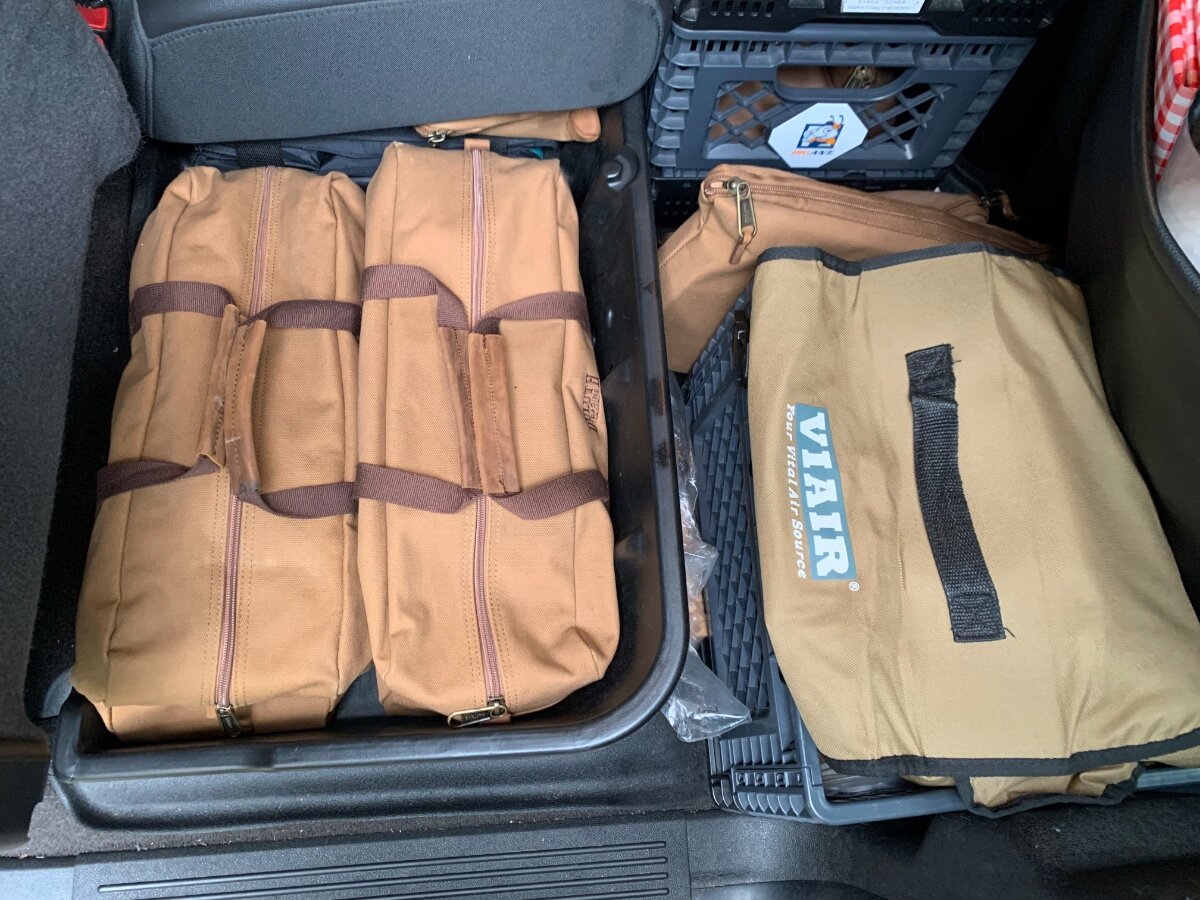
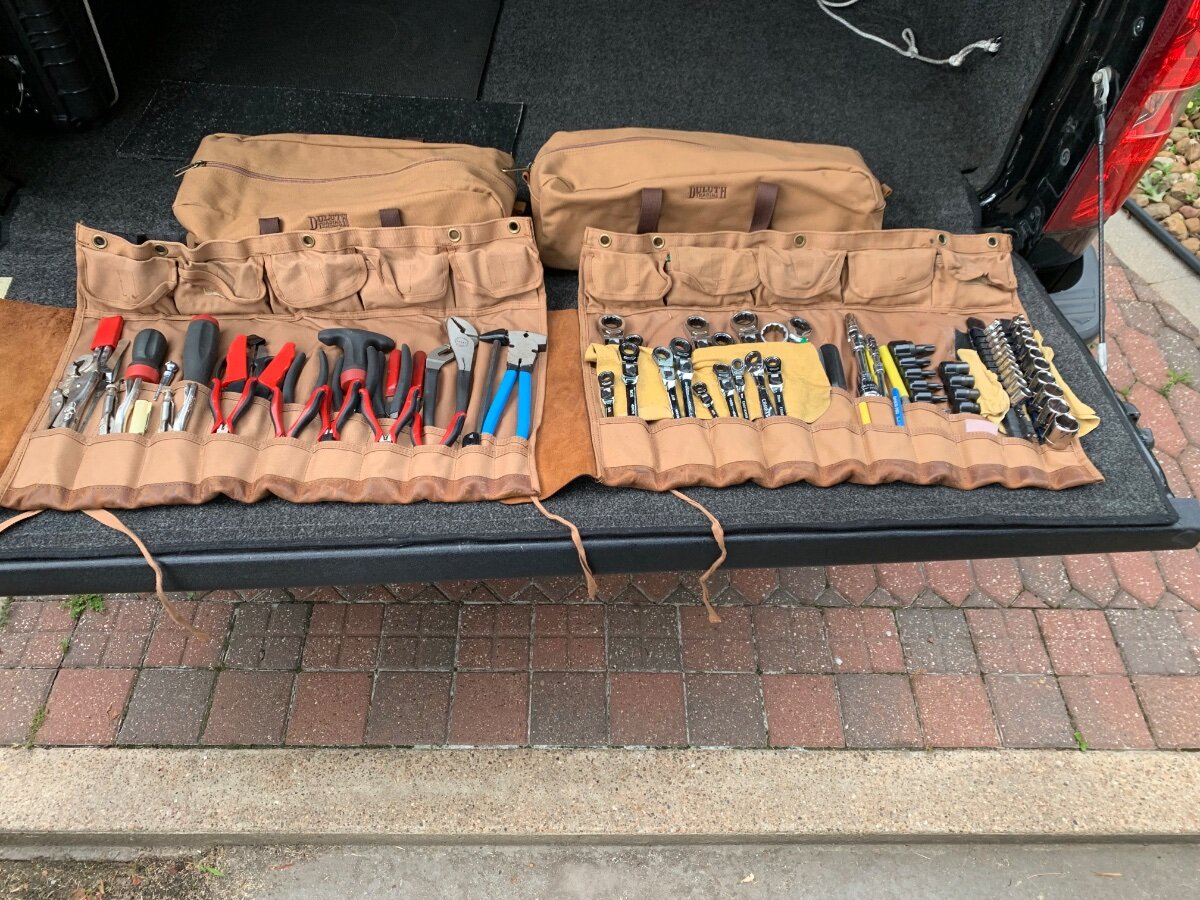
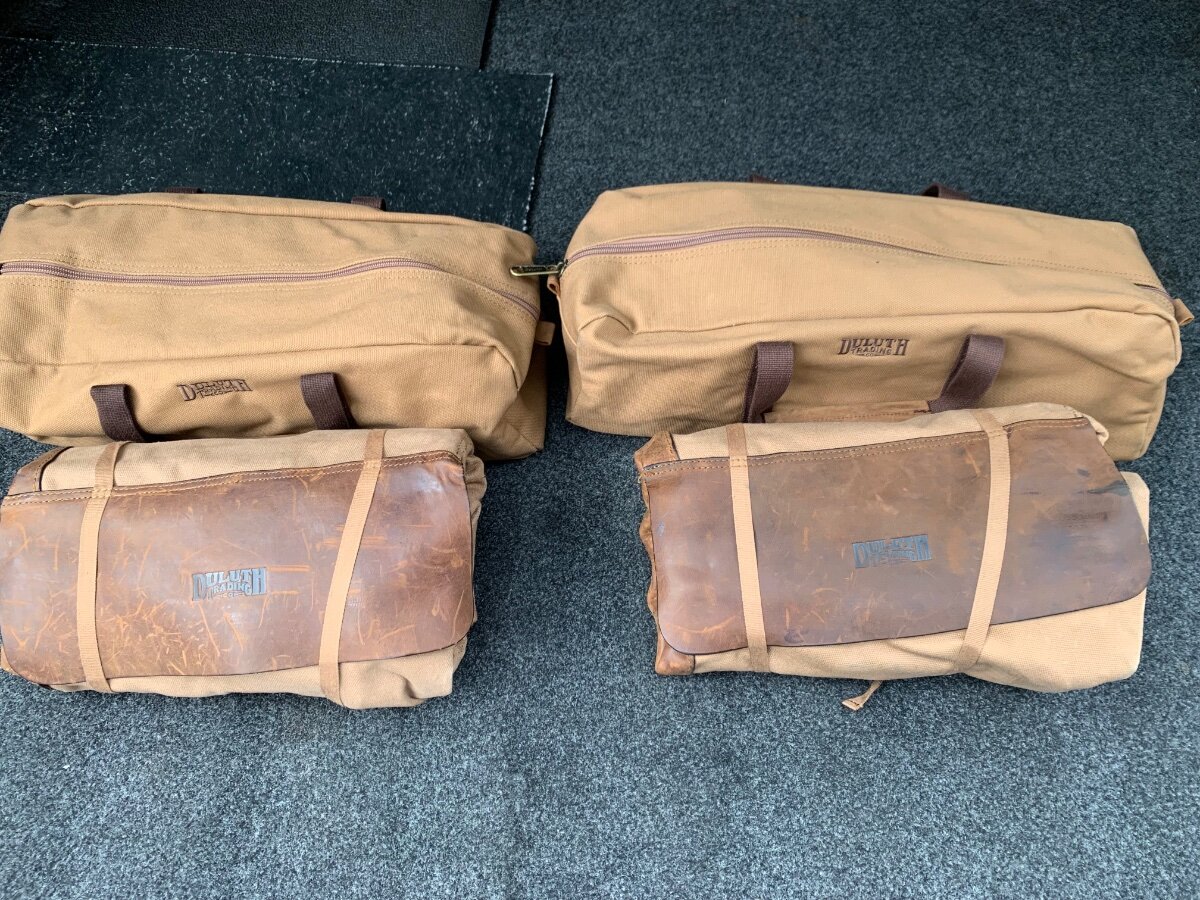
I put these tool kits together soon after buying my 2012 Chevy 1500 4x4, which now serves as my current TV; where the Oliver goes, they go! The small individual pockets have assorted sockets and driver bits, as well as other accessories.
1 point
-
It definitely depends on the person and situation youre in. I "Full time" in my LE1 granted im not actually in it for most of the year as im out working on ships. But it is my main house so to speak. I have a small storage unit for seasonal equipment and anything i want to keep but dont need with me in the trailer near my parents house that i can drop/pickup from when i visit them, my F150 acts as my garage and all my time spent not at work im living in the trailer. when i am at work if its not somewhere that i can bring the trailer it gets dropped at whatever the nearest/cheapest storage lot is until i get off the ship. So far in my career its worked out to be 2 months at a time in the trailer then out working for 6 but pretty soon here that will change to much more time off. i think if it were more than just me it would almost certainly be too cramped for full time but ive had friends come with me for a few days at a time with little issue.1 point
-
Welcome to the forum! Ask lots of questions as there is a lot of collective knowledge and know how here. Make sure you take a deep dive into Oliver University for lots of helpful info and videos. Our Oliver Travel Trailer is everything we need and nothing we don’t! Patriot🇺🇸1 point
-
Welcome to the group! Lot’s of folks here who like to answer questions, so ask away. You should run over to Hohenwald and get a factory tour and meet all the great Oliver folks. The showroom is worth spending time in to check out the floor models. Mike1 point
-
Just out of warranty? That is a bummer?1 point
-
Krunch and I climbed Star Dune in August of 2009. The 750' climb was like walking in quick sand. It being August, we started climbing before daylight to beat the heat. Mossey1 point
-
Hi Steve, Yes, I've been busy with other things and haven't been on the forum for a while but I did get your PM. The box itself is just a PVC junction box from Home Depot. For the penetration through the box and into the attic, I used a marine bulkhead fitting from Amazon. https://www.amazon.com/gp/product/B0002DKAKA/ref=ppx_yo_dt_b_asin_title_o09_s00?ie=UTF8&psc=1 . For the antenna wire entrances, I used a cable entry system from Automation Direct (a great company that I use quite a lot) https://www.automationdirect.com/adc/shopping/catalog/wiring_solutions/cable_entry_systems/frames/bpa-s-10-2-0 You buy the frame and then the individual inserts separately in the size that you need for your wires. I see that the particular one I used is currently back ordered but they have other similar ones in stock. I used a lot of sealant / calk around the penetration and box and haven't had any issues with leaks. As a side note, I'm still really happy with the Pepwave system. It's faster than the DSL service I am able to get at my house. In fact it works so well, I have an ethernet cable run from the Oliver into the house to supplement the DSL when when we're home. (although I do have to watch to make sure we don't exceed the data limits of the cellular plans) I hope this helps and good luck with you installation!1 point


.thumb.jpg.e34bf01ef7f7d5e99ad31856d45afbeb.jpg)


-
Recent Achievements
-


")


")


")


