Leaderboard


Popular Content
Showing content with the highest reputation on 08/11/2024 in all areas
-
We echo @Mike and Carol's comments above. As reported in another thread, we replaced our 12-month old Monroe shocks after we replaced the axles & leaf springs last May. I was surprised that 3 of the 4 Monroes were toast after only 8k miles - but we were not in a position to acquire a set of Bulldogs (in Hohenwald at the time) so we replaced them with OEM Monroes. We've logged just north of 6k miles since May and we function-checked the OEMs at the 5k-mile point - all good. We also checked axle U-bolt nut torques at the same time - all within specs. I'm thinking with the max travel of the axle set being approximately 4-1/4" (2-1/8" up and 2-1/8" down) that the longer stroked Bulldog (4.69") option would be fine given the slightly higher lift with the Alcans. Also, I believe that any higher rated leaf spring will tend to dampen the OTT load at a lower frequency and shorter stroke when under tow as compared to the OEM 4-pack 1,750# springs. This may allow the shock absorbers to last longer, IMO. Regarding towing the Casablanca with upgraded running gear: Like Mike mentioned, no appreciable difference observed in towing during this last 6k+ miles - other than a general overall "solid" feel and less "porpoising" at slower speeds over rougher roads. We reduced the electrical trailer brake gain from 6.0 down to 4.5 due largely to the 12" drums' greater braking action. The OTT always pulled like a champ, anyway - its, quantitatively, a more "confident" towing experience and a "peace of mind" in the overall running gear with the upgrade. Bulldogs are definitely on our radar screen for a swap-out probably when the 10k-mile point is reached on the existing Monroes, FYI. Cheers, All!5 points
-
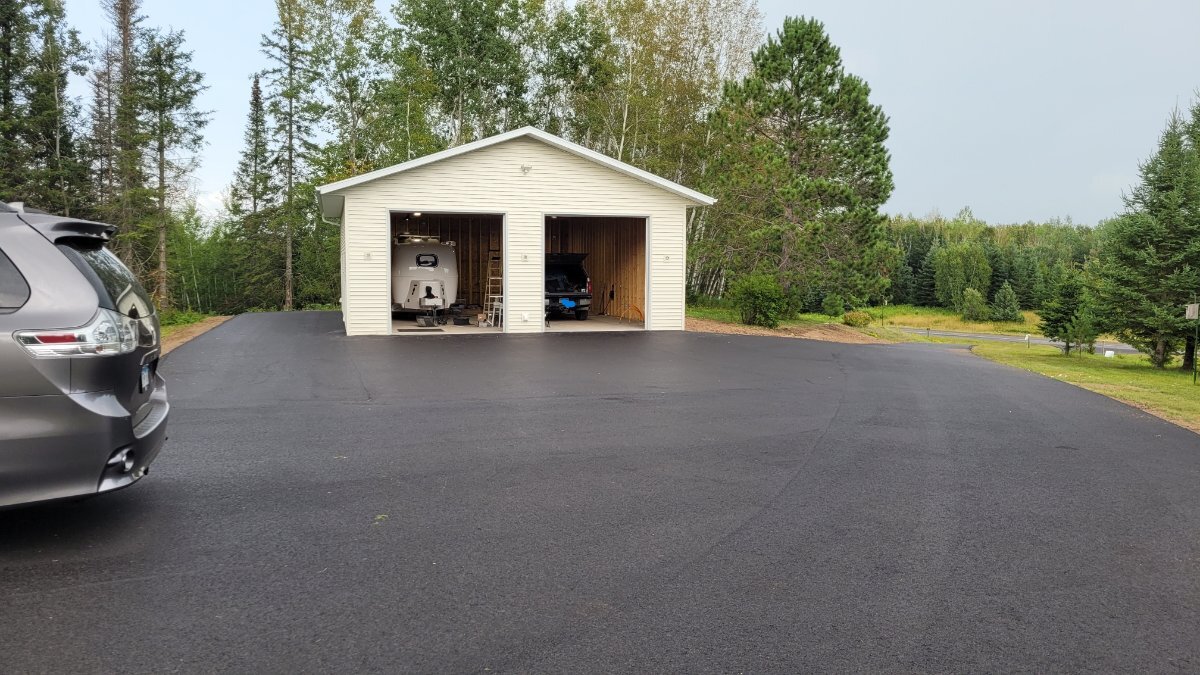
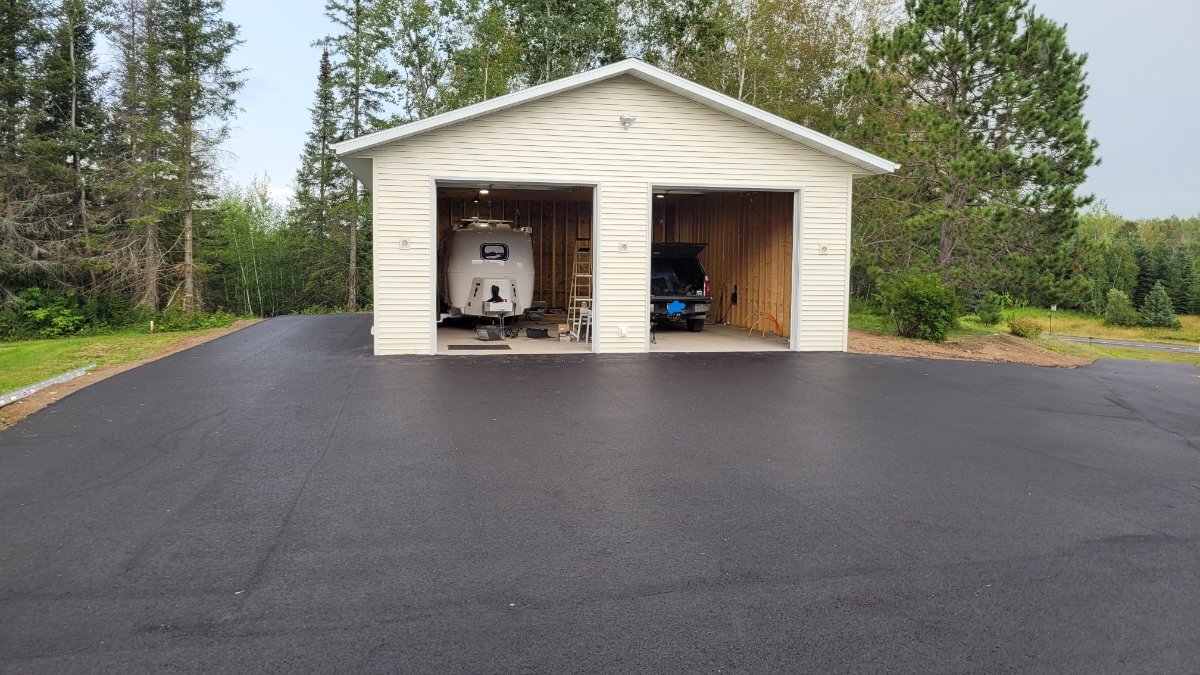
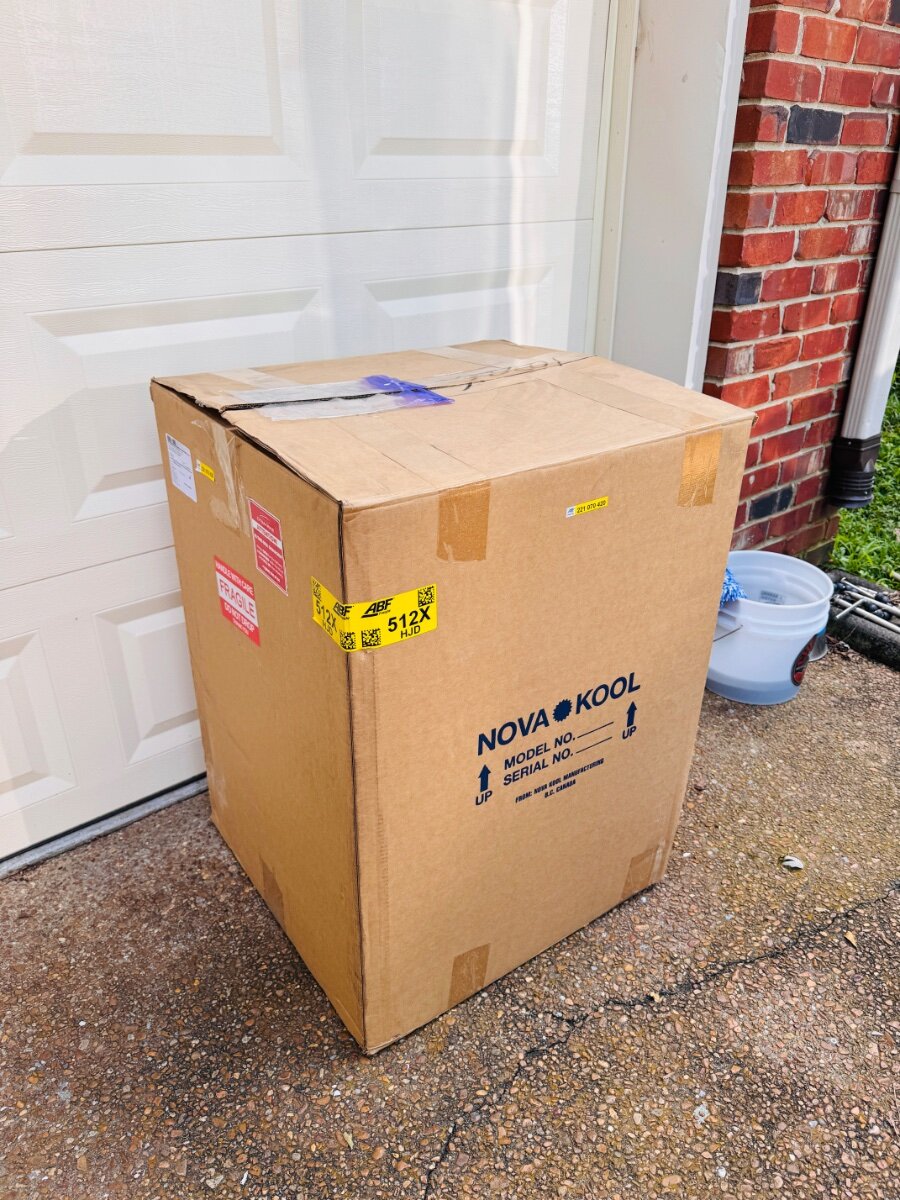
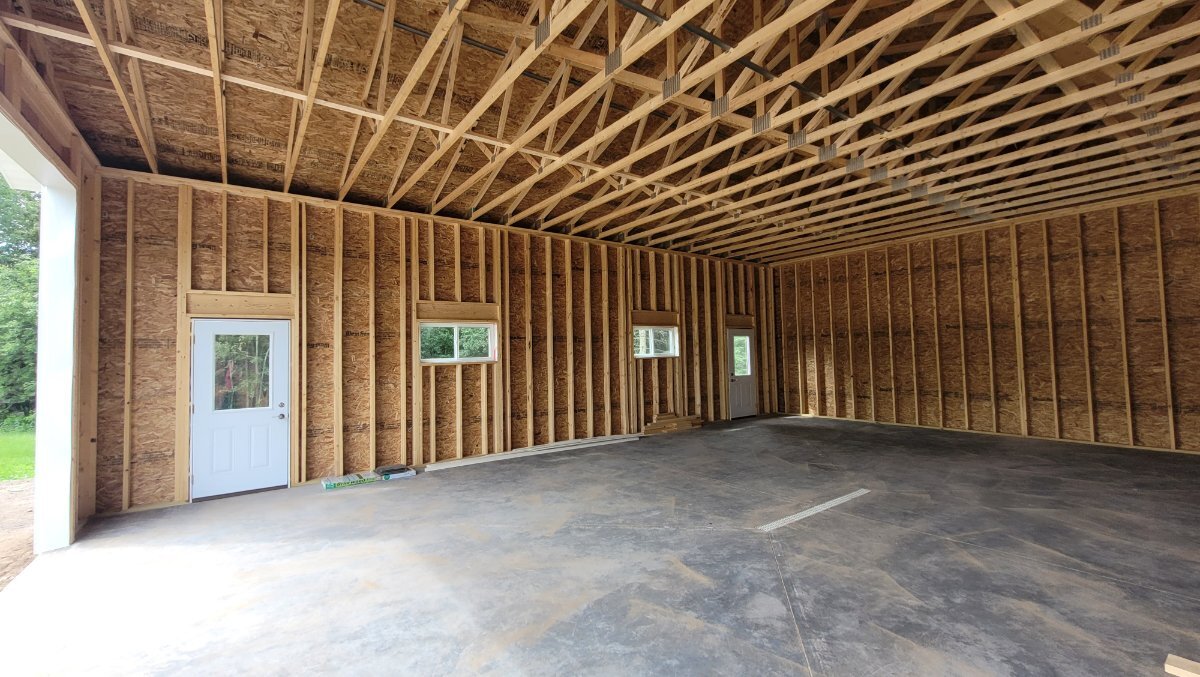
Well, passed rough electrical on the first go round so that's good. Had some coordinating to do as the driveway guys got behind, the service line went under the driveway, and the only electrical inspector for our region was on vacation in Mexico until last week. Anyhow, liking how it's turning out so far. The lights have worked out great, the doors are awesome, plenty of clearance backing the Ollie in. Paving and gutters got done this past week. Now, onto the insulation, finishing, and heating system. The fun never ends!
 3 points
 -
Personally, money not being a factor, the bigger the better (BIB). This being the case, it would be a 1-ton maxi crew cab 4x4 w/8-ft bed for us. Most likely a F350 Tremor - my buddy has one and it's impressive. Very versatile for our lifestyle. If the beast is solely used for a TV, we'd double the size of our Casablanca "hangar" for the massive truck. We owned a RAM 3500 for many years and it lived outside - not the best situation. Our RAM was my EDD (every day driver) - one needs to "plan ahead" when maneuvering through the city with that long-ass rig, for sure. But for hauling loads of yard waste, gravel, or generally heavy loads it was a wonderful rig to own. Maintenance wise, it was very affordable - OTOH, fuel costs were a downside especially after 2020 when diesel jumped 2 - 3x. The pros and cons list is a long one - but with money not an issue.... BIB, seriously.3 points
-
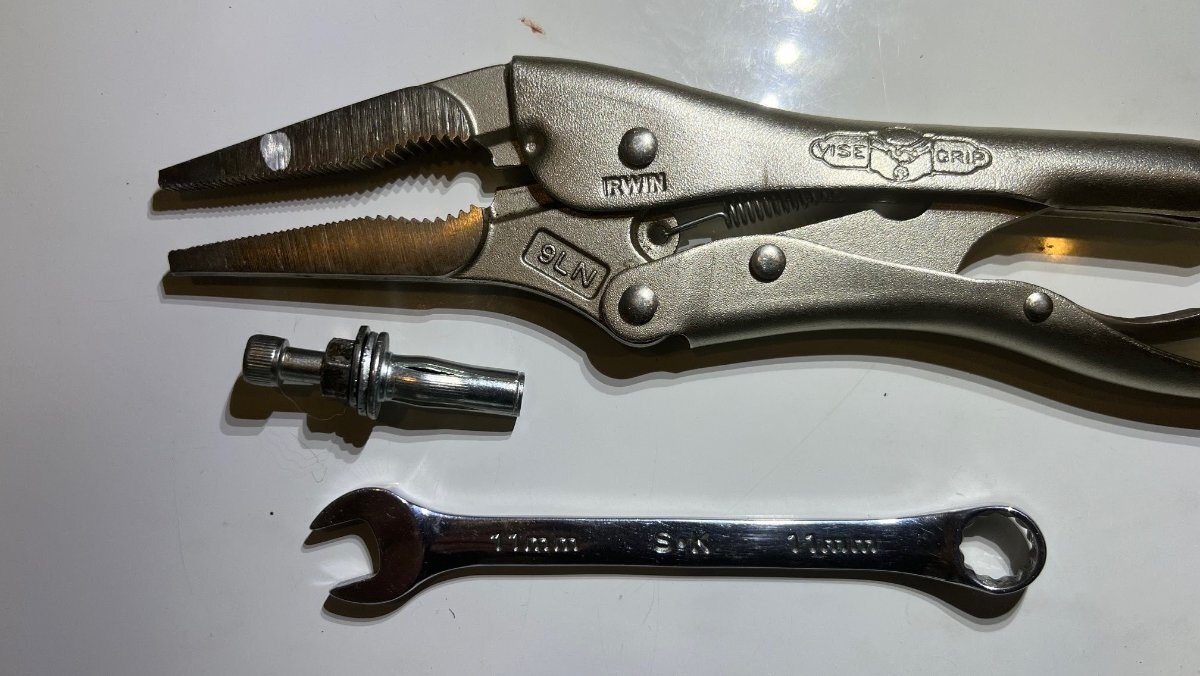
Time to strap down the MP2. I used ¼”x20 Plus-Nuts that I learned of on a thread that @Frank C wrote on replacing the bathroom vanity cover. There is a heavy-duty interior lip that allows for this without exposing screws to the interior. I knew of this HD lip from last year, when the curbside I mounted brackets for our motorized ball valves for the plumbing system. Not easy to get these started without the special tool but I was not going to spend that money for two bolts! A long-bolt-nut concoction and needle-nose Vise-Grip did the trick. Doubled some rubber tape for a tight fit. I got sloppy on the rear-side strap allowing the drill bit to catch and it pulled the strap in a spiral. Had to straighten it out the best I could because replacing it would be a pain. I’ll add to this post soon to explain programming, both configuring the MP2 and updating the Blue Sky SC for LiFePO4 batteries and more usage data. Ran our old LOUD-dog Dometic Penguin II for 4 hours today while strapping down and finishing up. The inverter was supplying ~1600W and the SC about 200 (cloudy day) for 1800W total. The batteries were close to full and read 37% when done, but 100% SOC is not yet set so these may be off. Finally, thanks to Mike @rideadeuce for leading the way on Epoch batteries and the MP2 installation.
3 points
-
Yes , you need a truck, a real truck. Not a SUV. The bigger the truck, the better. For most people, a 3/4 ton (2500) is enough. Personally, I’d want the diesel. You said money was not an issue. If you need/want more cargo capacity, get a 1 ton. Then, you can take almost anything with you and it’s not a whole lot of money difference between the 3/4 ton and the 1 ton any way.3 points
-
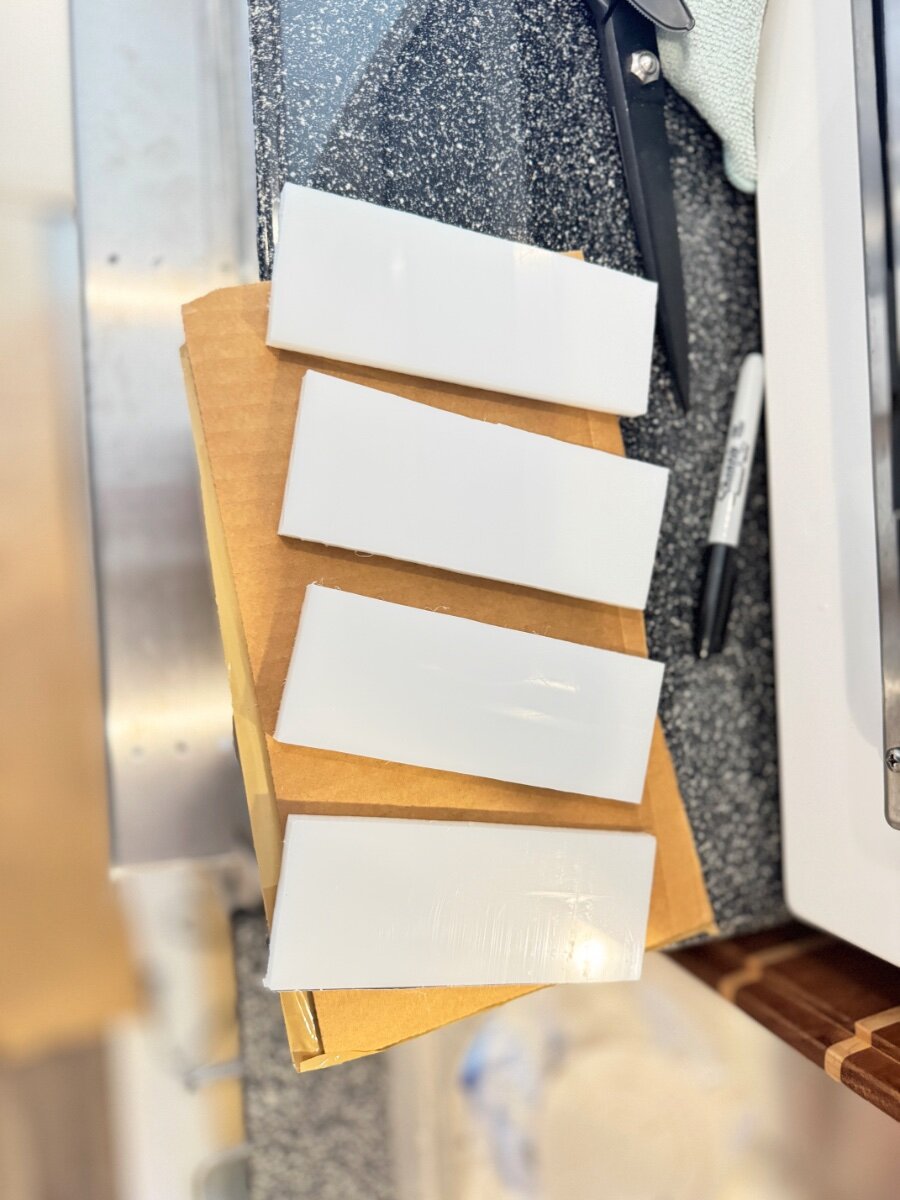
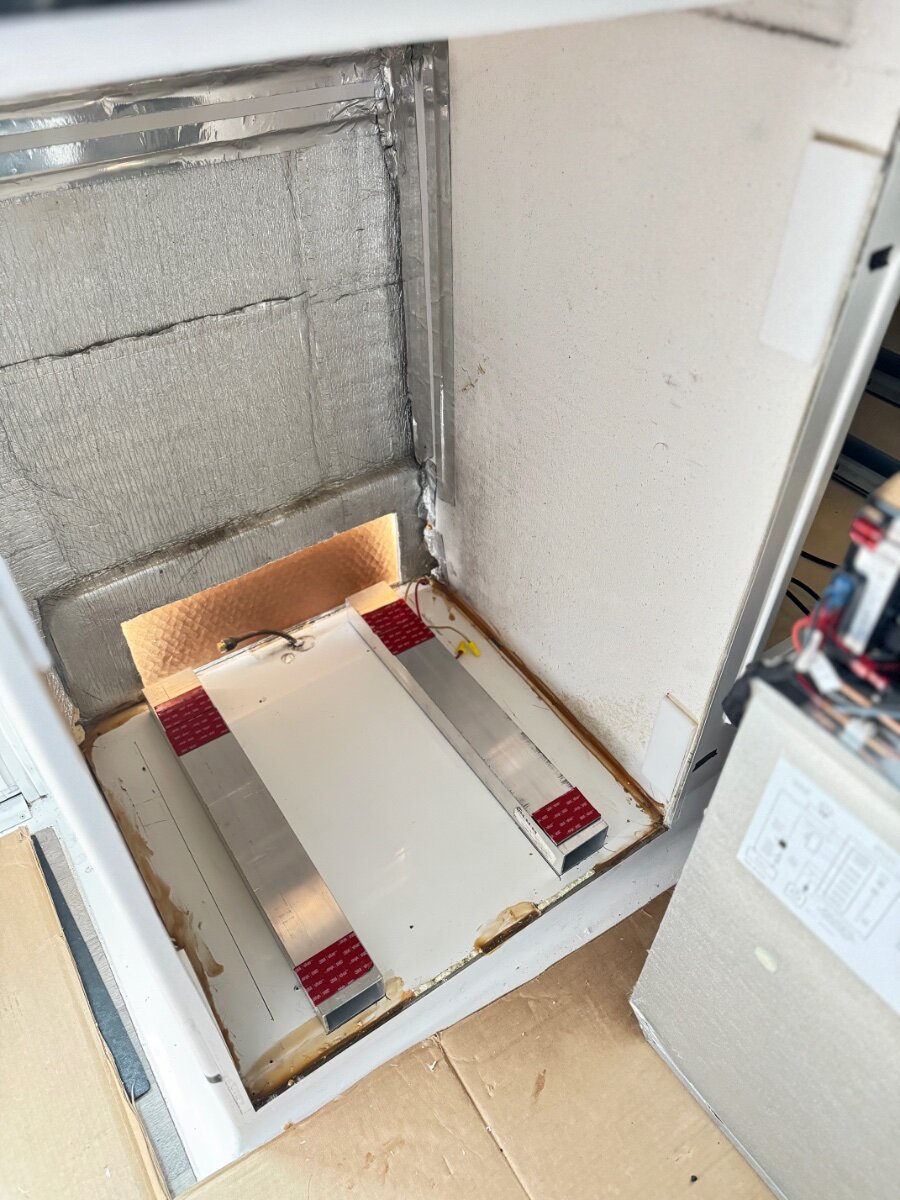
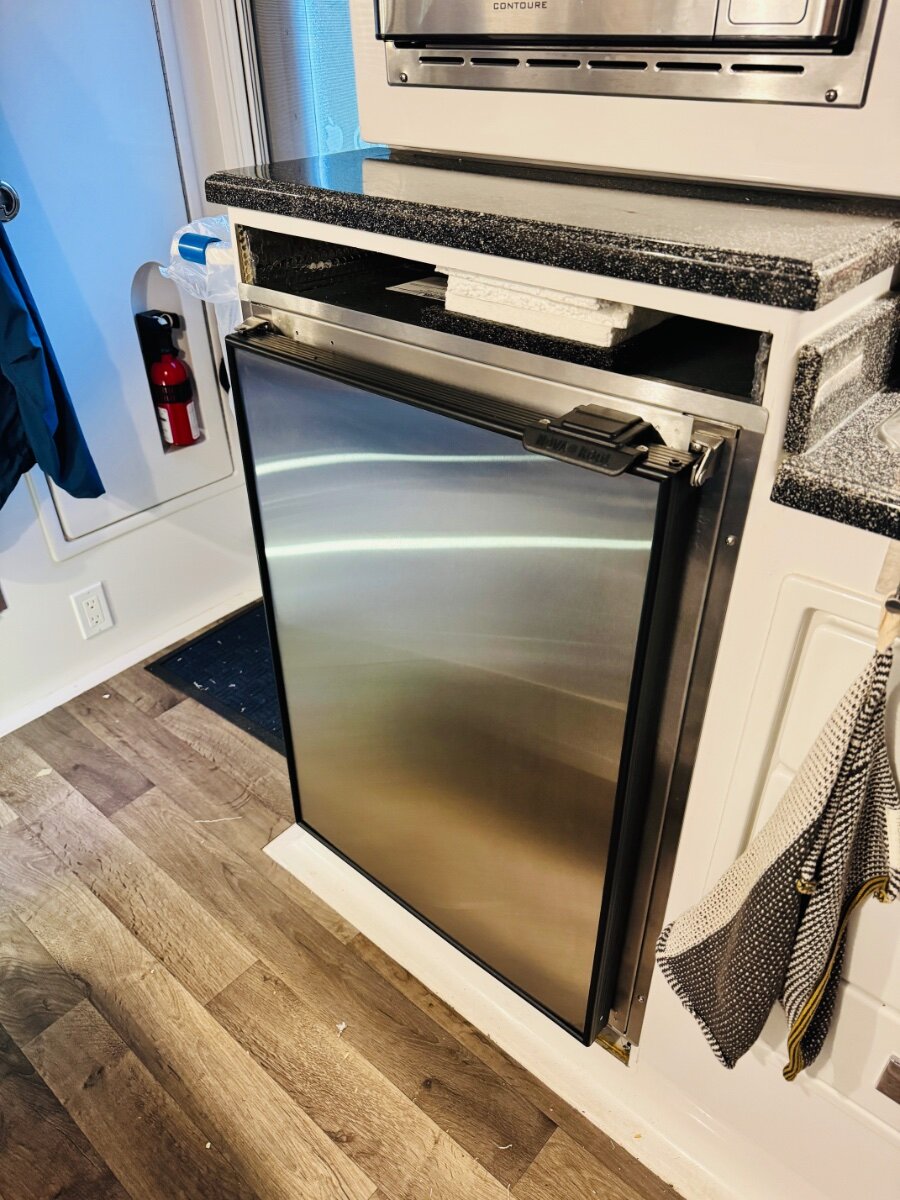
Thanks to everyone before me who did this install and shared it on the forum. Especially, a big thanks to @mountainoliver, @Geronimo John for all the info and pics. The install was pretty straight forward but not as refined as some. So happy to have gotten rid of the absorption fridge. Nothing to add except some pictures. I did end up copying a lot of things. Ended up using a little bit of VHB tape on bottom supports, 3/8 in HDPE for side brackets and used some better plastic to plastic epoxy. The other stuff I used did end up failing @mossemi (you sir were correct!) and ended up screwing (6) 1 1/4 in. SS screws through the backside for stabilization of the MPII. Glad I had the aluminum mount for backup. This time I used https://a.co/d/5IrB3w2 First part of install was quick and I forgot to take pics. Destroyed the Dometic fridge getting it out!. I will be done once I caulk and source some SS vents to cover the top and bottom holes.
2 points
-
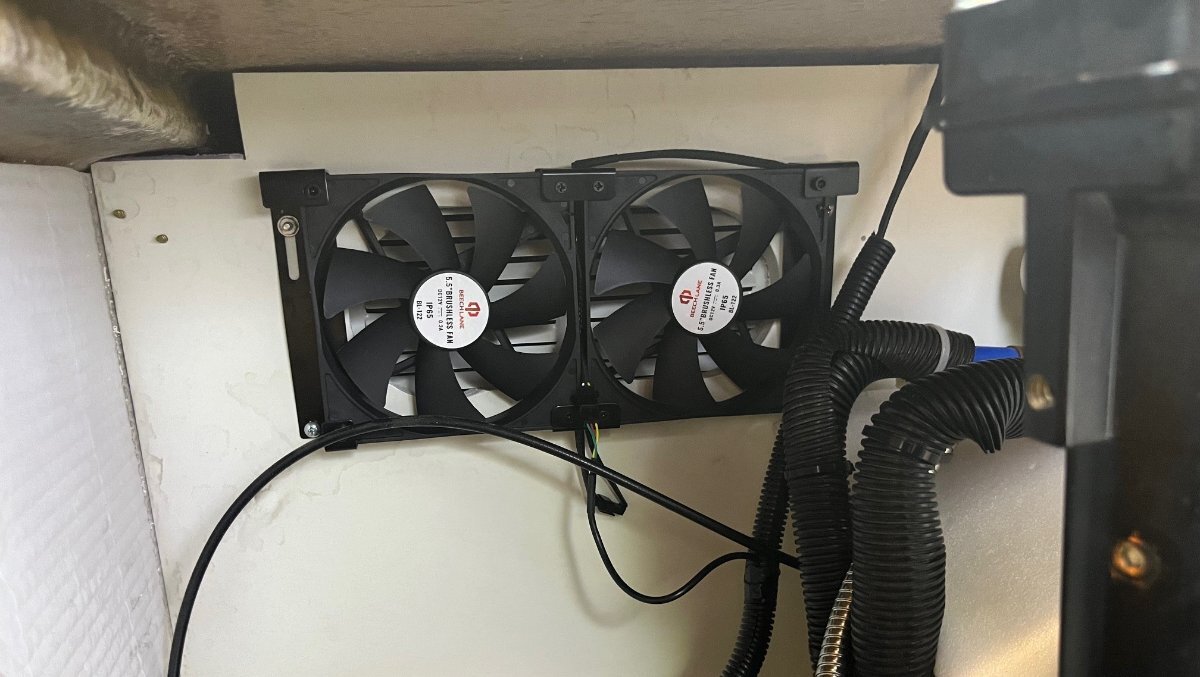
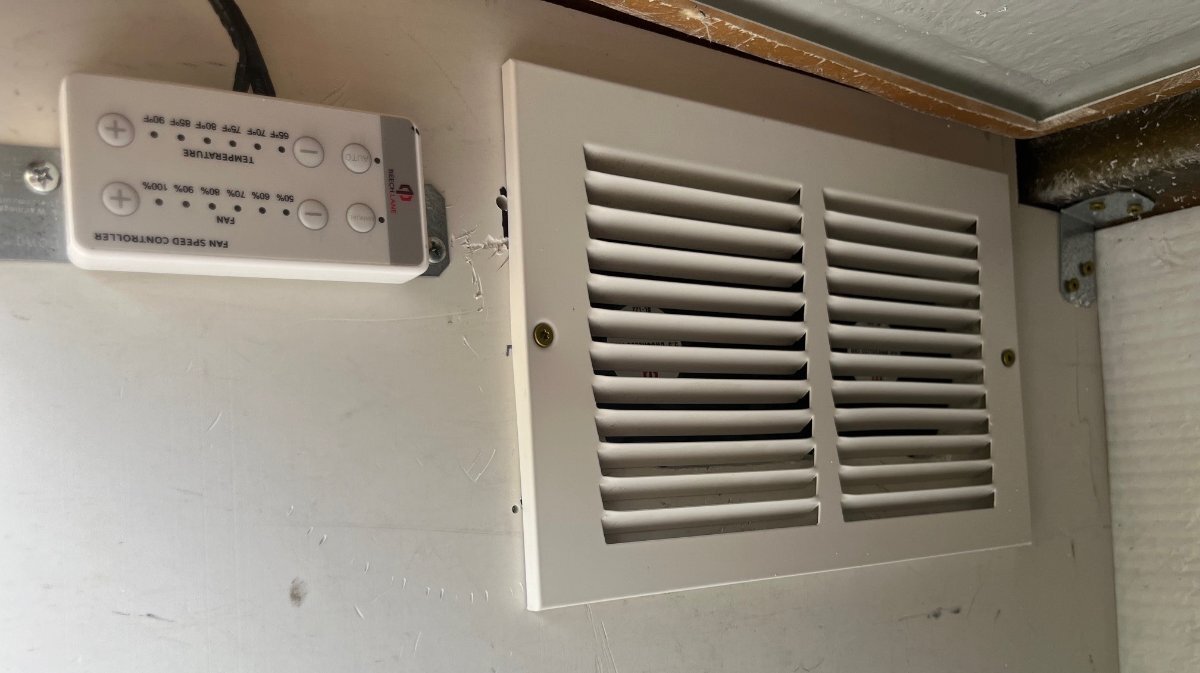
I have not installed the Beach Lane Twin fans yet, but I did just verify they work and noted how much they use per manual setting, at least indoors with ambient temps around 75 degrees. There are impressively quiet, even at 100%. And they move some serious air. Make a nice decorative wooden enclosure and they'd be better than any desktop fan you could buy. Would keep you cool at night for sure! Hmmmm! Speed - Watts Used 50% - 0.6w 60% - 1.2w 70% - 2.05w 80% - 3.2w 90% - 4.6w 100% - 6.6w
2 points
-
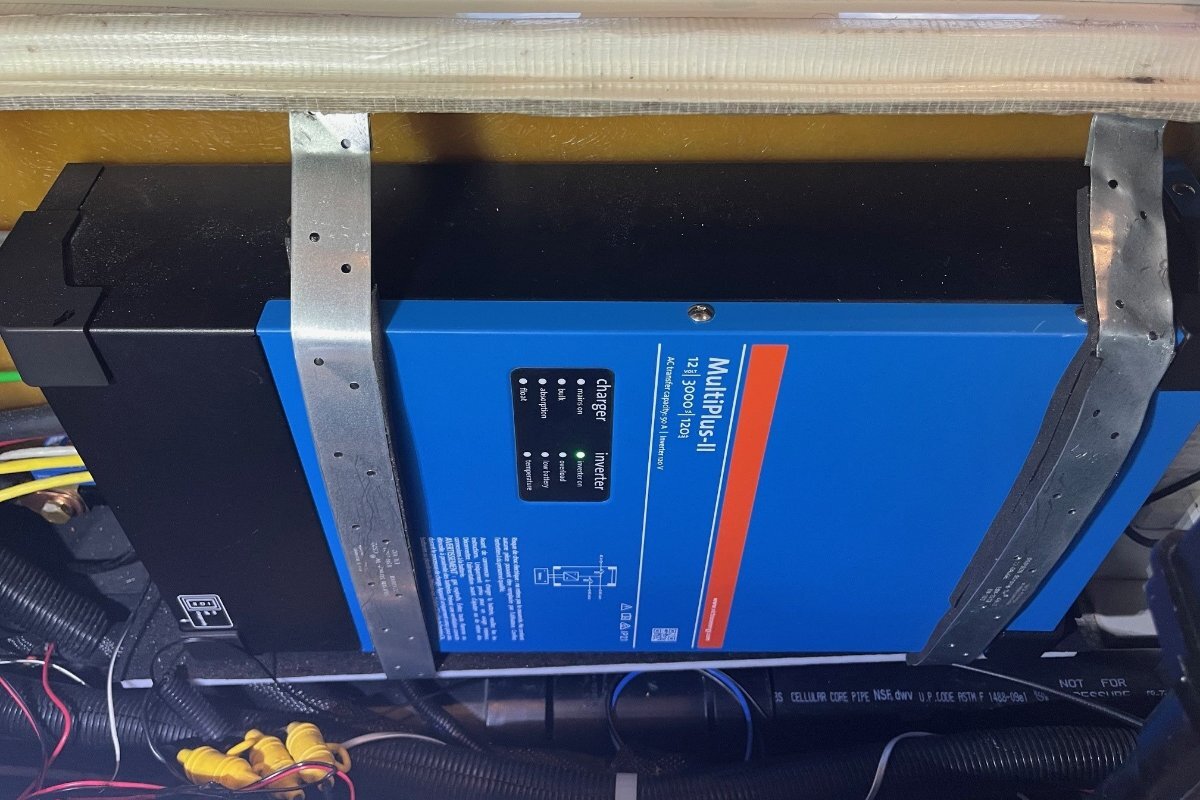
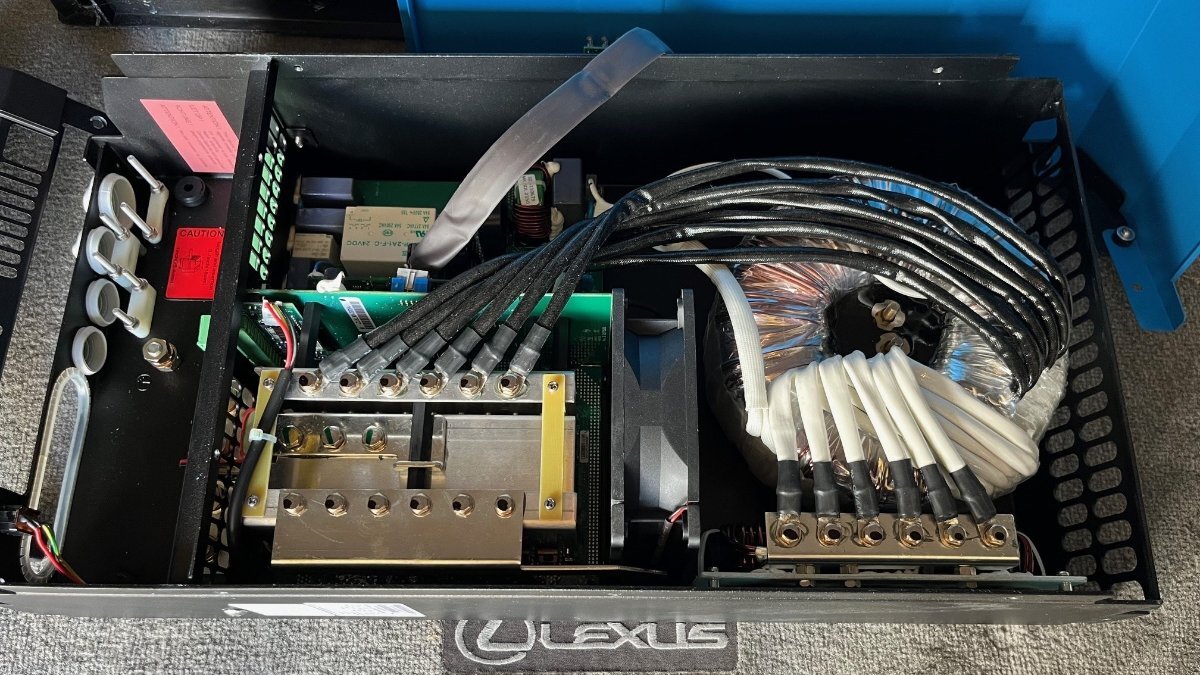
This inverter is a beast! When I first field tested it, I disconnected shore power and ran the A/C off of inverter only. It was reading over 3500W and I didn't understand. This is not a 3KW inverter, but a 3KVA rated at 2400W continuous. How was it able to run at 3500W+ for 1-2 minutes until I realized it and turned off the A/C? When I did the inverter was still pulling over 1500W. I thought that nothing else was on, so I started tripping the 120VAC breakers. The last one did it and I found out we had the HWH AC switch on! Whoa, won't do that again. Then it ran A/C for the next 4 hours. I turned it down to 72 degrees and the compressor was running about 2.5 of the four hours. This old Dometic PII takes +/- 1800W or 150A DC inverted. IT dropped down for 37% SOC. Given 63% of 600AH used is 378AH and if you divide that by 150A for the A/C it comes to 2 1/2 hours running the PII full on compressor running. As @rideadeuce has shown the Atmos A/C takes half this amperage, so with a future A/C upgrade, we should be able to run all the A/C we need for the hot day now and then. Here's the internals of the MP2 Beast!
2 points
-
@MAX Burner Excellent taste! 🤩🇺🇸 Ha! I can say we are very happy with our 6.7 liter 1 ton Diesel Tremor. Long haul comfort, safety, up higher cab view, fuel mileage when towing, zero issues with cargo capacity or tongue weight. The diesel engine brake did a fine job all through out our trip to Colorado descending through many of the Rocky Mountain steep passes. No need to heat up our truck or trailer brakes as the diesel engine brake worked flawlessly. On a few of the passes we traveled on they had local law enforcement checking brake temperatures with infrared heat sensor tools on vehicles descending down the mountain. We were never brake check or flagged to pull over with our rig. Several cars and trucks were made to pull over until their brakes cooled. Most 1/2 ton trucks will tow and Oliver, I fall into the club of how well the truck with stop a fully loaded ready to camp Oliver. No white knuckles towing or slowing with our beast. It’s the right tool for the job in my experience. @George Alexa yes you need a truck imho and are wise to do your due diligence. Whether it is diesel or gas that is all according to your budget and what works for you with regard to payload and camping style. We started out towing our Oliver with a half ton truck and quickly learned that we could be pushing the legal limits with our payload capacity. Naturally this was a concern due to the legal implications if something were to happen operating an overloaded tow vehicle. We sold our 1/2 ton and bumped up to a 1 ton and never looked back. We like keeping our vehicles garaged and when we built our home I made sure it would accommodate a larger heavy duty truck like our Super Duty. Best of luck in your decision on a tow vehicle! Drive em all and pick the one that will serve you best. Welcome to the forum. Patriot🇺🇸
2 points
-
We installed Bulldogs this year.2 points
-
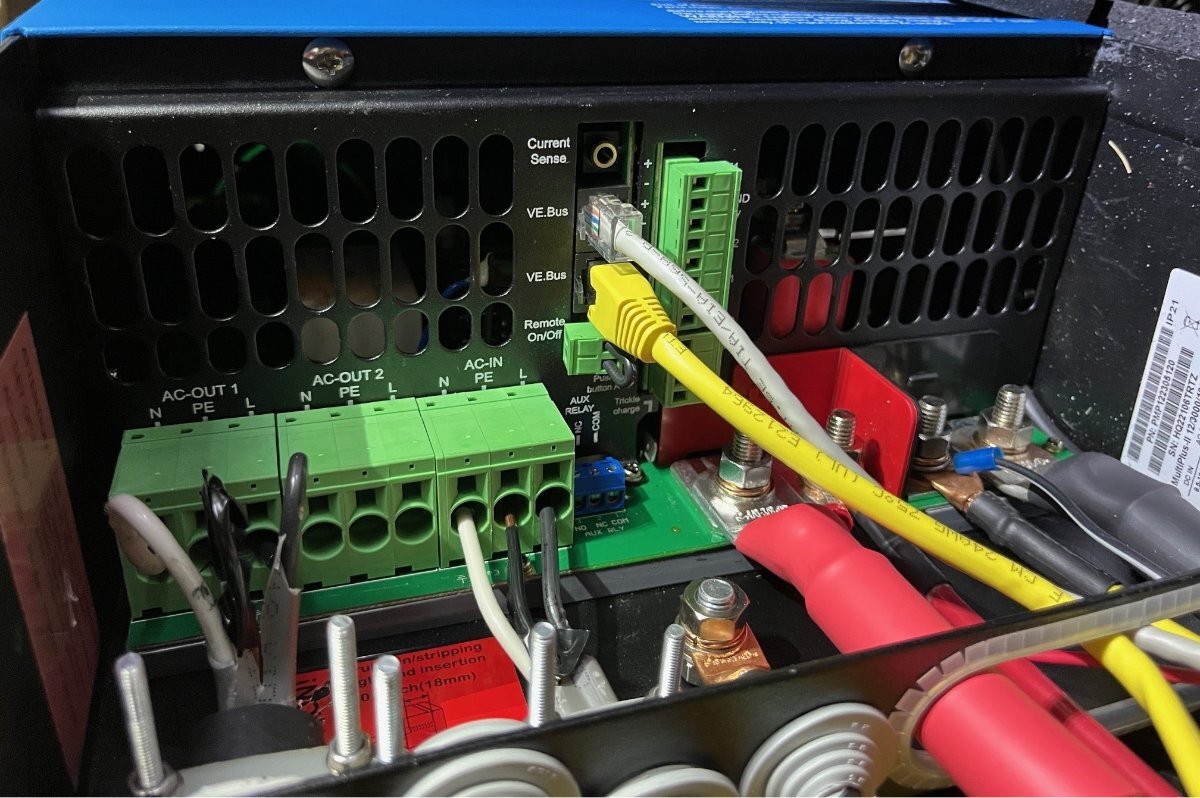
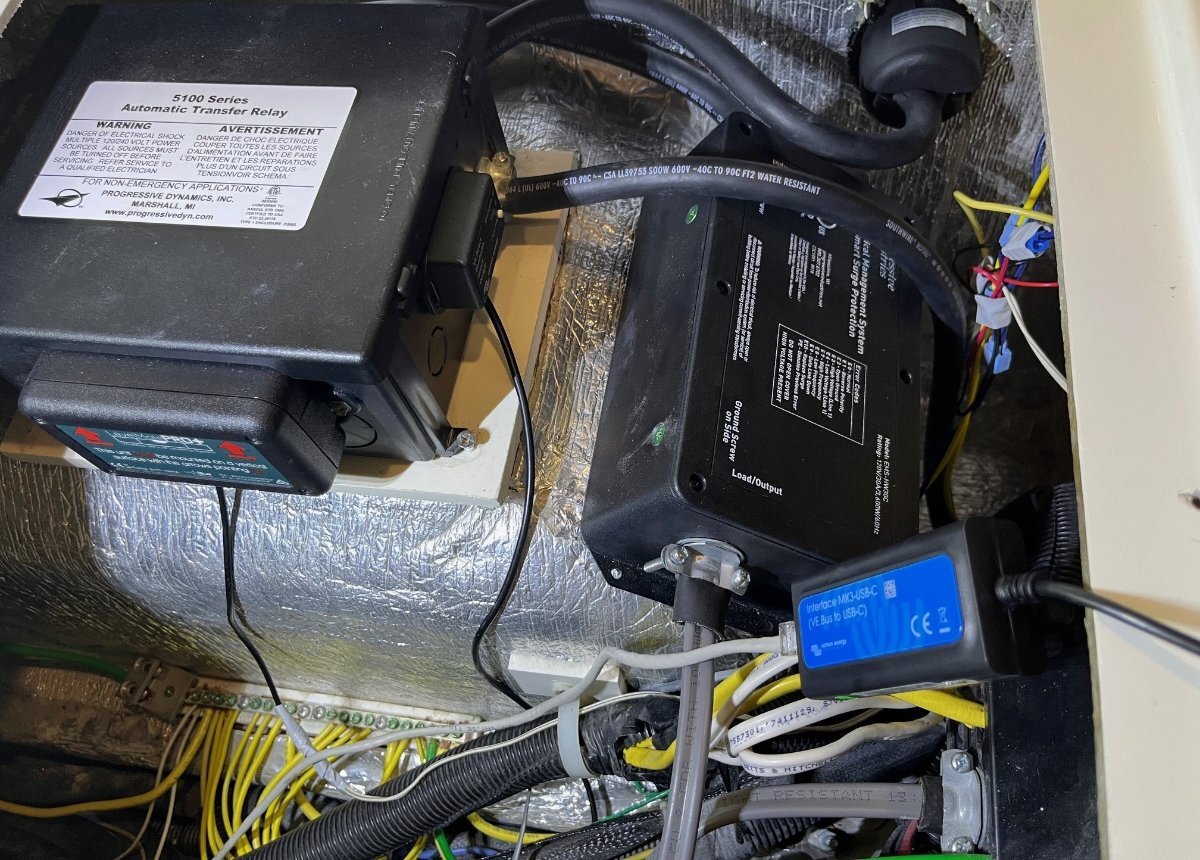
I wired everything prior to strapping the MP2 in place. The dual DC terminals allowed for the 4/0 battery cables and other +/- connections to the B+ and B- buses. These terminals made it so no additional +/- buses were required. Notice the SmartShunt (battery monitor) is wired directly to the ground at the MP2 vs. at the batteries, yet it is still first inline as it must be. I had 10-2 AWG direct burial cable from when I added the 30A RV outlet to our shed. I wired two runs, from the EMS and back to the 30A panel main breaker. One picture shows the old short round cable that was removed. The next picture under the rear dinette seat shows the new 120VAC wiring the MK3-USB-C interface needed to configure the MP2 inverter/charger. While I was in there, I disconnected the PD4000 controller and used that breaker to separate the microwave (now our Emeril Air Fryer) from the other 110V outlets. I will keep it there for if/when any major changes are met. Normal operation (OFF, ON, Inverter only, Charger only) and to set incoming amperage (15, 20, 30, or 50 (N/A)) can be set via the VictronConnect App via Bluetooth from VE.Bus interface. Both devices connect using any ethernet cable (have a box full)! No panels or screens must be installed cutting into walls, unless wanted. I must find a decorative patch for the Xantrex on/off switch I removed.
2 points
-
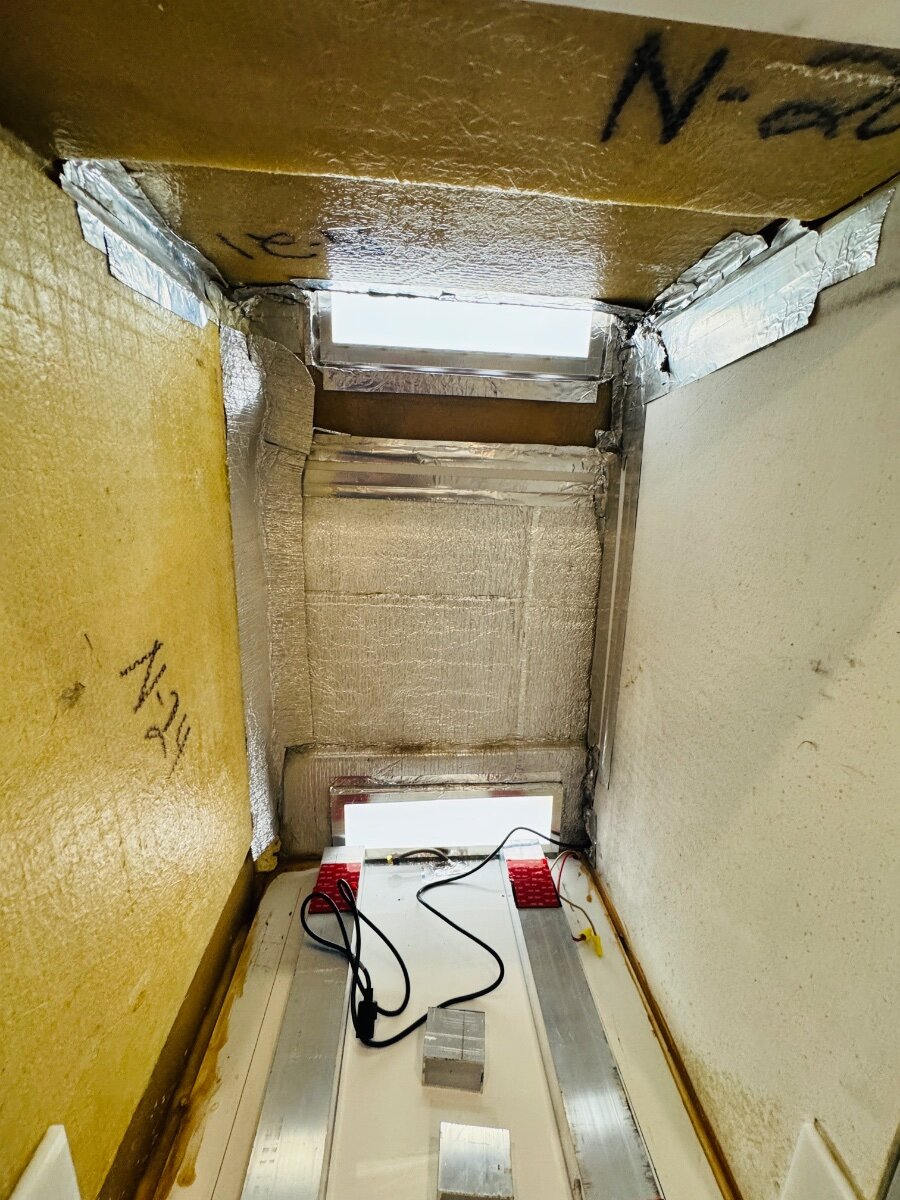
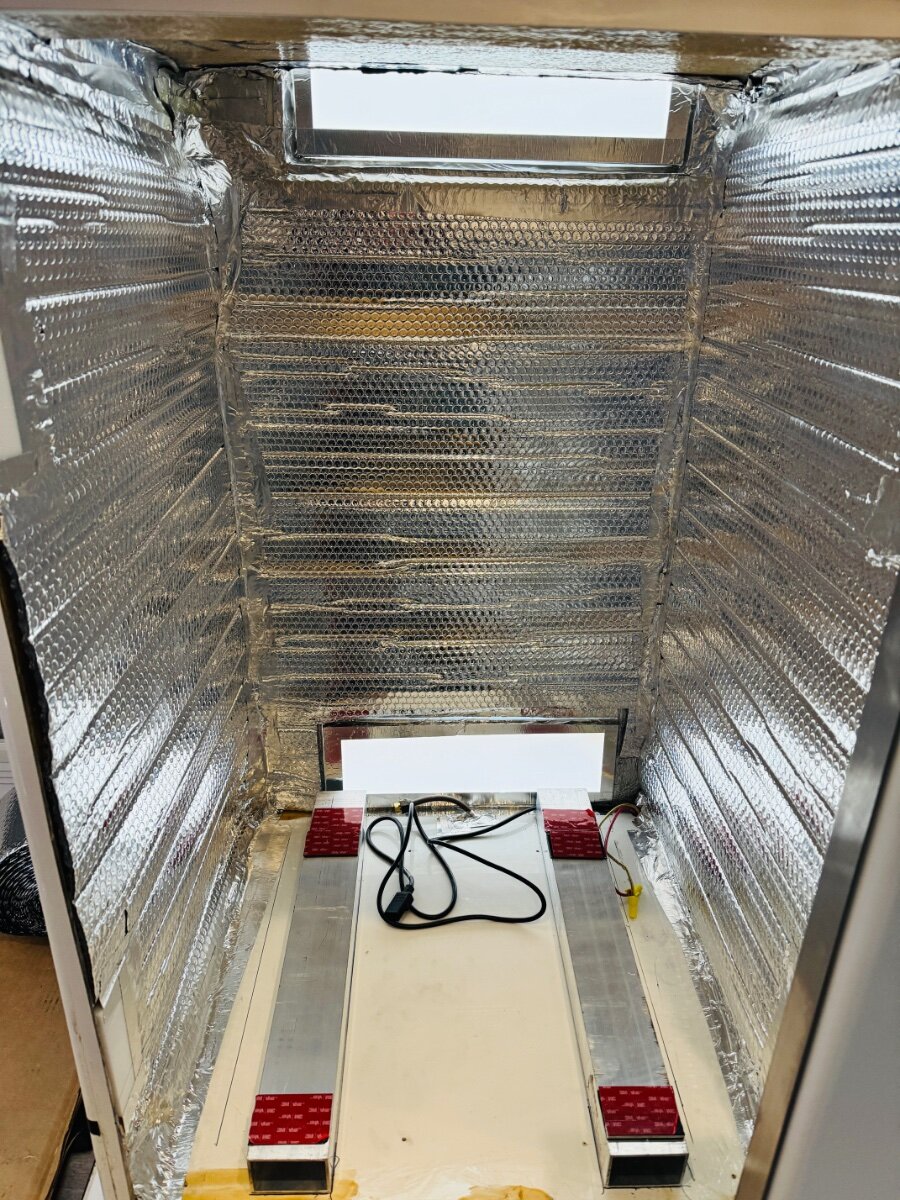
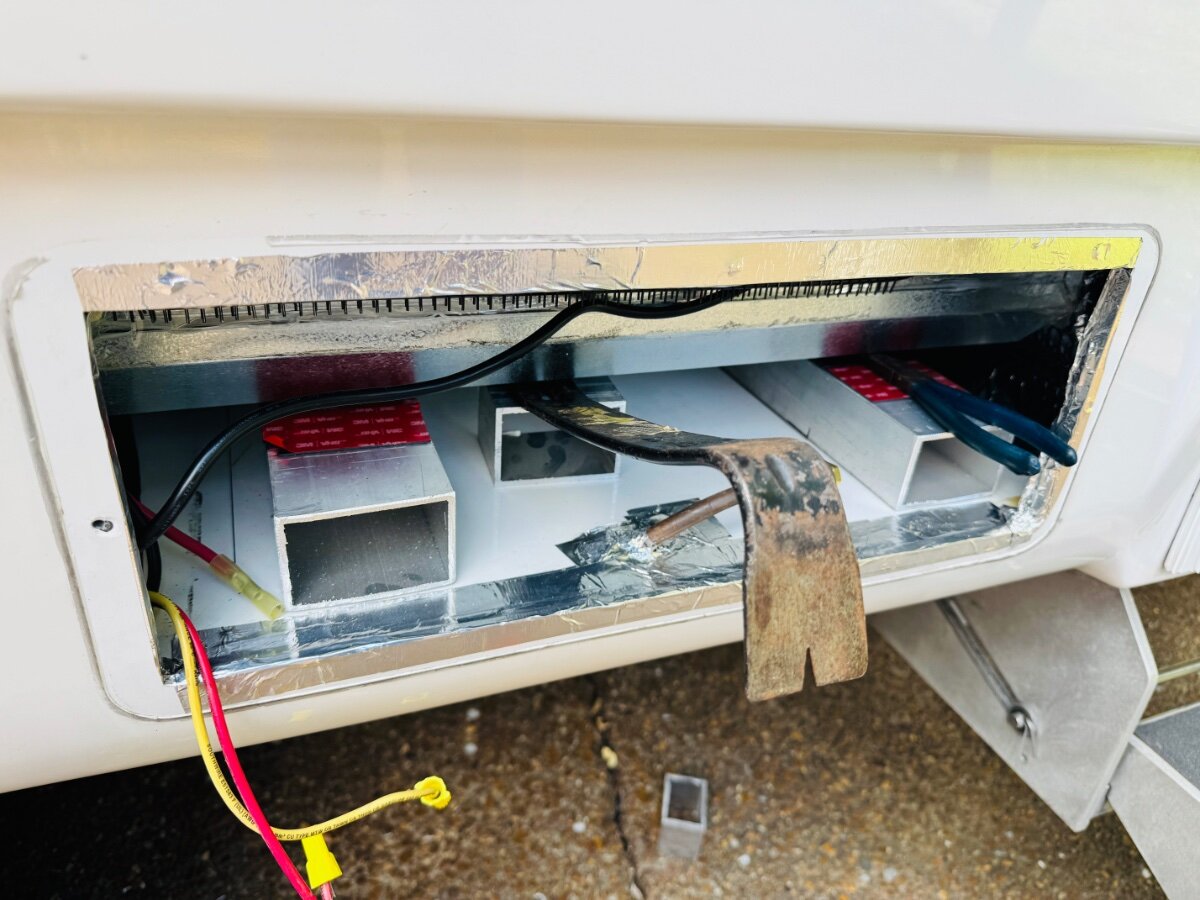
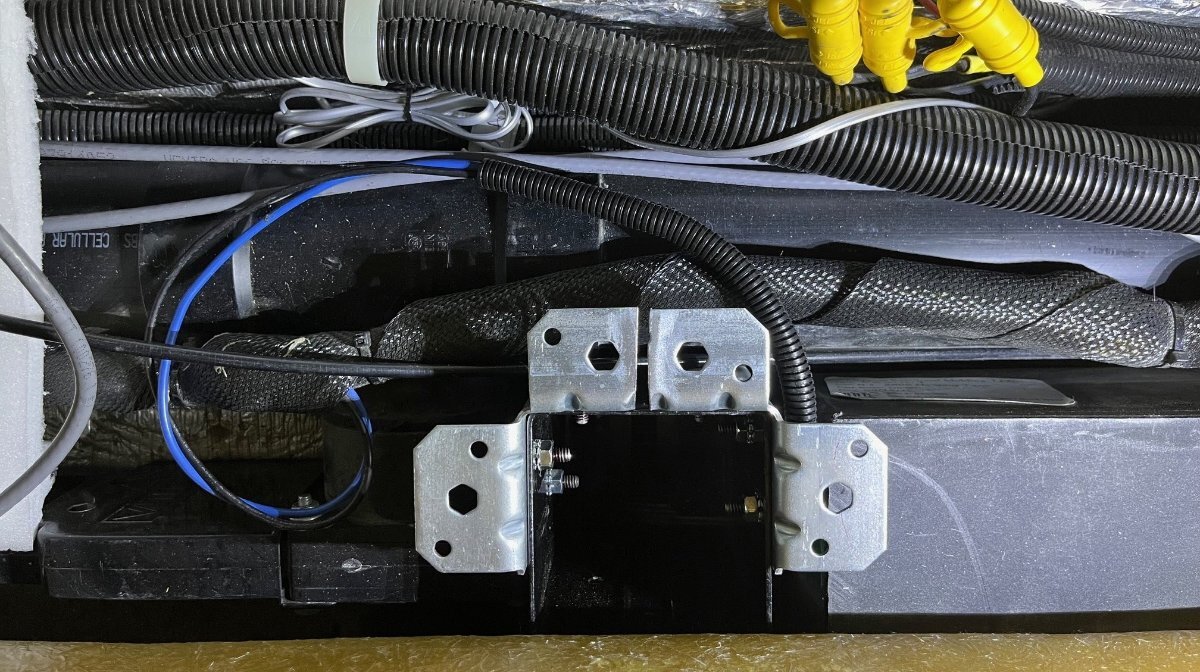
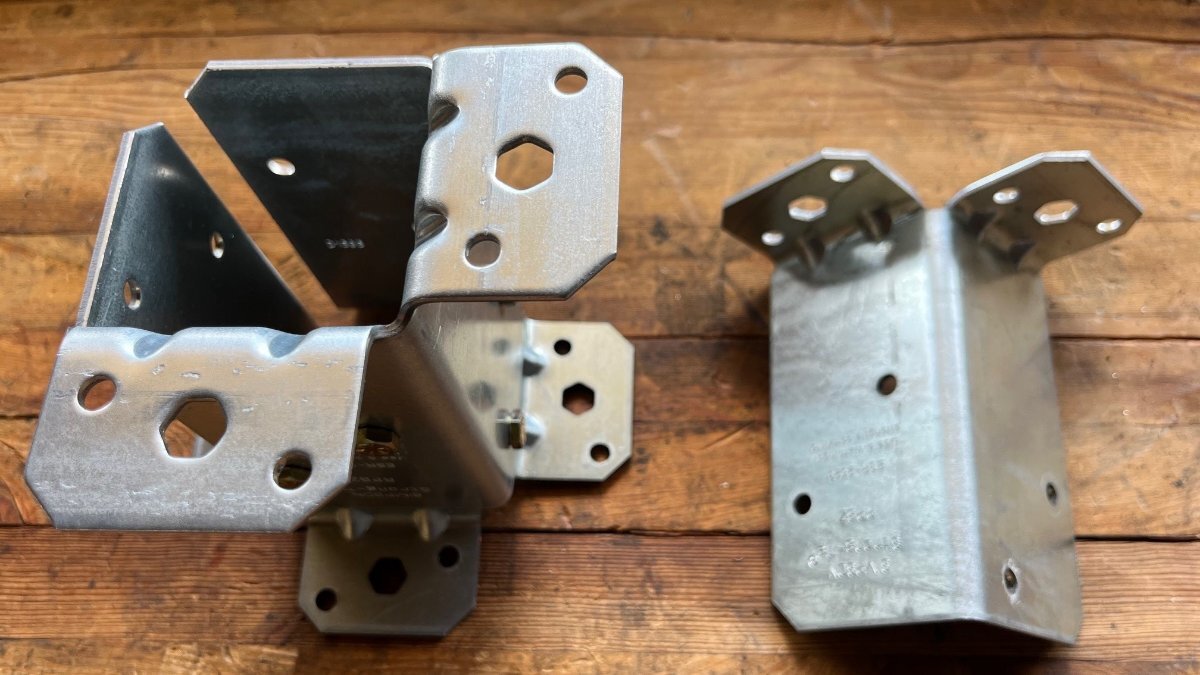
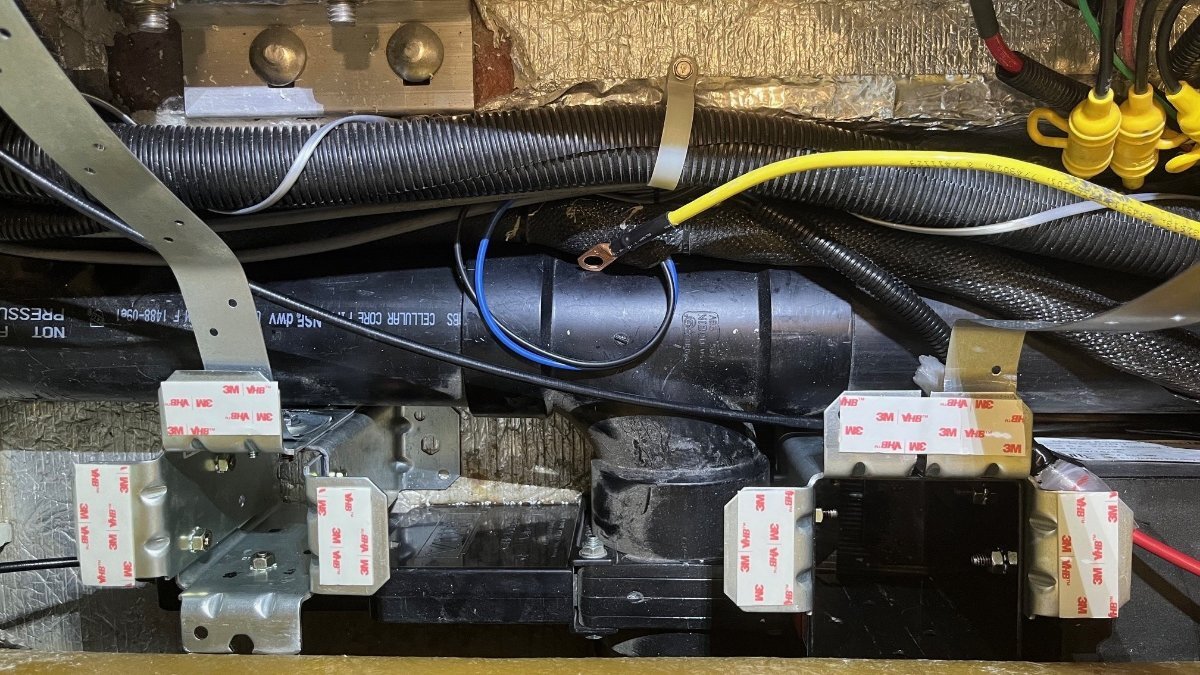
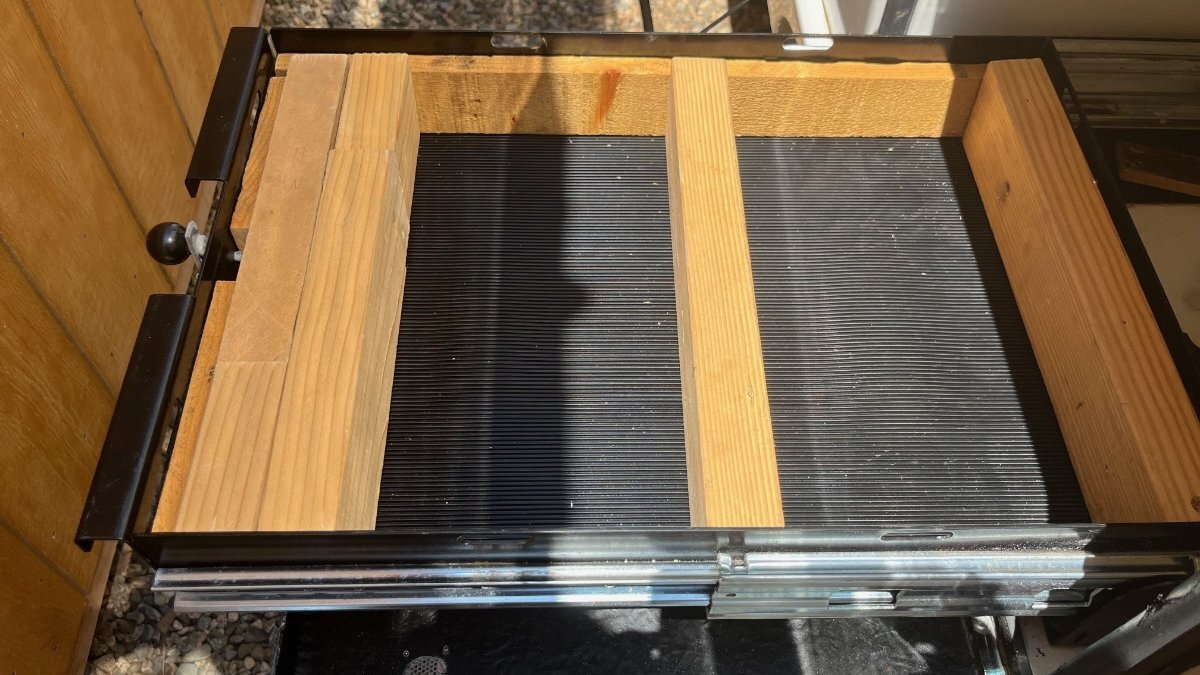
Next task was to build a platform for the MP2 to lay on it’s side and strapped to the wall. I purchased 4x4 post mounts and other Simpsom ties until it all came together. Notice the open area in the center of the first picture, rubber mat floor 4x4" in size. The area further back where the second mount would be would not take a 4x4 mount, closer to 3” width. The 4x4 in front just fit with one base tab cut off and the rear mount had to be inserted in the two parts pictured and bolted together in position. The rear mount as assembled was about 3/8” lower, so I added another layer of 3/8” HDPE board and the main board is 6x24” which you can see leveled in the last picture. I bolted strapping material to both bases prior to taping the shelf in place. Neither mount is bolted down since I did not want to penetrate the outer hull. Everything fits snuggly and the 42 LB weight of the MP2 (later) strapped above should hold it nicely.
2 points
-
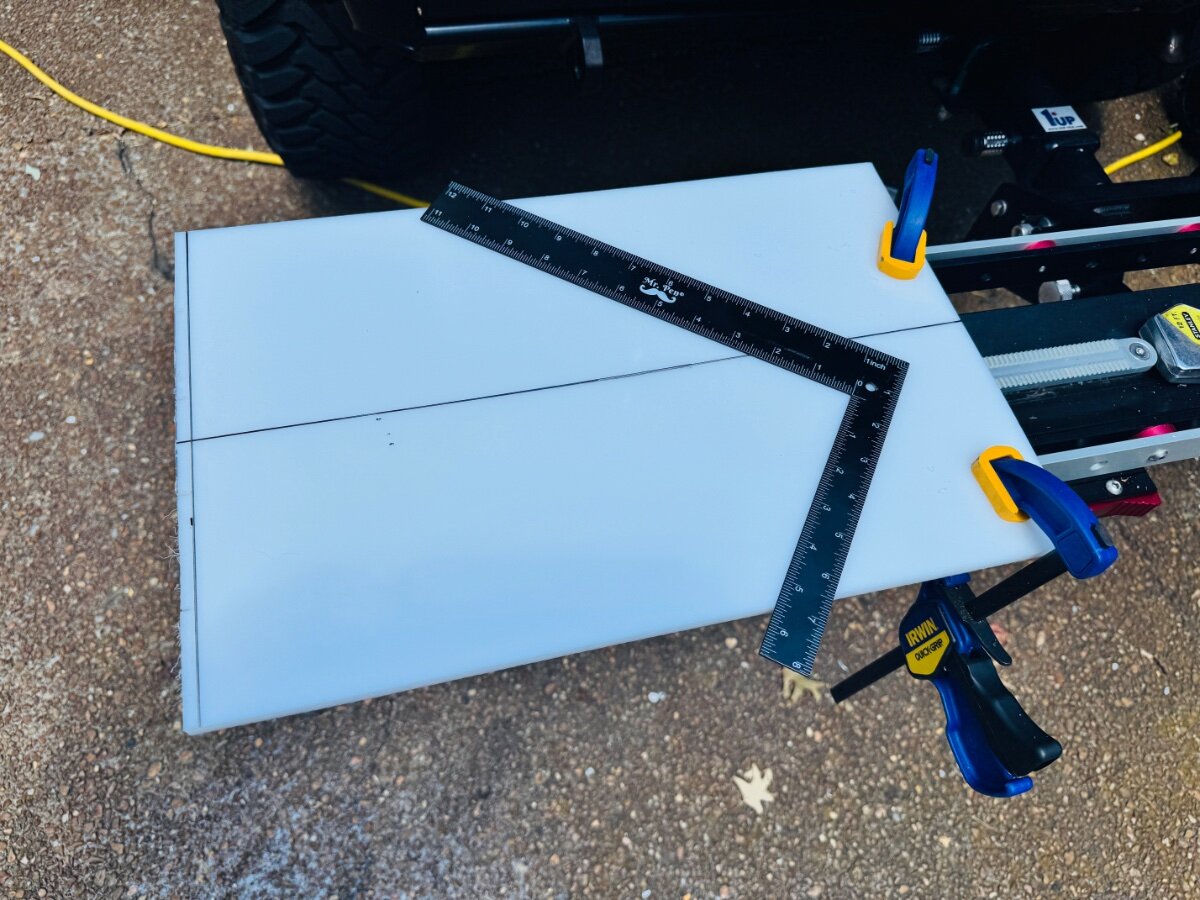
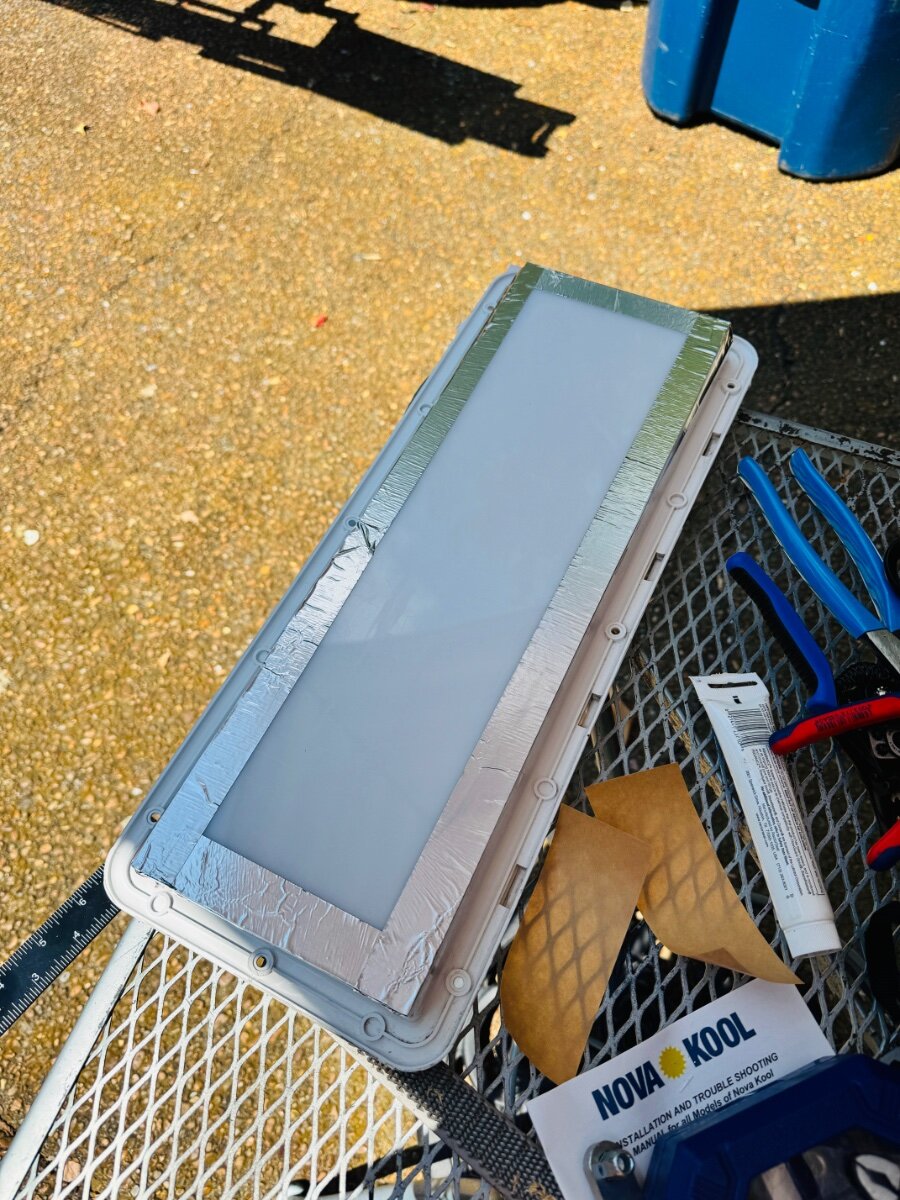
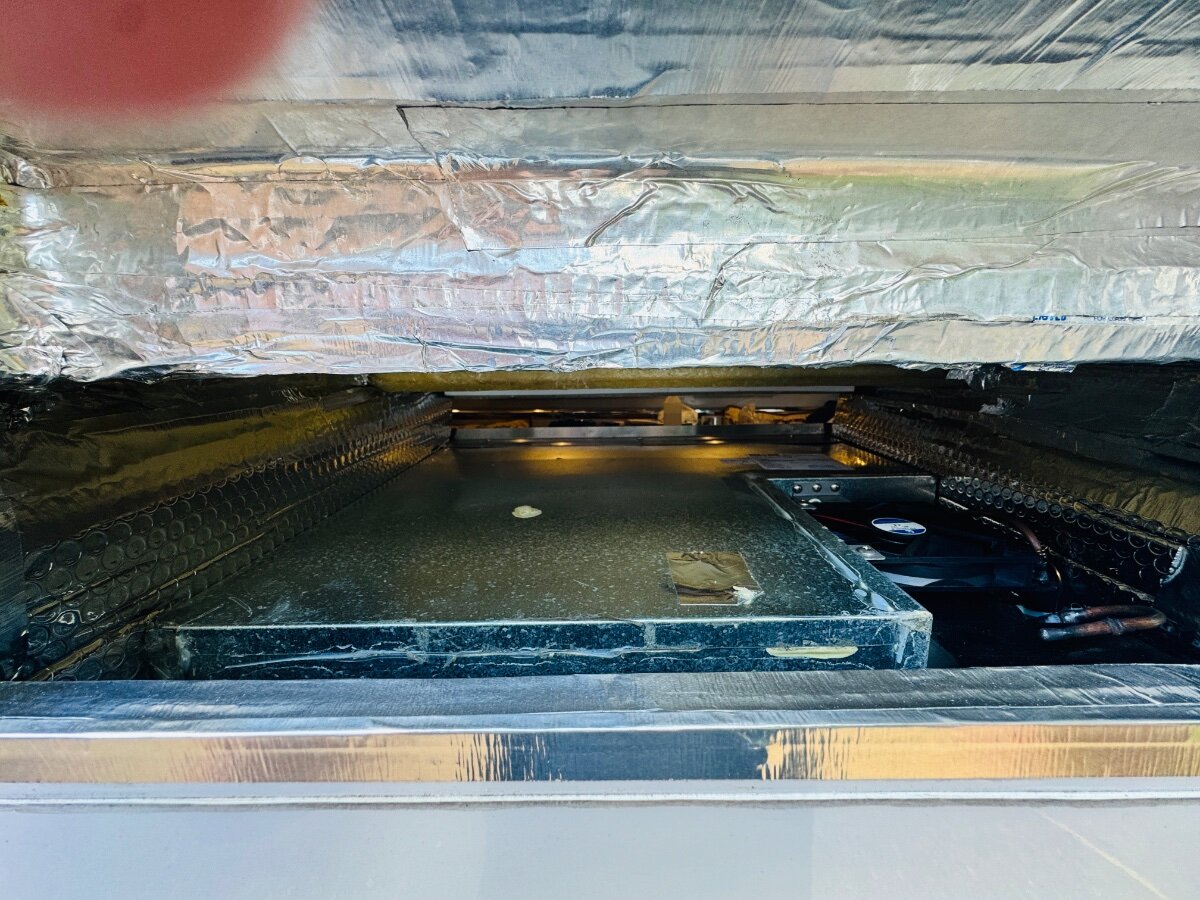
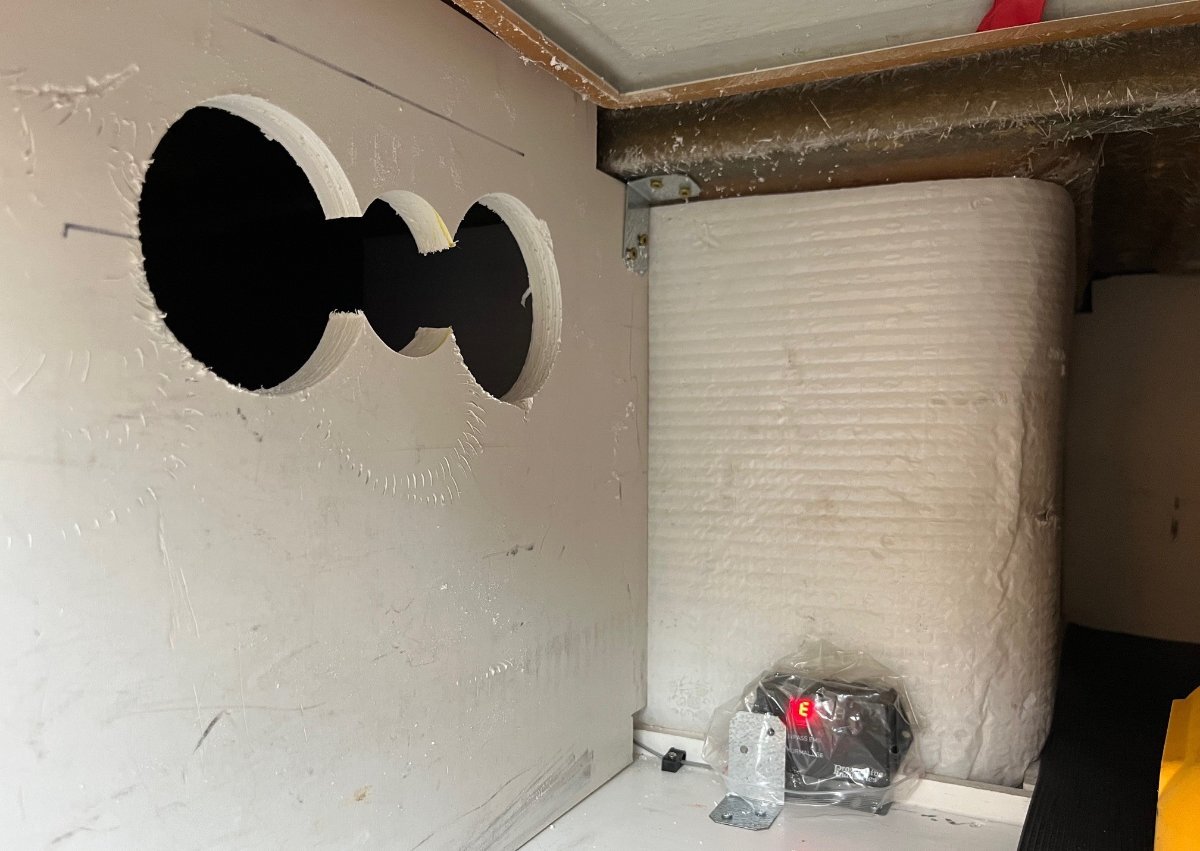
I had just installed a Beech Lane dual cooling fan for the fridge cavity and thought the same fan would be great to vent the basement area under the streetside bed. A 3KVA inverter produces a great amount of heat when inverting and charging large amperage. I was waiting on delivery of the Victron Multiplus II inverter anyway and it makes sense to install this before the large inverter is in the way. This fan is a dual 5” fan. I had a 4” hole saw available and thought that was enough of an opening to clear the hot air in this small basement space. I ended up using a jigsaw to cut a straight line opening above and below (not pictured). Notice the L-bracket top-right in pictures, necessary since this wallboard is only connected to the floor and outer wall. Then I hung the fan inside, added a wire loom. I used the grill that I removed from the furnace return when I added a filter there. Yes, the control and grill are hung upside down. I could have wired it the other way, but the wires would have to loop below. I keep a duffle bag there, so I pointed the vent up to blow over it.
2 points
-
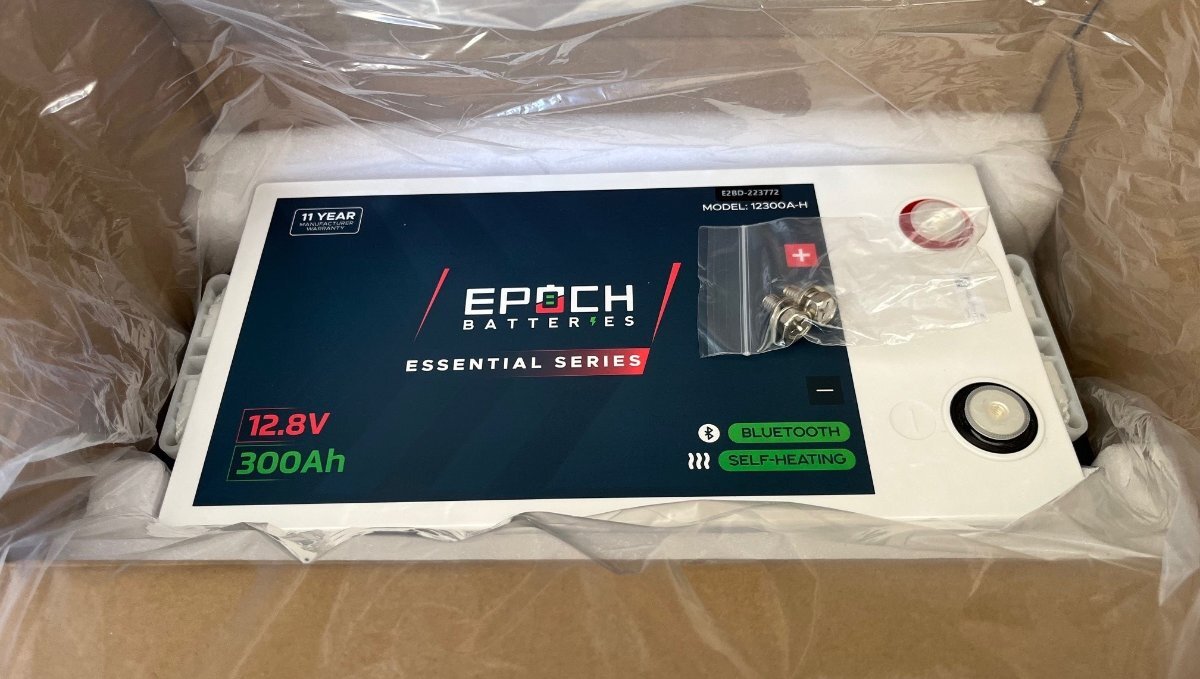
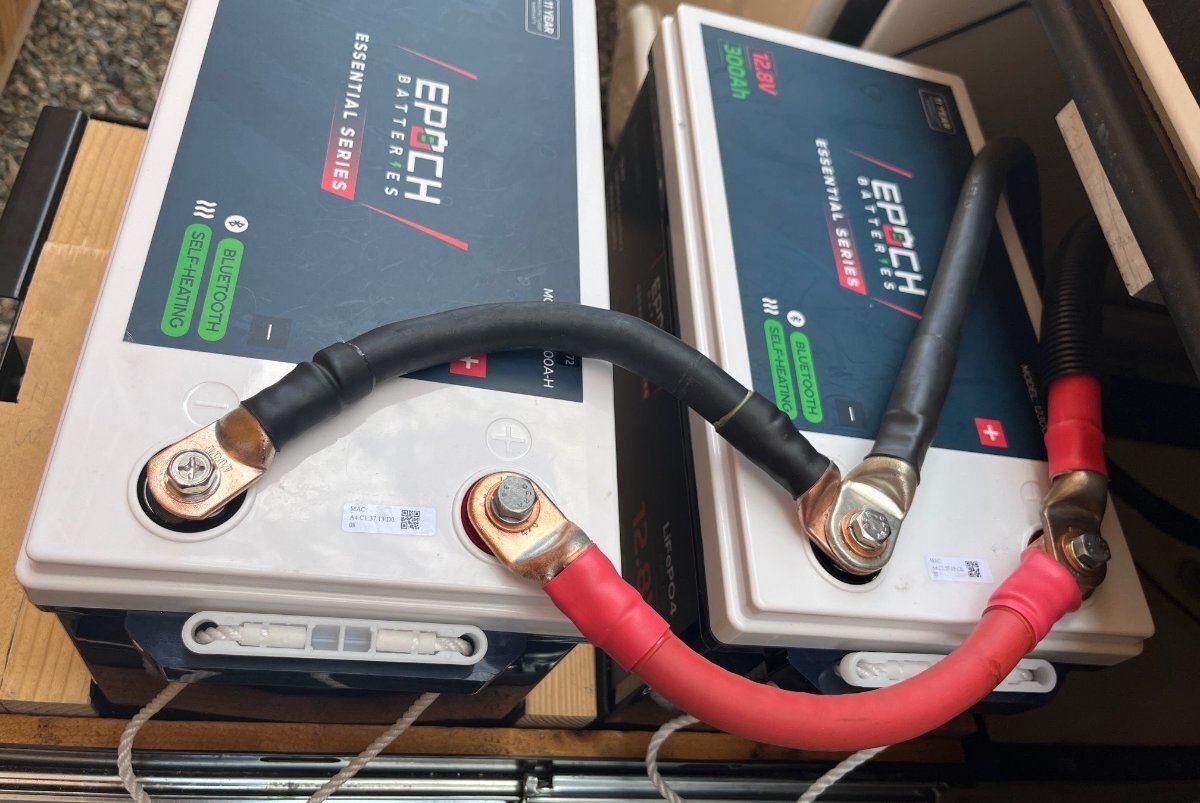
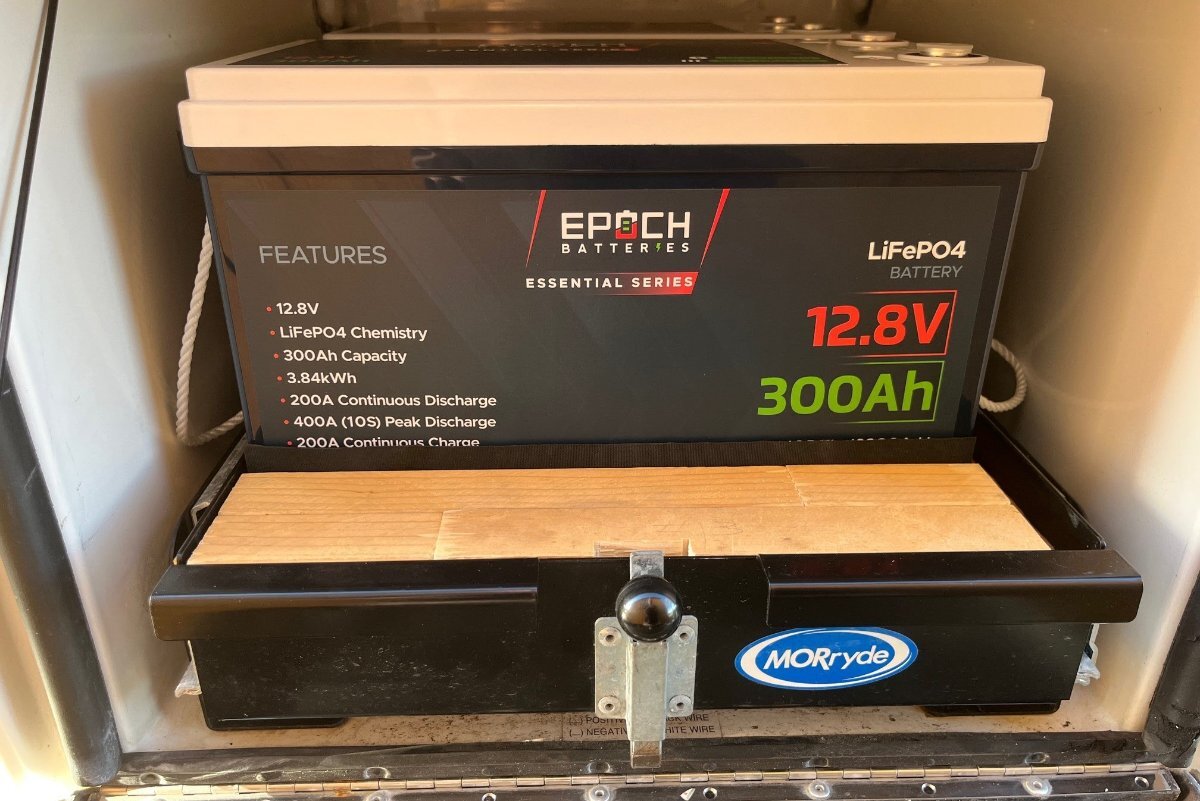
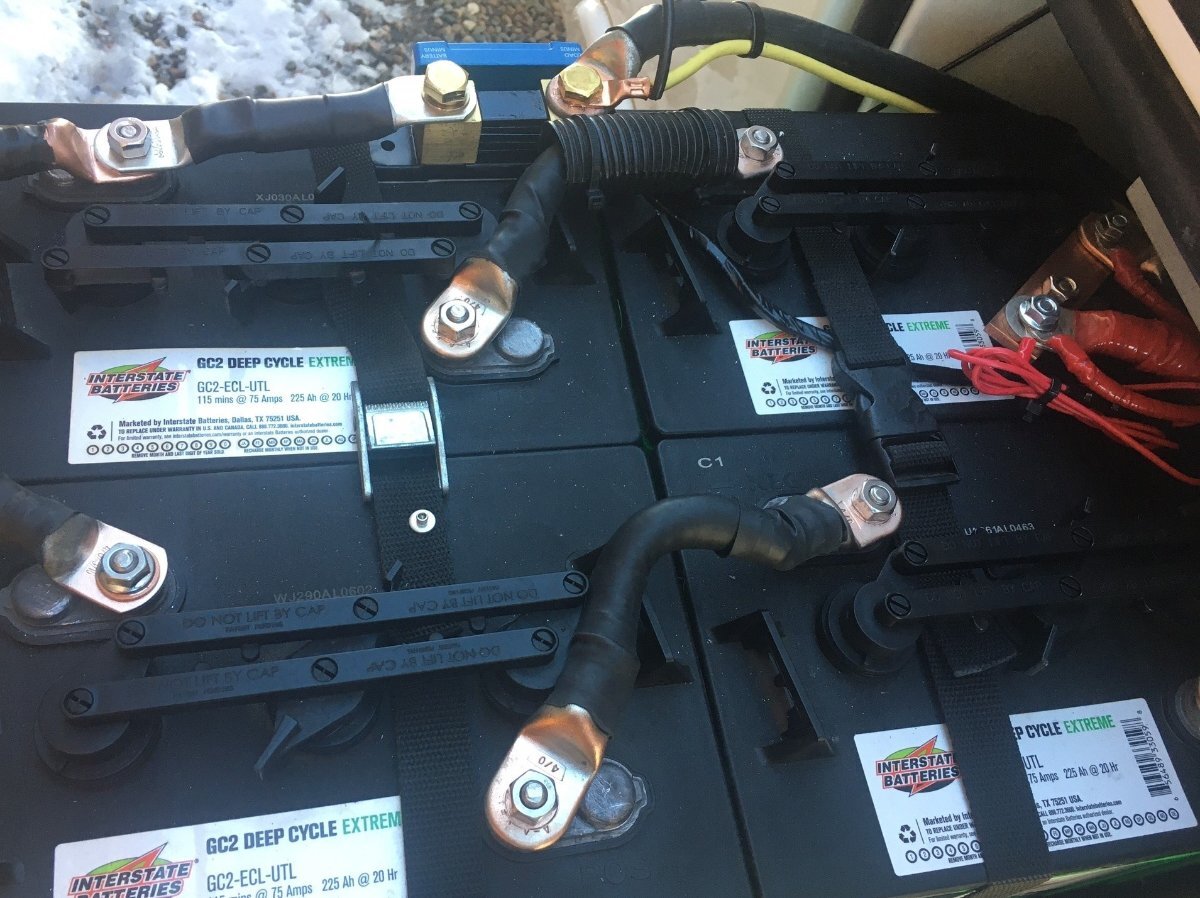
Simplicity in design is something I live by, so the goal is, beyond new batteries and inverter, to reuse everything else possible and not add any unnecessary cables, switches, buses, display screens or the like. Every additional connection adds resistance and possible points of failure. Mine is a minimum viable design (KISS). Getting the batteries positioned was my first task, since their purchase was the start of this project! The Epoch 300AH LiFePO4 batteries at 13 ½” long fit nicely sideways in the 14x21” battery tray. They are 7.3” wide, so there is a lot of space that I’ve filled with some 2x3” stock and rubber toolbox liner, both items I had on-hand. Given the snug fit, I do not believe they need a tie-down strap. They’re not going anywhere! Originally, I thought I would have a breaker and shunt in the battery bay and later decided all could be installed in the interior. I reused the 4/0 cables that OTT had installed but drilled a new hole for the B- cable to go directly rear to the new inverter location under the streetside bed. The B+ cable will be routed to the original Blue Seas ANL mount. I made a new 4/0 cable about 4’ long to get from the fuse assembly to the rear-mounted inverter. I was thinking Class-T fuse but decided to save the money and just buy the Victron specified 400A ANL fuse mounted in the OEM housing. Kept the original 250A fuse as a backup that would work for everything but running the A/C. I've cut battery weight near in half, and they sit further in as well. Don’t these batteries look great and there is nothing that can go wrong here. I’ll check them once or twice and then hope to keep this bay locked for years to come without worry!
2 points
-
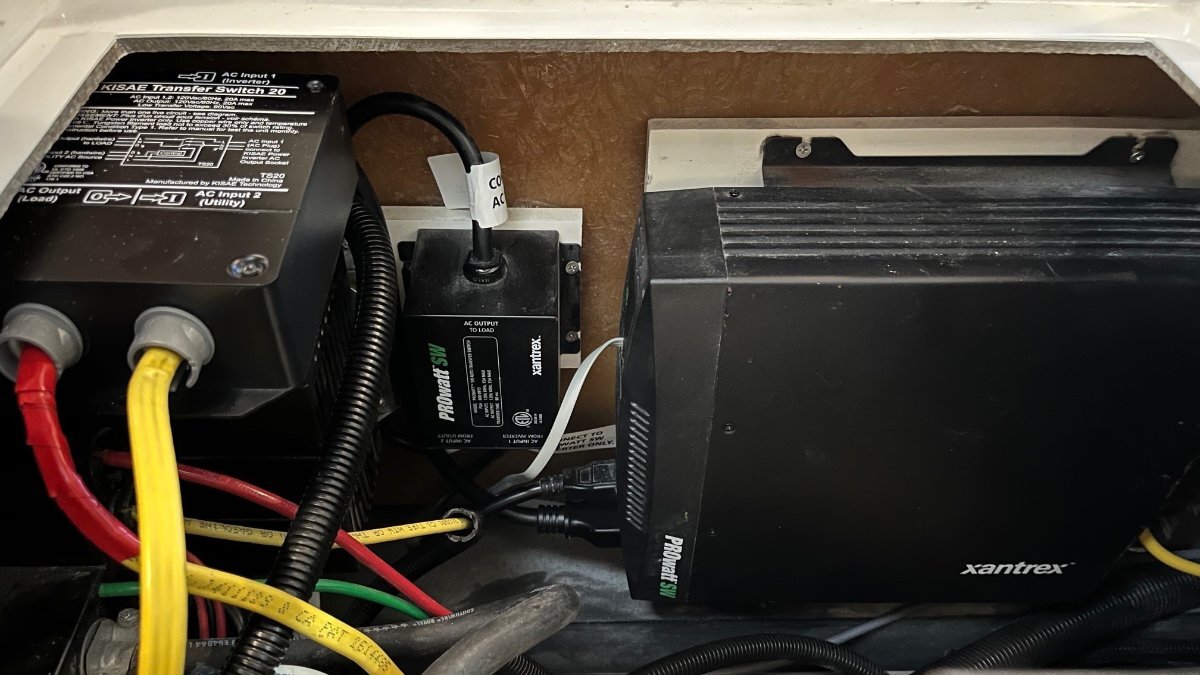
I got a lot done this week! 🤣 In introduction, our 2016 Hull #113 has roof-mounted 340W Zamp solar, and had a 2KW Xantrex inverter (only with separate PD4000 converter) and 450AH 6V lead-acid batteries renewed in 2021. Given a recent price reduction and a 10% off sale with free shipping, we were motivated to purchase two Epoch 300AH LiFePO4 batteries for a total of 600AH and it made sense to upgrade to the Victron Multiplus II inverter/charger at the same time. Everything described to follow came to $3200 total investment including all small parts and the costs of many on-hand shop materials. Just two years ago, the cost of the LiFePO4 batteries alone would be nearly double! First, all the old had to be removed. Demolition is always fun first step in a project! I removed the lead-acid batteries (sold them on Craigs in just a few days) and all the cables, the Inverter, the ATS and junction box. It’s crazy how OTT wired shore power to inverter power, using wire nuts in this junction box, real backyard mechanic stuff (correct design would be to use a dual-bus power panel). Everything in these pics has been removed (anybody need a 2kW Xantrex system or spare parts)? The second crazy thing is where they installed the main DC fuse (see pic). No way would I have known it's up there until I removed the cables! To access this fuse, you have to sit low reaching through the rear dinette seat.
1 point
-
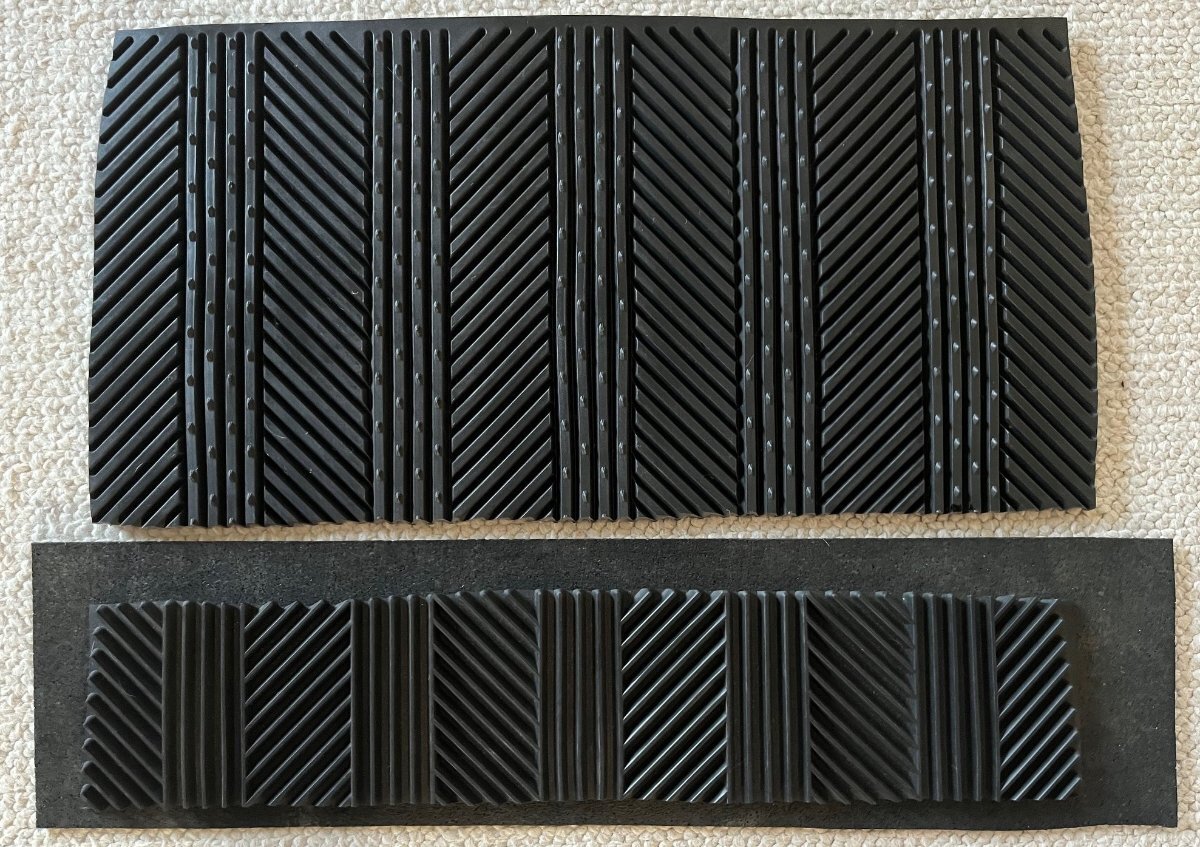
Another item on the mechanical installation. I used some rubber to cushion the inverter on the bottom and backsides. The thin rubber was cut to 6x24" the size of the HDPE board and I used carpet tape to keep it in position. The thick rubber cushion was cut from a truck rear floor mat, just laid in position and the strapping should hold it nicely in place.
1 point
-
Bullseye💯 on point! 👍🏻😄1 point
-
Money no object? I'd contract with Toyota to build me a one ton diesel V8 truck in 4WD. 🤣1 point
-
Happy with our 2013 F250, 6.2 gasser. If I needed a new truck, I would go either with the 250 or 350 gasser, with the shorter bed. Currently we have Crew Cab with 8' bed and it used to carry an 8' camper.1 point
-
Rather than use the web-based mapping tool, I simply found a large US map, and fill in my own states. I use a graphic application on my computer to "fill" each state (in my case one color for "camped in" and another for visited with the Oliver, but didn't camp.) I save a copy of the map with the states filled, then made a 200 pixel wide copy, and paste that into the signature file. To add a state, I simply fill in the new state on the original large file, and save a new 200 pixel wide copy. (I've found that the resolution on the small file is too low to use the "fill" tool there, which is why I do the changes on the large map.) Here's a start for you. To add Canada, find a similar map, or, start with a blank North America map for both the US and Canada.
1 point
-
I started towing our Elite II with an F-150 gasser. I had enough power but was limited in payload capacity. Also, with a 1/2 ton pickup you have to use the weight distribution hitch, which can be a pain to put on at times. I needed to buy a newer truck a couple of seasons ago, due to mechanical issues with an older truck (not towing realted), so I now tow with a Silverado 2500 HD, 3/4 ton also running on gas. The benefits are not needing to use a weight distribution hitch, and an extra 1000 pounds of payload capacity. It's amaxzing how much gear you may want to carry. Add in 36 gallons of gas when weight is a consideration. Gas vs diesel is a personal choice. My Silverado is my daily driver, and it actually gets better gas mileage that my F-150 did.1 point
-
Hello everyone. We are long time motorhome owners preparing to make the jump to the travel trailer experience. This will be an incredible downsizing experience for us. We typically do not go to the local campground a stay for a few days like many campers. We are traveling campers, usually gone for 1-4 months, with overnight stays from 1-10 days at each stop depending of the location interest. My wife is a reader and enjoys journaling. I am a landscape and wildlife photographer. We enjoy a mix of national and state parks, county parks, and some private campgrounds. We will stay at a KOA if we need full hookups and nothing else is available. We are impressed with both the build quality and design of the Oliver Elite II. This comes at a high price when compared to the cost of other travel trailers. We will be towing with a 2024 Toyota Tundra with minimal payload capabilities. Question 1: Do you recommend using a weight distribution hitch on a trailer this size? Yes/No ? Andersen? or Blue Ox? and why? Issue 2: Best advice on how to manage food with the ittty-bitty fridge. Question 3: How do you best manage clothing with available space? Which floor plan, options, and modifications have you found to be useful? We are thinking twin with most options and platinum package and 640AH batteries. We do not want the compost toilet. Your thoughts and ideas are appreciated. We are really looking forward to this change.1 point
-
Toyota requires a weight distribution hitch for your Tundra when towing an Oliver, we use the Anderson hitch. As you've mentioned your payload will be limited with the Tundra, visit a CAT scale and check your weights especially the weight on the rear axle. If you have the air bag suspension the truck will trim out nicely when towing the Oliver. The Tundra tows the Oliver very nicely and with the Tow+ mode and the twin turbos you'll get good performance. I've noticed no sway whatsoever with my setup and gas milage is reasonable at 13 mpg typically when towing ( 20mpg when not towing ). We have the composting toilet and are glad to have it. We can go three weeks between changing out the compost which is easy to do. You'll save a lot of water by going with a composting toilet and not have to deal with other peoples messes at the dump stations. Twin beds are the way to go with the Oliver. Water conservation is key when boon docking but you can easily add portable jugs of water to the system if you need to by using the Olivers boon docking configuration. The platinum lithium package is wonderful. The pantry can hold a surprising amount of food. We went with the 30lb propane tanks, they are heavy but came in handy for winter camping.1 point
-
I've towed with 1/2 ton and 3/4 ton trucks all my life from various campers to inboard powered open fishermen boats when I lived in Florida. IMO, nothing tows like a 3/4 or bigger diesel. Do you need it? No. Is it nice? Absolutely! My son and I debate this all the time. Using a 3/4 ton diesel as a daily driver when you're not towing is not nearly as cost effective when you add in all of the additional costs. However, if you're towing a lot the scales tip to the diesel, again in my opinion. The new 1/2 ton diesels intrigue me as they seem to cover daily driving and towing but, my 3/4 ton duramax sure makes me feel comfortable whenever I get into the mountains or heavy traffic. I'm lucky to have the benefit of not using my diesel as a daily driver so it is garaged through the cold Minnesota winter next to my LEII.1 point
-
I bought a diesel F250. Great truck, great range and plenty of payload. The downsides to a diesel are increased initial cost, increased maintenance costs, possible issues in extreme cold weather and reduced payload compared to the gas version of the same truck, IMO. I do a lot of the routine diesel maintenance myself. I don’t think you have to have a truck, but it is very helpful to have a place for gear, chairs, propane etc.1 point
-
As @mossemi noted, some of these questions are really subjective, and I agree that you will figure them out. That said... My tendency is to camp for long durations -- 3 or more months at a time. My longest stop in one place is about 2 weeks. This year, I boondocked continuously for 5 weeks, hooked up at a campground for a few nights during the extreme heat wave, and then boondocked for another 4 weeks. There were small towns with laundry facilities, grocery stores, fresh water, fuel and propane refill options. I have a composting toilet; @Cameron summed up the benefits. I'm very frugal with short showers and efficient dish-washing. I've never run out of water. I carry a 3rd 20# propane tank and that has been helpful. Space has not been an issue for me, but I converted from bicycle touring so I'm used to paring down to essentials. I carry clothes for all seasons and find that I rarely wear some things. I can go for about 4 weeks without the need for a commercial laundry. My shirts and socks are merino wool; they air dry in an hour. That's a trick I learned from bike camping. About 90% of my clothes live in the bulkhead on the rear end. I have the twin bed model and love it. Food is subjective, and relates to how you like to cook and eat. I love to cook and don't eat processed foods, with few exceptions. I carry my freezer full of meat, and cheese, milk, eggs, veggies and cold drinks in the refrigerator. I never feel shy of food space. In the pantry I carry dry goods (beans, rice, dried fruits, nuts, spices, oils, canned fish, paper towels). I have a stove-top pressure cooker and cook batches of stew, chili, soup or other meals that make several meals. In my tow vehicle, I carry extra food, and plenty of bottled drinking water. I probably carry too much food. My dishes and cooking pots all stow in the drawers below and the cabinets above the kitchen area. Some Oliver owners have devised clever ways of stowing things in their front closet. My closet is a catch-all and is not very efficiently organized yet. If it fits your schedule, I would suggest that you attend an Oliver rally, where you can tour Olivers that are set up in different ways. There are mini-rally gatherings in different parts of the country; I think one is coming up in Texas.1 point
-
Hi. My wife and I downsized from a triple slide fifth wheel and now have a twin bed LE2. We find we can fit enough clothes in the trailer for about 2 weeks of warm to moderate temperature travel. A little less if the weather is cold. As for food, the pantry and fridge are big enough for about 2 weeks of food. One thing to note: the new fridges have more fridge space but less freezer space then ours, so you may be more limited on the frozen side. We have the standard black tank. 3 days if you're using it exclusively, but we've gone several weeks by using bathhouses for everything but those early morning/late night calls from Mother Nature. Expect over 2 weeks on the gray tank if using max water saving measures. If using for daily showers, etc., then probably 3 days. You'll need an Andersen WD hitch with your truck and an LE2. We have a lot of stuff in the bed of our truck: Clam, chairs, mats, griddle, table, etc., etc. so watch your cargo weight. We have the Platinum lithium package and love it. It's the saving grace of this trailer. Haven't used our generator for 2 years (we don't use the AC much). We also love our additional street side awning. It's one of our favorite features. Keeps the cabin much cooler and gives you shade all day long. One final word. We may be an outlier but our 2022 Oliver has not been without issues. Some were not Oliver's fault, some are. Most minor, some major. It's a good design using good materials but, in our case, it has certainly not been trouble free. In fact, we have a cosmetic fiberglass issue right now. Maybe we got a bit of a COVID camper, maybe just bad luck, but I want to be honest about that. Thank goodness the Oliver service team is generally exceptional and none of the issues seriously interfered with our plans. We still like our Oliver and find it very comfortable and easy to find sites for.1 point
-
Here is what I found out.
1 point
-
Here’s another Lisle product that I am using now to pack bearings. You fill it with your grease gun through the zerk on the stem. A lot less waste than packing in your hand using grease out of a tub. https://www.lislecorp.com/specialty-tools/handy-packer-bearing-packer IMG_2453.mov IMG_2454.mov1 point
-
Seemed to have plenty of available up/down travel with the stock monroes after installing the Alcan springs. I plan to look long and hard at the Bulldog shocks when the monroes wear out1 point
-
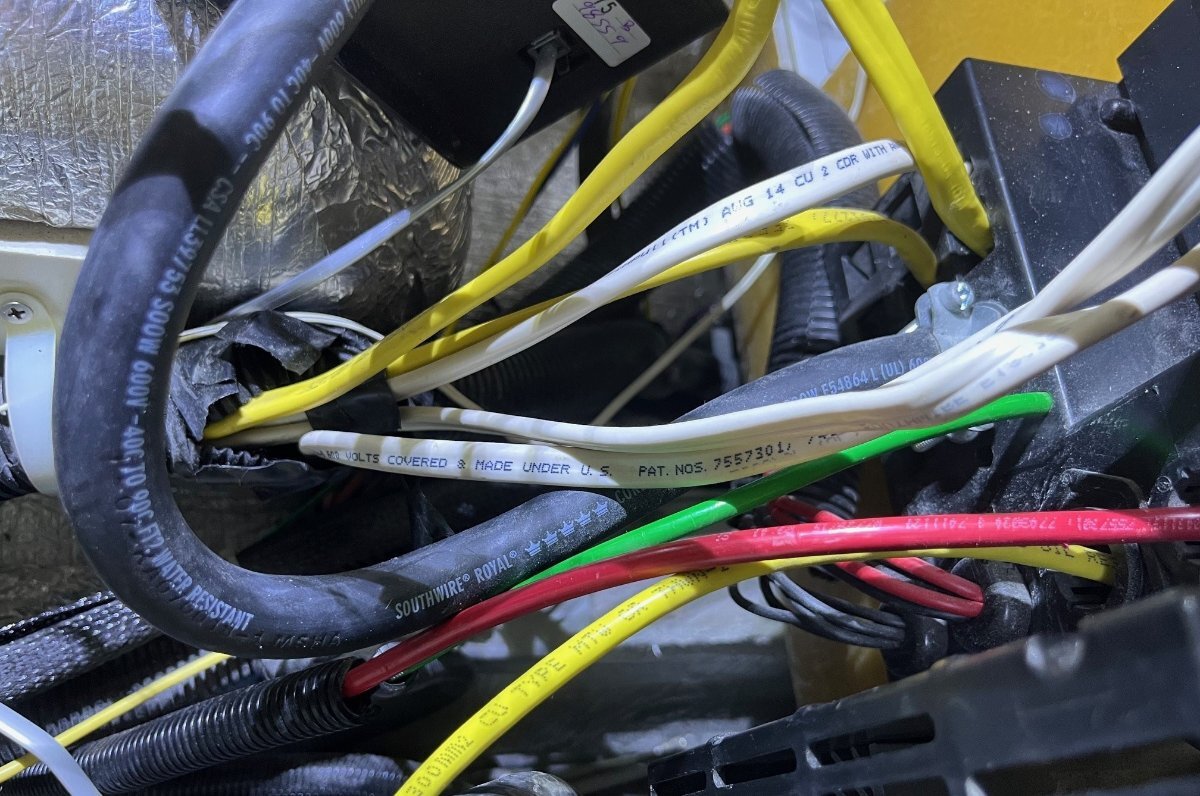
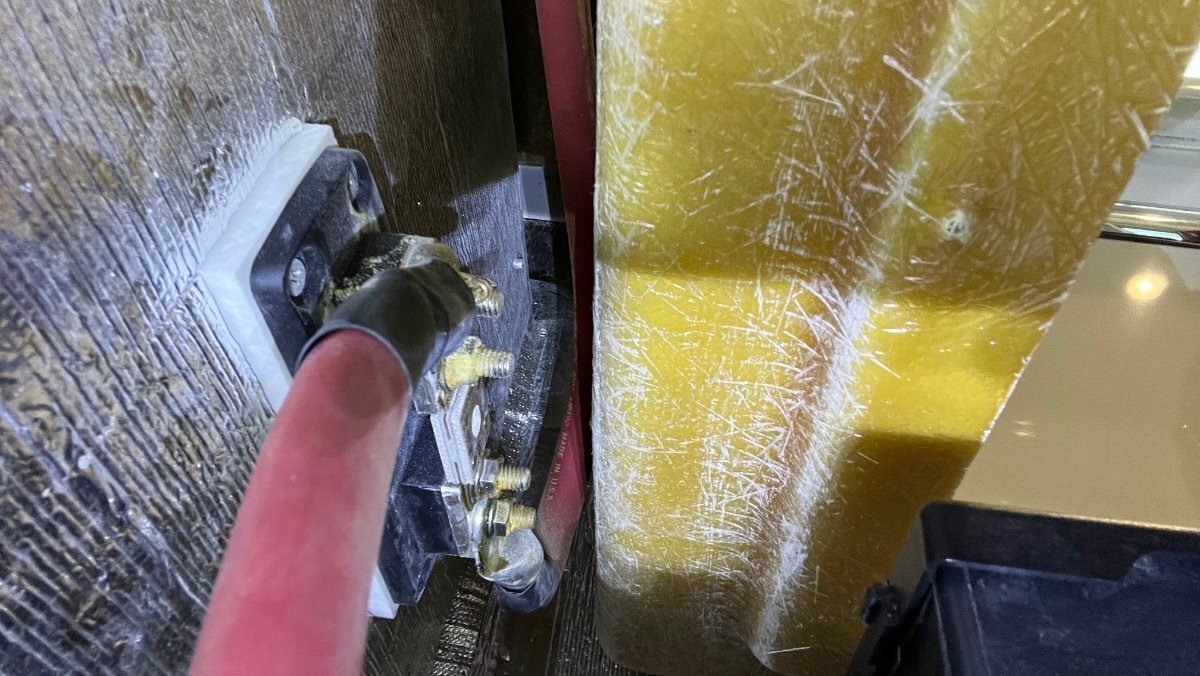
Those work great to verify a hot leg is live, but it seems like he has that already out to the outlets according to his circuit tester. Someone is going to have to use a multimeter and check voltage from the hot leg to the neutral at each connection point between the EMS to wherever the problem is. My guess is a bad neutral connection somewhere or a bad EMS itself.1 point
-
In May before the rally, Oliver service replaced my springs, shocks, bearings and brakes. Jason did not mention any issues fitting the ALCAN springs I brought. I’m sure they used the stock Monroe shocks. I don’t notice my trailer sitting any higher, although I’m not sure I’d be able to discern a .5-.75” difference. After our summer trip through Colorado and Utah we didn’t notice any significant difference in the ride either. This should be a good setup as we start our second 100,000 miles. Mike1 point
-
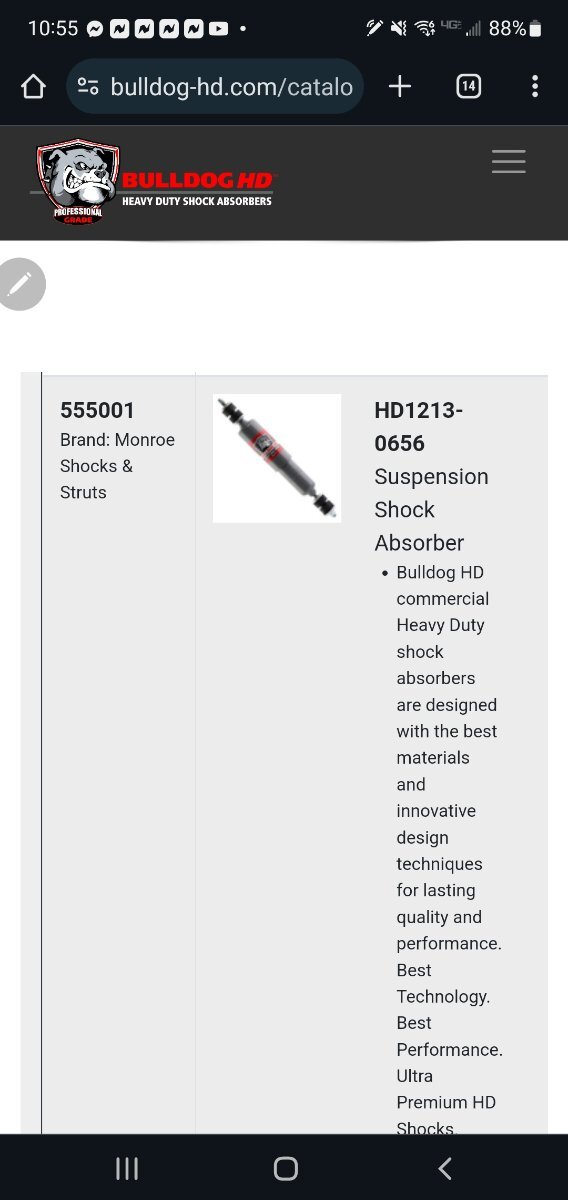
I've been wondering... Some have reported that when upgrading to the Alcan spring it has increased ride height up to an inch and that there is more travel in the leaf spring. Should a replacement shock allow for the greater travel? The Monroe 555001 is the OEM spring. Monroe also has the 555025 model, which is the same overall yet slightly longer with greater stroke. I copied these specs from the 4statetrucks website, as Bulldog has aftermarket replacements for both models: Shock Specs 555001 555025 Compressed (in) 7.95 8.66 Extended (in) 11.97 13.35 Stroke (in) 4.02 4.69 Perhaps those who have installed Alcan springs can chime in? @Mountainman198 @MAX Burner @ScubaRx and @rideadeuce Did the shocks installed appear the correct length or would it allow for +3/4" in compressed length and +3/4"stroke be a better fit? Sure, the OEM length fit, but would +3/4" in stroke allow the slightly taller springs to perform without constraint? When I get the chance to make this upgrade, I would take before and after measurements on one side prior to ordering (let her sit on jacks stands a couple days to get the right part). I'm figuring 3/4" longer should be better. This has been a discussion on other TT forum websites. Stronger spring rate in the shock would also be preferred although Monroe does not list these specs. Either way I would choose Bulldog over the Monroe OEM brand. Bulldog describes their products as a "High Quality Aftermarket Replacement Part (Not OEM)." This is the ~+3/4" longer version: Bulldog HD RV Shock Absorber Replaces 555025 For Trailer Leaf Spring Retro Kit - 4 State Trucks1 point
-
I have several recommendations, having spent weeks in that region this year: North Rim of GCNP is very nice, less congested, less commercial and there are plenty of NF boondocking sites that are within reach. From the Kaibab NF near the North Rim, you can also take day trips to places like Vermillion Cliffs, White Pocket (if you have OHV or hire a guide with capability), "The Wave" (be aware that tickets are required in advance -- for many of these highly desirable locations) and other places. Kanab UT is a great central location for camping before heading to Zion, as there are many things to see and do in that area: Pipe Spring NM, Dinosaur Tracks, Coral Pink Sand Dunes SP (where you could camp if you want hookups), as well as day trips from Kanab to Zion, Bryce, Red Cliffs and other sites. St George is much larger, and in my opinion it isn't as walkable as a city, whereas Kanab is entirely walkable. If you stay in Kanab, they have farmers markets two days a week, a great library, some interesting museums, good groceries, free fresh water and a very friendly Post Office where you can receive mail General Delivery (not all USPS will do that). I concur with others on trekking poles; take at least one with you. Learn and understand about driving in sand. Understand how the weather impacts the "dirt" (sand) roads. Plan your timing accordingly. As Spring marches on, and the dry weather extends into early summer, the sand becomes more treacherous. One Park Ranger warned me about trying to drive through the western section of GCNP (the section that is southwest of Pipe Spring NM) because "it's so dry that it's easy to get stuck and it can cost you $3,000 to get towed out". Don't pull over on the side of the road unless it's paved or you know that it's going to support your vehicle. I saw many 4WD vehicles mired in the sand, in late May and the first week of June. One area where I walked, the sand would rise up over the tops of my shoes with each footstep. It was like quicksand, but thankfully not quicksand. Once the monsoons hit, I was told, some areas of sand turn into mud that can be equally treacherous. This condition depends on the area, of course. You might call USFS offices in the region and ask -- I found them very helpful on information. You might switch around the order of your itinerary, to plan the sandy places earlier in your trip. That's my two cents. Have fun!1 point
-
A few of the reasons we think owning an EV is not for us: We have no interest in an EV. The idea of someday being mandated by the government that we may have to comply and are forced to buy an EV is just not what we believe is American Freedom. 🇺🇸🇺🇸 Direct impact on the environment and health of workers mining lithium and other minerals. The draw on natural resources to mine lithium. The coal fired plants that power EVs is very real. Range anxiety due to the lack of charging infrastructure nationwide with no end in sight. Tremendous cost of installing this infrastructure on an ancient and completely vulnerable to attack power grid. (huge national security concern) Cost of installation of home charging ports for EVs. EV fires. Many fire departments are not equipped to deal with these fires and the hazardous fumes and what’s left over. Environmental impact. The cost of most EVs is completely out of reach for many American households. It’s been reported that insurance is much higher on EV’s mainly due to the extremely high cost of repairs if it can be repaired after an accident. Lack of qualified technicians at a body shop. Loss of mechanic jobs at existing dealerships. The huge cost of a replacement battery at some point in vehicle ownership. The accelerated depreciation of a used EV. Who wants yesterday’s EV tech? How Old Man Winter and extreme cold reduces the battery capacity. Many Canadians are already really unhappy with this and do not want EVs. EV’s are extremely heavy due to the battery weight and our roads pay the price. A road tax is being proposed in many states for EV owners since they don’t pay a fuel tax. Surely, at some point the government will automatically digitally tax EV owners on the miles driven and implement speed controls with electronic speed limiter in the name of safety. Some companies already implement digital control their on tractor trailers. Patriot🇺🇸
1 point
-
Personally, I would swap from the South Rim of the GC to the North Rim. There is a world of difference.1 point
-
1 point
-
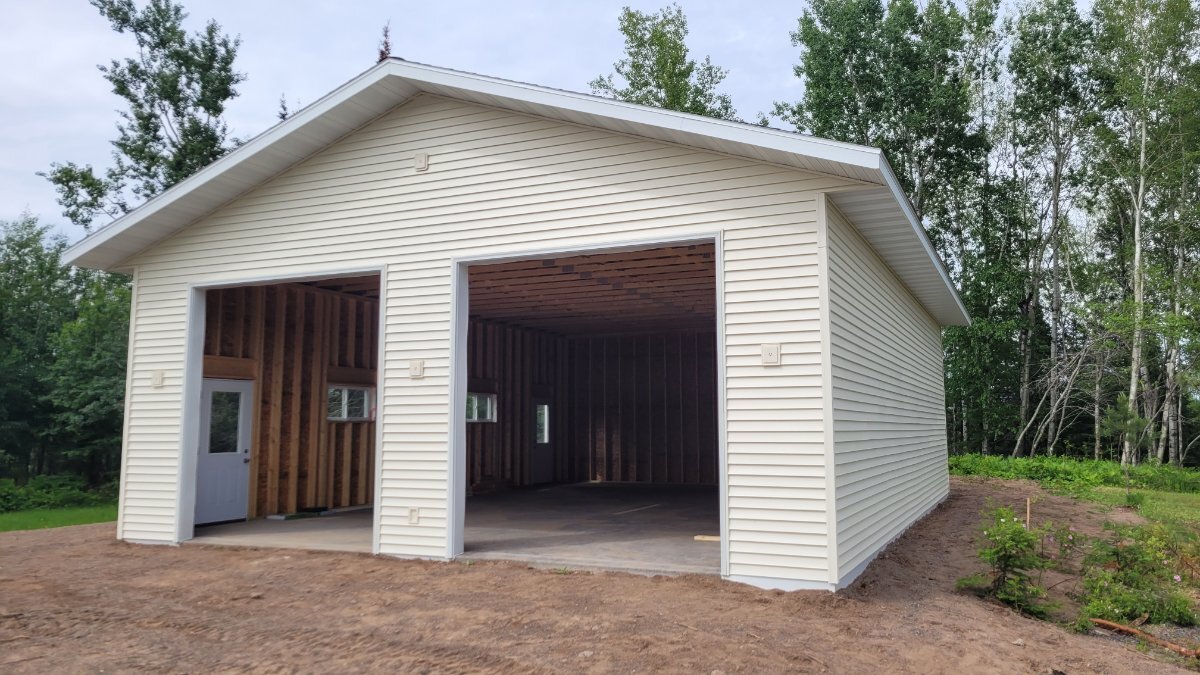
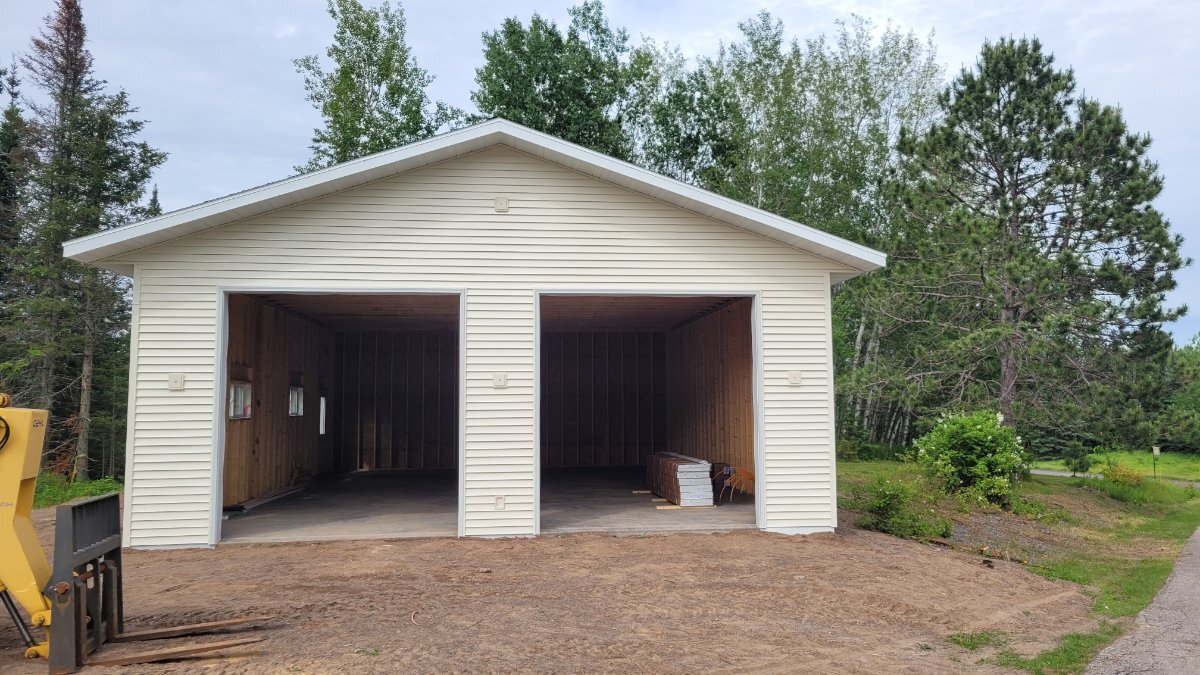
Siding and trim work is done, doors are in, windows are in, garage doors/openers have been delivered and will be installed next week. Then, final grading and the asphalt people do their thing! Coming together!
1 point
-
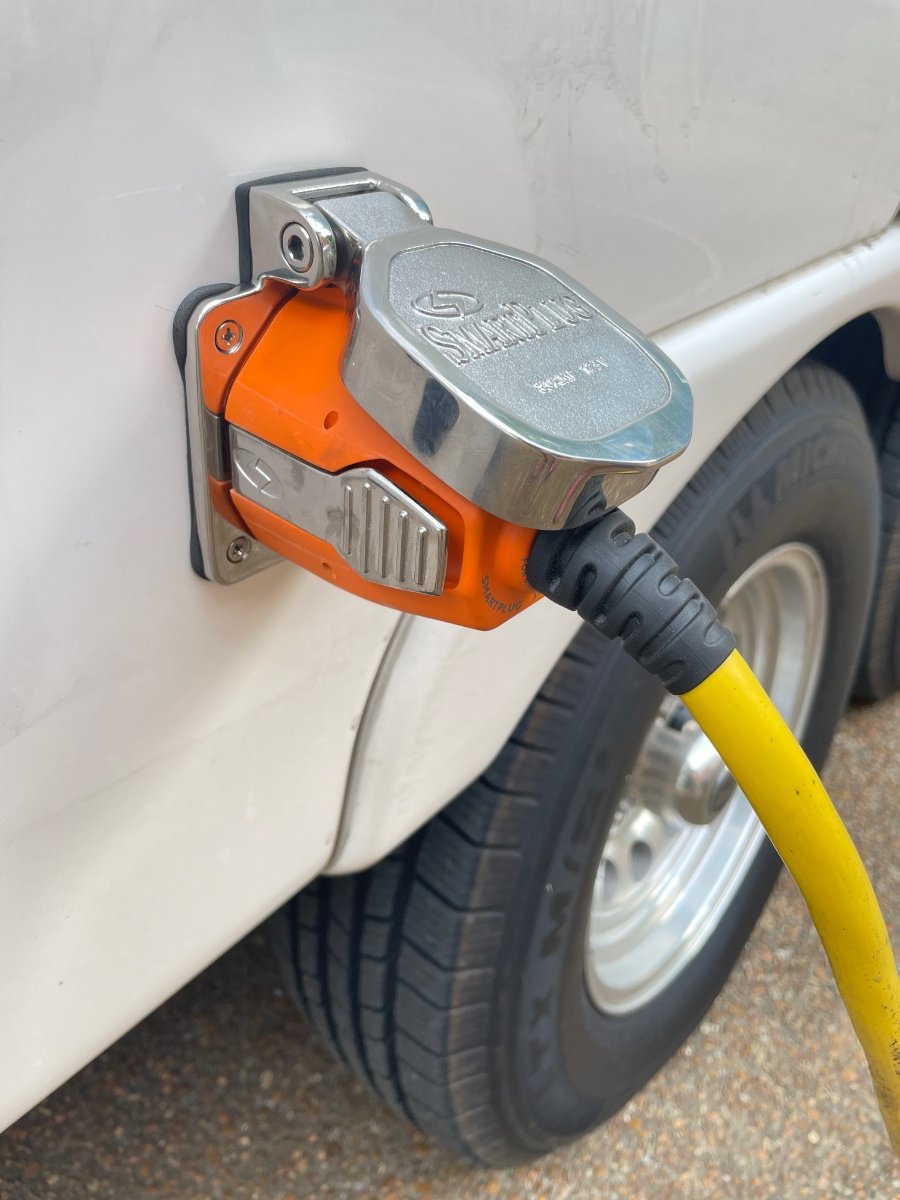
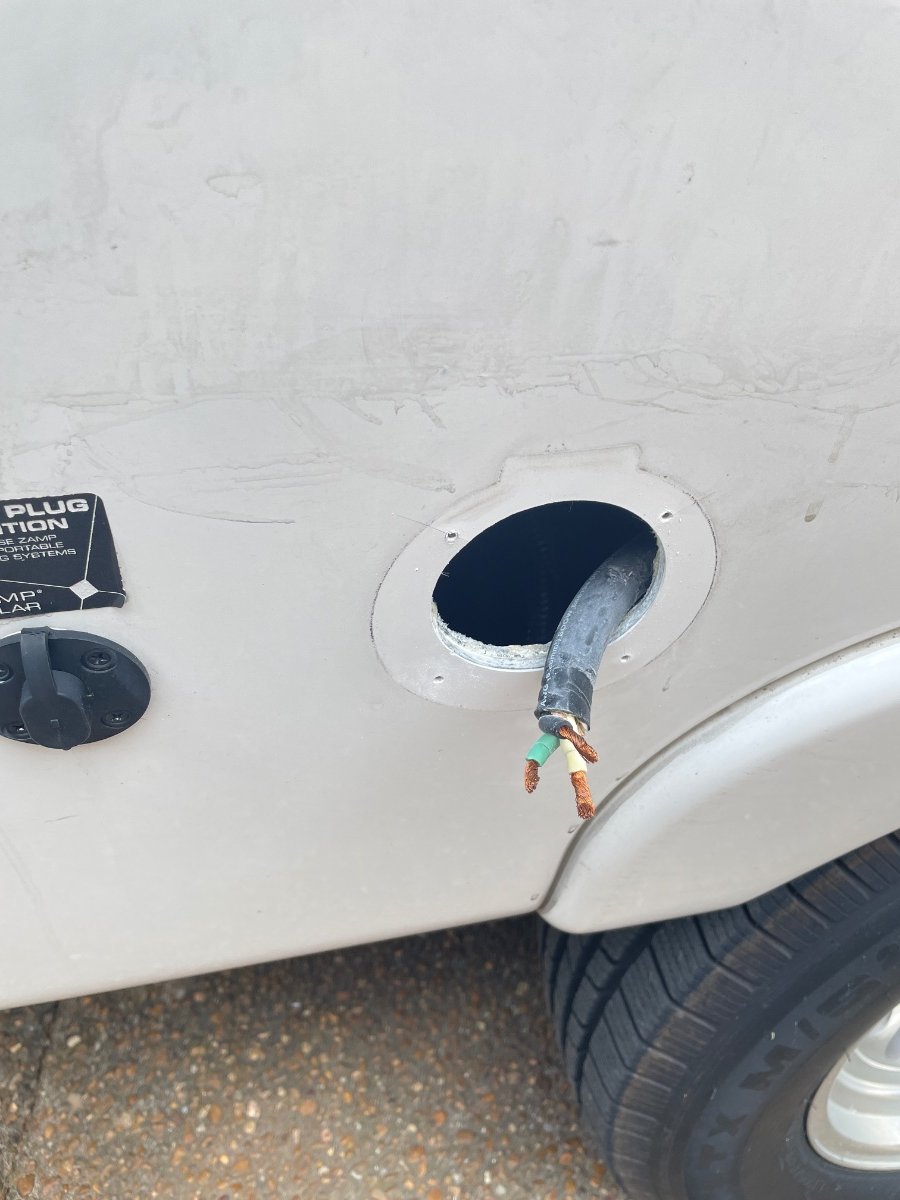
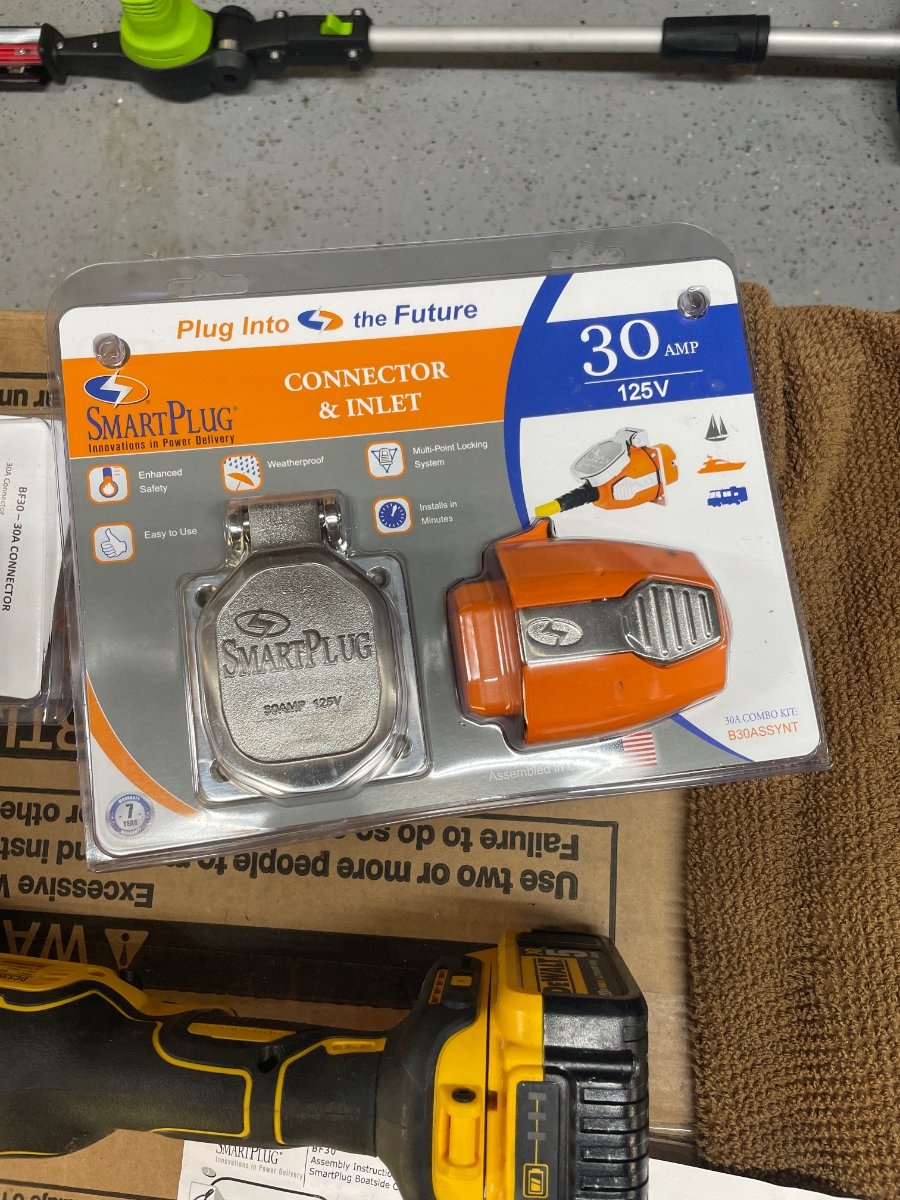
We did this about a year and 1/2 ago because we had some melted wire at the connection interface while running the AC with a 12 gauge extension cord. I like it and have had no problems since converting to it. Fairly easy install. The connection is more secure IMO and easier to connect/disconnect.
1 point
-
Hello Oll, I’ve been working in the marine industry for 40 years. gelcoat is very similar to paint in it’s required care. CUT, POLISH, WAX !! A heavily oxidized gelcoat will require cutting with sponge abrasive wheels. If you have not had experience with this , it would be best to learn from someone experienced. There are excellent YouTube tutorials on this if you are feeling too cheap to pay someone or, honestly want to learn yourself . Most important are cutting implement abrasive grades, polisher speed adjustment during passes and pressure applied to surface as you go. Polishing a new paint/gelcoat or an old weather/industrial impurity/sun damaged finish is an acquired, hands on skill. The most forgiving victim would be an auto/boat that is moderately oxidized. Find an old car that needs a polish and go to it. It can only look better, so you won’t have to worry too much about barking up an $80,000 trailer. After all of these years polishing boats and cars, I have come to be unimpressed with highly specialized products. Any product that promises high gloss without your flesh as a toll, is packed with disproportionate amounts of petroleum products like oil or grease (most likely salad oil from the local grocer). While some amount of these two ingredients are normal and desired, too much is harmful when left on and especially when activated by U.V. Influence. (Think Amorall after two weeks in the sun) I recently bought an Ollie elite used (02/10/2022) from a guy that neglected to clean and care for the exterior finish (gel coat) and had it stored outside in Albuquerque N.M. The finish had a good bit of oxidation on the upper end sections. The gel coat was slightly yellow and not reflective at all (moderate oxidation). I chose to do a 4 stage polish restoration on these two areas , 3 stage on the upper sides and a 2 stage on the lower tub portion of ol’ Boondock. I use a dual action orbital polisher from Harbor freight (@$100) combined with the foam polishing pads in the specified cutting abrasives and the Maguire cut, polish and wax in their respected levels of abrasion for cut and polish. It is important to match the pad and polish cut levels. All of these items can be purchased at Harbor freight. The complete works for a 4 stage polish will cost about $300.00 . A 1 time detail (polish and wax, no cutting) for your Ollie by a competent detailer will run you $400-800 if they are any good and experienced. A 4 stage polish on an 18’ trailer takes 2 full days, a 2 stage ,1 full day. Ask yourself how much you would charge for your two days of experienced, dirty, manual labor. I’m only stating my experience here. If you disagree, tell your life mate, not me. Maintaining expensive, shiny things is expensive and time consuming. The maintenance part of acquiring and maintaining these things “comes with the dinner”. have a great day, B1 point
-
I should mention one more thing. There is a scam artist that spoofs local towing companies. A friend was the victim of this when I was there. I recommend that you look up and save the correct phone number/s for local towing companies before venturing out, in case you need them. My friend paid $600 in advance over phone and then the company never showed up; it was a reputable company -- but he had 'looked up the number on google' and it was a spoofed phone number.0 points


.thumb.jpg.e34bf01ef7f7d5e99ad31856d45afbeb.jpg)


-
Recent Achievements
-


")


")


")


