Leaderboard


Popular Content
Showing content with the highest reputation on 08/24/2024 in Posts
-
Just a couple options for you to consider... 1. Install a 12v - 12v DC charger. This device will connect between your TV alternator and your Oliver batteries ensuring they are topped off after towing after a few hours (depending upon its output, 30amp and 50amp output units are available). 2. Modify your SL kit to run directly off DC power. Inverters are inherently inefficient as they "invert" DC power from your battery bank into AC electrical power - maybe 70 - 80% efficient, if you're lucky. Your OEM SL system will operate from an AC power outlet right out of the box from Star Link - then it converts that AC power to approx 40vDC in the dishy. So, essentially, using a 400W inverter from your Oliver battery box to your SL router, then the SL converts the AC power back to DC power, thus, you're increasing the inefficiency "twice". By converting the SL to 12vDC you can avoid these inefficiencies when boondocking and conserving your Oliver battery DC power storage at the same time. There are multiple threads on making this SL modification in these forums, FYI.... Cheers!3 points
-
I wouldn't do that on the valve set screws. They require adjustments, if Oliver is doing service, that would be very hard to break the bond. Anything that requires adjustment should not be using locktite red for sure, and probably not at all. Things like the attic storage hinge screws for sure.3 points
-
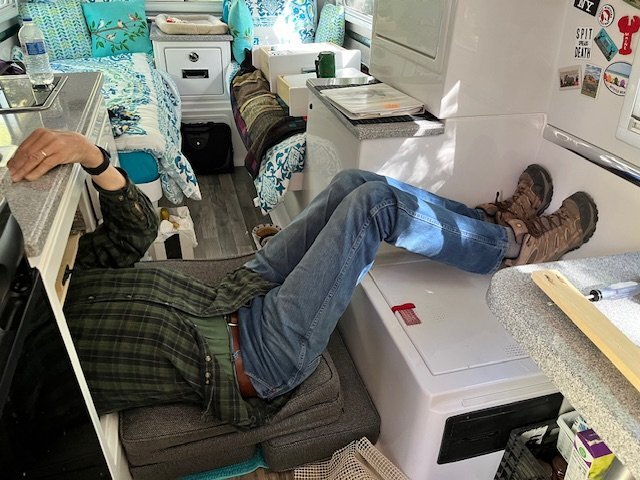
@routlaw you mean like this 'on the road repair' of drawer 'Rails & Slides' ??? A number of '(2) pre-drill holes' however 'with only (1) screw'... never did find the missing ones. The screws used should have been 1/4" longer. Not bad for a 76yo 6-5, I was further in before Maggie took the Pic, and of course Willis was right in there with me ‘Supervising’…
 3 points
 -
We lived in Sierra Vista, AZ for many years and this time of year is always interesting! Hot and sunny one minute and epic downpours the next! Mike2 points
-
We have had the set screws on the stainless railing between the dinette and the bed work themselves loose early-on. Also solved by Loc-Tite; hasn't happened since. We have an LE. I don't believe the LE-II model has that railing... the pantry is there instead.2 points
-
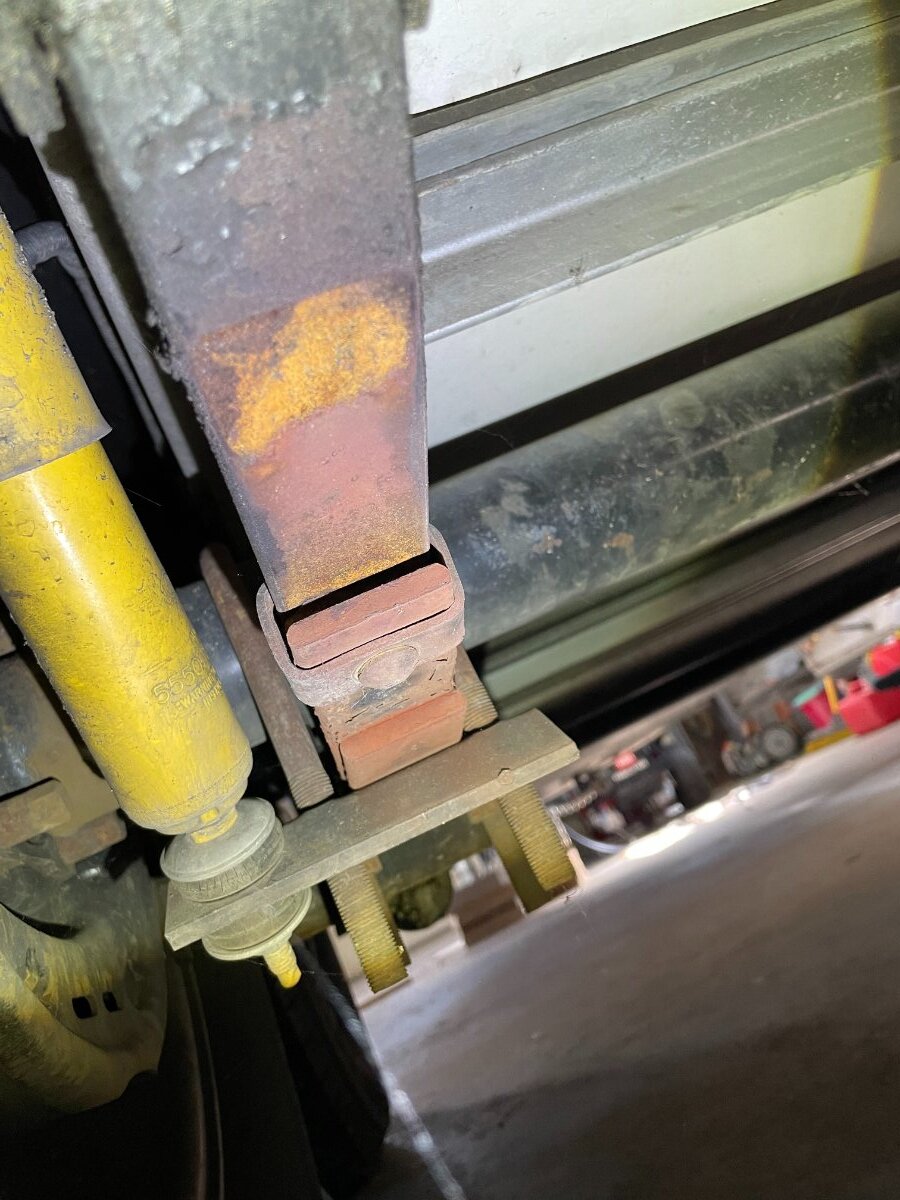
WOW! We have been sidelined this summer since the aborted eclipse trip and have been attending to other more important issues... So, no camping for us. But now we are looking at a short trip in October, so I thought it would be a good time to freshen up on recent issues. And WOW! What a thread. Yes.... I read it all. So, THANK YOU to the brain trust. It's nice having talented, knowledgeable, articulate, and kind owners to collaborate with. Really... you guys are awesome. So, I figured I should get my butt under the trailer for a look see. First spring looks good... no flattening. Same for second and third. Fourth looks good too...... Wait a minute.... The second longest leaf is shorter than it's supposed to be. Better take a closer look. See the picture. The second leaf broke about a half inch shorter than the third leaf. Guess it's time for a call to ALCAN. (Sorry GJ) Thanks to you all I have almost all the info I need. Except for someone to do the work after I get the springs from Alcan. We live just north of Asheville NC. Bumgarner in Lenoir NC is an Oliver dealer about 91 miles out. Camping World in Hendersonville is 35 miles out. I would like to minimize my travel and risk of breakage on the road. Are there any other type of shops that could do this work? Any personal recommendations to be made? Thanks again for all the help. Scotty
1 point
-
I find this helpful when selecting wire: https://mgispeedware.com/wire-size-chart/ I also prefer using marine grade wire.1 point
-
No question in my mind… except the non-isolated vs isolated aspect. I still have not had the time to replace my alternator to a high output because I am not getting near the capacity with current setup. I used 4 awg wire from TV battery to Orion XS via Anderson connectors.1 point
-
In residential wiring 14/2 Romex is used for 110V outlets, or 14/3 for light switches, all 15A circuits. For commercial where 20A outlets are standard they use 12/2 Romex. Commercial will also use stranded 10 and 12 AWG THHN wire where conduit is run. Our Oliver #113 has 12/2 Romex (yellow jacketed) for the A/C and HWH circuits. Everywhere else 14/2 (white jacketed) is used which is fine for the GFCI 110 outlets, but they also use it for the microwave, and the fridge too, where they really should have gone 12/2. In fact, if you look closely at the picture showing the breaker panel, our fridge is marked as a 20A breaker but instead they installed a 15A breaker with 14/2 Romex. You will see the HWH breaker is tripped, so I can turn it on/off from the panel instead of opening the exterior HWH cover for that switch. Ron, it's great that yours has all 12/2. I would not mind at all if they used 14/3 for 110V outlets, but all appliances, microwave and fridge should sit on 20A breakers with 12/2 AWG wiring. On our hull they also wired the microwave and the 110V outlets to the same 15A breaker. I was able to find the individual 14/2 Romex run for the microwave, and it is now wired to the breaker that was the PD converter that is no longer in use with the Victron MP2 inverter/charger. In the first picture you can also see the house 120VAC wiring where I used 10/2 UF-B. I wired this to the MP2 when it was sitting on the bed platform and because the UF-B is relatively stiff it fed nicely across the basement floor as I lowered the MP2 in place. @katanapilot given you are using fine-stranded 10/2 cable, you should certainly wire it first before your mechanical installation and you must use wire FERRULES so that the wire can be pushed into the MP2 AC terminals. The ferrules will be large and not real easy to insert. The thinner solid core wire pushed in nicely.
1 point
-
I did not see any increase in humidity in the cabin until I changed out the fridge and closed exterior vents. It has gotten better since the ambient humidity decreased. Due to the fact that I have made so many changes in short order, I am still processing the observations as seasons change. The Atmos to me has an advantage in this category mainly due to how it utilizes the fan and supposedly the design reduces mixture with outside air.1 point
-
Brings back fond memories! Back in the 90s we shopped many weekends at Blain's F&F in Woodstock IL.1 point
-
1 point
-
Can't see the photo. Typically the + and - terminals of the batteries are all connected together with short cables, + to +, - to -. One + and one - will also have a large cable leaving them and going off into the trailer body. These are the terminals you'd connect to. Make sure you don't mix them up. Usually red + and black -.1 point
-
Thanks, he therein further confirms my thought on the matter. My recently acquired 12,000 joules ‘sacrificial lamb’ with circuit analyzer for less than 50$ before tax.
1 point
-
One issue with installing an EMS/EPO at the pedestal is that you're not picking up the voltage drop between the pedestal and the equipment/appliances in your TT. Might not be an issue, but also might be... I like a sacrificial surge protector at the pedestal and then an autoformer, and then an EMS/EPO unit before the breaker box. Maybe overkill, but I like overkill when it comes to electricity.1 point
-
Sure, you can connect an inverter to the main + and - connections on the Oliver batteries (not just one Oliver battery). Just watch your battery consumption.1 point
-
Finished my MP2 upgrade. I used the 10/2 UF-B I had vs. spending more money. Nothing wrong with using this or buying more expensive stranded cable. I only needed two short runs. One to the inverter from the EMS and one from the inverter to the 120VAC panel. It is a straight shot through a very wide opening in the basement. I cut both lengths about a foot longer than needed so they lay nicely on the floor of the basement. It is waterproof cable and 10/2 provides adequate ampacity. OTT does use superior cable to the batteries, where you truly need it, and for the shore power receptacle connections. Everywhere else for AC circuits OTT uses 14/2 Romex and the UF-B is an upgrade from that.1 point
-
Here is another article on surge protectors from Mike Sokol. He stated using a cheaper surge protector at the post as a sacrificial lamb to protect the wire EMS is OK. In a previous article he recommended using another EMS like the Hughes Watchdog 30amp with EPO that will shut power down at the post. Each owner decides, no post surge protector, a cheap surge protector at the post, or another EMS top of the line surge protector with EPO. https://open.substack.com/pub/rvelectricity/p/are-double-surge-protectors-a-good?r=nq2l8&utm_campaign=post&utm_medium=email1 point
-
Bite the bullet, and buy the one with the charger, battery and case. Especially if you plan to carry it with you on trips. Exchange the coupler for a LockNLube and you are better than good to go. All neat and tidy in a case that won't allow the grease that will inevitably ooze out, collect dirt to get onto everything else you will be carrying. This would not be an issue if all your trips are short and you're always back home before it's time to grease up again. Our average trip is >5K miles, so our GG usually makes the trip with us.1 point
-
It's hard to have enough spares for everything and me too! I've bought many spares we've never used. Want to be prepared but dislike wasting money! Two years ago, we were heading out in our Bigfoot Class-C on a 4-week trip to Page AZ (Glen Canyon), Mesa Verde NP CO up to Moab UT and the great NPs... We got to our first stop, a boondock nearby Sunset Crate NM. Stopped the truck to check the map and put the truck in park. When I was ready to continue, the truck would not come out of park. The P-R-N-D-L shifter would NOT move! What would you do? I took a deep breath and several more and stopped to think, why would this occur? finally, I thought of the brake switch. The simple electric switch behind the brake pedal that stops you from changing the trans position without having your foot on the brake. I got on the floor of the truck with this simple tool, bypassed the switch and we were able to drive to our campsite. Went to Napa a couple days later and they had the switch for $22. ALWAYS have one on these in your toolbox!
1 point
-
Mike has lots of great info and advice on RV electric, but he's WAY off when it comes to the Hughes Autoformer. Been waiting for his "Part 4" testing results for a while but now he says he bound by an NDA by the NEC and can't reveal them. I'm glad I took the advice of Hughes electrical engineers (which Mike is not. BTW), as well as from a friend of mine who is also an electrical engineer before waiting for his final results.1 point
-
I'd use blue. But it's up to you Red is quite difficult to remove, when you have the need1 point
-
As noted by @Patriot -- I frequently check the fasteners after travel. I have my tires at 55#. However, a couple of rough washboard roads have convinced me to lower my tire pressure more. Even though I go really slow, the vibration impacts everything. This last trip, I opened the Truma AquaGo WH (outside panel) to turn it on, and discovered a screw sitting against the panel door. It took me a while to figure out where it came from. That required me to go buy a TORX screwdriver (star-shaped), and Blue (medium) Locktite. I also purchased some other new tools this week, for dealing with Zerks. But that's another story. I wish we had a "recommended tools" list on the OTT Service Knowledge Base (a more robust list, I should say)... because sometimes you find a need and no hardware within distance.1 point
-
..and same here1 point
-
Same here. We roll at 45psi cold - pressures usually bump up to around 52-54psi after 20-30 minutes this time of year...FYI1 point
-
Yes, we also 'Had those Shims', found some on the floor below cabinets. Kind of reminded me of paint stir sticks. I removed ours, not really knowing what they were... I thought maybe temp spacers during assembly, and were left in there. I did save them, now I cannot find them, not in TT, must be in garage. I figured out what they were months later. However, have not had issues with drawers or slide/glides. all staying put. I do see where Metal Slide hdwe, may have some issues in the future, but no issues yet, and we have had travelled some rough roads. B~Out1 point
-
We have been running at 50 since the beginning of the year.👍1 point
-
This is not necessarily true, when we picked up our Oliver E2 March of 2015 (#70) tires were at 50 or perhaps 55 PSI certainly not 80 PSI. For the first few years we ran them also at 50 but in the last 2 to 3 years have kept them at 45 on normal paved roads. I certainly agree though running them at 80 makes for a very hard ride.1 point
-
This is what I found, when the MW stopped working, and I had to remove it. (not working was another issue). We have the High Pointe (see pic) MW, the faceplate has good attachment to the fiberglass/cabinet, no issues there. However you have to slide the MW out to get access to where the shroud is attached to the sides of the MW. Shroud has SHARP EDGES... We had (1) screw on each side of shroud holding it to the MW, (1) on bottom of cabinet, (1) somewhere between OTT assembly and Valdez AK... IMHO, These (see pic) were not really good screws to attach the shroud to the MW, they were counter-sinks so they would not be snug. All were all loose, having worked their way out partway. The screws on the front of the shroud were basically holding the MW in place. Opened up MW, Repaired the MW, Closed up MW. I replaced existing screws with some short panhead sheet metal screws with fatter threads, and some appropriate external tooth washers. I should have used regular nuts/bolts/washers & bolted the shroud to the MW but I just wanted to finish and get on with vacation. We will see. Getting the MW back into the compartment, and lined up and under that cam attached to the bolt that holds it in place at the rear of the cabinet was not easy, maybe an hour & half...
1 point
-
Tire Pressure and make sure your shocks are in good shape. I have found that most appliances in the OTT to be 'Metric threading', that is important when buying/replacing lost bolts/nuts. B~Out1 point
-
I like to test the power pole prior to spotting the Ollie and if I’m not blocking traffic I won’t even back in until I have verified the power pole is in working order. Mossey1 point
-
Agreed, the red is a permanent seal that I do not use. I like the blue stick since, which is like a paste that you can rub on a screw vs. the liquid that will drip. BTW, Loctite is truly designed for metal automotive bolts. I wonder if the woodworkers out there know of a good thread sealant? This is what I have on my workbench for automotive maintenance: Amazon.com: LOCTITE 248 Blue Threadlocker Glue Stick: All-Purpose, Medium-Strength, Anaerobic, No Drip, General Purpose, Works on all Metals | Blue, 9 Gram Wax Stick (PN: 37643-506166) : Automotive1 point
-
I think that it will take a very large solar panel array to be able to reliably recharge your batteries after any significant AC use thru your inverter. I’ve played around with our system running the AC at night for 8hrs with 400w solar and 640 amp-hrs of lithium from the factory. Even if we had double our solar wattage, I think it would take 8-10 hrs of full perfect angled sun exposure in the summer to replace what the AC consumed overnight. Although running a generator is less desirable, our EU2200 could likely bring the batteries back to near full in 2-3 hrs and solar could top of the last 10-20% throughout the course of the day. If it it hot and humid when we camp, we try to have shore power or go north, or to elevation out west.1 point
-
A very good question.1 point
-
I use blue, ordinarily. Red is quite permanent. Blue generally does the job, but you can still remove the fastener, if necessary. But, Loctite is def your friend.1 point
-
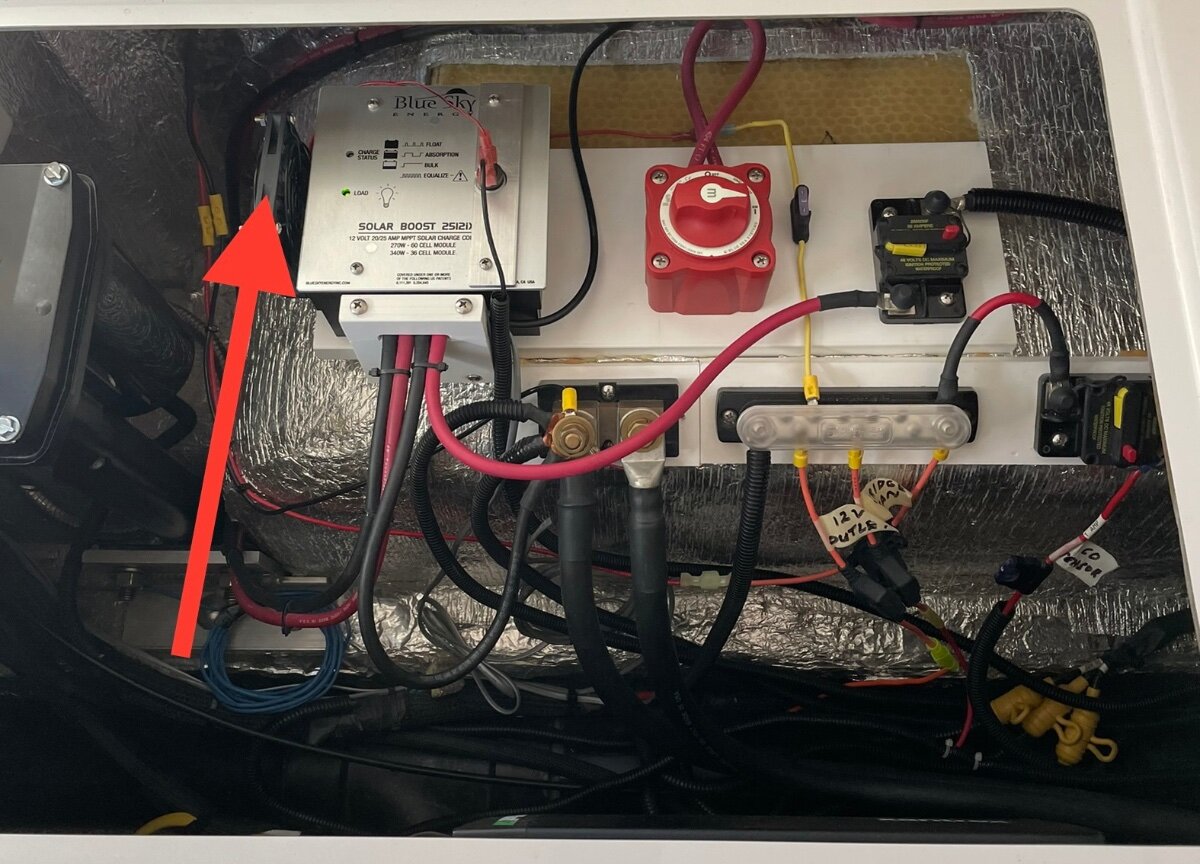
John, the Blue Sky solar controller is supposed to be mounted vertically (I think according to the manual) but that’s not practical every time. I added a fan and a snap type temperature sensor. I don’t remember the on and off temps but typically this type of sensor has a 30 deg dead band. The fan only draws about a tenth of an amp and run it on a one amp fuse. I added some slots in the plastic box for the air to pass through and this setup has made a huge difference in the temperature.
1 point
-
It has not been my experience in 4 years of ownership. Annually or often after a really long trip, I go through and check all the fasteners I can find and snug them down as needed. I prefer medium strength blue locktite where applicable. We have always run 55 psi in our tires since the day we took delivery of XPLOR in June of 2020.1 point
-
After nine years our kitchen cabinet drawers and glides have all but come apart. Am in the process as we speak of rebuilding all of them now but otherwise no can't think of anything coming loose to speak of and make no mistake we have seen our share of rough backcountry gravel roads. As @jd1923 suggested you might want to look into your tire pressure. We run ours at 45 PSI and lower if its rough gravel roads. More on the kitchen cabinet drawers in a later post.1 point
-
I would continue to search for the source of the high humidity before you open up one of the outside vents. I think opening up one would be a mistake. Originally the outside vents never were in any way connected to the inside of the camper. They just vented to the back area of the old absorption fridge. Opening the outside vents now will allow the outside environment direct and unfiltered access to the inside of the camper. Including water intrusion, dust, dirt, insects, and anything else that can get through the outside louvers. I really can’t imagine the new fridge is creating moisture inside the camper. The condenser coils on the back of the fridge only get warm and transfer that warmth to the surrounding space. Inside the fridge stays fairly humid but that will eventually collect on the freezer supply lines and need to be periodically manually defrosted. I really have not noticed an unusual increase in humidity since I installed my Nova Kool fridge five years ago. The camper is a small space with a lot of hard surfaces, humidity does rise and drop somewhat rapidly. I do use a dehumidifier periodically and use the Maxxfan and bathroom vent as needed. It is a balancing act at times. Just my opinion of course.1 point
-
No, I agree. My only thinking is that the basement and bay areas are sealed off from the cabin and the Truma is vented to the outside. So you would think that since ambient humidity is higher that the humidity would be the same. But it is definitely quite higher in the cabin. Humidity is coming from the Nova Kool due to closing the vents? Not sure.1 point
-
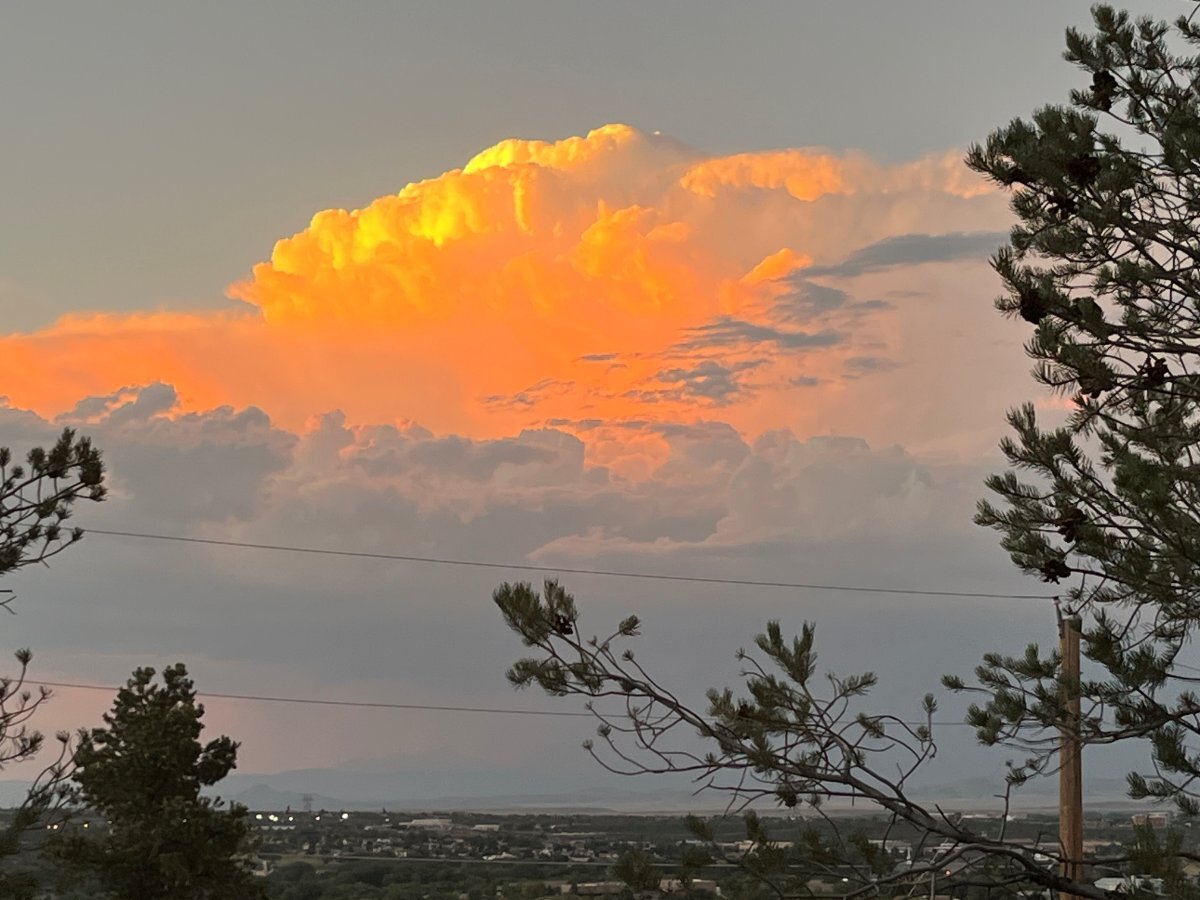
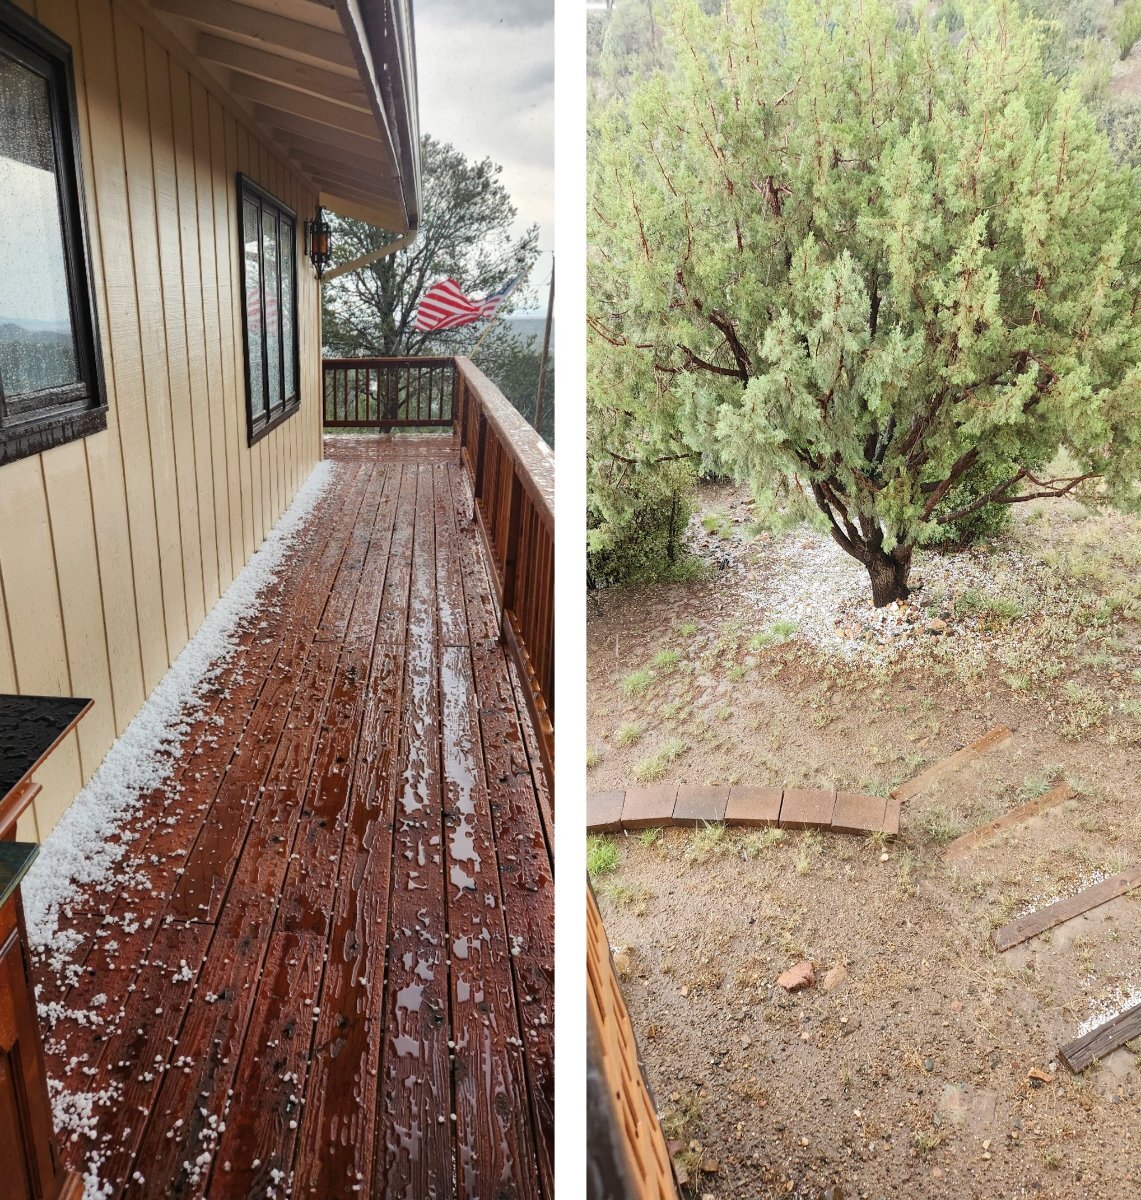
Monsoon rains all week! We love it since now we are at 47% RH and a month humidity it was down in the teens. 20 years ago, it was our last spring in Northern VA and Adam's little league season got rained out 7 of 12 games! The next year he joined a Prescott AZ team. We got rain one evening and all the boys were jumping up-n-down in joy, smiling faces looking up to catch the rain. The game continued. Last night this bad boy had all the look, but not enough energy to dump buckets of rain! Weather report says no rain this weekend, with monsoons coming back next week. 😂
1 point
-
We get hail often when the monsoon rains first hit with a bang and high winds. There was a lot more, all over the deck. The heavy rain that followed melted all but what was under the eaves. It hailed twice this week alone. No damage recently. I got a new $16K roof from Farmers a few years back. It sounds terrible with the high winds, but the hail is small. Last week Chris had my pretty '92 Lexus SC400 at the pickleball club. She was very worried and called me. But what can you do, you can't go out in it. I told her that old sports car has real metal, not like what they make today! Wanna see real hail? Probably not, but twice in the Round Rock Texas area, we've witnessed golf ball sized hail. Got under the viaduct JIT both times! Car dealers had the big hail-sales, but you'd have to be really needing a deal to buy one! BTW, the other pic shows a relatively young, beautiful Alligator Juniper! Bark like the gators you have in Florida. I water her regularly and treasure 'er in our backyard. It's the iconic tree of the Prescott NF. Check out this one, likely 300 years old with diameter as wide as Chris' full reach!
1 point
-
1 point
-
John, If you tell Alcan you want a set of springs for a Oliver Legacy Elite II they have a default for undersprung install and 3” u bolts almost all Oliver E2s should have a 3” diameter axle. I double checked mine with a set of calipers just to calm my ocd. The reason to check is just to reassure the correct u bolts are ordered at time of purchase as there had been at least one report of replacement axles on older E2s being of different diameters. Springs should be the same regardless You can certainly do the string circumference then to the math for diameter. You can also check the stickers on your axles. It should look something like this and say D52 capacity - 3500 lbs as our trailers are only a year apart you and I should have very similar axle specs
1 point
-
My objective when starting this thread was to cast light onto a significant safety problem that many of us have dealt with (and/or may deal with in the future), share my chosen solution and then share the results of that solution with other E2 owners. In doing this, I hoped others would develop and share their own solutions and their observed results following implementation. Any deviation to this objective is outside the intention for this thread. Please try and stay on objective and if you have found your own solution, please provide your reasons for your choice, including analysis and specs, where you purchased, the total cost and your observations during installation and direct observations of use after implementation. There will likely be more than one viable solution to this problem and that’s fine. Providing the details on how you arrived to that solution and real-life towing following install should be of great help to the rest of us.1 point
-
So, two members have purchased the Dexter brand 2400 LB springs and more than 10 of us have purchase the Alcan product, rated at 2750 LBS. When I upgrade, it's Alcan for sure! It's not that everything made in China is bad, just literally millions of MADE IN CHINA products are of extremely poor quality (go ahead and take your chance on your $100K investment). The marketing slogan is Better-Faster-Cheaper though they often forget the first word is BETTER! When give choice, I will NEVER purchase from the CCP and will pay hundreds more for first choice MADE IN USA and second choice ANYTHING BUT CHINA. I need a bumper sticker that SCREAMS this sediment. I believe I also wrote this on page 6, or maybe it was page 9, no 12! I'll bet this thread hits 20 pages... The design of the Alcan has the second leaf fully extended to the full length of the main leaf. @ScubaRx just wrote it clearly in B&W, @MAX Burner mentioned it at least twice and I wrote of it before. No brainer, this is the cause of failure. Good ol' Dexter can make a heavier spring, but not a better one. EOF1 point
-
@Geronimo John you made a brief mention of China, so I'm guessing their heavier springs are also made there. Too bad, and I see other issues too. Several members here, going back 12 pages of comments, were worried about going too stiff on replacement leaf springs. I had written earlier that 14% stiffer is a nice bump - perfect! You're suggesting 2400 LB rated springs which are 37% stiffer. That's a big difference, that personally I would not at all advise this option. The Dexter "Tech" was selling the only option they had. Rethink this? Anyway, when it's time for me to upgrade I'm going with MADE in COLORADO, U.S.A. For $310 more NP and getting the right weight rating. Besides I also trust @MAX Burner and he showed us a quality installation using Alcan parts. I have for years paid a considerable premium so NOT to purchase from that large land mass in eastern Asia. This country stole IP from Motorola, where I worked during the 90s. and so many US companies. Come visit my garage to witness a 50-year collection of Made in USA tools. I'd say 96% Made in USA, and 4% from quality Asia manufacturers (also US Allies), specifically Japanese and Taiwanese made tools. Amazon has read my comment 100 times when I return junk. I click "Not as advertised" and just write "China" for the stated reason. They take them back with a smile!1 point
-
OTT Forum members reading this really, REALLY need to carefully read the 100s of posts, already provided in the 12 long pages of this thread. Every question asked in the last many days has been asked a good 2-3 times already and answered in considerable detail in the pages above. Bottom line, have your suspension inspected. If your leaf springs show anything but a natural arc, have them replaced. The Alcan product is a good upgrade at a reasonable cost. Mine look fine now, so I have no concern or worry. When needed, replace your leaf springs. It's just that simple.1 point
-
Good news and thanks for the road trip update. My Alcans are installed and I have a 1,700 mile trip scheduled for later this month. I too am looking forward to the peace of mind over the poor performance of the EMCO spring packs that came on my E2. Did you notice any negatives from towing with the 2,000 vs. 1,750 rated spring packs?1 point
-
Just by way of an "UPDATE": We pulled into a nice Harvest Host location yesterday afternoon at the "BAR-Z Winery" in Canyon, TX about 20 miles south of Amarillo near Palo Verde SP. We've logged just over 1,400 miles since R&R efforts of the AxleTek and ALCAN spring packs. A prior-to-departure torque inspection revealed no more "U-bolt stretch" as the nuts met target torque specs. For us, at least, our higher level of confidence in the running gear and general peace of mind knowing we've got 2k#-rated 5-spring leaf packs under our 3.5k# axles was worth the $'s, time, and effort in this upgrade, FYI. Cheers from a couple "Happier Campers"!1 point


.thumb.jpg.e34bf01ef7f7d5e99ad31856d45afbeb.jpg)


-
Recent Achievements
-


")


")


")

