Leaderboard


Popular Content
Showing content with the highest reputation on 10/11/2024 in all areas
-
We got a small DASH rice cooker on Amazon. It works well and doesn’t take up much room. It is also easy to clean.2 points
-
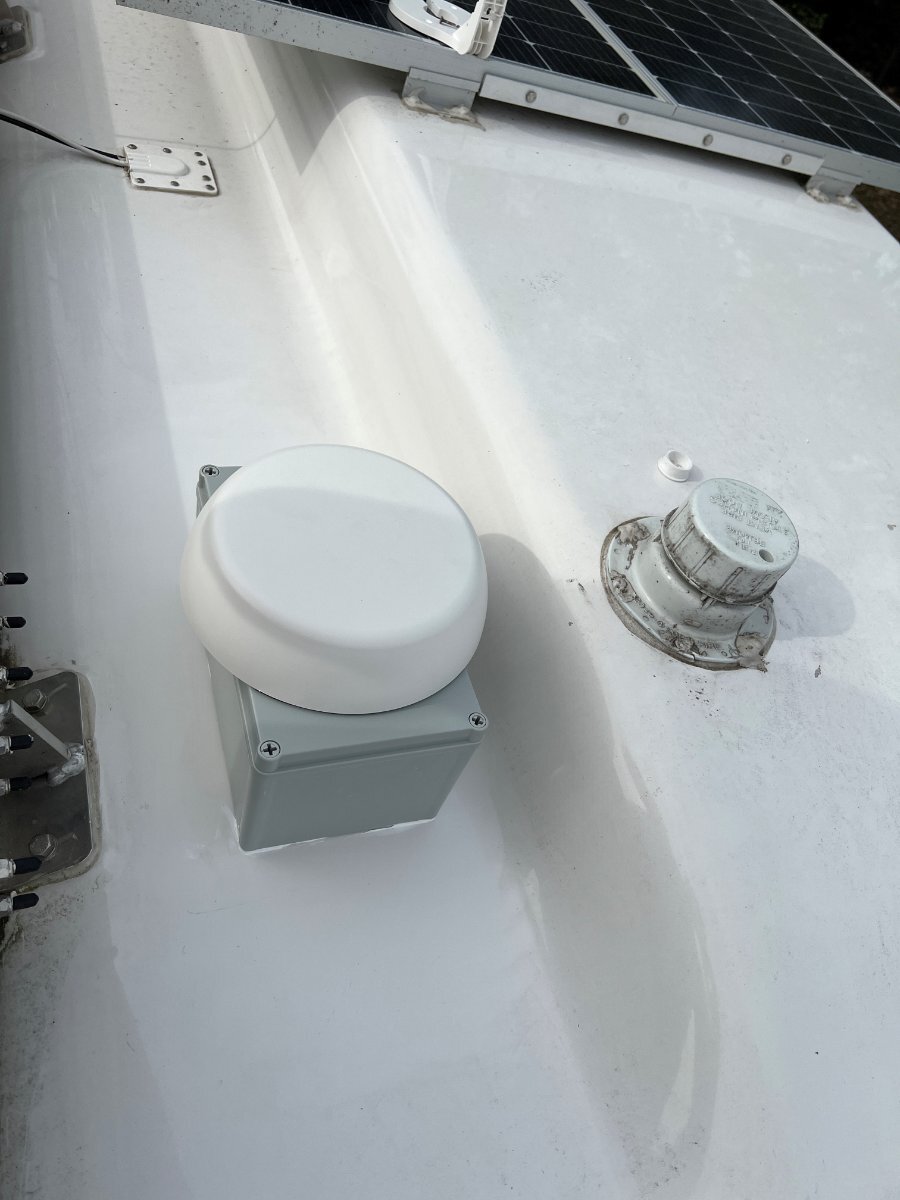
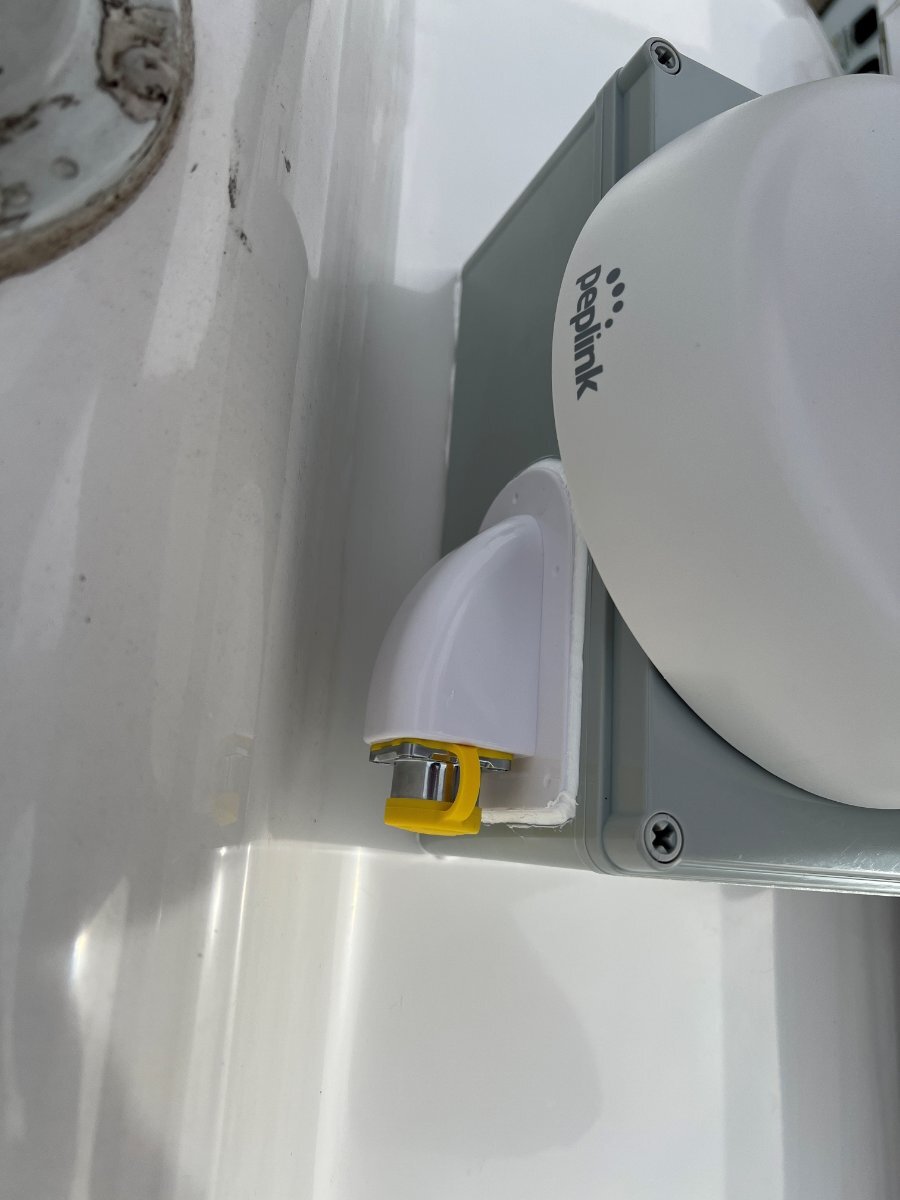
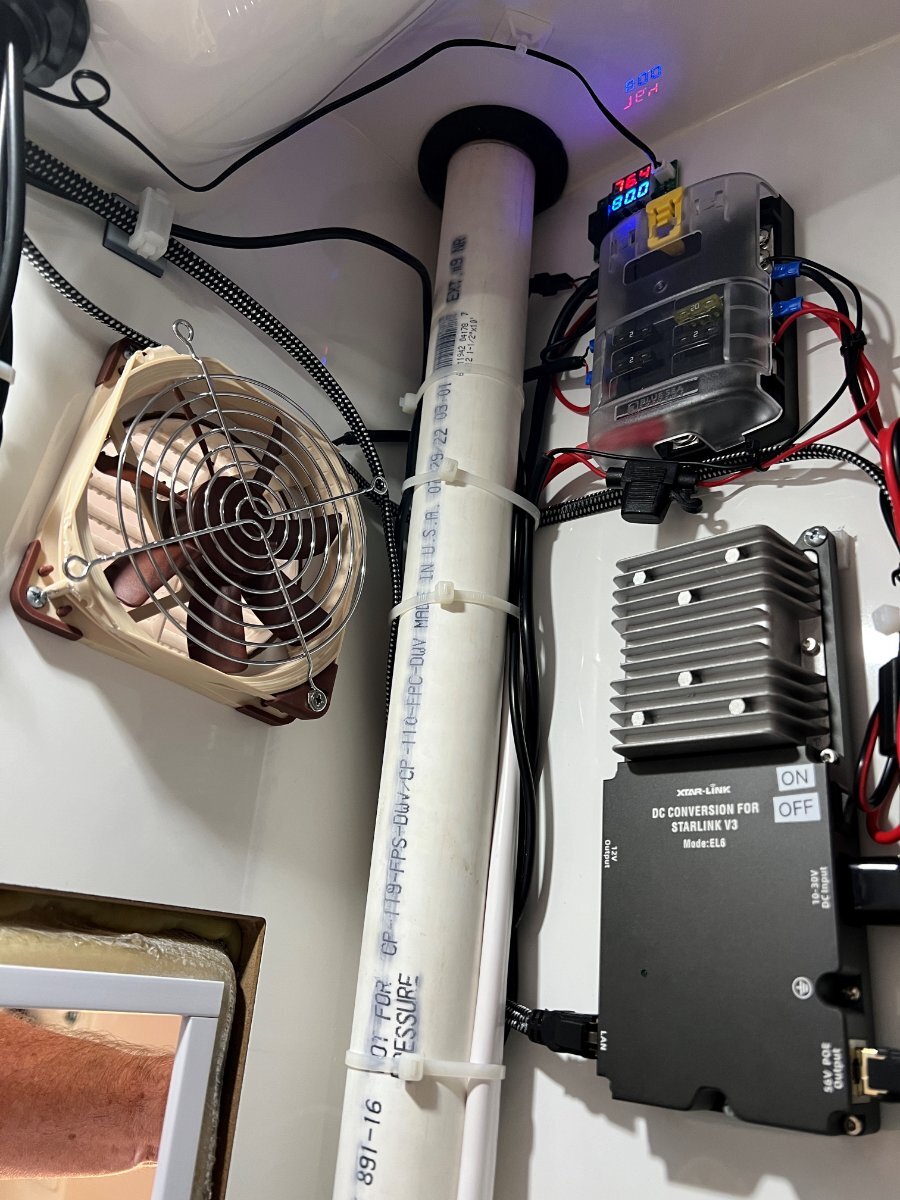
Well my install is done, following the advise of @jd1923 and install by @MAX Burner, I installed the Peplink router, Starlink 12V conversion and just for sh*ts and giggles a 12V fan in the closet. Also, I initially installed the Peplink 42 antenna to the awning with the included L bracket, but that only lasted about 130miles, the one hole in the plastic L bracket broke out and the bracket was only held on by the other screw! Anyway, that was before I decided to add an entry point for the Starlink to the roof for a later flatmount project. I currently have a pole mount and the idea was to add a Blue Seas Cable Clam hull penetration adjacent to the 7-pin cable like @MAX Burner did with his dc/dc install. After the Peplink L brack issue, I decided to go with a box on top of the roof with the Peplink antenna sitting on top, and an RJ45 waterproof connector on the side of the box for the Starlink cable quick connect, either for the roof mount, pole mount, or using the 25' cable on the ground. Here's the box on the roof, I used a Lifegard Aquatics R270577 1" slip bulkhead fitting to feed the 7 antenna cables and RJ45 cable through to inside the closet. Not pretty, and probably should've gone with a slighly lower profile box! ..and the RJ45 waterproof connector on the side of the box for the Starlink cable quick connect, either for the roof mount, pole mount, or using the 25' cable on the ground.. Peplink Router, Fan, 12v thermostat, Blue Sea Systems 5025 ST Blade Fuse Block and EL6 DC/12V conversion kit for Starlink Gen 3 This install (inside the closet) took way longer than I was hoping for, it's a very tight space, and unless you have the shape/flexibility of a spaghetti, you will end up with scrapes and bruises in places you didn't know existed! If I had to do it all over again, I would attach/mount all the wires to the thermostat before mounting it to the wall like I did, and to make things worse, the Blue Sea Systems 5025 ST Blade Fuse Block was mounted before the thermostat, so I had to basically go in blind to mount the wires to the bottom of the thermostat (not shown in my pictures, bottom of the thremostat is obscured by the top of the Blue Sea Systems 5025 ST Blade Fuse Block), but this is what the thermostat looks like at the bottom, I had to get 18AWG wires into that blue connectors, it was literally a pain in the arse!
 2 points
 -
Mike and Krunch Mossey and Duke and Chris Chadwell are all safe!2 points
-
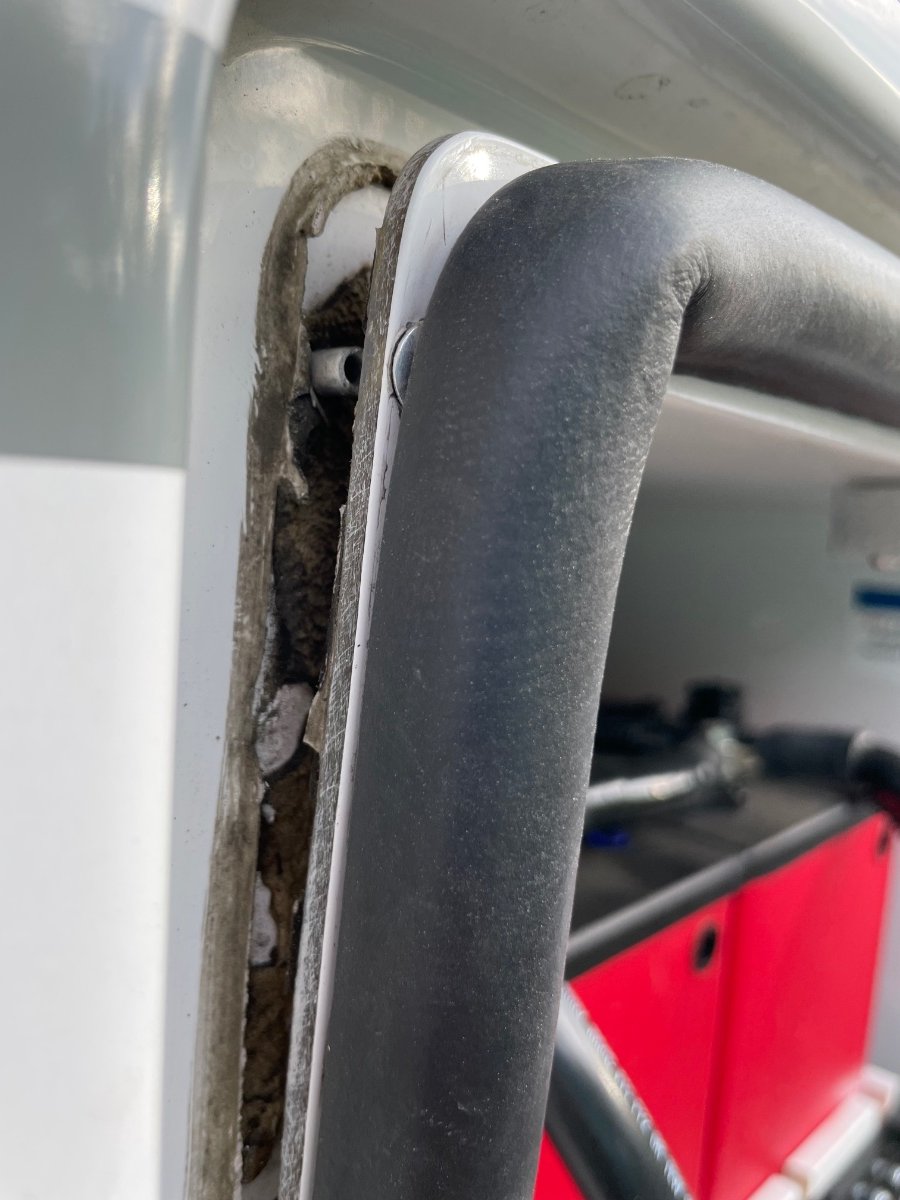
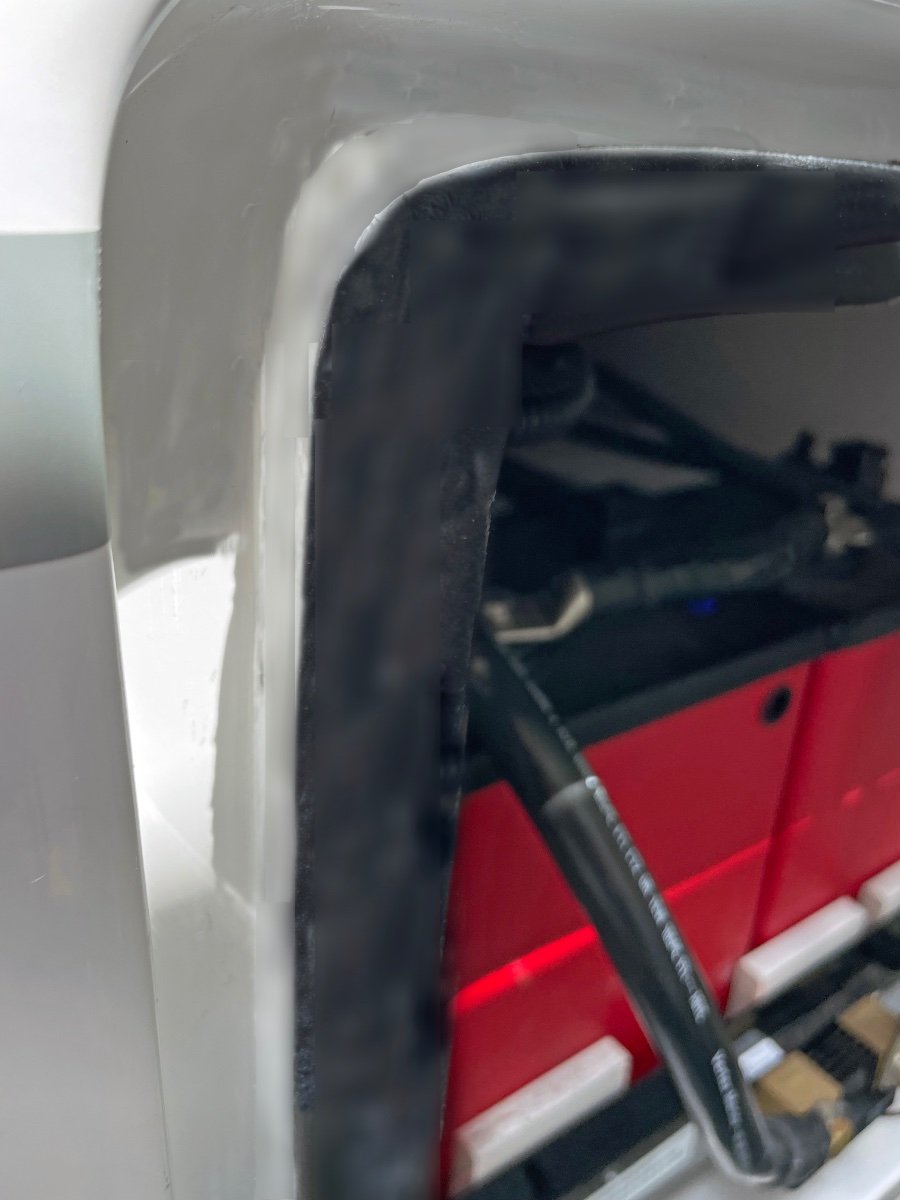
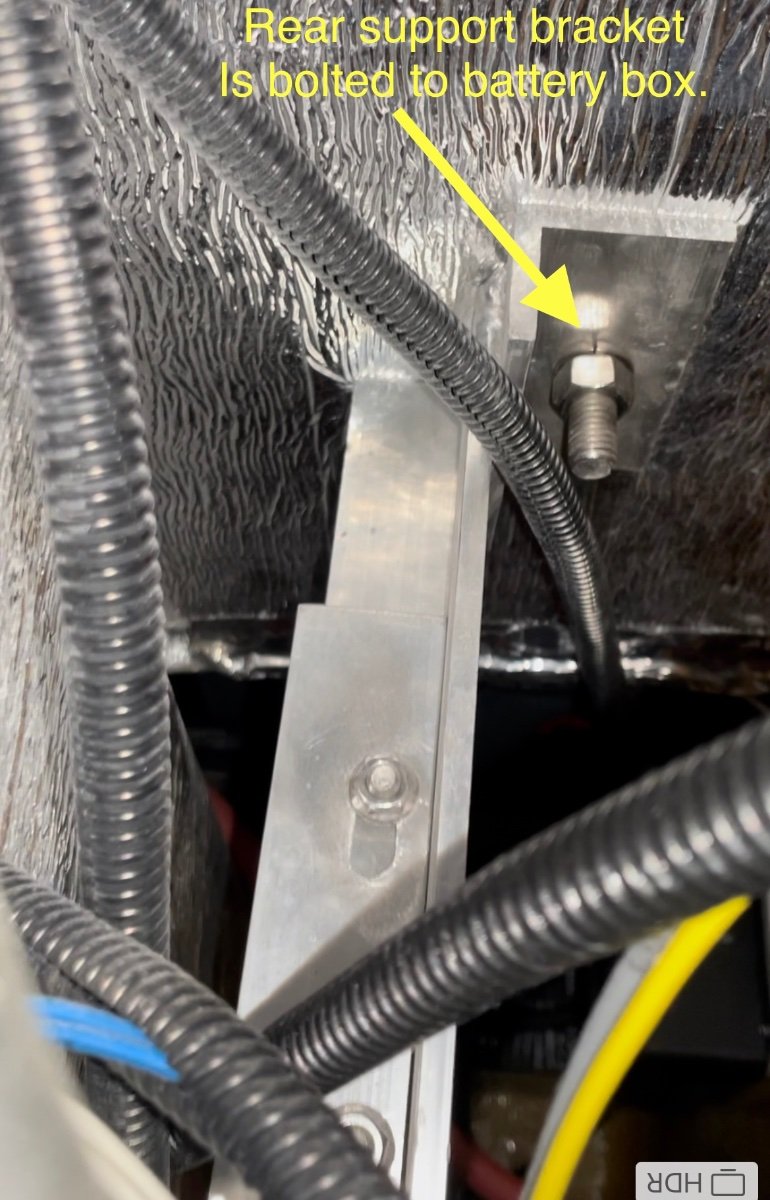
This spring as we were prepping for a new road trip, I noticed the battery box door seemed to be sticking out further than normal. I thought I would adjust the latch to pull the door in a bit tighter. What I found was that the battery box had started to tip forward away from the main hull as shown the pix below. All the rivets up both sides and all across the top of the box had sheared and the box was tipped out about 1/2". I contacted Oliver Support to understand how the box was designed, mounted etc. They cleared me for travel after having me check the support strut inside the trailer (under the pantry area) . After some further consultation I was able to perform a repair. Here's a sketch of how the battery box is installed in our Hull 505 (2019 Elite II) trailer. The repair steps I took following Oliver instructions were: 1) Remove the batteries from the slide tray to get weight off the box. 2) Drill out all sheared rivets. (3/16" bit) 3) Release the 2 support bracket bolts inside the trailer under the pantry (one of which is adjustable). (This step is a pain and requires some long extensions for the ratchet wrench to make reaching nuts possible.) 4) Tip box back into position. (Check that the box base still has a slight outward tip for water drainage.) 5) Re-tighten support bolts. 6) Re-rivet all around the perimeter. 7) Clean seams and add a bead of boat life white sealant around the battery box seam. (See pix below). Repaired Box Above: Door closes with a good seal all around and the box sealed to the body. We are going to keep an eye on this as we travel this next year, and make a trip to the Oliver factory for them to inspect and repair if necessary. I'm not sure of the root cause or mechanism by which the box tipped out in the first place. One concern would be that the box is putting too much pressure on the outer hull while bouncing down the highway. I don't see any indications of cracking in the glass hull or box at this point. Hope this helps if anyone else see's an issue. Craig Hull 505
1 point
-
For the last few hours members of our "family" have started to feel the effects of this hurricane. This is only the beginning of a 12 to 16 hour period that is forecast to bring up to 20 inches of rain and a record storm surge. Hopefully everyone will make it through this storm safely and the damage that it is sure to cause will be somewhat limited. God speed to all of those in the storm's path. Bill1 point
-
The Aurora Borealis made an appearance in coastal South Carolina last night…you can see my Elite II in the foreground reflecting the Aurora.
1 point
-
My brother sent reports from my place in Lee County Florida. All is well. Flooding in the neighborhood stayed below the door thresholds, and all but one resident had moved their cars ahead of time, so our neighborhood residents avoided vehicle damage. (Every vehicle had been totaled during Ian in 2022). I'm feeling grateful.1 point
-
I'd just go step by step and double check along the way. Is the shore power good? It's grounded and the right voltage and everything? I keep a little tester on hand for that. Then I'd connect to the Xantrex bluetooth app and see what it says. Does it show any charging? Bulk, absorption or float? I'd also make sure my settings were good on that Xantrex app. Maybe set the incoming breaker rating to 10 amps and the charger current to 50 amps. Unlike Xantrex, I've been able to reach the Lithionics people via the online ticket system and Dmitri was very responsive. Maybe try that also.1 point
-
As Bill reported, Mike and Krunch Mossy are both alive and well. He asked me to let everyone know.1 point
-
1 point
-
Pics would help if you can get them. Bill1 point
-
I've just received emails from both Shallowgal and Mossemi. Both report bunches of wind and rain. Power was/is out for both since between 9:30 and 10:00 last night. Apparently a small tree has fallen on Mossemi's house causing little damage. Shallowgal "only" has small tree branches to clean up around the house. Hopefully most of the rest of Florida sees similar. Bill p.s. glad to read Seadawg's report above too.1 point
-
Now that, I could buy into.1 point
-
Milton made landfall at Siesta key/Sarasota around 8:30. Moving very fast. Damages from wind, torrential rains, and tornadoes will be seen in a big part of the state. No power in many many places. About a quarter of our county, so far. My extended family and friends have all reported in. Safe and good.1 point
-
I'm assuming mine was removed by previous owner, replaced with a nice drip edge. Can somebody confirm who knows the OEM "rain seal?"
1 point
-
Pulled mine off last week. Disgusting holder of all things gross. Came off in two pieces while only pulling by hand. Residual adhesive came off easily using plastic razor blades. Whole job took under 30 mins. Good riddance!1 point
-
Just did this myself earlier in the summer. Mine was also pretty much dry rotted and ugly. It's a job make no mistake. Have yet to install rain gutters over the windows though, probably should do that soon.1 point
-
That’s what I did four years ago. I don’t regret the decision!1 point
-
I just removed the awning seal on our 2017 LE1 and it had deteriorated to where it was no longer effective. I was able to really clean that area for the first time while I was washing and waxing her. I plan to forgo replacing it and apply an over the window rain gutter. Amen.1 point
-
2021 E2 390 AH 3000 W Inverter I arrived to a full-service camping facility late afternoon. I was plugged into 30A shorepower. Around midnight- so about 6 hours after plugging in, I heard a pop/boom and then my inverter (which had been off) remote bluetooth turned on and the inverter made the charging sound. This cycle repeated itself about 3-4 times every 5 minutes before I got up and looked. I went outside and unplugged the vehicle. The next day- I plugged back in. It didn't happen right away, but it happened again that night and I got up and looked under the dinette seat. I could hear the popping coming from the Transfer Relay switch (I think I am not 100% sure). I looked at the built-in surge protector codes. It said error code 0, but I did notice the energy coming through was not consistent, it varied around 5 points. Additional info: 1) I believe I may have been the first to use this power system but I'm not 100% sure. The host asked another camper if they had an issue and they didn't. It was a new state park. There had been lightning that night and the host said lightning did seem to affect the power in the area. I had my own surge protector plugged in at the post. Questions: Was it my camper or their power? Was there a safety issue/possible fire issue? What makes the transfer switch pop? Do I need service? Is there a protection mechanism built into the camper that if shore power turns off the inverter will turn on? Or was it just that the power went off, then came back on and I was hearing the charging of the batteries (not the inverter)? It was that whiny machiney cooling off fan sound. It has been a few weeks since this happened so I don't remember all the details, but I could have sworn the inverter turned itself on when the power was shut down/popped. Is there some sort of protection built it where it can do that? Maybe I misidentified the charger turning on as the whole inverter turning on.1 point
-
Bryan, as I recall I just used traditional tools. With the tray empty and pulled out it was not difficult to access. Mike1 point
-
Mike, How did you access the nuts, whilst tightening the bolts, as mentioned above, that is a difficult location to get into? Bryan1 point
-
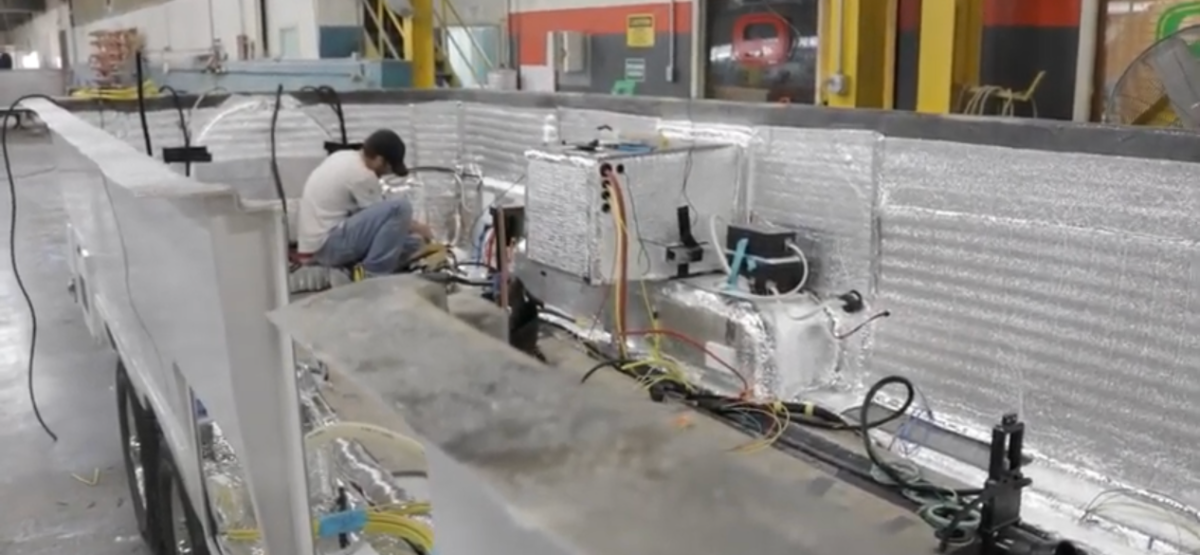
This is a screen shot from a tour video showing how the battery box is internally mounted. Once the trailer is assembled there is no way to reach the area where the battery box is joined to the sidewall of the outer hull. After final assembly the box is buried deep under the pantry area of the trailer. According to Oliver Service, after insertion, the box is supported by the outer hull by, by the wheel well and by a support arm that is bolted to the box on the top and the frame of the trailer on the bottom. The only way to get backer washers, or backing plates onto the rivets (or bolts if desired) is during the manufacturing assembly process. An owner cannot reach back into that space from the inside of the trailer. For those of us experiencing sheared pop rivets, I'm not sure there's a much better solution than maybe stronger stainless rivets and perhaps some 3M 4200 Sealant/Adhesive to help hold the box in place. I'll keep track of the repair and review it with Oliver the next time I get to Hohenwald and report back any updates. Craig - Hull 505
1 point
-
When I replaced my AGMs with lithiums I also had to do some repairs on the slide out tray in the battery box. I had several rivets that failed and I replaced them with stainless steel bolts and nuts/lock washers. It’s doing fine after a year and a half but some of that is due to the significant weight reduction the lithiums afforded. I think the 4 AGMs were just too much weight for the tray. Mike1 point
-
Another excellent write up, thank you! I have had my slide tray out for a re-paint after a battery leak, so I wholeheartedly agree with working the support bolts under the battery box is a challenging endeavor. Four hands to make doable. You detailed instructions will be help someone in the future, so kudos to y’all in the great northwest! Mossey1 point


-
Recent Achievements
-


")


")


")


