Leaderboard
Popular Content
Showing content with the highest reputation on 11/06/2024 in all areas
-
Bill: Once again sage advice regardless of which product to be used. I tend to latch on to good recommendations and "immortalize" them into a Do-It-Yourself guides. Attached are two of mine that I intend on using in the Summer 2025 voyage around the US. As always, many much smarter owner's work has shamefully been copied for these guides. GJDIY - Ollie EZ Gutters From John D's Post.docxDIY - Trim Lock Drip Rail (Oct 2024).docx2 points
-
2 points
-
Both of my GM TVs (Chevy Silverado 1500 and GMC Savana 2500) are gassers equipped with the Tow/Haul feature; selects a lower gear for better engine braking effect and optimizes transmission shifting. They also have Manual mode, especially beneficial when going uphill or down a steep slope. I always engage Tow/Haul when trailering the Oliver and have used the Manual mode on occasion with the Silverado when towing in mountainous areas, but nothing too extreme; works great in lessening actual use of the vehicle’s brakes to ‘slow the go’! Something I noticed different with the Savana in the hills encountered on our most recent travel into Texas Hill Country, was the very apparent and effective downshifting of its 6-speed transmission when slowing for a stop, as well as down grade at speed. Could be that it is basically a commercial vehicle designed for carrying and handling heavy loads under adverse conditions. The hefty front and rear disc brakes, 12.8” and 13” rotors respectively, was another bonus; I rarely had to manually engage the brake controller, especially for quick stops at sudden traffic light changes. Because my wife has ‘extreme anxiety’ with thought of “those cliffside roads” that @jd1923 mentioned, I may never experience his described encounter; but then our GPS Navigation has taken us down many a path of uncertainty, don’t ya know!2 points
-
Good post JD. I hope a lot of folks read this. I learned early on that the brake controller is not a "set and forget" device. I am always tweaking mine depending on road conditions, speed and especially GRADE!! At the start of a long steep descent, I put the gain way up. I can tell now when the TV and trailer are in sync with each other. Good thing you have an HD truck and glad you are safe. Brake failure on some of the steep grades we have out west is not an option! Does your Ram Cummins not have an exhaust brake? Not a diesel owner but thought that was one of their great benefits. Cheers, Dave2 points
-
Many of the National Parks campgrounds are dry camping. Others, like around Moab are public campgrounds, COE and FS. I still use the Ultimate Campground app, even though it is no longer supported. You can sort sites so that you can find amenities that you want. Mike2 points
-
2 points
-
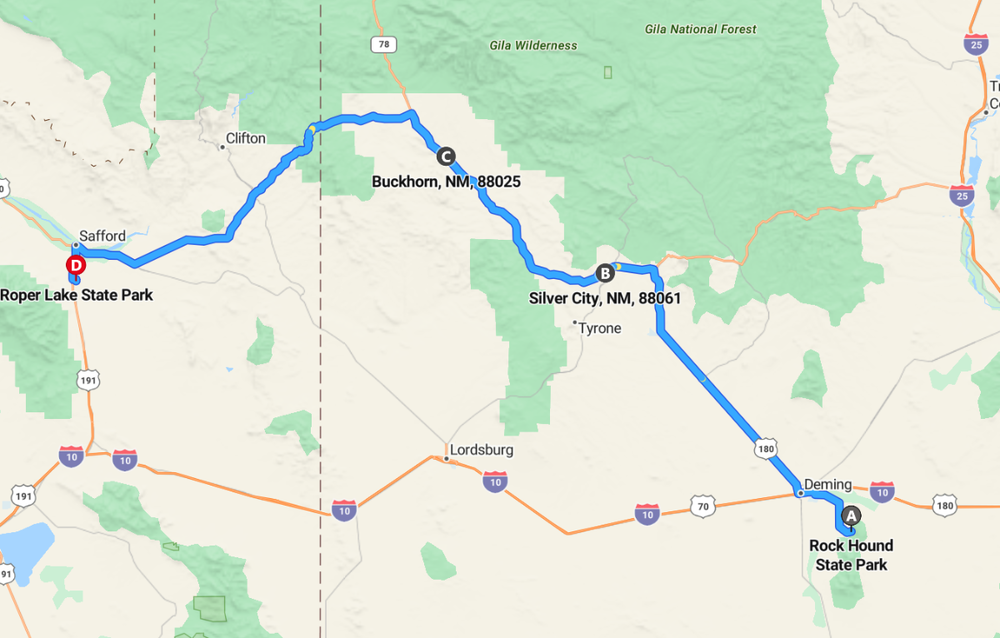
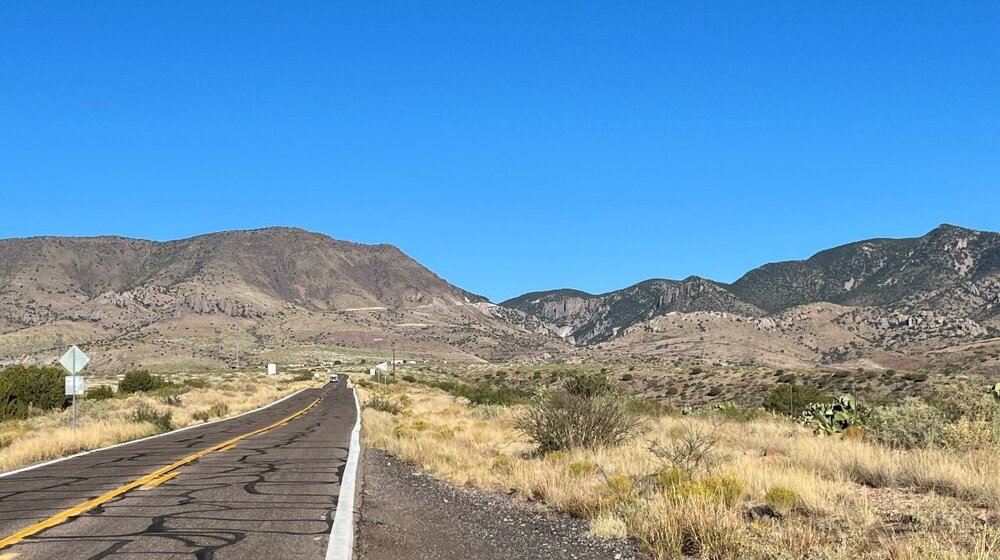
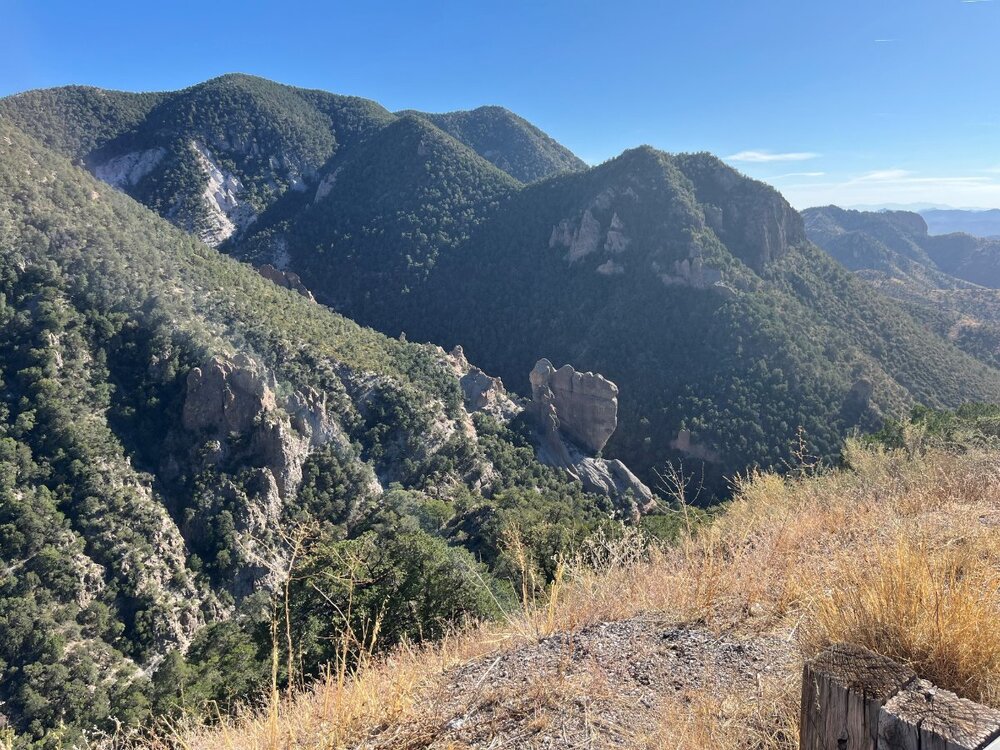
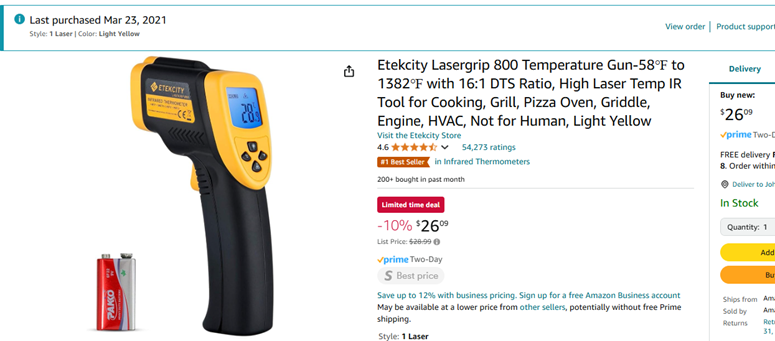
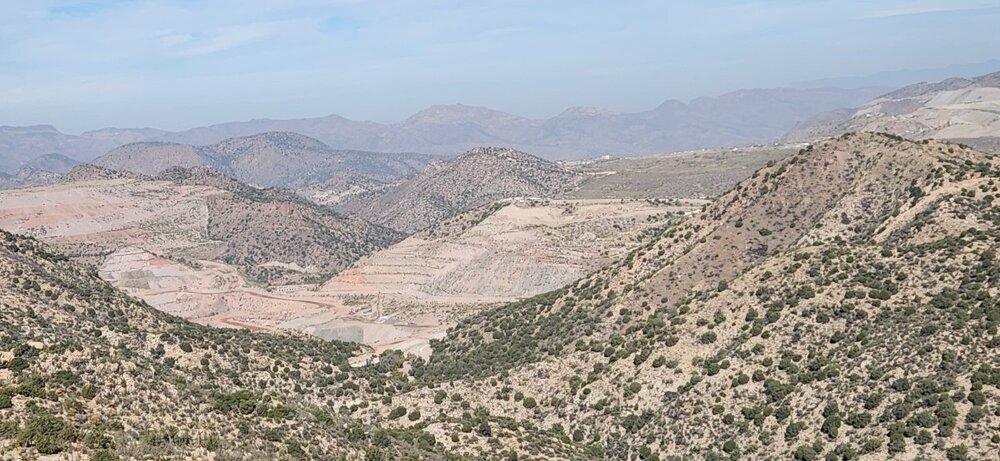
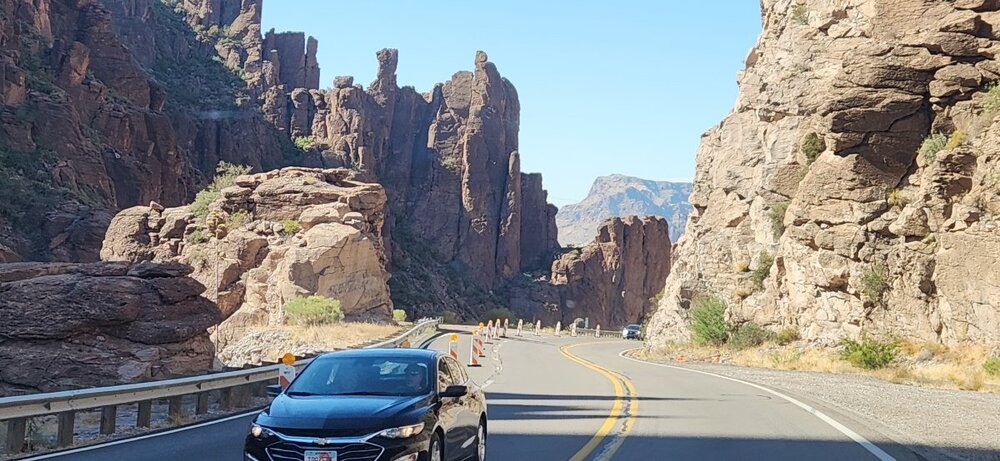
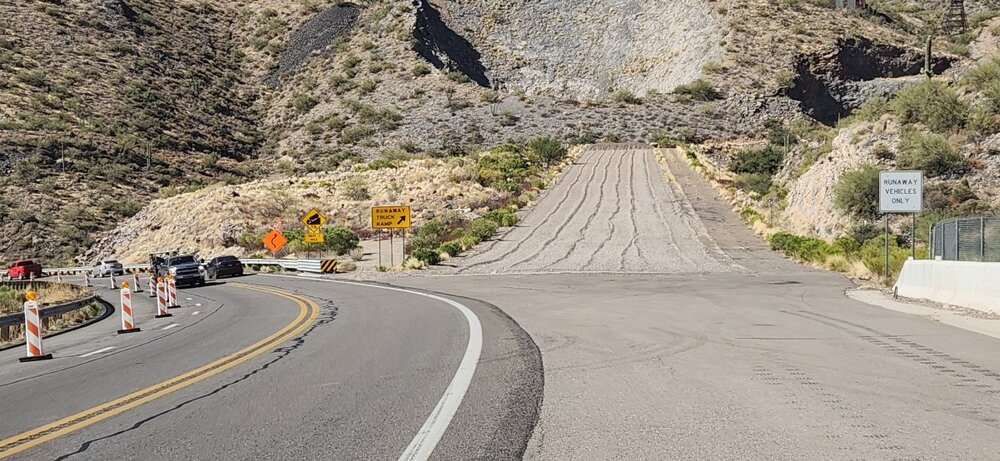
We are home safe now though I ran into quite a learning situation on our final stretch home. We spent the night at Rockhound SP near Deming NM and the next night was Roper Lake SP near Safford AZ. The normal route would be to take I-10 to US HWY 191 for a 2 1/2 hour drive. We've driven that route as well as US HWY 70 from Lordsburg to Safford. We really wanted to see Silver City and take a scenic route (see map) adding another hour to the drive. Heading NM on US HWY 180 out of Silver City we turned left on US HWY 78. Perhaps I should have heeded the warning at the turn, "Not Recommended for Truckers, Steep Downhill Grades." We had traveled up over 9000 ft in the White Mountains of AZ and all through Lincoln Co NM climbing and descending 1000s of feet in altitude without concern. What a beautiful drive and HWY 78 was not one of those cliffside roads, not scary with safe shoulders. There was a section after entering AZ that first climbed much higher and then it must have dropped 2500 FT in just a few miles, OMG! Zoom in to see the road (second pic). Much of the incline is behind the mountain and cannot even be seen and we are miles away when we stopped. After we got more than halfway down, I felt the upgrade HD brakes on our Dodge Ram start to fail. I have felt this before, so I knew what it was, from driving the heavy old cars of the 50s that would overheat and fade. The speed limit was marked at 30 MPH with many curve warnings at 20 MPH. I never exceeded 25 MPH regardless my brakes overheated. I have an infrared heat measurement gun. Parts of the discs were at 360F and the caliper holder on the right side was the hottest just over 400F. I was thinking why? We sat there for 30 minutes until all temp reading were down to 160F. (See 3rd pic for side view where we stopped.) I realized the truck was breaking for the trailer that the trailer brakes were not engaging hard enough for the extremely steep grade. The gain was fine for driving around town but should be increased for highway speeds and what I've learned now is that it should be increased more for declining steep grades. Thought I should write this up, so others do not get into a similar or worse situation. Maybe there are better controllers? Mine has a digital readout, numbers getting larger as the brakes are depressed harder. As they were the numbers only got up to 20 or so. After I increased the gain, the numbers were reading well over 40. I have never driven down such a mountain road with all the steep up and downs we have in the Rockies!1 point
-
Wow. Glad you are a safe and experienced driver. As others have mentioned, I too adjust my controller settings when on the fly. This is even more important for the many owners using well equipped half ton trucks. This demands that we be even more cautious of velocity under tow and how hard we are working our brakes. This past summer we were way back in the Custer Mountain State Park and I sensed that my brakes were being overworked despite my using gears 1 and 2 of our ten speed tranny. I pulled over and my IR sensor indicated 350 to 400 on the TV and only 125 on the trailer tires. I bumped up the Ford OEM brake controller to 9 of 10 while on the steep parts of that afternoon. In retrospect, for our rig, our truck and Ollie both are just shy of 6,000 pounds. I have for years use a seat of my pants check of controller setting. It requires two tests: TEST A: On a safe lightly traveled road, get up to say 45 MPH. With the trailer brake controller set to zero (OFF) and your trailer connected, apply your truck brakes for a firm stop. Sense the travel distance and de-acceleration your truck brakes provided. TEST B: Repeat the above test, this time with your brake controller set at it's normal reading. Now manually apply the trailer brakes using only your lever on the brake controller. Sense the travel distance and de-accelerating your trailer brakes provide. The truck brakes generally will provide superior stopping power than the trailer brakes. However you should definitely feel the power of just the trailer brakes as they try to stop a 12,000 pound load. If not, adjust to a higher controller setting and repeat the process after everything has cooled down. I highly recommend and have used for 3 years the JD suggested thermal sensor pictured below. Cost was appreciably a bit less than the far superior Kline suggested above. But it gets the job done just fine. When doing the above tests, if you have an IR Gun, your readings should be about the same for the axle being tested. I.E. the disk brakes on our truck temp's should be in the same ball park. The drum brakes on our trailer should be as well. If you see a significant lower temperature on one brake as compared to its peers, it likely is not performing well and needs further investigation. Finally when really working your brakes on a long downhill run, it is a great idea to pull over at a safety stop and check temp's. Look for outlier readings. GJ1 point
-
We have a lot of Klein tools in the family, many are Made in USA (not sure re this one). https://a.co/d/fhNa8N91 point
-
This summer I experienced my GM Silverado's engine braking -- it was the first time that I recognized what it was doing, and it is fantastic. I'm glad you had the tools to measure temperature and the knowledge to recognize what was happening, and what to do @jd19231 point
-
I know this has been discussed on the forum but not sure if anyone has done this or if it can be done. Been thinking about the water inlets and the outdoor shower controls. Is there a way to put a shut off valve to the lines going to them? Would it be practical? I am thinking that by shutting off water to the points going out of the trailer and draining it would eliminate those parts of the plumbing system from freeze damage. The rest of it would be kept warm either by the furnace (while camping) or by running a heater inside the trailer with the hatches open (while stored) We have a garage that rarely gets below freezing in winter but it could if outside temps really dropped. Then I would just run the heater over night. TIA, Scotty1 point
-
I re-plumbed the entire rear end of the trailer. I straightened out some lines and rerouted others so that they are neater than they were when our trailer was built in 2014. While I was at it, I put electric valves, that are controlled with a switch in the basement, in both the hot and cold lines going to the outdoor shower. I also ran an airline, that can be controlled with a valve in the basement, to these two valves so that the plumbing of the entire trailer can be blown free of water. The airlines also run to both wheelwells where an air fitting is available for airing up the tires. This entire air system can be supplied via the onboard compressor mounted in the back of the Silverado.1 point
-
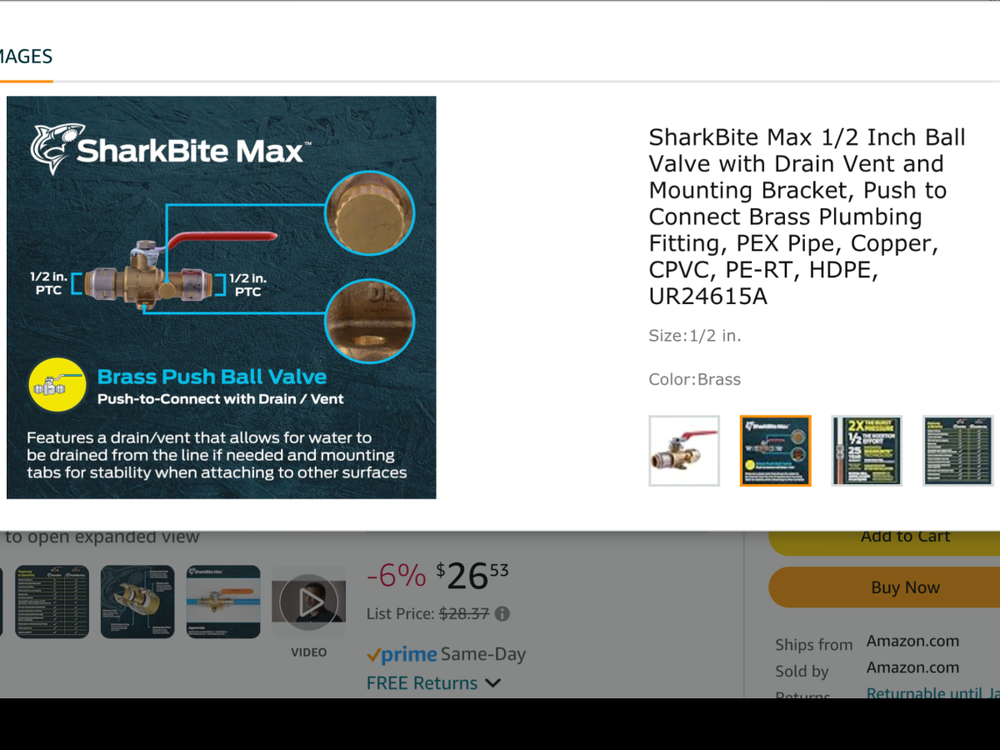
Two of these 1/2" Sharkbite valves with drains (one for hot, one for cold) plus a PVC pipe cutter, should be all that is needed. Depending on how much room you find around the Pex lines, I recommend making just one cut and trying to insert the Sharkbite fitting on both sides of that cut. If there is room, that is best. If some of the Pex must be cut out because there is not room otherwise, cut no more than 1/2 the length of the new valve out of the Pex pipe, to ensure enough Pex remains for insertion into both ends of the Sharkbite fitting. FWIW, when we camped with Hull #1291 with outside ambient temps of 9 degrees F, the lowest temp in the bottom of the hull was near the outside faucet. So, be sure there is no water left in the flexible hose to the shower handle as well.1 point
-
1 point
-
I drove an 18-wheeler for six months helping a friend with his transport business, some of which while hauling grain up through Palo Duro Canyon in north Texas and into Oklahoma. Saw many a truck runaway ramp and quickly appreciated their purpose. These ‘big-rigs’ have air brakes which can fail if applied too often on extensive down hill slopes; a situation wherein air demand exceeds the capability of the onboard compressed air supply or even a malfunction to the air system (compressor, air tank, air lines) itself. These off ramp structures are comprised of a deep bed of sand or gravel, an effective method of safely slowing heavy vehicles like trucks and even buses to a stop. The sign displayed in @jd1923’s pic reads ‘RUNAWAY VEHICLES ONLY’, guess that includes an Oliver TV, as well. Safe travels!1 point
-
Yes - this has been done by more than one owner (not me - yet). Yes - there is a way to place shut off valves in each of the lines mentioned. Being "practical" is in the eyes of the person doing the work or paying the bill for having the work performed for you. Good luck with your plumbing skills and working in tight quarters! Bill1 point
-
Pictures from "Top of the World." The first picture does not do it justice. This drop in person looked like if you were driving at 50 MPH right on the edge of the Grand Canyon, OMG my heart was pumping! Final pic is the truck runaway just prior to a tunnel through the mountain. US HWY 60 descending to Superior Arizona.1 point
-
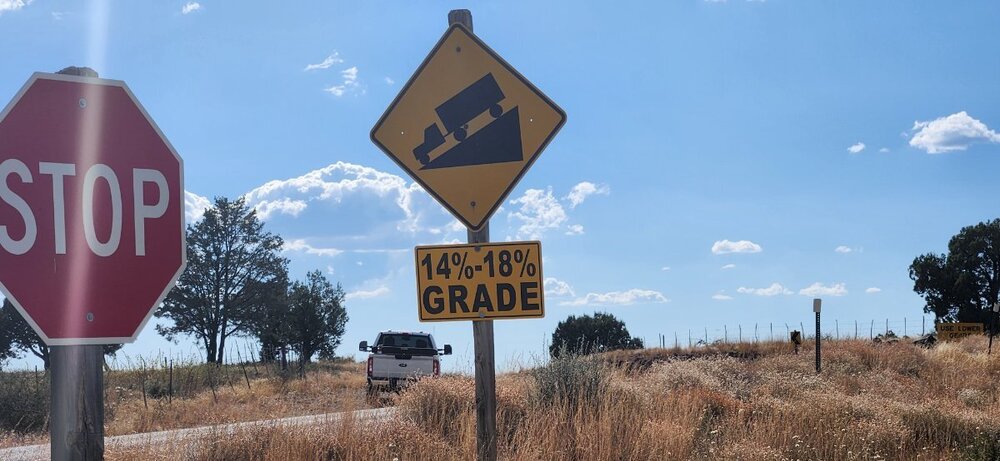
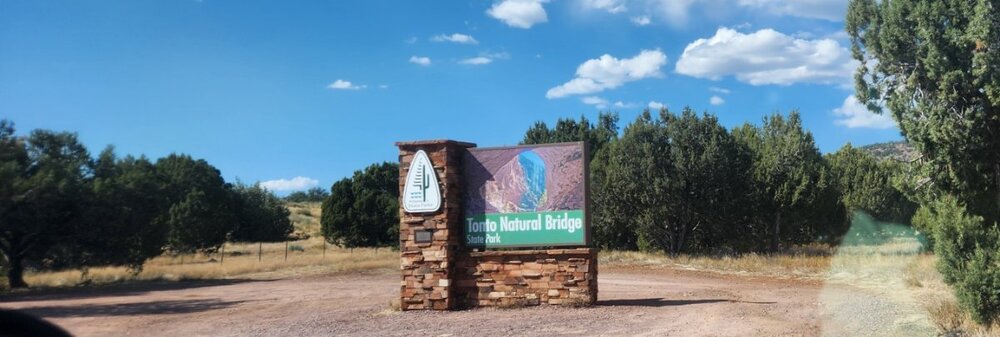
We didn't have to worry much in the rolling hills of Central Texas, elevation 1200-1800 FT max. The descent on AZ HWY 78 was over 3000 FT in about 15 miles. What caught me by surprise is that we had climbed to 9300 FT and descended the White Mountains of AZ and over 8000 in Lincoln Co NM, no issues. This drop in elevation in such a short length of road was extreme. Check out the sign in my first picture. Ever see a grade warning this steep? Twice we have wanted to visit Tonto Natural Bridge near Payson AZ. Both times I was towing. We did not realize the road to this park was so steep. This sign was at the exit of a turn-around area they had for us towing travel trailers! We passed on this visit not having time to disconnect and honestly, I did not want to attempt this descent even without the Oliver! Interstates and US highways have 6-8% grade max when speeds are >55 MPH. They did not have grade signs on AZ HWY 78 though I'm certain it was at least 10% in some stretches. Maybe Tonto Natural Bridge another time. It's only 2 hours from home.1 point
-
I check my gain on a regular basis, a habit I got in to with the smaller half ton trucks I towed my Oliver with. The last 4 years with our 2500, the big 6.7L Cummins does most of the braking.1 point
-
1 point
-
My RV Lock makes a funny extra (music type) sound when the batteries are low and then still makes the normal (music) sound during unlocking or when the RV Lock is locking. This has been like that for about a month now while the trailer is waiting for spring. Normally, when the batteries are good, I hear a sound with each depression of the 4 password numbers. When the RV Lock accepts the password, it make a music sound during unlocking as well as when locking. So the RV Lock gives plenty of advance notice that the batteries need to be replaced. I really like the RV Lock myself. I keep the key forb and key in my pocket or in the TV. It is nice to just come back from a hike and put in the code and unlock the door without finding a key. I would not be concerned with upgrading to a RV Lock as you can always use the actual key just like on a regular lock.1 point
-
Almost every time I read a thread here on the Forum or watch a video about these locks I consider "upgrading" my old fashion key jobs. But, then I see a story such as this about being "locked out" or worse - the lock simply will not operate and I try to remind myself of why I like to keep things "simple". Simple seems to fit well with my brain!🤪 Even though I still do the key thing the old fashion way, I do keep a set of keys in both the tow vehicle and the Oliver. Plus I have a couple of extra sets in the event I need to give a key to someone else that is going in a different direction than I am. Bill1 point
-
@jd1923 I did a day long scouting trip up into the Allegheny National Forest in Northwest Pennsylvania yesterday, looking for dispersed camping sites. The ANF is the only large tract of federal land in Pa,, and allows dispersed camping, as do the BLM lands so common in the west. The park rangers had been very helpful, giving me a number of forest roads to check out, but their biggest and most helpful piece of advice was to get the Avenza app and download the Allegheny national Forest map ($5) into it. A number of times we were “off grid“ without cellular service, but the Avenza app kept us clearly located via its GPS capabilities, moving our little blue dot along the forest Road on the app as we drove along. We would have been lost several times without it. You are also able to drop a marker on that map, as we did for about a half dozen sites that we wanted to come back and visit with our Ollie. We would’ve been lost without it! Geoff1 point
-
I also took a look for it in the "Playstore" this afternoon and apparently it is NOT there . Bill0 points
-
Recent Achievements


