Leaderboard


Popular Content
Showing content with the highest reputation on 11/11/2024 in Posts
-
To All my Brothers and Sisters who have served. 🇺🇸🇺🇸 Thank you for all you did to protect our great country. Freedom is not Free.
 9 points
 -
Happy Veterans Day and a solemn salute to all who served in the Armed Forces - "Let Freedom Ring..."
9 points
-
While traveling from Florida to Huntsville, AL. last Thursday I spotted an Ollie in a campground along US Hwy 231, maybe south of Troy, AL. I didn’t have time to stop then but thought maybe on the way home. Of course I promptly forgot about it until I drove by again yesterday and noticed the door was open. So I turned around at the first opportunity and stopped to say hello. The owners of LE2 #462 are Mike and Elaine from Oregon and we had a pleasant but short visit. We discussed an 120V AC issue they were having with their refrigerator and I was able to show them the location of the access panel to the AC plug and I’m sure they have it fixed by now. It’s always a good day when you have an unexpected visit with fellow OTTO’s! Mossey4 points
-
The following video popped up on my YouTube recommendation list a couple of weeks ago, showing a new Bluetooth enabled replacement panel for the SeeLevel II tank monitors. I thought that this would be a handy upgrade, so I called to place an order, and it arrived yesterday. Installation was simple. I removed the original 907-P3 panel (Model 907, with Pump switch and 3 tanks) by taking out the four screws holding it to the wall. Then I pulled off the three connectors for the water pump, and removed the Molex connector on the circuit board. The new panel is a 907-BTP7 (Model 907 with BlueTooth, Pump switch, and up to 7 tanks) and came with a new wiring pigtail. In the video, James shows using WAGO connections. But Oliver leaves very little slack in the wiring for the tank monitor, so there's not much room to cut the existing wires and connect the new ones. And, there's no need to do so. Since we do not have an LP monitor, nor an alarm, we only need the four existing wires; just in different pin locations. The above photo shows the original Molex connector, with, starting from the right: White, Blank, Red, Black, Blue, Blank. As shown in the attached wiring diagram for the new 907-BTP7 panel, all that's needed is to move the last three to the right one pin position, as follows: White, Red, Black, Blue, Blank, Blank. Push on the Molex connector, reconnect the three water pump wires, and replace the panel on the wall. Done, in under 30 minutes! Safety protocol would of course be to switch off the solar disconnect and turn off the batteries before starting, as the Molex pins are not insulated, and bumping them together could cause a spark or blown fuse. Download the SeeLevel app for IOS or Android, and follow the instructions to get it set up. Of course, we do not have an LP monitor, nor more than three tanks, so the ALT and LP buttons will not be used. Garnet used to offer a 907-BTP3 panel, but that was several years ago, and is no longer available. Now, the obvious question, is why would someone want this panel with Bluetooth? Oliver's fresh water tank, like most, has an overflow, so observing tank level isn't really needed for filling. And there are inline flow gauges for much lower cost. But if you're in line at a low flow water fill, with impatient people behind you, it might be nice to know your progress. or maybe you're in the shade, hanging out in your hammock, and suddenly wonder if the shitter's full. Now you can check! 🤣 I'll use it to watch how full the black tank is when I'm flushing it, and monitoring the gray tank when I'm back-flushing it from the drain outlet. It'll be easier than running back and forth between the monitor in the trailer and the faucet on the side of the house. And, simply because I enjoy fiddling with tech stuff like this. I see that the price has gone up considerably since I ordered on November 7th. It was $109.99, and is now $146.37. That's a 33% increase in four days! Here's the link if anyone is interested: https://shopusa.garnetinstruments.com/solutions/holding-tanks/c-709-btp7-709-btp7-display
4 points
-
At last years Oliver Rally Truma Rep Dave Leyman talked about the intro of the Truma soft start. He specifically mentioned that a Truma tech or Oliver Service would have to do the install for warranty purposes. The Truma tech said the SS was not going to be sold directly to the public at this time. This might have changed IDK. For anyone really interested in a Truma SS, I suggest giving Oliver Service a quick call, they will give you the full scoop.3 points
-
There are a few install posts here. The DC-DC charger is great if your stays are short, back on the highway every few days. Won’t help for longer stays and wanting to run the A/C.3 points
-
You do not need this relatively expensive kit, with regulator, if attaching the generator directly to the Oliver onboard LP quick disconnect which supplies regulated LP pressure. Yes with an external tank, but connected to the Oliver only a hose with correct fittings is needed. I just spoke to Derek at Hutch Mountain and he asked me to post this to clear up a misunderstanding. When installing their propane conversion kit, it is required that the large Demand Regulator is still used when connecting to the onboard LP quick disconnect.2 points
-
According to the SoftStartRV website, they only provide two models, which leads me to believe they are universal in application and thus, not brand specific. Thanks for providing pertinent information regarding Truma’s business practices, much appreciated!2 points
-
Thinking Truma is a good decision for Hulls #1500 and above, those with money to spend not wanting extra aftermarket installations. Unless something comes up better in the next 2-3 months, I’ll go with Atmos that @rideadeuce and @Ronbrink have proven, $1650 including SoftStartRV installed, S&H included, install yourself or find a local installer, At the Truma price point, it should certainly come with integrated and proprietary soft start! Another point for us boondockers. The Truma pulls large amps like the noisy Dometic. Atmos much more efficient draws less than 10A, Run your A/C on your 3KW inverter!2 points
-
There is truma mobile service based in Phoenix.
2 points
-
We currently have the Honda EU 2200i Companion model. Yes it has a 30 amp receptacle, but unless something has changed since we purchased ours it is not a TT-30 straight-bladed receptacle matching the shore power cord. It is a NEMA L5-30 3-prong twist lock receptacle... so you will need an adapter to use the common 30A shore power cord configuration with the Honda EU 2200i.2 points
-
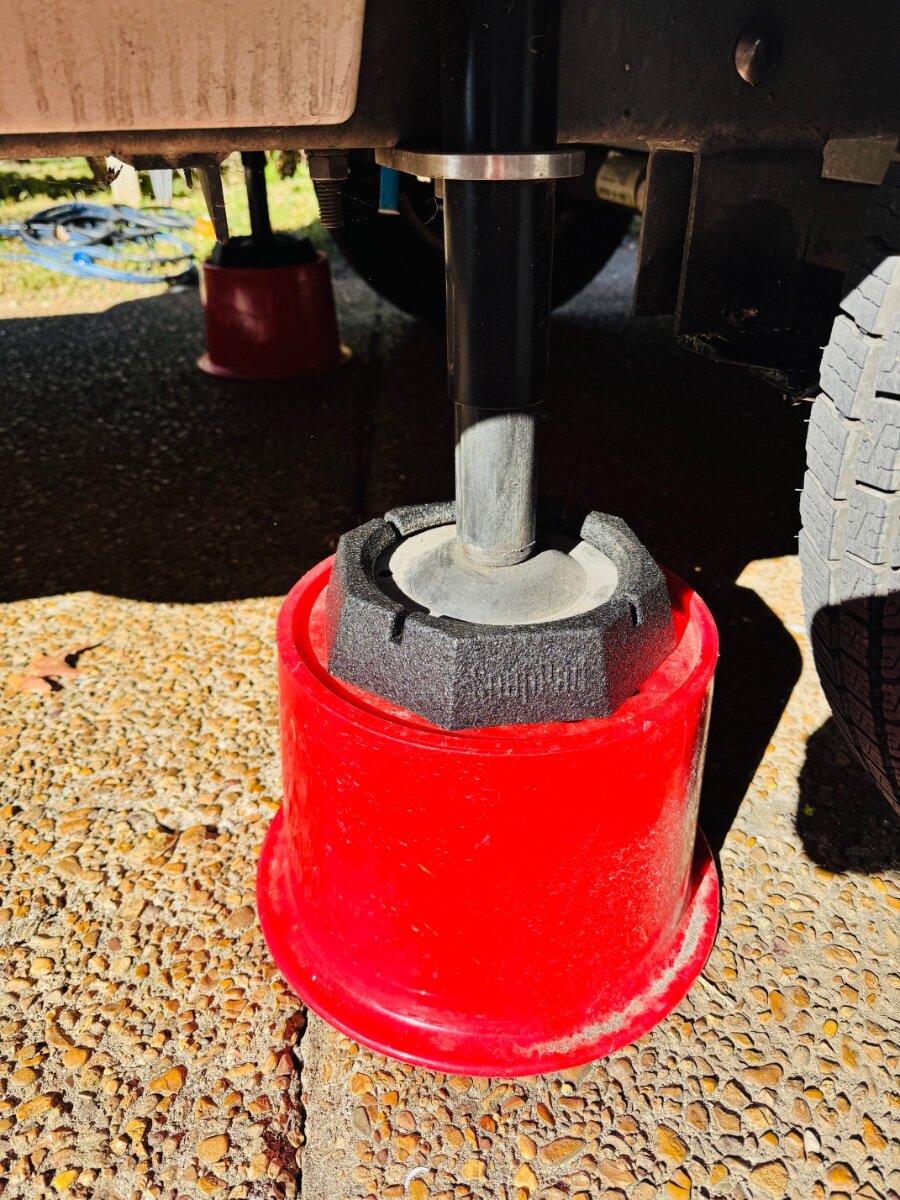
From 3 years back the snap pad install video on hull 5052 points
-
Either way you'll need both receptacles; absent an additional Y-adapter of some kind... one receptacle to power the camper load and the other for the neutral/ground shorting plug to keep the Progressive Industries surge protector/power quality checker happy 🙂1 point
-
This is all true JD. But I am also thinking emergency use of the generator at home where options of multiple fuel use would be an advantage. While having fun in my Oliver, I would only ever run the generator on propane for all the reasons you mentioned, and a few more! I also try to never run ethanol gas in any of my gas powered tools. Only high octane non-ethanol gas is used. Where I live, it is pretty easy to find. There is also a website that will list local "pure gas" locations in your area. https://www.pure-gas.org/ Dave1 point
-
When we had the soft start installed at the Elkhart facility, this is what we learned. 1. They are installing the standard SoftStartRV unit but they add a custom made bracket (which they will not sell to you). 2. The unit is installed with screws and 3M tape on a frame piece in front of the evaporator (bottom-left). Not in a cavity behind the evaporator (as is suggested in a video in YouTube). 3. There is a 2 year warranty on this install. 4. It is easy to do yourself but that would void the warranty if some left. Per the tech, if you install one yourself, and then need work done on your unit for some other unrelated issue, they will refuse to provide service. Warranty or not.1 point
-
What better reason do you need?😉1 point
-
Yes! Thanks for bringing that up. If you want to run the generator on propane only, this could be true. But if you want dual fuel capability, then you'll need the kit. Rethinking the Hutch Mountain kit now in favor of the kit made by Grenergy. If you watch the install videos on YouTube, I think the Grenergy system is much better thought through, with better components. I'm also rethinking the need for the Companion model. The 30 amp plug would be necessary if running two generators in series, but for one gen, the two 20amp plugs would be fine. Dave1 point
-
now i'm curious!1 point
-
It’s my understanding the ‘kit’ is installed to make the single fuel (gasoline) Honda into a dual fuel generator (gasoline/propane).1 point
-
Not that I'm advocating for Truma. I'm not. I have no experience with them.1 point
-
I believe I saw these on one of the forum members Oliver @Galway Girl and did a little research to find them. Pop on and never have to take them off. Quality, thick, durable rubber. Pretty cool. Not sure if there has been a previous post but thought I would share. M https://www.etrailer.com/RV_Jack_Pads/SnapPad/SN59FR.html
1 point
-
I too haven't needed one yet and NOT thinking about it. Another 80-100 LBS in generator and extra LP. Rather reduce weight than add more. Added 600AH LiFePO4 and a solar suitcase adding to 720W solar and Victron 3KVA MP2 Inverter/Charger. Yes, none of this helps in bad weather, though 9 of 10 days it's "another sunny day in Arizona!" We don't camp during the hot SW summers. With an Atmos A/C upgrade (planned for Q1 2025) we could run the air a couple hours (<10A at 120VAC) in the afternoon spending ~30% SOC with our configuration. Most of our travel plans include boondocking for periods of 2-5 days. We regularly book stays at national/state/county parks in-between our dry camping stays. We will get down below 50% and hook-up and chargeback to full. We also carry a 50' extension cord with adapter for emergencies. Before you go generator, increase your battery bank in AHs and plan a hookup campsite every so often. I would add another 300 to 600AH Epoch LiFePO4 in the basement first (will fit in the void under the pantry for 1200AH total). Or do what @rideadeuce did and start off with 920AH!1 point
-
Here is additional info of the benefits of snap pads per their website. The rubber pad acting as an electrical insulator is note worthy. https://rvsnappad.com/blogs/news/snappads-what-are-the-actual-benefits1 point
-
For me, it boils down to a faster camp setup and 3 less things I have to store and pull out of the basement. If three of us pool our 4th extra pad we could give a set to someone! Ha1 point
-
I installed snap pads a few years ago. They help to not leave a foot print on black top paved sites at campgrounds. We also use the Andersen red buckets for both the front jack and rear stabilizers. For some It’s more of a want than a need I suppose. They do look great. 👍🏻1 point
-
Same here. Maybe a Christmas gift? I still think they’re cool.1 point
-
I agree that they are cool and attach easily and will probably last a long time... But, this is one of those items that I've told myself I need but I simply can't figure out why I need them. Bill1 point
-
I replaced my CO detector this summer even though it was not going off, but since it was a 2018 Ollie, I wanted to replace it before it started alarming due to age. When I took the old one off, the back said it was a 2017 detector.1 point
-
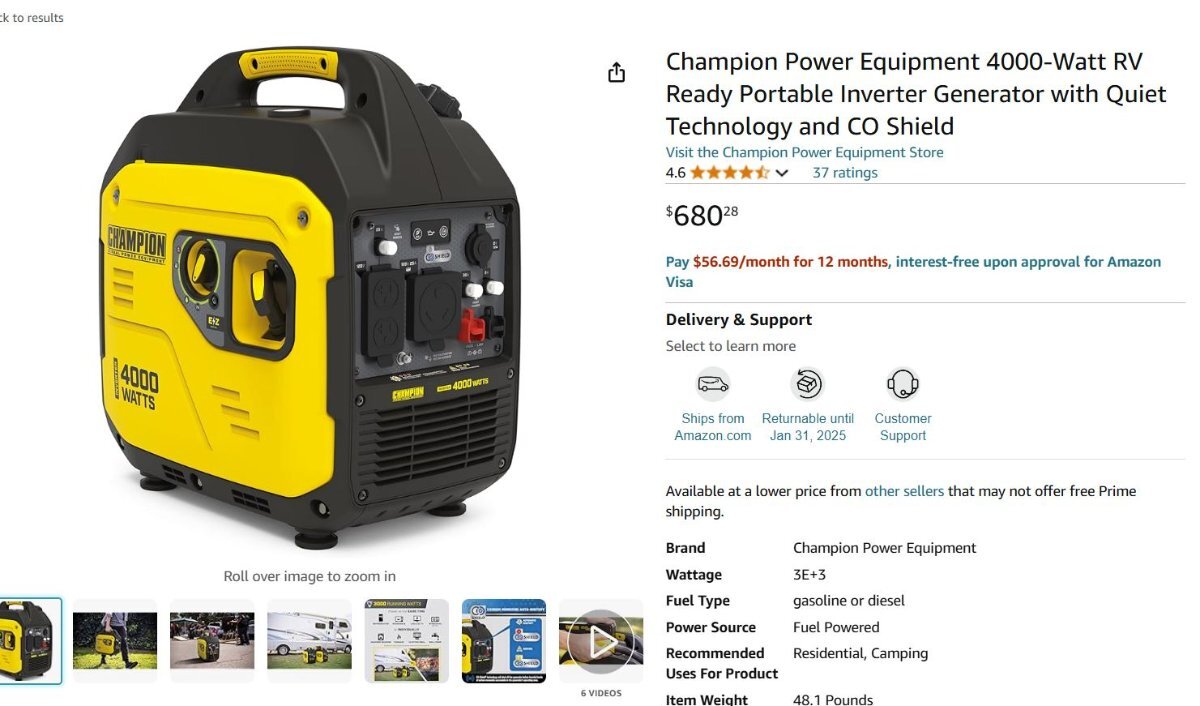
We picked up this generator a few weeks ago. We have an LEII w/dometic...I wanted something that I could run ac, micro, hair dryer...and run on propane or gas. Amazon.com : Champion Power Equipment 4000-Watt RV Ready Portable Inverter Generator with Quiet Technology and CO Shield : Patio, Lawn & Garden
1 point
-
When I was ordering my Elite II, and knew I wanted to boondock a lot, I considered ordering the 30# tanks -- but once I understood how much they weigh when full, the decision was easy. I use 20# tanks and I carry 3 of them (2 in the dog house and one in the bed of the truck). I have never run out of propane, though I have allowed 2 of the tanks to be out (once). I have learned to be mindful of where I can REFILL my tanks and also to keep a watchful eye on tank levels (watching for the sensor to show it has switched over to the second tank) -- so I know as soon as one runs out. Remember that if you are boondocked somewhere, you might need to be able to lift the tank into the bed of your truck (unless you want to tow your Oliver every time you refill) -- so it's not just lifting to get into the doghouse, but also in and out of the bed of your TV.1 point
-
My wife and I did New Foundling and the same port you are going to stayed at Conroy's just up the road. many roads have no swalls and deep drainage ditches to hold snow in the winter but the roads would not hold me back , did Alaska twice and there you really have the frost heaves but marked slow down and all is good. Plan your trip, great people and sights do all the fingers even take the ferry north of Gros Morne and go over to Labrador for a couple days well worth the time and cheap ferry ride short enjoy.1 point
-
Go to the back side of the detector and follow the wires. Shortly, you should run into a black round thing that is the fuse holder. Bill1 point
-
We have used this dehumidifier successfully since 2020 until the temps get below 40 degrees. It has served us well. We have never used damp rid. https://www.amazon.com/Pro-Breeze-Electric-Dehumidifier-Portable/dp/B01DC5PPWM/ref=sr_1_18?crid=2SIBJ6HVGFKGR&dib=eyJ2IjoiMSJ9.HrIRptQvyhn8CtLR9MURR4yFx3td6QLmVGnTF21LwUWhApGvKHhJeEGoBcqZP6ilBlGoGPhiojbOMuDPbjw8K8X-3JCrUrjj6sb63GyOvdnfgrnzQbODo41htnz-HEvY5jL7vrlY_Om48WlDGr8sjKky3txCTvL2oaFfhVahOesGH9NWAaXF_mEr_Vwj7z78P0WfMPRe44uQu7MmJRxLkV3I_HzbG8xLpAOQZ3zatZBgV6qNBi7m4qxAtlMf2_ZxdYVl9nWUNp9piBi_TPH26ONw0sZ296kr8N9pBaP4TAo.khzBUA9QQ_dPl5ZuNnLOkTUe4RTNtRfV6gP1KngFEeE&dib_tag=se&keywords=small+dehumidifier+for+rv&qid=1730671535&sprefix=Small+dehumidifier%2Caps%2C130&sr=8-181 point
-
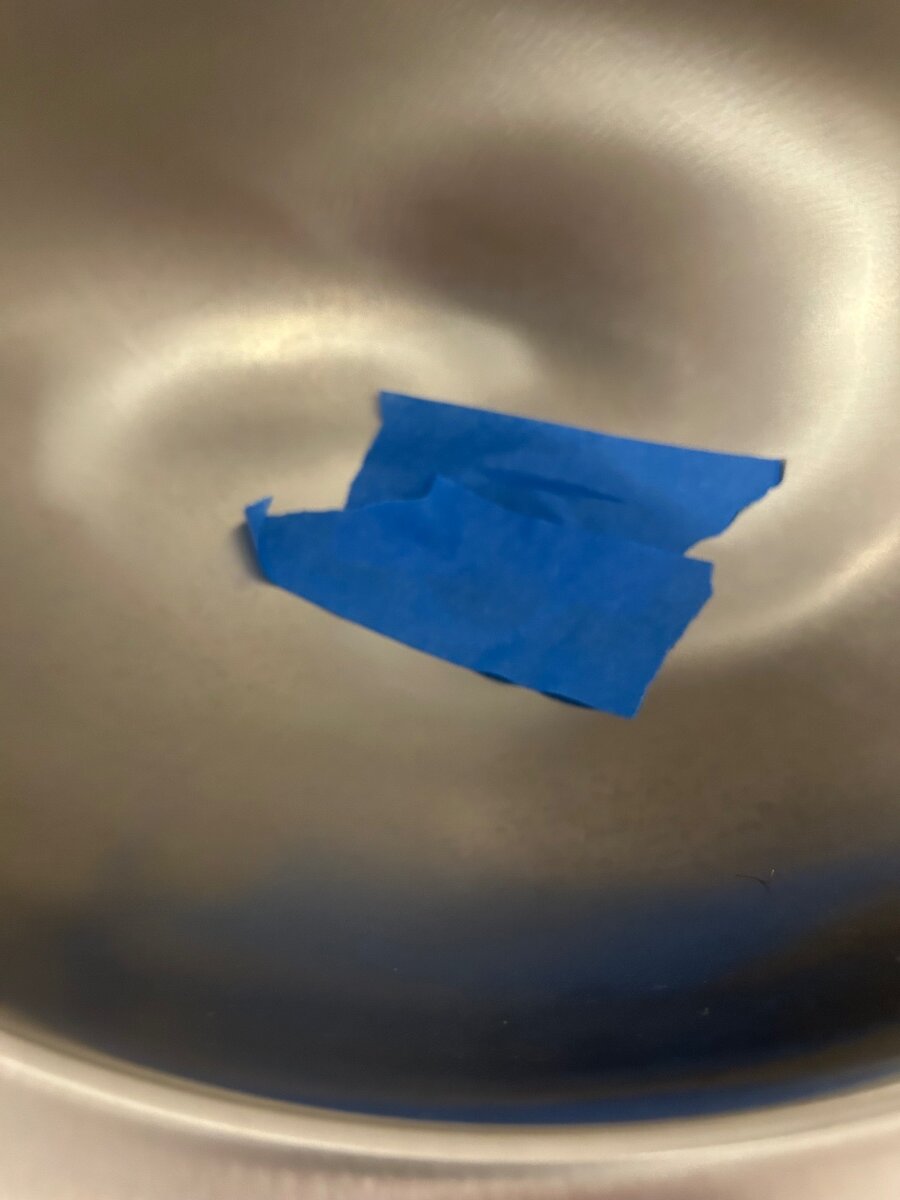
John, I stepped in XPLOR this afternoon and checked on our dehumidifier. While inside I noticed that the strong odor of the antifreeze we used to winterize has greatly diminished. I could still detect a slight odor but nothing like it was. So after inserting ear plugs as the alarm as you know is ear piercing and I decided to reattach the RV Safe LP/CO detector. The green light came on in normal and the detector did not go off. 🤞🏻 Our Ollie is parked in our Hangar in the backyard allows us to actually hear the detector if it alarms. I also took @topgun2 suggestion and covered the porcelain throne with Saran Wrap and I also covered grey water drains with a little painters tape. I will let you know if our alarm goes off again as this is week 3 after winterizing. I think leaving two windows open even with our cover on really helped disparate the antifreeze odor. - David
1 point
-
I went with red after drilling out the burner cover and installing bolt through the top with nuts below. But my threads were trashed so I redrilled the holes slightly larger and installed bolt with nut and red locktite...not caring if ever I can get back apart as I'll replace the whole stovetop with sob. I could cut the bolt head off if absolutely necessary. Thanks per SNY SD UP :)1 point
-
These are metric screws that come up from underneath to hold down the burner cap. “the bolts used to secure the burner caps are common M3x24mm socket head screws. Most RV appliances are going to have metric (screw, nut, and bolt) fasteners, to be compatible with the non-USA market. If you are going to ream/drill-out thru the burner cap and put in bolts... I would stay small, less than say 1/8-3/16"... At that point I would probably go with a small 'round-not-slotted-head', a slotted head is just one more place for food to catch and be difficult to keep clean. My problem was, with all the shaking (Campbell Hwy, roads to Mayo, Keno & Tuk) on our AK trip 'on roads less travelled', the threads on the underside of the burner cap had pulled/stripped away. Also not thinking "hey, could they be metric not SAE". So I caused some issue by trying to fit SAE into Metric. My Very Bad!!! If you have the D21 (ours was installed in mid-2020) and you remove it, and do not see blue Loctite on the screws, at that point, I would get some 'Blue', loosen up the screws just a bit and add a drop of Blue, retighten, and call it Preventative Maintenance time well spent. I am not sure when Dometic started adding the Blue Loctite to those screws. it was done sometime between 2020 & their 2023 email reply. This is not thread-drift, but I believe the root cause for a lot of our appliance & trailer problems were Blown Shocks, which I did not check before heading 'Off-to-Alaska'. That said, after we replaced shocks & leaf-springs, "yah we broke some of them too". This years R/T to Alaska was rather uneventful with regards to 'shaky-trailer-syndrome...'. We did had an issue with the 'Highpoint Convection Microwave' coming loose from the front panel, but fixed it (interesting screw choice in there) and we were good. However, getting it re-seated in the very back took quite a while. Thanks to all for the comments and feed-back. Gawd I love this forum. B~Out,1 point
-
In our experience ethanol fumes whether spilled near the sensor or dissipated by respiration after a few drinks is enough to trigger the CO alarm if the trailer is closed up. I’m sure the ethanol in the antifreeze would also be enough to trigger the alarm.1 point
-
@St8ofbeing I will save you a search on the forum. Last year we had to replace our RV Safe LP detector while on a 42 day 6000 mile trip. I purchased the detector at Humphrey RV, in Montrose, CO and it was a fast simple install. We got home and winterized and the new detector I had just installed alarmed and would not reset. So I called RV Safe and explained the issue and long story short they sent me a replacement. The gal was really nice and also sent a prepaid return envelope for the faulty detector. The gal I spoke at RV Safe said well RV anti freeze should not set the alarm off but anything is possible. We had no LP turned on, no leaks and the alarm only sounded after winterizing. I admit the RV AF order was quite strong inside our Oliver. I just don’t understand why the antifreeze odor would set it off. Fast forward - I just winterized last week after an 48 day, 7400 mile trip out west and the LP alarm went off and would not reset after winterizing. So I will be calling RV Safe again explaining what happened and requesting a replacement. If you contact RV safe make sure you specify a white trim replacement. They also come in black. I would caution against adding an on off switch to your LP detector. I opted not to as it could be deadly if one forgets to turn it on. https://rvsafealarm.com/contact/ Edit and update - I just spoke with Andrea she is the Customer Service Rep and is sending me a replacement. I will return the existing detector. Patriot🇺🇸1 point
-
The first thing I would do (if I were you) is to actually use the "search" function at the top of this page by typing in "carbon monoxide". With the 119 results you will get - about 5 down the page is a detector that John Davies put in and it just may be the solution for you. However, note that these detectors do not seem to be the most reliable of devices - read a bunch of the other posts that the search gives you. Good luck! Bill1 point
-
We always leave the sewer hose attached. No reason not to…. It makes life so much easier!1 point
-
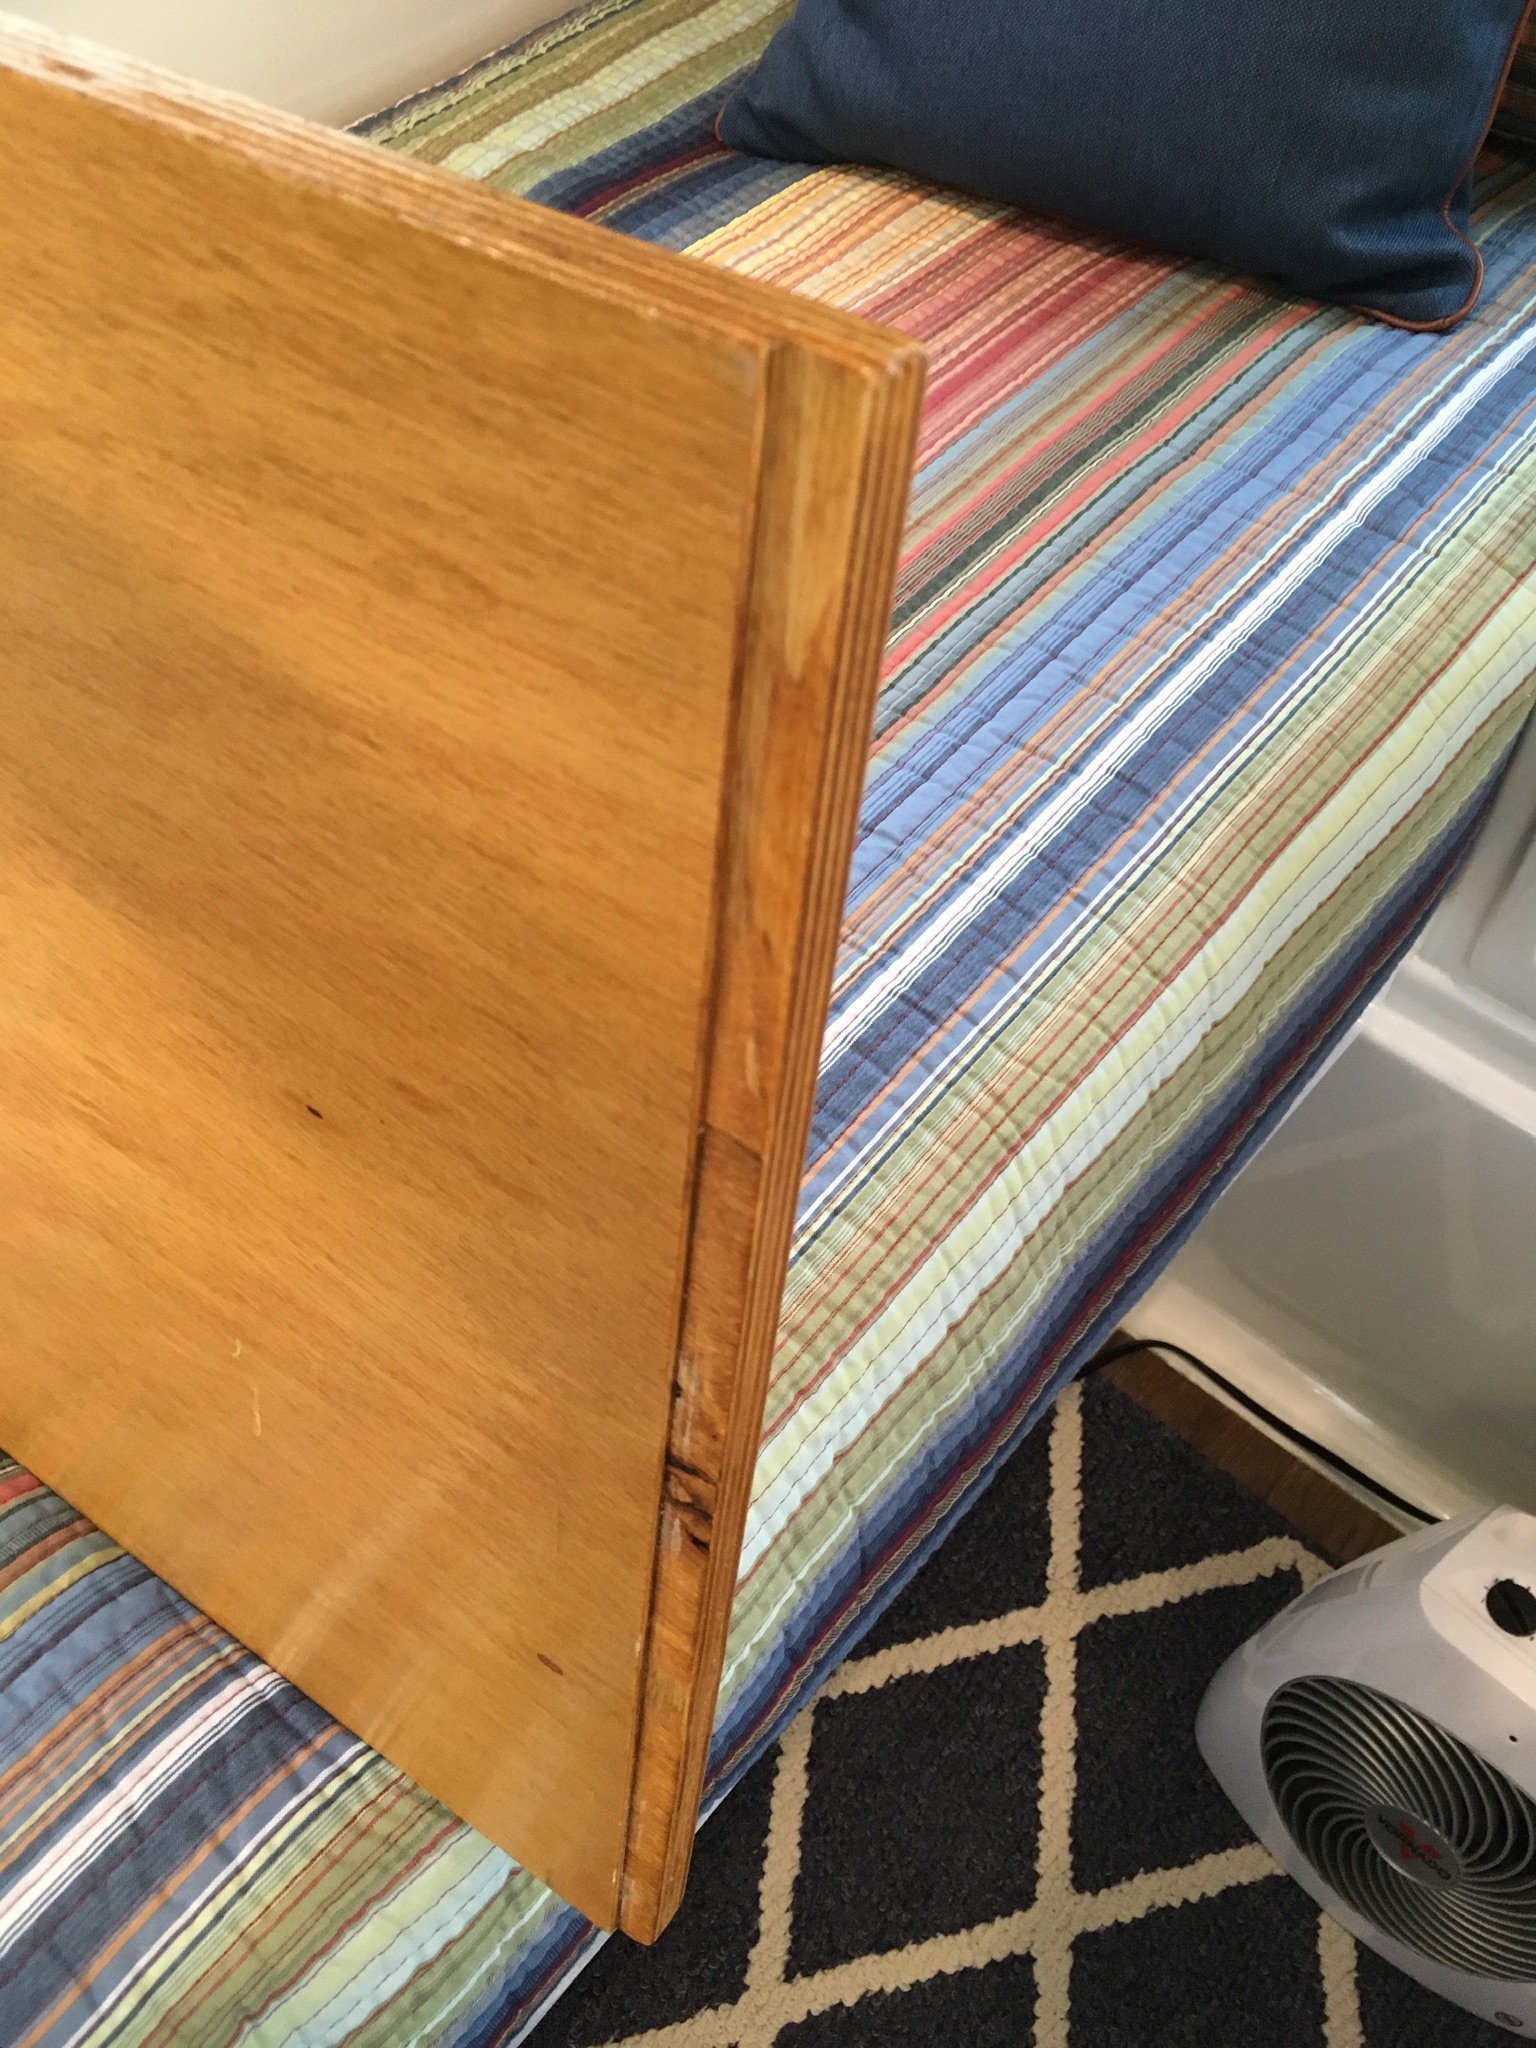
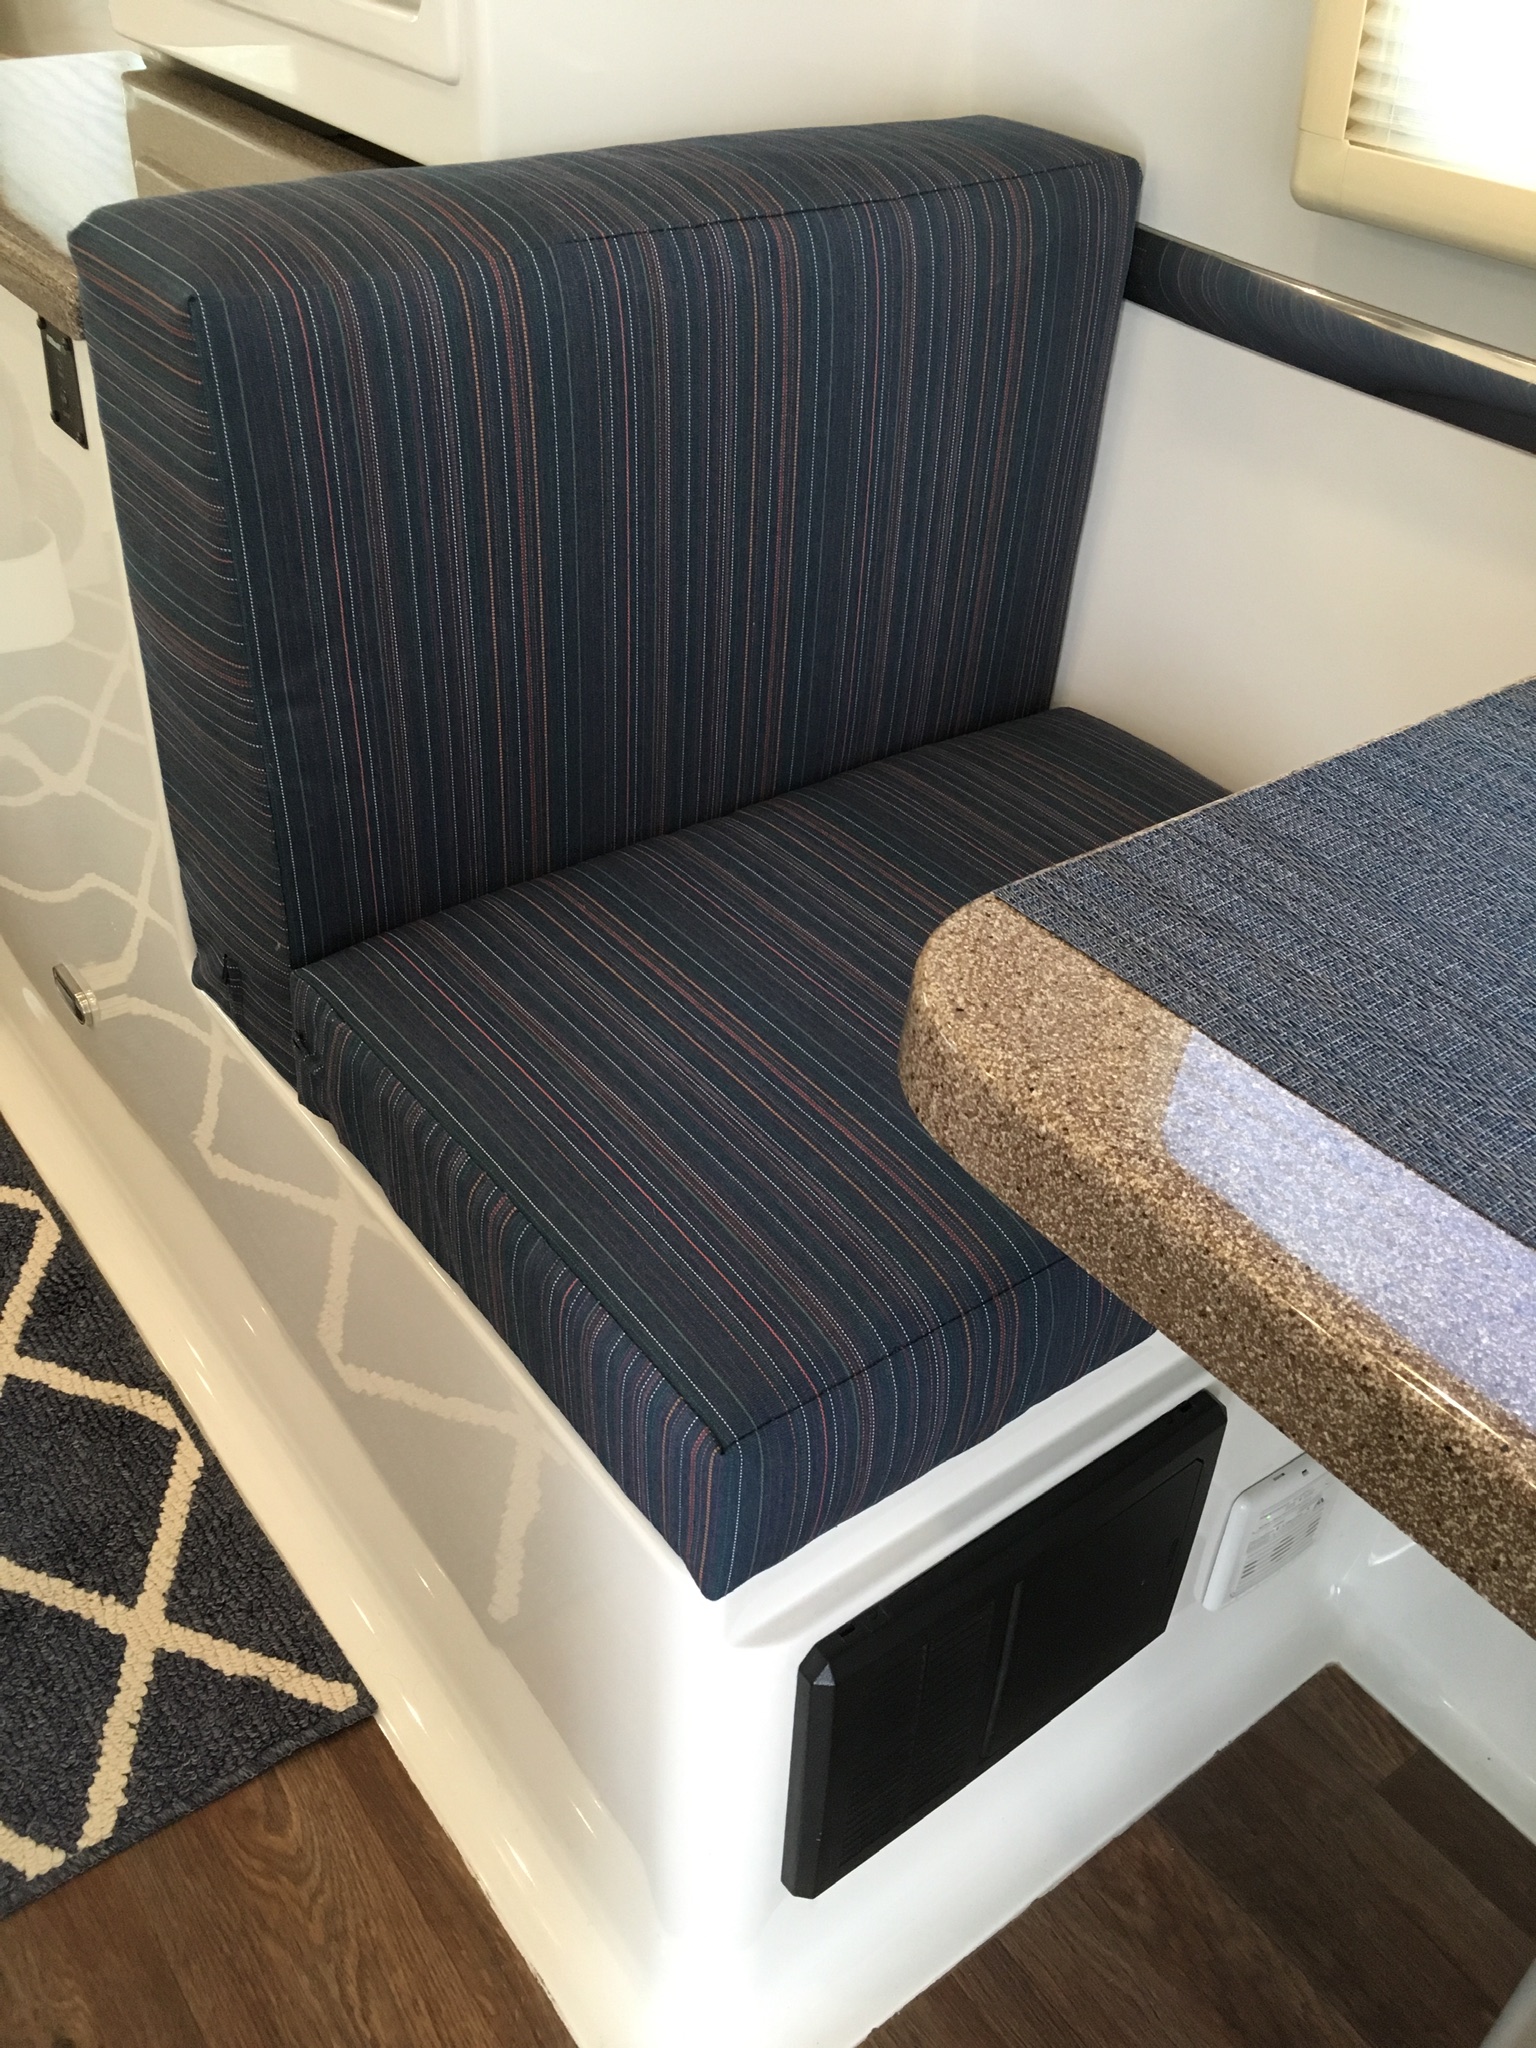
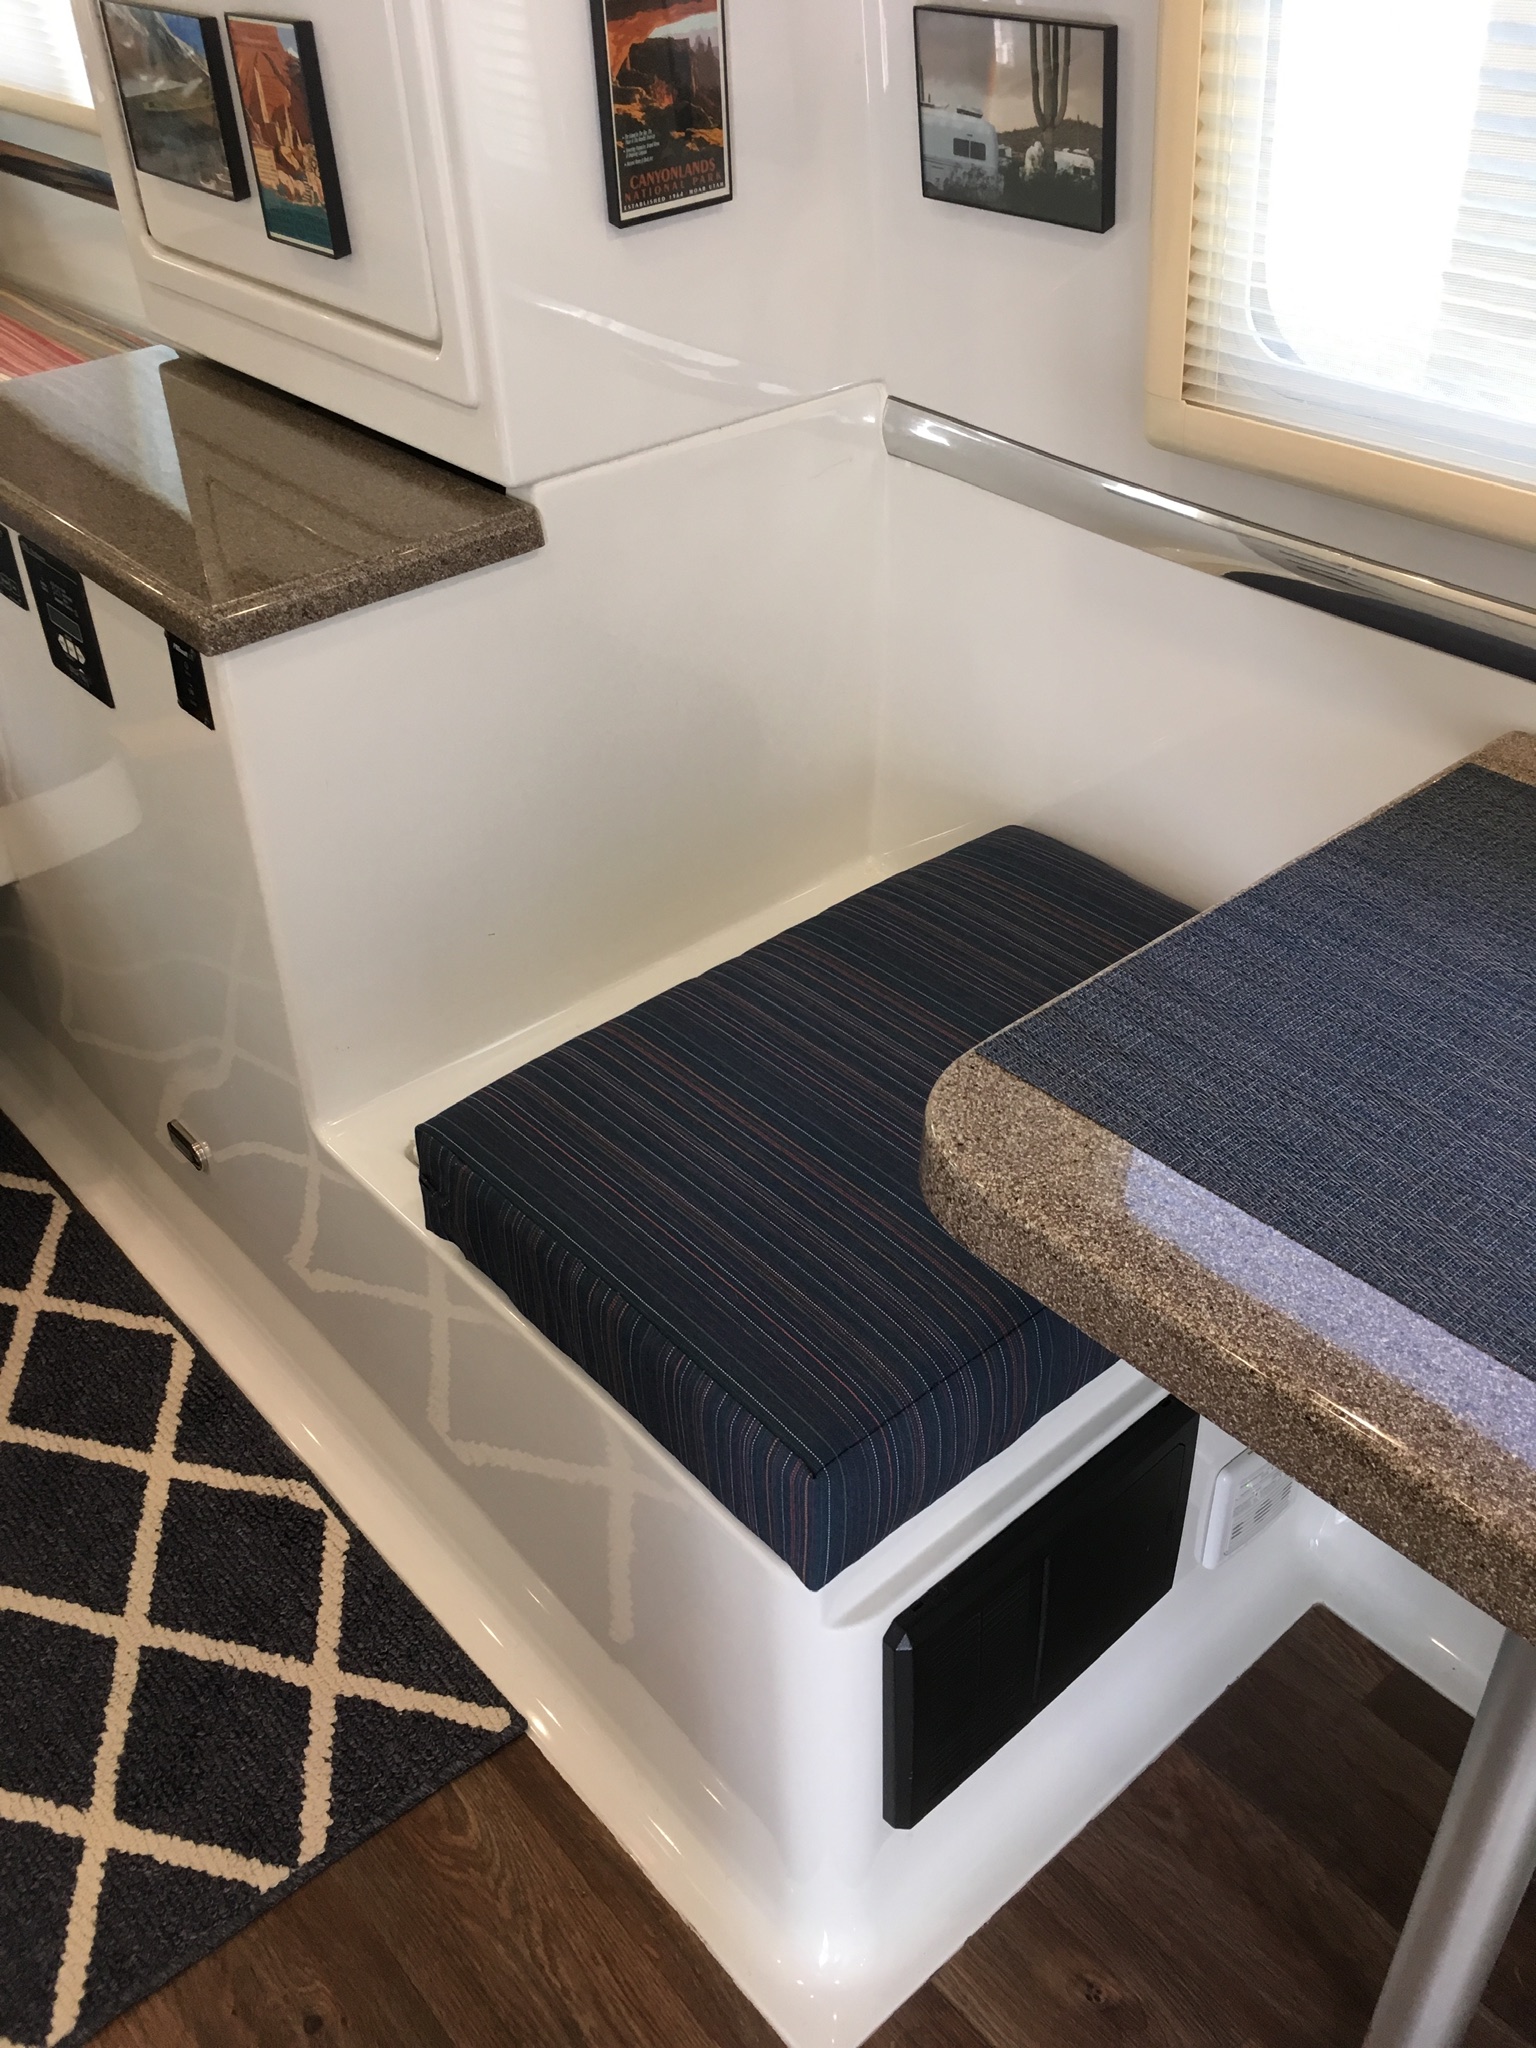
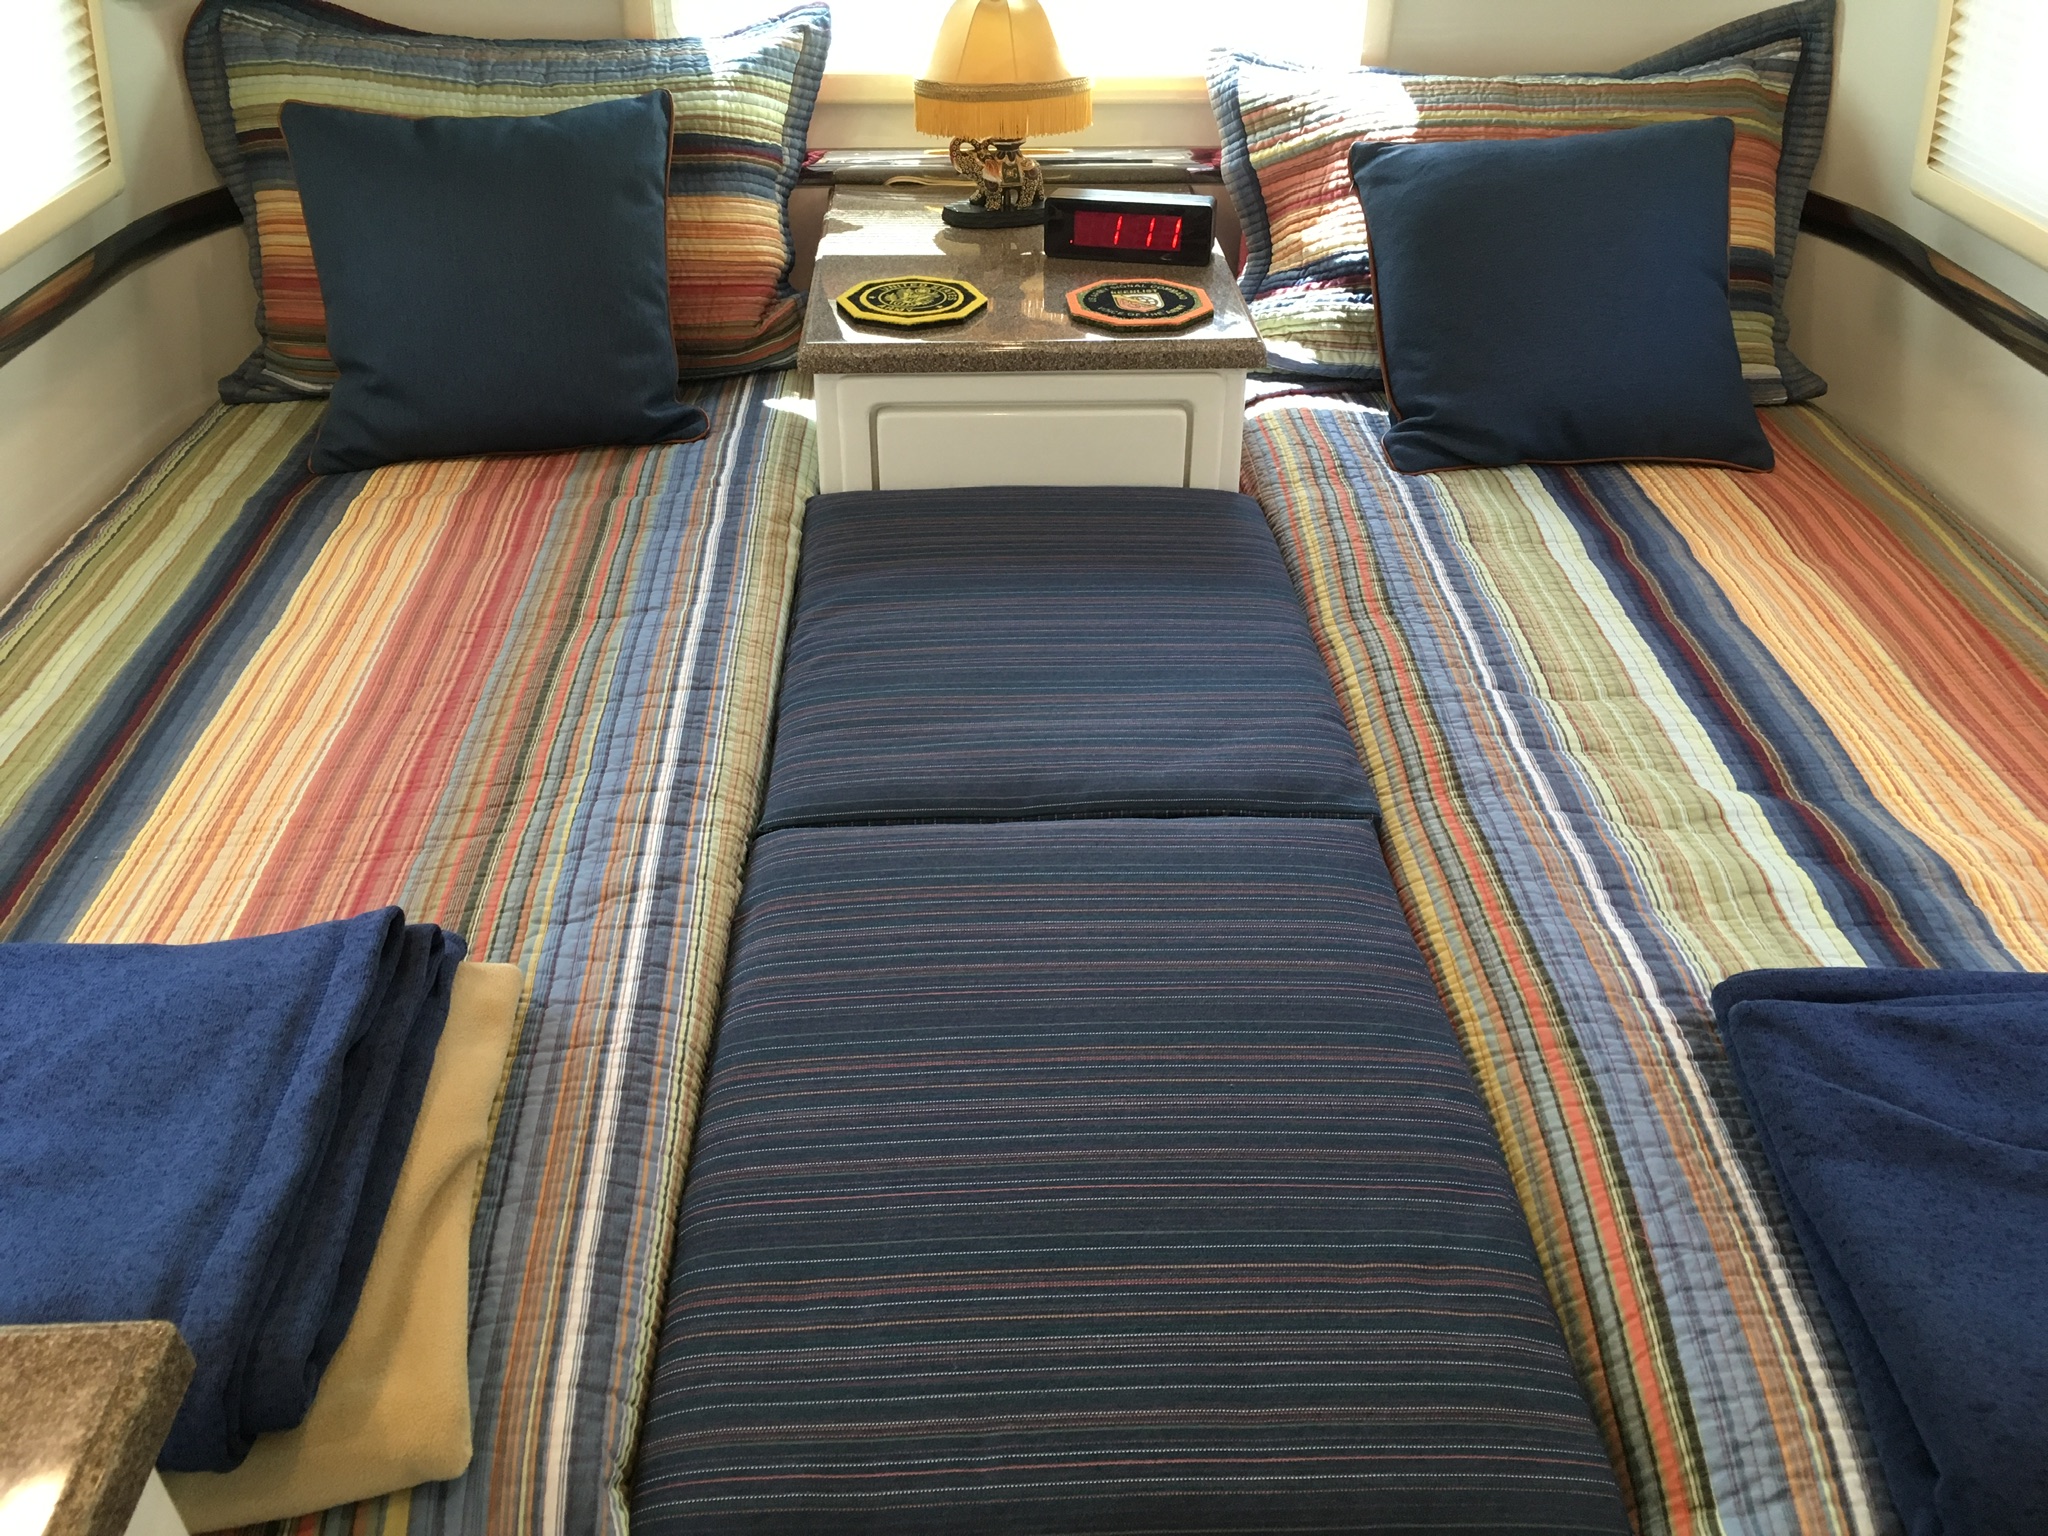
We have the twin bed version of the LEII. After the first year we realized that we were so used to sleeping together that it would be nice to be able to occasionally convert the twin beds to a double bed. I made some plywood pieces to span the gap between the twin beds and we bought some foam to sit on the plywood and create a double bed. We went with this for a year+. The problem was storing the foam when we were in the twin bed mode. So, we measured and discussed and this is what we came up with to eliminate the extra foam. We are leaving tomorrow for a month or so to go up to South Dakota so we’ll see how it works. Here is the gap between the twin beds. It measures 18” X 51”. It’s actually 50” from the nightstand to where the curve starts on the bed frames. Here is the same gap with the plywood. There are three pieces measuring 19” X 17”. It’s 3/4” plywood. The plywood stores easily under the mattresses when not in use. I cut a 1/2” X 1/8” recess on the short side of the plywood so that when placed on the fiberglass mattress frame is locks in place and won’t slide. In order to eliminate the extra foam that required a place to store we reconfigured the dinette cushions. We had new cushions made that included a larger back cushion that measures 25” X 19” and is 6” thick. In the dinette it sits on the fiberglass, not the bottom cushion. The new bottom cushion is smaller, 25” X 17” and butts up against the back cushion. The larger back cushions sit on the plywood when in double bed mode. Here are the new dinette cushions. Notice the back cushion does not sit on the bottom cushion. Here’s a shot with the cushion removed to make the double bed. Here are the cushions on the plywood. We were a little concerned that the dinette seats wouldn’t be as comfortable with the thicker back, but sitting in the driveway the last few days it seems okay. Also, we wondered if the bottom cushion would stay put without the back cushion sitting on top of it. We’ll see how it works out this next month on the road. Mike
1 point


-
Recent Achievements
-


")


")


")


